Transcripts
1. Intro Symmetry in AD to Create a Reflected Butterfly: Hi guys and welcome. My name is Dolores now's parent
and I'm coming to you from sunny, Manitoba, Canada. Today's class is second
in a three-part series. In this series, we're
designing a reflected artwork. We're going to achieve that
reflection using symbols. And my finished product is
going to be a butterfly. So that's basically
the project that I'm taking you through in
these three classes. We're going to start
with the planning. So the first lesson is all about inspiration and gathering all
the resources that we need. I'm going to be
creating a mood board. That mood board, I'm going to
decide on my final sketch. You'll see me go through
the whole process of creating that sketch. And then we'll take
that sketch and import it into Affinity Designer. In Affinity Designer,
we're going to create a symbol that we're going to be using to create our
symmetrical reflected repeat. You've been using symbols, so this shouldn't
be too difficult. You're gonna be amazed
at what you can achieve. Once we have that template, we're going to use
the sketch as a guide to block in all of
our basic shapes. These will all be a
part of the symbol, so the reflection will
automatically happen. It's really neat. Then we're going to
take and add any of the details we need as
we progress through. The finished product
should be something that has a whole bunch
of the assets that you created in the first-class will probably be creating
assets as we go along. That's completely up to you. The artwork that I create, I know that I'm going to
use for art licensing. Your purposes may be
completely different, maybe just for personal
use or to print, to give as a gift. Maybe to flesh out your POD site for
even to do like I do, and submit it for art
licensing purposes. Whatever your end goal is, you're going to learn
a whole bunch of different things in this class. Remember that this is only the second class in the series. There is a third class. And in that class we're
going to be creating, importing and applying textures. My goal for this three-part
series is to have you create an artwork that you're
truly proud of and that you can use for any of the purposes that I mentioned. Now if you haven't
done so already, I'm going to
encourage you to hit that follow button up there. That way you're informed of
any of the classes I do. And you're notified as
soon as I post them, you'll also get any of the
posts that I've put out. Also encourage you
to go to my website. I should change my mailing
list there because there's always a bunch of different stuff happening there. And of course, I don't
want you to miss out on anything like free resources. Don't worry. I don't
overwhelm you with emails. I just don't have
time to produce them. So are you ready
to get started on your butterfly or whatever
design you decide on? Alright, I'll meet
you in lesson one.
2. Lesson 1 Reference and Moodboard Inspiration: Hey guys, welcome to lesson one. Lesson one here, I want to go
through some reference with you and I'm going to show you how I create my mood boards. Let's get started. Pinterest is a nice place to start when running a project. That's one of the
main ways that I find inspiration for most of
the art that I create, I definitely do draw
from other things. Magazines, just being outside all kinds of different things. What I'd like you to do for this particular class
or series of classes, is to do a really good plan. And I find that a good plan
starts with the mood board. I want to have a drawing, I want to have colors. I want to have a idea of style. I want to have all that
figured out before I actually get on my iPad. I think it's good
sometimes to just get away from the actual program or software that you're using and really think about the
project before you start it. I remember in school, students were always
so ready to dig into the software and ignore
the whole planning phase. And the art reflected
that, in my opinion, anybody who took the time to do some planning always ended
up with a much better piece. And that goes back way, way, way back to the
good old days when we did everything on paper
with a pen or pencil. So that's kinda what I want to get you back or get
you into doing. And that says getting everything kind of workout before
you get to the software, you'll find that it
really makes your work go better and makes you
produce better artwork. What I have done
myself personally is go through and take a few of the artworks
that I would like to include as inspiration. And some of them might be simply for the shape of the butterfly. Some might be for color, others might be for just
a little hidden idea, looking at something like this, maybe the autonomy
style of folk art, that background idea might be something that I'd
be interested in. So what I do is I get
into Pinterest like this, then right-click
on whatever image it is that I'm interested in. I copy the image, and then I go to whatever program it doesn't
have to be Photoshop. It can be procreate anywhere
and just paste your image. So this is the mood board
that I've ended up with. So I've pasted that
one that I just chose right here and resize it. If you were working on
Procreate to do this, what I would do is save all of your images and then
import them individually. So in a case like that,
instead of copying, you would right-click
on here and you would do Save Image and, or add it to your photos. Let's just do it that way. And I will get into Procreate in a minute and show you
how to deal with that. But that's basically what
I went through and did. I'm on my desktop
right now recording. So that was one of the
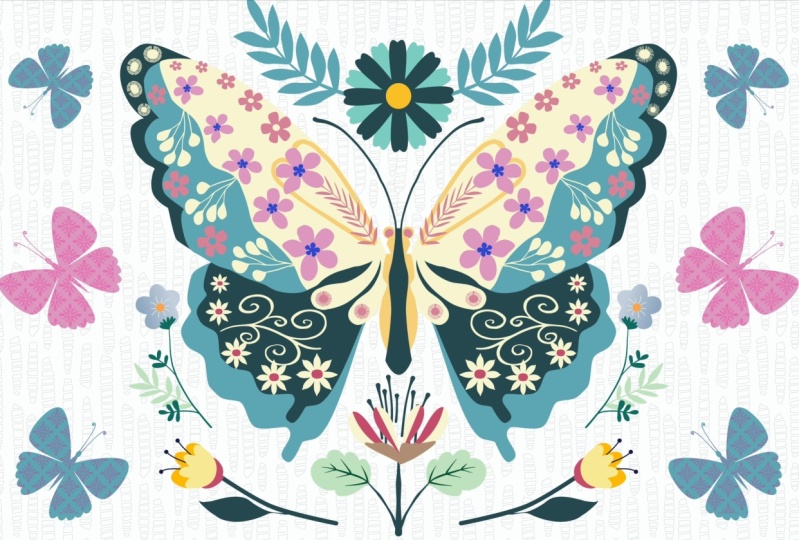
pieces that I chose. You can see that original
inspiration piece that I showed you
in the last class, the Affinity Designer for class. I have grabbed this one
here for couple of reasons. I love the color scheme. I love the way the florals, or it's kept simple. What for four or five
different florals here. This is also by
Jennifer friendly. So these two are
both her artwork. This flower is repeated
in three spots, so that gives it some unity. These three, no rules are
really followed here as far as how things
really work in nature, you would never have a tree that has different flowers on it. And yet the way
she's done it here has still become very
unified in the end. And I think that's because she limited the amount
of motifs that she used to use a lot of the same leaves in
the background, light, dark, but the same leaf essentially
the whole background I love because of the
texture that's in it. And then of course I
love the composition, and that's one of the things
I find Jennifer Burnley is very strong with
his good composition. So she's got a
real area here and then slightly smaller
area up here. You've got lots of curves
that really lead the eye. She's got lots of
variety as far as tone. So she's got some
really light stuff working towards the really
deep and bright stuff that's in the foreground than medium stuff in the middle
that helps to give it depth. So this is a really good one
to draw on for inspiration. And like I said, I really liked the color
scheme of this one. So here you can see that
almost the same color scheme. So these are the
two colors schemes and I'm thinking of using, I've saved these images already in my camera roll
so that I can access them on the iPad and use them to create my color
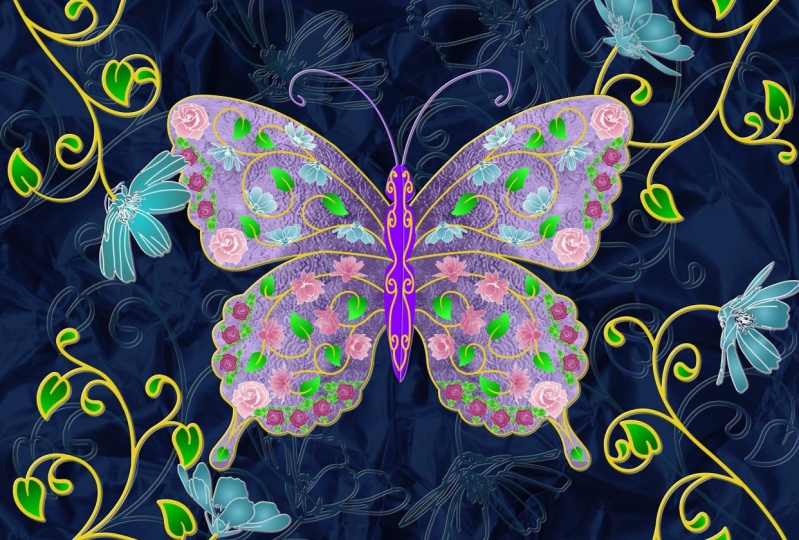
palette when I get there. Now this one here, this is also an odor me inspired piece. I love the background. This is something we
can consider doing instead of these backgrounds, like what Jennifer does. I think I pulled this one here because I really
liked the gradients in the wings here and
just the overall texture. So going back to Pinterest here, this was from my
butterflies and bees board, and then I clicked on that. And a lot of other
ones come up down here that are also great inspiration. Here on my surface
pattern design board. I think it would be good for
you to go into this auto me inspired word that I have. You can see I've got
a few butterflies collected here at the top. And overall here you
can get a lot of ideas for things like motifs, arrangements, color
schemes, and the like. So that's a board that
you should visit. Then of course, color palettes. And here you can see I've got a hundreds of skin color palette saved like literally hundreds. I've tried to organize them
mainly by colored groups, but sometimes something that doesn't go with that grew
kinda sneaks in there. But you can see that overall
as you go through it, you can decide, let's say yellow was one of the colors that you
were looking for. That was the color of the year, not last year, but
the year before. I think I've got all my
yellow color schemes here together so you could easily grab a color scheme from here. And what my suggestion would be, especially if
you're on a Mac and even if you're on your iPad is to take a screenshot of one
that you're interested in. So here on my desktop I
would do Command Shift four, and that gives me
those crosshairs than I could just select. The one that I'm interested in. This is going to
save to my desktop. So I could go to my desktop
here is that screenshot here? I could take that
screenshot and save it into my camera roll. It's
going to show up here. Some of the other things
that I've been saving. And then let's go back
there for 1 s to Safari. I know that there was one
last thing and oh yeah, this was the color scheme
that I really decided on. So here I did take a screenshot and I added it to my board. What I usually do when I get to this point is I print
this off and I keep that handy whenever I am off the computer and onto my
iPad and starting to sketch. And that's actually going
to be the next stage. We're going to go
into procreate. We're going to do
a bit of a sketch. And then we can also,
while we're there, create a color palette, even though we're not
using it in Procreate. I think creating a color
palette will really help us. So definitely take some time before you start to go through and do some of the pre-planning
for our next step, which is going to be the
sketching stage in Procreate. Alright, So I'll meet you in the next lesson where we're gonna get started with that.
3. Lesson 2 Creating the Rough Sketch: Hi guys, welcome to lesson two. Lesson two here I'm
going to be creating a sketch and I'm going to
be doing it in Procreate. If you're comfortable
doing it in Affinity Designer, go for it. Or if you would prefer to do
it with a pencil and paper, you could do that as well
and then import the sketch. As long as you have a sketch. At the end of this
lesson, I'll be happy. Let's get started. I'm in Procreate now
because I want to do some sketches of the
butterfly that I want to use. I have experimented with a
few different shapes here. Not really sure which
one I want to use, but I want to show you a quick and easy way
to get the shape. And I don t think this is really any sort of copyright infringement
or anything like that. We're just looking
at this to get basic ideas for
the proportion of the wings and possibly the
shape of the end of the wing. There's a bunch of
different varieties here. So that's why I brought
up this example here. You can bring it in like this, or you can go into your
Canvas and reference. And I'm going to import the
image and the exact same way. So you can have it off
to the side like that or you can have
it in your image. Let me just get rid
of this one actually. From there we can refer
back as we're drawing. So I am going to
make a new layer. I have gone into my Canvas, drawing guide, edit
drawing guide, and I've switched the
symmetry to be vertical. We've just got it perfectly
divide it in half here. So from here we can draw, whatever we draw on the one side will be repeated
on the opposite side. So I think it might be good
to start with the body. Sketch yourself out kind of a long, kind of a cigar shape. And you can see here
there's a huge variety. Some of them are big,
some of them are small, some are divided. I am going to give mine a
little bit of a head here. And you can see that everything
I'm doing on the one side is perfectly reflected
on the other. So now for the wings, now for the most part, these are kind of about, it looks like about
halfway down. One is definitely halfway down. This one's a little
bit higher up. That's where the division
between the two wings, yens, I'm going to do
something like this. So I am flaring out. And when you break it down, It's like a giant triangle. So your triangle shape
is somewhat like this. We've got an angle over here. Of course, that's simplified and rounded out because
it's organic. It's not, it's not geometric. And here we can start
rounding it up. I'm going to erase this part
because it's distracting me. And I guess I could have
had more of an angle here. I'm going to scale up the edge a little bit there
because I do like that. I think that will be nice
for our finished piece. And remember, Sketch, we're
going to be going into Affinity Designer to
finish our butterfly. We're just doing this so that
we have a sketch to go by. Now, that bottom
wing on a lot of them is angled quite a
bit inwards like this. Sometimes they're squarish,
like this one here. Sometimes they're super rounded. So I'm gonna let you decide
the look that you want. I think I do kinda like that. Slightly squarish look because I'm going to scale
up the edge anyways, but I think I would
go with somewhat of a shape like this. You almost can't go wrong with an illustrated butterfly because the shape can be
really whimsical. In other words, it doesn't have to be completely representative. And I mean, it's a butterfly. There's no doubt it's
a butterfly, right? We can move it around
if we feel like we're running out of
space there, which I am, and then decide on your antenna, they can be just
straight like this, maybe with a little bit
of a knob at the end. Or they can be really whimsical
and have a bit of a curl your illustration so you do it whichever way you think
you liked the best. We don't have to go into
a ton of detail here, but I find that if I have, I keep switching to white here, if I have a guide as to
what I want to do here, it makes it a lot easier for me when I get into
Affinity Designer. And right now really all I'm
doing is blocking in main, main things that I want to remember to do when I get there. So I'm putting in what would end up being kind of a
two tone maybe area, or I might do it in
black like this. I have no idea at this point. I am just at the planning stage. So there's some really
interesting different things to observe in
something like this. In this case, the top wing was broken down into a scale-up
on the inside as well. So I've kind of mimics the
scale-up that I had there. And I think that's what I like. But this is kinda cool where
the bottom wing then is, in contrast, just kind
of a big rounded area. So look at your reference here and think about how you
might want to finish that. Remember, we're gonna be adding a ton of flowers and things. So you don't want to totally
reduce the space within, but it's nice to have
a plan and I want to do that auto me inspired
almost like folk art, art pieces inside or
art accents within. So I'm gonna do something maybe like this where I'm
going to have some. Leaves on a branch, maybe one big flower up here
than some smaller flowers. Not sure exactly what,
you know, like I said, just roughing it in so it
could be something like that. We could have little
flowers all through there. What else can we be
inspired by here? I do like the idea of
a string of dots and I maybe would do that in my
sort of border areas here. So I'm kind of thinking of
that as I'm roughing this out. This is super rough. I could retrace it and clean it up to take it into
Affinity Designer. I think I'm gonna be okay. I think I can follow this without cleaning it up too much. Some of these other
ones did really well. That one not so
much, but this one, I guess none of them
are really clean, but they would be totally
suitable for me as a guide. Yeah. So that's how I'm going
through and planning. I'm not thinking about
the background just yet. That's something that I
could kinda plan out here. I guess. I refer back to my reference when
it gets to this point. So as I told you, I printed it out. I like having the hard-copy
and I usually have it just kind of sitting off to the side here as I'm working on this. So this reference, I mean, I didn't really
have to bring it in here as I have the
printed version, but I'm just wondering
about the background now. So do I wanna do
something like really busy like Jennifer does here? Which is how I did
my sample one. Or do I want to do something
a little bit more classic, more realistic, so to speak. I know that's not
super realistic, but I really quite like the branches and
things going through. So I'm really torn. I think that for the
purposes of this class, I'm going to do something
a little bit more like this because then
we can really dig into adding these textures
and things are patterns. And really this
class is going to be mainly about the setup and
getting everything ready. And the last class
is going to be where we're going to do all of these really colorful and
playful fills and things. So I think I might do something like this now I don't want
to copy what she's done. I mean, it's out there already, so I want to do
something of my own, but I think I can
base it on this. Make some flowers
here at the bottom. Think about maybe some cool, larger items in the actual
background. Nice and subtle. So these are light and subtle. And so these at the bottom
can really stand out. And I do like the idea
of this flag here. I don't want to copy that, but I'm trying to think
of what could I do? That could be really
interesting like that as well. So all of these things
are going through my mind as I'm working on this. Maybe I'll add a
new layer here and this one won't be assisted
as you not labeled assisted. And I'm just going to
close this reference off here because at this
point it's just in the way. And I'm going to think about what I might want to add here. So I've got mine in completely different
proportion than she hasn't. I do it this size because
that's me more usable. I can use this when I'm doing screenshots for Creative Market, if I'm selling a brush set or for the titles
even of this class, this proportion
is better for me. I think at this point, I'll just kinda start
going for it now. I'm thinking of some really
big flowers in back here. Let me just change my
stabilization here. I'm going to bring that
down a little bit. What would be really
neat would be some kind of a nice big branch. Now I'm gonna go right
across my butterfly. I kinda feel at this
point it's important for me to not look
at that reference. They're really don't want
it to be exactly likers. But I really do want
to have some kind of a big branch
going through here. So I'm thinking I'm
going to follow that angle that I have here
and then branch off from it. So here I'm going to just
do some nice big leaves. Not quite sure how
I'm going to do them, whether they're gonna be
topsy turvy like that or not. I might change that afterwards. And I want to continue with maybe a little bit
more of a branch kinda showing along
the bottom here. Kind of in a garden. And this stuff is there in the background as it's fluttering and looking
for a place to land. I could change my
mind completely about this when I get into
Affinity Designer, but I could just kinda like the idea of roughing
this all out and having a bit of a
plan when I get there. But basically that's what
I'm going through and doing is planning
that background. Here. I can erase wherever it has crossed over onto
my illustration. So I have a little bit more of a tidy plan when I get
into Affinity Designer, Let's start to come off. And at this point what I
would do is I would just save this and I could save it as a JPEG so I can export it here, save it to Files. Think I have a folder
for this class yet, so I'll add one. So that stands for
Affinity Designer five. And I can rename this
to be Sketch and save. That's one method. The other method
would be to go to that file that I've
created in my class, assets down to the folder. If accidentally put that
folder into another folder. So I will do that
again, Class Assets, add a new folder,
146, affinity five. And I will save this as sketch. And then I would go
into that folder. I could take this sketch
here and share it, right to Affinity Designer. So let me just find it. So we've got our
sketch imported here. Okay, so in the next
step we're going to talk about creating
the color palette. I will see you there.
4. Lesson 3 Refining the Sketch and the Color Studio: Hi guys, welcome
to lesson three. And less than three here I
want to clean up my sketch. And then I also want
to show you how I created my color palette.
Let's get started. So here I am still in Procreate. I decided I wanted to do a
really good clean version. So I am currently
retracing my original. So my original is on
this layer and this is going to be my clean sketch
that I'm bringing in. I had looked at the
other one when I got to Affinity Designer and
thought, you know what, that's not as good as I want
it for this next stage, which is going to be the
actual drawing and so on. While we're here
in Procreate too, I thought that I
might as well create the color swatch document that I need as a guide for creating
my color palette there. So I'm going to
time-lapse this for you. You can watch my process as I kinda perfect my sketch
a little bit more. Most of this stuff, of course, will be filled in with those assets that we
created in the last class. So what was I doing here? This is coming down. I'm going to put this on another layer for
the time being, because I really like to swing my lines all the way across. I get a much nicer
line that way. And then I can just go in and erase anything that overlaps. I'm really not too sure
yet about this background, how I want to do it. I might change my
mind completely. And of course, that's my prerogative as the
artist or designer. I'm in charge of how this
really looks in the end. So there are many, many times that I do
a plan like this and then don't necessarily
use all aspects of it. But I didn't want it. Show you kind of the
finish on a clean sketch. I don't even know
if I necessarily have all of these made yet. So some of these might
be assets that we create and add to
our assets library. One left, and that's
this one here. I really wanted
to try out one of those two layered flowers
that I had drawn. So I'm pretty sure about
one pretty much like this. So that's gonna be
what? That'll be. Shut that layer off and that's a much cleaner
sketch for me. I'm happier with that. I think I might slightly thicken this line
on the butterfly. Just saw that It's
easier to see when I get to Affinity Designer, I think I had done that on the non drawing assisted layer. I could actually add
Drawing Assist here. That would actually
be a lot faster. So I'm ready. This is going to be the one that I'm actually going to use. So I'm going to export it, save it to Files, go to that proper folder. I'm going to rename this one
and I'll call it sketch too. So I liked doing it in this
way, having that backup, but then I will of
course go and do it this way and just
open it in designer. So I have to actually
close that documents. And then I can go
in and do that. Now there and ready
for me to use. Now let's go back
to procreate here. And I'm going to
make a new document. And I'm going to
import those swatches. Actually don't have
to import them. What I can do here is just go to my color palette listings
here at a palette. And I'm going to do
new from photos. And remember I had saved
that color palette here. So this is two color
palettes together, and that's what created that. Let me just bring them
in here for you to see. Those are the colors
that I chose. And I like sometimes bringing in a photo like this because then I will get a really
good range of colors, including whatever inspire
that original artist. So I've got a gorgeous
palette here. I may make some changes to this, I guess at some
point because e.g. something like this,
I could change those colors to be a
little bit more contrasty, but you know what I
think I'm going to, I'm just going to
stick with it because there's tons of
contrast built-in here. I'm happy with what I see. And so this would be the
palette that I would use. What I can also do, I'm going to choose
this as my default. Actually, I'm going to share it. I'll go back to that same
folder and save that palette. What I'd also like to do is see these palettes
as cards so that I could do a screenshot of this and possibly
import that as well. So I'm doing a
screenshot by using the main power key and
the volume up key. So that's giving
me that first one. I can even do this
that saved it's photos and then I'll do the
bottom half of it here. We'll do it this way
and we'll also do it with the compact view. And now we can go into
Affinity Designer and import those. So let's make a new document. This doesn't much matter
as far as size goes. But just in case you did
want to print this out, I'm doing it
eight-and-a-half by 11. The dots per inch don't matter here because
we're not going to be using it for anything
other than our own use. So here we would
go to Insert are placed the image
will add that one. Didn't crop it for some reason. No matter there's
the other half. So we've got all of
the colors we need. So that's really
what's important here. Because what we're gonna do
next is create the palate. Okay, So I want to create a completely new palette
for this documents. So I'm gonna go up
here to add a palette. So I'm adding an
application palette here, and I'm going to use
my color picker. I've got it selected here and select the colors and
then add them individually. Now one of the things
you want to make sure is that you've got
this auto apply on here and you've got this
source as the current layer. So there are choices here, but I just want to keep
it on currently are. I will sample that first color
and add it to the palette. You can barely see it there
because of its color. But now we can just go
ahead and continue. I'm thankful that they put that choice as the top one here. So it's faster to choose. As you're going through
here, you could decide whether you for sure
want that color. You could definitely be skipping some of these
if you didn't want them. So e.g. this brown here
is very close to that. So I'm going to just leave it. And then I'm going to
jump over this one here. And you can see I'm not grabbing every single color
that just kind of formulating an idea of what I want my
palette to look like. I'm also changing the order. So e.g. that one, then I would do
this one because I think that in my
palette that's going to make it easier to choose the darker color or the medium
color or the duller color. I'm also going to sample some
of these colors over here. I definitely like that. Read as one of my colors. I like this pure turquoise. What the bottom here
are more pure colors. These are the ones that are
dulled down a little bit. It's nice to have a variety. And I would really
suggest that you have a really good mix of real dark shades than medium, and then some neutral
shades and a few brights. For this project, of course, we're probably going to make some changes as we
start colorizing. And really at this point, we don't have to worry about
how many colors were doing. This isn't surface
pattern design. This isn't a repeat patterns. So we have a little
bit of flexibility. We don't have to
limit the palate to, let's say ten colors. Now, this, this, and
this are very similar. So I think I'm going
to delete this one. And what I could do
at any point here is switch over to my
color wheel here, and switch back to my swatches and add an alternate color. But I think this is more
than enough for me to start. I'm going to also
name this palette. So I'm going to call this
one butterfly project. That would bug me if I left
that, not capitalized. Now our name for
the palate is here. We've got all the colors that we need at least for starting out. Alright, so let's go
into our document. I want to check right away to see if my palette is
there, and here it is. So that's the beauty of making
an application palette. This will always be available
for me whenever I open up Affinity Designer until
I decide to get rid of the palette and I might even
rename it or something, but I do like this collection and it's similar
to this palette, which I call my faves. So who knows? I might actually even use
some of the colors from it. So let's go back to the
butterfly projects. I'm really lazy. As you can see, I haven't
named a bunch of them. I'll go back and get rid
of them or whatever. But yeah, so here's
our butterfly palette. And I just wanted to bring
that up just to be sure that it did save and it
is here, so that's great. Now of course, my
neighbors started immediately mowing
the lawn as I start. So I'm going to check this
and see if the sound is gonna be okay before we go
on to the next part, which is setting up our template for getting the reflection
on the butterfly. I will meet you in
the next lesson where we're gonna get
started with that.
5. Lesson 4 The Reflection Template and Add Textures: Hi guys. In this lesson we're going to be creating that
reflection template. And I want to remind you real quick to save that template, make a duplicate of it before you start
with your butterfly. That way you have that reflection template
for anything you ever wanna do that's reflected.
Let's get started. Alright, so for this lesson, what I want to do
is help you set up the document so that you
have the reflection. So we're gonna be creating
a symbol for that. I'm setting up my
document 24 " by 16 ". And the reason I'm doing
that is because I'll be adding those bitmap
textures eventually. Might not be in this class, but I will be adding those. And in order for a bitmap to be a high enough quality for me
to use for art licensing. I want to make sure that I have my resolution
nice and high. You could get away with
doing 12 by eight, which is my usual size. If you are not planning to get it printed
out for any reason, if it's just a practice piece, then you can definitely
start with 24 by 16. Now the only other thing I'm
going to say about that is then the assets
that I've created, some of the market is
seem really small. But to me that's okay
because these are vector. So that means that even if
they are coming in small. So I'll give you
an example here. Let me go to the
flowers that I've created for this project. So if I were to insert
that, well, of course, call me a liar because
that one is not small, but I know the ones in this test would come
in quite small. And in this case I do have a texture on it
already, so I'm okay. I wouldn't probably
enlarge that one too much, but let's say one of these, I insert it, you're going to
see it's absolutely tiny. Now I can enlarge
this to the size of this page and you'll see that the quality is still
absolutely perfect. So vector elements are fine. Any size, any of your
assets can be really small. If you do have textures in them, like this one here, then I wouldn't enlarge
it much more than maybe 25% if I'm going to be using it with the
already added texture. So that's just a little bit
on your documents size. Now, what I wanna
do is I want to set up a symbol and I want it to be the exact
half of this document, so we know that this was 24 ", so I would need a rectangle
that's 12 " wide. Now, one of the things you
can do put your snapping on down here and you can see
it snaps to the edges, but it will also
snap to dead center. So that green line
that you saw there, you see up here, that line indicates that I'm
perfectly in the center. This is kind of a
roundabout way of creating that automatic flip in programs like Procreate
or even Illustrator, this can be done completely automatically and it's
not done with assemble. There are menu commands and canvas setup strategies
that will give you repeat. But in Affinity Designer, there isn't really
a way to do that. So we have to do a
bit of a workaround. But what I want is this
one to be over here, but then I want it to be
flipped at the moment. This isn't even assemble. So first thing I would
do is go to my symbols, no symbols in here because
this is a new document and I'm going to add this
symbol from selection. So now you see that it's
right here and it's assemble. So that means anything
that we put in it. If we look in the
layers palette here, we have this orange line, so we know that anything
that we put in here, if we have the reflection here, it'll duplicate it and flip it. We'll just start by
duplicating that. And of course, it has
duplicated it right on top. We can go into the Transform
palette and flip it. So it doesn't look like
anything happened. But if we move this over and make sure that
we snap it into position. And how did I end up with the absolute exact same
gray as the background? Who knows? I'm going to change the
color just slightly, just so that you can
see it to standing out against that background. So I've done the reflection. I know I just did
it, so it's done. But I want to show you
now what will happen if I add a piece of artwork here to show you
the reflections. So can we just noticed that I must have stretched
box just a little bit. We can check the size here. Oh, I see. That's exactly
what happened here. And we can always go
in here and check now, I know that it
should be 12 by 16. So I'm going to change
this to 12 right now. And that fixes it on both
sides because it is assemble. Remember, having
it as a symbol in here means that whatever
change I do to it, it'll change it
wherever it occurs. So let's do a little test here. I'm going to view a
heart because I think that would be a really good one and I'm not gonna do
it with the heart. I'm gonna do it
with the teardrop. Let's just pull a teardrop here. I'm going to fill it with red. And so what's up
with that? It's not. Flipping. Now, you probably know the answer if you've
thought this through. And that's because if I go
to my layers palette here, I don't have it as
part of my symbol, so let's drag that in. And I believe this bottom one is the first one that I set up. And so you can see here that
it is working perfectly. So anything I do here now, and I know I don't
have to do this. I want to make it perfect. Now you know that it's working. So anything we draw within, as long as we have it
within our symbol, it's going to reflect. So just remember
that this first one that you put down will be the bottom one on
the layers palette. That's perfect. That'll be the easiest
way to remember. We know we can always drag
whatever we need into here. Now another thing to note
about this is that you can add textures to even this background template
base if you want to. I'm going to show you
just real quick how to bring in a or how to use the assets panel
here to add a background. So you know that I have a
category here with patterns. So you can either click
through your palettes this way or you can click on the name and that'll give
you the pallets like this. When you get a bunch
like I have here, it is actually
kind of nice to be able to swing
through it this way. So I'm going to just grab this texture here
and hit Insert, and I'm going to rotate it. So that kind of somewhat fits that half and let's drag it. And I want you to note
here that I am dragging it to halfway on the layer
that I want to effect. So that's, I want
this to be clipped, so I want the size to be cut off so that it's nice and tidy. And I'm dragging onto that layer and I want
to see that line. Now. I don't wanna do it over here. I want to do it over here. And it has clipped. It's hard to see
that it's clipped because it's a rectangle. After all, we could go in
here and do the heart, and that might make it a little
bit more obvious to you. So let's go and grab another texture from
our asset gallery. And maybe this time let's go into the stock images
that are here. So I've got Pexels and Pixabay. And I swear I used to
have Unsplash here too, so I don't know how I lost it. I'll have to figure that out, but I'm gonna go to
this one's fine. I'll just type in texture here. Search. These are free to use. There's no copyright. You can just grab
anything on here. And I really like the ones
that are really contrast you, the textures that
are contrast C, because I find that
those really show up better on something colored. So e.g. this one here. Now in order to insert it, what I wanna do is a
long hold on here. And then I'll get this, which indicates that
it's downloading. And of course, we don't have it in position yet, but
that's interesting. It actually is reflecting. So I must be, let's look here. Yeah, I'm in the symbol layer, so I just happen to be
within it when I did it. So I want to actually
clip this to the heart so that it fills the shape and is trimmed just like
a clipping mask. So that's, I think,
really, really cool. And the fact that there are so many textures available here, I almost exclusively use the textures that I
found in Pexels here. And it took a lot of experimenting because there were so many cool ones that I really wanted to try a bunch
of different things. So that's exactly what I did. Something like this might be
kinda neat, so long hold. So there you go. I mean, how quick is that
to put into your image? And of course, all of the things you can
normally do to a layer here can be done with an imported image that's
placed as a texture. So I can go through here and
play with blending modes. And as you can see, the
one that I just added is interacting with the
one below it as well. So that's kinda neat. So you could go
in and figure out a really cool texture overlay. And that just shows you
all the different things that we can do as we move
our way through the class. So, you know now how to
do the reflective repeat, you know now how to
add a texture to it. So that takes us to
the next lesson. I'll see you there.
6. Lesson 5 Creating the Basic Butterfly Shapes: Hi guys, welcome to lesson five. And less than five here
we're going to block him those main big shapes. And then I'm going to
show you a kind of a fun way to create the antenna. Let's get to it. Before we get started, I am just going to go in
here and go to Layers and get rid of these things that I no longer need so much. I want to show you
with textures. But first things first, I think we need to start
blocking in our initial shapes. So the way I do it, I like having my sketch
there as a guide. So I'm going to go
to Place image here. And I remember I saved
it into my photos. I also have it in that file, but I'm going to import it
here and I need to drag it. It's not going to fit
quite exactly right? And you see what's
happening there. It's in my symbol and
I don't need it to be, so I'm going to
bring it up here. And that is not the one
that I really wanted, but I think it'll work anyways. Actually let me just
delete this one, bring in the one from the Cloud. So sketch two was
the one that we worked on last and
fits pretty darn good. Actually, I forgot that
I did it exactly double. So as you can see, what I've done is
I've put it outside of my symbols here because I want to keep this separate and available
anytime I need it. I am going to go in here
and I'm going to lock it. And then I'm also going to
change this to darken mode. What that does is allows anything that I'm
doing underneath to show through the way I started this project and I've done this whole project actually
I've done it twice, so I really have a good handle on the best sort of progression
through for doing this. And I want to start out by
doing the reflection because obviously this stuff
that's going on in the background is not
part of the symbol. So let's concentrate
for now on the symbol. What I did real simple. I used my pencil tool and
I traced out the shapes. No, That's pretty funny, but it's got a big stroke
on it which we can remove. Of course, one of the
ways to get rid of the stroke history just
flick upwards on the stroke. And I'm going to fill mine with one of the colors
from my palette here. So let's start with
this deep teal color. Now, I'm on no tool right now. If I switch to this
tool and move tool and double-click on my
half wing that I've drawn. I can do this, hit Close and that
will close the shape. Now also it's a
straight line so I'm able to use it to line
up perfectly there. So that's pretty cool. And now I'm gonna go through and do the exact same
thing for the bottom. And I want it to stop right there so that I could
do the same thing. Switch to this tool, select it, and use the context menu
to have that close. And I think I'm going to just eliminate these points here. I don't need them because
less points I have is the more control I have here
for fixing up my curves. So that one was an extra one
2s or took that one out. And sometimes it's hard to grab them when they're really close. Here we go a little bit better. And this one, Let's do a
slightly lighter green and teal. And what I wanna do is
definitely put that underneath. And then I want to
take both of those and drag them into my symbol. So right now it went
underneath the rectangle. Let's move it above
the rectangle. And you can see that the
reflection happened perfectly. I'm also going to change
the color of that to that kind of a neutral light,
cream color in the back. It's a little bit dark. So here, this is another
little trick with sliding. You can just slide down
or slide up here to change the purity of your color or the
saturation of your color. Now the body is next. So let's give that a shot. And I really suggest that you do it this way where
you do the half, stop approximately
in the center, select it and hit Close. And that gives you such a
nice straight line there. And you know that it's the center because it
clicks to green here. So this one, I'm
going to fill it with a gold color and that one
has been placed below. But the neat thing about it,
or the good thing about it, is it's already in that symbol just because I had
moved those two down and then I guess
I was on one of these layers when I
started drawing this one. So it didn't directly above it, which had it in the symbol. So that's something
to maybe try to do when you're drawing
different parts here is try to remember to go
into the symbol itself before you start drawing and then you're going to
have your symbols in there. So what do you think about
that sketch being there? That was really helpful. Don't you think I personally prefer to do it this way
than to just wing it? I'm going to do a little
bit of clean up here. Let's delete this one and. These look pretty good. So now I'm ready to start drawing the interior
shapes here. For this one, again, I'm going to draw
that inner shape. And one of the things you can do here is choose your
fill in advance. I'll make sure you
have clicked out of whatever you were working on, so nothing is selected. So I just clicked out here. You can choose the fields. So for this one I
think I'm gonna do this as my fill and
then makes sure that you select Use fill here and you'll see
it come up here and here you can also click into it and you don't have to be
in your swatches to do it. You can just lighten
your color here. So here I'm going to draw
that inner shape to close it, lined it up to the center, and I'm going to make a
couple of adjustments. I know I was a bit wobbly there, so removing a couple
of the points helps me make a much
smoother contours. And maybe this one here, I'll delete as well because then I can check that contour. So one of the things
here I would do is go in that one didn't
get into the symbol. So let's drag that in and you see it immediately
reflected it here. You could turn off your sketch temporarily so that you could do your little minor adjustments
to maybe get your border straight or whatever it is that you're trying to do with yours? I like correcting as I go along, I just find it's more efficient. So I'm not sure I will
keep that greeny color. I think I'm gonna do this
one as a as an alternate. I've already done this, like I said a couple of
times and I'm thinking, I'm gonna do this in different colors than I planned or a different
sequence of colors, if that makes sense,
Just so that I'm not exactly the same as before. So now this one has a
big sort of a loop. School. I've kept that same
color, pulls it, line it up, and let's get
rid of these points here. Probably these points here. And that allows
me to do this way easier than if I was trying to move all those
individual points. I think so far so good. The last thing I wanna do here is add some of this
other detail in here. We'll probably do that
in the next lesson, but I think we can just squeeze the antenna into this one. So I'm going to, in this case, changed to, let me
de-select here first. So you can de-select by
just finding a place on your screen to click. Or you can also go here and hit that little x
and that deselects. So this time I want
to do a stroke, so I'm going to switch
this over so you can just scrub over it and it'll
switch it to the stroke. Let's go with that dark brown. And I'm going to
draw it as a stroke, which looks super
weird at the moment. But let's go into the
stroke palette and do some experimenting
with the pressure points. So this is fun. I love this about
Affinity Designer is this ability to go in
and adjust your stroke. You can even do a fun
little things like this where you can get a knob
at the end of your line. It takes a little bit
of experimentation, but a life that you can
get that thin and thick, Look, you can still definitely enlarge it
here if you need to. But I liked that. I liked that little knob
that I've created there. So that's the one
I'm going to use and I'm going to just drag it
in here and it's reflected. Now the problem is it's
in front of my yellow, I want it behind. And now we've got our basic
shapes for our butterfly. Ready to go for the next
lesson. I will see you there.
7. Lesson 6 Placing Assets and Adding Details: Hi guys, welcome to lesson six. Less than six here, we're going to start placing
our assets and I have a few tips and tricks
to share with you. Okay, so I've got my sketch
back on here because I want to tackle the body here
and these stripes. And there's a couple of
different ways we could do that. I want to show you the
two different methods that I would recommend. I'm going to grab a
good idea to de-select. I'm going to grab
a different yellow and the first method I'm
going to show you is using the pencil tool
and we're going to just draw the different stripes. So I'm gonna do a couple
of them here just to show you and let me just see if that I think this might
be the same color as I used and it does look like it, so I will darken that slightly so I can just do it
by pulling down here. Let me just draw something here first and I want
to use the fill. So the way I had gotten that darker color
was just to pull down on this so you don't even have to
open your swatches. You can just have your
stylus or your finger on this color and just pull up to get it lighter and pull
down to get it darker. So again, I didn't
close the shape here. So I'm going to grab
it with my move tool and then back to my node tool. And then I can just hit
that close to close it up. And let's put the
snapping back on so that we can get this
to snap to the center. Now as you can see, we are not within the shape. So what we would need to
do here, Here's the curve. We want to take this and
drag it into the curve. And you see how I'm
stopping halfway in the middle there and
I get that blue line. What that will do
is it will clip it. So you can see that now the
edges are cut off, right? It fits right within there. So then I would just go through and hopes continued to draw, get the pencil tool
first and again, switch and switch and close. And then I can use that node
tool to line it right up. That's kind of the most common, I would say method. Maybe the easiest to
wrap your head around. You can see that next
one, because I had it. I didn't de-select that one. When I started to
draw the next one, it drew it directly
above it and pay. So that's the one method. The other method I want to
show you is by using a stroke. So let's de-select by
hitting that little x. And I am going to, first of all switch. So here I can just drag across. And now the stroke is going to be what's colored in this color. I'm going to reset. So I've double-clicked or clicked on that background here, and I can reset the
pressure so that'll take it right back down to zero. So there's no change in
the shape of the stroke. And let's just draw a stroke That's almost
the right thickness, maybe a little bit lower down. I could put my sketch back on and that would
probably make it easier. So maybe a little thick, we could reduce the
thickness there. And again, we want that
to be clipped within. Basically gives us
the exact same look. But the beauty of it, of course, is that you've only
got the one line and you see how fast
it is to then go and add additional lines
for the sketch off, but see how quick that is. And I've added the
lines, and of course, these can be expanded if I needed them to be
textured, e.g. I. Could easily go
into this menu and expand the stroke and see how it's a shape just
like the other one was. So it's just two
different methods I want to show you both. I thought you would find
that kind of interesting. And then the next
thing I wanna do is just kinda start talking about how I go about filling
out my design here. So this is where the Asset
Studio comes into play. So the flowers that I
had put together for this in our last video
with this set here. And there's quite a variety. These are the ones that we were working on or that I showed you. And as far as adding them, it's just as simple as
clicking on it, inserting it, and then making sure that it
is within our symbol here. So we could even add
it to the top here. Now that it's within
our assemble, we can move it around, do whatever we need
to do to position it and perfected so we could
turn off the sketch. You can take a look at it. And I think that's a
really great start. If you think about the sample, which I happen to have
sitting right here, that flower actually quite
reminds me of that one there. So that just shows you, reminds you of the look
that we're going for. So this is what I would do. I would keep my sketch
on and I would roughly place most of the different
things that I want, most of the components. So e.g. this one here would work perfectly for
this, I believe so. I'm going to insert it, rotate it, enlarge it, and remember these are vectors, so enlarging is not
an issue at all. I'm really not 100% sure
of these colors in here. I didn't really
experiment with that. So I'm going to maybe
just lighten this. So remember, we can just do
this to lighten the color and we need to drag it
down into that symbol. I want to try a little
bit of variety here. So some of these flowers are, you may not have
seen that even they are textured flowers that I added and I did a few
of these off camera. So when you go to
grab it and it's so annoying when this
happens, you know, you're trying to drag it and this kinda just pulls
the whole thing down. You really need to hesitate
a little bit here. And I'm probably the
worst person for that. I'm just always in a hurry, so I probably bring
it upon myself. Now, something like this. We would just go in and
duplicate if we wanted to use anywhere else and
just move it into position. And I'm putting it here
because I want those to be a plant that's joined
with a stem of some sort. So the other thing
I wanna do is have this fern behind it. So I want to make sure those
flowers stand out the most. Now we've got a couple of
other little ones here. So let's check out what
else we could use. A little bit of variety. So maybe I'll insert
one of these. I'm thinking this one
might look nice and at which position that
here bring it down. And then what else? What else would you
guys like to see? This is actually my
favorite, this marigold, but I don't think
it really suits the style of the illustration. I'll show it to you many ways, but it's nice, but I'm
not sure it works. I don't mean to leave it in for now and we'll see if we can make it work by
adding other things. I just want to
hide my sketch for now so that you can
see what's happening. The reason I said I didn't
think it matches or works is because of that outline
that's on it, that stroke. So the other thing I could do is to go into that shape itself. And if you ever want to
break down a shape and you're trying to get to
all the different parts. And let's say we're in
the symbol right now, you just have to
double-click on it. And each time you double-click, you're going to get deeper
and deeper into it. So here this one has a stroke. So what I would do is go in
here and remove that stroke. So I'm taking it right
down to zero there. Or what I could do is
just flick upwards on the stroke in the
swatches palette. And I could do the
same thing for this. I'm trying to remember
what I did here was that two separate shapes? Yes. See, I wasn't able to
just take the stroke off because there's actually
a double level here. So this is what I should
be looking at here. And this is why I love
the Layers palette so much because you can go in
here and see the parts. So I just need to
actually trash. And then I've got my
marigold without outlines, which I think works better. The color is not
necessarily perfect against this light
teal background, but that's okay because
I am going to be actually adding texture
and it does darken it. And I think that's
going to show up way better when it's on
a darker background. I think you get the idea. This is what we're going
to go through and do to place all of my
different motifs. So what I'll do is I'll meet
you in the next lesson, because in the next lesson, I really want to break down the last few things that we're
going to do in this class. So what this class does, and what you'll have at
the end of this class is your whole butterfly layout completed and ready to have
textures applied to it. So in the next lesson, what we'll do is positioned the rest of those
little flowers, at least roughly the
idea is that we want, then I'm going to start
laying out my background. I'll meet you in
the next lesson.
8. Lesson 7 Honing Placement Of and Altering the Assets: Hey guys, welcome
to lesson seven. Less than seven here we're just flipping, perfecting our layout. We're going to really think
about the placement and do everything we can to enhance
our layout at this point. Let's get started. So what I'm gonna do here is a time-lapse
for you that shows you my placement of all
of these little motifs. Alright, I'm gonna just kinda roughly to start out
with place a few that I think I might use
because I like that the process is not interrupted when I'm
in the middle of it. So I'll just put a bunch
of them in here loose. Remember if you
need to resize and you want to keep
it proportional, put your index finger on the keyboard one
finger because it doesn't have to be
your index finger. I'm sure there'll
be more than one leaf that I'm gonna need. So maybe I will
place a couple of different ones and I know
I need other ferns to, so you're probably
going to see me also flipping between sets
here because I've got a few sets that have
motifs in it that I really like,
something like this. You can see right away, it's not in the color scheme
that we're working with. So what I would do
here is just go into my colors and remember, these are the colors that
we picked for this project. So I would just go in and make adjustments to appear
to be the same. Just delete one. And maybe I will go and make a slightly
different one here, not the stroke but the fill, so that I get sort of a
peachy color that I like. And then I'll go
back to my swatches here and add just so I have another one
now it looks like episode that's the same
fat but that's okay. This one has a stroke,
so I'm going to take that off right away and maybe change the color of this motif here appears to
have some transparency. So I want to go
into my layers here and make sure that
it's on hard light. So I'm going to put
that to normal. I think that went I'll
do one of the yellows. The other thing I
noticed while I was in the layers palette was these little guys at our Declaration on
that particular motif. So I want to make
sure that that's in the family of colors that
we are working with today. Let me just turn
my sketch back on. These three look like they're
the same but they aren't. They're actually each of them
is a little bit different. Now this one I will also change. So this one here, I'm
going to flip it. The other way to duplicate is to start dragging and then
put two fingers down. Now remember that you
can go in and edit. So I can go in and take a look at this in
the Layers palette. And I've got a curve
with a texture added. So I could go in there and edit perhaps the blending mode. I think I like that, so
that's darker color, like that color better. So I'm going to go to the layers and I think I'll
just get rid of this one, duplicate this one, and
put that into position. Now to draw the stems here, I've got the correct color here. I got to de-select this guy, go into my strokes, use my pencil tool, and I'm going to draw a stroke at the
moment it's on fill. I don't want to use the
fill and take that off. Then I can go into
my stroke here. I can either do it
here or I could do it here to
enlarge the stroke. And then I could go in here
to apply a color to it. Now remember that you
can also go in here and make adjustments
to the shape. So there I've got
it so that it's tapered so that it's a tiny
bit bigger at the bottom. And I like that you can add some in-between two if
you figure that, you can get it to look
a little bit more interesting by having a
little bit bumpy or whatever. I'm drawing the three strokes
to make up this plant. Now I'm gonna go into
my layers palette and I'm gonna move that
sketch back up to the top. And I'm going to
turn it off for now. And so these three strokes here, what I want to do is
actually connect them, make them into one single shape. So I'm going to hold
down one finger so that I can select all
three of the strokes. Then I'll go here
to expand stroke. So now they're not
strokes anymore. So I made sure of
course that I had them shaped exactly the
way I wanted them to, because there'll
be a lot harder to do any editing when
they're like this. When there a path. Of course you just can grab, delete, do anything like that
to make your adjustments. So make sure you get
that completely adjusted before you go in here
to expand the stroke. And then once you've got
the stroke expanded, use the add to make it
all into one shape. And then I usually hit smooth
at least once, maybe twice. I think that simplifies. It takes away a lot of
the extra anchor points. And what I'll need to do is
to fix that up a little bit. And I think I'm going to move this guy be the sort of central. I'm going to flip
it over. I think that's gonna be the main flower. They're sort of the
big showstopper. And then this one here, I'm going to duplicate to
bring over to this side. Now, I clicked one
too many times, so I ended up just having
that one part of it selected. These should be grouped. So let me look here. Now they aren't
grouped at this point, so I am going to group them. Makes moving them
around a lot easier. The other thing I
want to do is grab that stem and bring
it down here. And then I'm going to grab
everything to do with that flower, including
these leaves. And I'm going to group them. So you want to get disciplined and start putting these are mixture that
these are in groups. Otherwise you're gonna go
crazy trying to find things. So take the time to do that. Now at this point, I
don't think I really need to work to much more
with my sketch. I mean, I can look at it. Let me put this the top. But essentially I've got the main flowers
blocked in here. So now I can turn it
off and then just start just perfecting
it visually. And the one that
I ended up doing, of course, has so
much detail on it. Now the other thing is you can group everything
that's on the top half. I'm going to lock
that temporarily. So to lock a layer or a group go here to the layer options. And then you should be
able to lock both of them. You can drag over
here on the bottom. They aren't yet in the symbol. So even though this
symbol is locked, I have been able to
select all of these. I'm going to group them because that's gonna make things
a heck of a lot easier. So that when I
drag them in here, it's one group that
I'm dragging now, all the rest of them here. So from here down to
these six liters here. So from that layer
to this layer, all of the motifs from the top. So I'm going to
drag to the right, select everything and group. It seems like we've got
the two groups together. My mistake there, so I'll take, I'm just gonna go
back a step here. That piece belongs to this. Want to make sure that I've
got that expanded and added. There we go. So this is
our bottom group here. That's one group. And then this is going
to be the other group. So now we've got the top and the bottom that we can
move around separately. And of course we can
still go in here and individually move
any of the elements. So I'm gonna do a little
bit of adjustment here. And then I'm gonna
come back to you. And then in the last lesson, what we're gonna do is kinda
rough out our background. Alright? Alright, I
will see you there.
9. Lesson 8 Creating the Background Elements: Hey guys, welcome
to lesson eight. Less than eight here is
all about the background. Has good at it. Before I continue with this one that we've been
working on together, I'm just going to show you
real quick the finished one that I did while
I was practicing. So of course, what
you're going to notice here is all of
this background stuff that I have going on and that's what I
want to do right now. In the other
illustration is to show you how I went
about planning it. I know it's not going to turn
out at all like this one, but I thought it would be good to point out a few of the things that I wanted to and give
you that comparison. So this is the one that we
looked at for an example. And remember we talked about the light flowers
in the background. Just little things like
this to fill in the space. And then the texture on some of the flowers and texture
on the background. Now, the texture
stuff is what we're saving for the last class. So we're still going to be
just laying out elements, but now we'll flip into that other document and we'll
add some of this stuff. Now. Some of them were assets
and some of them I drew specifically
for this layout. The ones I drew specifically are mainly these big ones
in the background. So this big long stems because I didn't have anything
quite like that. I probably could have
retrofitted something, but it was just as fast
for me to draw it. So let's get right
into that because I think that lesson could end up stretching really long if I
don't get at it right away. So my first thing to do here
is the shoulder sketch. Now we're not going
to be touching these two layers at all. The symbols I should say, because this is not a symmetrical part
of the illustration. Maybe what we'll do, I'll just select that one, but I want to, first of all, just add something that I could use here
in the background. Like I said, this
isn't going to turn out exactly like the other one, but I want to go through
this process with you. And something like this with a long stem
might have worked. So I could insert this
and it's really small, but this possibly
could have worked if I flipped it and maybe
altered the appearance. Sometimes shearing
will help so you can stretch it in one
direction or the other. I don't think that's something
I've showed you yet, but that's not really
giving me what I want. So I think I'm just going
to delete it and let's start with these great big
stems in the first place. So I'll start with the
pencil tool and let's draw. I don't want to use the fill, I just want to have a stroke. So here, maybe I could
already choose the color. Let's choose a color
that I'm using. I'll choose a dark
green for now. And so you can see here
that has changed down here. And I can also increase the width of it before
I even started. So I'm not sure what size
the line needs to be, so let's just pull one here
and that is too small. Now here I can just drag or down to change the
thickness of a line. And of course I could go in
here and adjust the profile. I think it's okay. I think I'll just leave it. I'm going to just delete that last point there and
pull it towards that leaf. And while I'm, while, since I've already got that set, I'm going to draw any of these big stems that
I think I need. And maybe I'll do this
one and then switch. So de-select that one and switch to the other
green that I'm using. Make sure there's no
fill on it and I'll use the other green to
do a couple of these. So now I've got the stems, I need time to start
drawing leaves. And I apologize if I'm going
through this really quickly, I'm going to de-select
that one so that I could change this to use Phil, take the stroke write-off and select the
darker ones first. So I'm selecting
the darker color. And then I'm just going
to go through and quickly draw out my leaves here. Leaves are fairly easy to draw, so it does go quite quickly. Now, I didn't have any sort
of stabilizing on there. So that's the other thing
I could do is go into here and I did I had the rope stabilizer on
it, so that's good. I was thinking to myself, cheese and a lot more
steady than I usually am because I had
that stabilizer on, so I'm not sure
maybe it stays on. Once you've selected
something, I can't remember. Okay, So the next
thing I wanna do is to group the ones that are
together like this plant, this plant, this planet,
et cetera, Olympic. Just do these leaves here first. This one, and that's
the lighter green. Maybe it'll move this
leaf a little bit further so they can get
a bigger leaf here. I'll do another one. It will only be peeking out behind that. And maybe I should do
the same thing with these branches here so that
there are additional leaves. Even though there'll
be somewhat hidden. It's nice to have
them there because it really helps to fill
out the background and almost instantly, right? So we'll do something like this. And don't worry,
we're going to change the order of everything here. And I put that intermediate
leaf in there just in case I change the height and I remember
doing that on something. I don't remember which one, but just in case then I don't have to
add additional leaves. Now, I want to select
all of my strokes here. So hold one finger down so
that you can select them all. I'm doing all the ones that
are the dark green first. They're all selected. And I can go into here
and Expand Stroke. Then also I'm going to do add and let's go through now
this leaf changed color. Okay, got it. Let's go through and do
all of the dark leaves. So you can do it this
way or you can go into the layers that might
even be faster. So what I'm grabbing
all of them. You can also select
the top one and then two finger select
to get the whole column. So it's like the first one and then use two fingers
to tap the bottom one. They're all selected. I don't have light green
ones, so this is fine. I'm going to hit group
here because I want to be able to grab
these stems as well. And now that they're
all selected, I'll go into here and add k. So what did I do there? Somehow I have a duplicate
of that line here, so I'm going to delete it and
put that back into place. I'm just making sure too that my leaves are
actually overlapping. I didn't go through
and close all those leaves because I
knew that once I did this add operation that
it would close them anyways. So let's go through
and just make sure we've got all the dark
ones here in this group. And now, select all of it. Click on the first
12 finger tap. Doesn't always work for me. So I think that sometimes I must hit with one finger
first or something. Alright, no problem. Be that way back to selecting. Sometimes it's easier
to divide and conquer. So do half of them and then
go and add the other half. Okay, So now that's all one piece and
that leaves this one. And so this, and this
have to be expanded and then all of these selected
and we could do add that one. So now this is all in
one piece as well. That was harder than
it needed to be. So now I can start
placing some flowers. So we'll go into the assets
here and let's grab a few. I think I'll grab this one. And why don't we pull these, we're going to end up needing
to pull these below it. The rectangle is going to
be an issue at the moment, so I'll just leave it for now. Let's see if we could, because we don't want to
put it in the symbol. So I'll figure it out and let you know what we
have to do there. But my first motif added, now, some of these I
will confess that I had taken and placed like this, and then I went and
added the textures. So that's something
we're gonna be doing in the next class. So maybe I'll avoid
using the ones that have textures just so that we can go through and do that
together so that one doesn't really fit what
I had in mind there. So maybe I could use
it here instead. And remember that you'll be able to talk these things
behind the butterfly. So for now, just keep them in the foreground because
it's just easier to work with that way
and insert a wage. Just keep adding motifs that
you think will look good. Now in the, in this collection, I had more of them that
weren't filled with anything. So something like this, e.g. now that thought one that
had the blending mode on it. So we'll go back and two layers here and go into
the blending modes. And I'm just going to put
that to normal for now. So that's gonna be
definitely the recipient of some sort of a fill. Let's go back to here and
we'll just add a few of these. And so really, at this
point what you're doing is just trying to
fill out your layout. We're definitely going to be
doing a lot more work with the motifs as far as giving
them texture and whatnot. But I didn't want this
Lesson to drag onto match. We also will be putting
texture in the background. And then I just wanted
to show you a couple of the other sorts of motifs
that I had created. So you're going to possibly
consider doing this. I took this idea from wallpaper that I
found and I traced. So just a vintage wallpaper. And this is something
you're going to maybe want in the background. And if you recall, the sample piece had
things like that going on in quite a few of Jennifer bring lays
off things like that. So motifs that are basically watermark in the background
because they're circular. I decided to use this. So I think I'll put
this one back here and drag it below
these other layers. So what I'm doing here is going through and composing
my whole background before I worry about moving it into position so we
could group all this. I could continue
adding to this group. If I have this group selected
when I insert something, I think then it goes
into the group. No, it doesn't. It goes above the
group and then I can just slip it
into position there. So this might be a good one for the whole background
on this side. So I would also go into the layer options and
reduce the opacity. And of course we're
gonna be having to adjust a lot of this stuff later on or switch to a
blending mode screen, which will show up a
little bit better. And a lot of this is subtle because it's all about layers, building everything
up in layers. So I'm going to position my last two or
three motifs here. And then we'll hop
into the next lesson where I'll show you how to
position this background. And then that'll be
the end of the class, will be able to
have some time to compose and get our
basic pattern perfected. It's going to be flat, really, no texture or anything. You can definitely have gradient flowers and things in there. So those of you who
created gradient flowers, you can slide those in there. Those will be lovely. And in the next class,
Affinity Designer six, we will be adding all of the textures and really getting it to look a
lot like Jennifer's. So I'm going to add those
last few flowers that I want. I was thinking that this one of these heads would be
nice for the top. Or I can go to my layered
flowers and stems and add a two layered
flower like maybe this. So I would add this
piece and this piece. So I'm going to insert, and then the back of it, I think could be this
one or this one. I can go insert this one
because it's simpler. And in a case like this, I would do two tones of maybe this peachy
color that's the same. It's a little bit different and we just need to change
the layer order here. And you can see how I have
now a two layered flower. And I'm not sure that
that was the exact match, but it seems to be our rate
for that type of flower. I'm gonna be doing a lot
of adjusting to this before we do start
that next class about textures that I want to just have everything placed
and ready to go. So I'll meet you in the
last lesson where we're talking about how to move that background alone and not have it
part of the symbol. Alright. I'll see you there.
10. Lesson 9 Wrap Up: Hey there, welcome
to the wrap-up. So glad that you've
completed this class. And this of course, is only
part two of this series. You still have the
third one to go. And that's where we're
going to really see some major changes with
the looks of our layout. I took some time, definitely before
starting this lesson to create some textures. I went out and
photographed a few. I created some from
found objects that I had things around the
house, that sort of thing. So this is one of the
things that you can be doing to prepare
for that next class. Also, really think about
your design and how you want your placement of
elements if you have time, even create a second layout. And that way when you're
actually doing your textures, you can whip through two
documents much more quickly. That's just an efficiency
strategy that I have. I like working on two
or three or five, the same layout as I'm in the thick of it because that way I have a bunch to submit
for art licensing. I just feel it so much more
efficient way to work and it really adds cohesion
to your collection. Everything looks like it
was done at the same time, which makes perfect sense. If you are selling
for art licensing and the end user then has
some options when, let's say they want to hang
two or three together, or they want to do the same sort of look for several
rooms in their house. That's just a suggestion, but that's one of the ways I think about
it when I'm working. Now if you haven't done
so already and you're watching this class
on Skillshare, definitely hit that
follow button up there. If you didn't do it at
the beginning of class. That way you're
informed of any of my new classes as I post them, make sure you head on over
to my website as well. There are a lot of
free resources there, and if you add your name
to my mailing list, you'll also be informed. Anytime I add a new asset there, I'm generally adding assets, especially free ones
with almost every class. So you definitely want to be on that list so that you don't
miss out on anything. So I guess that's it for today. And I will see you in that
last plots where we really add a lot of textures and finish off our
beautiful illustration. See you soon.
 Delores Naskrent, Creative Explorer