Transcripts
1. Intro to AD19 Power of Symbols and Master Templates: Hey guys and welcome. I can't believe I'm at
the 19th class that I've recorded here for
Affinity Designer. I'm really excited to
actually bring this one to you because it combines the use of Symbols to
create a repeat pattern. I know we've done this before. We use repeat symbols
all the time to create patterns
where at least to see a preview of our patterns. But this time I'm combining
22 different symbols. So we're going to
have a symbol that reflects within a symbol
that creates the pattern. I know it sounds
really complicated, but I'm going to make it
as simple as possible. I'm excited because I'm
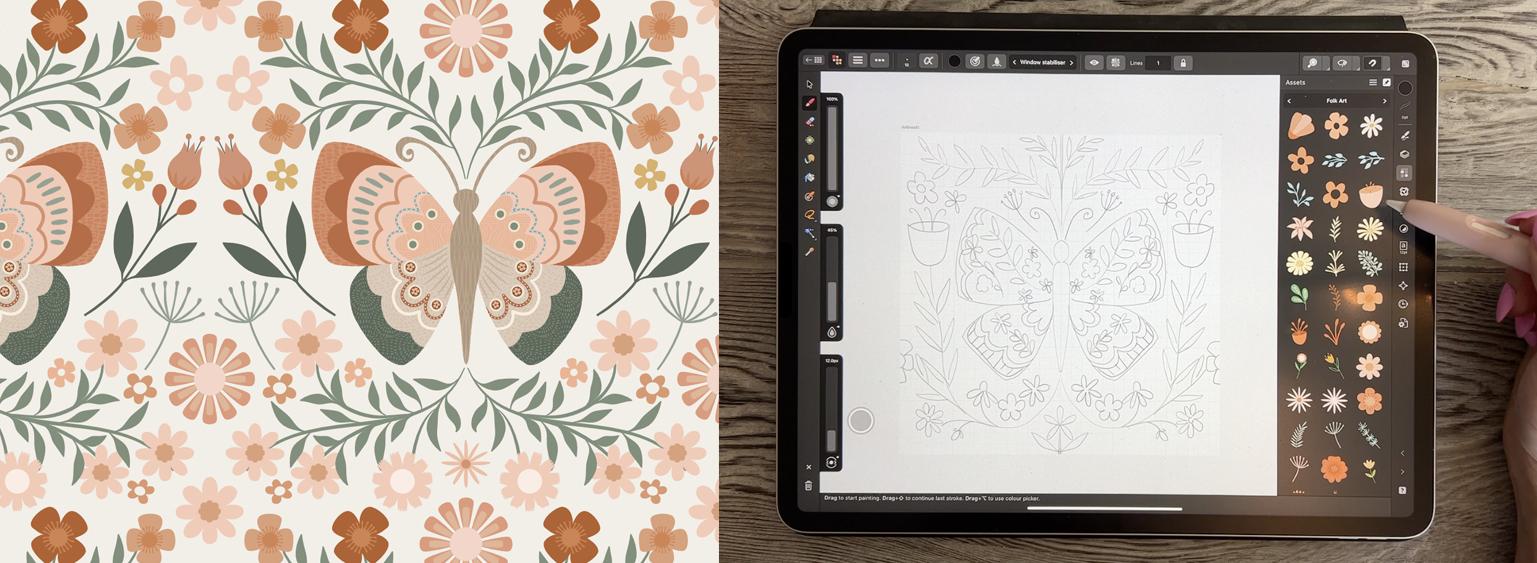
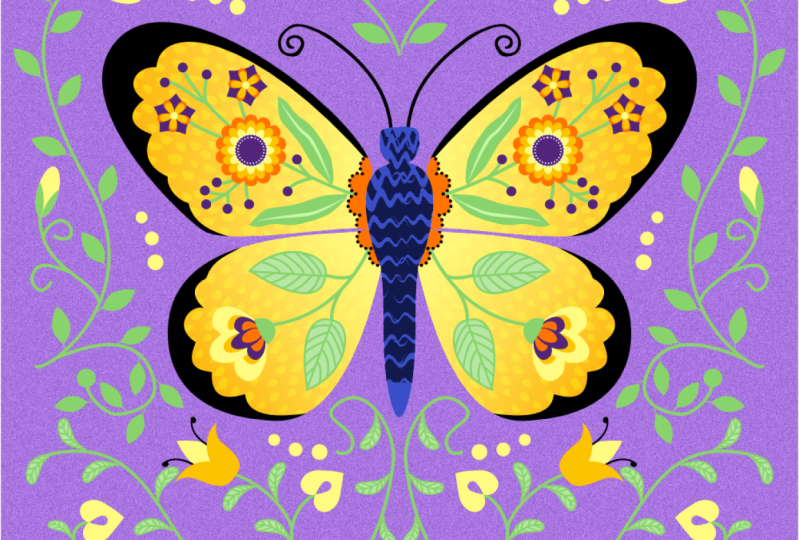
going to be showing you this Folk Art butterfly
that I created. But this particular technique is going to be so useful for you in creating any sort of
full drop or grid repeat. I'm gonna be using it
eventually to do things like scallop repeats or G
patterns, S curve patterns. You'll see it's gonna be a
series of a bunch of classes I'm gonna be using
to show you how I've created some really
complex patterns. They look complex, but actually when you have these
templates available, you're going to find
that they're actually quite simple and are
very fast to produce. I'm going to be giving you a bunch of assets
for this class. But you know how
to create Assets and I'm sure you've got dozens from some of the other
Affinity classes that you've taken with me. Now if you're watching
this class on Skillshare, I'm gonna suggest you hit
that follow button up there. That way you're informed
anytime I release a new class, you also get the notices for any of the discussion posts
so that I send out. And I'll also suggests
that you get your name on the mailing list
of my website. From my website I send
completely different things. So you're gonna find that that's where I mostly Post things
like my artists resources. So definitely get on over there and add your
name to the list. So are you intrigued? You ready to get started? Alright, let's dig in
2. Lesson 1 Overview and Examples: Hi guys, Welcome to lesson one. Lesson one here is gonna be all about inspiration and Examples. I'm going to show
you a few ideas that I had and also I'll show you how my document
breaks down. Let's get to it. I thought I would start
this lesson taking you into my Folk Art
boards that I have. So I've got a couple of them. I've got just general
full cart here, and I've also got
Folk Art animals. Let's take a quick
look at the animals because I think this is where we can start and talk about
this particular project. I read this butterfly, just printed it out so that
I'd have it as a reference. So this is kinda thing
that I'm looking at. But what I want you
to pay particular attention to is all of these little flowers and
leaves and greenery. All of this little
sort of fancy stuff that's going on in
the butterfly itself. And as we go through this board, I think you can get
some ideas for the type of imagery that we're
gonna be working with. I've created a bunch
of assets for myself, which will eventually
become an asset pack, hopefully timed for
the same releases when this class is coming out. But, oh, here's a good one here. Let's take a look at this.
So here's a butterfly. Once you find the
butterfly, that first one, you're going to get a
lot of related examples. And these are perfect, absolutely perfect
for kind of thing that I'm trying to show you. The cool thing about this
is we're going to be using as a template which will allow us to insert assets on the one side or
draw or whatever, and they will be repeated
on the left-hand side. So we're going to focus
on the right-hand side. And this is really
beautiful example. Lots of different
little flowers here. Many of these I think you
could make using the shapes. Think back to the first couple
of classes that I had done here for Affinity Designer and all of the little
flowers that you create a, you probably have a
bunch that you can use. Really all of these would be
perfect food for imagination and also for just creating some of these
additional little assets. I did a lot of greenery because I think
that that's one of the nicest things to use
with this because you get a lot of these long
and sweeping lines. This one is
particularly gorgeous. One of the things that I didn't add in mind at all was texture. And with this one, you can see that there's some beautiful, beautiful texture
that's been added in. So we're going to focus
on something like that. You could also go to
that other board. This is just a regular
full cardboard, but there's a lot of different
things mixed up in here. Some good ideas on
greenery and foliage. Some of them. One here, it makes me think of Tracey Capone because
I think she's got some classes on doing
this particular Layout. And one of the things I like
about what she's done here, if it's her, is this sort of squarish foliage and flowers. So this really speaks to
the shape of the repeats. So that's something that you
could be thinking about. There's also no reason why
you wouldn't be able to use this particular
design that you're doing today as a repeat pattern. I'm going to show
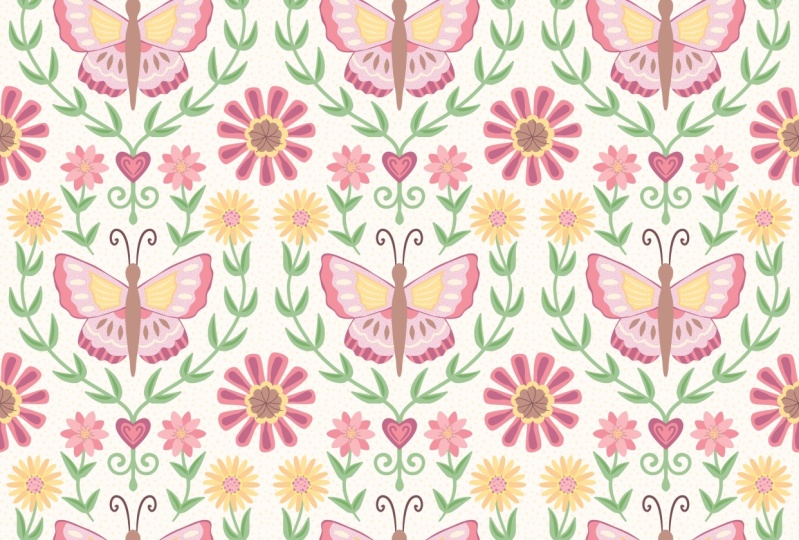
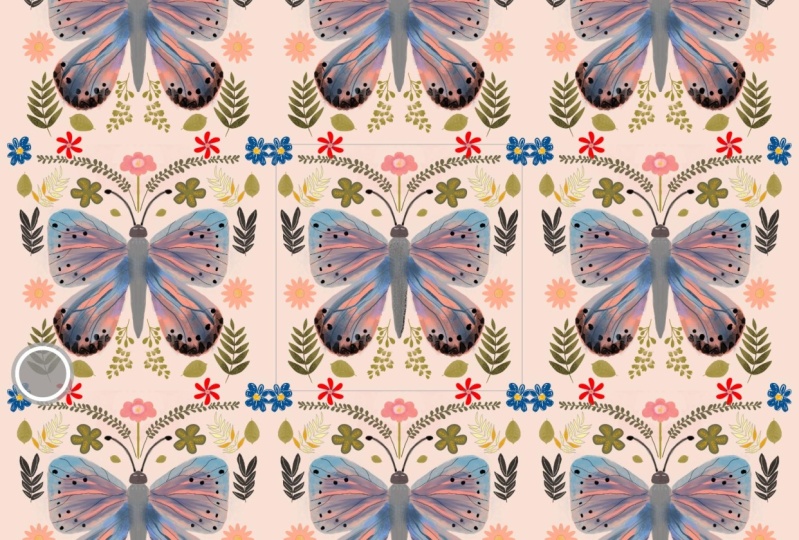
you mine right now. So as you can see, I've got quite a few variations
on butterflies. Show you the finished full drop. And you can see
what I mean here. It is a full square
that drops down. So another word for it
as a grid repeat because everything is lined up
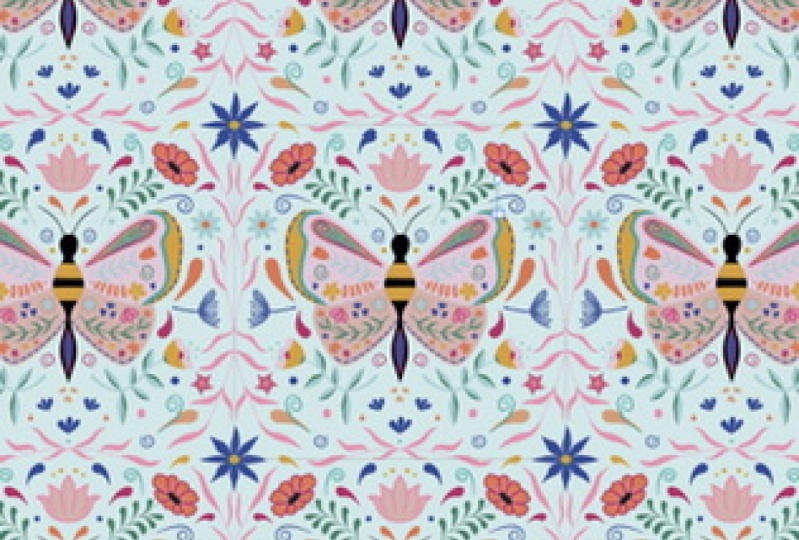
horizontally and vertically. And as you can see, it has turned out beautifully. I added a few of the motifs on the edges which I will be
showing you how to do. But in essence, this is the project that we're
going to be working on. I am using now using my new
method for making patterns with the initial pattern
in a single symbols. So this is the single
symbol here, which is here. I can hide it by toggling between clip to canvas
being on and off. So that shows you this is basically what we're
gonna be creating. You can see within that symbol that there are two
separate symbols. And this side is the Reflection which will
show on the other side. So the initial document will create it's just a ten by ten. You can see that
there are a lot of Symbols or assets that then are perfectly lined up and
divide it so that they will perfectly match when the whole
pattern is put together, There's a couple of
little extra steps that we can do there too. I'll show you
exactly what it is. It has to be done. I'll show you a
couple of the other ones that I've set up. This is pretty much the one
that we're going to be, are similar to the
one that we're gonna be doing in class. So there's that I did a couple of practices as you can see. And the cool thing about
that particular template, this is another version. I'm going to be
entering this into a Spoonflower Challenge
for a monochromatic, I haven't decided for sure if this is the one
I'm gonna put in, but I decided to try this one as a monochromatic color scheme. You can see here my use, I got a little bit more
adventurous as far as my greenery and how the
pattern would work. I actually think this might be, might be a diamond
repeat, doesn't matter. The one I'm going to
be showing you today is the full drop Reflection. So that's the name
of the template. And as you can see,
I've used that a lot. Full drop with Reflection,
with Reflection. And these are the other types of patterns that you
can create with it. I think I have a whole bunch
more like this type of thing and you can tell
it's not dropping down, so it's a straight across. Repeat. The other example I want to show you is what a
half-drop looks like, which is something that we
will also be working on. I think it's going
to be my next class. And I might have stuck
that in here, yes. So the next one we'll be
doing is dropping pattern. So this is a half drop repeat. So this is gonna be part of another class where
we're talking about the stroke profile for creating some of these
thin and thick lines. But in order to start
our butterfly Layout, I'm going to actually
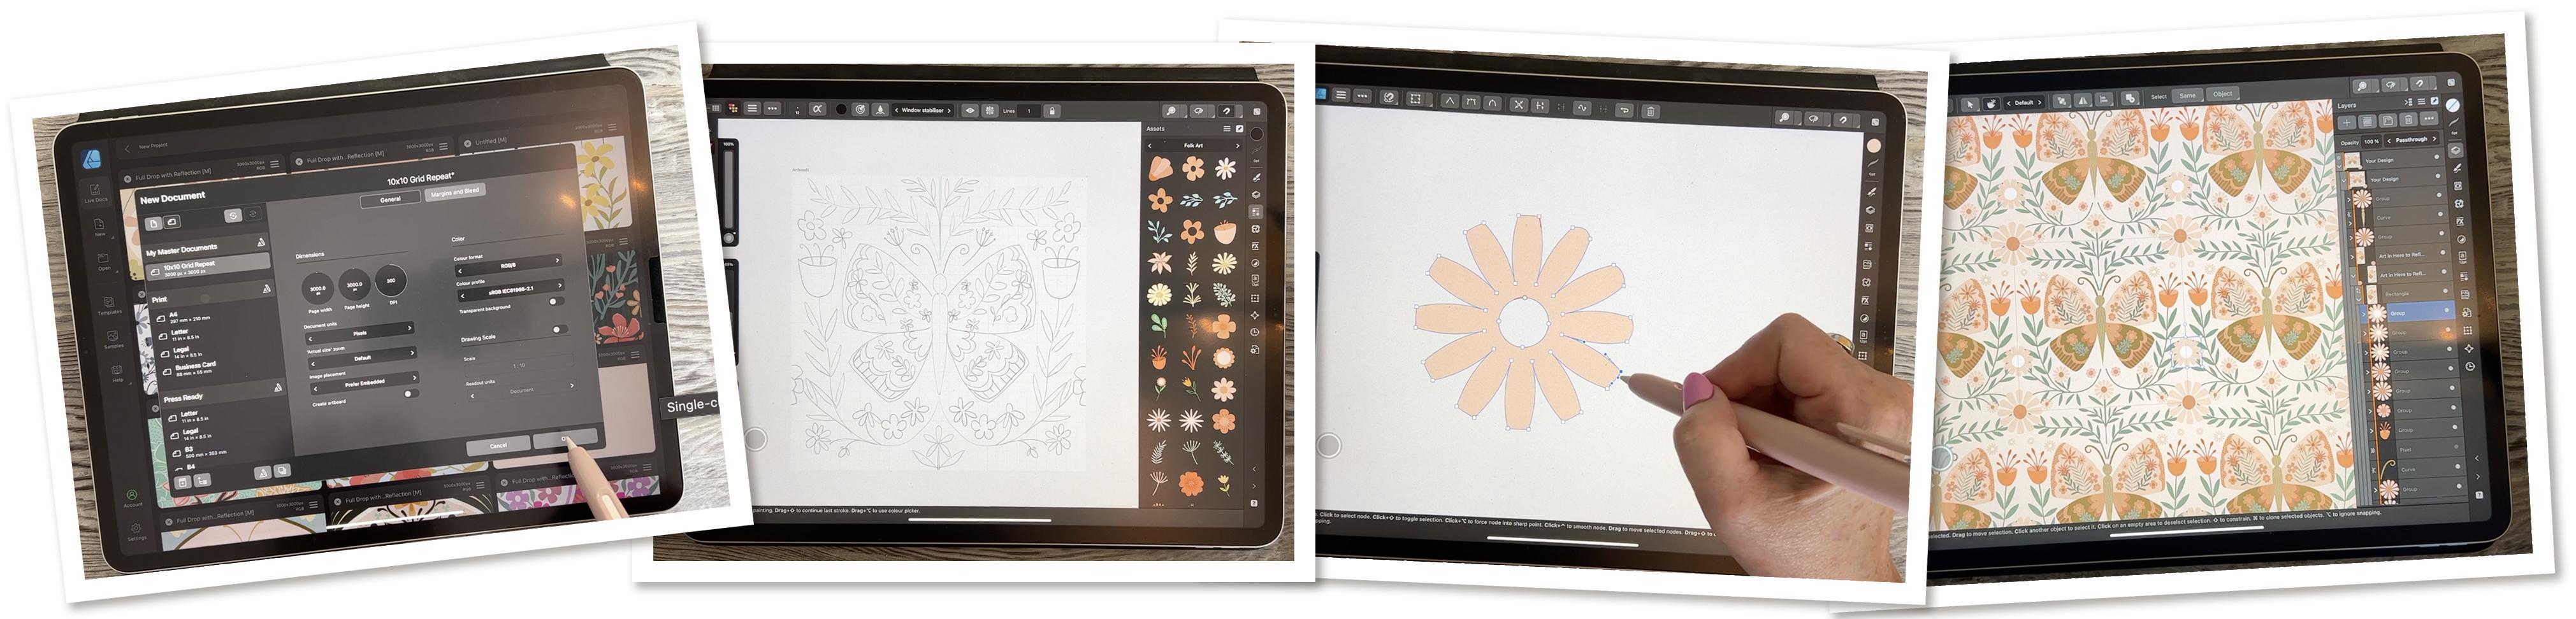
save it in here. I'm going to do a new document, 2000 by 3,300 pixels per inch is what I'm
going to be doing. Now, I used to be really vigilant about
doing a ten by ten, really common measurements
so that it was easy to repeat a motif
from side-to-side. But now that's
really unnecessary because of the new templates
that I've been doing, but the document is fine. It doesn't have to
be an artboard. You can be an artboard. Doesn't really matter
because what we're going to end up doing is copying what we have and sticking it into
another repeat later on. I just wanted to
keep it as simple as possible to start
out with once you have your ten by 1,000
bytes or 3,000 by 3,000, just click Okay, and this will be the document that we
will be working with. And what we need to do is
work on one-half initially. So I just use the
rectangle tool and my snapping on so you
can see that this has been pushed down and
that's why it is dark. When it's not engaged, it's light and
when it's engaged, it's dark like this. And I'm going to just
draw myself a rectangle. It will snap. And the same thing
with the center here. I can find the center and it'll, it'll snap perfectly so you
see the green line there. That means that you have
the perfect center line. And when you see the red line, you know that you've got it perfectly lined up to the edges. So that's exactly what we
need to start out with. Now in order for this
technique to work, what we need to do is
make this into a symbol. So we've used symbols
before when we're doing patterns and I'm
going to show you, all you need to do
is click on this. It looks like a pinwheel, a thing or I don't know gear. And if you're unsure
of which one, you can always hold
down the question mark here and you can see
the word symbols. We're going to click
into the symbols here. We're going to add this rectangle as a
symbol from selection. Now when we go into
layers palette, you're going to see that
there is an orange line here. So before I made
it into assemble, it was just a rectangle. As soon as I make
it into assemble. Back to layers palette, you can see this
orange line here. So that's really important. It's critical that this have
the orange line because this is what's going to
make the Reflection work. So at this point,
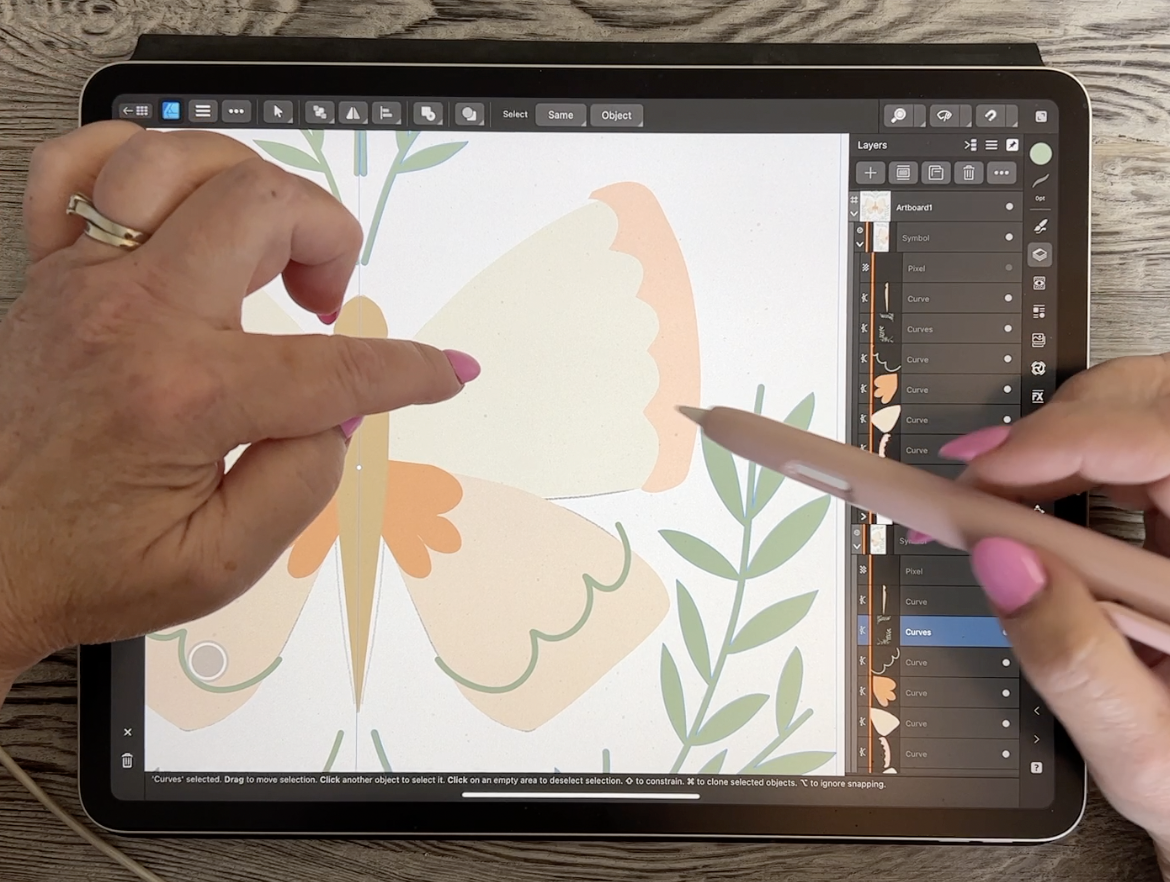
what we need to do is duplicate this. And I love this. Three fingers swipe
down for duplicating. And now what we wanna do is
we want to flip this one. So I grabbed this middle, bring it over to
the opposite side. And now I know that I've
got the mirror image. If you want to test it, you can just draw a quick line
within one of the symbols, make sure that it gets
into the symbol layer. It's gotta have an
orange line here in order for it to be reflected
on the other side. So a lot of times when you draw something or let's say we were going to insert a flower
that we're making. Or let's see what can
I grab here this fast? Let's use a cloud. I'm
going to draw that. Let's just fill it real quick. And in this case, because I was within
the symbol layer, it repeated automatically
on this side. So that's exactly what you want. So at this point,
what we need to do is start planning out
our illustration. So in the next lesson, what we're gonna do is start
a pencil sketch to help us do the Layout much more
quickly and more accurately. And we're gonna be switching to the pixel persona to do that. Alright, so I'll meet
you in that next lesson.
3. Lesson 2 Rough Sketch and Reflection: Hi guys, Welcome to lesson two. This one I'm gonna
be talking to you about the Reflection and also a rough sketch
because I think are Rough Sketch can really
help plan the pattern. And it'll just give you a little bit of
breathing room when it comes to position
some of your elements. And I'm going to also
explain why using symbols is so very powerful
here in Affinity Designer. Lets get started. So I think to make this easier, first thing we should do
is show some guides here. So I would just go
into this menu here. And as long as you've
got the grid showing, I think you're going
to find that it is very nice to have that
in the background. I personally have mine
as a light bluish green. You can change it here. So you just have to click on the color and you can see
that it changes it here. So I personally like just a light blue grid
in the background. You can divide it
up even smaller. I've got it just sat at
the default setting. You don't really
have to change it. But I think this will
just help us to know where the position of
the center line is. Now also, you want to be
in the pixel persona here. So make sure you click on that. You'll see that the
tools change on this side and we're
going to grab a brush, and let's go into
the brushes here. I'm going to grab
a six B pencil. You may have a preference. I like the six B. It's quite nice and dark. And I think that's
just see here, but I hint the default size and settings here
all are fine for me. You can darken it or make it thicker or whatever
you would prefer. So we're going to
just start by drawing probably just the basic
shape of the butterfly. And you're going to see
that whatever I draw on this side reflects on this side. Now you may be asking yourself
why we're doing this as a symbol as opposed to
just doing a reflection. Because you can set a reflection here like
a symmetry setting, but I prefer to do
it in this way. I'm just switching right now to all the different
settings of the grid, but I would just leave it on the regular setting and
turn the symmetry off. The reason that we're
going to be doing it in a symbol is because
we're actually, our goal here is to create
a repeat pattern with this. So I am finding that for myself, it's easier for me to work
with an actual symbol. So that'll come later in the lessons here you're
going to see what I mean and why it's nice to
have it set up in this way. So let's just start
by kind of roughing in our butterfly body. Now you can see that a new
pixel layer has been added. And it has been added in the symbol because
I had that active. And so exactly how we need it, we can continue drawing. I think I'm gonna do the
body, something like that. At this point, you can shape your butterfly
whichever way you want. You can look back at reference. My wings were kind
of like that shape. And then I think something
like this for the bottom, almost anything goes
with a butterfly. So you could decide if you would prefer to have it look different or whatever. I'm gonna actually at
this point move it down a little bit so
that I can center it. So you saw that red
line come into play and that showed me that
I have it centered. When I was planning mine, I kinda thought of the greenery before I thought of the flowers. I wanted to just get
a real good flow. So if you see the
way I did mine here, it's got a lot of stuff flowing
out from the butterfly. And you can see that
your eye is definitely drawn in by these particular
bits of greenery. So you could plan
it in that way. Honestly. If you were to look
back at the examples, you're probably going to
find 100 different things that you could do
for the background. So let's go back
into that symmetry. Full cart animals board,
not necessarily symmetry, but you can see sometimes
the background, there's some things that
have been added here that aren't part
of this symmetry. But you could definitely
take a look at this and see how Folk Art symmetry
is accomplished. This one, I liked the flow of the greenery around the bottom. Also, if you check
that other board, you'll see some other
examples like this one. These are really already
kind of symbolic flowers. They're not really
realistic flowers. So definitely refer back
as you're working on this. But what we are creating
right now is a rough sketch, which can also change as
we are working on it. So I kinda went I Pencil, I kinda went out from the
bottom of the butterfly, draw the bottom there. And then I kinda went
out from the top. And then I just sketched
in some leaves. I find that doing a little
bit of this planning, it will help with
your composition. While you're working
on your motifs, you're not having to think
about the positioning. That's all been worked out. So, you know, go through and do all of this sort
of positioning. And then you can also do the
same thing for your flowers. I wouldn't take the
time at this point to create the actual flowers. Right now, try to focus on the sketch itself and
keeping it simple. So for flowers, you
just want to draw some very simple
representations of flowers. Again, you might want to plan some of the positioning
of greenery. Your leaves don't have to
be the same for this one. You might want to shape them
just maybe a little bit more rounded as opposed
to the ones that are out here building a
little bit of interest. In contrast, in, you
could definitely have flowers that are
on stems like this. And again, a little
bit different with the leaves just to try to make it a little bit
more interesting. With a butterfly to, I like doing
something like this. At the end of the wings. It definitely gives it a
little bit more boldness to have some sort of darker
and thicker line work on the outside. Try things like double lines. And this one, I can see that my flower is going to
go over that edge. And I really quite liked that. You could have just detail on the top and then on the bottom, do more of this sort of shaping. I think I did something
like this on mine. And again, you could
do double lines. I'm gonna be showing you
a few things to make the lines themselves
more interesting. Now the other thing you could
do is start thinking of colors and how you might want
to work your color scheme. Personally, I think that the least amount of colors the
better for management. So you don't want to
pick or use 100 colors. You might want to
narrow it down to, let's say five colors
or ten colors. So think about that as you're working on this and refer back to some of those samples that we were looking at on Pinterest. Now for this vine out here, you could also add flowers
and they could be, let's see, let's try
something like this. So it's a little bit
more of a contrast. So these can be more like DZ, like flower, longer petals. And the side view
is really nice. You can add buds with a
little leaf underneath. And then I think
overall you would just want to consider putting different shapes of flowers
in to keep it really dynamic. One of the things that I have seen quite a few people do too, is to shape a flower to
whatever the whitespace is. So you can have a flower that's shaped
somewhat like this, so that it fills
the whole width. And that could be connecting to this particular set of leaves. If you have changes
you want to make, just simply grab your eraser and make the change
that's necessary. This might be cute
with some stuff coming out of the flower itself. And I did forget to put
antenna on my butterfly. So I'll do that in this way. And again, I'm just gonna go through and
fill out all the space. So maybe I'll do the
rest of this off camera and I'll come back to you
with my sketch finished. And then we're going
to proceed to doing some of the fill
of these flowers, like adding the actual
flowers and stuff. I have a really large asset pack that I developed
specifically for this class. So that's one of the things
that I'm gonna be using. But by all means what you
could do is duplicate or draw your own and then add them to your own Asset Gallery. So we'll talk more about
that in the next lesson.
4. Lesson 3 Creating Vector Assets and Filling: Hi guys, welcome
to lesson three. So now we're getting
into the nitty-gritty of our real design here. We're gonna be talking about filling some of those assets. So doing things like adding some texture and also
creating assets. And finally, we're going to also deal with some of that greenery. Let's get to it. Alright, so you can see
I have gone through and filled up all my space here, and I've got my asset
pack open here because I was using it as reference for some of the flowers and
stuff that I was drawing. So I'll be able to
save quite a bit of time by using the ones
that I already have, what I would suggest
that you do and you could do it here
in this document. You could move off to
the side here and do it. In order to work in this area, you want to make
sure that you've got clipped to Canvas on. Let's just try something here. I'm going to drag one of
my assets in here yet. And you can see that if
you've got clipped to Canvas on your working here, off the canvas and you
can see this area. If you don't have that on, then you can't
work in this area, but this is a really
handy spot too. Some of your development, if you don't want to get
out of this document, I'm going to throw that one out, but what I'm gonna
do now is switch back to the vector persona. And then I'm going to
use actually a couple of the different shapes that we have over here to do my flowers. I know that you've
probably taken the class where we
developed assets. So you pretty much have an idea of what I'm
going to do here. So I would draw whatever
shape that I wanted to use. And in this case, I've used this quite a bit for
making flowers because you can actually somewhat shaped
what you've got going on. I'm going to turn
off the snapping, but you can use the different
controls here to change the way the cog looks
and you can definitely make it into a really
cute little flower shape. I would colorize it based on whatever color scheme
you're thinking of using. You can change it on the fly. But I find that when I have a nice-looking combination
of colors here in my assets, I've got this as my
folk art assets. I find that it helps me to do a more cohesive design when I'm actually in the process
of working on it, then I don't have to
really think about colors too much. I use. I've got lots of
swatch galleries here. This is the one, these
are my favorite colors, so I would probably go in and use one of the
colors that I have here. So let's do something like this. You can go lighter
if you'd like. You could separate the
curves so that you could color the middle of the
flower differently. So what I would do here is, first of all, I would
convert this to a curve. So at this point
it's still a shape. I'm going to convert
it to curves. This way I can actually
go into and make little changes that make this flower maybe not
quite so symmetrical. So I have, like I said, use this one quite a lot. So I'm pretty used to doing
any sort of changes necessary for this is stuff that you
can do in your spare time. If you've got any, if you're like me, you don't
have very much, but if you have a little bit of time
on your hands one day, just go through and develop a bunch of these little assets because you'll find that
for a project like this, it's just super useful to
have these already made. If you want it less symmetrical, then pull some of these and
you don't change the position slightly or change the shape a little bit so that they all look a little bit different. You can grab two of the nodes and move
them at the same time. And then here, Let's
take a look at this. I'm hoping that I can just
color this center and Noah. So at this point this
is being recognized. One curve would go in here
and separate the curves. This is what I do when
I'm going to select all the notes as I press on the button until I get these
visible additional tools. And I go to the top
selection here. And that's going to allow me to collect all of those
nodes at the same time. Now what I would do here is
go back and grab the ellipse. Draw an ellipse here. If you hold down your finger, you're going to get
a perfect circle, two fingers, and you're
going to draw from center. So you could put your cursor
in the middle here and hold. And actually three
fingers will give you a perfect circle drawn
from the middle. Now, we know it's
going to be separate. We can go in and color
the middle section. And now I would do the same
thing where I would hold down or access that this is like the Shift
key on a keyboard, and I can then
select both parts. These have to be
grouped in order to be put into the asset
gallery as one. So we're going to go
up here, group it, and then we're going to
open up our asset gallery. And I'm going to just add, let me go into the
subcategory here. I have to go into the
assets that are in this category and Add
Asset From Selection. There it is. So that's how I go
about creating assets. That's one flower You could go in. There's another one that I
like using is the cloud. The cloud makes really
cute flowers again, holding your one finger down, make a perfect, perfectly
symmetrical shape. You've still got control
here where you can pull and extend the, I guess, what you'd call petals. And again, you would want
to convert to curves, make sure it's selected
and convert to curves, then you could go in and adjust and make it
maybe less symmetrical. I mean, if you really liked symmetrical flowers, That's all. That's alright too. This is just so that I
have a bit of variety. And then again, you could draw a circle or whatever you
want for the middle. I'm going to draw
from the middle and then hold down
three fingers. I'm going to make this
center really nice and big. That one I'll colorize
slightly differently. So maybe in this case I would put a peachy colored Center. You can also select both
pieces if you want to. Go into your alignment
options here and make sure that they're aligned
vertically and horizontally. Make sure now you go into the Layers palette and
make this into a group. Open up your assets
that you want to add to an Add Asset From Selection. And now I've got another
little flower there. So I'm constantly adding
to my Asset gallery, and this is what you're
gonna go through and do. Now I'm going to give you
a few assets to work with, but you're going to
likely want more so that you can work
on your own design. Now, at this point, what we're gonna be
doing is just filling out our entire design. I would start by doing
the butterfly, of course. So I'm going to take just the pencil tool and
draw each of the shapes. There's no fill at the moment. I'm going to just choose
one of my lighter colors. And I think at this
point I'm gonna get rid of the grid
in the background. So just go to this menu and you can just tap on grids
and it'll turn it off. And another thing I think
I'm going to want to do, of course, I'm going to
drag this into this symbol, but I'm going to
make sure that it's below the sketch so that I can be keeping an eye on my
design at the same time. So now you probably
noticed that I did not have this closed and I
could have had a close. There's an automatic
way to do that, but now that it isn't closed, I'm going to ask Affinity
Designer to close it for me. Now, from now on, if I want to draw and
have the shape close, I'm going to select
that auto close there. And so now as I'm
drawing my other shapes, they're going to be
automatically closing. So I'm going with a
lighter color here. I'm going to draw this one here, and you'll see it
has post on its own. I'm going to change the color
of this one and I'm gonna go through and perfected as I'm going for this middle shape, what we're gonna do is
just a half of it and you see how it didn't close it there actually let me do
the head at the same time. So we're going just on the
one side and drawing it. It has auto closed
and that's perfect because now we've got
a solid shape here. I'm going to change
the color of that. And I would go through
at this point and do all the filling
of my little motifs. Let me just fix this
little area here. If you find that you have
more points than you need, you of course can just
click on one of the nodes, the garbage can up there and
you've gotten rid of that. So I would go through and do these solid areas of
the butterfly next. But once you have your
butterfly basically drawn, you're ready to start doing
some of the other work here, like drawing the
volumes and so on. You may have the perfect shape
of plant to put in there. But it's often the case that because you shape
them in a specific way, the ones you have in your
assets will not work. So I'm going to just
quickly show you a drawing, one of these, and that'll give you the
idea of how to do it. And then I would suggest
you take time and I will off-camera
just kinda finish all of these things here. But let me just show you one
to start out with. Here. I don't want the
shape to be closed, so I'm going to turn that
off and then I'll just draw, draw from the top down so
that I get a better curve. And then I'm going to go
to the line tool here. I'm going to enlarge it to
the thickness that I want. And then I'm gonna go through
and add a color to it. So make sure you click on the
stroke here, add a color. And this, at this point is still just aligned and it
has not been expanded. I would go through and draw all of your
individual leaves. So now that I'm
drawing the leaf, I don't want the
stroke on there, so I'm going to flip. And basically it's
just a quick flick from the stroke to the fill. And you've changed it over
here and now it will stay that way as you go through and you draw all of
your other leaves. I'm going to use. I'm going to click on
the bucket up here. And then you'll see
that as I draw, I'm drawing with the
color that I want. Okay, So I'm gonna go
through and add leaves here. You can definitely do some correcting as
you're going along. If you've changed the
shape or you want to keep the spacing consistent,
that's 100% allowed. Now You see an issue here. These last few leaves that I drew were not a
part of my symbol, so they did not
repeat on this side. So what I need to do here, you can see it right here
in my layers palette. I have to grab all of these. So you can either select
them by dragging to the right or you could select the top one and then
two finger tap on the bottom one and you'd
have them all selected. Now you can drag them into
the symbol and you're going to see them pop
over to that side. Now another thing I do, because it's just so much
easier to stay organized. I at this point, would combine all
of these together. So I first go to the
curve and expand it. So now you can see
that it is a shape. Here in Affinity Designer, they call it a curve. But if you were in
Adobe Illustrator, It's called a shape. Now that I have that shape, I'm going to first of all, fixed up a couple
of things here. When I was drawing these leaves, I didn't have the
auto clothes on, but it's not really a problem
for this particular design. You can see that it's open here, but because it's overlapping
with the stem here, when I select all of these and I'm going to
do that same trick. Select one, two-finger tap, Select the rest of
them and you can see that everything is overlapping. I can now make sure that I'm
on the move tool and that will allow me to get to these operations here
and I'm going to add. And now you can see here that it is just
one single shape. So double-check what
you've got here. Something like this.
There's a little bit of a notch in here. You could either
choose to delete a point or you could just move the other one so that you've got a nice smooth stem with
your leaves on it. So that's exactly
what I'm gonna do for drawing all of the
rest of these stems. So I'll go through
and I'll do that on this particular one
here at the top, you're going to see
that my stem is actually going to connect
to this flower here. So what we'll do here is draw
the stem on the one side, almost like when we did
the body of the butterfly. So I would get the
pencil tool here. I'm making sure that I'm in my symbol and I want the fill. I'm going to make sure
that it's on autofill. You can see that
that is actually darker and I'm also going
to put the auto clothes on, but I don't have to run
into that issue again at actually what I'll
do in this case, I'm going to go across the
middle and then down again, way too wide for what I want, but I can definitely make
adjustments at this point. And you'll see obviously
it's on both sides. I want it to be about the
thickness of this one here. So I would just make adjustments
until I have it perfect. And I'm also going to overlap
a little bit over the end, because when I create the
repeat pattern with this, I want to make sure that
it connects to this side. As of this moment, I've done, I've showed you how to do all of those
vines and things. So that's what I want you
to go and do off-camera. It might take you
a little while, the rest of the flowers
and things like that. In the next lesson, I'm gonna
be showing you how to get your symbols and position them and make it work
for this design. Alright, I'll meet you
in that next lesson.
5. Lesson 4 Adding Assets with Clipping Masks: Hi guys, Welcome to lesson four. Lesson four is all about
assets and adding, clipping mask the details. Alright, so I've got all
of my greenery done and I've put it into a very
nice, tidy single shape. I had all the separate
shapes and then of course, I went in and use
my move tool and the add function
here so that I could get them all as
one single curve. I started working on
the butterfly here and I realize I could show you a few things here
if you've taken my other Affinity
Designer courses, especially the reflected
butterfly that we did quite a few classes back. You'll know what I'm doing here, but I just thought it
would be a great way to give you a bit
of a refresher. Now, I've got two or
three different methods for adding these colored areas. Maybe temporarily, I
will turn off my sketch. I can find it. I can show you a little bit
more clear clearly. So you can see I
have overlap beyond the edges of my
main shapes here. And at this point, these are not necessarily
all in the correct symbol. So let me just grab this one. This one, and this one, and I want them all
to be in the shape. I drew them on this side. So I guess these are the only
two that have to be dragged into this symbol here on
this side and this one here. Now the reason they've just
disappeared off the screen there is because I have
them on this side. And in order for
them to show here, let's make sure that they're in the symbol and not
just below the symbol. Okay, Here we go. This works. Okay? So this one here, I'm going to flip it so that it's facing the
correct direction. And then this one here, I have to make sure that I
have in the right side symbol. You can work either side, just so you know that
you can do that, you can work either side. But I find that
it's just helps me keep it clear in my head if
I've got them all going on, on the one side. So now you can see that these shapes are
on the right side, but there's still
not enclosed within that particular part of the
shape of the butterfly wings. So what I wanna do is the clipping mask to
have it fit perfectly. So I'm going to
take my curve here. And what I'm gonna do is I'm
going to grab or drag it over the shape that I
want to put it into, which is this one here. And you can see that the whole, as I'm dragging it
over this layer here, the whole thing
turns blue and that indicates that I'm
creating a clipping mask. And you can see now
that the wing shape itself has clipped that
color area perfectly. So I'm gonna do the same
thing with this one. I'm going to drag it onto
this part of the wing. And also this line that I've created can be dragged onto
that part of the wing. So I did one with
just a line just so that I could show
you that that is one of the ways that you
can create some of these shapes in here the line
is not thick enough, right? I want to have it nice and bold, just like you see
underneath here. So at this point I
could go into my line, select the line and go into my strokes palette and make changes here until I get
the thickness that I want. You can also change where the
line is being positioned. At this point. If you had the thickness to
what you wanted, you could expand the stroke. And now I've got an
actual shape here. So that's one of the
methods that you could use to do a little bit faster. I don't really like
the way it's done, this really thick curve here. So I think I'm just
going to eliminate, or actually I can just go. Yeah, I'm going to just
eliminate this one. And I would just go with my
pencil tool at this point. And I want to make sure
that it's going to fill with the color and
that is going to close. So I just want to
deselect everything here. So just make sure you
click on that acts. Everything is de-selected. And with the Pencil tool now, I can have it feel and
I can have it close. And so then I can
draw this shape. Now let's go into
the swatches here. I'm going to take the color
completely off of the outline and then I can draw a
nice sharp shape here. You could do this part just by thickening up the line or
widening the shape there. And then again, this
is one of the shapes that I would take and I would clip to that curve so that the edges are nice and
sharp and lined up. Now I see a little boo-boo here. So let me just fix that. I think I can eliminate a
couple of those points. Same with this one here. And you can go through
and do this for all of your finger shapes that
you've got within. For this one here, this would be a great opportunity
to use the stroke. So I want just lines here. At this point I
want to deselect. So I'm going to click
that X. I'm gonna go into my palette here, and I'm going to make sure that there's nothing
in the field but there's just a stroke. And I think I will
go with a darker, peachy color and I can draw. Now, I gotta make sure
that I'm not filling and I'm not Closing
the shape deselect. And then I can draw
some lines down here. Now it's way too
thick because of that previous
setting that we had. But now we can just
go through and draw a A stripy pattern that I
had along the edges here. Again, this is gonna be
all in the wrong spot. I'm going to select all of them. First one was selected, so
I just double-tap on here, then I can drag it down into the correct symbol
at this point, I want to expand so that they're actually curves and not
the actual line anymore. Let me just straighten
this one out a little bit. Select the top 12 finger, tap the bottom one. I'm gonna go into my operations here and expand the stroke. Now you can see that they're
all complete curves. Switch to your Move
Tool top here, go to Add, and that will
make it into a single curve. Incidentally, you could also
do the same thing here. You could expand the stroke. And if you go into
that operation again, you can merge the curves and you end up with the
exact same thing here. So it doesn't matter,
you can do either. And I'm going to drag that onto my curve there to
make sure that it's clipped and it actually needs
to be positioned below. And you can see that that has carried over to the
other side perfectly. So now we can start
using our symbols to fill in the
extra spaces there. So for the things
like flowers that you've already got
predrawn over here. It's perfect because you
can just insert re-size, makes sure that it ends up in the symbol that
you want it in. Um, I can actually have
it just on top like this, or I can drag it right into the symbol so it's
clipped within that. And I like doing
that because it just makes everything so much tidyr so that flower didn't exactly match what I
had underneath there, but I think that it's
still really cute. I want to use it again. You could hide or reduce
the opacity of your sketch. So to reduce the opacity, you would just click on the three dots here and then you can tone it
down a little bit. And I liked that
because I can see the effect that I'm achieving
here a little bit better. So the next thing I
would do, of course, is to go in and start adding
more and more symbols. I could be inserting
things like greenery. So for this one I kinda
had rounded leaves. So if this one would work, I would insert it, of course, position at if I tuck it
in behind the flower. So let's go into layers again. If I break it down here, put it into this curve, and then I also go in and
tuck it behind the flower than it really looks like it belongs with that particular, it makes it into all one plant. I just noticed that one of my stripes here went
beyond the edges. So I've just adjusted
that and remember that with your greenery or
whatever you're drawing, you can also apply
curves if necessary. So here you could grab, can see which one would work. Try this one. No. Let's just
try the mesh. With the mesh. If you want it to,
you could move your flower or your greenery
around if you wanted to, let's say, Establish
a little bit more of a curve than what you had
in your original symbol. So I quite liked the look of
that a little bit better. It's curving a little bit more. I'm going to make sure a
ton of changes on this one. I'm really spending
time drawing it out. And so now what
you can do here is just continue with your
Filling of your shapes. Take time to do a really
nice arrangement. I'm going to be
probably spending a bit of time to make
mine look perfect. Remember that your
assets in here, even if they come out
small, can be enlarged. It doesn't matter how much you enlarge them, they're vectors, so they will always remain
really nice and sharp. Also, just note that now that you've got it
placed in your document, you can go in and make changes. So for example, if I didn't want that to be quite as dark, I could go in and really lighten it or pick
another color completely, and that would be okay. It's not affecting
this asset that's actually in the Asset Gallery. It only affects the one
that you've got placed. And I see that that is not currently into the symbol
that I needed to be. I would grab all three, put them into a group. I would drag them down into that simple so that they
repeat on both sides. So you know the
drill at this point, you're just going through and your Adding symbols and
Filling up your design. So I'm going to take
time is going to take me a little while to position
all of my assets here. And I'll come back to
you with that finished. And we're going to talk
about how we would then take this and create a
pattern, repeat with it. Alright. So I'll see you
in that next lesson.
6. Lesson 5 Perfecting the Layout: Hi guys, Welcome to lesson five. As you work your
way through here, you'll notice that
you are Perfecting the Layout more and
more as you go. In this lesson, we're
going to focus on that. I'm going to be
doing things like adding more texture to assets, repositioning them,
resizing them. Anything I can think how
to make it look better. Let's get started. As I was
working on this, of course, I have thought of ten other
things that I can tell you, and I'm going to cover a few
of those in this lesson. I'm still working on it. I'm still going to be doing some Perfecting off-camera at
the end of the lesson. But I do want to show you a few little things that I think you're
gonna find helpful. I wanted to move this
little leaf here and it's really hard to select it
by drag selecting over it. So I just wanted to show you
another method and that to get your little sub menu here and go to this
would be, I think, like adding control if you
were on your keyboard, like on your desktop, like I know the top is adding
the Shift key and I think the bottom would be
adding your control key. So it would be like
using two keys to do whatever function
that you wanted to do. And I find that for selecting something that's blocked
by other things, I would go to this option
here, Option click, and you're gonna see there that if you're on
your selection tool, I can now select freely. So you can see there
that I'm getting just a set of marching ants, or I guess what you would
call a dashed line. That dashed line allows me to just really specifically
pick some points. Are some nodes to move. I can just use the Node tool
to move the leaf around. But if I also wanted to
change the angle of it, I could go to the
transform mode here. And then you can see I get a
lot more control where I can actually change the angle
or whatever on that. But that's a nice way to select something that is just kind
of in an awkward position. That was one of the things
I wanted to show you. The other thing is
this flower here. What I'm thinking of when,
when I do my full Repeat, I want this to repeat exactly
on the opposite sides. So what I've got here, and let's put the
snapping back on for this one is I'm snapping it right to the center lines
right in the corner. So what will happen here is
that when I do my Repeat, that flower will end
up looking whole because all of the parts of it will repeat
in the corners. And I think that'll become, I know it sounds
a bit confusing, but I think it'll become clear
to you when you see me do the full pattern repeat
on this piece of work. Then the other thing I
wanted to point out here, I did some alterations
on these two in here using the warp
tools or the mesh tools. So see how I've
got the mesh here. And if I were to deselect and then take
a look at it again, you can see that that warp has not actually been applied there. I want to make it into a full
curves so that I know that that is now a single
curve on its own. So for that what I do, you have to be back
in the mesh tool here and it's been reshaped. I could continue to
reshape it if I wanted to. But let's say at
this point I can still make adjustments
because it's still. And active mesh. Once I'm done, once I've decided this
is the way I want it to look than what I wanna do
is convert it to curves. And that's what this little
icon at the top here is four. So I'm going to click on that. And now it's been
converted into a curve. And if I were to select it, you'll see within
your work group here that you've got
a single curve here, and that's what you want
when you're finishing this. And then obviously I continued
to add more motifs here, and I will continue to
do that off camera. But I want to also show you or suggest to you that
another thing that you could be doing is adding some
textures here to do some of the Filling or adding interest
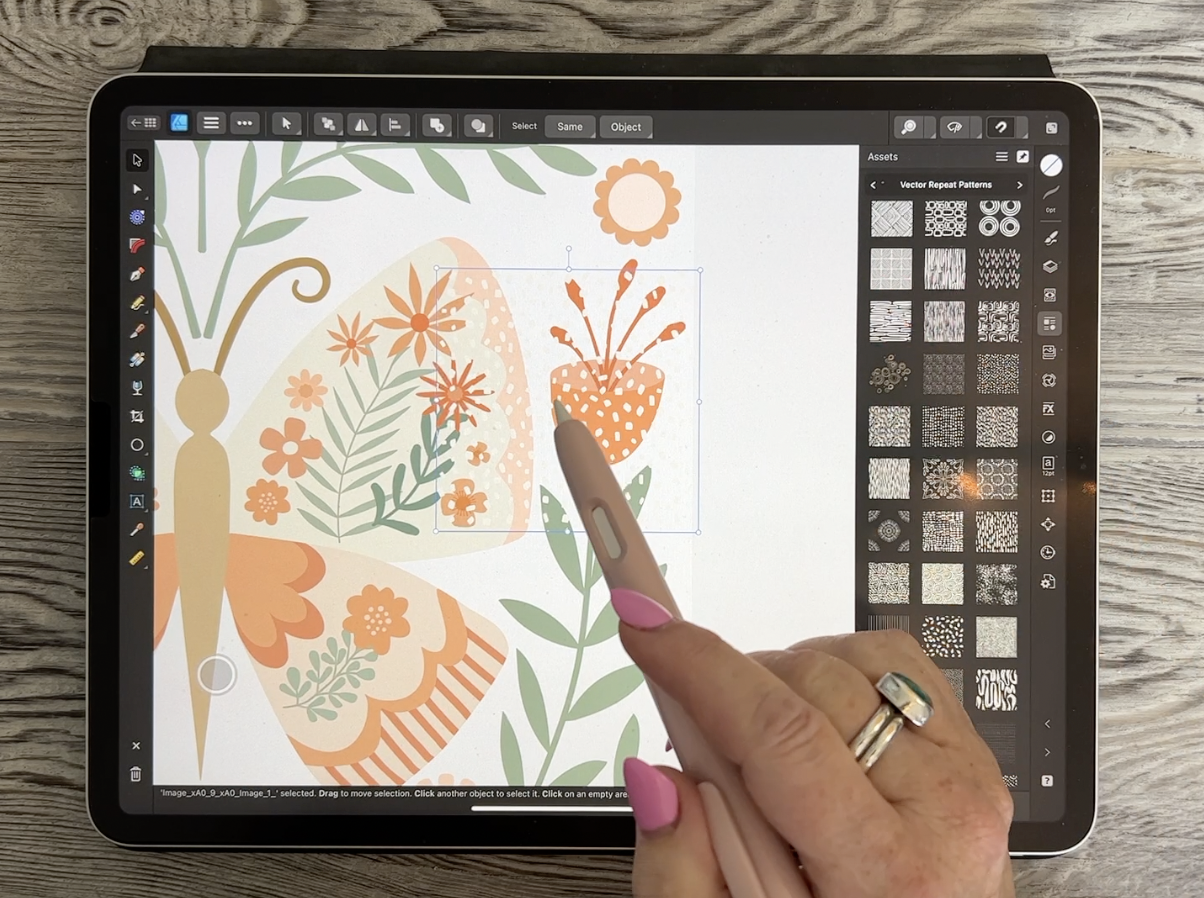
to your different shapes. So I've got a bunch of Vector patterns that
I've been saving. And I've got quite a
huge collection here, which at some point I will be
making into an asset pack. But at this point
I don't have it. I'll be giving you a couple
of these to play with. But what you wanna do in order to apply them once
you've inserted them, are installed them here in
your Affinity Designer, you're going to want to
do a long hold on it. It will place it. And now for applying it, if that's the one that you want. Now I'm resizing it because that one happened
to be a really big one. So I could repeat it. What I would do here is
I would just duplicate. I've got a perfect
copy of it there. I still have my snapping on, which is great
because now they've snapped beautifully
to each other. You can go into your
Layers panel here also, and you can select both
of them and go into your alignment
options to be sure that you've got them lined
up perfectly vertically, or however yours
happen to line up. And I think this one here actually needs to be
moved down a little. I think it was. Alright, never mind.
What I would do now is I would group
these, these two And because I want to have it clipped to that
particular shape, I'm going to bring
that all the way down to the right hand
symbol here and locate the piece that
I want to put it into that's here in
this half of the wing. You can see it here.
So I'm going to take this and I'm going to
drag it all the way down. And I need to
highlight that curve in order for this to be
positioned within that curve. So that's another way
that you can go and add some real interests and some
FUN stuff to your motifs. I did. Well, there's one mesh
here that I'll show you. That's kinda cool. I did a zigzag Maggie,
repeated curve here. Let me insert it so you can
see what it looks like. And let me fill it with. This is the color that
I'm going to put here in the body of the butterfly. And what I could
do here is I can slightly darken
it because that's the same color as I
have going on here. I'm going to before
I position it, I'm going to duplicate it and just add it to
the bottom here. So I have a nice tall piece
that I can put in here. Again, I would go through
and group those two. And now this whole group I
can drag into the body shape. Now, the body shape,
as you recall, is half-and-half Like
I've got half on the left half symbol and I
have half on the right symbol. And I know it's starting
to sound really confusing. But I think what I would do here is in this case because I want to apply the texture
to the whole thing. It might be better if I
have just a single shape. So here instead of having
it within this symbol, I'm going to drag it
out so that it's not duplicating anymore because
it's not within the symbol. Now, I'm going to duplicate
it just like this. So I've got the duplicate. You can see here that
I'm going to flip horizontal and I
can now line it up. We can make sure that we
say select both of these. And again, we could use
the alignment to make sure that the tops are
aligned perfectly. I'm going to make sure that
these two get combined. So I've got them, I'm going to actually
drag them so that I've got them above all, like both of these sides, about the two halves
here that you can see. And I'm going to drag this
one so that it's on its own, just like that one big
flower that I have. And I'm going to make sure
that they're overlapping. So I'm just dragging to make sure that there's no gap there. And let's do that at
the bottom as well. So we'll just move that over a little bit and move
that over a little bit. Now they're both selected here, make sure that you're
on the move tool. And then you can use the Boolean operations to make
them into a single shape. So the beauty of that
is now I can take my mesh here are
my funny texture, a little bit smaller
and I can drag it in. And you can see it's
applied to the whole shape at once instead of
doing it half and half. So I'm getting pretty excited about this is
starting to look really cute and I think I
would just continue adding flowers wherever
I had planned. Like filling out the design. Remember to put these into your symbol so that they
repeat on the opposite side, go in and make any adjustments
as far as color goes, continue adding all of
your pattern in here. So we're really off to
a great start here. I think it's time for
me to spend some time off camera getting
this all fixed up. And then in the final lesson, what I'm going to be showing
you is how to take this and put it into one of
your pattern repeats. Next lesson is gonna
be filled with tons of additional information
as you can see. Alright, so I'm going to
take some time off camera. I'm going to have
some lunch and then I'm going to really finish this off completely and I'll
meet you in the next lesson.
7. Lesson 6 Making the Repeat Pattern : Well, you know what
this lesson is about. I really want to show
you how to then take this artwork that you've created and make it
into a repeat pattern. There's a lot of little
adjustments that I ended up making and I just wanted to point all of
those out to you, so we'll be reviewing what
I did in my own document. Then I'm gonna just kinda
break it all down for you so that it's as
easy as possible. Let's get started. Alright, I just wanted to
show you this real quick. The finished artwork as finished as it's gonna
be for this class. Anyhow, I have added
additional colors. You can see in some cases I've really darken things up
or really lighten them up. I've got some additional
flowers that I've added. And basically now I'm ready
to put this into a repeat. So I would select everything here though,
the entire design. So I'm going to copy and I'm gonna go into my
pattern repeats. Now, if you have been in
previous classes with me, you know, this method here, you've seen this where we have two separate artboard with
the symbols repeating rate, and this is the
symbol that you would output for your final pattern. Repeat this new
method. I like better. It's quite a bit more simple
because you end up with just a single image in the middle and you don't
have to artboards, so you don't, you
don't have all of that repeating of
Symbols and stuff to do. You can just use
the template as is. You start working in the middle. And all of the Repeat symbols are here around the perimeter. When it comes to outputting it, you still simply output that one main part
of the document. This part doesn't get
printed or export it. It's just that central symbol. I have created these templates. I'm gonna give you
this particular one along with the class. So if you're watching
this on Skillshare, you have access
to this template. You'll just have to go to the link that I have in the
Projects and Resources. And I'm going to just give
you a really good look at how I produce my repeat. So in this case, what I do is a new document
and I do New From Template. I've saved all the different
templates that I've made. And as you can see, I have a very extensive
collection here. I'm going to choose the full drop template and there'll be exactly like what you just saw
when you get the template. You can eliminate
my logo for sure. And then you can paste
that image that you did. Now you could have
been working right in this document right
from the start, but rather than confuse
you with all of this information as well, I thought that I would
keep it separate. So at this point I'm going
to paste and it has pasted it perfectly into
position because I also had a ten by ten document. And this document is a
ten by ten document. Now that template that you have, you will be able to
use it repeatedly because when you
open from template, that original template
stays wherever you have it stored and you're working on a duplicate of the
template itself. I just loved this process
because there aren't all of those artboards to
worry about and you don't have to do any
repeating of your symbols. So I didn't have to take this, let's say these corner ones here and repeat them everywhere. All I had to do was
put one version of it and you can see that when I
move it, it moves it around. Now in this case, I
have both corners because this is a
reflected repeat. But you can see that it
works absolutely perfectly. And I didn't have to actually
place those two at the top. The same thing goes with
the ones here on the side. You see as I move it around, that I only had to have that one positioned on that
one-half of the template. So I really loved this
process and I find that it's quite easy to use. And you're going to
find that as well. You'll be able to do
anything like this. This is a full drop repeat. So again, it'll be just
this center bit here. This one doesn't
have a Reflection. I'm not giving you the
one with Reflection. I'm just giving you this
main template that has the one single
square in the middle and then all the repeats
along the outside. So learn how to use
that one first. And you're gonna find that
you're gonna be able to create wonderful patterns like
this so quickly and easily. So these are full drop repeats, which means that the squares
are lined up like a grid. So the full drop means that
it drops one full square. Okay, Here's another
example of something that I've created using
that same template. And of course this one
has the Reflection. There's another one. And so all of
these, like I said, our full drops and in some
cases I've got the Reflection. As time goes along, I'm going to be showing you all kinds of different methods to use these templates
that I've created. Now this one I wanted to
show you because I added, it's really similar
to the one that we were working on bond this one, I added a lot more texture. So those are the
Vector textures. I've given you one
so that you can experiment with it and just do some placing of your patterns as clipping masks
like I showed you, even as simple pattern
like this can be so elevated by just
adding textures to it. So when you look at
the actual symbol, so this would the curve, you can see that the curve
is reflecting in this case, and within it is the
texture that I've applied. I hope you have FUN with this because there's gonna be so much more that you're
gonna be able to do with these types of templates. This is the next class
I have coming up. And in this class I'm actually
showing you how to use changes in the profile of the stroke to make
interesting lines like this. But we also use it to do leaves and petals
on the flowers. And you just won't believe all the different things
that we end up using it for. I'm gonna be showing you how to create these kinds of things. That's all to be revealed
in the next class. What you're going
to find with all of these new techniques
that I'm teaching you is how much more efficient you can be with
your pattern design. You're going to find
that creating patterns. You can do it at double speed. I honestly can't believe how many patterns
I've created since I've started using this particular type
of pattern repeat. And again, we've got
the single symbol in the middle and the other
symbols around it. You won't believe your eyes. Alright, so that's
it for this class. And in the final lesson, I'll just be wrapping
up and showing you some mockups that I created using our
butterfly artwork that we created today. See you there.
8. Lesson 7 Closing Thoughts and Mockups: Wow, that was a good one right? Now. I haven't had the
time in this class. Just show you about doing the
scallop repeat and the OG and other patterns
that I would like to do with you as full drops, I can see a couple of classes coming out that focus on those. So make sure that you are on my mailing list so that you
can find out more about them. Make sure you watch
for those classes. I've been having
so much FUN with Affinity Designer and there's so many things
that I've learned, I really like that. I learned how to make
last few selections. That was a big aha
moment for me. If you have any ideas and
things that you've found with Affinity Designer that I haven't covered
in other classes. Make sure you mentioned
that because everybody can benefit from learning all
those little tips and tricks, if you're watching this
class on Skillshare, I'll also suggests that you hit that follow button up there. That way you're informed
anytime I post a new class and you know that
these Affinity class is kind of go in a series. Also. This is where I would
give you a bunch of ideas in discussion
posts and whatnot. So make sure that you have added yourself as a follower if
you haven't done so yet, I would suggest
also that you get on over to my website and add your name to my mailing
list because from my website, I also send completely
different things, especially artists resources. Thanks so much for
hanging out with me today and I'm so
glad that you're learning Affinity Designer
as deeply as I am. I'm finding that I am drawn to use this software more and more. The more I learned about it, the better I get at it, and the more I
find I'm using it. So I hope that's happening
for you as well. He sure can't be priced guy. Great. I guess this is Bye for now
and I will see you next time.
 Delores Naskrent, Creative Explorer