Transcripts
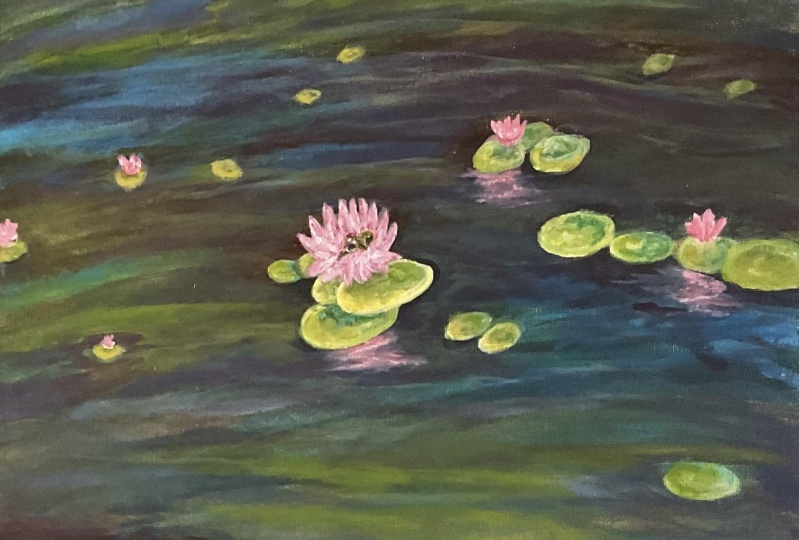
1. Welcome to the new beautiful class: Come to a new and simple
painting class that will teach you how to make this
beautiful water lily artwork. This class is perfect for
beginners because it focuses on letting go and painting
freely and easily. You will build a lot of
courage and understanding on how to paint freely
and a lot more fast. You will be able to
achieve clean colors, learn about perspective and
composition in this class. Hi, my name is
George, and I've been a professional artist
for over 11 years. And five years ago, I've
fallen in love with with over 20,000 students, both online and in
person classes. I've developed this
wonderful way of teaching. That focuses on having fun and making interesting projects while at the same time learning the basics and the
fundamentals of painting. Even if you don't have
any experience painting, you will be able to
achieve an amazing result. In this class, you
will have step by step encouragement and guidance
to be able to flourish. So let's jump into the course.
2. Materials needed: Welcome. Today's
course, will be all about how to do
washes and paint a bit faster so that we kind of cheat at the painting stage. I'm going to show
you how to build complexity without really
thinking about it too much. We're going to do a beautiful
lake with water lilies. It's going to be a
beautiful experience, and you will need a canvas. This is 30 by 40 centimeters. You will need a big brush, a big flat brush, a medium flat brush, and a very small flat brush. You'll also need a mixing plate, some water, and of
course, some acrylic. This is Amsterdam acrylic paint, titanium white.
Azo yellow medium. You will probably use
some other yellow, like lemon yellow, but
it doesn't matter. This is just a yellow
that has a bit more red. So burnt timber,
also known as brown, and some car mean red. And for this course, you will need to trust a bit in your abilities to do a lot of
things a bit more quickly. It's not as if we will
be rushing, but instead, you will be using the
big brush in order to create very fast things. You will also need
some paper towels, quite a bit of them
because you will be doing drawing with them. You will understand once we add some brown to
the mixing plate.
3. Painting faster: For the first step, you will need some brown on
the mixing plate, as well as some blue. And some yellow right
above the blue. Okay. Once you've done that, grab a bit of water with a brush mine already has
some green stuff in it, and add some brown
to this to make a wash. You need to make it
a bit thicker than usual. Add some blue to it. Once you do that, add a bit more brown just until it has
a bit of consistency. It's not just water and paint. So if you put it on down, you can start to see
it's a very dark black, and it's not opaque. And once you do that,
you can start to just add this color
most everywhere, especially in the middle. It needs to be in
the middle right over here, quite thickly. And then on the edges just
cleaning up the brush. Okay. It's very important
that at this stage, you go a bit faster
because we need to draw with the napkins. So that's basically
what you're doing. Let's grab some blue and
a bit of water to add it right over here as a line
going towards the left side. A simple easy line. Let's add some yellow to this blue and place it
right next over here. Let's add some more blue. And a touch of yellow. I know this seems fast, but it doesn't need
to be that precise. Okay. Let's add a
bit more yellow to the pile and go further
with the painting. Okay. Be careful not
to go into the blue. You can actually add
more blue just to attach it and right on this
corner over here, let's add some more blue. Let's take some more of this brilliant blue
and add it at the top. Let's create a nicer green, just adding some
yellow onto the pile, and going over here. On top of the blue
right next to it actually. And over here. Let's create a brownish
color with yellow. This will be a much warmer
tone for the bottom over here, and at the top, let's take some water to spread that
paint around faster. Water lubricates the paint. And it makes it run faster. Just go with some motions. You can go into
the black now and start spreading it
onto the middle side. And now let's take some of
this green and add some more of this color
nicely into the middle. Okay. Let's recreate
that dark color this time a bit thicker
and add it to the middle. In case you have some hairs, you can pick them
up like this and add them to the side of
the water container. Let's take some more blue
and add it over here. And smooth everything down, barely touching the canvas. Let's make that yellow with
some brown a bit more, just to add it into
the lower side, maybe add it over here
and over on this side. Notice how it starts
to look much nicer. Let's go with some beautiful
short lines like this, into the distance, and
as you go further, you can start to
create thicker lines. More of this yellow, just add a bit more yellow. A tiny bit to make some lines that are
thicker right around here, and right around here. Let's take some blue
and do the same thing over here and also
over on this area. Okay. Let's also cover all of the sides of the
canvas that are exposed. You don't need to let it dry. You're going to actually take some napkins in the next step, and you're going to start
drying immediately.
4. Sketch with the napkin: So, let's take one napkin, make it very small. And start over here, take out just a line and then
make it a bit of a circle. Let's make it bigger. These are the leaves of the water lilies, and let's make another one
connected to this one. So notice how it
is quite circular. And I'm changing the towel to make another one just
over here like this. And then changing the towel again to pick up some
more of that color. Oh two circles,
and going further. Let's make another one,
but smaller this time. So two big ones, and then another
smaller one just here and another smaller one
next to it because of this. Okay. Let's build
some right over here, creating like a spot, a center of interest. These are just ovals,
simple little ovals. That you are creating
with the napkin. This is a very secret technique. Also, it's called
the napkin frenzy because you are building
this layers of paint. Let's make another one here. Okay. And as you go
in the distance, you should make
them a bit smaller. Just barely touching the canvas. Just one over here,
so we balance it out, make it even smaller, just a small little pyramid, and start adding one over here. And another one just over here. Maybe this one we're going
to make a bit bigger. Change the towel once again, make that small point just so
you can uncover this color. You are basically
taking the paint away to have a space for
lighter colors, and you're also learning
how to draw like a painter. Let's make another one that's
bigger, right over here. And another one
connecting it like this. Notice how I accidentally
made another one here. Let's actually make it. And I'm noticing that this
should be a bit bigger. Okay. Now, let's
take a clean towel just because you're going
to need to make a flower, which is very, very simple. Just make this into a tip and start from the
middle right over here, and add one petal, and then another one going
up and another one going up. Make another tip.
Add another tip. Let's make it smaller and make
this flower a bit bigger, just like this. Oh, no. I created some textures
here, but that's fine. And of course, let's add
the middle as well. Okay. And let's take some more of this napkin and erase
some of the middle. That's one flower done. Let's make another
one just over here, but a bit smaller this time. Right over here. Just like a cup and going a
bit to the sides. It's a little bit of a
cup and it has a side. Okay. Now, let's
focus a bit more on the leaves on the lily pond. L right over here. Let's make another one. And maybe another one, just here going that way and smaller ones
in the distance, very, very tiny ones, for that, you will need something
like this to just be able to cut some lines. One, two, three, and
going over here, Let's build one more flower
in the distance, but first, you will need to make
another lily just over on here and
another one connecting the other ones like this. Let's erase some more of that. In case your whole painting
is becoming too Dry. You can take some water
and do it with the brush. Like this, you have a bit
more control with the brush, circle it with some water, and then take the napkin
and take that water away so that you
uncover the canvas. Let's make this a bit longer. Okay. Perfect. Now, you
don't need to let it dry. You're going to paint over it with some very intense greens, and let's focus a bit on
the whole perspective.
5. First lily pads: This step, you will need
the small brush, some blue. So yellow, making
a beautiful green. This brush is a bit crooked. Notice how it's round. I'm noticing when I'm
mixing the color, just add more yellow. This will be a very
intense yellow. But it will mix a bit with
the color on the background. Let's focus not on
this one first. Let's focus on this
one right over here. Focusing on that circle, making it nice and round. Now, at this point, you
don't need to rush anymore. You've done the rushing part. Now you can take
your time to make these very beautiful and round. If you would have painted
over this, directly, it would have really
messed up the color a lot, and you would have to wait
for the paint to dry. Now you don't have to
wait for the paint to dry because you
can go like this. And let's take and now that
you have some practice. Remember, these shapes are very flat at the top and very
flat at the bottom. Let's make this round
shape over here. Let's add a bit more
color to the middle. Remember that these ellipses are not footballs, like
American footballs. They are very round on the edge over here.
They are not pointy. In fact, let's make it a bit
more outside on the outside, so we cover some of
that dark color. Now going and refining the edge, notice how here it has a wonderful corner
just like a football. Let's take some more yellow, mix it in with this
just so it's a bit different and actually
round this a bit. Notice how the brush creates a bit of
texture that is good. And then as you go and refine this wonderful patch of color, You can go inside a bit faster because this is just
the first layer of paint. If you have some streaks
like this, those are good. You can actually create them by pressing a bit
harder on the brush. It creates a streak on the left and the
right of the brush. And then the one in the middle, you can blend inside
of the shape. It really makes the
painting a bit more ty, and when they dry,
they dry a bit flat. Let's make this one over here. Notice how there is
a bit of space here. That's just because the napkin was added too close to the edge, and I went overboard a bit. So instead of fixing it, we can just add another
one barely touching. And now you can also see what happens if you
go into the blacks. So that's how it
would have looked like if you would have straight
up painted on the black. Let's make it a bit
bigger. Just like that. But it's fine because it's
a bit in the background. And a tip that you can do
is clean up the brush. Pick up some of the color, clean up the brush again. Pick up some of the color. You're basically
doing the same thing you did with the napkin, but this time with the brush. So let's take some more
color, add it over. Still too black,
but that's fine. We're going to let this dry at some point and add more color. L et's add more
yellow and focus on the beautiful color and beautiful leaf over
here. Lily pads. They are called lily pads. This one, you can brush
a bit with your finger, just because it's
very close to us. Let's make it a bit more
round on the bottom, and focusing on this one. You can go a bit faster once
you get the hang of it, just going and adding
slowly to the edge, and then going lower.
6. Complexity of the lily pads: Adding some more yellow just
to change up the color. This will be a very
interesting color, so let's add it over here. Okay. Just as a tiny
bit of highlight. And maybe over here, and let's make this
one a bit more yellow. It has a bit of black, so it will basically become duller. D D sines yo, just focusing on that edge. It's very important
for lily pads to have a very straight edge
and a very crisp one. So you can go fast
in the middle, but as you go to let's
add some more blue, as you go to the edge, you need to be a bit slower and methodical with your circle, barely touching the black, and going down and
slower, making it bigger. Notice how it's
not round enough, needs to be a bit more round. And over here, we can go to
the side to create that edge. Perfect. Now, on the other side, you can go this way
with the brush, so you have more control
to go on the side. Okay. Once you've done that, you can move to the next one, which is one over here. And let's focus on the edge. Notice how it's
not round enough, so we're going to
have to make it a bit bigger and more round. Picking up some of that black, so we need more color. Going to this one,
doing the same. These are the same
repeated shapes. But because we are
grouping them together, they look a bit nicer. And because we are
slowly changing the hue, let's now add some blue, and let's add it to the
middle of this one. T a tiny bit, maybe in the background here because
it has too much black. Okay? And to this one, we're just changing
a bit to hue, and once we have a
close enough hue to the other ones
like these ones, you can start to add it
and make a circle with it. Because it's a different hue, you can go around it to create a difference in
between the lily pads.
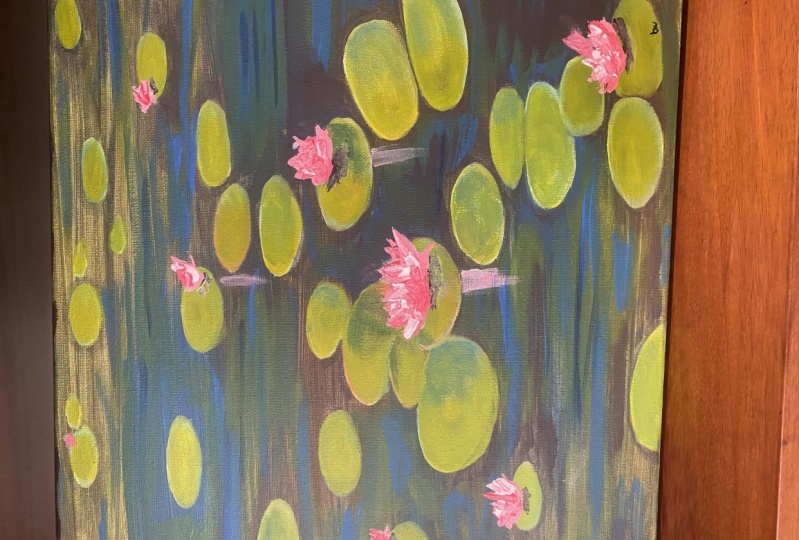
7. Creating perspective: And as you go further, you need to add a bit
of brown and a bit of yellow to this color to
make it a bit darker. So you create a bit of depth. These smaller ones can be
done very fast and loose. Just barely
scratching the canvas and being very careful,
just like this. Just a tiny bit. Let's group together
two or three over here. Notice how the black
ends up making the color a bit
duller and darker, so you need to pick
up some more color. Let's make another
one over here. Maybe this one is
a tiny bit bigger. Taking some yellow and mixing it in just
to change the hue. Okay. And let's make
this one a bit bigger, so it goes outside and
opens up that composition. Making this one over
here a bit bigger, of course, because
it's closer to us. That's how things work
with perspective, grabbing some yellow, some
blue to remake that color. Some yellow and now
making the edge, pressing a bit harder, just to give it more color. Okay. Don't worry
about the whites. If you have a bit of white
around here as fine. Let's make this
one like this way. Just creates a bit of a depth. Notice how the black is
getting into the green, so you need to pick
up some more green. Notice how you can take advantage of the
shape of the edge. Notice how this will
almost create a square. This also happens over here. Let's actually accentuate it. So it's a different type of edge that you've created
like a interplay. And this feels like
it should have another one on top to the right, just to build a bit
more verticality. Just over here. This can be
a bit darker. It's fine. You can add another layer
once everything is dry. Let's clean up the brush
out of that black and make this one over on this side. And let's make another
one over here. And over here, deliberately going into the black to
pick up some of that black, and another one over here. And let's build some sm, smaller, smaller ones like here. And small These
can be just dabs. T a smidge of paint. But keeping that
circular motion. Let's make one that goes
outside, and opening, opening. Let's add some more
color to this one. Let's mix in that black a bit, and add right over here another one over the
black that is almost dry, but it's still showing up. Okay. And now we need to let this paint dry completely
so we can do some flowers, some beautiful
flowers, some lilies. If you have a hair dryer, you can go over it
with the hair dryer. It dries so much faster, and you can paint
even even faster. It's almost dry completely, but it needs like
15 minutes to dry.
8. What you've learned so far: Focus on what you've learned
before we paint a bit. And I kind of tricked you. But for a good reason, I kind of tricked you to paint
the background very fast. You didn't really need
to paint it that fast. You could have just
waited for it to dry, but this is a very good way
of getting in the habit of just doing a fast wash
and painting a bit faster. This painting is about
learning how to paint faster. And you've also learned
how to do circles, these beautiful round shapes, these beautiful vals, and you've learned a bit of brush handling. By focusing on the edge. Pressing a bit harder. Let's take this vitamin
water from here. Put it on another table, so I don't confuse it
with the paint water. Even though if you drink paint water, it
makes you stronger. I'm not going to try it. I've never drank paint water, even though it might seem so. So you've noticed that if you
press harder on the brush, it makes this nice
edge right next to it.
9. Turning on the lights: And in this next step, it will focus more on creating
some color variety for the greens by adding a bit
of red to the palette, right next to this blue, and a touch of white, just to bring forth that those beautiful greens
and make them lighter. Be careful not to use all of
the white. Just take a bit. Go over the green, take some yellow if you
don't have it or it's dry. Take a tiny bit of
blue and mix it in making this beautiful
highlight color. And let's go over here
and add it onto the edge. Take some water, clean the
brush with some water, put it on the side of the cup just so you don't
have a lot of water, and you can soften this edge and create some textures
very beautifully. Let's do the same over here. L et's blend it in,
take some more color. Add that edge, pressing a bit harder and taking more color to have that beautiful
edge showing. Shifted a bit to the
yellow, but that's fine. And you can also use the side of the brush like this to
accentuate that yellow. Let's go a bit over this blue, to blend it a tiny bit. Once you've done that,
you can add more white to this beautiful color, this beautiful yellow green, and focus a bit
more on the edge. Just a tiny amount, and then over here to
create more contrast. Take some more yellow,
shifting the colors a bit to create more
color variety. And let's make the same for this one right close to the edge. And on this edge as well. Oh, no. I need to make
it a bit bigger now. See if you let it
dry completely, you can paint over it. Take some water. Blend it a bit, making some textures as well
as you go along. Be careful not to cover at all. And with the s watery yellow, you can start doing some
edge work on these ones. On the ones that
are further away. And really control that edge. Let's take some more paint. And for this one, well, actually this one because
it's more of an interest, more of a focus, and creating some textures
and over here, creating some textures
and then brushing them, creating some textures here,
brushing them as well. Let's take some more
white, mix it in, and some yellow, and a
touch of blue from here. Let's focus on this edge
and over here on this side. On this edge as well, pressing harder to get that beautiful edge
over top of it. Let's build up some textures
on this one as well. And over here, making that edge, once again, taking some water, adding running the
brush like this, take some water out of the brush so that you
just have a little bit of a wash that you can put on
top of these lily pads. Water lilies. Take some more paint,
add it to the side. It still has some water. So it's a bit transparent, which is nice because you
can create some textures. You can also put your finger down to create more
abstract shapes. Let's focus on this
edge right over here. There will be another lily pad, another lily flower on top. There is a bit of a
hair here, I think. Now, I cannot take it out, especially with the gloves. So you have to be careful for beautiful hairs to pick them
up when it's appropriate. And let's focus what more color on this edge right over here, and over here,
blending it a bit, and then recreating
this beautiful, nice Squareish shape,
blending it into the shape. Okay. Let's make a
beautiful orange green. Take a tiny bit of
red. Make this orange. Add a smudge of blue to it. It might seem very, very
orange, but it's fine. Let's add it over this to
add more color variety. Don't worry if it's to
orange. That's good. And on this one in
the background, Let's add some
yellow to it to make it a bit stronger and
closer to the other colors. You're just building
color variety, even though it
doesn't look perfect. It will look perfect once you go back to the high light color. Let's add some distant ones, maybe making this
one a bit longer. And let's go back to this color. Let's make it again with some blue and some green and
some yellow actually, and some white to be able to replicate this color
and go over it again. It still has some orange in it. So it's a bit more
close to the orange. It's an intermediary color. Perfect and over here as well. Be careful not to cover
all of the orange. Can always pick some pick
some up and add it over top. Let's take some water and create some textures watery
textures on top of them. This has the added benefit of creating some
interesting shapes. Let's add some edge work
and color to this one. In fact, let's take
some green from here. And recreate it. Let's add a tiny bit of this yellow to the ones
in the background, smudge it a bit ad a bit smudge, add another bit smudge, and to this one to make
it a bit more circular. This one needs a bit
of love as well. Let's make now deeper green. Just a touch of this green, making it a bit more
towards the green, so you can add it over top. Be careful to keep some of the
darkest areas still alive. Don't cover everything up. It's important, and let's
go closer to this lily pad. Okay, and a bit of a touch
here because it's too flat, and to this one as well, creating a nice edge. Let's actually
press a bit harder, so it creates that edge, softening the middle, making a bit of a
color shift over here. Clean up the brush. And
now let's recreate. That's this whole step. You don't need to really let the paint dry.
In the next step. You will be focusing on
the blacks and making things a bit darker
and some blue.
10. Reflections and negative painting: This next step, you will
need the bigger brush, the bigger middle brush, and blue and brown and
the touch more blue, and the touch more brown. You need to make
it a bit watery, just a tiny bit watery, so it blends better
on the canvas. Now, you'll need
to focus on making some darker areas underneath the lily pads, just like that. And then continuing them
and smudging the edges. There were some white
spots over there. This is a very good time
to focus on the edge work. Remember, underneath them,
you need to be a bit more of a line to build a bit
of a line just as a shadow. Notice how this
was a bit yellow, and I went in and
cleaned that circle. It's a bit too thick. So be careful not to go
very fast and very thick. Perfect. Now going on this
side and cleaning up the edge. And here you can go a
bit darker and thicker, and as you go to the left, you can go a bit softer. Let's create this angle as well. And this softer edge, let's make it a bit more crisp. Maybe add a bit of a wiggle, Let's see which one needs a bit more refinement like this one. It's a bit too thick. Let's add, let's
erase some of this. Doesn't have to be
the exact color. Can basically just refine the edges as you go further and then
blend some of it away. Notice how here I touched
with the napkin. That's okay. We're going to
keep some of them, clean up the brush with
some paper towels, just swirl it into the water, and then squeeze the water and the paint out
of the paint brush. Not too much. Needs
a bit of love. Let's take some blue,
add it to the middle. Let's take some water,
making it a bit more fluid. And now let's focus on making a beautiful highlight
on the water. It will be a bit
transparent when it dries, so don't worry if
it's too intense. Go into the blacks and
picking some of that black, being careful not to
touch the lily pads, taking some of that
black so that you can really blend it a bit more. Like for instance, here, and touching it
with the fingers. For instance, over here. And you can also go on the edge, just like that to create
some beautiful colors. Let's add another beautiful
reflection line over here. And if we are here, let's clean the brush, take some of this color. It still has some
blue and create another lily pad
bigger one just over here in the side of the canvas, just to balance out
the composition. Make it a bit longer, take some more color,
and some water. To make it run to make
it like forrest Gump. And now, let's clean the brush and with some brown and some
yellow, recreate that green. Let's add some blue to
it and some more yellow, and a bit more blue, and now a bit more brown. Needs a bit more yellow just so we can make it
a bit more visible. Let's add some water, so it's lubricated
and transparent. Wonderful. Now, with
this found color, you can go over these greener
parts into the blues. They are not dry yet, so they will pick
up some of that blue and create some
wonderful reflections. Notice how I built this
wonderful tower over here. You can extend it to the right and then build
it over here as well. To the left actually. Extend it to the left. And continue it a little bit further just so it builds
a little bit of a bridge. You can also smudge it a bit. Go with some lines right
over here and smudging them, going from here,
smudging them as well. These are softer
edges of the water, adding another layer on top. Oh, no, I picked up
the wrong color. Adding another layer
on top just to create more color variety. Now, focusing on this
beautiful edge over here, you can go around the lily pad. It has some black. Just
don't worry about it, pick it up and do a little bit of a
line. Smudge it a bit. And let's focus on this area. The further you go,
smaller the lines become, the thinner they become. So try to make them thinner. In fact, you can pick up the small brush and clean
it out of the brown, take some of this color and
start making some lines, some beautiful,
long green lines, can also go a bit thinner with the paint
by adding some water. This will make them run faster, and also it will make
them more transparent. Notice how soft and
thin those lines are. I did a bit of a
bigger one here, so let's break it down just a bit lower with
some finer lines. And over here, coming
from the side, smudge it, and let's
add smaller one. Let's take some
of that blue with some water and do the
same on this side. And on this side. It has a bit of green into it, so it's a bit nicer. That's why I added
it here as well. Creates this
beautiful turquoise. And over here since
there is a bit of blue. Of course, you can go
around the shape of the lily pads just a
bit on some of them, and then smudge it towards the left and a bit higher
around this one, maybe and smudge it to
the right, a bit more. And a tiny bit more
making some lines. You erasing some
of them even more, and then over on this side, just breaking a bit
of that black under line and over here to make
the line shorter and softer. Notice how you are creating softer and finer lines underneath the lily pad
just by going like this, creating that shadow
a bit thinner. And making some more
lines over here because this lily pad is
having a big shadow, casting a big shadow. Okay. And now let's go
back to the green, mixing in with some
of this black, just to change the color
a bit and the hue. And over here, make
some more lines. Clean up the brush on
an area of the canvas. And in the next step,
you will be making some lilies, some
beautiful flowers. You need to let it dry a bit, maybe use a hair dryer
to dry it faster, exactly what I'm going to do.
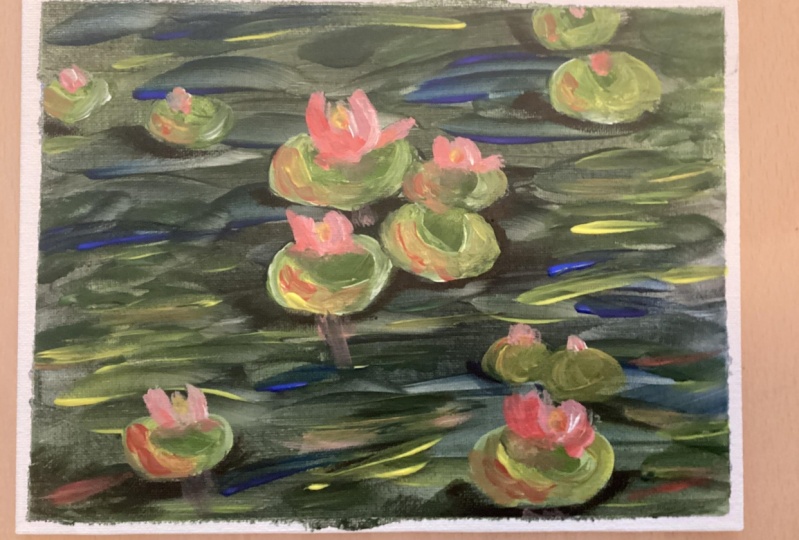
11. First pink flowers: Notice how there is
a bit of water here. If you have that, just
take it out. It's fine. And clean up the big brush, just so you have it
ready for a later stage. In case we decide to
make something with it. So it doesn't dry completely. Okay. Let's actually clean the big biggest brush as
well, so it doesn't dry. Just swirling a bit, dabbing the water, and then squeezing out that
paint. Perfect. I made a mess. Let's
clean my gloves. Okay. And for this next step, you need very clean brush, a very clean brush, and find an area that's clean on
the beautiful plate, the color mixing plate. Let's put it here
and touch of red. A tiny bit of red, more white. Be careful not to pick
up some of that brown or the blue or even the yellow. Just making this beautiful
candy, very light pink. Now let's add it
over on this side. Let's focus in on just
the shape of the lily. Notice this is just a petal
and another petal here. Let's actually put
a finger down, the pinky finger down, so you have more control and
add make a corner like that. And over on this side, making a beautiful corner
as well, and on this side. These are very simple shapes. They are just the opposite
of this, which is rounded. This is just like a football. Okay. And over here,
let's fill it in. And let's build another
one onto the side. Well, let's round it
out at the bottom. Let's build another
one just over here. Maybe it has a thing
sticking out here, and it's a bit smaller. And right next to it, there is another
one that is closed up only for two
petals. Or three. Okay. Let's build
up some more color. And let's make one
over on this side. Let's decide here, here, here. Let's make it right over here, over the green, so it
stands out a bit more. And another one here. Let's make another one
over on this side. Next to this, this
needs to be smaller. Notice how this is
the biggest one. These two are medium sized
and as they go further, they are smaller and smaller. Let's add another
one just over here. This will be just
a point of color. To balance it out. Let's add
just a touch color here.
12. Vibrant colors and reflections: Perfect. Now let's make it a bit darker by adding some red
and a touch of yellow, just to make it that
rosy, beautiful color. Now, on the left side, we're going to add the
shadows overtop this color. It will start blending with the pink that you've
already laid down. Let's also add another
one coming towards us. It's like a small triangle
and one going up, and a bit of a shadow
onto this side. Let's add another
petal in the middle just over here and
another one here. Simple little shapes. Okay. And for this one, just a touch and this one and
another petal for this one. Perfect. Now, clean
up the brush. Add some more white. It still has some pink, but you also need to
take it and make a very, very light almost white color so that you can start
to add some highlights onto the left side and
some touching Okay. Let's make this a bit more
big onto the left side, barely touching it,
cleaning up the brush, taking some water, just
a tiny bit of water, just to blend those things
together a bit more. Just a tiny bit of
touches to blend it. Okay. Let's take some
yellow and some red, a tiny amount of red, mix it together over this pink, a bit more yellow, a bit more yellow to make this rosy pink
intermediary color. Notice how it sticks out a bit. Let's add it to the
left side and a bit to the right like this
and in the middle. And over here, and let's make a beautiful splotch
of paint over here. And let's add another lily
with the color over here. Now, clean up the
brush a bit and start doing some reflections.
Take some water. So you have a transparent
color, transparent pink. In case you have the
blue still showing, and as you go down, soften it a bit longer, and then take a bit more color
and add it to the middle, still watery and add more color and make
the shape smaller. So it reflects. And
over here as well, add a smudge with the finger. Add a smudge, and over here, it will be longer, just because it's a bit
more in the distance. Let's make this one
longer as well. Add a bit of water just so we can make it longer.
It's too long. Let's erase some of it and
add it back in just a bit. Let's take some more color and add it to the
middle over here. Building those layers up a bit, smudging them, adding
some more color.
13. Contrast and vibrancy: Let's clean up the
brush, take some yellow, mix it with a touch of red, and let's add it in the
middle of the flower, almost all of the flowers. They have this small,
beautiful yellow middle. Let's add some white
to this color. Just a touch of white, and add it onto
the right side of the yellow you've just put down. Just a touch here or
there, and maybe here. Let's also clean up the brush
a bit. Just a tiny bit. Take just on the corner
on the tip and add it into the middle of the
of only this highlight. This reflection. Smudge it, then take
some more pink, add it a it to dit the shape. Let's add more pink to this
one just because we need to make it more visible.
Just like that. Now let's just smudge
some of those edges. And now for the crown jewel, let's take some of this blue, just a touch with some water and go over
with a few lines. Creating the water ripples
over top the reflection, so I builds up that
illusion of being water. Let's add it and make it more intense over here and over here. Let's add a touch, just a bit of white to the pile, just a smite you can go lower just so it doesn't feel
awkward because you have these intense
lines over there. Okay. And for the last
highlights of the lilies, you're going to make
this color again. Add a touch of yellow
to it, too much yellow. Add a touch of yellow to
it and a bit more pink and take a bit of paint and start adding some
beautiful highlights. Now that the water lilies
are a bit more dry. They can take paint a bit more. Smudge it a bit. Be careful
not to cover everything. And if you do, it's
not a big deal because next step is going
back to the pinks. This time a bit more intense. Just to add a few touches and create a bit more contrast
and also vibrancy. To make that pink
even more stand out. This is not only because you have added another layer and
the color is more intense, but also because the
color underneath is more intense as well. Let's add some more dabs over
here and maybe on the left of the yellow to create a
bit of a orange feel to it. Let's add some more of
this here and maybe here, and also underneath this one. And the line over here.
14. Final details. Thank you: Perfect. Now, clean up
the brush because you are going to make the shadows
underneath the lily pads. Take some yellow, mix
it with some blue, and some brown, a bit more
yellow, and some red. Let's take a bit of red. It's too blue, so let's
change it to over here. Let's take some red
to make it more. Nice and muted, too much red, not really mixing colors
properly now, but it's fine. Now, that is the right color. This is a navy beautiful color, and you need to go onto the left side of the
lilies to create a shadow. Don't worry, it's going to
be a bit darker as we go. This is just the first pas onto the side. It just places them. Now going a bit darker with
some blue and some brown, making a bit of a black and
mixing it in with the color, just so it blends better. And right next to the lily. Let's add it going even darker, right close to the middle. Can smudge it a bit, just a tiny bit and over here as well. Right next to this
one, smudge it. And in case you have too
much of a dark color. You can go ahead and
add some yellow, just a touch of blue and some
white and a bit more blue. To edit the wonderful highlight. This was an actual good step because you need to have
some nice highlights very close to the edge of the shadow because it will intensify those
shadows a bit more. Let's take some more
yellow and a touch of blue and create this
intensity around the shadow. Maybe make it smaller over here, and now take some
white and add it over just to create
that effect even more. Notice how it stands out. Don't go around it
too, a tiny bit. Don't circle it. Let's create this edge. Now going over and doing over
here the same exact thing. Okay. Now, it needs just a few touches and
the painting is done. Needs a bit more color here, and let's make it darker black. Can you believe it?
You are almost done? L et's make a darker
black, and with this one, you're going to start to edit a bit of the
shape of the lily. Wherever you see gray, just start cutting it out a bit, just so you can make
it more visible, especially on this one. Over here, there is a soft edge. It shouldn't be there. And in case you have the color too different from
the background. Try to add some of the
color of the background, like, for instance,
blue, will go nicely. Smudge it, and right in between, let's add some blue. It will really make it pop. And also some green. Let's add some
green on the left. Green and pink are
complimentary colors and on the right
as well right in between here and doing
the same over here, but a bit more intense because
there is a bit more white. Let's take some black.
Do it in the middle. Let's build another petal, just dividing these
petals a bit, getting some more
of that brown with the blue and smog it a bit. Going around it, making
another petal here, slowly adding some crispness to the edges and some
colors around it. Like for instance, over here, it's not so clear that those are two lily pads. Now
they are clear. And take some water with that black and make
some other lines, just going over the
reflections and over the blue. These lines are very crucial, the black lines that
you're doing now, because they add more depth and they make the
reflections and the colors, actually, the colors of the
water become a lot more intense because
you can compare it with the black that
you are putting now. The black lines. Let's add
some shadow to this one. And create some crispy
edges for this one, and clean up the brush and there you go.
The course is over. You've learned how to create
water in a very simple way. I think there is
something that I should be fixing like here. Okay. That's just about it. You've learned how
to do reflections in an easy way by
doing transparency, smudging with the finger, and then adding more color
in the middle of the shape. You've learned how
to make a water lily with the shadow
on the left side. And you've also learned how
to make this painting in a few minutes in
30 or 35 minutes. And that's just
about it for today, if you need to do something
else onto the painting, you can really clean up the brush and add
some more of this white and really add just a few more
highlights if you want. Not too many. Don't
go overboard. Don't overwork the painting. You can also do some lines, reflections like this,
just a few of them. There you go. The
painting is over. This was an exciting course, and if you are gracious enough, please leave a
review in order for other people to know that
you liked this course. Thank you for watching and
see you in the next one.
 George-Daniel Tudorache, Together we will create amazing things.