Transcripts
1. Welcome: Hello, and welcome to another marvelous painting class
where you will learn how to transform an
abstract painting into a beautiful,
flowery painting. Almost all paintings start
as an abstract painting. And if you add details and
you refine the shapes, you slowly start to have
a figurative painting. This class is perfect for beginners and
intermediaries who want to either practice or understand the
fundamentals of painting. Hi, my name is George, and I've been a professional
artist for over 11 years. Five years ago, I've fallen
in love with teaching. Both online courses and in person classes with
over 20,000 students, both children and adults, I've developed this fun, interesting way of teaching that focuses on exciting projects and having a lot of fun just creating and getting
the experience needed to know and understand
everything about painting. This composition might feel complicated, however, it is not. You will get step by
step encouragement to make each and every
brush mark count, and you will feel freedom and flexibility to create
other paintings as well. You will finally
understand how to have clean colors in your
paintings. You will really focus in on building textures
and depth in your painting, how to make a wonderful, a wonderful background
for your paintings. And, of course, you will have a great experience
taking this class. And without further ado, let's go into the class.
2. Materials: For this course, you will
need a canvas that is 40 centimeters by 40 centimeters
or smaller or bigger. This design works on
any kind of canvas. You'll be making an
abstract painting for that. You will need two brushes,
only two brushes, a big flat brush, and
a small flat brush. You will need a place
to put the paint. You will need a water container, use a recycled container. You will need acrylic paint. This is Amsterdam acrylic
paint, titanium white. Brilliant blue, carmine red. Burnt umber, also known
as brown and yellow. You can use lemon
yellow or you can use Azo yellow medium. This is just some lemon
yellow with a bit of red. It's a bit closer to
an Indian yellow, so that's why it's just nice. But lemon yellow
is good as well. And you will also need
some paper towels. Okay. You will
also need a bit of courage and a lit
of patience with this painting because even if at times it feels like
you're not really you don't really understand what you're doing and
how it's going to end up and you feel like you're not
doing the right thing. By the time you finish it, it's going to be looking great. And I'm going to
give some pointers that you can use to improve it if you want or change some things in order to
have a better painting, even if you made a few
things that you don't like. Now, let's go into
the first step.
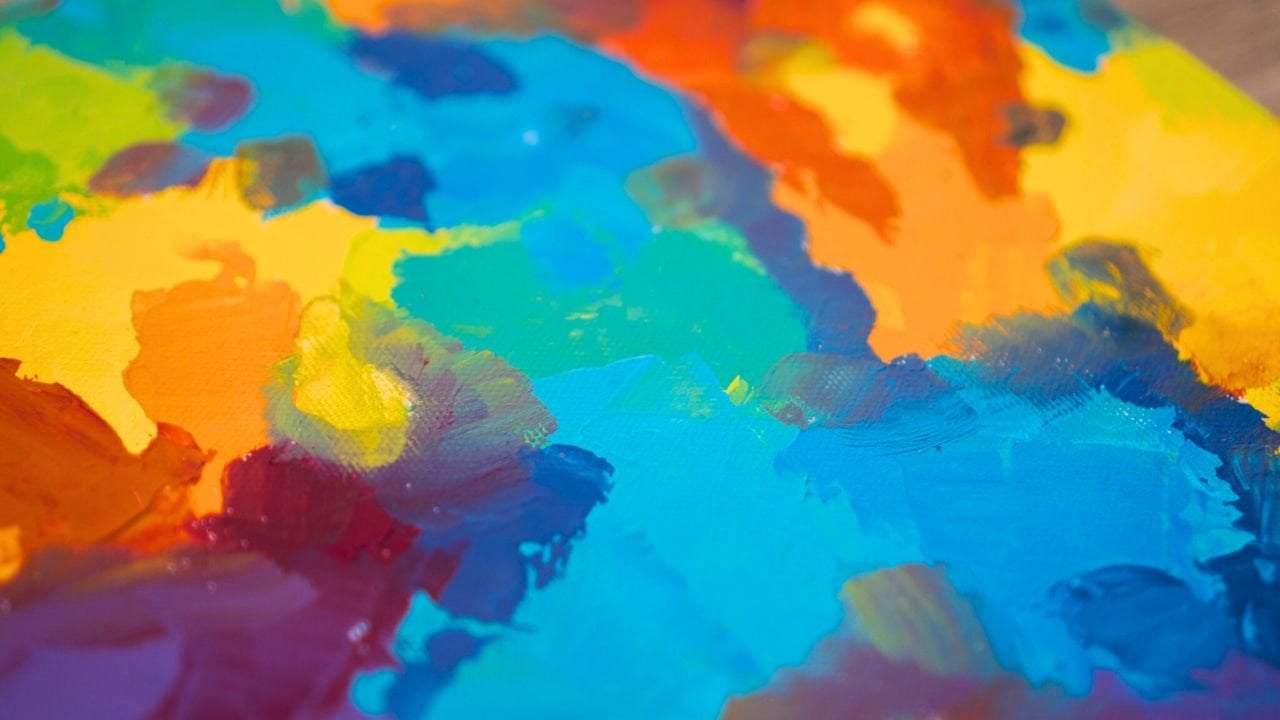
3. Play with colors: For the first step, you
will need some white. A generous amount of white. You will also need some blue. Let's add it over
here and some yellow. Take the big flat brush with
the corner of the brush, take some water, add it to
the middle of the plate. Take some blue, and then take about half
of the white you've just put in and mix it
in nice and thoroughly. Just about half a
very, very light blue. We should take a bit more
blue and add it over here. Take a bit more water just so we cover the whole
canvas very, very fast. Water is a lubricant. It will make the color
flow a bit more. Take some yellow and add it over just to change
that hue a tiny amount. By adding a bit of yellow
into this light blue, this baby blue, you are making
it a bit more turquoise. And now let's just start to
make some abstract shapes, taking some more water, and right in the middle, press very hard on the brush and just start to go
with motions like this. And start adding some shapes. Now notice that I've left
some of the shapes open. This is basically a rectangle, but it's a organic rectangle. I'm just going to go over
here and do the same. Maybe this one is not going
to be so rectangular, even though it is and over here. So it's big, medium, small. And you can go even
smaller if you want. Okay. Now, let's add a bit
more blue into this mix. Notice how beautiful
this color becomes. Just a touch of blue
and a bit more white. And now we're going to
do another color in between those beautiful stages. Don't worry if they're mixing. You can even go inside to add more texture or take away some of the texture
that was created. So notice, this is a
medium. These are small. And now this is
going to be Well, we're going to need to
make a bit more color. Don't worry if it's not
the same exact color. You can always go and mix it
in with the blue you've just created and add some of
this into the color. You can go a bit faster, you can go a bit slower. All you need to do is focus and make these
beautiful shapes. You can also add some pizzas, some flick of the wrist
thing where you just go inside of the shape of the outer blue to
create more shapes. Clean up the brush
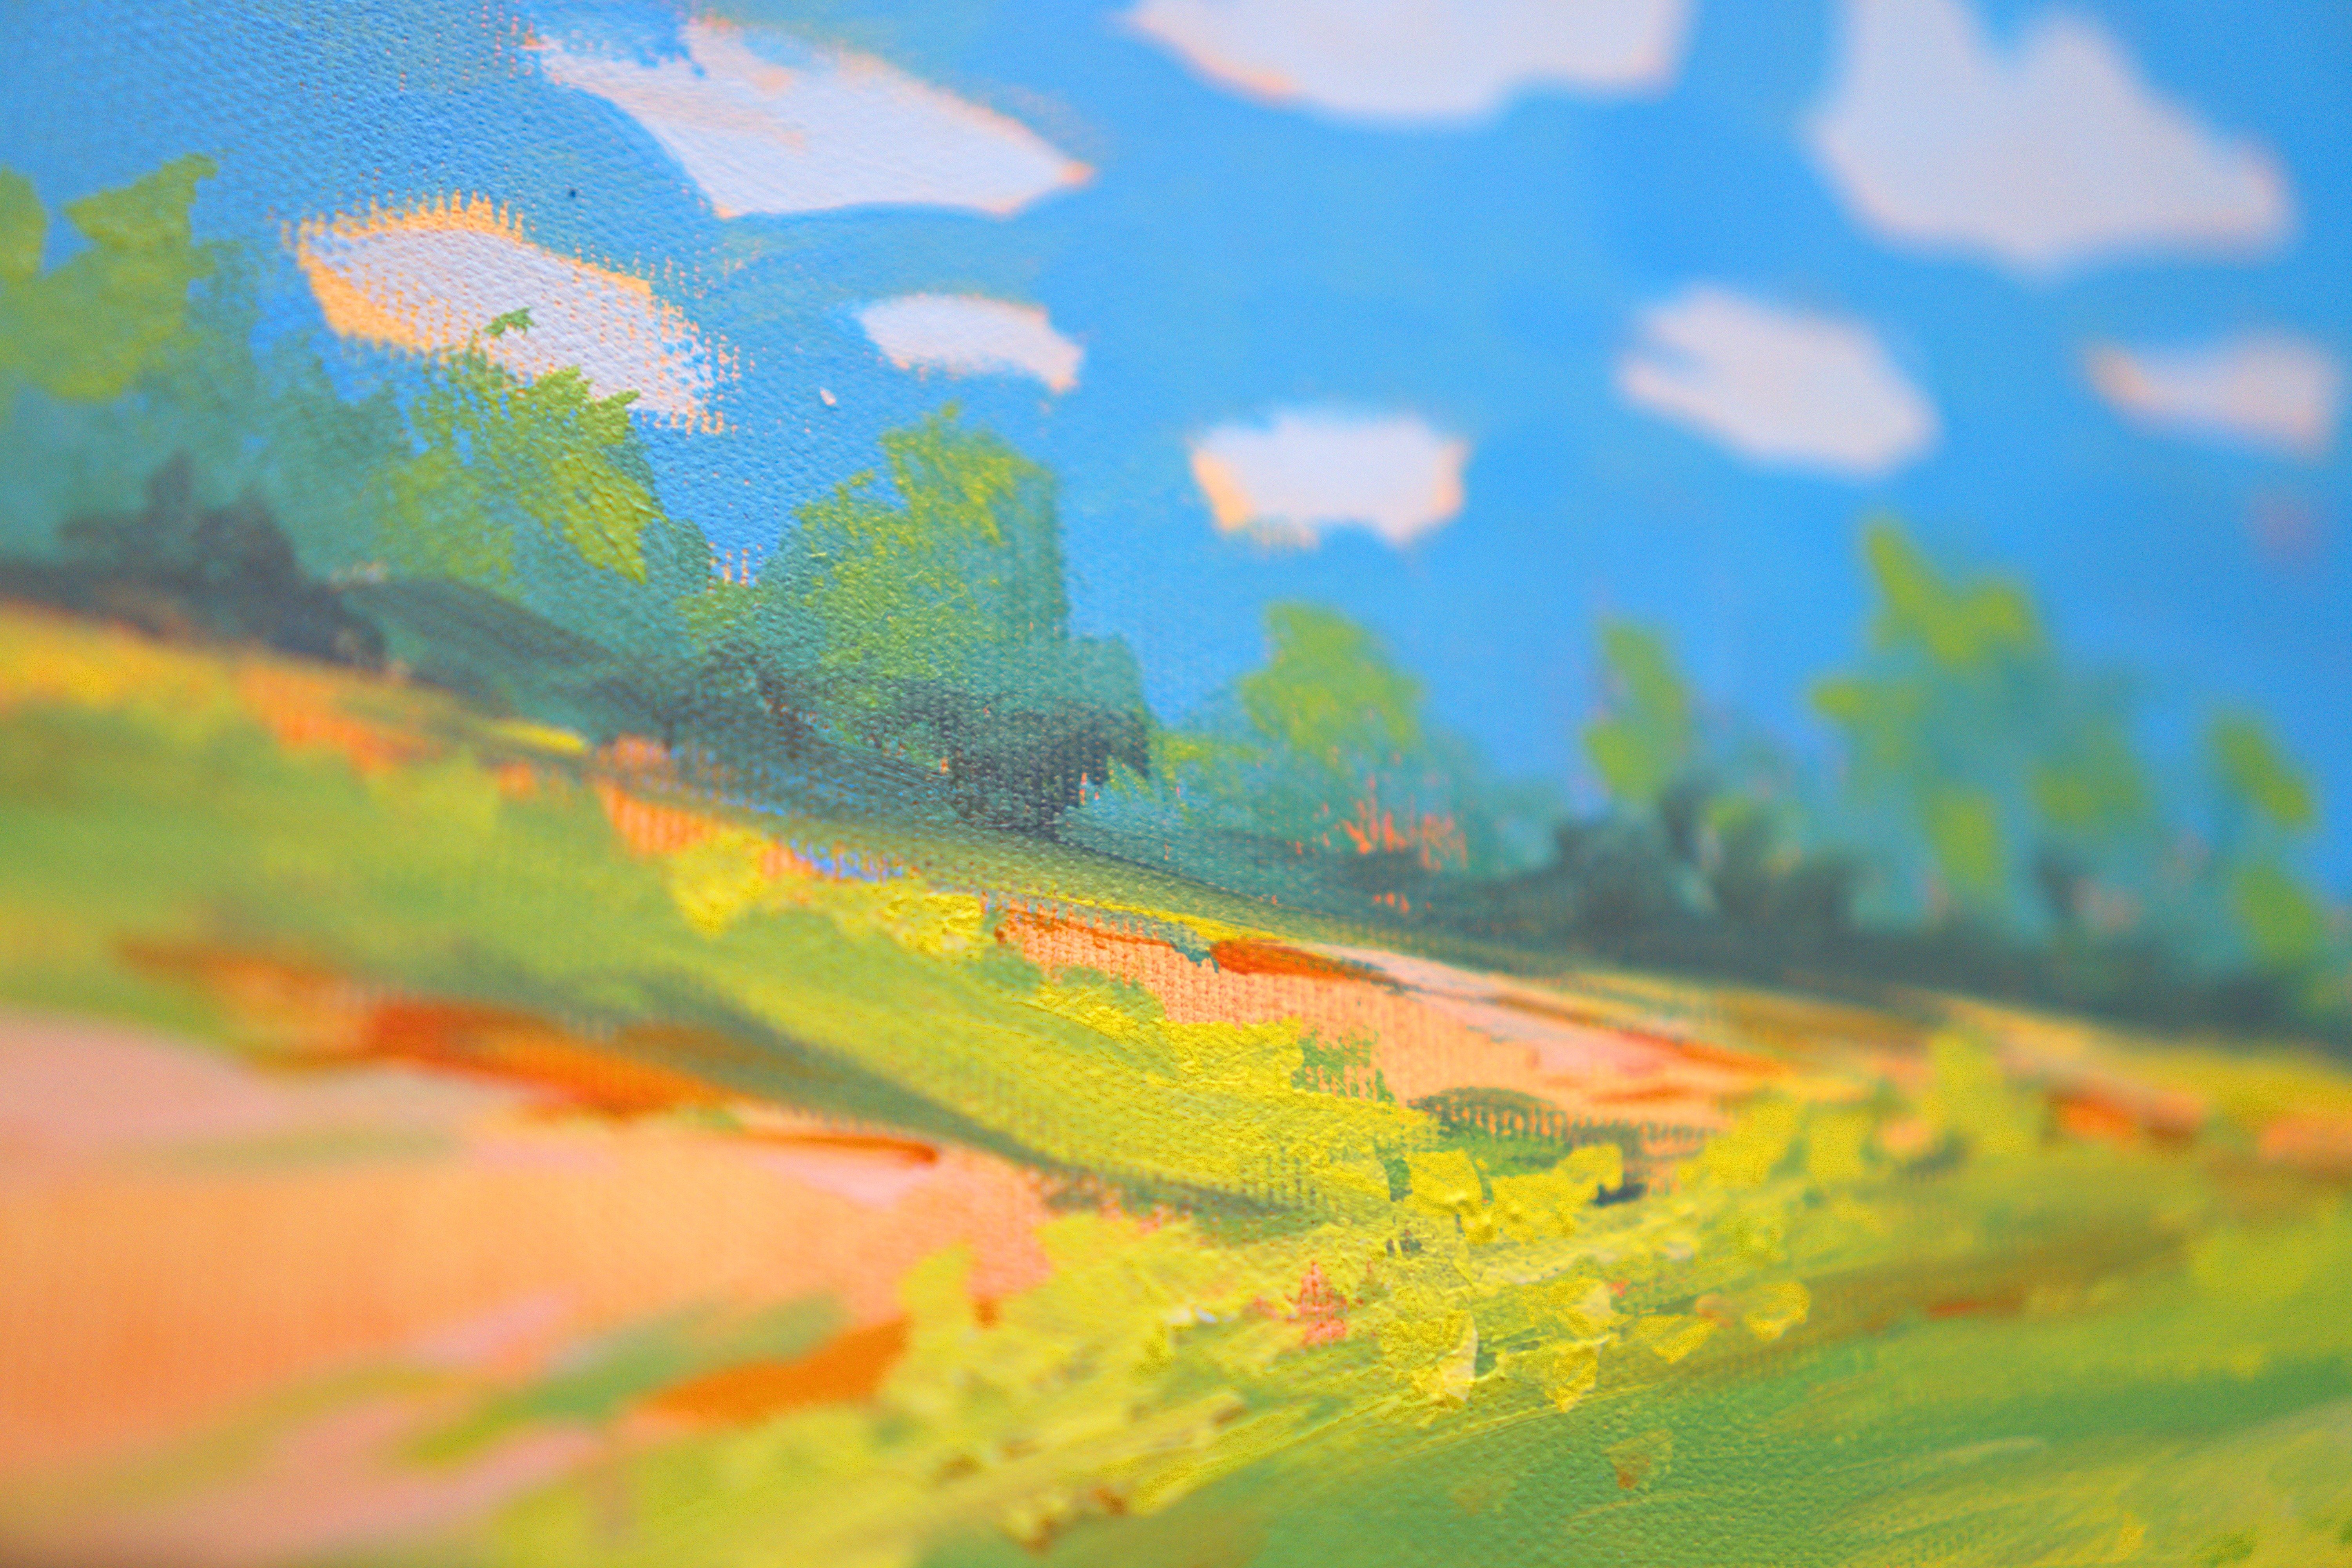
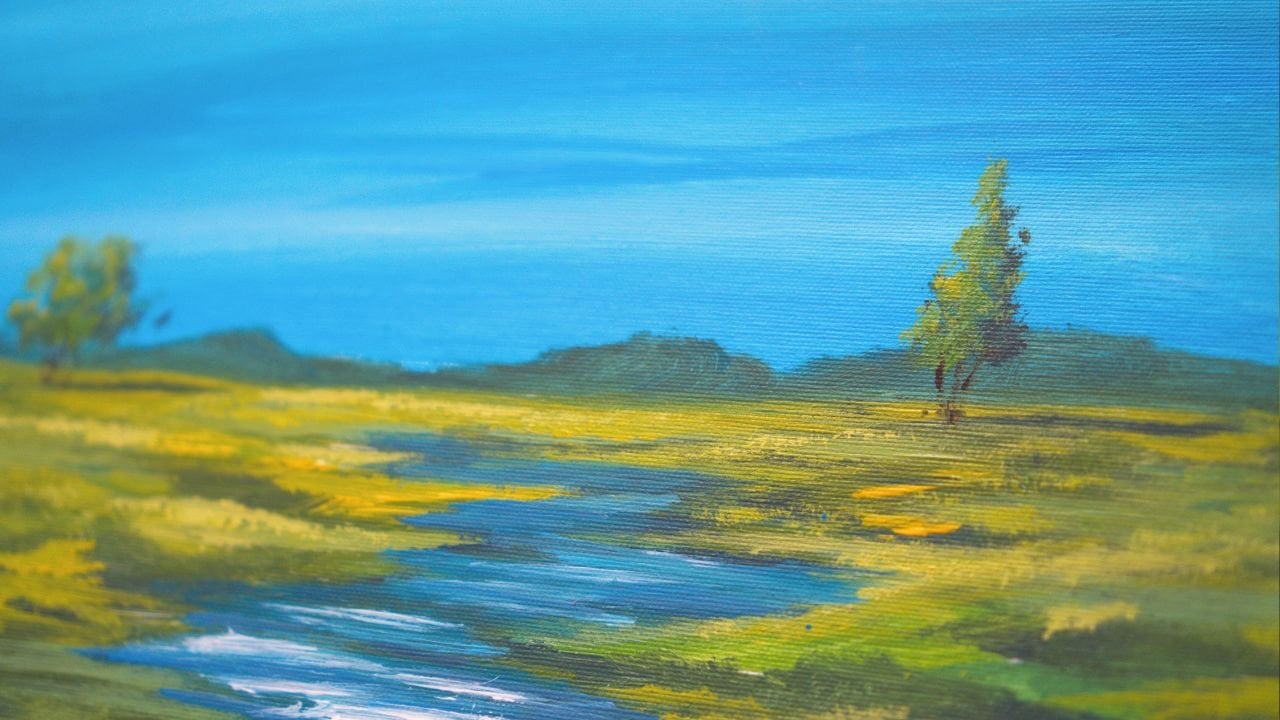
on the bottom side, make a very straight, beautiful. This looks like a sky. Of course, you can
go any type of way. You can leave it as
a sky or you can just add some white if you want to make it more like a sky, take some white on the
middle of the brush of the corner of the
brush and just brush some white just on the top. The key here to making these
clouds is the fact that you are breaking up these shapes
even more with your brush. Notice how easy it is
to just break them up. You can always go and add
more clouds if you want. Or you can just do something
else like over here, just not make a landscape. But you now know how
to make a sky super, super easy and painterly. Now, I'm creating the same almost the same color
that we had initially. It doesn't have to be the same. You can have it a bit more
white, a bit more light. So this is an abstract way to build some painterly clouds. It's a bit darker. It doesn't matter.
With this color, if you have a lighter color, you can go onto
the left side and add some of these clouds. You can also play
with your finger and blend them in a bit. Can do all sorts of things. Another thing you
can do is brush of some of the color down, just so it blends. Perfectly. Now, taking
some more of this color and adding it just over here just because we don't
want to create a sky. We're just playing
with abstract shapes. But you're playing
with color and discovering what you can do out of these colors. Notice I'm ruining the sky. You might feel like I'm actually
it was a beautiful sky, but it doesn't matter. We're just playing
around with colors.
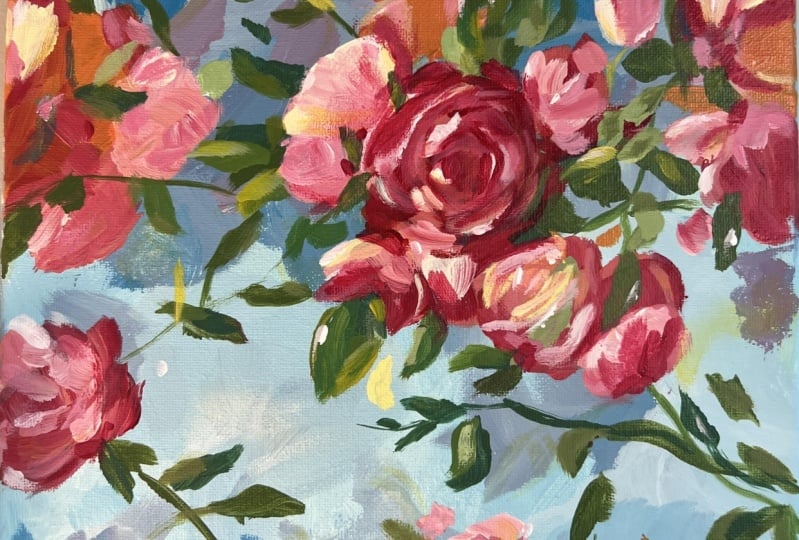
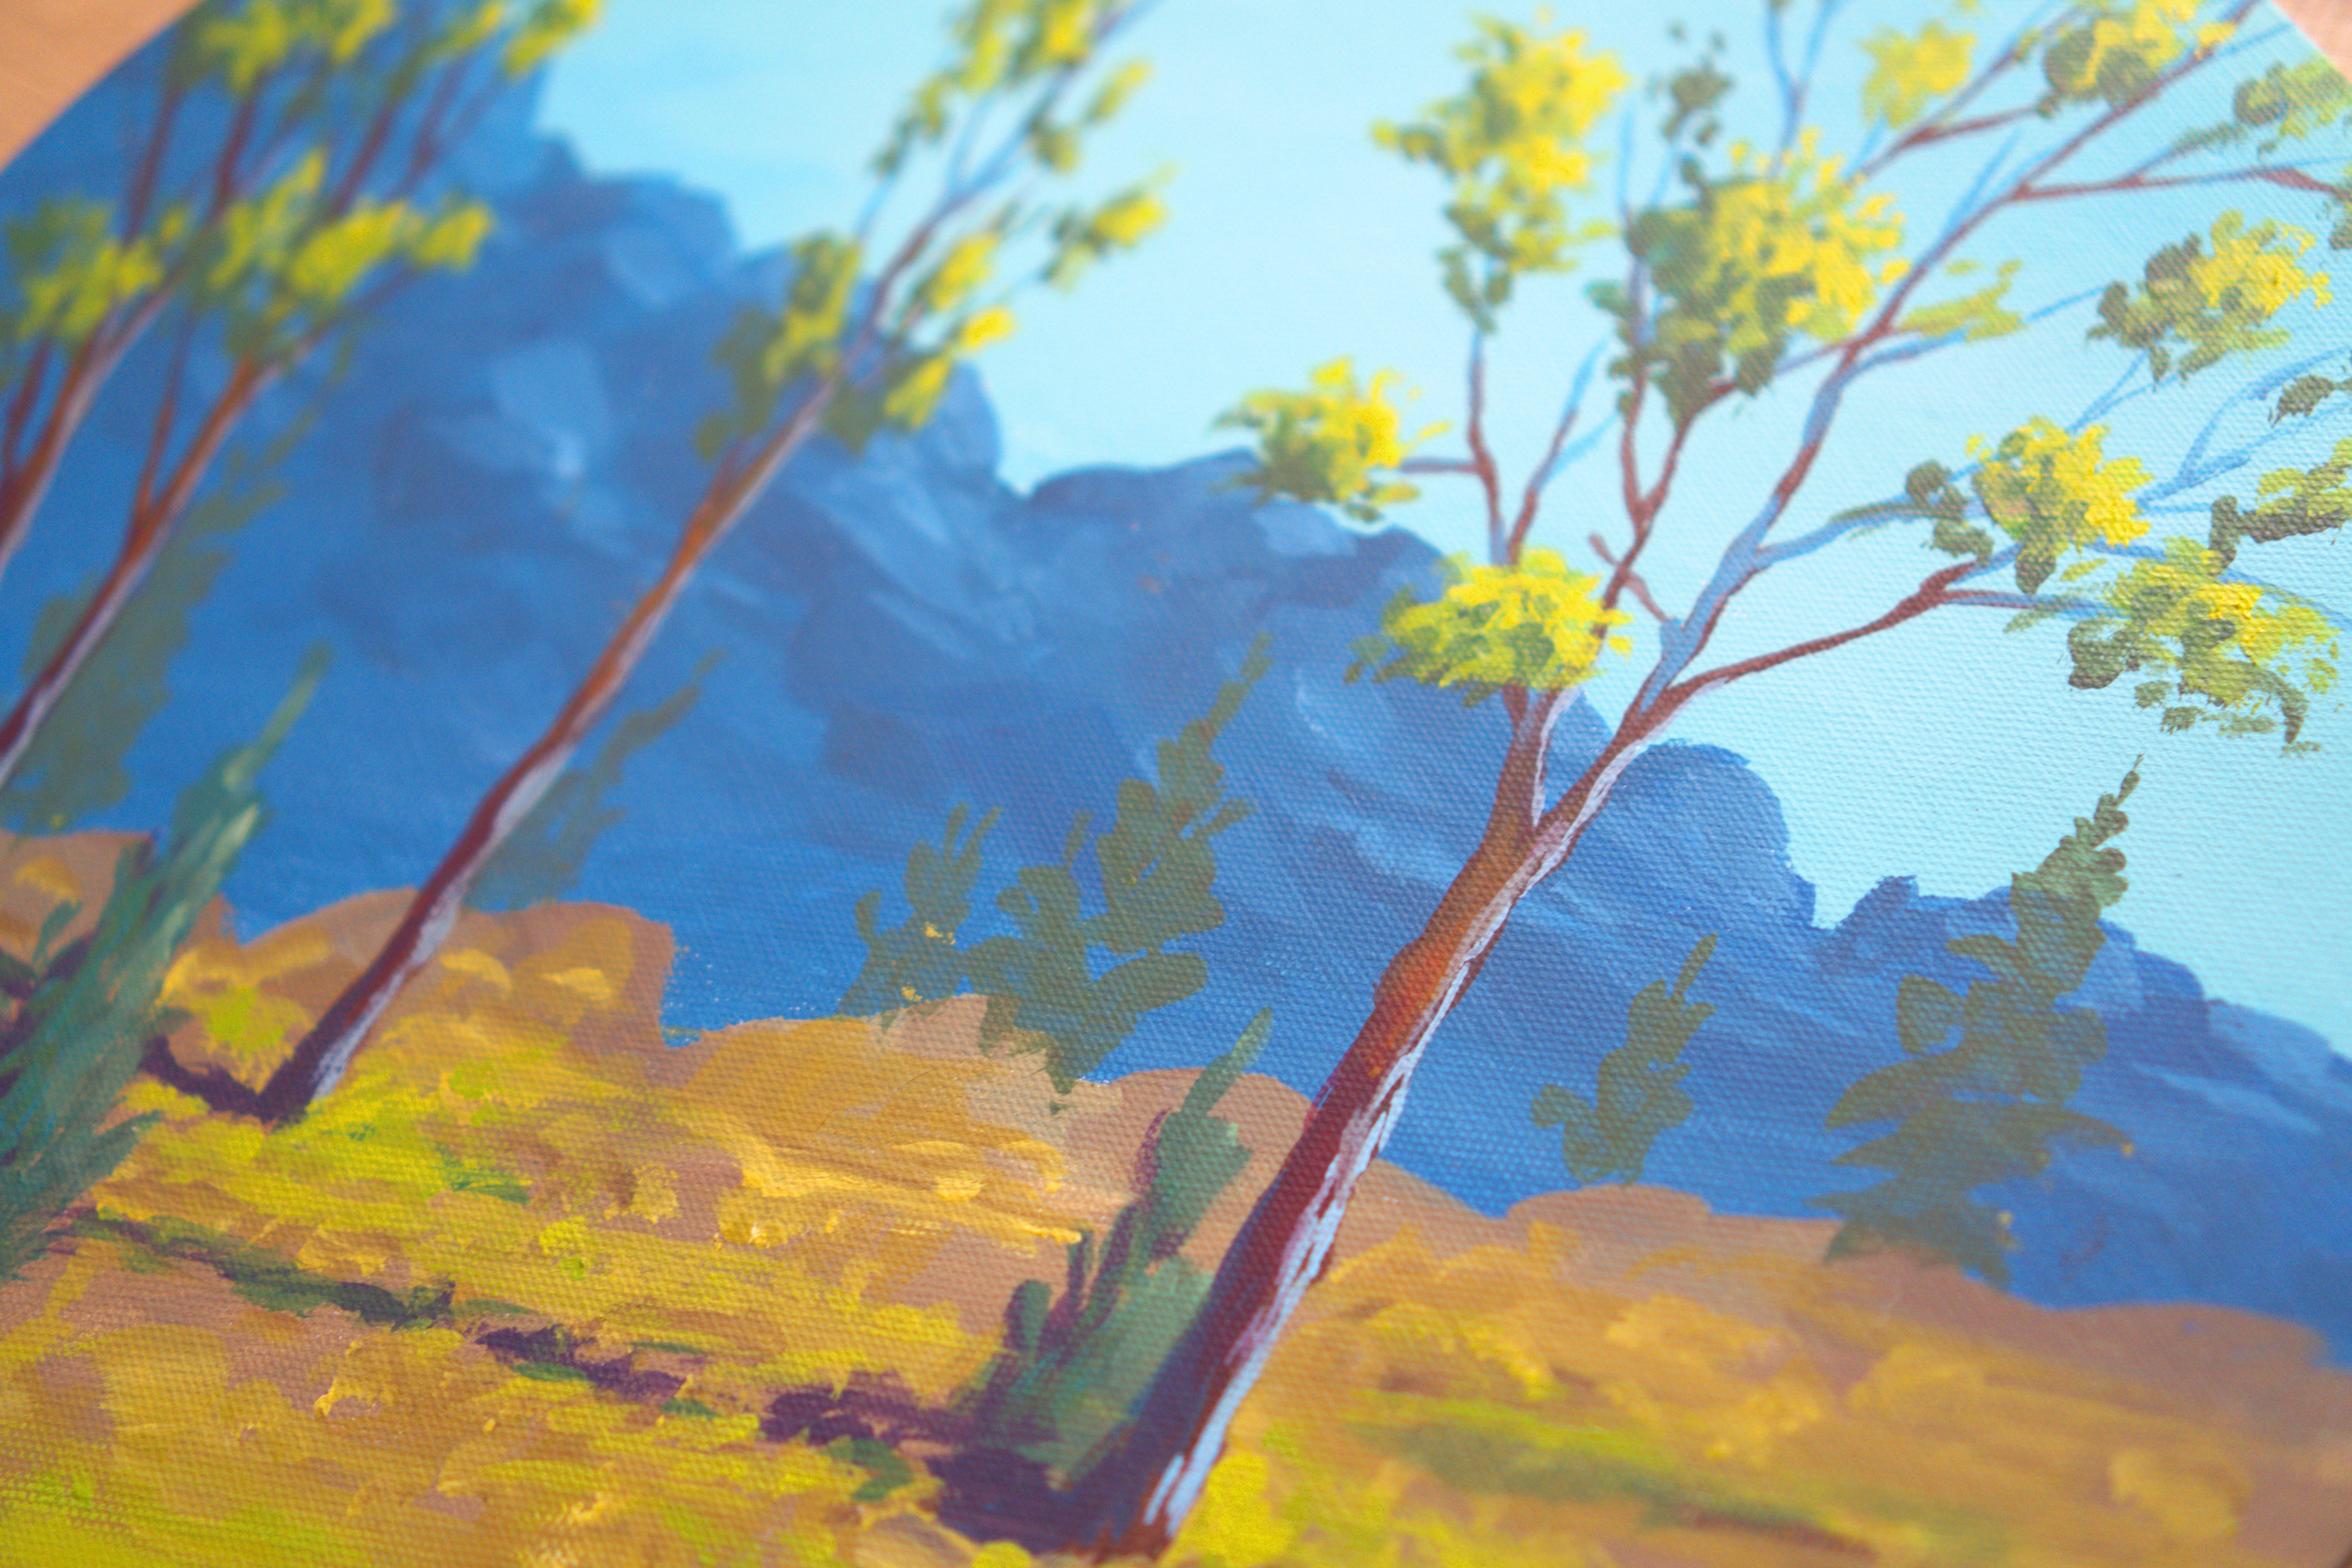
4. Landscape or roses: Now going into some
beautiful Red. Let's add some red to the plate. Okay. And with some blue right in the middle over this color, so it doesn't feel so strange. When we add this color, it's not gonna feel
so strange because it already has a lot of
the color into the brush. It already has just a massive
amount of blue and white. If you don't have enough,
just build it again. Blue, white, yellow, and
then mix in some red and some more blue two get
this beautiful purple. And now let's just play around.
We're gonna play around. You can literally go like
this and make mountains. Just a straight line. Let's not make these
mountains so hairy. See? Easy. Just with some cuts, you can create a beautiful
line of mountains. In case you are picking up too much color from
the background, just add some water, and then it will
blend a bit better, and it will create
these nicer mountains. But, again, this is not a
landscape painting course, so we're going to add
this color over here. Just add it over here. We're gonna probably touch. This is a very simple shape. Now let's add it over here. Let's take some more of it. And on the bottom, just cleaning up the
brush on the canvas. We're just playing
around with colors, just transforming everything
and seeing what's going on. You can always go back
and add other things. You can always change. Okay. Notice that the
brush as I go deeper into the groove into the
beautiful hair of the brush, it has a lighter blue, so I can go over here to
cover some of that white. I let the paint dictate
where I put this. I don't have to think that much. Let's add some more white and mix in some red
with this white, making this beautiful pink. Very muted pink. It has a bit of
blue, so it's muted. And I'm just adding it
where I see some white, these colors are very close
and they have a base, so they feel very they are
like friends, like relatives. Now, a good way to really
understand because you are always painting
this way, like this way. It's always good on
abstract paintings to just flip the canvas
around so you know, you also start to see
the whites a bit better. And you also start to see
what type of things it needs. Like, for instance,
let's add some more blue because this is a very it's still
looking like a sky. So let's add some
blue and mix in quite a dark and powerful
blue and mix it in. Let's add it here as a shape. Let's create a bit
of a bigger shape. And now let's add some
weight on this side. So that it doesn't feel like
a sky anymore that much. Let's add some of
this blue over here. Let's break this down a bit more this volcano looking thing. Now, let's take
some more of that blue and add it over here and
a smaller one next to it. Maybe one over here. And in case you don't
like something, you can just go and
brush it a bit and then redo it. It's fine. You can even use your fingers. You can use a paper towel and
take some of the color off. And once you take some
of the color off, you can go back and
add some more texture. You can go with the corner
of the brush and add some textures and then blend them in if you want, if
you don't like them. Look here, there is some white. So it's not a very
difficult thing to do. You're just playing around. The only thing you need to be
careful of is to keep some of the background
colors you've added at the beginning still visible. So you don't add too many layers on top of the
paint you've just created. Just focusing a little
bit on the edge to see if it needs a
bit more color. Perfect. Let this
dry completely. And then go over with
some other colors. This way, we're going
to create a lot of color contrast because
you're going to go from colors that are
very close and very related to colors that are neighbors from
across the street. These are called the friends
and relatives colors. The siblings colors are
called analogous colors. And colors that are opposites, they are called
complimentary colors. You've played around with a little bit of analogous
color contrast, a little bit of
light, a little bit of dark and now you're going to play with some beautiful
complimentary colors. If you have a hair dryer, you can always use
the hair dryer to make it really dry very fast.
5. Give yourself permission : Course is all about
permission to play. Give yourself the
freedom to play around and not get attached, even though something is looking good or bad, it doesn't matter. What matters is that you are learning how to use your tools, how to use color, how to paint, and
you're having fun, and you're understanding by playing even though
it seems a bit fast, that's one of the most important
teachings in painting. You don't really need to analyze everything and over
analyze everything. You need to let a little bit loose and let the
hand and the brush do the work and that's how you create organic looking
shapes and organic. You have some guidelines that
you can play around with. But of course, there is
always this possibility that you don't even know how
beautiful it can look if you just press and
play with the color. You would never know. This
is a very interesting way of painting because
you are playing, and it gets very addicting
once you get over that hump of anxiety and other emotions that stop you from
the freedom to paint. You will start to understand that this is not
such a big deal. We're just playing around
like kids with paints, but we have a little bit of structure to really
create something more interesting because we have a deeper understanding of
how our colors behave. And that deeper understanding
comes from a lot of play. The more you play
around with colors, the more you understand
how your colors behave. That's why this is a very
limited color palette. It's a primary color palette
with white and brown added as other colors to either
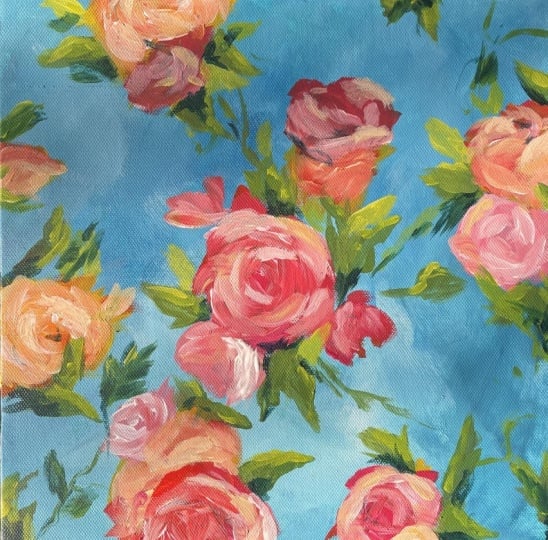
mute or lighten up a color. Now let's go into some
beautiful oranges. You don't need to paint oranges. But of course, if you feel
like some oranges would be nice on the
painting, that's okay. Let's add this orange
wherever we see white. If we still see some
white, we can add it over. This is a very thick paint. The painting is completely dry. And also where you feel like the painting is not so great. This is the way you mask things, remember to also go a little
bit outside on the edge. Don't keep everything
in the middle. Open up that composition. See? Now you're learning about composition and playing around. These are three small areas. Let's build a big
one right over here. Let's build a big one. Let's add more yellow to it. Okay, bigger, better, stronger. Just press down. If you don't like the shape,
doesn't matter. You can edit it later. Let's add some more yellow to
add a few droplets around. Maybe add this color C. Now, it's all on the top. Let's connect this, make
it a medium shape. Okay? Now, we need to add to
break some of this area, maybe not right in the
middle, but over here. It just feels a bit
more interesting if you don't let it be like a log, like a big lump of paint. You can add some more
water if you want to lubricate some of the paint, but don't take too much
water because that will make the yellows and the
oranges very transparent. In case your oranges and your yellows are transparent
because sometimes they are, just let them dry and
at a later stage, add another layer of
yellow and orange. You're learning
how color behaves and how to create
abstract shapes. Maybe you are going to play around with some
straighter edges. Let's see what's going on if you go with a more straight
edge just on the side, and another one just over here, another one next to it. Let's make this one
a bit straight. You're playing
around with shapes and discovering what you can do. Maybe out of this one, No thinking is required. You just add paint. Not too much, not too
little, create some shapes. Now, of course, adding some red because it's just
here on the color palette. We're trying to use up almost all the color
onto the palette. Just over the
orange, the orange. Let's go over the orange
over here as well. And a straighter edge
just over in this area. This color is very
rouge. It has this. Some people might not like
it because it's a very, like, a lipstick color. But just adding a few dabs
here and there, that's fine. Or if you take some water, you can really go ham. Just shoot, pom, pom, pom. A round shape. Let's take a bit more water, just a tiny amount, the
tiniest amount of water. And let's figure out this shape. Like this, I'm trying to
clean up those edges so they don't they're not so hairy. They are a bit cleaner. This can be a rose at
some point, if you want. In fact, let's really transform this painting
into a rose painting. Now, let's go over here
and add over this orange. If you don't have the orange, you can go back and add
some of that orange in. Notice, this is the dark
part and the light part. It's just colors. Now, this one, it's going to be two roses. So we're cutting it like
that, cutting it like that. And it's going to
be another rose, maybe just an orange rose. This is going to
be an orange rose, and this is going to
be a more red one. Simple shapes. Don't
make them that hairy. Try to cut some of the hairiness out of the
whole thing. Maybe over here. Let's add another one over here. Notice how easy
it is to just add some color and cut
in some petals. Just add a blob, maybe right over here. You can also do these
are all the same. Notice they are almost
all the same blobs. Let's add a different type of blob that looks
like a flower. Which is the it's
like a triangle, but with round corners
at the bottom. Notice round round. And then you can add some more on top just to round
that corner as well. And then connect another one
the same way, a triangle. Maybe this one is
going to be bigger, just a triangle, and maybe it has a bigger bottom. Perfect. That's how easy it is
to create some shapes. Let's change this
color a bit more. On this side, just a blob of paint can go as fast as you
want or as slow as you want. There is a misunderstanding
in painting that you need to paint very fast to create these interesting
things, but it's not. If you really want control, you need to go a bit slower. If you want to create some
more interesting things.
6. Abstract shaping : Now, let's go and add some
of this white over the red, creating this beautiful pink. Now, don't worry about the fact that some of them are hairy, but you can also go onto the left side and clean up some of the left
side hairiness. Notice this is a cut. You've done this in
the beginning as well. You've done some sort of like when you went
into the edges, into the small crevices
where it was white, you went and did some
of these type of cuts. But because the
red is still wet, these colors combine to create a beautiful petal like Thing. Now, let's add Roses
become very beautiful if you add just like a circle
in the middle like that. Focus in on just the left side. Let's determine that the
light comes from here. So we're just focusing
on the left side. The shape just going
down, very simple. Maybe there is another
one another petal here and another
one just over here. Let's make this one bigger. You can also take some water, some more white, with some
more red to create more color. And once you've
created more color, you can also add some flowers. Like, let's say we add another
flower just over here, and we add another flower just
over here with this color. And we can add
another one just over here because this one
was a bit lonely. And let's add another
one over here. These are just blobs of paint. It's just like in the beginning. Just playing around
with blobs of paint. Let's connect these two areas. And you can go
back into the red. Well, let's first
finish the pink. We still have some
areas over here. Can go as abstract as you want, or as figurative as you want. If you want to be more abstract, you just go like this. You don't care too much. You can take some of the
red and add it back in. Take some of the red
and add it back in to create more of a transition. You can also edit some of
the petals if you want by going in between
them with the red. Just add some shadow
on this rose. We're just trying to finish
the color off of the plate. There is a theme here of
finishing the colors. Let's add some yellow. Right over that pink and some
white right where it was. I know I spilled a
little bit here, but it doesn't matter. Just take a napkin, brush
it off, and that's all. It's not a big deal. Let's first create a very light pink because we already have
this pink in our brush. So let's create this
beautiful light pink. And over the very light pink
areas you already have, you can add another highlight. Don't worry if it's too strong. I'm going to teach you
another technique that will integrate these colors together
a bit more in the end. You can even add
some of these colors to they don't go very
well with yellow roses, so we're keeping
that because these are colors that are
very close to the red. They are actually white and red. So of course, you can
also add some flowers, some other blobs,
maybe one over here, transitioning into
a bigger whiter. This is going to be
like a white rose, white, very light
and white rose. And let's make another one
just over here, transitioning. Okay. And maybe one here. This is a simple blob of paint. This is exactly
like you did with the blue or the orange before we decided to create these
roses, too much white. It doesn't matter if
it's too much white. Just blend it in a bit,
take some of the color, add it where you have
more red still wet, and that's all you have to do. Remember to sit a bit on the
left side with these colors. Notice, if I roll the brush, notice what a beautiful color because it has a white and then more red and you pick
up more red from doing and playing in
the other shapes. If you do this kind of a role, notice how beautiful that is, how beautiful and
textured that is. You can also do it over the white and over the white
and over the white. If it's too crazy, can just go over it
and create a bit of structure just like that. Perfect. Now, let's clean up the brush.
7. Ask the right questions : For the next step,
you don't really need to wait for the paint to dry. You're going to
paint some foliage. That's why the yellow is here. And even if you still can't
clean the brush perfectly, that's fine. That's good. Because some of that pink will create some more
interesting greens. Let's take some
yellow and some red. Notice how intense
this green is. We have a problem
here. First of all, we don't have enough blue. And second of all, it's a very, very intense green.
We don't want that. When you want to cut a green out, you think
of the opposite, the opposite being red, but red would be too strong. So let's add some brown. Brown is basically a
orange that is very dark. If you went too
dark, no problem. Add more yellow. You shouldn't go in the
middle like I just did. You should go onto the side
like this and take some of the colors so you keep one
side of the color clean. Notice how much organic
this green looks now. It's a beautiful green. Let's add some water
into it to make it a bit more flowy because we
need a bit more flow. There's a lot of
paint in this brush. And then don't go very
close to the reds. You can go closer to the reds in the areas that
are not very thick, right over here and add
one simple brushstroke. It's like a square, and
then you can edit it a bit to add make like a leaf. That's simple, very easy. And then try to really focus on the edge and not make it perfect because notice
how ugly this looks. It's too perfect.
So let's break it. Notice it now looks more integrated into the
whole painting. Let's cut this over here. Over the yellow, you can
go a bit more easily. This is exactly like
in the beginning where you've created and you've added the dark blue in
between the light blue parts. It's nothing different. You're just deciding where
does leaf kind of end up. Look at how triangular this is. Let's break that down. Let's make another
one next to it. Notice, such an easy way
to just break things down. If you don't like a shape, ask yourself, what
does this look like? It looks like a triangle. Too much like a triangle. What do I need to do to make
it not look like a triangle? Add a little blob
just next to it, or break the shape
down a bit more. Okay. You can go over
next wherever you feel. You can also touch to
see if the red is dry. Over this yellow,
it's going to look amazing because
it's a yellow being a transitionary color in between the yellow and the
red and the pink. Let's add another one here. Let's try to connect to make these areas a bit more
feel a bit more connected. Let's add some sticks. Don't worry if you
went over the pink. Let's add another one here. You're also trying to put the roses because they
are all at the front. You are trying to
bring them back. The way you do that is by adding some leaves that are over just a tiny bit over
the Roses, like this. Perfect. Now, let's focus on this area being very careful because this pink
is still not dry. At this point, the leaves
look very, very flat. Don't worry about that. We are going to change them in a bit. Over the orange, you
can go a bit inside, a bit more loose because the orange is very close and it plays very well
with the pink. Remember that trick where
you turn the canvas around just to look
and notice that here, we don't have foliage. It's a stick, another leaf. These are simple,
very easy shapes. And if you really want to correct them or
you don't like them, you can just go and
fix them a bit. And then make another one here. Let's add Let's take some water. With a flat brush, you can
always create this edge, this beautiful knife edge. And with this knife edge, you can go and do some sticks. Even if the sticks
are not perfect, sticks are just organic shapes. And even if you have an area that's a bit messed up, like, right over here, can
just cover it with a leaf that comes towards
you a little bit. Let's make it a bit more round, so it doesn't seem like
it's going that way. And then add another one here, add a smaller one here. Make that knife's
edge once again, just so you can
dab it over here. Let's make this one bigger. Now let's add another stick, maybe, let's say, here. Let's add a stick just going
this way. And then a leaf. Okay. Just fixing that leaf. These are two connected, but it doesn't matter right now. We're just creating
some foliage. Okay. Let's add another
beautiful stick just coming out of this. Add a leaf, add another leaf. Press down on the
brush with color. You can also go a bit more
into the very, very wet areas. You can create a lot of water, take more water and create
this wonderful different type of leaf because it will become way easier
to just control. Go very slow. And controlled. And look at how organic
that leaf looks. Turn the canvas around. Notice how on this side, there is nothing coming in. Let's just add. And
because this is so watery and you can
add even more water, it will dry in a very
interesting way. It will clump up. It will become very different
than the other leaves. So maybe this is a
different plant just going around and spreading
its foliage. You can also go over
the other leaves with some of this watery green.
8. Slow for control: And now a cool trick is to just add more
brown over it and some blue and create a different type of
bluish, darker leaves. Let's break this orange down. Notice it's a bit different. Look, I'm just going
to add it right here so that you
notice that it's a bit darker. Just a few. And you can go over these leaves as well to make them less flat. Let's add a tiny bit more
blue and start playing around to really integrate and make this scenery a
bit more interesting. Don't be afraid to expand.
Don't be afraid to. Now, I think the pink
is completely dry. It's not, but it doesn't matter. So you can go a bit
into the pink as well, maybe separate this
rose over here. Notice how the pink it's
turning the green a bit gray. Let's add another
leaf over here, maybe add a smaller one. The leaf. You can control the
shape and the shape of the leaf by
just going slower, pressing down, noticing
what is going on. And notice how if
you go a bit slower, you can really create
these beautiful leaves. Notice, make another
one just over here. Whoop. Just make it a bit pointy. Pointy. And then a
smaller one like this, maybe make a stick
that goes out of it. And add another one just over
here, add a stick to it, continue to stick down, continue this stick,
cut it with a leaf.
9. Leaf highlights : Now you can go into the yellows, add more yellow to this color, and some white to create
some of that highlight. You can also create some
new leaves over here. Let's create one. Let's add
the highlight to this one. And if you don't like the
highlight and it's too strong, go with the back of the brush and create some
textures over it. And then you can go
with the brush again and recreate that leaf. You can also go with the
finger and play around. You can also think about
let's turn this canvas around and play around with the fact that light comes from this side. So let's go in here, in here. Let's create a bit more order. Now that we have light, we can really focus in on the
fact that light is hitting some of these leaves. Okay. Now you can also create
individual leaves if you have the space or the need
for another leaf, like, for instance, here
and here and maybe here. Okay. Let's take a leaf and explain
a bit more what's going on. Let's take this
leaf over here on this edge and add a
tiny bit of yellow, well, half of it, and
then create some texture, just some dabs next to it. So it's a bit more organic. You can also do some sticks by carefully creating that edge, that knife and create
these beautiful sticks, maybe a thicker stick over
here and a leaf over it. O and another stick, maybe over here, connecting with this leaf and going
behind this rose. Maybe we create
some separation in between these roses
by adding some green. It doesn't matter if it
blends with the red a bit. It's okay. It creates more depth. It blends in the
colors together, so it creates color harmony. Okay. And if you want, you can go even lighter by adding more yellow. Just a tiny bit more
yellow and some white. Okay. And go even lighter. Let's add some more white
to make it even more light. Even more apparent. You can add some leaves. Notice how easy it is
to just build a lot of layers and a lot of depth with just
three beautiful colors. We've changed this
color just a few times, and it already looks like so much complexity
has been done. And all we've done
to achieve that is add just a few more colors. Just touching the left side of the leaves and in some areas, creating new ones,
like, let's say, over here next to this beautiful rose and another one just here to cut that shape that
was sticking out. Can also add some highlights, go with the finger,
create some texture, add another one just over here. Just sticking out. If your colors are too intense, try to add a bit of brown
to it to really cut that intensity out in order to create more pleasant colors
so they don't scream at us. You can also use this to
calm some areas down. You can take this
color, take some water, and do that trick with
the water once again, creating more flat colors. Creating some more flat colors. Okay. Let's let this dry completely, especially in the roses areas because you the leaves
because you need to add a bit more highlights
to the roses and also some color variety because
this looks all the same. It's all the same dark
red, all the same pink. So you're going to
do some washes, some interesting play
differently with the paint. If you have a hair dryer, just go with the hair
dryer and dry it in like 10 minutes it's
completely dry. You will also need to clean
your brushes thoroughly.
10. What you have learned so far: Have felt at some point, like you are not doing the right thing or you should be doing things more carefully. And that comes from the
fact that we don't tend to give ourselves this much
permission to really go ham, to really do interesting
things on the canvas. But it's important that we let go of these emotions
and play and let go of the end result and really start to see
what's going on. Let's recap everything that
you've learned until now. You've learned how to
build a basic sky. Notice that the sky
is now on the bottom. Let's turn it around.
Just like that. It doesn't matter
which way it's up. This painting can
go any kind of way. So you've learned
how to make a sky, but then you painted over it. You added new colors,
darker colors. You've also added some
splotches of red, and then some oranges. You've transformed
those abstract shapes into beautiful roses. Now the next step will
be about the focus, the central focus
of the painting, which in my case, is this one. But in your case, it might
be here or here or here, and it might look way different. But these principles
work as well. So you're just going
to add, for instance, if you have a red rose in
the middle in the center, you're just going to add
some more highlights onto it and add some
more color variety. In my case, I'm just going to add this define this white rose, maybe make another
interesting flower that's a bit more white. And while I have that color, just touch up these ones, but a bit more abstract because these are not
the center of interest. These can remain like
that. Well, this one, no. It's too flat. It needs either a darker shade
or a lighter or both. So take your brush, squeeze some of the water
out onto the side of the container. Take some white. Can take this white, even if it has a bit of green into it, just the tiniest
amount of green. And then some yellow and this will be the highlight
for the white roses. It's a pink that has
more yellow into it and just the same. Onto the left side, turn your canvas how it feels
like it looks the best. And remember, this
is the left side. So let's add some of
these highlights. Left top side, left and top. Let's add some of this here. It's very intense.
Doesn't matter. Okay, let's add some of
this here, maybe here. And it's a bit more different
than just a few touch ups. It's a bit more
different than the rose, but that's no problem because look at this. Take some water. Take a bit of red if
you still have it. Take some water
and a bit of red, just the tiniest amount, brush it on the side of
the beautiful plate, and then go over these areas, just a tiny bit over them. You can also create
if it's too intense, you can also create some shadows with this newly found color. Can go with your finger just to create more
color diversity, you can also clean up the brush and blend in
a bit of this white. You can even pick up more if you want and blend it in
with that watery rose because that rose that red that you've just
put in is so wet, is going to blend super easily with with the white on
the brush or on the area. So now you've just
integrated that. And now let's take a bit
more of this light yellow. Let's add a bit more yellow
into it and some more white and let's add just a touch over here to create some interesting looking shape. And maybe this color looks good enough to be a
flower on its own. You can also go notice how
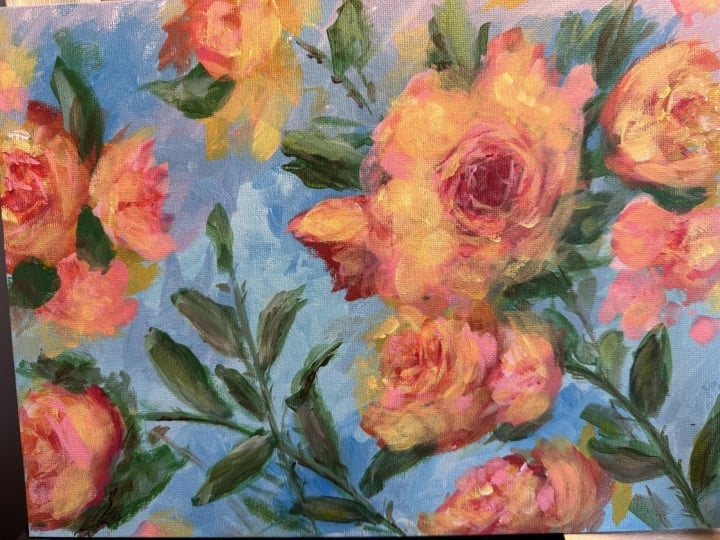
this color is very yellow now. And you can also now create some interesting highlights
onto the yellow orange roses. Not thinking too much,
just adding color. Add more water to
the color just so it creates interesting cuts. Now, of course, it's going
to look out of place. But as you did with this rose, now you can clean
up the brush a bit. Just a tiny bit. Take some
water, take some red. Well, some yellow, and
a tiny bit of red. To create a little
bit of an orange, wash. And then you can go
right next to these areas. You can also create
some highlights with this color if you want. Let's add it here. So we add some highlights, and maybe over
here, not so much. Let's erase it maybe over here. Yeah, that looks fine. You can also add some Oh, no. You can also add some
highlights over here, maybe. And blend this in with
a different color. Maybe add some of
this here. Okay. You can also take some
more red instead of the yellow orange that you've created and go into the
red areas with the swash, the red areas of the roses, next to them to add
more color variety. Don't worry. At this point, it's just watery goodness. It's fine if it's very, very watery and it
has a yellow streak. It doesn't really matter. And now let's build
this middle of this rose and the side. And maybe this one, let's
not make it so hairy. Perfect. Now, take your
napkin. A fresh one. Fresh napkins, everyone. Fresh napkins. We have fresh napkins, three at the price of one. Fresh napkins. You don't need to take water. It's already watery. Now just try to blend, just a tiny bit. Don't go overboard. Try to blend some
of these colors. Look at how beautiful
and complex it looks. And now you can blend if
some areas are too harsh, you can blend them together. If two areas if some area
is not really defined, you can just blend it in
just so it disappears. Blend in. Don't go too hard. You need to have
some of these areas just have like an edge,
the edge of the petal. Okay? You can blend. Look at how hairy
this one looks. Let's just take the brush, take a tiny amount of water, and make it less hairy. Maybe some paint. Okay, can also add
another highlight. So napkin action. Just brushing it off, just so you can blend
discolor a bit. Don't go overboard with the
blending because then it looks undefined and boring. Notice that it's even
the more you let it dry, the harder it is to
just find areas. With some orange, you can
go back with some red, take some water, and some red, and not only use the
brush as a empty vessel, but also with some water. So you create more
intentionality. You can go over the
middle rose and add some bounced highlights onto
the left, onto the right. Maybe something is reflecting. Maybe this rose is reflecting. You can do the same
on the orange roses. You can add some
more highlights, some transparent,
translucent highlights. Don't worry if you go too
light on some of the roses, you can always go back with some darker color and accentuate
those beautiful colors.
11. Roses focus point: Let's clean up the brush a bit
more thoroughly this time. Let's take some brown.
And unfortunately, we do not have red. We need to add some
of this red. Back in. Let's take some brown and some
red is a very dark color. Squeeze it out of the brush, add some water to it
just on the corner, and start adding some
very dark areas. These are especially nice around highlights onto the
right of the highlights. Notice how much more
texture it creates. Maybe I'm just going to
add another one here. And another one just over here. You can go a bit more red. If you want to create a
lot of this is a secret to creating very contrasting
and very vivid colors. If your colors are a bit muted and you really
want to add in the center area of your
focus of your painting, if you want to add
more intensity, this will really make it pop. You just add some clean with
a clean brush, some red, some of this wash of red and it starts to
become even more. And you can add two or three
layers if you want to create this wonderful red hue over the darker areas and
even on the lighter areas. If you have an area like this and you want it
it's too intense, you can just also blend some areas more
into the dark see. And now you can
do another trick, which is to change the hue. So you've made this
really intense red. Let's take some blue. You might think
to yourself blue. What? Why blue for roses? We don't know. Let's find out. Well, I know, but you're
going to see what's going on. So very watery. Okay? You can also
test it out on a side. It's too intense. So let's brush it over the napkin and then take with the corner of the
brush and do the same thing. Just play. You can also take
it from here and play it around and add some more
interesting color variety. Just adding some more darkness,
blue darkness, coldness. It will dull down that pink. It goes very well. Over the orange as well. You can go over this. Notice how it changes this to a little bit of a purple hue. You can even add some
red over it to make it a bit more
integrated if you want. So let's take the example of this beautiful rose over here. Let's add some blue, and notice how the shift in color created a
different type of rose. Let's add some red
over it and maybe some brown let's clean the brush and start playing with
some yellows, as well. You're just playing
around with colors. Yellow, water, find
a place to put it. Maybe over here. Okay. Clean it up a bit. And this is where the
interesting thing comes in. Wherever you have big
highlights like this, you can just change the hue of these highlights by making
them a lot more yellow. Clean up the brush. It has
too much yellow water. I can go over the areas over the highlights or even
over the dark sides. Can go over some leaves as well with these colors with
this yellow type of color. You can go inside the yellows, the pinks, all of the colors
just changing some variety. I picked up some pink. It's fine. And after
you've played around enough and you feel
like the roses and the things are perfect
just the way they are, and you don't know
what to do next,
12. Contrast and focus: Don't have to let it dry. You can just clean up the
brush, take some white. Make a very light pink
or very light white, depending on what you have. What kind of rose and add over the top the
highlights once again. Just to blend in those washes, you're going to notice that if you pick up some of the color, it will go so interesting
into the highlights. It will blend so nicely
into the highlights. Let's add highlight over here. Let's make this
rose a bit bigger. Let's add some of this
highlight over here as well. You can also add a few
flowers like this, but that will mean you
are going to need to make more shadows and more
interesting things. Let's add this highlight onto this flower as well over here. And, of course, let's
add it over here. Even though it's not
really the color that it's needed over
there, that's fine. You can adjust the hue. If it's light
enough, you can just adjust the hue at some point. Notice, all of the work
has been done over here. That's because this is the
focal point of the painting. And that's one of the
biggest tricks in painting. You place a lot of interest in the focal point and the rest
can be abstracted away.
13. Tinkering : Cleaned up the brush just so
we can do some more leaves. Some more light colored leaves. Take some yellow, blend
it in with some blue. This is a lot of yellow,
very yellow leaves. Just because we
don't have a lot of yellow going into this painting. So let's also add some
highlights with this color. Notice how much
more light this is. Take some water as always, and you can blend it in
just a bit on the side, or you can just create
another leaf like over here. Create some sticks as well. And the leaf. It pops up so much
because you have this interesting area that you've created of
darkness, of dark leaves. And just a few of
these lighter leaves will just create a
beautiful, interesting look. Notice how we've just added another hue and that's how simple it is to
change things around. So you had a darker one, the middle dark, then
the lighter one, and now an even
lighter one just to create a lot more
interesting shapes. And at this point, you can just stop right here if you want. You need to let it dry, and that's all you need. But you can do something
more interesting, which is let it
dry completely and then try to step away for half an hour or 40 minutes
or an hour and then go back and look at what you can
do a bit more refined. What you can really put in that will change the
whole situation. Like, look, this
flower is too empty. It's not connected to anything. So let's add another leaf, maybe one behind it. Can always go back and
create a darker green Even though if it's not
exactly the same color, that's even better
because you can now really focus and build
those shadows this time. Let's build shadows onto
some of the lighter leaves. Shadows on the right side, of course, shadows, shadows. And you can also take some water and go ham with the sticks. Go crazy with the sticks. Can add some highlights and shadows to the
sticks, as well. This is a very hairy situation. Let's give it a haircut. Okay. Let's add this area
needs a bit of a leaf, maybe a bigger one, and then
another one just over here. Let's give it a haircut. And maybe a stick like this, a leaf, leaf another
leaf going down. So you see you stand up a bit, you look, and you notice
that this rose is too flat. So you add a leaf over it. You add a leaf over here just to bring that in the
background a bit more. You add a leaf over here. At any stage, you can go
in with different types of things and really create
and recreate that edge. Like, notice that this
is not very defined. You can redefine it with
some leaves or you can go back with the reds
and define it that way.
14. Finer details : Let's, in fact, go and see if we have more red, and we do. So let's clean this brush a bit. It should be a bit cleaner. So one way is to cut, cut the edges, which is
called negative painting. That's one way to refine things. Another way is to work
on the object itself, which means you're just
going to take some of that red and
redefine this shape, maybe over here as well. See? And then go again here. Maybe this one has a
darker spot like here, and maybe some of this blue
doesn't need to be there. This over here, and you
can clean up the edge of something very easily by
going as close as you can, not focusing too
much on the color, but going as close as you
can with the color and adding some of that edge
back to the colors. If the highlight is too
bland, too intense, to too organic, you can
just add and look around. Lo where this color is
found on the painting, maybe over here, and
maybe over here, you can also at any point, add new things like flowers, like small dots,
like another flower, well, not a flower, but a petal. Okay. So to change, you can always go with
negative painting, which means just cutting inside of the edge of the shapes. These are just shapes,
abstract shapes. We define them as being roses just because we
know what a rose is. But if you played enough
and roses did not exist, you would come up and understand
how to make this sort of spiral looking
thing all on your own. But because we know
what a rose is, it's even easier to create it and flowers and
things like that. And let the mind play and
really try to see what's there. Why is this shape like this? Why is this interesting? Why is this so textured? It's like candies.
15. Thinking like an artist : Let's add another leaf here. Instead of looking at
your painting and saying, Oh, what's wrong with it, instead of that, ask yourself
this better question, which is, what can I add? What is something
that I can add? And what is something that it's missing and
where position it? Look where it's missing. And once you do that, you will understand at this point
that painting is all about asking the right questions
and letting yourself do and paint freely. The right questions would
be, what can I add? What stands out to me
and shouldn't stand out? What if it doesn't stand out, what should stand out? And you ask yourself, What color is there?
I have green. This is too flat. What can I do? Can add another different
color to unflatten it. The response is very
simple and easy. You just listen to the words, say the sentence out loud. This is too flat. Add another. This is too round. This is too you go
flat. What's flat? It's too uniform. The color is too uniform. So the more you go
and be more specific, the more apparent the answer is. Like notice this is too gray. So it needs more color. See? It's like, No, no, this is too red. It needs more orange. You question, is it too much
of this, too much of that? And then you ask the
second question, the follow up question, which is, what can I add
to make it different? To make it not so red. And the answer is
just a yellow wash. Okay. If it's too much, too much, what's
the question here? What's the problem here? It's too much water,
too much yellow. So I cleaned up the brush
and I take it away. And then now it's
too little water. You can even go as far as to put the water down,
clean up the brush, then take some
water and blend it in you can just play around and see what's going on, see what's happening. Notice I've picked
up some of the green and it looks interesting
on the rose. So I'm going to add
it intentionally. I picked up some of this
green from this leaf. So I'm actually going to
add it intentionally. Just because it gets
a bit of variety, builds a bit of variety.
This is too round. What can I do if it's too round? What's the opposite
of round? A square. Okay, let's square this down. Okay, see. Now, it's too close
together, too, you know. Let's add a break
right over here. Now, this break is too dark. What can you do if that is
too dark? Add a highlight. If you have some
white still left, some of this light color. Perfect. It just goes in
the background a bit. Now, it's unblended. Let's blend it a bit closer. It breaks over here.
Now, let's add this highlight over here
as well, maybe over here. And then whenever you
have paint on your brush, ask yourself where
this color can go and where does this color
belong somewhere else? What area can this color be in? And would it look great? Would it look good over there? Like, for instance, some red. Where does red belong
here, here, here. So here, it's not so red. Let's increase and create
some more color harmony. You can also go over the
highlights to dull them down. If you dull them down too much, you can go
with the finger. Well, it was still wet. Doesn't matter. Right,
over here, maybe
16. What have you learned Thank you: Painting could have
been a painting of oranges or apples
or anything else. You can really use
your imagination. Have a few reference images to really understand how
to paint that form. Just simplify it in
three beautiful steps, dark, light, and highlight. So you have a dark area, a light area, and
then a highlight. And it's the same
everywhere, dark, light, highlight, dark
light, highlight. Simple, and not all of
them need to be treated in three different light shades. You can leave it just light and dark and then create some
color variety inside of the shapes and inside
of the things to create this interesting
looking painting, roses, apples, whatever
you are painting. That's just about
it. At this point, you can go back in with
some blue if you really want to but it's
not really needed. It would really make this
a bit more interesting. Like, for instance, if you take and create some of this blue, but never put it around here because it's going
to be very obvious. Just put it over here. I will really push
the things forward. But then you have to go back
with some leaves over that, so those marks are
not at the front. Remember, all the marks
that you make last will be the last thing
that is going to show up and touch the
eye of the viewer. So be careful not to do
the background at the end. Or if you do go back and add some of the same
color, like, for instance, in this rose and add it
over so that it really creates an edge over the color you've just
put in the background. Okay. Now, thank
you for watching. Thank you for
taking this course, and don't forget to leave a review and see you
in the next one.
 George-Daniel Tudorache, Together we will create amazing things.