Transcripts
1. Introduction!: Hello everyone and welcome
to my Skillshare class. My name is Yvette lab and I'm a full-time fine artists based on the central
coast of California. I create landscape and seascape paintings
in acrylic paints. And I have lots of classes
here on Skillshare that show you guys tips and
tricks for acrylic painting, different landscapes,
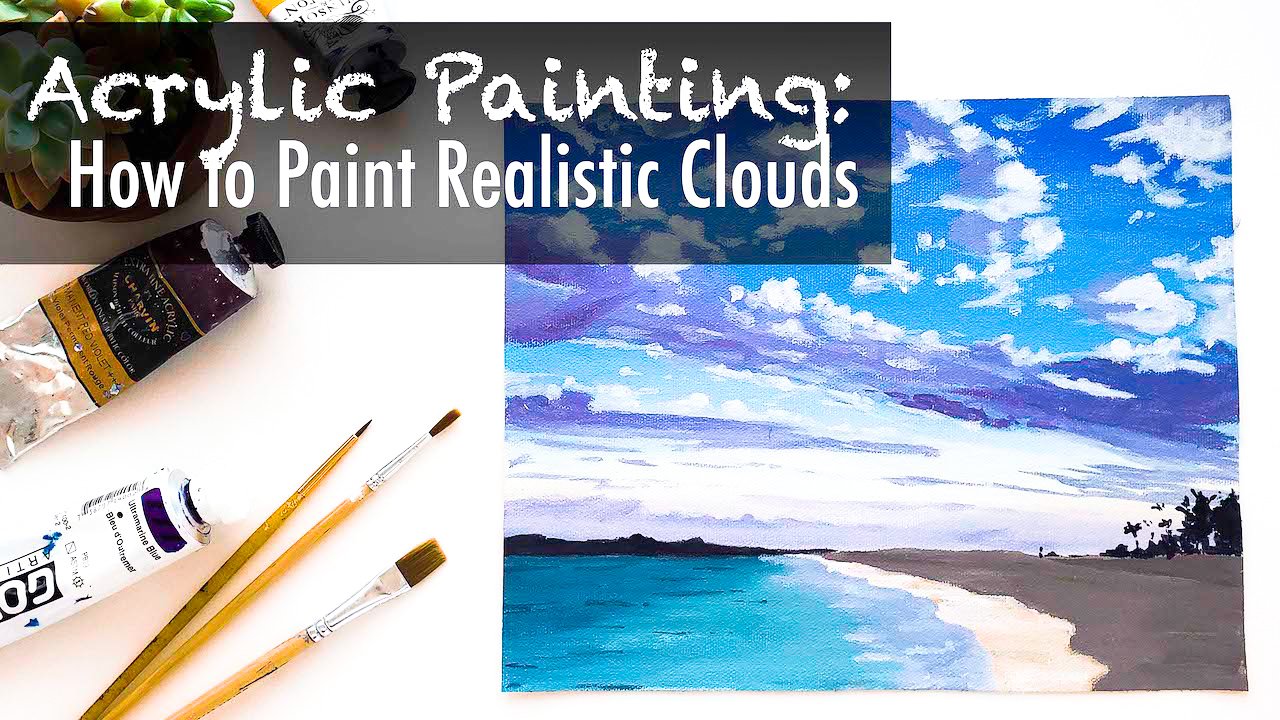
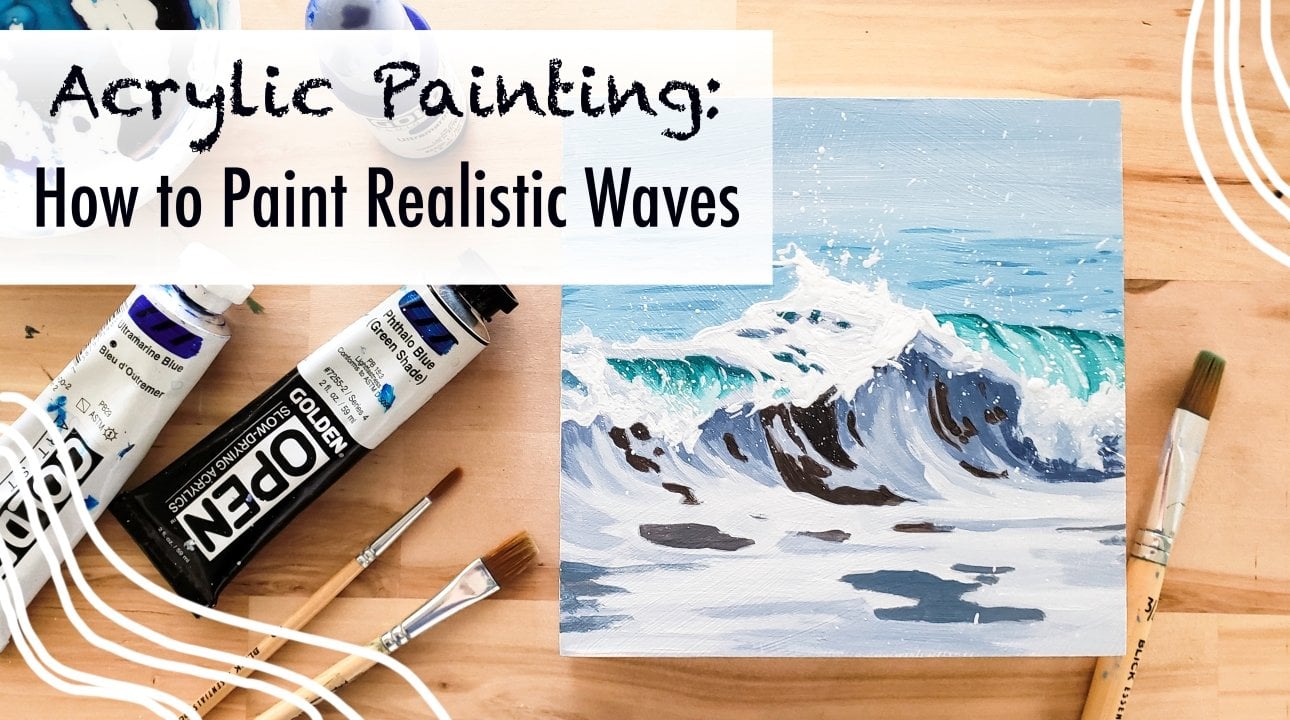
clouds, water, etc. In today's class,
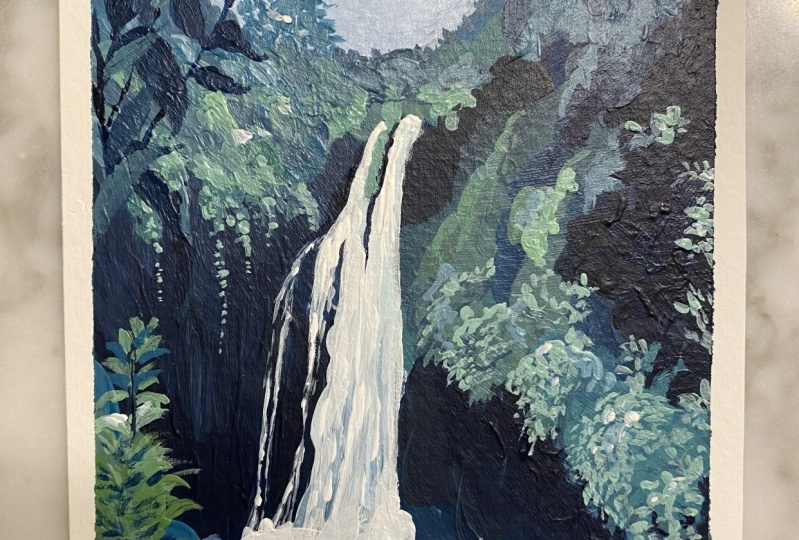
I'm going to be teaching you guys how to create a beautiful waterfall painting with acrylic paints on paper. This is the final product
that will end up with. And I'm really excited to go
through it with you guys. In this class. We will be mixing every color and doing every
brushstroke together. You'll be able to
see everything I'm doing to create this painting. In addition to just watching me, I will be talking
you through it, telling you what
colors I'm mixing, giving you advice for how to
do precise brushstrokes and intentional brush strokes and just everything you need
to know to start painting. I'm so excited to get started, so I will see you guys
in the next video.
2. Materials and Tools!: Hello everyone and welcome
to my Skillshare class. Today we are going to be
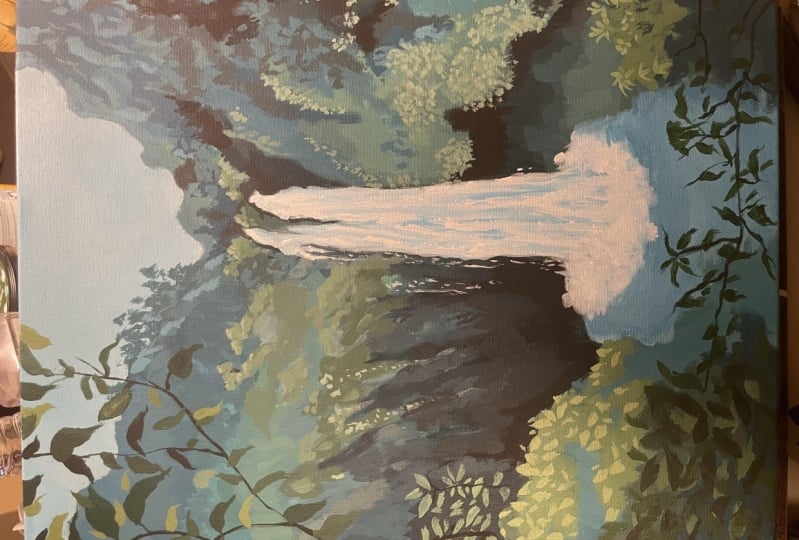
learning how to paint a beautiful lush
jungle waterfall. But before we get started, I'm going to go over all the materials you'll need
for this class and things that I recommend for people getting into
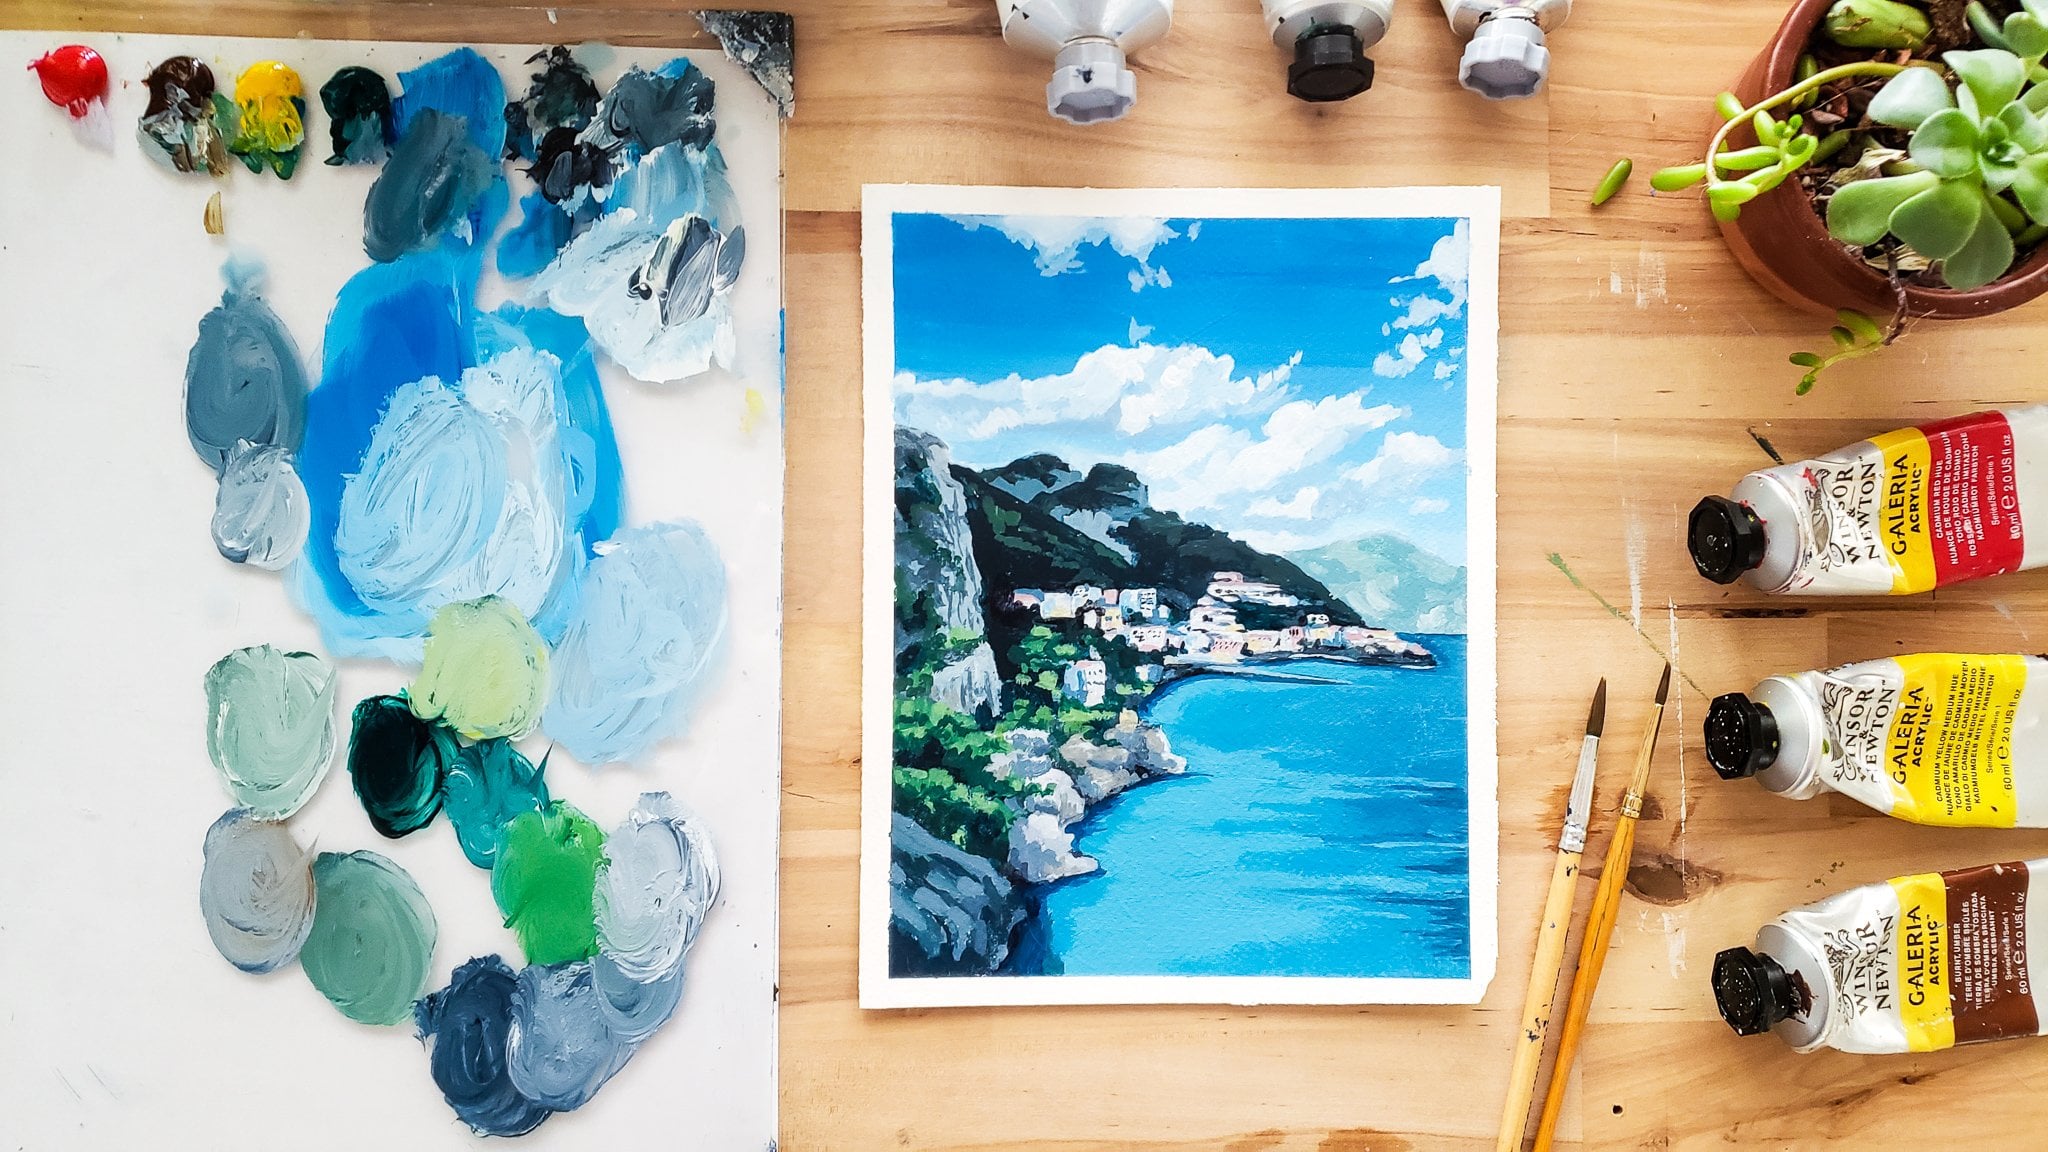
acrylic painting. The first end objectively
most important thing is your paints. These are all acrylic paints, but there are some
differences between them. I really recommend this Winsor and Newton Galleria acrylic set. If you're a beginner or you don't want to spend
a ton of money on paints, but you still want to have
a nice quality product. You can pick up a set of
these for probably around $20 with a coupon at Michaels or Joanne's,
something like that. And it has all of your
basic primary colors that you'll need to mix
pretty much any color. Definitely everything you
need for today's work. Although I do recommend
getting a Payne's gray, this is my single favorite color of paint and I use it in
every painting I have. It's essentially a replacement
for a tube of black paint. It's very dark, but it's cool, toned like a blue gray. You can swap it
out with black to mix really vibrant,
dark, shadowy colors. If you have a set with black, you can sub that in
with a little bit of blue maybe for today's project. While I do 100% recommend these, Winsor and Newton
Galleria acrylics, and I do still use
them in my practice today you can see these
tubes are well-loved. I also would recommend
these golden acrylics. These are a professional
artist quality paint, quite a bit more expensive, but really nice to
use and they have a much wider variety of colors if you want to collect
different colors of paint. So if you're just starting out, this is a perfect set
and then you can add in some nicer colors,
like Payne's gray. And I always recommend
the first move away from cheaper
paints to be a white. This is because when you
upgrade your white paint, it will be much thicker and more opaque and you'll be able to
build up your layers better. Sometimes with a cheaper white, it's harder to get
opacity over your piece. So just to recap, these paints are great, great. Get them, use them, practice and build up
your skills with them. And then the first thing
I'd recommend to do is to get yourself a more expensive titanium white and then
any brand that you like of Payne's gray because that's just my favorite color
to use instead of black. Also, if you have your own
set of acrylic paints, a different brand That works
great for today's project, we're gonna be using
a cadmium yellow, which is just your
basic primary yellow. This is called Windsor blue, but it's also often referred
to as phthalo blue. So if you have a phthalo
blue, that will work, this is burnt umber, a brown, any brown would be
great, a warm brown. And then we have cadmium red, just a primary red, yellow green, which is
just a blue green color. Any green that you
like will work. In addition to that, of course, we have a big tube of white, the most important color
when mixing paints. And of course, as I
mentioned, Payne's gray, you can go through your own
set of paints and kind of build a similar palette
compared to this. To complete this video, if you have different colors. Next, we're gonna go
over brushes that you'll need and that I
recommend for painting. For this project, it's about
a six by eight paintings, so it's not very big. So I do recommend having a
few different sizes of brush. My favorite for this
kind of painting is this filbert oval tipped one. And this is about a half inch. So this is kind of the
biggest brush we'll be using. I really like when you use this, you'll see in my
painting it creates these little oval
shaped marks that I really enjoy for jungle and
loose landscape paintings. But if you don't have that, I would recommend just like
a rectangular flat brush, then you'll need a
medium-sized pointy brush. This is just a round. Number six will be able to do
lots of details with this. And then I always really recommend getting
yourself a set of really tiny brushes
to go in and be able to do really small
clear details with this. This is a size 0, round brush, just really small,
perfect for details. Nothing too complicated. So that's pretty much I
recommend these three. Definitely my favorites
for this type of painting. If you don't have a
more oval shaped one, you could use still
a square one. For today's project, I'm
going to be painting on watercolor paper that has
been primed with JSR, which is essentially a
cheap white paint that's used as the base
coat for a painting. It's the same thing
that they use to prime canvases that you buy at the store that are
already called pre primed. And you can use it on paper
or canvas would pretty much anything to make a really
nice surface for painting. Though I'm using paper
for today's project, you can use Canvas
that you have. Or would I just recommend
that you prime whatever you're using with Gesso first. In the next class, the next video I will be showing you guys how easy
it is to do this. Also wanted to mention
that I do recommend using a watercolor paper that
is thicker like this one. This is 300 GSM, which refers to the thickness. And you can see on the front of your sketchbook or paper pad, I do recommend one
that's a little bit thicker just so that it holds up better against the paint and
it doesn't curl as much. Lastly, some miscellaneous items for painting are a palette, something to mix
your paints song, I love this glass palette
because it's so easy to clean and keep and
just use easily, put away easily, and
make more room easily. It's very mess free. I really recommend
glass palettes, but if you have anything else, a plate, I'm a plastic palette. Whatever you like to usually
use to mix your paint on, you can go ahead and use that. Then in addition,
you'll need some water. I always recommend
having a couple of cups of water so that your water
doesn't get too dirty and you can switch back
and forth and have some cleaner water and one and really dirty
water and the other. It doesn't have to be a dual
sided container like this. You could just use two
cups or two jars easily. Then you'll also need either a paper towel
or a dish cloth, something to dry your brushes
on after you rinse them. That about covers
it for materials. And next I'm gonna be
showing you guys how to prepare your paper for painting.
3. Surface Preparation: How to Gesso: The very first thing that we're gonna be going over is how to prepare any surface for
painting with acrylic paints. To start out, we're using JSR. This is basically just a thick, cheaper white paint
that you can use to do the first layer
of your painting. The reason that this
is important to do is because it saves you a lot of
your more expensive paint. You won't have to
do as much layering and your paint won't soak into the paper as much and it will create them better
layer in that way. If you do it without
Jesse, you can. It's not bad for the
painting or the paper. It's just that you'll
have to do probably quite a bit more layers and
use quite a bit more of your more expensive paint to get the same level of opacity and completeness
with your painting. Using this is super easy. You're just going to open it up for a little
bit on your paper. Then I like to use a little bit of a bigger brush for
this if you have it, but you can use what I
pointed out earlier. It's just easier and quicker. And you're literally just
going to go ahead and coat your paper completely
with this white paint. This is also nice because
it adds a little bit of texture to the
painting which I like. I like little brushstrokes
as the underlayer. And you can use a thicker amount of
paint are a little bit less depending on how many coats you want to do and how
you want it to feel. But once you're finished
with that super easy, we're just going
to let it dry for probably about 15 to 30 minutes depending on how
thick your paint is. You want to make sure it's fully dry before you go
ahead and start your painting so that the white doesn't mix with your colors
as you're starting tag them.
4. Tape and Composition: Once the Jess who
is completely dry, I'm gonna go ahead and tape off just a little bit of the
edges so that we can have a nice clean edge to our
piece and we're done. And it also helps me to protect the table from getting
lots of paint on it. I do recommend if
you're painting on your kitchen table or something where you don't want
paint to put something down as well just to
protect the service. Now I'm not going to tape it to the table because I like to be able to move my painting around while
I'm working on it. I'm just going to be taping
little bit of the edges. With that we're ready
to get to painting. I'm going to be setting
up my palette real quick. And then we will dive right
into our watercolor painting. Okay, so before we start, I do recommend
that you check out the reference photo
that I'm gonna be using for today's project. I have provided it in the student project
section of this class. And I think it's
really helpful to be able to look at the
reference photo along with me so that you can make decisions and kind of see
where the painting's going, what the end goal looks
like, the composition, the colors, and
things like that. It will give you a better idea of the pathway of the painting. Go ahead, pull it
up on your phone or print it out so that
you have it with you. And we will go ahead
and get started. First things first, I
like to start out with a damp brush always just a little bit easier to get the
paint ratios that I like. And I'm gonna start
by mixing up our Payne's gray and a little bit of the green color and a
little tiniest bit of white. We want us to be a
very dark color, but just a little bit of white helps it be a
little translucent. And I also added in a
little bit of our blue. We end up with a very
dark teal color here. I'm adding just a tiny
bit of water to this as well using this color. We're just going to go ahead
and start sketching in the main compositional
shapes in this piece. So we can see
there's kind of like a big hole for the sky
wherever it's coming in. That kind of comes over here. Then our waterfall starts right
about here in the middle. You can just quickly
eyeball this. For now. We're just marking in main compositional
points so that we can work on the
rest of the piece. Then you can see that
it's really dark in here. So I'll use this dark color. We have just block in a
little bit of that shadow. The first thing that I like to do with paintings like these, just now we're mixing
up a little bit more of that same color with the blue, green and Payne's gray,
a little bit of white. You'll just have to mix
it more as you need it. But when I'm first
looking at a painting, the first things I'd
like to do is mark in the main landmarks like
the sky and the waterfall. And then I will jump straight into laying in the darkest
darks of the painting. With our first color. We don't need to get
too in depth here. But we can see that over on this side of the waterfall
it's quite dark as well. This is my way of
sketching out the piece. For sure. I like to not just dry it, but start to add in these
compositional changes as well. Then you can see it
balloons out down here. We have our pool. I'm just sketching it
in really lightly.
5. Composition Part 2: Then we're gonna have
some foliage right here. I'm going to leave that light. Kind of draw that in right here. This is super easy and loose. We're not trying to make it
look like much of anything, just get in all these values. Then. Same thing at the top
of the waterfall, we can see that there's
a break in foliage, a little bit lighter there. And then these trees, these
trees are in the background, a little bit darker
further away. I'm just marking that in. And then on this
side is actually much more continuous
the darkness. So we'll just kind
of sketch those in. A lot of this is looking
at your reference photo. I'm just getting a really
loose approximation of how you want
your piece to look. It can help, I think
just to kind of squint your eyes at the
reference photo and see where the darkest
spots are on the picture. Then sometimes I like to
squint my eyes were looking at the reference photo and squint my eyes were looking
at my painting. I think this can really help to just lay in those values
where there should be, which will really help overall. And then you don't have
to worry as much later. If you don't get caught
up in details now, you don't have to
worry as much later about where things should be or ending up with that
classic drawing something. And then you hit the end of the paper and you weren't done. If you're drawing a
body and you get to the knees and you don't
have any more room, you don't have to worry
about that if you focus on the overarching
composition like this, first, next up, I'm going to
be mixing up a new color. Same area where mixing some
white into that color. And then a little
bit more green. Almost all the colors I use in here are going to be
some variation of blue, green, Payne's gray, and then sometimes I'll add in
a little bit of yellow. Right now I want to
kind of stick to these more bluey greens, but I went to a lighter color. I'm just creating this
teal, but gray, green. It's hard to describe. Color is hot. But luckily you get to
see what I'm doing. Then we're gonna
start laying that in. It's almost the same color. A little more white. It's always good
to go back and re mix colors if you don't
feel like it's quite right, don't ever be afraid to do that. I'm going to start by kind of layering this in on the top. A trick for painting
landscapes is just to know that further away things
like these distant trees, which are the furthest
away in this piece, are going to be a
little bit lighter, less contrasty,
and less detailed. Then the front.
6. Blocking Colors: Then for more of this, I'm going to mix in more
yellow and green and gray. I want more of a muted green and less of a blue color
for this part. But we're still
keeping it pretty like and add a lot
of white to that. Then we'll just
start laying that in in some of these areas. But there's a
little bit lighter. Here on this side
of the painting, you can see that there are quite a bit of trees that are little bit
brighter and lighter. You can see the shape of it coming around and
then down over here. And it almost kind of shadows as Cliff area that we have here. Then we'll use that
same color and start to do the same thing with
some of this foliage. If you look at the
reference photo, which again, I really recommend, you can see he's kind of shapes, these little bush shapes that are rounded
and coming down. I'm trying to add that in
as well with my movements. Your brushwork is really important when you're
creating paintings, it's easy to forget about. But if you're very
intentional with direction, I think it really comes
across in the final painting. I'm going to add a little
more blue to that. I like to really work off with
the same kind of colors in my pool for awhile
when I'm first starting out so that
they're all similar. They have similar values, but they're just a
little bit different. Then now I'm gonna go back. Now we have some of these
light compositional colors. I think it would be
most helpful to go back and work on the darkest
parts of this painting. Again, I'm adding quite
a bit of Payne's gray. Then just a little bit
of green and blue. Then you can kind of mix in a little bit of
that other color. You get some different
shades in here because in shadows
they're quite complex. You have a lot of different, very small changes in them. You can see over
here that as we get closer to this pool with
water and the spray from the waterfall itself that it gets a little bit
lighter because there's missed. That's why I'm going
ahead and adding a little bit of white
into our color. Starting to kind
of blend that in. I've been a reference
photo we have, it's actually kind of
almost a green miss. Having a little
bit of yellow into that will pull some of those
generally greens and do it. That will eventually
then just blend back up into our plant. Over here. I'm going to
carry this all the way down, adding a little bit more gray. Keep changing it. And then we'll go back into
our darker color as well. And I'm going to pull
that all the way down to the bottom of the painting. For now, we will go over
with lots of other layers. But I think getting
a good base layer can be really helpful. We're going to mix up more of that dark color and kind
of do the same thing on the other side of
the waterfall where there's that nice drop-off.
7. Adding Contrast: Color Blocking 2: And so we can see
that this part of the painting is
actually the darkest. So I'm using the closest
to just straight Payne's gray that I will on the
whole piece, right? The bottom section here. And I'm again using my brushes intentionally to start
to create these. If you look in the
reference photo, you can see kind of dips
in the cliff sides. So I'm using the
shadows to start to create that and do that
really intentionally. Right away. We'll take some dark up here. You can let your
brushstrokes and the shape of them
be really organic. That's why I like
this round brush. I think it creates
really cool kind of rounded shapes where
these darkness areas are. You can mix a little bit
of brown into this as well to get more
of a muted green. That's one of the
tricks I really like is adding a little bit
of brown or green or red to green to make them
more muted for St green. And we'll go ahead and start building that up as we move up. You can see there's quite
a bit of shadows over on this side and this is not quite as dark as the
color we were using, but it is still fairly dark. You can see as I put
them next to each other, That's a little bit lighter. This is a good example of like you look in the
reference photo, you can see, I like to move
all around with my colors. But you can work on
it at your own pace. But you can see
this comes up and then down and that creates this overwhelming
closed in jungle, you lush feel the way that these plants are over here. I'm gonna keep it a little
bit more cool tone because it is a little bit
darker and further away, will start to come in around
these things we've built up. I'll take that all the way
to the edge because again, it will be covered by some
of the foliage and a friend, but it's easier to get your
first layer out of the way. I'll mix a little bit more
Payne's gray and about blue-gray, little bit darker. And kind of transition it
into our darkest darks with acrylic sometimes I
think it can be tricky to blend when you're
starting out, but I think the biggest tip
I have is to work quickly. The same area when you're
trying to blend and just go back and forth
between your colors as much as you need to. Because although the
paint is dry a little bit quicker and can be
harder to blend, It's also a blessing because you can go over as
many times as you need. So if you make a
mistake or you just aren't happy with
how it's going, then you can just keep
going back and forth. We have a nice darker
pattering here.
8. Filling in Greenery: Color Blocking 3: And I guess what we'll do
now is start to fill in all of these white spots all around the painting
that we have left. We're gonna need a
nice light. Gray blue. Again, I'm just using
our blue and our gray together to get this kind of creamy,
lighter color. I'm bringing that up. I'll just start filling in
these background trees, which like I said, are usually quite a bit lighter because
they're in the distance. There's the midst going on. It's a little bit foggy. And the further
away something is, the less clear and
detailed it is. And I will mix up
a few variations of these colors
because I like to have just different tones in all of my
paintings like this. To just move quickly, move around the piece, adding in lights and darks. You'll end up with all
these fantastic colors that we can go over
later with more detail, but the background of it really adds to the
piece in the end. So let me use that same
kind of darker bluish gray. Bring it down around
here and continue. These shapes. We see will be able to
elaborate on them a bit more. But I want this painting
overall to have the feeling that it's very deep and everything is kind of coming down around this beautiful Cove, which is the waterfall. For the front. We're actually going to use a little bit lighter colors are going to do a
little bit more of a saturated yellowy brown green
instead of a blue-green. I'll just start laying that in. We'll come in with lots of
details and plants as we go. But I like to get rid of all the white on a page first
because it really helps you to be able to
see the color contrast and things that
need to be changed. So mixing up a teal
and other teal color, it's a little bit darker, but not super dark. Here. We're going to start to fill
in all this whitespace. I think I want it to be
a little bit greater. Ideally, this would be a
little more differentiated. But we'll get there
from the background. A little bit of
brown, little bit of gray mixing up this muted green. I'm going to add some white
to it because we want it to be a little bit
more standout. We can start to take
that down as well. Down these crevices. I'm mixing a little more
Payne's gray and we're getting more of a
gray color that I'm adding in because you don't want to transition all of these colors
from light to dark. You don't want to have, you
want to show that it's a gradual coming over
the cliff kind of thing where all these plants are just sort of hanging down.
9. Sky Layer 1: Next I want to do the pool
which is a gray blue again, all these are
different variations of this gray, greenish blue. But for the pool it's definitely in a little bit more blue. We won't add any green to it, kind of a silver eBook. We'll just go ahead and take
that all the way down to the bottom of the painting. Around and on the
edges of the poor. I'm gonna make it a little
bit darker over here. It kind of blends
into the edge there. Last thing we're
gonna do is the sky. I'm mixing up a really
light gray blue. It will be quite
light, almost like a, just a tinted white
because it's kind of a foggy, moody picture. Mix that color. I've just mixed up a little bit of
Payne's gray and a littlest tiniest bit of
the Winsor or phthalo blue. I'm just laying that in there. Then I think we're gonna
need another coat of that, but we'll let that
one dry first.
10. Finishing Base Layer: Tape Removal: It for this guy to dry. I'm just going to
do one more round with are really dark, teal blue, gray, deeper colors and add
in just a few more details. I can see that it's quite
dark under this shelf. Underneath these leaves. White dark and a little bit
of a circular pattern here. I want to add more
layers than over here. I'm just kind of
closing that gap. I'm adding a little
bit more of a yellowy green around the piece, you give it a little
more dimension. Using this round shape
of the brush too. Mimic that leaf
shape in some areas. It doesn't have to
be too detailed because we will
be coming in with a smaller brush to really
emphasize all these shapes. Then know that the sky is dry. I'm going to go ahead and put a second layer on that
so it's nice and opaque. I want to make sure
that as I'm doing that, I'm going to switch to a smaller detail brush
and just go ahead and make sure that I've really gotten in on all the
edges around here. Covered up every bit of white in-between the
trees and the sky. Okay, so now that we have this image blocked
in really loosely, I'm actually going to go ahead
and take off the tape for a painting because it helps me to see a little bit clearer. But if you want to keep
your lines really crispy, then you can leave the
tape till the very end. It's up to you. Since I'm gonna be only using a smaller brush pretty
much from now on. I'm gonna go ahead
and take it off.
11. Waterfall Layer 1: Okay, So already
I feel like I can see it quite a bit
better and I'm not too worried about the edges
because I can always go in with a little
bit of white paint if I want to clean them up. Or you can just cut them off at the end or frame
them under a mat. But this definitely
helps me to see the piece better really quick. I'm going to also show
you guys how I call my glass palette and it's
really easy and less free. Just take a spray bottle of
water, give it a spirit. Then I use the scraper. But you can even
use a palette knife because it's pretty
easy to scrape off. And I'll just scrape
off all that paint. Then you use a wet paper towel or a dry paper towel,
doesn't matter. Wipe all that off. If it's really dry
paint, it's even easier. You just kind of pick it
up and throw it away. Give us space to continue
with our project. Looking at it, I actually want this guy to be even
lighter than it is. So I'm just kinda good and add another layer onto that guy. This layer doesn't have to
be as precise because we've already built up a
nice layer of opacity. If you like the
color of your sky, you do not have to go
back and change it. In addition to that,
I'm gonna go ahead and start adding in waterfall. I'm just going to use a
really, really light blue, almost just pure white
and add that in first. Then we can add a little bit
more depth in it as we go. I'm just using blue
and gray here. We can see at the bottom there's a bit more darkness as
the water's coming down. You can just kind
of add that in. I'm working quickly
here again so that I can kind of mix and
blend these colors together the way
that I want them to be sure to clean off your
brush if you feel like it's getting a little too muddy and you can't get
the color you want, just give your brush a rinse
and a wipe that'll help. Then I'm using that same color
just to lay in our pool. I'm gonna switch to a
smaller brush here. We can get some nice
little details in there. We'll bring this
up a little bit. If you're looking
at your reference or following along with me here, we're just going to raise
that up and kind of create a little bit
more shape with it. The water is running
down these rocks. Not a perfect
straight waterfall. Water curves and areas where it's kind of
just running around. We can even carry that down really thin lines and it doesn't have to
be fully connected, just a little dots
almost all the way down. Then we'll have some splash kind of coming in to pick it up. Creating these lines down
at the bottom to show the rock and the air
showing through water. We'll carry that all the way up, but getting a
little bit lighter, mixing a little more white. All the way up to about
here where they meet. Then the darker part we'll
switch over to the other side.
12. Waterfall Details: If fun thing about
waterfalls is that they can seem really daunting.
How do I paint that? There's a lot of detail, but you can do this really cool, loose approximation
because water is so organic as I always talk about in my
cityscape painting tutorials. You can have a lot
of fun with it because you really
don't have to be as precise as you might
think in order to get a realistic look or a
convincing, at least. It looks like to me
there's almost some water. It's coming down over here. We can see I get
trickled off from there. Then we'll go in with
some pure white to add in really nice highlights. And I'm going to do
that right here. You can look at your
reference photos, see where the
brightest whites are. I want to leave a
little bit of texture. I'm using quite a nice
good God Buhl glob of paint on my brush. You can see. Then I'm just dabbing it on. This adds a really nice
texture to the waterfall. Want to carry this like this. You can see that
most of the water is trickling down this way. Kind of have like
a main middle area that's very thick and white, as well as the sides. I'm going to thin that
out a little bit. Just kind of border. That's a little bit lighter. Show clean edge. This actually comes
up pretty straight. So I'm gonna go ahead
and straighten mine out because of the angle
that we're looking at, pouring out more this way. So it's pretty
straight on this side. And then it comes out a
little bit right here, pulling on some rocks
or something like that. We'll use some of
that white down in the bottom as well as
it's reaching up and spraying to kind of show
the difference between the water falling
and the water that is all tumbling at the bottom. Then we'll get a little bit of a darker, more silvery blue. Start to blend that in the pool. Just a tad. Then I'll use this blue color to come back in and add a little
bit more definition. The pool that we loosely
blocked in earlier. A lot of acrylic painting
just takes quite a few layers to get the final
look because it's a little bit of a
translucent paint. You need those layers anyway. But you can complete
them quite a bit quicker than with oil painting, which is why it's my
favorite medium to use.
13. Waterfall Finishing Touches: And then I might go
in with a little bit of a darker color, mixed a little more
gray and blue together, just a tad darker. And we'll take our
right underneath the pond and at the edges. Like we were doing earlier. Then I'm just
adding a little bit more white and then go back. Keep layering on his water, fall till I feel like
it looks really good. When you want really
bright whites, I always recommend getting
a good amount of paint on your brush and letting it be
a little bit more textured. That really helps
it to stand out. At this point in the painting. It's time to jump into lots of little details that will really make this painting come to life. But I do actually like it as is. If you wanted to just go in and fill in any areas where you can see the white
of the paper through it. You could do that.
But in this tutorial, we're going to go ahead
and continue into details. But I think it looks really cool and a little bit more of
an abstracted form as well.
14. Beginning Detail on Greenery: So I'm going to mix up some of our green and Payne's
gray and white. A little bit of yellow. To warm it up, a
little bit of brown. Kind of a muted
forest eat green. Then it's similar
to these colors in here is kind of what
we're trying to match. Then I'm gonna come in and start to just add little details
on top of what we did. Had little leaf
bits coming down. Because you can see in our
reference there's kind of these different little bits
of foliage overhanging. I've zoomed you in a
little bit so you can see what I'm doing a
little bit clearer. We're just going to start to
kind of my motion I like to describe is it's a dab and
drag dancing around the paper. And that kind of creates
these leaf shapes. Paying special attention
to this overhanging area. We can go ahead
and it makes it a little more saturated green by adding a little bit
of green to this, a little bit of a yellow. Kind of come in here. Start to add in these shapes
I was talking about earlier. I'm going to emphasize them
with this lighter color by highlighting them and
then creating these plant. Trailing down. We'll go ahead and start doing
that on this side as well. I'm going to start with
a more of a gray green. To add in some details. Will continue to
change up the colors. The more colors you
can add into these. Better when it comes
to different shades of this teal and green
that we're working in. I'm going to go ahead and mark in this top of the
hill here with these, you can see there's
kind of two layers. There's this crusting
down and then this turns into our whole cliff. But there's also kind
of like a little mini cliff behind it.
15. Building up Layer 2: Then we're going to go back
into our really dark gray, green, dark one of the darkest colors that
we have on the piece, kind of mostly Payne's gray. I'm going to start to build up the bottom
a little bit more. Then I'm going to
add a little bit of a lighter color to that. You can tell it's lighter, but not too much and kind
of add to the edges of these in-between areas
and build them up. You can see that it's
becoming lighter, but you still feel the
shadow, darkness around it. Creating a gradient to show there's a clear
drop-off area here, but it's not just
immediately black. It kind of fades into
black and shows all of the texture and the leaves
and the rocks as you go down that it's not a
completely smooth surface. Then what kind of
come in with more green or yellow or black? Continue to add layers to the greenery just
above it as well. Overall, although we're
adding lots of colors, I want this to read as
a little bit more of a simple painting with clear shapes that make
recognizable objects. So it's okay to go over
some of your splotches and colors with another color
and kind of clean it up, which is kind of what
we're doing here. Adding in some kind of
dots that come down, showing that the plant
is coming down and there are some areas that the light is
reflecting off of it. Then we'll add that same color, but add a little
bit more blue-gray because as we move
back into space, it gets a little bit cooler. To show that there is kind of too little
drops right here. We can add some of that same
color over here as well.
16. Details in Background : And then as we move up
in the piece, actually, I want to really
bring out some of this more blue teal color. And we have, so I'm
gonna go over it again with a nice blue green from here up in
the reference photo, this area right here and
then the back trees. We're going to really try
to keep them quite cool, toned unless green, a little bit more of
a jungle, a blue. You can see the light.
There's some of these trees. So I'm going to build it up over this guy we created
and just kind of that same dab and drag motion. We will create the shape
of a nice round tree. Then just fill in
some areas of it. That it gives the
illusion that there's a big tree and you can see
through some of the leaves. Then you can just add that
little bit of texture. I'm kinda all along this
hillside if you want. Then it'll take that
same blue over in here. Then the other thing
that's important is I want there to be like a clear area right here that's showing that this
is behind the waterfall. So I'm darkening it
up a little bit. Then I'm going to add in, in this area using
a light blue teal. Kind of some of the leaves
that you can see in the reference photo
and everything's kind of in this area especially similar to this side
is coming downward. It's dripping, it's
drooping, it's very lush. There's lots of greenery. I want to make sure we show that with where I put my
lights and darks. Then I moved back
and forth a lot. I think that's the easiest
way for me at least. So I will just go back into
gray, cover some of this. Then I'm going to mix up a
real dark blue-gray hand will start to transition
some of these dark shadows, darkest darks we have into
the rest of the piece. So that's not quite as
stark of a contrast. Because you can see that
there's large dark patch right here that comes over
more into the middle. So I'm adding in some of that using that same kind
of dab and drag and dance all around the paper
to give that leaf texture. Having a little more
blue to all this, I wanted to continue to bring the blue
into the background. A little more white to get
kind of a mid toned blue.
17. Creating Depth with Cool Tones: I'm just going back
over this tree area. I like to put at
least two layers on most areas of my painting unless I started out
with really thick paint, just think it helps it
to look really finished. Then I'll add a
little more white to this gives a bit of
a lighter color. We can add in some
of these close dropping the back as well. I kind of like to
use an L shape. I'm sure you've noticed
as I'm painting, it's going to cross
and then down. We can add some of that blue around wherever you feel like you want a little
bit of that blue. I stick mostly to the background because that's the
traditional way. It's cooler in the back, warmer in the front to
show depth and space. But I also liked to have pops of color around the painting. I'm adding some more white
into that and I'm gonna go over some of these light areas. Same on this side, we'll add in some patches
of lighter colors.
18. Carving Detail with Shadows: And then we'll mix up a
darker teal bringing again, I really like to kind of carve out details
with these dark colors. I'm gonna take it right along
this side of the waterfall. Carve it out right along this
side here to emphasize it. Well, we'll come back into this dark area
up here that we have and kind of go over that and we spread it
around a little bit. Can you bring it out further? I'm carrying it all the
way under the shelf. But we've created
and I'm going to carry it with that DAB
and motion to show the leaves and go up to kind of separate the front of the
painting from the back. Now we know all of
this is in the back, and then we'll have a
little bit of details right here in the front. As if you're taking a photo
and this is close to you, it's on the hill you're standing on and all of that
is pushed back. I really like to do
that because I think it frames the viewer
like it feels like you're really immersed in the painting when
you have some of the details next to you. And I'm going to add some
darkness kind of all around the top of the
waterfall as well. Because this shows that
it would be in shadow. It's coming out from underneath
some of this foliage. That's how it's popping out. So it would be in shadow. And then we'll move into
a more vibrant green. Start to add little
bits of detail in here. Highlights. I'm adding this underneath our lightest points here to
add a little bit more of that dimension and blending it out a little more gray into it, a little more white to just get a little bit
more of a neutral green. Same, very similar tones, a little bit more neutral.
19. Leaf and Tree Details: Then a little bit
of blue to that. And I'm going to kind of blend this background blue
down a little bit. Adding some blue, some gray. I wanted to be kind
of a dark color. Match this background color, and then we're going to
kind of bring it down. It's a little bit less clear where things
begin and start. In a jungle this dense, it is kind of unclear. And I really like that
because it gives you a lot of freedom to play around, Create, and not be too exact, but still get the lush overall
feeling of the jungle. Now I really want to
add a little bit of detail into these leaves. I'm going to mix
up a little bit of a really nice light,
warm, green color. Make sure it's lighter than the colors we
already have there. I'm gonna go ahead and start
adding in some detail. I'm gonna do a
little bit smaller, a little more dots. You don't have to
be perfect circles. In fact, it's better if they're
a little bit imperfect, but they add quite a
bit of texture to it. And then you don't have to
cover the whole thing either. I'm just going to kind
of do these edges and areas where in
the reference photo it seems like
there's a nice big, brighter blob of leaves. Carry it around areas where
you feel like there should be a little bit of a
brighter more definition. I'm gonna move around
the piece and add this to any areas I just really
want to be highlighted. There are a few leaves
peeking out of the shadows. I'm adding some over here, which really brings
together the whole bush. Add some smaller dots, kind of trailing
down on this side. I don't want to go too heavy
over here, just a few. I'll emphasize it without it being too overwhelmingly
distracting.
20. Foreground : Then I'm gonna add more yellow to this
because like I said, the closer you get
to the foreground, the warmer it is some yellow, some brown and go
like a nice warm. Green. We'll start to add in some of the bushes
here in the front. And I'm going to shape these
kinda like a palm tree or firework kind of coming out. I will make them a little bit later so we can see them better. Because I want to have
some different kinds of foliage in there. Here's doesn't have to
match mine exactly, but I do recommend having
just some different kind of leaf shapes, your
different bushes. Then we use that
nice green color, add just a touch of blue to it, will start to draw in
our plants over here, will start to
emphasize this point. Bring it out. Then I'm going to mix
up more of a gray, darker green, blue as
we have been using. Kind of do this corner
a little bit darker. If you don't have your tape on, don't spend too much time
trying to make it perfect. Like I said, we can cut it off
later or you can frame it. But if you stop your tape on, then you don't have
to worry about it. I'm going to add some of
that over here as well. Just show that this
is kind of receded. Having these corners be dark, I think it really
draws the eye in and balances out the
rest of the painting. We use that same color
and I will come in and do some similar leaf shapes to add a little bit more texture
over here as well. Then I'll add a little
bit of white to that. A little bit more yellow
and gray will start to blend it up with a little bit of a lighter
color transitioning it. I'm actually going to mix up our original very dark color with just a little bit
of blue and green. Cover up the top
of this, I think. And we'll just look
better that way. I think it's good to
always be willing to make adjustments to your
painting as you're working. Sometimes as you start to
see things come together, it just seems like something
will look better if it's moved or a little bit different. I think that adjustment
really brings this bush into the foreground
at separates them. So I'm really glad that I
went ahead and did that.
21. Foreground Details: We will, however, use that
space that we just cleared. Create a plant. They're coming up from the bush. I'm just doing kind
of weave shape. You can see it in
the reference photo. It's kinda like a big
wide jungle you leave. I'm using a little bit more
of a vibrant green for that. I think the most
important thing when you're doing plants
is to kind of, they don't have to
be perfect, but make sure that the
leaf shapes are different so it shows the different directions
of the plant. You don't just want the
stereotypical leaf shape. We want to do some straight
ones, some flat ones, short ones, ones
that are pointed away, and stuff like that. It doesn't have
to match exactly. I just think it helps to
kind of give the illusion. This is real plant
moving in space. Then we'll go in with a
darker color and mix it in and create some leaves
that are a little bit darker than that are
there in the background. These are just leaves that
would have been in shadow. Then I'm going to
take just a tiny bit of her straight Payne's gray and draw in our stock. A couple of them. I'm gonna continue with
using these lighter greens. A little more white to it, will start to add in
some random leaves. You can see that if
you look carefully, this plant right here in the reference photo is
very similar to this one. It's just quite a bit closer. So I'm going to make
it a little bit more vibrant and we'll have the leaves be a bit bigger. But we can do the
same technique.
22. Foreground Tree Part 1: Then we have this
kind of tree falling across the front and I'm
really excited to add that in. So I'm gonna go ahead and
start working on that. I'm going to use Payne's gray. I'm mixing a tiny bit of green. Maybe the teeniest bit of white, but this is really one
of our darkest colors, is pretty much black
because it's all in shadow. And so you can either
really nice dark color. I'm going to let
the brush create different widths for me
by going really lightly. Kind of following that shape. It dips down. I think to get natural
branches letting your brush create its own
shapes is really important. So don't be too precise, just let the line width
vary because of that. All the way over branches
going all around. I also just really
helps when you're doing branches to look at
your reference photo, see what direction it is. Sometimes if you
try to make it up, it can feel like a
little bit, not real. So it doesn't have to match
your reference photo exactly. It can just help you to get
ideas for organic shapes. Like how some branches
cross over each other, etc. Have another one over here. It's really small. Then we've got some
really thin lines. Sometimes I'll add
a little bit of water to my paint so I can thin it out and then
I'll twist my brush. You can see that so that I get a nice pointy end to work with. Then once we have that in, I'll go ahead and mix just a teeny bit more
green into that. Maybe a tiny bit more white. We're still working
with a very dark color, but it's not quite as
dark for these leaves. I'm really going
to pay attention to these leaves
and how they look, because I want it to
look like a real plants. At this point, you
might want to move into your tiniest brush
for these leaves. But it's up to you. The more that you paint leaves, the easier it will get to create organic shapes that
look convincing. You'll start to
understand how they lay and be able to make them
up a little more freely.
23. Foreground Tree Part 2: You'll have leaves
kinda crossing over the stem and all around
as well at helps to add to the tree fallen overlook. They want they don't
all need to be attached to the stems
you drew either. You can join, just kind of move around and put them nearby. Then in this corner
it's the same plant, but there's quite a bit
more light coming through. So I'm going to mix up a
lighter green with yellow. And we'll continue the
same shape of leaves. But we'll do them later because the sun is shining
down around here. What kind of do a
variety of colors. So we'll do a little bit more, some of the darker greens and
some of the lighter greens just move quickly
because there's so many leaves in this area
that is not quite as clear. Just stack them. I'm going to colors and just
kind of a mixed leaf look. You can go in and
out, but whiter green to a couple of areas if you want to kind of show that the light is hitting some of these leaves, depending on where they are. You can use your
imagination to see or look at the reference photo because there are a few leaves, the reference photo
that are like bright green because the sun
is shining through them.
24. Vine Part 1: In our painting is getting
pretty close to done, but we do have these
beautiful leaves that come down in the front that
again frame the painting. We'll go ahead and mix
up some colors for that. Again, we're just going to
mix a really dark green color using our Payne's gray or green and a
little bit of water. And I will start by
drawing in stem. We can see it comes
out to about here. There's a couple of different
branching off here. And then it comes down to about just above
our other plants, so we'll carry it. This is like half
of a tree. I think. I'm just following along
these branches as best I can. Again, these things
don't have to be exact, but I think it's
helpful to look at the reference photo so it
doesn't look too strange. Then we'll go ahead and
start with the leaves. For these top leaves, I actually don't want
them to be quite as dark. Most of them will do. We'll start out with
just a couple that are. Then we'll do a mid toned green. Then you can just
add a little bit of white to that to lighten it up a little bit more green is our dramatic shift
to this point. We're just working our
way up a little bit. Still going to be
quite a dark color. You just want to be able to see the color a little bit more. I'm just mixing up more
of that same color.
25. Vine part 2 and Finishing Touches: And then we'll just continue
to lighten that up. A little more white and
a little more yellow. And we'll start to add
in some lighter leaves. These leaves also another
thing that makes them a bit more convincing is they're
crisscrossing each other, overlapping, not all separate. I'm going to mix up a really
vibrant green as well, because there are
just a couple of places where it's shining through quite a bit. Let me get these
really vibrant leaves. Then we can move back
into our mid tone green and add in more of those. I'm going to mix up
a little bit more of that really dark color again. Just a few more
leaves and touches. Once you're comfortable with
your leaves and you feel you've added enough
detail to the foreground, etc, and you're happy
with your painting. We can go back in and add a
little bit of white paint to any edges that aren't perfect or you can go ahead
and remove your tape if you never did that. But that is just about
it for this painting. I hope you guys really enjoyed the process
of creating it. And you learned some things
about acrylic painting and had fun because that's
the most important parts. The process of art is far more rewarding than the product. If you have any
questions at all about this project or just painting
with acrylics and general, you can ask them in the
discussion section. I will definitely respond to you and your classmates
can also check it out. And we can talk about things. Leave your work in the
student project section, please upload a photo because
I really want to celebrate your work and see what you've created and just cheer you on. And I loved seeing it. Also leave me a review if
you enjoyed this class and let me know what you think
that is, really appreciate it. That's it for now. I do have other classes. You can go check out
on other subjects. And it was so wonderful
working with you today.
 Yvette Lab, Fine artist in Portland OR