Transcripts
1. Intro: Christmas is not a
time nor a season, but a state of mind. To cherish peace and goodwill, to be plenteous in mercy is to have the real spirit
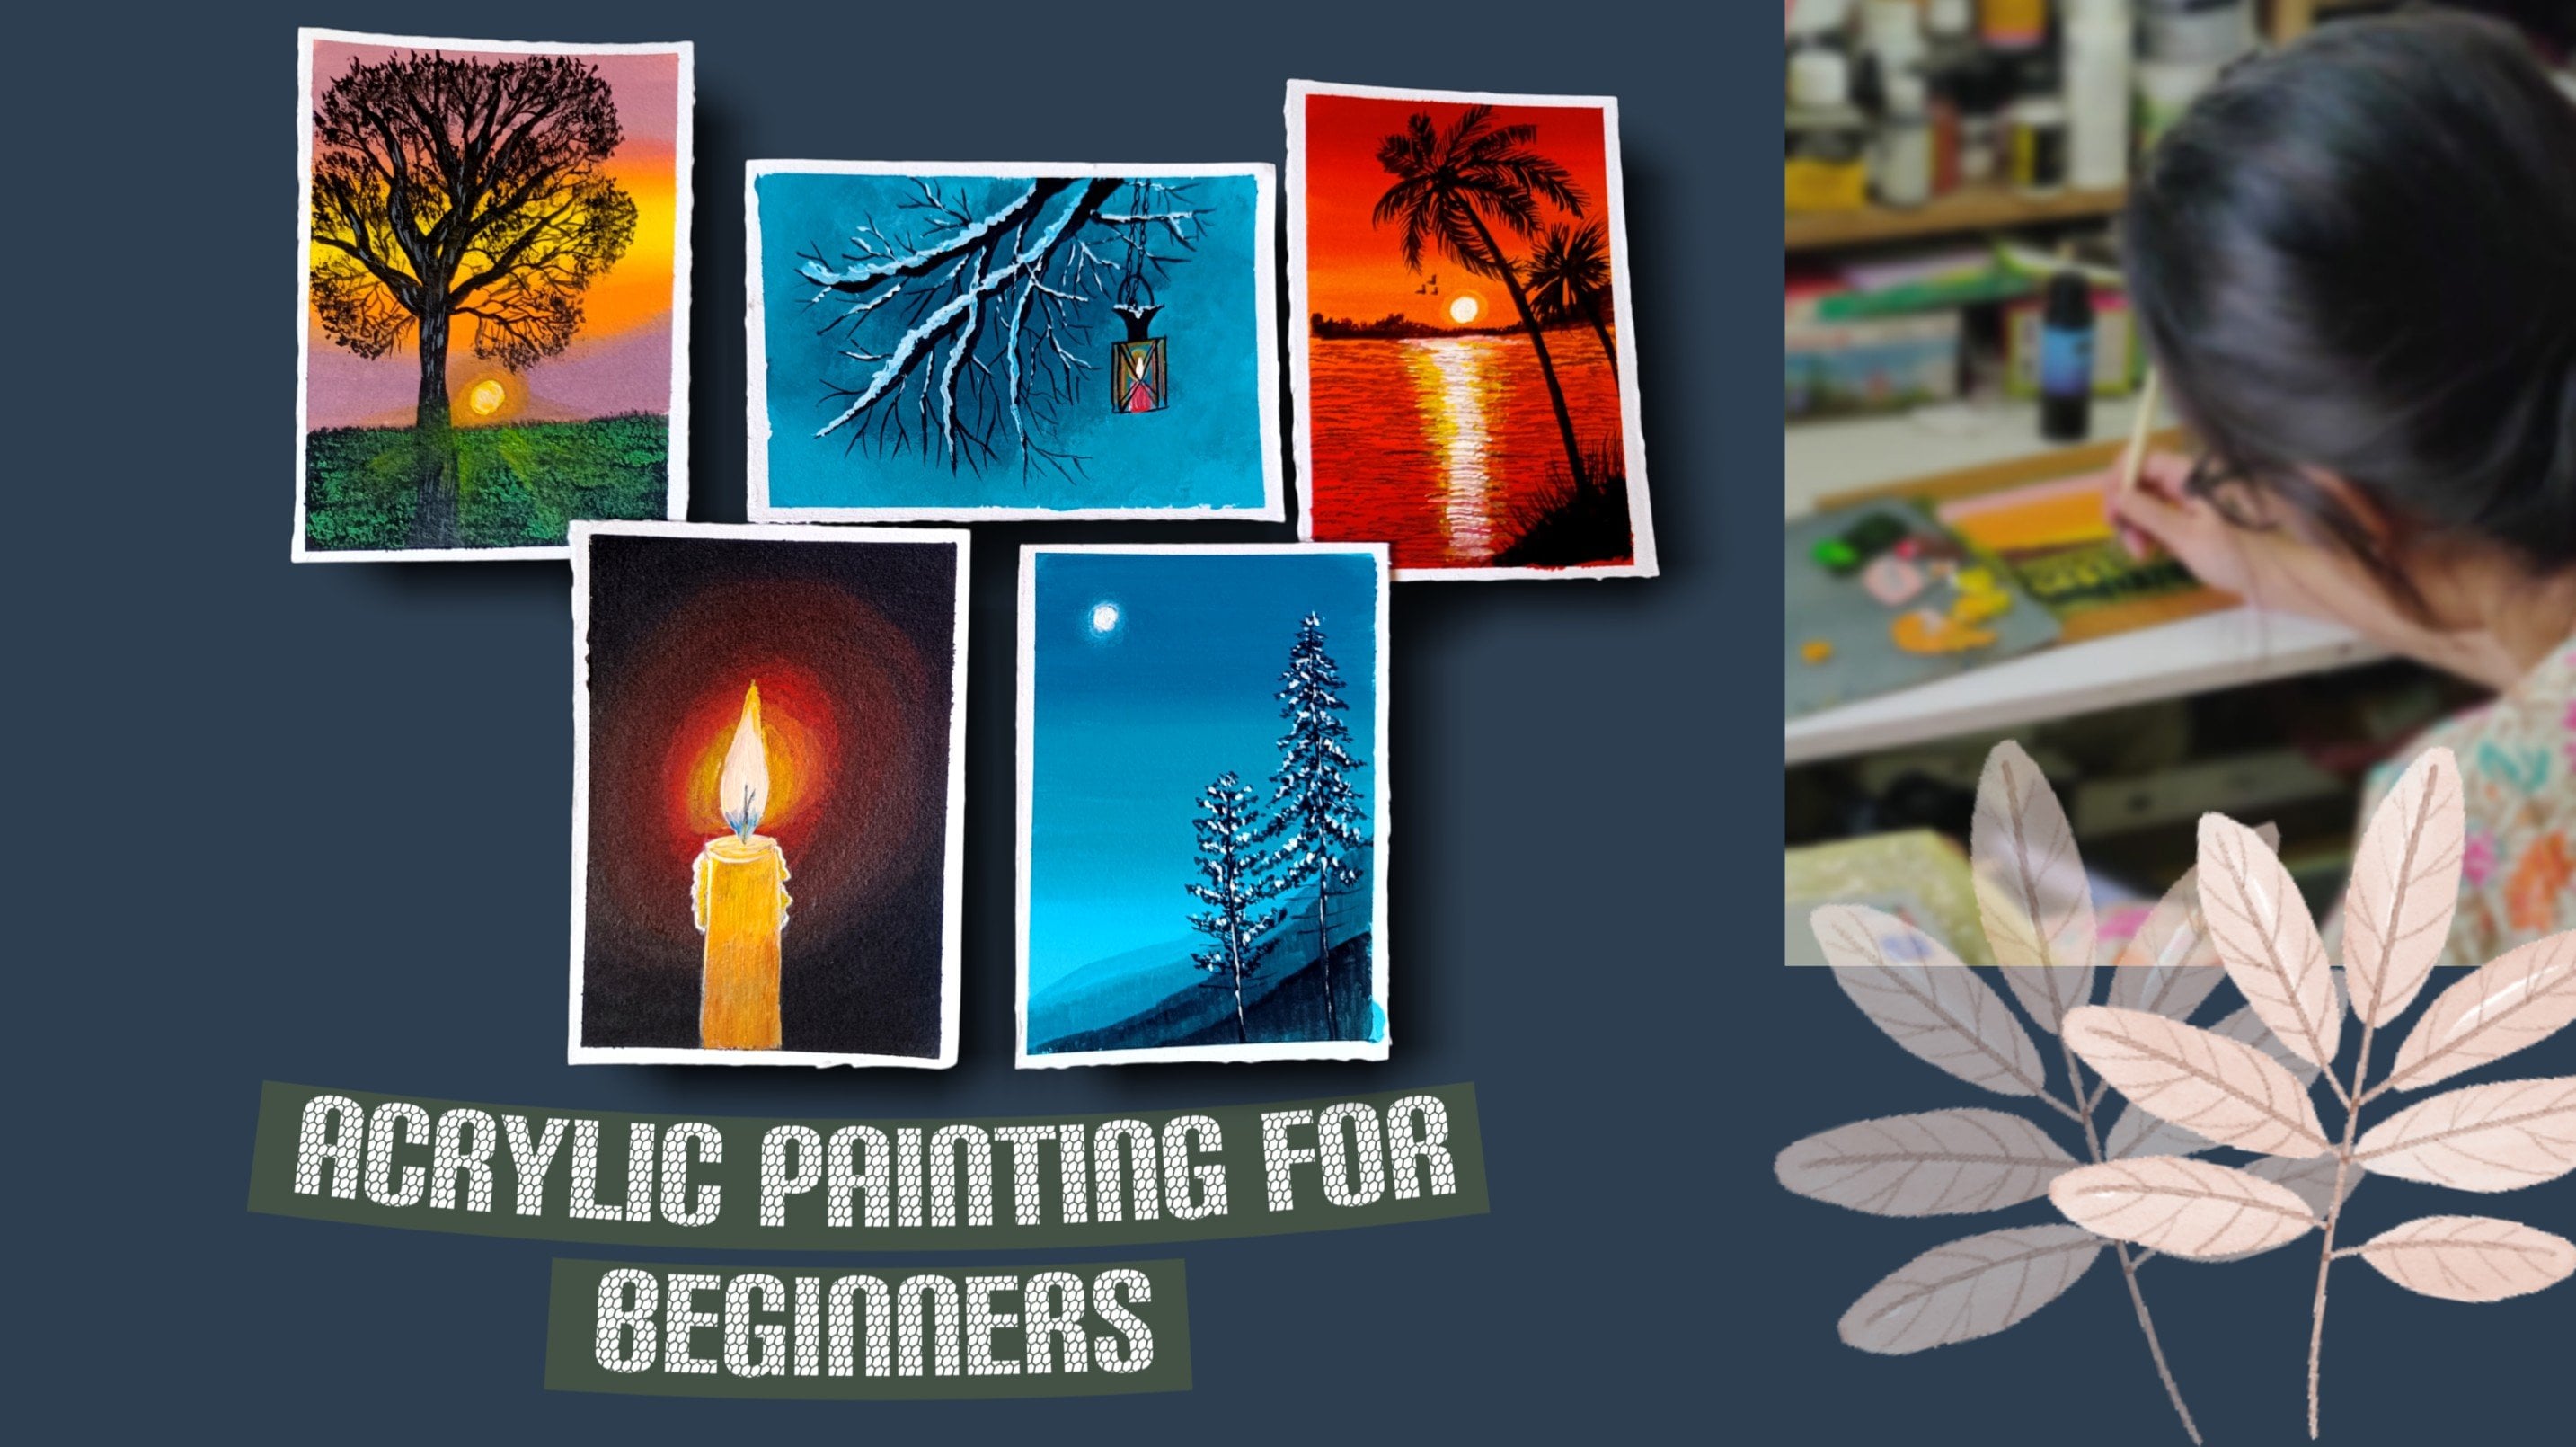
of Christmas. Hello, friends. My name is Mohiisna and I am an
acrylic artist based India. I mostly do landscape painting and animals and bird
portrait painting. Many of you know me as Mohoni Art Gallery from
my Instagram account. So in this class,
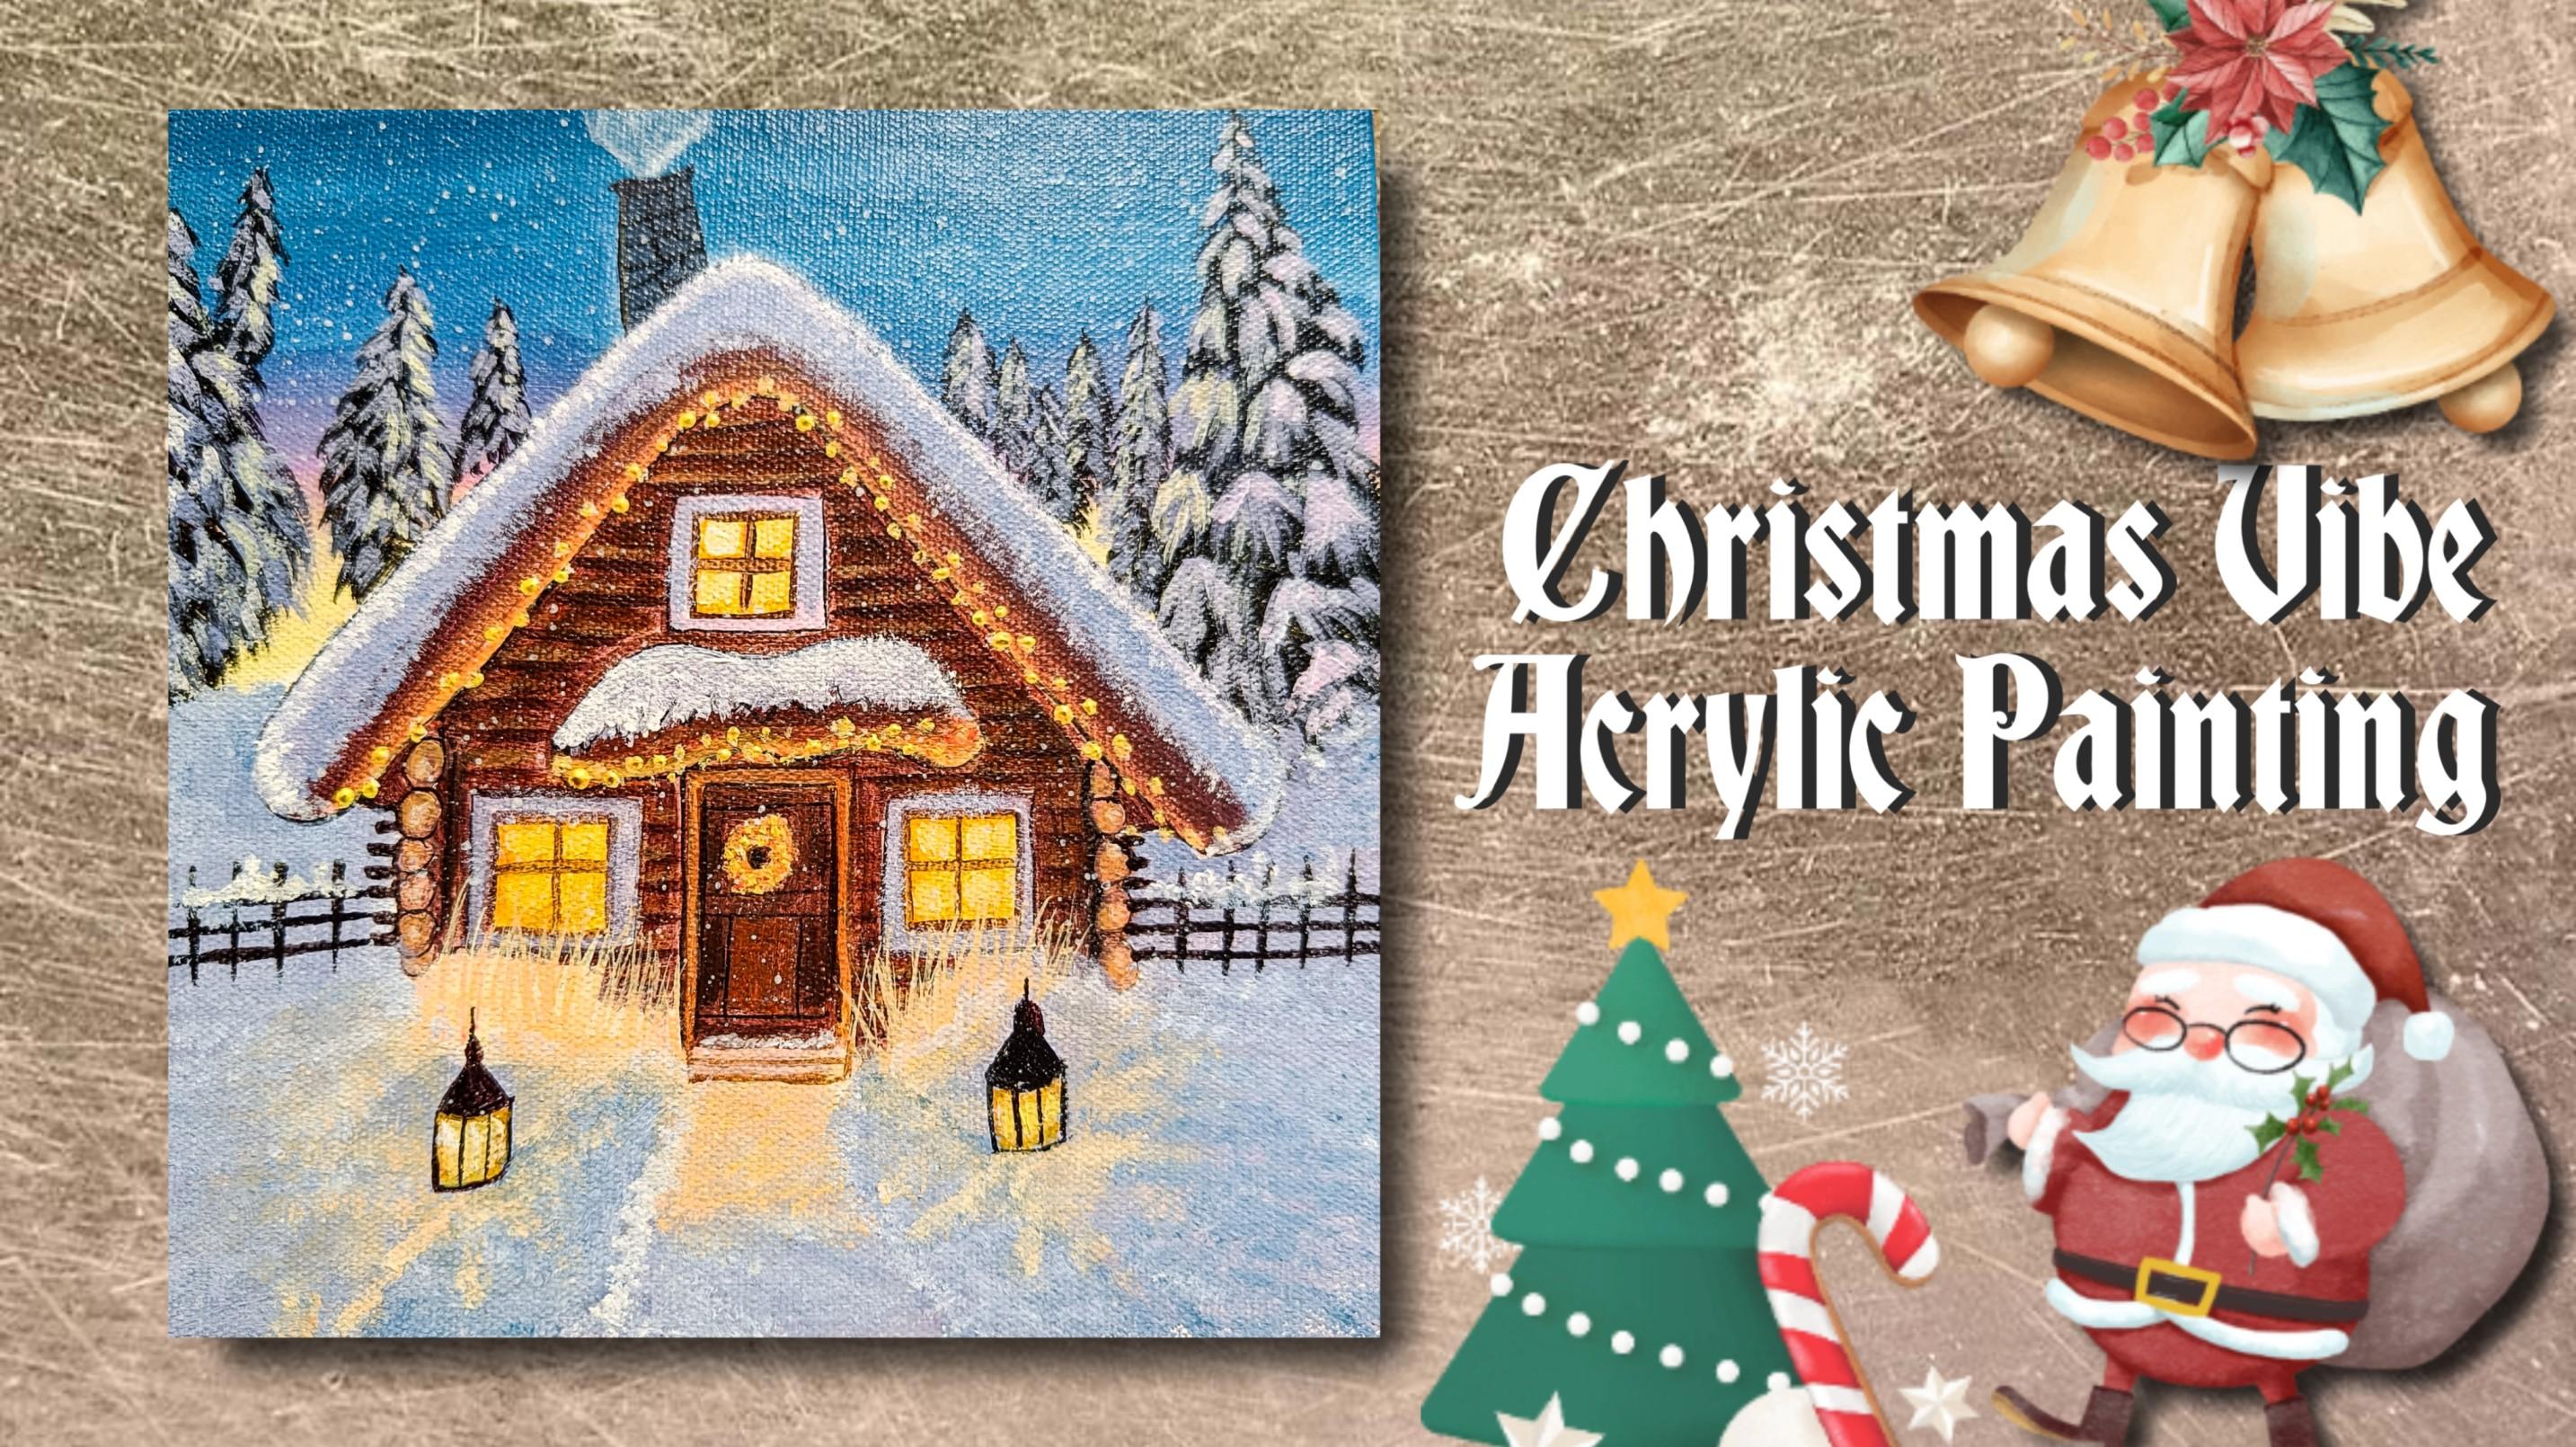
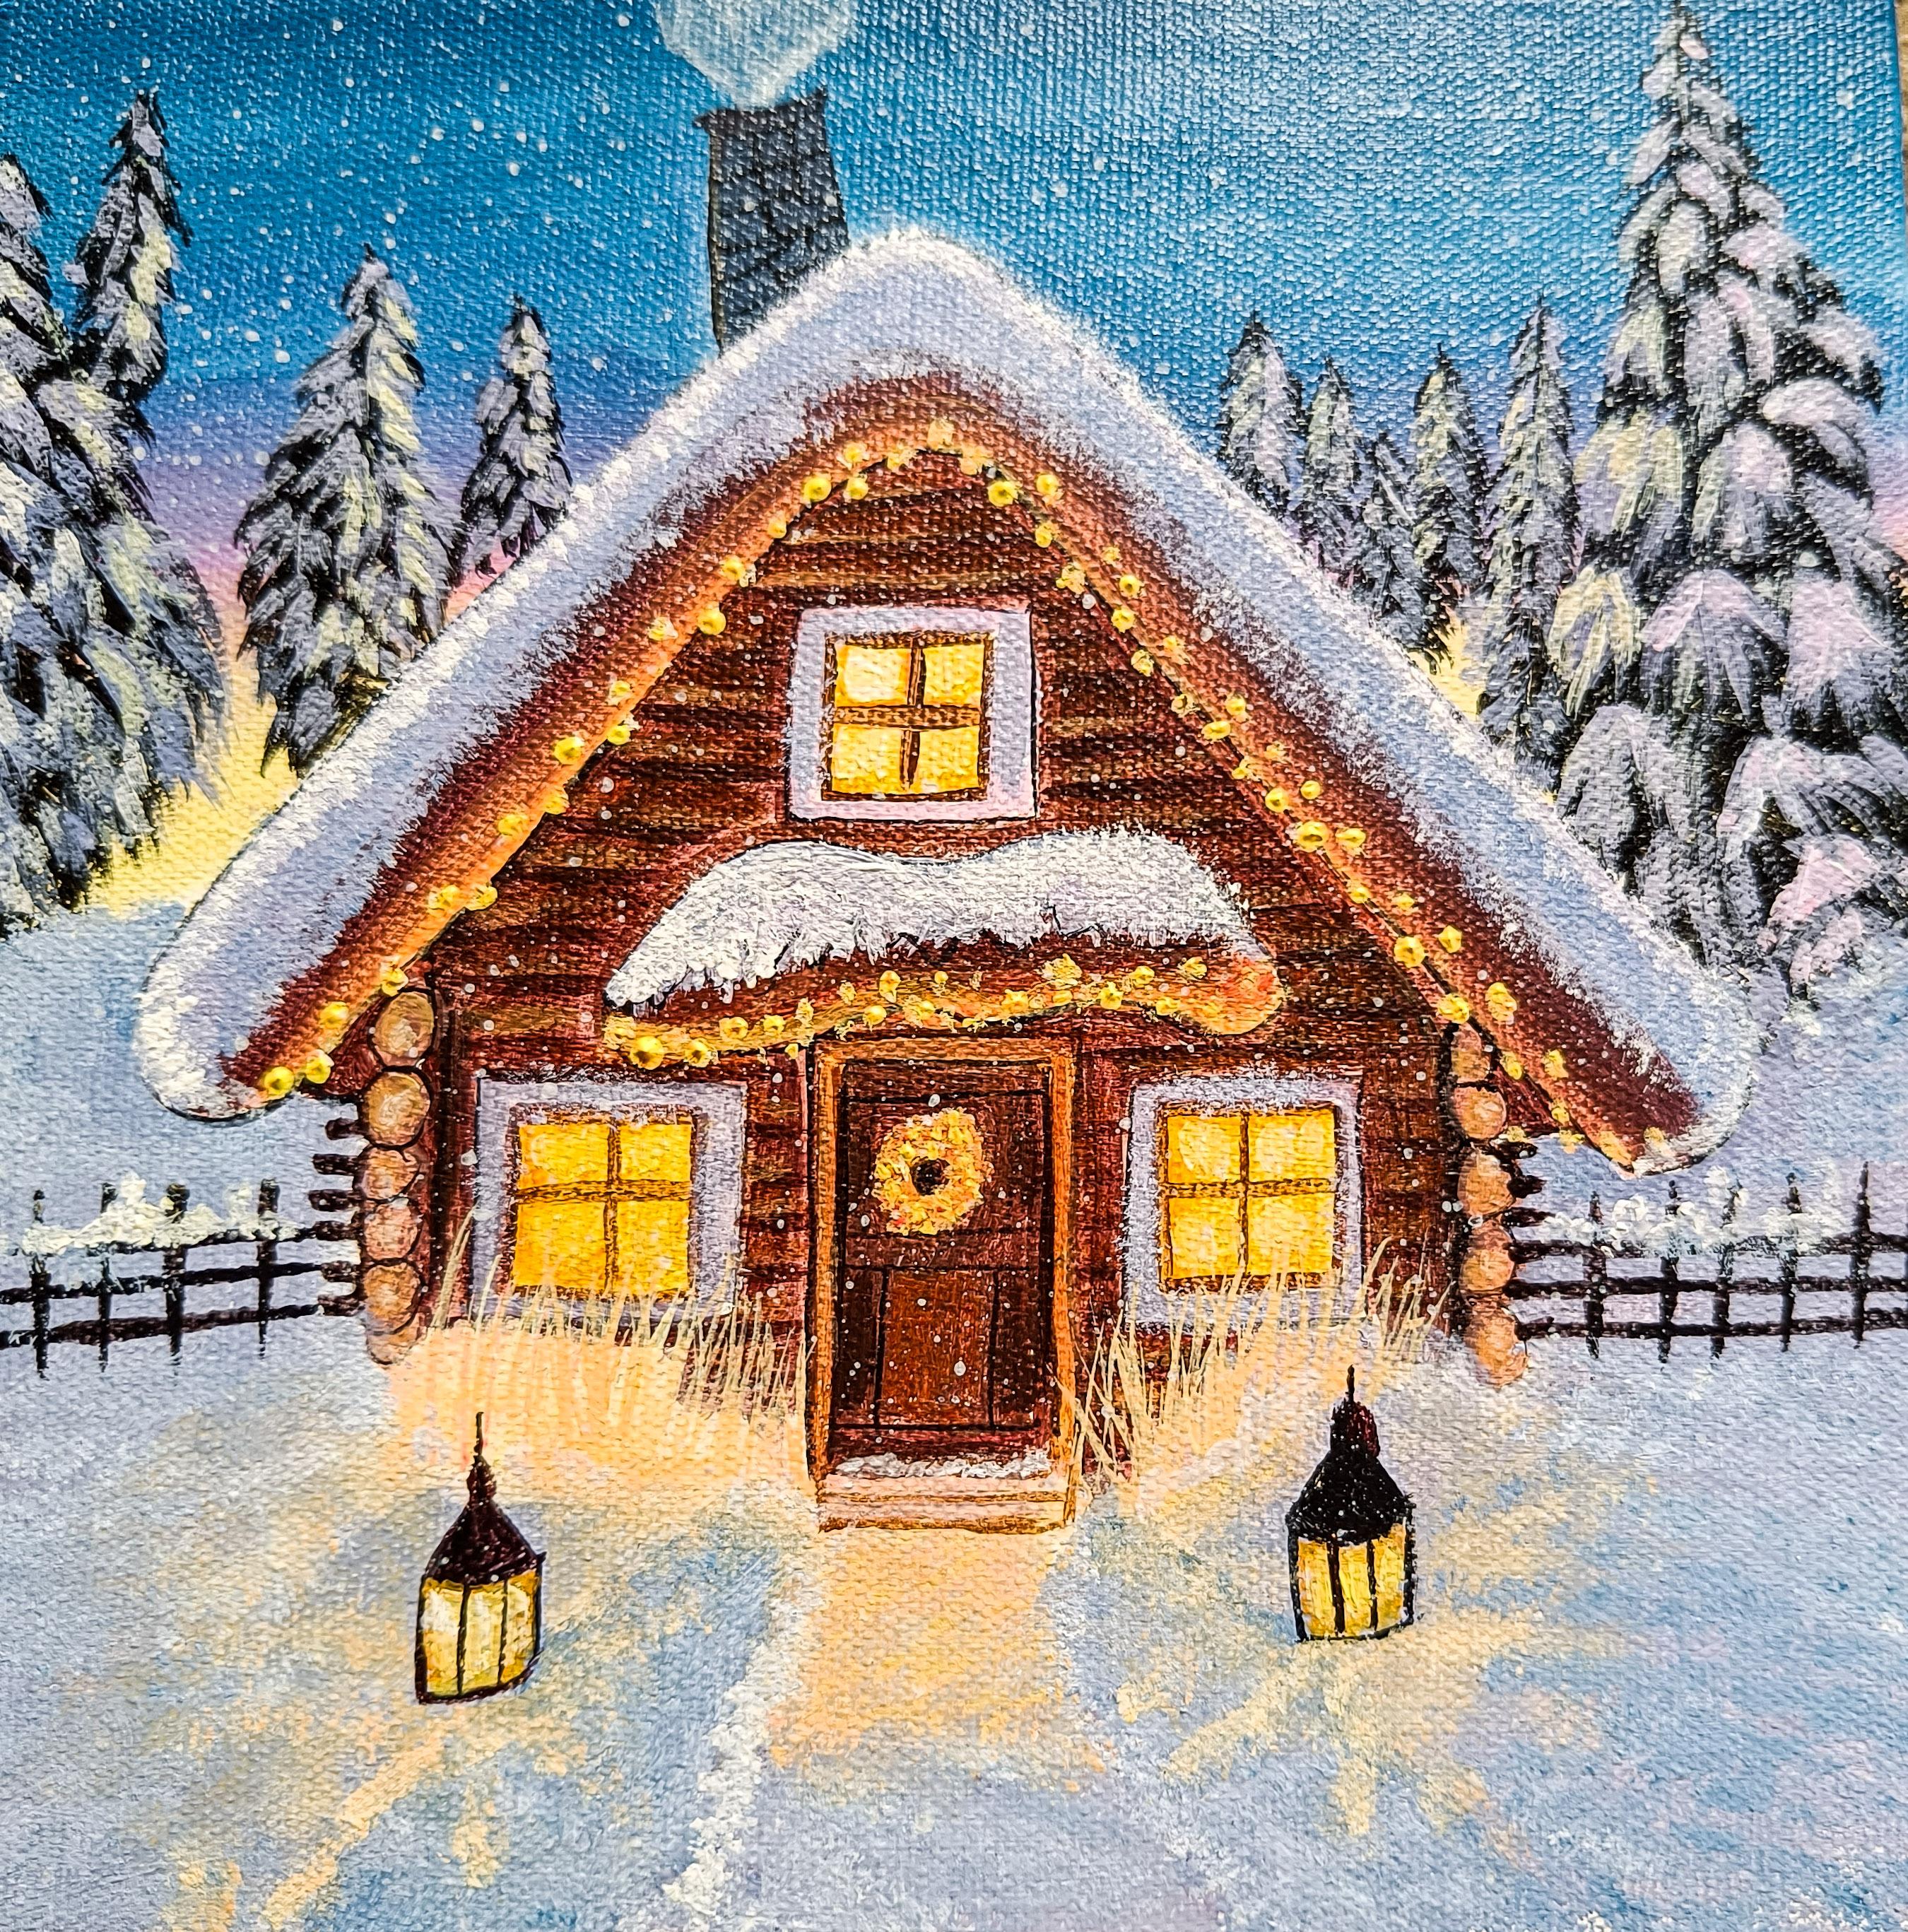
we will be painting this beautiful Christmas
vibe painting. We'll start with first the
blocking of the background. Simple blocking, then
comes the tree shaping, then giving textures to the
tree, the snowy effect. Then comes the whole
hut detailing, the whole hut blocking, how the rooftop is splended, each and everything, small, small details, how the
highlights are made. Each and everything
we'll do from scratch. Very small, small
details are these. Then comes giving
effect to these lines. Then the snowy effect on the
rooftop to the land area, then giving textures of light and the snowy
effect finally. So without wasting the time, let's start the Christmas magic.
2. Materials Required: So this is the painting
which we will be doing. So let's first discuss
about the material. So this is the canvas
which I'm using here. This is almost ten
by ten inch canvas, and it is acid free, triple primed canvas, and it
has a stand also with this. So it is a stretched canvas
which I'm using here. You can use any
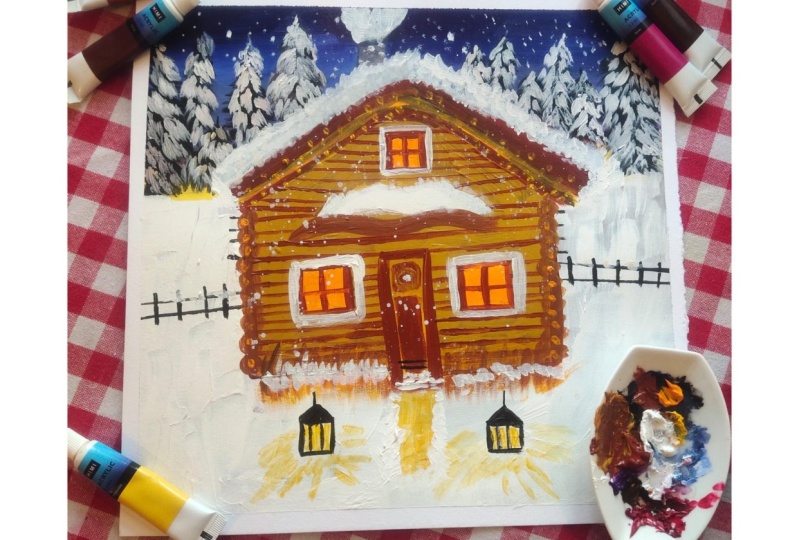
canvas of any brand. Prime it at least two times. Then these are the colors of different different
brands, some Camelin, some Windsor and Newton, and some Brustoiffent
different brands I'm using here for this. And you can see how the colors
are all these colors we will be using for this painting. So all these colors, I will be explaining in details when we will
start with painting. So for the sky, I'm mostly
using Prussian blue, which is the mixed with white. Then a little bit of
pinkish and purplish shade, and the yellowish shade is there everywhere where I have used
the lemon yellow color, then violet and white
and Prussian blue for this snowy effect which
I have applied over here. Then this Azaren crimson is for the house that I
have mixed with brown. To create a brown effect. All these color
mixings I will be telling you each
and every detail. Again, lemon yellow
for these lights. So we'll start from
scratch, color mixing, everything in detail, we will learn in this class.
These are the colors. So black is, um this
is the camel brand, and different brands, you
can see here are these. These again, the camel brand. That is the edgety one. This
is the normal camel brand. So all these are the brands. Now, let's talk
about the brushes. So these are flat brushes which I'm using here.
There are two sizes. One is big and one is
small size. For blocking. So mostly for blocking, I will be using the brushes. This is the round
brush of size two, very small size brush. Again, another round brush. This is the Bristol fan
brush, which I'm using here, and then comes the rigor
brush or liner brush, you can say, and this is
a flat bristol brush. So you can see there
are two Bristol brushes and rest are the
synthetic brushes. So these two brushes we'll be using for
creating textures, rest for just filling it. And apart from this, we
need the water container, at least two water jars, one for dirty water,
and one for clean. Then the tissue. Then
comes the palette. Use class palette. It would be preferred because
it doesn't sticks. So yes. So let's start with this
beautiful painting.
3. Background Blocking: Hello, all, and welcome
to this new class. So this is the sketch which
I have already drawn. So I'll share this image, this sketch image on the reference node so that
you can just draw it. And we'll start with painting. So these are the colors
which I have taken. This is blue, white, then violet, pink, and yellow. This is hot pink,
which I have taken, and yellow is the
cadmium yellow. So let's start first with the background with
my flat brush, and let's dip the brush in water and we'll directly
take the colors. So first color
which I'm going to take is the Prussian blue. This is Prussian blue, which we'll be using here and a little amount of
white to this Prussian blue. And we'll start from top. So slowly just I'm covering the background first and
then we'll do the house. So it's a kind of
Christmas house which is fully
decorated with lights. So this is a theme,
and it's snowy night. So the snow is also falling
and the trees are filled with snow something like
that, we'll be painting. So I'm just first
blocking the sky first. That's why I've used here the Prussian blue because
I want the night sky. So I've just filled this
area up with this color, wash off my brush, and then again, take
a little more of this color and
little lighter color than the one which is above. And I'm just blocking
it carefully. Even if a little bit of color goes inside this whole drawing, it's perfectly fine because we can always
overdo an acrylics. So I'll just mix a little
bit of violet in this. And a little bit of white, and we'll move downward. So as we are going downward, it will be violet, then a
little pinkish and then yellow. So the whole background
sky will be like this. It's actually a sunset time, which is there where the sunset is happening and
there is yellow light below. So it's about to that you can say it's evening time when
the sun is about to set. So just wash off my brush, and then I will use
the lighter color. So a little bit brush
marks is there. It's perfectly fine because
we are just doing first coat. So just mixing pink,
hot pink, violet, and white and very light
color I have made. Now, you can see here
blending is not happening properly because the
color has already dried. So whenever we have to
do the blending part, the color has to be wet. Now, here the color is wet, but the other side, the
color was dried up. So it's okay, but when we
proceed to the second coat, we will make sure that both the colors are
wet when we are doing, especially the blending part. Now mixing this lemon
yellow and white mix and blocking the lower part. Now, since my pink is wet, so it can easily blend
with this yellow. Just adding this yellow color below and blending it with pink. I'll not take this
yellow towards blue because whenever
yellow mixes with blue, it turns into green. This is whole
background painting. We'll wait for it to dry and then we'll apply
the second coat. Before that, let's do the lower part dry it's
drying the above part. Every time whenever we are
doing the second coat, wait for the first coat to dry, then only apply the second coat. Otherwise, your whole
background will get ruined. Now I'll do the lower part here, which has a shiny
part above with yellow and a little
bit of the snowy part, which is shining yellow, and then the purplish color. Here I'm using my
round brush first. I'm first making the
nice lavender color with mix of blue,
pink, and violet. And I will first cover the middle part, which
is the lower part. So you can see I'm just
covering the lower part first with my round brush. You can use your
flat brush also. It's not compulsory
that you have to use your round brush only. You can use any brush, whichever brush you feel
like you can use it. So just filling this area
which is in the center, this is actually the
pathway which is there, which is filled with snow and there is a light
which is reflecting. That's why that above
area is with yellow. Now I will take this
yellow and white mix, and I will just
apply it on the top. Now, in order to blend
these two colors, just mix it in a circular
motion in between them. Just wash off your brush, remove excess of water, and then just blend
the colors slowly. So this is just the first
coat which we have done. Even if a little bit of
brush marks are there, it's perfectly fine because we'll always do the second coat. Okay? So now this is done. I think the background
has also dried up, so we can apply second coat. So let's apply second
coat on the above part. So same color we
will be using here, the Prussian blue,
than the pink color, then the yellow color. So similar colors.
Not much difference. We can lighten the
colors if we want. But similar colors we are using. Just for the blue
color, dark color. But here also, I
have mixed white because white makes
the color more opaque. Even if little colors go inside the sketch, it's
completely fine. So just enjoy the process and
do it with very light hand. Don't press your brush. Otherwise, we'll
create brush marks. So this is the first
side which I'm doing, then I'll do the next side. So I'm just washing
off my brush, grabbing this pink and violet
mix a little bit of white. Now, here this blue is wet, so now it can easily blend
with this blue color. So that's why we have to keep in mind that both the
colors are wet, then only we will be able
to blend the colors. So now we will be doing the lower part, that
is the yellow part. Every time whenever you are
taking different colors, wash off your brush nicely. It's very important to wash
your brush before using, especially the light color. Now, you can see here
there is a patch, which has come up because the
color was not fully dried. So if the color is not dry, this patch comes. But it's okay. We'll be creating tree over
here, so it will be covered. So just covering this part again for this part I have done, so just covering the other side. Just slowly, slowly do the
coloring and just remember that second coat should be done when your first
coat has dried up. Don't use it on wet
or semi wet coating. Otherwise, same thing will happen which has happened here. So you have to be very careful when you are
applying the second coat. You can see nicely I'm just
trying to blend the colors. Tuck and washing off my brush, grabbing this yellow
and white mix, and just filling this area with this color and simultaneously
blending the colors. So this is the whole
background which we have done. And now we will be doing
the tree detailing. So let's start with that.
4. Tree Painting: Welcome back. So now let's start creating the trees first. So here I will be using
directly black color to create the trees because here we cannot draw anything
with pencil. But if you want
to draw it first, then you can draw with your
watercolor pencils or chalk, and then you can just
do the coloring. Now I've just taken
my rigor brush just making the
color little fluid, this black color, and then I'll start drawing
the tree lines. So first, I will draw the lines where I
want the tree to be. So there are lots of
pine trees behind, which is there and fully
loaded with the snow. That's how we are going
to create the whole tree. So this is just the
line which I have just created where I will be
just painting the trees. Similarly, I will be creating the lines on the
other side also. Just creating some lines where I will be
creating some trees. It's a little smaller, bigger, of different
different sizes. So here, actually
the tree is half, so I'll just be depicting it half so I'm not drawing
any line over here. So two lines I have
drawn to the other side. Now, with my round brush, I will be creating
some textures, mixing a little
blue in this black. I don't want perfect black. So that's why I mixed a
little blue in this black. And then starting from the top, we'll start creating
some nice tree lines. So just giving first
the shape of the tree. It's just the rough
diagonal and curvy lines which I'm creating, thick lines. It is not also thin. I want
to cover the entire thing in, like, a triangle shape. So that's how I will be
covering this entire thing. It is a huge pick
and a thick tree, which I want to
create over here, something like this, thick tree, which is till the down. And I will fill all of these
areas with this brush lines. So you can see all curvy lines
I'm just trying to create. And I'm just filling
this entire space. I'm not keeping anything empty, just filling it with
perfectly black and blue mix. Here, you don't have to
bother about what strokes. Just the curvy strokes, you can see in the downward
direction it is there. And with similar colors. So just enjoy the process and try to do with your
round brush this thing. Little thicker round brush
like two or four size. Don't use very thin brush. Otherwise, it will take a lot of time to create these shapes. So take a two or four
size round brush depending upon the size of your canvas and it all depends upon the size of the canvas which
you're using. If you're using a
bigger size canvas, you need bigger brushes, and if you're using
smaller size canvas, you need smaller brushes. So on this canvas, I'm using like eight
by eight inch, so I'm not using
very big brushes. These are normal size brushes. So depending upon your
size of the canvas, you have to choose your
brushes and make sure whenever you are
painting on a canvas, you should prime it at
least two, three times. Then only use that canvas. And just making it till the down because I want the tree to be
very thick and fluffy tree. And similarly, I will be creating all other
trees as well. This is the main big tree
which I'm creating here. And the other side also,
there is a quite big tree. So this is the main tree
which is looking very thick and full of,
like, black thing. And then we'll create the snow. Black we have created because we have to
create snow over here. That's why I've covered this
area totally with black. And this is a sunset time. So we mostly see the trees
in a blackish color. So that's why I painted
this in black colour. So if you want to represent
some smaller trees, so you have to make
it more smaller. Smaller trees means they
are very far distance. That's why they are
smaller in size. It doesn't mean that
these trees are small. It means they are
very far distance. So again, just
creating these trees, these lines and making the lines in the downward
curvy direction. So one more tree,
I'll create over here because there are lots
of gaps in between. So I'll try to create one more. And first, let's
create that one. So one more tree I'll
create over there and little bigger lines
I'm just trying to create. So you can see I've just filled this area with lots of trees. Now to the other side also, I will be doing the
same thing with different sizes of
trees, I'll be creating. So here also small bigger size, different different sizes of trees we will see
at least three, four trees I'll try to add. So always try to use
milky color over here. Don't use very thick color. Try to use milky color. Then only that proper
value will come up. And don't use very liquid color. Otherwise, this black color
will become gray color. So don't use too much
water on your color. Water should only
be on your brush. That's it. So you can see here I'm just
reflecting half of the tree. So that's why I'm creating
half of the tree lines. And one more tree
I'll create here, making a little
bigger tree lines of this side tree because I want this tree to be
very big and thick. We'll add one more
tree which is behind this tree and we'll try
to create that also. Just taking this again, this black color and mix of blue and one more tree which
is behind this tree. Just the upper part
is reflecting. This is all the tree formations which we have done over here. Now we will be adding some more details to it.
Let's start with that.
5. Tree Detailing: Hello all. Welcome back. So let's start with more
detailing of these trees. So I'm just taking my
rigor brush and giving a little more details and shape to these trees
with same color, which we have used earlier. So just giving a little
shape to these trees, a little more pointed shape so that it looks a
little pointed from top. A little bit details on
the sides of the trees. Small small details are required because when we
will be creating snow, there should be a light, sorry, dark background, then only
that snow effect will come up. Otherwise, that snow
will not be visible. That's why we are creating
a dark background. Whenever we do any
painting in acrylic, try to always see first
the darkest color which is there and then go for the lighter and
then more lighter. This is like we do the
layering of the colors. Here the darkest color
is bluish black color, so that's why I'm
using here this color. Then I will start
adding the snow effect. So I'm first giving the shape
to all the trees first, and then I'll start
adding the details. So one more tree I'm adding over here because it is looking
like a blank space. So I'm just adding it over here. So a little more shapes
to all these trees. Try to use rigor brush whenever you are creating
some small, small details. Rigor brushes are
very good brushes and very effective brushes, and it creates a magical beauty when you use these brushes. It comes into a variety of
sizes like two by zero, three by zero, zero,
seven by zero. The number of sizes. So as the number increases, the size of the brush
becomes more thin. So now I'm taking
my round brush, and I will just take white because my white
has got finished. So I'll just take
more of white in this and then we'll start
creating the snowy effect. This is a different type
of pine tree which I have created that snow thing
is all filled up there. So again, the round brush, mixing this pink and this
violet color together, and a little bit of
this Prussian blue to make it a little
lavender shade color. So I don't want a
perfect lavender. There should be a touch of blue, then only that snow
effect will come up. And I don't want it to be
completely white also. So the first layer
which the color, it should be, bluish
violet color. It should be like that with
a tint of pink added to it. So you can see I'm
just creating first, the shapes of the snow
with this round brush. Giving a nice thick, snowy effect to these trees. So you can see I'm
just creating in the downward direction like
the leaves are frozen. Tick texture, falling. This will add really the
depth to these trees. And of course, we will
be doing one more layering to these textures. But first, this color. So you can see, I'm just
making some textures like a petal shape in different
different directions. So in middle, some
inside, some other side. So likewise, we have to create the whole feathery texture of the snow So in most of the
things in all these trees, we will be repeating
the same process. So just take little
little color. Don't take too much
color on your brush, and water should only be
on your brush. That's it. Not too much water is
required over here. So only water on your brush, grab the colors and create
these types of textures. So you can see why I have
put this black color behind so that it gives a nice value to
this lighter color. Otherwise, that shape
would have not come up if you have not put black behind. That is black and bluish color. Just slowly adding all these
textures of the trees, and now we will move towards
the other one as well. You can see how I have
created this first tree. Similarly, we will be doing
the other one as well. So very small small textures
in these smaller trees. So just add, again, the same color and not too much color should
be there on your brush, and it should be thick, not too much thick color also. Just water should be there
on your brush. That's it. And just grab the colors, mix little amount and
do the texture thing. So all these trees which
are behind will be doing the same similar textures. So just enjoy the process. No. So I can see similar textures, I'm applying to the
other side as well. So in the middle,
some in the side, some in the center,
some in the other side. So different
different directions create a little depth
to these trees. It looks like the tree is, like, in three D shape. So that's why this depth in different directions
that snow effect looks like a three D effect. So that's why I'm applying
into all the directions. Now, these two trees also, we'll be doing the
same technique. So as we go down, try to make these
textures a little bigger because when
it comes down, the shape of the trees
becomes a little bigger. So try to make these shapes
a little bigger in size. So this first layer
is almost done. This first layer of the texture. We'll be doing the
next layer also. So first, we have to
complete this entire thing, and then we'll start with the
next layering on the trees.
6. Roof Painting: Welcome back. So let's
start with more detailing, more layering of this color. So I'm just adding more
white to the same color because I want to create a
more effect of the snow. So just adding a little
little of textures of white with a mix of this
color on top of it. Wherever I've created
those shapes, I'm just adding on top of
it these lighter colors. So not filling entirely
just adding on top of it. Now, this adds a little
depth to the snow effect. Now, adding little yellow
and white to this side to give a depth of
this sunset effect, which is falling on the tree. That's why I've added here a little yellow towards this side. So a little yellowish effect of the snow is being
reflected this side. If you will follow
each and every step, whatever I have given
I'm doing over here, you will definitely be creating a very beautiful and
vibrant Christmas vibe. So just adding, again, this yellowish white
texture to all the trees. Just a few little
here and there. Now, similarly, I will be
doing the other side as well. So other side, I will be using this white color a little bit of yellowish
mix to one side, and to the other side, I will be adding the same white
and bluish color. It's just adding
to one side first. All these small small details play a very important
role in creating the vibrant effect to the painting and the
side more of white. So whenever you add
these textures, don't fill the entire thing, add it on the top
of the snow effect. Just on the top. That's it. Now I'm just adding
more whitish texture on top, more white. Means the color should
be more lighter than the color which
you have used earlier. Either you can just
use completely white if you have
used a lighter color. So here also, I'll be
creating some white textures. His taking little yellow. So just washing off
my brush first and this line is there which I
will be creating throughout. First, I will take this
white and yellow color first I'll draw the lines just adjacent to the area
which is there, the line which is the hut above area, drawing
the line here, just to give an
idea that this is the area where we have
to create the effect. Also just drawing this line, just to give an idea
that we have to cover this area completely
with the different color. Now, use your liner brush for this and make the
color a little fluid, then only you will be able
to create a nice, fine line. Don't use thick color. Try to use very thin color. Thin colour in the sense that it should not be a milky color, it should be a fluid color. If it is a milky color, it will create thick line. If it is a fluid color, it will create nice lines. So now let's start
filling the colors first. So just making the
same snowy effect of the color to the above side. Just above first because there's a snowy area
which is covered. So that's why I'm
covering that above part with the snowy
texture color. Okay. Now, here I'm
using my round brush. You can use your flat brush
also for covering this part. It's up to you what
brush you want to use. I'm not covering
the entire thing, just a half of this
base that is covered, which we will reflect
like a snowy effect. Similarly, on the
other side as well, I'm just covering
the entire thing. Where you can see half of the one side and
other half also, I will be covering with this
snowy color which is there. Which is a mix of blue, pink, and violet and white. These are the colors which are mixed to create this color. Now here, the lower base
of the color which I will be using over here is different color which I
have not I think taken out. You can use burnt sienna. And if you don't
have burnt sienna, you can use the Azarin crimson with a mix of black
and yellow to get that burn sienna color. So since this color
has dried up, so I'll try to use this crimson, that is Alazarin crimson. And I'll just take
Alazarin crimson, and we will mix these colors, and we'll see how the colors that burn sienna
color is formed. So I'm just taking this
Alazarin crimson here. And this color, I
will mix it with the black and yellow color
to make burn sienna. Now, you can see I'm just
mixing these two colors first black and Elazarin crimson and yellow color to create
a nice burn sienna color. It gives a very nice color of the burned sienna if you
mix all these three colors. Don't mix too much yellow. Otherwise, it will turn
towards the yellowish side. Mix like and black also
should be very less, otherwise, again, if
the black is too much, it will turn the entire
thing into black. So here I am not mixing
the colors, you can see, because the upper color
has already dried, so I'm not trying to
blend the colors. And if your color is
wet, the upper color, that is the snow color,
then you can blend this. But if it is not wet,
leave it like that, just give a nice shape
to this base area, which is the upper
house ceiling area. Covering it nicely.
With this color. And then I'm just
leaving a little area. I'm not fully covering
this with this color. Little bit area I
have left below, which I will be doing
with orange color, which I will make it with
pink and yellow mix. So I'll wash off my brush, grab my pink and yellow color. So this is hot pink,
which I'm using here. So try to use hot pink. Then only you will get
a very nice effect. So now just adding this color to this and you can see how bright
this color is coming up. And if you have this
fluorescent orange, you can use fluorescent orange directly instead of
mixing these two colors. So you can see how nicely this, this vibrancy of the
color is coming up. Here you can also use
cadmium orange as well, cadmium orange and
a little bit of yellow mix to give this effect. So you can see the brightness.
7. House Blocking: Welcome back. So now let's
start filling the below area. So same color again, this crimson, Alazaron crimson, black and yellow mix. Same color which we have
applied in the second one. Same color we will
be using here. And here, again, I'm
using my round brush for filling because it will be easy for me to fill
these entire area. So there are some
corners as well. So if you will use flat brush, you'll not be able to
paint it correctly. So try to use this
um Round brush only for filling up all
these small, small areas. So it is easy to make lines with this pointed round brush, especially to the windows
and to the doors. You can easily
make proper lines, and then you can
fill the colors. So just filling the colors
with this round brush, use the brush size according
to the size of your canvas. So size I won't be telling, because every person uses
different different sizes. So according to the
size of your canvas, choose your size of the brush. So just filling it. I'm not bothered yet
about the smoothing of the perfect finish
of the background. I'm just filling the colors, giving the first shape of this corner and little
darker color to the sides. I'm adding. And then
the same similar color. Just to the sides, I'm adding a little
darker color so give a nice projection of the
above and the lower base. And just filling it nicely. So fill it slowly because we have already
drawn everything, and then we are starting with
the filling of the colors. So try to use your round
brush and do it slowly. So whenever we are
creating any paintings, which is a little
intermediate form, it takes a little bit of time. So enjoy this painting, and I'm sure you
will love it when it is completely finished. So already this background, the trees are already
looking very beautiful, and I'm sure you will
love it when you will do the entire painting. It's a perfect
Christmas vibe that how the houses are
decorated and that winter beauty adds beauty
to this Christmas season. So just, enjoy the process
of filling the colors. I have never been to
such places where, which I have shown you here,
which I've painted here. I've just seen in the images. I must you must have seen it
and you must have felt it. So I have never felt it, but I love to feel
it when time comes. So just filled with snow. I really enjoy looking at
the palm trees especially. So palm trees also, sorry, not palm
trees, pine trees. So these are not palm trees.
These are pine trees. So yes, so pine trees
filled with snow, it looks really beautiful. Here we can in India, we can see only in Kashmir. I don't think anywhere else
we can see this in India. Especially in Kashmir, this
type of scene can be seen. So I'm just filling it up
with especially the sides, I'm filling it with dark and the middle area with
the same color. So slowly, slowly, I'm just
filling the entire thing, and then we'll start filling the windows and the
doors and everything. So here, don't bother about the brush marks and everything. It's fine because we will
be doing detailing here. So once we'll do the detailing, all these things
will be removed. So don't worry about
the brush marks, fill in the colors
in any direction. Can see already it is looking so bright when we are
mixing these colors. So if you have burn sienna, you can directly use burn
sienna and if you don't have, you can just mix these colors. So this is the whole background
thing which we have done. Now we'll color these things with yellow and a little
bit of white mix I have done over here and covering this wood shapes which
are in a circle of form. Just covering those circles
on both the sides m. So mostly the blocking of the background
house we have done, and then we'll start doing more detailing of this because there are lots of detailings
in this house, which has to be done to create the perfect brightness and
Christmas wipe to this house. Adding a little more
yellow and giving a little more yellowish
texture to this. Uh
8. Window Painting: Hello, friends. Welcome back. So this is a fresh palette
which I have taken here, as you can see, same colors
which we have used earlier. These are all same colors. Apart from that, one more
color we will be using is the Indian yellow
for these windows. So if you don't
have Indian yellow, you can use cadmium yellow.
That will also work. So taking out this
Indian yellow, and we'll start first
painting the windows, especially the center one and the lower part of this also. So let's start with
first the blocking. Again, I'm using my round brush, small size round brush, and this Indian yellow, and I'm just filling this
inside part of the window. The inside part I'm filling, and then we will do
further detailing of this. So once this inside
part is filled, I'll just taking this
lemon yellow and white mix and putting it in the center to make it a little
more brighter. So a little bit in the center, then taking just white to
make it more brighter. So this is how we
do the layering, especially inside
the window part. So similarly, we will be doing
the other windows as well. So let's first take
this yellow and, uh this pink mix and just
outlining it in the center, just a cross line. And then after that, I will
take a little bit more of this crimson and black mix
to make a little more of a brownish shade and creating
the lines in the center again because I want a
little darker shade to be. So that's why I have
added little black and this lazarin crimson and also to the outer lines
also similar color. This is actually the
base of the window, which is dark in color. So you can use your round brush or if you feel difficulty
in doing with round brush, you can use your rigor
brush also or size zero round brush for doing all
these small small details. Now, I'm just mixing
a little white. And again, the similar colors
that is yellow and pink. And I'm doing the outer area, which is there a little
snowy effect, it should be. But this is not a
color which is coming, so I'll just wash off
my brush and take this violet and white and
a little bit of hot pink, and then I'll do
the outside part. Just covering this outside
part with this color, like a snow color it
is covered with snow. So do it slowly and
within the boundary, and then we'll draw the
outline with black later. So just filling this outer gap which is there in the window. Similarly, we will be doing the rest of these
windows as well. Let's first start
with this part. And this also is
covered with snow. So that's why I'm
taking Priscian, then this violet mix. And just covering the upper
part, especially with snow. And again, the lower part
like we did the ceiling part. Similarly, we'll
do this part also, which is the upper
head of the door. So just making for
the snow part, mixing all the colors
a little darker color. So just taking a little water and I'm just trying
to blend this color. Sometimes we only need a damp
brush to blend the colors. Now, mixing this whole
Azarin black and yellow mix to create this nice brown color that is burnt sienna color. And I'll cover
this lower portion of this shade which is there. So just covering this part. So currently, I'm not
bothered about too much of blending because this is the
first coat which I'm doing. So when I'll do the second coat, I will try to do the little more blending
of these colors. Now making orange color and applying it in the
lower portion. Like we did on the upper
part of this house. Similarly, I'm doing
this lower part also. Similar colors are these. So now let's do blending these two colors together with a sucklm motion
of the brush. Currently, it's not
blended perfectly, but it's fine because we
have done just one blocking, we will do further detailing, then these all things
will be covered. So now let's do this window. Same thing we have to do what we have done
on the upper part. First, we'll fill the
color with Indian yellow, and then we'll do more
detailing in this. H so every time I mostly
use this round brush, small size round brush, and flat brush is used mostly in these types of paintings. So if you have round brush and flat brush of
different sizes, you can do any painting,
whatever you feel like. It's just a size of brush
and the canvas matters, that what size of
canvas you have. So slowly, slowly, I'm just filling up
these whole things. Now in this I'm first
outlining the area, and then I will fill
the colors inside. So we actually have
to make a very bright looking filled with
all lights and everything. That's why I'm trying
to make it a little more bright because in festive season we
decorate our houses with lots of lights
and bright colours. That's why I want this house to look like a very
bright and festive. So I've just outlined it. Now we will do the
detailing inside this with lighter colors. See how it's looking. Now we will be doing the
outer part of this window, which we have done above also. Similar colors of the snow that the outer part
of the window, which is the outer
shade of the window, it's filled with snow. That's why I'm using
here, the snow color. So this is the whole thing. Currently, I'm not looking for outlining it in the last
section we will do. I'm just filling the colors
and doing the detailing. Later on, we can
do the outlining.
9. Wall Texture: Welcome back. So now let's start further with
more detailing. So now we will be doing
some textures in this part, which is the outside
area of the house. So again, I'm using the same
brush with Alazarin crimson, black mix, and this yellow mix. So initially here, first, I will be outlining, and it should be a
little darker color than the color which you
have used as the base. So if you'll mix a
little more black, then that color will come up. It should not be
completely black, but yes, it should be a darker
color than the color which you have used as the
base color of the house. So I'm just creating the
horizontal lines, thick lines. I'm not making it
very thin lines. It should be thick lines. To create a woody
effect of the house that these are the wood cutouts
which are in this shape. So like that type of
shape I'm trying to create over here
with my round brush. Here, also, you can use your rigor brush for
creating these lines. But with rigor brush, again, the lines will be very thin. That's why I have used here
a round brush of size too. So just filling this area which is there with the similar color that
is the darker color. And to the other side also, I will fill this
gap which is there. Now we will start doing the other side,
which is left out. So you can see how bright and beautiful already this house
is looking very pretty. Like feeling off the festive
vibe is coming up already. And now Will makes a
little bit of this yellow, and I'm just filling
up this color. Just filling this up. Now, here if you don't have Indian yellow, definitely, you can use
cadmium yellow over here. So if you have transparent
cadmium yellow, that will be much better. And if you don't
have transparent, like translucent site
of cadmium yellow, you can use cadmium yellow and add little water to that
to make it a little thin because we don't want a very thick color
of this yellow to be. Just adding this textures. Now, see, I'm just
taking this yellow. I'm mixing very little amount of this red to this and
just filling the gaps. So each and every area, which is in between,
I'm just filling it up. Now I will make a
little orange shade and I'll start creating
more lines to this. Now, to create more effect
to the whole lines, just adding the lines on
top of it, that's it. And not very thin lines.
It should be a thick line. Then only that lightness of
that colors will come up. It's looking like
that the lights are falling on these areas, these wood blocks
which are there. That's why this
effect I'm giving up. See how nicely the
whole background of this house is looking when we have added this
lighter color. Now let's do the
center part that is the area which is
above the door. Again, the lighter color, just fill it up
with light colour. And then the darker color And here I will try to give
the shape of the snow. So I'm first applying this color first and just trying to blend it with the lower
color which is there. So whenever you are
blending the color, try to mix it with
lighter colour. Try to blend it
with lighter color. It will be easy for
you to blend it. Now creating the
upper snowy effect, just taking this violet, white, and a little bit of
this prussian blue. And thick color here I will use. I'll not use very thin color and little lighter
color than the one which I have already
applied over here. Also giving a little
shape of this snow, which it look like that some
snows are falling like this. You must have seen that
snow when it is covered. It looks like they are falling like they're creating a
certain type of shape. So like that, I'm trying to
create this texture above and also a little snowy part
to the whole window area, which is the outer
area of the window. Very small small details matter over here when we are
doing such type of painting. Now here I'm just mixing
all these colors, and now we will be
doing the center part. Now, the center part, I want the color to be a little dark. But first, I will make it
outline it with the same color. The outer window part, which I'm doing over here. Now, if you want a darker color, always mix a little
more black to this, then only you'll
get a darker color. This is the shape of it and
just covering the area, leaving that circular red thing, which we'll do it later. But first, I'm just filling
up the whole door part. This door color is similar to the color which we
have created the line, so it is a little darker color. It's not light color. You can see I've just fill in this entire thing with
this darker color. Now the outer color, I will do with this light color, this outer shape which is there, the outer boundary of this door. Little bit of black
I'm mixing over here. I don't want a
very bright color. That's why I have mixed a
little black to that color. Covering the outer boundary of this door. You can see we have
already filled the colors. Now we will be doing
more of the detailing. So already we have done
the filling of the colors.
10. Snow Effect: Welcome back. So now let's
start with further detailing. I'm just making the
snowy effect of this color and a little
more light color. I'm just trying to make it. And then the above part, which I will be blocking, it's like a dark bluish color. It's not completely bluish, a little bit of black
is more added to make it a more darker color. Creating first the shape above and just blocking
it with one color. Here also, I'm using
the same brush, that is the round
brush of size two. Now, the size here also depends upon the size of your
canvas which you are using. So I've just block in the
upper part and later on, we will do the detailing
once this has dried up. Now little more shape
to the above section, making it more pinkish. And then let's do the detailing below
first before starting the above detailing because we'll wait for it to dry and then we'll start
the detailing. So here with orange
pinkish color, I'm just dabbing the brush
and taking thick colour and creating this circular effect. Just thick color. Don't use too much water when
you're doing this shape. Now again, let's do
the further detailing. Again, taking this mix of
color which we have done, and I don't want it to be
a perfect black color. That's why I mix a little
bit of blue to this. And first, I will just outline the whole above chimney
which is there, and then I'll give the
shape of the brick. Just normal lines
which I'm trying to draw over here,
normal brick lines. I'll not do much
detailing of that. Because I don't
want the paint to be painting to be
very complicated. I want each and everyone
should be able to draw it. So just making the lines
like brick lines and just outlining this whole above
ceiling area which is there. Now, whenever you are
doing any outlining, try to use a very
milky, not milky. It should be a liquid color. Means add a little water to
it and then use this color. Otherwise, you will end
up creating thick lines. We don't want thick lines over
here. We want thin lines. That's why you add a little water to this
color and then use it. The outlining is done, then we will do the further
detailing of everything. So what I'm doing here is I'm just outlining the outer area of this window with a thin
line using my rigor brush. Now, outlining and
every boundary detailing should be done
with your rigor brush, and color should
be in liquid form. It should not be a
very thick color. If it is a thick color, you will end up
creating thick lines. Now, these types of paintings you can also create on cards. It will look very nice when you will gift someone like
this type of card. So I have done on canvas, but you can do it on paper and create it like a card and
you can gift it to anyone. So just outlining this
whole circular thing, each and every part
which I have colored, I'm just giving a
little outline to this. After that, we will do
the further detailing of this outlining of
this whole door area. Outlining it with
very thin line. And now let's create some a little bit more thin
lines to the inside part. So there are two
lines which is there, which is the boundary
of the door, actually. So just creating some
nice thin lines. And also making some
textures in the lines. Textures in the sense, this
is a door which has lines. So that's why I'm
creating these lines. So you can see I've
just added the lines. I will do more detailing
to the store part. But first, I'm just
outlining everything. Also a little more color I
will add to this portion with a mix of Azarin and yellow mix to make it a
little more brighter. Since this Indian yellow
color is thin, transparent. That's why it is not
creating much effect. It will always create a
little glazing effect to it. Glazing means you can
see the color of it. That's why it will create
a nice glazing effect. So that's why if you're
using cadmium yellow also, make it a little thin
and then use it if it is a opaque cadmium color. Now, just adding more
snowy effect to this part, taking thick color off white, and just adding some
normal textures above with my round brush. This texture you can
also add with fan brush, which I will show
you here as well. It makes the process very easy when you do with fan brush. Now, just a little smoke which is coming out of
this chimney, here, try to use dam brush with very little amount
of white colour and just create this smoky effect. That's it. And then just
taking this, again, this lighter color, mixing
little white and creating a little highlight to one side to give effect of these
lights which are there. Just adding a little
more this light color to this whole wood logs which
are there in a circular form, adding little white and giving it in the center, more
textures to this. Now, again, taking
this brownish color and a little bit of So later, we can create the outer edge
because we have to block in this whole grown thing also. So I'm making it a
little darker color, little darker into the sides. And now taking this nice
bright color of yellow. This is lemon yellow, which
I've taken and adding some nice thick
colors to this wth. Very small, small
details are there, which actually adds a lot
of beauty and textures to this entire this festive
painting, which you can say. So now we will create some textures on this
above snowy effect, which we'll show over here. So here I'm using
a damp fan brush, mixing it with
violet and white and just creating the above textures snowy textures with this brush. You always use damp brush. Don't use that wet brush. Dam brush means dip it in water, remove all the water
from your brush, and then use this
completely thick color and create this texture. Then you will see a perfect
texture will come up. So never use a wet brush when
you are creating textures, always use damp brush or dry brush for creating
such type of textures. So you can see how the
textures are being added. Here, I didn't blend the
colors, but with textures, it is automatically getting
like it is blended. So this adds the beauty
to this snow actually. I'll also add some
lighter effect on top of that roof it is
on the top of it. Also little textures to this window pane and
this upper shade area, which is there above the door. So you can see how the textures
looks when it is done.
11. Blocking Foreground: Welcome back. So now let's start with the
further detailing. So again, I'm just making that snowy color which
we have used above. And I'll start filling this
up in the lower portion. So using my round brush, I will try to fill in
the entire region below, which is the snow covered land. So just covering
each and everything. Whatever I have drawn,
I've just covered it, and later we can
draw it on above it. So this is the good thing
with acrylic that you can always overdo on top
of it once it get dry. So I'm just covering the entire thing below
with a similar color, which is the snow color which we have already made earlier. So here I am using my
round brush because I don't want a perfect finish
of this whole texture. It is okay if there
are brush marks, little bit here and there.
It's perfectly fine. So a little darker
color I'm making over here and a little bit of this pink also I'm adding and just filling in
this entire thing. Currently, I'm not bothered
about the textures, anything. I'm just filling and blocking all these
spaces which are there. And the one which
I have divided in the center in the two parts, that I will do with a
little darker color. So first I've just covered
this area till here. And the line which you can see the slanting line coming
in both the directions. So that I will do with
a little darker color. So I'm just mixing a
little more Priscian blue and just making this color a little darker and filling
it in a vertical direction. Oh making a little dark color more and trying to fill this portion in
a vertical direction. So it's very important how the
brush movements are there. And in this part, I'm
just moving it in a circular motion, the brushes. Now, again, the other part, similar color which I
have used the other side, and then I will start
doing same thing. Whatever we have
done, the other side, similar way we will be
doing this side as well. So just enjoy the
process of blocking. Little bit color variations may matter because every
time we mix the color, exact color does not get formed. So a little bit up and down, it's fine because somewhere the snow is dark,
somewhere it is light. So it's perfectly fine. So I'm making this middle part also a little light in color, filling this color above also. And then I will be doing a little more lighter
yellowish color. And don't take too much color on your brush when you
are blocking this up. Take a little less colors. Otherwise, it will be very difficult for you to
do all these blending. You must have seen how
much color I'm taking it, very little amount, and
water is only on my brush. Now, this part, again,
a little darker. You can see how this has
come up, this whole thing. And now we will be doing a little more of
this texture thing. So now let's do the part, which is a little more shiny. And a little more texture
I'll give to this whole part, which I'm just creating
here, the straight line, which is across the door,
little darker color, just a straight line with my flat brush to give
more shape to the door. And now I'm using
my textured brush, which is this texture brush
for creating some textures. So just taking a little
white over here, taking very little
amount of textures, and this is a flat texture brush which I'm using over here, as you can see, giving a complete raw white and
completely dry brush and giving a texture on the top. This texture you can also
give with your fan brush, that is the Bristol fan
brush which you have. But I prefer this brush,
flat Bristol brush, which I'm using here
to give the texture on the top to give a little
more highlight to this snow. You can see how bright
that line is looking, which is above the rooftop when we have added a
little white texture. Now here also, I'm adding little white texture
for the snowy effect. Just a little bit of textures. And here we have to
use thick color, but little little amount, and the brush has to be dry and the color you should not
mix any water in this. You should use a thick color. So now you can see how
bright that above and this whole bunch of this line is looking when
we have added white to it. A little bit more of the effect. Now I'm just mixing little
lemon yellow to this white and using my round brush and a little bit of pink
and just filling this area. This is actually a grass area. With the light, it is
getting reflected as yellow. So this grass area is
actually covered with snow and with the
light which is inside, it is getting reflected like
it is yellowish in colour. So that's why I have put over there first
the yellow color, yellow and white mix. This also I have covered with yellow and a little bit yellow
towards this side as well. So yellow, pink and white mix. So there should be
more amount of yellow. So you can see how bright
now it is looking. So just mixing it in
a circular motion. So once the base
color has dried, even if you apply yellow
color on top of this blue, it will not turn into green. And whenever you are doing
this type of technique, use less color on your brush. Now with my liner brush, I'll just use black
and just try to create your the lamp which is there. Lamp is there on both the sides. So I'm just drawing it with
my liner brush directly. You can draw with pencil and
then you can outline it. But if you're
comfortable drawing directly with black color, then of course, you
can draw it directly. So both the sides,
I will be drawing this type of lamp
which is there, and also I will show
the light which is falling on the snow, as you can see in the picture. Draw it slowly and if
some mistakes happen, suppose if you have not created, if you have created
thick lines of black. So how you can correct
it. It's simple. Once this has dried up, just apply a layer of
white colour once that white colour dries and then you can directly apply
the same color. So this is how we can correct
the mistake if it is there. So see, one side, I have created this
lamp, simple lamp. It is a square type of shape and triangle on the top with
a circle on the top. Very simple and basic
lamp here I've created. Similarly on the
other side also, I will be creating the
same type of lamp. So done, both the sides.
12. Foreground Detailing: Welcome back. So now
let's create the fences, which are on both the sides. So using my liner brush, or you can use your rigor
brush also or flat brush also. Any brush you can use
for creating the lines. So I've just mixed
all the colors. I don't want it to
be perfectly black. So that's why I've mixed all
the colors with a little of this red also that
is alzarin crimson. And I'm just creating some nice straight line and some nice vertical
line as well. So this is the easiest
way to create the lines. You can also use
your liner brush. There's no issue in
using liner brush. Either use liner
brushes or flat brush. But it is okay if it is not a very straight line because
these are all fences. So mostly the
fences are not very straight when you will
see in these areas. So these are not very straight
line, as you can see. Similarly, on the
other side also, I will be creating the fences, straight line and
vertical lines. So three horizontal lines
and some vertical lines. So very simple way of
creating these fences. So now let's start painting
the lamp area, put the lamps. So I'm just mixing this
yellow and pink together to make a light yellowish
and pinkish colour. And just putting all around. And to the sides, I will
be putting orangy color. So just a little bit more of
orange towards the sides. Or you can use this color
which is this Indian yellow, which I have used here that
also you can use because Indian yellow is similar to the orange color
which you can say, and try to blend both
the colors together. So I'm just trying to
blend the colors first. After that blending, I'll allow I'll just use
more of this yellow, that lemon yellow in
the center to make it more bright and a
little bit of white also. And I'll try too
much white it is. So just blending these
colors together. And here, also, I'm putting some white and blending the colors. Now you can see how bright
these lambs are looking. Now let's start with
the area which is above the area which
is above the lamb. These are all yellowish
area as you can see. So I'm just mixing
both white and yellow together to make some
nice grassy texture. So these grasses are
actually yellowish, white in color because these are mostly like the
snow grasses which are already covered
with snow and when this light yellow light is
falling on these grasses, so it is turning
the grasses into a little bit of more yellowish. So this effect I
wanted to show up. That's why I'm using this color. I've also mixed a little bit
of Indian yellow in this. Make the color a little fluid
and use your rigor brush for creating some nice
lines of grasses. So very thin lines in
different directions. I'm trying to create to capture the grassy
effect of this. This thing I'll be doing
on both the sides. Other sides also, I'm just
trying to create this grass. So just thin color and just
moving the brush upward, like we do the shading thing. So just like that,
you have to move the brush upward in
the upward direction. Now, let's add the lines to these lambs using black
color, two straight lines. Similarly, I will be doing
for other one as well. Now, let's add some yellowish
area towards the door area, which is there and
towards the window area. And also towards this lamp, which is these lights are being reflected on
these snowy part. So very small, small
details are these which makes the painting more
beautiful and realistic. These textures I
will also add with my round brush because
with round brush, it is more easy to create
the roundness and textures. And this is like
a glazing effect, which I'm giving it to
the sides of the lamp. So glazing is nothing, but you can see the
background color as well, and the color is a
little thin color. That's why it is called
as glazing means you can see the color
which is below. So very thin colour are lots of water in this and make
the color a little thin. So you can see how bright
this texture is looking, this area is looking like the
lights are falling on them. Now, let's add some
more textures towards these grassy snowy area. Mixing both yellow,
sorry, not yellow, mixing these all three colors
to make the snow color. Now, the snow color
has to be a little lighter than the one which you have used in the background. It should not be very dark, very light color, which I am using here in
the background. So lighter than the
color which you have used earlier
for this snow part. And I'm just applying
it over here. So as you can see,
I'm just applying it using my damp fan brush, and I'm just applying
the textures all over. So very light textures here and there. I'm
just applying it. Just mixing more of white
and this violet and applying it towards the
center area which is there, giving a shape of this
line which is there, just applying it and
giving a little shape to these snow So whenever you
give these types of textures, always try to use damp brush, and the color has to
be a thick color. Don't mix water in this. It should be a
completely thick color. And using the tip of the brush, I'm just applying
these old textures. Very light pressure
of your brush. Don't press your brush. Very light pressure
should be there. You can see I've filled all the area entirely with
this type of texture. Similarly, I will be adding some textures of yellow as well. But first, let's
add this texture. Just a little more
white towards the area, which is the area
towards the door. So now you can see how
this it's looking like a snowy effect that is
given to this whole area. Now with another flat brush, which is the Bristol flat brush, I'm adding some textures of yellow towards the center part. Just a little bit of
yellow and a little bit of pink I have mix
to create the textures. So just I'm adding
little little textures towards the area which
is near to the door, and also I will add some
textures near the lamps as well. Again, this brush,
also, same thing. You have to use damp brush. Don't use wet brush, damp brush or dry brush, and the color you have
to pick on the tip of the brush and just give the textures with
very light hand. You can see I'm just giving
a texture of the light, this yellow light, which
is falling on the snow. So this is the effect which
I'm trying to give on the snowy part that the light
is falling on the snow.
13. Final Detailing: So welcome back. So this is
our last part of the class. So let's give a little
more detail to this. Just taking black
color and giving a little more shape to
the area and making it a little more dark because
some of the areas are covered with this white and
yellowish color. So I'm just giving a little more shape
and just on top of it one line to add more
value to this lamp shape. Now let's add some more
details of the the door part. Mixing the same color. And the lower part, which is the area, which is the stair area. I'm just trying to make that. So using, again, the same
brush round brush and just making first the shape of
the stair which is there, just one line and in between. And I'll leave it like that. I will not color it
with the same color. It should look like
that there are snow which is there
on top of it. That's why I will
leave it like that. The color. I've just drawn
the lines. That's it. And I'm adding a little
white to these areas to feel the snow effect on these things. So just taking a little
bit of white and adding some textures
on top of it so that it looks like there's a snow covered on top of it. Now, just adding a little
more lights on these areas. So there are lights
actually on top of it, which we have to create. So now I have given the
shine to all of these, but I haven't
created the lights. So I'm just adding a
little more light color to this center part to
make a more shiny. And now we will be creating
some nice light areas. So first, just mixing
white and yellow, and just adding the thick
color of dots just diagonally. So as you can see,
I'm just adding the yellow and white
mix of dots to this part so that it will look like there are little little lights which are there on it and due to which the
whole thing is shining. Diagonally, I'm placing
all these things, one on the edge, one slanting. So like that, I'm
placing all these dots. Similarly, I will be placing all these dots over
the lower area, which is the shed
area of the door. You can see how bright this is looking when we have
added these dots. Also, similarly, I'll be
adding below as well. So just enjoy the process. Now taking this Indian
yellow and white mix and adding a little more lines. To add the lines I'm
using here, rigor brush. Just adding the lines to these dots just to
make it more bright. Oh. Also to the below area. So just adding more of lemon yellow because my lemon
yellow has got finished. So now I will be using backside of my brush
to create these dots. Just mixing these pink
and yellow texture and white and just
mixing it properly, washing off my brush, and using the backside
of my brush to create these dots more vibrant. So with the backside, I'm just creating these dots. So this is the
easiest way to create dots just to make it
more bright and vibrant. Wherever I have
created these dots, I'm doing it again with
this backside of the brush. And similarly, I will do
for the lower part as well. So you can see now
it is more visible than the dots which we have
applied with the brush. So it's looking like
bright, beautiful, like, full of sparkle, light,
sparkling light everywhere. So just making a little
more dots in this wth area. You can see how bright this is looking just making
these circles, giving a shape with black color because the other side
I have already given, this side I forgot to give. So I'm just giving a
round shape to this. Very small small
details are left, which I'm trying to do it. Mixing again these dark color, and I'm just adding again
the lines which are there. These are actually the wood area which is coming
out of this house, wooden logs which are coming
out like this in a line. Create snowy effect on
these fences as well, which I have left earlier. So just a little snowy effect on these fences that snow is, like, there on these fences. A small details are left, and we're almost done
with this painting. I hope you enjoyed
this painting. And if you did, please do
share your project work. You can tag me on my Instagram. That is Mohni Art Gallery. I would love to
see your projects. So you can see, I'm adding the final details and giving the last shape to it. Just adding more
white to give more roundness to this lower area. And now we will
create some magic that is the snow effect with just sprinkling all over the entire painting
which we have done. Just wet your brush properly. Too much water on your brush, just grab this white color. Just a liquid, white color. You can see how liquid it is, and just at a
particular distance, just sprinkle it
with your finger. You can see how nicely the sprinkles are coming
when you sprinkle it. So just like that, you have
to sprinkle it everywhere, and it will look
like that the snow is falling on the entire thing. So this is the complete
painting which is done, and I hope you guys
enjoyed this and you felt the Christmas feel and this
Christmas vibe in this. So do try it out, and I would love to see your projects,
and thank you so much.
 Mohini Sinha, Acrylic and Gouache Artist- Nature Lover