Transcripts
1. Introduction: Masks: Welcome to this course. I am really excited to show you the basics of a powerful tool in Photoshop, cold mosques. I'm going to walk you through how to edit non-destructively in Adobe Photoshop and take out all the intimidation when using a mosque. We're gonna do to fund projects together where we will change the background of Guan image using mosques and then jumping on over to something really fun where we have a cool Instagram idea for you. Ok, let's jump right in.
2. Masks 101: So let's jump straight in and start our first project together where I can teach you some of the basics to do with mosques and make your editing work a lot less complicated. So follow along if you are working with me, open up your project files in project one, let's bring in this ice cream image to get us so click and drag, and that should open up straightaway. I have a very large brushes, so let's make that a little bit smaller Before we get started. Ok. So first things first, always organize your layers. I'm going to unlock this and rename it. Hit into. If you would like to make a copy of this, feel free. I'm going to leave just one for now. Alright, so when we look at an image like this and say, how do I change the background of this right now it's on a white blank canvas, which gives us a lot of room for editing. And your first instinct might be, OK. Let's grab my eraser tool here. Come on over and start erasing this background, maybe like this, working around the ice cream and getting rid of that. And while there's nothing wrong with this, when it comes to a blank background like this, it's certainly leaves a lot of room for error because this is what we call destructive editing, which means we are erasing things from the original photo over here on this layer. And if I were to switch this layer on and off, I can't get this, I can't get this information back. And this is a problem if I accidentally come over my ice cream like this and try and keep editing, don't quite realize I've made a mistake. The only way to get this piece of information back, this ice cream pot back to press Command Z, Command Z, Command Z until you find where you went wrong and you are undoing all your good work. And if you've made the mistake and you come over here and you do a bunch of cool editing. It might be a long way into your project before you realize that this mistakes being made and that's wasting valuable time to have to come back up here and erase step-by-step until you find the missing information. This is where mosques can be so helpful because mosques can achieve the same thing, but in a non-destructive way. Let me show you what I mean. Let's undo all the way back to we have our original image and I'm going to put a mask layer on top of my ice cream lamb. Really easy. All you have to do down the bottom here, this icon with the circle inside of that square. Just click it and you'll see that that ICANN has been pasted on top of our layout. And that means this layer has a mosque on top of it. If you come and look at your canvas over here, you'll say, well, I can't see anything. It's invisible. If you imagine a mask as if it was like a layer of cling film, it's completely invisible. It's sitting on top of your layer. And all it's doing is indicating what is visible in this layer and what is invisible in this layer. And we do that by using black and white ink. If I were to draw black ink on my mask, it's going to hide things from the layer. It's going to show everything except where there's black ink. If I use white ink on this layer, it's going to bring it back, it's going to reveal it and take that mask off of that part of the layout. Let me show you. So let's choose some black ink. Make sure we're using our brush tool. Going to increase the size of this and make it a round brush so that we can really see what we're doing. And check to say you're using the mosque. The little brackets are around the mosque icon non around the layer. So check your on your mask. And if I start editing over here, it looks like I'm just using the eraser tool. I'm getting rid of that. You can see the transparent background behind it. If I were to come over here and accidentally erased them at my ice cream, look at that, what a mess. Instead of undoing all of this stuff, I can just switch back to white ink. Remember black hides things and white reveals them. So I can come back in and just draw white ink that's showing up as our ice-cream because I'm revealing all of this stuff that my black ink was hiding. So you can come in and do that and you can do this infinite times. So if I go back to Blackboard, zoom in and do some detailed editing inhale. So if I draw blacking right into the middle here, kinda big hole out of the middle of my ice cream. Switch back to white ink and I can draw it straight back in exactly where it belongs. No destruction done to my original thing because I'm not actually editing my ice cream. I'm editing what the mosque is letting me see. So let's go all the way back, undo, undo a million times until we get back to the start. And I want to show you that one more time to add a mosque. Press that button at the bottom and we have a mask now on it. You can add black and white ink to this Canvas, just like you'd use any other tool, you could use, the Brush tool, which is what we just did. You use the paint bucket tool, the Ellipse tool. You can use anything that's going to draw ink onto our canvas. So we could select the whole picture, everything on this layout and paint bucket tool with black ink right on our mosque and it looks like everything has disappeared. But it hasn't. Because if I were to switch back to white ink and just draw some stuff back on, you'll see it start to reveal again. So that is important to remember that lack hides and white reveals. Let's use this to our advantage by changing what the background looks like here. I'm going to switch this layer off completely so that we're hiding the layer. I'm not, I haven't covered it in a mosque. I'm using the eye tool, so I'm going to switch that off right there. This leg is completely hidden. And let's add ourselves a fill layer so we can go layer new fill, solid color. What would you like to call it? I'm happy to call it that. And let's choose something kind of bright and fun. Maybe this cool teal color. Okay, so right now I just have a fill color over here, a fill layer to be our background. And what we understand about layers is that we can bring that to the back and our ice cream can sit on top of that. But I can't see the teal because my entire image of my ice cream is showing up. So let's hide some of this background and reveal some of the teal color below it. Remember out teal is sitting right below all of our ice cream. I'm going to select my ice cream using this quick select tool, objects selection. You can draw a little box around it and let Photoshop do the bulk of the work. Right now I'm selecting my ice cream. I would like to select everything except my ice cream to draw my mask on top of. Because remember we want to change our background. So to do that you can press Command Shift I. It was select the invest to what we just had selected. Okay, so let's come and check what layer we're on right now. I'd like to remove the background from my ice cream. So we're going to select ice cream and make sure we're on the mask layout because I would like to make this background, this white blank background, invisible. So I need to hide it with black ink. So let's grab the paint, paint bucket, tool. Switch over to black ink, black hides in white reveals. And all I'm gonna do is just color in this space. And it looked like I just dropped teal ink onto this TO paint bucket tool ink onto this canvas. But really, I dropped black ink onto our mask, making the background invisible, revealing our teal layout just in the background section. And I know this because if I turn off the teal background layer here, our background disappears. So go ahead and press Command D to Deselect that ice cream. You can double-click on this color anytime you want and change the background to a color that suits you better. I really quite like that peachy color. So let's go with kind of a bright peach, perfect. And let's have a little bit more fun with this. I'm going to draw some circles onto our canvas. Let's create a new layer Command Shift N. And I'm going to call it circle. I can come over here and choose the Ellipse tool. And let's choose a fun color. I'm gonna make it kind of a lighter version of the pink that we have in the background. And let's draw just a great big circle right there. And to make that color a bit brighter so that we could, we can see what we're working on. Okay, so here we have a big circle over top of our ice cream. The layers on top. Ice cream is second, with the background hidden and I'll color fill background is lost. Let's say I would like to put this ice cream in front of the dot, but the dots still in front of the background. I can just drag my lay it down like this because we have isolated that ice cream. But I want to show you that we can also adjust the mask on the Shape Layer to hide what's in front of that ice cream. So let's turn a mosque on together. Make sure the circle les selected, click mosque. And let's go over here to our brush tool and come on in here, I'm going to turn the opacity down just a little bit so we can see the ice cream behind it. And remember black hides, white reveal. So I have black ink and I'm just going to hide some of this circle from where our ice cream shows up. And it's going to look like the circle is behind the ice cream. You can come in here and adjust your Tools to get rid of all of this ice cream in the really exact, if you'd like. I'm just doing this really quickly to kind of show you how the masks work, I can switch to white ink, hit X on your keyboard to show more of the circle and come right up close. Hit X again to change colors. So sometimes we can't always order our layers in the right order, but you can see how it looks like that circle is behind the ice cream now. So let's have a little bit of fun with this. Let's, let's copy. It's do another circle. We could do two or three of them. I'm just using some shortcuts here. Great. And we can reorder these or we can just adjust their masks. So this is this, this one. Let's make this a little RD, do some spikes here and there, some crisscrosses. Remember I am not erasing this circle. I am adjusting the mosque fill of this circle. Let me show you. At any time if we don't like what we've done, Whiting reveals, you can get the, the brush tool to store it back into place. Let's reorder that one. And this will map here. We can throw him behind our ice cream as well. Great, so that is some basics to do with masks. We can look at them, reordering things, and we can also look at them in terms of non-destructive editing. Remember, which means you can come in at anytime and adjust what it is that we're looking at so that you're not ruining your original image. If at anytime you would like to switch your mask off, we have our ice cream layer sitting up the top here. If we'd like to switch that off, I just select that mosque. I hold shift and I click, See there's a little extra hour mosque icon and we're back to our original image, which just goes to show that none of this has destroyed our original picture. The last thing I want to show you is a layer mask. We have added a mosque to alia originally, but there is also the option to come up here and you say new adjustment layer. It's going to change everything below this mosque into something else. Have a look, I have a hue saturation, and it's changing the tint of everything below it. So it's changing our circle and circle and our background because it's adding these tins. If I were to move this down a little click, it's no longer adjusting L kinda waffle cone looking circle here. If I send it down one mole, it's only adjusting our background. So that's something to keep in mind as well. If you want to use a Adjustment Layer mosque, you can adjust any layers below it. We can even adjust out ice cream if we put that below LA a mosque. So you can see that icon is slightly different to the rest. So that's something to keep in mind too, if you'd like to change the color of something below something else, add an Adjustment Layer mosque, and you can do that completely non-destructively. Okay, so now that we've gone over a couple of basics to do with mosques, joined me in the next lesson. And we can attempt out first project together using some of these tools.
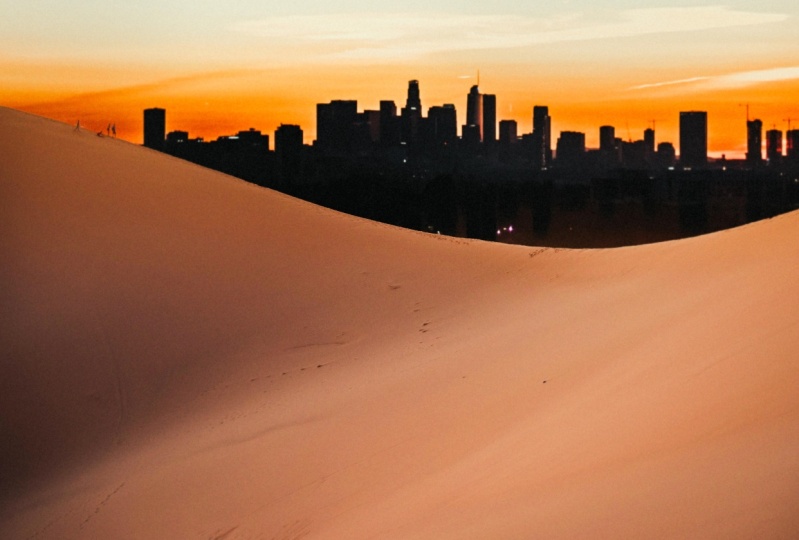
3. Changing A Background With A Mask: Alright, so let's start our first project together where we can use some of those tools that we have just covered and use mosques to change the background of an image. So if you're following along, go ahead and open the project two folder. Let's bring in this picture of the dunes. So we'll bring that in first and see what we're dealing with. All right, so let's unlock our layer and give it a name. Fantastic. And so we have this big sweeping photo with the sand dunes here and a sky and some background over here. Let's say this is a family photo of you guys. Let's pretend this is you and your family up here on the mountain. And you would like to pretend that these June's we're in front of a big city landscape. I'm going to show you how to do that by using a mosque, which is a nondestructive way of editing this picture. And we can undo it and come back to this at any time. Open your pure project files again. And let's bring in this cityscape. So dragging the word city, great, and we can kind of put that into place up here. I'm not too fussed about its position. Hit Enter. And because this is going to be our background, let's drag it behind the dunes. Great, so we have our dunes on top. And then this cityscape in the background, we're gonna put that behind our genes. All right, so when we're dealing with are dunes layout, we want to add a layer mask down here at the bottom with the circle in it. Hit yes. Okay. And here it shows up without brackets around it. Now remember, anything we do in black ink is going to hide it from this layer, revealing the city behind it. Let's have a little look at what I mean. Great, so I'll cities there behind it. We're not erasing anything from this layer. We're just showing what is underneath it. So let's, let's bring that back in. You can color it in or I'm just going to hit undo. In this case, we wanna get rid of all of this sky landscape pot of the picture. And I'm going to say if our objects selection tool can grab the majority of that for us. There we go. It definitely has done a good job. I'm not too worried about here, up here, you and your family because we can come in and adjust that more in detail once we've gotten rid of the bulk of the sky. So now that we are on our mosque, Leah, I'm just going to use the paint bucket, tool, drop black ink onto our mosque, hiding that pot from the layout. And I'm gonna press Command D to Deselect. And that is a pretty good first pass at this, we can move the layer below it and a little more. You can put that into place. I'm gonna make it just a little bit bigger, so it looks a little bit more realistic. And let's go in and have a bit of a cleanup in hell, because I think it may have some of the old image. Here's you and your family. So let's bring you guys back. Click on the mosque, grab your brush tool. I'm going to make it a little bit smaller than that. And remember white ink reveals. So we want to reveal a little bit more of these people go because that person's head and there's you and your siblings. Excellent, that story back IN. Great. And we can take the time here using the black ink and a smaller brush and a little bit more of a feather to get rid of the remainder of the sky from our original image. So all I'm doing is drawing black ink into our layout for the dunes file and hiding these pots from layer. I'm going to speed this up for you. Okay, I'm happy with that for now. You can be a little more detailed on yours if you'd like. You can also come in here and make any changes anytime that you would like. So zoom back out. And it looks like we may have missed a little bit on the side here. Not to worry, blacking cards, we're just adding some more blacking today. Spots. Excellent. And let's check the other side. Just a couple of spots. Great. So we did that in maybe 35 seconds. We added a mosque over the old sky and added in a city landscape. If we highlight our city layout so that anything we add to this image will show up right below it. Let's bring in another couple of backgrounds. Just to have a little look at how easy it is to use a mosque to show that we are in different locations around the world. Maybe there's a sand dune in front of the Eiffel Tower. Maybe we're doing something a little more artsy and now there is a beautiful night sky with more hills in the background. You go at any point if we want to get rid of this mosque, we can just press Shift and click on it, and we can toggle back and forth from the original undistorted image to our new project. So go ahead and follow along and see if you can add this night sky, the city landscape and Paris to the background of as sand dunes.
4. Merging Images with A Mask: Let's go ahead and do something really creative and put together a fun project for an Instagram post using masks. So if you are following along, go ahead and open project three files and bring in this blank Instagram picture. That is a template. I'll show you what we have made here for you into this, into your Photoshop. And it is a blank photo from a screenshot of Instagram. It's got it's got a caption down here. It's got no, no name or anything. So you can go ahead and use this for this project if you would like. Now that we have this in, we're going to put an image in this space where a picture would usually go. But we're going to have it kind of crawl through the screen and kind of come to life a bit. So if you open back up your project files, go into Project three and bringing this image labeled sitting. And I'll show you what we're working with. So we have this cool looking girl here sitting on this bolide in front of this Smokey City landscape. And if I drag down the opacity a little bit, I want to help you Photoshop there. So it looks like her leg is coming down off of the off of the Instagram post here. So I want to kind of line it up with her bottom foot here. Just sitting on that line, you can see the faint line from the background behind it looks like her knee, her leg, and her shoe is going to come come to live off of this post. So once it's in the right place, we can keep the opacity at around 45% because it's going to let us see through the image a bit and make sure we can see both of these images at the same time. I'm happy with that at the moment. Let's select the area we want to mask. Remember, a mask is going to help us hide parts of this image so we don't have to cut her leg out of this image, or we have to do is hide everything that isn't her leg below here. Let's give it a bit of a headstart with some sharp corners. What's used? The polygonal last through tools that you can find that up here, it's the one with the pointy edges. Select that and that's gonna let us select some very straight lines. I'm going to click Start Here, hold shift to get that line really straight. Kind of just, just give it a, a rough guide. Every, every time you see a corner, I'm just clicking, click, click, click, giving in a rough place to start, going back up to the line and then hitting shift again to make that straight. And I can just select all the way around here, double-click to close it up. And let's put a mask on that section. So once I put a mosque, it covered everything except the part we wanted to cover it so we can go up here and hit invert. And it's going to block out the post from below here and just leave her leg. So let's add to this a little bit. We want to add some black ink to our mask so that we can hide the rest of the wall behind her leg. I'm gonna bring the opacity up a little bit more because it's clear now what is white from our Instagram post? And what is the dark gray wall here? Great, so let's just grab out brush tool here. You can press B or hit the brush. Make sure we're using black ink to hide parts of the wall and double-check that we are in the right layout on the mask. So once I start drawing, I am removing all of this wall here. Go up right close to her leg. I'm gonna make it a little bit harder of a brush and a little bit smaller. So we can start dealing with some of these close details. If you make a mistake, remember we're just drawing in black ink. You can switch back to white ink and fill in the rest of your space. So you can be as perfect as you like on yours. I've just sped this up really quickly for you so that you can see what it looks like when you color all of this extra area in black ink. Okay, so once you are happy with your mask, all that black ink that we have drawn, if you want to check as to what the mass currently looks like, you can hit the backslash key on your keyboard, bringing up this red tinge, it's gonna show everywhere that we've hidden on this layer. If at any point you would like to remove your mask, just hit Shift and click on the mask over here. It's going to show you the original image behind it. So there are two little tips up there. Let's continue on with our mask up the top here. I'm going to make sure this sits within the confines of our image. And line that up with that line up the top. And because we can fill with anything to use our Inc., I'm just gonna use the Paint Bucket tool. Make sure we're in the mosque with black ink and simply click and we have hidden even more of our photos so that lines up with the post at the top. Alright, so this is a great first setup using the masks joined me in the next lesson and we'll finish this off and make it look a little more real.
5. Finishing Off: Let's finish this off together. Let's make this image look a little more real. So the first thing we want to do is make sure our capacity has been turned back up to a 100%. There we go. Her colors got a lot stronger then and we can't see through her anymore, which is called now she's sitting in the right place. I want to touch up my mask just a little bit down here. It looks like it got a bit bumpy. So the way to do that is click our mosque. Let's draw a guideline in for ourselves so that that line stays really straight. And I'm heating inverse to select everything except that square. Click the mosque and we want to reveal, so white ink reveals. We can just draw that back into place here and here. So de-select is commanding and a much happier with that. I've also noticed that it's not quite sitting on that bottom line, which had really like to have happen. So let's grab our image layer and you can just nudge it down with the arrow keys until it's lined up in the right spot. Like the look of the line. So maybe you just one-click up, perfect. And I like that it's right inside the bracket up the top here, so I'm happy with that positioning. Okay. So let's lighten her leg a little bit. It looks a little under exposed to come over the top of this. And then we can add a fun little shadow in here and we will be all finished. So a really easy way to lighten a part of an image is using the Dodge Tool, which you can find in here. Burn is going to take parts of your image and make them a lot darker. And Dodge is gonna do the opposite. It's going to brighten them up in certain spots. You get a tool with this. It looks similar to a paintbrush boat right now you'll notice that we can't edit anything on this picture. And that is because it is still a live image layout. In order to edit the image itself, we can right-click Rasterize Layer. And it will give us out paintbrush. As I start clicking with this Dodge Tool, you can see parts of her shoe start to clean up and lighten up. That looks a little better. I'm going to kind of continue this line up into her photo a little bit more just to brighten the sides of her face, her arm, and kinda accentuate that sun on that one side. It's very slight, doesn't do a lot at a time. You can adjust how exposed we're going. If I go a 100%, you'll see it goes really bright, really soon, but that looks a bit unreal. So I don't want it that, hi, I'm gonna put my exposure around 60%. And the next thing I'd like to do is give her leg a shadow. So as it's coming out of this picture, it looks like it's leaving leaving an imprint as if this was part of the wall. And how I'm going to do that is with its own layer. So let's go Command Shift N to pick a new layer, and let's call it shadow, hit Return or press OK. And I showed it will pop up over here. I'm going to zoom right in onto this location. I'm going to grab the brush tool here. And I want to choose sort of a light gray. So it's going to have a little bit of a a pinky tinge to it. And we go, that looks good to me. And let's get a really big but really soft brush. Make it round. Really soft, soft edges because shadows have very soft edges. We can always add a little bit of a blur to it later, but it's good to start with a softer edged brushed. Alright, so I'm going to kind of draw on this where I feel a shadow might sit on her feet. That looks horrific by itself, but bear with me. And let's change the order of these layers. The shadow should not go on top of her leg, should go behind it. So click and drag that and let that full behind her foot. And I don't hate that for this part of the leg, but over here on the shoe, it does not look very realistic to me. So let's get rid of that with a bit of a mosque. Let's click mosque to add a mass to our shadow layer. Let's grab some black ink because remember black hides. And make sure we have a very soft brush and we can sort of start to go and hide parts of that shedder next to her leg. Maybe bring back a little more round her foot. And there we go. I'm happy with that for now. Let's blow that layer slightly up here. Ok, make sure we're clicking on the right layer. Up here at filter. Go into blur, will go into Gaussian Blur. And it'll bring up this panel here. And we can adjust how blurry shadow layer is C, that's way too washed out and that is just as crispy as we started. So let's sort of blur it up slightly. I'm happy with that. Click OK. Zoom out and have a look at our handiwork together. We have made this really cool live Instagram photo where she's jumping out of this post. You can feel free to use this template. Take a picture of yourself or someone you know, in a sitting position and use mosques to hide parts of her layer in order to make it look like a live picture.
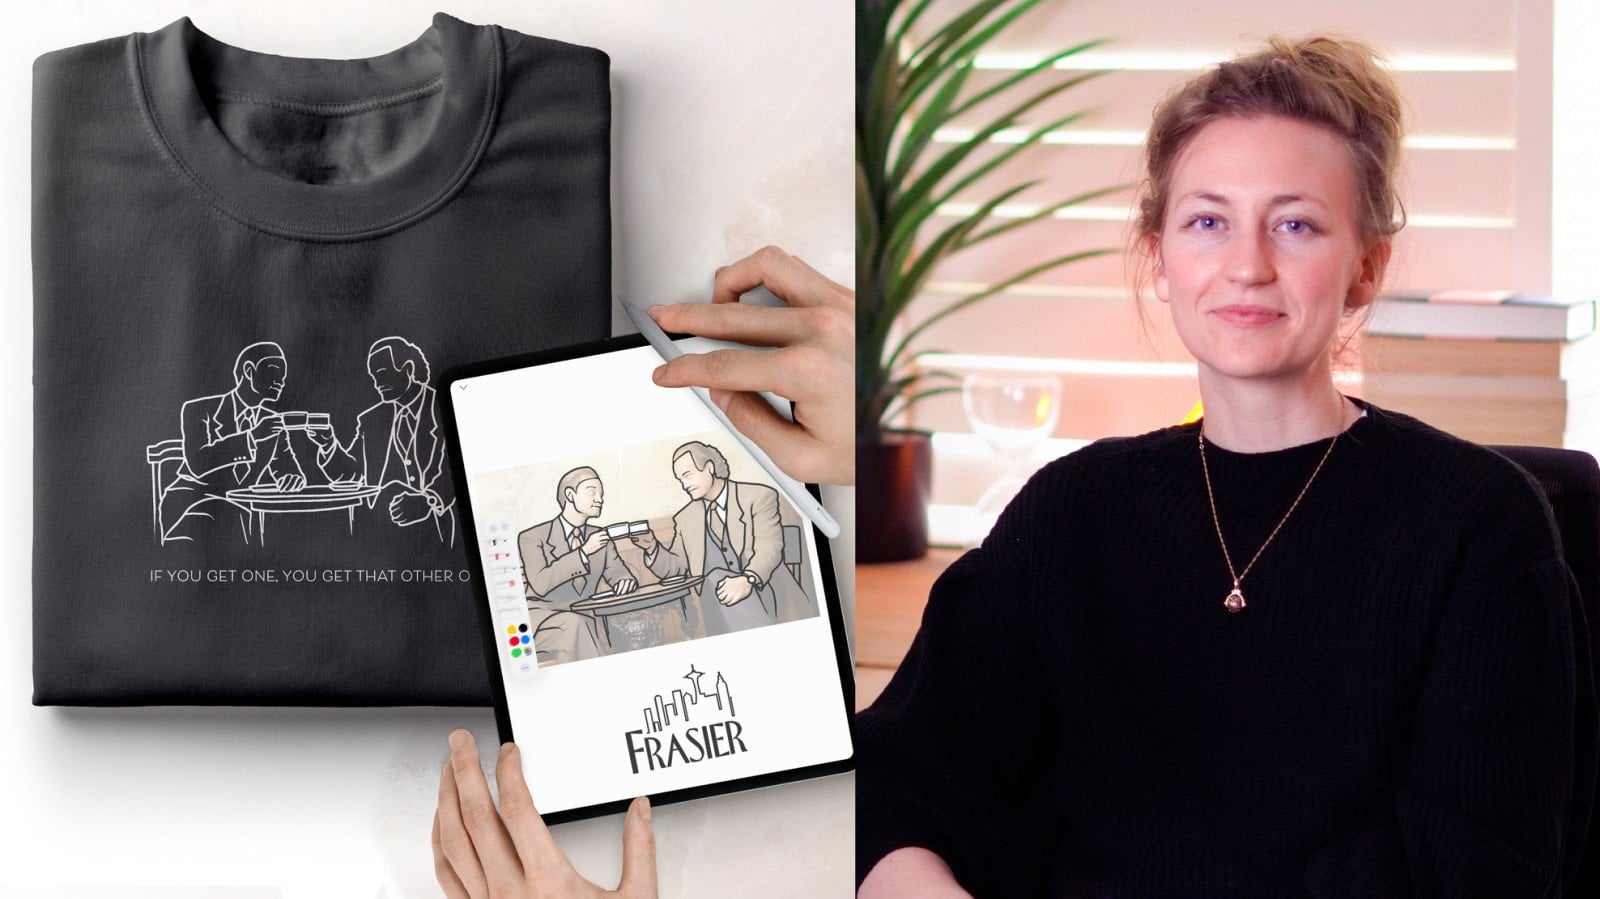
 Genevieve Wilson