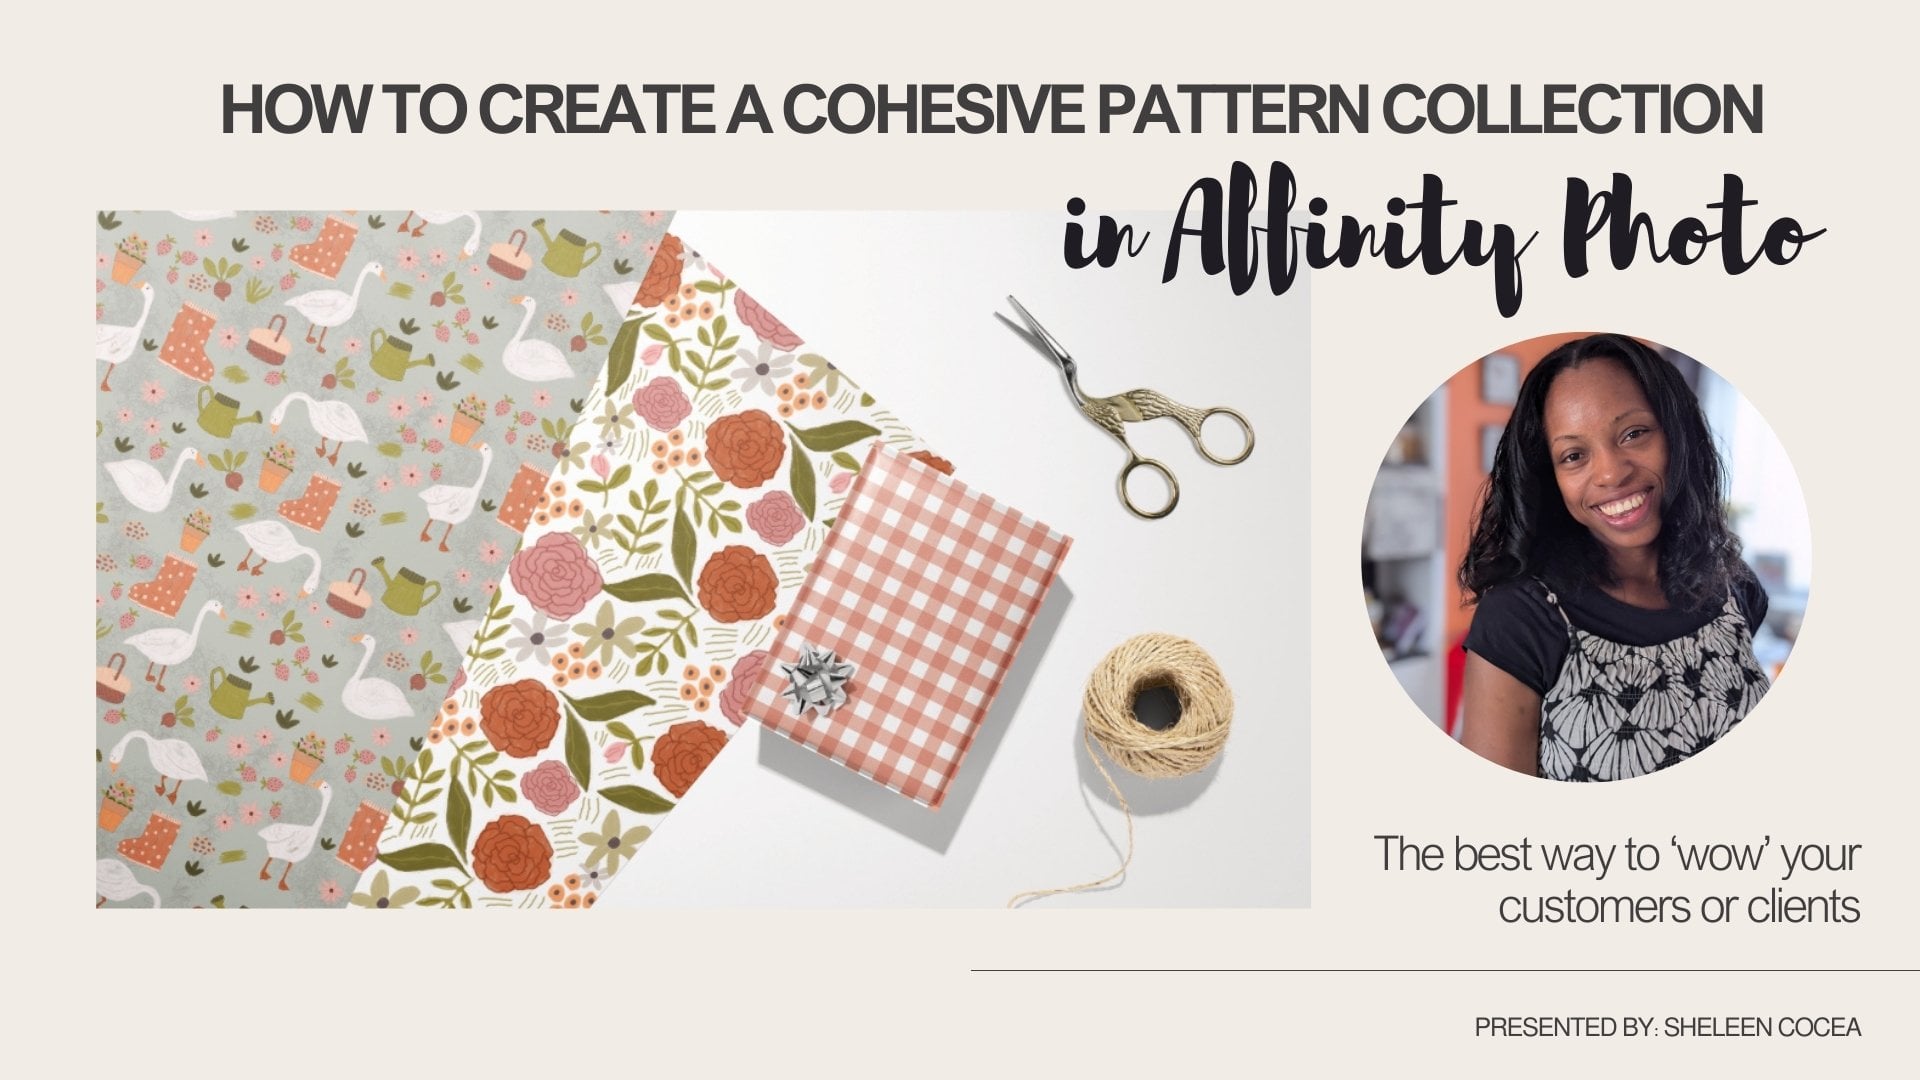
Transcripts
1. Intro to Class: Hello, my name is Lee and I'm
a surface pattern designer. I have a great passion teaching students how to use
the Affinity software. In this class, I'll be
teaching you how to create your own mockups for your portfolio and
social media sites. Mockups are a great way to get your art notice by clients. And it is a great way
for them to visually see your designs on products. The first Mockup technique
you use to edit yourself. The second Mockup
technique will be via print on demand website. The third Mockup
technique will be from Creative Market. Download. This the quick note that
I'll be using affinity to, but you can follow by using the previous
Affinity software. I will also show you
the best ways to create your own portfolio pages
on Affinity Publisher. And what makes your portfolio stand out to your
potential clients. Join me in my class if you
want to learn about how to create mock-ups,
portfolio pages, and how to get your work
expose onto social media is all about getting
those clients and those customers coming
to your designs. I can't wait to
see you in class.
2. Lesson 1: Create a Mock-Up from a photo: Hello, and welcome to the
first lesson of this class. Here. In this lesson, I will teach you how to create
a mockup using a J peg. As a beginner in market-making, it is best to get
images that have black surfaces for an
easier time editing. E.g. wallpaper, world art, greeting cards, and stationery. For rounded surfaces like
kitchen where bedding, apparel. It will be more advanced to
create a realistic look. But maybe in the future I can create some
methods like this. We will be doing a
wallpaper mock-up. If you start by going
to the bottom of this Skillshare class and click on the Projects and Resources. And then click on
the jpegs provided. Save it into your documents. Then we can start. I will be using the newest
version of affinity. It works the same as
the previous infinity. It is just that you
have to check where the icons are as they will be
placed in different places. So watch out for that. Okay, let's begin. And you can see here, this is my mockup
using my own patterns. So I did a wallpaper pattern and I'm going to show
you how to do that. Okay, this is my
way of doing it. There are different
ways of doing it, but I found this the
most easiest way. So go to file and open it. I'm going to open the JPEG. Jpeg is bedroom
wall by Cam Idris. Going to open that. Okay? So the thing that we need to do is to
get rid of the background. And then what we
do, we just place our pattern in the
white areas there. In case if you, the first thing you
need to do is click on the rectangular marquee tool. I'm going to do is just news this rectangular tool to
get rid of the background. So I'm doing it in
different sets. So take on this. And then what I do,
I press Delete or Backspace and it
deletes the background. And I'm going to do a
rectangle by rectangle. So then I click away, and then I do the same thing so you can zoom in and see where you're cutting the lips. Okay. De-select this. Okay, so I've done most
of the areas there. And you can see like when it
comes to the rounded areas, we need to sort that out. How I do this, I use the
eraser tool and I zoom in. You can see the width
of this has changed, so you can change
the width of it, the shape of it as well. If you click on More, um, I changed the shape slightly
to make it more oval. That's it. You can
change the size. You can do the size. Over here. You can do the width there. So what you do, just go in. Okay, Just to make
sure you select, got anything selected there. Okay, So zoom in. Make sure I'm clicked
on the background. And I just erase the areas. So you need to have a steady
hand here and just rub out the background there. That's it. Okay, that's it. So I've taken the
background out there now. So now the next part
is to add my pattern. So I just start on this layer. You can add another layer, but I find it easier just
to keep to this layer. And then you place your pattern. This is a pattern
I'm going to use. Actually come that open
and then place it, places it in front. Okay, automatically comes
as a new layer anyway. And I right-click or use two
fingers to get to this part. So I'm right-click and then
I click onto alignment, sorry, I click onto a range. And I said I put moved to back. Okay, so it sends it backwards. And I use this move tool
to get into corners, just make sure you're snapping tool is on so it's accurate. Okay. And then you can overstretch it depending on how you want the
pattern to look. You can stretch it like so if you feel that you
want it to look bigger, if you want it to look smaller, you can just leave it like so. And if it is, which it
should be a repeat pattern, where you do is this
press, Edit, Copy, Edit, Paste, and then move it across. Then you have your
pattern there. If you want to make
it smaller, again, you can get your foil. So I want it small. Copy, edit, paste. And you just paste your pattern along or the missing areas, the gaps, I should say. And making sure that the
snapping tool is on. Okay. They have it. You have your first mockup. And this is a mock-up
that is free. So you don't need to
sign up to anything. You don't need to buy. Buy it. This image
is a free image, so it has come from Unsplash. Of course what you do is file. You can save it as a
Affinity Photo file. So you can edit
it if you want to change the background, etc. So it's good to save it, the affinity file itself. Okay. Thank you for joining me in this lesson. I hope you have
learned something new. You can use this technique are many JPEG images for mock-ups. So enjoy editing. Thanks again, and I'll see
you in the next lesson, where we will create a mockup using a
print on-demand site.
3. Lesson 2: Creating a POD Mock-UP: Hello and welcome to lesson
two in creating mock-ups. In this lesson, we
will be making a mock-up in a site
called printf for. Print for is a print on demand
website that allows you to sell your products on your
own website or Etsy page. It gives you more control, allowing you to contact
your customers. Even if you don't sell
your work straight away. It is a great platform
for exposure. And they have amazing mock-ups. If this is not for you, don't worry, but you can
see how the mockup process. Also, it's good to note that
if you want to make sales, you need to have a good
marketing strategy. So print fall is a free
site to sign up to. You can opt out anytime. The link is in the project and resources tab on Skillshare. So print for, as I said, it has loads of
products from there, clothing, home, deco, that you can put your designs
on, your patterns on. I'm going to go into mind one, just going to kick off this. So the first thing you
would need to do is click onto product templates. This is when you've signed up. And product templates. When you sign up it is free. So if you feel like
you don't wanna do it, then you can come off it. I think it's a great way to
just have mockups there. Even if you're not selling them. Got you. You got a chance to do mock-ups
on there and save them, and then you can
use them for print on demand sites as well. If you could come
to product template and then create more than
you've got your options here. I'm going to click on
to home living because I'm gonna do a pillow. Cushion. Then make sure you click
onto all overprint. If you have a pattern, you click on Design
and choose your file. And I'm going to choose
the seashells one. To get your designs and
files onto this library, you need to click on
to upload a new file. Then choose your file. So I chose this one, so I don't need to click on
it. So I've already got it. So I'm going to
press Apply the k, So it's put the square on
top of the design there. But if you feel that you want your repeat to be a
little bit smaller, you drag it down. Then you click on pattern. The pattern you want to click on this block because you want
that seamless pattern. Okay? And then from then on you can
change it how you like it. I'm just going to
keep it quite large. Then you need to do
the back as well. And you've got the
layers. Hear me click on the three dots here. Duplicate to print out the back. Okay, so that's duplicated,
so you want to check it? They come back and it's
on the back as well. And also there's the 3D view. There is a mock-up view as well. Just kick off this. Just to give you an idea
of how it will look. Go back to the design here. This here is telling
me that I will need to do it for
these ones as well. So because they have
different sizes of pillows. But I'm just going to keep
to the 1800s 18 for now. I'm just going to
save this as a draft. And clicking on the X
button and save as a draft. Okay. If you want to add
it to the store, you can go through that
process of unlit to use store. It will tell you what steps to take it to your
website or to Etsy. But for now, we're just going
to do the mockups there. I click on this button
here with the three dots. Click on to download my clips. And then choose the
market style you like. You can choose all of
them or view them. So e.g. I. Might choose these three. I'm just going to
do the front view and it's going to be 18 by 18. So click off the ones that are not the K and it needs to be J peg
with his, with the PNG. That is for your website
when you just want to have it without the background
and you're selling it, you just want them
to see the product. But you just want it smaller. So it's good for your
portfolio or for social media. Click on generate mockups. And then it will go on to
your downloads as a zip file. Once that's downloaded. If I show you my son
loaded as an archives six. So click onto that and
then I'll look for the design that unlike the best. Okay, so you can see that view. There is another market there. Once you're happy with
the one that you like, the flavor into your documents. I've chosen this
one because I like the color that goes
with the cushion, the lighting as well. So this will be great for social media and
for your portfolio. If you can save this,
that would be great. And then I can
show you how to do a portfolio page
with this mock-up. Okay. Thank you for watching. And in the next lesson, I'm going to show you how to do a mockup using a Creative
Market download. And with that, there is
a special technique of how you put your patterns
onto the mockup. And then once that is completed, then I will show
you how to create your own mockup pages
for your portfolio. Thank you, and
I'll see you soon.
4. Lesson 3: Using a Creative Market Mock-up: Hello and welcome
to lesson three, where you'll be learning how to use Creative Market mockups. Like Creative Market is a great place to find so
many things like fun, brushes, mockups, et cetera. If you want to
advance on yourself, on your portfolio
or your website, I've linked a mockup bundle, which is in the Projects
and Resources tab, and that will send you
to Creative Market. So I'll just click on to that. Now. The bundle I'm going
to be working on with you is the wrapping
paper mockup bundle. This is by the Mac little stuck. Now there's loads of different markets that
you can work with. You can use one that
is more directed to what you would like
to do in your industry. So if you wanted to do something in stationary like notebooks, you could do bedding,
fabrics, et cetera. So you can have a look at that. There are some with
different ranges of prices. I've gotten for the
low budget price, this one is $9 as a license. So it's important that you
pay for the license because they're making the
effort for you. So I think it's good to
make an effort for them to to support the businesses. Yeah. So I've done a wrapping
paper mock-up. Like I said, there's other
ones that you can use, but this one is just a starter. I find with the more
expensive ones, they're more complicated. But that just depends on
what your preferences. So just start off
simple, in my opinion. Okay. If you look
in the corner here, it says PS photoshop. It says six ps d files. It's good to get the
six of the files because you've got a variety
instead of just getting one. So if you're doing
it for website, if you're doing it
for your portfolio, you've got a variety. So you can see here
it says Photoshop. And obviously we're
working in Affinity Photo. And that might
give you thinking, make you think, Oh, there is this going to work. You can see here it
says Smart Objects is going to work in
smart objects as well. So the thing that you
need to look for is, first of all, you need to go into Affinity Photo,
click onto that. And then you go to the top
where it says Affinity Photo. Click onto preferences. And then make sure
this here is clicked. It says import a PSD smart
objects where possible. If that's not ticked, you're going to find it
difficult to do your mockup. Okay, So make sure that's clicked and
that will work there. So I've actually downloaded this because I'm going
to open. Open it. Opened. Yes. So I've got a few
different ranges here, so I'm going to click
on number four. Okay, before I click on that, you can see here it has
instructions as well. So each of these markets, they'll give you an instruction
guide to look at where. Again, you go into
the layers and have a look at what is there and
what you need to change. So I'm going to
start off with this, the first part which
is a stretch paper. Just click on that group and you see it says your design here. You double-click on that. Sometimes if you double-click, you just done this, make sure it's selected. And then click on the Move tool, and it's there and
double-click on that. And then they have it. And
then you find your pattern. Place your pattern in there. Working with this one. Place. Got a very large file here, so I just reduce the
size from the corners. Remember, I'm not from
the edges because it will change the size
and the pattern. The size of the pattern, which you don't want to do. So I'm just going to
reduce that to this side. Then I do edit,
copy, edit, paste. Drag it along, making
sure you've got the snapping tool there. And then just paste again
to make you repeat. You can distribute to see
if it's repeated correctly. Then you go back onto the main page and see
how it looks like. Okay, that looks very nice. And so the next part is the we can just close
that the rolled paper. I'm going to click
on that light, so just make sure it's where it says your design
here. There we go. Now, this is where if you have
a collection of patterns, this is a great way to
introduce different, maybe a color way or a
different style of pattern that is in that same color palette. But if you don't have that, you can use the same color, just have a plain color. So I do have a color palette
that I'm working from. I'm going to just
use the pink color. And I'm going to just
use the flood fill tool. And that will fill there. So you can go back and have a look and see what
it looks like. Okay, there you go. It looks nice. And now it's got an option where you can put a sticker on. So you can put it as a
great opportunity to put your your logo. Click on that File Place and
then just find your logo. If you have a circular logo
that's fantastic, fit square. You might need to get rid of
the layer. On the main page. You might see the circle at
the back if that makes sense. So I'm just going to go and find my logo and then
place it in here. It's little bit big, so I'm
going to reduce the size. For now. What I'm going to get rid
of that background there. I'll go back to the main page. You can see that you've
got the white background. I'm going to have
a look at this. Now. See where the stickers. Let's see if we can
delete it right there. Okay. So you might be better
off just putting this thicker on itself. S3. Yeah. It's my work better that way. Because if you have a logo that square
or different shape, then you can just put
it on top of there. And that's it. Okay,
and that's it. If you go to file
export as a JPEG, I'm going to put
wrapping paper too. Okay, Thank you very much for
joining me in this class. I'm looking forward
to showing you how to make your own portfolio pages and pages that stand out
to clients and agents. What worked for me
when I landed my, when I landed my first agent. I will show you that
in the next class. I'll see you soon. Thank you for
joining me. Thanks.
5. Lesson 4: Creating Portfolio Pages: Hello, and welcome
to lesson four. We'll be creating
a portfolio pages in Affinity Publisher. My portfolio that I
have at the moment, this is a PDF version. So you can see I have my background pattern here with my logo and the
name of the portfolio. And then I've added some mockups with a little cropped
version of the pattern. And then I've got some
other patterns here. And then I've also included
some color palettes as well. More mockups and some
other designs as well. So it's just to show
you that how to do it and giving your
portfolio bit of variety. So you're not just
showing your patterns, but you're showing some mock-ups as well as some color pallets. You can also add your
own illustrations to it that will give it a
more variation as well. So open Affinity Publisher, what I'd like you to
do is click on to File New and then A4. So I like to work in landscape art portfolios
or landscape. So that's just the way I prefer to work for you. Click on to A4. And then if it is portraits, you can just change the
orientation button. If you are on affinity one, you, the orientation button might be somewhere around here. Okay, so just have a
look around to see whether that Britain
is. And then Create. I'm going to add
some pages to this. So I'm going to have
at least five pages. This is an example, this is very short portfolio
example for you. I click on this button here, which says add pages and it
says number of pages, 1 page. So basically the next page is going to be two pages
next to each other. So I press Okay. Okay, so I've got
that one and I'm going to add another one. Page three, there's going
to be two next week, but there's five
pages altogether. So on the first page, I'm going to add a background
that I like to use, preferably a pattern
that you have already. This just gives a bit
of personality as to your design style
if you have a design. So I'm going to go
into my documents and find You've probably
want to have a design that is quite a neutral design, so it doesn't have
too much color on it, so you don't get distracted. Not visually distracted. So the file that you use needs to be either a JPEG or a PNG. If you use a fire that is
an affinity file or a PSD, what you'll find is
it will crash in white crash or it just
doesn't like it that much. Because when you
convert it into a PDF, the PDF likes to convert
it from jpegs and PNGs. If you do that, what will happen if you
use an affinity e.g. and you save it just as an
affinity file document. When you open it and might say, there are some files missing
for that not to happen. You want to use a PNG or
a JPEG crop this down. A little bit of a gap here. This is going to be
at my front page. Okay? And I'm going to edit, copy this, and paste
it onto the next page. So I use my move tool and
drag it onto the next page. Now for the next page,
I'm just going to fill it to all the edges, so it covers the edges there. So now let's show you how to add your ready-made mockups that we have created in
the previous lessons. So the first thing you need
to go into File Place. And we'll go to the first
mockup that we did, which was the one with
the wallpaper mockup. And then place that into
your document there. I'm just assuming. Now I'm just going to do
the mockup itself here. And then on this side here, I will add the actual pattern. Okay, I'll place that here. So you want to try and keep it the same size as the mockup. And then I'm going to
use the crop tool. And it's nicely use the crop
tool just to get an idea. Might want to make that bigger. I think I'm just going to make that bigger Move tool and move this and
make this smaller. Definitely bit of
playing around with it. Use the crop tool again. Just move it slightly. Move tool, make this bigger because I don't
want it too small. Plane around. Zooming,
moving a lot. Yeah. So you can
see I have added the pattern here and
it's has been cropped. I didn't want to use the
full repeat tile because it gives the client an idea
of what this pattern is. Because if they're
going to buy it, you don't want to show it. Yeah, full show.
This is what it is. But you want to give
them tasters like it, then they can buy it
and have the full tile. And also it stops
copyright as well. The first one is a mock-up. You want to do the
next page as some of your patterns and we don't
want every page as a mock-up, so it just gives variation. I'm going to add
some color ways. Try to use your
best work detailed work so it shows your skills. So I'm just going to
crop that down. Yeah. Okay. And then I'm going to
place the pattern. She showed the colorway, then crop tool. So I go into the
next page and I'm going to add the mockup. This mock-up, I'm going to choose the wrapping
paper mock-up. This was the one from
Creative Market. I prefer to move this orientation just to
give it a different look. And I think for the other ones
have been doing portraits. So it just looks more succinct. Lung there. Again, I'm going to
add pattern as well. You don't have to, but
this is what I like to do. This they give them a taster. Find my pattern here. Place. Large, crop that down. So that wasn't cropped.
I just dragged it down. I drag it down to a
similar sizes mockup, and then I'm going
to crop it down. I can, then I can add my
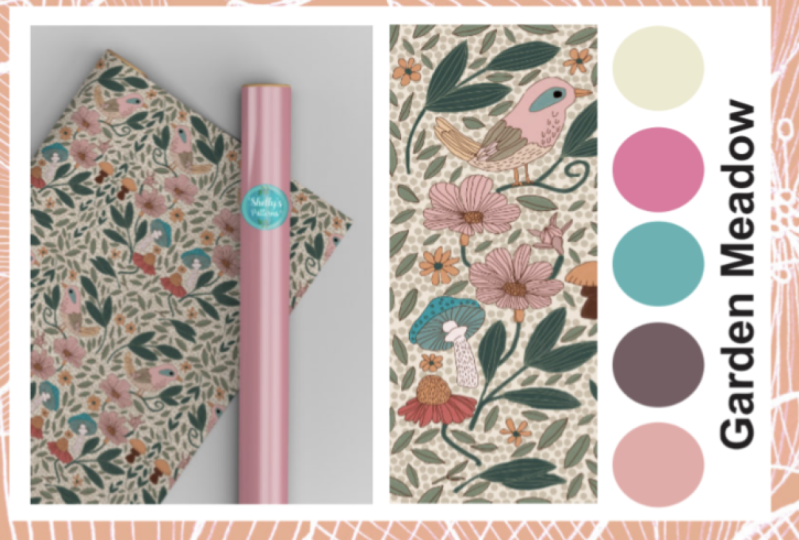
palette, color palette. So with that one, you click onto the tools
and then Eclipse tools. And then I tend to
work in circles, but you can working squares
if you wish to do so. But I like working in circles, so I'm just going to
move that closer to the edge there so we can put the name of this pattern here. So yeah, I'm, I'm using this
from the color palette. So find the color
palette that can width. If you can't find that you can make your color
palette again. Edit, Copy, Edit, Paste, and then drag that down. And then change colors. Once you know how it's
quite straightforward. Okay, and then I can add, I like to add the name
of my design here. So this one is called
Garden meadow. You can often come
going to just quickly crop that down. Okay? Okay, Then the last page, I will do a mockup because we've done
them are cut together. So let's find that
mockup that we did. This one was the one
from print four. Place. Now with this mock-up, I'm going to put the
pattern behind it. So the market there, and I'm going to do File Place, find my design place. So you can go into a lime, sorry, arrange, move
back one. There we go. So you've got the
pattern just behind it, which is quite nice. Just give that whitespace
there as well. And again, I can add
a color palette here. We'll use the same
one I did copy edit. So the circles are
the same size. Now, I don't have the color
palette ready for this one, so I'm just kind of guessing what the color is while trying to match
it to the palette here, so you can do it
that way as well. Just copy this text here, Edit, Copy, Edit, Paste. So now it's the same size. And then change the name. Sea shells. Then make that central. Alright, so I've got a
bit of whitespace here, so I'm going to get those here. Drag it along a
bit more central. Okay? Okay. Then you can add
some more designs. If you want to add
some more pages again, you go straight to where
it says Add Pages. And then you can add some
more pages to your portfolio. So if you have any
questions, please do. Let me know. I'm here
to help. I'm a teacher. That's what I do. I love helping students. If you want to give a comment or put a review on this lesson, that would be
greatly appreciated. So thank you very much and
I hope to see you soon in more lessons in
the coming future. Okay, take care.
6. End of Class : Thank you again for
joining me in this class. I hope you learned something
and I wish you all the best with your portfolio by
gaining more clients. If you want me to
review your work, please add your work to the
project and resources tab. If you prefer, you can e-mail me, which Lean
culture@gmail.com. Feel free to add a
review to this class. If you'd like more content, please do say what
you would like. And if you have any
questions about design work, please comment on the class
and I'll be sure to help you. Thanks again for joining me and I wish you all the success. Happy designing
and see you soon.
 Sheleen Cocea, Teacher of Pattern Design in Affinity