Transcripts
1. Intro to the Course: Hello, my name is Lane and I'm a surface pattern designer
and art teacher around here to show you how to design in Affinity Designer
and affinity. Surface Pattern Design is
a great skill to have, especially if you
wanted to drive. Fabrics, will get
you wet licensed by companies that will play to
design on many surfaces. In this mini course, I will be teaching
you how to create your own vector pattern in Affinity Designer
and Affinity Photo. You will learn the steps, but tracing your own drawings
using a digital stylus, creating in detail and color. Are we show you how to get your own inspiration from creating your own moodboard
and color palette. Once you've learned these, you will have the
knowledge and creating your own half-drop
tattooing ritual. Them be tested on to a
print on demand site. Join me on this mini course. If you want to stretch
yourself in pattern design, in creating vector patterns for your own portfolio and work. Can't wait to see you in class.
2. Creating a Mood board and Colour Palette: First thing I'd like you to
do is open Affinity Designer. Now show you my mood board. This is my mood board
that I created earlier. And you can see that I have some images and also
a color palette. What I have used this Pixabay, you can see in this corner here, Pixabay is a website that allows you to
download free images. So it is great to do that, so you don't have to
worry about copyright. I also got to this color
palette from Pinterest. So I have a Pinterest account, which is a great thing to
have as an artist because you can collect images
for inspiration. The first thing you need
to do is go to File New. Click on A4 and
make sure that is, it is a landscape. And then create. Then you
click onto Pixabay k. So you click up at
the top where it's got that search bar, and you click in what
you are looking for. For my projects I
wanted to create. I want to use flowers and birds. You can decide whether
you want to do with flowers or if you want
to do with leaves, I might add some leaves
to those as well. Or if you want to do food or transports fruits
and vegetables, choose a topic that you feel that you'd like to
work on to make your, create your own pattern. That is totally fine. So I'm working on florals, so I just click at the top. I've just clicked
on for flowers. Will come up with a range of
different types of flowers. Now, I want to try and
look for flowers that I would like to draw is for inspiration and also for something that I would
like to draw myself. So what will happen in this
process is that I will draw some flowers and
some birds by hand. And then after that,
in the next lessons, I will show you how to
do a digital image. And by doing it digital image, I will be tracing around my
already drawn out images. So yeah, so look for your, what you'd like to draw
and what inspires you. Like this pattern here. So you can go straight
to here and download it. It's free download, you
can download it that way. But for me, I find it easier
just to copy and paste. So if you click here, I do the right-click
and then Copy Image, click onto Affinity
Designer, and then paste. I've got my first image there. So if you want to learn
how to crop your image, if you feel there's
too much space there. There's the crop tool here. With vector crop.
You click onto that. And you click on to the middle section
there and drag along. When you happy, you
click Move tool. And then you can make it bigger,
smaller, etcetera. Okay. So I might look for another, our copy image and paste. Okay? I'm just going to
do to images for now. You kinda get the idea, making sure that
you've got a range of different icons,
different images. So you've got Flores, different types of flowers, different types of birds. Okay. Then the next thing
I'm just going to show you is my Pinterest account. So you might look
at this and think, why is it in a
different language? Well, that is a good question. Well, I I'm learning Romanian and it gives
my husband's remaining. And it just kinda prompts me
to think of the language. Sometimes say, that's the
reason why it's like that, so please do ignore that. So this is my page,
Shelley patterns. And here are all my inspirations and some of my own
design work as well. Um, so I'm gonna go
straight onto color trends. And yeah, so you
can see a range of color trends here
that I've collected. So the best way for you to
do this is just look for color palette and then typing what colors
you're looking for. E.g. you might look for cones, ok. And then you've
got the earth tones. Look, looking around there. Or you might look for hostels. Okay. And there's all
different colors, different mood, mood boards or color palettes you can
work from, which is great. For this one. I didn't cut copy of the image. I actually saved it. So Save Image As
and then save it into your documents or a place where you want
to save it to you. I've already saved it. So I go into Affinity
Designer File, Place to find my image color
palette open, and then place it there. Now. And how I create
my color palette from here onto the swatches, I click onto, create
a palette from image. Select Image, image. They're open. And it's selected
some colors here. Now it hasn't collects
selected all of the colors. So I want to change
the number of colors. So I'm going to put it to 12. You can actually
type, type it in. So you can see it's selected more colors
there, which is great. And I press Create. And you can see I've got a
lovely color palette there. And I can use this for my seamless patterns so I know what colors to
choose when I'm coloring, which is so great. To go back-and-forth. I've got my color palette there. But the first thing you
also need to do is save it. Because then you can use
it for anytime you want to put it onto another programs. So if you want to use it in Affinity Designer
affinity photo, you've got this color palette. So I go, I go into
this bar here, and I click export palette. I've already saved it here. So all you do is save it. So whenever you want to
download it onto infinity, you just click onto
import palette. Inputs it. You make sure you import
it as a document. They have it. So take this time to
finish your mood board. I'll show you my example. Then once you've done that, if you can print it off, that'll be great
because then you can reference the images
that you have on there. So if you've got
birds on there, e.g. you can start drawing
as a reference. You don't have to
draw the exact bird. You can change the
style of the bird, whatever you want to do. You can take parts of the flowers and just make
it your own if you like. So if you can print
it off, you can. If you don't want
to, that's fine. Saving paper, that's fine. Yes. So it'd be
lovely to see you in the next class where I can show you how you can get your drawings scanned and then
raise around your images.
3. Drawing, Scanning and the Digital Stylus: So before we start
our digital drawing, we must draw our images either
by freehand or by tracing. So if you look at
your mood board, try to take some
images from there and draw what you can
or what you like. If you prefer to trace them, then that's okay too. For this, you may need
a light box or draw on a window in the daylight so you can see the image is
clearly when you trace. Try to draw at least
six to seven images. Once you have done this, scan your images
into your computer, preferably at 300 DPI for a good quality scan
and save your file. This is my Wacom stylus
and drawing pad. There are many other stylists is that you can try out there, have a look at the reviews
and make your decision. At first, I found
it a bit difficult to draw with this stylus, as I wasn't used to looking at the screen whilst drawing
at the same time. But after lots of practice, I've gotten better over time. If you want, you can
practice drawing on Affinity Photo or
Affinity Designer just to get the feel of the pen so that you can get used to it. In the next lesson, I will show you how to trace using the stylus
in Affinity Photo.
4. Digital Freehand Drawing in Affinity Photo using the Paint Tool: Next lesson, I'm going
to show you how to do during just by tracing
over your own drawing. So for this part you'd have
to open Affinity photo. So you can actually do
in Affinity Designer. But if you want
to have more room to do detailed drawings, It's better to do it
into Affinity Photo. And I'll show you
how to do that. So if you click on Affinity
Photo and vile new A4, and then click the orientation. That's what I meant
to click and create. And then click onto place. And then I click on to this scanned image that I've done of
all my drawings. I click onto the page, change the orientation,
just move it around and drag it across. Okay? So we just make sure
that is its layer there. So I'm going to change
that to template. So I'm going to concentrate
on one element at a time, okay, sick onto the crop tool. I'm going to crop it
first so I can just start with the easiest one
first, of course, flower. Okay, and then apply. The tool that we use is
the paintbrush tool. The only thing that
you'll have is that it doesn't have a rubber
tool in Affinity Designer. So with Affinity Design, it's better to use
a different tool, which is a pen tool that can
show you how to do that. Click on the paintbrush tool. You want to find a brush that is easy to
work with. So e.g. if you've drawn it in pencil, you want to try and find something that's
drawn in pencil or pen or a blue pen because
it's more precise. You find. So say like this tool, this brush here, it
looks quite nice. You can change the spacing
of it in the flow field. But I'm going to just
leave it as that. Okay? So use my stylus. The stylist is quite good
because you can use, it doesn't matter
what stylus you have. I've got the webcam,
but if you have a different stylus, that's fine. It's quite nice to use an iPad. If you have an iPad, that's even better because
you feel like you're drawing onto the page when you've
got a separate tablet, you have to work with the
differences of working on that pad and then looking at
the screen at the same time. So it's a different way of working and it takes
a lot of practice, so you might not get
it straight away. So you might need to
practice for few times. So if you find this difficult, then I would wait for the next lesson where
I'll show you how to do it using the pen tool, which is a lot easier when
you're first starting. Okay. So I'm just going to draw around my touring. You can check it even now. So if I take the template
off, there you go. You've got your drawing there. And you can just see if there's any areas
that you really like. You can go onto. The rubber tool. You need
to change the width of it. Size you'd like. Remember, you can
zoom in and out. So you've got the Zoom
In and Out tool here. Okay. You can click
on that or you can. For me, I just use my
finger and my thumb. And I use the mouse pad. Go in and out. So you just
find what works for you. So I'm just going to
use a rubber tool. You use a stylus again. I'm just going to use thickened day isn't
just going to get rid of That's okay. Just leave it like that for now. Okay, You can see that it's just one layer there
so that, that hit, I'm just going to change
the name of it and just put the flower one. That's well one. And then I'll go straight
to adding color. There's two ways of doing this. You can either color it using the paint tool or
you can just fill it. So the first thing you need
to get your color palette. So if you remember, we created our own
color palette. And if it's not on here, then you need to import it. So click on this icon here. Click on to input palette
and Document Palette. Okay, click onto that
and then press open. And there you have it,
you've got your palette. So I'm going to show you
how to fill it first. So I've got the
tall open already. So you click onto
flood fill tool. And I'm going to do this. Flower pink. I just click on a segment here and it just
fills it in. Just like that. Okay. Then inside I might want to put different color like this kind of beige color. And I just fill it in. They feel might need to zoom
in to get into sections. You need to go again and do feel so small. So tiny. Yeah, that's very tiny. I don't think you
can see that anyway. No. Okay. Let's zoom out. Too small to see. Okay. So
that's all been filled in. But if you feel that, okay, this looks nice, but it looks very plain. And I want a bit
of texture to it. So this is how it's done. I'll show you. So
I'm just going to undo all of those fields. So this can make you
feel like you're actually coloring,
getting yourself. So you click onto brushes. So first of all, you need to make
sure that it's them, the paintbrush tool,
click onto brushes. And then you can choose your medium you
want to work with. Um, you can try wash,
maybe try that. You want to just test
it beforehand as well. Because you might think, oh, I don't really
like that texture. Okay, So just test
it beforehand. Can see that's going
to look like that. Okay. Um, I work with dry media sometimes. You just test it. Okay, so
I'm gonna try this now. Let's undo that paint and
you just color it in. Okay. You can just start
before you get to the edges. I tend to just do the bigger areas with
a bigger pain with a larger width of
the paintbrush. When you get to the edges. I want to make sure that you're not going over the
line too much. When you're doing it with
a stylus, it's like, oh, it feels like I'm actually
coloring it then. Like cool. Okay. So I'm just going to change the width and
make that smaller. And then just zoom in to make things easier for yourself so you can
see what's happening. See not going over
the edge too much. Now I want to draw those
lines that were there before. So I'm going to click
onto this tool. Sorry, I'm going to click
onto the color black and go to brushes and go to pens. I was working with before,
if you can remember, and then you just draw those
lines that were there. So I think that's too thick. So I'm going to
undo and try again. Okay, so that's one element. Okay? So if I have
Affinity Designer open, click on to that file, new. And we just do it as inches. Yes. They did it before. Eight by 8 ". Okay. Okay. Um, and
then I click onto the Scratch tool so I can
have my background here. And then just make sure I have my palette. Just make sure. Yeah, that's fine. Okay, so
go back onto Affinity Photo, get rid of the template. So first of all, just get
rid of that template there. When Edit, Copy Merged. Then click onto it and Affinity
Designer and edit paste. You have the first
element there. Edit, copy, edit paste. You have them as one. And then you can
change it around. You would like it. If you want to change it in any
way, change the color. So if you have B wanted to do another flower and
it's this color, you go back and you can
actually click on to this. You can color it again, or you can just fill it. So you get to my colors. Swatches, say blue color. Yeah, you just fill it and it still has that kind
of texture there. And zoom in. You can see certain areas. It's, it's, it's not filled in. So you might need to take the brush tool remembering
what brushy views, because you've got to
go back to our color. Picking up on the
color that I want. Yet begun. Then you can just
color in those areas. You can see it's pixelated
because it's so close. Okay. So they have it. There's my next one. So again, I'll go to file, copy merged, and
then edit, paste. Now have another one there that you can use
for your pattern. Okay, So you go back to
Affinity Photo and you file save as because if you ever want to add
color, re-color, change it. Do something
different. It's there. So you save it into your documents that
where you want to put it. And I'm going to name as
flower one, flower one, say. And just save it as
Affinity Photo file, not as a JPEG, because if you save as a
JPEG, you can't change it. So you need the original file.
5. Using the Pen Tool in Affinity Designer : In this lesson, I'm
going to show you how to infinity designer, where you can use a pen tool. So if you're struggling, trying to draw with the
stylist, it takes some time. If you've picked it
up, then that's great. But if you wanted to do
some things a bit more simpler than go into
Affinity Designer. So you go into File new A4, pick the orientation as
landscape and create. Then you place
your scanned image into a document and place. It's just basically how you
did it in Affinity Photo and just stretch it and making sure this is
your separate layer. So it just turns
out to template. Okay, then I create a new
layer for the drawing. So we'll do a
different flower here. So we're trying to do this with lily flower,
I believe it is. I'm going to call it flower. And so I do, I click on the Pen Tool. Make sure you have it
on black pen tool. You just click on the
area so it doesn't draw, it just makes lines. So you kind of pinpoint the areas where you think
there's going to be a curve. So I'm just gonna
do the outside of it and then finish it at the end. Then I click onto the move
tool, come all together. And to create those curves, I click on this tool here. It might be on something else. It might be point or something. It needs to be on Node tool. Zoom in, and then I just
bring it up like this. This is another method
that people use as well. So no right or wrong, you just do what
works best for you. And I was I started
off doing it this way. I prefer it this way to
be honest because it just made the the
lines straight. I mean, straight
but more precise. Okay. So I can actually
make this a bit thicker, the width of it thicker. This I can actually fill it. Import Document
Palette, Color Palette. Click off that. It's
filled it in there. So you can either fill it in or the same way. You can color it. You can color it in
using the brush tool. You can do it that
way if you like. But again, there's no rubber, so it's up to you. Um, okay, so we've
got some lines here that we want
to draw as well. So I can go into the pen tool. Let's sure it's black. Just click on the edge. I want to draw my line. And because I'm not connecting
it to anything, now, I click straight back onto the
Move tool and then a node. If you need an extra, you can click there. Okay. Okay, sir, I click
onto the okay. Yeah. All right, so it's set behind, so I'm going to have
to move it forward. So it's up the top. And then I can see it's just
going to live lightly. So I can just bring that up. Okay? Okay, so then I do
the same thing again. You might want to
click above the layer. So it's on the top so you
can see it didn't go behind. See where I'm clicking? Yeah. Okay. Sorry. Click back
onto the move tool. Click onto the page. And then you do your next line. Oops. Day. I will group all of
these segments together. And that's all as one, so
it's not all over the place. And if you need to
take things out, you can go into the
group and change it. And then you just
add more onto it. So I'm going to
use the pen tool. Again. If you want if you want the
whole thing to be filled, you need to close it. Okay. If it's not
closed, it won't fill. It will fail partway. So that's something to note. Note to get those
curves looking goods. Okay, so I can click
onto the field tool. And let's say you have it. Pink, light pink, dark
pink, looks great. And then I'll do the
last part. The stem. Harvest them. Okay, and then click on the Node
tool, get those curves. Would add an extra
curve in the center. Okay, and then I
go to Fill color. Grapes. Lovely, well done. I'm looking here and I
see a line just die out. So I can just go
into the group here, find that line and just move
it to zoom in a little bit. Like That's all together. Now, what I need to do, it was to get these parts
altogether as one flower. I group it together as one. Names gone for some reason. But I'm just going to
there's my flower. So you guys can just take the template off
and you can see that fuel.
6. Adding Detail to Vector Drawings in Affinity Designer: In this lesson, I'm
going to show you how to do detailed vector images. I'll click on bread. So I've made it as a group. And then I've separated. Each part. Has a layer for
the, for the base. You can see if I just
take all of this off. Okay. So the first thing, please, the pen tool again. And I drew around, okay, as we did before and
using the node tool just to make these nice curves. So once I've done, once I did that, I then added the color
that I want it on the top. And then I went on to doing the wing and the same process but with this wing,
as you can see, on the original, it didn't go around because
you're using the pen tool, it's best to go all the way
around so you can fill it. Okay. Otherwise, if you don't
want to have that look, then you just have to use the vector brush tool and
then color in with the color, you'd like. Another layer. So that was that's there. I just did I just did another layer on top for the
I section and fill that in. Then I did the feet. The same way. The beak. We can see the beak is
just one piece there. So I just added the
line afterwards. The I with the I just used. If you can see here
there's some shape tools. There are the shapes
that you can use. This if you click
on this icon here, it's on the arrow
tool at the moment. But you can choose any of these. You've got the tier two
hearts all Cloud COG. And you can actually, if I just show you, if I just click on Cloud tool, you can make a shape and you can actually
change it around as well. Click on the Node tool again to just zoom in. So you can see there's
that red dot there. You can bring it
in, Bring it out. So this could be quite
nice if you want to do a flower and it just
goes out as a circle. So this can be a fun way to create some other
vector patterns. So you can have fun with that. That's another option as well. I'll just delete that. Okay. Going back to my bed. So I did the I and then for the next part
was to do with the detailing? With it. Yes. So you can see here, I added
the detailing later on. Do you feel like you want
to add some details? You can do some mark making. And this is where the
vector brush tool comes in. If you want to do that with
the vector brush tool, so you can click on the brushes. Click on to. I like to use dry media, sometimes, bit of texture, and then change the width of it. And go through the swatches and try and find a color that
you'd like to work with. So, um, or you could just use black and just
change it slightly to a more brown, light brown. You can add to your
color palette. That's fine. And then I use my stylus. Zoom in a little bit. I
can do some art-making. This. Oh, that's too light. Okay. So I collect all those curves. Hundreds of cars. They need to be I can
just group it on its own. And it needs to be
on the right one. Because on that one, isn't it? Okay. I just
mentioned their kids. Okay. That's all in one. So you can see there you go. You've got touched on.
7. Saving your Vector Images: Well, I did the
original drawings. I want to save these
as individuals. Okay. So I do File new. It doesn't really
matter what size. I'm just I would just
keep it as inches. Create sale at this one. So edit, copy, edit, paste, and then just having this one element to
this page, right? I'm going to File Save As flower for keeping that page open. Going to go back and
get another element. This one's called
leaves, the Edit, Copy, Edit, Paste.
Delete this one. Oops. Try not to change
the size of it. Just okay. File. Save As you gotta
change the name of it, because otherwise it will
override the other one. So this would be
a separate file. And you do that.
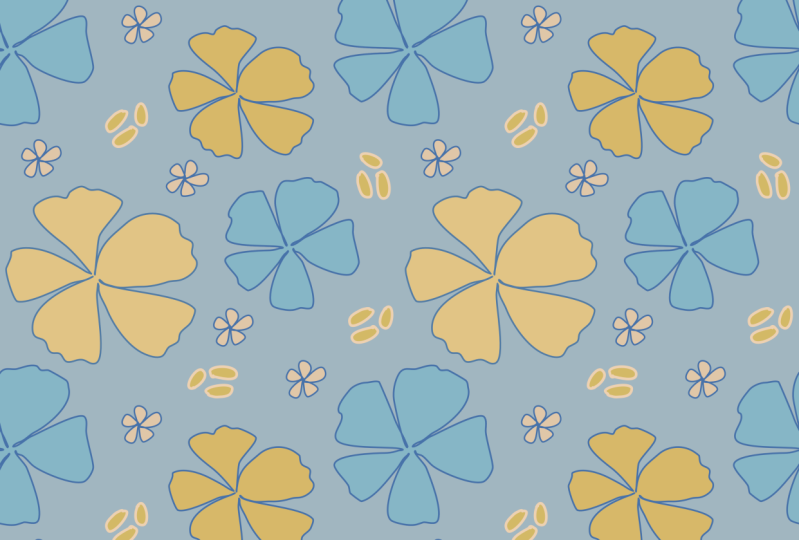
8. Creating a Half Drop Seamless Pattern & Testing your Pattern : So this is an eight
by eight inch square. And I've just added
my elements together, the birds and the
flowers and the leaves. And I've kept it all within the square so there
shouldn't be any, there isn't any of the elements
coming out of the square. So what I'm going to do is group it altogether as one
piece there. Okay? Now I've got a bit
of slack here. It's coming off the edge. So I'm just gonna
get my crop tool and just make it flush. For that to happen, you always need to have the
snapping tool on. So if you'd put the snapping
tool on and also you click onto Show Guides, Show grid. So that just gives
you extra look into where things
are snapping and you can see that the
measurements are correct. Okay, So once you've cropped it, click on the Move tool
and then click away. So we're going to create
a half drop pattern. With this. I will show
you how to do this. This is the easiest
way. You can do it. Many, many other
ways of doing it, but I will show you this way. So nucleic onto your square. And then you drag it
along to the center. So you can see all
four squares in the middle and then squares
on the sides as well. So that's in the center. Now I'm going to copy that. And I'm going to drag it to
the top right-hand corner. Okay. I might need to zoom out a little bit so I can show you. Okay, so you can see all four squares in
the large square. That means it's central. And then you edit,
copy and paste, and then drag the second one, the third one into
the bottom corner. Just zoom in because
I think that was it. There we go. Yeah. Okay. So I'm going to
select all three of these pages so everything
is merged together. So we haven't got layers on top of layers
where you can't see them. So I'm just going to
group it together. So it just makes it easier. Okay, so that's
grouped together. And so then now I'm going to add some elements
in this space is here. So let's go to File, File Place. And you can see all the elements that I've saved separately. So usually with small spaces, I like to use flowers. Then just minimize that. I'm just going to crop
these edges here because it's a bit annoying when
there's too much space here. Okay, I'm going to copy this and use this same
flower few times. You can take the snapping tool off if you want to have a bit of a freedom to move it around, but make sure you put
it back afterwards. Just use this same flower
trying to size a bit as well. So it just has a
bit of variation. You can even move it around. Okay? Okay, so the next
thing I need to do, group them all together again. So all those notes that
I've added, grip it. Right, I'm going to
click onto square. There we go. Now, I'm going to just
crop the edges, right? I've got to make sure
the staffing tool is on. Otherwise you're
gonna make mistakes. Yep. Sure. It's snapping. Okay. Move tool. There's
my swatch there. I'm going to so I'm just
going to test this. So if you open up
a new document, eight by 8 " I'm doing again, you can change the
size as you wish. Okay, get back to my page. I'm going to edit,
copy, edit, paste. And then slowly drag it
into the four corners. Edit, copy, edit, paste, and dragging it along
to see if it works. So when you drag it along, it needs to make sure. That's another thing is to make sure because it's a half-drop. So you've got a half
draft it. Okay. Copy, Edit, Paste. That should be there. Edit, copy, edit, paste. Copy, edit, paste. Okay. If you're happy with the pattern and you like the spacing,
then that's great. If you feel that you need to
add four elements in there, or you can even add
a background to it. Then go back to the original. Adds to that. You want to go back and change, change it in any way. You go back to your your pattern and then just ungroup it. Go to ungroup. And then just change your elements
around to how you'd like it. And then you do the
same process again. And then just to check to see if you are happy with the pattern. Okay? So next thing I'm
going to do, group. Again. I'm going to export as a JPEG. And now I just need to test it. So I'm gonna delete this. Now. I'm not gonna do it. So I'm
going to open a new document. Again, have lizard
documents open. And I'm going to get a square. I'm going to fill it. Use a field guide to fill
bitmap and pattern one. And this will, you'd be able to check if the pattern
has repeated? Yes, it has. That is a half-drop pattern. The difference with
the half drop pattern is that it's harder. It's harder for you to
find where the repeat is. So it's quite a nice pattern to, to work with. Okay? So, yeah, that's worked nicely. Say now you can
see that it works. So going back, so you can see that you've
got this, this bit here. You don't crop it
because what happens is that it will change. It will change it
in a way where it won't it won't do
the repeat properly. So the other thing I'm going to do because I've
saved it as a JPEG. I'm going to check
if it works. Who? My screen flower account. So go into my Spoonflower count. So I'm going to test my, I choose my file. It tells you the formats you can choose from
tiff, JPEG, or PNG. It has to be 150 dpi. That's the recommended.
If it's any other, like if it is 300 DPI,
what will happen? It will probably come up bigger. So if you want to have
it a bit smaller than you want to upload
it as 150 dpi. And I can show you how to
do that as we go back. First of all, you'd
get your pattern. Yes, I own the rights to this
pattern and then upload. So I'm going to view
all my products. You can see my design is more, it's kinda like a C style
because it's smaller. You can actually create
it bigger if you want to. And you can see that's
quite nice actually. There. Yeah. See it
on all the products. They're very slow in here. Yeah, I can see it
on the cushions. And when you see it on
products, you like what? It actually looks quite nice. If you're not happy with it. Again, you can go
back and change it. So it's just nice
to see it visually. So that is it for this lesson. Thank you so much for
joining me in this class. I hope you've
enjoyed yourself and learn some key things about working in vector patterns in Affinity Designer
and Affinity Photo, depending on what your style is, I worked with the
pen tool mainly. But again, you can
just work with, you can work with the vector
brush tool, affinity, flight, because that is the rubber tool if
you need to use it. So if you do have any questions, please, please please
do write to me. I am very friendly and I'll
try my best to help you. So thanks again for
joining me in this class. Enjoy designing buh-bye.
 Sheleen Cocea, Teacher of Pattern Design in Affinity