Transcripts
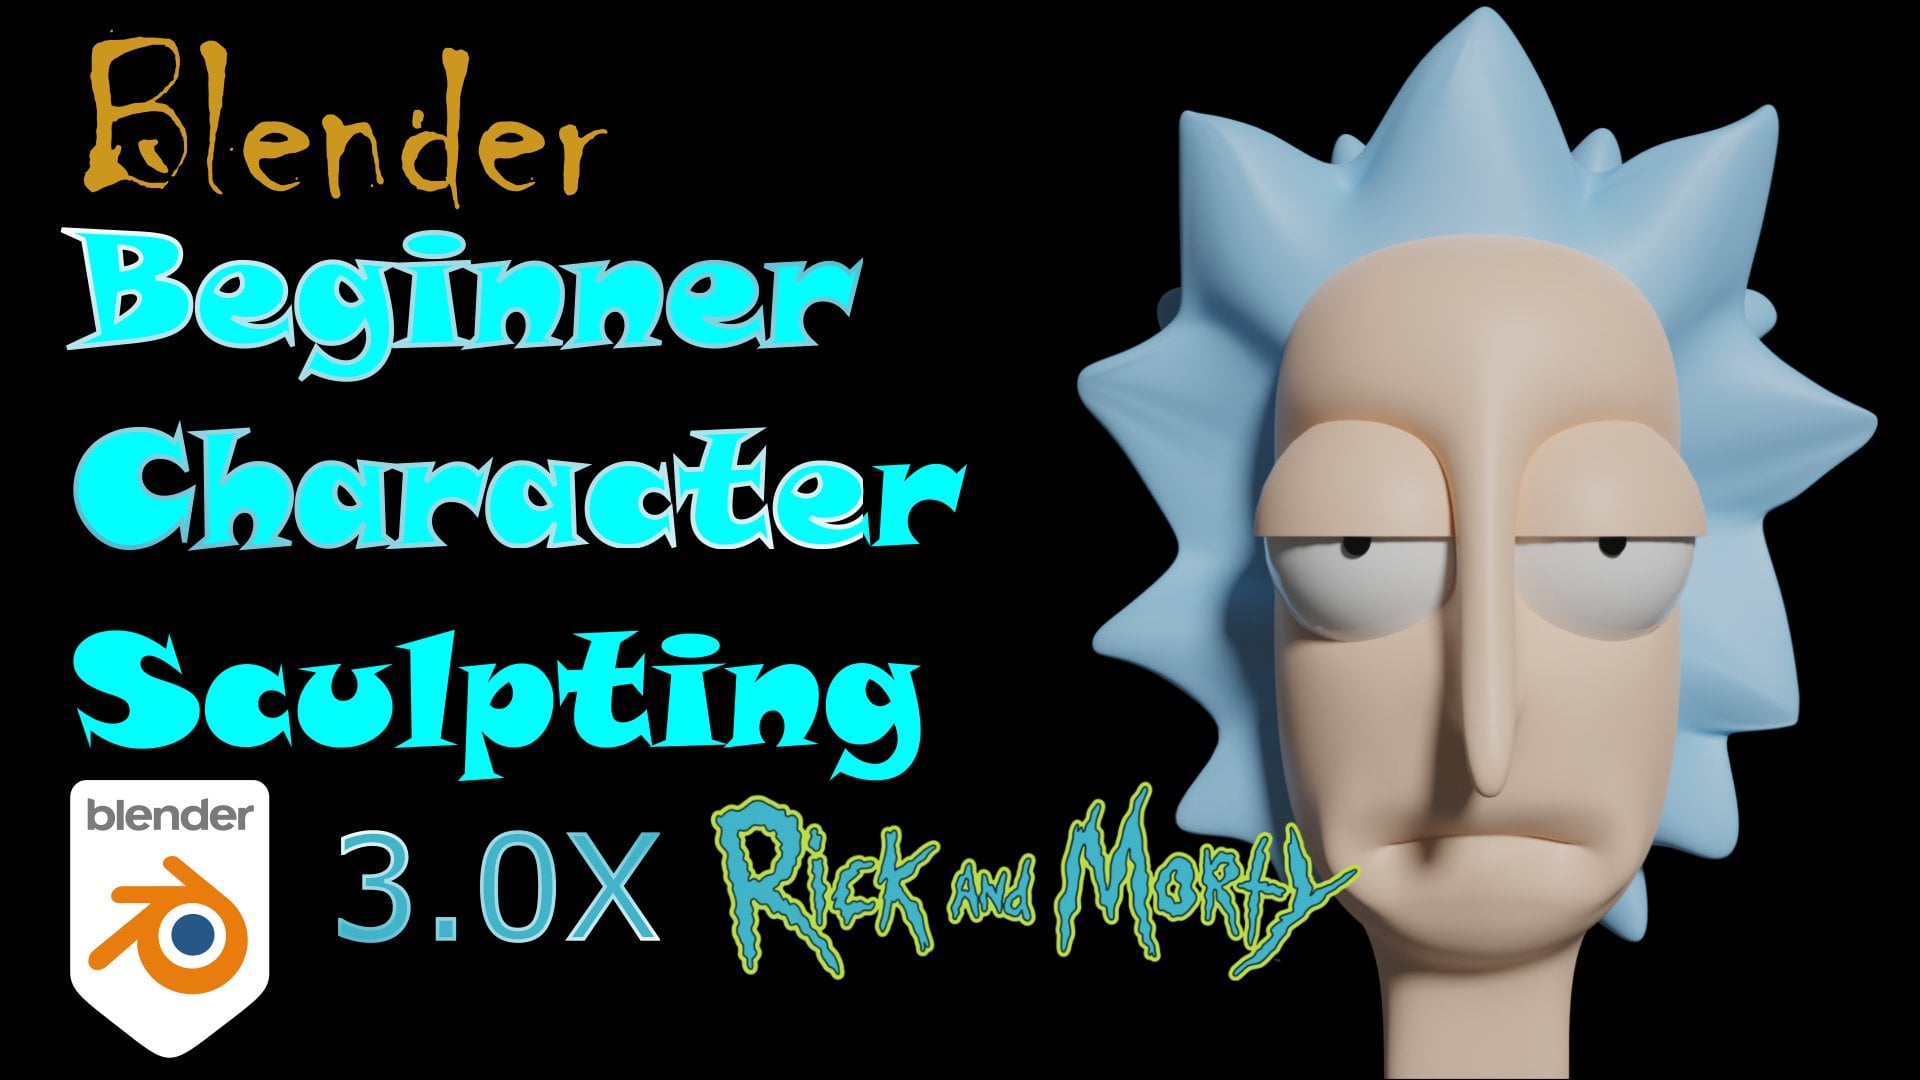
1. intro: Hello everyone. My name is Connor
and I'll be doing 3D modelling for
about four years now. I made this course for
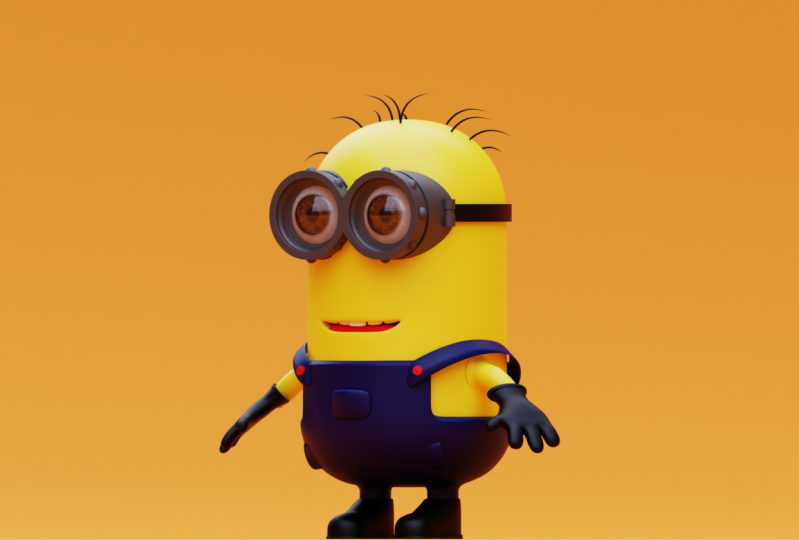
beginner to intermediate. In the course we will be learning how to
make them Indian. Of course, from
this peak will mean we will make that
loves the glasses, will make transparent
transparency. So it actually looks like
he's got classes on. At the end, we will go through
all my my render settings. So we'll be using cycles. And we will go into
our preferences, change some of our
settings to make sure our GPU or CPU can run
the cycle property. We could do some
materials, some base, some basic materials so we can get the yellow and the blue, all that nice stuff
for the final render. Um, I hope you guys can
join me in this course. I'll also give you guys a word, a word page so you guys
can see all the shortcuts. So, thank you very much and hope hopefully I'll
see you in the course.
2. Reference and Body: All right guys, as you can see, I'm in Blender 3.1. All I'm gonna do now is just going to click
on the right here. I'm gonna drag select, delete my scene, all the
objects in my scene. I'm going to add the shortcut so you guys can see what
buttons I'm clicking. I'm gonna put on the left
side. So bottom-left you'll see all the
buttons are praised. As you can see, left-click, right-click w, w times too
crazy into close that menu. I'm gonna go into the Y-axis. Then going to push Shift.
I'm going to go down to image loading my reference. The reference should
be in the description. Somebody there for you guys. I'm gonna go to Character
many, millions it in. Once I've got a chart,
I'm just going to go into the Properties, going
to put opacity. I'm going to type in 0.55. I'm then going to add a cube. So I'm gonna shift add cube. I'm going to go into wireframe. I'm going to click on my image. I'm going to gx, bring it to the middle or
as close as I can. Then going to scale this
cube on the x-axis is x. Alright? I think that's about middle.
That looks about right. Then going, you can, you can tell this is a subtle
if it's in the middle, the reference, so you don't
want to move the box at all. You just want to scale it
together and make sure that it comes to a point where both
sides are inside the cube. I'm then going to GZ to
grab the top, top face. So make sure you press three for face left and
then top press the top one. I'm going to paste the
bottom resolve GZ, drag it down to the feet. Around there. I'm now going to go out. I'm going to click on
this reference again. I'm gonna shift D Z. I don't think I did that
right RSA at 1 ninth. Just like that. Now gonna just put it
somewhere around there. This side doesn't matter
too much as long as it's the same
height, which it is. Now going to grab
this reference gx, put energy axis over them. They didn't go into
click on both of them. I'm going to press M image. Let me just nucleation. Go to the top yet click
on this icon here, and then click on the icon
there, and then just dry. I'm gonna drag this
above this collection. So this is just going to
click on the images now. Then I'm going to close that. I'm going to click
on my collection. Alright, and then not
assault of the body. I'm going to delete this cube, go into wireframe like that. I'm going to hit
Shift a. We're going to add a cylinder like so. Vienna scale this
cylinder, the cylinder. We're going to go
into edit mode, select this face. Cheesy. We're going to go Control B. Now we're going to put in a
lot of phases, so just small, so we'll scroll up until
you feel comfortable. I can I feel like I can
put a couple of more. I said the student till you feel comfortable with the
amount that you like. How many did I put? Let me let me tell you how
much I put I put let's see. Put in I think it
should tell me. Yeah. We're going to lift
here 123456789. I put in 99 to ten. And then now we're just going
to get the bottom face, GZ. Bring it around. Yeah, Control B. I'm gonna make less
faces at the bottom, so I'm just gonna
scroll wheel down because we're still going to
add a subdivision modifier. So that should be
our buffer, right? Like that, because the sides lot more flatter than the top. The top is more
of a round shape. Then I'm gonna go and decide you to make sure it's right there. I'm going to bring it
closer to this module. I think that's about right. I don't think I need
to do anymore scaling. Since about right to me, I'm
going to add a loop here by the ons just for now.
I'm going to Control B. We're going to add, let's go
with this is the last one. I'm just going to add
a loop. One loop, don't, don't control
V. It is one. Again, Four minutes and
we can do the glosses. So what we're gonna do
now is we can go Shift. I'm going to add a cylinder. We're gonna go RX 90. When you go into wire-frame, we're going to scale
it down a bit. What I'm gonna do
is I'm going to place it in the middle there, in the middle of the inside. I'm going to scale
it up like so. Just like that, I'm
gonna I'm gonna go and decide for you to see roughly where I want to put it. I'm not going to
bring it all the way. I didn't think it's necessary because it looks
like it's turned, but it's not going to make, you'll see it won't make
sense when we get to that stage because we saw
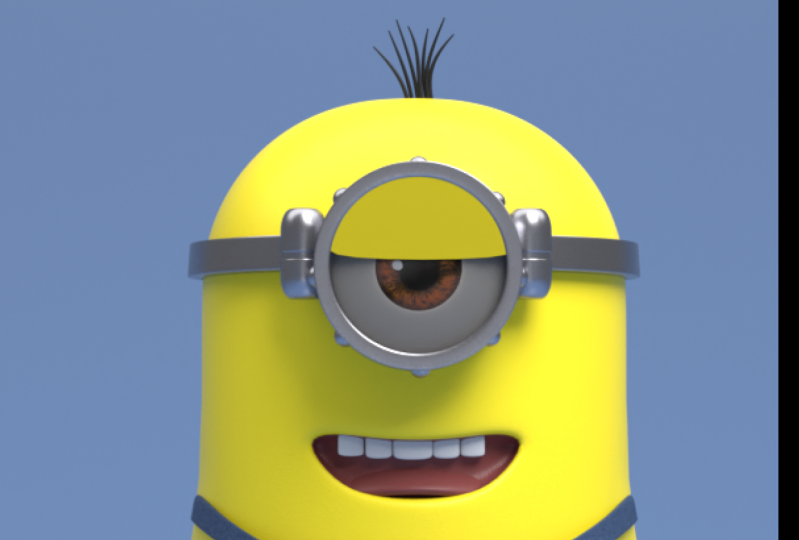
the millions glosses, as you can see, are flat. So we're just gonna, we're
not gonna do any rotations. We're going to
leave it like that. Maybe bring it out a bit more. What I'm then gonna
do is I'm going to go into face select mode. We're going to go
back into the why. We are going to proceed,
going to wireframe. We're going to press
I'm going to press I, and we're going to
press E to scale it in. Let's do it. We can do close this,
just leave it there. We can change that. We're
going to change it later. We're gonna go, then
what are we going to do? Let's see. I think that's about right. Let's just press go
into this mode here. At the mirror modifier, click on the media
themselves, the body. We go into de-select
oriented to disable this, the TV so we can't see
the mirror modifier. It's still there
but it's disabled. We're going to grab these
middle four vertices. We're gonna sx 0, EXIF to delete the faces, I'm going to grab the
edges, make sure you have the back edge
as well, guys. Put the display
settings back on, make sure clippings on, on the mirror modifier
enemy into g, x, just like that, That's it. And then we're going to now Control R to add a loop.
We're going to Control B. We're going to
scroll wheel down. So it's just to say, I'm going to de-select Alt S, bring it in a bit,
perfect, just like that. You can bring it anymore. You can read at least to your desired scale,
it like that. I think that's perfect. I think that's perfect for the
first video, guys. Any questions, please let
me know. I'm happy to help. I'm I should get out. I'll try to get back to
you as soon as possible. So any questions
with the shortcuts, I'm gonna give you guys a
shortcuts page as well, so it will make it
easier for you guys. See you in next one.
3. Finishing goggles and strap: Alright guys, hey, we're
a bank. Let's see. I think what are we gonna do
next is let's do these dots. As you can see, these
dots, these little screws. Maybe, maybe screws. What we're gonna do is we're
going to add a cylinder now, not assumed actually, sorry. We're going to add
in a sphere GZ, and then we get up when
you go into edit mode. And then we're gonna
go into wire-frame. And we're going to press
three for face select, gonna do eat off of it. So EXIF, data off of it. I'm just going to
scale it down now, bring it down, go into solid. I'm calling out my
shortcuts are lots. Apologize if it gets
annoying eventually. I'm just making
sure that everybody knows. You guys probably won't. I'm just gonna put dx. Alright. We could add a, there's a thing called a
circular array modifier. But I tend to have a lot of issues when I work
with that modifier. So all I'm gonna do now is
I'm just going to go Shift D. Bring it around, turn it right, edit a bit. Bring this one back. Maybe make it smaller. I'll make them smaller
altogether with that. Then I'm going to shift. Do you got g x? Sorry, I forgot a lot. Gx, Gy double, double. So g is easy to bring it
like that right at it again. I think that's okay. I'm going to grab
all three of these. We're going to
duplicate them, G, G, 180, GZ bringing
down all day today. And then now we're just
going to add one more. It right here. Since that's perfect. Yeast use It's perfect. I'm just gonna go this
one brings went on a bit. Gz double GZ, double Z, G, ZZ. Grab all of them. Control J to join
them all together. Go into edit mode, press a, so they're
all selected, go to the top
individual origins, and then we're going to Alt. Or just, sorry, just say this. I think that's perfect. I don't want mine too big.
I think that's right. I'm going to press I'll
just grab this one. Let me bring it inhibits
just to make sure it's in. These are all fine. Maybe do this one a bit. Cheesy. Cheesy as gx x, gx x. So sometimes I change, you might have to change
it up, say G, G, G, G, G, G, G XX CSA we go. Sometimes I have an issue where sometimes this
doesn't work here. If I double-click
Z, double-click x or whatever, it doesn't work. So you might just have to
manually go inside yeah, go bring it into that. Sometimes it could be
easier to be honest. I feel like it did
that little faster. I want to bring
this on optima like that and I'm just gonna
shade smooth, perfect. And I'm going to go into the
properties on our properties modifies mirror,
mirror millions. Let's give this a subdivision as well. Let's go control too. I like working on shortcuts instead of actually
adding subdivisions. So I'm just going to Control to, to add two subdivisions. Going to click on this face in the middle.
Yeah, there is a phase here. You're going to go I
to insect ID ones in, roughly put a data, let's
bring it in just a little bit. I'm going to bring it in.
You're going to bring in another one and you just
going to press in center. That just makes sure
it's like that. And then we're going to press Control R to bring down there. As you can see, I'm
lagging a little bit. Just because there's
a lot of polygons. You're gonna do
that for our life. Maybe you can bring
it on. Bring one in. Yeah, to tie to
that edge up to it. You can see in here
to tighten this up, bring morning yet
to tighten that up. I'm just going to press one. Join J for join. Find these two. If you guys have coffee,
coffee is the best. I could do all of this coffee,
I'm going to go Control R. It's totally random,
but control I add one here and
another one, yeah. Control R, that's
my secret. Coffee. Control are at another one here. Maybe I don't know when you
are shopping it up and I'm gonna shade some
insulin just to see. Another thing I'd
like to do, which I'm not going to do in this course. Are we going to obviously do it? But I like to rend not random, but I'd like to see
how my object looks. Rendering like. All I did is I clicked on
this a forward slash and next year shift all
the way on the right of your keyboard, you
should have afford slash. Click on that once. Then you can go into the shoe. So I'm gonna go to insect, insect again at center. What I was saying
is I like to not render preview like
this in random mode. I like to do all the settings
like roughly about now. Add some colors as you
see how it comes out, which is not a bad thing, but it's obviously
great to do that. You should just do
it all at once. So I'm actually going to
bring this in a bit to order. These are proceed because
you can't select this. I proceed to the sake of the faces, and
then I'll press Alt. We have the inside faces and
ultimately do knowledge g, g to about there. And I'm gonna grab
this edge here as well to line it up
again. That's perfect. Just like that. Actually almost done if it goes Let's
add this strap. Yeah, that's trapped there. I'm going to Control R to
put in another loop. Yeah. I think I liked this loop a
little more than that one. We could use this
one, but I want this one because it's flatter. What I'm gonna do
is I'm gonna give you guys an add-on on,
I'll give it to you, but I'm gonna show you if we go into the top-right, top-left, we got edit, we go preferences, we go to Add-ons, and we type in the
search button mirror. And then you'll see the
auto mirror, this ticket. If automation is not there, just go into Google and type blender or
term mirror add-on. But I'm I'm sure it's yeah, it should
be there for you guys. I'm pretty sure it's
probably in there, so just add that on
Save Preferences. Close it up. Now you can press
in God edit mode. Go to Edit on the right, good edit auto mirror. And then we're going to
click Auto a mirror. And then as you can see, I don't like working
on the left side, so I'm just going
to ours said 180. I like working on the
right. I don't know. It's just something I can't do. I can't work on the left. We're going to
actually empty center. Company is already active. Gi it looks like that. That's fine. Maybe I won't maybe
I'll just leave it out was that I had to leave their control one subdivision
like that. That's good. To extrude. Scales on inhibit, quite
as irritating them. Gx down, gx. So perfect. Now that we've done
that, let's add, we're going to grab this
face, these phases. I just alternate there. And I'm gonna go into
top you quickly. I'm going to delete, delete. I'm gonna get rid of all
the faces up to you. I'm going to add this one in. I'm going to Shift D
to make a duplicate. And we've got P for selection. I'm gonna make it
a new solution, g, Z to bring it up a bit. Let's see, we're about to
close or maybe I was right. But I think I think
over yes, right. I'm not going to follow
the reference to my lucky you can
follow the reference. But I just added up personally like it
when they were put it. Now, I'm going to press a,
I'm gonna go into edit mode. Press a to go, well these edges, E hold Alt S. Then we're going to scale it up quite a bit to maybe
scale it down. But salt is again, think there's about right now all I'm gonna do is I'm
gonna add some edges. So I'm gonna control all
double G to put it there. Grabbing that 1.21, yeah. You could go to
two subdivisions, so control to which I might end up doing,
but you don't have to. You can see, but I think
control two will make this even smoother.
That's how I find. If you can't run,
one looks fine. Just to if you can run, I'm pretty sure you
guys should be fine, but yeah, I'm gonna do two GZ. Gold. Looks nice. It looks nice. I'm just going to go
Control S to save. And then I'm going to save it. I'm going to save it mean
menu, menu, blend file. Okay, cool. I'll see you guys
in the next video. Thank you.
4. Creating Arm and glove: Hello, We're back, We're back. Let's see what are
we going to do next? Let's do the arms. I reckon. We do the arms. We made this edge or earlier. Let's go Control B. We're going to add another, I'm going to scroll wheel after that, another vertices there. We're going to add a circle. Now I'm gonna show you how we're not going
to add a circle, but we're going
to make a circle. I'm actually going to
GZ to bring this on. And we're going to go
roughly about here. I'm going to bring
this edge down a bit. I think that looks okay. I'm going to add these three. I'm gonna EXIF, we're going to quickly
add on and we're going to add another add-on. So we're gonna go Edit
Preferences, Add-ons, loop tools. There we go. Look tools, add that Save Preferences. We're going to close
it again. Now, what are we gonna do is we're
going to go into edit mode. We're going to press Alt, select this edge here. We're going to go to Tools and then we're gonna go circle. Let's see how much damage that. Before we do that,
let's add a loop. Loop here. Maybe a loop here, and then you honestly that, and we're going to
go to the Eigen, we're gonna do circle. So I went back to
press Control Z. We can scale it down a bit. Guys want to see what
happens if I shade smooth, that'll be fine. Okay, and then we're
going to do that. We're going to go, we're
going to go E and then g, x. We're going to grab
all these edges again, because it's too big. You might have to
go into wire-frame and then Alt click all around. And then we're gonna go down. I'm going to scale it. I think that's too small. One. I can go to smaller. We're going to
bring it down a bit. Not as much as that. What we're going to
bring it down a bit. And then we're gonna go g x. We're going to add
a loop in g x. Again. What I'm gonna do is I'm gonna
make it so I use arms are not T-pose what are
called the render. When you render it, I wanted to use arms not to be straight, but not to be too
low down either. I'd say roughly about there. Maybe even shorter. Arms on too long, maybe
make a little bit shorter. All I'm doing now is I'm clicking on the
edges and pressing W G. I think they'll be fine. What we could even do is
you go straight is arm out, which I think is
actually right now. If I put this all year, I think it would be right. I think that's all I'm gonna do. I'm actually gonna
press Control to, to clean up this edge,
to clean up all of this. So Control T is gonna be quite heavy if we apply it, you
can see how many votes. So we're going to
have, which is a lot, a 100% is a lot, but there's things
will, if you want to make it fair game,
It's topology. And it's all these other
things you need to do. But it's not too bad. I think I'm going to
leave mine like that. Added another loop
in the editor, sharpen it up a bit
daunted to shop. Do one sharper. Think I like one like this. So what I'm gonna do now is
I'm going to grab this edge, press I to insert, and then I to insert
again M at center, like so. That's good. I think let's add the
legs off TO before. Let's see the legs now. I'm trying to think, how are we gonna go
about these legs? Before, before we
go above the legs, let's, let's add in
this gloss panel. So what we're gonna do now is we're going to press
this edge here. We are introducing goggles
and appraisal stage. I'm gonna press shift D,
press P for selection, grab just this edge space F. And then each extrude and
we're going to bring it in. I'm gonna press I1,
strike it in a bit. You can't see, but
we can precede. You can press
wireframe to see you. I didn't need to,
but you can't do it. Or you can press I again and
you can go in and center. I'm going to do on
this side. So you got you got Eigen and
an M to center. Then what we could do is
you can control forward slash again, two loops. Two loops. Why should work? Seeing as it's not,
I'm gonna have to just I'm just gonna have
to do for such again and then disturbed by
Ms. Manually control our control our Shade smooth. Just like that. I
think it's perfect. Then let's see. Let's quickly make
the gloves and then we can do the feet afterwards. Let me go Shift a
to add in a cube. I'm gonna first Gx
to put the QBI, scale it on the third
axis. Let me go into top. Scale it down a bit. Actually scale it applied the
GZ again, get it up a bit. Then I'm gonna go
this, I'm gonna, I'm gonna shift R to duplicate
what I just did. And I'm going to go E
with a little bit of a, rotate the side and an
E Again, let me go. Ii makes us middle one
a little bit longer. I'm gonna go E to rotate. You again. Then he's
also got a Tom. He's got a TEM. We're going to have particular
these e to extrude. Bring this on place. I bring this one
closer and again, this put the thumb there. I'm going to bring
this one back a bit. I'm going to press
the thumb again. Bring it so it looks
like it's rotating. I got to press Control one
or control to control two. I'm going to press three gravel, these phases extrude them. Then we're gonna
do is we're going to drag all these phases. Then we grappled
edges and we're gonna go through Tools, circle. Just like that. I'm going to grab
these edges yeah. And bring them up a bit. Bring them up a bit like that. And I'm just gonna shade smooth
just to see how it looks. I want to fix it
up a little bit. I'm gonna put a loop. Yeah, gx, little bit longer. Maybe bring this thumb inhibit. I'm just gonna do a
little bit of a rotate to study some deformation. Different. I didn't have definition.
Definition is the right word, but I'm just going to
bring it down a bit so it looks like something
else is going on. Yeah. And sought to
straight fingers. Bring this one down quite
a bit due to edges. Yeah, I like that. I just did some rotating. I'm actually going to
bring this edge inhibitor that looks like it's
pulling this epsilon. Bring it, bring it down a
little bit on the x-axis. It looks a little bit big. Let's put another loop. You scale it in. Maybe you're gonna go are at AIA street a little
bit off there. Actually, let's make it
a little bit bigger. So Control Z, this edge. I think grab this again
and then Alt S, a GUI. Then let's flatten out, flatten it out but form
in a form like that. And then I'll just
extrude, maybe just scale it down into y-axis. I'm going to scale it down. Now we just want
to place it there. However, you can't
just get it. There. Will be a t over the t. It's kind of long. You can see that
this pretty long. What I can do is maybe, let's see how are we
going to go about this? Let's grab a bunch
of these faces. Yeah, g x, x2, IY, a little bit bigger. I think it's good like
that. I might want to bring this down a bit. Maybe scale it more like that. Maybe RY show the hand shaking. It might be different
for you by the way. So you might have
to face the REXX. Things changed when
you doing it to solve. So I think that's good. I don't know how much I liked
his hand, to be honest. I think it'll be fine there. Leave it like that. I might just scale it on the
y-axis to make it smaller. To me. I might just bring
this middle finger. That's fine. We're going
to add a mirror modifier. The Mish. Then let's
say end of this video. Thank you.
5. Making Pants, legs and shoes: Okay guys, we're back. I don't like the
length of my arms. I think that says
putting me off the most. So I'm gonna EXIF,
delete all those. And then now I'm gonna bring
it in yet a bit like that. I think that looks a
little bit better. I want to quickly see
if everything's right. Yeah, that's right. I might make it a
little bit longer. I think I deleted
too much there, so I'm going to Control Z.
I'm gonna put a loop for, I don't know, I think
it's way too short, so I'm gonna bring
this up a bit. Bring it up. I think that's way too long. Maybe I'll write it because
I don't know it's there. The arms don't a look, right? I think it's because I too long, so I'm just going to grab
this edge, loop down a bit. This double G. There we go. Perfect. Go with that. We could even maybe
bend these arms down a little bit more
if you wanted to. But I think I want
to leave mine like this. I'm going to
bring his gloves. The gloves are facing upper Mach wait, I think that's good. Okay. Next up we need that
will say add his mouth. His mouth, his mouth is there. I'm going to add a
loop. Yeah. I'm going to click on these three. I'm gonna V to split them and I'm going
to bring them down. I'm actually going to, I'm
going to redo that I'm gonna v from year
three is too much. That's fine. That's perfect. Going to grab this vertices. I'm going to grab these three
vertices, bring them up. Got this one, Bring it up
a bit like that, guys. I'm going to grab
this whole image. We're going to extrude,
Pull it inhibits. We're going to GUI. Then we're going to scale
it down a bit like that. And we're going to get GUI
again and then scale it in. Then we're going
to go like this, grab those two edges like that. We will not like
that, like that, like that, like that. And we're going to do
that. There we go. We can guide the
inside faces, Yana, maybe bring it back a bit
like I think that's good. There we go, guys got
a little mouth now. We can move them,
make them smile even. That's the thing that's cool. Little smile. I got mixed up. We want to add, I think we can add the legs to the pen so it's not
going to be connected, but they will be,
it will look right. Maybe. Let's add. Depends. So we're gonna grab all
of these like this. I keep on saying like this,
so sorry. Say it again. We will do that. And then you're going to Shift
D to duplicate it. P for selection. Maybe it's Control one, this one, Control one. We're going to go
a Alt S. We go, Let me say it like that again. There we go. Bring this one up. Bring them inside is just adding some loops here,
some control loops. As you can see this
a problem yet, we, that we need to fix tight
edge which had a split. There we go. There's also a
tightly Jonah fix. What we could do is delete, delete, delete those, these
ones that we just added. We've got another plan
for us to solve edges. We're going to add
in the middle ear. There we go. Maybe
we can go Control T. And I'm going to go
control to Jeff Smith. Perfect. Let's see if we
can add the legs to this. So I'm going to add a
couple of little bit more. I'm going to extrude
this one again. Ux. We're going to add, I'm
going to grab these legs. Yeah, not these legs. These faces. Faces like that. Don't worry about that. That's appendix treating into the mesh and we can go
through Tools circle. You might have an issue. I just want to scale it down, rotate it says try
to rotate on the Z, make sure all the polygons. And then now what we
can do is you can go into an extrude the legs down. We can adjust it. Let's put this faces
off so you can adjust. Bringing it like that. The face is back. This subdivision modifier,
it back on scale this down. Let's get it up. I mean, gx around, yeah, around there
doesn't need to be exactly the reference. Do that g x little dip there. What we can do now is think I want my legs a little longer than I think they're
matching, right? I think that is fine. Next, we can add six minutes. We can see how far we can
get to the shoes equitably. We can go Control
one, control two. With a squared. Bring this down
roughly about there. Go to Extrude, bring
it back a bit. Put a little while loop when GZ. See how long the pizza. Let's go back a bit or a lot. Got the Whole Foods, wanted flats or put a loop all the way down. I want to do that. Just do that then Shade Smooth. Should be fine for our boots. We can actually add another
thing, yeah, a loop. And then do you see and
then I to insert it. You can see what we did there. We can grab all these loops and then Alt S to make
it even bigger, we're going to add a loop in the middle to tighten the edges up on what N at the bottom. If you want to. We can go forward slash
insect at the top here. I to insect again and
then E to excrete down, Control R, and then Control
R to add some loops. And then there we go. We've got our shoe mirror. Little big, to be honest. Scaled it down a bit and I'm
gonna gx, get it on the X. Maybe. I made them smaller than the scale
them on the X to fit onto the legs
properly. We go. That's it for this video.
Go control this to save. And then I'll see you
guys in the next one.
6. Making pockets, teeth and tong: Hey guys, next up, we're going to add the strep. And then we should
add the pocket. Pocket right there. This is, makes sure the
pencil right there. Alright, we could actually
bring this up a bit. To be honest. I'm going to Control up to you. I'm going to Shift
click Control Alt, Shift click control of tier. I'm gonna GZ, made up a bit. There we go. Let's add the stripes.
So what are we gonna do is we're gonna grab the minion. We're going to grab a
scrap these faces yeah, from the toolbar here. Shift D, going to this
way, right at it. Rotate it. You wanted to get
a rough rotation. You just got to rotate
it a bunch to get it's overlapping the arm and then to the side so you can
scale it on the y side. Rotate to rotate it. But more so sad,
intercepting g z. What I'm gonna do is I'm
gonna go E and extrude in. Also go out P selection, sorry before we go, I got a gonna
rotate it some more and I think that's good. Just like that. And then
I'm gonna go control are tightened it up there. Tighten it up until our
titanate. Titanate. Just like that, makes
it a lot better. I also want to excrete this inhibit because
we can put a button, but I think the button
will fit anyway. Let's cool. It looks
right. I like one. Origin to geometry. Origin to geometry. It might rotate mine a bit more. I think that's a
little bit better. Let's go in through the skin, but it's the fact that
again, go like mine. Let's add let's add some teeth, give it some shape. Fmt through. I'm just gonna add in a cube, scale it down into
wireframe. To scale down. What I'm gonna do is I'm
going to press Control One, luthier, Shade Smooth
in another leaf there. Microcontrol two. That's perfect. We might even be
able to do this, don't want it to shop like that. That's perfect. And then I'm just going to
go back in front. It's going to wireframe,
duplicate it. I'm gonna RZ. Rz, scale it down a bit. Put it in the right spot. Again, duplicate it
again. Put it there. Good. And then we're going to
join these two together, Control J. I'm gonna go to
mirror modifier and modify it, and then click on the
minion. There we go. Now we've got teeth. I mean, it's coming alone,
millions coming together, make a tongue so we're
going to add them, shut a data cube,
scaled it down. Also going to go Control too. Cheesy. Scale it on the X. Bring it back a bit. We're going to start it inside. Inside. We're gonna
go into side view. While we have this face, we're going to go E to extrude, bring it up a bit and then E to extrude and then we're
going to scale it down. I think like that. Maybe GUI bit forward,
bring it down. Like that. That looks fine. Small-time. There we go. We're making a million
character guys. Cool. Scribe, these two
pouches Shift D, P for selection. To extrude. See that I've got something
else here on this side. Much of y, but this, but we're going to EXIF, data back into the scientists, Excuse me, go back
onto the side. Yours ever does that when you go into edit mode and
it's like this, just go back out to click on this, and then it
should be fine. What I'm gonna do is actually we're going to keep it attached to the body or the pens. We're just going to click
the issue of vertices G. I'm not sure where
this, I'm going to actually delete this. I'm not sure where
this one comes from. I think comes from the inside. I'm just going to delete
that, grab these two again. Gui, come out quite a bit. And then now what are we
gonna do is we're going to Control J to join it again. Okay. In this back on. And then we're going to join
all these vertices together. I want to teach you something
good. Lim. I'm going to press G to bring
this one back. Now if I press Shift
on this registry and shift and this one and I
right-click or I don't know, actually compress and I
got lost in order join. So right now it doesn't look great, but it
will be outside. As you can see,
that happens if I go like this again
and I've got M. I'm going to right-click
on Add lost, add two quick favorites, monitor move, but you can
add it to quick favorites. And now when you press
Q, you can go add lost. And a disk goes a lot faster. That lost. Last lost. You can see it's at the back
and tighten it up a bit. Tighten Let's see. I think maybe when it was
separate and look better. We're going to
separate it again. As you can see, icon go all the way
back, which is an issue. We're going to just have
to redo the process, which I apologize for if
we were just testing to see if it would have been right, but I didn't like art came out, so I'm not gonna do that.
Sorry about that guys. We're gonna do this shift
D Again, p selection. This one, let me go a extruded. I'm going to put a
loop, right? Yeah. I think maybe we will join these bottom
vertices together. Just tasting, Yes, I
apologize, I do apologize. I've got at last, at last. At last, at last. Now we've got this
vertices, yeah. And then GUI a control
are there. There we go. That looks better. Maybe bring this down a bit. And then G, G, like that. There we go. It looks a little bit.
I think it looks better like us than it did
when it was connected. But you guys can pick obviously, you guys can choose
what you like. And I think I prefer this one. I'm not bringing
show any of these bring an intimate
control twos, right? I'm going to bring
this out again. I don't know why
all the way there. Okay. Cool thing. I like them. I think I do. I don't know if I do, but I
think so. I just scale it. These two as well. Get it open, not going to flush. I think that's fine. Maybe go a little pouch. What do we do with
a bucket? Now? Let's see. I wonder what
happens is for each tree this, these lost them. I just, I clicked on
extrude on some of these. There we go. Then now we're going
to get these ones. Bring it out a bit like that. They go to Insert and then go to Extrude and then just put
it somewhere around there. You've got pockets now. Maybe fix it up a little bit. I think that looks fine. Even maybe bring them up because it might
be too far down. Bring them up, right, date them. Got pockets. Kits. Can maybe control. Now I'm gonna control to
keep it a control too. We can even maybe add a loop. Yeah. Maybe add a deep in the middle. Okay. There we go. We could do the same
thing that we did. You could, if you wanted to, you could just
duplicate this as well. Got origin, origin to geometry. Let me show you I've got them verify somewhere in the middle. When you have platysma
modify it because it's different origin to jump
to it. There we go. I did a bunch. You getting the right angle
and then you can just place it there like we did With might even look better. I'm not sure. You'll see. I think this one looks better.
That looks much better. Let's see. Maybe, maybe we'll
just leave it how it is. If you wanted to, you can
do it I just showed you now. It doesn't look too bad. Do we want to just fix it? By the way, you can just
delete all these inside faces. I'm just gonna show
you how to fix it. If you don't like the way
that I showed you to do it, then just go add loss
to all of these. Last, last, last, last, then it should be fixed up. Big mistake. Fixed wasn't a big mistake, but it was a taste mistake. We're just gonna go
origin to geometry. I think I might just do it
all I showed you guys now. We're almost done. I think we've got one more, two more episodes
before we actually render the final product. Product, I'm going
to scale it down. I think that looks okay
when you add the textures, It's just going to
material preview. I'm just going to go new. Want to see how it's gonna look. If it's not gonna
look as nice when it's attached on
the type of blue. To make it blue, we
don't materials blue. Add click on this blue here. Then we're going to
make quick you to understand where you are and
then blue, it looks fine. We'll keep like this. It looks like it's supposed
to be like that when you when we render it, it
will look a lot better. Don't you? Worry, back into
solid via a gecko, guys. I'll see you
guys in the next one. If the videos are going
a little bit longer, like they're very unfortunate. But yeah, I'll see
you guys next one.
7. Creating button, Hair and eye: Hello guys. What are we gonna do now
is I'm just gonna add a mirror modifier
on the pocket here. So we're gonna go mirror
modifier, click on the pen. There we go. One on each side. Now. We pretty much basically almost, pretty much basically
almost pretty done. What are we gonna do
now is we're actually going to add a button. We could add a cylinder, but we could bring
down the sub-labels, but it's just for a reminder, it's not going to be
used for any games. This just making a character you wanted to bring the first time you could
bring them down yet, but I'm just going
to be minus 30. So I'm gonna go RX. I'm
going to scale it down. D, Gx is why scale it down? Or sorry. Then I'm gonna rotate
it at this angle. Rotate it at this angle. We're just going to
place it down a bit. Put it right there. I'm
going to control one, maybe control to insert,
to insert again. And then we go to emit
Center Control R. Then I might just do
the same on this side. Insert, insert images into
maybe disruptive there. And then I'm just going
to add a mirror modifier, this guy as well, mirror input x and y. So it should do the back. We're not going to have
to make another one. So Shift D, I wrote it, it maybe I'm gonna double x, double y, double y. I was for me, might
be different for you. I'm just going to
square root it. There we go. That looks cool. What else? What
else we still need? We need a breach. You pretty much have
everything ready. I think this is added here. So how are we going
to add the here and now is we're
going to add in, we're going to go
Shift to add a curve. We're going to add a pause. So let me just gonna go, sorry, GZ, going to go into edit mode and delete
these two vertices. So I've got these two handles, press X and vertices. We're going to scale
it down a bit. We are rotated, bring it. I think somewhat like this. We're going to make it a
different type of think. I'm gonna do this top of here. And now we're gonna go to the properties of
listening Serbia. Click on this button. Go geometry. Good depth. I'm going to put
my depth at 0.15. I'm gonna grab this thin piece. I'm going to go Alt S. Then I'm just gonna do that. Just make it super small. We will full caps right there. I think that's perfect. Bring it up a bit. I might just bring
it down a bit more, more into the middle. Like that. On it. Add a mirror
modifier quickly. It doesn't on both sides. There we go. We can kind of see
where we're getting at. I'm much as E Now I'm
not gonna do that. I want to make it lower
it down like groundwater. I think that'll be good. Then all we're going
to do is shift D, shift D G. I write
down a bit, shift D. Put it about there. Then we're going to
bring some back. That's about enough,
must be even too much. I want to lead one at the
back, one at the front. And the analysis uneven them. But to bring this one here,
you bring this one up. Actually, it looks like he is fixed. I wanted that one came out. I'm just going to
bring it down a bit. Maybe forward. Like that, that's about fine. We could maybe add
one at the backend. I think it needs
one more strand. Like that. That looks good. I think lighting. But also we missing. I think that's about it. The eyes. Okay, so how are we going to add the
eyes you're gonna do? You're gonna go
download Blender. Blender kid from Google. I'm going to open it so quickly. Lynda.com. See if my loads and should load. Here we go. Blender, blender kit.com. Or you want to do is
download Blender kit. Once you've downloaded
blender kit or you're gonna do
is gonna go File. Well, you're not
gonna get a file. You're gonna go Preferences, Add-ons, install, find mine. You're gonna do what you did
the last time, blending, blending, liquids
up, install add-on. You're going to click on
it. And then by Linda kit, you can change where your
global files directories. So I changed mine because
I don't like mine, go to my C drive, change mine. And this is where
all the objects are going to install
on your computer. Alright? What are we gonna do once
you've installed blender kit? You're gonna go out in
this, there should be an icon and you want to talk in, I turn this on quickly, so I I'm going to
add this one, right? Yeah. Then you all
should download. And then once it's downloaded,
you will find it here. I'm just going to scale it up. I'm going to add 180. So it's facing the
front. I'm gonna Gx, Gy. Get it done, g, g, gx. All I'm gonna do now is I'm gonna go back
into object mode. I'm gonna hide this. I'm going to scale it up. G, gx, so you fit it in there. We're going to preview mode. It looks a little funny now, but it will look right in a bit. I'm gonna have to
scale it down a bit. I think that's about right. I'm going to grab these
faces like we did earlier, so grab all of them. Then I'll click on this one
when G, to bring it back. Then scale it up,
bring it forward. Maybe I should start
popping through anything. I'm actually going
to put mine back. You want to grab onto the empty every time
you move at them. And Alt, Alt H. Actually not sure why
I'm, I think moved here. All I'm gonna do is I'm
just gonna actually put it back. Must have been a mistake. I did not show why, but I'm just going the backward was based Alt H
to bring it back. I'm going to have to
bring this even more back behind it again. Bring it all back. I'm gonna
bring this forward a bit. These two forward. Don't forget to go on to ease us all and bring them forward. Then HGI, that material preview. And then all I'm gonna
do is I'm gonna add a mirror modifier onto this. Onto the object itself. Can click on the I,
add a mirror modifier. Here we go. We've got on both sides. I get, I'm just going
to hold the empty, our hide the empty with h. And then there we go. I'm going to Control S to save. We want eight minutes. We're going to add one more thing and then
we're gonna render. We'll go through the
render settings in the next episode
for the next video. And we're going to add the
speech and video as well. The next one.
8. Getting everything ready for final render: All right guys, we'll be back. What I'm gonna do now is I'm just going to add a cylinder. Cylinder. I'm going
to scale it down. Gc, Gx, Gy, place around there. See how this thing looks. Around. Gonna do this graph,
both bottom pieces. Control. Be scared. If you ever have
problems with control being as all by the
way, Well beveling, just click Control N scale
and then do it again. I'll fix it off. So this is all I'm
gonna do. I'm gonna undo that Control R
and then Control B. At one loop. Alt is E and then left-click. And then all this, I want to make this smaller and longer. Bring it out a bit. I'm gonna shave three phase control
one to give it subdivisions. Subdivisions, like that. There we go. I'm just going to add
a mirror modifier. Perfect, I'll million. Let's go through
some render settings and stuff like that. So you want to do is you
want to go to the top yet or better in the tab. You want to go into cycles, GPU compute, and then you
want to go to time limit. You're gonna make time limit my, this is my render settings 20. I make this one thousand, five hundred and ten hundred.
Ten hundred will also do. You want to go to, I'm
gonna give you some help in the preferences yet you want
to go to preferences system, put it on your GPU if you
render you to GPU and CPU. Cpu, I prefer interviewer for GPU because I feel like it's stronger than will not
render with my CPU. That's my personal opinion. I don't know what your specs all but between whichever
one is stronger, you use that and I use optics and then you just
want to save preferences. There we go. Okay, and then next up
we want to add an HDRI. Hdri. We're going to go
to the settings. We're going to click
on Color environment. We're going to click Open. Then what you want to do is
you want to go to HDRI Haven, HDRI, even getting a channel other screen could
leave for you guys. Yeah, HDR haven.
And the one that I'm gonna use this Cambridge. I use this one Cambridge. This is my favorite one that I use and you just
want to download it? Download either too careful. Okay. We good. I'm going to open
mine. Good luck. Open image. I'm going to
click on this camera icon. And I'm going to
click on this icon so you won't see
it in the window or in the render. I'm also gonna get
a shift, a Rosling. I'm gonna add a plane
at the bottom here. Like this. We're
going to scale it up. We're going to go
into edit mode. We're gonna grab this edge, Raja. We're going to pull it up. We're gonna grab the beginning
and we're gonna control B, give it a few loops like
that and shade smooth. Now if we go into
rendered mute mode mood, we can see on ice or object
actually looks very nice. What I'm gonna do is I'm gonna
click on this back icon. I'm gonna go I'm gonna
go into the materials. Material and I'm gonna make it. Maybe I want to make it great, but the same time I
want to make it yellow. Yellow, maybe, maybe a
dark gray might look nice. Let's see. Maybe I'll make mine gray. I don't know. Maybe a bright
color would also be nice. Bright yellow, but let's add
the millions material first. What I'm gonna do though, is I'm gonna go, I'm gonna
go back into solid shift, shift a reference, re-add your reference because it's not just one doesn't
have capacity. And what you're gonna do is
go into material preview. I like to take
your money cycles, but if your computer chorionic
or two material previous. So what I'm gonna do now is I think I might have a yellow. Yeah, I don't, I'm
gonna make this yellow. Yellow. Click here and click
on the eyedropper tool. And then I'm gonna
bring up the CTE, maybe make it a little bit more orange on the orange side. Roundabout there. I like that. We're going to
click on the glass now the glosses go, I knew. Then you want to click
on this participate PDF. You want to go transparent. Then you can either
turn the transparency, the opacity down a bit like that to make it,
so it looks like loss. I'd like to turn mine down
a little bit, not too much. You see if it's too light, it doesn't really
look like it is with its two dots too much. You just want to
keep it roundabout there. I think that looks good. Next we want to add a solver.
We're going to go to New. And I bring down
the white of it. We're going to add a
metallic. See how that looks. I think I like that. We're
going to add it on this thing. So sorry. Just type Sylvia. What color is this? This is black and
silver. Silver as well. Solver. We want to add a black, excellent black
onto the buttons. Buttons up black
gloves, also black. Black. Black as well. Make all the hair black. You could also make the transfer these into actual geometry. Still curves at the moment, I'll show you how to turn
them into geometry. Now. If you want to turn
them into geometry, all you have to do is we
have to do is click on him. Click on all of them. I'm not gonna do it, but
I'm just saying if you want to do it, you
click on all of them. And then you've got object, convert, convert image,
and then it will become a mesh. That's it, That's it. That's all you have
to do. Pretty simple. I'm gonna change the
opacity of this gloss. Want to make it even
lighter? To be honest? It seems like it's low dark. The teeth teeth are fine
that color the white. I'm just going to make
the tongue color. I think that's perfect. Then the boost and you'd
be black. There we go. We basically have
a little minion. It doesn't look too bad. We could get the icon there, but it's a little more and
more into the UV unwrapping. You won't have to UV
unwrap your object. What are we going to do next?
We're gonna go into solid. We're going to shift a. We're going to delete
this. First of all, shift, shift a, camera, press 0. Then I'm going to
quickly show you something and you find it. I'm gonna go K-map, key mapping. Want to find the jar camera? I want to see if I
can find it. Yes. Sorry. This is a
little unprofessional, literally, she didn't
know where it is. I apologize. So you can move
your camera around. I think by default is control. Control something I did change mine and mine
spin like this. Pretty much. That's why I've been
changed in a while. So I do apologize once again. I just want to quickly
find it so you can use your camera around. I'm talking camera
doesn't come up. Shift the mouse wheel up. What are we gonna do is you're
gonna do it without bet. I'm just gonna go
out of that view. I'm going to go Shift, Shift X, shift climbing, GZ, lined it up. She had the camera selected and I'm just gonna go into interview this
to see how it looks. Doesn't look too bad. We're gonna go to
orthographic there. Like that. Perfect. I think I'm thinking
I might make this yellow a little more yellowy like that. I think. I think that's pretty decent. Silver. We could possibly, I'm gonna
bring the opacity down on these losses even more,
to be honest with you. And then the solver, I
think it's two Solver. Little bit better. I think I like that. Another thing we could
do is if you want, you could go to this. We can click on this icon. When you have Linda gets I'm just getting some materials
you already for you guys. Then obviously we changed
the camera to orthographic, so let me get back to that before we go into anything else. Goodly, I apologize
of the graphic. We want to bring
the scale up a bit. I'm going to gx landed up. I'm gonna RX as well. Roughly about I'm gonna GZ. There we go. We've got
a front view there. All right, that's pretty much a million now we want
to reduce price. If I can show you both. Actually you normally do.
Before I render sorry, I'm going to quickly go
to the background and I'm gonna change the
background color to yellow. Orange. I'm gonna make it
orange, nice cool orange. Brighten it up a bit. Yeah,
that looks much better. A 100% does that background
changes it up immensely. Mentally? My dog, sorry. You can even put these
Hayes close together. Here's might be far apart. Stuff you've got to
play around with. You're entering. Let's
pretty much the video guys. I'm if you made it this far
and probably brought you, show you one more
thing we can do. These little things
that we can do now, render once you've
handed to just go save, save as, and then we can
add it to your portfolio. Maybe you guys can post it. You made it. Congratulations,
you've made it. What I'm gonna do is I'm
actually going to click on this. And I go to Insert extruded in until they instead
the beginning, instead it out anybody inside the big gain like that and then shade smooth. It can add a loop. And another loop yet gives it a little bit more variation. I'm just going to double GZ. You didn't just duplicated g. Finally quickly just do.
Instead of having to go through it all into higher
prices again, just replace it. That's giving the
button learn more. That's about it, guys.
Thank you for watching and good luck at B blundering.
9. Bonus to help with color in renders: Hello guys, I'm, I just wanted
to show you one more thing as a bonus video. I
click on this video. One thing that could help you in your renders immensely,
if your color, if you feel like the colors a
lot to know enough to gray, what you can do is you
can come down here. You're going to you're
indicating which will come all the way down here and
go to color management. And you've got to look. You can change it to very high, high and medium, I think, but between high and
medium, it looks good. I can just show you how
the render will come out. I don't know, highs a bit
much, but let's go with I. And then we got F12. I think, I think this is a
little bit high, but just to show you can see a much more color and
how much more bright it will become like this. But that's pretty much
all I wanted to show you just as a quick bonus video,
just for the rendering. I hope you guys
enjoyed this course. If you did, please let me go review if you guys
didn't like it, the Sony widen like it, just like I can make a bit
of videos in the future. But thank you very much. I appreciate it.
 Connor Gerber, 3d artist