Transcripts
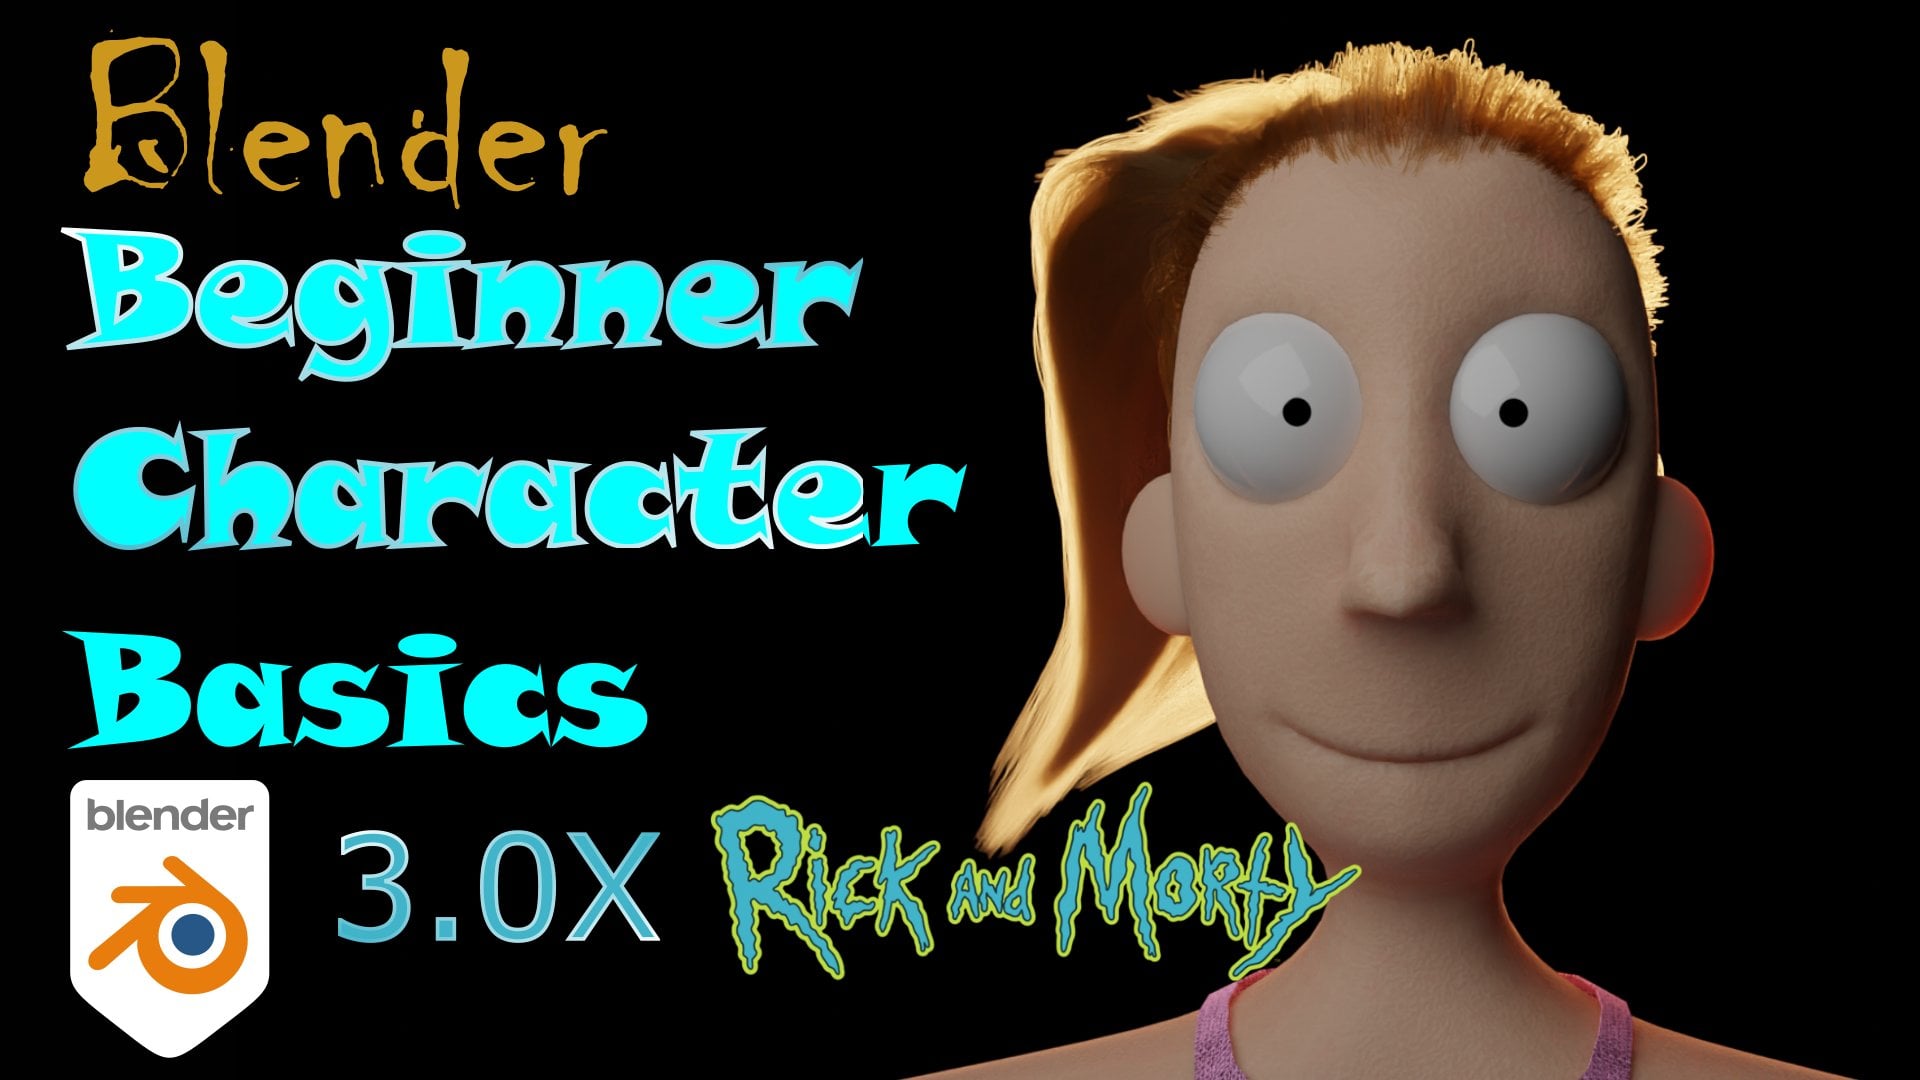
1. Introduction: What's up my blended family, if you like Rick and Morty, you are in the right place. We've already done classes
on their spaceship, space versions of
Rick and Morty and the full version of
summer R6 granddaughter, including the amazing
hair she has. And now we're gonna
teach you how to sculpt. Rick, Morty and Jerry. That's why we're gonna do
all three in this class. And once you have
this technique, you'll be able to take it and do any animated character you like. We're going to
cover sculpting and materials as well as
how to render this and get the best
possible image you can to show all your friends. Now without any further ado, here is your teacher, an e-mail.
2. Blender Basics: Before we get started with
all that fun modeling, the first thing you're
going to need to do is download Blender. If you haven't
downloaded blender yet, all you have to do is go to
Blender.org slash download. And right now they're are
showing lender 3.03.1. And that's what we're doing, the lesson or what we're
doing the tutorial. And now if this is
way in the future, like it's Section four or Blender version four
or something like that, then please refer to one
of my more recent ones. If this is sometime
before that and it's reading a bunch of
three-point anything, you are probably good to go. So go ahead and download
that and install it. Once you have it installed, you'll be greeted with
some splash screen here. This waste stream changes
with each release. So if it's plunger
3.13.2 or 3.3, this way scheme will
all be different, but as long as this one's a three-point x or
three-point something, you are probably fine. Now, the next thing I
want to show you is, let's say hypothetically that
you don't have a keyboard, you don't have a full keyboard or a full three button mouse. So if you don't and you just
have a trackpad on a laptop, you're going to go
to Edit Preferences. And in the Preferences under
input here on the left, you can click emulate NUM pad or emulate three button
mouse now emulate numpad. That's just the part
of the keyboard that has just numbers on it. If you don't have that, and you click this now
you can use those numbers at the top of the
screen instead. And now that's good for
a number of reasons, but we'll talk a little bit
about that in a minute. Now the second thing is
emulate three button mouse. Now if you do not have
a three button mouse, I strongly recommend
that you get one. It will make your life
much, much easier. But if you don't have
one, you don't need one. You can simply indeed
three button mouse by holding down the alt button and then the left mouse,
mouse button. And that will emulate that middle mouse button or
that middle mouse wheel. Now that we've done that and you're all ready to get started. This is the screen you see when you first open up Blender, and this is what we
call the 3D view port. And this is where you'll be
doing most of your work here. On the right side we
have the outliner, which just has all of the different types of objects and things you have
in your scene. It's a good way to check
and see what's selected. Now, you know something is
selected because it's orange. And you can do that by
left clicking on it. And you can see
here I left-click this cube and this is the default start
screen of thunder. So you'll always have this
default Q at the beginning. And you can see here
that is also orange. So I can click here or
I can click it here. And this is how you know it's selected and how you
can interact with it. Now on the right side, we have
lots of different things. I'm not going to
cover this at the, at this very second,
but it's not important. We will cover it
when you need it. Don't worry. As you're looking at
the 3D view port, let's just talk about how to
navigate that environment. In order to navigate
the environment. If you want to shift it around, you hold Shift and the
middle mouse button and then you can move it around. This allows you to move it
around without rotating it. Let's say that you want
to rotate it around. In order to rotate it around, you're going to hold
that middle mouse button here and rotate it
around, move it around. This allows you to move around the environment or
rotate around the environment. So remember to shift the
environment around or pan, you're going to hold
that shift button and move it around like that. Or if you want to just
rotate it around, you'll hold that middle
mouse wheel and that will allow you to rotate it around. Now, let's say that
you want to zoom in. If you want to zoom in,
all you have to do is roll that middle
mouse wheel and you will zoom in to whatever is
in the center of your screen. But let's say that you don't have things
where you need them. Let's say they're
all the way over here and you want to work on it. And it's really, really
disadvantages place, right? The easiest way
to fix that is to simply let click on whatever
you are interested in. And that's here in the viewport, or I could have
selected it here in the outliner and on the numpad
you're gonna hit period. Now that will zoom in and center knocking role the
middle mouse wheel out. And you can see now that this is now at the center of my screen. And that's just a
little trick that'll help you work on precisely what you want to work
on instead of trying to figure out how to get
the best angle on it. The next thing is, how do you rotate
and grab objects? If you would like to
rotate and grab an object. It is very simple. There are multiple
ways to do it. I'm gonna show you the easiest. If you would like to move this object around or any object around
without rotating it, you're going to simply grab it. And I say grab because the
key you're going to hit is G. So you hit the G
key and then you can move the object around. But because we're actually
working in digital 3D space, freely moving me
object like that doesn't really tell
me where it is. I'm going to hit
Control Z to undo. And that's how you undo things. If I hit G and then they access, I want to move it along. Now I can be more certain
about where it is. It hit Control Z
again to undo that. And I can hit G for grab, and then I can hit
X, or I can hit Y, or I can hit Z. And that allows me
to move it around on those specific direction. Now, let's say that instead
of moving only on what axis, what you really want to
do is move it in a plane. In order to move it in a plane, you're going to hit
G for Grab again. And then instead of
hitting the axis, you will hit the Shift
and the axis you want to lock in the same place, so I don't want it
to move in the z. I will hit Shift Z. And now I'm moving it
strictly on this x-y plane. So if I move this around, you can see that
it's still there. I can hit G Shift Z, and then I can keep
it on the XY plane that you can do
that on any access. I could've hit Shift
Z or X or Shift Y. And that would have
allowed me to move it just on that plane. Now, let's say that you
want to rotate an object. In order to rotate an object, you're going to
hit R for rotate. You can see that you
can rotate the object. But once again, this is a really random way
to rotate the object. So if I hit Control Z, I'm going to just undo that. I can hit rotate. And then if I hit Z, it will only rotate on z, x, why, and so forth. So that's G for grabbed to
move the object, R for rotate. And if you would like to
scale the object, it is S. So S for scale. And it behaves the same
way as the others. I say you only want
to scale in an x. You hit S for scale. And it's only on
the X or Y or Z. Or I can do Shift
Z and it'll stay, it'll keep that z constant
just like it did before. So that is how you move an object around and only a few seconds you are
learning so fast. Now the next thing you'll
probably going to want to do is to actually
change the object. Because before we were
like manipulating objects like where it is
and we did scale it of, for the most part,
we were not actually changing the object itself. Now in order to edit the object, we need to get into edit mode. Now, the current
mode we're in is object mode because we're
just manipulating the object, but we're not really
editing the object. So to get to edit mode, we're going to have
what we want selected. We're going to hit Tab. Now you can see that we can see what this object is composed of. Almost all of the
objects and blend there almost but not all,
are comparable. A mess. And blender is considered
a mesh modelling software, not a solid modeling software like something
like SolidWorks. So AutoCad or any kind
of CAD program for the most part is not a
mesh modeling software. And that just means
that our part is composed of these
vertices, edges, and faces and everything we do, most things we do here, the objects will be composed
of these components. Now how we interface with these components
is much the same. We can hit G for grabbed, or we can hit S for scale, or R for rotate. And just like before, we can hit S, then the axis. But what you can
do an edit mode is instead of just picking
the entire thing, I can pick just a
part of the object. So I can shift, select
these top vertices, which means that
this entire face is then selected because I selected all the vertices
associated with this space. And I can say S for
scale y in the y-axis, or I can say rotate
and I can hit X, so you only rotate it in the y. And now I have an
actual different shape. I can do this for vertices. I can do this just for a line, or I can do it for
an entire faced. Now, let's say that you want
to interact with the object in terms of just
just these edges, you can go in edge select mode, which is in this
top portion here, like edge select mode. And now I can interface with just this edge or I can
go into face select mode. And now I can select faces. Now if I go back to
vertex select mode, you can see that in order
to select that face, I did select actually
these vertices. I personally spend a lot of
time in vertex select mode. But when I'm doing
things like extrusion, which I'll cover in a second. I tend to do that in
face select mode. Let's say that you want to
do something called a shoot. And if you're thinking,
I have no idea what extrusion is through,
you're in the right place. I'm going to explain
what extrusion is. Extrusion. It comes
from it comes from mold manufacturing talk when they do certain ways
of molding shapes. But if I want to actually not multi
shapes creating shapes, if I want to extrude a face, it basically millions
to pull a face. Another phase I want
to extrude in Blender, hit E, and I'm able
to extrude this face. Notice I'm also an edit mode. You can't do an extrusion
in object mode. Now I'm going to
go to face select mode that we just talked about. I'm gonna select that face. You can hit Extrude. And now you can imagine, you can extrude
wherever face you want. It doesn't matter
even if this new, you can extrude it. Now you can imagine that
you can create lots of interesting structures
here with just extrusion. Now the last thing
I'm going to cover in this brief intro is inset face. In order to insert a face, you hit I, and then you can make the face
either bigger or smaller. In this case, I can
only make it smaller. And that allows you to put a
face inside of another face. Now if I hit Extrude
and I pulled out, you can see it
gives me this kind of faceted with
this tiered effect. But what's more useful is if
I hit I for insert phase, I make it smaller. I hit E for extrude, drag down. Now I have a whole. So once again, this
allows you to do more interesting shapes
with just a few things. So that's if we're extrude for
interface, for inset face. And once again, you can
do that for anything. You can do that on
any shape here. You can create lots
of different things. Now, what I encourage
you to do before you get to the next part of the class is to make
something simple. Make something like a chair, make something like a table, and screenshot it and put it in, put it in the discussion. Let me see, let me
see what she made. Be creative. All right. See you in the next one.
3. Modeling Jerry: Hello everyone and welcome
to this Blender tutorial. Today records will make Jerry
Smith from Rick and Morty. It's pretty much the kind of
depressed of Rick and Morty. He's a little bit of a silly guy and he's always looking
a little bit sad, or what's the ride worth? Just always looking a little
bit down the surrounding. Really going to try and capture that essence in the 3D model. Because we're going
to make his face in a very short time period. We would come to try to
stick to around ten minutes, maybe a little bit more,
depending on what comes up. While we model Jerry Smith, I actually already edit a reference image
or I didn't edit, but we're going to
do it right now. This is a standard had
been Blender interface. So you can press Shift a. You can go to Image
and reference, and that allows you
to select an image. I'm going to go to
my download folder and select the last one. Got Jerry were going through,
neutralize those rotations. I'm going to set x to 90 in the item set right
there, the white 090. This is looking
fine. I'm going to person D and X and move that away a little bit and
scale it up a little bit. We're only going to make
this head not TO or not that the ice code, which is the reason why he
said in a particular image. But I think this face captures the idea of Jerry quite well. So we're going to do
first is make the base. And that's all. So do you only think that if
you're going to maybe head, so I'm going to
select this cube. We are not going to
delete the default cube. Once again. We're going to select
it and press S and Z and just scale
it up a little bit because you can see the
heads has a little bit of oval or elliptic shape
in these directions. So we're going to scale
it up in his iteration a little bit, maybe
a little bit more. Now go to the
deficient modifier. Modifiers tap, which is
this gear icon or gear, what is it a tool
from kind of tool. I'm not that familiar
in the garage. And we can also add a modifier. And we are going to add a
separate efficient surface. We're going to set
this at three. I think we're going
to need a little bit more satisfied for now. Hit Tab on your object and we're going to
press Control R to add an edge loop and shaped
his head to Layer bit more to our liking. I'm thinking something like
that is going to be fine. One edge loop for this
one is going to do the job. Are we
going to press Tab? That's already looking
a little bit like the head shape of Jerry. How are you going to
worry about creating this little bit of
a sad face of his? And we're going
to start by going into school modes right here. And we're going to enable wide you a symmetry Right there. Press F to make your brush
a little bit smaller. And we're going to make
the eye sockets right now. It makes a little bit smaller. And some reason to why the Western poetry is
not working that well. That's because we didn't apply
the subdivision modifier. You hover your mouse over them, preschool through
a. There it is. Scale this up a little bit and create those eye sockets quite high in the heads are quite high compared to
morning and stuff. That is, Let's create those circuits by
holding Control and just throwing some nice
holes like this. That's looking great. Go back to object mode. Let's add another script
efficient service modifier and set it to one, right, the mouse Shade Smooth. That's fine. Let's see what geometry
is bent pressing Tab, because right now we're
going to make that knows and we need a little bit more geometry from the nose. I'm going to apply this
deficient modifiers. So hover your mouse over
it's in preschool for a. Now check it again. I
think this can work. If we add another super
efficient modifier right there instead that the one,
don't apply that one. And now go to skilled mode. We are now going to try and CAP. Nose isn't very pointy. Pointy nose, which we
can probably re-create. We're going to use a
snake hook for this one. We're going to go a little
bit to the side view. And we're just going to try and match the nose to
the reference image. I'm just going to extrude
this a little bit down. And if it doesn't work, I was just controls at it. There's no there's always
time to controls that, something like this
and now go to press G and just move this if it allows me to move
this a little to the side. Let's see what it looks like. Alright, so this has
to be a little bit wider at the base of the base. That this has to be a
little bit more inwards. So we can actually see the shape of a little
bit of a triangle. I think this one has
to go up a little bit, mixed up sharper corners. So I'm just using grep tool. So shaped them, those
into what I wanted to be. Just try and follow
me on this one. Let's rise and do it yourself. It's always a good
learning curve to try and do things
or self as well. You can always press Control Z if you don't like something. And I'm actually thinking about changing this subdivision two to your computer can handle
it if it cans. Just don't. But if again, feel free to do so because it just looks
a little bit smoother. I'm just creating this nose
with the grep tool sort of. Step one was just extruding some geometry with
the snake hook. And then all I do is shaped
the nose with the grep tool. So G and the bottom has to be completely flat like this. And I think we can make the actual triangle
shaped little bit more defined with a
nice light in the end. Maybe it's a little
bit vague right now. By the way, let's try and shaved this down
a little bit more. We've got a nice and pointy, but you can't really
see the point in his office knows yet. Because we don't really have
the right lighting setup. But I think the shape
of the nose is right. It is fine. I'm not going to do
much more on that part. Maybe move it a little bit. Like so we move this
side a little bit more, are still in the graph tool. So don't worry if there's something that you feel like I skipped telling
you. It is not. All right. Something like that is fine. I'm trying to make this
side piece of limit more. What's the right words? A little bit more. Pointy. All right, so I think
this will do the trick. Alright, so let's go and
try and shape the mouth. Now, I'm going to go from
field by pressing them three. I'm going to go and select
the crease right there. In the reference
image is mouth is of course very sad shape. So we're going to try
and make that as well. I'm going to scale it
down a little bit of pressing F and just
resizing the brush. Let's try to create
a set. Jerry. We can even over, over
schedule rate that part a little bit like this. That's looking very nice. And now I'm going to
select the drought brush and I'm just going to
drive those corner. Most mouth soreness little bit because that's a little
bit of extra geometry. And it will define the mouth
shape a little bit better. That's looking fine. That is great. I'm going to press G and F at. I'm just going to
move this nose even a little bit more done
because I feel like there's too much of
space between the mouth and the nose, right? So you can just make
those edits real quick with the grep
tool like that. Now let's go back to
object mode or shift a mesh UV sphere. Scale this down. First Gy, first GCF, breast gx. And I'm just moving the eye to the right place and scaling it up a little
bit of pressing S. Something like
that is looking fine. I'm going to press G and X and move it out
a little bit more. Press G and Y, G and Z. Just try and get the eye on the place where
you want it to be. Something like this. All right, so next
step we need to create those large eyelids because
he is a sad guy and it needs those eyelids to be
nice and low because he doesn't have the
strength to keep them open and stuff like that. Let's go to x-ray mode, but they'll getting this
little icon right there. Select your eye. Whereas the guy wrote at your screen
a little bit if you can find it personally. But three again, now hit tab and let's go
to the select box. So select this icon, hold your mouse on it
and go to Select box. And we're going to
select a lot of material like this. One more. May be. Yeah, Let's try it like this. Let's just over-exaggerate
the whole, the whole sadness of
Jerry a little bit. What are we going to
do now is press E, escape Alt S and just
scaled it up a little bit. So it's like an eyelid
going over and I like, So hit tab and let's
disable x-ray mode, right mouse, Shade, Smooth, go-to your object
data properties, go to your normals
and select outer smooth just to get rid of
those which shading issues. All right, that's looking fine. Let's hit Tab on
the eye right away. Let's go to materials. We still have this
eyelid selected breast three on your keyboard
right now to go into face select and let's hold
shift and double-click on one of those H's that goes in this direction
and double-click. And that will, that will this whole edge loop through
your selection. And if double-clicking
does not work for you, then you can probably
try Alt click. I think that should work if
double-clicking doesn't work. Now hits plus in your materials, hitting you at goal. The first one, I hit publish new and call this
one by double-clicking skin. And it assigned right there. Now you've got the skin material on this eyelid right there. It does give you a
fine. We don't need to do anything else right now. We can hit Control a and apply
all transforms reservoirs, right, the mouse set origin, origin to 3D cursor. And let's go to the modify
properties right there. And modify your,
let's add a mirror and then change the
x's from x to y. There we go. Now Jerry has to ice and we can start worrying
about the hair.
4. Modeling Jerry's Hair: Alright, so I created this hair. This hair is pretty
similar to mourn his hair. Very simple hair. We're going to press
Shift a mesh cube. Let's add a modifier
step deficient surface and set this to four. Let's press S,
scale that a little bit up in the z direction. Press G and gx and
just make sure that it is has the
right starting points to go into sculpt. Alright, now go to scrub mode. Let's toggle x-ray president
a bit three branches, the y symmetry tab. This icon right there,
press and press F. So now you've got to
grep british enabled. You can apply this first, apply a chip
deficient Modifier by hovering over it with their mouths and
pressing Control a. And I'll just move
this to the side. The whole pair, part two about where it
stops behind the ears. We don't have the air,
so I'm not sure if you're going to make
the difficult thing for debt because the ears are
quite simple to make. We might just leave that out. All right, so that's
looking fine or no, just toggle x-ray off
because now we've got the hair outside
of the face and we can actually start worrying
about the shape of the hair. I'm just going to increase my brush are very
much move everything. The back of the head
delivered more. Something like this because
firmer foam for you. We want to see the
shape of Jerry's head and the hair is pretty
much on top or in the bag. And I'm going to
add a lot of sleep deficient surface and set this to one maybe antique control a, just so we've got a
little bit more to shape. Those nice curly
parts are what is it? The, the parts that
go in and out. I'm going to show what they intended it to be
in this series, but I think they are
something like like, like curl, curl or
something curly hair. So we're just going to recreate a little bit of
that stuff as well. That are some nice details. And in this case it won't
look completely flat. And it is nice. Alright me move this
out a little bit. Still in the grep tool. Still making some nice
details, something like that. Make the back a little
bit currently as well, but just moving
stuff in and out. Grabbing stuff. Moving
stuff in worth. Like so. Just sorry, it isn't
completely alright. I feel like this is
going to be fine. Maybe move this down a little
bit, something like this. Move this up a little
bit, something like that. Alright, so this
is looking fine. I think this looks like Jerry already really going
to go to object mode, select the head,
press skilled mode, and let's hit this
snake hook for now. Regard to create a neck. Now, zoom in a little bit, go to the back of the head
and the bottom and just extrude that down.
Something like this. Brush G and just move the parts. This is not what we wanted to
reach like the snake hook. Let's try again a little bit
more from the bottom side, and now let me make it
a little bit bigger. Rosetta, few times, try again. All right, this
is looking better. Brush g Now that you've
got the geometry extruded and just shaped
and how you want it to be. Something like this. A little bit more, little bit more in red right
here at the deep heads. You can actually see
where the next starts and where the chin is. For example. It's looking fine. Actually, it is
not totally fine. I'm going to press
conference said a few times. I think that it's too much. The reason why is because
we couldn't really see the bottom shape
of the head anymore. I think we should
work a little bit more in the back here so we can keep that nice phones
shape of the face. Something like this is
already fine for G. And let's increase
this a little bit. Just apply the
subdivision modifier if your geometry is being annoying. Happen sometimes. And then just shape it
a little bit Better. Move this to the
side a little bit. We'll distribute side
a little bit as well. That is growing to
be fine for now. That is the neck. I'm going to go to object mode, select the hair right
mouse and shade smooth. Now we're going to press
Shift a mesh and circle. Let's press G and X, g and y and just
scale this down. This is going to be, the pupil is just gonna be very small. I'm going to press
R Y, just rotate. That's something like this. G x g. Let's keep this to the eye
or set this to the isobars. Gy, move this to the eye. Gx, move it out a little bit. Why wrote to this a little
bit to the actual shape of the eye and move that
to where the eye is. Something like this. Scale it up a little
bit more, maybe. Tap F and extrude it to the eye. That's looking fine. I'm going to move this
in a little bit more, pressing G, something like this. I'm going to press Control a all transforms
rightmost set origin, origin to 3D cursor at modifier mirror and change
the excess from x to y. There we go. So there's
going to be the pupils. I'm going to select them, go to Materials hidden, you rename this to pure. Let's set the base
color to black and maybe the roughness down to 0.1. Hit GoPro safe, I'm sorry, Control S to save your file
and name it as January.
5. Texturing Jerry: Let's go to the rendered view. Let's go to the
random properties and let's set the renderer
ancient two cycles. And let's hide Jerry
in the background. We don't really
need that anymore. Make sure you always have
the render tab as well. So disabling renders, if
you don't have this icon, you can hit this filter
icon right there and just click on this
photograph icon right there, which means disabling renders and then you will see
them right there. And you can turn this off. Let's select the head. Go to Materials. Renamed is to actually we
already have a head with zeros. So select this icon right there and select skin because we
created that when we made the, I change the base
color to a skin color. Let's see something like this. I should not have removed the reference image to sheath,
but it's going to be fine. That's like your hair
hidden you and rename this hair and make this
singular with gray, brownish or we need this
a little bit darker, limited closer to the
whitish values as well. Something like that. Now we're going to actually, I think we already have all
the materials setup. We did. Alright, so now let's
select our point light right there and
change this to a son. The strength of three. Let's rotate this a little bit. We've got a little bit of a more interesting lighting setup, something like this
is looking fine. And now hit Shift a mesh, pulling SGX and move it away. Breasts are white and 90 and press S and scale
that up all the way. Something like this. Now President, Pence 0,
go into a camera view and select your camera cube
square thing right there. Now if you press Shift F,
you can actually move around your camera with
WASD and your mouse, just like you bought
in a video game. Now let's move this
outwards a little bit. So I'm going to select my head and I'm just going
to change the materials little bit because they were a little bit
too light when we changed the lighting to
sudden. Something like this. I think the hair
is looking fine. The ice as well. Like sad eyes, so it's
going to be fine. I'm going to select
the plane, hit New, and I'm just going to make
this a nice reddish color as we do like debt. We might even select the sunlight and
press R and zeta and move that a little
bit like this. Many of our, why, make them a little
bit more from France. This is going to be fine. So now we've got a nice
shadow from the nose and we can see that
it's nice and pointy. And we can also see the
shadow in the mouth and soft shadow from the
head on the neck. I think this is looking like a said. Let's render this out. Go to random properties set
is two cycles and device GPU, if you have a throne GPU, Of course, otherwise
set it to CPU. That's all we have to do. I'm
going to set the time limit to ten seconds right now because
that's all we grow into. Nice because it's
a very easy model. Now hit Render, Render
Image and it's going to render out your own Jerry. It's going to finish
in five seconds. So you can see it's
already looking with very, very nice is done already minimize this window and go to the compositing
temp right there. Select use notes and
select render layers. Press Shift, left-click
on Rina layers. And now we've got a viewer node that you can swipe to the right. I have the composite
depth to the right as well in the
Reynolds and lift. So you can see Jerry
and a background and we can see the
changes that we make. And what are we going to
do in a compositing tag is make a little bit
more adjustments in the course and stuff. Hit Shift a and search for hue, saturation and value and swipe that in-between the rent
or lease and the viewer. And let's wipe this saturation
value up a little bit. Hold shift so you
don't overdo it. And let's see. It's overdoing it. Something like this. So just so that Jerry has limited color and the
background as well, I'm going to increase the value a little
bit because I wanted it to be a bit lighter,
something like this. I'm also pressing
Shift a and search. And I'm going to type
in varieties of cones, rest, swiped it in-between the
saturation and the viewer. Maybe increase the brightness
just way too much. Increased a little bit, and decrease the
contrast as well. So you've got a little bit
more for those shadow values. I think this is looking fine. Now, go back to your render. Those changes will be applied. They won't because
we forgot one step. Connect our bright
contrast nodes to the composite tab right there. Alright, so now go
back to your render and those changes
are applied there. Hit Image, Save, and save GAS. Saved this as Jerry, our own sad little GRE. Alright, so that is
it for this tutorial. I hope you learned something
and I hope you liked it. I will see you in the next one.
6. Modeling Morty: I'm going to make Morty from Rick and Morty and
we're going to try and make this quite quickly in around ten minutes might be a little
bit more depending on how how we are going
to approach this. But I've got quite a good
idea and how to do this. So let's get started
for once we are not going to delete
this default cube, but we're just going to apply a soup
deficient and modify. So goes into wonderful, I
said right away and click on modifier and hit super
efficient surface. Let us make this 33. Now we've pretty much a sphere, but the width a little
bit better geometry to work with later. To check what more they
actually looks like. I'm just going to add
a reference image. So press Shift. Let's go to image to
reference, and let's add. Let's go to the download folder first and then we're
going to open this one. So this is the morning I
chose to make regarding to make those rotations are
a little bit more clean. So we're going to set 9090. So that is going to be nice and aligned
to the front view. Press G and X and moves
it away a little bit, scale it up a little bit,
something like that. This is what we're going to create and what he doesn't have. Every interesting phase. Well, it is very
recognizable because of the hair and the
mouth and stuff. That is just a round face. We have the round face or the
round head started already. And I'm going to apply the subdivision modifier
by pressing Control a. And I'm going to actually
add another one. That's going to be a one. Now
what we are going to go to sculpt modes and re going to create some
nice eye sockets. So let's press this school the brush right there,
sort of drought. And let's press F and
resize our bridge to something more that can
create an eye sockets. Now we're going to enable
a y symmetry, right? There's this little icon. You can now see that we've
got some symmetry going on. Now if you hold Control and
drag something like hair, actually, how does it look? Something like that?
Something like this. Just to throw some, some big eye sockets for more tea that we can
actually add some Ising. I think this is still
a little bit too big, so I'm going to preschool
for Rosetta and zoom in one time and then just
do the same thing again. Like that. I think
this should be good. Maybe live is still a
little bit too big. It actually, it's more, his eyes are a little bit
smaller compared to the heads. Embarrassing Rick Sanchez. So let me zoom in
a little bit more. They're the same thing again. Something like that
is going to be fine. You can see that there's now
a little bit blocky still. If you press a right
mouse and shaped smooth, we can still see some of
those blocky, blocky areas. We're going to apply this 11, simply fishing and
just add another one. So whitened not I'm going
to set this to two. And now we've got
those eye sockets. But first we're going
to create this. And notice before we get to
the actual eyes or the mouth, go into skilled mode once again and grab this little
snake hook right there. Let's go into cipher. So I'm already knows
it's just a line, old pointy pointing pump. It seems like I think it is actually shape of a nose that
we can try and recreate. I've got a snake hook and
I'm just drawing the, what I would think the 3D shape of the
nose could look like. Something like this. If you don't like something
just brush controls with. So I think this is a
little nice and pointy. Maybe not long enough
because we can't really see that it is an
actual pointy nose. I've got the grep tool
enabled now and I'm just trying to grab some
parts of the nose out. And I'm going to direct this in a little bit just to keep it
nice and pointy like this. And don't worry. You can just keep shaping this until you are
completely satisfied. I think this is
going to look even better when we actually
add some lighting. So this notice properly lit. Like this is already
looking fine. Little pointy nose of Morty. Next up, we're going to
worry about the mouth burst. And I'm going to go to object mods and suppress
tap on the head, see if we even have
enough geometry. Create something like
that. And we don't. So we're going to
apply this to and to modify represent control.
Check the geometry. It is a little bit much, but I really think we do need this much to create
a mouth like that. What we're just going to go, excuse me, going to do is
go back to school modes. And we are actually going to
go out of the cemetery mode because we want this mouth
to hang a little bit to one side because
otherwise it's going to look weird in front view. We're going to go back
to the snake hook. Regards to make it a
nice and small and it's right answer on your camera to about where I've got it as well. So we see at the
limit from the left. And then we can just
try and extrude something that is going to
look like the dead mouth. Like this. We can
reshape it later. Don't worry, too much. Alright, so that is step one. We're going to make
a little bit longer. I've got the grabbed tool
enabled now by the way, if you've got some weird
geometry going on, just control said a few times, it means that you
pretty much over extended the boundaries of what is possible
with the geometry. You've got. Just
scape this skill this to something that's
kept Luke, like a mouth. All right, so I think
we need a little bit more to decide the even. So I'm just grabbing stuff
going through the front view. Maybe we, this is too big. We're going to drag this
in a little bit more. This is a very unique mouth, or it's going to
require a little bit of trial and error to get rides. But you can see I'm
zooming in, I'm sculpting. Just try to create something that looks like the
face of morally, this mouth is already looking
better than we had before. I'm going to resize
it a little bit. So I'm going to make everything
a little bit smaller. Like this racialized
your brush once in a while by pressing F
and just scrolling. This mouth is already
looking a little bit more like the actual reference image. Bit hard because we
see it from froms and the images in 2D are mostly elevated from the site with something like this
is going to be fine. So go back to object mode. If you want, you can even add
and sub deficient surfers. So if you select her
head now and for step, you can see that there's
a mouth is really being Let's see,
stretched and stuff. So if you add a notice
of deficient surface, it should work
fine because it is not a very complicated object. But it is going to add
a lot of geometry. If your computer can
handle it, I am. You can just do it. If it can't, you can
leave it like it was. Alright. I'm just going to apply
the VARK with this. I'm going to press
Shift a mesh UV sphere. Scale this down by
pressing S brush Gx, Gy. For SGX, I'm just moving
this to where I want. So look it through an x is by
pressing G and then the xs. Let's see something like this
is already looking great. So what I'm going to do
now is press or sorry, r and y and 90, just so that we've
got this pure pill, this option for our pupil, the front, well we can even
make this little derby life. I've sampled roads into this, is that extra superpowers that roads the district
is side a little bit. What you see in Rick
and Morty is sometimes didn't make the eyes and license Derby simply by rotating the ice or the pubis
little bit too. Besides, right
now, I am going to press Tab and I'm going to press three on my keyboard to
go into face select. We will just select this
inner branch right here with the query selector. So that is this leg box. You can select it by hovering your mouse over select box and just brushing it and holding it and then turning
it to select box. And I'm going to press I to insert something like this because I don't want
these people to be big. Rigor mortis, very small pupils, pupils, something like this. And then I'm going
to go to Materials, this tab right there. Plus hits, New hit, Plus once again
and hit new name, the first one, white's
named the second one. Pill. There we go and make
that black right away. The right there and turn
the roughness down. So scroll down during
a reference 0.1. Same thing for the roughness
down for that as well. Something like this. And I'll go back to object mode. Right mouse Shade smooth. Let's press a right
mouse set origin, origin to 3D cursor, go to the modify properties, add modifier and add
a mirror right there, and turn this from X to Y axis and press Control
a all-trans forms. And then it should
be mirror off. Quite alright. Alright, so now let's
worry about this hair.
7. Modeling Morty's Hair: And the hair of Morty
is quite, quite iconic. I think we're just
going to create that quite easily by hitting Shift a mesh cube modifier,
subdivision modifier. Whereas it, and this
doesn't need to have as much geometry as
the actual heads. So we're going to
probably turn this to three and scale this
down a little bit. Just like this. And then we go to the brushes g, x and g. It is limited behind
Morty muscularis open. A little bit like so.
That is looking fine. Let's turn to for actually
something like that. And then we're going to
go into skilled modes. I'm going to re-enable
the y symmetry. I'm going to press G, F, scale this up a little bit. And now I'm just going to try and shape the hair
as morally hence. Alright, so it isn't
not working that well because we didn't
apply them when to fire. So we go back to
object mode over, over your modify
or your ship diff, Control a and apply that. So now we can actually
work with the geometry, go back into skilled modes. And let's just drag
this to the size. Just so we've got
the front shape of the hair goes
something like that. Move this out a little
bit as well. Like that. It starts a little bit down on the bottom.
Then it goes up. It has some wounds from
some wrinkles and stuff. So it's probably some curly
hair or something and we can just create this with
the grant brushes as well. Like that. Looking fine. We want this to go forward
the limit maybe as well, and make that happen. Not that hard at all. Because his hair is
just not dead at fonts. Rakes hair was a little
bit harder to make. More of his hair is not
that big of a deal. Just create some nice, weird curly stuff in the hair. Make sure it is not
completely round. So it's a little bit more
organic, something like this. That's looking fine
already. Alright. Now press object mode. Once again, I'm going to press Enter x and just move
that back a little bit. Because for some
reason, the hair of the Rick and Morty
characters basically starts on top of the head instead of a little
bit more to the froms. Because you can always see
the rounded shape, right? So that's pretty much
implies that the hair starts on the top or
even behind the dog. Moved it back, go
back to school mode. And I'm just going to drag
this in a little bit so it doesn't become too large. You know what I
mean? Something like this is looking fine already. Maybe drag this
just a little bit, just a little bit, and maybe direct this a
little bit because we need to see some volume in
it for hair office. Something like that.
Girls and stuff. Something that you
can actually see from a front view that's actually
looking quite alright. Now, I'm going to go to Object modes and I'm going
to add another sub diff, just to add some nice smoothness and turns to one right
mouse, Shade Smooth. That's looking fine.
8. Rendering Morty: Now we're going to select the heads material,
sorry, two heads. Let's go to material properties. Change the material
to the name head. Let's set this beige color to more actual skin color
or something like this. And let's actually go to
rendered view for now. They're going to do a render tab right there and
thoroughness of cycles. Let's go back to the
material and just make this a nice skin color, a
little bit more orange. Maybe it's something like this. That's looking fine. And we need to light this up
a little bit more. By the way, let's select this point lie that
is their standard. And we're going to
turn this to son, turned the strength
down to three and just press R and Z and just
rotate that a little bit. So we've got some nice
shadows in the face. I don't want the nose to cost that much of a shadow
on the market because the mouth is actually a very interesting
piece on this project. And just make sure
you get a nice, a nice shading that highlights the shape of the
face quite well. Something like that. We'll do a little bit more. We can actually see the pointy
nose a little bit better. Actually something like
this grows, be good. All right, So some reason
this pupil isn't a black yet. So select the I press Tab. And with that little
part selected, go to your proof and
material and hit Assign. There we go. Now it is black. Now select your
hair. We're going to delete those two materials, hits plus hidden you. And it's going to be
here and double-click. It, turned this
into hair and then make the coal are executed me that was the material
I think a few times. I'm not sure what happens. Select your hair. Your hair. I think I still had the
I selected hit plus new and certain base color
into a nice brownish color. I think you'll be
fine if we didn't finish the hair before or
just select your hammer, it's Arial and make it
a little bit brownish, like Morty has didn't at the reference image
anymore because it is almost finished already. From already there is no real
Nick can do is press Shift a mesh and just add a UV
sphere, presages that. And let's press S and
shifts it and just scale it down a
little bit just to match a little bit of the
shape of mortis T-shirts. Let's press G and x. Let's move that up a little bit. Something like this.
You'll be fine, whereas the right
most Shade smooth. Let's give it a new material right there and make it
a little bit yellowish. So what is the color of
the shirt off Morty, I think something like this. We'll do a little bit lighter. Like that. It doesn't look fine. Because gx little
bit more maybe. Just that there is a little
bit of geometry right there. Alright, so I'm going
to press Shift a, match plain brush gx, RY 90, and scale this up the way gx so that shadow is not costed. The axial plane right
there hidden you. And let's give this
a nice material. Thinks something bluish
might work here, or let's stick to something
nice and reddish. Something like this. Hits 0. Go to your camera view, select the camera, square, brush Shift F, no use WAS
and D to move your camera. And I'm good at
screwing to move it into the room view of Morty. I don't want to see too
much of the body because that's very quickly modulated. Models like not sure what it's called, something like this. Let's go be fine. I'm going
to move this backplane, Beck a little bit
more because we still see the shadows
or press G x, move it back and
scaled it up, like so. And now we can hit Render. So go to your render
template here. And I'm going to turn
my device to GPU. I'm going to set my time
limits in the render at ten seconds because
that's all we need with cycles x and a decent
computer. I think that's it. Make sure it's settled
cycles as well. And then just render your
image that you'll be doing in ten seconds because that's the maximum time we gave it. Now Let's wait 1 second. Until it is done. We go now minimize the screen
and go to compositing. Hits. Use notes and select your render
layers right there, Control Shift and click it. And now we can see it
in the backgrounds. We are going to hit Shift a
search and search for hue, saturation and value,
swiped it in the top. Between the viewer and
the render layers. I'm going to increase the
saturation because we need a little bit more color in
the face and stuff like that. I'm going to increase the value of lipids as well because I want it to be a bit lighter. We can also hit Shift
a and search for bright contrast and
swipe dead name it. So when the saturation at the viewer and make it
little bit more bright, maybe increase the
contrast as well. This is just a little
bit about feeling. So try and make this, try and give it
the look you want. You can always go back
to the saturation and increase a little
bit more if you want. Like that is going to be fine. All right, so make
sure you connect this bright and contrast nodes
to your composite as well. And then you can go
back to the Render tab. You can hit Image safe S, and then we can call this Morty. And that is already done. I hope you learned something. I hope you liked it. I can see
that we miss the ears now, but I think the ears are the least important part
of Morty and we only have very limited time period
for this tutorial because I wanted to do
some quick tutorials in about ten minutes. So we're going to
leave out the ears. If you wanted to do it yourself, you can do it the same way. Use the, sorry, the scale tool to create
the mouth and nose. Just use the grep tool or the tool that we use sort of snake hook em to
just exclude those here. So a little bit and
make sure to turn on symmetry as well. That's it for this tutorial. I hope you liked it and I'll
see you in the next one.
9. Modeling Rick: Today we are going to make a very interesting
version of Rick Sanchez. And this is going
to be interesting because we're going to try and make it in around ten minutes. So let's go into a very, very quick 3D model. And then we're just
going through and select the default cube
and press Delete. Alright, actually we did
not have to do death, but it is very, very basic thing
to do in Blender. So it is really was pretty
much automatically deleted. So we're going to
add an order cube. So press Shift a mesh and cube and then we're right
back where we started. And then we're going to
scale this up in the z-axis. So press S and Z and this scale it up a little
bit because we're excited. Yes, face is, of course a little bit higher than it is white. If you're struggling with
what he actually looks like, just get a reference image on the screen or you can edit
in or by pressing Shift a and then going into
image and then reference. And I think I've downloaded one so I can just
import that one. Hair. I'm going to move this decides
to G and X and we're going to make those rotations neutral
just by pressing and 900. I think this one should
be 90. Yes, there we go. So now we've got it in
the right direction. So plus g x I move it
away a little bit. Maybe you scale it
up a little bit. So this is the face on
pretty much looking for to re-create about ten minutes. So let's go and get started. So we're going to scale
this down a little bit. So right away we're going to go to the
Modify tab right there. We're going to add a modifier and add a subdivision surface. And we're going to set
this at three for now. Several one's a little bit more geometry to make it rounded. So this is a way to elliptical. We're going to press tip,
we're going to press Control R to add
an edge loop and just swipe this up
a little bit so the head is going to read
a little bit more square. It's like this. Same thing
for the bottom sides. Move it up a little bit more so that one is a little
bit more rounded. I think this is looking fine. We're going to go
out of edit mode. Now we're actually going
to try and make them nose and the eye sockets because we're
going to add an eye later. In order to do so. We want to scale this with
the additional geometry. So we're going to apply
this up deficient modifiers or hover your mouse over it
and press Control eight. And now if you go to edit mode, you can see you've got
all this Germans were to work with. Right away. We're going to add on motor
subdivision modifier, but not actually apply that. And we're going to
share this at 11. That should be enough for now. Now let's select the head
and go to sculpt mode. And right away we
wanted to enable the symmetry in the y-axis. And it can be done a pair at
the three icons and press Y. Now you can see there's a dot
on the right side as well. So we are going to
create this eye sockets. So let's see on what line it is. Pretty much aren't there. If you press F and then
just drag your mouse out, you can see you can make the sculpting tool with bigger and that's what
we need right now. We're going to create
the eye sockets. And let's see how we're
actually going to do this. Hold Control and make sure
you are in the drought tool. And with control you can
actually paint inwards. So let's do that little bit of this already looking
pretty alright. Actually, all we need
is a little bit of a socket for where the eyes are going to be. Nothing more. Make sure you leave some space
here for the nose later. But they should be fine. So we're going to go
back to object mode and right mouse and shade
this smooth for now. Let's right away. It just adds some eyes. Or shall we start with the nose? Let's start with the
node because we're sculpting now any way. For the nose, let's see. We don't really have that
most geometry to work with. So you can see if we want to
create a notion right there. We only got two sets of
phase rows to work with. And that's just not
going to be enough. We're going to apply
this 11 modifier. So comfortable a, let's see, this is a little bit better
and right away we're going to add another
sub diff at 11. Because I want this to be smooth as well that we're
going to scale them now, select your heads and go
back into skilled modes. And we're not going to use
the dynode TOPO today. We're going to work with the
geometric we already have. And now we're going to
select the snake hook right there. Make unknown. I'm going to wrote in my
view limit to the side, I'm going to go to the nose
or where it should start somewhere like
there and I'm just going to drag it down like this. Make a little bit smaller
and keep dragging it down. Make it a little bit
bigger. Maybe. Drag that down a little more. Something like this that
losing like a nose. That's Rick cliff. I'm going to press G
and just move this out a little bit so that it is
a little bit more rounded. On those bottom sites. You can see that this is still a little bit HE right there. So we can try to two and that's going to make it
a little bit more rounded. And I think this
is looking fine. We can reshape the fluid
with the grep tool. If you press G, maybe make
it a little bit more, more straight or
whatever you want. I'm going to make a
little bit longer maybe. Let's see. I think this is looking outright that isn't noticed for now. Go back to object mode, shift a mesh, and
go to UV sphere. This is going to be an I. We of course have to shade
this a little bit smaller, or scale this a
little bit smaller. So plus S edges drag
this down all the way until you think
this could be an eye, something like this person. And why just
position it, Gx, Gy. This should be fine. And of course, it is a cartoon, or those dimensions
of the eyes are not completely going to say it
is not completely true. So those eyes, if
they were real, they will overlap in the school. What's going to
happen there as well. But it doesn't matter.
So first things first, before we mirror this, we're going to make this islet. And there's going to be
a very easy process. We are going to
enable the X-ray mode right here, this icon, and you can also press Alt Z. I mostly just
press this icon. I'm not sure why. Just press that. Select your breast step. Let's go into front view by
pressing number three and regards to select all of those
upper edges right there. We're going to
press E and Alt S, press Escape first and
then Alt S. There we go. I just scale it up a little
bit so it looks like there is an eyelid over the eye on the top side,
something like that. Go out of your edit modes and let's disable
X-ray once again, we can shade this smooth, right mouse Shade
Smooth and let us go to the object data properties
Deb right there, go to the normals and select Auto Smooth so we don't have
this weird shading issues. All right, so before
we mirror this, we're going to apply some
materials which kills, otherwise, we're going to
have to do that later. It doesn't really matter
which sequence you use, but this is going
to be my sequence. So we're going to select
the eye and press New. And we're going to
rename this to I. We go ballistic, null, press New, and we're
gonna name this skin. Then we're going to
select the head, and we're going to
press this little icon and select skin as well. So they've got the
same material. And that way the eye lit and the head will have
the same color and stuff. So that's going to be perfect. All right, So we've
still have to define which part of the eye is
going to be which material. Press Tab number three, go into X-Ray mode.
I just select. Well, this is still
selected, so that's fine. I'm going to press
three on my keyboard to go into face left. And I'm also going to select this bottom face
circle right here. So double-click on the
list in this direction. I did choose, select the whole
bottom edge loop as well. I de-selected this
face by accident, so I'm going to reselect that. And now we're going to hit
the skin material and hit Assign the whole I will
otherwise be the materials. So the first material. And now that we select
this top side and hit Assign the skin material, then this part is going
to be skin. Looking fine. We're going to disable
x-ray modes ends. I'm actually going to now
apply a mirror modifier. So go to the modifiers
and hit mirror. And now you can't
see anything and that's because the origin
is in the eye itself. So we need to set
that at the center. So select the head and the cursor is actually
already in the center. So we're going to select the I, right mouse set origin, origin to 3D cursor. Then we don't want to mirror in the x-direction within the y. There we go. That's going to be the I.
Of course we are going to need to make a black
pupil somehow later. That is going to be easy because we're just going to
take a little bit of a shortcut right there. But first we are going to
worry about the mouth. The mouth we're going
to sculpt as well. So we're going to
select the head. We're going to go
into skilled modes. And we're just going to use
decrease brush right there. And then, well, where should the mouth be a little
bit under the nose. We're just going to drag
a mouth right here. Make sure you're getting
it a little bit straight. Without those weird
shading issues going on. Just move that to the
side a little bit. You can press G and
move it up and down a little bit so that it gets
a little bit more straight. You can hold Shift
and click and make deliberate more smooth
as well. So let's see. All right, so
there's a small bend in the mouth that goes up, something like that
is going to be fine. Drag this down a
little bit, maybe. Maybe drag it all
down a little bit. Shaped this smooth
little bit more. Hold Shift and click that will Shade Smooth
little bit better. If you think you're done, you
can just wrap the drought and scale this down with F and just paint those little
mouth corners right there. It doesn't go into
add some nice, nice look to the mouth.
10. Modeling Rick's Hair: Just looking fine.
That meshes the Eric. Ready a little bit. Now we're going to worry about the hair. So go back to object
mode, select your head, press shift D and press
Escape and skill is down a little bit more pressing
S and hold Shift and just scale it down so it doesn't overlap with your other heads. And we're just going to use
this head for the hair. That is the easiest way to do
this in ten minutes or so. I think we're already almost at diamonds, but that's fine. A little bit more
isn't no problem. I think we're going to
go into skilled mode. I'm going to select the snake hook tool once again and we're going
to go to x-ray mode. Right now you can't see anything because everything is
just an X-ray mode. But once we drag this, you can see something happening. First, we wanted to create
the silhouette of the hair, so the pointy hair,
we're actually going to disable the symmetry right here. Just start extruding stuff. Try and extrude things that are going to be a little
bit like the hair. We can reshape this later. Just make the brush smaller
by pressing F and just try and create the hair
shape that Rick has. You can see that it takes
a little bit of time. Birth Indiana is
going to look fine because we can still
reshape this by using, for example, decrease brush. The other one called the pinch. For example, if you know
it's selected crease brush and throughout right here, then it's going to be a little
bit more inward like that. And we cooled even
de-select x-ray mode right now. See what
it looks like. Today's isn't looking poorly, but that's going to be five. We can just go into, go
into object mode and press G and X, sorry, G and X and just moved as down the back of the head
so it doesn't intersect. Alright, so let's continue. Go back to skilled modes. Let's make some nice
creases on those points. Right there, right there, maybe here as well, just
a little bit more inward. Here as well, there as well. There was real, we
can make this little more pointy by
picking the pinch. Then just drought or stop pieces a little bit
more like this. Like this. If you don't like something, just press Control
said it's dead easy. Like this. It doesn't lie some point
they already this one as well. That one. This one. That's just how you can make the hair silhouette real quick. Of course, the backside has
no hair whatsoever for us, so we can go back
to the snake hook. Just saw throwing some more of those extrusions and
just turn your camera or define which direction this
is going to be extruded in because it's always extrudes
parallel to the camera, like this, like this. And it doesn't really
matter because this is not the part
that you get to see that often like this. And then we need to
change the camera angle a little bit so we get
something like that, like that, like this.
Maybe like that. It is just free
handing it right now. So this is an animated
character that has 2D hair. And returning to create
3D hair right now, we're just going to have to
improvise this quite a bit, but it's totally fine. White and there's always room
for some creative freedom. You know, something like this. I find this fine. I want to extrude this
up a little bit more. So press G and just grab that up because I think it
will be cool if we can see some of those points
through the front, like so. So it looks a little bit
more 3D than it will be. Harder wise,
something like this. I'm just going to
keep it like this. Now we can actually go
and select the head, go to skilled modes. We're going to select this snake hook again and
we're just going to extrude the neck down
like this. Not like that. I'm going to decide few, maybe make it a little
bit smaller and then just direct the backside
down a little bit like so. Few times, little loose, nice like a neck. And then we can just press G and move this outside
where it's a little bit. So maybe this inverts
a little bit. So this is a neck regular
person who'd been 0 and we're just going to
position the camera for now. So go back to object mode. Select your camera. If you didn't press an
input 0 yet to just do it. So you're in camera
view and press Shift F. Now with WAS and
D and your mouse, you can just move around. Just get a nice angle of Rick, I'm just going to take
the films right there or make sure that
is in the scene. And this bottom
pieces note because we're just making
this really quick. So there's no shirt on
our torso or whatsoever. So you can see that the hair is getting a little
bit through to face. So just select this
and press G and X. It just moved it away a
little bit, so that's fine. Something like this so we can
even move it a little bit more gx because I think Rick is bullying me a
little bit or at least we can see this
rounded face into a phone. So that's what we wanted as
well, something like that. It's going to be fine.
11. Texturing Rick: Let's go into rendered view. Select Display first
and hide it by pressing H. Make sure you hide
it in the render, as well as by pressing this
camera icon right there. If you don't see it goes
through this filter tab and enable this
icon right there. Now go into rendered view. Let's go to the random
properties panel right there and changes
from EV two cycles. I just liked cycles
little bit more. Select this light that is
automatically in a scene. Wrote it this a little bit by pressing R. And why
is that not working? Let's rotate our
screen a little bit. Select this light. I think it is not as sunlight,
it is not as a point. So we wanted to
change this to sun maybe and set this to
a strength of one, or maybe 33 is fine. And rotate this a little bit. So it is a little bit more often organic shape,
something like that. So we can see a nose shadow. I don't want it to be over
the mouth. Maybe do I? Maybe a little bit,
something like this is fine. We're going to press
Shift a mesh plane, but gx, why 90? And press S and just
scale it up like this, maybe move it a little bit more. So you didn't see the shadow in the render lipids 0, a
little bit more, gx. This is going to be
the backgrounds. We're going to
materials hidden you. And we're just going to make
this maybe a little bit bluish like the hair. We're going to select the hair. And this has the skin materials. So we want to breast and the
minus button and hit plus nu and make this a little
bluish like the hair of Rick. Think it is very light blue. Maybe we need this background
to be a lighter color. Maybe something like this
is going to be nice. Limited reddish. That is a nice color to
go with the blue. Select our skin material. Make this a little bit orangey. I think Rick is a very
light skin color, so we can leave it
something like that. Now select our eyes. Of course we want this
to be nice and glossy so we aren't going to decrease
the roughness quite a bit. Decrease the mixture you are in the eye material
not in the skin. Just decrease the roughness
all the way down to, well, let's say 0.05. Alright, so now we want
to go into solid view. I'm going to press Shift
a mesh circle, press G x, and just move that there are why 90 and just scale it down. Is it going to be the pupil? I'm just going to make
this very simple because we press gx and moved it to your face and rotate
this a little bit. Gx, rotate a little bit. Make sure it is in your
eyelids but not in your eye. Something like that. Press
a press F and extrude this. Just extrude that until it is in your eye,
something like that. So now we've got a pupil that sticks out a little
bit, but it's fine. Person who had 0 just
to see how that looks. That's fine. Plus gy, move it
out a little bit so it is facing the
camera like that, right mouse set origin, origins with 3D cursor. And let's go to the
modify properties and add a mirror right there. Now press Control a and apply
all transforms pressure, right mouse set origin, origin to 3D cursor once again, that we didn't want to
mirror this in x, but in y. There we go and let me go through the material properties. President, you make this black and turned the roughness
down just like this. So that's should
look like an eye. Now, there we go. We can move it down a little
bit, something like that. Maybe that's a
little bit too much. Like Did I don't want to play
around too much with this. Began maybe rotate the
sun a little bit more. I'm just going to
leave it like this. I like the shadow that falls
over the mouth and stuff. Let's keep it like this
because now we can see the actual size of
Ricks and nose. You can render this out. Now, if you go to your
random properties, you can set this to GPU compute if you've
got a strong GPU. And I'm just going to set
my timer to ten seconds. Because cycles x is a very amazing at rendering and we don't need anything
more than that. I didn't render
animation, Excuse me, press Render and render
image. There we go. You can see that ten SEC is really all we need
to render this out. Right now is looking
a little bit dull and we can fix that in the post, post editing. So I'm going to minimize this. I'm going to go to my
compositing tab would use notes. And I'm going to select my render layers
and press Control. Control Shift click. We can see in the background
what is happening. We're going to press Shift
a search and search for, let's say, hue and saturation value swapped,
It's in-between. I wanted to saturation to
be a little bit higher. You can see in the background
what was happening. And I just want
some more color in the scene and I want it to be a little
bit lighter as well. So you can certain value
up a little bit and it will get lighter like that. We can turn a situation or even a little bit more like that. If you want contrast, you can press Shift a search
for brides, slash contrast. Just wiped an
in-between as well. And you can make a little
bit brighter contrast up a little bit as well. Something you will
gets a little bit more contrast in, for example, the mouth and the shadow
areas, something like that. And if you are happy
with the result and make sure to connect your final notes before the viewer through the
composite as well, because that is what
is used to render. Then go back to your render tab, which is now updated. And now you can press
Image safe S and save your image as for
example, Rick Sanchez. And then just save it. Right? So in the end I changed
a few tiny details. For example, the
top of the nose, I just made it a
little bit thinner with the grep tool
in sculpt mode. So we've used that a
lot in this tutorial. So you should probably know
what I'm talking about. Just drag that they know
a little bit and you'll get a little bit
of smaller noise. I also move the
hair a little bit outward with the
grep towards wealth. So just swiped it out
with a little bit so that the hair appears
to be a little bit larger. And that's it. That's a complete tutorial on how to make Rick
I hope you enjoyed.
12. Skillshare OutroHB: Amazing You made it to the
end and congratulations, Thank you for taking this class. And don't forget about all the other cool Rick
and Morty stuff we have. If you're interested in the spaceship or
anything like that, check us out, let us know and we'll see
you on the next one.
 EduCraft Ideas, 3D Animation with your imagination!