Transcripts
1. Intro: Hi Kim Prussia, care
and thank you so much for checking
out this class. In this class, we're
going to discuss some continuous
line art practices, benefits, variations,
and repurposing by adding a pop of color are turning it
into an animation. I became inspired by this
type of art because of the minimalistic and
simplistic style of it. Observing the fluidity of the continuous line art really had me wanting to
recreate this myself. That I know that when I started to research and learn more
about this type of art, I realize that creating this continuous line art also has several benefits
for a new artist. Learning more about
recreating this type of art. I found that it helped
build muscle memory. It helped me observe my reference images with a more open-minded
thought process. It also helped me create
better illustration sketches. The first and
second time around. I'll take you through
the various practices that I found helpful when I was recruiting this type
of art will create several continuous line art
drawings in this class. We'll also repurpose
the artwork by adding some color as an
accident for the background, as well as turning it into an animation that you can use for your social media sites. So this is for you, if you are a new artist and you want to learn another
technique of illustration. This is for you if you like
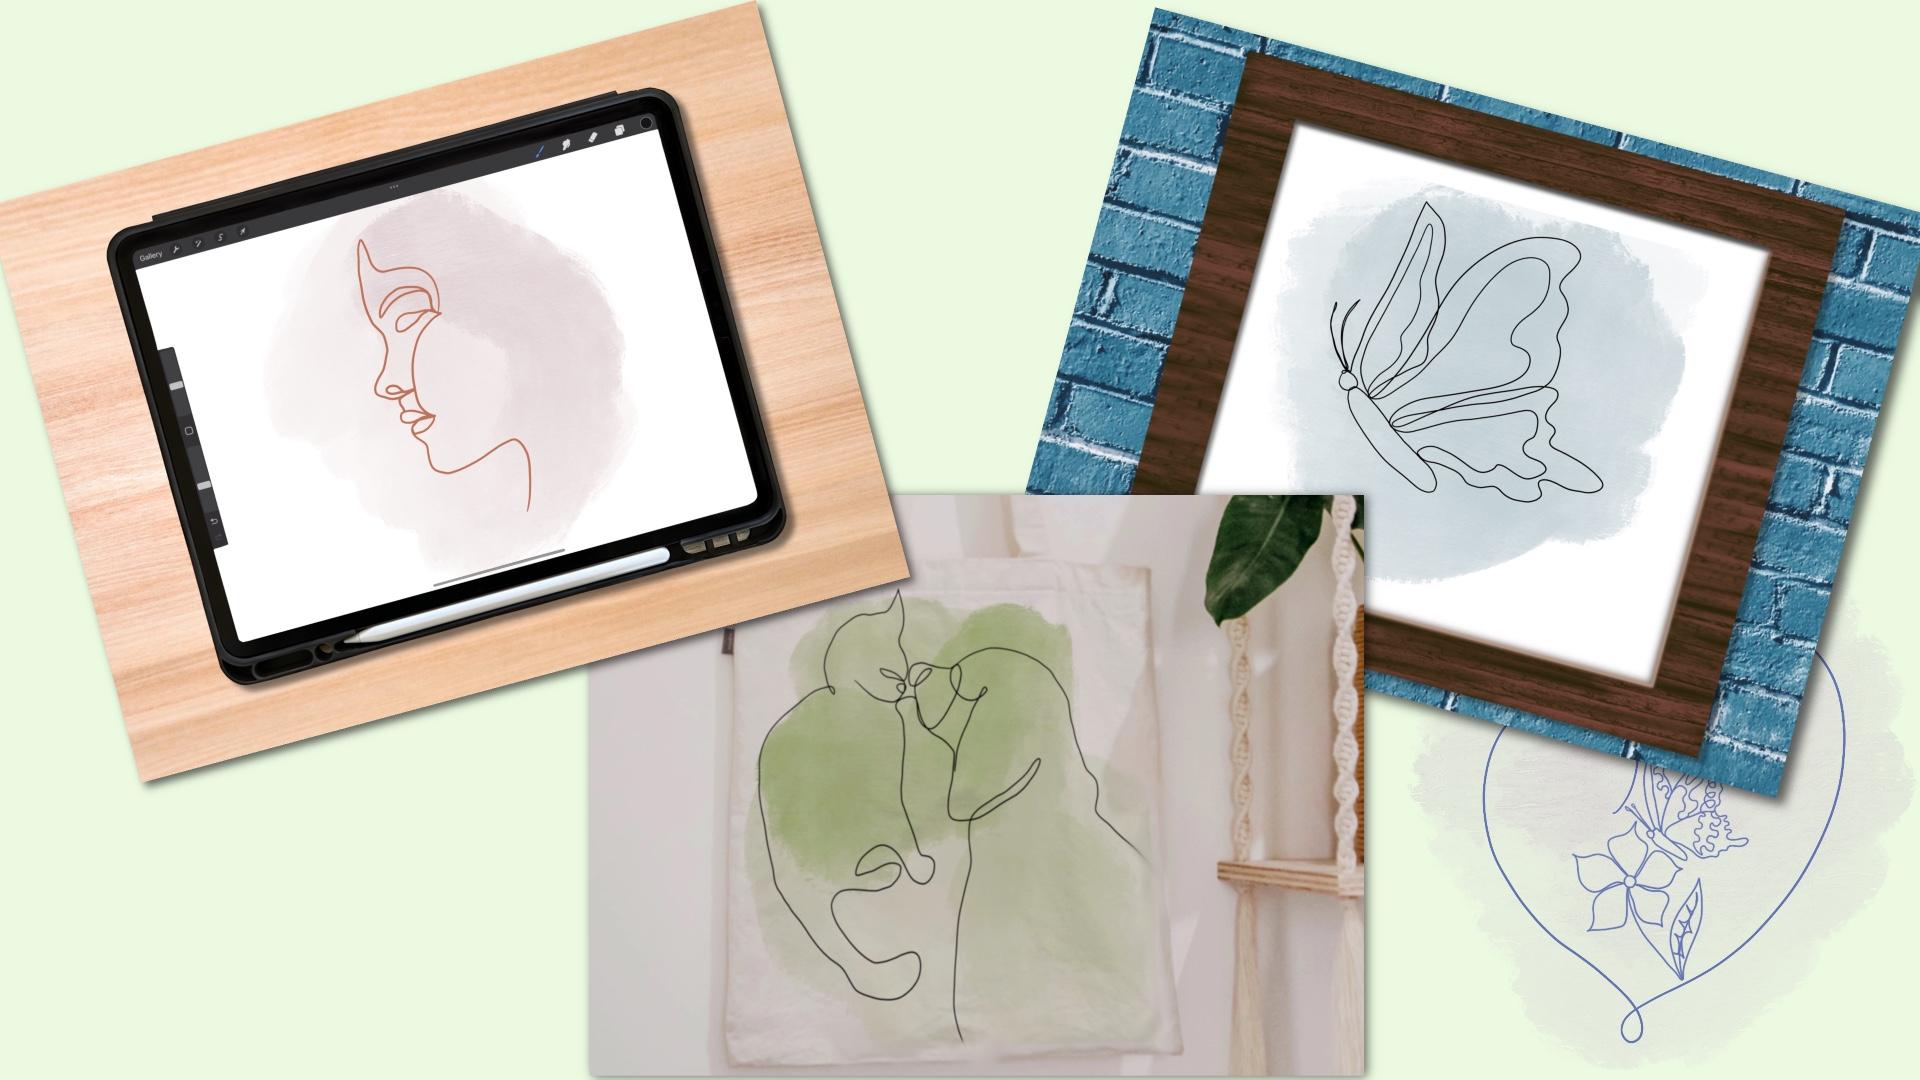
repurposing your artwork, I'll be using my iPad, the Procreate app,
and an Apple pencil. If you're ready. Let's get started.
2. Class Project : In this lesson, we'll go
over the class project. For the class project, I would love to see any of your line art drawings you choose to create
in this class. If you go the extra
steps by adding a pop of color and or an animation, I would really love
to see that as well, because this helps inspire
other creators as well as myself when you share it in the class under the projects
and resources section. Up next, we'll go over the free resources that
I supply for this class.
3. Free Resources : In this lesson, we will go over the free resources that I created and supply
for this class. In this class, I
supplied and adjusted monoline brush that I found to be useful in these
types of drawings. I've also included a
pressure sensitive brush if you enjoy varied weights
in your drawings. Lastly, I wanted to include a color palette
of various shades that resonate with my own monkey when it comes to these
types of artwork. But by all means, I want to remind you that the brushes and
the color palette, or only optional, I
encourage you to use your own favorite
brushes and colors that inspire and excite you
in your own artwork. Up next, we'll discuss what
is a continuous line art.
4. What is a Continuous Line Drawing?: In this lesson,
we'll go over what a continuous line art is and how other people
can interpret it. What is a continuous
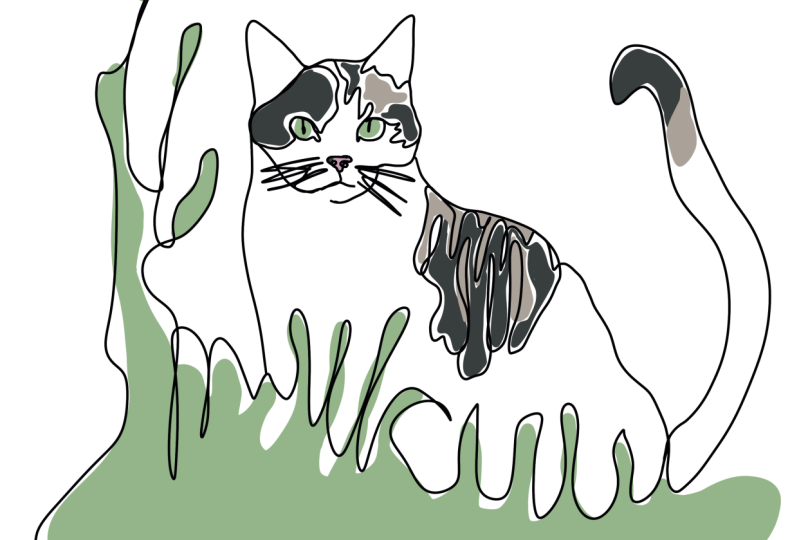
line art drawing? Well, this is just
a drawing that uses a continuous and unbroken line from the beginning of your art through the end of your art. What I observed with continuous line art is that they tend to be
more minimalistic. That means there's less details involved in creating
this type of art. There are more simplistic
in nature. For this class. I wanted to focus more on the practices the
beginning artists, without giving you overwhelmed. In the next lesson,
we'll go over some of the benefits of the practices that I am going to show you in creating
continuous line art.
5. What are the Benefits?: In this lesson,
we'll discuss just some of the benefits
that I discovered myself when I started creating some continuous
line art drawings and learning how to
create this type of art. When I was just starting out, I discovered firsthand some
of the benefits myself. It builds muscle memory by practicing these continuous
line art drawings. It'll allow me as a
beginner artists to store shapes and
fluid motion and movement of illustrating
a particular image or element into my memory
bank through repetition. I also discovered that a
developed hand-eye coordination. I found that practicing these
continuous line drawings that with my hand and
eye coordination, when I would reference an image and sketch
out my illustrations, I also discovered it is a
great relaxation technique. I found that practicing continuous line drawings without lifting my pencil
gave me more freedom, more opportunity to focus on the now moment of my drawing. I found that drawing and
itself has been so relaxing. And one of my go-to practices when life just gets too
noisy and overwhelming, but also found that drawing
freely is even more relaxing then when I focus on a particular
subject or details. Have you ever just scribbled? Well, believe it or not, this process in
itself is just as helpful as scribbling
on a piece of paper. I also was aware of
that I became less hesitant when creating
my initial sketch. It actually allow me to focus on the process then the end result. Now, these are just a few of the benefits that I
discovered achieving with my own practices in
creating this type of art. In the next lesson, we'll
look for some inspiration and grab some reference images that we can use
in later lessons.
6. Grab Some Reference Images: In this lesson,
we're going to grab some reference images as well as look at
some inspiration. Let's start on Pinterest, I have a link to my continuous line art board on the About page
for this class. You can click on that
link and I'll lead you directly to the
board I have saved. Or you can search for
continuous line art, even though continuous line r
is one fluid singular line. I've noticed that, that there
are different versions of this that they do include
for continuous line art. This is where they add more
detail with unattached lines. Some of these are so
unique and so beautiful. Even with adding a pop of
color on the back of this, really adds to the overall
aesthetic of the drawling. So just skim through this to get a rough idea when creating
your line art drawing. So even the line art drawing itself can be
used for book covers. Our designs. I've seen them on T-shirts. In this class. I'll show you how to
create a butterfly, a profile face, as
well as a flower. Let's grab some
reference images. I like to go to the commercial
use sites like Unsplash. Here's an example for
a profile on Unsplash. You can use your own photos or you can search
on these sites. This is just gonna be
a side view of a face. You can certainly use a
photo of yourself as well. You can search for
different flowers. When you're choosing a
flower for this class. Don't worry about
all the details. When you're looking
and trying to choose the right flower. We're going to create a
shortcut method where we're going to focus on more of the overall outline of this flower rather than
all the minute details. You can also go to pexels.com to look for more additional images. If you're unable to find
one on the other sites. You can also go to
pixabay.com as well. In the next lesson, we will discuss
briefly about having a complex reference
that we are using and create a shortcut to make it more easy for us to create
a continuous line drawing.
7. Complex Made Easy by Short Cut Method: In this lesson, we're
going to discuss taking a more complex
reference image that we're planning on using for our continuous line
art drawing and create a short cut into making
it more easy and more manageable when
we're looking at it to create our continuous
line drawing, I'm gonna be using
this butterfly, a reference to show you
the technique they use. You do not have to follow
along with this time. I just want you to see
the process that I go through when I take this more complicated
butterfly image, turn it into more of a simplified and
minimalistic type drawing. I'm going to lower the opacity down so I could draw
over top of it. And I'm using my monoline brush and I'm just going
to just draw around the outer edge of this just to decide what part of this
butterfly that I want to use. This is just the process
that I go through. I tried to uncomplicated
the image so I can focus on just a few of the details as I'm
drawing this out. I'm just drawing around just trying to decide what's going
to work and what's not. And then I'm going to
lower that opacity down. Choose another color just so
I can see where I'm drawing. I'm just trying to make
my movements more fluid. As I decide. Do I want loops in this? Do I want more swirls? And how I'm going to connect these pieces of this
butterfly together. So see here this seems a
little bit more fluid. Just a process I like to do. Here. I'm just
adding some antennas as I'm drawing this out. So this was just
me practicing out, showing you how we can
uncomplicated these images. So think minimizing the
image is so much better. I feel personally that by
taking away so much detail, you can see all the curves and fluid goodness of this
continuous line art drawing, which really adds to the
overall risk static. Again, I just keep going through this just to see
what feels right. Up next, we'll practice uncomfortable until
it's comfortable.
8. Practice Uncomfortable to Comfortable : In this lesson, I just
want to continue on with this butterfly image
to show you how I practice the uncomfortableness of drawing this out
until it's comfortable. This isn't a necessary step if you're going to create
line drawings themselves. But I have to take it
a step further so I can use these practices to really ingrain the shape of these images as
I'm drawing them out. I just continue through
this to see what feels right and
what's comfortable. So I add my little loops. I add my outline
of the butterfly, just trying to do it in a fluid motion to see what
feels comfortable and natural. I just continue this until I feel comfortable enough to where I don't need
my image anymore. I just want to see if I built enough muscle memory of
that reference image by drawing it out without my
reference image to guide me. You can see here I am a little bit out of
whack, but that's okay. I love to do this is just relaxing to doodle my
way through this image just to see what
feels good and try to build up my muscle
memory as I go along. I just continue this
process, turn that off, and I just draw it
out again just to see how much I can really recreate. This isn't necessary to really create your
continuous line drawings, but I do really
enjoy this process. I feel that it's
a great tool and practice in order
to really develop my sketching skills and my illustration
skills as they go along as a self-taught artist. As you can see here,
some of these are a little wonky and crazy, but they're only for my own personal practice in order to become a
better illustrator. In my opinion, I really
do enjoy this process. Up next, we'll create a butterfly continuous
line drawing together.
9. Butterfly : In this lesson, we're
going to create our butterfly continuous
line drawing. Let's create our canvas. We're gonna be using 3,000
pixels by 3,000 pixels. Tap, done. Tap, Create. Michigan important
that butterfly reference image that you chose. And we're going to just outline the main parts of this
butterfly that we want to use. Here. I'm just going around
the outer edge. We don't have to be perfect. You can include the extra
details if they feel comfortable and they appear
to be more aesthetic. I love adding some extra loops and swirls on. I create these. And as I draw, I
just try to see how I can connect one continuous
fluid line as I draw. Here, I really liked this
has turned out pretty good. And if you choose, you can
lower the opacity and try to improve the look and the fluid minus of this
continuous line drawing. Just go over top
and draw over it to see what makes it more fluid. I really do enjoy
this type of art. Take a couple of
tries until you can figure out the right path in order to make this drawing
in one continuous line. Now's a great time
to add this to the project section
of this class. Our next, we'll create our flower continuous
line drawing.
10. Flower: In this lesson, let's import
our flower reference that we decided on and reposition
it to your liking. Add a layer. I'm going to actually try the script brush in a
calligraphy section. And here I am just going to uncomplicated this flower by tracing around the outside edge. You can add a stem and a leaf. Now, we're going to turn
the reference photo of n, lower the opacity of
our line drawing. I'm just going to draw around
again just to see if it feels more comfortable and
appears more fluid in nature. And again, you can
keep going until you get the right image that
you're trying to achieve. As I mentioned earlier, I do like to keep going
and just see where I can really stretch my imagination when I'm creating
these line drawings. I do like to turn my
images off to see if I can recreate that trawling
with that reference. Don't forget to add this
to the project section of this class. Up. Next, we'll create a profile face continuous line drawing.
11. Profile Face: In this lesson, we're
going to create a profile face
continuous line drawing. Import the image that
you want to use. We're going to lower the
opacity down, grab a color. And we're just going
to simplify this by journaling the outer edge
of this profile face. So let's draw the outer
edge of this face, connecting the nose and the lips together with one
continuous line. Running it down to the neck edge and around the backside of the head and connecting
it to the eyebrow. And I. Let's see what this looks like
by turning off our image. Add a layer, lower the opacity
of that first drawing. And let's simplify this a little more by drawing around
connecting the lips, adding the nose up and
around the forehead, and connecting the eyebrow. And I will connect it
to the lips like this. I actually really liked that. And if you need to
keep practicing or make it a little bit
more fluid in nature, just add another layer to new opacity down on that
drawing and just draw it out to see what method and what path works best for the
drawing you're creating. I really liked the lips of this and the cheekbone along
with the eyebrow. If you need a little
guidance here, you could draw out a guide
by doing a vertical rule. Adding some horizontal
rule for the eye, for the nose, the mouth, and the chin position like this. Turn your image off. Just try to draw it out by using that guide and creating it without your reference
image to trace. Again, this is just something
I like to do just to help improve my drawing
and sketching skills. It's not too bad. I
would love for you to share this to the project
section of this class. In the next lesson, we will turn our minimalistic drawings into Bobo abstract by
adding some color.
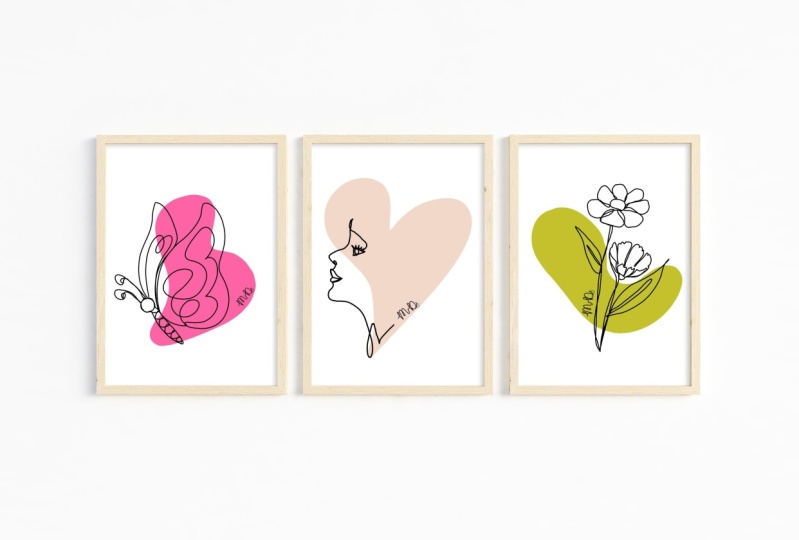
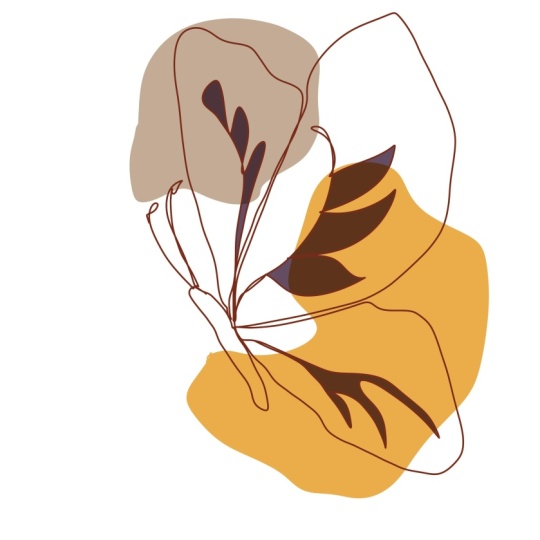
12. Turn Minimalistic into Boho Abstract: In this lesson,
we're going to turn our continuous line
drawing into Moho abstract by adding a pop of
color behind the drawing. For this, I'm gonna be
going into the painting, brushes and grabbing the
gauche, choosing a color. You can choose a color from the color palette that
I provide for this class, or choose a different
color to your liking. And I'm just going to spread
it around the backside of this drawing like this. You can continue doing this
with all of the lines, rumblings that you
created. Here. I'm just inspired
by practicing out my profile face without a reference MH to
see how close I can come to my first creation. Want to show you a
different method. You can grab the monoline
brush and just draw a odd shape behind your image
and fill it with color. This will give you another
entirely different type of continuous line drawing. You can also choose to add another spot of color
behind your image. There's no limit to the creations that you
can create with this. I can't wait to see your
continuous line drawings in the project section
of this class. In the next lesson, we'll animate a continuous
line art drawing.
13. Animate your Continuous Line Art: In this lesson,
we're going to enemy a continuous line drawing. First, you need to find a reference photo that you want to create and turn
it into information. You can use one that you've
already previously created. All we did was simplify
my photo and try to connect the two images together
with a continuous line. So I'm going to
create my canvas. I'm creating a ten
by ten inch canvas. Or you can use 3,000
pixels by 3,000 pixels. Tap Done, tap Create. For this, we'll need to import an already continuous
line drawing image so we can trace over it, lower the opacity of that image. Let's go to the Actions menu. Turn on animation
assist, tap the bottom, and we're going to
set that image as the background so we can see it throughout the entire process. I just want to choose the
beginning of this image. And I'm just going to draw
around in small increments. Tap the bottom, tap Duplicate. I don't want too much
of a large line. So that way this animates
smoothly and fluidly. So tap the bottom,
duplicate. Again. I'm doing it in
small increments, and I'm just going
to fast-forward this video because this is a little tedious and it does take some time to recreate. If you happen to erase
as you go on each layer, if it happens to not
run smooth enough. Because once you tap
the bottom duplicate, It's gonna duplicate exactly
up until that point. Again, I'm just
drawing short lines, tap, Duplicate, and continue on. I'm gonna do this until my
entire image is complete. And I'm going to delete
my original image. And let's hit play. How cute is that. You can go to
settings if it's too fast and change the
frames per second. We can even tap the
last image and hold the duration for a
couple of counts. So that way, this way, we can really see the finished image before
it goes back around again. Now let's tap the share
button and turn it into an animated MP4 like this. There you go. Up next is a heartfelt
thank you to all of you.
14. Thank You: Thank you so much for taking your time and
watching this class. I hope you really enjoyed
it and I hope that you get the benefits from it as I did in learning and
researching this type of art, but also in
practicing it myself. If you haven't done so yet, make sure you hit the
Follow button so you get notified on my next class. I can't wait to see
you in my next class. Don't forget to look for me
on YouTube and on Instagram. If you'd like, you can share your projects on there as well. Just tag me at Cambridge shook.
 Kimber Shook, Artist | Designer | Creator | Teacher