Transcripts
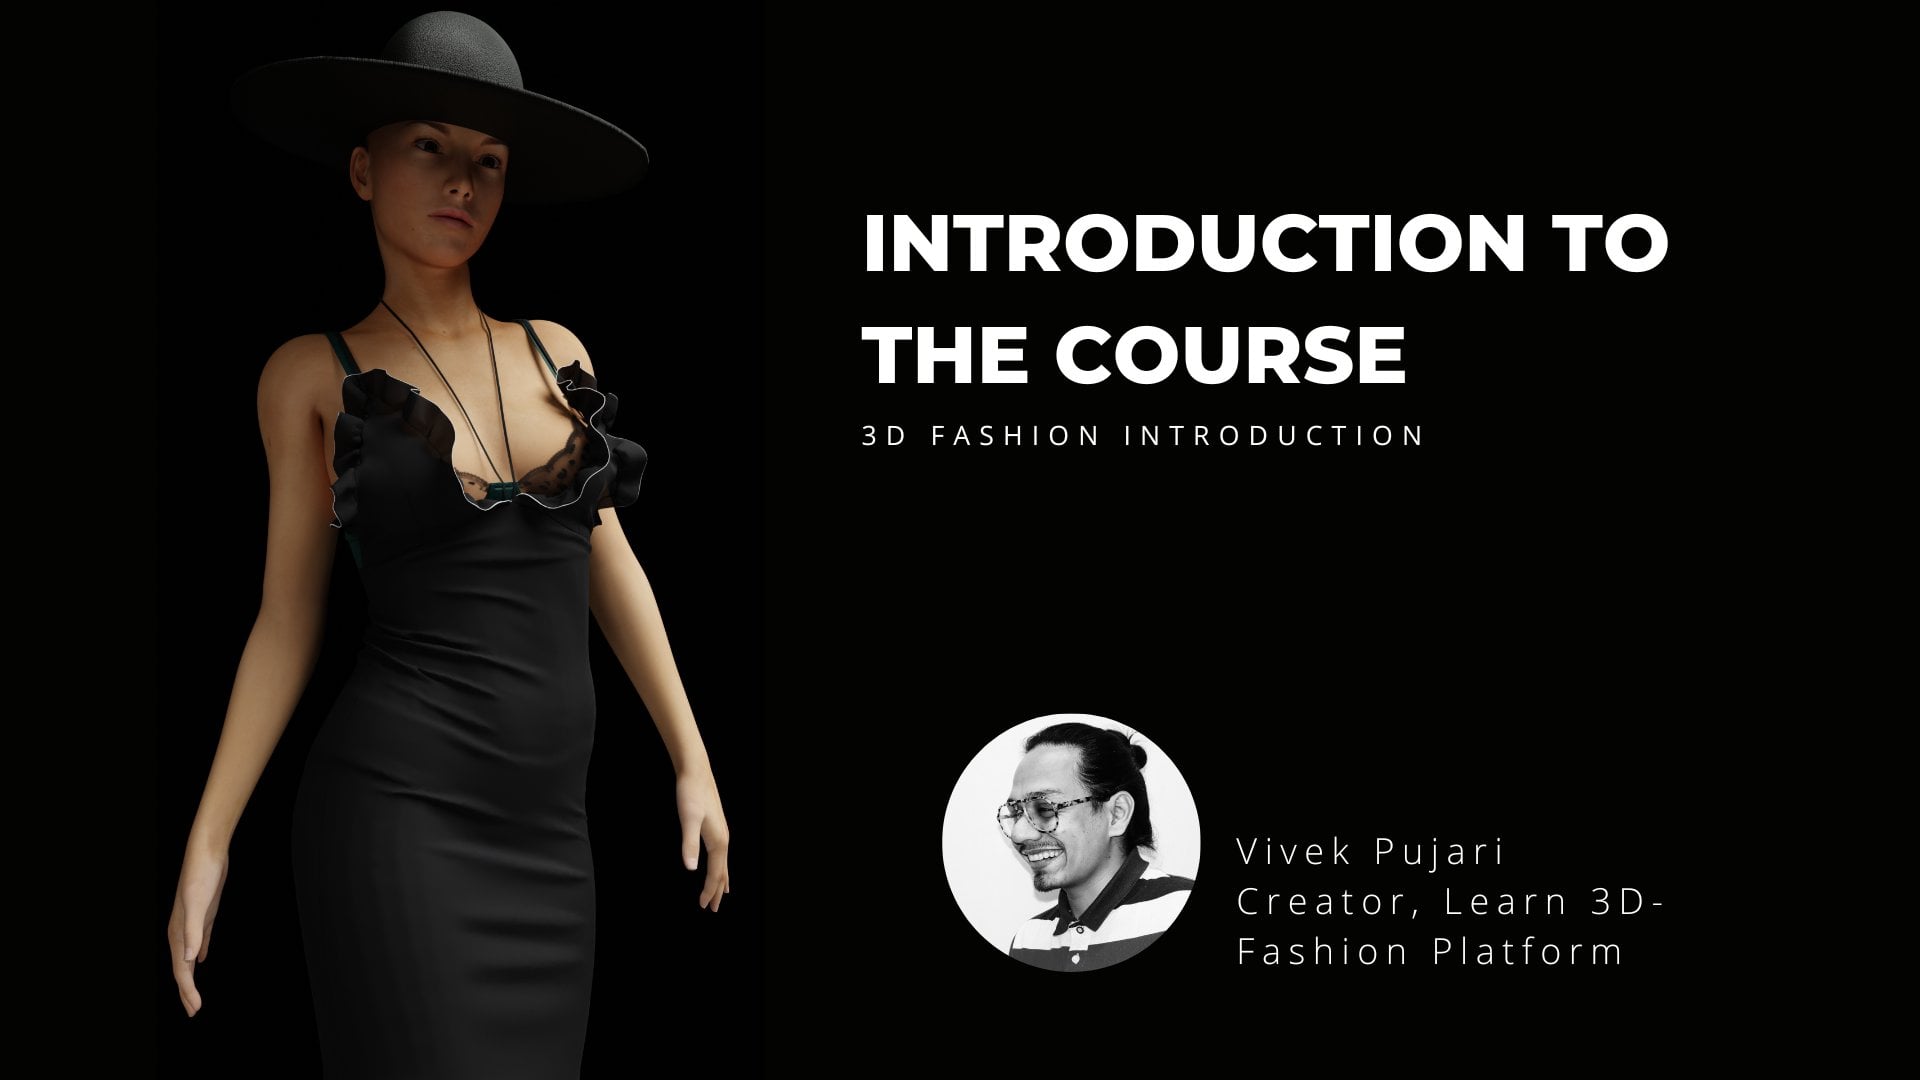
1. Introduction: Hi, my name is awake. I'm the creator of learn
3D fashion platform. I've taught more than
3,000 students from ten plus countries
from brands and institutions like Harvard, Nike, you will FIT and Udot join me in a comprehensive
journey of learning, all the tools and
features and CLO3D. In this course,
we will look into the Complete 3D and 2D toolbar. All the five different
tabs, Library History, Modular Configurator, Object browser, and
Property Editor. And lastly the menu bar. This course will make you
more efficient in completing your CLO3D projects and
save hundreds of hours. So what you're
waiting for, join now
2. Understanding the 3D toolbar: Let's jump directly into Clo
and let's start working. So first of all, I'm
going to minimize all that, all this, right? We'll just going to expand
this tool one-by-one. So let's bring
these files first. And I'm going to be sending you these files,
so nobody is okay. You've will be having
these findings with you so that when you work
so you can find it in the course that a tree or in the link below
or something like that. Okay, so first tool
is simulation tool. Everybody's noted, right? So it's a nominal simulation.
They can play this. The fitted simulation
is a better way of experiencing or fabric. Okay? So it kinds of, It's a little bit slow,
but it's a better way of simulating your fabrics. This fitting simulation
basically, also, when you give
different properties to your fabric, it
works accordingly. Okay, So it's kind of
connected with that. The second tool is a
selection tool, right? Selection tool. You can select objects,
you can select Object, and whenever you
select the object, you see this gizmo, right?
You'll see this gizmo. This gizmo is controlled
by preferences, gizmo, and they are different kinds of
gizmos here, right? I normally use world
coordinate because world coordinates is very stable in
terms of X, Y, and Z axis. So the X, Y and Z X is remain constant even if you rotate
and do anything, right? Screen 5 min, your
x-y axis changes according to where
you are watching it frontal sometime it's very, it's not very productive. Okay, So I normally
use world coordinate. Okay? After this you have
this brush tool, right? So what does Brush Tool
does is you can brush like this and you can
right-click and you can see you can create a
pin, you can freeze it, you can solidify It's been
strengthened it the brush tool basically helps you to apply all these property into
a small segments right? Wherever you can, quickly can do this right-click and you can
freeze this portion right. Now this is completely
so in this way you can apply different
properties to this. Second is a Select Mesh, okay? So select mess. Basically
if you select this, it helps you to pull your
fabric or something. What happens in Clo is that when you are
arranging a pattern, your pattern I stuck
somewhere, right? So suppose your pattern I
stuck in this, like this. So what you can do is if
it's stuck inside the body, you can quickly pin this, right? Like this and you can
just bring it out, right? So this is a better strategy
for doing the species. Third tool you will
see here is called Select Mesh and
select Message link. Basically lesser tools. You can select the mesh with a lateral that
nothing interesting. Pin box to pin boxes, symbolic. It's been something right? It will, It will be
paid in the air, right? And you can move it. So
normally we use print box been tool for draping purposes. You can select it
again and delete it. After this you have been right. So again, you can pin
with lasso tool, right? Okay. Now let's look into this
Edit Style line scales, tiling moves, Thailand
draw style lines. Okay, so this is sometime
it's a very important tool. But again, guys look because
we use pattern-making, okay? Pattern-making is a very
important aspect of CLO3D and you can't ignore pattern-making while
you're designing anything. So sometime it is a good tool, sometimes it is not a good tool, sometimes it's better that
directly work on the patterns, okay, So you can select this, you can draw this up, right? So what you're doing, you're
changing the lines, okay? And you can play this fight. This directly changes happens in 2D patterns or
sometime it's really useful because when you
edit things on 2D window, you're not able to
understand, right? Or you're not able to see
how this is going to impact, but, but it really, it really becomes
very helpful one, once you understand that
you can directly do it in 3D pattern, right? So I'm just going to Control Z. Second again is the
scale skyline, right? So you can select this scale like lines and then you
can scale it up, right? So all these tools, these are basically just to edit directly in 3D instead of 2D. Okay? So all these timelines, you'll move style and
draws tie lines, right? So if you suppose you said draws dielectric and click here, you can double-click here. So now you have created
this line, right? So that's the pattern
is separated from, let me do a Control Z again. So all these tools,
they help you to, to control your lines. Okay, now let's go to the next
to next tool is this edit. So this is first
stitching, right? You can delete a stitch, right? You can delete our sketch
and you can quickly stitch. It. Stays this with segment's going. Right. Segment is very simple. Stitch the segments
and segments, right? You can play this. And
then you have segment M2 and M2 N works really in a lake. So suppose let see. You have two segments, right? Okay, How, let's bring
some other stuff. Let's bring this file. Okay? So this is a file, right? And suppose you have this One moment. Fabric, right? And the way this is
done is I'm going to quickly got this, right. And I'm also, let's first delete
this syllabus line, right-click and cut. Okay, now let's control NCDs. Let's make a copy. Now. You can use this, right? And by the way, whenever
you use it to use, you'll see it's
written here, right? What it's trying to do, select a segment to begin
with EMS going to select, you have selected
this segment, right. Click here, and then select Enter to
complete the segments, you can select multiple
segments because I'm going to select one more segment.
So now it's done right? So once you have M is
done, you press Enter. And then it says that select to, select to begin the end segment. This is N and this
is also N, right? And now it's done. Let's press Enter, right? So if you play this now
this is stitched together. End-to-end works like you
select all the M first, then all the end first, and then you stretch
it where it's useful. I think when you are
doing gatherings, right? Than it is important
then when you're doing segments calving
than it is important. So all these places
becomes really important. All the tools that
are here, right? And the common Tools
between 2D and 3D, it means that you can apply
in both the ways, right? So yeah, that's how it works. So free stitching tool, it's, it's, it's pretty simple. Let's do Control Z. Free stitching tool. You can just quickly stitch two segments in whatever
the way you want. So for example, you
can select this, you can stitch from here, and then you can stretch
it from this toilet. You can detach it
from this side, this side, the side
to this side, right? Also, this three-stage model
is quite simple, right? Again, 3D stitching
tools segment basically means that for us to
select all the M segments, secondary select all the
end segments, right? So that's how to select
all the M segments. I'm doing it. I'm not doing it in 3D because in 3D it doesn't
work that great. Okay, That's why
I'm doing in 2D. So you select this, you have selected this, so this is all M that
you're selecting Guide. Then you press Enter and
you select all N, right? This is you're selecting all
and right and press Enter. So this stitching is done. Now you see this gives you this ability to
select all the M first, all the ends, and then, and basically it will
automatically adjust itself right? After this, you have
this auto sewing tool or to sewing is
really not helpful. I can just quickly show you
this for conflict comment. I have never seen this working. Okay, so let's bring the avatar. Okay, Perfect. Suppose all the stitch
lines are deleted, right? So what I can do
it, I can select this with the edit sewing
tool, right, with the edit. So into like it's selected, I can select all the fact
that I can delete it. If I play this, all this
business has gone right. Now what I can do is I can
do autoscaling, right? It says that top partially
open, closed, right? It is closed. Otto. Ok. Now you see it has touched. But some pieces are not spaced. Great. So it always like it
doesn't work that grid. If you take a little bit
more complex design rights or it's not going to
stitch this at all. If you'd suppose you take this. So it's an end of
a useless tool I don't like it doesn't
really help much. Okay, for simple garment
it can work with, I think for complex comment and whatever the garment as a fashion designer
you're making regs. It's going to be
complicated, right? So I don't think
anybody use this tool. Okay, Next is a pin 2D, right? So this is edit pin, and this is pin tool. So normally what
happens is Clo has this interface that they are going to give you the
tools on top of it. They're going to give
you edit 2D, right? So for example, button
Edit, button, piping, edit, piping, binding, edit binding
or tape editor, right? So first we'll go through this edit tool like the spin to, and then we're
gonna use this edit tactical by what you can do. You can pin the fabric and you can pin the fabric
with the avatar, the way we used to do
it with many queen. Okay, so quickly, let's, let's see how does that work. So suppose you want to
pin this with this side. You can play this.
So now you see these two are pinned
together, right? This is what Pin
Tool does if you hold this and you
see tack on avatar, so you can also tack
things on avatar. Okay, so what I mean by that is, let's quickly create
a fabric. Right? Let's tap it with Avatar. If you play this for now, this is stacked
with the appetite. Okay? So this is how it
works. Okay, perfect. And I'm now if you want
to delete that, okay, if you want to delete
that pin now you come to this Edit tool and you can just delete this and you play
this, it's perfectly fine. Okay, after this you
have this full tool. Fold tool basically gives you this ability to create folds. Okay? So what I mean by that
is suppose you have a, let's go to the
Modular Configurator. Let's go to, let's,
let's make a new file. Okay. Let's bring the avatar. Female. I'm quickly moving you through these older tools because
they are so many tools. But as I said, right, once you start doing
your own projects, then you really understand
how things are working. Single. Let's do this, Let's do this, Let's do this. Alright, so now suppose
your color jacket, right? It's, it's not like
it's not done properly. It's somehow it is
opened up like this. Let's play this, right? So it's not done properly. Now you want to
make it turn bites. You can select any line and
then you can basically select this green or red
line and you can just make it fold properly. Okay? So this is, this tool is used. So for example, maybe
you want the color to be like kind of not folded, right? And so what you can
do is we can work around with this Pollard. Wait, what is this happening? Are you going to,
let's do Control Z? And let's select this again. You guys, this is better now. Now this is straight, right? And also let's make this, sorry. Let's select this and
let's play this, right? So now you see your followers
are standing in this way. You control your folds
in a garment right? Second is, this is a
really interesting tool. It is 3D fold garments. You can fold garments file and it can present a
really interesting ways. So let's do it. Let's fold it. I'm going to delete
all the patterns. Yes. And I'm going to bring
in my t-shirt, right? Let's fold a T-shirt. Okay. Now, before we play
this, let's fold it. Let's put it down, right? And also let's rotate
it kind of like this. Okay, let's play the simulation. Folded, right? Okay. Now you can just make it a
little straight up, right? Or you can right-click and you
can just strengthen it OK, and you can see it's better. Alright? You can and
unstructured data simulation. Okay. Now we want to fold this. Before folding this, let's
go to the full tool. And you see right here is this, this is different folds. I usually want to rotate this. I don't do this. If you want to rotate this,
you can rotate this. If you want to turn it,
you can turn it right. If you want to reduce
the particle distances. For reducing the
particle distance, sometime it is helpful if the
particles are low, right? Then, okay. Why I'm explaining these tools? Some of the terminology that I'm going to
use, for example, particle distance, you
should be knowing it, okay? Alright. So now let's quickly see, this is for like if you want
to spread your fabrics, we want to apply physical properties and
this is for folding. So we're going to turn this on. Then we're going
to turn these two. This is for Complete fold, this is for selected fold. So what I mean by that is if you select this and if you like, draw a line like this slide, because you want to
fold it from here. Right? Now, if you turn this, this whole thing is
going to turn okay? But if you select, let me do. If you select this, only the
selected piece is going to. So for example, this is
the selected right piece. And if you, if you draw
the line, just hold it. Okay, So select this. Now if you fold this
only this pattern is when the photo this loose, make it for the
selected pattern. This is for complete
pattern looking. Alright, now let's do it. So we're gonna do turn this on, turn this on, let's make a fold. And then let's
move it like this. Okay. And then we also have
this selects ligament is more of a body
selected. Move it. Let's select this. Move this. Okay, let's select
everything and move it up. Let's select all the patterns. Let's move it up. Rotate it. You can rotate it by the way from
there on the end game. You play this, right? This is maybe you can
fold it better way. Okay, I have, maybe I haven't
done it in a better way, but but this is how
it works normally. Okay? So this is how are any full box, alright, so I got
you got this two. Now, let's see what
the student does. So let's come to the,
let's bring our file again So now the next tool is
the 3D 2D arrangement. So reset 2D array input, right? So it basically helps you to
reset this 2D arrangements. If you click on this
right, all the patterns are arranged like this. The next tool that you'll see here is 3D arrangement, right? So it basically like arranger all the
patterns around the 3D. The problem here is this, that if you suppose you move this pattern like this, okay? Like this and you
play the simulation. Suppose you did it like this. Now, if you make your 3D turns, this will be down, right? So this is before you have
played the simulation, the way you have
arranged your pattern, it's going to be,
it's going to save that position and it's going
to bring it into that. So it doesn't
necessarily arrange your pattern in 3D format
just before you already, before the simulation, before you have played
the simulation, the way you have arranged your pattern and just reflects that. Okay. Perfect. Okay. Now there is this another tool called
reset 2D or 3D arrangement. This is really useless. I haven't got the results
like it's a useless tool. I have never got any
results from this. Okay. So I don't use this tool. You avoid using the stupid. Okay. Perfect. Let's now look
into the next two. This is a good 2D. Suppose let's bring
a trouser. Okay? So now look, this trouser is not fitted properly
to the avatar. So the anomaly way we
do it like we move it, like remove it,
like we do it this. All right? And then we're going to
play the simulation. But the better way of
doing it as something like this that you turn it on, right-click on this site. 3d, 3D arrangement, right? So once you click on this, it's going to read
repay, beautiful tool. It's a good tool. You
can use it every time. You can use it with any kind of garment and it always works. So this is a really nice tool. After this, you have
high-resolution, low-resolution customers
division for rendering. So if you do a high-resolution, the particle Dustin distance, add-on thickness, all
these things change so that your garment
fall in a better way. Right here in the simulation, the fitting property turns on right, accurate fabric, right? So that's what happens if
you do high-resolution. Low-resolution. Things are very much fast on the 3D panel. You can move your
fabric, you can drape your fabric
in a quick way, but the grape is not that great. So there is a trade-off. If it's a high resolution thing, then you are, everything is
going to be very slow here. And that's fine. Alright,
next tool is tape, right? So as I said before, we go to the edit
tape measurement, let's first look
into this Basic, so confidence, all
these measurements. So basically, as you can see, Basic circumference
measurement is going to measure your
circumference, right? And you can just do a three click button and you can just get a circumstance, right? So you can find this
measurment, everything right? You can do first-class, second click and then third click here. And you can find this
kind of measurment. Next is you can find
base take middlemen, surface tapers, and myself. Let me explain you
one other tool. What is the difference between
surface tape and be steep? Because there is this linear
tape and height measurement, all this bass stave and surface, Dave means this, okay,
so if you've done, if you go to the base
Taylorism and you'll see from here to here. And let's go to the surface. It's going to calculate
the surface, okay? What I mean by that is if
will see here quickly. Got it right. Now if you see this right, It's not calculating
the surface area behind the bus tried under
the bus, sorry. And then you see this this is
completely on the surface. Okay, So that's two
different things. And then height measurements and height measurements
for avatar. You can turn this on. It's really simple tool, right? Nothing complex, right? So you can just quickly just create a height
segments, right? So you can calculate the
height, Double-click, single click and double-click
that how it works, okay? And then our height measurements
of the avatar, right? So it basically, it will fix one end to the bottom
and then you can just quickly
calculate the heights and different part,
different things. Next tool is you have linear measurement and
circumference measurement. Okay, So these tools
are for garments. So let's bring this file. Perfect. So now let's first look into
the linear measurements. So you can actually do a simple, let me show you a basic plan that will be much
better actually. Let's use this tool
for drape. Perfect. And let's use this now. So as you can see, this is very simple
measurements, right? So what's the height? And then second measurement
of advertising. So confidence based
measurements. So you can take the waste
measurment like this. So all these means that
menu can take the length and circumference
measurements of garment. Now the next tool is the
motion 2D motion tool is always used vending have given
some motion to the avatar So let's bring our dress. Let's see how the
motion tool is used. So you go to the avatar, you go to female,
you go to motion. You can apply any
motion file, okay? Right. So this is your motion
file and if you click on, hit on display icon, it's going to play
the simulation. So that's where this motion
is useful and you can have organic and just
pause this, right? So very simple. Let's do Control Z. And now let's look into the next tools. The next tool is Ben tool. And you can draw things
over your designs, right? So this is a really
helpful tool when you are doing
pattern-making because it directly helps you to understand how to draw anything
on top of a pattern, 3D pattern and then translate that to work
2D patterns. Okay? And this is super
helpful, Very helpful. So if you right-click
on this and you can do trace has internal
shape, right? So can you see now you have
this internal shape here, which is such an important tool. So this is, you can, this tool is for making. And as I said, Clo basically
gives you two tools. One is for one the actual
tool to edit that 2D rights. If you click on this edit tool, then you can just edit this. And you can delete this. Also,
you can edit the points. Okay, 3D base pan, right? So what you can do
with 3D bass pennies, you can create something
and draw something. So you ever hold your left
mouse button to do this. So you hold this should create something and it
will be reflected in the URL patterns. Next tool is the pen to write
avatar pen tool, right? So in the same way,
the way we have used the 3D pen garment tool, in the same way,
this is avatar tool and you can just quickly create something interesting and
you can just move it here. You can create a
tattoo or something. So you can create
something interesting that look all these
tools, as I said right? Again, I'm repeating myself
that before you use any tool, it's important to understand. Let me just turn on the videos first before you use any tool. I think it's really
important for you guys to understand that what kind of a project you are doing, right? What kind of a skillset
that project needs, right? And then based on that, you need to use the tools. So if you're just having
FUN around with this, you don't need all
these tools, right? But if I really diving into
pattern-making and you really want to be very
technically correct. And then you want to
use all these tools, then it makes more sense. So my idea behind
doing this is so that you understand
all the tools and then you start
working on your projects. And based on that, you,
whenever you are in doubt, you can just quickly jump
and you can just look into the other tools I have used
and how to use those tools. Okay. Just to help
you guys, that's it. But please don't focus on projects because that's
where the learning curves. All right, let's keep going. So the next tool is
the texture 2D, right? So if you apply any texture, right, so let's apply
a texture first. Okay? Let's quickly
apply fashion. Let's apply a texture. I'm trying to figure
out a texture. Suppose this is a
texture. This is one of the image that we did. Okay? If you want to scale it down
or scale it up, that's fine. You do it so you can press here, you can scale it down,
you can scale it up. Because all these, this
is just one fabric, okay, That's all the
fabric is getting. Zoomed in, zoomed out. Suppose you have another
fabric like fabric one, and it has a different texture, supported has this texture. And suppose let's apply it here. So now you can
individually control this. And you will see this fabric
on the controls like this. It doesn't control this bug. So the main fabric, like if you are zooming in, zooming out and in the
top, this is for rotating. This is for scaling in X, Y direction, X and Y direction. This is what uniform scale. So this is how you
have to create different fabrics and then
you have to apply this again. Let's go to the garment bag. Let's go back to the side land. Okay, perfect. Now, next tool is, and you can. Next one is the graphic tool. So this is edit graphic. This is how to apply graphs.
Lets you select this. You can select any pattern, you can select this, you can
drop it here. You can press. Okay, good to go. And then you can select this Edit tool just to scale it down or
scale it up. Okay? So you can, from here, here you can scale
it, you can move it. You can apply all
these things, right? So all these small that the
notches that you see, right? It basically helps you
to scale it uniformly. And then this is
for rotation, okay? So this is how you
can apply this And I can just move it
like that. Okay, perfect. So this is how you
use graphic tool. The next is the buttons. Okay, so let's use that tool. Let's delete the graphic first, select the graphics
and press Delete. So now the graphic to me,
another button tools. So this is Edit, button and buttonhole, and this is button. This button and
Button holds, right? So let me do one thing quickly. Let me delete the stitching
from here. It's deleted. Okay, now let's apply some buttons here so you
can apply the buttons. You can simply click
here, buttons, buttons from before
you apply a button, it's important to
understand that you mark things properly, right? So normally what we do, we create internal lines, leg weak-kneed internal lines. And then we mark
these internal lines on a certain points, right? Then there will be used
to put the buttons. Because of this in-between, every button should be precise. Okay, So this is how
you put buttons. And again, the second step is how do you put button tools? So this is how you put
button hold. One here. One here. Okay, perfect. The next tool is if you
want to edit something, you can go to Edit
and you can edit it. The next tool is how do you
fast than the buttons, right? So what you can
do, you can select all these buttons, right? And you can just drag
it towards here. As you can see now
your buttons are done. Sometimes your buttons will
go inside the pattern. So for that, what
You'll have to do, go to the Edit buttons, select the buttons, right? And just move it out. Select the buttons. Move it out, right. And also here, again, select the button, just move
it out and displayed it. So this is better. Now
this is completely closed. Okay, so I hope
this makes sense. Okay, next is how do
we apply a zipper? Let's delete the buttons. Let's, let's bring
the file again. I'm not saving anything. Okay. So every time I'm getting this file, the same violet me. Okay, so I can
delete this, right? Let's go, let's edit
stitching really. By the way, the same
tool is here and stitching, you can open this up. Now let's apply a zipper here. Okay? So to apply a zipper, single click and double-click. Single click and double-click. Right, as you can see
now if you play this, so now you have a zipper here. Now the problem
with the zipper is, as you can see from the top, this is not opened up, right? So normally whenever we
applied zippers some width, we have to leave some words. Okay, So let me quickly show
you how to leave that width. Okay. I am editing those stitching,
but this is the wrong way. Okay? This is not the right way. Technically, right. This is not the right way. But that's fine. The timing. Now you see there is this
opening here, right? And which is really
important because it takes some zipper, take some amount of
words from the top. So now you can apply
zipper in and better ways, single click and this double-click and click. Next. Good, I'm double-click right. So this is done. Let's
play the simulation. So now you see that your zipper is way much more, better, okay? It has taken that grid. So this is how you
apply a zipper. Okay, Next, that's something
to the next piece. Alright, next is piping. Okay, so let's
delete the zipper. So again, you can
select the zipper. Okay, one more thing. You can hold your zipper
and you can move it down. So you can hold
this. Just hold it. Let me see. Let's stop the simulation first. Okay, Hold your zipper. Let's go to the selection
tool and move it out. So now you see that you
have this opening, okay? So you can control your zipper. But you can also select as a
person, you can delete it. Now, let's apply piping. So this is edit piping.
This is piping. Piping in very simple
single click and go down, go down, go down
and double-click. Perfect, this looks nice and you have this really
nice piping here. In the same way
you have binding. For binding, you
have to be closed, you have to completely closes. So confidence that it's
a selectors selector. Select here and select tail. And two-and-a-half. Perfect. It's, so
this is binding. You can go to the
edit binding, right? And you can control the
binding in a way much more, better way from here. Okay, perfect. The next tool is
this is called or I think this turn
your fabric, okay. This press your
fabric, but it also, wherever the sewing
line is present, it basically turn
your sewing line. You don't normally use it much. But when we use it, I'll be directly change
the sowing lines. So for example, if
you want to change the sewing line property
2D turned right, so we just directly
do it from here. Okay? So if you like, if you select your leg, this right, this pattern, particularly it's not going
to apply here, right? So you can simply Basic Link-Local me
quickly, show it to you. Okay. This is your fabric, right? Let's right-click layer
clone under, let's do. Let's again click on this. Where is blown. Oh, I can't see that. It will be in the 2D
layer clone and that, okay, so that's what
we're going to do. So now you have
this here, right? This is layered. Now suppose I stretch this fabric
a little bit, right? I'm going to delete the avatar. We can just hold it. It should be yet. So suppose if I apply this so it's going to
turn lake and you see it is taking the shape of the pattern that
is below, right? So all the curves
and everything, this is what it does. Okay? It takes a shape,
also it changes. So in line right off, all this pattern to are turned right if
you have selected, okay, Perfect To all the
tools in 3D toolbar is used. Now let's also look into some of the tools that is present here. In the inside the 3D toolbar. All the tools that are present inside the 3D toolbar is called. These are all the
visual tools, okay? So all these tools, those are present here. They control visual
aspect of your 3D window. So suppose if we click
on this first, right, it's going to render your, its going to rent
the makeup quality render right out of this, right? So, but take some
amount of energy also. So keep turn it off, right, then you can later turn it on. This tool here. Basically it is
symmetric rendering of your and so that you can see the silhouette snap better way. So this is for this getting her silhouette in a right order. Now next is, for example, this is for the 3D garment. You can hide the garment and
looking hide the blue lines. You can hide the red lines. Suppose there is this
red line, right? Let's see. If there
is this blue line, right? Let's see this. Yeah. So it's going to hide these red lines and
this blue lines. Okay, sorry, blue lines. It's also going to
hide the scenes. It's also going to hide the pins and all
these things, right? So these tools are used for
this particular purpose. Now next is you can
hide the buttons. You can hide the
different kinds of puckering or trims
and all these things. Next is avatar. You
can hide the avatar. You can bring the
arrangement points. So what does attainment point do is suppose you have a piece of fabric like this. Okay, now you want to
arrange this around. And it's, it's very hard to arrange anything on the
circumference and Clo, you select the pattern, right? And then you click on
some doors, right? And it's going to arrange
itself based on that. So it becomes really simple. If you have a waist pant
and anything like that. So this is the tool that
you will go forward with. The third tool is basically
it's a volumetric 2D, right? Not used much, right? But what you can do is you
can change this, right? So you can change all
these values, right? So that if you bring some avatar in
which we want to tell, okay, there is this,
there is the hand, is the ankle, there is a
nice and all these things. Then we basically we can
arrange all these points here, but this is not
very useful tool. Okay? Next is, you see this is
called a bone 2D, right? So you have this different
bones and you can arrange it. So sometime if you're not happy with the way
avatar outstanding, let me hide this tool, right? So what you can do, you
can hold this tool, right, and then you can
rotate it, right? And suppose, maybe
you want to just move the leg a little bit
early, like this side. And you want to move the hand a little bit
like this, right? And so this is how
you can do it. You can change the avatar
position like this. This is a really interesting to. Next is for the
measurement, right? You can turn on
the measurement so they're amazing mentor
visible to you. The next is that you
can show 3D bent leg, whatever you have created. You can just show those
3D pen here directly. Okay, perfect. So this is how you make
you use this avatar to. Next is a fabric tools. So this is the first tool is Textured surface, right? Sorry, Tim textured surface. And in this surface
basically you can see the thickness
of a fabric. So how do you like doing it on Baidu unit
thickness in a fabric. So suppose you have a fabric and the color of the fabric is
different from front and back. Okay, so suppose we have
this main fabric in which the color is red from the top, read from the top
right and the bottom, like it's something
different, right? So let's do back, turn it off and back. You have this white, know, you have this color. Okay? So now sometimes what happens is that you also have different thickness
on the fabric of age. So let's change the
thickness 2 mm, right? But you're not able to
see the thickness here. So the problem is because the thickness of the textured
fabric is not turned on. So when you want to
select the turn on the thickness non-empty and see the thickness in the fabric. Okay? It's a really
important tool when you are rendering in, because whenever a
fabric gets folded, get different kinds of
thickness and this is a part of finishing
process, okay? So this is how you do thickness. Delete. Okay, next tool is
called the mono got, this has led, this is
going to convert a fabric, can do everything right, no colors, nothing
monochromatic, right? In the same way, like you
can just quickly explore. This is going to
turn your fabric into translucent surface. This is going to
turn it into mesh. And this is going
to convert into thick texture surface,
but back, right? And this is going
to convert it into a random color surface so that
you can see it like this. All the patterns and
everything, right? Perfect. So let's convert this into this and
let's cohorts. Now this is sum of two tests, some of the garment fitted maps. Okay, So this is going to
show you the surface, right? Stretch trade. And this is going to
show you the stream map. This is going to show
you the flatMap and finally, just told on. Yeah. So this is going
to show you where, wherever you have ample amount of the pressure that is applied. Okay? So what happens is this, that these pressure
points actually creates some time is really important to understand where the pressure points are. And just to see that when you
are doing pattern-making, how it's getting implemented
into an avatar body. But again, guys, let
me emphasize on this that human body is more like, human body is not like the body that you've
seen Avatar, right? Because it's a very
stiff paint of a body. But mostly we have
muscles which change the shape based on the
pressure applied, right? So you have to take that
into consideration. So this is not the
exact p
3. Understanding the 2D toolbar: Now let's come to
the 2D Toolbar. Let's go to the
library garments. Okay, Now let's come
to the 2D toolbar and quickly we're going
to hide everything. Let's see. So the first 2D selection tool, you
can select objects. Second tool, you
have multiple tools. So this is for edit patterns. So you can select this and
you can edit patterns, okay? We can edit patterns like this. Third tool is In this second, this transformation points
less segment, right? So suppose you have a fabric, you, let's create
a fabric, right? And now let's click on this. So what you can do is you can select the line and you can
transform this line. Okay? So if you double-click
on this pump point and you drag it right
to this bottom. So it's going to change
the pivot points of menu. Now, if you change, sorry, double-click on this and drag it and move
it here, right? And now if you rotate this
so you can see it I just rotating at this pivot point. So it's helpful in that sense. Okay, The third tool is
called a third point. So you can add
different curves point, we can move it like this. Then you can move it
on the top, right. Interesting to. After this
you have edit curvatures, so you can editor
curvature of line. After that you
have smooth curve. So you can click on this
and you can drag it right to make a smooth curve or an
ad point and split lines. So you can add a point, you
can right-click and exactly, precisely defined by the way, all these things that
you are doing here, this can be done very precisely in a pattern-making, okay? And that's where, I think
that's where you should look into the pattern-making
assignments from our course. That's going to help you more. Then let's quickly delete this. Then we have a
fullness tool, right? Fullness tool. So let's
first create this. Let's bring a garment. Then only I can show you how
the fullness tool is used. Okay, let's bring a basic torso. Look. Basic torso is really
important because it really maintain
the current size. Alright? Now you can use this tool again. It has to fit this properly. Okay? So suppose you have this garment and now we're going to apply
some fullness to this. Okay, so first thing
is you can use the edit tool that we
just learned and you can just move it down, right? And you can move it
down by the weekend. Do it really precisely. Some inches. Now let's cut it from here. Now let's give some fullness. So the first fullness tool, basically you can
add some fullness. So you can by W can
be very precisely, can just move it by pi. And you can also move
it from here to here. All right, so this is how you can just quickly
give some fullness. Oh, just hold on. Okay. I think I did not. This is how you should do it. So you should cut
and Sue this, okay? Because if it's going to cut, It's also going to
see this pattern. So the fullness tool
symbol, single click, single click and single click
and then move it right. Fullness 2D. Second is fullness line, right? So what do you do in this
as you select the line, sorry, you first select this, and you select this. And then you select this
and you select this. Let's select the bottom first. And let's select
this second, right? And it says that how much we want this,
change this, right? So you are the, look,
you're moving this, okay? If you play this now. All right, now you have added
some fullness in the front. In the same way you
can add fullness. And this is this, this
tool that you see here. This is use for single click
and increase this value. Right? And then just do okay. So this tool is
particularly used for adding fullness based
on two lines, okay? So that's how you use it. A simple variation of
this can be less, okay? So this is a small rectangle. Right? Now you go to this
fullness 2D single click, single click, and
then single click and single click right, then you just
increase this value, right, as you can see here. And if you do, okay,
so now you have added some fullness in the bottom. So this is how it works. Okay, the next tool is creating simple fabric or creating
a simple patterns. If we can create a rectangle, you can create our
ellipse, right? If you press Shift,
you can create a circle and you can
create a spiral. So wherever you feel like
all these tools by the way, it fits well if you're
doing pattern-making, otherwise, we're not going
to use all the students. The next tool is for
internal lines and polygons. So this is really
important tools. So you can be as creative
as you can write. You can create shapes. Again, when you are
making patterns, you need to create
all these shapes so that you can cut your
patterns according to that. And that's all it helps us Next is you can just
create some lines, right? Just support line so
that you can see how your patterns are coming and you can create
something interesting. So based on those shapes, you can decide where to put in, like notches of points. Next tool is called
trace 2D, okay? So this is basically
like if you have created up something inside
this pattern, right? Suppose you have
created a simple shape, but I like this, like this, and double-click. So maybe you want to
trace this, right? So you can select this line
and you can select this like this selected select this single click and I'm pressing Shift, and then right-click
and pattern. So you see we have traced
your task pattern out. This is how you use Chase tool. Next tool is called
a notch, okay? So this is edit notch. Okay? So what you can do is you can create notches
like this, right? And notice that important because when you're
stitching your pattern, it really helped to also helps your pattern
to match, right? So this is how you
use notch patterns. Now, this tool
here that you see, it's called a seam
allowance, right? So what it does, it basically it seems to your lungs, right? So because when you want
to stitch your patterns, you want to allow
some seams, right? So it helps you to
allow the scenes. Next pattern that
you see here is called wrap Voc pattern. Okay, so let me show you
how walked pattern works. K is bring the T-shirt. Okay. Let's play this. The
better optional like this. You can click on this,
okay? So it fits better. Okay? Now, walk patterns Basic
basically helps you to, if you select this, right, if you select this, then this is going to walk
your pattern like this. Can you see like these two things are completely getting
moved based on this. And you can create
a notch right? You click on this
and you press Enter. It's going to create a notch. You click here, and you press
Enter, right, so it's done. So can you see, let's see again. Single click. So I single click, move it right and right-click on this
and do stationary pattern. Then you can see you have
a notch and our place, Let's press Enter so you see,
you'll get a notch here. So this helps you to understand and move pattern around
or different pattern. Now the next tool
that you see here is called point of major. Okay? So you can basically suppose you want to add
this into your POM, right? So you can select this line
and you can select this line, or you can select this
and just hold on. Select this and select this. Right. Now you have this
line and you can see this. The point of major, your POM is written here, right? So you can create
these different lines. That is going to be
the part of your PWM. Okay, Next is, and you can
edit these lines, right? You can select this
added dislikes. Next is the annotation tool. So you can write
something, right? You can undo annotation. And then with this edit tool, you can just move this
annotation anywhere you want. After this, you have this tool
called pleat tools, right? So how to use, Let's see. Before making the pleat, I'm going to create
an internal line. Single click and
double-click. Press. Right-click cottons you. So you have this pattern
here with you right? Now, Let's just increase
the length of this first, let's delete this point. And let's increase the
length of this, right? Also let's edit the
stitching because otherwise they will
be gatherings, right? I'm just going to
reduce the teaching. So let's play this. Perfect. So now let's create some pleats. Okay? So for creating
the Complete says go from here to the bottom. Double-click, single click, and select the sides
of the bleach. Let me show you
again single click, single click, and then select the sides of the prejudices aside where we want to make it. I have a better way
of making the police, but it's the easiest way. Okay? And sometime when
we're doing pattern-making, it is not the best
way of doing it. Sometime a manual control
this way, much more better. Okay, so number of pleats, maybe I want number of
pleats up ten, right? And I want 0.78 or 0.1. Okay, sorry, it's gone. Single click, single
click, Select the side. Okay, I want five bleeds
and I want it to be 0.5. Okay. And I want it to be,
everything looks fine. Okay? Let's press. Okay. So now you see your
pattern is done, so we're going to just
reset the 2D arrangement, okay, so that we're going
to strengthen this. Because why do we
do strengthening? Because once we
do strengthening, it will become a little like the folds will become
better once you play this. So now you see that you have, now you can just make
it back to this. Now you have nice face pleads,
okay, that you're done. So this is a very simple
way of making the bleeds. Sometimes it's not the
best for you gain. The way I have covered
it in my course is a very different way
of making the pleats And it is a more controlled
way off the pleats also. Okay, so let's
look into next to, the next tool is edit grading. This is all the tools
related to grading. And I will suggest
you that grading is a very technical subject and it is not just
how to use this tool. There are so many
fundamentals behind grading. So I'm not going to cover the
grading for the time being. Because grading you
don't do anything. You just click on this and
then you click on the pattern. It's easy. But understanding reading
is different, right? So you can go to the
pattern-making assignment in the course and you
can just find it there. Okay? Then next is auto-grading. So again, it tried to
auto-grade your pattern. What, what I mean by that
is suppose you have, are. Okay, Let's just
select this T-Shirt, okay. Save as nope. Okay. Okay. So you have
this t-shirt, right? And then you can change
the advertiser size. Avatar Editor. Let's make it 38, let's make it for T, right? So now you see the
Avatar sizes change. Now how do you fix
this pattern to it? Because this pattern is
not going to for it. So what you can do
it, you can just create on auto-grading, right? And it's going to
auto-grade this pattern. Okay, so now you can see it has auto-graded this
pattern for you, okay? The way it has
auto-graded is not right. I don't like this at all. This is not how we
grade our patterns. Okay. But again, this is
what the software does. I didn't mean everybody
has, as I said, right? Grading is a technical
topic, right? Okay, now let's, let's move on to the next
part. This is edit sewing. So again, it's the same
tool, but what we did here, segments sewing is again, the same tool that we
did here are three. Sewing is against the same
tool which we did here. So all the tools, you know, this is for understanding, this is for inspecting
the sewing. Okay, So some point
you're sowing lines. If the ratio defenses like ten per cent or the length
difference is 0.97. So it's going to
show you in red. Okay, so all these red
lines that you see, there's a difference between where the stitching
is happening. So what I mean by that is
let's quickly look into that. I select the rectangle.
Let's suppose this is, this is one segment, this is a second line. If I'm stitch these
two segments, it's going to be
in red in color. Can you see because the
difference is high? But suppose, if this is
equal to this, right? How to make, so let's
Control C and Control V. This, right? Now let's teach this. So now there's, this
will not be read. As you can see, this
has not read right now. But as soon as I
change the length of this, this will become red. Okay, so that's
what it shows you. The next tool that
you will see here is called this iron tool, right? It basically like either shrink your fabric or
expands your fabric. So either you can
shrink your fabric, but you can expand your fabric. So how it works,
Let's close this. Suppose this is, let's
play this simulation. Let this your sleeve, right? So if you kind of play this
study, this is your sleep. If you applied as
wide as you can see, it's shrinking, right? And if you increase the value, if you apply that it's
expanding, right? So this is what this tool does. Sometimes when you are
making your patterns, you want to adjust it from the waist and some letters you, so you can apply this and just reduce the hardness Oculus, reduce this value and
reduce this value also, it will be really nice way. Okay, the next tool here that
you see is it seemed tape. Okay? So what seemed tape
does is let's, let's bring our
design back because this is getting
really bad in shape. Okay, perfect. So let's look into
what seemed tape does. Okay. So seam tape basically helps you to secure
the seams, right? So because your garment, when you play the simulation, your garment falls, right? So this basically helps you to prevent that gravity
effect, right? So it makes the
particles intact. It doesn't change the shape. So to maintain the shape of
some area we using Dave's. The next is again,
we have done it. It's a fabric or texture
tune edit, textural. This is a graphic tool.
This the same tool. Next tool is added. Top stitch, right? So you can apply different
kinds of top States. And it is, again, it is the
part of finishing process. And if you don't
know, let me explain. Let me explain that there
are three there are three different there are four steps of making 3D to
first step is called Modeling in which you take your basic shape
and convert that Basic same into a desired shape. Second is called are finishing in which you
are applying trims, buttons, zippers and everything. Third is called texturing, where you are applying
fabrics and all. And finally it's called
renderings light. So these are all the
different processes which you have to, this you have to do. Now, let's apply a top
stitch here so you will see that you have a
really nice stop sharing. This is a part of finishing. You can apply it like free stitching and all
these things simple. The next thing is, let's bring our shot
again later simulation. Okay, So the next thing is, it's called puckering, right? So you can apply bucketing. It's against seen
buckling or three puckering segment buckling
of 3D buffering, right? So you can apply it here, right? So it gives you
see what's, again, this is a finishing
process. Okay. Let me emphasize on this again, that's puckering
is not a feature. It's a defect which comes right. So don't apply it everywhere. Applied where the fabric
thicknesses there. Where, for example, if
you're making a denim, denim in seems there are more probability of getting
this buckling effect right? So apply there versus
applying it on everywhere. I don't apply it everywhere. Okay. Not helpful. Next is that you
have this layering. So before I think she layering, let's create some patterns. So this is, I'm creating
this shape here, right? This is the shape. And then I am going
to select the Save, right-click and copy as, let's see, do we have
clonus pattern, right? So this is option
clonus pattern. And I can just
quickly stitch this, right, this with this. This would, this, this with
this and this would this. I should have done
it with the free stitching, but that's fine. Again, right-click and I
can do super-impose over. So it's going to automatically
super-impose it like this. Okay, let's play the simulation. Now with this tool, what you can do is you can basically layered, you can tell, okay, this path and what is the relationship between this
pattern and this pattern? So is it over this
pattern plasmin? This is going to
come on the top. Minus mean. This is going to
go inside right? Now we can see that your, this particular
patterns inside this, so if you change this value now it's going to
come out, right? So in, out, in, out. Okay, so you can establish the relationship between
different patterns. Now Finally, you have
this one tool for this, I'm going to delete the avatar. I'm also going to delete
all the patterns. And let's create a
simple small like this. Like this is huge. Let's make it smaller like this right-click layer
clone under right. And let's open property editor because it's going
to be useful here. Let's, if you click on this, sorry, let's delete this. Not needed, okay,
just simple pattern. Let's select this.
Click on this. It's going to copy
a pattern here. Right? Now. Wait, you can change it by five and you can
quilting distance, we can make it by ten. Okay. What happened? Okay. Something I don't
know what happened. Bring something happened. Okay. So let's make the weight to be five and pulling bit, then. There's some problem
that is happening. Let's make it ten. Okay? So now let's play
the simulation. So can you see you have a nice pillow for making a cough jacket
and all these things. This really helps. And if you reduce this, if you make it one, so you will see,
this will become a little bit more to line, right? So this is how you can make
pillows and you can just give some kind of a volume
to any any shape. That's how this tool is used. Perfect, so now we have used
all the major tools, right? All the 2D and 3D
Tools. Last thing. How all these things,
these are visual things. They control visual
property of a fabric. So let's see how that is. If you quickly go
here, you see here, this is for controlling
the stitch line stop, stitch, all these things. Okay. In the fabric section
you have hair to control, baseline to control
seam allowance and all these things in
your pattern, right? Stored is if you want to
show the measurements, like you can turn it
on if you want to show the pattern name,
we can turn it on. If you wanted to show
the green lines. You can turn it on if you
want to show them meso. So all these thing you
can see that there's nothing really
interesting about it. So just see how it works. This is again, this fabric tool is same as this
which we discussed. So again, the same tools. And this is 2D pattern
block if you want to lock some of the patterns
from the 2D, right? So then you can use this
tools to help you that. Okay, perfect, So this
is how you use 2D and 3D window. All
the tools are done
4. The 5 Tabs : Library, History, Modular Configurator, Object browser and Property Editor: So in third part, we will try to understand how these five Tabs, Library, History, Modular Configurator and
Property Editor, Object browser. These all are connected
together and how all these tabs work. So let's quickly
jump into Library. In Library you can quickly see there are
different folders. And inside these folders
you have different assets. So assets or any 3D
files that you can bring onto the 3D or
2D environment, right? So there are different assets. So you can see garment
avatars, hangers, fabric, and all these things
if you want to see where these
files are located. Okay, So these are just folders. You can hover over
these and you can see users and documents
Clo assets, right? So you can always find where these folders are and you
can create more folders. And then you can find all
the folder listed here. Okay? So if you want
to save any file, like you can just save it
on a particular location inside this particular
folder, it will be there. Second is avatar you
can find like you can go and you can just have
different kinds of avatars. You can have different types of based on the different
measurements you can have the avatars and
you can just bring those two same hangers, fabric, hardwares
and trims materials. And you can go to
the Clo set, right. And you can sign in here. And you can you can
bring some assets, download some assets,
and can directly bring it to the 3D environment. Okay, So you can
download these assets. You can use these athletes. Perfect, So now
let's quickly go to the favorites and
you have this file. I hope if you don't
have this file, I have linked it in the
comments section or somewhere. Just go and check. Open this file and let's
try to quickly understand how Object and Property Editor
is linked with Library. Okay, so first let me
open Object browser and Property Editor and let me show you what I mean by it. Okay, So let me go
to File New Project. Okay, so now there
is nothing here. Whenever you bring
any files, okay? Suppose I am trying to
bring this value here. So whenever you bring any
file, all the fabric, all the assets story related to that particular file will be
listed in Object browser. So what I mean by that is
suppose if I bring this file, there is this thing
called pattern. You can see the patterns here. But as soon as you bring a file, you also have fabrics. Right now, there are
no buttons in this. That's why you can't see any buttons if
there were button. So they will button
will be listed here. In the same way, top
stitch button holes are not puckering, right? All these assets
will be listed here. So let's quickly understand. Lifts. Try to bring a
button and let's try to see how these three
things are connected. Whenever you select any object. In Object browser, it's property will be reflected
in property editor. I'm not going to explain
all the properties that is going to take
too much of time. But in general, there
are two options. Whenever you select any object, suppose you are selecting this, you're selecting a pattern. By the way, you're not selecting
a fabric. Fabric is H2O. When you select the
pattern, all the Property led to this pattern
is listed here. When you select a fabric, all the fabric properties
is illustrated health. Let's, let's create
a quick button and let's try to see how these three
things are connected. So let's go here.
Let's put a button. Not you'll see this is
a button here, okay? As soon as you can go
to the selection tool, if you select this tool, right. So as soon as you
selected what I said, it will be reflected in the
property to this button. This button will be reflected
in that Property Editor. So what is a property? It says that threat
length, right? Style, and collision. So these are the
three properties of this particular button. Okay, great, So
you can change it. You can see the style
is default button. This is the style here. You can create more styles
like, just like fabric. So you can create one
button, one right? Now this, how do we apply
this button to this? So if you select this from here, you can select button while. To change this button property, you can click on
this button, right? And you can change
its properties. So this is how it's related. Okay? So right now,
if you select this, it's this bumpkins particular property will be listed here, but if you select the button, one button one property
will be applied here. So now you can select
all the fabric threads and everything is
selected from here. And then you can just seem
to all the properties. So let's also quickly look
into the fabric color because I think that is one more concept which really relates to
these three things. Okay, let's try to
go to the fabric. Now there is one fabric. We can create more
fabric, right? So we have three more
fabrics we have. And we can just go
click on fabric three, we can change its color. So we can change its color
to something like this done Now, if I select
the pattern right, so as you can see the prompt
in the property editor, I can see all the properties of the, this particular pattern. Let's select this pattern. Now, if I go down there is this one property
here called fabrics. So I can just go to this fabric, what I can drop it also, but I wanted to show
you that how it is working behind
the scene, okay? So you can select any particular pattern and
you can just like step, suppose you want to
apply fabric tool. Let's change this
property for us to some other color, right? Let's do this. Yeah, Okay. And now you can quickly
select this pattern, right? And you can go here and you can apply this fabric to here. Sorry, I didn't
have blood fabric three fabric to something. Fabric. Okay. So now,
in the same day, now you understood that
whenever you bring an asset, those assets have
different objects. Those objects have
different properties. To control those objects
and those properties. You can use selection tool. You can select the object first. You can change it from the
property editor and you can change the object of the
properties also, right? Great. Now, History, little. Let's talk about History. Also write in history,
you'll see right? So whatever you are doing with all those things
are listed here. If you click on this,
so now what does it? It's basically, it's
telling you how much how much you
have done till now. So it's all about that. Okay? So I think nothing, especially in that sense. Right. So you can just check how much how much further you haven't gone through
if you want to move back. So you can go to the
history and you can go back in Modular Configurator, you find different sites. Default files at Clo have
for Menu can see jacket, polo shirts, T-shirts,
transport, and all these things. And you can try bringing
those blocks to to, to the 3D space, right? In the women's section,
you can go here. You can bring goods,
their trench coat, right? And you can just try this one, double-click and
double-click, right. Then you can just
use layering, right? And I can just bring those
two objects out, right? I learn complex
things up, right? So these are how these three tabs are
associated with each other. I'm just going to show
you the last bit. I think that is very important. So let's quickly see how do
you apply a top stitch, okay? So I'm going to
apply a top stitch, a very simple top stitch. Okay, so let's click here. Let's go to three top stitch
and let's apply adopt Situ. Okay, so now this top stutters. As you can teach visible, I'll just turn on the thickness
of the fabric, right? Sometime what happens
a top stitch, basically, it gets applied
on the face of the surface. Okay. So it's not going to be a plan the backside
of the surface. So what I mean by that is
if I turn this fabric, okay, how can I turn
this right-click? And you can just use
Flip Normal, Okay. It's just going to
turn right now it's turned how it's done. If I go to the, this
surface, right, if I remove the tick
texture surface and now you can see it's dark in
color, means it's turned. Now you are Topsy, It
is not visible here. Okay? So how you can
work with this, right? So what you can do, you can
go to the selection tool. You can select your
top stitch first. And as soon as you select this particular toxin is going to show you different
properties. Okay? So this is
default opposite. So let's select the
default top stitch here. Now, in the bottom there is distinct face, right
configuration. So you want it in the
front or the back? Isis, I wanted in
both directions. So now it is in the
boat direction. Okay. So that's why Understand. Look so look, let's
do it one more time. Okay, So if I select
the top stitch, you will see that
it's showing me, it's not showing
me that property offered default object. Okay? These are two different things. Okay? So it shows me the property of this particular edge where
I've applied the top switch, where is the start and
curved right angles, smooth offset, right? We're going to change
all these values. So let's say 0.25, right? So you can change all
these values, okay? But if you want to, for example, let's add
Andrew top stitch, right top stitch
one and let's make it double stitch count.
Let's make it too. Okay. Now I want to apply this
particular tops to share. So I'll go to the
selection tool, I'll select this and
from here and I can apply the top stitch one. Now because it's only
in the front side. Let's do both. Yes. So now I think we
should let's see. There should be
two top stitches, but it's not visible
right now. Let's see. Again go here and offset value. Let's select it at
three by 16, right? And stitch count,
let's make it three. Okay. There is some problem,
I don't know. Like let's do one, Let's do two. Now it's working. I don't know why it was not
working with last night. Okay. So now you can see, right, you can change the
threads faith. This is how you
control property, Object and Library
Modular Configurator. You have all the
files, default files, you can use those files. And in history you
can go back and you can just control Z, control Y thing, right? Command Y or Command Z, right? So just undo and
redo thing it is. So you can go there
and it's a better way. It saves a lot of data for you. Perfect, So this is how you use all those
different five Tabs. I hope you get in good
understanding of it. Now, we will finally
see how the menu bar is used in the next assignment. Alright, thank you so much. Take care. Bye bye.
5. Understanding the Menu Bar: Alright, so in this
last assignment, what we're going to understand
how the libraries use. So first thing, let's
bring our garment right, so that it doesn't empty. It has good. Now on the top you can
see file edit 3D garment. Let's, let's work on
all of these rights. So let's go to File. You can see, you can
open a new file. You can open a new garment. You can open projects like so. Suppose you have
some save files, you can open it through this. You can add projects,
that's fine. It's better that
you drag and drop the faculty are directly.
It works always. Now save as is
important because if suppose you want to
save this garment, Okay, so let's make this
comment a little functionally. Exchange the fabric. Okay? Oh, let's do
it this time, right? Okay, So this is
the final garment. Let's quickly, yes. Now suppose you
want to save this. Okay, so let's do
a File Save As, and how do you want to save it? That's your first
priority, okay, So if you want to save
this as a project, so what's going to happen is you're going to
save all the files, everything advertise it isn't
everything is going to say, Okay, environments
and everything. If you don't want to do that, you can also see this
as a garment file. You can save if you
just want the pattern. So you can just
save the patterns, you can just save the avatar
also accessories also. It really depends on you. Okay? So most of the time they
just used two things. Okay. Should I save
it as a project file? Should I save it
as a garment file? So I think if you
create our garment, which you use on
a regular basis, suppose I use this garment
on the very regular basis. I also use a basic torsional
with regular basis because that's a basic building
block that I always use. So I have saved that
as a garment file. Okay, let me show you
garments and other. So you have this file with me. This is a complete basic torso, alright, as a garment file. Now, if you want, you can also do the same thing. Okay, so how do you
save the file in such a way that it
will be listed here like you can see for me, right? So first thing as I have told
you in the previous file, so you need to first figure
out where the location is. Okay? If you go to the garment, right, so you go here, this dot file, right? You hover over here, right? We will realize that it's held user vague documents, Clo acids. Okay, so I'm going to figure
out where my folder is. I'll remember this
dislocation, right? And then I'll go to File. Save As I'm going to
save it as a garment. Okay. Save as garment
and let go documents. So you can go to vivek,
right then you can go to document where the document is. Then you can go to Clo. This is for the Mac, I think for the Windows, you will be having it
will be in the C drive. Then you go to public
public document, then you have Clo
and then assets. Then inside that. Yes, I hope so. Just hover over it. You will do, you'll see so Clo is there, right Then assets, then garment, they will be some
folder called garment. Yes, perfect. So now you can save it
and you can call it. I'll delete it later on, right? And I can save. As soon as I save it
right? It will be here. As you can see. I also have this previous phase. So you have both the face. You can also save this
as a project file again in the same location. So that would work perfectly. Okay. Now next thing is,
first thing to save thing. I think it's a really
important for you. So you should do
it import, export. This really actually
helps you to export things to different
softwares, okay? And I don't like I can't show
you different softwares, how to export it,
how to import it. So just, just, just
for the thing, most of the times we use DXF files are and we use
OBJ, FBX, Alembic. So these are the major fight. Okay, great. Now, let's quickly jump
into the edit part. Okay? So this is just for basic, redo, undo all these
things, right? It's nothing interesting. In the 3D garment section, you have all the tools that
are listed already heard, okay, so 3D pen you
can see measurements. So nothing complex. We have
already gone through this. Okay? So again, same tools
which you have here. Again in the 2D pattern tools, you also have the same tools, like all the tools
that are listed here. It will be here. Okay, please. And everything, you'll have
all the tools here, right? Similarly in the
sewing you have again, you have all those sewing tool which I've already discussed. Where does m2, m3 showing
what is M2M segments? So in all these things,
material, texture, graphics, button, zipper again, all
these files are held, right? So the menu bar of
clue, I don't think so. It's much useful. But I think there is this
important tool that is avatar. You can change them measurements
of the avatar, Right? Right now. The size
of this dress, again, the basic torso which I
created this dress from that, the size force 38 ", the bus size and the
waste was around 30. Okay. So that was
my misalignment And your MSM and
can be different, but you can adjust all
these measurements and you can actually go a little bit more advanced in the dress form and
you can cover more, better control over this. Okay? Perfect. So now next is one of the
important thing is settings. Okay? First thing is user settings. I think this is really
important in view controls. You can always control. If you have a magic
model, then you can just see all the settings, how it's working, how
it's not working. If there's something that
is not working for you, you can customize
everything on, on this. Okay? Second is user interface is really important
because hair, every person use different
kinds of measurements, right? So you can always used like different kinds
of measurment, how the colors looks, and all the things like what
does the line length, line, everything you can control from her in the user
interface specifically, one of the major thing that we changed here is called
a unit system, right? So we use inches, some people use centimeters, some people use millimeter. So change it accordingly. Whichever book you
are following or whichever metal rods
you're following. In the same way. Let's see if there's any other
thing that is important. I don't think so. Okay. Perfect. Let's close this. Now. Next is settings. Okay? Sorry, for Francis. And preferences are important. I think in preferences
is one thing impossible. That is gizmo screen coordinate, local coordinate of
world coordinates. So let me explain you what these three things
are so that you use the right thing in the
screen coordinate basically, if you select any pattern, okay? So suppose you select
your pattern, right? So now you see this, you
have this gizmo, right? X and gizmo is like it has
X, Y, and Z coordinates. Okay? Now the problem
with this gizmo is that whenever you move the X, Y, Z coordinates changes, right? So for example, suppose this
is my Z coordinate, right? And let me just make it, Fran writes if I move it here. So you will see it's just
moving in this direction. But now suppose I am
moving there, right? So now it's, you'll see it's moving in all three directions. So I don't like this because it doesn't give me the control. It, okay? So it's sometime, it is better to use a world coordinate because
in world coordinate, what happens now you look, all your x's are fixed. Okay? So now if you move it in this direction or wherever
you watch it from, it's only going to
move in X direction. So it gives you better control because what happens normally is when you are moving
an object in 3D space, you're not able to see how the other directions are
also getting affected. Okay, So this gizmo gives
you a better control over the given files and
how you're moving it. So I normally use this. But again, you can experiment
on your own, we can try it. If something works better
for you, then that's great. All right, What's next? I think next is nothing. All the tools are covered here. And these are, I think, are most of the times
we use setting, we use preferences
and then most of the tools those are listed
here will be using here. And then we use
fight to save and to export that all the things
that we normally use. One last thing,
this is simulation, animation, print
layout, Modular UV. Okay? So let's quickly jump
into animation, right? For awhile, because I want to just show you the
animation thing, right? So let's go to Avatar. Let's go to Motion
female and motion. Let's apply this motion right. From here you can
go to animation. And as soon as we go to
animation ripe and you see this, these are timelines, right? This is a timeline
for this animation. And these are different objects that are getting animated. So this is transition, and this is a your
avatar motion. So this is like it's, this is the time it's
going to take to transition from zero this
stage to the desired state. Okay? So if you play on this, it will just get, the simulation
will start happening. Okay? So the avatar is going
to move based on, and based on that,
the garment is moved. And now you will see,
let me stop this, okay. So you see this is
the garment section. So this garment timeline
is getting created life. But I, its avatar is
moving and your garment is behaving in the
same way, right? Animation has a lot
more competent in this. I think it would not be
fair from my end also to cover animation like this. I think they are
different components like rigging and all
these things, right? How do you render the
different frames? Well, right, how do you
set up your lights? Because you've been
your avatar is moving, then your lights also needs to be adjusted in
such a way, right? So all the different components
needed to be taken care. But I just want to show
you these are, again, these are different
tabs that you have. This is UV editor in which basically if you want
Explored your pattern, then you need to create
a UV map, right? Because that's how you're
going to communicate to other 3D softwares that these are my like UV files. Why you if files are
important because UV files or like if you ever 3D objects, if you break that 3D object, not 2D object, right? So that our 2D object, because on top of
that 2D object, then you can start putting
prints and everything, right? So it becomes important in terms of applying textures
and everything, okay? With Alembic files,
you don't get UV maps. Okay, So just remember that these are different
things, right? Like it's, it's
quite funny, right? I think Clo is quite fine
and it's quite easy. But I think vial going Clo, you should always remember the technicality part of
the technical part of it. So the technicality
is more important. I think they're using
Clo because Clo is easy software
and because this is our last assignment right
in the menu, right? The overall idea behind this is that you will understand that once you know
all the tools, right? So it will be better for you. So that suppose maybe you
want to apply some X, Y Zed application, right? Or you want to apply, use some tools or you want to
change the pattern, right? So I just made this tutorial
so that you know that, okay, these are the tools, these are the possibilities
that are there, inclu, and I can do that. So that was my idea. It was nothing for
a teaching purpose, but it will move for making you aware about all the
tools and everything. I hope this was
informative, right? Last time. Also I
said this again, I'm going to repeat this,
repeat it every time. There are five stages of
3D fosters modelling. Second is finishing. Third is texturing. Fourth is rendering. Fifth is animation. Modeling is taking
our basic shape, converting that basic shape
into a desired shape. Second is finishing. Finishing is applying
all the trims and everything that makes
a garment look realistic. Seems trims and everything. This texturing how to create
amazingly good fabrics, how to apply those fabric. Okay, Finally you
have rendering, how to set up your camera, how to set up your lights
and all all these things. And finally, you have
animation, right? And all of these topics are mostly get covered
with different software. So you can do
everything unclear, you can do everything on clue. But if you want to get
really amazing results, you need to use more softwares so that everything's
looks really beautiful. Alright guys. So I hope this was informative. Thank you so much
for taking time out. I hope this this will help you to understand all the different tools and apply them. And yeah, that's it.
Thank you. Take care. Bye guys. Enjoy life.
 Vivek Pujari