Transcripts
1. Introduction: Hi, In this lesson I will show you how it can preserve your memories related to your summer adventures, first date, anniversary, or any other memories that are dear to you using flowers, either that were given to you or let us solve, collected or bot, you will be able to learn how to make a beautiful fresco picture using materials that you most likely have at home, I suggest that you choose from three options that I created for this course or begin. There is advanced and more intermediate composition that I will show you from which you can choose where suitable options for yourself. You'll also learn how to drive flowers in variety of ways yourself. And if you're interested in that idea, let's get down to business then.
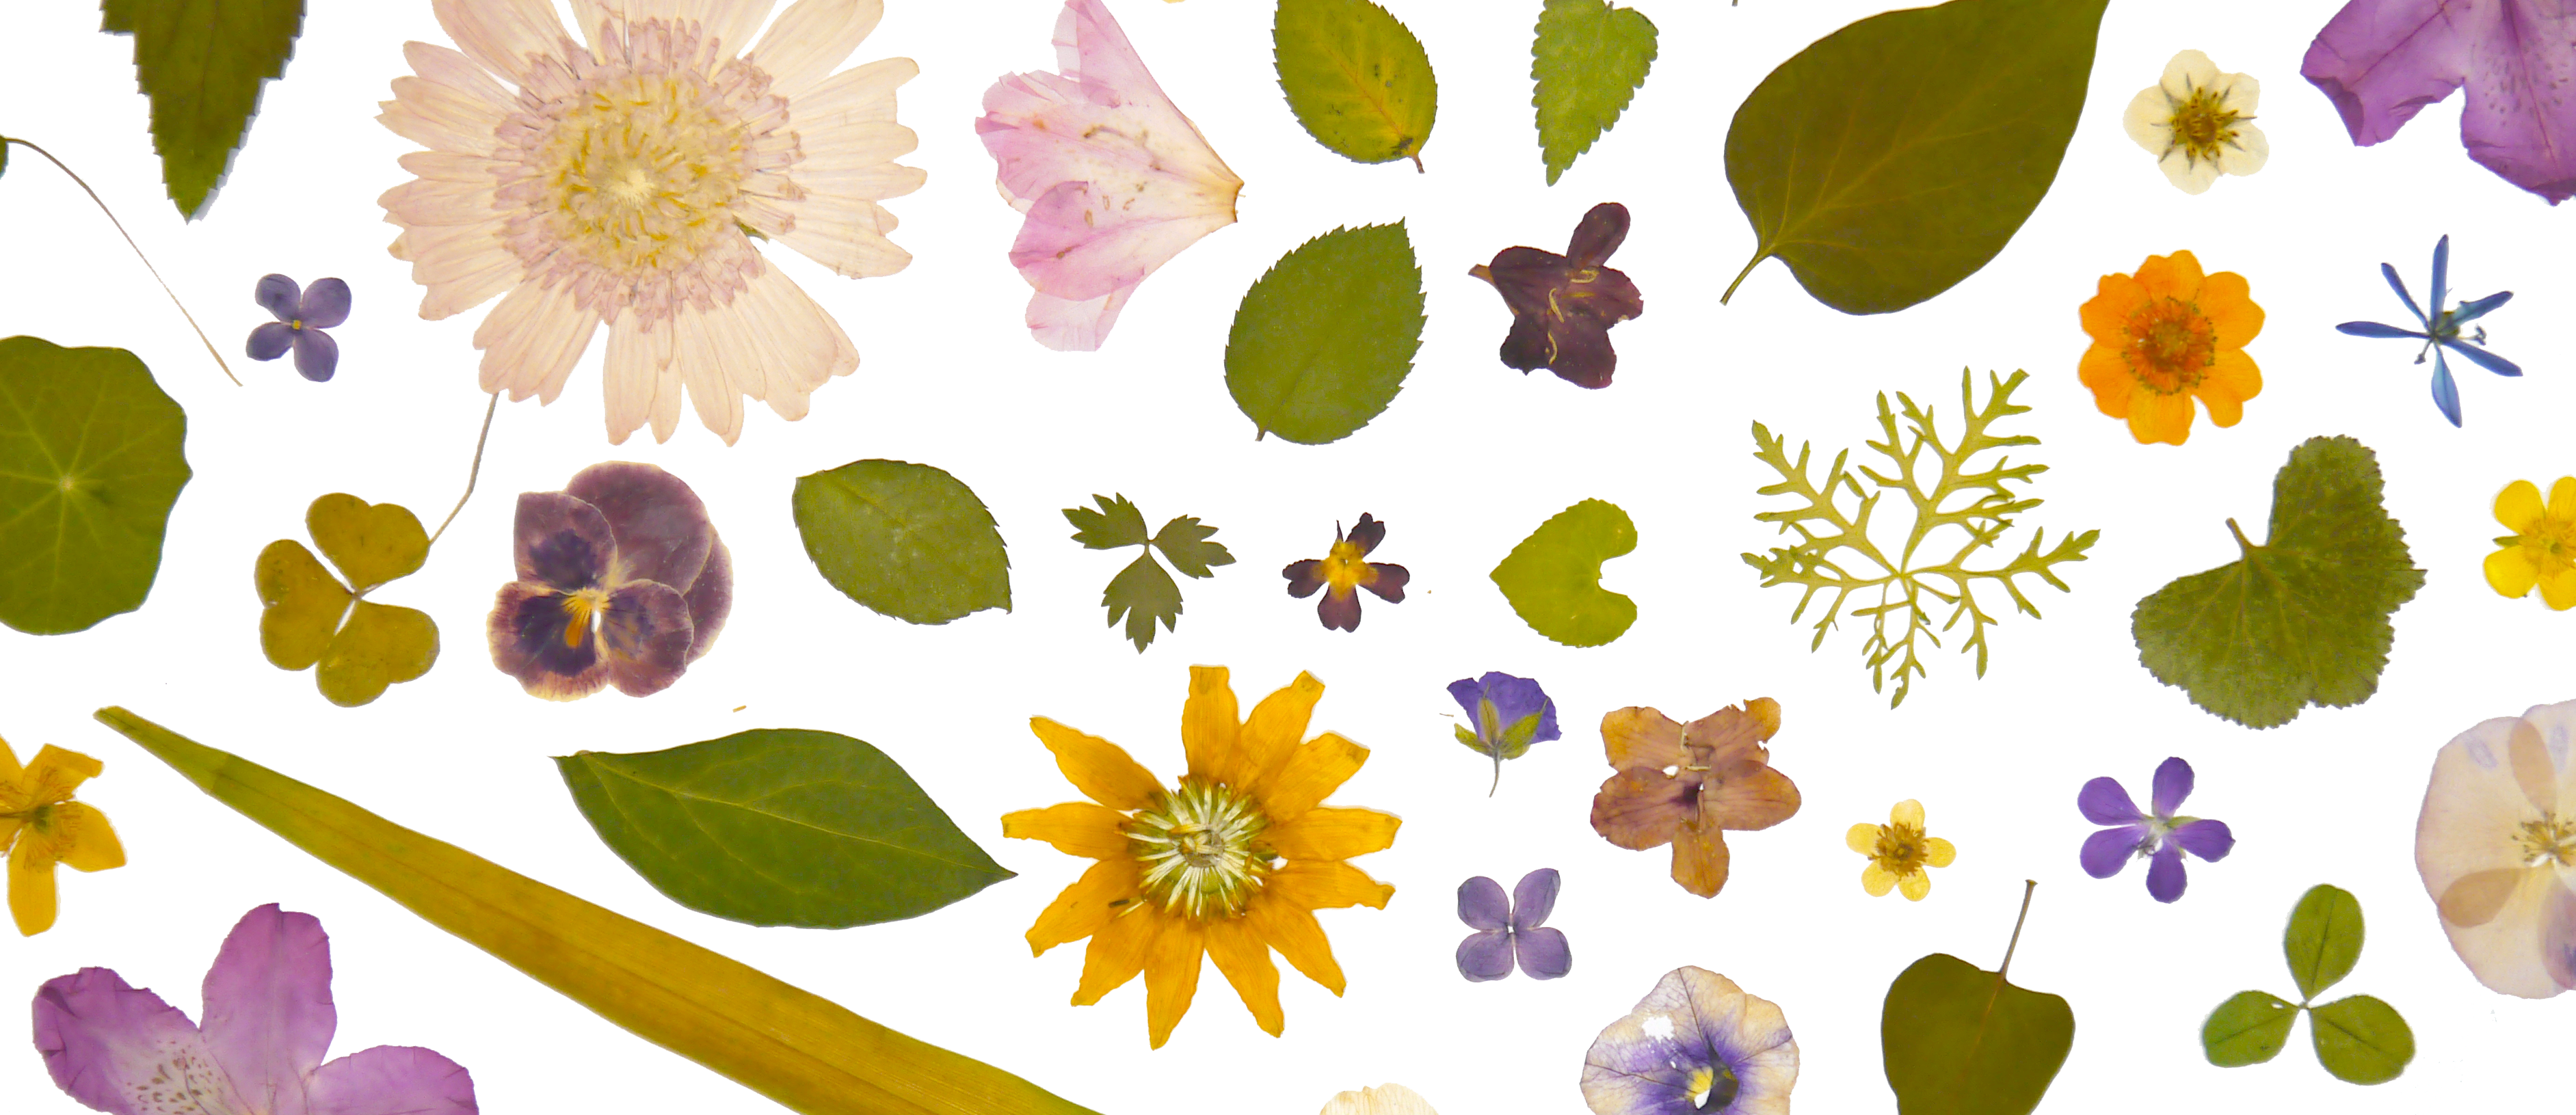
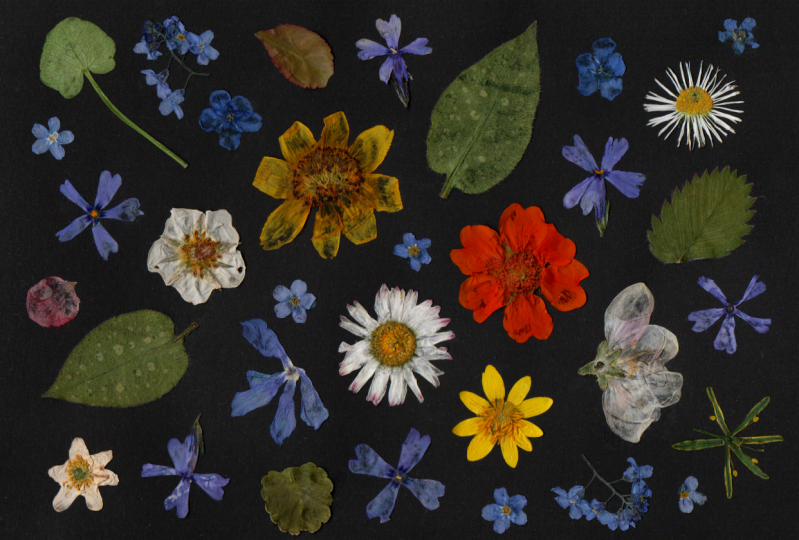
2. Materials You Will Need: For materials you will need different flowers. It's best to choose small and thin flowers. Then of course, the frame where you want to put your art door. Thick paper of natural colors like white, beige, gray, or black, according to the size of the frame on which we will glue everything. Pva glue a small brush, tweezers. It's best to use a large bird of lasers, but I don't have one. And Adobe now with the small ones as well, scissors. If you have bipolar knife, you can use that as well for drying flowers. You will need to belt a sketch book and a few old books. If you don't have a sketchbook, then it'll be enough just with the books. For another method that you will need, napkins and newspapers or cardboard and an iron. Additionally, you can use watercolor paints if you want to compliment one of the composition that will gray and maybe some black bands as well.
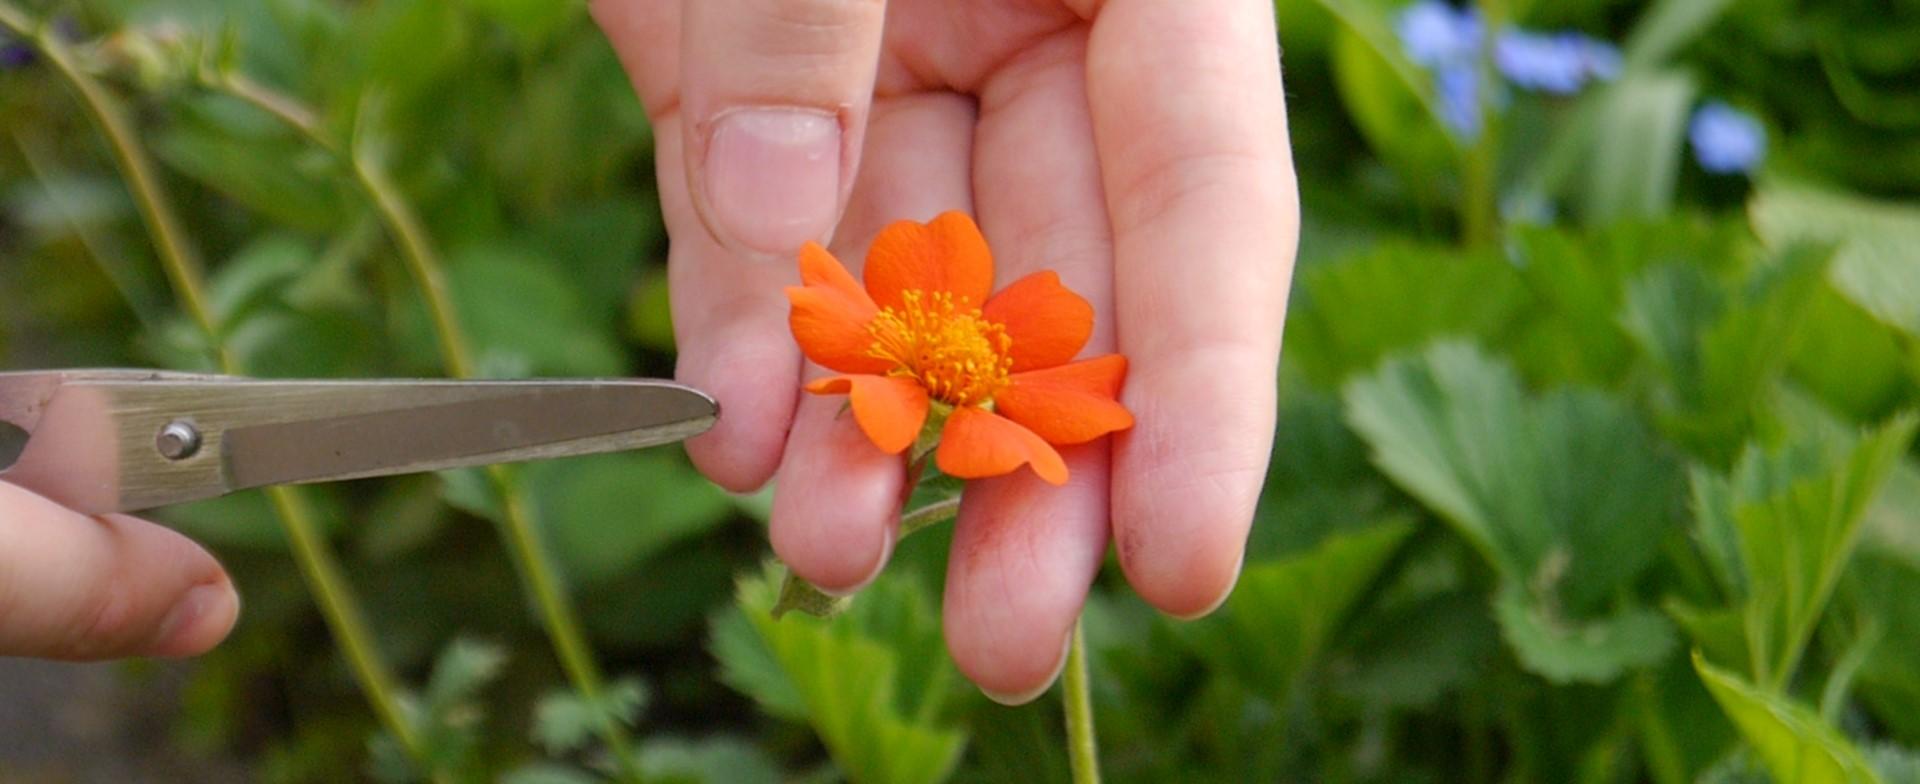
3. Making Pressed Flowers: Now I will teach you some of the ways you'll be able to collect a range of different wild flowers or flowers grown in your garden. First of all, don't like flowers after Rainer do as they should be dry. Choose those flowers that don't have a thick course since it contains a lot of water. So the flower will drive for a long time and not evenly. A flower with a thickened center after drying would look like this. The core has dried up, but the petals have dried up in the weird shapes and easily fall off. Therefore, take a lighter and thinner flowers and you can divide thick flowers like arose and do separate petals and use it like that in their compositions. But you still can use those flowers with the core if you like how they look like breasts, and that'll be fine as well. I will teach it, do the easiest ways to drive flowers yourself and I use these methods are girly myself. Let's begin with the simplest but the longest way you can place flowers between the pages of unnecessary book or sketchbook. Then add a few more large heavy books on both sides. And for constant pressure, Rob all books would do bouts and tighten them as much as possible. These flowers will have to be laughed for two to three weeks to dry brain from the book and can sometimes transport to flower petals. So it is a good idea to place your flowers between sheets of non glossy and non bleached paper before putting them inside of the book. Or you can put them in between cheats of baking paper. You can also drive the place flower is between cotton buds. This method is suitable for more delicate flowers, but it's not necessary. If you want to get depressed, draw flowers then the same day, then you can use an iron. But again, I don't advise drawing flowers, but the thick and the same way I do and the video, this whole dike along time and the flower will begin to fall apart. But they can dry small flowers in this way in just a couple of minutes. Put the iron on the lowest temperature and doornail the steam. They do soft and even napkins between the virtual iron, the flowers because they are in easily or the flowers and periodically lifted so that the moisture comes out of the flower. Then after 10 seconds, take out the flower and put it immediately in the book since they may not be completely dry yet. And they can change their shape while cooling down. Here you can see how I dried flowers, right? That the cottage, I gather a handful of flowers that I wanted to dry and dry them with an iron. As you can see, I didn't have a soft napkins and newspapers, so I use office paper and dow G also worked. I dried flowers in parts of about done thesis at a time, and then I cut a new portion so the flowers were fresh in order to dry them beautifully. You can try both of the methods and see which one you like the best.
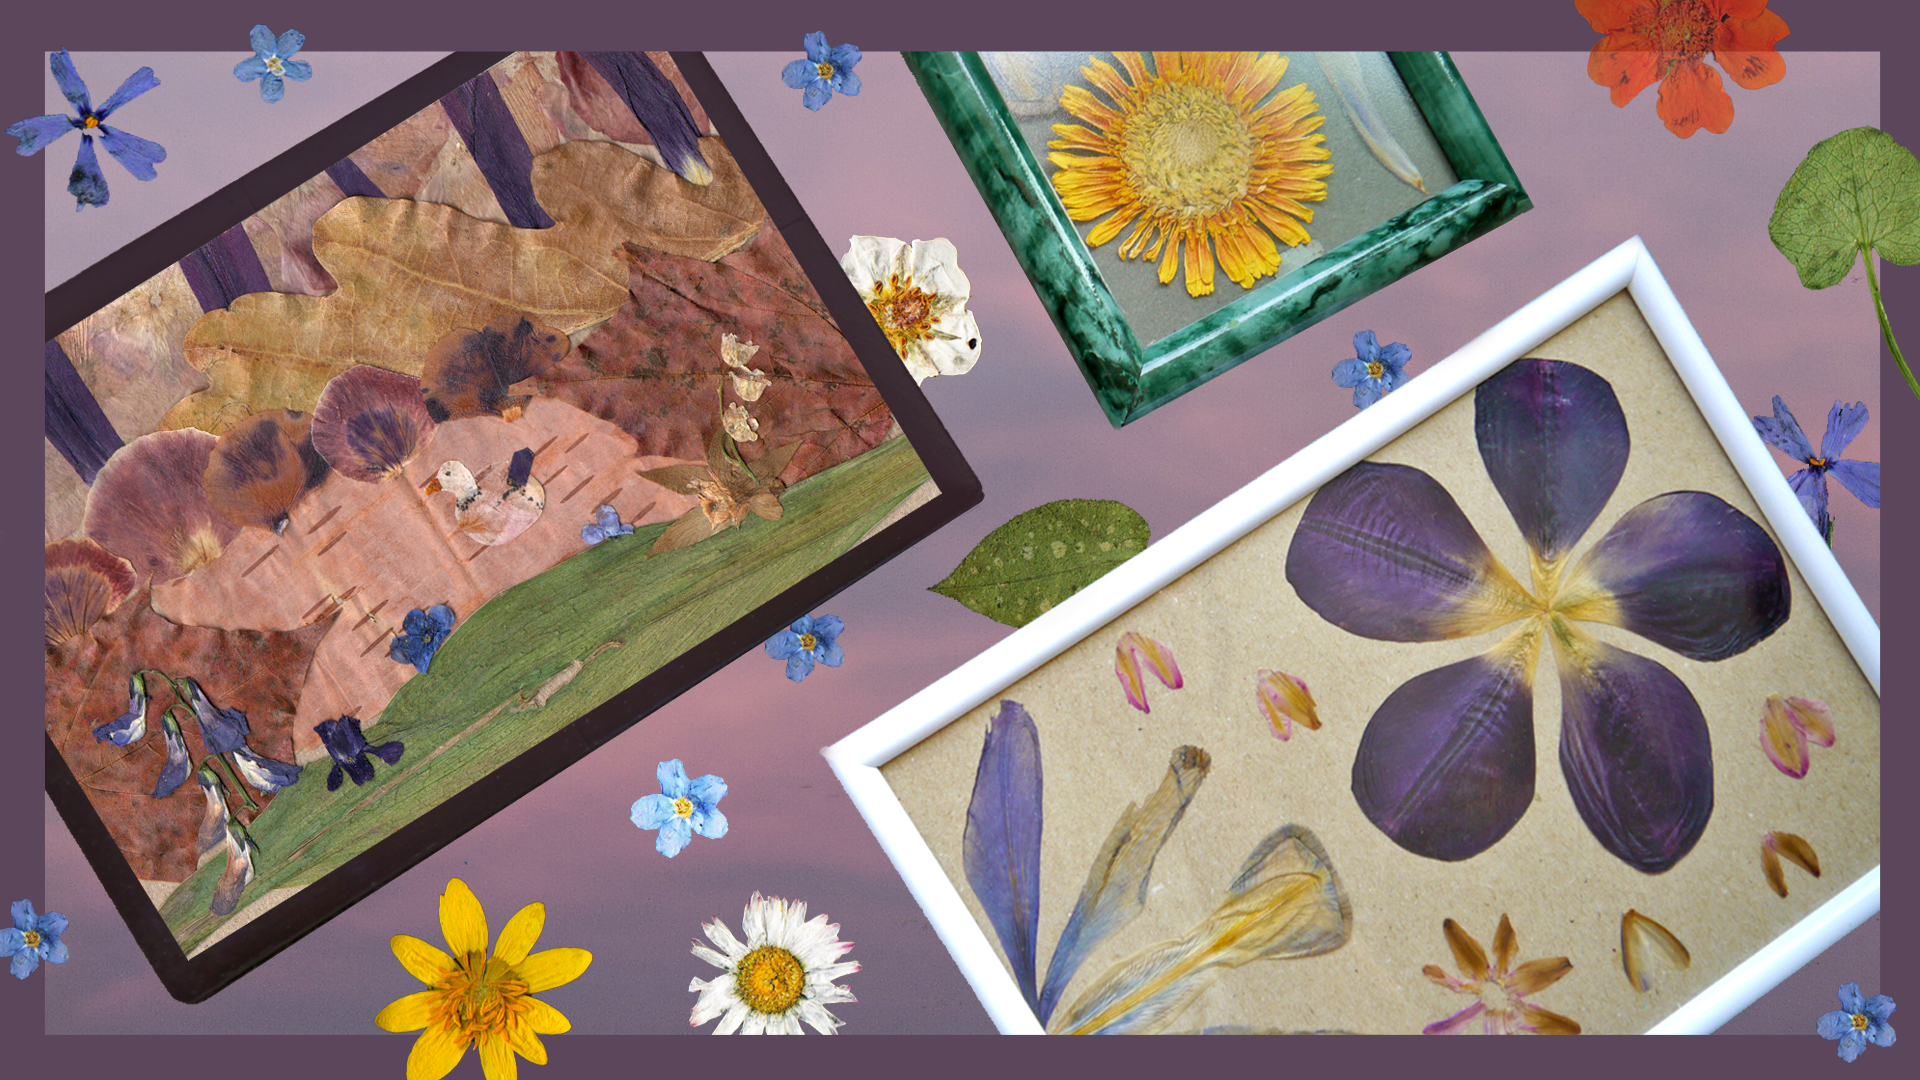
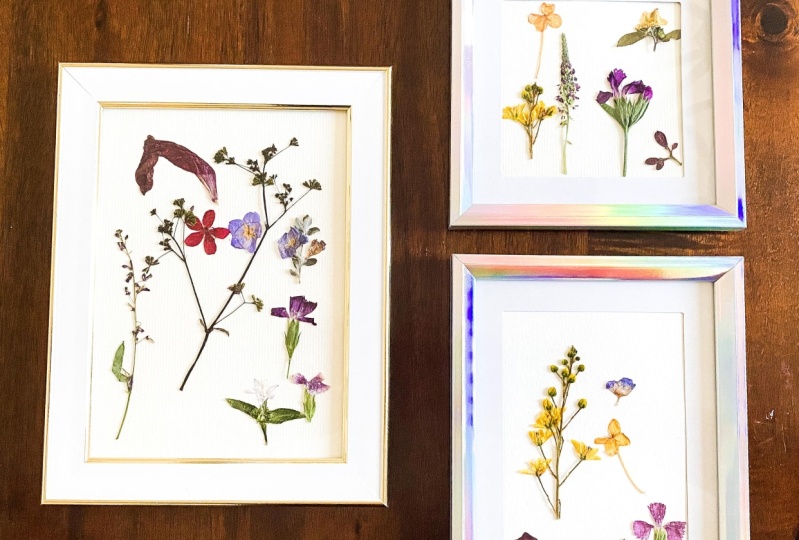
4. Flower Picture: Beginner : The easiest way to make a beautiful composition is humanly the subroutine pressed flowers throughout the sheet of paper. I'll also show you some interesting options for inspiration. But first, let's start by choosing a small number of flowers for the composition, I like to choose flowers in the single color scheme. This time I did green wide and purple flowers and leaves, and then I chose the paper color that best matches my chosen flowers. When everything is prepared, you can start distributing flowers, some cardboard I like to start from the center and then lay out the largest flowers and fill the empty spaces with smaller ones. If you don't like this option, then you can try to make flowers in the circle. You can draw a circle with a pencil and then erase the line before you glue the flowers. This time, I also start from the center and then evenly their siblings flowers to other, they form a circle. I feel the empty spaces, but small flowers. You can also have dried to distribute the flowers in the square, making up the flowers and even strips like you see on the video for a more unique flowers can be distributed in the form of a square or a circle or any other geometric shape that you like just died on paper and filled with flowers as you like. Also another interesting option is to distill, build flowers by colors in the form of gradient. You can create very minimal compositions or more filled up with different colors and flowers. I will show you some examples from the Internet that I found and I held that it helps you with the inspiration for your composition. I'll also show you another option with different flowers, and I will show you the method of cooling flowers in the seventh video of this course. So you can go there, right, to buy if you're not interested, just and under options for your flower compositions.
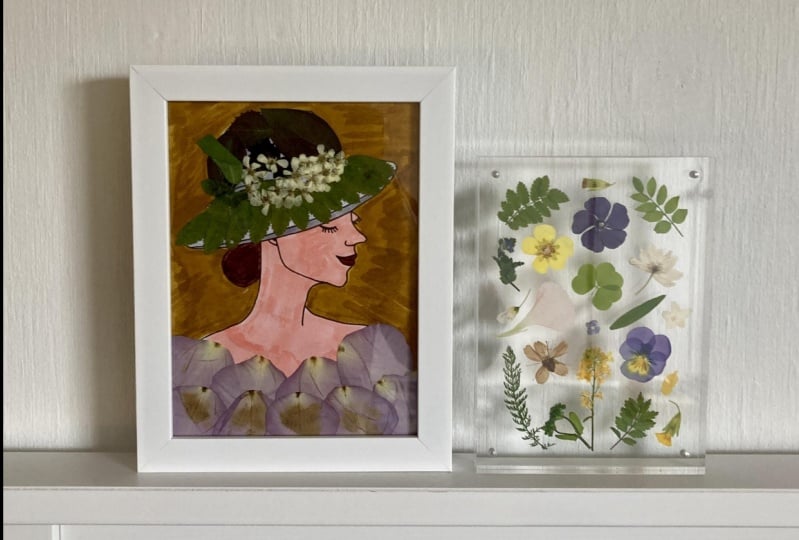
5. Flower Picture: Intermediate : Now I will show you the more complex version of flower arrangement. To do this, you need to have some drawing skills, but you won't need to draw a lot because I already created these two compositions options for you. And you can find additional materials that I created for you. So you can find those options and use them. I will show you how it can use flowers as a Bardot drawing will draw a human figure and use flowers as a friend workload. And you can win these drawings on office paper and then you will need to cover it the other side of the paper with a pencil in order to then transfer the drawing to the cardboard that you have chosen. You can also print this drawing directly on cardboard, but in this case you will not be able to erase the line after you glue the flowers button, you have colored the paper with a pencil, darn it over and put it on a cardboard, and then draw a line on.
6. Flower Picture: Advanced : The third option of the composition as the most technically difficult work with pressed flowers, because it involves a lot of dying and patients will create the picture completely using flowers, as in these examples. To do this, we first need to draw a sketch and then select materials for it. I decided to create a like in nature would put the arrows that I have as the central material I use the foundry bark, it reminded me of like wood water lilies. Then we need to draw a rough sketch of what we want to create. And for the sketch, I picked up various materials with interesting textures. You need to choose flowers from the dark as to the light ones. This will help us to create the sense of depth in the picture that we're going to create. A window zeros are selected and we need to make the sketch more specific. And for this, I search the internet for pictures with though I kinda forest, which helped me understand how to create the sense of the forest from flowers when they're drawing gets or the LEA need to draw a sketch on cardboard and begin to cut out materials so that they fit the size of the drawing. And this composition, you need to plan everything in advance since we will work in layers and immediately glue the flowers on the course of working on a specific layer. So the first we need to start output gluing the background of the forest. Because in my example then I glued tree is made of dollar petals on top of this background, as you can see. And on top of this, I glued the next layer, atom OK, leafs, perfectly suited as bushes. Then I repeated the same thing with different kinds of flour is working on next layer. At this stage, I was not sure with materials. I wanted to create the earth from them, but in the end, I decided on Autumn Leaves as day grids and grace contrast with other colors. And you need to glue bright the sleeves and flowers to the front plan in order to make it stand out more. Now that the main backgrounds is their ID, you can add details to it. And for this, I chose various small flowers that I had. In order to make it clear that this is a lake, I decided to add small duck made flower petals. And for this I cut out a few details from which I made a doc, I decided I would draw the eyes and the few feathers would append, but they can also be cut out of petals and decided the picture looks in the end, the complexity of these poor glycine fact that we will make all the salesman flowers. So some of it's components are very small and delicate and will acquire a lot of preserving and patients as well. But it's all worth it, if you like how it looks.
7. Gluing Technique: Now if trust me with that process and listen to all the instructions first and then it would be tough to me. There are two methods of how to glue flowers, but first you need to create the composition, and we did that to alert the cell. The next step is to take a photo of your composition and then carefully remove all the flowers have side. And for the first method, we will glue the flowers one piece at a time. Glue the flowers one-by-one, copying gear, photo bus, a little amount of glue on, and the clean plastic packaging that you have, for example, from yogurt and use a small brush to take a bit of glue and transfer it to the back of the flower, then glue the flower to the cardboard. There should not be too much ACLU. And if you think that the glue is too thick, you can add a couple of drops of water to the flowers, can be helped with tweezers for convenience. The second method can be used when you specifically know that you need to fill in some parts of the picture with flowers. And this case, you can just paint our, the section of cardboard with glue and glue. All the flower stood. When everything is glued, leave that cardboards that the composition of breast flowers and the dark, cool place to dry and do not put it on under the sun and dried, but the hairdryer, because it will ruin it. So leave it for about 24 hours. And then you can take your composition, put it in the frame, and hang it if needed. They can fresco flowers after gluing them with a few books placed on top of the composition that you can waive it the next day. The composition can be inserted in frame and then hang in the place that she'll way.
8. Tips and Tricks: And it is best to put these declarations that the flower is in the places where the sunrise will not fall on them because the flowers change their colors under the sun, race under the sun. So keep that in mind as well. Avoid storing does the court in rooms with high humidity because there is a possibility of multiple appearance and be prepared for the fact that the flower is that may change their color slightly, even store it properly. And I will show you examples. These works were made six months ago. And I said can see throughout the months that were placed on the sun for some time and they definitely changed our color. Also assumes this picture is made out of their natural materials. There is a small chance that the Beatles can get there. So in this case, you will need to freeze your composition and freezer for about 24 hours. And then you will need to take it out and separate the position from frame and Gamow all of the dung beetles and then put this composition to dry in the dark, cool place I mentioned earlier. So hopefully that's meant to work. But after this submitted, there is a possibility that the molten upper as well because now it's odd flowers can go through this process. So keep that in mind as well.
9. Project: So now that you've successfully watched all the videos that I created for this course. You can create something yourself. So your task is to make a small compositions out of the three options that I suggested to you. It doesn't need to be exactly the same. Actually won't be exactly the same any ways because we have a different materials. So that's okay. Just be creative and see what happens if you draw these flowers and your sheet of paper. And because it's the most special part of working with natural materials with frost flowers is that there unique and you'll now be able to repeat the same composition twice. And that's totally fine. And as well, flowers are so beautiful. And the cheer picture definitely all the amazing, even if you spend only five minutes on gray things as composition, trust me as well, I have added several PDF documents that I found on the Internet from American universities, created additional information for a breast flower compositions. So if you're interested in this, you can study further the free information that I've found. You don't need to buy lots of books, additional things in theory. And I will really like to see your compositions that they're gray because it's really cool to see all the different flower is their own. The world though, if you would like to share the SUID me and our community, I will be wearing caret tool. And if you like this course, I would be really, really thankful if you'd leave or move you. And thank you for watching. Bye, bye. Have fun with your breath flowers.
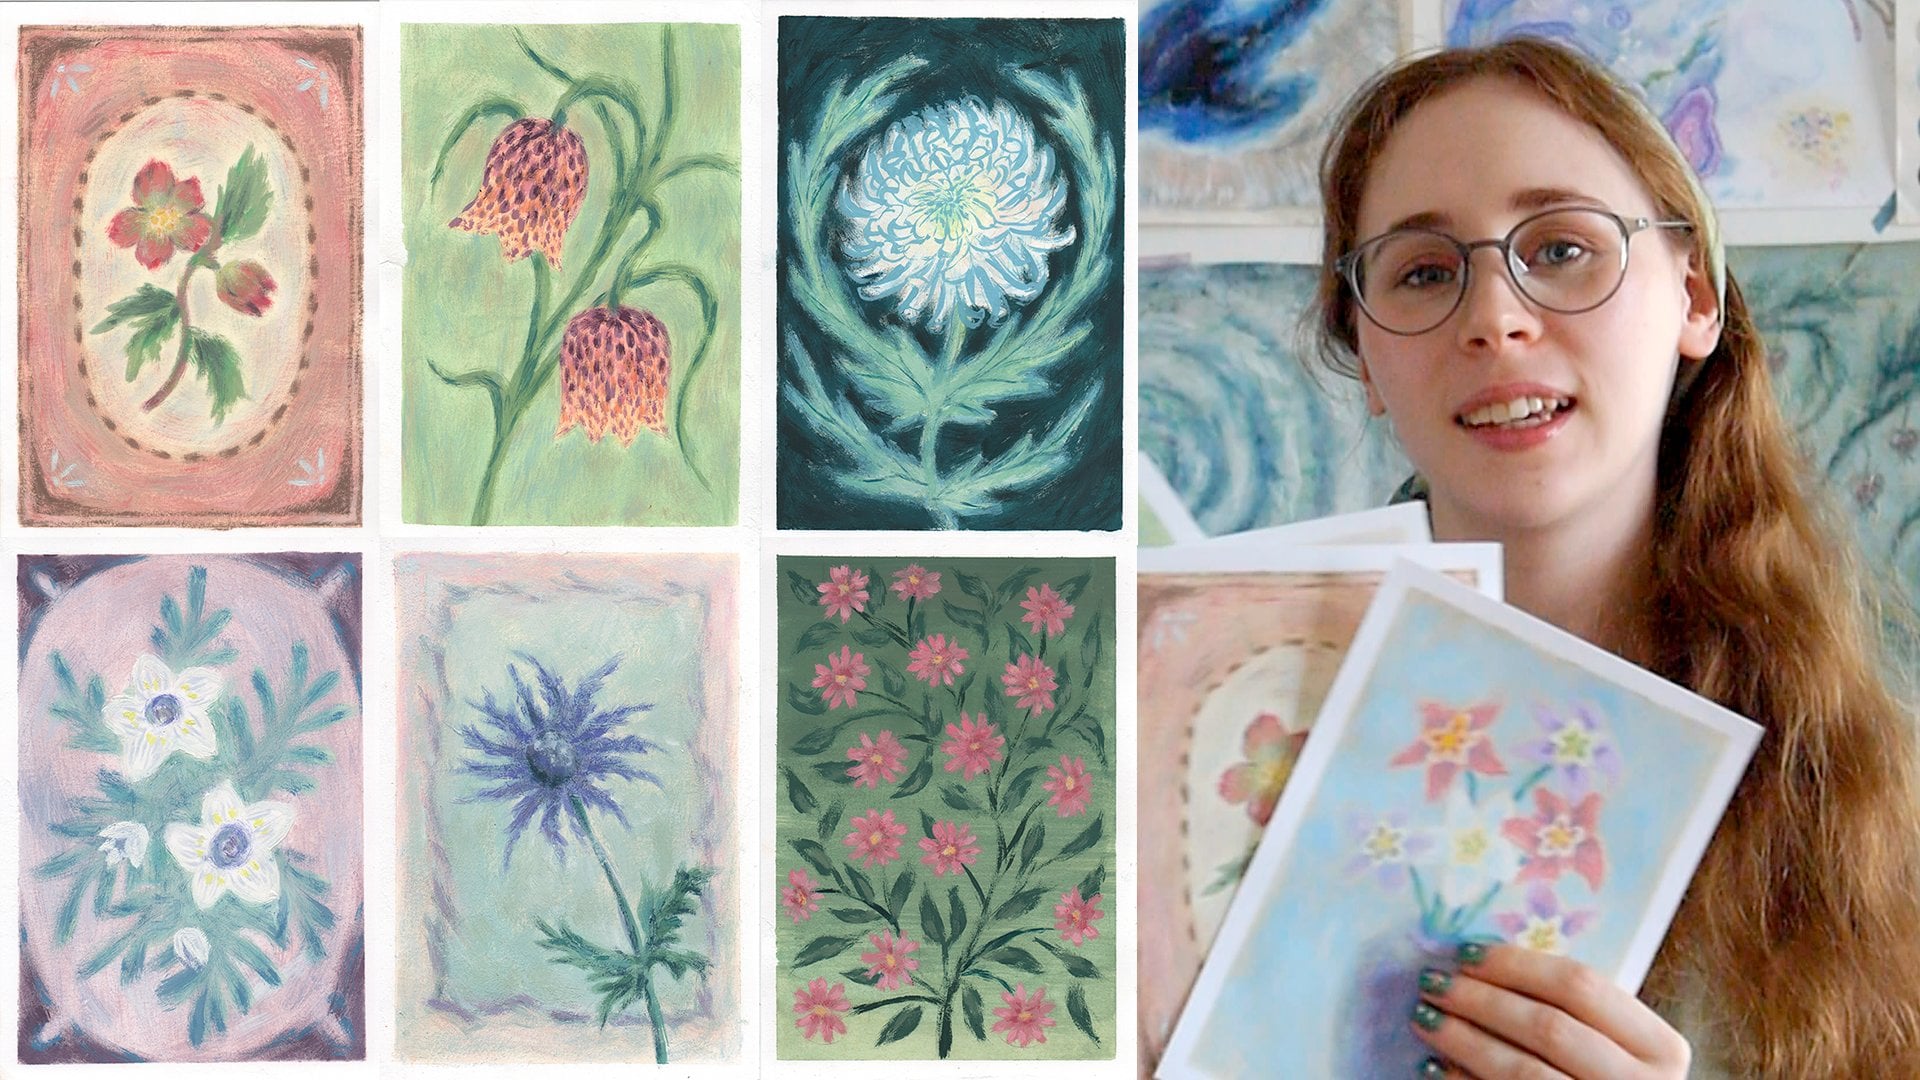
 Policorne, Illustrator & Fine Artist