Transcripts
1. Intro : Drawing is one of the ways to
develop fine motor skills, helps our brain to cope with the accumulated
information during the day and has a positive
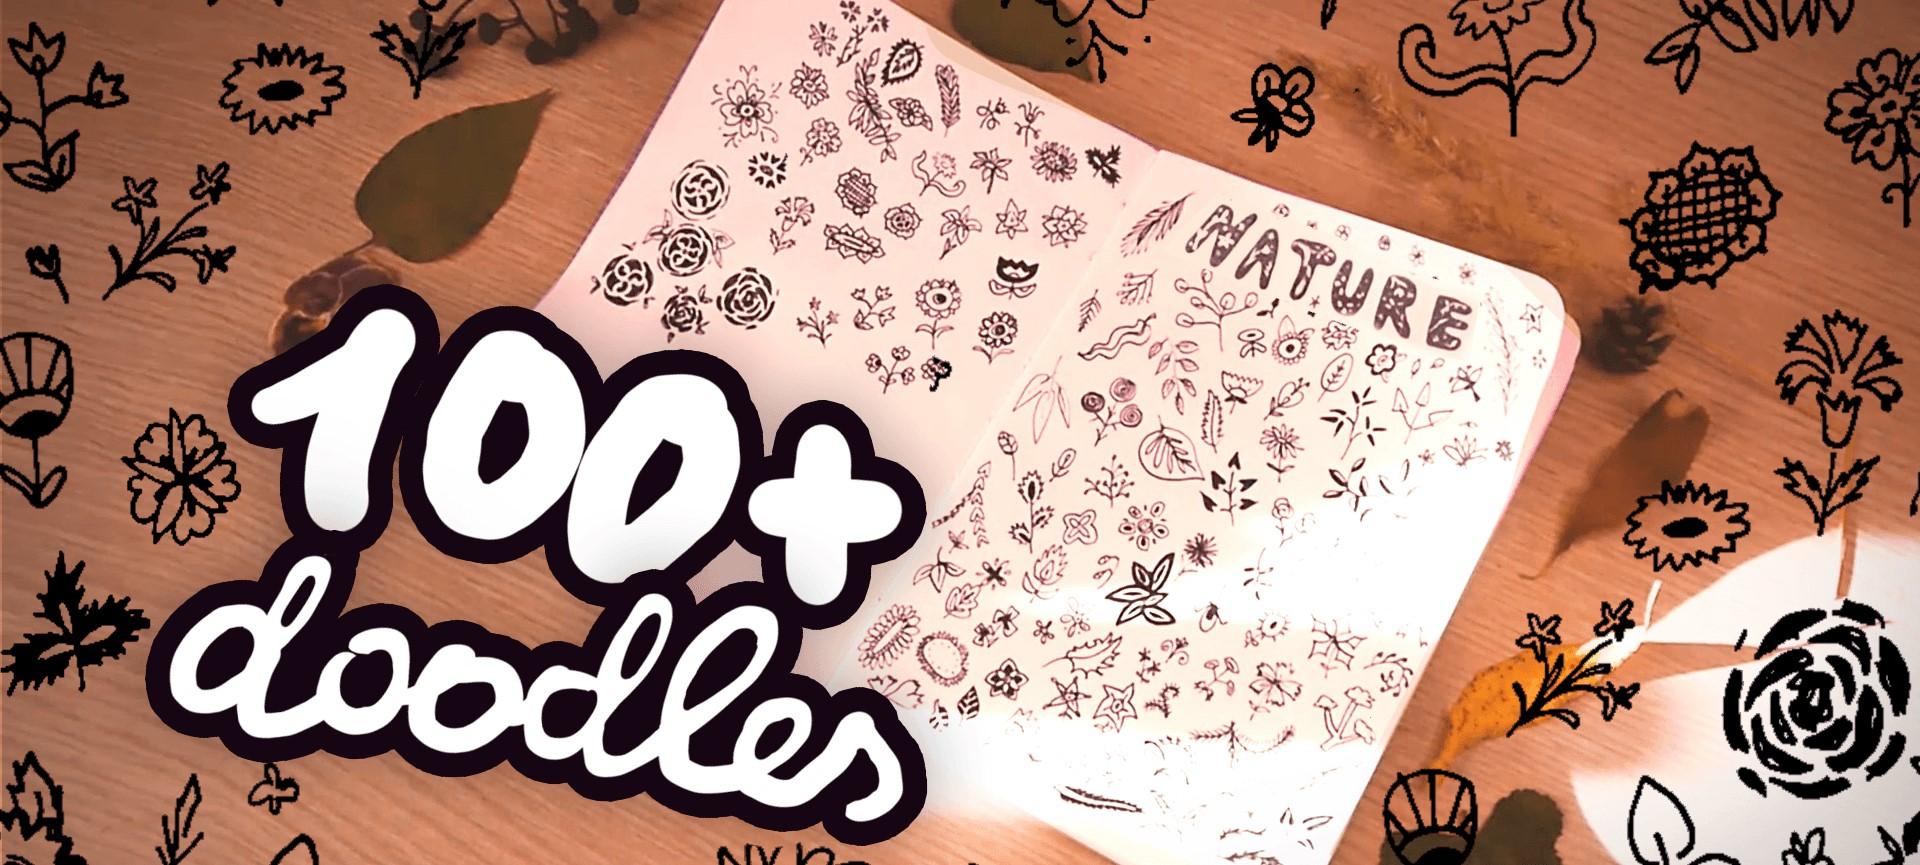
effect on our nervous system. High in this course, you'll learn how to
draw more than a 100 simple and
beautiful doodles. And you'll be able to fill
a full page of sketchbook or bullet journal with the
doodles that I will teach you. My name is Paulina and I'm
a professional artist, so it can help you
if really master these beautiful,
do those drawings. You can fill your
sketchbook page planner or create a greeting card, maybe even a wall thicker. Why not? It's a great tool to
have up your sleeve. And most importantly,
do those are great way to relieve tension and
get rid of anxiety. Sciences have Brew and many useful effects of drawing
such two tools such as the poverty of these
drawings to concentrate our attention and processing
information more easily, as well as their
ability to get rid of unnecessary stress
in our daily life. It sounds amazing.
Therefore, I invite you to try out this
interesting skill, as I'm sure it will definitely
come in handy for you.
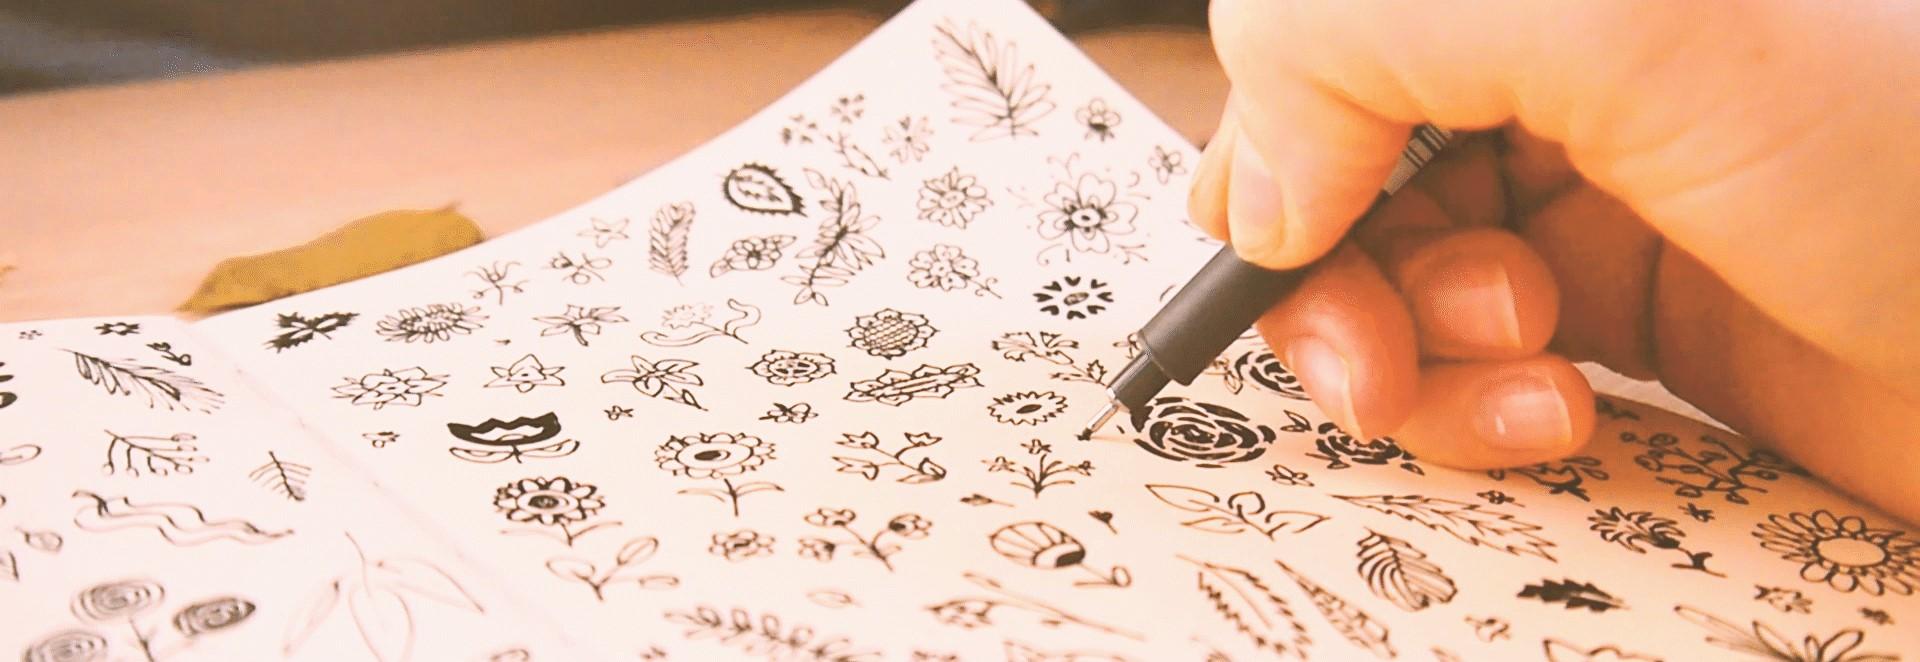
2. Required materials: From the materials you
can use a pencil and an eraser if it will be easier
for you to start drawing, the most important material
is a big one liner. It's best to take four
millimeter thick ones since the line turns out to be
just the perfect thickness. And I use Staedtler liner. In addition, you can also take a black gel pen to
diversify the line, but it's not necessary. As for the paper, you can use any paper that is
comfortable to work with. For example, you can use
a sketchbook like I do, or a bullet journal,
bullet blender. If you still don't
know what paper you like the best work with, then I suggest you
to use some kind of unnecessary old papers, such as old printouts
or drawings. But I will you have at hand
also for your convenience, you can print a file that
all the doodles that I will show you in coming
up videos in this course, you can find this file
in additional resources. And now let's move
on to groundwork and warming up exercises.
3. Groundwork: Before you start drawing, you can warm up your hand as we do it with the voice
before singing. In fact, our main
task is to relax hand and give ourselves
some confidence. These are the qualities
that will help you to create beautiful,
amazing drawing. To do this, you can draw several lines and
the separate than necessary piece of paper start
by drawing various shapes. Then you can try to connect these shapes and
different compositions. This will make our brain
start thinking creatively. It also helps to
adapt new materials. Another tip is to try
different lines while holding your pencil or pen
in different positions. I usually like to fill
the entire sheet with all sorts of scribbles
before I move on to drawing the main
picture that will help you gradually enter
the drying process. The scribbles allow
you to feel free, which actually helps to
get rid of the art block. Don't forget to
practice drawing lines of varying thicknesses
and pressure. Do I holding the
end of the pen or even the tip of the pen
and see what happens. Now let's start. The most exciting part
will finally draw doodles. I created a system by which we will gradually complicate the, think of these doodles, but don't be afraid. I'm sure you'll be able to draw any of these
doodles if you want to, especially since
I will guide you to all of the drawings. Swell. Don't forget the doodling
is a metadata of process. So don't give your
attention to small mistakes because we will not
give them energy. Let's hop into the
next lesson then.
4. Simple Doodles: Let's get started. Here we go. Our first doodle, dot three triangles and
connect them with lines. Those will be stemmed
and we already have our first do though.
Isn't that great? Where the neck is
due to draw a line. And then I will
connect a couple of diagonal lines through the
first-line, draw a circle. Now fill in circle
line with a lots of small curves and add
a few triangles. And the last step is to draw a circle in the center
and you can fill it in. Now the next one
is really simple. You just need to draw
as many as you want or circles and then just
connect them with lines. For the next one, draw a
longer line and fill it in with very long
and thin curves. Next one, draw a line and add a little circle or oval
on the end and draw a few diagonal lines in
shape of Christmas tree and at the end of each
line, another circle. The next one is really simple. Just draw two wavy
lines and connect them at the end and draw
another line in the middle. It will be a stem of the sleep. Really simple, but to get, now let's draw Morley use and draw a line at the
end of this line, draw a dark shape. That'll be our
firstly than that, other leaves make little gap and draw them diagonally
through your first line. And that's already a full twig. And you can share these leaves, but just adding a few
diagonal lines on, only on behalf of the leaf. Next one is really
simple as well. Just draw three circles
and a drag and I'll shade. And each circle you
need to fill in with spirals and
to finish it out, but you just can connect them. And now we go another
variation of flower. When the next one just draw a line and very
long drop shapes. For this next one,
let's just draw a leaf. It's the one we drew before, but this one is just
more simple and you can add more diagonal lines
so it'll look more filled in or the next one
you need to draw half of the circle and fill it
in with the curvy line. And that's so simple. Just add a few leaves and
the stem. And here we go. You can decorate this
flower, for example, with the half of the
circle in the center, like I did, where I can
just leave it as that. For the next one,
draw a big drop shape and I would advise you to
draw a symmetrical shape. So it would look more interesting At long
curves in the center. I really like this design. It's really simple
but beautiful. Next flower is variation of
an oval and line once again, but this time, let's
add the leaves, but leaves will be just the
half of the circle or oval. And you can decorate
this flower as you want. Once again, the similar
technique now let's draw a leaf, but just fill it in with the
diagonal lines and center. Nixon's really cute and
draw a line using lots of hearts and you can make
them as big as you want. And it will look very cute. Care can see I use bigger
and smaller heart. And we got a little bit
more in the result. Next one is quite
simple as well. Draw some drop shapes or
oval, doesn't really matter. And the diagonal shape, it's fine if it's
not diagonal and because we use are
not perfect, right? So it's fine if it's non perfect and just connect
them with lines. It's really simple
and beautiful doodle. For the next one, let's draw a branch will need a long line and just fill it in with
random shapes of leaves. Or you can draw hearts if
you want to decorate the, just put a few dots here and
there, and it's really cute. Now let's make flour. You'll need to draw a small oval and there'll be our center. And I'm very long curved shapes. It's just a simple flower, but nonetheless geared, let's add a stem
and a few leaves. For the next one, draw a half of the oval and filled in with the zigzaggy line and just draw a few leaves at the
bottom and a stem. Now let's make another branch. For this one, you'll need to dry just upside down parts and
connect them with lines. And that's being can
color these hearts. And you'll get all sorts
of different effects. But really simple. Now let's draw a
brunch with berries. And I like to put dots
so they make a drag and they'll shape and then connect all the dots to the center line. And if you want, you can add a few more berries
to fill in the gaps. Now let's draw up bigger branch, but just a bunch of drop shapes. And the, as per usual, just connect them all
with one line and center. But these leaves, Let's make
a little more interesting. I like to color just
half of the leaf and then to make a really
interesting effect. Next one, draw a line and
filled in at the end, and draw a few more ovals
connected to the line. But believe a bigger
gap between them is now you'll need just to
draw a zigzaggy line around these and leave just a little gap between
o and the line itself. This one is really
simple as well, but it looks interesting and
complicated. But it's not. For the next one.
Just draw curves in a cross shape and to raise
them around with the line. It's, it's so simple, but yet another reason why not? Now let's draw a flower using ovals or circles,
doesn't really matter. You can draw whatever
shape you want. But the most interesting
part is to fill in these flowers with
different dads and ovals. Maybe draw another circle or put more that I
didn't know be creative. It's an interesting shape
to experiment with. For the next one,
just connected bunch of different lines
in the center. And that's it, a
perfect flower stamp and a few leaves
and you're done. Next one will be a
little different draw card line and then draw another curve in
the middle and add ovals at the end of each
line or the next one, draw a drop and then make line, and in the center, just draw a half of the circle once again. And to make this flower
more interesting, draw a curved line
around the drop shape. And you can put a dot in
the center of this drop. Next one is a cross
shape made up. Once again, you
can find center of this class and add
smaller Olsen the gaps. Now let's draw roses. We'll need to draw a smaller
virals and add three curves, arches around them and just
connect them with lines, stems and add more
diagonal lines to make leaves really
good, really simple. Once again, for the next one, draw a dot and a curved
line around this dot, but this time make
this line a bit more thicker and add a novel in the center and maybe some
leaves around the curved line. But the next one drive
the same flower. But this time add
lines in the middle of graphs connected
to the oval shape. And to make it more interesting, gloves at a few more dots or ovals and the gaps
between these curves. It's just a different variation
of the similar flower, but it looks completely
different. Let's draw another. Oh oops, a happy
accident would not connected this L the way it's supposed to
be, but it's fine. So let's continue to just add more curves around this oval. As you can see, with the different accidents
and mistakes, you can make them into something beautiful
like this flower. And you cannot have
a notice that there was a mistake right now, right? For the next one, draw a line
and make light of spikes and just make them smaller at the ends and bigger
in the middle. This time, draw the
same spikes but connect them in one center. For the next one, draw
a more I can play via a line and draw filled in. It's really simple.
Let's draw another. And you can see I made an
hunter, happy accident. So use this additional
declaration for this flower and draw another folding in the center and draw a line for the stem. And to fix this mistake, Let's just draw a few
lines or diagonal lines. As you can see, the mistake
has gotten really simple. The next one is
actually my favorite. I always draw these leaves and the cornerstone, my notebooks. Those are just a
bunch of drop shapes. And I made these
lines very thick. But to make these leaves
more interesting, I add another field and
leaf in the center, but I make sure that
there is a little gap. These leaves look amazing and they really
helped me to get rid of anxiety if I talk on
the phone or something. The next one, draw a circle. Let's make a flower
out of the sun and draw another oval in the center, a few leaves and stem. That's it. This time let's make a flower. I'll do the heart, jaw higher than a
few antennas between these curves and add a little
drop shape and middle. And of course the
stem and leaves. Next will be another oval and draw a line in the
center, draw a stem. But let's make
interesting leaves. Thanks to leave will be really simple and just draw a wavy line and draw a spiky lines around it connected
at the end of course. Next one is not my favorite, but it's an option. Just make lots of triangles and then you'll make a flower. This time let's draw
a drop shape and do more drop shape and connect
them with the center line. Of course, this one is
one of my favorites. Again, you can drive this in smaller size and to
look really good. Now let's draw a line and add a three different sized hearts, the center of this line. But let's make leaf and just trace them around
with another line, leaving a gap between them. Next one is Clover. Make line, Olson a triangle and draw another
triangles around each. Next one is really cool, simple and ethic thing to draw these flowers made
out of loopy line, just great five loops
and connect them all and maybe
decorate these loops. But that's, and I cannot
start drawing these flowers.
5. Intermediate Doodles: Now let's move on to
medium difficulty. Do those next term be
more experimental? Just draw a wavy line
and that zigzaggy wavy, curly line, whatever
line you want around it. So it will make an
interesting leaf. As far as the next
one, just draw three small drops and
connected to the central line. And this one as Aleve, we'll draw a spiral. Let's draw more simple hours. Add a line, then just
paint built-in ovals, and then just add a few leaves. That's it. That's all. Do those need to be
difficult? For the next one? Draw a line and oval at the end, and then just draw them
with diagonal lines, leaving a little gap and that ellipsis to the
end of each line. And to make it more interesting, let's add a line in
each ellipse and don't forget to draw
leaves as well. Very important. The next
flower is one of my favorites. It's just five, exaggerate the thrombus
connected at the center. It looks really cool,
but it's so simple. It doesn't need to look perfect. Next one is another variation
of flower just to draw a center dot and dried triangles
connected to the center. But this time, instead
of straight line, draw triangles using
zigzaggy line, draw another line
and a few leaves, and you can decorate
these flowers, but just more lines
in the center. Let's draw another
simple flower. Just draw three Clouds and
connect them with stems. For another variation of branch, just draw a bunch of spiky hearts and dry as
much height as you want. The next one will be
just a spiral with a bunch of smaller
spirals on top of it. And you can color
these smaller spirals and the center if you want. Now let's draw spruce branches. Why not just draw lines
and fill it in with the diagonal smaller lines in the sun is really
satisfying to draw, though, especially if
the line is curved. For the next flower, just draw another circle or oval and draw a star around it, making a little gap
between the oval and star. And you can decorate this
flower. Here're you want. This time, let's draw
another star-shaped flower. But this time, as you can see, if you can add the center
circle with the star, it looks completely different to the previous flower from
fluid, that's the curation. I decided to add a few more drops at the
end of the star-shaped. And of course, don't forget
the stem and leaves. For the next power, draw two curves and just
fill these curves, but more curves
connected to the center. As you can see, I
drew a bunch of variations of this
flower because it really depends on the way you draw curls and how you connect them, and how you decorate
this flower. The flower is look
completely different, that's made in a
similar technique. Next one is another
star-shaped flower connected to the center circle. But this time let's add
more petals to just draw triangles in the gaps
of the star to decorated. Let's just coloring
these triangles but leaving a little
gap between lines. Next one is really simple. Just draw a circle or oval and
fill the ellipse line with lots of small curves
and they can decorate it with the dot
line in the center. Next flower is a variation
of the Ruiz flower. But this time let's experiment with the shape of the ellipse. And instead of adding
something in the center, well, let's draw a bigger curves
around the smaller ones. Now let's draw the
love using curly line, and let's just decorate
it in an interesting way. I'm a bit tired of
drawing the flowers, so let's draw a bunch of
little and cute small flowers. So you can see, you
can draw flowers and the star shape or
consulting curvy line. Bunch of leaves here and
there, filling the gaps. Let's draw another star with filled-in center or a
flower without the center. And there is a bunch of
different options how I can draw these small flowers using the techniques that
I showed you before. Now let's get back to
the bigger doodles. Now let's draw another
heart-shaped leaves. But this time, just leave a
bigger gap for the stamp. Just not colored them and connect them all with
the line and center. For another branch,
draw a spiral line, and it'll be a stem cell. Draw two more spiky lines
around and you can color it. Then it's looks more
interesting this way. Now let's draw another leaves, but this time arrow
shape. Why not? And the full demand just draw more diagonal lines connected to the center line.
That's it. So simple. The next branch,
draft queue spiral lines on top of them to
draw a bunch of triangles. Let's make another
tool at this one, a bit smaller and more simpler. But let's add leaves
using gloopy line. For another leaf, just draw a wavy line and drop and
chose filled-in curves. Let's draw another
variation of leaf. Just draw a silhouette
of the leaves. Instead of drawing the stem, just imagining where
the stem would go and fill in the gaps
with the liner. Here's another variation
of the sleeve. Now let's draw more leaf shape. So spiky hearts.
6. Intricate Doodles: So now I will show you
my favorite doodles for the next doodle, draw ovals in a triangle shape. But now let's draw zigzaggy line around them and fill
this gap with the liner. Looks really interesting. For the next flower
will need to draw a bean shaped center, and you'll need to
fill the center with the curves of
different sizes and shapes and draw these
curves as in the center and the outer line of this bean. For the next flower dried this interesting shape at
the circle in the center. And the view antennas, my favorite ones, right? Stan, don't forget the
stem and leaves of course, this time I'll do leaves with
this loopy lines as well. For the next leaf,
Let's draw a line, a hard at the end
of this line and fill it in with a bunch
of curves or hearts. Next, draw a bigger leaf
and draw a spiky leaves in the center and make the outer edge of the
flower is spiky as well. For the next flower,
draw a bunch of circles that grass hour
exactly in the middle. This one is really
easy to mess up. Add more leaves. Yeah, another flower. Next n is a variation of the spiky rhombus flower
that we drew before. Next one is really
simple flower. But if the flower is simple, Let's make interesting leaves. Next, draw a dot
for the center and around it you need to draw
exactly three hearts. It's already really cute
flower to be honest, but let's decorate with more
petals and then different shapes and triangle
shapes or smaller ovals. As you can see, you can create almost a similar shape
by using just triangles, but I like the heart-shaped
flower more for the next one, just draw a bunch of different sized
leaves, and that's it. Let's draw next flower using
a bunch of spiky triangles. Draw a line connecting the
middle of these battles with the oval in the center
and draw a stem and leaves. Next time it'll
be another tulip. Draw half of the circle
and draw another. It'll open the center just
leaving a little gap. As for the flowers, draw half of the circles and you can decorate
that by coloring it. And why not? These flowers are really cute. Just draw five really
small hearts with a dot in the center and
connect them with stems. It's cool when stamps
are not straight, but when they're making
another interesting shape. Let's make another
flowery drying curve, but this time more
complicated and the best way to decorate
this by drawing gloves. So spiral, spirals and the center or spirals
and as the leaves. The next flower you
can draw by using brackets and just decorate
it in an interesting way. For example, making strokes. Here I can see another
variation of this flower. For the next one, draw circle, but another circle
in the center and draw a star as we
drew it previously, draw colored triangles
in the center. And the most interesting part, to just draw a
bigger cards around these triangles and to
decorate this flower, you could draw spirals and
put dots here and there. For the next flower. Draw an oval and a bunch of
smaller hearts around it. And you can fill
them in with liner. For the next flower, drop the color circle and
inside the smaller circle. And then you can fill
in another circle, inside a circle, bunch of circles and draw a bunch
of curves along the edge. Decorated, draw a bunch of spikes in the gaps
of these curves, and don't forget about the
stem and leaves of course. Next one is just Greta look
connected to the center line, would do leaves really simple. Let's draw more variations
of these flowers. This one is similar
to the tulip flower, but with curves and half of
the circle and the center. For the next flower
draw small tulip, but it's not draw these spiky drying girls making a shape of the
flower around it. The last but not least, is my favorite
flower, to be honest. Let me show it a
few more times so we can clear understanding
how to draw it. You need to draw a
dot in the center and draw three bean
shapes around it. And now you'll need
to just fill in the gaps with more
triangle shapes. You want to finish this flower. You can make them as
because you want. Flower is similar to
the previous one. But instead of being shapes, we'll start, I'm trying
small, I don't know. Like our jobs were half of the circle shapes
in the center and just leave bigger gaps
as we go around the center. And with this
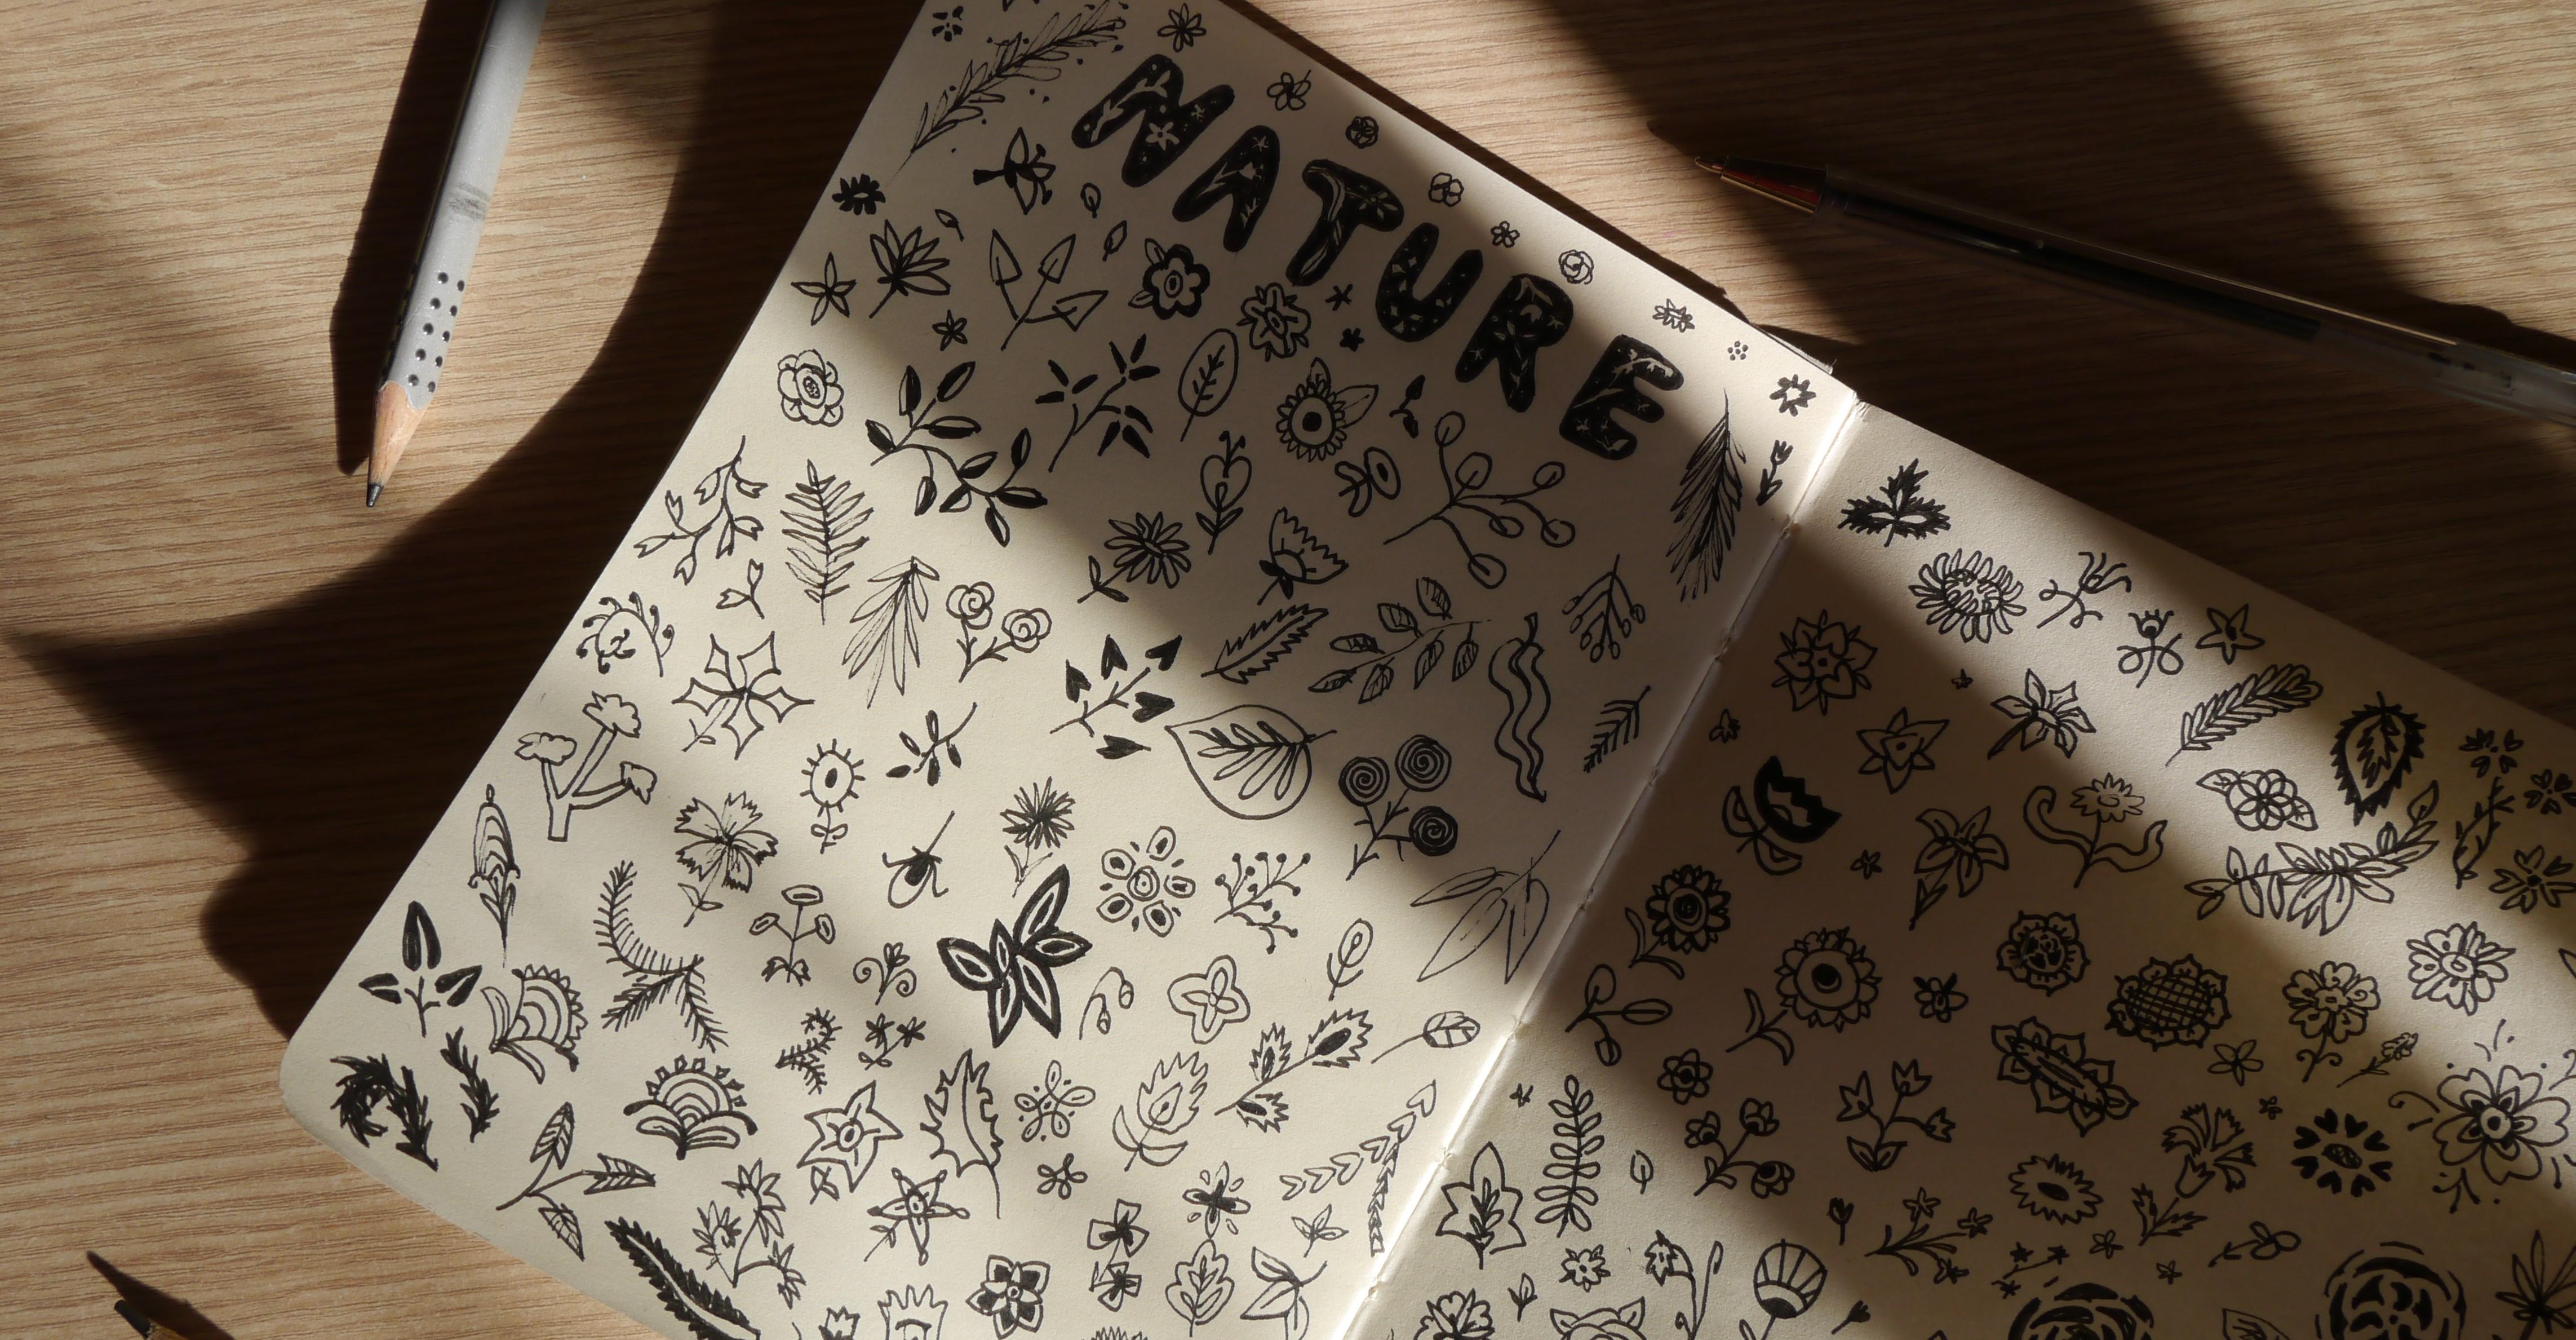
technique, you can draw it bigger or smaller flowers. That's it. My friends. There we go. All of the doodles
and here we go with did a great job and filled out
the full sketchbook page. Hopefully you liked my doodles.
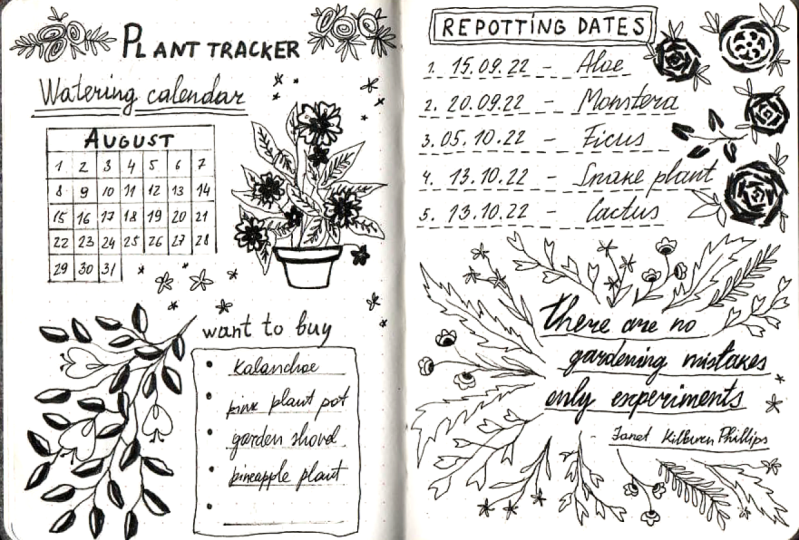
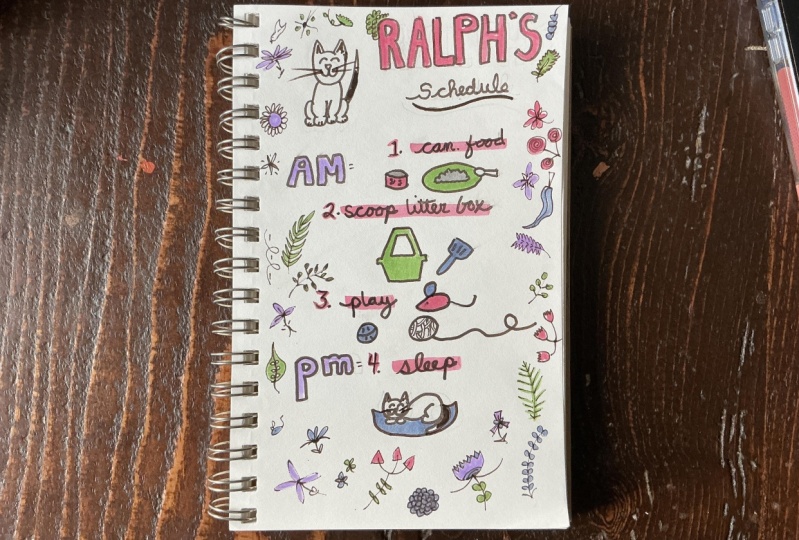
7. Create Doodle Composition | Full page art: Now that we already have a full library of
various doodles, we can combine and create a
full pictures how to them, for example, this is perfect for creating greeting
cards or annotations. Actually can decorate basically everything that you wanted to. Therefore, I will show
you how to create your own beautiful
and unique picture. Now I'll show you how to create a simple greeting cards
or birthday card. You will see a lot of
different versions of these cards from which you can choose
the one you like, the most Jews, the
colored paper you like, and then select your
favorite doodles can also print the file with
all the doodles that you'll find in the resources and chose those doodles that
will fit your greeting card. I draw all of the doodles but pigment liner out
different thicknesses. I think the best thickness
would be a 0.4 milliliters, but you can choose whatever
pen or pencil you want. Use a pencil to sketch the future drawing in
circles and lines. Now the sketch with pencil very lightly so that we
could then erase it. Usually I mark the center of the composition
and based on this, I outline the position
of flower doodles. And now you can fill it in with the doodles that we have
in front of our eyes, evenly distributing
large and small flowers as well as dark and light ones. Then you can cut out a separate
card that text and just write the word thing directly on paper by attaching
a circle with tax, they will notice those
places that can be additionally fill in or erase. And this is how the
first sketch looks like. You may not add text at all
if you like how it looks. Now I'll show you
the second version of the composition with doodles. This time the flowers
will create a frame and you can add a greeting
card message in the center. This option. So it looks very
beautiful for this sketch, I decided to choose our rectangular textbox is you can see with the
cutout text box, you can find the perfect
position for it. So it's very convenient and
you should try it as well. But a third option, I decided to create a pre-K
or flowers with a large bow. If you're satisfied
with your sketch, then the next step would be
easily erasing all the lines, so only transplant line remains. This is necessary in order for the pigment to soak
into the paper. Then you need to trace all the flowers with
the pigment liner. Once this step is ready, you can fill in some areas that you think would fill color. Then if you drew your picture on a colored paper, then you can additionally paint over various areas
for a white pen. And that's what I did. Or you can paint the color. So if you do those
with colored pencils, markers, or even
the watercolors. Now it remains to choose a suitable message and
glued onto the card. And this is how we created our own beautiful greeting cards from our favorite doodles. Amazing. My opinion, it
turned out very nice. Such cards can be
decorated both with children or even with
family or friends. And that's a great
relaxing activity.
8. Create your own Doodles: Well done. You've finished
all the triangles, but now on the tube and more useful information in
depth so that you can create these doodles yourself and find interesting new ideas and
inspiration for drying. To do this, I have a
few life hacks for you. My favorite way to find
inspiration is to study drawings of people of antiquity
or historic drawings, for example, you can Google
ethnic floral motif, find many options
for inspiration. But please be mindful of
different cultures and their symbols that you
might use in your drawings. The second option is to
draw from real flowers or photos of flowers
display you can create completely
unique to those. The third option and the most difficult one is to capture the
shapes around you. Use your imagination
to make them into interesting but creative
versions of flowers. Here you can see that I
have selected the brush as the object of study to
get the desired result, I draw a lot of similar
drawing from a child, choose the best one. I notice that it's easier
for me to start with more realistic drawing and
then simplify it as I go. But for you it could be a
completely different story. The key point and doodling is experimenting and
finding new ways to draw things you like, enjoy this process as well. And this is the result. I hope these methods
help you to find inspiration and you'll be able to create
something new yourself.
9. Class project: Great job. We got to the last video of this course and that's awesome. And that's for your
class project. And I would just invite you
to share your drawings under those glass so we all can
see that, for example, a page from your bullet
journal with very drying, perhaps you'll be able to
create their own doodles, then I'll be very happy to admire them down below
in the project section. And you can also print an error for file with all the doodles that I showed you today down below in the class resources. You can also watch the rest of my creative courses
on Skillshare. There are pretty good as well. You can find more of
useful information and videos on my YouTube
channel polygon. So check it out.
Thank you so much for watching this
course and I'm really excited to see
your drawings have a great and inspiring
rest of your day. Bye.
 Policorne, Illustrator & Fine Artist