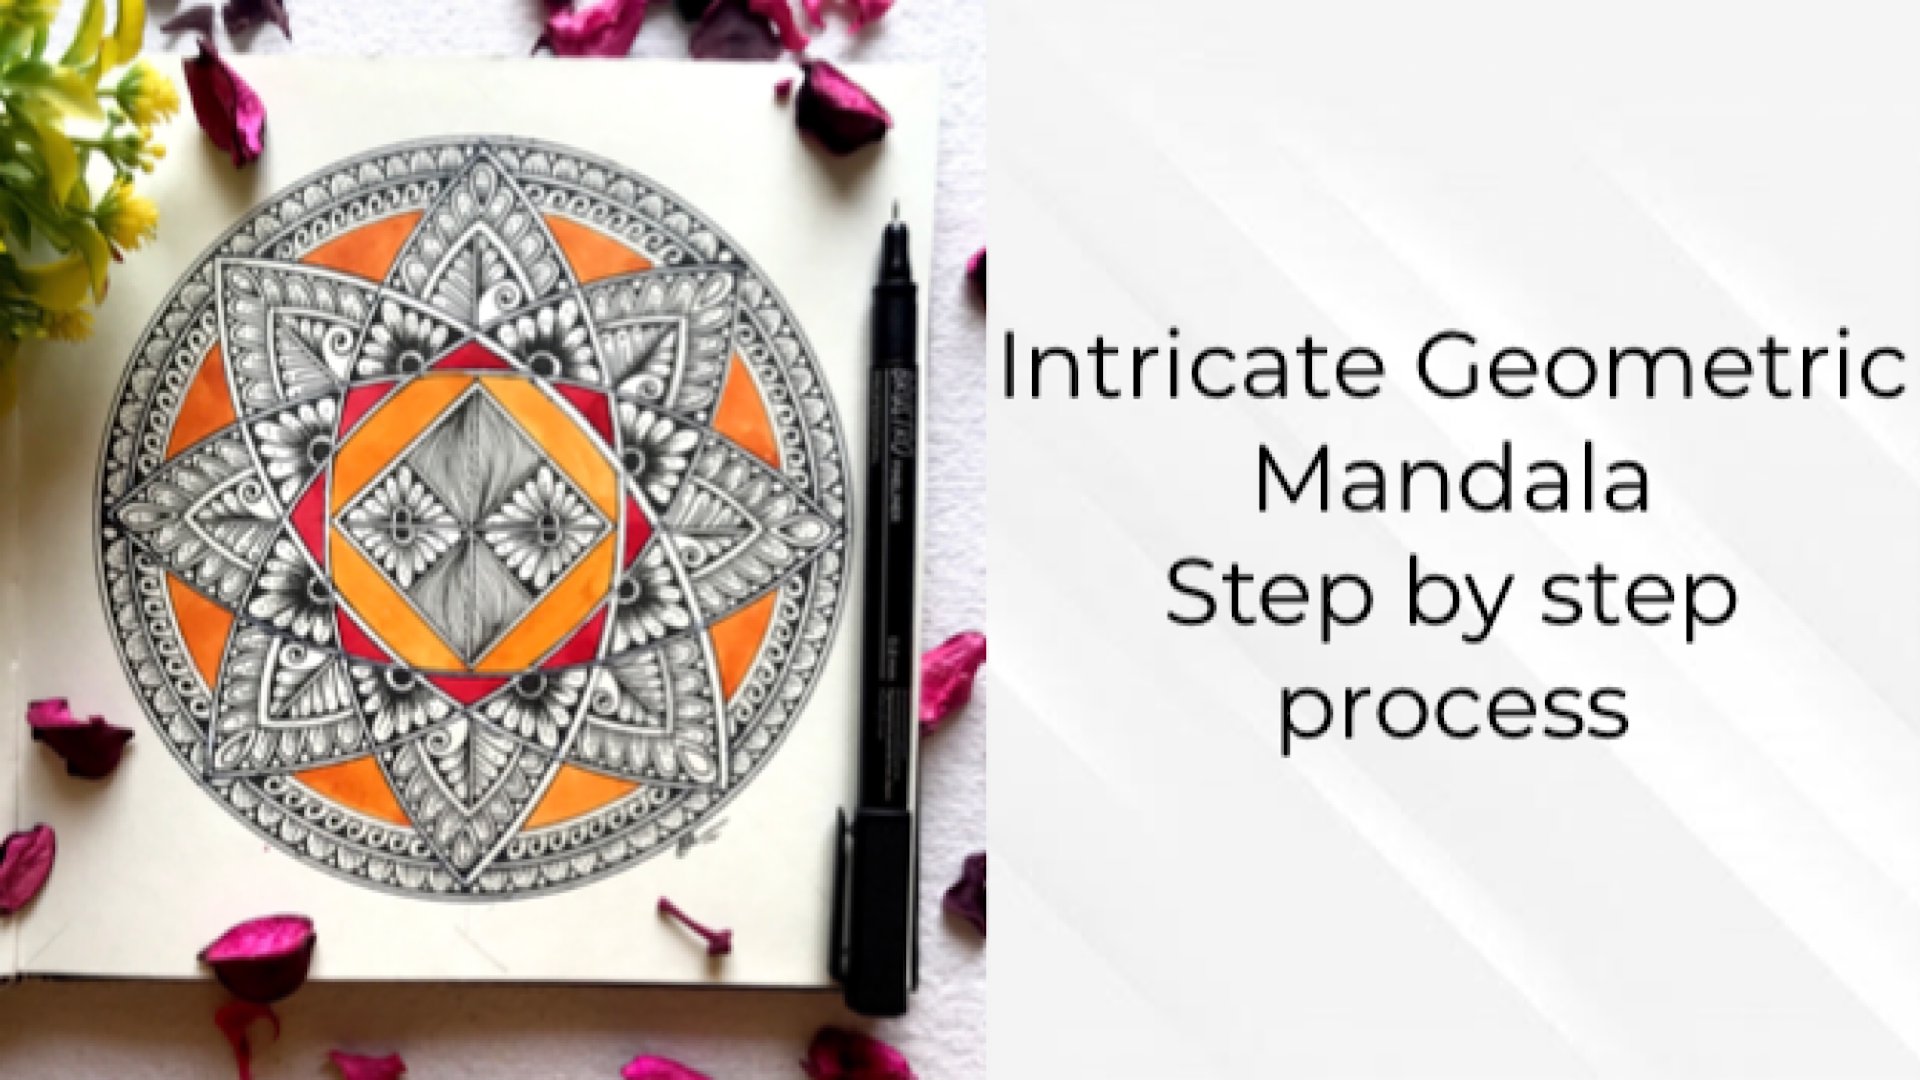
Transcripts
1. Introduction : Hello everyone,
myself, richer or watercolor in a Mandela
adls based in India. And I have been practicing these both odd froms For
the last five years. We can also connect
on Instagram. I go by the name otto stakes, just search me by the name
our districts, and that's it. Today, I would like
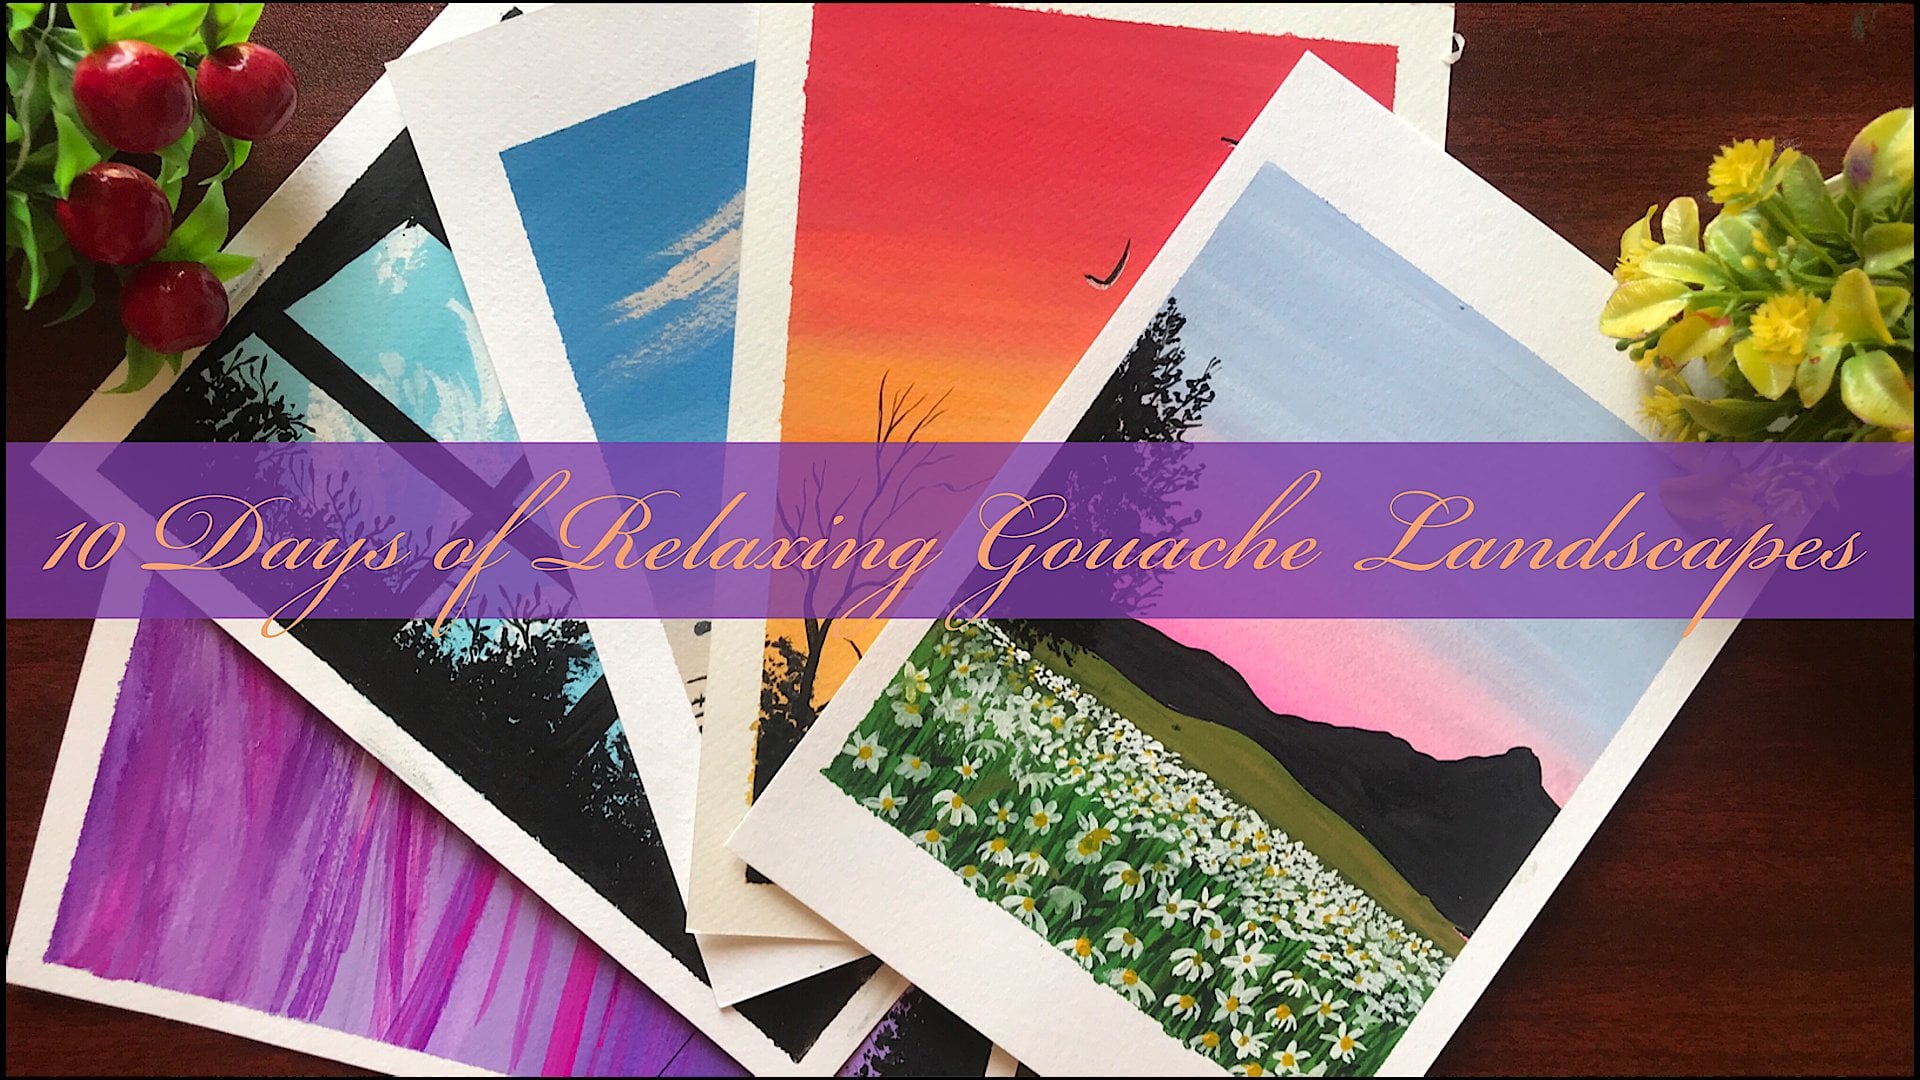
to welcome you all to my new Skillshare class that has five days of beautiful mandalas in which we will be
learning different kinds of 5 $1 in easy
step-by-step process. And these are very
beautiful to do. So let me give you a
tool of the projects that we will be
doing in our class. The first project is a
green leaf guage Mandela, which is done on a wash
bag around the right. And the second one is Floral mandala that has also has been done on the
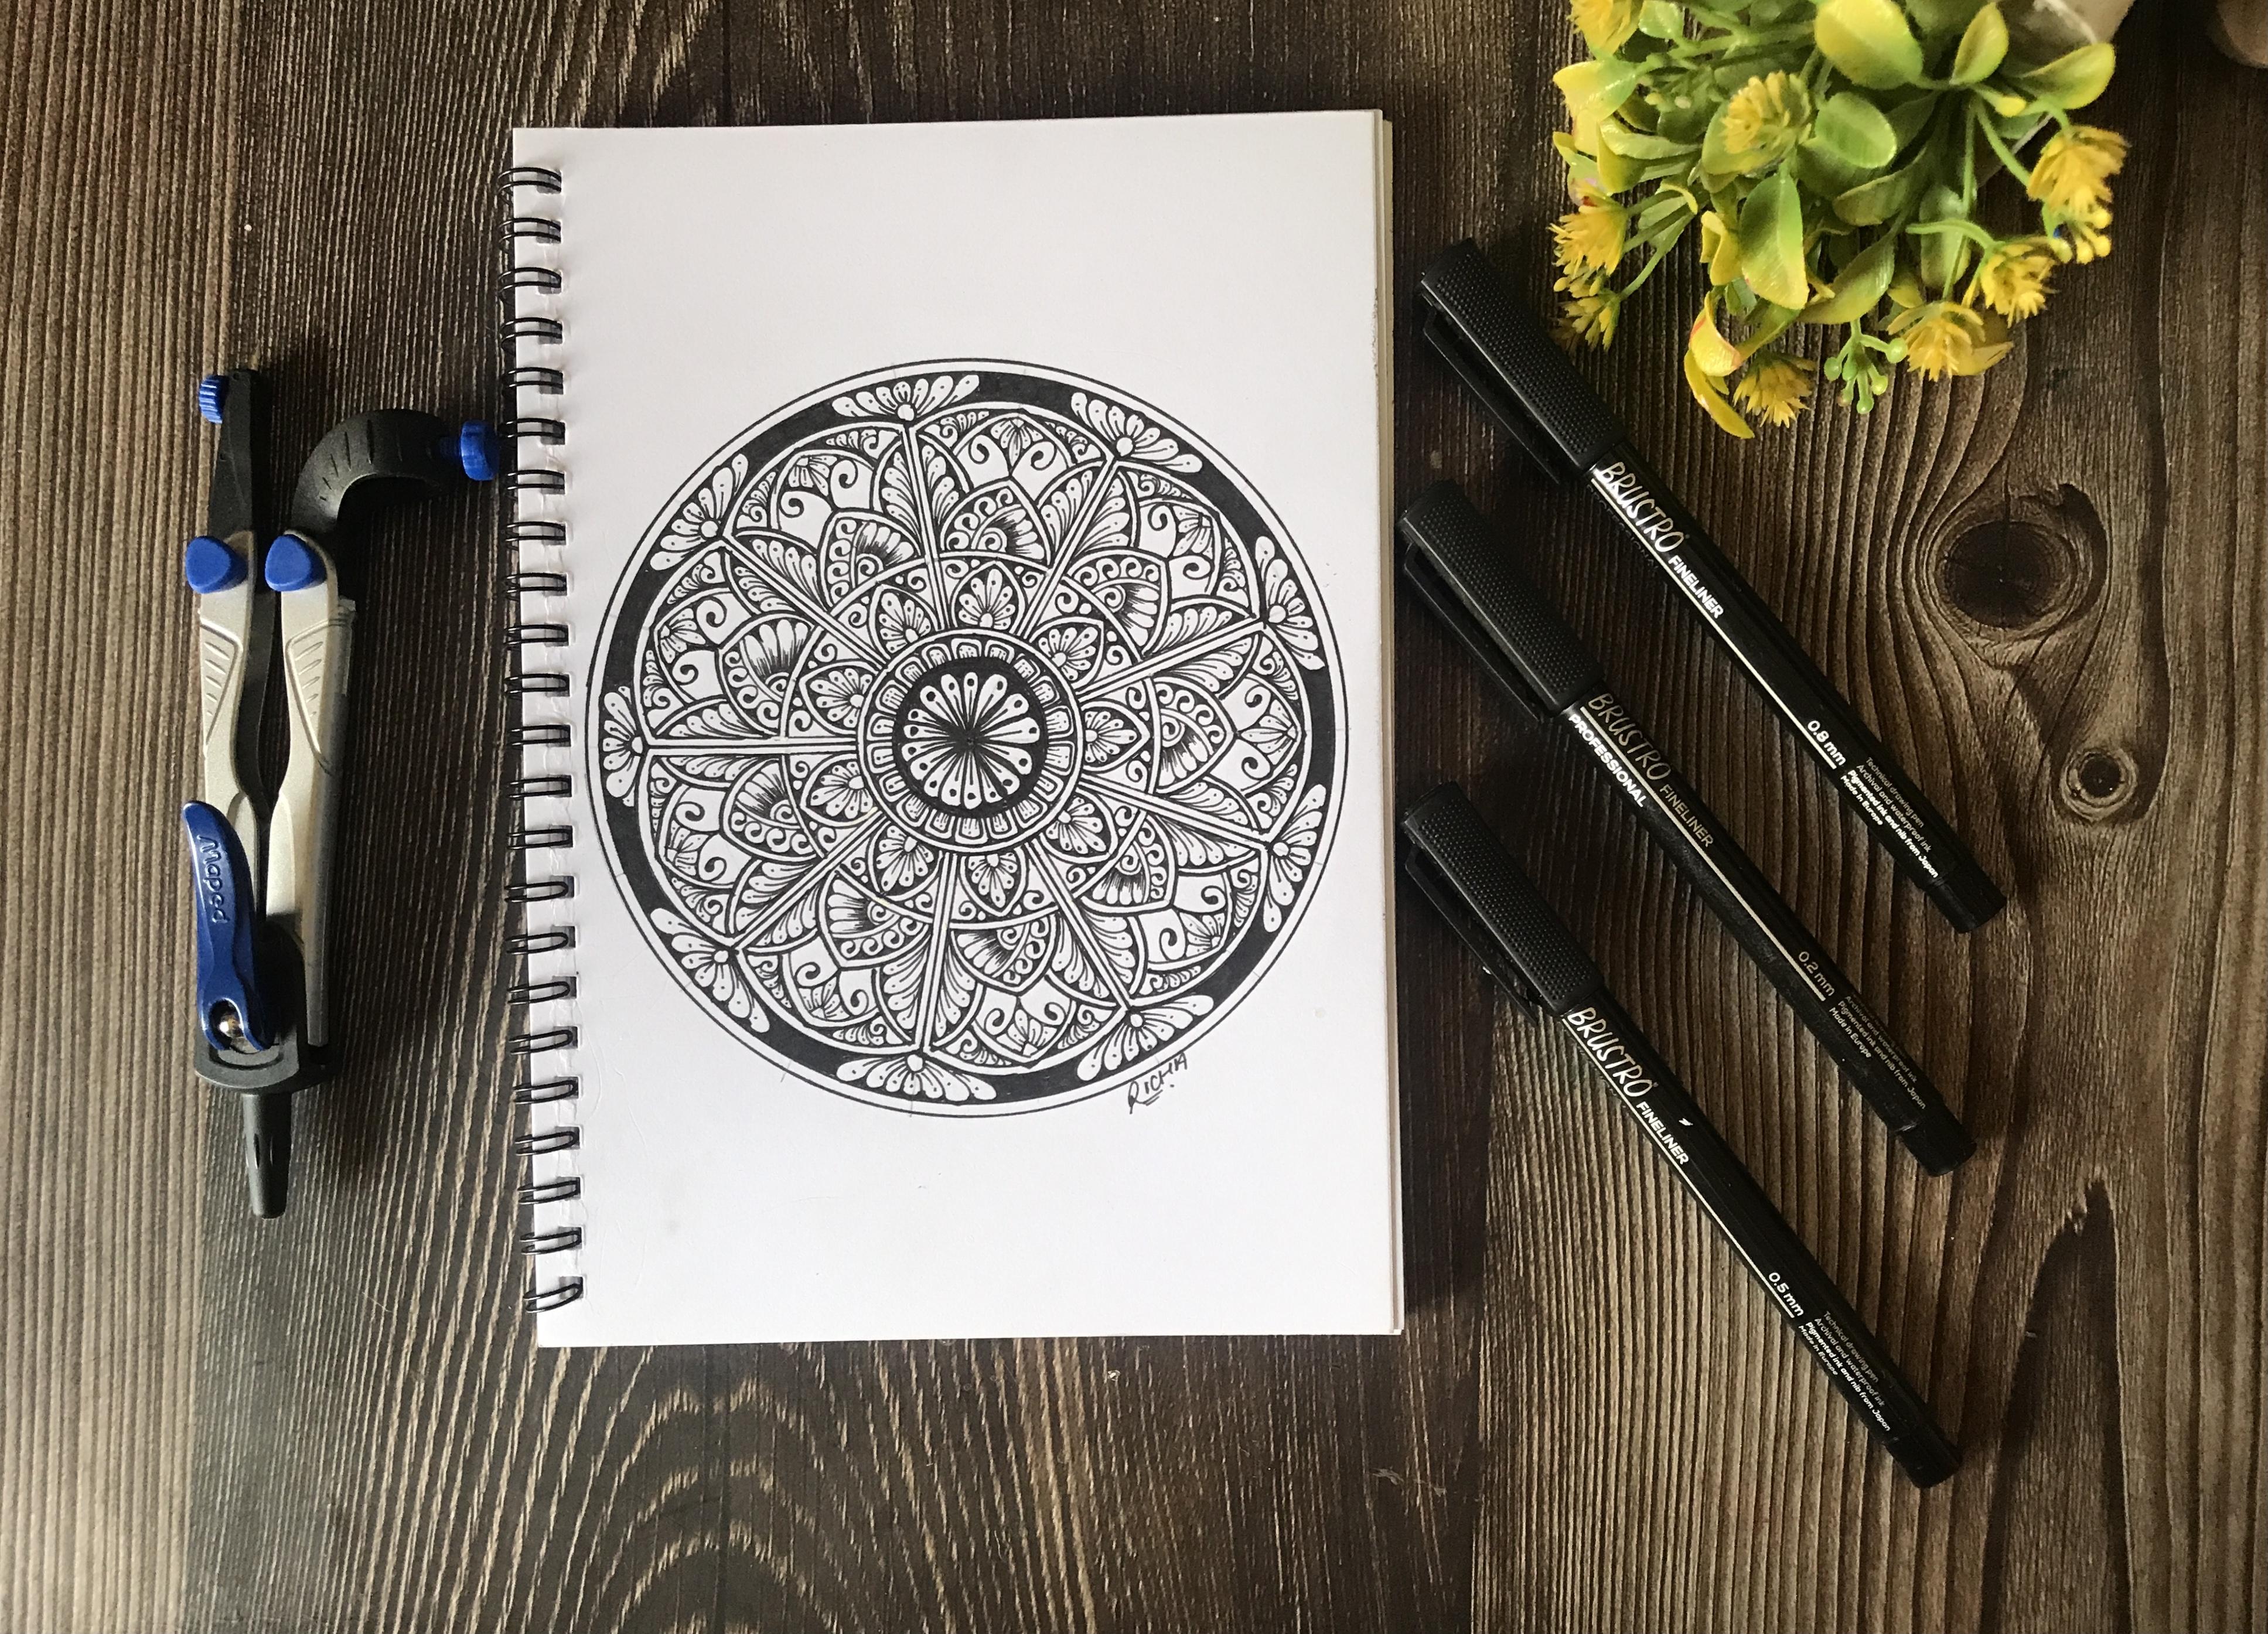
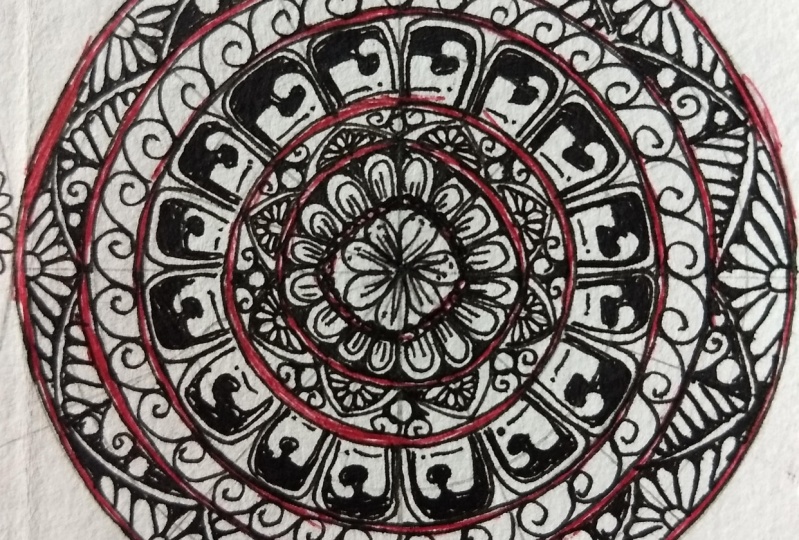
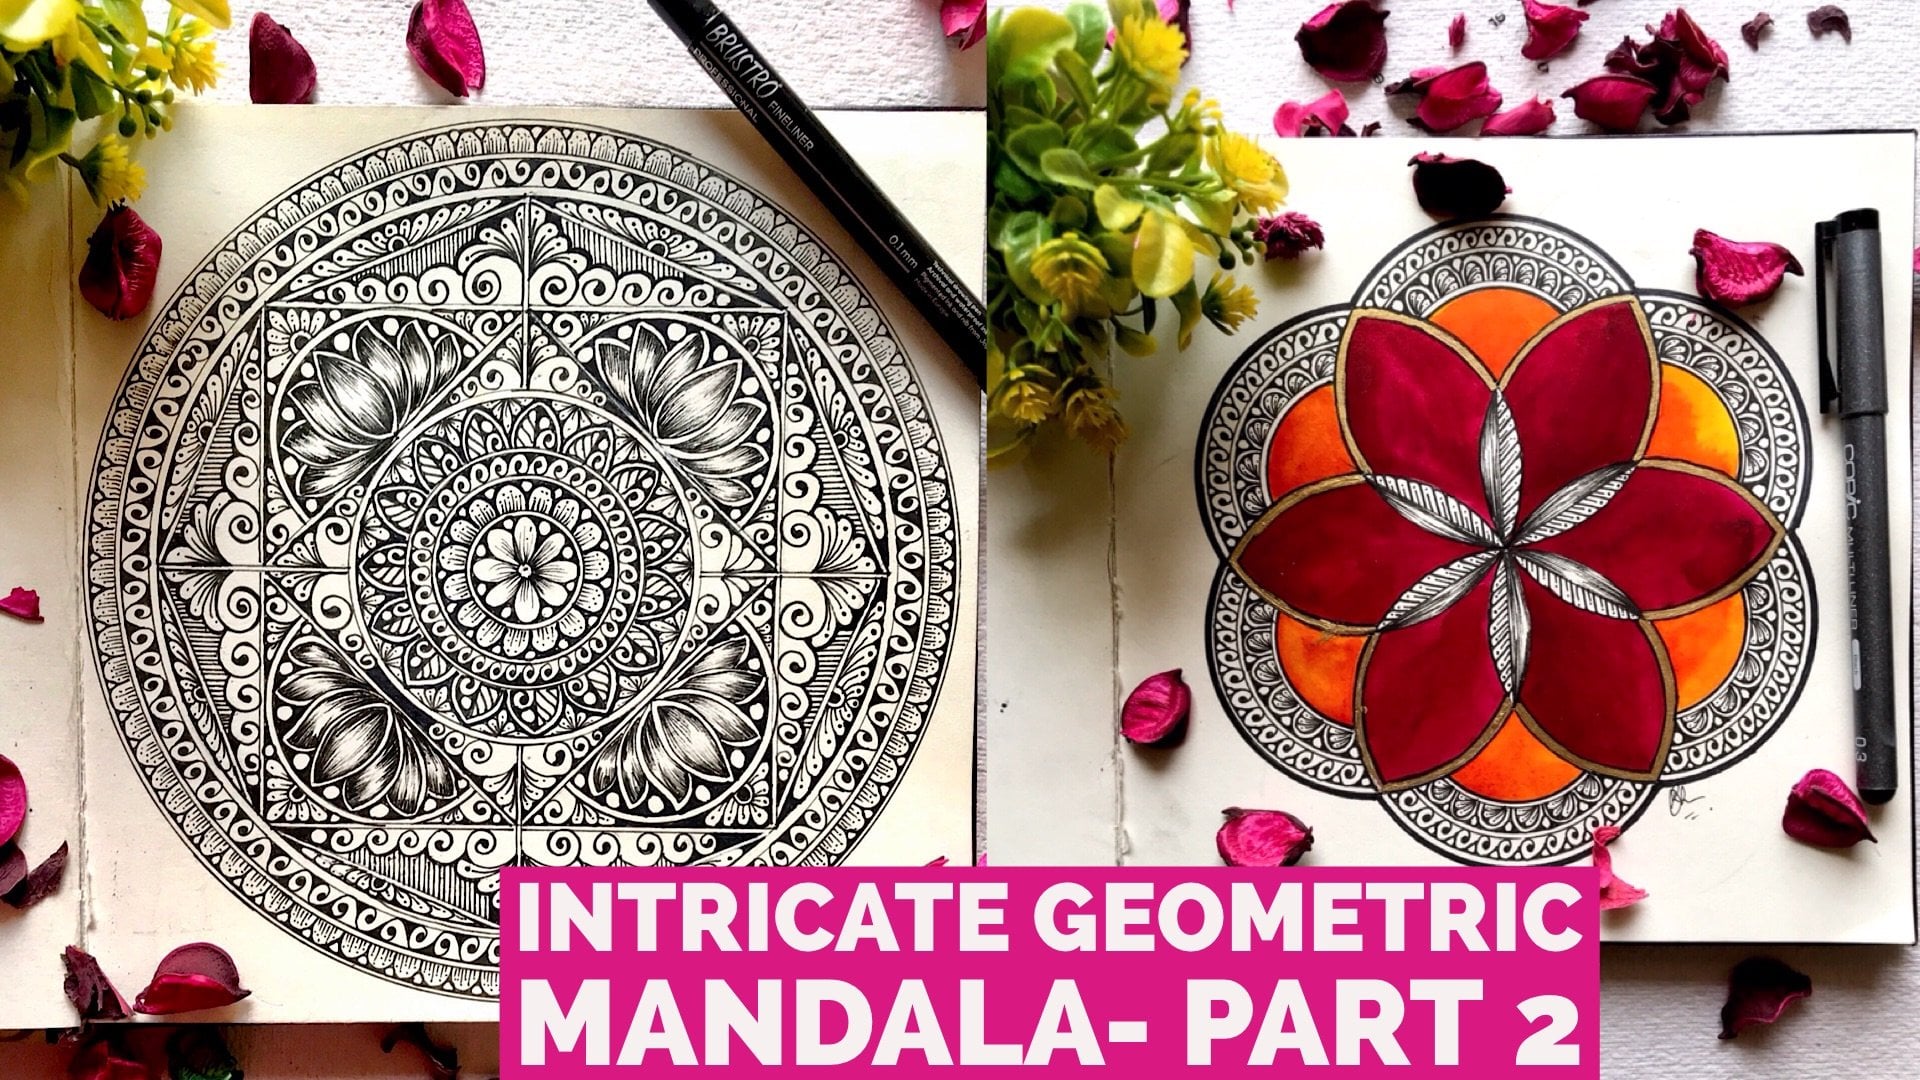
garage background. The third one is a classic
black and white Mandela and who doesn't love a
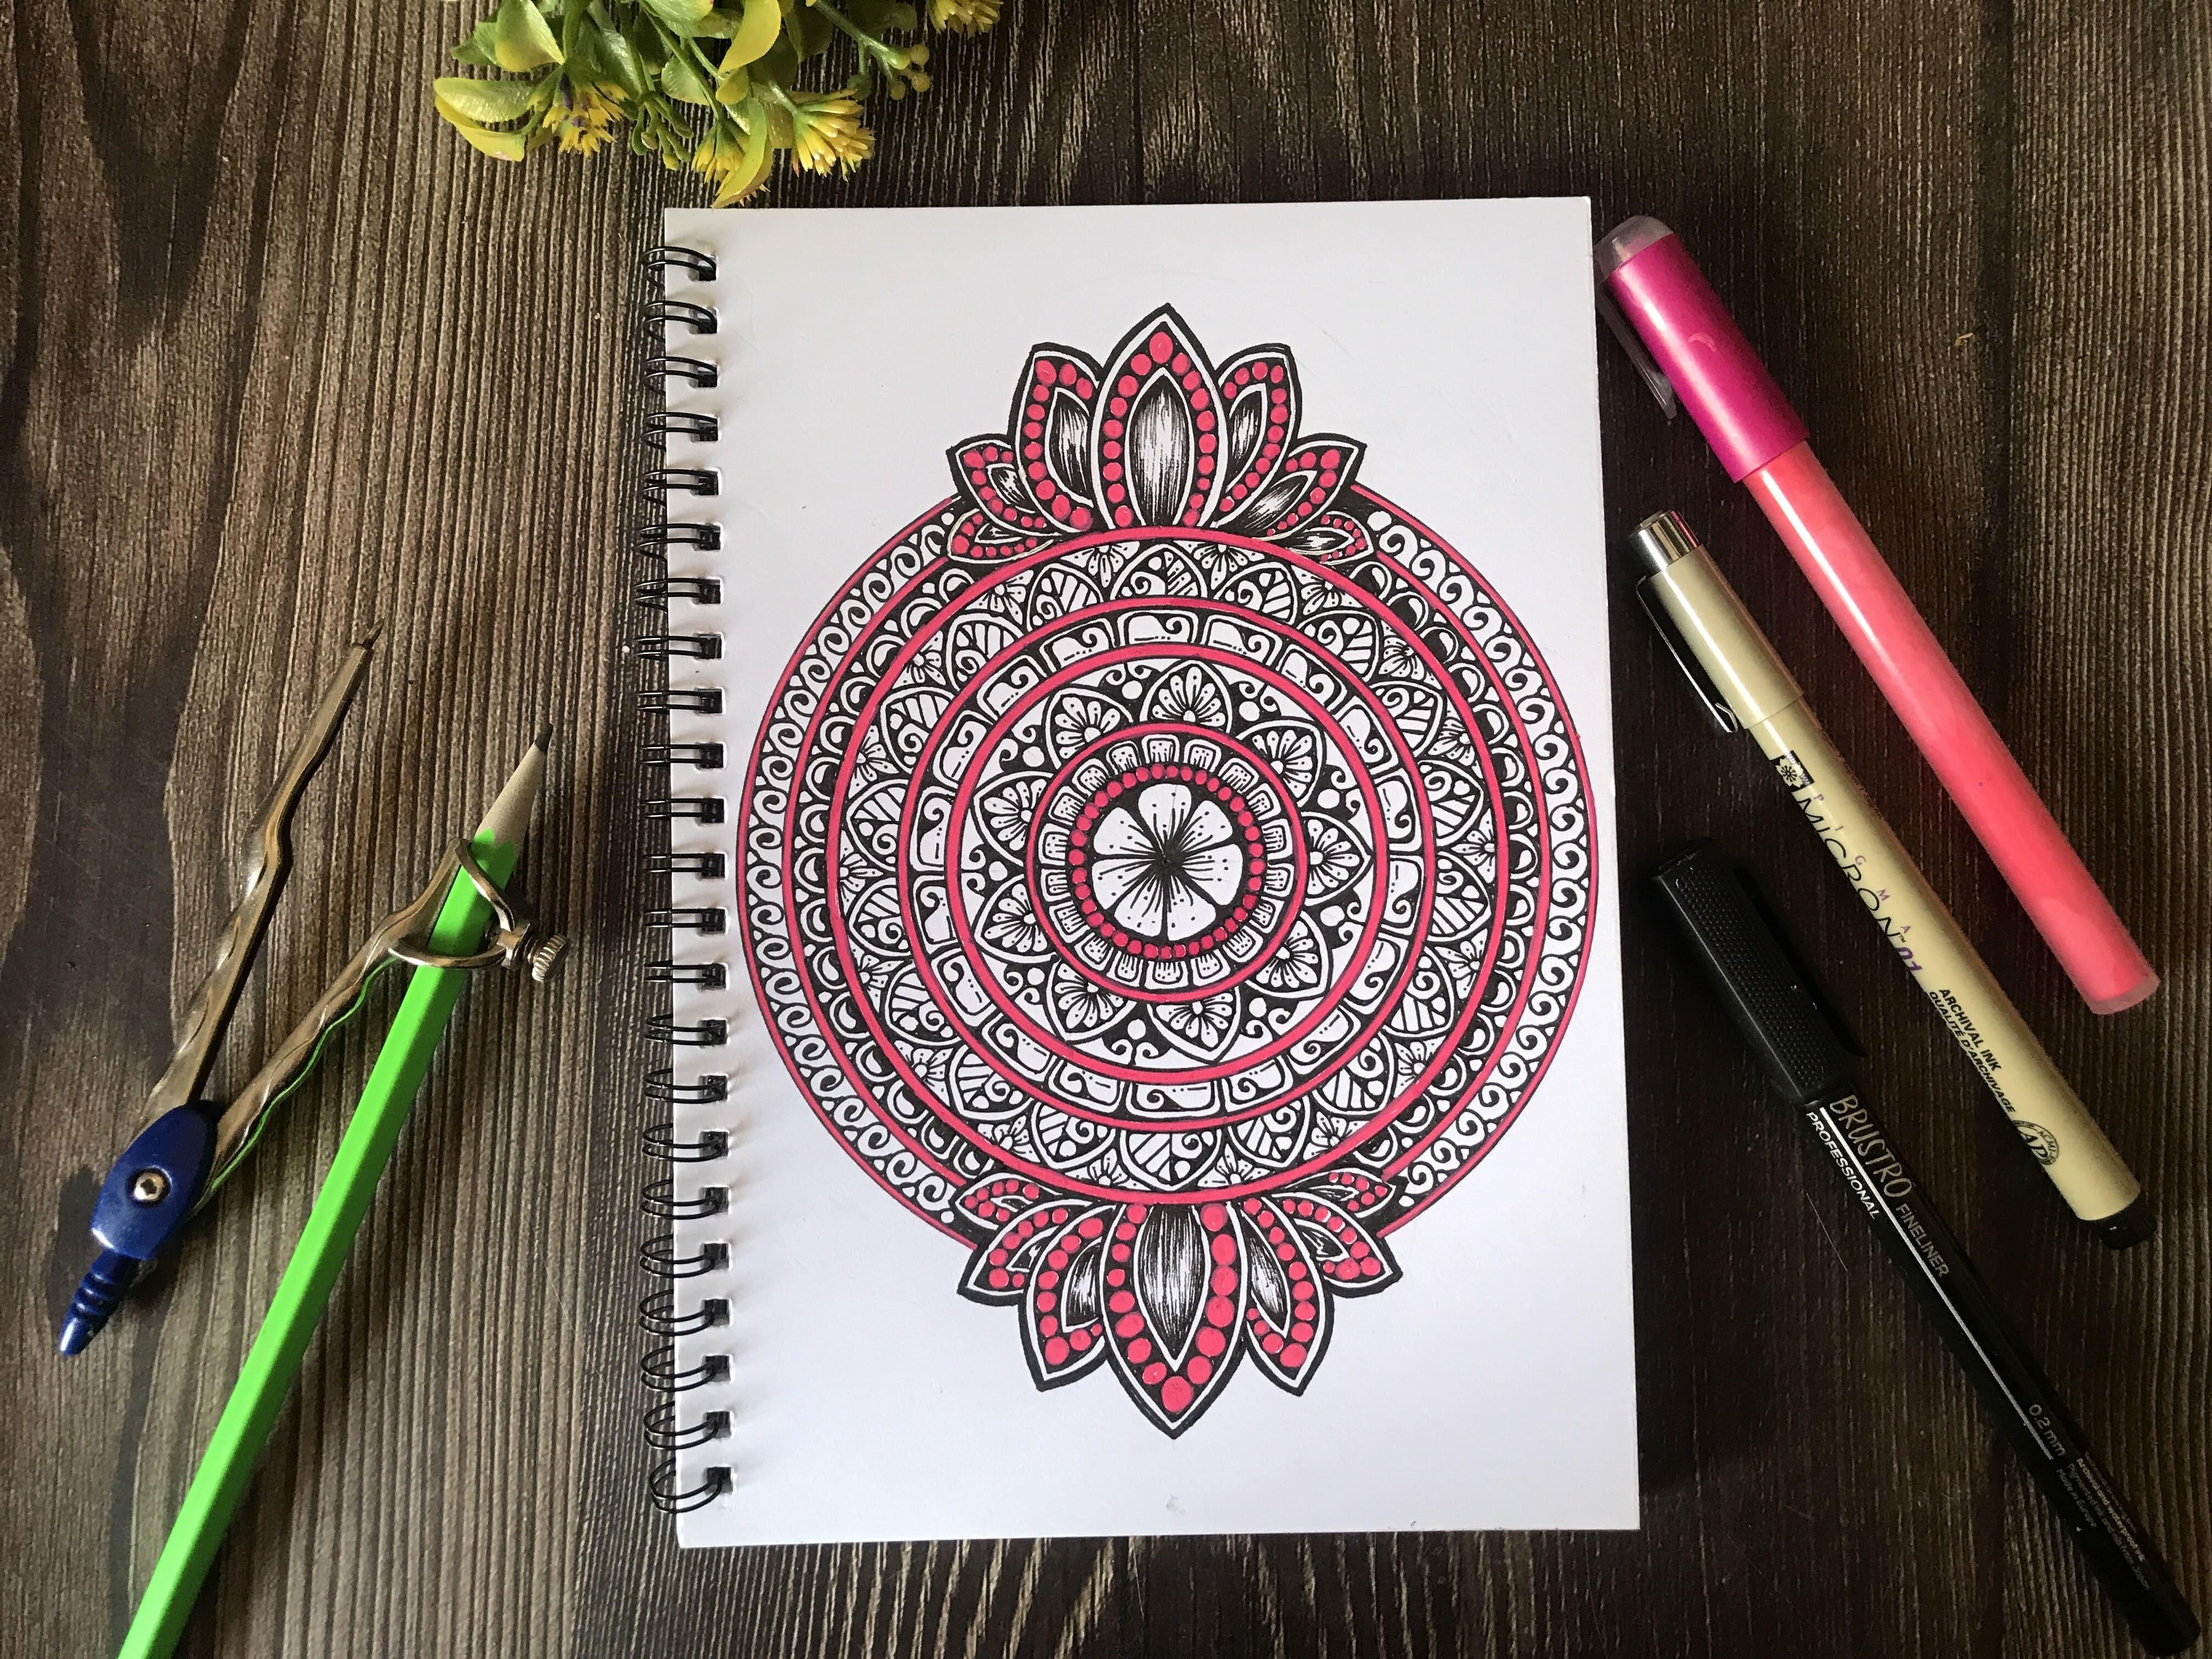
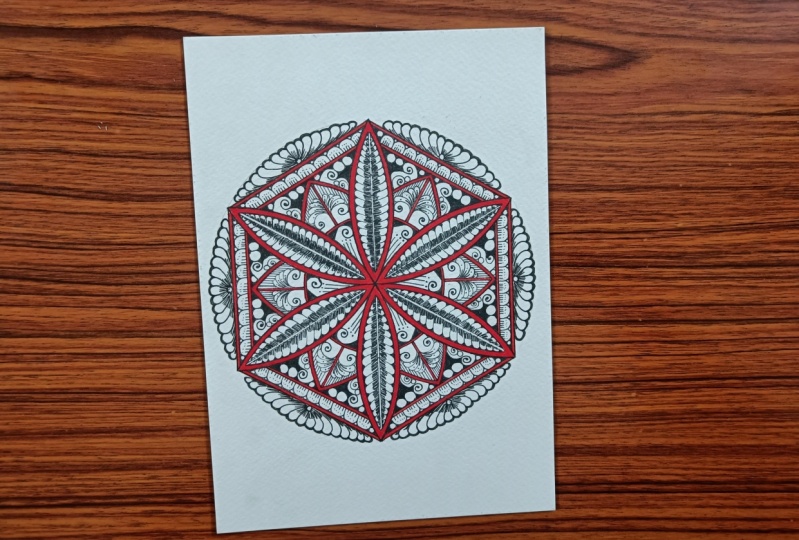
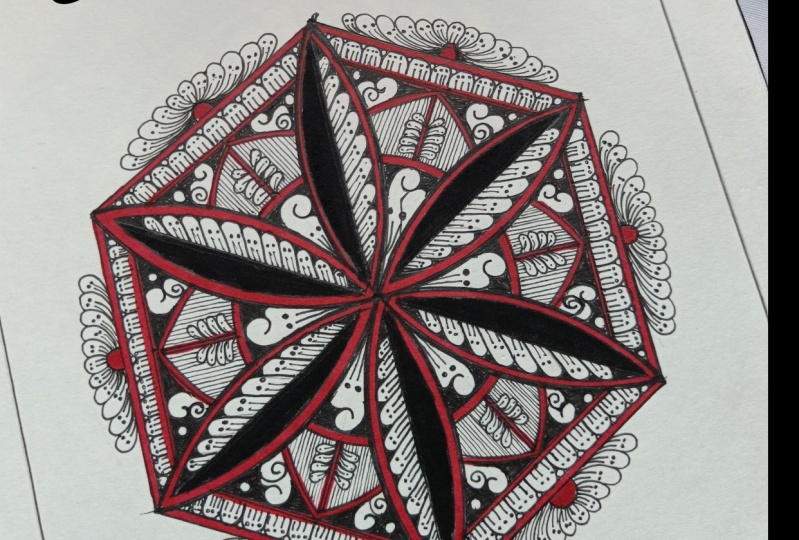
classic black and white? Everyone does. The fourth one is a hexagon
Mandela with a twist of red. Last but not the least, it is a ludus Mandela. So without any delay, let's get started
with our class.
2. Art Supplies: Hello everyone. Let us know the art supplies that we need in order to create our medulla. So we're gonna
start with campus. The campus I have taken
it is France deadlier. We need a pencil. It is a ruler and predictor. And we need 010 to find liner. We need masking tape, and we need some wash
or poster colors. Let's grab our paper
and I will start fixing the masking tape on
the edges of our paper. Once it is ready, we will move on to the color mixing chapter.
3. Colour Mixing: Hello everyone and
welcome back to the color mixing session. And in this we will be
learning how to make some color for the
background of our Mandela. Okay, so I am going to use post to color is in
the sap green sheet. So if you don't
have full circular, you can also offer gouache. And I'm also going to
use white gouache. The color proportion
is two parts of sap green into paths
of white gouache. If you feel your shadings
bit on the darker side, you can adjust the white gouache accordingly to your need. Second thing, when we
are mixing our color, we have to be cautious
that we have to prepare our color on a
creamy texture consistency. It should not be watery. So it will give the
effect of gorge as opposed to colors and Gorgias quite similar in the properties. Both are mad and both
are easily reactivated and weekend see the particulars are a cheaper version of gore's. As you can see, I've
colored is prepared and I'm gonna add some water to get it on a creamy texture consistency. So it is prepared. Now, I have already
taped down my paper. This sketchbook is 240 GSM. It is with this smooth
texture will get, this is an ivory paper. So if you don't have this paper, then it's completely fine. You can opt for any
paper, whatever you have. I will start painting our
background and I'm going to do a flat wash of Sap Green Bay style sheet
that we have created. If you feel your
brushes slightly dry or your color
is slightly dry, what you can do is
dip your brush in the water, remove excess water. I only have one or two drops of water is more
than sufficient. Okay? So in this way you will get a flat wash off sap green
and the color will be ready, and our background
will be ready to go is DD. So let's move on to the
detailing part of our Mandela.
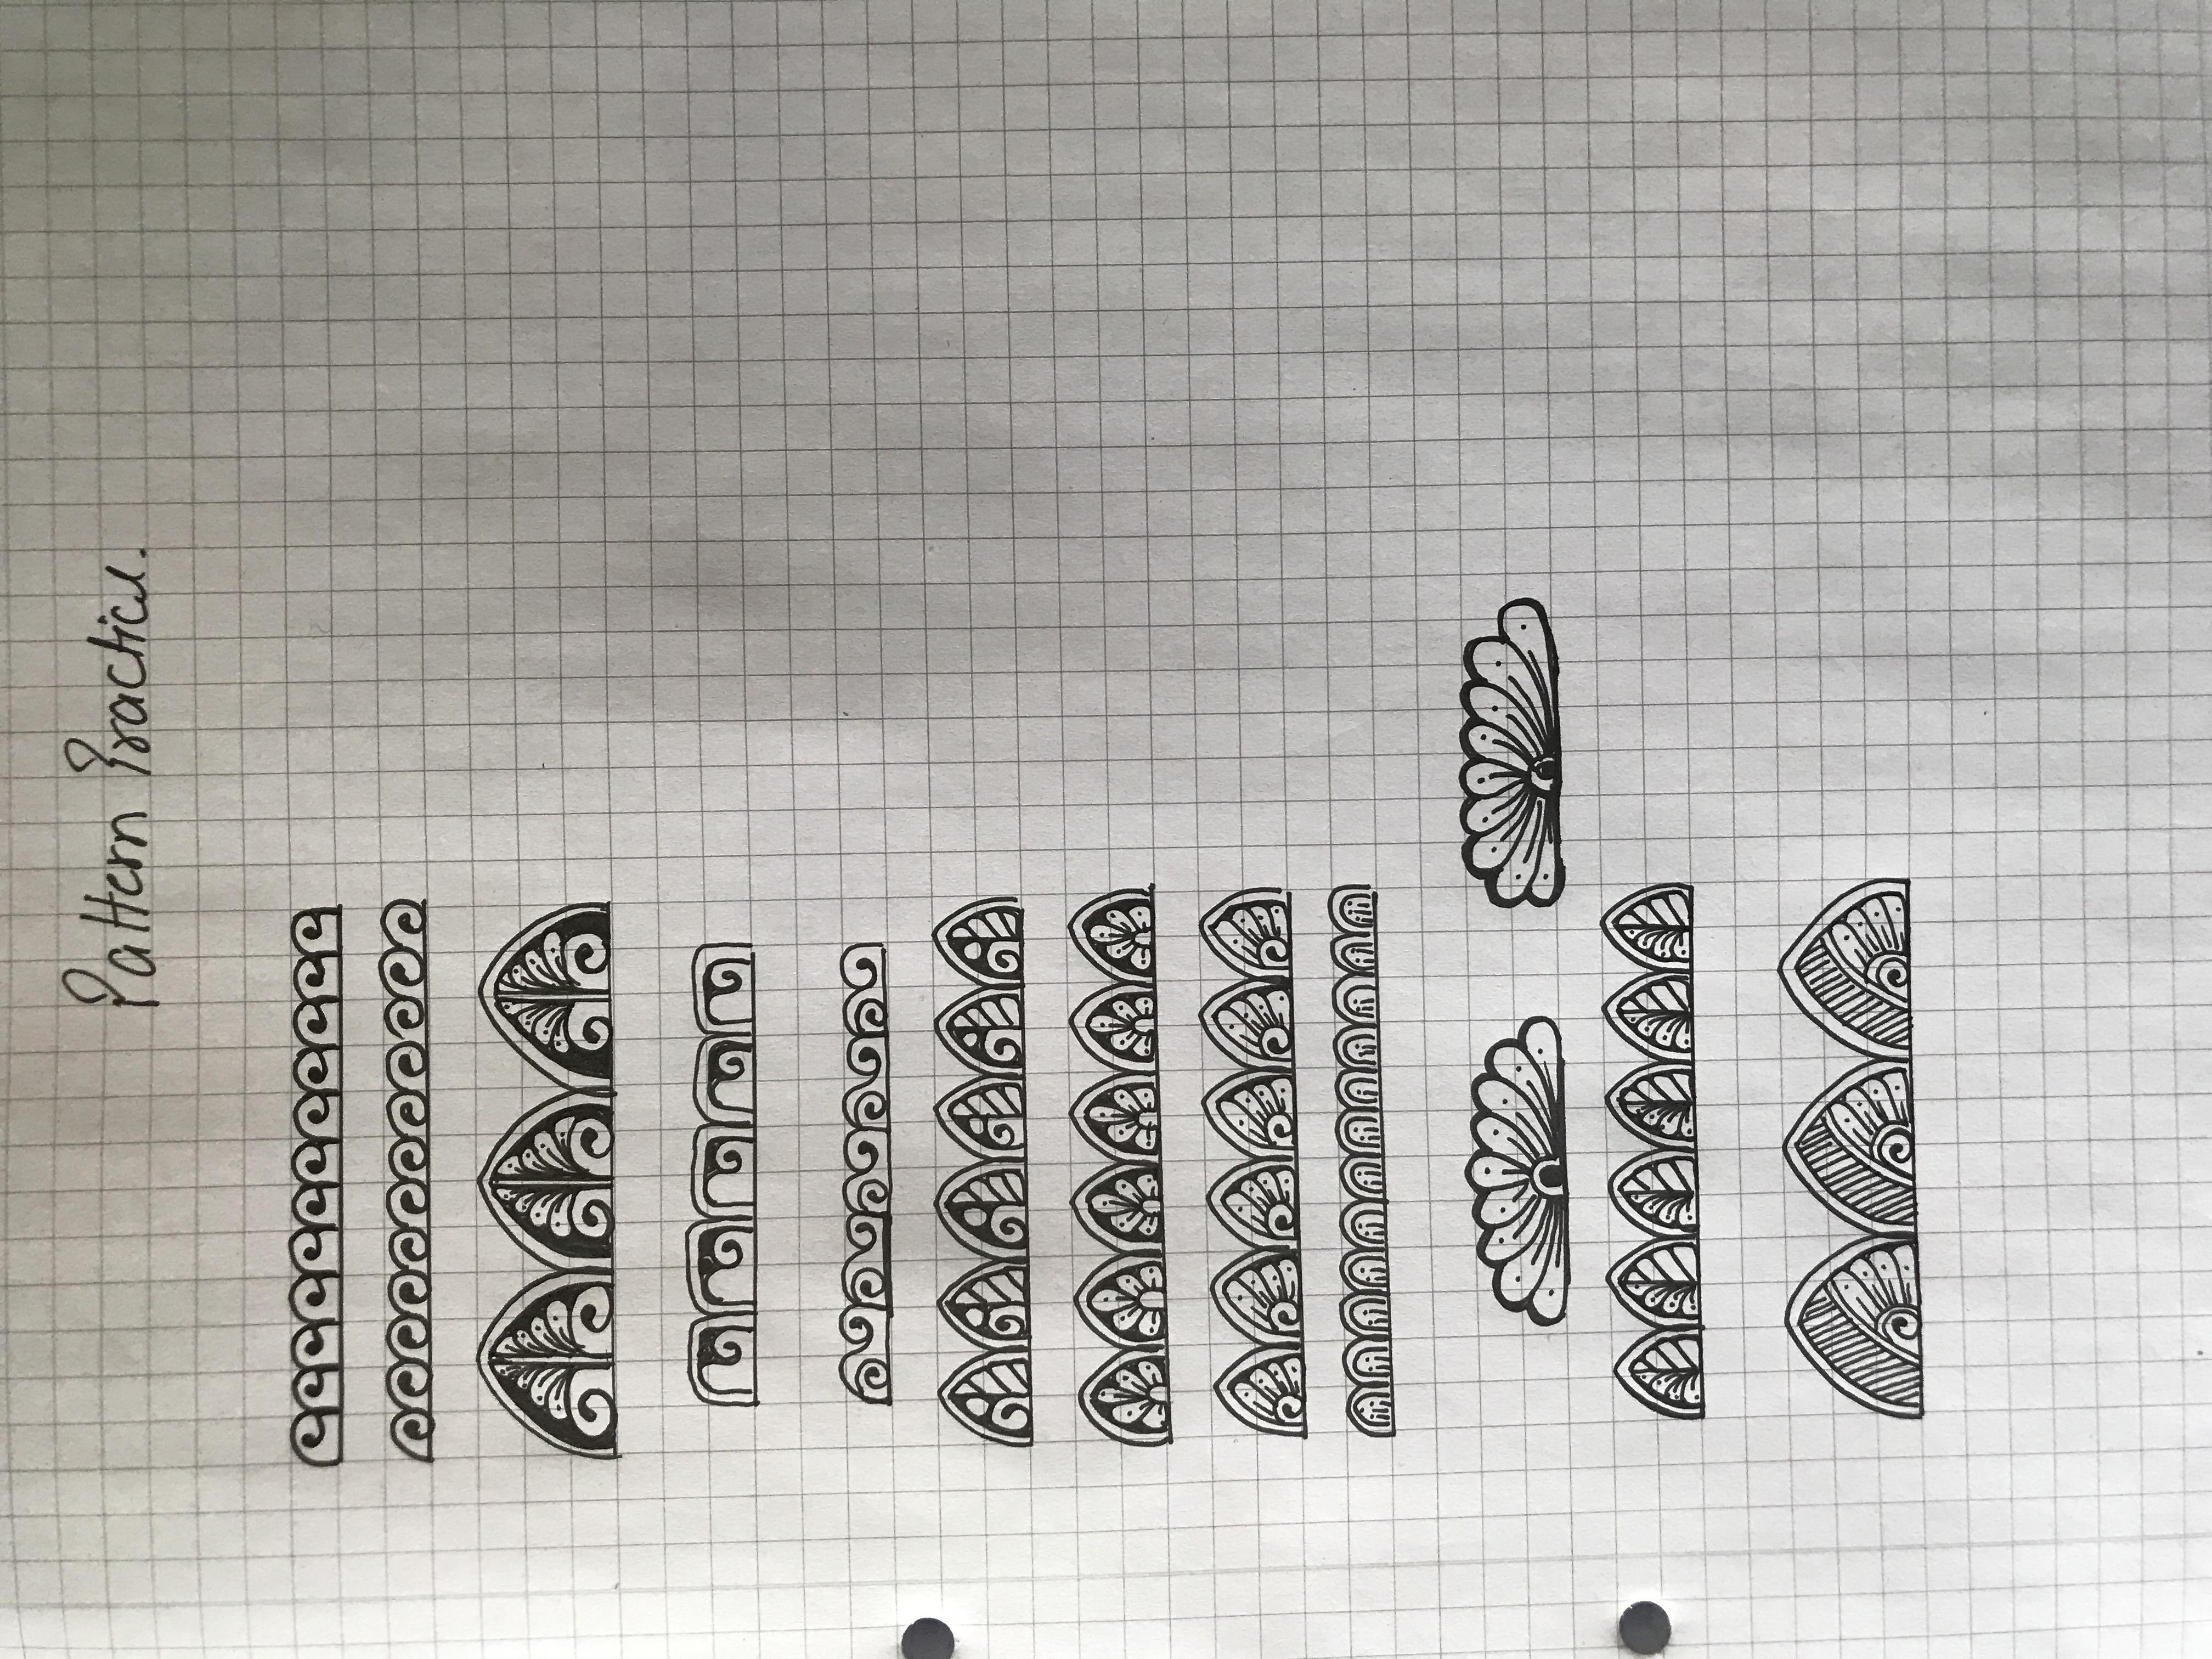
4. Pattern Pratice Exercise: Hello everyone and welcome back. In this session we'll be
doing some pattern platters, the battles that I have used
in all the five Mandela's that will read drawing
without any delay. Let's get started. I always make sure whenever
you are drawing the shapes, you do you use your
0203 number fine liner. And when you are feeling
details in those shifts, you're supposed to
use 01 number phyla. Such intricate videos, okay. And that pattern doctors
is almost complete. So let's see you guys
in the next chapter.
5. Creating Grid: Hello everyone and welcome back. So I background as ready. We're gonna start
prototyping a grid. So we have to find the
center of a beach. So I'm going to join all
the four opposite corners. And now where the line will
be intersecting both lines, that will be the
center of our page. So I'm gonna take
a point from that. And I'm gonna draw a line on the bottom part of our paper. And we'll get the center
of deadline. Fine. Once we will have the center, I'll take my campus, please your campus, protect
campus on the point. And then start drawing
random concentric circles. Or you can draw it at the
gap of 0.5 centimeter. We have to draw the circle still the both corners of online from which we have
taken the center and we are drawing the random
concentrate goods. And again, let me
tell you that you can draw it with a gap
of 0.5 centimeter. If you're not
comfortable with that, you can draw it randomly. Fine. Once they are done, I will replace my pencil
with a permanent marker to draw the outline of our
goods. Let's start it. Make sure whenever you are drawing the outline
of your grid, the concentric circles one, you always double line it because it will give
more Phenice in your patterns when you will draw the finance and the
shapes on the grid. Now we are going to mark
ten degrees of angle, each on the outer circumference. So far so good, the median one. Once it is done, we will start joining the
line from those angles today. Center of our Mandela. Please see on the center
of a Madonna and start joining the lines to the relevant angles
that we have created. We have to repeat
this process in the whole half circle
that we have created. Our grid is complete and
I'm going to start drawing shapes to be filled with buttons and I am using 01 fine liner. We'll get these other
shapes that we have practiced in the
technique section. So just before I start drawing, it goes through the
technique section to get a hand on these
chips and fellows. Draw the outline of the shapes I am going
to use ten dip my GPA or what you can do
is you can also use 00 for number. Fine liner. That's completely fine. As I don't have right
now it with me. So I'm using a thin tip permanent Margot to
outline my shapes. Okay. Now I'm gonna start
the outlining our shapes with the help
of the 01 fine liner. Okay, once this whole
process is done, we'll start filling up. Betty does. So when
you are creating the layout of your mandala, take it easy, goes slow. You don't have to Josh's enjoy
your time in the process. It is almost complete, so let's move on
to the next spot. And that is a detailing
section or foreign Mandela.
6. Adding Details: Hello everyone and
welcome back to the detailing session
or firemen dollar. Okay, So these are
the patterns that we have plugged this in the
pattern practice session. I don't think that you will
be having any problem. Once I will do some patterns. And then I'm going
to fast forward the process because I have
already told you about it. Okay, so let's start
up the D dealing. Now we will complete
this layer with another floral
pattern that is very easy to do and it is one of the most favorite patterns of
mine to fill up the layers. Again. So let's get started. For this layer, we
are going to draw a small, fastly design. It is one of the most frequently
used patterns and Mandela and
quite easy to draw. Okay, So just go through with the patterns action
technique equation. So you will find all these
patterns practice then, and you'll also find a button
cheats to practice drawing. Okay, so here I fast
forwarded the process because I was going to repeat
the same thing. Right. The right highlights
to our mandala, I am using a signal
white gel pen. What do you do is you can
also use white gel pen, okay, that we're required
to do in Ottoman data. Let's finish it and move on to the last kid. In the next shift.
7. Adding Details 2: Hello everyone and
welcome back to the detailing session by T2. And in this, we are going to
complete the final layer. Let's start adding the
shapes in the final layer. Now, we're going to add the white highlights
and our mandala. Okay, so you can use
signal white gel pen. Either you can use a white acrylic marker
or Posca marker, or you can use a white gel. Once it is, then we'll move
on to the last chapter. Okay. Now for the contrast highlight, I am using our light
green postcard. Or you can use any other marker or sketch pen or watercolors, whatever you have,
you can use it. Okay. So we're
going to highlight the little spins that is left
in between the two layers. Okay, so it gives a nice refreshing contrast
look for our Mandela. Once we are done coloring dad's particular areas that I have already
told we are we are now going to do
the double line on those ideas so that
it won't look messy. Okay, Ben will complete
our final medulla. Then it won't look
messy and it gives some very beautiful and
clean and fresh look. I wanted to dealing
part is done. So we'll finish those center, these all fire Mandela, the center Flatow
from Mandela with the shading techniques
that I have already told in the
technique section. And then we will move ahead
to paint some leaves. And for that I'm gonna
use sap green color mixed with a dark
tone of viridian hue. Okay, so I let you know about this thing and
the next chapter. So let's finish it and move on to the next
chapter. Thank you.
8. Painting Leaves: Hello everyone and welcome back. In this session we will be painting some good full
green gouache leaves. And I am taking the same sap green color that we have used to paint
our background. This time we are not
going to light the color. What we're gonna do,
we're gonna make a dot, few shades on the darker sides. Okay? So I have taken two
parts of sap green and I am going to add three or four part of viridian hue in this color, so we will get a darker
tone of sap green, and mix. Okay, So let's start
prepping our color. Color is ready, so let's
start painting our leaves. And first we're going to
draw a branch and the brush, then I am using
It's three numbers, round brush with a pointed tip. Okay? We're gonna,
we're gonna follow the same process that we have practiced in the
technique section. Leaves are done. So once it is done, I'm just drawing the final leaf. And once it is done, we will remove the
tapes and reveal the final Madonna painting
that we have done. I hope you guys have
enjoyed the session. Don't forget to upload your projects in the
project section. I would love to share
them on my Instagram. And thank you so much
guys for joining me. Thank you.
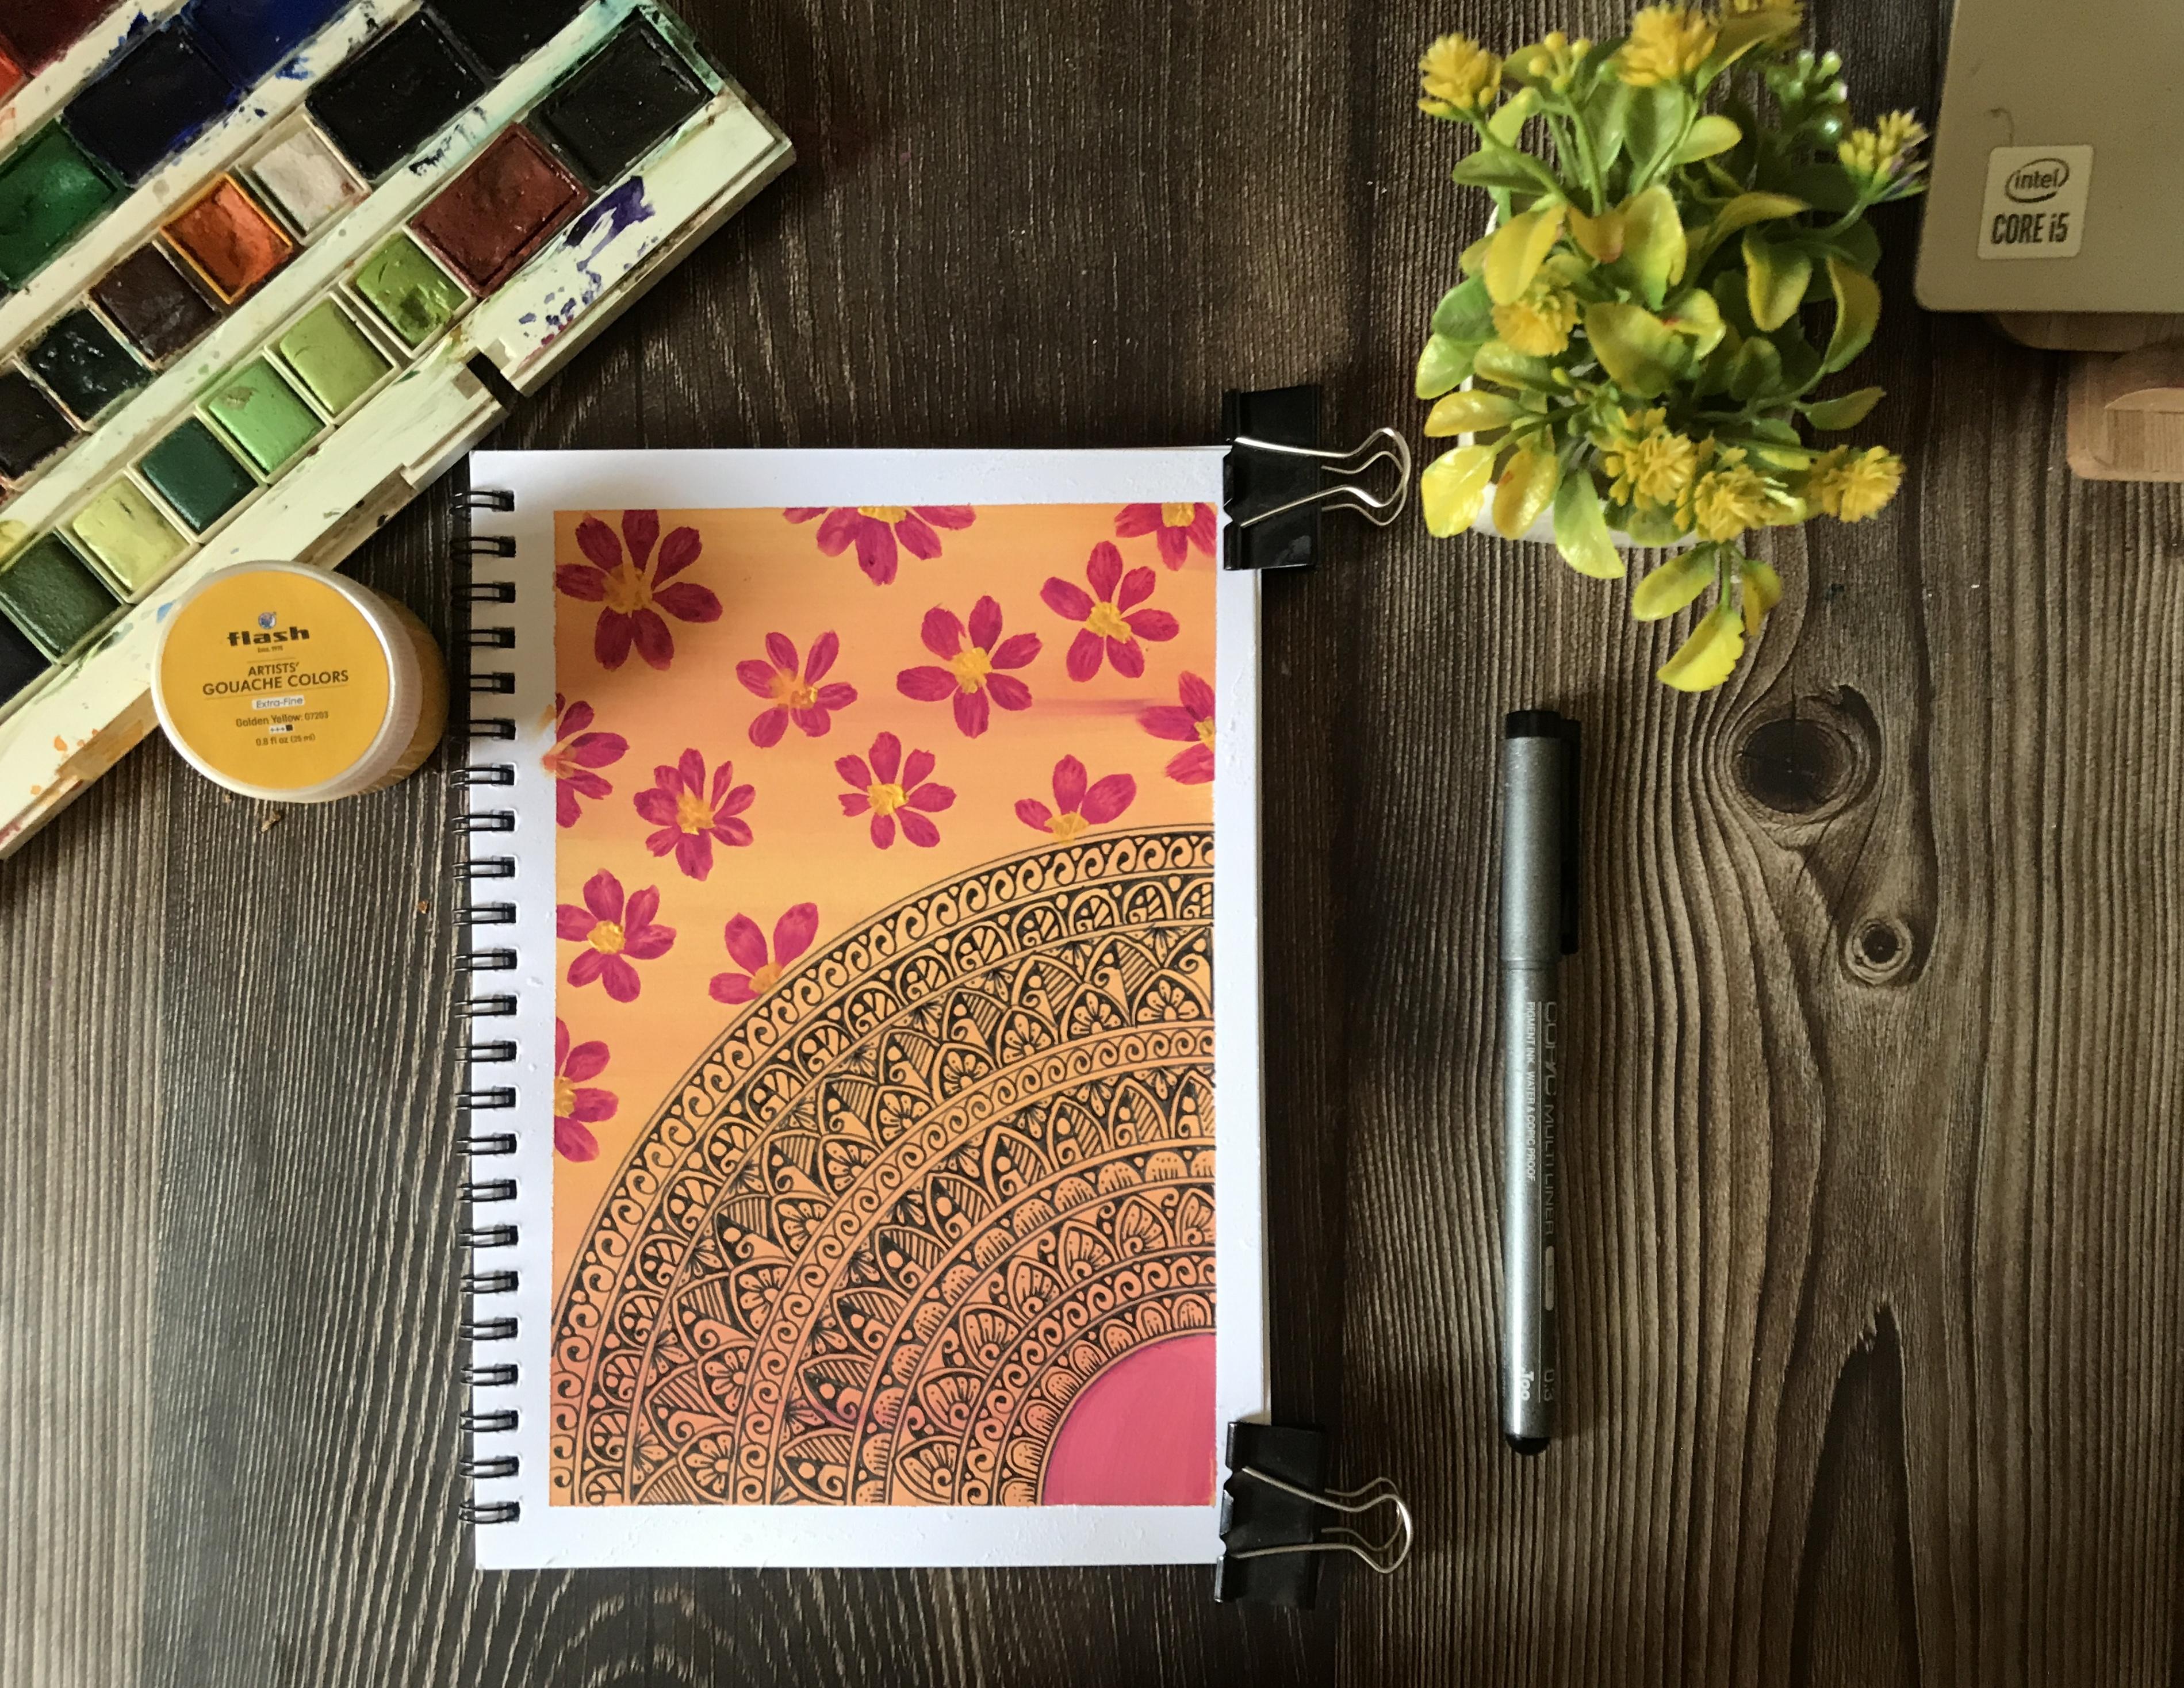
9. Floral Gouache Mandal Painting Background: Hello everyone and
welcome back to another amazing session
of garage Madonna class. And this is the
floater garage Mandela that we will be creating
in this session. The background and
the photo booth had done with the
help of a gouache. So without wasting any
time, let's get started. We will start typing our paper by taping it down on
all the four sides. So once it is done with a move forward to the color
mixing session. Okay? The color that I am going to use our media, yellow, rose, and white color. Okay. So we had to take
two parts of muddy yellow, just a hand-off rows and
whitewash, one bond. So we have to prepare a color on a clipping texture
consistency so that our gosh won't loses
basic properties. That is opaqueness
and matte finish. Now our colors ready, so we will start painting. It will be a flat
wash of one color. We are not going to
do a gradient wash, so it is quite simple. You just have to paint your full paper with the
color that we have prepared. Okay? Once it is done, we will move forward
to the detailing part. It is done. So let's move on. Let it dry and move on
to our detailing part.
10. Creating Grid & Painting Florals: Hello everyone and welcome back. In this session, we
will be creating crowded and we'll be
painting florals. I have placed my campus
in the top-right corner, in the bottom-right
corner of our page. Okay? I am drawing random
concentric circles, but what you can
do is you can also draw circles and a gap
of 0.5 centimeter. That's completely fine. Once we are done with it, we will create angles
and we will divide our Sonka circles
and do it angles. What I will be doing that I will be creating this
Mandela free hand. But what you can do is you
can place your product or on the top bar on the right
bottom corner of our page. And you can also draw angles
with ten degrees of gap. Okay, So once it is done, start outlining
your Mandala grid. Like the way I am doing. And what I'm gonna do
is I'm going to do the double line eat sections so that once we
will add details, it will be crisp and clear. The details won't
margin to each other. Now our grid is complete
and what we're gonna do, we're gonna paint our fluids. And you have to take rose
color and just hold your brush and press the belly of your brush so that it will
create a petal type effect. And this is the way we
are gonna paint flowers. And it should be random. And if you're not
comfortable doing directly, brush what you can do is you can also outline the Florida, the one that I am doing
and then you can fill it nicely and easily with the
help of the round brush. And I am using three
number round brush. Okay. Floats are almost done. And let's move on to
our detailing part.
11. Adding Details Floral Mandala: Welcome back. So in this
session we will be doing the details in the grid that we have created in
the previous session. And all the pattern exercises are available in the
technique section. So if you want or
I say you must go through the technique
section once before you start
creating your Mandalas. And these are the
very easy to do patterns that I have
selected for you guys. Okay, So once I will draw
a pardon, and after that, I will fast forward
the process a bit because I will be repeating
the same patterns. So if you are having
any difficulty, what you can do
is either you can slow down the video
or you can go back to the technique section
where I have thought patterns for this Mandela
and the previous one beyond dandy Dalian
for this session. So for the last three
layers that we have, the March detailing within, the second last and
the fun below do it and the other one
below to that also, we will be doing details in these layers in
the next session. Okay? So I'll see you
guys in the next section.
12. Adding Final Details Floral Gouache Mandala: Hello everyone and welcome back. And this is the last session of adding details to
a fruitful medulla, will be completing the
last three layers. So let's get started and to practice these patterns
and detecting section. So you can go along
with the process. Fill up the negative spaces. What you can do is you can
use your pen tip marker. I always use a CD, DVD market because that's mode, convenient for me to fill up the negative space that
we have in our mandalas or whatever we left when we
are done Vidar patterns, okay, So this is just a protein. We can use that CD, DVD market with attentive. Or what you can do is you can use a fine liner of 08 size. That will be perfect. If you feel that
your fine liners are not working on
gouache properly, what you can do is you can
change the nib size to three. As I have also switched my
fine liners and right now I'm working with a 03 fine liners because this problem
doesn't happen. But maybe in case if it is
happening with you just change the lip size and a
switch 203 finalized English. Now detailing BARDA is
almost complete and I am just giving the final touch ups. To fill up the circle here in the bottom right
corner of our page. I am using the rules. Club gouache. If you don't have this one, What you can do is
you can opt for any thinking sheet
that you have. Are Mondelez almost
complete, vivid. Drop the, we will paint the center of our flaws with
the mid yellow gouache. Once it is done via, we'll remove the tape and
review the final Mandela. And I hope you guys have
enjoyed this session. Don't forget to upload your projects in the
project section. I would love to share
them on my Instagram. And thank you so much guys
for joining me. Thank you.
13. B&W Mandala Grid Formation: Hello everyone and welcome back. Today we are gonna create this beautiful
black and white $1. Without any delay.
Let's get started. I'm gonna first the
center of our beach. We have to join the lines from each respective corner
to their adolescent fun. And we will get the center. And once we will get the center, we have to create a circle with a circumference
of 6.5 centimeter. We have to draw concentric
circles at the gap, both 0.5 centimeter, okay, and the circumference of
outermost circle is 6.5. Let's start dividing r goes into 20 degrees
of angle each. So place your predictor on the center point
of good and then start marking the 20 degrees
angle on both of the sides. And once it is done, we will join the angles to
the center of our Mandela. Let's start inking the
layout or one-off first, do the double line of the outer circumference
of our Mandela. We have to create an odd between the two
degrees of angle. So I have gazed my campus
on the center point, as you can see in the video, I'm creating the egg, okay, So it will give an edge
for our beautiful Mandela. Let's draw this antibody
of our Mandela. It is a very simple, easy petal pattern that I'm
just creating right now. We have to create a
circumference for this flower. And my pen is not
compatible with my campus for such a
little circumference. So I'm going to draw
Ed flee handedly. So if you want, you can use the campus. And if you'd gone, then you can also draw it freehand li like
the way I am doing. Now, I'm gonna create
one more circle with a gap of 0.5 centimeter or two, our flower that we have created. Okay, and I'm gonna
do it double line. After that, we
will start laying, laying out our grid formation
for our Mandala patterns. Now take your predict. Take you joined the lines the way I am doing and we have to repeat this process altogether
for the whole Mandela. Now we're gonna double line
segments and once it is done, we will start doing the
shapes in the grid. Now let's start
creating the shapes in the grid that
we have created. It is almost complete. So let's move on to
the next chapter.
14. B&W Mandala Adding Details: Hello everyone and welcome back. And, but we will start ID dealing session and I am
going to use 01 fine liner. And these patterns are available in the pattern practice section, so you can pick the Zoom beforehand before
starting your mandala. So let's get started. Once I will show you how
one pattern is done. Once or twice, I will
show you how it will be done and then I'm going to speed up the process as always, because I'm going to
repeat the same pattern. For me. It is a bit
easier when I am doing 1.5 of pattern all
in one Flow-like, I'm just rotating my sketch book and I'm just completing the half of the petal because it
comes nicely in rhythm. So if they're not comfortable
with this method, what you can do is
you can always go for doing the full petal
and then move on to the next first year. It is complete, and let's
move on to the next 1. First I'm going to do double outline and all of the
shifts in the second layer. And once it is done, then we will start dealing. Now I'm going to show you
how the pattern is done in this battle and this
particular section, the petal I am doing and
the tools are one on the sides and one
above this petal, as we'll be doing this
section complete before. I let you know how to do these
patterns in these shapes. And once it is done, I will pass forward the process. All the layers are
completed and now only the outer most
bottles remaining. Okay, So let's start adding
the details and dad bod, and once it is done on when
Darla will be complete, mandela is almost complete and I hope you guys have
enjoyed the session. Don't forget to upload your projects in the project section. I would love to share
them on my Instagram. See you guys in
the next session.
15. Hexagon Mandala Grid Formation: Hello everyone and welcome back. Today we are going to
create this gorgeous, beautiful black and
white treatment Allah. Without any delay,
let's get started. I'm going to draw a circle with a circumference of
6.5 centimeter. You have to find the center of your page and then you have to draw a circle with a
6.5 centimeter radius. Now, I'm drawing one
line that is horizontal. I'm going to place my
compass on the point. Both the circumference
and the line. Join. And I'm gonna draw a half circle like
the VA I am doing. The distance will be the same. Died from given any point on the circumference to the center. Okay. You have to be a bit patients and
draw it very light and Italy because if you just move
from 0.1 centimeter also, It's gonna spoil
your whole work. Just take it easy. Okay, don't create the circle. We just need the
circumference of 6.5 centimeter to
create this flower. And now I'm gonna start double lining in
Florida that we have created. Okay, when you are
creating the flower, make sure that the distance on which you are going to create the art should be
the same as it is from the circumference
to the center, okay? It should be the same gap. So you just have to place your compass on the
circumference and with the same distance from
that point to your center, you're going to draw the
circle, half circle. Now it is done. So let's start
creating our hexagon that we're gonna create with
the help of this flyer. Make sure while
creating your grade, you are not forgetting to
double outline your layout. The gap on which I am
drawing the circle is this three centimeter
from the center, okay. Now we're going to draw one
line here with a gap of 0.5 centimeters from
the outermost line that we have created
for our hexagon. And in this section of bandana, we will be using
broader patterns. Now I'm going to divide that particular part that is between two leaves into half. Okay? So I have to divide this specific section of
farming data into equal half so we can create
similar details and more Ferdinand shapes
on the grid layout. I'm going to do a bold
outline to our paddles. There are multiple users of your projector
like the leg here, I am creating a petal shape between the two leaves with
the help of our predictor. So I'm just drawing
the first half of the leaf and placing our predicted to the line
that we have intersect. We have divided the section
into equal half. Okay? Now I'm going to give it
a bold outline to this, these petals that
we have created, as you can see that they
are created with perfectly symmetrical, perfectly
symmetrical way. That was the only reason
that we use our predictor in that we do create the
arcs of this section. Now, I am going to divide it
into half equals to half. The pedals that we have just created between
the two leaves. Grid layout is almost
complete and I hope you guys have enjoyed
creating this layout with me. And so let's see you guys
in the next chapter, we'll be doing that detailing.
16. Hexagon Mandala Adding Details: Hello everyone and welcome back. So let's start
adding the details in our shapes that we have
created on a grid layout. And to create the details
I am using 01 fine liner. Whereas I will be
using 0 to 105 number. There. I have to fill
up the negative spaces. Okay, so let's get started. When you are doing
the straight lines, make sure either you are
using a ruler or a predictor. It will give more
Phenice in your work, though it will take much time, but it will be on
the better side. Appreciating purpose,
always shy and I use are used or rough fine liner because the
tip is bit rough and the she'd strokes
that we want to create, those are more perfect with
that kind of nip inspite of using a new pen or
something that is not to hold. Now what I'm gonna do is
once this leaf is complete, I will add the leaves into equal house with
the help of a ruler. So to draw the flaws on
the edge of her hexagon, I am using 08 fine liner
to draw the outline, to fill up the details, I'm going to use 01 fine liner. This is the basic reason when I'm drawing something
like these flowers. I always tend to use a fine liner to give them
a more prominent look. Now on detailing
part is done and I am using a CD, DVD marker. It is from solo primer company
and it is in red color. So it is more of a maroon color. But it looks very beautiful
and coordination with black. So I'm going to
use it and I have, I'm gonna highlight the section, different sections of amygdala with the help of
this red marker. Medallia is almost complete and I hope you guys have enjoyed this session and don't forget to upload your projects
in the project section. I would love to share
them on my Instagram. And thank you so much guys
for joining me in a truly means a lot to see you
guys in the next session.
17. Lotus Mandala Grid Formation: Hello everyone and welcome back. And today we are going to create this beautiful black
and pink Mandela. And let's get started. So I have taken the center
of my page and I am drawing random
concentric circles at a gap of 0.5 centimeter. The circumference for the outermost circle
is five centimeter. Okay? Once God the outer circle, then we're gonna stop and start dividing our Monday Allah, the concentric circles into
20 degrees of angle each. Okay, So just create a vertical line intersecting
through the center. Then please see our
campus on the edge of the top point and draw
a semicircle on the edge. So this will be the guideline to our loaders that we
will be creating here. The distance for the
CMI is a girlfriend. Outer circumference is
three centimeter to the outermost circumference
of this semicircle. Okay? We're gonna repeat the same process on the other
end of the vertical lines. And once it is done, we will start creating angles of 20 degrees
of each on our grid. Now I'm going to ink the
outermost circumference that we create at the gap
of 0.5 centimeter. I'm gonna double line it. Okay. Now we will start creating the other circle
was this outline is done in a more circle
that I am drawing. The circumference of this
circle is 1.5 centimeters. Okay? Now I'm going to draw another concentrate circle
at a gap of 0.5 centimeter. And I'm gonna double line it. Again. I'm doing a concentric
circle at a gap of one centimeter and don't
forget to double line it. Also good at a gap
of 0.5 centimeter. Now we will divide our circle into 1020 degrees of angle each. Once it is done, we will start joining the lines, intersecting the center and creating the 20 degrees of
angle each on the grid. Now I did is complete and I will start drawing the
lotus on the top edge, on the top part of our paper. On the circle that we have
created as a guideline. Be the same process
on the other half. Now, we are going to incur
lotus on both of the sides. Now I'm gonna create one more concentrate
circle at a gap of points and 0.5 centimeter touching the edges of a Madonna. And once it is done, we will again create one more concentrate circle with the same gap 0.5 centimeter
touching the edges of. Notice. Now we're going to do the double outline, a thick bold outline to the
outer edges of our lotus. Let's start adding the details to our grid that
we have created. And all these patterns are
available in the practice. I didn't, she died. You can follow beforehand. Okay. Let's start adding shapes in different
segments of amygdala. Good layout is complete. Let's move on to the next spot, the detailing part of Montana.
18. Lotus Mandala Adding Details & Thank You: Hello everyone and welcome back. So let's start adding the
details to our Mandela. Once I will show you how
to do these patterns. Okay, So then I'm
gonna fast forward the process as I will
repeat the same process. For adding the details
in the shapes, please use 01 fine liner. Okay, So because you will get
more intricate it that way. Once your nib size is 01. I'm using a DMI acrylic marker. And if you haven't, then it's perfectly fine. You can use any other
colors that you have. Fifth you, okay,
That's perfectly fine. Either you can use
sketch pen or EMEA directly, acrylic Mancur, night. So that's perfectly fine. When data is almost
complete and I hope you guys have
enjoyed the session. Don't forget to upload your projects in the
project section. I would love to share
them on my Instagram. And thank you so much
guys for joining me. Thank you means a lot.
 Richa Saxena, mandala & watercolor artist