Transcripts
1. Introduction: Artist, not sure what to draw or maybe you feel stuck in your art style,
I've got you covered. Over the next five days, we're going to create five
amazing drawings together from simple coffee sketches to adorable strawberry
characters. Each day brings you a new
prompt and challenge. And you'll also get a bunch of awesome moodboards
and reference photos to help guide you
throughout the way. I'm here to inspire you and get you drawing in
the super easy way. It doesn't matter if
you're just starting as an artist or if you already
have a lot of experience. This course is a
good fit for you. We'll start simple and build up to more complex
work as we go. It's going to be really fun and we're going to be drawing
many different things, and I can't wait to
see what you create. So grab your favorite
drawing supplies, and I will see you
in the course.
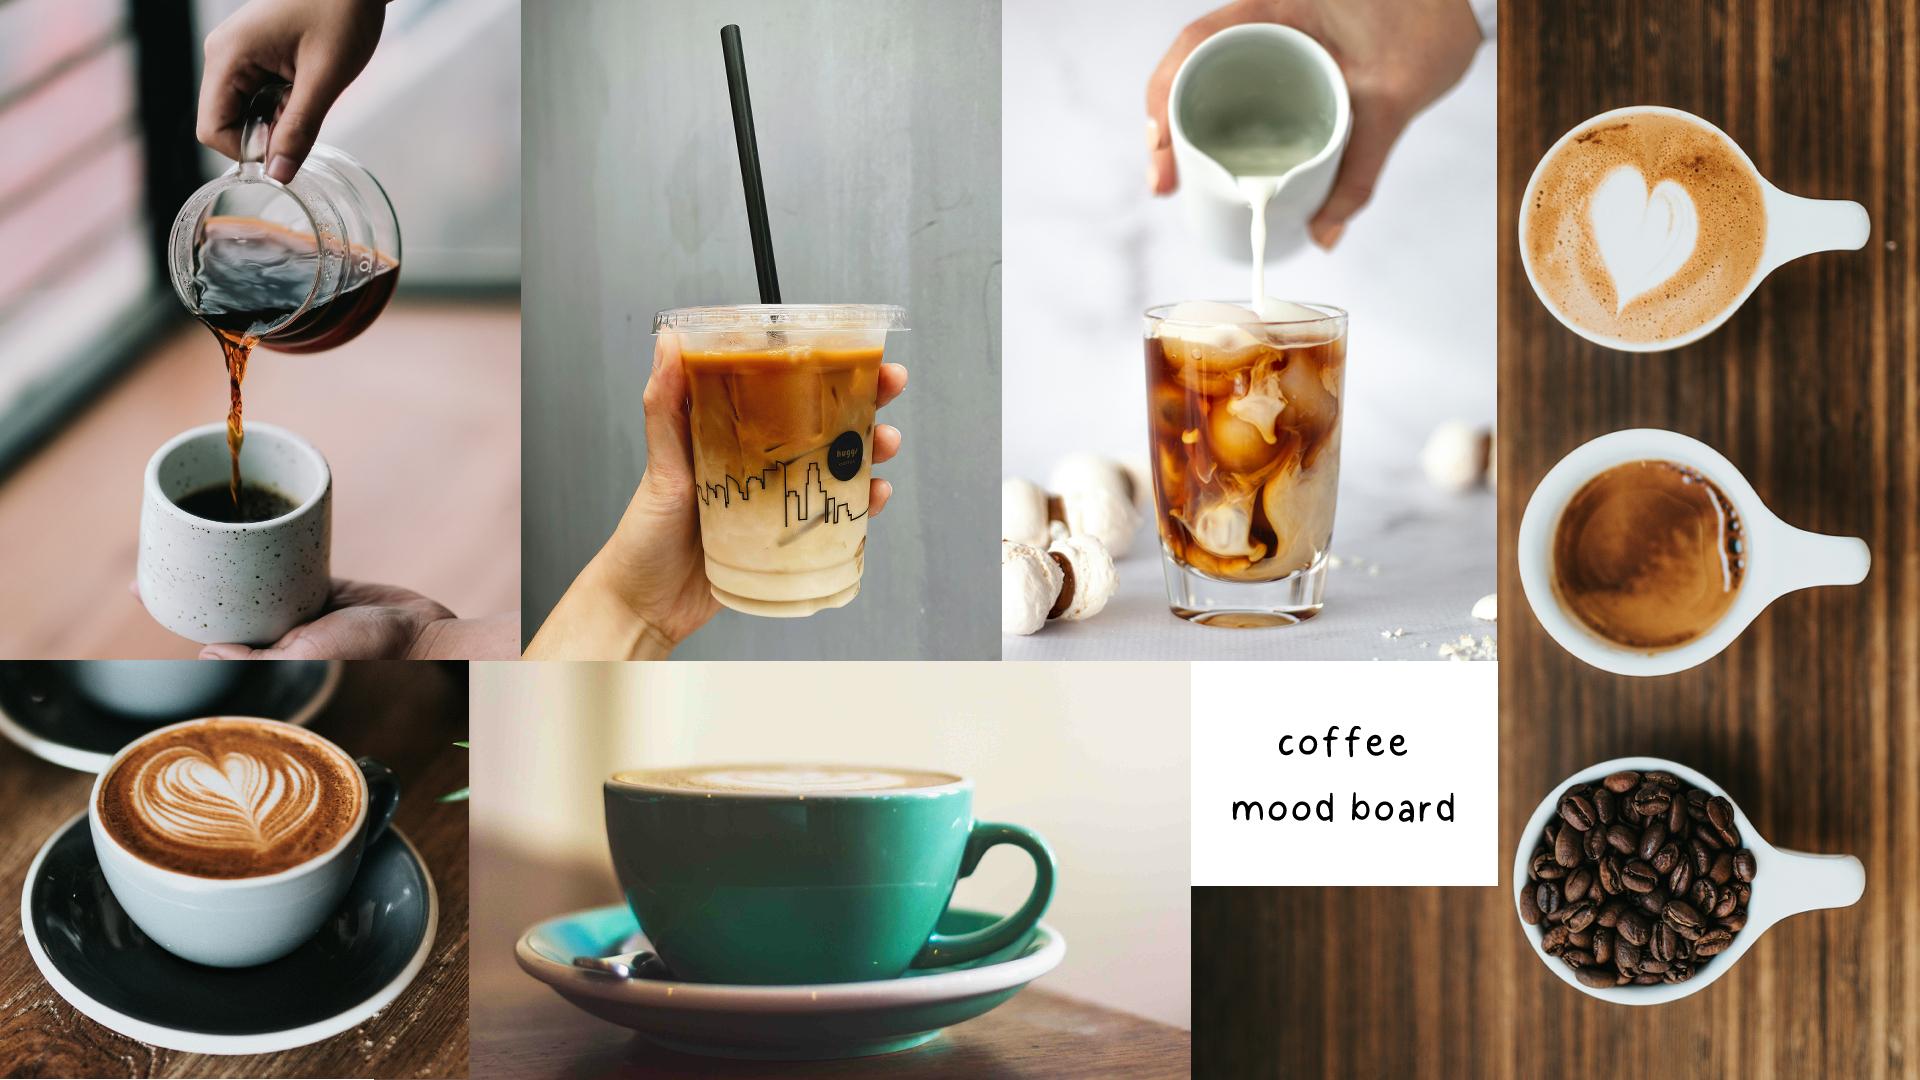
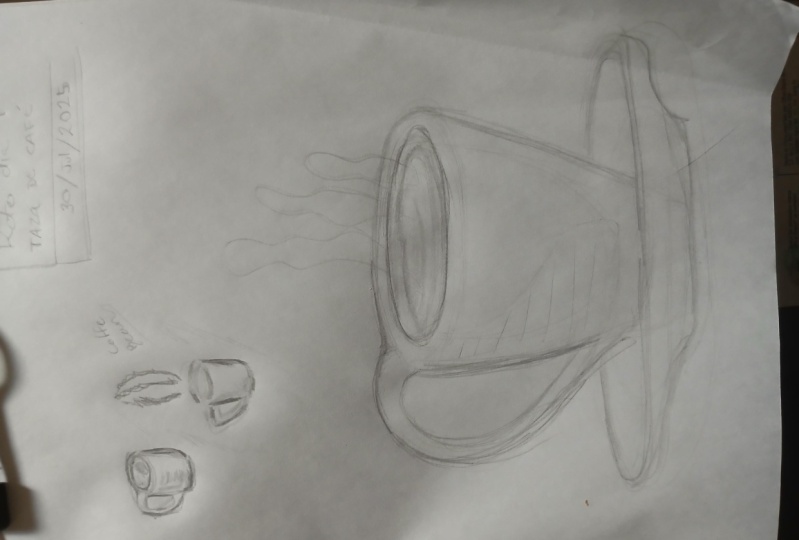
2. Day 1 - Coffee!: Hello, and welcome to our challenge class
on drawing prompts. So we're going through five days and five different prompts. One prompt a day. And the first prompt we're
going to draw is coffee. For each of the prompts, I created a mood board so you can have some references of
the things we're drawing, and so we can take
inspiration from them. Take it as literal as you want. You can keep it very simple or you can be more
complex with it. So we're going to start
with something very simple. So we have here coffee, and I'm going to take
inspiration from this and draw what I see in one
of these references. And if you want, you can also look for your own references. So first thing I'm going to
do is just to warm up a bit. I'm going to go over
these references and just draw some shapes, find here the shapes
of my drawings, and see which of these
speak to me the most. Remember that I'm
doing this digitally, but you can use any
medium for this class. Just going over the
pictures, for example, so far, I really
enjoyed this one, but I also like the simplicity of a coffee cup like this one. I also enjoy here the example
with some coffee beans. This one is also very interesting
because of the colors, the coffee mixing
with the colors here. But if I want things simple, maybe I want to go with
a simpler example. As I'm doing this, as I'm
going over all these images, I'm also thinking about each of them and what I
would like to draw. Now, of course,
you can just take inspiration from the picture and not draw exactly what you
see in the reference, or you can just draw
exactly what you see. Both are great exercises. One focus more on
learning how to draw something and learning how to draw something in
a more realistic way. And well, drawing what you see, practicing that aspect of
drawing exactly what you see, and the other focus a bit more on creativity and imagination. So it's totally up to you which one do you
choose to go with. But remember, for
this first day, let's keep things simple and don't go
overboard with this. We're drawing coffee.
We're going to draw coffee and nothing of anything
else besides that. And since I want to
keep things simple, as I said, I'm just
going to draw the cup. No hand involved. I just want to draw the object. We have, like the image of some buildings
right in the cup. Going to keep that. Going
to take some liberty here. Now, I'm just going for a
first sketch right now. Maybe the other way around. Yeah, perhaps like this. Just putting the idea down, and now I think we could, like, draw a few coffee
beans here and there. I think that could be fun. Now a simple background, like just a circle. Yes, there we go. Alright. Very simple, just
a cup of coffee, and now I think I can go
for a more detailed sketch. So what I'm going to do is lower the opacity of my sketch, then add a new layer on top, and I'm going to use a
darker color this time. Now I'm still using
a pencil here, and I'm just going to start to go over my sketch and give it a cleaner look and add any details I might want
to add or even remove. So as you can see, I'm being very literal
with prompt here. I'm just drawing a
cup of coffee and adding element or two just
for the fun. All right. Not being very perfect
with my circle here because we can
fix that later on. But yeah, I think we're
done with the sketch. So now, what I'm
going to do is clean everything up with new
line art and colors. So we can hide this one, lower the opacity of
our second sketch, and now we're going
to draw our line art. And also, when we're drawing
things based of prompts, don't worry too much about
how perfect your drawing is. This is mostly an exercise, a practice and doing
something for fun. We don't need to take
this too seriously. At least I don't always
like to just have fun and see what I can create, explore my style, perhaps, or explore a new style. Sometimes just try
something different from what I'm used to,
trying something new. So if I'm doing that, I know that probably won't be as great as my other
drawings, and that's fine. The idea of prompts
is for you to just relax and explore different
things with your art. Maybe you'll find something new about your art and what you
like to do, and maybe not. You're just having
fun. You're not creating something to
sell or I don't know. It's not a commission. It's not work. It's just fun. And also the complexity
of your drawing will also depend on how much do you want
to take with each drawing? Maybe you're a bit in a rush
and you don't want to spend, like, a whole hour
in the drawing. So you can keep it very simple, or perhaps you're feeling like taking some time with your drawings and you
do have time for that. And so you can make
something more complex. And that's why I want
to with each prompt, I want to try different things
with you so you can see the possibilities of what you
can do when drawing prawns. Alright, I'm not going
to draw the circle because I want it to be
just one solid color. So I'm going to go over here, add a new layer, but this
time below my line art, and that's where
my colors will be, and I will now pick
here my ellipse tool, change here to solid to fill. And I'm going to pick a color, and I think I want a yellow. We're going to try
yellow for now. And now to draw a
perfect circle, you're going to want to press Shift and then draw your circle. Then press Enter
and there we go. I'm just going to move it and you never know
maybe something you're doing can end up being a
product for you to sell. For example, I think this
could be a cute sticker. Let me just do something here. There we go, make it
a little bit bigger. Now, just because I'm having fun with this and I'm liking
the idea of the sticker, I'm going to go for my
ellipse tool again, but this time, I just want line. And make the line a
bit bigger, maybe 20. Let's see if, that's perfect. Now again, I'm going
to make a circle, press Enter, and now I'm
going to move it here, maybe make it a bit bigger. There we go. Now, I'm going to select both of these layers, both of my circles,
and I'm going to go here to line and center them. There we go. Perfect.
Now with that done, I can go and keep
coloring my drawing. Now I'm going to merge both of these together,
my background, and now on a separate layer, I will finish this, so I'm going to use a paint
bucket for most of it. So the straw was black,
so I'm going to do that. Going to use maybe kind
of graystone for the cup. No fix here. This area. Now for the beans, we want a brown, right? Or the coffee beans, maybe a bit lighter.
We want it lighter. Yeah, I think so. So
yeah, as you can see, it's all about exploring and just having some fun
with your drawings. This is a perfect
opportunity for you to practice your creativity and
what you can come up with. Alright, so now for
the coffee itself, I'm going to add a new layer. Below these colors we've done, and I'm going to
roughly paint an area. But I want to create a
bit of a gradient here. I could use the gradient tool, but I'm doing this
and otherwise, you have a different
alternative of adding a gradient
to your drawings. I'm going to go here over to Felter then blur, Cushion blur, and now this blur
window appears, and you can now choose
the strength of the blur and how strong
your gradient is. There we go. I think I like it. Yeah. This way. And now
let's go back to this one. And I'm going to add
a new layer on top, and I want to pick this
color and fill our cup here, but with some conspiracy. So I'm going to go to this sit here and lower the opacity. Doesn't really matter how much and you can change it later. Right, 15, something like
this. And there we go. Our first prompt has been
done in less than 20 minutes. Now, could I do something
better than this? Probably? If I wanted to, and then I will take a
longer time to do this. But in less than 20 minutes, we have what I think is actually very acute drawing and I could even make this into a
sticker, for example. Here it is our first day coffee. We took it very literally
and drew a cup of coffee. Now, besides the moodboard, I also left you a template with the grid where you can add
each drawing that you do, on each day, you can
add your drawing there. So if you want, you can now take your time and then
add it to that grid. And you can do that each day, and then you can share all
your drawings with me so I can see them and give you any feedback
that you might want. So for today, this is it, and I will see you in day
two for our next prompt.
3. Day 2 - Moon: Alright, so hello
and welcome back. This is day two of
drawing prompts. And today we have moon, we're going to draw something
inspired on the moon. So once again, I have
here our moodboard. Don't forget that
you can download this moodboard if you want, or you can find your own images and even take your own pictures. And for today, as I said, I want to try different things
for each of the prompts, so you can see how versatile
drawing prompts is. You don't need to only draw
literally what you see, and you can actually be
quite creative with it. So for this one, still
keeping things very simple, I thought that we
could draw a pattern. So we have our moon here. And as you can see,
there's not really a lot of exploring in this case. So we do have for example, I really like this
image here that we see several phases of the moon, right, going thinner and
thinner until it disappears. And I think we could do
something with that and perhaps add some more
elements, a star or two. You can add other elements
that are not in your photos. So I think we could do
something like this, perhaps play with sizes
of the moon as well. As you can see, once again, I'm just going in and
trying something. See what I can come up with. Do I want to use this idea here, use the different phases here? So the moon grows
smaller as we go. I think that could be an idea, something like
this. I like that. And then, yeah, we got some stars here and there,
something like this. So kind of a pattern
or I don't know, we could make a bookmark and even if you wanted to
truly make this a pattern, we could we could use this. All right, I like this.
Wallpaper perhaps for your phone,
that works as well. So it can be multipurpose. We can make a
pattern out of this for I don't know,
some gift wrappers, for example, if you
wanted to print it, maybe a wallpaper for your
computer, your phone. Tablet. What else? I think we could use this to
print if we made it longer, for example, and we can
print this as book markers. So yes, as you can see, just taking a few minutes to think about this
and I can have a few ideas for my drawing. Of course, I don't really need to actually make a
product out of this, but it's good to have some
ideas. You never know. Maybe the things
you're playing with in this class might end up
with something a bit more, an idea for a product, an idea for a project. I don't know, you never
know what can happen. So, yeah, I think it's very clear and I don't I
feel I don't really need to go through
another sketch because the shapes are
very, very simple. It's mostly circles and stars. I don't really need the whole another sketch because the
shapes are very simple. So what I'm going
to do is create a new layer on top and start
drawing my final line art. So I don't want to use the
circle till this time. I want to draw my own circle because I don't want
it to be perfect. The moon isn't
perfect. There we go. Now for the second one, what we can do is
draw circle again. This is also a great opportunity to practice your circles, right. And now we make this line here, and all we have to do is
erase what we don't want. So one thing about
this eraser I'm using as you might have noticed, I'm using this layer
here with this symbol, which is a vector layer. And what that means is that you're going
to draw in vectors. So you can basically scale
your drawing up and down, move it around, and never lose
the quality of your lines. Another advantage to
use the vector layers, especially when you're
doing the line art, is that you can then
use something called the vector eraser here in
Clip Studio, this one. And what happens is, as you've seen, when I use it, so let's see, I'm going
to make this line here depending on
what you choose. So I have this one, erase
up to intersection. I can erase this, and it will
erase up until that point. So it's very useful for
these kinds of drawings. Right, next one, and I'm
going to do the same thing. Oh, this circle
is actually neat. Let's write this one
and here you have to be careful that your lines
are actually closed. Alright. Now here another line. So as you can see, I'm
being very loose with this. I'm not looking for
perfect circles and lines. I want it to be a bit
wobbly, let's say. Alright. I like this. And now our last one always
starting with for me, it's easier to go this way. Always start with a circle and then cut what we don't need. There we go. So now
I have to do is rain all the other elements
and add a few more. Perhaps the stars, I don't want them to
be perfect either. Just have some fun. Don't
think about perfection. Things can be just
about fun sometimes. I don't think I
want this one here, so I'm going to draw a
smaller star. There we go. Alright. That looks nice. Let me move this here
and I'm going to add here some more circles. Now, for the pattern, there are other ways
to make a pattern, but I'm going to
keep it very simple. So what I'm going to
do now is I'm going to duplicate this layer
and move it downwards. Something like this. All right. I'm actually going to
duplicate it twice, so I have a copy of the original always and
keep it over there. Now I'm going to move
it a bit like this way. Alright. More or less
centered, maybe a bit below. Going to add a layer below. Let's hide here all references. This one here. Okay, yeah. Now, a layer below. And I want it to be let's say
purple, a dark purple. Let's see this one for the
background. Yes, that's great. All right. So now I want
to color my drawing. So I'm just going to
go over everything, make sure this is
the color I want. I like this better, I think, just so I see where
everything is. And if I don't like
any of the colors, I can go back and change this color or
the background one. I'm not too too happy
about the purple. I want for it to be a
bit less saturated, I think. See this way. Yes, I like this better. Now this is all about
preferences, okay? What I like might be
different from what you like. So now I'm going
to duplicate this, move it to the side, and
now try something else. So move it a bit like
this, for example. Alright, let's finish
coloring this here. Alright, so now we can
merge all of these layers, duplicate them until we
reach the end of our file. So we don't really need more. This is it, and there we go. Very simply, we made a
wallpaper or a pattern, and once again, under 20
minutes, even less perhaps. But yes, very quickly, and we have a cute wallpaper. So have fun with that. If you don't want, you don't really need
to make a pattern, you can come up with
something else. It's totally fine. Once again, don't forget to
download the moodboard, and don't forget
once you're done, to add your new drawing to
the greet template that I gave you and fill the second square with
your mood drawing. I hope you have fun.
Take your time, and I will see you
in the next video.
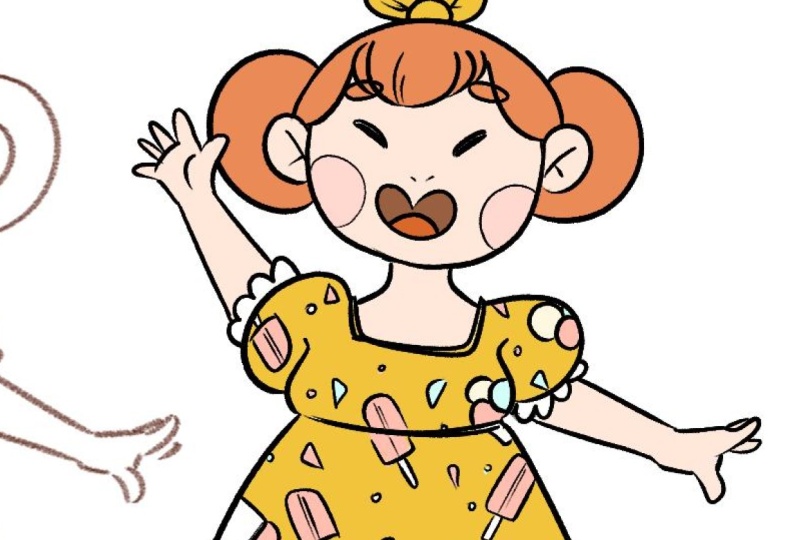
4. Day 3 - Ice Cream: Alright, so hello
and welcome back. This is date of drawing prompts. And today we have a
very summary prompt. We have ice cream. I wanted to go up a notch
with our prompts here. So this time, I want to include a character
in my drawing. But I'm going to keep
things very simple. I'm going to draw something similar to a Chibi
character, for example. So we can add more complexity, some more complexity
to our drawing, but still keep it fairly simple. So first things first,
I'm going to add a layer and I'm going to
pick my pencil brush. And what I'm thinking
is drawing a character. So since this is a very
summary prompt the ice cream, I want to take that idea
and draw a character with a dress with perhaps
ice cream pattern. So we're basically
picking the idea from the previous prompt and
mixing with a new one. So first of all, also, I'm not going to be drawing
a very complex pose. Let's keep things simple. So first of all, I'm going to make a sketch of my character. Happy character, of course, keeping things very simple. Alright. So we have a body here. Now, let's think about I'm not going to think about hair
yet because I don't know, it depends on our dress, and I'm going to make
a very simple sketch of the dress of my character. So I think I want, like, kind of balloon
sleeves like this. Alright, so the dress and
the character is done. So very simple shapes,
as you can see, very messy, but I do have
a body there and a dress. I'm going to add
the ice cream and the pattern to the dress on
my detailed sketch face. So first, I'm going to
lower the opacity here. And add a new layer on top. Now, let's get a bit closer
to our drawing here, and I'm going to first redraw my character without all of
these lines underneath it. Let's keep our lines simple. I'm basically just going over the sketch and adding any new details that
I might want to add. Also, it's fine for things to
be fairly messy right now. It's still a sketch, so it
doesn't need to be perfect. As you can see, I'm keeping the shapes the same
way I had them before. I'm just erasing what I don't need or ignoring what
I don't need anymore. There we go. So yeah,
this part is done. So now let's decide
on the pattern. And now this time, I will use the ice creams over
there as inspiration. So we have different
types of ice cream. We have a con ice cream. We have sorbet like, this kind of ice cream, which I don't really
know the name, but that goes all tour. And we also have it in a cup. So I'm going to start by
drawing one of the I like them. Okay. Now we can also draw perhaps a few ice
cream balls like this. Perhaps I think that could work. Something like this. You know, we can just add a few
elements here and there, just to fill the spice
a bit more with stuff. There we go. So I took
inspiration on my moodboard, on my references, and created something a
little bit different. So instead of making
the ice cream the main character here, I use it as
inspiration to create a character and add
the ice cream to it. In this case, I
decided to create this dress that had ice
cream drawings on it. Now we can go over everything
with new line art, and then finish with the colors. And for the colors,
I'll probably also inspire myself in these
colors here. We'll see. All right, so lower
the opacity a bit, add a new layer on top, pick my pen Brush, and now just go over the lines. Just take your time.
And once again, I'm not really focusing on making the greatest
drawing here. I'm just having some fun. I'm not doing this for
work or professionally. I just want to draw a bit and have a bit of fun and
lower the expectations. Alright, so my
lines are finished. Now it's time to add the colors. So a new layer
below my line art, and I'll use the paint bucket to fill my drawing with color. Real like this yellow. So I'm going to be
using the yellow. So I'll just first fill
the colors and then fix any gaps that might be missing a bit of a
blush on the cheeks, thing like this, and
I think we are done. There we go. So using
a very simple prompt, we managed to create a character using as inspiration, ice cream. So the whole theme of ice cream, what it invokes, and what
we could draw with it. So here it is my
character with a dress made out of ice cream drawings. This is it for this video. Again, don't forget to download the moodboard if you want
to use it as inspiration. And once you're done
with your drawing, don't forget to add to the
grit teplate that I gave you and fill out the third square with
your ice cream drawing. So have fun, take your time, and I will see you next time.
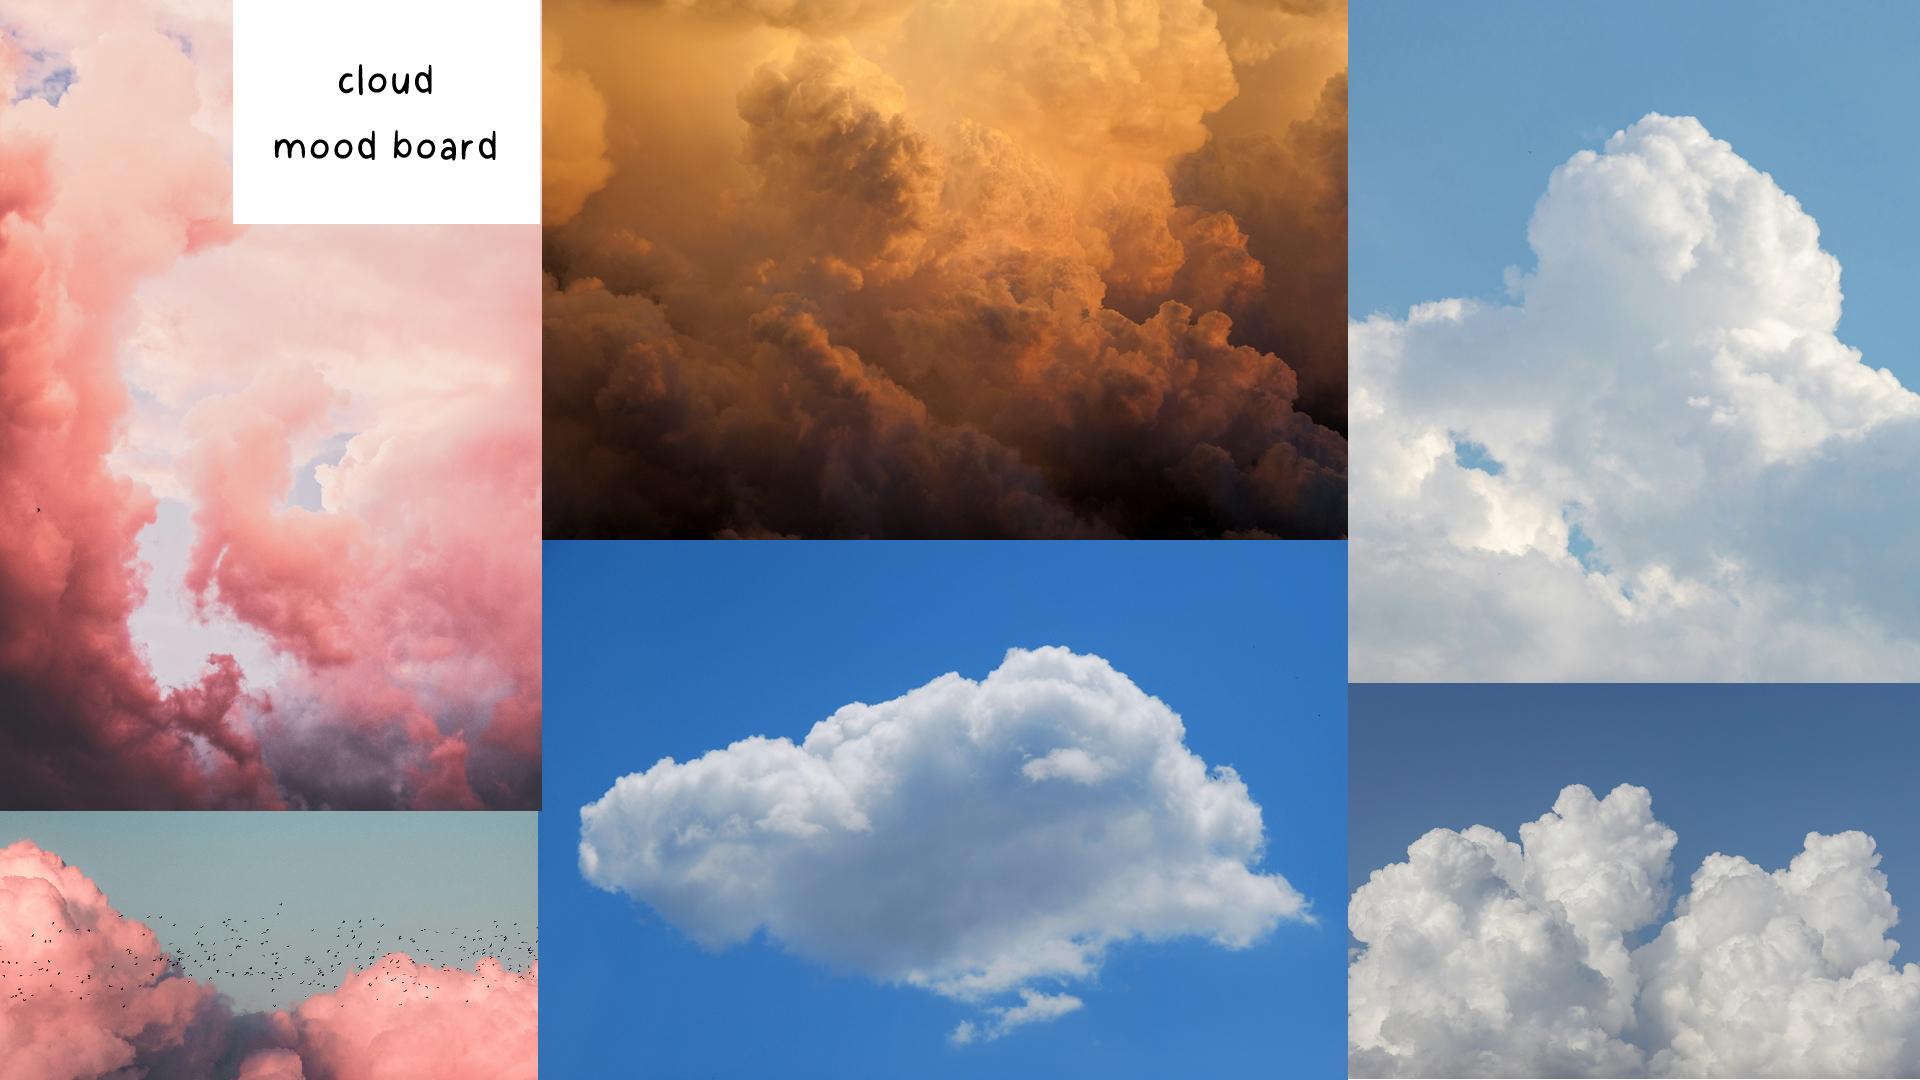
5. Day 4 - Clouds: All right, so hello and welcome. This is day four of
drawing prompts, and today we're going
to draw some clouds. So so far, we've done
something very simple. We drew one of our references. Then we tried to draw a pattern, and for the third day, we drew a character with
an element of our prompt. So for this one, what
I'm thinking with our clouds is drawing a character and
adding a background. So going up another
level and add a bit more complexity to our
prompts and to our drawings, but still keeping things simple. So once again, don't
forget you can download this moodboard and you can use these references
for your drawings, or you can find your own. Alright, so I'm going to create a layer and I'm going to
start drawing a character. Going to keep things simple, a bit of a hivy style
like we did previously, and then we will
work on our clouds. Maybe our character is
sitting in the cloud. Yeah, that can be a nice idea. Let's draw it fairly small, so we can see everything like kind of
a drone made of clouds, perhaps, something like this. I'm being very
loose with my lines here and giving
form to my ideas. You can see I don't really
have a fully formed idea, but we can do that as we draw. Alright, so I like this. Let me resize this a bit, make it a bit smaller. And now perhaps just a
frame around it so I know how far I'll
go with my drawing because now we can draw a few
clouds on the background, something like this, perhaps. So as you can see, I'm
just keeping things very simple, just a few shapes. The body isn't really anatomically
correct or realistic. That's fine. For now, I
can fix things later. So yeah, very simple. Shapes, I have a character
and I have clouds. A character sitting in
the throne of clouds. I like that. We have
our base sketch. Now, once again, just
like I did previously, I'm going to go through
a detailed sketch phase. So I can't figure out the rest of the details such
as the clothing, the hair, the face,
things like that. But once again, we'll keep
everything very, very simple. Right. Let's draw our face here. I want it to be
very, very simple. I don't want a lot
of details here. We have the cloud appearing
here on the side, and then here, right? That's what I drew
on my first sketch. Let's keep it. I'm not really
focused the cloud shape. I just want to know where
it is because I want to explore our brushes
when drawing our clouds. So I want to do something a
bit more abstract perhaps, more shape focused, do
a simple hairstyle, something like this, perhaps. Okay. As you can see, I'm changing things here a bit. I'm exploring where I
could add the other legs, something like this.
I think that's fun. This leg is up the
rest of the body. Yeah, I think we could do this. It's obviously a bit weird, but I think we can work with it. Alright, now, for clothes. I want something
that's kind of flowy, simple skirt,
something like this. Let's move this leg a bit. Okay, so we have
that figured out. Now, let's draw the other
clouds very quickly, and now we can do our line art
and then paint our clouds. Now, as for colors, I think the thing
I want to focus the most here references
is the colors. I really like the pinks here, so I might use that. But first, let's do
our line art, right? So I have my pen Brush. Let's zoom in, and now
I'm going to go over my previous sketch just like before and draw my character. This is the point where you decide everything that needs to be decided if
you haven't yet, if there's something still
that you want to change, this is the perfect
opportunity because even if you are in
this less stage, you can still change things. You're always in time
to change things. Even if you're using
another medium. If you're not doing
this digitally, you can always
change your drawing, if you're not enjoying
something on it. Feel free to change it. Even if you have to
redo it, that's right. As you can see, I'm here
exploring my the ice bit, what I could do with them. Okay? Something like this. Do I want to draw
some lips, perhaps? For example, Yeah, I
think we could do this. This is fun. Let's continue
the rest of our body here. So we have this flowing
area over dress. Right? So as you can see, I'm not really
taking a whole lot of time on each drawing. I just take my mood board as inspiration and try to
come up with something. Now, is this the best
idea I could have? Probably not, because the
longer you take with something, you try different things, you will realize that you
can have other ideas. But that doesn't mean
that you can't do anything good enough with
just your first idea. And once again, this is
just a bit for the fun. Just experimenting here, having fun with your
drawings. So do that. Have fun, right? Don't worry too much about how perfect
your drawings are. It's fine. It's totally fine. We're just having
fun, a bit of fun. We're not really looking
for perfection here. Basically, what we
want to do with prompts is explore
our style at times, but also practice
feeding our creativity. We're trying to
improve our creativity and imagination with this. You can even do more than
one drawing per prompt. If you have another idea, feel free to explore
that new idea you have. Now, I'm not going to be drawing the clouds
with this brush. I'll leave it as it is for now. I'm only going to
use this brush. To draw my carrot. I want to have a little bit
of the dress showing here, but I think I am done with
this part. All right. Let's take a look at
her. That looks okay. And now we're going to go
for the coloring phase, and I'm going to start
with the clouds. And I'm going to leave
my sketch showing. Usually, when I go to
the coloring phase, I hide my sketch, but this
time I'm not going to. I'm going to keep my sketch so I know where the colors are. And now perhaps I'll pick here one of these
colors, something like this. I'm using my mood board
as a color picker. And I'm going to
use another brush. So I'm using Clip Studio. And if you're doing
this digitally, feel free to explore
your brushes. Even if you have some
favorites already, explore your brushes and see
what you can do with them. So for example, I'm
here on Clip Studio, and I'm going to try using
this pointy ism brush. I never used it before, but it looks fun to
draw some clouds. So that's what
we're going to do. So now I'm going
to zoom in here. I'm on the correct layer. Let's see if the size
of the brush is enough. I think so. So now
we're going to go and start going
over these shapes. You don't need to be too frightful with your
initial shapes. These are just a
bit for reference, and just explore the
mediums you have. Even if you're doing
this traditionally, try using mixing two mediums
like pencils and markers, for example. I don't know. It's nice to experiment
and try different things. So I always I'm always trying to motivate
you into doing that, especially with these kinds of exercises where not
doing any serious work, any kind of serious work. We're just having
some fun with art and exploring our styles, perhaps, learning new things. This is a great time to explore different
brushes and mediums. As you can see, I'm
being very loose here, and I really like the
texture of this brush. Alright, so now let's give a bit more shape
to our clouds here. I'm going to pick a
darker color for now. Let's see perhaps
something like this. And let's add some
shading to our clouds. As you can see in
our references here, we have a lot of shading and
highlights in our clouds. It's not just white or one pink. We have lots of tones here, and I want to work with that
and play with the texture. I think playing with a texture is one of my favorite things, especially when I'm doing
just things for fun. All right. I'm really liking
this look. It's really fun. Now I'm going to
pick a lighter tone. So perhaps this one, maybe even more if we have it. Let's see here now.
Let's try this one. We need something lighter. This is not enough. I think I'll have
to pick it myself. Let's see now, and perhaps maybe we have to
play with, yeah, here the density of
paint of our brush so we can have this lighter
tone properly. And once we have a background, we'll also be able
to see this better. So this is probably our
most complex video. And the next one, I promise you, we'll take things a bit lighter again so we can rest a bit, you know, so it's
not everything so. Complicated or complex, but the level of complexity
is all up to you, right? Okay, I really like this. Now, let's add a background. I'm going to pick
this color for now, and I think I'm going
to use my brush for it. I think that will be fun drawing the background
with this brush. So I add a layer
below my clouds. At the same time, I'm not
sure about this color. Let's try something else. I'm not too sure
about this color, but one thing you
can do when that happens is you go over
here to the layer, right click it, and then
new correction layer, hue saturation and luminosity. And here we can play with
our colors, the saturation. Maybe I want it to be a bit more into the blues
instead of purple, thinking like this, perhaps. Alright, so as you can see, it's basically changing
the colors on my layers, but now I'm going
to go over here to this button and clip
it to layer below. So now it's only acting
on my background. And now, all I have to do is go to my character and
add some colors to them. I may have to hide here. My sketch and my background just so we can see it clearly. I will have to erase some
bits here and there, sample here because
we want the clouds to go over some areas of our
character, but not all of it. So we just have to
erase some bits. Alright, I think
this is mostly it, and now we can
finish the coloring. Let's use this blue, a bit darken for the dress of our character,
something like this. Or do we want the
hair the pinkish? No, I think this
works best. Alright. So now I'm just
going to fix all of these little things where
paint might be missing. And our drawing is done. This was the most complex
or most complex drawing. But again, you can keep things as simple or as complex
as you feel comfortable. That's very important.
I want you to have fun with the drawings
you're making. Even if you're
challenging yourself, I want you to have all
right, so there we go. I'm not going to
draw any shading or anything like it
as it is simple. But this is it drawing a whole painting based on
clouds or promus clouds. This time, I decided to incorporate the clouds
with the background, but also with our character. So there's some interaction
there, and this is it. This is going to be our
most complex drawing. Feel free to try to do
something in this line. So incorporating character and background using the prompt. It's all up to you.
Maybe the clouds can be the hair of your
character, for example. But yeah, try to have fun. You can try different things. Don't forget that you can
download this moodboard, and once you're done
with your drawing, don't forget to add it to the greet template
that I gave you, and I will see you
in the next video.
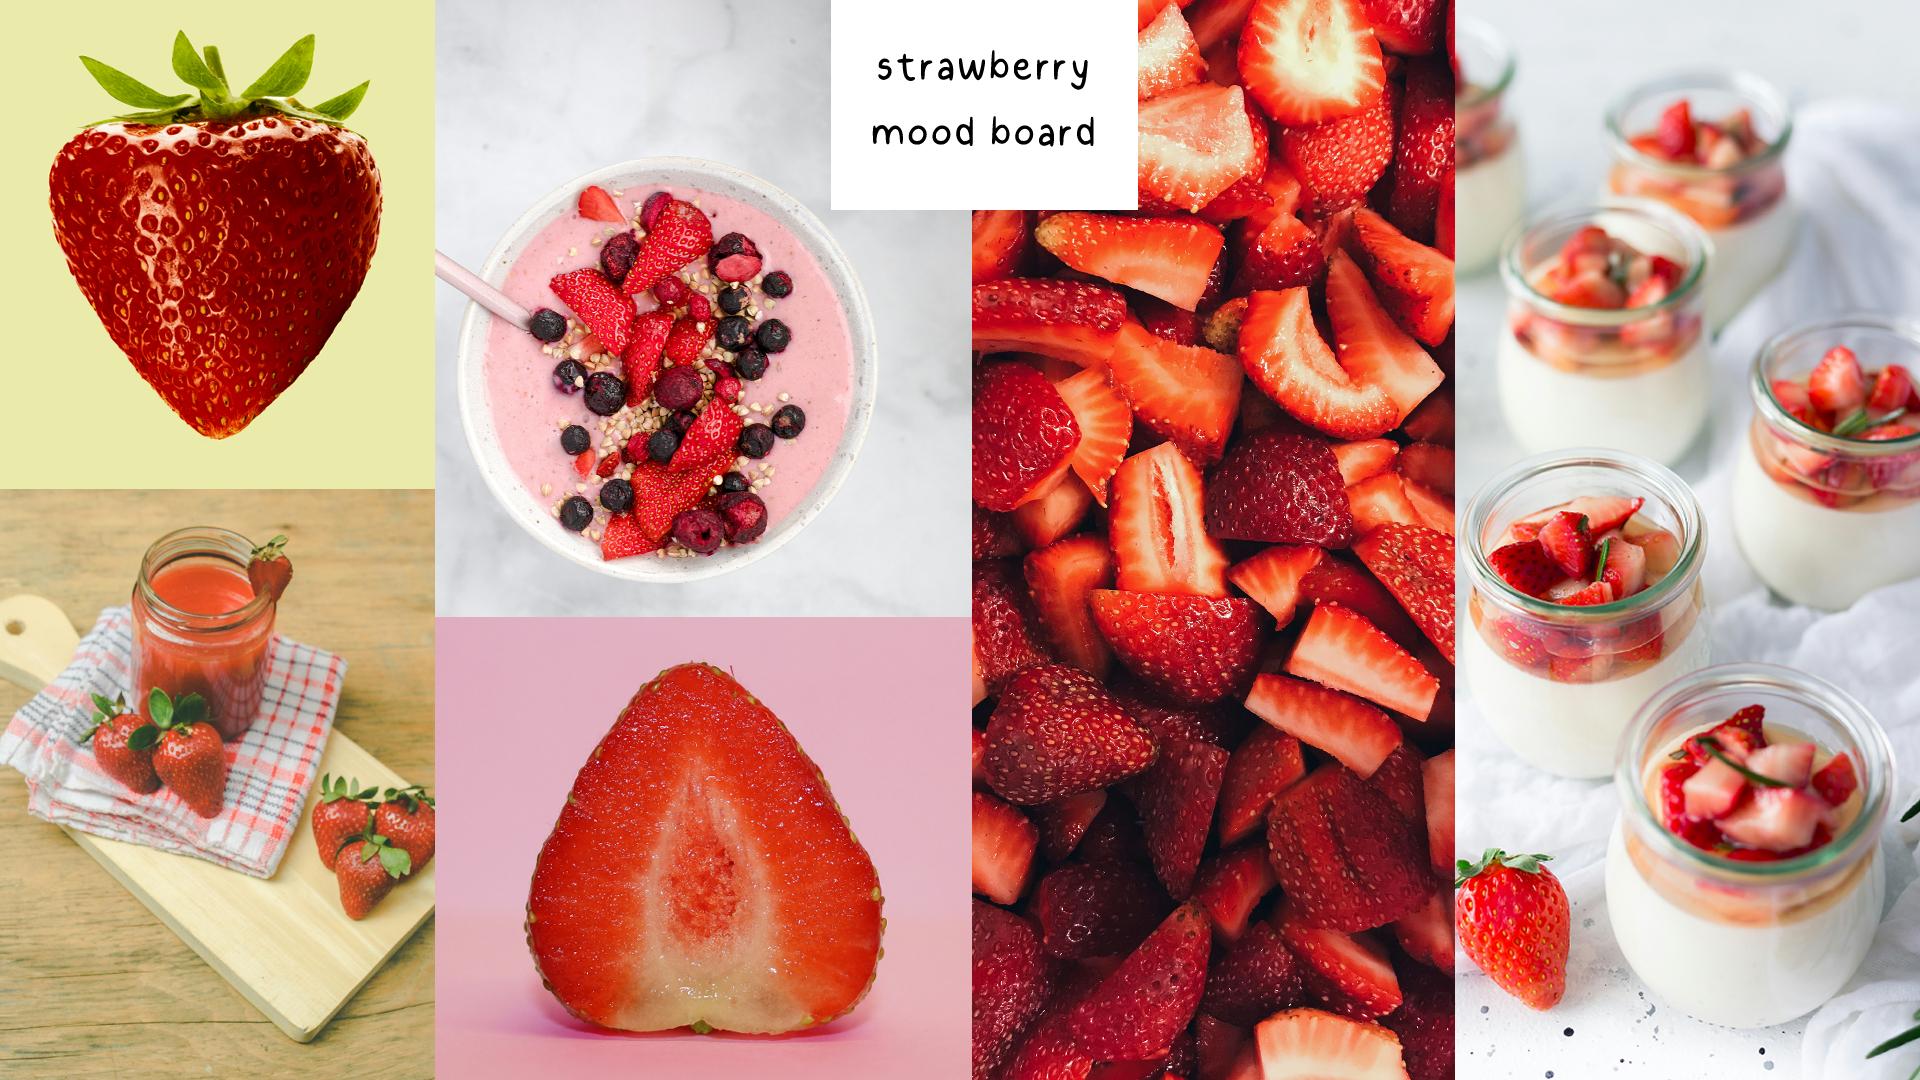
6. Day 5 - Strawberry: Alright, so hello
and welcome back. This is day five of
drawing prompts. This is the last day of
drawing our prompts. And I want to do
something fun this time. I mean, they were
all fun to draw. But this time we're
going one step further and make something a little
bit more silly even. So we have here our prompt
this time is strawberry. As I said in the previous video, we're going to do something
simple this time around. The fourth day was
the fourth day and the fourth prompt was our
most complex drawing. So now I want us
to wind down a bit and draw something
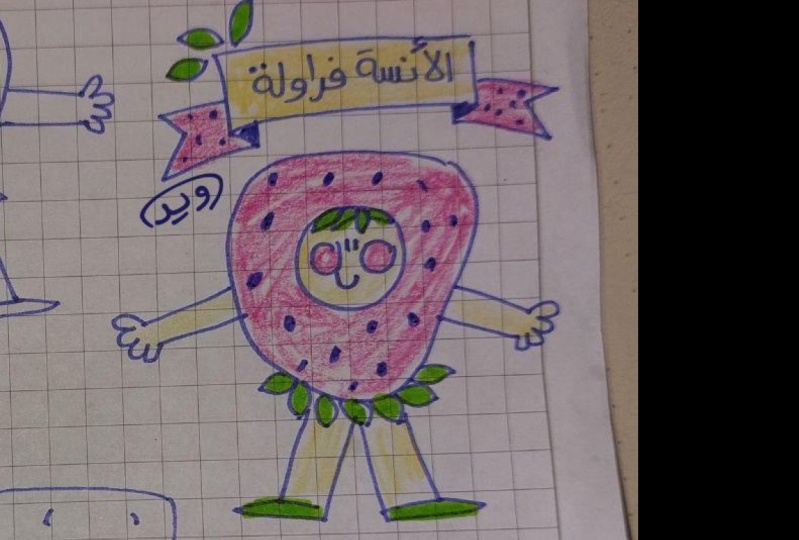
more on the fun side. So we have here a moodboard, but I want to draw a character
that is a strawberry. So that's what
we're going to do. I'm going to grab my pencil
and get a new layer, and I want to be able
to see my strawberries. So I can get that shape. And now I'm going to
start drawing something. So we have here our
strawberry shape. I always like to have one
drawing character standing. I always like to have like
1 ft up and the other down. I think it's fun and cute. As you might have noticed,
I think I've done that twice throughout
this class. But, yeah, I like that, right? So we have the greenies
and the strawberry shape. Do you want arms coming out of somewhere?
I'm not too sure. We can. Okay, yes, I think that's cute.
Some arms here. Now I want to add some
more greenis here, just like it's a hair. Something very, very simple. Do we want the eyes
closed or open? I don't know. Not too sure
about the expression here yet. Okay, I like this.
I feel like this could fit a children's book. Really cute. Let's select it
and make it a bit bigger. There we go, or
strawberry character made with very,
very simple lines. And I think that there aren't a lot more details that I'm going to add here. So I think I can
skip the details sketch phase and go for my line art right
away. That's so simple. My character is the
shapes are very cute. We can see it's a strawberry, and it has some
humanoid parts as well. So we have here a weird
strawberry rise, I guess. Alright, so I'm going to
lower the opacity here a bit, add a new layer on top, and then I'm going
to grab my brush. And now, just like before, go over all my lines. Now, once again, this
is the opportunity for you to change
anything you want to change about your drawing. So I'm deciding to
make this area a bit rounder than what
I had initially. Basically, for the legs, if we break this down into even simple shapes,
it's a triangle. So we have a triangle
and a rectangle. So you can break your
drawings into simple shapes if you want to make it easier for you to get the
exact shape you want. Draw this kind of
shape a lot of time. So for me, I can already go
for that exact shape I want. But if it's something you don't really have
enough practice yet, then break everything down into smaller and simple shapes. Then once you're
more used to it, you have more practice, you can skip a few steps, and you don't need to break
down things that much. I kind of want to draw
my circle by hand again. And as you can see, I'm not
great at drawing circles. I will repeat drawing
my circles as many times as I need until I'm
happy with the shape. So do not feel embarrassed by that or afraid of
doing that, right? It's perfectly fine.
We're only humans. If you want a perfect circle, you can use the shape tool that you have on your
drawing software, or even if you're doing
this traditional, you can use any kind of circular object that you have
and use it, draw around it. It's perfectly fine to use any tool that
you have available. Example, for this case, I didn't want to
use the shape tool, mostly because I want to have this more organic
look to my drawing, so I don't want
it to be perfect. That's usually the
important thing about using the tools is, what is the look you want for
the drawing you're making? Do you want it to
be more organic? Do you need to be very
symmetrical and perfect? Then use the tools. If you want to be a bit more imperfect, then you can do it by hand. It's all up to you. Alright? So now all we're
missing is the face, which I think is really cute. I don't usually
draw them this way. This is basically a new thing
that I'm trying right now, but I'm really liking it. Alright, and now the
little blush, right? Let's move it a bit to the side. Something
more like this. Yes. Perfect. Oh, and we're
missing the strawberry seeds. Alright, now we can
hide our sketch. And other colors. Once
again, we can go. Let me just add the
layer below my line art, and then we can go and color pick our colors here
on our mood board. Now for the greenies, let's pick here, a green. I really like this
green. That's nice. Now, perhaps here this area of the inside
of the strawberry. Let's pick something
as light as possible. See what do we like best. Let's try this for now. I feel this is a bit too
dark, but we'll try. Yeah, it's way too
dark for what I want. Let's try from
this picture here. Yeah, perhaps something
like this will work best. Something like this, perhaps, or do we want the legs to have the same color as the
face in the arms? Yeah, I think this works best. We can try to go more saturated. Now this is let's try
to a bit lighter. No, I think this color
works. I like it. And all we are
missing is our blush. So let's go over here and
pick something a bit lighter. Let's see if I like this. Or we could do the green. Let's try the green. Now,
reddish is better, right? What do you guys think? So, see, this is a kind of exploring
that I'm talking about. Just try different things.
Oh, yeah, the same red. I think it's much simpler and we have the
same level of saturation. Let me just draw very
quickly a background. So I'm going to add
here a new layer. I'm going for my
shape to rectangle, and I really like this color
here on our first image. And that's what
I'm going to use. There we go.
Perfect. Here it is. Our strawberry
carter really fun. Some easy and simple shapes, and we got here something
really cute and easy to draw. So yeah, this was it
five days five prawns. Don't forget to download
the moodboard so you can use them as inspiration
or as reference. Also, once you've finished
all your drawings, don't forget to add them to the greet template
that I gave you. And then once you're done
with all your drawings, feel free to share them
with me with prompts. We all can have such
different ideas, so I can't wait to see
what you came up with. And if you have any questions or need any feedback,
feel free to ask. Have fun with your drawings, and I'll see you
in the next video.
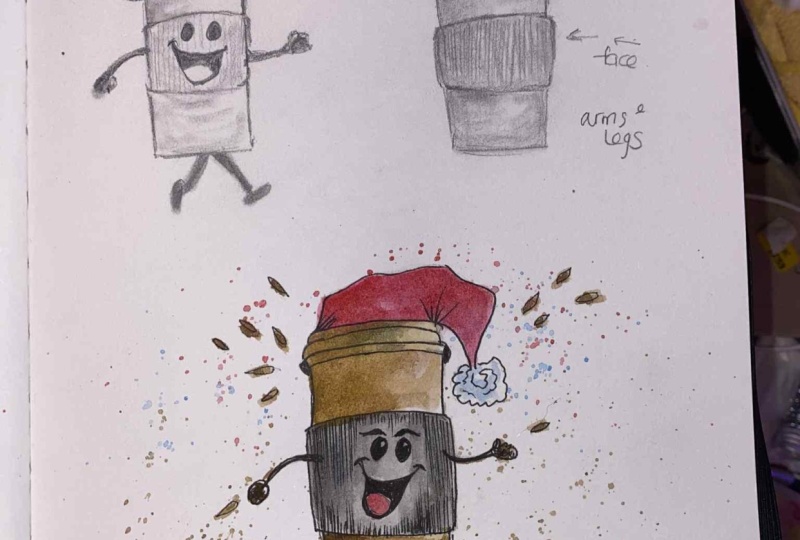
7. Halloween Update - Pumpkin!: Hello, and welcome back to
this little Halloween update. It's October, it's Halloween. And I thought of adding a new video with a
new prompt for you. So this time, we have
a pumpkin prompt, and we can do a lot
of things here. Also, yes, hello. I'm
appearing this time around, so we can have a different
connection here while drawing. And I have here once
again my references, my pumpkin references, and we
have a lot of options here. I'm thinking personally of drawing a character
mostly because I love drawing
Halloween characters and I'll keep
things very simple. But you don't need to do that. You can draw anything that
comes up to your mind, and I will give you a few ideas. For example, you can
draw just a pumpkin, a simple pumpkin or
a pumpkin patch, for example, maybe a scarecrow where the head is a pumpkin, a pumpkin latte that's
in vogue nowadays. It's the drink of autumn
and winter. What else? A pumpkin pie, an outfit, that is all oranges, perhaps with a pumpkin pattern. So cookies we have here a few cookies that
could work as well. And these are just
some from the top of my head that you could do. You can do a piece of
decoration, a candle, perhaps. That could be fun, as well. So yeah, there's a lot
of options, and for me, I think I'll try based
on these images, I think I'll try to a
character based on a pumpkin. So I'm going to pick here my pencil as always,
create a new layer, and here to the side, I will draw I will start by
drawing my pumpkin. So I like to divide things
here into these shapes, so more like these
bits here that we see. But we could also do
something like this. That could work as well. And I want it to be cute, a cute pumpkin character. And now I want it
to be quite simple. So I'm going to try. So do I want it to be a bit spookier or keep
the cuteness in it? I'm not sure. We can make a dress instead of
this. Let me see. But keep it with simple shapes. For example, let me grab my. So for example, we can
still have something like this that might be a bit
too humanoid. Not sure. Can also add here a bow
that could be really cute. So use this bit of pumpkin, this little bit here, like it's hair. Do
something like this. It's a bit of a mix of the
two ideas with the feet. Do you want legs instead? I think I prefer tiny
feet appearing here. Yeah, I think I like
this. It's very cute. Now, I'm just going to make it a little bit
bigger. All right. Now a new layer on top, lowering here the opacity a bit, and we can go for our more
detailed sketch, right. Always do sketches, a
base reference first, and then adding all the
details we might want to add. Just going over my lines, adding edit details
I might want to add. For example, I'm thinking,
do I want to add here? Another ribbon
perhaps, just to add a little bit more detail so
it's not as oversimplified. Yeah, I think that could work. Not too happy about
the head shape here. My pumpkin shape, maybe a bit rounder,
maybe more like this. I think I like it better. Yeah. I think this is it. So now, hiding the layer below, lowering the opacity
of this one, adding a new layer on top and now I will
draw my line art. See? Yeah, I think I like this. Let's go in and just go over all the lines of your sketch
with some clean line art. As always, I will make
this very quickly, but feel free to take your time until you are happy
with the drawing you have. That's the most important. You can see I'm adding here
a bit more details because I think it would be fun leaf or
to be part of the hairline. Alright. Just missing the fist, I will create a new layer
for the face just so if I need to move things
around to eyes, the mouth, and the blush, I will do it with the coloring. All right. So now we're
going to do the coloring. I'm going to merge both
of these together, and now a layer below my
inart hiding my sketch, and now I will start
adding colors. And for this one, of course, we're going to use some oranges, a darker orange for
the feet too dark. It's covid, yes. Now, perhaps I would say
purple for the dress. Halloween for me, it's always lots of orange,
purple and black. So I'm going to go
with purple here. Okay? I think I like this. Same thing for this bow here, I'll fix whatever needs fixing. But now I just want to
get my base colors down. Green here for the hair, and I think green for
this haven, as well. So we don't add too
many colors here. Alright, let's not fix here, whatever is missing or is
too much here and there. And this is, no, it's not this. I was forgetting the blush. We are missing the blush. And now, yes, our character
is finished, so cute. My pumpkin character, perfect
for this Halloween time. And this is it. Don't forget to
download the reference. Also, there's an updated
template for you to download. Don't forget to download that. There's an ra square over there, so you can add the drawing you made for the pumpkin prompt. So don't forget to download
it and then share it with me, post it, and share it. So I can see what you can come up with the prompt And remember, take your time and have
fun with your drawing.
8. Before You Go!: Hi artist. Amazing job
getting through this course. Congratulations, and I hope
you had great fun with it. The most important thing
is that you showed up. You tried new things
and kept on drawing. If you haven't yet,
don't forget to post your assignment so I can see and give you any
feedback you want. I always love to see
what you create, so I'm looking forward to that. If you enjoy this class, please consider
leaving a review. It helps me keep
creating new courses, and it also helps people
like you find them. Have an amazing day and as
always, keep on drawing.
 Patricia Caldeira, Illustrator | Digital Artist | Designer