Transcripts
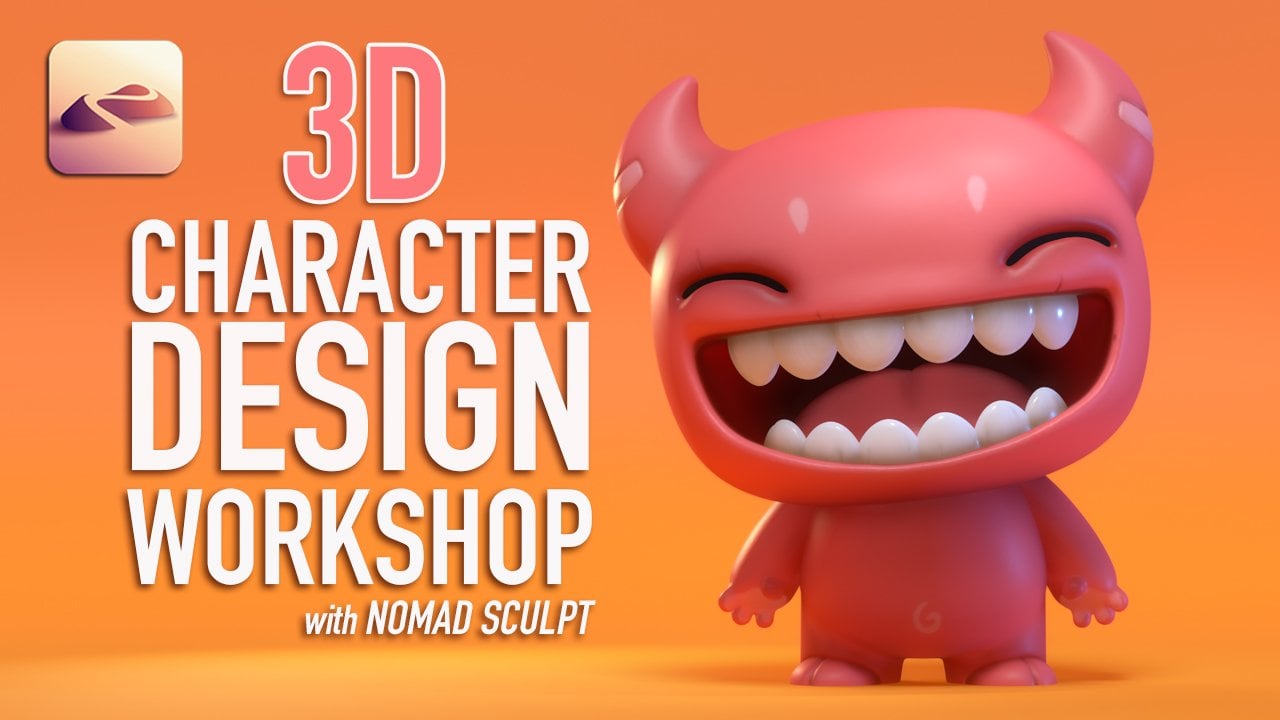
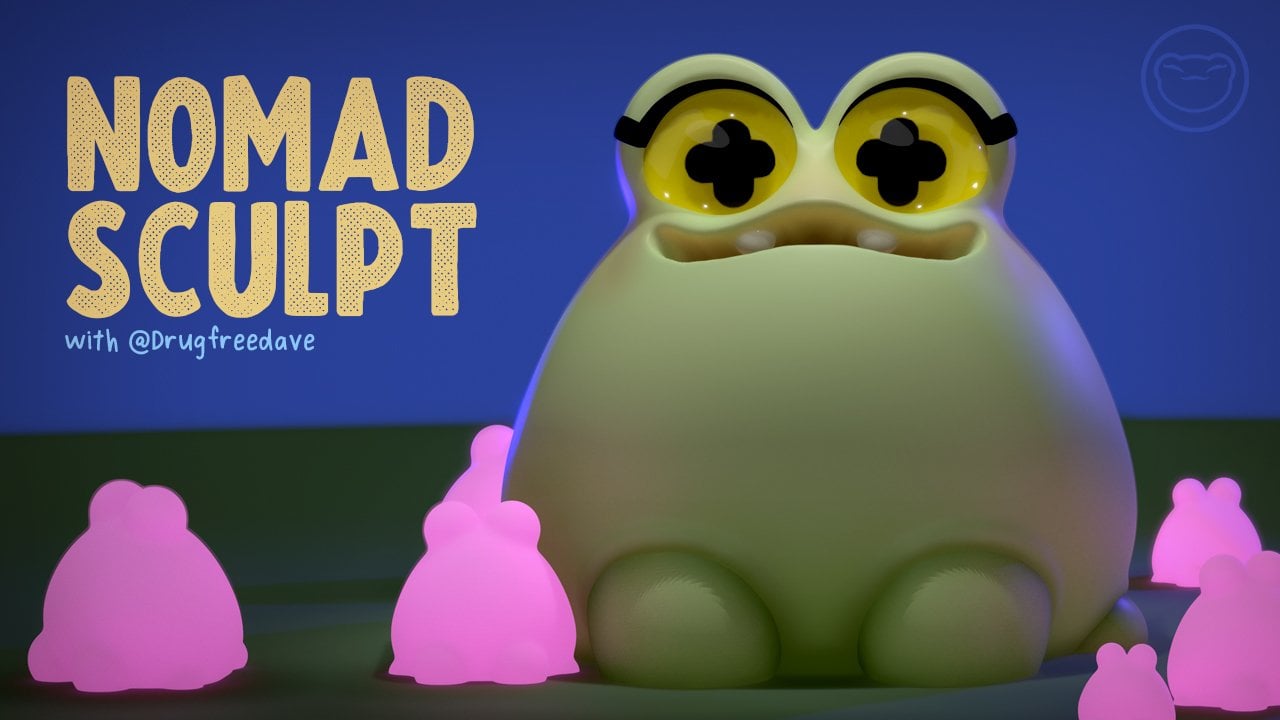
1. Advanced Character Design: Chibi Mouse: 321, go. Welcome to my advanced three D character workshop
in Nomad Sculpt. I'm drug free Dave, And I'm excited to show you how to
push the limits of what you can achieve with
three D. And bring your three D sculpting
workflow to the next level. Whether it's your
original characters, fan art, AI generated art. Some artwork looks like
it's too complicated or too complex to design
in three D, it's not. I'll show you how to think
simple, problem solve, be patient with yourself
and use the tools available to produce the type of sculpts you may not even
realize you can create. You can export to other
three D programs like Blender for more complex
rendering or even animation. You can also make ready made three D prints for art that
you can hold in your hand. Wow, this is a
complex character, so you want to be really
familiar with Noman Sculpt. We'll cover scene prep blocking
and detailed blocking. Sculpting tools and masking
creativity over reference, lighting painting,
post processing, and everything in between. I'll go over all my
steps fully so you understand my decision
making and my adjustments. Sometimes mistakes wind up being perfectly different
than what we expected, as Bob Ross says. Happy little accidents. Once again, I'm drug free Dave. And I look forward to
seeing you in class.
2. Class Project: Thank you for joining me and
allowing me to be part of your three D journey
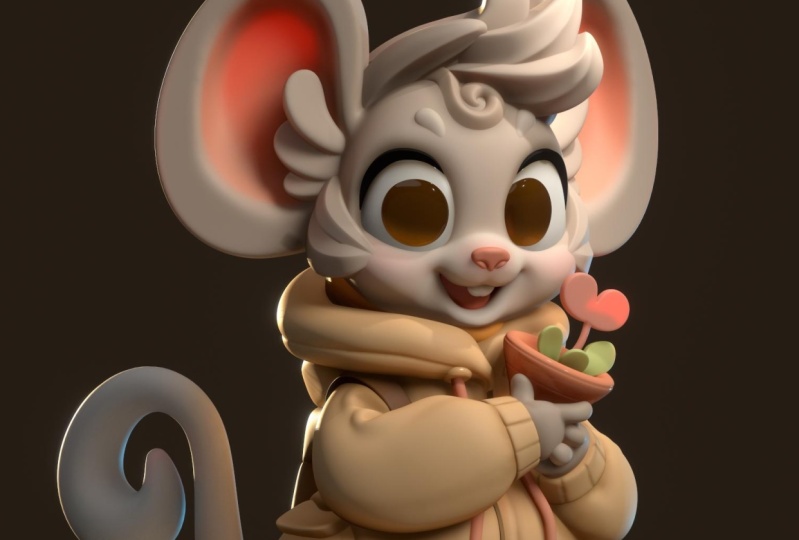
for this class project. Of course we're going to create this really cool cheb mouse, but really what I want
to see is creativity. You can follow everything
that I'm doing and create one that looks just like the
reference, just like mine. But after that, I just want to see you play around with
it, have fun with it. There's no wrong way to
create art in my classes, as you know, as long as you're
learning and having fun. So what I want to see is maybe subtle changes, color changes, texture changes,
material changes. Anything that you'd like to do? Scene prep, obviously
that's what we're going to do to set up everything
for our scene. This is normal stuff
that I do before I start sculpting blocking and
detailed blocking. Normally I would block out all the pieces and
parts all at once. But I like to cover
the head first. I think that's the
most important piece, that's the most difficult piece. So I'm going to do
the head and then I'm going to do all
the little details. We're going to block
those out as well. I think it just
makes everything go smoother once you
get the head done, then everything else, you know, there's a little
bit of wiggle room, but you really want
to have the head done and looking right. Sculpting tools and
masking, I use those a lot. So you're going to get
a lot of experience using the tools in
conjunction with masking, in conjunction with other
tools and things like that. It's just a workflow thing. And you'll see how I work. I think it's pretty efficient. Of course, the more
we go forward, the more we learn
and the more we get even more efficient
creativity over reference. The reference is two D, so we're not going to see the back. I make up a backpack and
other things working out how to make two D into three D is you're going
to have to make stuff up. You can do it the
same way that I'm doing it, or you can
do it differently. Don't be afraid to add
your touches to it. Lighting, painting,
post processing, the normal things that
you would do once you're finishing
up your sculpted. I'll just show you
how to how I do it. Maybe it'll be a little bit
different than how you do it. I think that's about
it. Let's finally get started on this
cute Che B mouse. Let's move on to the next
video. Getting started.
3. Getting Started: Okay, let's make sure that our canvas is set
up for sculpting. First we have our sphere. Here we have the grid on. Let's make a little platform.
This will be the ground. We're going to use
this red line here to be the horizon line. The grid you can
turn off and on. I just want to in I think I'm going to
bring in a cylinder. Maybe we'll just
bring in a square. Let's do here. Let's just add a box. Let's scale the box down. Actually, let's make it
a little bit bigger. We'll just use our gizmo
and make the box bigger. Make it a little bit flatter. We'll bring it back down to that horizon line,
something like that. So now I can just
get rid of the grid. I don't really like the grid. Okay, that's that. Let's
turn all of this to Macap. We go here mat cap, and make sure that we're on
orthographic, which we are. Let's just save a
quick one to B mouse. We want to bring in
our reference image. Let's go to the little
image thing here. We can close that
reference image. Now we'll tap on our
whatever image is there. Import photos. And then we'll
bring in our image. Okay, transform need
to be that big. We'll put it right about here. Okay, actually this box may need to be a
little bit smaller. That's fine. Let's start
with the head first. I'm going to bring
this sphere up. This sphere big. So I'm
going to delete it. Just add a new sphere. See how small the sphere is. Go ahead and validate it. I'm
just going to move it up. Let's take this sphere
and rename it head. Let's take this box
and validate it. And let's just rename
it floor or LR. Move the head on top. Okay, take move. Symmetry is on. Obviously the default is x.
I'm just going to turn on show line just so we
can see the symmetry. Obviously we have to imagine
that this character is straight up and facing us. We don't want to be
just round like that. I'm going to make the move
tool a little bit bigger and just just widen the
top a little bit. I think something like
that is pretty good. Not really too much, You
just don't want it to be su egg shaped on top. The bottom you see is
a little bit wider, going to follow
the reference and make it wide on the bottom. Okay. Something like
that, I think is perfect. I'm going to turn to the side. I just have to imagine
the back of the head. If I was imagining
the back of the head, I would think that it
would come back like this, maybe something like that. But when you do a
shape like this, you have to look
at all sides too. Because if you
look from the top, I'm going to spread this out
a little bit in the back, give his head some depth. I think that looks pretty good. Again, you just want to look on all angles and you want
it to be spherical. You don't want to
narrow out too much. If you look at it from any
angle, even like this, yeah, it's not too bad. It doesn't seem to
narrow out too much. Open it up a little
bit more down here, just so it's nice and
round and cute and plump. I think this head is
looking pretty good. Next we have these ears, which I think I'm going
to do with cylinders. We'll go ahead and
add a cylinder. And we'll just use our
gizmo to move it up. We'll move it over and we'll
just use snap and snap it forward and then
shrink it. Okay. All right. The ears are
going to be around the side, literally. It's this shape. You can stretch it a little bit. I'm going to go ahead and actually Yeah, I'll validate it. We can always
mirror it later on. Let's just go ahead
and put years probab. I have to write it a few more times once we mirror
it and all that stuff. Okay, let's use the move tool. Let's turn symmetry on. But let's just use the symmetry. We want the symmetry to be
here so that whatever is happening on the front will
also happen on the back. Let's check out our
symmetry right now. When I tap on it, I don't
actually see the symmetry line. I'm going to go here
and put it to local. Now I can see the symmetry line, because instead of the
world center symmetry, it's now local to the shape, because I moved it
off the center line. Don't worry if that's confusing. If you have show line, just hit local and you should see
the red line on the shape. Let's see, we want the green
line with the green line. Front and back is
now symmetrical. So now we can take move
and we can just make this shape around here. Okay, it looks pretty good. Maybe a little
more round on top. Something like that,
I think is good. Now, I'm going to make
sure that I hit front. I always make sure
I hit front so that it's pretty much
how it's supposed to be. I look at the sizes of things. If I'm looking at
the top of his head, which I would assume is here, there's not that much like this is probably a little too big, although I can move
it down as well. There's also that I'm going to, t, let's take it off snap. I'm going to tilt it
out a little bit. Maybe shrink it a little bit,
maybe something like that. Okay, I think
that's pretty good. Also, I want to tilt
it a bit as well. I'm going to hit front
and I'm going to take my pivot and move my
pivot over and down. And then hit pivot again. Since I moved the pivot there, it's going to anchor the
ear to where the head is. That's what's really
useful about using pivot. Now I'm going to
take this green and I'm going to pivot it
back a little bit. You see the symmetry line
is changing. That's okay. I'm just going to pivot
it back a little bit. Look at the front and
that looks great. Just want something
like that where you can just see that edge. So his ears aren't just like sticking straight out. I
think that's pretty good. Maybe we'll bring
it down a smidge because if you notice here,
this part of the cheek, like the bottom
part of the head, is almost equal to the
bottom part of the ear. Okay, Symmetry is all
crazy now. That's okay. All right, let's hit front
and see where we are. Everything is
looking good so far. Next for the head, let's see if we can make
some tubes here and these will eventually be
these sections of hair. Let's use the tube,
let's do a quick save. If we're looking
at the tube tool, it's like an S. We'll start
here, I'll just use curve. We'll start here and then
go something like that. Obviously that's always way off, but I want to bring
these behind the head. Here's what it looks
like in the front. This is eventually, we're
eventually going to try to make it this shape.
That'll be the point. We'll just move
this to the back of the head like that, okay? All right, let's hit
radius and radius. Now we can adjust
all of the nodes. Let's make these a
little bit bigger. This one can actually be small. Maybe we'll add
another one there. Maybe something like
this I think will work. Also what I want to do
is change the profile. If we top profile, you can see that it's very much square. We might be able to
cheat it and twist. If I take twist and
I just twirl it, then we might get a little bit closer to what we need.
Maybe something like that. We have that edge already
there, that's perfect. The only thing
else I'm seeing is there's a little curl up there. I might try to get that
a little bit more. Little curl up,
something like that. I think that looks pretty good. Then of course, you can
bend this as you want, but I'm not trying to get it
to similar because remember, his angle is like this. Since he's at a slightly
different angle, it's okay that this isn't
perfectly in line with that. I'm going to do a quick save. I'm going to go to the tube, and this is going to be hair. I'm just going to
rename it hair. But then we can
clone it as well. Then we can go to
the cloned one. We can take our gizmo and we
can move it just underneath. We'll move it down. It looks like it's a little bit smaller. Maybe we'll move it down out so it's a
little bit in front, it looks like this is
a different angle. Let's try to get
this sharp edge. Let's try to get
that sharp edge. What I would do is go to the
tube tool and then twist a little bit to try and get that nice
sharp edge out there. Maybe a little bit more,
something like that. This one's a little different, so I'm going to change these, I'm going to move these up so that it's going
right into that one. Something like that I
think is pretty good. You can see a little
bit more of it. So I might try to just pull
this down a little bit, but I think that looks
pretty good to start. Okay, Yeah, I think
that looks great. All right, so let's go back to the ear and we will
make this opening here. I think we'll just use
layer. Layer is great. You want to use sub, Let's see how deep it is If
we're on the ear and also the ear needs to be a little
bit stronger. Let's go here. Multis and subdivide. Maybe twice is good. Now it's 23.2 We'll use sub. Let's just go ahead
and make this opening. I'm going to start down
here and just go up. Just do something like that. I think that looks pretty good sometimes if you
need it a little deeper, you can do another
one. But I'm not sure. I guess that could work. I might do a little bit of
a deeper maybe. Something like that is good. It's nice. It'll be
nice and thin so we can probably see through it when we make some
of those lights. Okay, I think this
is good for now. We'll come back and we'll
continue on the head section. Yeah, we'll go from
there. Good start.
4. Head Building: All right, let's get a little bit more
into the head shape. You can see here has
these cheeks on the side. I think it's easier to just use spheres because you're
still blocking, even though we're adding
some of the details. Basically we're
just blocking it. Just a little more in depth. Let's just add sphere. We can go ahead and mirror it. Let's now use our gizmo. And we'll bring it up and over. I'll bring it forward so
you can see what I'm doing. I just want to make these ches, I'm going to flatten them
a little bit this way, and I also want to
flatten them this way. We might have to flatten
the head a little bit too, just so it has so
much of a arch here. We want it a little
more flat. We'll see. We'll work the cheeks in
and then see what happens. Okay, I want them to go
with the flow of the face. I'm thinking maybe
something like this. I know it looks funny now, but I think I want to
actually spread the face out so it's in line
with these cheeks. Maybe I'll bend this
forward a little bit as well. Maybe something like this. I know it seems a bit funny. I'm constantly trying to gauge, may move it down a little
bit and maybe out a little bit where I want
the cheeks to be. If we're looking at the front, it would come down and we
still want this shape, how it's round at
the top and then it widens out of the bottom. I'm going to use those
spheres for that. Pretty much what I mean by
spreading the face out. Now I want to take
the head and move. It doesn't have to be that big, I'm just going to move the head. Now we're still on symmetry. I just want to move
the head out a bit so that it marries up to these
cheeks a little bit better. Now, we can adjust the cheeks, but the whole reason I'm doing this move a little bit fast
with my movements here. But I'm just trying to visualize how this thing should be when I'm looking
at it on the side, I feel, let's see, What do I feel feel as though
the hair is a too far back. I might move it forward a bit. This way I can take the head and move the top of the
head forward a bit as well. See how this flattens this out. That's what I'm paying
attention to now, is I just want this round
part of the face to be flat. I'm going to turn it
this way and then pull even here a little bit
to spread that out. Now see how the front
is, nice and flat. That'll be a little bit easier once we melt these
spheres into this shape. But the spheres also
make the bottom. Let's go back to the spheres and let's validate the spheres. We don't need symmetry anymore. And now I'm just
going to stretch them just so they're a little bit more in sync with
the face shape. Maybe even on the bottom. Just pull them a little bit. Okay, see how this is? The shape makes a little
bit more sense now. The only thing is
they're far back. I think I like the
way this looks. Now I want to add
this little snout. It'll be a little snout and it looks like we have plenty
of room for the eyes. We're just going to add a
little spherical snout here. Let's go here. This mirror is going
to be the cheeks. Make sure you change the name
of the mirror to cheeks. All right, I'm going to tap on head so that
when we add the sphere, it doesn't automatically go
into the cheeks hierarchy. Let's add a sphere. I'm
just going to name this so you can name it Snout,
if you professional. Let's do a quick
save. All right, we'll bring it forward first. And then I'm just going to
bring it up, Let's shrink it. This part is very important. A lot of times I tend to make them too big for some reason. The great part about blocking
is we can always adjust it. But maybe something around something like this
is pretty good. The only problem is, now that I'm thinking about it, sometimes I use a square or a cylinder actually to
get the right shape. But we can actually, we can use what we have. I'm
going to validate it. The shape isn't too bad. I do want to square it
off by pulling this. Let's use both of
those symmetries. Let's use x and z, I believe, although I don't
see my symmetry lines. Do we have to go to local again? I don't remember having
to do that so much. Okay, that's front and back. Okay, I think that's
the wrong one. We want x and z because
we want left and right, and we want top and bottom. Now we'll go to move,
make sure symmetry is on. And we can open it
up a little bit. Just pull that out
a bit like that. Now let's turn off the green, that way we can
see how it's flat up a little bit
more round on top. We'll just suggust that
a little bit here. We'll just make it a little
bit more round on top. Something like that, I
think is pretty good. We also do want it
a little more flat. I think I'm push and pull until the profile
looks a bit more flat. I think that looks pretty good. I think it looks pretty good.
It might be a little big. So I'm going to shrink
it. Get back to the snot. I'm going to shrink
it a little bit. Then I'm going to take move now. I just want to pull these sides. See that goes into the cheeks. I'm going to pull, I'm actually going to be
behind where the snout is, even though it's on the head. I'm going to, once I find it, I'm just going to pull
it into the cheeks. Push and pull, push
and pull, push, pull. I don't know if those are
the words, but you know, song singing, I want to make sure that it's
around on the bottom too. I'm just going to keep track
of that little bottom part. Just pull this top part, see how we get that
nice little roundness to it. That's what
we're going for. The front of its fine, we can always addit that a little bit. Oops, Okay, I think
that looks pretty good. Again, it might be
a little too big, so I'm going to shrink it side. Also, I need to bring it into
the head a little bit more. That was weird. What
was that? What is that? Are these connected somehow? That's so weird. Why
is the hair moving? There must be some
sort of glitch. I don't know. Maybe someone
understands what's going on. I don't. But I think I
can still move it back. It looks like the hair goes
back to where it should, maybe out a little bit further. I think something like
this feels about right. We'll stick with something
like that for now. I want to take the head and I want to make sure that the chin is there to actually, we can take the bottom
of these cheeks and pull them out a little bit and
then go to the head and make sure that we pull this out a little bit so
there's that chin there. I'm just going to round it out a little bit on the bottom. Can even bring this
out a little bit. Maybe I'll make this
a little bit bigger. So this is more of a sweeping
flat bottom of the face. It looks like a great
shape I'm going to save. All right. Looks cool. Okay, we have, let's see.
I'm looking at the ear. I think I'm going
to take move and just drag this down a
little bit like that. And we want to do this
little round part in there. I think that looks
like a cylinder. Let's add a cylinder. We'll move it all the way
up just so we can see it. I want to do snap forward. We'll make it small. We'll
pinch it a little bit more. I want to do the same
thing like we did before. I want to take symmetry. Oops, let's validate it. Actually, you know
what we can do. Let's stretch it first. I guess I can
validate it anyway. Let's validate, let's
go to symmetry. It looks like it's already
on vertex we want green. If I don't see it, just
remember if you don't see the lines on there,
just go to local. There's, there's red. We want Z, because I want to
stretch up and down. Remember symmetry.
We go here vertex. Now we should be able
to pull this apart. Maybe just something like that.
I'm going to take it off. Symmetry, I'm going to put
this back to auto now. We can just use move, we
can turn symmetry off. Actually, let's
leave symmetry on. But let's change it from
blue to green. There we go. That way, everything is going
to be equal on the front, on the bottom, even though it doesn't look like it's
equal in the reference. First, let's remash it. You notice that it moves
ugly. We don't want that. I'm going to do a quick save and then I'm going to resh it. I use the short cut down here. If you don't have
that, you can change your short cuts right here. Vox remesh. I always use the
voxal remesh down there. I think 175 is good. I'll resh it. Once you remash, then it should just be
like a normal shape and it shouldn't get
that ugly movement. Let's move it. I'm going to make this bigger so we can get nice sweeping move
energy. There you go. See how I'm just manipulating
it so that it creates this nice curve just by pushing and pulling something like that
I think is good. I'm going to re mesh
it back down to maybe like 15145 or so. Then I'll take and
smooth the whole thing, especially the bottom, to
really give it that shape. I'm going to turn symmetry off. And then I'm going to
take move and just make it nice and round on top. This is also, I
turn symmetry off. I'm okay with this front part going up a little bit further. That's why I just turned
the symmetry off. But I think that
looks pretty good. Now, let's just use our gizmo. I'm going to move
it to the center, so I'm going to do pivot, center pivot now we can just move it into place,
make it really small. Maybe we can stretch
it out this way. Okay, Let's bring the pivot
down to the base of it. That might be easier for us to place it where
it needs to go. Right about there,
it looks like it's maybe a little bit more forward, maybe a little bit bigger, maybe even a little bit
more bigger than that. Something like this.
Then once you're happy with the thickness
and everything, then you can move it into place, you can take it off snap, and then you can
just adjust it to be roundabout where
it should be. I'm thinking
something like this. Of course. We'll adjust
the ear and stuff as well. Okay, I think this is good. We'll come back and we'll
continue on the face and head, and we'll add a few more of these little pieces
for the hair. There's some here, it
looks like there's some along the side of the face, which looks pretty cool. Yeah, so far so good.
Don't forget to save.
5. Hair Stylin: All right, although we can use the tube tool for some of
these little sections. I think it's sometimes easier to just use spheres and
just stretch them. That's what we're
going to do, this one. This one, because we
do have to fill in all of this stuff back here that
we just have to make up. But it's in the back, It'll be easy, we don't have
to worry too much about it. Let's go ahead and add sphere. We can validate it so
we'll just shrink it. Actually, it looks more like
a cylinder but that's okay. Do I want to stretch
it or do I want to just Let's just
stretch it with move. I'm going to bring it
over here. Wait a minute. Do I have an odd symmetry on? Let's check. Oh, actually
we don't need symmetry on. That's what it is. We
don't need symmetry. So then it could just move,
you know, unencumbered. I do this a lot and
I'm pretty used to it. I just do a lot of
push and pull with the move tool and it's really great if you can
just push and pull, then you can eventually get
to the shapes that you want. Any time if your model starts
to break or look strange. If you do that, then
you just have to remesh the shape
that you're using. As you can see, I'm
just manipulating this until it resembles
what I'm looking for here. Something like that.
See how it goes right into right behind the ear. Maybe I'll just move
it back a little bit. Maybe something like that. Looks like it goes
right behind the ear. But I'm really just looking at this nice curve when
I look at that. Yeah, the shapes,
that's pretty good. I always look at
this negative space to get a gauge of where
I'm supposed to be. I think that looks pretty good. All right. There's some
on the side as well. Let me see what's the easiest
thing to do for that. Maybe we will use the tube tool. Actually, let's do curve. There's one here, one here,
that might be a few more. They look like they go from
here and then up to the face. They're nice little
details. I like them. Let's see, let's stick with one for now and
just get the shape where we want them or
the general angle. It'll be something like
that. They'll be one on top, and then we'll just do
another one on the bottom. Let's do the radius. There's all three
of the nodes there, so we can make these a
little fatter in the middle. Something like that. Let's go ahead and turn on the profile. Okay, that looks good. I might want to add to this
a few more profile angles. Now that I'm in
the profile menu, that's right here, I'm going to bring this
down a little bit. I'm going to bring it down
and then move it over. Here's my option just in case something is not working.
This is what I'm using. I'm going to add
some nodes here, I think give it
some more sections. You can do the same
with the bottom. You can move it up and
then add, add some edges. Let's make it a point
there. There we go. Maybe we'll make it a
point here as well. It looks like this is good. More what I was looking for,
that looks pretty good. I'm going to make the
ends a little bit smaller and I just want
to bring them out. I'm going to bring all
these parts a little bit further out just
so I can see them. Even if it's smaller, we can always make it smaller later. I'm going to do a quick save,
but this one looks good, which means, let's see, this will be hair. Let's put this with
the other hair. Where's the other hair? The other hair is down here.
We'll put that together. We can just clone
this cheek hair one. I'm going to change that
to cheek hair or lower. We'll use our gizmo
and just move it down and we can make it bigger. It looks great. Maybe we'll tilt it a
little bit with the gizmo. Give that more flat
angle that we see. Maybe we'll tilt it back, but we can go back
into the tube options, which is the greatest
thing we can really tuck this however we need. It looks like this goes
right into the cheek. I'm going to make
that nice and small. But I also want to bring
it out so that you see it. Of course, we can adjust it a little bit later if we need. We'll make it a
little bit bigger. There we go. So something like
that, I think looks good. If I make it bigger, I just bring it out a
little bit more. Okay. Don't forget. Again, we might adjust the ears a little bit,
but we'll see what we like. But I think that
looks pretty good. It looks like there's another
little piece back here, but we really need to figure
out the rest of the hair. I think for the rest
of the hair we'll just use a sphere. Let's hit front. We'll do a quick save.
Let's add another sphere. Let's move it up and move
it to the back of the head. With this sphere, I think
we should a nice shape, that will be the
back of these hairs. I'm going to flatten it a little bit and then I'm
going to tilt it, bring it forward, and go
ahead and validate it. Now we'll move for now, we can keep symmetry on, but not for very long. I think we'll just
put it into the head. Let's turn symmetry off
and really just make it flow with the hair. I'm just going to push and
pull it like I always do. I blend it in with
that natural curve of the hair,
something like this. And just blend it in
with the head as well. I think something like
that looks pretty good. This looks believable,
it's all the same color. It doesn't really have to
be that crazy in the back. But what we can do is add
some fun designs with the crease tool in reverse once we get something
that we really like. All right, I think
I might want to. Let's take this tube, which is hair, and
let's clone it. Let's take our gizmo
and move it back. Let's turn this
little piece into, let's just use this
nice piece of hair. I'm going to adjust it so
that it would show up, even flatten it so that it
would show up maybe around here maybe something like that. I'll go back to tube then
I can just adjust it. Maybe I want a little
bit more of it showing can pull it up. This part maybe curves
around a little bit. Again, this is the back. It's okay. It doesn't
have to be perfect. I think that looks pretty good. If you wanted to
make that end round, I would just maybe
add another node and then you can open it up. Then you might have
to just smooth out this end a little bit. Something like that.
But I don't know, I might just leave
mine like this. But we'll see. I'll
leave it open for now. Open for interpretation, maybe something
like that for now. All right, oh, this sphere.
Let's go to the sphere. It looks like it's poking
through the front. We want to maintain
those nice edges. We'll just push that back that way it's not coming
through the front. There we go. Okay, I think everything is
looking pretty good. The nose is feeling
a little bit big. So I'm just going to
smooth the whole thing. That should shrink
the size a little bit in like a more natural
way. I think I like that. Okay, let's go to
the ears and let's just mirror it till we
have it on the other side. It's a little bit tricky
since we had adjusted it. We adjusted the
symmetry to local. Let's bring it back to world, Make sure you're on the front. Let's mirror this ear. Go here. Add and mirror. Now it
mirrors it to the other side. Okay. I'm going to just go
to the mirror and name it ears just so you
don't get confused. I'll do a quick safe. I'm going to do the same
thing for these two pieces. Actually, can I mirror them yet? Oh, I can. I'm going to hit mirror and then go down to
this one and hit mirror. Now they're both mired. I'm going to name the mirrors, then I'm going to
name this mirror. Cheek low. Okay. Do a quick save. I'm so used to saving
so much. Okay, great. So now let's see. It looks like this is a, I'm looking at the
space for the eye. If the eye comes up out here, there's not going to be
enough space for the head. I think it might
be this. I think this might just need to
go up a little bit more. Either that or the head needs to get a be a little bit bigger. I just want to make
sure there's enough. Well, we can play that out also. Yours might be a little
bit different than mine, because obviously
everything is not going to be exactly similar. But let's see, I might want to bring
the cheeks down a bit. I think that looks good. I'll bring a bit to
match back up with that. That should be enough
room for the eyes. I just want to
make sure you have enough room between
the hair and the eyes. But both can be adjusted. The hair can be adjusted, different aspects of the
head can be adjusted. That's that's just
part of sculpting. Now that I made those changes, I'll do a quick
save for the eyes. We just want to make a section
for these eye sockets. I think we'll use mask, just regular mask on the head.
The head is really small. I'm going to subdivide it. We'll go here multi, we'll
subdivide maybe once is okay. I think once is okay. Now we just need to make these round section for the eyes. I go to minimize that, I'll take a good look becaus,
I'm going to cover it up. Look at things like the space between the ear and the eyes, the space between the middle of the snoot and the eye,
things like that. That's how I gauge how
this shape is going to be. I'm thinking it's
going to be maybe something like this essentially. So now I'm going to
look at this and it looks like there's really
not enough forehead space, but it looks like there's
not enough forehead space. What I want to do is I'm
just going to undo it. I'm going to take the cheeks with move and I'm just going
to move them down a bit. I'm going to move them a little
bit, something like that. I'm going to move this
down a little bit as well, even though we just did it, sometimes you got
to do it again. I'm going to move
it in a little bit and I'm going to take
move on the head. And I want to extend the chin and all that stuff
down a little bit more. So maybe I'll even take the ears and they're
still in a mirror, so the same thing should be
happening to their side. Just move them down
a little bit too. Okay, so let's try that again. I'm going to use mask here and we want to just
make that nice round piece. Okay, let's see how that looks. All right, so it looks okay. It's not exactly wide enough, it's very round the sockets and there's actually a
lot of space in between. That's one thing
that I really want to pay attention to is all
that space in between. The space for the forehead too, I think that's important
to get those right. I'm going to undo again and bring all the stuff
down even more. I'm going to bring
these cheeks down. Bring the head down. Unfortunately, this is
just part of getting the look right.
Unfortunately there's no I want it to be on the cheeks. I would love to be able to
get it right all the time, but sometimes you just
got to like feel things out and just until they look good and I actually
want to take these pieces. Maybe we'll start
with the bottom one and just bring it down. I'll do the same with this one. I'll just bring it
down a little bit, something like that. Bring
this down, will follow. Okay, it looks like there's enough space
there now, hopefully. So let's try it again. So I'll use mask and
I'll start about here. Okay, I think
that's pretty good. I'm happy with that. So
I want to clean it up. I want to make it a little
bit more round here and then do unmasked and
just clean it up a bit. What's important is
that it's very round. I want to make sure that
this is very round. For some reason I'm tending to make it go in a
little bit here. When it's actually round, I want to make sure
that that's round. I want to make sure I leave
a decent amount of space. I also want to open
it up a little bit so that there's plenty
of space in between, maybe even a little bit more. Because I know that when
you bring the pieces in, when you in them
and smooth them, sometimes it can
spread a bit more. I want to compensate by making sure that this is not
too close together. Otherwise, it'll get closer
together and closer together. And I don't want that. I also want it to be nice
and round here. I'm actually going to add a
little bit more to this side. See how I make it round
off from that side. I think that looks good,
maybe a smidge more. The eyes are quite big, so I think that works.
Probably too big. They could be too big,
they might be too. I'm going to take some
off a little bit, I'll take a little bit
off. Okay, I like that. Once you have your shape
pretty much like this. Let's go to the Mask
Options up here into. Let's undo one thing
that we need to look at. Let's hit Solo. Make sure you're on the head,
and hit solo. That's one piece that is
going to make a difference. Let's take the mask, unmask. Let's just unmask
some of the bottom. Now we can't see it. You can hit solo if you want to see it. But as long as we
just have some of that unmasked on the bottom,
that's a little cleaner. We just want
something like that. So now we can go back
to the mask options and invert, that's much better. Now we can take the gizmo
and just move it in again, the hair is doing
that weird thing. Move it in doesn't really
have to be that deep, maybe. Something like
this. But something I like to do is make it
a little bit smaller, like scale it down a little bit, then actually move it. It's moving, I'm just going to make it a
little bit smaller. All the sides are coming in. I think that's a
little bit better. Maybe even squatted a
little bit this way. I think that's a little bit
better. Something like that. Now, I'm going to go to the
mask and just clear it. I think that looks pretty good. Let's smooth that. Just see
what we get. Very nice. Very nice, beautiful,
if you ask me. Okay, I want to add a
little bit of a chin. Sometimes you just have to add the things
while you see them. But I want to add a little
bit of a chin here. Just extend this a little bit. Okay? I think that looks great because the mouth is
going to be open, so we are going to need a
little bit more space there, but we can push that up a bit. But so far so good.
We'll continue, we'll do maybe some of the
eyes while we're at it. Let's take this little piece, we'll name this ear here. Let's just clone it.
Yeah, let's add a mirror. I'm going to name the
mirror here. Or hair. Okay, cool. Let's save, and we'll continue
in the next video.
6. Eyes & Nose: All right, let's
jump into some eyes. We'll add a sphere. Let
me go back up to head. I always tap head when I add shapes so I know
where they are. We'll add a sphere. We'll just work with
the one sphere for now. We'll just move it up. Maybe we'll shrink it a
little bit and then we'll bring it the eye, we have something
like this, obviously, we don't want it that round, but we're going to flatten it out. I'm going to bring it out more. I'm going to flatten
it something like this. I think it is pretty good. What you want to do is
you want to line this up with the curvature of the face. I'm not only going to move
it in to that eye socket, but I'm also going to spin it. It's a matter of moving
it in the right spot so it's nestled right
in this eye socket. And I'm going to go
ahead and squeeze it. Once it gets close, then
you have to maneuver it. It's in there so it's snug. You don't want to
sticking out too far from the head, maybe
something like that. Looks pretty good. Maybe
I'll squeeze it together. I'm a line also. You have to be careful if
you're on a line because it's not going to stretch or push in accordance to the shape. Just keep
an eye on that. It'll stretch this out
a little bit more. There seems like the
eyes are a little bit longer, you know what? Also, they're a little bit at them at the top and a
little wider at the bottom. I think that looks pretty good. I'm going to go ahead and
I'm going to mirror it. It looks okay. There's still a few things
that are bugging me, but I think I'm just going to validate it and
then I'll just use move to polish it up. Literally just by moving it. Something like that, I
think is pretty good. I'm going to pull it
out a little bit there. Obviously we can work
with the cheeks. You see here it
curves underneath, but we can do that
with the cheeks. We can probably do it
with maybe even flatten. Let's try flatten, symmetry. It's in a mirror. It's
happening to either side. I wanted to make sure
I'm just flattening it because this line comes
straight down there. I'm just going to
flatten it a little bit. Go ahead and scoops, make
sure you're on the cheek. Smooth it a little
bit. I'll take move and I can just move
it down a little bit, something like that, so
we really get that curve underneath the eye. I
think that looks good. I'll just smooth a little
bit out for a good measure. All right, let's
hit a quick save. Okay, I'm just now moving around the face just to make sure that the eyes look
good from different angles. You don't want to
go to a weird angle and the eye looks funny. Pretty happy with that. The
only thing that I might see is I might want to
just bend it a little bit. Let's see how that
yeah, that looks okay. I just felt like the bottom part was bent out a little bit. So I just wanted to flatten. This is the thing
you want to go for. I like to keep a nice
straight down here. This bump bump for the chin. Eyes are pretty
straight. I like that. I can see this ridge. If I'm looking at it profile, I think that looks pretty good. The eye looks
fairly, even around. The only thing that I'm
seeing that's a little bit different is my eye comes
in a little bit there. But I don't really think
that's too much of a big deal. I could take move
if I wanted to. I guess I'll do it since
I'm telling you about it. And move this a little bit so that this eye comes
more straight down. That's the only thing
that I did there. Might even stretch the cheek up a little bit so
you can see it. Anyway, you can make any
of those little details until you think it looks good. I'm pretty
happy with this. One thing I want to do is
flatten the ridge above the eye socket that I just
like, the way that it looks. So I'm going to take here with flattened tool and
just flatten this out. Something like that. I'll just take smooth and just lightly. Just give it a nice
little smooth over. I think that looks
good. All right. Let's this is the eyes. Let's take the mirror and
make sure we name it whites. That way we know it's
the whites of the eye. We'll, I'll just label it again. What is this? This is here. What's his name? It, hair and we'll put it down by the hair. Okay. I think everything is
pretty much labeled. Sometimes I just have to
look through and make sure everything is labeled.
What is this? I think that's more hair shape. Okay, good. Everything is nice and labeled. Let's go to a quick save. All right, this is
looking pretty good. Let's see, let's throw in
some really easy irises. Pupils. Irises. They're pretty
round obviously. They're going to
be looking off to the side. He's
going to be turned. But for now, I think we'll
just put it in the center. I'm going to use the gizmo. We'll bring it up and
forward so you can see what I'm doing. All right. I'll make it pretty
small and then I'll shrink it up like that. I'll move it to
the general area. You might actually have to
make it a little more round. It depends. Sometimes
it's a little bit hard to maneuver
it around the eye. It just takes some practice with what is this thing called, gizmo, excuse me, Something like that. Let's see, there's
not that much space below that. Looks pretty good. Of course, it doesn't work for the angle that it's looking. Now, they should be about here. I think later on I'll adjust
it a little bit better. Also, I just want to make
them really more flat. I think that looks pretty good. One thing that I do sometimes is I'll go to the eye and I'll actually flatten it out a little bit around
where, where the iris is. The reason I do this is because sometimes the dome shape of the eye will alter the
shape of this pupil. And I don't like that, I'd
rather just flatten out the eye because you won't
really notice it that much. I'll just take smooth
and just smooth over it. It just allows the eye to
be a little more flush. Okay. I think that
looks pretty good. It's a little big. I'm going to make it
a little bit smaller. Part of me wants to
squeeze it a little bit, but I'm not sure yet if that is a good
option. I'll just do it. I'll just squeeze it. I want to make it look good
for the front for now. Later on we can move it, but I won't be able to
live with them just looking really weird.
This looks good. This will be one. We'll go ahead and add a mirror, and I'm going to name
that one as well. You can name it
iris or whatever. I just call it one. Now we have the two eyes
there looking good. This little thing,
actually a lot of animals have little tuft right here and I
really like making it. Let's make it, we're going
to take P one and clone it. This is going to be dots. I'm going to name the mirror
that I'm going to name the shapes that dots. All we did was just
clone the irises. Now we'll take dots and
we'll just move them up. Sometimes I use a cylinder,
cylinder for this, but a sphere is actually fine. We'll do something like this. I'm want to make it
small. I'm really just concentrating
on the one shape. Sometimes this can get
confusing using both. You can take this
out of the mirror. You can just do one literally
just because sometimes it can get confusing
having two shapes there. I just do whatever you
go. Okay, something like this, tilt it. Then I'll validate it
and I'll just move. Or actually drag might be a
little bit better for this. Let's see, what shape
do I want to make it? We can give it a little
push and pull so that a tear drop. What
shape would that be? I usually like a little
shape like this, but it could also be
the opposite way, like if you were to push
it the opposite way to look good. But I think that
looks pretty good. Let's see what happens
if it's the other way. I'm just going back and
forth between the move tool and drag to get what I need. Something like that.
Looks pretty good too. I think that probably
looks a little bit better. I like it now. Once you have that, you can
just drag it right back into dots and you
have two of them. I think it looks great. Okay, let's put a
little nose on there. If I'm looking at this nose, we could probably do
it with a sphere. I usually use a cylinder. I'm going to go
ahead and tap head and then we'll add
the cylinder there. We just want to bring it up. We'll use our gizmo and we'll
bring it up and forward. Then we'll make sure
we have snap on and then we'll just bring
it forward and shrink. It can probably
take it off snap, we just make it small,
something like that. Actually we can make it
a little bit bigger. Maybe stretch it out. It'll
be something like this. I made it long for a reason because the top part is usually a little bit
longer than the bottom. This just gives us
some room back there. Essentially, We'll just
make this into the nose. Let's go ahead and validate it. And then let's take smooth and we can just smooth
the whole thing. It'll change pretty drastically. Okay, now let's move and
we'll just shape a nose. What I like to do is just
press down on the front. I'm pull it back from the center to I'm going to pull
back on back part. Just push and pull just so it's something like
that. Looks pretty good. Now what would be
nice, let's try case. Where is the crease tool case? Maybe we can just
add a shape like this to just make it
a little more nosy. Maybe we can flatten this ridge something like that. Looks good. The only thing
that I might need to do, I can probably use drag and we'll just make it
a little bit wider. Just feels like it
should be a little bit wider then the whole thing
may be a little bit smaller. Okay, pull it out
a little bit more. I think that looks pretty good. Let's take a look. I think
that looks pretty nice. Make it a little bit smaller. Sometimes I tend to make
snouts and noses a little big, so I'm really working
on not doing that. Okay. I'm going to take drag
and I'm just going to move the ends back a little bit. Let's take a look at the.
Okay, that looks pretty good. Now I'm going to do a
quick and I'm going to vmoseI'xmsh around 200, and then we can
just smooth it out. And it should be a little more
tough than it was before. Okay, I think that
looks pretty good. We'll drag that down
a little bit more. It's a cute little nose. Okay, let's add this crease
in the middle of the, so let's box mesh it. So I'm going to box
remsh it around 200. And this is just so
we can work with it. I'm going to smooth
it out a little bit, then I'll take case. Now we have symmetry on, which is fine, but we just have to make sure that
we're right in the middle. Since we have symmetry on, I'll do a few passes on this
just to get that separation. And then I'm going to smooth it out just to get that nice
separation in the middle of. Now we have to get to the mouth. We'll use mask, but I think we'll do that
when we come back. I think we got a lot done. Faces looking nice and cute, just take a good look and experiment with making
things bigger, smaller. I might need to make the
snout a little bit smaller. I'll do that in the next video. But I'm just always paying
attention to things that I might need to change
or might look better. That's just something that
comes with the territory. All right, I'll see you all in the next video. We'll
get to the mouth. We get to save.
7. Mouth Chronicles: All right, for the mouth, we may have to extend
this a little bit more, but we'll just play it by ear. We'll use the mask tool. All right. We're going to
use the head for this one. We'll use the head and
we're going to mask off this mouth right
underneath this piece. Pretty simple. Make sure
you do not on unmask like me now we'll just A
mouth is open mouth. I'm thinking something
like that, but I do know that it does this weird thing, when I always do this, the mouth winds up bigger than
what I want it to be. Keep that in mind, I'm
actually going to make it smaller because the mouth winds up bigger than
I want it to be. I think I'm going to do
something like that. I think that will work now
that we have that there. Let's do a few things actually. Now that we have that,
let's take clay, either clay or inflate. Maybe we'll use inflate. I want to inflate
outside of this. Remember we're
still on the head. I just want to inflate
on the outside because he does have
like a little lip. I want to just add
that in there. Clay is similar, but there's always a few ways
to get to the same goal. Now we'll go back to the
mask and let's invert it. We'll go back to
the mask invert, then we'll take the
gizmo and we want to push this unmasked part back. It's okay that it has
those weird shapes there. That's from the cheeks.
We'll get rid of those. I'm actually going to move it up a little bit and maybe even
make it a little bit smaller. Something like that,
I think is fine. I'll go back to my mask and
then I'll just clear it. We have something like that
that looks pretty good. Now what we need to do is trim these cheeks and we need to vox mesh all of these
pieces together. We probably could have
done it before doing this, but I don't want to
vox mesh the snout, the cheeks, and the
head all at once. I'm just going to
trim these cheeks. I'll just use lasso and I'm just going to chip away at them. Okay, I think that
looks pretty good. If we solo them, we
can see if there's any miscellaneous pieces
we don't really need. We don't really need
all this back here. Okay, that looks good. Part of me feels I could possibly have made the
mouth a little bit deeper, but I think that might be okay. I can always take layer and sub and make it a little bit
deeper manually like that. That should be fine. That
should be more than enough. Okay, I want to take the head, let's do a quick save.
I know it looks crazy. So we're going to box remash that and smooth all of this out. Let's box remish the
head around 200. So solidify this up a bit. We'll smooth it. Actually, you know what we can
do before we do, actually, no, I think it's fine. Let's take a look at the
cheeks snouts a bigger size. The the cheeks are 5,000
Let's subdivide them. By subdividing, we're
just going to give them more geometry because if we want to voxal remish
them with the head, then we're going to want to give it everything more geometry. Let's take that,
let's label the nose. Okay, We have the
head. We have the. Let's go there. First, we
need to validate those. So we validate the
cheeks snot head. Let's do a quick say
before we do this. Fox remesh. Oh, you
know what, I do. See, let's go here.
Where is it at? Let's go to multi. Let's
just subdivide it. That's what I was saying
before that I forgot to do so. We'll subdivide it once now. We'll take the cheeks, snot, and the head, I'm
going to sneeze, that's why I'm talking funny. Then we'll just Fox
remesh all this together. Maybe I think 200
will be fine for now. Okay, so we'll box remesh
all that together, so now we have a
nice clean face, we can just smooth this out. Part of me was considering
having a second piece here, but I think it's just easier to put it all together
and then just paint it, separate it with paint. Now, I'm just
smoothing all around. You just want to smooth out
those, those cheek areas. Okay? That looks pretty good. He
looks a little bit crazy. And that's because we need
to pull up the bottom of the mouth, basically. We need to take drag, we need to drag on these
corners of the mouth. Okay? We need to drag those up. That's going to make him,
that's going to give him a little bit more of a smile. We also need to, let's
see if I can explain it. We need to push this part. You see how the head, like this part just comes
off this connector part. We need to push this back. We want to try to
keep it straight. We're going to push that back. But we also need to make sure
that this is pulled up a little bit, something like that. So let's smooth it. Let's
smooth the bottom part. Sometimes this takes a
little while to get right. It's a little tricky Of faces
like this can be tricky. I want to take move and
I want to just pull out down here at the
bottom of the head. Okay, Let's see, how do
I want to approach this? He does have a lip
that looks all right. I want to use case and I want to add this crease here
going into the mouth. Let's add that. And then let's smooth
it out as well. Let's see how that looks. I want to take
drag, and I want to drag up even the inside. I want to drag that up as well. Okay? Okay, that's not too bad. Let's also pull down, we want to make these nice and round here. I'm just pulling down on
the little area right below his nose because that
still has to be round. I guess we can wait and make the split a little bit later. We don't have to do it now, but it's looking really good. It's really important to always continue to look from lots of different angles to try to see things that you
might want to fix. I think I'm pretty
happy with it. Let's take case. And
I want to try to make some separation from
the bottom lip. I'm going to make this
crease and go under the lip and see how that looks. I'm going to try clay and
adding clay almost like a chin. I'm going to try to make a chin here and see how that looks
when I smooth everything out. I don't mind that
this stuff is subtle. Yeah, I don't really
mind that at all. Basically, I just had to you want to push back this part of
the mouth essentially, and I can probably push it
back even a little bit more. I'm going to use drag, but
make it a little bit bigger. Just push that
back a little bit. Okay. All right. I think that looks pretty good. His mouth is open
a little bit more. So you can just, we can protect this
upper part by using select mask and lasso. Let's protect this upper
part. Symmetry is still on. Then we can take,
drag, can literally just pull the mouth down so
it's a little bit bigger. I think that's pretty good.
Let's clear the mask. Make sure that it does. I'm what do I want to do next? I'd like to make a separation from this part and I think the only way to do it is to use flatten and to just flatten out this area next to the lip. I'm also going to flatten
out a little bit this way. Essentially, I'm just
making a separation here, making a more of an indent, which should give a little
more definition to this lip, but also just bringing the face. Making the face a bit, not as pump in these areas. It doesn't need to really
need to be plump here. Hopefully that makes sense. Yeah, I think that's
a little bit better. I think what was bothering
me is that this was all very flat here and I really
wanted this to be pushed in. Flatten is a good tool for that. Okay. There is another
thing that I want to do. I want to extend this edge up
to the corner of the mouth. I think I'm going to
use crease and sub what that does is it'll give me a nice crease that comes up. I'm going to start here and then bring it right
up to the mouth. It's a cheat, it gives
me a nice crease. I'm going to take it off sub and I'm just going to build
this out a little bit to this corner of the mouth just to make that
a little stronger. All right, I'm going to
take clay and I'd really like to build out these
little round pieces here. I'm just softly just
building on them with clay, making that a little more round. And then I'm going
to vox remish it, let's save and I'm going
to vox remish this, all I did was
basically just shape this bottom part of the mouth. I'll give you some good
views of that so you can see what I was doing. Well, you know what
else I want to do. Let's, let's inflate
the bottom part of this lip a little bit more before we do.
A box will merge. Just so he has a little
more lip to work with. Phenomena. Box remesh at around 200 and then just
smooth everything out. Everything should smooth,
might make it a little bit smaller and to make
sure that I go nice and light so I don't lose too much. We can bring some
back with crease, but we want to Maine, we want to maintain a lot of these shapes
that we're making. I think that looks pretty good. The nose still
feels a little big. It also just might be
a little bit too high, so I'm going to bring
it down and flatten it. Maybe just bring it in a
little bit. Oh, there we go. That's better. It was just a little
bit too high, I think. Okay, good. So I'm going to use Case
and I'm just going to, I'm going to extend this
out a little bit more. I'm using drag, so
I'm just gonna, okay, I want this to
stay nice and straight. Okay. All right, I think
that looks pretty good.
8. Teefies and Lashies: Okay. I want to flatten this. Just take, flatten and flatten
out this lip a little bit, just to give it, just to
give it that nice flat look. I think this just looks a
little bit nicer than having the whole thing round, okay? And then a little bit of
a smooth but very gently, if you want a
little more detail, I'm going to use case and sub, and I'm just going to detail out this other part
of the lip here, like this crease and sub. Super useful. And then I'm just going
to flatten it and it's just going to give
me a little bit of definition for that Lip. Okay? All right, so let's add the teeth in
there so we have the head. Let's go ahead and
make a sphere. So I want to move
it over and up, and we'll shrink it teeth easy. So we'll just flatten this. It looks like, I guess this
will just be two teeth. Let's move it into position. Okay, so something like this, a little more inside the mouth. We'll make it smaller
and move it over. Then we'll go back to our
tools up here and mirror it. We can still use the
gizmo and then we can just adjust it as we need. I'm thinking
something like that. If you want them to be
a little more rounded, you can just bring them
closer to each other. Oops, we have to. There we go. So yeah, maybe something like that can
make them a little bigger. All right. So if I'm
looking from the side, I think this would be a
little bit more straight down, maybe.
Something like that. Okay. So we can go ahead
and validate that. And then I'm going to take move, I'll make it a little
wider at the top. I think that looks nice.
Let's add a tongue in there, so this will be the teeth. We can go ahead and invalidate those and just call them teeth. Then we'll just add another
sphere for the tongue. Simple. We'll just make it
really small and flat. Maybe you want to
stretch it out some. If you want to get real fancy, you can validate it
and take flatten and you can flatten up
the sides a little bit. Sometimes I do that and smooth it out, nice, shrink it. Let's just move it in
there and see what we get. Make it a little smaller. I think that looks pretty good. I'm going to take move and just bring it up a little bit in the back. I think
that looks nice. The only thing that looks
a little bit strange is the fact that the there's
no inner part of the mouth. But let's do a quick
save and I'll show you something that I do
sometimes to mitigate that. I'll just take layer and
sub we're on the head. Sometimes I'll just carve out, I'll carve out an area in the mouth like this. I've opened up that area now. I'll just smooth it. Be careful
not to come out too far. You don't want to push
the lips out too much, But you can smooth all in there and have a
nice little mouth. Okay, that looks good. Now, I might make the tongue a little bit wider
on the back side, maybe even coming up
a little bit more. But yeah, something like that,
I think looks pretty good. I think that's great. While we're here, let's add some tubes for the eye lashes. We'll use a tube,
we'll use curve, and then we'll use snap. Snap will actually keep
it on the surface. If we take a look, it's starting
more at the top and then it's thinner at the bottom.
We could stick to that. I probably will do it the
way that I normally do. You want to try to stay true to things that you
would normally do, things that make it yours? I think that's really important to stick to that kind of thing. I'm going to add another node and I'm going to flare this out. I need to turn off snap though. See if that works.
Turn off snap, otherwise I won't be
able to get it to come from off of the body,
off of the head. This seems pretty
good. That seems nice. Now we'll tap radius and
we'll make this part smaller. Oops, a little bit smaller. And I'm going to push
it into the mesh. That way disappears into
a really nice edge. We'll make this
nice and fat here. Now we have something like this, which I think looks good. I'm going to add
another node here. And this one I'm going to, oops, I'm going to tap radius again. I almost forgot that part. I'm going to make these
a little chunkier, this outside, the outside one. And I'm going to make this
a little bit smaller. And I'm going to move
it up so we can get a nice little taper at the end. Something like that. I do
this with most of my eyes. Make this part a little chunky. Okay. I like that. I'm going
to go ahead and mirror it. I think that looks pretty good. Here's another option.
Something else that you can do. A little extra thing,
you can clone this tube. Let's hide that one
for this other tube. Now let's just say you
want to just do it normal, maybe you want to just
add another sphere, another node there,
and then just have it taper a little bit. Let's bring it out a little bit more then We'll just adjust
it and make it nice. And even something like
that also looks good. The reference actually is
a little bit thinner here. Maybe I'll make this
a little bit thinner. If you want to get
that flat edge, the reference actually
has a flat edge. You can use profile.
We actually, I always go to tap
on this profile, but it's actually right next
to it. We'll tap on that. This looks good,
but if you want to rotate it, just tap, twist. And you can rotate it out a
little bit more like that, which I think looks nice. Yeah, that looks pretty good. Now, I just want
to see if I twist it out like that, does
that look better? That might actually look better. Let's validate that, because
we have that as an option. And we also will hide
this and bring this back. We also have this as an option. Let's validate this as well. Okay, I usually just
smooth off this end. Take flatten, or
actually we can take and we can just shape
this a little bit. I usually like to do
a shape like this, smooth it out a little
bit, something like that. If I really want it flat, I can also just use
flat and tool and then just have like a nice
flat edge that faces out. I think that's nice too. I got a little depression there. I'm not sure when I did that, but sometimes it happens. Sometimes I find
that rather than trying to fix something, sometimes it's just more
efficient to just go back and redo it and
not worry about it. Okay? I don't like the way that it should be
more like this. Okay. I'll flatten this. Flatten that too, And I'll
just smooth it. Okay? That's a little bit better. So now at least we have
both of those options. I'm not sure which
one I like better. I like them both, but this
is how it is sometimes. Let's label this lashes or
lashes or laces. That's fine. All right. I'm going to do a quick save. Looking good. So far very happy with this little
rascal, didn't we? I thought, oh, the mirror, What happened to
the mirror? Okay. Apparently what I did was I'm going to bring the
ear hair out of the mirror, and I'm going to
delete that mirror. I'm going to go back
to the ear hair, change the symmetry to world. Now I'm going to do add mirror, now it's on the other side. I'm going to label it your hair. Okay, Do a quick save. Okay, good, good
looking, really good. This might be nice as a
little swirl down there. I might have to make that
a little swirl tube, maybe curve, and
then maybe just like a little swirl down there. I'm going to take
it off of snap so I can put it through
the other mesh. Maybe have a little bit
more of a curve here. Then we use radius to
how do we want to do it? Let's use radius twice. It can get a little tricky
with all of these nodes. You just have to
really pay attention to which line is linked. For example, this one I
want to make smaller, but then the rest I
want to make bigger. We have to look to see where these little lines are going in order to other nodes
a little bit bigger. Oh, there we go. See
now I can kind of see them and that makes it a lot easier there we go. So we want to make
them nice and thick. Kind of like that. Maybe
these can be bigger too, Something like that. Maybe just a little extra thing. I don't know if I'm
going to keep it. We'll use Profile. Let's
see if we can twist it to make it a little to look a little
bit more appealing. Actually, that looks
nice. Like that. It's nice. See if I can
get rid of this area. There might not be
able to, but yeah. Okay, let's just date it
and see what it looks like. I might try to smooth
that out a little bit. Still interesting. It's cool. I'll pull that off so it's
nice and flush with his skin. Maybe we'll keep it, maybe
we won't. I like it for now. I'll safe. Make sure I label it here, curl. Okay. What else do we need
to do? The back of the head we can do later. It's not really that's
like an extra detail. I think the head is actually
looking pretty good. I think we can jump
to the next one. I think we'll start on the coat. So we'll do a Taurus. And then we'll
connect the Taurus to maybe a bunch of spheres or maybe another Taurus down here for the base part of the
coat. It's nice and round. Then maybe we'll just connect
them and we'll have a maybe sphere here. But
we'll figure it out. We'll figure it out.
That's what we do. I got to bring
these eyes a little closer together for now. Oh, that looks great. All right. Good job guys. I hope
everyone's doing well and hanging in there never
get to save again. I'm always going to keep
saving. Saving and saving.
9. Coat Assembly: All right, let's get
started on the coat. We want to systematically just build this out
piece by piece. We're going to go back to a more traditional
blocking first. But then, again, just
like with the head, sometimes it's nice to block, but then make it pretty
close to how you want to look rather than
do all the shapes at once. The head is always
the hardest part. Spend the most time on that, spend the most time on the face. That's really the
key, is the head. I'm going to select all of this because we just
need to move it up. I want to take everything
except for the floor. We don't need to touch
that gizmo always. I'm just going to move this up. Maybe something,
maybe around there. Okay. We'll do
another quick save, because I'm obsessed
with saving. Now we can do, of course
it would do that. Let's add a, and we'll use the
gizmo and this will be that hoodie type thing. We'll make it a little
big bit bigger than his head, something like that. Let's see if we move it up, it's maybe a little bit wider. Could flatten it a little
bit. Something like that. Goes right under his chin lip. If it's at that angle, it's going under his lip. That's pretty good for now. I think that's
pretty good for now. There's actually two tiers. I think there's a few
things that we can do. Let's call this collar. Okay, so we have let's clone
it in collar one or lower. It might be nice to bring
this down and then bring it in and that could help us create that look that he has there. Okay, I think that looks pretty good for the main body of it. I think I want to use sphere. Let's use a sphere and
we're going to move it up, essentially I just,
we're going to, once we validate it, let's
validate this sphere and we'll turn on the x and z. That's exactly what we want. I'm going to take move now. If symmetry is on, we have
x and Z. I want to try to make this square
shape like a tear drop, but more of a square shape. I just need to change my move. I move tool so that it's
a little bit smaller. So I have a little more control. We just want to
something like this. Actually, I think that
looks pretty good. I think that looks pretty good. I'll make it a little
bit bigger and then I'll make it a
little bit squatter. It's not that long from the chin to the bottom. I
think that's pretty good. Okay, let's make this body color, let's add another Taurus. We use our gizmo to bring it
up and this is going to be that spare tire type look that's like at the
bottom of the coat. We'll make it bigger
and let's use our tools here to make it thicker. It actually can move in. I'll bring it up a
little bit more. Something like that I
think is pretty good for the shape going to take the body and
I'm going to move it out a little bit on the top. I think everything is
still looking very good. I'm just going to build
out these corners. Let's say if it
was like a square, there would be
like an edge here. I'm going to build those out a little bit just by
pulling on the edges. Just make sure you're
on that shape. I'll make the move
tool a little bit bigger just so the
moves are a little more uniform like this. I don't think it needs
to be that far back. I'm going to take
the Taurus. And. Squeeze it a little bit,
so something like that. Okay. All right. So did we already validate? Well, we did validate
Oh, no, we didn't. Good. I'm thinking I might want
to make it a little bit. I think I want to make
it a little bit thicker. So let me see. I want to make it a little bit thicker so it's
something like this. It's going to come
down in the middle. That shouldn't be too
difficult because we can just pull on this side. I think I'm going
to validate it. This is the top Taurus. Then I'm going to move, I might have to do drag, but I think I'll try move first. I'll hit front. I'll
make this small, and I'm just going to
pull down on this. Let's make it a
little bit bigger, the move, so it's
a more gradual. Okay, I think I like
the way that looks. I'm going to pull it in as well. So now I'm going to follow
suit with this one. So I'm going to validate it and then use the same
move tool and pull it down because I think I'm going to make this
underneath that layer. Okay, so we'll go
back to this one. And it looks like it
might go up a little bit, so I'm going to move it up, out and up a little bit. Maybe it bends a
little bit here. I'll take this one and
I'll do the same thing. I'll pull it out, make
it go up a little bit. Let's do the same thing
with this Taurus. I pretty much like the
way that this is shaped. So I'm going to
validate it and we'll move and it looks like
this part is coming up. We're going to push that up, can't really see the back, but I'm going to
assume the back is just puffed out a little bit. I think that'll be fine. I don't think it needs to
be any more than that. This is the waste tube. Let's add another sphere. Let's just use this sphere to connect the hood
part with the coat. We'll move this up. We can
go ahead and validate it. We'll make it a
bit bigger. Okay? And then we'll just use
move with the symmetry. To connect this
with the hood part. We can pull the bottom and it actually, you
know what we can do. We can make it more of a hood. Why don't we pull this out
and make it a little bit wider and then just make
it like a proper hood? I like the way that looks. Yeah, I just made it like the
hood of like a normal coat. I might move this
Taurus down a bit. Okay, let's get rid of
the top part of this. We'll use trim,
make sure we're on the hood part and lasso is fine. And we'll just go ahead and
trim off the top of that. Okay, I think that looks
pretty good actually. I can bring this
collar part. Collar. I'm actually going to move. I'll just stretch it out a bit. All right, let's
make the little pot. The reason we're
going to make the pot first, or the little bowl, is because that will help us
with the arms and the hands. This will give us
a nice gauge so we can make the arms and it'll give us a spot
to bring everything to. I think for that I guess we'll just do something
very similar to this. Let's use the, the tool. Where is there it is we use the, the tool, we use
the path instead. Because I like the line.
I like being able to see the middle in my imagination. It comes out a little bit, comes back in, and then
it comes back out. I'm just going to
do that shape here. I'll bring one piece out. I'm going to put that
on the middle so I know that's the middle.
We'll do one there. I'm going to do a little one that then I'll tap on the
screen and drag again. That makes the bottom part. Then I'm going to tap on
the screen and drag again. Then I'm going to tap
and drag it one more time, something like this. It's like this. Obviously we can move it around a little bit. What we want to do is
make sure that we make the inner wall of this shape. I think this is pretty good. Do I want to tap these because they don't
have to be that deep? I think something
like that is fine. And I'll hit the gray
or the green node. And then we have a
little something similar to what the
reference is holding. We can go ahead and
make this round if you want to tap on these. I'll add some other
little nodes here. Obviously you can just
make a regular bowl too. You don't have to make anything fancy do something like that so that we have
a little bit on the inside that
looks pretty good. If you want to make
these straight, of course you can just tap on them and
it'll make that straight. Okay. So it's probably
more like this. I'm going to bring these up. Oops, accidentally. There we go. So I think it's
something like that. I think that's pretty good. Maybe I want to spread it
out a little bit more, so. Something like that. Okay. So I think that
looks pretty good. We can go ahead and
validate that then. We have a decent little
bowl type thing. Of course, you can just use your regular bowl if you want. Okay, I want to put the
gizmo in the middle of this, so let's do pivot, pivot. Of course, we can shrink it
and we can bring it down. Well, let's look at the
size. Not that big. It's fairly small that it's
right under the mouth. We see the mouth. It's a little
bit lower than the mouth. It's probably about here. But again, I try to gauge to see the
levels of everything. Like the bottom of the lip, it's like a little bit lower
than the bottom of the lip. Later on, we can come
and make it asymmetrical and turn it, okay. Yeah, that looks pretty good. Now, I think I want to use
some spheres for the arms and we can try to
figure out how to get these nice grooves in there. Let's make this flower pot. I'm thinking about doing like ice cream or something
else in there, but we'll see, I'll probably
do the plant first, but I'll definitely
do some variations. Do a quick save
to do that again. Okay, let's add,
let's add a sphere. Let's get these arms going, I think for the sphere. If we make it a pill
shape and stretch it, then we can take select
mask and bend it. I think that might
be a good plan. Let's validate our sphere. We'll take symmetry. We'll change this to vertex we want to make sure that
we have the right symmetry. I think we want green, but I think we want local too. Because we want the green line. We don't want it to be here,
We want it to be here. I'm going to tap local, then I'm going to use this arrow to stretch out this pill shape. I'm thinking
something like that. I'm going to turn symmetry off. That way we can use the
gizmo and just shrink it. I want it to be size. I think something like that
is pretty good actually. It might be a little
bit smaller on the top. That might be easier
to the tube tool. Now that I'm thinking about it, I think it might be easier
to use the tube tool. I'm going to hide
this U arm for now. Let's try the tube tool. I'll just do path. It
comes out from under here. And then it curves. I bring
this out from the body. Whoops. Let's turn off snap so we can
get it away from the body. Now, I'm just trying
to bring this node close to where it has to be. We have this little piece
on the end and then we have the hand that would be
like ending it here, the little wrist piece. And then the hand, of course, this is going to be tilt
tilted forward a little bit. We're keeping it
fairly relative. It doesn't have to be
super exact right now. I'm going to get
that nice curve in there. It looks pretty good. So let's fatten this up.
Let's use the radius. I'm just going to do
radius twice so I can, so we can work on this arm. I'm going to add another node there so we can get that
curved out a little bit. Okay? So the middle ones
are a little chunkier, especially this one o will
be something like that. Make this a little thicker
too. That looks pretty good. Of course, again, we're
going to have to adjust it, but I'm going to put
it really close to the body because you really don't see
anything underneath. You really don't see
there's not space going to be in between the
arm and the coat. I don't oops, didn't
mean to do that. I don't mind bringing this closer and having
them intersect. I'm okay with that
because that'll show that like there's weight showing the arm having the arm
being down on the fabric, push that in, get
that a nice curve in. Okay. All right. I think that looks pretty good. There's also this strap
here. I'm not sure. I don't know if we want
to make that part of the jacket or like a backpack. I guess we can make it a
backpack, but let's add it in. Let's change this to do quick save then let's
just add a cylinder. I use cylinders for straps
and things like that. We'll bring it up with
our gizmo and we'll bring it over now. You just have to use
this as the strap. We'll just place it, just maneuver where it needs
to be. Make it smaller. I think that looks
pretty good actually. I move it a little
bit further up. Things like this do
take a fair bit of adjusting, Just take
your time with it. I do like this, but since
I haven't validated it, it's nice because we can hit radius and then we can
make this end smaller. We can make this end smaller. Here, we'll go back to the gizmo and just
adjust it a little bit. Something like that.
So that's good. Maybe we'll stretch
it a little bit. Stretch this a little bit. Okay, that looks pretty good. Now we have a sleeve
and we have a strap. Maybe we'll make it a backpack. Oh, it is a B. I am noticing it's a
little bit to going into the middle of the
jacket instead of like this. Let's just adjust
that a little bit. Yeah, I think that's
a little bit better. It looks more like
a proper straps. I'm always adjusting everything
over and over and over. Okay. Make it a little thinner.
Yeah, that looks good. It's a quick save. All right, so let's take a
look at the shape of the coat. I think I might take move and just move this
Taurus down a little bit. Maybe just move this
coat out a bit. It looks like I'm on X and Z,
so we don't need to be on. So we'll just use, so we can just move this
out a little bit. Okay, I think that looks good. I want to merge the
Taurus with the coat. But now that I'm looking at it, let's just bring it down a bit. I just want a little
bit of space. Maybe I'll just bring the
front down a little bit. Okay, I think that
looks pretty good. Essentially, this will just be the body going
into this Taurus. Because the Taurus
is going to be the round plump
part of the coat. I'll hit a quick save because I made all those little changes. Now I'm just going to take
the coat body and okay, what is this weight? I always spell things
wrong and body. Let's go ahead and Fox,
we mess them together. Probably 150 is okay. Let's go ahead and
smooth this out. Make sure symmetry is on. We just want the x symmetry, so we don't have
to do both sides. We can just smooth
that out. Nice.
10. Backpack Building: So I think we'll make
a simple backpack, or I'm going to make
a simple backpack. You don't have to, but
sometimes, I don't know. I just like to add
these little touches. Let's figure out a way
to do it. It's not. Let's just use what is
this? This is the hood. I thought I thought
we labeled the hood. I guess not. So we have the hood there.
Let's add another. Let's add a box. Let's use
our gizmo And move it up. And move it back. So I'm going to shrink it
this way, and I think we can. Mm, yeah, let's validate
it. We have our box here. I think we'll make
this into a book bag. Maybe we'll make it. Maybe we'll make the bottom part
a little bit bigger. I'm going to use select Mask and a rectangle and just
mask off the top. Then I'll take gizmo and I'll just make this a
little bit bigger. Maybe even pull it down
a little bit and give it a little action like that
with the arrow, the node. Something like that. Let's clear this mask and maybe we'll
mask the bottom as well. Let's do it the opposite way. Let's, let's mask that off. And then let's take this
little piece and shrink it. And then we'll do
something like this. We have a nice little shape, clear the mask. We have
something like this. Let's smooth, we'll
just smooth this down. If it ever smooths like that, we can go ahead into here and multi and just subdivide it. It should be better. Yeah, now it's a little bit better.
It's not that soft. I don't mind that
it's rounding out. I don't mind that at
all. We'll smooth that. We have a nice shape that
isn't just regular square. Let's take split, let's do
rectangle and let's split it. Maybe we'll split like that. We'll take the top part, smooth it, smooth that. Feel free to do. Feel
free to do you like a shape book bag? Any
shape that you want. You don't have to
really follow my shape. I'm just making it up. But you know, people
have different shape book bags, backpacks. But I think something
like that is pretty nice. Yeah, I like that. I guess I guess it would
make sense if this was connected to
those straps. Right. I guess it doesn't
really have to be, but it would make more sense. But this could actually
be part of the too. There is a lot of options
that we can do for this. Let's, let's move this part out a little bit. Let's
move them both out. This is going to be B one. Oh, no, let's not
use the numbers. This will be backpack upper. This can be backpack
lower or backpack Lou. We'll do something
like this. Okay. Actually, I'm going to
take the hood, pieces, collar, coat color lower, and hood. I don't know why these
are all so separate. We need to put them closer together and I'm going
to move them up. Yeah, I want to move them. They're like encapsulating
his head a bit more. Yeah, it's a little bit better. That feels a little bit better. Then I'm going to
take this hood since we have where the backpack is, but I still want to
push the backpack, I don't mind pushing the hood and then bring these two parts. Might as well just connect them. And then moving these
two parts up a bit so that it looks
like it's the hood is resting on the backpack. I'm okay with that. I'm
al right with that. Okay. I think let's see if
we can stretch this part of the backpack out
just by using move. Then we might be able
to just take this, Let's validate this piece. We might be able to take
this and then move, we'll make it a
little bit bigger. And then just we could push it into the
backpack like that. Now, of course, we do have to cut we have to work out this
issue, but that's easy. I do. That's not a problem. I think we can probably
do it, let's see. Might be able to
do it with trim. Probably won't be the cleanest with might be able
to do it with trim. Let's see what happens
if I box will remash that it's not bad but
still looks pretty good. Maybe give it a little smooth, it's still a little weak. I'm going to hit Save,
Let's see if I can box, remash it a little bit higher at 200 and just see if we can get a nice
little smooth on there. I think that looks pretty good. The only other thing I want to do will smooth out those ribs. The only other thing
I want to do is add something else here, which will probably
be a cylinder. This will be backpack strap. This will be the Where's
the other backpack? Let's bring all those together. It's the backpack strap. Let's add cylinder, Taurus. Let's add cylinder. I just
want to add another strap here just to make it look
like it's not just going into the bag like that.
Just a little detail. I like making these
little details. We'll shrink it, move it out so you can
see what I'm doing. Okay, I think the best thing
to do for this type of shape is let's do something similar to what we
did before first. Do we want to make a hole in it? I don't think we
want to do a hole, I don't think we want
to worry about that. Let's validate it. And then let's use symmetry and vertex. Let's take a look at the symmetry that we're
going to use. Let me set it to local. Okay, we see the red line here. Let's stretch this
out and we'll do something like that. I
think that looks good. Tap symmetry. I'm going
to put this back to auto, then I'm going to
Vox'll remesh this. 15160 I think is fine. And then I'm just going to
smooth the whole thing out. I'm going to turn symmetry back on and just smooth
this out a bit. Okay, now I'm just going to adjust it so it looks like
it's part of the backpack. Make it a little smaller. So we'll rotate it. Maybe
something like this. Make it a little flat. Yeah, so just maybe
something like that I think is a nice little detail. I kind of want to
make it even now. I'm going to use move and I'm just going to
bend it so that it's nice and even
with the actual strap. Okay, I think that
looks pretty good. Let's add a little pouch
on the front of this. For that I think we'll
just use backpack low. Let's just clone it and then
just name this one BP pouch. We'll just have it cloned
and we'll just pull it. Let's see, will a line help us? No, we'll just pull
it out straight. Shrink it, then let's
flatten it a little bit. I'm actually going
to change the pivot. So I'm going to tap pivot and have the pivot the way
that I want to squeeze it, now that it's facing this way, that's a little bit
of a better squeeze then maybe we'll
move it forward, something like that,
smooth it out. I think that looks
good If we want, maybe it's a little bit
puffier at the bottom like my backpack would be because it always has a
bunch of stuff in it. We can actually take flatten. And if you want to flatten
out some of these edges, it's always a nice little
touch can smooth it out. Okay, so let's add some other
little details to this. Let's take a box. We'll make two little straps,
so we'll move it over. And I just want to make
two small rectangles and these will just serve
as like straps that are on connectors or something, maybe something like that. I'll mirror it and
then validate. And then I'll just use smooth. We can just smooth these. I think that looks good. Also, since we have these boxes, let's see, let's take this mirror out so we have it on its
own, and let's clone it. Now let's take
these and validate. And these will be B P, a straps mirror. I want to take this box
out of the mirror for now. I just want to
bring this out and make it a little smaller
and then move it in. Just do something
like that. Why? I'll bring it back
in the mirror and then validate them both
and then connect them. Just another a little detail
I'm going to take flatten and I'm going to flatten out at the end of this
backpack, those corners. And we'll smooth that
out a little bit. I think that looks
nice. Okay, cool. Let's take this strap
and add a mirror. Okay, we can go ahead and
validate this backpack strap. We'll just mirror this
as well the cylinder. We can add a mirror. We got to be careful
for the cylinder, we have to change the
changes to world. Now we can add the mirror and
it'll be on the other side. We'll go ahead and
validate these. This will be part,
it's the buckle. That's this trap. We'll
just bring it into here so we don't lose it. Also, these pieces
became quite big. This little part is 133 and we don't really
need it to be that big. As we keep going, we don't want the project to get
more and more heavy. Let's just do this really quick. We'll leave the arm for now because we can mirror
the arm later. Let's take this little piece,
let's do a quick save. Let's go into our options
here miscellaneous. Let's just decimate it, and we'll leave it
there at like 16. Let's take a look at
these little shapes. These are all quite small, everything else is quite small. Yeah, those are okay. All right. Otherwise the file size
can get really big. Okay. We'll come back
and we'll continue working on this in
the next video. I don't know what
I want to do next. Maybe maybe the little
wrist part in the hands. But we'll see,
we'll keep rocking and rolling. Don't
forget to save.
11. Petals & Hands: Okay, I want to position this a little bit more how it's
going to be for real. I think in order to do that I want to create the plant now. That way we can set it in there and we can move
everything together. First, let's just make like
a brown soil type thing. We'll just use a sphere. I'm going to rename it soil. And I'm just going to connect
it to the flower pot. And this is going
to be super simple. Can flatten it a little bit, make it a little bit
bigger, let's validate it. I think that should be
good. We can always take either clay or inflate or layer or
something like that. We'll turn off and we'll
turn symmetry off. And we'll just can lower
the radius intensity. And we'll add some
little variation here. We'll just smooth it
out. Should smooth out nice and easy, but that just gives us a
little variation in the soil. Let's make it a
little bit lower. Oops. Okay. Now let's make this cute little
plant right here, which should be pretty simple. It looks like it's
two cylinders. We will add a cylinder. This is going to be plant A. Let's use our gizmo. We'll bring it up and forward so we can see what we're doing. Make it a little bit
smaller, flatten it. We'll do snap and
snap it forward. Okay, I think
that's pretty good. I think we can validate it. Let's check the symmetries
we have straight across. And then let's take
a look though. We really need to. We can do what we want, but
I think I want the green. I think I want green.
We're in world. We want world or local. Let's just stick with local, just like a tear drop. We also want X as well. I just want to make it like
a tear drop, really simple. Keep it nice and round. Cute, Something like that.
I think that's perfect. And actually, you know, it's
a little bit different. I'm going to make move big. I'm, I want to blow symmetries, I'm going to turn the x off
with the move really big. I'm going to try to just
push it over in the middle. I'll make this a little bit smaller because the shape is a little different than
just straight up and down. I'm just trying to stick
to that a little bit. I'll make the move a little
bit smaller so I can bring it in almost like a quotation
or something like that. I like that. All right, this is plant A, let's add a mirror. Let's take the gizmo. Let's turn symmetry on. And vertex, we'll turn snap off. We should be able to move
these back and forth. Great, I should do that
a little bit slower. Basically remembering this
out of the flower pot. We have the mirror and the
plant before we had it, like it was just regular.
It was just an auto. We had the mirror and
now it's working. I might have been
on the mirror part. That might have been
where I messed up. In order to move
them back and forth, you have to be on
the actual plant. Hopefully, you don't get
too confused by that. If if you do, you have one again,
Go back here, add your mirror and then go
to plant and let's see. Yeah. That's the easier
way to do it now. We'll bring them both
together, we'll tilt them. We get the cute plant thing. I'm going to use a line
because I want to just pull them straight this way
instead of right now, it's set up for each petal. But I want to just
do it straight. So I'm going to hit a line now. We can just move it
straight like that. We have that cute little plant, may bring it together a little bit more, so.
Something like that. Okay, I think
that's pretty good. I'm going to go ahead
and validate it. I'm not going to think
too much about it. This will be we'll
make this petals, Isn't it with a T?
Is it with a T? I don't know. You can let me know.
I think it's petals. I'm not sure. Okay,
that looks good. So let's do a quick save. And I'm going to box
remash this round 150. Smooth it out and we have that nice shape, okay? So the petals is not
in the center pivot. Center pivot. That way we can move this
to where we need it, which is right above the plant. We can always adjust
it a little bit later. For now, I just want
to make sure that it's right over top. Okay. So something like that. Maybe a little smaller
too, right around there. Let's use tube and make
a really easy petal. I don't think we need snap, so we'll just do the tube, curve it down and
then just adjust the nodes so they don't
go all over the place. Okay, we'll make it a
little bit smaller. Add, let's give it a
little bit of a curve. We can always come back to
this a little bit later. Something like that
I think is good. This is the pedal stem now let's just add a few
other little cylinders to make for the
other little leaves. Really simple. We'll just do the same thing
that we did before. Bring this forward,
Snap that down, shrink, bring it a little
closer to the size I want me, so I can gauge how thick. Okay. I think that's
pretty good. So I'm going to go ahead
and validate it. And I think we wanted
x and y local. We'll hit front, we'll
move symmetries on, so we should be
able to just make a nice simple plant petal. We'll do something like
that. That's good. I think we'll, let's name this one leaf and we'll name
the other one leaf this way. I just cloned it so we can
make some variation leaf. I said now we can just make a little
variation in these leaves. We'll hide one of
them. Leaf can be, maybe it's a little wider. Okay, so now we have two leaves that we can sort
of just load in there. Make them a little smaller. Oh, let's take it off of snap. Okay, maybe we'll clone
this one and just move it up and give it a
little variation. Maybe make it a
little more squat. It's also nice to take some of these and add some bends in it. For example, I'll take this leaf and I'll put the
symmetry back to x, y. I'll put it to x. Just turn that off, and actually just turn the symmetry off. And then just give
it a nice push just to give it a little
bit of variation. It's nice, I got the symmetry
still on for that shape. Okay, let's take
this bigger leaf, let's bring it down, Let's put it in here as well. We'll make it a little smaller. Maybe we'll put it
like towards the back. Bend it back a little bit, maybe it's against the
side, a little smaller. I'll take move and turn
symmetry off again. And then give us a little push. Yeah, something like that. Nice random bits. Oh, I can see this
coming out of there. So you know what, We
can just trim it. Nice trim, make sure nothing else is coming
out. Looks good. What is that? There we go. So let's do a quick save. Make sure to subdivide your
pot because we're going to need more geometry for the
details in this next bit. But it right, let's see
if I use mask like this. And then also else I might be able to do what? If unmask. Then I do make this bigger. I do really thin lines. What happened? What
was that all about? You guys saw that? I don't know what I did that was weird. I'm innocent from whatever
just happened. I'm innocent. So let's try to see if
we can shrink all of them shrink at all. It does get a gets a
little weird but doable, I think, oh, that's
nice. That's pretty. Look how pretty that is. So I'm going to hit save. I think that's a
nicer flower pot. I'm going to leave it like that. I think all the
shapes, petal stem, I'm going to leave
that unvalidated for now so we can adjust it. Let's just make sure this
is everything it is. It's going to be tilted and
really close to the chest. It's actually going to
be off to one side. I guess I'll do it now off to one side and
tilted forward. If we're looking at it straight, it's really going to
be from this angle. That's actually pretty good. I think that's around
where we want it that way. He looks good for looking
in the front as well. All right, great. Now, I'm just going to
adjust this a little bit by pushing that
over a little bit more. I want to add a Taurus here or do I want
to add a cylinder? Let's do a cylinder there. We'll do the same
thing. We'll put it right there and then
we'll just taper one end. I want to use snap and I want
to snap it forward first. I'll shrink it. Let's take the gizmo and snap
it this way as well. Before I really turn
it off of the axis, I want to be able to use radius and make one side smaller. Not really that much smaller, but just a little bit, I
think something like that. Now. This is close
enough to this. Let's bring it at in,
It's pretty good. So now I don't mind
putting it off axis and really getting it
lined up to turn snap off. Getting it lined
up with the arm. Let's see if I turn
a line off that helps so I can move it
straight back on its own axis. We'll make that a
little smaller. Everything looks good.
And I might actually make the back a little wider. Yeah, we'll push it
in a little bit more. I think something
like that is good. So this is the arm cuff. So that's the arm cuff. So let's do a quick save. So let's add a sphere. And we're going to
call that hand. Okay, we're going to move it up, shrink it. Do I want to use a box for
the hand? You know what? We'll just stick with spheres. I'm going to clone this. And
I'm going to name this palm. We can validate it. Let's just make this a little
bit bigger then let's, let's use the gizmo and
let's flatten it first. This is going to be the hand, the palm we have symmetry on. To be big, we'll just
make it a little more squarish or a
little more round it, a little bit more rectangular. I think that's the
word I'm going for. I think that's good. I want to take flatten,
and I just want to flatten around the sides too. Okay. That looks good. I also want to take move. I just want to
push it real good. I couldn't help it. I'm
sorry. I apologize. That way. It the hand has a
bit of a bend in it. It's flat on the palm
side and there's a little bit of bend
on the opposite side. Okay. Now we can take
this little finger. Let's actually,
let's put one here. We'll move this fire
here for the thumb. Let's see, I do, I want to try to leave
the fingers. Very simple. I think I just want
to stretch them out. Let's validate this to
symmetry in vertex. Look at front. Do I
have the right now? It should stretch out.
It didn't stretch. Okay, maybe we were. Let's go to local now. It'll stretch. Good. We'll use that. I'm going to do a quick save. I'd like to save before
I do any vox remashingt. Vox remash at like 150 or so. And then just smooth it, okay, we'll make it a little smaller. This will be the thumbs. Take it off Symmetry,
put it back to auto, and it should act normal. We'll put it into
the hand like this. Well, let's name the
original one, thumb. Okay, We'll move this up. Let's just change the name to fingers so we don't
get confused. Now. We have the finger,
we have the palm. I can't put them together yet. I don't want them to
start moving altogether. Okay, so this is going
to be the pinky, we can clone it
and move it over. And then we can
make the pinky ones smaller because the pinkies
are always smaller. We'll bend it a
little bit forward. We can bend the mall
a little bit forward. Okay, we'll clone. And then move one
over on this side, maybe make it a bit smaller. Okay, I think that looks good. I want to take move and I want
to bend them all actually. This will actually flatten
them a little bit too. See how that nice little hand just shows up out of nowhere? I love it. Another thing I like to do is
taper the fingers, spend it a little bit that
way a little bit more, and then bend this bit more, we can actually move them up. So what I mean by taper
is you can kind of see, I'm just going to move this
way over to the middle. I'm just trying to be, I'm just going to trying
to position them. So this one is up forward, this one's a little
bit behind it. And this one is
the furthest back. But I still want to move it up. Okay. I think that looks good.
I think that looks great. Okay. Now we're just going to do a little bit of housekeeping, which I just want to change the shape of
these a little bit. For the thumb, I
have symmetry off, and I'm just going to push
that down a little bit here. Maybe even pull it
up a little bit. The push it on this side to give us
that nice round thumb. I don't think any other
fingers really need that. I think they all
look pretty good, but usually cartoon thumbs have nice films like that. Okay? So I think the hand
is looking good, so I'm going to connect
all these, okay? And I think I'm just
going to position this. So now I'm going to
move it into place. Here we go. It really took me a while
to get the hang of working with making hands and making hands the way that
I want to make the hands. Because it's not easy to
really make stylistic hands. But once you get it and get the shapes
that you really want, the way more fun to make them. Okay, let's see. I think the best
thing to do is to adjust the hand to be with the pot and then have
everything follow that. We'll fix the hand first and then we'll make
all of that follow. We'll get to that
in the next video. But so far so good.
Don't forget to save.
12. Hand & Finger Positioning: Okay. As I was saying, we want to make the
hand look good on the flower pot and then we'll make everything
else follow that. That's the easiest way to do it, as long as you still
have the hand connected. Let's I keep accidentally
touching these other pieces. All right. Can I lock all of these? I think so, yeah. Lock is clutch sometimes. Let's figure out how we want this hand to look
good on the pot. Firstly, what is first, that actually looks okay. The only thing that might
need to change is the thumb. I'm going to take it off lock and adjust the thumb,
it seems like. Okay. So I just want to
put the thumb on the far because it was
kind of facing like this. So I just moved it so
it was in the front. It kind of looks like he's, he's got a little more
weight holding on his hands. I think that's pretty good. Then you can just really
adjust these fingers. You can adjust these
fingers for the pot. We'll rotate this a little bit. You can, even with symmetry off, you can take move
and then you can, you can just adjust
the fingers like exactly to the flower pot. Now, I do want to be
a little bit careful because we still
might move things. I am keeping that
a little bit in mind that we might decide
to move some things around, but I think this is pretty
good to smooth this finger. Make a little smaller too. Sometimes I tend to,
some things can just be like a little bit too
big or too small. It's important to
pay attention to the size of different things. I just want to put
a little bit more of a bend in this little finger. Okay, I think that looks good. Maybe I'll make the thumb
a little bit smaller. Oh, you know what?
I forgot to do. I forgot to clone the hand. That's all right,
we'll get to that. All right, so I think we can validate it because
we were going to, Let's take this arm and
then let's clone it. All right, and we'll hide
the one and this arm coat. Do I want to do it with both? You know what? Let's delete. I think we're going to
do both coats at once. I think we'll validate
this and make it official. Actually, before we validate it, let's adjust it a little bit. Let's adjust the cuff first. It feels a little big, too. What is shaking? It's annoying. Okay. So now I want
to make the cuff and everything look like
it's made for the hand. The hand is what's
most important here. So I want to make
everything kind of work for the hand. Okay? I think that looks pretty good. Be a little bit smaller. Okay. That's not bad. I think, I want, I think I might want the cuff to be actually a little
bit more over the hand. Oops, Let's make sure. Let's squeeze it. There we go. I want to squeeze
it that way too. There we go. I think that
looks a little bit better. So I'm just kind of squeezing
it and tilting it so it looks like it's actually going over the hand. That's
what I kind of want. Okay. All right. So now let's bring this, let's go back to
the tube options and we'll kind of just
bring this a little bit more tailored to the cuff. I think that
actually looks good. I'm pretty happy with that, and I think the cuff looks great. Okay, cool. So I'm going to take arm coat and
I'm going to clone it. And then I'm going
to take arm cuff in, clone that as well. I'm going to put these
both underneath this. I want to validate. Sorry, validate was
hidden under that. I validated this, I've validated this because I think
those are really good. Let's do a quick save. I just want to, oh, wait a minute, Oh, this is the other cuff, these parts, they're
not validated yet. I wish that I could
validate them, and I can't mirror them yet. Well, actually I can. I'm
going to mirror that. I'll mirror that. Okay. Even though
it's showing both. I can hide these are our
arm cuffs on the one side. I'm going to hide
those for the mirrors. Now, I can adjust
this arm as well. So what I'm going to
do for this arm is actually bring it back, and even though it's moving the other one, that's all right. Now that I've mirrored
the other arm, we can always just
split this once. We're happy with this side, we can just trim this half off because we already have
the other arm here. This was the only way
that I could mirror this and still adjust this side, which we can't really
see in the artwork. Okay. This cuff is good and you
know what we should do. I'm just going to move the cuff back to where I
think it would be. It would actually be maybe
somewhere around here. I think we'll have to
we use the tube tool. I think we'll have to adjust this arm so that it's
far enough back, but that's not a problem. I'll move this as well. I'm just going to put it where it would go. I think
something like this. Maybe we'll even move
the plant forward a bit. We can take the palm and then
we can take the flower pot. And then we can take the pivot. And I'm just going to
move the pivot this way. We might be able to just
move it forward a bit. That might be okay. We will have to adjust this, the other arm a little
bit, but that's all right. There's always going to
be a lot of adjusting. Let's take, then we want to flip the hand on the
other side as well. Let's see, here's the palm. I'm going to take all of
these and clone them. Then I'm going to take each piece and I'm
going to go here. World and flip object here. World flip object here. World flip object here. I like, I have to continue to say it or
else I'll mess up. Hopefully I didn't.
Hopefully I can move this over and instill
a hand. Perfect. I'm going to use a line, so I can just easily
move it straight where I needed to go and move it here. Okay, So it looks
like we have to, maybe we'll make this hand
going a little bit underneath. We just have to figure
out a way to make these hands look naturally, both touching each other and touching the, the flower pot. That actually looks okay. So I'm going to grab all those
again and then just twist. Okay? We can put it there. It's either that or we
put it more underneath, like more towards the bottom.
Which we can also do. We can just have it
more towards here. That might actually look better. I'll move it up a little bit. The thumb looks like it's
touching, so I like that. And the rest, honestly, we
might be able to just use move or the gizmo even
for each little shape. Oh, but another thing
we have to do is go to the fingers and do
pivot center pivot. Pivot center pivot.
Since we mirrored them, the pivots all messed up, just in case we need to
move any of these things. Pivot center pivot will help
us get the pivot right. I think that's pretty good. Take it off of a line
and just adjust some of these fingers so
that they're not completely going
through the hand. Maybe we'll even tilt
it down a little bit. This one I'll bring
forward and move in. You also don't want
the fingers to go too far back on the hand. We'll move that down a little
bit then move that over. Okay? I'm tilt it. I always want the
hands coming this way. Like instead of like before it was like this,
which doesn't look right. You want the bottoms of
the fingers to be more facing inside instead of instead of turning
weirdly like this. So it looks like it
has a broken hand. Okay. I'll tilt that. I think that looks pretty good. It almost looks
like he's holding his other hand, which I like. I think that looks nice.
Now, I'll just use move, makes sure on that finger. And then I'll just
bend it a little bit. By bending it, it's just going to just help it to look a
little bit more natural. Okay. And this pink, it looks like I can turn it
a little bit more in. Like I was saying, maybe I'll stretch it a
little bit more. Bend it a little bit more as though it's really carrying it has some weight above it. And then I'll just move, and I'll just give it a
little bit more of a bend. I'll just push it into the bottom of the
flower pot a little bit. It looks like it's being held. I think it looks good. Okay. So now I'm going to
work on this cylinder. If we have a nice
place for the hand, maybe we'll just work
on this cylinder. It's okay that the other side is moving because we're just
working on the one side now. Okay. Something like this. I think that looks good. This actually is fitting
in there nicely. The coat is actually
fitting in there Quite sometimes. It's a
little tricky to kind of adjust these pieces. There we go, that's better. Go to make this a
little smaller here. Here we go. Good. I
think that looks great. I think I'm happy
with this side. I don't think I'm
going to move it too much more since
I'm happy with it. So I'm just going
to validate it. I'm going to take the cuff
and invalidate that as well. Now that we have that validated, we can trim this side of it. I'm going to trim, As long
as we don't have symmetry, we can just trim this side. It's a mirror. It's a mirror. Let's take this and validate it. That was the step that I forgot. We want to take that and can't trim if it's
not validated. Now we should be able to trim it as long as we don't
have symmetry. Same thing with this, but
again we have to validate. This is the cuff two,
this is the arm two. We'll take the cuff. Now that
it's validated, we'll trim. Make sure you don't
have symmetry on, and we can trim that. Now let's bring
back the other arm. Still looks okay, but we do
need a little bit of help. First we'll just adjust the
cuff cuff, looks like maybe. Something like that. I think
that looks pretty good. Then we'll take the arm
and we'll just use move to put it behind the cuff,
something like that. I want this to be a
little more round. Same thing over here. I just want this to be a
little bit more round. Good. Okay. So now I'm just going
to any little things that I think look
a little funny, just fix them up a
little bit the fingers, but I think that
looks really good. I'm going to take this
cuff with move and I'm just going to widen it a little bit so it matches the jacket
or the coat that looks good. I'll take the coat and
bring it a little further up that I'll do the
same thing with here. Just small adjustments. It's very tiny adjustments. Okay, let's hit Safe. I think it looks really good. All right, beautiful. Another thing that I'm
noticing is we will have to adjust this strap because
right now it's too thick. So once we work
out the arm cuff, then we'll have to just make it so this strap
looks more like that, but that shouldn't
be too difficult. Okay, so we'll come back and we continue working on some details for the coat and the arms. Don't forget to save.
13. Puff Wrinkles: All right, let's
try to get some of these creases in the sleeve. Now, this is a bit
tricky right now. We have this situation here because all we did
was validate these tubes. What I want to do first is go to the multis
and subdivide, and we'll subdivide it again. Okay, so now it's 14.4 so I just want to use this
natural crease from the tube. And I'm going to
take the crease tool and just dig that in there. Okay, so we'll dig
that in there. I might do it a
couple more times, just make it a
little bit deeper. Okay, Something like that. I think that's
probably pretty good. There's another one
here, so we want to do another one here, almost like the code
is being squished. I'll make it a little bit
higher, another line there. I'll just keep going on
this crease like this. We got to be careful,
you don't actually hit the rest of the
coat like I just did. There we go. So
something like that. You know what, I'm
going to multi resin again or I'm
going to subdivide it again so I can just get a
little bit more detail in that. Can just push that
down with the crease. Okay, good. So the next
thing I want to do is take inflate and I want to
inflate around the edge. I want to inflate this piece. And then I want to bring
the inflate around like this. Bring it around. You can even make
it a little bit bigger and bring it
around the front of the coat or a sleeve like that. But I want to do the
same thing here. I'm going to make it
a little bit thicker, right around the edge
of that like that we dug out with the crease and then we just inflated
around the edges. All right, let's vox
remesh this arm. I'm just going to pull
up the voxel and we'll remesh it around 240 or so. See how that looks. Now,
let's smooth it out. Okay, it looks decent, but it looks like I might
have to repeat the process. So I'm going to take crease, I'll run the crease down here. And let's see, I'm the
crease here as well. And I still want a
little bit more. I want this to be puffier, so I'm going to do inflate
right in the middle here. I'm going to try to use drag. And I want to try to drag
out this, the space here. Puff this up a little bit. All right. Now, once
we have those shapes, then I just try to
smooth and just try to make it look as
natural as I can. It looks not too bad. It's not too bad. I still want this to be a
little bit thicker. Let's try clay
instead of inflate. I'm going to try clay here and then smooth that out. Okay, I think that
looks pretty good. So I'll use clay some more. I'll add some more here just so it really
looks like it's, the fabric is being
kind of smushed. That's what I'm going for. I think that looks
pretty good then. Of course, you can use drag
if you still think that. If you want to add more to it, you can try to drag
it down like that. That actually worked
out pretty well. This one. I might want to
drag it up a little bit. See if you see here, this
is going up a bit high. We'll take drag a
little bit bigger. I'll just try to make
those crevices even here. It might actually be nice
to drag that all the way down behind that,
behind the strap. I can even take this a
little bit and pull it up. Essentially just trying to use clay a little bit
more around here. Just trying to make those shapes in the coat and really make
it look like a fabric. The only thing that I still want to be more
round is right here. Hopefully that
will do it for me. Yeah, I like the way that
looks. That looks good. Okay, so I'm going to take inflate and I just want
to add a little bit of just some little subtle parts to the jacket. You can do sub as well to the little depressions.
And then just smooth it. Obviously this is very smooth, so we want to make sure
that we smooth everything out, blend everything in. It looks nice and natural. We probably have to decimate
it. It's really high. Now let's go to miscellaneous
and then decimate it. What that does is it's going
to change the topology. It's going to take
some, it's just not so. We should be able to
smooth it a bit better. It's still not as
smooth as I would like. I might have to flatten
this a little bit then, so it's not bad. It actually still looks better
with the higher number. I'm going to take that off. This part looks good. I
don't mind this part at all, this top part. But I might have to do
a lot of this stuff manually and really go
easy on the inflate. I do like the
inflate down there, but I'm going to bring
the intensity down. Oh, am I still on sub I
actually it doesn't look bad. Like I always say,
sometimes there's just accidents that happen inflate, take it off of sub and we'll just add a little
bit more down here. And then just smooth it just to give the coat a
little bit of life. I think that's good
even back here. What might be nice
if we do inflate, you add those little
inflate marks from the can take case case,
maybe in between. And then smooth it to get some real nice natural
marks in the coat. I think that looks pretty good. We'll do the same
thing for this side, we want to go to here. And then multis and
then subdivide it. Maybe we'll do it
that many times. Maybe we'll just start by
using inflate, maybe clay. I think clay worked out a
little bit better for us. Let's just smooth this and
see what happens first. See what happens naturally. We'll use some clay and
maybe just go around this. Actually, let's make it, let's actually use
drag first because I do want to make a little
bit of a depression there. Then maybe I'll use clay
and go around that. We'll smooth this out
just so we can get a more those natural bends then. Let's see if we can
use crease here. That's the only problem
is that it will go into the other parts. You have to be. A bit careful with it but I'm just using case and
then I'm just using some clay to just try to make some little more
organic parts of the coat. Again we can't really see them. I'm going to use
inflate and sub, just do some more
little shapes here. Maybe we'll do some creases. Maybe here, then clay to make it appear a little bit more puffy and then just smooth
everything out. Do you really want
to get that nice, soft look clay down here? In again, I'm really going off the cuff here because
once you get it, like once you understand
what's happening, then you can just a or as
little as you want really. You don't have to do like all
everything that I'm doing. Exactly. As long as you have, as long as it makes
sense what I'm doing. And you're good to go. Had a little more crease here. I want to do that
on this side too. I want to add some of
these little creases right where it goes into the. This really doesn't
want to smooth. There we go. Okay, Looks pretty good. I might do a little crease sometimes. I do get carried away
with the inflate tool, so I have to watch
myself sometimes, but I really enjoy
the inflate tool. Let's see if we can make
this a little bit deeper crease or if I can crease
all the way down here. Okay, so I think that
looks pretty good. Now like I was saying before, I just want to use move, I want to fill out
this spot spot. But fill out the straps
that looks a bit better. These are connected, but I think it should be fine as long as we don't have symmetry. I should be able to move one
and not the other perfect. I do my little tests like that, so I'm just going
to use move and I'm just going to bring this in a little bit so it's
consistently flat around. That's perfect. Okay, good. Very nice. Very, very nice. It'd be nice to put
some elbow patches. I might have to
do that as extra. Let's do a quick save. All right.
14. Thighs & Cobblering: All right. We can
come back and do some more details and
work out some more stuff. Let's get the legs in there. I think we need to
bring everything up. That's a lot actually. I'm just going to select
everything except for the floor. Wherever that is, I'll
select everything, Use the gizmo and
move everything up. Hopefully, I don't
have to do this again, but I probably will
move everything up. And we want to add
some pants again, we're going to be looking
at it straight on. I think for this we'll
just use some cylinders. Yeah, I think we'll use cylinders so I'm going
to go to the top. I always do add a cylinder. We'll use our gizmo.
We'll move it up. We'll move it over, make
it a little bit smaller. Okay. There's not
that much space from the bottom of the coat
to the first ridge. I think it might be
something like that. I'm just thinking of his
size, that's pretty good. Maybe even a little bit shorter, maybe something like that. They're pretty wide and they're going to be on a little
bit of an angle. Let's take our radius, so we'll tap radius and
make that part smaller. This part can be a
little bit bigger. I'm thinking something
like that is pretty good. Okay, there's a few things, the way that he's standing, there's a few things like with
the arch of the character. Let's see how I can explain
this so it makes some sense. And again, this is going
to be a little bit trick, we might have to do it now. But usually when a
character is standing, it's going to be like
an S, almost like this. Then the legs are going
to be coming out and then it's going to bend
a little bit more. Later on we might have to take the coat and the
backpack and everything, and we might have to tilt
it back a little bit. Tilt, move the head back
and tilt it forward. There's a lot of
anatomical things that will make the position a
little bit more dynamic. I don't think we
have to do it now. Let's just get these shapes
in how we like them, but we might have to
adjust some things. Just his stance is a little
more dynamic also with leaning from one side to the other that can really make
things look really good. Those little weight
distribution. And just like the arch of the
back, you know what I mean? That all makes a big deal. But I guess we don't
have to. You get it? You understand? We don't
have to mirror it. Let's see, we don't actually
have to mirror it now, it might be just
easier to just make one and then just
call it I think let's use the gizmo and
let's tilt it a little bit, move it forward. And I guess that's I
guess that's okay. It's kind of more
what I'm thinking, like he should be bent
back a little bit. Um, you know what? Let's actually, let's
just, let's just do it. The head, what is said? Oh,
this is going to be the legs arm. That's the other arm. Let's take, let's take the arm, the hood, the upper. I don't even know what
all these things are, so we want to take everything
except for the head parts. I don't see any head parts, so we should be okay. Oh, hair curl. I don't
think we need that one. I don't even know what this
oh, that's the lashes. Nose, ears, cheeks. Okay. I think everything
else is part of the head. We just took everything
that isn't the head. I think we just want to
I'm going to hit left. I think we just want to bend
it all back a little bit. Hopefully, this is
everything okay? It is. I think I just
want to bend it back. I want to bend it back
anymore or is that good? I think that's pretty good. The only other thing
I was thinking now because I think
that looks better. We can tug down a little
bit on the coat to give a tad bit more on the coat. I think that'll be
fine. That would actually fit really well. The only other thing
that I was thinking is now if we go to hair curl, if you take all the pieces
from the head, not the floor. If we take all the
pieces from the head, I think that's
everything in the head itself. Let's just do a test. That's everything. I might just want to make
it a little bigger. I was thinking it might just
need to be a tad bit bigger. Let's take a look. I
think I like that. Let's see what happens if I
move the head back a bit. I think that feels a
little bit more natural, but the head being
back, but that's good. But the body has a bit, it just feels better. Feels better. I
want to pull down a little bit on this coat just to give us a little
more to work with. Okay. The pack is okay. I think that's all right. We can actually move it
out a little bit, make it a little bit wider. Maybe we'll put the pockets on. I'm not sure I like it
without the pockets, but maybe we'll put
them on the pants. I think we'll make
it a little bit smaller and just
stretch them out a bit. Move them out a little
bit. I think that's good. All right, make it a little
bit wider at the end. We can probably just maybe a select mask to make
this underpart of it. Do I want to validate it? Yeah, we'll validate it. Let's let's see if we
can use select mask. Take select mask. I
just positioned it so it's like still flat like that. Make sure it's not on unmasks. Going to be a little
tricky because it's not exactly straight. But then again, I don't think
we need to do it that way. Actually. I have an idea
and I have a better idea. Let's clone the
Legna, the gizmo. And we'll put it on local
and we'll put it on green. I think that's what we need. We don't need it
on X, just green. Now if we go to flip object, okay, that gives us another one. Now we can just go like this
with it and bring it up. All we did was we just made another leg
and we flipped it over. And that's like
exactly what we need. I'm going to move that up a
little bit. Now we have that. We have that difference.
Perfect. Now let's add a Taurus at the bottom. Add a Taurus. We use our
gizmo and we'll move it over. We need to make it smaller. Well, we can make this bigger, but we need to make the
whole thing smaller. We use our gizmo
and just shrink it. We need to stretch it too. Let's go back to
our options here. I can figure out
how to get to them. There we go, I don't really
want it to be much of that. Donut I think
actually is better. And then just using the gizmos to stretch it up, I
think that's better. So we'll make that a
little bit bigger. I think something like
that will be good. I think that's a good
shape. All right. I'm not going to validate it
yet because we might change some things but I do like
the way the two legs are. I'm going to do a quick save Then I want to take these and voxel rematch time together, a 175 or so. Then I'm smooth and we
don't really need symmetry. I'm just going to
smooth out this leg. All I actually
want to take move, I want to pull it a little bit. I'll hit front and then I'll just move it over a little bit, maybe make it a smidge smaller. Okay, Then I want to
probably clay and sub, we don't need symmetry, but just clay and sub, I want to make some of
these depressions in there. We're just going to use clay and sub to make some of these
curves in the pant. We have a deep one there and
I think we need another one here. Maybe some on the back. You can't really see them. But
I feel like they would be, there would be one
back here as well. Something like that.
You can actually do the regular clay and you can actually add
some in the middle. We just add some pieces there, like how it flowing up front. I want to take move
and I just want to pull that out a little bit. All right, let's smooth
it and see how it goes. I think it looks pretty good. I think it looks great. Yeah, I think that looks good. I'm just going to hit, I'm
just going to move and just drag it up a little bit. Whoops, That might have
been a little too much, a little too aggressive. No, it's actually okay. Yeah, that actually looks good. I just want to use
clay and I want to make I want to raise this
part of it out a little bit, so I'm going to add some clay there and just smooth it out. There we go, Perfect. Maybe, maybe we want to add a
little bit more flare here. I'll just manually drag
it out a little bit, add a little bit more flare. Is that too much? That
might be too much. I'm going to use
clay and just, oops, not Symmetry sub making another
little depression here. Okay, yeah, that's not bad good. All right, cool.
Now I like that. So I'm going to take this and just try to really match
what I'm seeing there. Even though we're
going to see it from a slightly different angle.
I think it's all right. Okay. I think that looks good. The only thing, I'll make
it a little bit smaller. It's a little bit small. Okay. I think that looks
pretty good. I think. I'm happy with that. Okay, good. So, so now we can do so we have legs and feet, so let's just block them in before I think too
much about it, let's just use a cylinder
gizmo and let's just block in these legs that size. Maybe a little smaller. Okay, so it'll be
something like this. Maybe this is a little
smaller as well. Okay, then I think we'll
use another cylinder. We can probably just,
let's name this one leg, then let's clone it and
name this one shoe. We'll bring this down and
make it a little bit bigger. Okay, so maybe around
here for the shoe. And let's add the sphere. Let's call this shoe be shoe. Some of you will know
what that's from. Okay, and this will
hopefully become our shoe. All right, do we
want to stretch it? Let's, let's validate the sphere. I actually want to stretch
it out a little bit. I think we'll do
symmetry vertex. Let's check our symmetry line. Let's move it to local. Let's change from x to y. We want to change
to, because we want to stretch this way. We want to stretch it this way. Now we'll just move
this out. Okay? I'm going to box, will remish
it and just smooth it out. Okay, so I'm going to
smoosh it a little bit. There's not that
much space between. Whoops, let's take
it symmetry off and put that back to auto so that we can just
move it up normally. Okay? All right, everything's
looking good. I think I'm just going to
make this big and move it up. We'll have to move
everything else later. There's not that much
space between there, but there's going
to be another torus there. Let's add that in now. Okay, so that is the shoe. Let's add torus. We'll move this up and over. Okay, and we'll
stretch this up again. This is going to be the
top part of that shoe. Okay, this cylinder, hopefully we can still make
it wide at the bottom, because we want it to be
a little bit wider at the bottom like this. The top can be a
little bit smaller. I'll just adjust the Taurus
until it's right on top. Good. Okay, now what we want, let's take this sphere. Let's see what's the best
way to pull this off. I think we might just do move, let's actually go change from Z to x and we'll use symmetry. We just want to
flatten this out, see how it's round.
We don't want that. I think we just stretch
this down and widen it up. We have to do it
on all throughout. Okay, looks good. I'm going to pull it
down a little bit there. We're getting there. I want to pay attention
to how low this is. There's actually not
that much space there. Let's take the cylinder and just move it up the
slightest bit so that, that's nice and straight. We'll take this part
and move it up. We'll take the base
and move that up. Okay, so something
like that is a little closer. All right. So the back actually
goes straight down. So I'm going to move that up, so it's more going
straight down. Okay. I'm going to
squeeze the back. That looks okay. It's looking all
right. We're doing okay. Slowly but surely. Now, let's see if we can
maybe just drag this part up. I'm actually not sure if
this is going to work. Drag and then spread it out. And right now, it's just this little piece
here that I'm trying to copy. So I'm going to
pull this top up, pull around the sides. It's actually not too
bad. It's not too bad. Okay. So I'm just going to pull that
back a little bit back there just to make
that go straight down. The only reason I'm
moving it so that goes straight is I don't know if we want to put I'm not
sure how we want to do the soles of these because
these are actually quite, I'm not exactly sure if I want to match
this apples to apples, but this looks
pretty good so far. I'm really liking this so far. I think what the
best thing to do is, okay, here's what we'll do. Let's take select Mask or no, let's not take select actually let's do select Mask
with rectangle. And I'm going to bring the
select mask to about here. Then use the gizmo and then
stretch this straight down. Okay, I wonder if I want to. I've actually never tried
to make a soul, actually. That's okay. Let's go back
to select mask and clear it. All right, so now we have this
bigger soul to work with. That was a weird sentence. I'm going to trim off
the bottom just with rectangle, maybe about there. I'm going to do a quick
then I want to do split. I want to do split,
and I want to split pretty much right at that edge. I'm going to take this
part of the shoe, and Vox will remesh
it around 200. And then take this part and
Vox remesh it around 200. Now we have those two. Okay, let's see what happens if I smooth this out a little bit. Just that little edge. I just want to smooth that out. Actually, we don't need
symmetry right now. Okay, now let's take the heel. I know I'm working with
this thing in the way, but we can move this thing down, actually we'll move
it down to there. Now we'll go to the
heel and smooth. We can actually use round edge if you don't have round edge. I'll show you. I'll show you how to make it
in the next video. This is a good place to
pause, make sure we save. And I'll show you how to do
round edge in the next video.
15. Round Edge & Shoes 2: Okay, so first let's do the round edge tool
which I have here. And what that does is once we have it and you
click on say, this, I just want to drag from
the middle and it'll just smooth everything all at
the same time I'll undo it. Okay, so just make sure. Okay, so first we want to take the smooth
tool, tap on it. Clone it, R edge ridge. Okay, now we go to the
clone is going to wind up at the bottom tonight. Is this the right
one? Yeah it is. This is the first
thing. There's nothing really there that
we have to change. Then we go to this little
pencil instead of, do you just want to
go to lock radius? Then we go to alpha. I don't think we need to change anything here. I think
that's all good. Fall off, let's just
tap here and make this straight like that filter. I don't think there's
anything we need to change. Make sure to check. Use global settings. We do not want that checked
because if this is checked, it'll change everything else. We don't want that now. We'll just go here and
dot straight, straight. Okay, I think that's everything. Yeah, and then we
should be good. Now we go back, tap
it and then save. And that should be saved. Now you just want to go from the middle of your
object pretty much. Don't go too crazy but go from the middle and
then just drag down. It will just straighten
out everything. It'll smooth everything. You can do that in place of like smoothing all the way
around something. I was going to try to not
use it for this video, but it just comes in handy. Hopefully you already have it. If you've done my
Youtube tutorials that smoothed out this
part of the shoe, it's actually nice because it's still the same
shape as the shoe. That's like an added bonus.
Let's make it bigger. That, I only think we
have to make it as big as, as big as the art. But you can if you want. I don't know. I like that a bit. It might be even fun
to clones this and make a one like a soul
for the foot two. That's right. I don't
know. I like it. I like it. We call
this baby soul. I really wanted to do SO. Ul, this is big soul. I should have put soul
first. I put the wrong soul. I knew I was going
to do that soul. Baby is nice to. I think that
worked out okay. Let's see. Yeah, we have,
that's looking good. I think we want to
shape more of the shoe. Now, There are some interesting
details in the shape of this shoe that I think we
can probably pull off. Let's take, if we're
on this piece, we might be able to
use the rectangle and trim a piece back
here like that. And then take lasso and
trim this other piece. It's nice. So let's vox o remesh this piece and
see what it looks like. Let's use round edge or ridge and smooth this out
and just see what we get. Oh, I think I had
a color on here. Why is the color on here? I'm just going to change
this back to white. It doesn't really make
a difference, but I didn't want that color
even on the met cap. I don't want that color. That's actually okay. Even though there's going to
be a flap that goes around. Maybe take. I want
to use symmetry. I think I want to make this
front a little more square. Maybe move is the tool. I want to make this a
little more square. Let's see, to come out further. I don't think I wanted
to come out that far. I think I like
something like that. I think I like that. Now
let's work with the strap. I want to have it so it
comes out and then I don't, I I was thinking maybe it's like a
little tongue that comes off like an actual strap. But maybe just a
regular strap is fine. Let's do so we'll do the
same thing that we did. Oh, actually we
might be able to use the tube tool, a matter of fact. Let's try the tube tool. Let's use Snap and let's
just drape it over here. I probably should have
used the other one. Let's undo and use path. What is this thing doing?
Get rid of this thing. Okay, so let's use path and 123, something like that. We don't really need that, We
don't need that many nodes. Let's take it off of snap. Okay, good. Let's make
it a little bit bigger. Actually, let's
use profile first. We'll change it to profile. We should be able
to use the gizmo and doesn't really stretch. It's okay. Let's go back to the
tube tool settings then. Let's just see how much
control we can have with this. It's not bad. Let's see what twist can
do if you tap twist. Let's see how it twists. Oh, it's okay. All in all, I think it
works out all right. But I think it's easier to
just do it the other way. I'm going to go back
here and I'm just going to add a cylinder. The tube tool is great
for some applications, but I still think for
this kind of application, the good old cylinder is
probably the best bet. So we'll move it forward
and we'll just shrink it. We'll take it off snap. Okay, let's stretch it that way. We'll stretch it this
way a little bit. And then move it down, essentially
just trying to make it so it works like a
strap would work. It looks like we
can actually use the radius and let's make the back part a
little bit more wide. It's another benefit
of doing it this way. I think that is pretty good. I don't think we'll get
any better than that. Maybe move back a little bit. Maybe open this up a little bit more tilted a little forwards. Yeah, I think that's good. Now that we have this, I guess I could spread
it out a little bit. Yeah, I'll spread it
out a little bit more. So I think that
looks pretty good. Let's go ahead and use we
want I'm trying to think, if I want to use a hole, why is the gizmo like that? I've never seen that snap. I don't know what
that is. I actually I don't use snap at all. Anyway, what was I doing? Completely blank as one thing changes and gets me off
focus and I just go blank. What was I trying to do?
Oh, hole, that's right. If we use this blue node, I think it controls the hole. I don't know, I want
the hole there. It might be better
to just keep it flat. Let's validate it. Whoops. Also the other thing
that I'm thinking for the strap hit undo, I don't want to hole linear
subdivision might be better. And post subdivision to one, I think linear
subdivision is better. So I'm going to validate that. Then I'm going to do a quick
and then I'm around 150. Get those edges nice and crisp. Let's use round edge and
smooth the whole thing out. Then let's take move, I
guess we can use symmetry. Let's see if we
move it to local. Actually, let's not use symmetry because we probably
could use it, but let's not use it now. I'm just going to adjust
this strap a little bit just so what matches. Okay, so something like that. Push that in a little
bit more so it doesn't have these huge
sections coming up. Okay, I think
that's pretty good. All right, Yeah, I'm
making this so far, so now I'm going to
do a quick save. I think I want to just vox
remesh these three pieces. I think I want to vox remus
tend together because we can always use crease at
that point in time. Let's, this is the shoe strap, we don't need the sole baby, we just need the other
parts of the shoe shoe. That's the cylinder.
Let's validate that and bring
this down to shoe. We have A and B. Then we also
need this Taurus up here. Is that, um, we'll take
this and validate it, we'll move it down here. I think we'll just
take all three of these vox remiss them
together around 250. I think a little bit
more detail in this, but I think that
looks pretty good. We could probably use round edge because I think we're
going to use crease anyway to get some
of the details back, but I think that
works pretty well. Okay, so let's put on the inside there's a little cylinder that's there and I like
that little detail. This is just going to be
the shoe. That's fine. Let's add this
little cylinder in. This is like a
little tiny detail. We'll just use the gizmo. We'll use snap. Shrink it up. I love little details like this. Let's take it off snap. I really just set it in there. I think that looks pretty good. Okay, validate that
and we'll smooth it. We can probably decimate it. Let's go miscellaneous
and decimate it. Once this strap is 41.9 we'll probably have to go through and start
decimating some of this stuff so it doesn't
really get too big. But I think for now
I think we're okay. All right, so let's
take the crease. Oh, you know what kind of
would have been interesting, and I'm thinking I'm
getting ahead of myself. So let's go back here. And I'm not sure, I guess symmetry is still valid. So let's just try to get
some of these creases back. Okay, I think that
looks pretty good. And then we'll do
one going across, oh, this is actually a mistake, but it actually
doesn't look too bad. So I'm just going to leave it. But I'll turn symmetry off. I'll try to. It is a little bit of a mistake, but I actually don't mind it. I'm not that worried about it. Now, there is a line
comes off here, it looks like, and does
something like that. I think that looks good. I think I want the tip
to be a different color. I'm going to turn
symmetry of, oops, turn symmetry off and make
a crease down the middle. I used to have shoes like that. I want to take split and I
want to split this so that can be a different color shoe toes. All right, so I'll
make a quick save. And drink some water
so I can speak. All right, make sure to save. I think I just save, but
I'm going to save again.
16. Sole Man: All right, so I'm
not going to get too crazy with these souls. I don't really
think it needs it, and I don't really know if
I even like that too much. But I might add some
little details. For example, if we use a sphere, it could be a cylinder as well, but even it's just a sphere. Even just a sphere for like a detail can be a
little bit interesting. I don't even know if I
want it on the soul, maybe just two of these.
It's a bit interesting. It's kind of
interesting actually. I'm just going to validate it. And then I'm going to clone it. And move, move it back
so there's two of them. If I do that, let's say I
join them and I clone them. I feel like I have to bring them over to the other side as well. Okay, I like that. So I'm just going
to join them and do shoe beads for this part. You know I was thinking I
want to clone it first. So I'll clone it first. Let's go to So big
and change this to blending and turn this down. Now we'll go to so big one. And let's just put
B one, whatever. That's fine. We can leave it. We're going to take that
so big one and shrink it. See, you can still
see it inside. I'll make it a
little bit bigger. We'll shrink it maybe there. So now we can go back to the original one and
change it back to opaque. If you want to put
any of these little pieces which we can do, Select Mask might be the
best option for those. If I use Select Mask. And maybe I'll just select
the whole bottom part. And then take mask and unmask
with the regular mask tool. We'll unmask, then we can make some of these
shapes in there. Interesting. I'll
do one this way. I'll do one that way,
maybe something like this. Now, I did look like when
I did the other one, that I might have to make
this one a little smaller. So I'm just going
to do that really quick even though
I couldn't see it. I'll go back to this
and let's invert and let's see what we get if we
make the whole thing smaller. That's actually
cool. I like that. That's actually quite nice. Let's take select
mask and clear it. I think that's, that's actually better than what I thought it was
going to look like. I did make this smaller, but this might actually look
better if we make it bigger, but then just shrink it and
make another very thin, like a thin part of the soul. Maybe it can either be something like this or
it actually looks nice. I like that. I think
that looks fresh. I'm going to save it because I think it just
works well together.
17. Tall Tails: All right, let's make
this little tail. This should be pretty easy. We'll just use tube
and path or curve. We'll actually use curve. We don't need snap now, we're just going to
curve and just match. Okay, Pretty good. I'll use the gizmo and just
move it right to the middle. Maybe make it a little smaller. We'll tap on the tube again. All right, so now we can just adjust this
to what we need. I think we don't necessarily
have to match that. We definitely don't
have to match that. Let's see, let's
use radius twice. Again, this gets a little
tricky with all of these nodes. I'll make this one smaller, going really close to try to differentiate
between these nodes. Make it a little there, okay? I'll make it a
little thicker here. Again, we might change this
because actually it's really, it's not quite realistic. But, but I think that's a detail that can
easily play with later on. For now, I think
that's pretty good. You can always make it flat
too if you want just by using the profile. Okay. I'll do a quick. All right. So this is, this is pretty good. Pretty happy with it so far. I want to make this a little smaller and with
the leg I want to, I think we can validate it. I want to tilt it
forward a bit, like so. Now let's take the leg, let's make sure we're on world. Actually, all these things
I want to be on world, I'm going to validate
the Taurus, the cuff, this is the pants cu okay, that's world. So all these things, I want to want to make
sure that we're on world because we're just going to. So the legs and the pant cuffs, I could put it in a mirror, but I think it's better to I'm just a little I'm just thinking now that
I'm thinking about it, it's probably better to
go through and make sure that everything is
what's the word. I want to make sure that
these shapes aren't too big because the leg
right now is huge. So I'm going to go
ahead and decimate it. So I'm going to go
to miscellaneous and decimate the cuff
is fairly small. I'm still not certain if I want to make it a little smaller. I probably should have
made it a little thicker. You know, I wonder
if I can go back. I think that's fine.
No reason to go back. I think that's okay. I'm just going to move
it up a little bit, so I'm just going to
decimate the legs again. It still looks fine. Yeah, I think I'm just going to clone then I'm going
to flip everything. I don't think we need
Y, I think we want X and then object. Then we want to
do the same thing with all of these pieces. Pant cuffs, I want to
put all these together. Pant cuffs will cloned
flip object leg will world flip now. Unfortunately we have
a lot of pieces here. I think I can grab all of
these and then clone them. Oh, and I can't do the
symmetry on all of them. So it's a little tricky to do that because it
gets really confusing. I'm going to try to
move all these down. Luckily they all
have like numbers, the ones that are duplicates. So big two. Yeah, this is a
little bit tricky, but all we really want to do is take all of these
pieces like this, is to have a one oh one. We're going to flip object. You just want to flip
everything and make sure that you don't
miss something, but it is a lot of pieces. We have the cylinder,
we'll clone cylinder on. We'll flip object,
we'll take this shot. I don't see any shoestrap'lone I'm going to move these up
with the other numbers, cylinder one and shoes strap. We're just going to
flip everything world and flip object, shoe beads, flip object, okay, so big, whoops, see world flip object, so big two flip object, okay, That might be everything. I think that's everything.
All right, it looks good. Now we have our two separate
spots or two separate legs. Obviously, they
don't look good at the moment, but they will. Let's take the shoe we want to try to get
this whole shoe. Okay, so I'm going to try
to connect all these. I want to see if I'm
missing anything. I am. Okay, so missing this. I'm going to bring this down. So let's see if I'm
missing anything. That's everything perfect. So this is the one shoe and I really should gear
up the other shoe. I think this is the other shoe. No, we're missing the strap. Okay, so I think
that's the whole shoe. Perfect. So now let's
see, what is this tube? This tube is the tail. Okay, this other arm
we can get rid of. Okay, good. So we need to, so now we need to need to adjust the way that he's standing
because he looks okay. But obviously it
doesn't look right. Obviously it looks really weird. So. Let's start by
adjusting the feet. I think I want to move the pivot of the foot that
will make it easier. I'm going to tap pivot, I want to put the pivot down
where the heel would be, something like
there, essentially. Now I can move the foot. Okay? This one, the pose is
going to be like this. This foot can actually probably go a little bit more this way. I'll just adjust it so the is going in, okay. Let's say that this is, that's pretty much the pose, so I'm going to take my
camera and add view. And this is just
going to be one. Okay, so this will be two. Now, at least we
have our two views that we can easily get to. Let's take the other
foot. All right. We'll do a short cut. There we go. So we'll take this, oh, and we need to
move the pivot again. Okay? So we move the pivot. Now let's go back to our view. Let's adjust this foot. Something like that. So
now we'll just adjust it, so the leg is going
in pretty close, but oop, it's not right. Here we go. Okay, that's much better. Now, the pants we need
to adjust as well. So I want to do pivot, pivot. That'll make it a
little bit easier to adjust these pants. It might actually
be better to just use move, maybe flatten. I want to differentiate the two. I don't want them to
look mirrored at all. I'll take this one as well and move it back a little bit. Okay. That looks pretty good. I want to take the coat
and move it down. Okay. I want to take move, maybe push the spread that part out a little bit. I think I want to use inflate on the bottom of the coat here, just so it looks
like it's pressing on the bottom there
a little bit. Maybe flatten it out a bit. I'm just following the same
sort of things like we did with the the coat sleeves. You know, you can add some
creases in and things like that just to sort of
make it look like, you know, there's some,
there's some weight there. Okay, I'm gonna do
another inflate. I don't want to poke
it out that much. I like it, I just don't want
to poke it out that much. Okay. All right, good. So that was good for the pants. I am thinking I
might need to add a crotchell area in between. I think that might
actually work. Well, I'm going to add a sphere. Go ahead and validate
it. I'm going to add that right in the middle. I don't know if we'll need it. I don't know if it'll be
necessary, but it might. Let's see, let's try
and move flatten. And maybe we'll just flatten
out some parts of this leg. Maybe a crease on one side. Well actually it's flatten out a little bit
more on the side. I mean, it kind of looks
like it makes sense, but it also looks like
it's a little far down. That makes a little
bit more sense to me. It doesn't make sense to you. Is the real question,
personally, I think I like it. So I'm going to take
move and I just want to, I want to add some differences
down here as well. I really want them to look unique and not completely
just mirrored pants. Okay? And you know what, I
think, I might just take the legs and the pant cuffs. Let's do a quick save. And I might just vauxhall remish them altogether. Around 250. I mean, did I do
the Oh, I knew it. I knew something
wasn't right leg. That leg Pant cuffs that. Not the legs. Oh, in the sphere. Where's the sphere? Okay, so we need all these
parts and the sphere. So we'll bring this
up. Pant cuffs. Okay, so I'm going to
save this again now. Box will re mish
this around 250. So then we should be
able to smooth and everything should look
a bit more natural. I still might want to put
on a nice little flap. I think I want to build this out a
little bit in the back. Oh, I love the way
it looks so far. Okay, so let's get into
some more details. It's looking really good,
but we'll just continue with some more details on the
code and things like that. Maybe we will add some
pockets on the side, but we'll get to that in the
next video. So let's save.
18. Plenty of Pouches: All right. So let's give him
let's give him some pockets, let's add some pockets to
the side. Where's the coat? I think we'll let's
use a cylinder. We'll move it over to the side. There's actually a few things I want to use with the cylinder. I think I want to
give him a nice belt to a belt coming down underneath that to just
cross the little area here. I just think that
will look nice. Let's let's snap it this way, we'll make it smaller. Maybe it's better
if we use a sphere. I was thinking,
just validate this. I'll show you what
I was thinking. If we use the let's see, local why. That's because we
turned it, that's why the symmetry is a
little bit different. I was thinking we could
do it something like this for the pocket, smooth out this whole
thing and then just take, maybe just make the
bottom a little wider. This was my thought process, which I am second guessing
to using spheres. But actually it
actually looks okay. It's a little big, but I think it does look
like a jacket pocket. Let's take a look. It's actually not too terrible. Let's do this.
Let's move it out, and let's audit the
sphere as well. Pocket a, let's add a sphere. Might as well go ahead
and validate it. This was the other option we'll take move. And why can't it? Well,
maybe to put it to the local and we'll change this to Z so I can make it a
little more pocket like yeah, this looks good too. Does look a bit, maybe
a bit more natural. It was shaped to be there. Bring this down a
little bit more. Okay, I think that might win. I think that might
look a bit better. It's world, So we
can add a mirror. Let's take this. Oh, I was on the world. I
was on the wrong thing. So now we'll just add a mirror so it's on the
other side as well. Okay. Although, you know, it might be nice to. Actually take it
out of the mirror and just work on this side. Because I might want to put something different over here. I'm not too sure yet. For example, it might
be nice to flip object. Where did it go? Oh, I was on y. So that's why it flipped below, flip object pivot center. This light might
look nicer if it's a maybe like something over here on the pants,
Something like that. Maybe like right underneath
this is actually quite high. I think I want to make
it a little bit bigger. Maybe I'll just do it
inflate, turn symmetry off. That looks a bit weird, I think maybe a little
inflate there. I think I need some puff this out a little bit
and it needs some sort of like a strap for
the top of the pocket. I think for that
we'll use cylinder. We'll move it up and over snap. We'll snap it this
way. I think it'll be, I think it'll be good if
we stretch it across. You know what,
Actually this is fine. I'm going to validate it. Symmetry vertex. Let's make sure we have
the right symmetry. Let's make sure it's on
local x x, the one we want. Okay? Z is the one we want. Now we can stretch it this way. I'm going to take
it off symmetry and put it back to auto, and I'm just going to
box, remesh it around 175 and then smooth it out. Now I want to take move
and switch the symmetry to y, y, and x. This way can turn symmetry on. We're using the move tool. This way I can square
it up a little bit. What's happened
to the other one? Oh, we want y and z. Y and z, it's better. Okay, so I just wanted
to shape like this, which actually is not
perfectly the way I want, but I think it works. So now we can just
kind of tilt it. Maybe we'll put a
little bend in it. We'll take the y off. Put a little bend in it. There we go. That's looking more
like a pocket. And now I'm going
to take inflate on the coat. No symmetry. So we can just add, make the smaller so we can really make it look
like it's part of the coat. Maybe we'll do a little
crease action under here. Smooth it out a little
bit. I'm going to be very gentle so I don't lose too much of this detail. Okay. And I wanted to give him
a belt for the belt, we'll just add a
cylinder to rename it. Belt, excuse me. So we use my gizmo
and bring it up. Actually, this might be a good time for,
let's delete this. This might actually
be a good application for the tube tool. We'll do curve, we'll
curve it like this. Okay, So I think, I just
want something like this. So we'll make it a
little bit bigger, we'll go to profile. And I want to
change the profile. I want it to be thinner, so I just have to
figure out, okay, okay. I couldn't really figure
out how to make it thinner. I know that I feel as
though it's possible. Let's solo it. If I
use profile preset, I thought maybe if you just
brought them in like this, it would be thinner. I guess it is. But maybe
I just have to rotate it. Let's try that. Let's
bring this back. Let's do twist and then twist. I think that's good. I like
it, so it was a nice belt. We'll validate it and we'll, um, I think it
actually looks good. I may not have to
do anything to it. I think it looks great. Okay. We'll take this little pouch and just add some creases to it. Let's see if it's oh yeah, I think, I think it might work. A little tiny details. I don't know what the
symmetry is doing over there. For this. Maybe we'll flatten
the bottom a little bit. I honestly doesn't
really need too much. I like it the way it is. Yeah, I think I like that
the way it is. But we could always
add a crease, a nice crease in there. Maybe we'll subdivide at once. I love little details like that. Love, love, love them. Okay. So we need to actually get to work with
the middle of this coat, because he needs to have
that split in the middle. Let's save. Let's see about the
split in the middle. I don't think it actually
has to be a split. I think it can just be
if we do select mask, I do it on one side and
then the other side. Then I protect the
back part. The gizmo. I should be able to
just get rid of this. Let's see how this
looks. Not bad. If we smooth it out, it does look like a nice crease. It does look like a nice crease. Let's see how the
other creases look, if we add one crease
in the middle. I don't think we
need the symmetry. I'm going to get rid of the line because it's just in the way. If we do one going up and
then we do one over here, okay, we may have to
do another one here. So essentially we're just making some creases that just make the jacket look a little
bit more legitimate. So that's all that
is. We can solo it if you want to bring these
all the way to the top. Okay. All right, so now we have
to deal with this part, which is what I've
been dreading. I'm going to save, I think
I want to Vauxhall remesh the hood parts color and where's the other
one color lower? So many things that
they're just getting lost. There it is. So these I think I might want to Vauxhall remash together, so maybe around
200. Did that work? It did. Okay. So now that
that's remashed together, then I have a
little more leeway. So I can the back
part can pull that up and I think I want to try to trim this or do I want to
drag it down first? As you can see, I'm just
trying to drag down in the middle because it's a little tricky to make collars just design wise
because they have to go into the coat the right way. Sometimes it can be
a little tricky. I think that's pretty good just using drag and dragging it down. I would like to trim
in the middle there. I'm going to hit Solo. I want to just trim
in the middle. You notice how the back up, you might have to move
the back of yours up so it doesn't trim
all the way through. So I just want to trim these
so that they're separate. We'll bring it back.
I'm just going to, so I'm going to smooth it out. I want to protect one side. I'm going to take select
mask and I want to protect this side who turn symmetry off. Now I'm going to
take move and I want to move this side over more. Maybe like right in the middle. So right in the middle,
I think that's good. Then I want to do the opposite. So I want to clear the mask and then lasso
and protect this side. And then I'll take
the other side. And I want to do the same thing. It looks like mask
mask that by accident. Okay, so now I'll take move
and I want to move this one, so it's kind of going into the same place but maybe even
just behind the other one. Okay. I don't mind that at all. I don't mind that at all. Okay. So I think that's
looking pretty good. Let's clear the
mask and just take a look. I think that looks nice. I don't mind that one bit. I'm just going to
slowly adjust this. The only thing we have
to do is, excuse me, we can actually pull the
code out a little bit too, to fill that space. That made that
look weird though. Oh, that looks nice. I just used drag because
I'm just trying to hide the collar like in one
of these little creases, as though the collar is like going in one of those
little creases. That's really what
I'm after here. Okay, that looks good.
That looks great. Okay, so we do have to deal
with inside the hood as well and trying to figure out like a lot of those details like what's
happening inside the hood. But we could probably
just have him in like a turtle neck or something. I think that would
be the best option. We'll come back and continue
on with some little details, but we're in a very good place. Let's save and come back
and continue working.
19. Water Bottle & Detailing: All right, so
there's a few things that I'm seeing
right off the bat. Part of me wants the pouch and the coat to be a little bit wider just to give them a little bit more
shape in the middle. It looks good, but maybe
just a little bit wider. I think I'm going to grab the little pouch piece and the coat. Actually, there's something
else I want to do as well. I was thinking about
maybe protecting the top, but we could always
push that back. I'm going to take
select mask and lasso. I really like what we did here. I'm going to take the
lasso and I just want to protect this part of the coats. I don't know what, I
just masked the finger. If I'm on the coat, I want
to protect this side. Let's see if we can go here
and blur it a little bit. That way it won't be such a crisp line
once we stretch it. Now I want to grab the cote body and this little pocket
which I think we didn't name yet,
it's just these two. I just want to take
the gizmo and just stretch them out a
little bit this way. Just so it's a little bit wider. Yeah, that feels a
little bit better to me. It was just a
little like narrow. I think this works a
little bit better. Let's check out the damage. If I use Select
Mask and clear it, it actually looks okay. Yeah, I think it actually
looks all right. It's a luckily all
this stuff is organic. Anyway, I don't really
see too many issues. So that's good now that
I'm thinking about it. I can probably use crease on the coat and maybe just add in some little details here as though the coat
is being pulled on. Maybe add some clay and
add some little puff. Anytime I get to add these little details,
I try to add them, excuse me, because I
think they really, really makes the character. When you have those
little details that someone else might not add, take that extra time to add things that someone
else might not add. Okay, this I'm seeing
is part of the hood. It looks like anytime you
have little pieces like that, you can use clay and sub and
you can just clay them away. Sometimes you have to either move them or
something like that. We just want to
watch out for those. Okay, I think that still
looks pretty good. I'm noticing this still has a. I'm going to turn Symmetry off. I just want to get rid of
some of those little ribs. That's actually, we might
not even have to get rid of that at this point because we still have this hood that we
have to deal with. I'm going to go to the hood
and I'm going to take it off. Symmetry. I just want
to bring it into. I want to bring it
up. I don't think it really needs to be
showing in the front. I think in the back
is good there. I want to try to bring
it a little bit closer to this, this piece. I think all that looks pretty
good, pretty happy with it. The only thing I
was thinking is we can add maybe some details. Like if you want to flatten
it out a little bit, that might be cool, just give it a little
bit of extra shape. I was also thinking,
I don't know if we need another pocket here, but it might be cool
to have a pocket. And then like like a water
bottle or something. Almost like he has a
canister, like in a pocket. Now that I've said
it, let's just do it. I'm going to hit save because I like how wide we made that. I'm going to, let's see,
where's the backpack? Let's go to the backpack area. And I'm going to add a cylinder. Okay. I'll move this
up, stretch this out. This can be his little
canister. We could also use. There's a few ways that
we can do it here. We can either use
the lay tool again or we can do it here
by validating and using the select
mask with rectangle. Let's say we wanted to have like a tapered end,
something like this. I feel water bottles are usually a little
bit more like that. We'll clear the mask
some more details. Maybe we'll add a, probably
won't even see the bottom, but maybe a little
bevel at the bottom. Clear the mask and then
this looks a little bit, let's make it a little taller. Something like that, I
think looks pretty good. Do a quick save and then
maybe we box will remesh it. We can use round edge
and just round it up. We can use split. Split is great for
let's say the top. We want to just have
like a separate piece, then we can do that. I usually just box remesh each of these individual pieces. Let's choose round edge. We'll have to decimate
them most likely. But I do like to box remash these little pieces
and then smooth them individually for like this cap. Let's see. Okay, this can be the cap bottle Cap cylinder
will be the bottle. We'll make it be his water
bottle, we'll be healthy. Let's take the cap and
let's just decimate it. It's really small
then we'll clone it. Bottle cap neck does make
a little piece underneath. We can use the same. Maybe we'll make it a little bit bigger, something like that. Just to give it a
little little detail. This really doesn't need to be. Well, decimate that even more. Okay. All right. I think
that's pretty good. We have the bottle cap. Where's the bottle?
Oh, here's the bottle. I'm going to move this up and
then I'm just going to link all these underneath that
way they don't get lost. Once we're happy with that,
we can move it to the side. I think it will look
nice on this side. It's really big. Yeah, I feel like it would look nice maybe even like tilted
out a little bit. May be a little smaller. I think something
like that works. Now we have to just make some pocket for it and I'm
trying to think of what the best way to make the
pocket probably could use another cylinder as I think it might be a little
bit more efficient. Let's say we take the
water bottle and clone it, and then we make it
a little bit bigger. Okay, and then let's trim it. Okay. All right,
so we trim that. Actually maybe we
can make the inside. I don't know how tight we
want it, If we want it loose. If you want it loose,
I was thinking we could copy clone
the water bottle. Again, this will be a
water bottle pouch. We clone the water bottle
again, this is the bigger one. This is just the regular
sized water bottle. Let's do a quick
saved just in case. Then we can take
the water bottle, we can select those two, then we can hide the water
bottle and we can do bullion, Then hit bull in there. Now we just have this which
is the water bottle case. Change it or pouch. It doesn't have the thing in the middle or it's
hollow in the middle. Remesh it at like 150. We'll use round edge. Maybe we'll just take regular, smooth and smooth
out the bottom. We don't need symmetry
and maybe move. We can just, I want to kind
of hug it a little bit more to the bag and make it a little less like
looking like a bottle. That's the nice part about that. I can this, it actually
looks thinner, but I can actually pull
this up so it really looks like there's space there. Something like that. Although I wish it
was a little th, that's my only gripe. Let's see if I can
smooth this out. This is my only gripe is I
wish it was a little thinner, but I think that's
actually okay. Since it's not so thin, I'll just pull it
out a little bit on the sides so that it doesn't look really
thin and go to thick. So I think that's pretty good. Okay, I also want a
little pouch I think, or like a flap to go over
the back part of the tail. But I think I might change the tail instead of
a tail like this, I think I want a big fluffy tail to come down and actually
lay on the ground. That's something I'm
thinking about in my head. We'll do a quick save, honestly. I'm pretty happy with it. I think we just need to solidify some of these
details back up in the head. For example, these are gray, but they would go a little
bit more into the face. I just want to these in
and maybe bring that out, but I want to push the ends in so that they maybe make
them a little bit smaller. Yeah, I want these
to just come to a nice natural point like that. We'll do the same
thing over here, Although this is almost
looking perfect. That side looks pretty good. Okay. This is a gray. This part of the
head is also gray. Okay, Let's go ahead and
validate all these pieces. I've been waiting till I get to this part for such a long time. Okay, let's move some of these that shouldn't be
showing in the front. So we'll move that, this piece, I'm just going to use flatten and I'm going to
flatten out underneath. And maybe I'll flatten
out up here too. Just a little flattening. Nothing too crazy.
Okay, this part, I would like to make
it a little more, let's see if we can add a node, then make that a
little more round. It's a little tricky,
but that looks okay. I think that looks all right. So I'm just going
to validate it. Validate all these pieces. I think they look great.
Let's take this piece. I'm going to do a quick save, since we validated
a bunch of stuff. Let's see how big this piece is. Let's subdivide it maybe twice, and then let's smooth it out. We'll just make it
nice and round. You can even take your flattened
tool and just flatten it out because I like
that it's round. I'm just trying to
match that energy. Then we take our smooth
tool, and that looks good. This one is. Well,
let's go ahead and subdivide it twice
I think is good. We'll smooth it out.
We'll see that tip. I think we'll box
remiss them together. It's okay if they're not
all completely smooth. So we'll just do the
same thing actually. You might not need
to go that high, probably don't
need to go as high as subdividing twice, actually. Okay, I think that
looks pretty good. Let's do it once, smooth it out a little
bit, see how it's looking. Think that looks good.
I actually think it looks better. A
little bit smaller. Anyway, this was a nice little detail and I think I might
just keep it. I think I like it now. I was a little iffy about it,
but I think I like it now. Okay, now we have these
pieces on the head. We're just going to
take this hair shape and let's subdivide it once. Let's actually move it
out. Let's just take it. Just move it so you can
see it a little bit. What would be nice, because we do have to shape it somehow. Now this is actually just
going into the head. I think it's going to
be the same color. That helps us out immensely. Let's take crease and sub, it doesn't matter if
yours is different. Essentially, I'm just
going to, with the sub, she's going to make
some like wines and these will just act as like other layers for the hair. That's basically all
that's going to act like. I'm actually going to go up
here maybe make a couple more, something like that. I think that looks great. Something is bugging
me about this part, so I think I'm going to
pull it out a little bit. Give it a little
bit more of a bend. Actually I think it does
look a little bit better. Let's try crease on it. And maybe sometimes just add, adding some elements to something that's very flat will make it look a lot better. Even these little pieces, sometimes it's nice to add
a little something to them. I do like to go with the flow, the natural flow of whatever it is, but I think that's good. Maybe we'll add one here. This looks like a good spot
to add some little details. It just adds a lot of character. And I like it, I'm digging it. Let's save. Okay, now we have to figure out what we want to
box to re mesh together. I'm thinking, well, first off, let's go ahead and
smooth this out. Since this thing had
to go so long with not being smooth and
just being really ugly. But now it looks
great for these, for this hair, I should say. I want to bring it
back a little bit, and I might actually add
a second one in there. I like the way that looks. This is still in a
mirror, which is great. That's the reason why I
keep them in mirrors. So if you want to
add a second one, then you can just
add a second one and I'm going to make it a
little easier for myself. I'm going to bring
this ear out and then I'm just going
to edit this ear, or this little piece. Okay, maybe I'll bring it up
and then just angle it back. I think that'll be a nice touch and we can probably do it again. So if we clone this, let's see if we
make another one. Maybe just like a
slightly different shape. It might look nice. I think that looks cute. I think I like it. Now we
have these two and we can bring them back up into the into the same mirror and then they'll just be
on the other side. I like it we can
take the ear hairs. And I'm just going to validate keep instances. Let's try that. We validated it but
we keep instances. We should be able to edit
any of these that we need. If we want to
change some things, like maybe we just
want to adjust a few of these and they don't
need to be symmetrical. I think that's a nice touch. I think that looks good. But not everything has
to be symmetrical. Don't worry too much about that. I like them, so let's just
join them together for ear hairs look good. I don't think we need to bend them or change their shape
or anything like that. The only thing that
I'm seeing that we can do is if we want to make them
a little more realistic, we can add some
shape to the back. Let's see, I want
to use a sphere. Maybe we'll just use clay. Probably just use clay.
Let's see if it okay, good. It's happening on the
other side as well. Let's check the inside. The inside is getting
a little warped which we don't want.
Let's just change this. Let's go to the, the clay tool filter and front
facing topology. Only now we'll go
back to the ear. Essentially we're just adding the connective tissue
of the ear to the head. That's really all this is. We can just smooth
it out and it should look a little bit more natural. I'm going to take move
and just squeeze it into the head like that. Okay? I think that looks good. It's like when you
look at like a cat or any animal like this and
you look at their ears, they're actually, they have
like this shape like this. It actually is like a cone almost. I think
that's pretty good. All right. When we come back, I think he needs
like a turtle neck. We can get rid of some of this like empty space in the hood. We'll do the turtle
neck and we'll start fusing some of these
things together so we have something cohesive. I think that's a good next step. All right, don't forget to save.
20. Turtleneck & Detailing: All right. So for his
turtle neck or for his shirt collar
neck type situation, I think we'll just
use two Tauruses. Okay, so I want to go
to the closest part to where the neck
would be, coat collar. I'm going to add or do I
want to do a cylinder, We'll do a Taurus
and I'm going to put it up above the coat collar. Okay, so let's use the
gizmo and bring this up. And we can stretch it this way. Okay, Then I think
we can angle it. I think that's
actually pretty good. Like, I don't think we
need to add too much more. Obviously it's cold,
so it makes sense that this would be some
sort of layer there. Let's just validate it.
Let's just use inflate and we can inflate
maybe a part of it just to give it
that like collar look. Okay. Let's actually subdivide
it and then smooth it. You can take flat,
maybe we'll flatten out inside a bit if we want. Let's see, what do
we think about that. Maybe we'll take move and I want to the bottom but
pull the top out, it has that collarly look. I know that's not
a word for term. Let's make this a
little bit bigger, make the actions a
little more sweeping. I think I like that. If we want to, we
can add a crease, although we have
enough creases really, let's not sub just
regular crease. We can do that. And then smooth it,
it's still too soft. Let's save and let's
fox remish it instead, maybe a 200 or 180 or so. Then let's smooth it. Yeah, I like that,
that subtle change. I like that a lot and it
looks good in the front. I don't think we really
need too much more there. If anything, you can
just use inflate and maybe fatten it
up a little bit, but I don't think
it really needs it. I'm noticing that this crease ended a little too abruptly. I'll just make the crease part again and then smooth
it out to make it a little more natural.
Okay, this is good. This does not need to
be that big of a size. So we'll just go here
miscellaneous and decimate it down because it doesn't
need to be that big. Okay, back to this collar, thinking I might want to flatten the top of it a little bit. See how that looks? Yeah, I like a little bit of flat top. I think that looks good. I want to Vauxhall merge it to the hood and then to
the body of the coat. That's what I'm guessing. The only other thing
I was thinking is if I want to add
another pocket here, that's the only other piece that I was sort of
pondering doing, when I might add a
little bulge here with inflate that will
really make it look like the flower pot is
pressing up against it. We'll see. But I think I
need to focus on one thing because there's just so much I want to do
that sometimes it gets a little difficult
to literally focus. I want to take the ears and
the hairs, all these pieces. I think I'm happy with them,
so I'm going to validate. Oops. You want to make sure
you validate and just do join children ears in the ear has. And the cheek hairs. I'm want to validate
those as well. He lower validate those as well. This is hair shape, so there's all these pieces here that need to be validated together or at least joined. The ones that are the same
color can at least be joined. I just want to check the
ear hairs are very high. Let's do a quick save and they don't need to be that high. I'm going to Vox
remix them together. I think around 250. Okay, I think I'm going
to do round edge. Do round edge on them
and then decimate them. We go to miscellaneous decimate. I think that's good.
We have the ear, then we have the ear hairs. All these hairs. Hair shape, I'm going
to join them together. And then I'm going to join
them with the che, hair. I'm joining all these
hairs together. The ears even as well. Maybe I'll leave the
ears separate for now and see how big
the ear hair is. I'm going to change to head hair because now it's just
all the hair on the head. I'll try to decimate at once. These got all messed up. That's okay. We'll
leave it for now. Hair curl. Let's just put all these pieces together. Where's the hair? The hair go, oh, there it is. Hair curl. I'm going to
bring down to head hair, okay, whites. These are good. So I'm going to validate the
dots, the little things. I'm going to validate those
as well. We have dots. The pupils, we're going to move, so I'm not going
to validate them. This sphere is the tongue. This is what I call
housekeeping the lashes. We have two different
types, right? You know what we'll
do, we clone. For this one we'll
delete that one. And for this one we'll
delete the bottom one. Then we'll validate them both. We'll change them to
lashes or lashes A and B. That way we can just
keep them in check. Okay. This petal stem looks good, but now I think we'll make
it a little bit smaller. Maybe we'll just give it a
little bit more of an arch. I think we will validate it. Petal stem and petals. Let's take both of those. I think I just want
it a little bit over and a little
bit more slanted. That looks good. I like it. Anytime I do anything
I'm doing quick. I don't like do, I don't like doing
things multiple times. All right. So there's
some little details. For example, the cuffs, let's subdivide
them. You know what? Let's just take the cuffs and box will remish them at like 175 and we use round
edge to round them out. Maybe regular smooth,
sometimes regular smooth is a little more
aggressive. I'll use that. Let's do the other one as well. Let's box will remshtround
150. Let's just smooth it. Yeah, that looks nice Sometimes I don't want to box
will remash too high because I really want
these edges to be soft. That's good. Now we have
both of those, honestly. Are these separate cuff two? Let's just join them together. These will be cuffs, cuffs. All right. Now those
are joined together. We can do, we don't
need symmetry. I think just for
these, we want to put some creases in the cuffs. Maybe just solo. Okay. And then we'll
do the other one too. We'll do solo. Just
so we can kind of see where where we put
the first one. I think this is good. I love when you get to the
point where you can just add these little details
and then you can really just add
as many as you want. Now I'm going to
smooth so that they're nice and soft, okay? And now I actually
want the coat to still be very puffy around the edge. Push it in a little bit there. Pull it out a little bit there. I want them to be
married up very closely. Okay. All right,
great. Let's save. So we have all these
pieces together. Oh, we're looking at bus, wondering why that looked
funny. Let's hide. Which one do we want to hide? Yeah, we'll keep that one,
we'll hide the other one. Okay. Is the leaves. These leaves we
can join together. Okay. Everything else is good. Let's just check the
sizes on the soil. I'm just going to
decimate the soil. The leaves, they look okay. The stem, the petals can probably decimate the
petals at least once. For now, the flower
pot looks pretty good. Let's see if we
can decimate that. I guess we'll keep it even though it's quite
high, but that's okay. We'll work it out later. Okay, the arm coat
is pretty heavy. I don't think it needs to be. Let's see if we can, I don't know if we
want to vox rems the arms together with
the coat, but we might. I think I'll just
leave it for now. All right. So I think I want to
probably fake a pocket here, so I'm just going to
use clay like this. We'll smooth it out a bit and I'm going to use Case and I just want to
fake this pocket. So maybe we'll even just
flatten this a little bit. So we'll flatten, we'll
smooth everything. And I'll take crease again and we'll have this there. I still want to flatten this
a little bit more. Okay, we'll smooth out that top. I think that looks pretty good. I'm going to take
inflate on the arm, and I'm going to inflate
a little bit here. Just to acknowledge that this is pressing
up against that, this piece, that's all
that is. Pretty much. Maybe I'll take crease and clay and maybe I'll
puff up a little bit. Oops, let's make
that a little bit smaller by adding these little puff areas. I just wanted to look like
the fabric is pulling. Then I'll just use crease to now. This seems to be
smoothed a little bit more. Keep it nice and soft. I'll just take move and just kind of move it a little bit. Okay? All right. Do I want to add anything
else over there? This a little bit
of negative space is kind of bothering me. I might be able to fix it. Just with move though, let's try inflate and just inflating around the
back of this backpack. That might be enough for me to kind of feel like that space
is naturally being filled. And I don't really like it,
so I'm going to undo that. I think I'll just take a sphere, and I'll make an extra pocket
just to fill that space. We'll base it off of the
other one that we just made, so we'll just squash it together and put it along the edge of the
coat like that one is. Go ahead and validate it and
then I'll take move and I'll move it to match the shape
of the other pocket. Maybe flat on the top of
it, flat in the bottom. Then again, just match that other pocket,
flat in the front. I bring this part up a bit. Okay. Yeah, I like that.
So I'm going to use pinch and I want to try
to find an edge here. Oh, actually we can know
what we can do first. We can do crease with sub, we can actually add, oh, you want to make sure
symmetry is off? Add our own case. I'll do
the same with this one, and that will really
match them up a bit. Okay, I'm going to take this sphere and I'm
going to clone it. And I'm just going to flip
it over and move it up. I'm just going to make
like a makeshift like top just with the bottom
side of the sphere. Literally just turning the
sphere the opposite way. I'll just use move to make
it pull it out as needed. Give it a nice little smooth and then blend it
into the rest of the coat a little bit.
Maybe you stretch it. I'll take this little
thing since it's poking out and just
kind of push that back. There we go. That
looks better now. It just looks like two
pockets that are there. I'm good with that. Yeah. But I love doing,
I love engineering, little things like that.
I think it's really fun. There's another little
piece that I want now, we might as well just do it. This is, this is C pouch. Okay. Let's just add
another little box just to put a little
accent on that, and then we'll go on
to the next video. All right, so let's flatten
this. Let's validate it. Let's smooth the whole thing. Make it nice and smooth. And then we'll just slowly
move it into position. I just wanted some
sort of connector. I don't know, it just I just
felt like it made sense. Sea pouch clip. I'll call it a clip. Maybe I'll even clone the clip. And put one here as well. I'll make this one a
little bit smaller. Okay? I love making all these little
clips and connectors. I apologize for
stretching it out, but I literally can't help it. Even after class,
I'm going to be making more of these
type of things. Like we can put something here, can put something around, or we're going around, there's
just so much you can do. I have to rein it in or else the class will
go on forever. The next video, I want to get the hands together Vox
remeshed and smooth, Then we can figure out
what else we want to do after that. Don't
forget to save.
21. Belts, Zippers, & More Detailing: All right. So there's one
thing that I was thinking about doing while I was
thinking about the hands. I'm going to add a
Taurus and move it up, I think I just want to
add it almost like it's one of those elastic bits
at the bottom of the coat. I'll make it a
little bit bigger. Actually, I'm going to
flatten it out this way. Let's check the size.
Maybe a little bit bigger. Actually, I don't really
mind if it's not that wide. Something like that. I think I like I might want
to make it a little thinner. I can't remember which one
of these makes it thinner. I think it's that one. What
if I bring this up like that? Actually, you know
what? I don't need it. I don't want it
that thin because I think this might actually work also as the flat that I was looking
for, for the tail. Maybe I'll make it a
little bit thicker. I'm going to validate that
because I like it now. I do like this
piece that I made. I might pull that down a little bit just so I can see
it a little bit more. Then take this turn off
symmetry and totally just look like it's
connected to the jacket. And not worrying about it
being symmetrical at all, but maybe even coming down
a little bit on that side. I think I like it
going up a little bit better and I think I
want to flatten it. Okay. I think that's pretty good. Okay. So this part
really bugs me, that little bit of a shadow there that might not
be much of an issue, but you know I am. Okay. It's a little better. Let's see if I can flatten this part of the jacket as well. Flatten that this crease looks like it needs
some work too. Okay, And I think I might add
a piece in the middle here. A tube with curve and
just follow this part up. I can't really see the topps me take snap off so we can correctly put it
where it needs to go. Okay. Basically what
I want to do here, sometimes I forget to explain things before I
start doing them. I'm using this tube
because I want to make it really small and I
want to put it in the middle. And this is going to
act like zipper type. Like a zipper, like it's essentially going to
act like a zipper. It'll be darker, so it'll look like there's
more space in the middle. It's a way to cheat that
space in the middle without having to cut the actual
space in the middle. If that makes sense, I'm just moving it around
to make sure I can see it at most of the
angles that looks good, and I think that
actually looks perfect. We can really just
call it zipper. So I'm going to
validate it and then just call this zipper. The only thing that
I should have done, might have done,
could have done, let's try it, is
actually make it square. Yeah, that might be a little bit better, so we'll validate it. Yeah, that actually
looks little bit nicer, so we'll call this zipper. Okay, so we'll save
that. Looks good. All right. The hands, I'm pretty happy with
the hands essentially. All I want to do is I'm going
to do another quick save. Take all of these and
voxill remix them together. Let's see how it looks at 200. I think it looks nice. Solo y, I think it looks good. So we can smooth everything out. I don't think we need symmetry. There's nothing
symmetrical at all. We just smooth out
these fingers. That looks great. I love it. Hopefully we can just do the
same thing with this one. We just take the whole thing box will re, mesh it together. I think we did it like 200,
smooth everything out. It looks great. Maybe you can take
move a little bit and I just want to
adjust and spread out the surface
area a little bit where something is
coming into contact. And just spread out that
surface area a little bit. Okay, that looks good. We really need to be careful of these things because
it looks really weird. If it's like really
going into the finger, sometimes it's a bit hard to, it's a bit hard when
you have a shape like this for it to not look like
it's going into the finger. I think it's hard to move. It looks better when it's round. You know what? I think
I want to take this and do edge that might
look nicer anyway, and it gives us
less of a problem. And also what we can
do now is decimate it. All right, let's save. Okay, good. Yeah, I'm
happy with the fingers. I think they look pretty good. They look cute. Okay.
22. Drawstrings & Housekeeping: All right, so I forgot
the little draw strings, which he definitely needs
the little draw strings. So those shouldn't be too bad. We'll do those with Tus, we'll add a Taurus. Okay. I don't even
know if I'm going to have enough room on my computer. I might have to edit
some of these and the, oops, I might have to
edit some of these. Delete some, and then you
keep going like that. Okay, so we want to put it yeah, we're just
going to match that. We can just chill and do that. You don't need my walk through. You can clearly see
what I'm doing. How big do we want it? Because it's big and
chunky, which is nice. I actually like that. They're oversized. I don't want them to be thin. Okay, I think I like that. I think that's good.
Maybe a little bit smaller and a little bit further out maybe?
Yeah, just like that. That's perfect. I like that one,
so I'm going to, so I'm going to validate that
and then I'm going to clone it so that we can put
it on the other side. Let's make sure that it's
whorled and just flip object, it should go over
to the other side. Pivot. Center pivot. Now we can just add
this one as well. This one's a little harder
to see, but that's okay. Still deserves to be there. I'm thinking
something like that. I just want it to be nice and fairly flush. That
looks pretty good. Okay, now we'll just making a rope texture will be cool but I think we'll just keep it to a regular
tube for now, otherwise this will
get really crazy. I don't think we need snap, I'm just going to use path because it's really not
that many nodes. Maybe 12. Buckle your shoe. I think that's how
it goes. Okay, so we'll make sure
this goes in there, nice and tight will pull
this part out a little bit. Maybe even move it a little
bit there so it looks like it was actually like
in the, in the coat. I'm going to add
another little node here just to sort
of extend that. Oh, actually we could
make them lower, we could make them really low. So maybe we'll use that
curve of the jacket. Really important thing
is making this really look like it's being pressed up against the jacket. That's very important because that has to look believable. I think that looks good. We can bring this
down a little bit, it looks like it's
straight down. Maybe we'll just do it
straight down like that. Then for these knots,
I think we can just use two other little trust. If I can take this
one and just clone it, that's the tube. So I can probably just take
this and this will be, this can be one of the
Forget me nots, I apologize. I have to keep you guys
not only doing three D, but entertained if anyone's
actually taking this class. But personally, I'm
fully enjoying it. I think it's coming out good. I think that's the right word. Hopefully there's a few
other people that are also enjoying it because I am, I can't really do any
classes that I don't enjoy. It just takes too much time. You have to do the
stuff that you enjoy. The thing I love
about doing this is even though, like I'm
teaching a class, I literally learned so
much from doing these. Okay, that's a nice, maybe I'll move them both up
a little bit. Look at that. I like it. All right. I think
these look good. I'm going to join those two. What is this Taurus is? This tube looks really good. I think I'm just
going to validate it. Oh, I'm going to clone clone it. And then I'm going to validate. I hate when that pin gets in the way and you
can't validate what you want to validate this tube. Now we're going to move,
I'm going to tap a line, so I can just move it
straight over to this side. And then go back to
the tube options and plug this right on in. Okay, I think it
looks pretty good. This move over doesn't have
to be exactly the same. Maybe I pinch this
out a little bit. If anyone ever gets
my model and is looking all the way down into the crevices, it
still makes sense. I don't think anyone
probably will ever see that same thing up here. We'll pull this
out a little bit. It makes a little bit of sense. Okay. I want to put it
right on the surface. Okay, we'll put it right
there. That looks good. We'll make this a little bit
longer. And you know what? We can take the knot,
we can clone the knot. And then just move it over and then maybe adjust
it a little bit. Actually, maybe we'll just
spin it, stretch it a little. I'm going to separate
these knots. I'm going to delete that
one and clone this one. Separated. That's what
separated is great for. You can actually
make some changes if you decide you want to. Okay, I think that
looks pretty good. So I'm just going to
join those back up. I like that not okay. So I'm going to validate this. I think it looks great. What happened to this? Just see, move and get that back into
where it's supposed to be. So now the ends. I'm not really sure what I want
to do with the ends. Maybe a little bit of
inflate around the ends. Maybe a little crease action. Maybe a little
flatten action too. Yeah, I think that works.
So we'll do a little bit of inflate just to widen the
bottoms a little bit flatten, and then I think that works. All right, let's save. Okay, so I think I want to merge
the head in the ears. So we have the coat, we have
the hood, the coat body. We're pretty good.
I just want to figure out what I want
to bring together. I think the head and the ears
is safe to bring together the ears and the head. Let's do a quick save before we do this, just in case it crashes or
we want to change something. But I think that looks good now. The head and the ears are together. Okay. And I think this would look
nice together to the hair, all the hair in the
head and the ears. I, I don't know, really know about this because I
still want to color, if I want to color this pink, it's going to be difficult with these things
in front of it. So that's the only if part. Yeah, I think I might just
leave it head, hair and head. Let's do a quick save and
let's just test it out. So let's rematch it together. See what it looks
like? We brought everything together.
Okay, You know what? We'll leave it separate. I think we'll leave
that separate. Okay, the nose is one oh one K. We can
definitely decimate the nose teeth 12.2 Let's
decimate those as well. Tongue, you can
probably decimate once now the head is 166. Let's see if we decimated, if we notice any quality loss. Yeah, I did notice
it in the lip, so we'll keep it how it is. This part is 82. Let's see if we decimate. I think that's okay. I didn't really notice anything
different for that one. I notice a little bit, so
I'm going to keep that. I'm going to take, so I'm
going to smooth around, get rid of those little ribs, and trying to keep
that nice and smooth, I might need to go over
this again with crease. I'm not sure if the symmetry
will actually still work. It looks like it still works. I don't want any color. I'm going to turn
symmetry off, I think. Okay, I think that
looks pretty good. Okay, is Taurus. What about this zipper piece? Let's see if we can decimate. Oh no, that looks bad. Not, we'll see if we can decimate them.
Oh, they look fine. So we'll decimate those
once, maybe even twice. Okay, this little
piece is all right. This little legs are 195. You probably don't
need to be that big. Let's decimate them twice. See if we see any
quality difference. I don't really see any quality
difference with the legs. Maybe thing that a little
smoothing won't help. We can also add crease. If we decide to that, we need a little
more definition. We can just do crease and then
maybe a little smoothing. And I'm going to add
a little clay here, smooth and a little crease. Okay, that looks
a little cleaner. A little more clean. And actually looks
better smoothed out more, but that's okay. All right, so the pants are a little smaller,
which is good. The shoe B, I'm just looking at different
parts of the shoe. Now let's take a
look at the quality. If I try to decimate
this, did that work? I don't notice any
quality difference. I think it still looks
okay. Let's try the strap. I think twice is
okay for the strap. Both of them, okay? And for these straps, I want to just put them together, I think. Are they together? No, they're not. So we'll join the straps. Okay. I think what we need to do is bring all of these
pieces together. Let's save, because we're
going to be coloring them, or we're going to color
them all together. Let's bring these all together.
23. Housekeeping & Fine Tuning: Let's bring these
all together first. We can decimate this other side, because I just noticed that
I didn't decimate this side, all these little pieces
like these cylinders. I can just join them together. I'm just going to
bring this down here so I can figure out, okay, these are the same, so I'm going to join those. They're quite a big size, so let's see if we can decimate. Okay, I still think
that looks fine. Okay, let's join those two and then see if
we can decimate. No. Too much quality loss, so we're going to
leave that as is. So baby, we'll join those two and then
we'll try to decimate. That's good. We decimated
that a bunch of times. That saved us shoe beads. We'll join those together and then we'll try to decimate them. 123, that's good. All right, I think
that's pretty good. Now, we just wanted to try and bring all these.
So we have the toe. I forgot about the
toes. Let's join those. Let's see if we can decimate. Without much quality loss. That was good, so be, so we'll join those two. Strap is the same, so big, and this one is so small. Now it's just a matter of everything looks
like it's together. Yeah, everything looks good. I can probably bring
this down a little bit more. Okay, not bad. Not bad. This bugs me. So you know what I want to do. I'm just going to
add a cylinder. Let's do a quick save.
And I want to wrap something around there just
to kind of clean that up. If the gizmo will let me bring it over. Okay, so. Okay, so now I'll flatten it up and literally just use this. Maybe I'll turn
smooth shading off. I probably don't need
to turn smooth shading, Let's turn it back on. Okay, so we have something like that, which
I think is good. It's a good way to just add
a little something there. Oops, I don't know what I did. I want it to be just around the edge of
everything. That's good. All right, so I like that. I can't mirror it unfortunately, but I can validate it, then I can clone it
and move it over. Nice. Okay, so let's
join these together. Join, and these are sock rings. I just make up terms. But I like it. Okay. The legs look good. They're slanted in the right
position. I like that. Let's do a quick save. Okay, now, what else
did I want to do? So there was a few other
things that I wanted to do. I think the head still needs
to be a little bit bigger. Head, the head hair is like
somewhere far, isn't it? We need to bring all
these up to be next to each other. Ones. The eyes, the eye whites, the nose, the tongue, the teeth, the lashes, the Oh, don't tell me we can't
draw. Yeah, I can. Okay. I just want to
drag all of these up here so I can grab
all this stuff. How did I see the pits? I know for a fact I
just saw the pitoles. Nose one hits was crazy. Oh, maybe it was just
flashing behind that. So let's see what I collected. Oh, that is
everything. Okay. So I think this needs to be bigger. Yeah. Okay. I think that's good. I think that's a good start. It's much better with the
bigger head. Much, much better. Okay. I'm going to take
this little piece, the little turtle neck. Let's rename it that.
And let's bring it. I guess we can leave it. This will be the turtle neck. Let's make that a
little bit bigger because we're losing a bit of the glory of it. It, I don't know what's
happening. All right. Maybe I want to take and
pull this part out a bit. Let's make it a interesting
there. I like it. Oh, we also have to turn
the head, don't we? Do we want to do it now or
do we want to do it later? That is the question. I think I want to do it now. Let's go to our view. This view here first. I want to know what I'm going to save as I'm going that way. We
have a back up. If something goes wrong, you
can always go back to it. I'm going to take
all of these again, the nose up until
the eye whites, and we are going
to go to our view. And then turn the head. The plants are moving. Why? Come on things
playing games now. Okay, let's spin just the head. Something like this. Okay, I like it, We go there. That looks perfect to me. Now, we can adjust the
eyes as well, of course. I'm always pressing
the wrong thing with the gizmo. Never fails. So I'm going to bring P one
out of the mirror and just do this one side first
again, I can't seem to. Let's take it off of a line and we'll adjust
it a little bit. All right, let's check our view. Now. We want it to be looking
at camera which is at you. I think that's actually good. I think that's pretty good. I'm, I'm going to validate
this and clone it. You know what, I might
just bring it over manually and trying
to figure it out. Let's go back to our view. This is a little
tricky because it, the perspective of it is
what we need to get right. It needs to obviously go
on the surface of the eye. That's the first
thing, is trying to make it flush with the
surface of the eye. As you can see, it's a
little tricky. There we go. That looks good, but we still want it to
be nice and round. We actually need to bring it
into the side of the face. I'm going to make it a little
bit longer and smaller. If we take a look at the front,
let's see how that looks. Let's take a look at our view. Well, that's actually not bad, but I think I need to take
some of that out and make it a little bigger and maybe
tilted a little bit, so the top is nice and round. Let's take a look
at our view again. That looks pretty good. Let's take a look using symmetry
per perspective, I mean. Okay, so it looks pretty good. I think I want to tilt it
and lift it up a little bit. All right, let's take
another look at our view. Okay, that looks pretty good.
That looks pretty good. It is a bit tricky to get it to look like
it's looking straight, but as I move it around, it looks quite natural. It looks pretty natural. I think that looks nice. The only thing that bugs me, I think I need to move it up a be really, there shouldn't be too
different a space. Let's take a look at our view. I think that looks pretty good. Maybe even I'll bring
this up a little bit, so it's looking a little
bit more straight on at us the tiniest bit. I think that looks great.
I'm going to save. Okay, so now that
we've done that, I'm going to use move and
I'm just going to change. I'm going to turn
symmetry off because I just want to adjust
the parts that we moved, the parts that need adjusting, because not all of them do. Okay. I think that looks good. It looks nice from
the front as well. Okay. Maybe just like a little bit more in words
that looks good. That looks good from the front. The side noise. I don't
know what that's from. I don't know why I say
that like this noise, it's from some movie. I recall it, but I don't
actually recall it. Okay. I just want to puff
this out a little bit. Okay? I feel like this arm
looks a little bit small. So let's just pull this
arm out a little bit. Just lift it off of the
jacket a little bit more. Going to smooth that out. Okay, I think I need to move it. It looks a little
flat to the body, so I'm just going to
try to pull it out. Okay, I think that
looks a little better. Okay, I think that looks
a little bit better. I'm gonna take
pinch on the pants and just a little
too aggressive. I just want to try to
pinch this piece here and maybe even pinch some
of these little creases. And just use crease to
kind of or even clay and sub just to sort of bring back some
of the personality in what we did before. Very soft smoothing at
this point in time, clay and sub, just to bring back some of those nice subtle details that
we did before. You can even use crease
with sub if you want to really bring out some of
those folds in the pants. It's a nice little trick. And then just nice,
easy, smooth, just to blend them in nicely and it really
catches that light. So that's really what we want. Okay, so these legs might be
able to decimate them once. Let's put them both together. Let's decimate this one like
we just did the other one. Wait a minute, is
that just the leg? Oh, this is the pants, pants. Tricky. The leg 250, this leg. Wait a minute, This leg is
2,500 Let's decimate this leg, then let's join them
together. Now we have legs. These are going to be the
same color as the head. We'll just join them together, which is also going to be
the same color as the hands. Let's tap on the hands or
the hands are real heavy. I think we'll decimate the hands and just check for details. They look fine. Yeah,
they still look great. They still look
good. Even at six. Yeah, they still look
good. That's fine. These will join those together. And these will be the hands. Let's join them with the head. Okay, so we have the arm coat, so both of those,
Those are pretty big. I wanted to see if we can decimate this down a little bit. Twice still looks fine. 39, maybe we'll do
this once to twice. Actually looks good. Let's
see if we can do another one. On this side, I don't see any quality
loss the coat itself. Let's see if we
can decimate that. I am seeing a difference. I am seeing a difference. So
that we'll leave that as is. Let's look at the coat cuffs. Well, these are really
thick, they're really dense. So let's decimate those.
24. Accessories & LitPBR: All right, I was going
to make a new tail, but actually I don't really
mind this tail too much. I think I'm just
going to validate it. If I look at the view, I want to be seeing the
tail a bit more. I'm going to do a line
and then I'm going to move it over a
little bit more. We're seeing it like that. Maybe it's actually better
if it's a little bit lower, maybe it's better like that. I do like that. Let's see, I do like that. It's make nice
negative space Now probably I probably should have not validated it, but it's okay. We might just be
able to use move and then and then just kind
of drag it in there. You know what, If I
look at the view, it might not make that
much of a difference. Oh yeah, it does. So we'll move it over. Manually set that a little bit, make it a
little bit thinner. And then I want to take this
part and then just move. We can use symmetry, I think, slide it over
so it's in the middle. Okay, I want to pull
this out with move. I want to pull this
out a little bit, almost as though it's
like a little flat that's made to cover his tail. Now it is a tourist. I do have to make sure that we don't see
the tourist side of it. That's pretty good. Let's use flatten and just flatten this. I like that. I want to move this
up the tiniest bit and maybe even add. Let's do a quick save. This is the coat belt. All right, so that's
the coat belt. And maybe we'll put, oh
actually not spheres. Let's put two
little cylinders on the side so we'll snap it down. There's so much you
can do with cylinders, so many little details that you can just
do with cylinders. Let's see if we can The division that'll bring the size down. Yeah, I think that's fine. Maybe we'll turn
smooth shading off. I might change this,
but we'll see. So I'm going to mirror
it and then use gizmo. And just maybe put two here. Turn it off. Snap. Take it off of a line so we can
have a better idea of. I'm thinking maybe
something like that. Let's go ahead and validate
it and take a look. I like that little detail. I'll validate. These
are the flap buttons. And I want to take, This is 12 K. I can probably
decimate this. Let's decimate this, down. How big are these? Could
probably decimate these as well. Okay, let's for this pouch. I just want to put a little
patch or something on this. Maybe we can just a box Then we'll we'll take one of those little buttons and add that on there as well. So we'll just flatten this up so we'll validate it
and then we'll use round edge that'll give
it a nice round look. I'll take move and just
kind of we want to match the bend of the
pouch a little bit and move it in. So that's good. We can probably decimate this and do this bag tag. I guess we don't
really have to do the button. I think that's fine. Let's see if we can do a nice
patch looking thing here. The material is really not that, I'm not strong enough, so
I'm just going to leave it. It doesn't really
need it too much. One last probably may
not be last thing, but this bugs me here. So I'm going to add a cylinder. So I'm going to move it up and forward and then
snap it this way. If you can take it off, snap, shrink it, then we'll
move it in there. I think this will be
better for this area. I think it will look a
little bit more natural. Maybe tilt it forward a bit. Okay, I think that's good. I'm going to
validate it and then I'll smooth it out a bit. I might have to move it
out a little bit more. I think that looks pretty
good. Flatten it a little bit. Yeah, I think that
looks a bit better. So I'm going to take this
cylinder and the pants. Let's do a quick save. I might try to Vox or remix
them together. Let's see how it looks. Didn't really lose any
quality which is good. I should be able to
just smooth this. I think that looks a bit better. I would call that
fixed now the tail. Let's smooth the tail out. And it would be nice if
we can get an inflate. So we'll get a nice inflate
there that looks good. Hmm, do we need it? I might look better
without it. Okay, cool. I can't think so.
There's probably other little tiny
details that I might do, but I'm very happy with this. I'm just going to use
crease and try to run a crease down the pants. I'm just trying to get a
little more separation here. All right, great. So I'm pretty happy with this. I think we've connected
all the skin parts now. The coat parts are
not connected. So let's take the arms and
connect them to the coat. Or at least let's just
organize them together. Can join the draw strings. These are the drawstring knots. How big are they? Let's
join those together. But then under the drawstring, let's figure out
what this Taurus is. I don't know what is this. Oh, I think I know what that is. Think are the draw,
little draw strings. I'm going to join them together. Drawstring rings. I'm going to decimate them down. They definitely don't
need to be that big. And then I'm going to nestle
them with the draw strings. Then we have the coat collar. I'm going to put that over
there. What is this mirror? I'm not sure what
this mirror is. What is this? Oh, that's okay. So that's the some sort
of straps back here. I'm going to do
pivot, center pivot. And these are part of the
backpack start buckle. Okay, tail. How big is the tail?
It's not too big. Pants are 234 K. We can
definitely decimate those. So we'll decimate, okay,
I think that's good. So we'll do a quick save. Honestly, I'm pretty
happy with him. I don't think we need
to do too much more. Let's just smooth
the end of this. I want this to go
smoothly into the face, since we're not box remissing, then we need these to be
really, really smooth. Oops, we'll just smooth it out a bit. Yeah,
that's better. Okay, just checking
everything out here. These can be decimated. See if you can
decimate these tips. If you can't decimate them, then I might just take
flatten and then flatten them out so they don't have
this weird crease creases, and it looks better
to be flattened out. And then once you
flatten, you should be able to smooth them
a little bit better. Oops, I got to be careful a
little bit, smooth that out. Okay, that looks okay. All right. I think this looks
pretty good. Let's see. Yeah, I mean, I don't know,
maybe other little details that I'm not going to
do because it'll just take forever like adding
a little cylinders and stuff here and maybe
adding some little details. But honestly, I think it's good. I think I'm pretty
happy with it. Next I want to save and let's
get it out of this mode. Let's, let's go to the lighting panel and change
from met cap to lit PBR. Let's choose everything. I'm going to change it
to my Terra Cotta color that I like, which is
something like this. I'll paint all I'd
like to do this color because it's a more
neutral color. You can actually use
more neutral than this, can probably use like
a gray color also. Because I might paint this too, it might actually look
cool if I use a gray, a color that's close to what the three D
scope will look like. But anyway, you just want like
a neutral color to light. Go to our view. I'm going to save one
without the reference, so I'm just going to
turn the reference off. And then just to add a view. And this is going to be one A. Actually it's a little,
we'll do it there. I'm going to update this
one. That'll be one A. Okay, let's save, now
that we have this, this is a great ending point. In the next video, we can just do some really
easy lighting for him. Once after we do the lighting, then we can color him.
25. Lighting & Coloring: All right, let's
do some lighting. First, we want to turn
off the environment. Again, this is my
own environment. If you want to install
it, just tap here, import and then just
import the image from the projects and resources where I have the files
and stuff like that. If you want to use mine, that's when I always use
for my sculpts. But for now we're
going to turn it off and we have a
nice silhouette. Then we'll add our first light. It's always nice to
add the first light. This is a sunlight, obviously. I'm just going to move it here. I'm not going to worry too much about a backdrop in any of that. This, I don't think I going to do a quicker
version of the lights. Let's turn it up to about two, all right, that
looks really nice. If you want to adjust it, you can, but I think we'll
just stick with this for now. This is our key light, so
we'll just name a key, we'll clone it, and
we'll bring it over. Let's get a nice rim light. I'll move it down a little bit. Actually, I don't need to
move it that far away. Let's change this to rim. For the rim light, we'll
just have to adjust this to really get that opposite
side to figure out. Yeah, I think we want
something like this. I like to be able to
get that year as well. I think something
like that is good. We can turn this up
to maybe like four. Maybe double that
for the rim light. Yeah, Maybe something like
that. Looks really good. Okay. So I'm just going to
adjust the color. I just wanted to be a little
bit more warm, I think. Okay. Let me tap on this just to make sure that the screen is viewing as close to what
I'm seeing with my eyes. This looks good. Next, let's add, let's take the rim light. This is add another
sunlight and this will be what do we
want to do here? Let's do rim two. We'll do rim two. We'll bring it
over on this side. We'll get a little bit
of that Same thing but on the other side maybe we
can make this a cooler color. We tap on the light and we'll just make it
a little bit cooler that we do need a fill. Actually we let's make one more light add and this
can be TD for top down. We'll change this
one to a spot light. I'm going to do this
for the nice video. We'll bring it up,
bring it over. This one, I just want, right, getting the face right
above that head. Maybe we can widen
this a little bit, but I really wanted to just
be focused on the head. I think that looks good. Maybe a little bit brighter,
something like that. You can just, a little
by little maybe want a little more of it going on the body, but I
think that's good. Let's save. Now
what I want to do is first let's turn on post process so we can really
see what it looks like. I'm going to turn
this up for now. I have both of these on high. I'm using DFD, that's
what these settings are. You can save whatever
settings you want by doing all the settings
and then hitting Clone how you save the settings. I have this on global
illumination, ambient occlusion. This all looks pretty good. I don't think I really need
to adjust any of this. It all looks nice. I don't
have depth of feel on. I have bloom on a little bit, you can't really even see it. I do have tone mapping on if you want to look
at these numbers. But this is what it
looks like without it, with it, I don't know. At some point in time
I adjusted these, but those are my numbers
there. I think that's it. I don't have anything else
on except for these two which are by default. There is one thing that
we can take a look at. For the lights. If
we look at the key, sometimes I like to
change them to softness. We can take a look
at the difference. They're rough and then we
change that and then it makes them very soft which
is quite nice. The rim TD, let's see what it looks like
if we do softness, that might look better
without the softness. I'll leave that save. Okay, I think this
looks really good. I think that looks really nice. I think we can start coloring. Let's get everything back now. I'm going to do save as
this is going to be color. I do this again
when I come back. If I want to make
changes or do things, I can just go to a
previous version essentially for the colors. Let's go ahead and bring
back the reference image. Let's go to our view. Actually, I probably should
have lit it from the view, although everything
still looks good. Let's was it one? Let's update that one.
This looks great. Everything looks nice. Let's maybe make the key light the key, the rim light a little. We have one that's
a little bit blue and we'll make this one
a little bit yellow just to give that difference.
I think that's nice. Maybe I'll make it a
little more orange. Okay, I think that looks good. So next, what's next? I think we can start coloring. I'm want to save
this as this one, and I'm going to
also save it back as the one we were
just working on. Okay, so now I just
updated the other, the previous one that we saved. Okay, so first this
stuff is already gray. So let's start with
the jacket coat. All of this stuff. Let's put
all this stuff underneath. I think this is all
the parts of the coat. What about this little pouch? I don't think I
saw that in there. Let's rename it Coat Pouch. Okay, so we'll take both of these and put them
up in the coat, because these are going
to be the same color. Let's make this a pale yellow. Okay. Actually it should be
a little bit more orange. Oh, I forgot to add
the environment back. It's going to be very bright, so what we'll do is just
bring this down. We only need a little bit of it, maybe something like that. Okay. Yeah, we can turn post process off for now because there's a little
taxing on the system. Let's grab everything again. And I'm going to move the reference
because I can't see it. I'm going to move it over here. That way I can
adjust the colors. I probably could have
done the reverse too. You can also do this. You can bring that
back. Then you can move this over here. That's probably better. That might be easier
for you to see. I keep touching it and it
takes away everything. Oh, and this doesn't go away, does it? Oh, that's annoying. There needs to be an X on this, so I could get it out of here. Oh, that's really
annoying. Okay. Okay, so I think
something like this. So we'll paint that. We'll paint these
the same color. All right, so the face and
everything is a lighter gray. So let's grab that
color actually. And we want to make
it a lighter gray. I'm thinking
something like that. So then we'll take this and
paint it all the same color. The tail can paint
the same color. Maybe it looks like
it's a little brighter. Okay, In these shoes we can
make a nice pinkish color. I think that looks pretty good. We'll make that leather piece
the same color as well. This can be a darker color
and a little more orange. I think maybe something like that and be a
little less rough. Okay, this little piece,
like it's a little lighter. We'll make this the
same color as this. May be a little lighter, maybe that can be nice and
glossy. Somewhat glossy. And then we'll take the
little leaf and we'll make them a nice, paleh, green, nice. This can be, what color
do we want this thing? It can be similar to this,
maybe a little lighter, and we'll just match
this color for now. I might change it later. Okay, let's do a quick save. The lashes are quite high. I think I can
probably decimate it. Let me see. Oh, no, Let's
leave it. I zoomed in. Those are going to be black
and we're going to make sure that they're quite
rough so that there's no shine or anything on them. These are obviously
white but glossy. Now this is where it
gets interesting. I'm thinking we can go
orangish like this color. We'll paint that these
aren't together, I guess they don't have to be. Let's paint them
both that color. Let's try refractive refraction. Let's see if we can get
anything interesting. It looks okay. It looks okay. It would be cool
if the light could come through and lighten
up the bottom here. We could probably
do it manually, but I'm not sure how good that will look. But let's try it. Let's just take both of these
and join them together. Let's add a new layer
called lighter. All right, so now let's take paint and we're going
to use this color, but we're going to
lighten it up a bit. We'll lighten it up. And then we're going to paint.
We don't want symmetry. And we'll paint, we'll paint the bottom part here
for both of them. Then we'll make it even
lighter than that. I forgot that I moved
it on the side. And just paint it a little
bit lighter on the bottom. Actually looks a
bit warmer and a little more red. Let's do that. Okay, Something like that
is what I'm thinking. Let's use smoothie
pow, which again, which is smooth with
zero intensity. That's all this tool is,
smooth with zero intensity. And we're going to just
going to use this on this lighter layer and it should just smooth this
out really nicely. That'll give us the effect that I'm trying to go for here. Let's go back to our view. It just gives us that effect
that I was going for. It actually worked
out quite well. Now that we're doing
that, let's also add a layer to the eye
and make this darker. We're just adding a layer
to these eye whites, we'll go to that color. And then you want them like like a dirty watered down
coffee shade like that, something like that. That looks nice there. Then we're just going to
paint on this darker layer. We want to paint right
over the top of this. That's going to give us
a look like a shadow. It actually is a little too. I might have to grade
up a bit, actually. Might need to make it
a little bit darker. Okay, now we use smoothie pot and we'll just smooth this out. Hopefully it
smoothsooth smoothly. Okay, That looks great. Smoothed out really,
really well. We can take paint now that we know that, that
smoothed that well. I'm going to bring
the intensity down a little bit and just paint the bottom and just do
a right along the edge. And then just smooth
that out as well. That's just to give it
a little tiny touch of shading where the eye comes into contact
with the other parts. Let's go back to our view. Looks good. The nose is pink. We'll make the nose
nice and pink here. Be lighter. We want
some roughness to it. Well, that looks good. Also, we haven't done
subsurface with anything yet. Subsurface will completely
change the look of things. As you can see here, what
I like about subsurface is it gets rid of these really dark shadows
that sometimes happen. I actually wanted
to be a little more rough the whole thing,
so we'll paint all. Okay, that looks good. I'm
going to do a quick save. All right, and while
we have the pink, let's go to the tongue. Maybe we'll make
this a little more red and we'll bring
the roughness down. But I think that
looks pretty good. The teeth can be white, make them nice and glossy. Okay, I think we've done
pretty good so far. We'll come back and we just need to paint
inside the ears. We'll paint inside the mouth. And we'll deal with the eye
dots and things like that. Let's go to our view. Looking great. Let's
go ahead and save.
26. Deep Color & Post Process: All right, let's add
some pink to the ears. The ears are connected
to the head. We'll add a layer and
we'll make this pinkish. Okay. And I want it to be rough. We don't really want too
much gloss in there. Maybe somewhere around there is good, something like that. Now I'm going to take pat, remember we're on
this pinkish layer, I'm going to put the
intensity back up to 100. Let's see if it's doing the
other side as well. It's not. Let's see if we can set
this to local and we might be able to still
get two for one. It looks like we can. Okay. We'll just paint inside of this year.
It looks pretty good. I'm actually seeing
some ribs in there, so I'm going to go to the
base and smooth them out. I want the ear to
be nice and smooth. Okay, So that looks good. I'm not sure if I want
to do smoothie Pooh, because the pain
actually looks good. Let's do a little
bit more over here. The pain actually looks
really good as is. So let's see what it looks like. If we were to try to smooth it, I knew that I had messed
up. I knew I messed up. Let's go back to Pinkish. Add in what we just add it in. You want to make sure that
you're on the right layers Because the layers are important because I know it's a
little hard to see here, but I'm just doing the inside, the layers are important because sometimes you might
want to take them away. Or less make them a little
bit more, less opaque. Make them a little
more a little lighter, you can see through
them a little bit more. I think that looks nice. Okay, let's, we'll grab the skin color and just make it a
little bit lighter. Maybe even really close
to white, but not white. We're going to go ahead
and do subsurface. We'll bring this down to
0.11 for all the ears. Actually, this is the hair. Let's do the subsurface. Let's turn it down again to
maybe a little bit more, 0.09 the head, we want
to do the same thing. We'll do subsurface.
We'll move it down there to like
0.1 That looks good. And you can see through from this is making this actually brighter, the
subsurface scatter. That's from that rim light. That's actually working
out really, really well. Okay, we want to add, we have the pinkish
layer, let's add a new layer and call it whitish. I could have just
called it lighter. I'm actually going
to put this back to opaque if we go to subsurface is it'll maintain
what we had before. So I'm just going to
go back to opaque and I want to try to paint this lighter color on the
bottom of the face. I actually do this in most
of my characters as well. We should be able to
just use symmetry. Let's double check by
turning on the line. Yep, let's double
check this color. Maybe make it a little bit lighter that you can easily see. Okay, we'll make it lighter. I think maybe
something like this. And then we'll just
wrap it around. It's a little bit difficult
to see, but it is there. I'm going to paint everything, even inside the mouth. I think that looks pretty good. Could we have this off? I would like to see it a little bit better, but I
think it's okay. What we need to do now
is add inside mouth. It needs to be darker
inside the mouth. I'm going to change this color. I'm going to change the tongue color to be a little bit more rough since it's
inside the mouth. I'm going to go back here,
back to inside mouth. We just want like a darker
inside mouth ish color. We want to make sure we
have the roughness up because we don't want light
bouncing around inside there. Now we go ahead and paint inside the mouth and maybe we can make it just come a little bit
over the teeth. Maybe it's a little tricky because we don't want to go on the round parts of the snoot. Okay? I think that
looks pretty good. I think that looks pretty good. Let's use smoothie, and let's kind of smooth
this out a bit. We can see what it looks like. Smooth, it looks okay. But I'm going to take
the paint and erase. I think I'm just going
to erase a little bit. I think I might prefer it
with a, with a fine line. Let's turn on dynamics,
topology enable it. We're still using race, but this should allow us
to get a nice fine line. I'm going to disable it for now and just erase a little
bit more of this shade. Okay, What is that? I'm seeing a little
bit of cracking there. I might have to go in, I might
have to actually fix that. The rest of it I think
looks pretty good. But let's go, we're on the face. Let's go to the base and
really check that out. Let's see if we can smooth
this. Oh, you know what? Let's undo turn off
dynamic topology. Because that can really mess up if you're trying
to smooth things. Okay? Just a little bit. Just a little bit, okay. Those little details,
they'll get you. All right. That looks good. Teeth look good. I don't think we
need too much there. I think I'll grab the teeth. I'll make a new layer and
this will just be darker. And this is something
that you can do anywhere. Anywhere you see these grooves, you can do a slightly
darker color on a new layer and smooth it out a little bit. That's
just a little trick. I'm not going to do it with this whole thing
because there's a lot, it'll take all of us forever. But just like I'm doing
with these teeth, I go to the brownish color and maybe just make it
a little bit darker. It would be the same thing that I would do with these teeth. Actually, let me do it
a little bit rougher. I'm just going to
turn symmetry on. Not or local, turn
symmetry on, but local. I'm just going to
paint a little bit here and then just smooth it. That just gives us a little bit of darkness where
things are going into other parts. The nose. I'm going to grab the
color for the nose, make it a little bit
darker then I can use case and I can really,
That didn't work. I'm going to tap the
color here so there's no line through it now. It should enable
stroke painting. It would be nice if
symmetry was on. We'll change it to local. Okay, let's make this a little darker and turn
the roughness up. Okay, that's a little better. Now we have a little
more depth in the nose. Okay, we're back to the head. If I toggle the whitish part, it looks like I need to paint a little bit more up on top. So we'll just go to paint. I don't need dynamic topology because I'm not doing any edges. Let's make sure I
paint around the nose. But I might use dynamic
topology to do around the edge of that, draw on
the edge like that. Although it does, it might look nicer, a
little bit softer. I might just leave it for now. Later on, we could always come back and adjust it if we need, but I think that
looks pretty good. Everything's looking so nice. Okay. The nose, we have
subsurface, the teeth. Let's make those subsurface.
We'll bring this down. Did we change the
skin back? We didn't. Let's turn the skin
back to subsurface. All of these plants, the
stem and the leaves, those can all be subsurface. We'll bring this
down a little bit. Let's paint this time. Do we have Let's save. We'll paint the soil
like a brownish color. Make it like a light brown,
something like that. You can always go a little bit darker and do the same thing
like I was just saying with paint and paint around the edges and then
just smooth them out. It just gives it a
little bit of character. Okay, so then we have the backpack in
all of those pieces. So let's make the backpack a leatherish brownish color,
maybe something like that. So we'll paint those.
Let's paint the pocket the same color. Okay, the hood. Let's paint the same
color as the jacket. Also the same with these pieces. Couch, couch, pouch pocket. Okay, so these two, I'm just going to
join paint them both. Now these little details, this might be nice to add like a little bit of a
different color, maybe something like that.
I'll do it with here. Okay, so I think we'll do
a similar color to this. Let's see what that looks
like. Maybe a lighter. We can do the knots
the same color since they're pretty
much the same. Let's take the draw
string and the knot, they're actually all the same. Let's just join them all. These are the rings. I messed up the knots and the drawings can join the rings. Let's make them that same color, but let's change the roughness so that they're a little glossy, maybe even a little metal. Metallic I should say. Okay, let's grab
this color again. And I don't want to
any shine on them, so I'm going to make
them nice and rough. The zipper can be
very dark, I think. At least much darker
than the jacket. I think that looks
good. This under thing can be maybe
the same color, Maybe it should just be the
same color as the jacket. So let's use our eye
dropper and just color the same color the backpack. Let's grab that brown. Let these straps that color. Let's make the belt that color. Maybe we'll make it
a little lighter. Okay, now the pants, now
they're gray in the image, But I don't think they
should be gray because the legs are gray and
everything else is gray. I'm thinking maybe a
reddish color might work. I was thinking
maybe a color like this blue is actually kind of nice too. Oh, that's kind of nice. That's pretty good. For now, it's a little bit different. So let's take all the parts of the coat and make
them subsurface. Of course, we'll bring this
down maybe 0.09 or so. We'll do the same
with the pants. Bring that down A 0.09
The tail as well. So we'll subsurface the tail. We'll bring that down. I think the legs are already subsurface. Good. We'll subsurface
the feet parts. And the toes and these parts. What color do we
want to make these? I think we want to make them. Let's make the little
small part the same color. We can even do a little
subsurface on it as well. Maybe you'll tad
bit darker then. Let's grab the color
that they are now, which isn't bad, but I'm
thinking maybe darker. And what if this was
like a lighter color? That's interesting. These subsurface,
subsurface, those again, the reason why I really
like subsurface is it takes away the really dark shadows. I don't think I mind
it in the souls. How did these get 18
point or whatever? Let subsurface them
bring them down. Okay, the water bottle, I'm feeling like a green. Like a very pale green. This can be maybe
a darker green. I think this should
be a metal color. We'll use that metal
color in there and maybe we'll just up
the roughness a bit. Maybe take the metalness
off a bit a little bit. Okay. And this, I'm going to
make a darker brown pain all in inside here. Pain, these can be. What color should we make those? Maybe we'll do like
a bucksh color. Let's do these the same colors. The little things I did on
the side and then underneath. Let's do, we could do this
darker color. That's nice. Who? I love it. I think I want to get rid of
this and add a cylinder. So I want to add a cylinder. I want to change the post subdivision to two
so that it's nice and round. We'll validate it,
we'll move it up. Let's look at the front view and I'll bring it up
so it just peaks. Get rid of this. I'll
make this like a gray. It's a little bit of roughness. This looks good. Okay. Did we get everything? Oh, we didn't get these
little buckles here. Let's make them the same
color as these buckles. Okay, It looks like we
got everything else. Everything else looks good.
Okay, let's go to our view. It looks nice. Let's go here. And I don't think I ever
figured out how to get rid of, let's get rid of that. Let's turn it on
post process and take a good look
at our creation. If it's on orthographic, it has to stay on orthographic. Let's take it to perspective. I don't really want
it on perspective, but I guess we'll keep it
there since that goes away. I'll bring this all the way up. I'll just reframe it a
little bit to the middle. Add this view as Finn, even though I'm
probably going to work on it a little bit more. I think that looks wonderful. I'm trying to think if
there's anything else that I missed and I don't
think that there is. Is that piece connected
subsurface? Bring it down. Okay. Now that
piece is connected. All of our lights are on.
I think it's beautiful. I'm happy. Okay, so
let's go to view. Get rid of everything. I think that's it. I'm pretty happy with
this. In the next video, you know, and I think in this
video we'll just export. If you want to export,
you probably know how to do this since it's an
advanced class. Let's save. You can just go back
to Transparent. No, we want all that. Let's go to screen. So
we have the whole thing. Make sure all the bells
and whistles are on here, which it looks like they are. I'm going to send this over
as my official final piece. All right, I'll see you
guys in the next video. I was going to say
next and last. I think it's going
to be the last. I'll see you guys
in the next video.
27. Thank You...& More: Welcome back guys. Thank
you so much for joining me. Be sure to upload
your class projects to projects and resources. You can upload them
in the projects and resources tab and
please rate and review. That really helps me out and I really appreciate
the support there. Really looking forward
to seeing what you make and especially
how you change it. You can add more
than one project, so you can add the one project that we do in class
and then we can add derivatives that you do
afterwards, change stuff up. I really love to see
that and I think that's really the key
of learning and just being able to flow with your creativity and make
it, uh, really yours. Of course. All my social medias, Drug pre, Dave Instagram,
Tiktok, Youtube. Of course, I'm going
to be bringing this over into blender, so be sure to check
that out on Youtube, Youtube.com slash drug predave. Also, I'm going to be bringing this into blender, like I said, but if you want to
just take the scene and open it into blender
and play around with it, change the lighting, try
to learn it that way. Having the scene,
having the characters. I'm going to have that
available for you. Just reach out to me,
it's kind of a big file, so I'll have to
send it to you via we transfer or
something like that. And I'll send that to you so you can have
some fun with that. And you can see, you know how I work things
out in blender. And some of the differences in I highly suggest trying out new applications and
trying out things to just elevate your creativity
and elevate your artwork. That's what I'm always doing. That's why I bring my
things in to Blender. I try to learn new apps, and I just try to learn ways
to make things look the best that they can
look. Nomad is great. I love nomad, but
you always want to be pushing to just
make things better. Whether that be
another application. New classes like this, new formulas to get things just to look better.
That's what it's all about. Even I learned so much
doing a class like this, that's why I really enjoy it. And hopefully, I hope that you
really enjoyed it as well. Man of breath. Anyway,
I've talked enough. Thank you once again. I appreciate each and
every one of you. Keep drawing, keep sculpting. I'll see you wall
in the next video. But wait, there's
more also I want to add this on so I know
it's a bit dark in here. But I refused to set up my lights the way
that I had them before. I actually recorded all of this before I
recorded everything. I recorded the intro, the class project, the Altro. I actually recorded another
video where I was talking for like 10 minutes and I forgot to put the
microphone on the camera. This is the second
time I've done that, where I've spent a few hours setting everything
up and recording, and then I forget to
set the microphone up. It's really heartbreaking,
but it happens again. You know? We're
all human, we all make mistakes. I just
wanted to add that in. I'm going to show you
some little footage of me talking and imagine
how heartbreaking it was for me to play this on
the computer after I take everything off the memory card and the audio sounds like this. Roll it. Welcome to my advanced, the workshop with no mask. I'm drug free and I'm excited. Crystal level one last thing. This is the little character from I got to change the focus. This is the little character
from my skill share class. This is the greatest thing
about these classes and about nomad sculpt and about creating three D. You can make
things that you can hold. You can three D print them.
Three D printed this. I sanded it right now.
It has primer on it. I'm going to paint it.
This is all on my Youtube. You can see how I make these. It's the same character that we make in class. Sky is the limit. You can do some really
amazing things, I already know that. But I just wanted to show
you this because I'm really proud of these little
characters that I make. You can do really cool things with three D if you just
put your mind to it. I think eventually I'm
going to do something about sculpting these little
characters on skill share. So look out for
that, but for now, check out my Youtube because
there's so much stuff there. All right, keep drawing,
keep sculpting. I'll see you all
in the next video. This is the last
time, I promise. I don't even know what that was.
 Dave Reed, 2D & 3D Illustrator - Brooklyn, NY