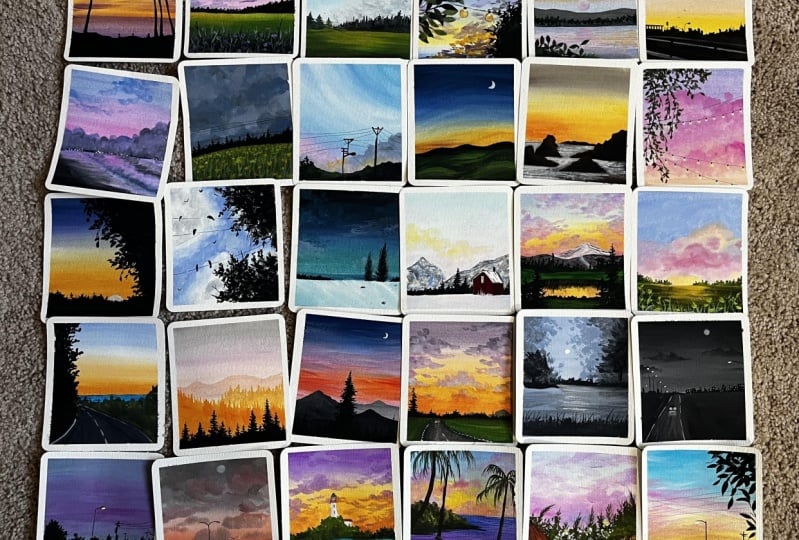
Transcripts
1. Welcome to the Journey of Colors: Colors aren't just
use on a canvas. They are emotions, stories, and the soul of art. When words fail,
colors and art begin. They are the language
of the imagination. Art isn't just
about what you see. It's about the feelings that
colors ignite within you. In every shade, there's a story, and in every artwork, there's a heartbeat
waiting to be felt. Colors don't just
fill the space. They fill our senses, transforming art into
a living expression. Hello, everyone. Welcome back to my new skill chere class. I'm a Macht Tapaia,
a child accountant, and an artist, as well as a creative business
entrepreneur. I work majorly with
pot coolers and Quash and occasionally
also explore acrylics. I also love working with
journalist supplies, creating in DII phone
cases, handmade frames, handmade cars, as well as
other DII craft projects. If you want to know more about me and my creative journey, you can follow me on
Instagram under the handle, creating from the heart, where I share all of my creative designs as well as my creative
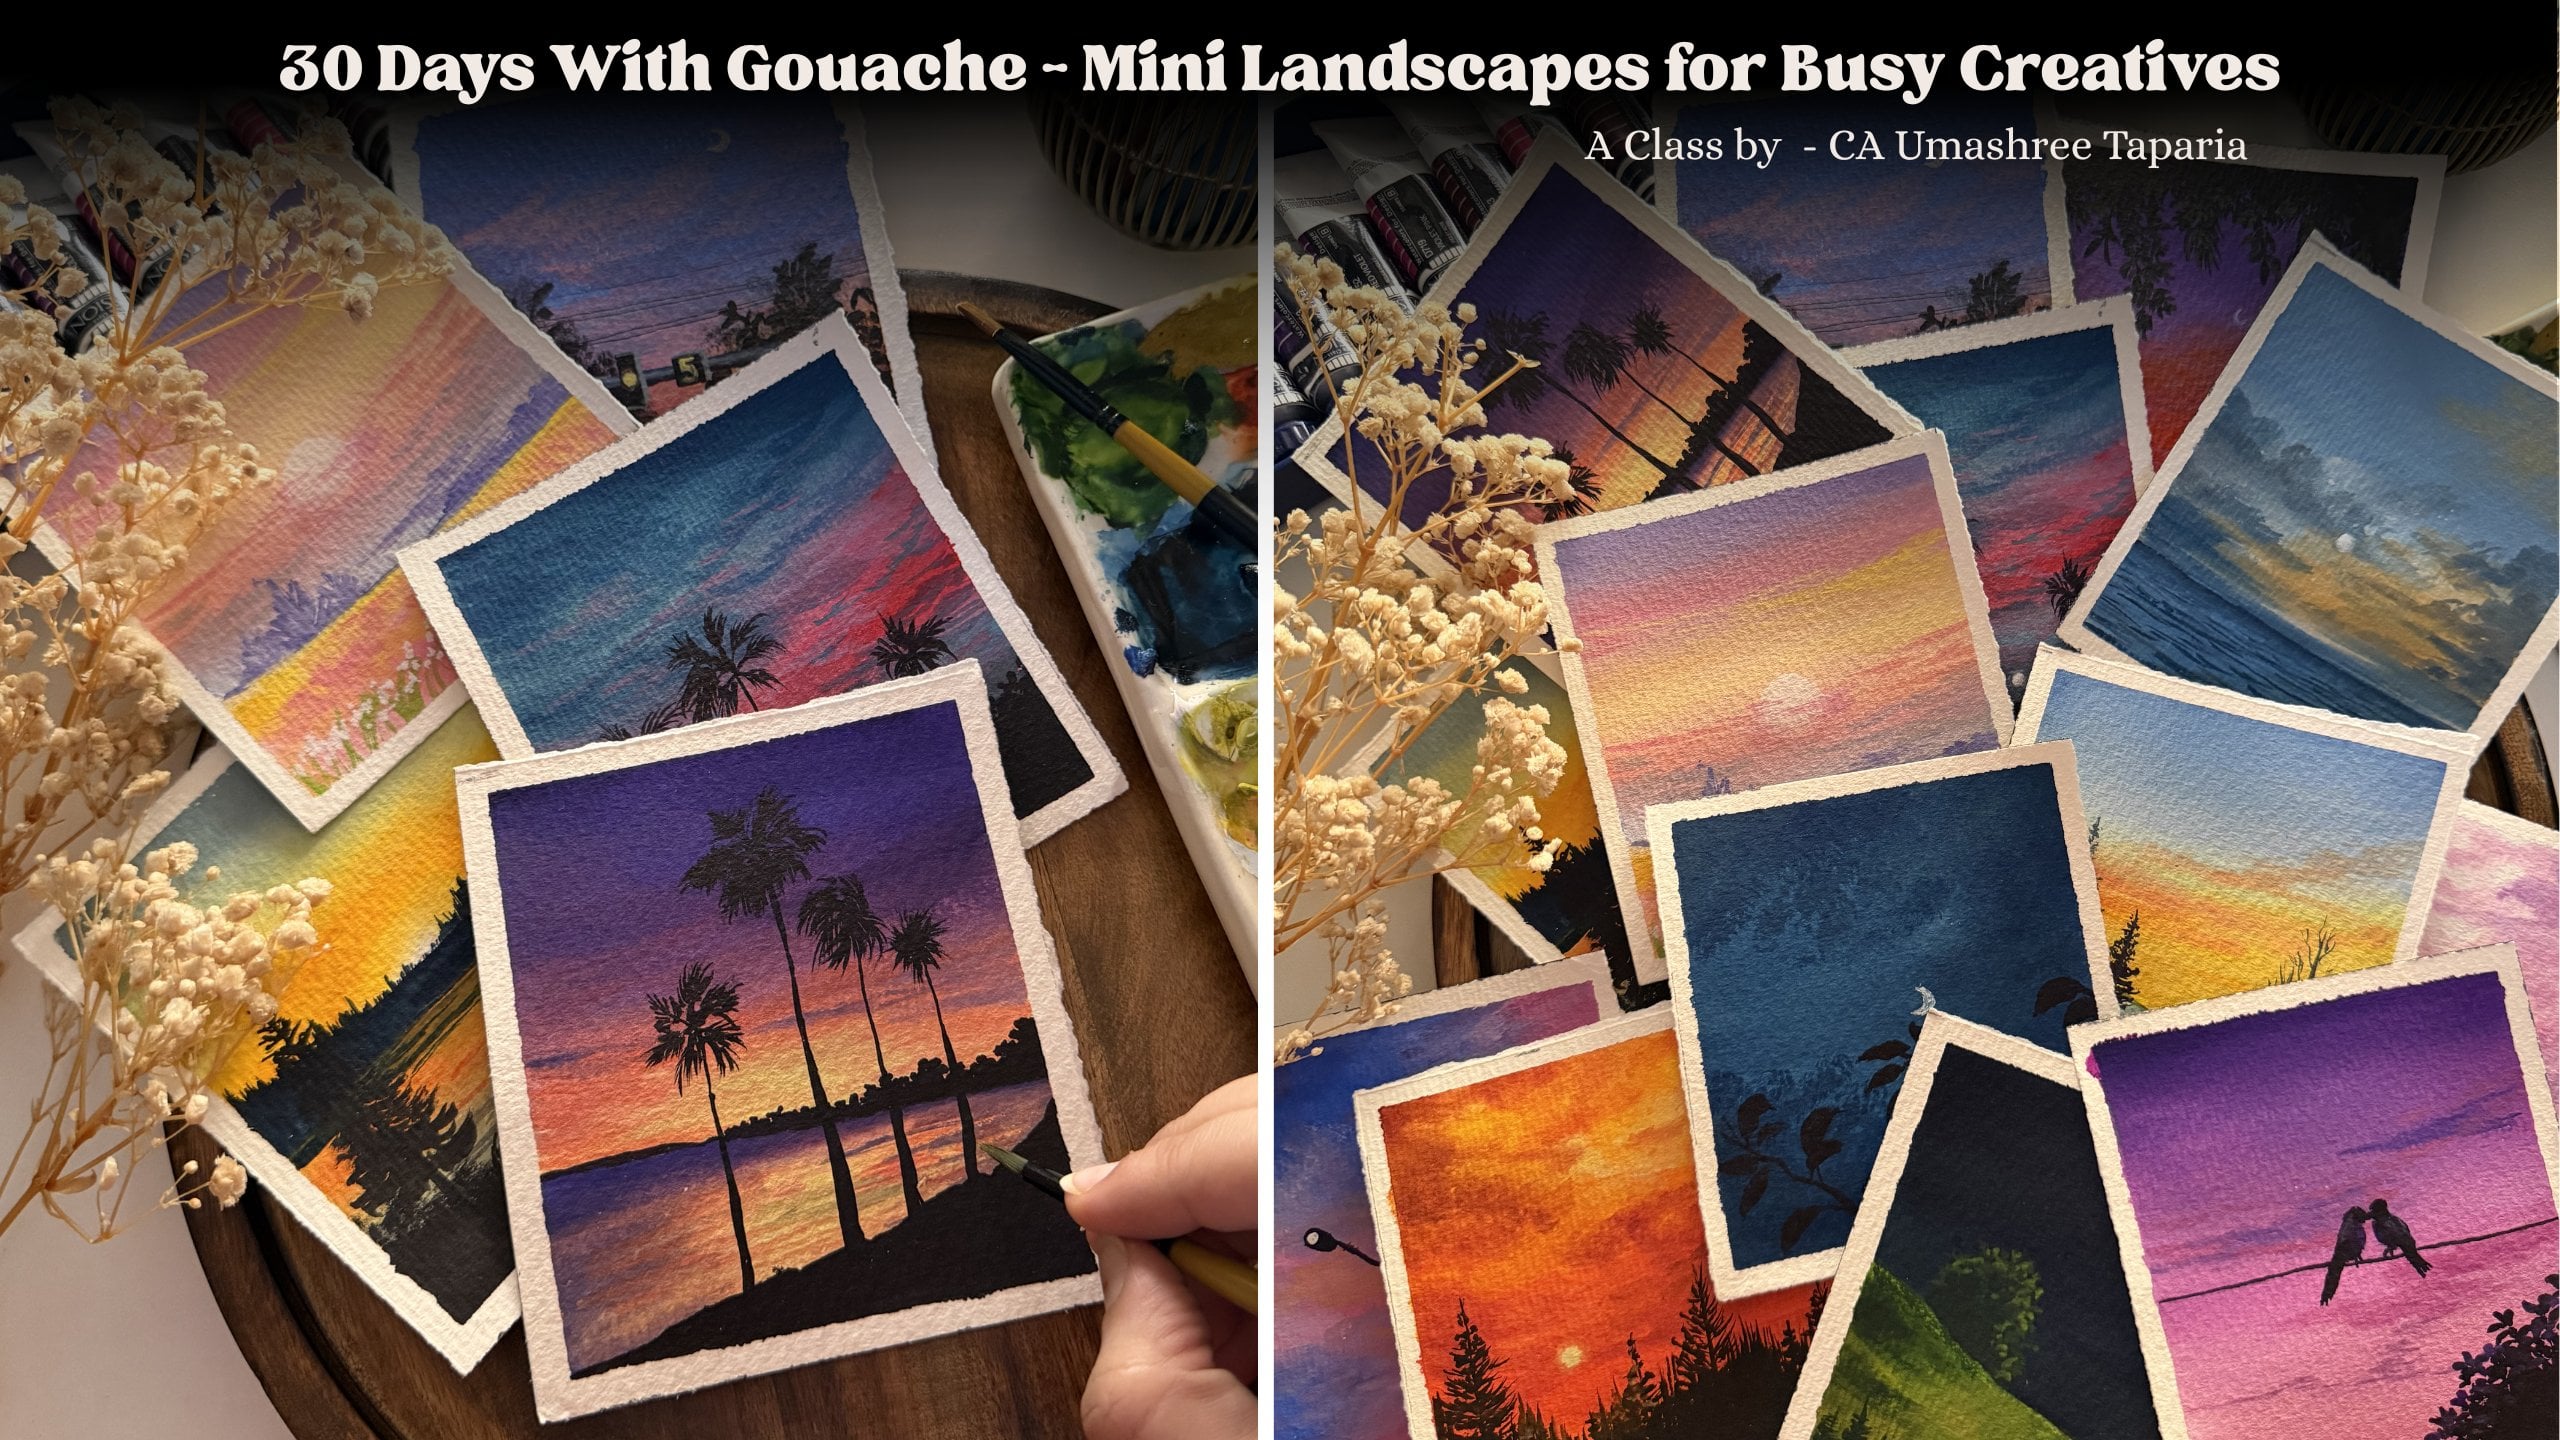
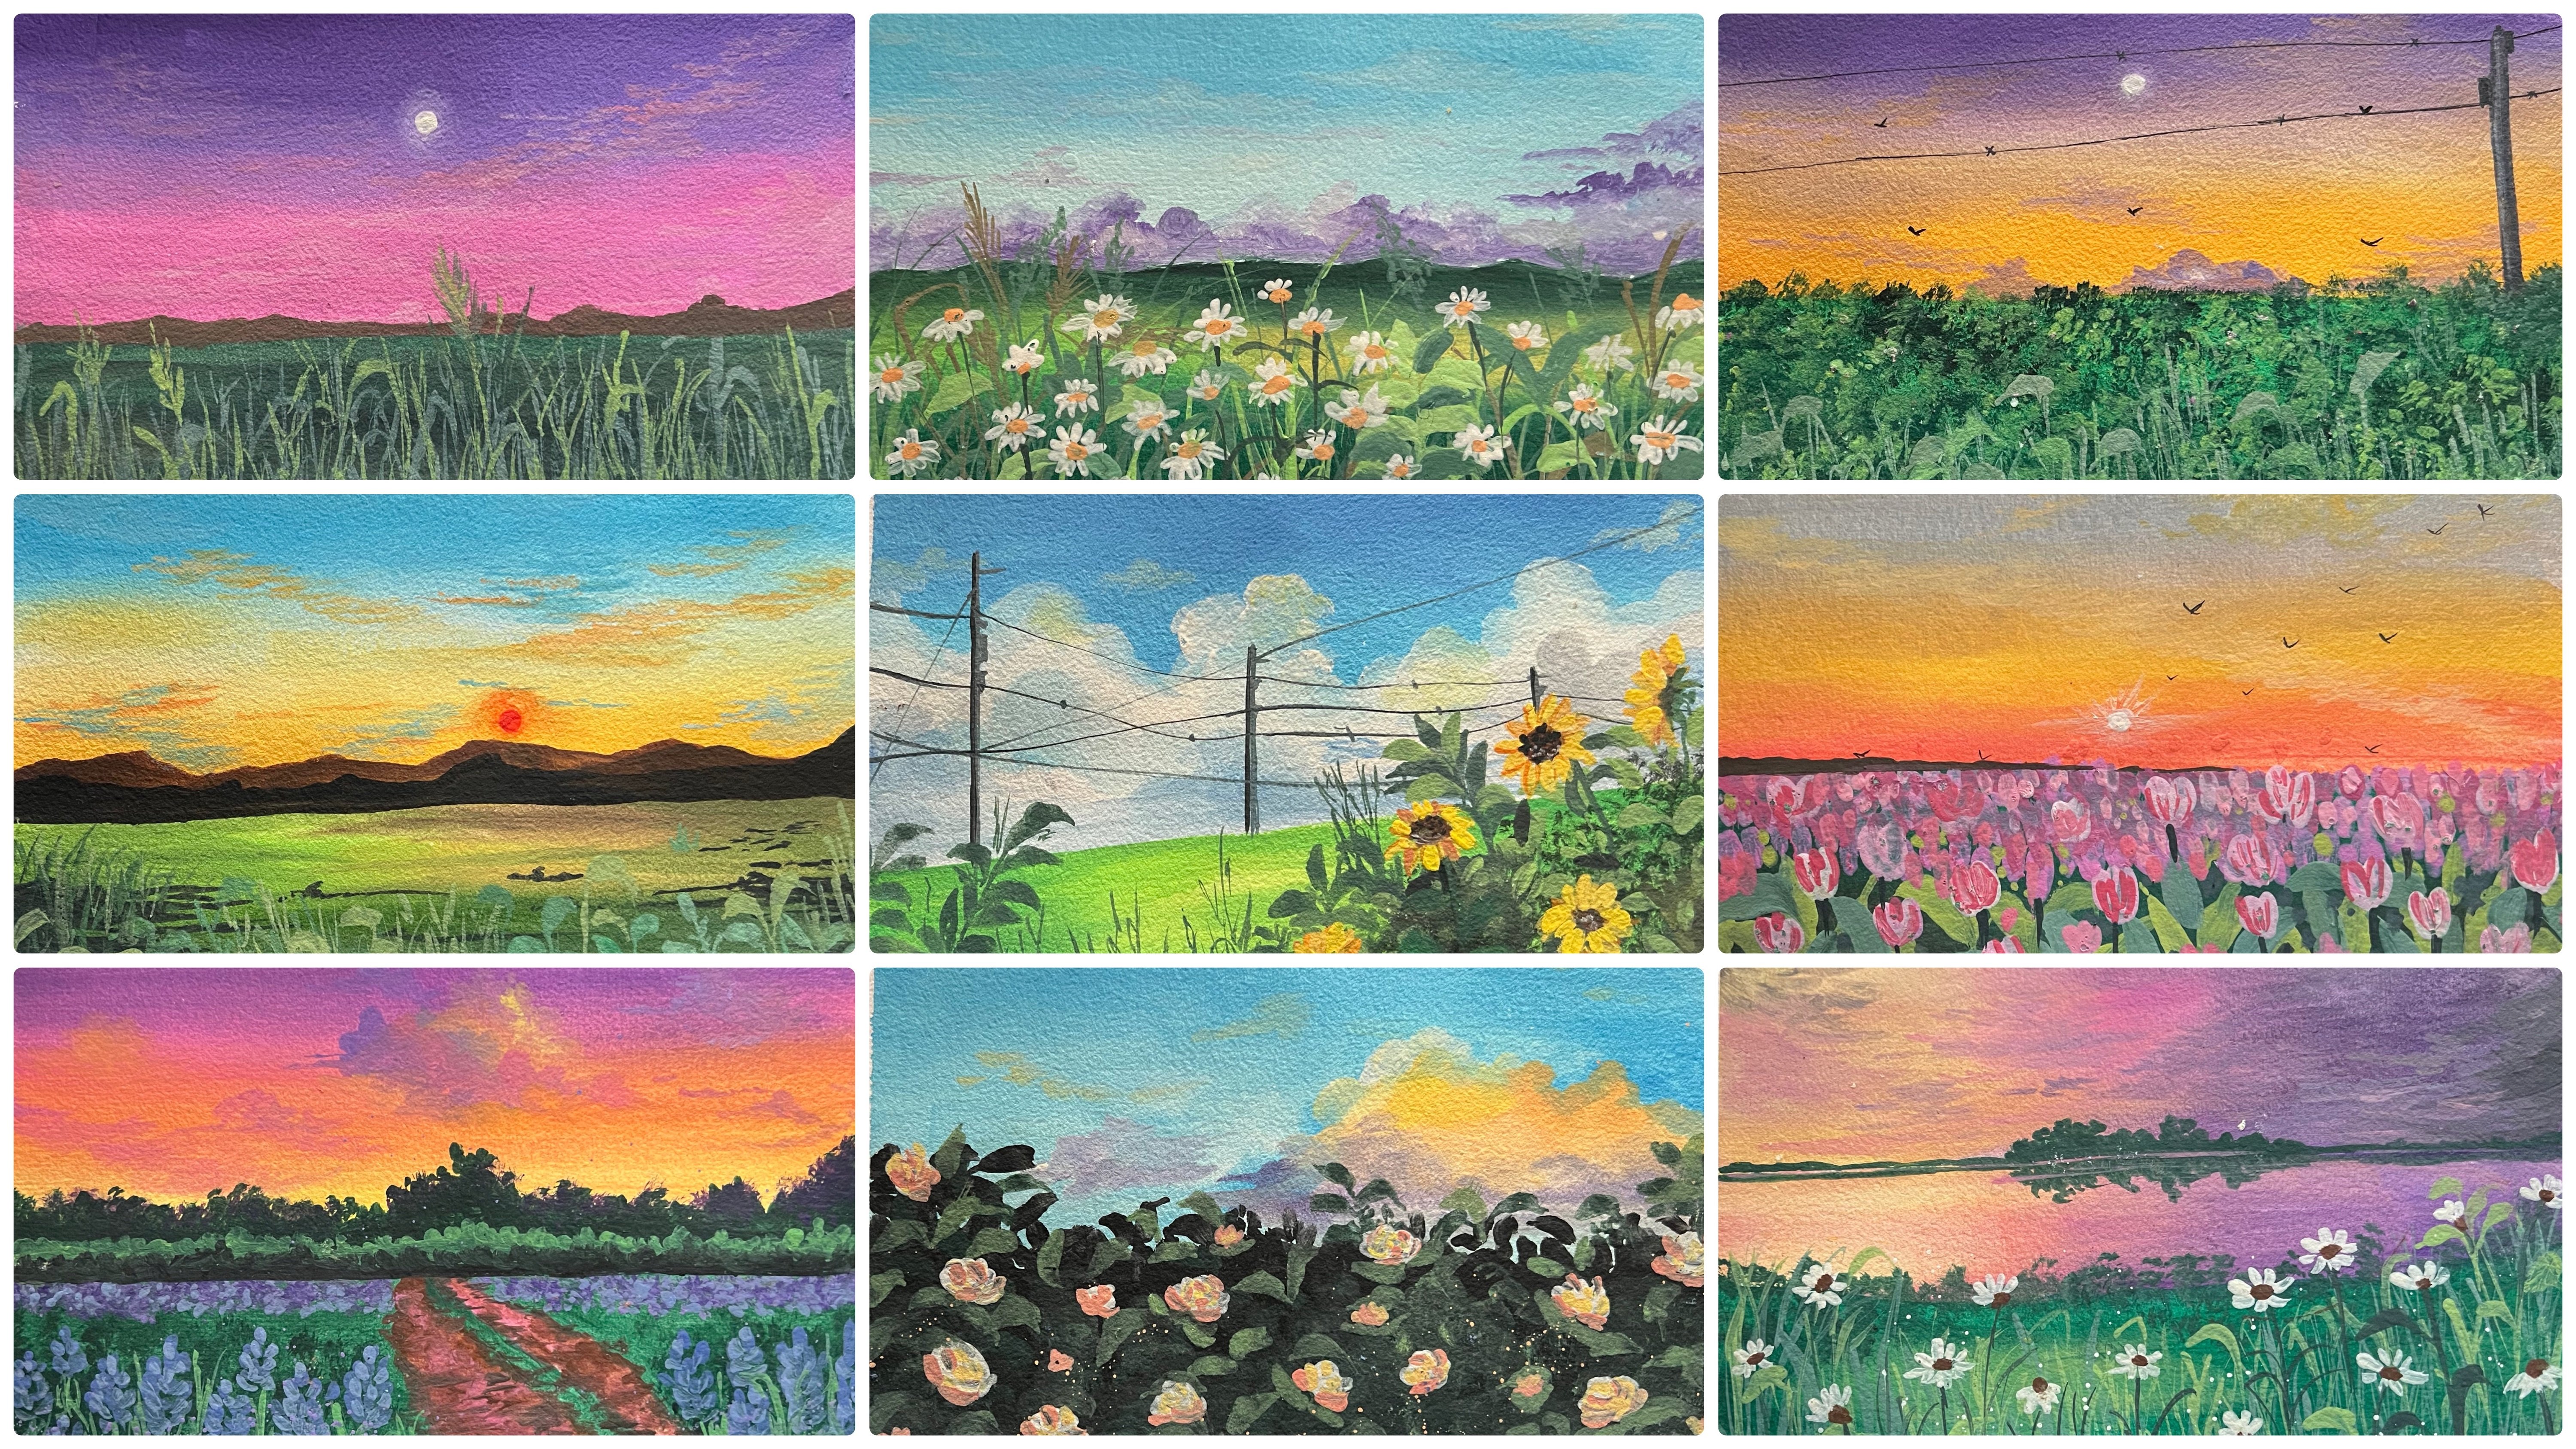
journey every day. Welcome to the 30 day
ash landscape challenge. In this class, real time into
the world of ache painting, focusing on the
beauty of landscapes. Whether you're new to Gach
or a seasoned artist, this 30 day challenge will take you through the
landscapes that inspire materials that matter and the techniques that
elevate your craft and creativity with each brush tokes creating in beautiful landscape
masterpieces each day. These 30 days will not just be a painting run
for you, rather, you would be exploring the beauty of nature
through the lens of ash, where every landscape
tells a story and every day brings a new
artistic adventure for you. Don't worry if you do not
know much about Guash, since I will be guiding you through all the
materials that you would require to begin and
join us into this challenge. I will guide you through each of the materials that
I would be using the alternatives and the
best possible things that you can use through the day challenge and join us into this creative challenge
and paint along with us. If you're someone
who's looking in to begin in your
journey with quash, or if you already work with this medium and want to
set into a daily practice, then come join me into this 30 day quash
challenge where we'll be creating in 30
captivating landscape through the coming 30 days, exploring in different
color combinations, as well as different themes
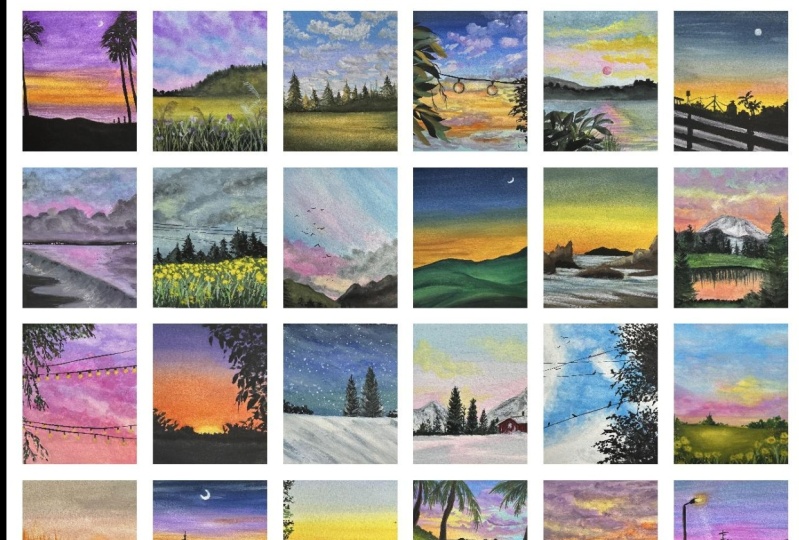
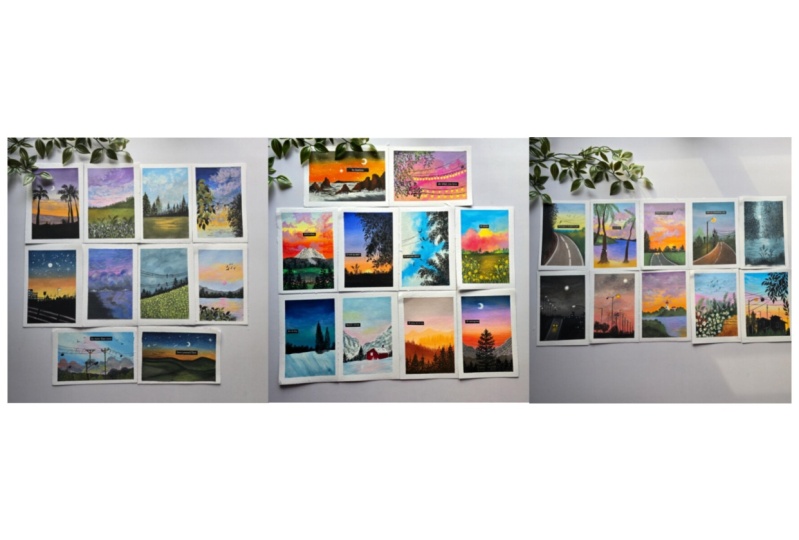
for each of the landscape. By the end of the
30 day challenge, you will have 30
beautiful masterpieces of your own to
flont and show off, which will be created by your own brass strokes
one day at a time. So without a further ado, grab your brushes,
pick your palette, and let's create 30 stunning
landscapes together, file mastering, gash techniques, and building your own
artistic confidence. Hope to see you join me into the next lesson and
dive into the class.
2. Materials you will be needing: So before moving ahead into the class
project for day one, let's have a look into
the materials that you would be needing through
this 30 day challenge. The first one being the
paper for painting on. I'm going to be using in
this handmade sketchbook, which is from my own
store hand binded using 400 GSM cold press paper. Now, you can use any paper, which is ITA 250 GSM and above. If it is 100% cotton, it helps you with leering. But even if it's not 100%
cotton for Gache, it is okay. You don't need a cotton
paper when it comes to Gach. Here, you can see the
thickness of this paper, since it's 400 GSM,
it's quite thick. Reason I'm using a 400 GSM paper here is because I'm going to be working on both sides of the book to create
paintings each day. So, ideally, this
paper is thick enough. It will not buckle up even when I paint in on both
sides like these. So I'll show you how it looks even after
painting on both sides. The paper hasn't buckled up, it's stiff enough and straight. So that is the
reason I have gone ahead with a 400 TSM paper. Can use any paper, which is IDA to 50 GSM apo. It can be 50% cotton, 100% cotton or a
cellulose paper, but I recommend using a cotton paper because it helps with not buckling
up off the paper. So that's about the sketchbook. So here I have used
this handbound. You can use paper.
This sketchbook is approximately 6 " square size. You can use a paper, any size that you wish
to go ahead with, a landscape portrait, and adjust the painting according
to your dimensions. So that's about the
paper or the sketchbook that I will be using throughout
the 30 day challenge. Now, next is this palette
for mixing in my paints. I'm going to use this
handmade ceramic palette, and I'm just going to mix in
colors as in when required. At times, I may directly mix in colors onto the paper itself. We'll discuss each
of it while we move into the class
projects each day. Next coming up is the brushes that you
need for this class. Now, here's what my brush stand
looks like at the moment. But don't worry. You do not
need all of these brushes. I have all my
brushes stored here, the natural hair brushes, synthetic hair for watercolor, acrylic squash, for all
mediums that I use in. Now, for this class,
I'm majorly going to be using in these
synthetic brushes. You basically will need one
medium sized flat brush, a round brush, a detailer brush, and if possible, a
fill bird brush. So these are basically the
brushes that you would need. Now, if they can
be of any brand. I recommend one thing that try using in synthetic hair
brushes for gouache. It helps better with
blending and moving ahead. So I'm actually going to
use this Brustro brand taklon brush set and the
velvet touch series, as well as some of the
miniature brushes. So I have a medium
sized flat brush, a filbert brush, small, and big size, and
some round brushes, and some retailer brushes. So this is, about the brushes
that I'll be using in. Now, majorly, it's
going to be from this synthetic brush stand only. I won't recommend using natural hair brushes for gouache because
they've not worked that well as well how the synthetic brushes work when coming to
medium called ache. Now, one thing that
I want to talk about is try having a
detailer brush in your set so that it
will help you in getting in the fine details
in your painting easily. I'm going to use in this
Brusto miniature brush set. Now, this is the rigor brush. I have this entire set with me. I will keep on
using brushes from this miniature set
as in when needed. But you can just have a mini
detailer brush with you, that will do the job for
all of your paintings. Next, you need a jar of clean water for cleaning your brushes or wetting
in your paints, getting in the right consistency
for blending as well. So that's about you can even keep in two jars if you need to. Next, you need
either tissue papers or a rough cloth for
cleaning your brushes, staving of excess paints,
creating in textures. Next, I'm going to use in these clips because since
I'm working on a sketchbook, I will have to clip on my
papers so that they do not, you know, keep on moving. Apart from that, you need a
masking tape for getting in those clean white edges
for each of the painting. You can use even a simple
white carpenter masking tape. You need not have such fancy
tape at your disposal. Now the main thing is the
paints that we'll be using. So I'm going to use in this 112 color set from
the brand Mia Hemi. Now I'm going to discuss in detail about these paints
in the next lesson showing you every
detail about this paint set that I'll be using
its consistency, its properties, how perfect
it is for quash paintings. So that is about the materials that you need for this class. Let's move on to the
next lesson now.
3. What my color palette looks like: Now, before we dive into the
class project for day one, let's have a look at this color palette that
I'm using for this class. It's the 11 to color set. Now, I know this
color set is huge. It has so many colors, which not all of you may
have in your basic palette. Don't buddy through
each class project. I will keep guiding you to
make the color mixes for the colors that I'm using or
use the alternate shades, which will suit best with the painting that
we're going ahead. Have a look at the colors
that go in my palette here. You will see the
shades of brown, moving on to blues, and then moving on to
all the shades of green, including light
greens, dark greens. Then moving on to the
shades of yellow. Moving on to the shades of these pastel green,
pastel yellows, and then moving on to the shades of oranges, sunset colors, and then some skin
tones moving on to some pink, red, dark orange. And lastly, moving on to lilac, pastel pink, pastel purple, and those light shades. So that's everything
in my palette. Gauche paint is
similar to watercolor, but it is opaque and
a versatile medium. It is often described as
an opaque watercolor. When mixed with a little and
the right amount of water, it gives you a i print rich and opaque finish to
the final painting. Gauche can also be used as watercolor if
diluted with water, but will not look very vi print because it turns out to liquidy, and you can see the paper underneath just as in
watercolors, we do. Ash is thick and rise quickly. However, even if
the paint dries, it is easier to
re wet the paint, unlike acrylic by just spraying or adding in
little drops of water. Using distilled water
instead of tap water, and using ah spray can help in preventing moles from
forming to a larger extent. This spray is a savior to keep your paints
free from moles. This set comes in
a portable box, and each color has
a pop up space to remove these twin jelly cups
outside and use in easily. So now if you see, if I want to remove in
these two colors here, I can simply pop it
from the bottom. And here I have the
colors out and easy to use if I do not want to keep the entire palette around. Same way, each of the cups out here can be removed and
used in separately, giving in the
perfect ease of use. Gash pains are thick
and they dry out quickly whether kept
open or on palette. But these paints can easily be reactivated by adding
in few drops of water, and they still give you
the opaque finish out here and maintain
its consistency. So it's quite easy to revet these pains avoiding
wastage of pains, even if tried out
on the palette. Now here you can
see how beautifully even the rewetted pains
give you the opaque finish. Coming to the leering
with Gach with Gach, leering is quite easy as even the taker toones can be laid down on
the lighter color. Like here, I'm just layering simple green onto
the lighter shades. But did you know even
lighter shades can be layered when it comes to Gach because of its
opaque consistency. Now, I'll go ahead with some black color and
add in some leaves, and we'll see how even the green will be visible on the black. Plus overlaying with
ash is quite easy, but you just need
to be sure that the base layer has to be tried
completely before you go ahead with the next
layer so that you get the perfect finish and
the colors do not mix up. Also, you need to be a little gentle on hands when
going ahead with overlaying so that
the base layer is not activated because again, these are water based paints, so they get easily reactivated. So you can see now the greens are also
visible on the plaque. Since this is an opaque medium, it's easy to correct
mistakes once it dries out, giving the perfect
finish to your painting, So here's a closer
look once again on this entire palette
from the brand Mahmi. I'm going to be using in this entire palette throughout
the 30 day challenge, using in different
color combinations and color tones through
each of the landscape. Now, since my palette has all the required
shades possible, I will not have to go ahead with any color mixing through
my class projects. But don't worry, I'll
keep guiding you through the color mixing options and
color shades for each class. So now let's dive in into
the class project for d one.
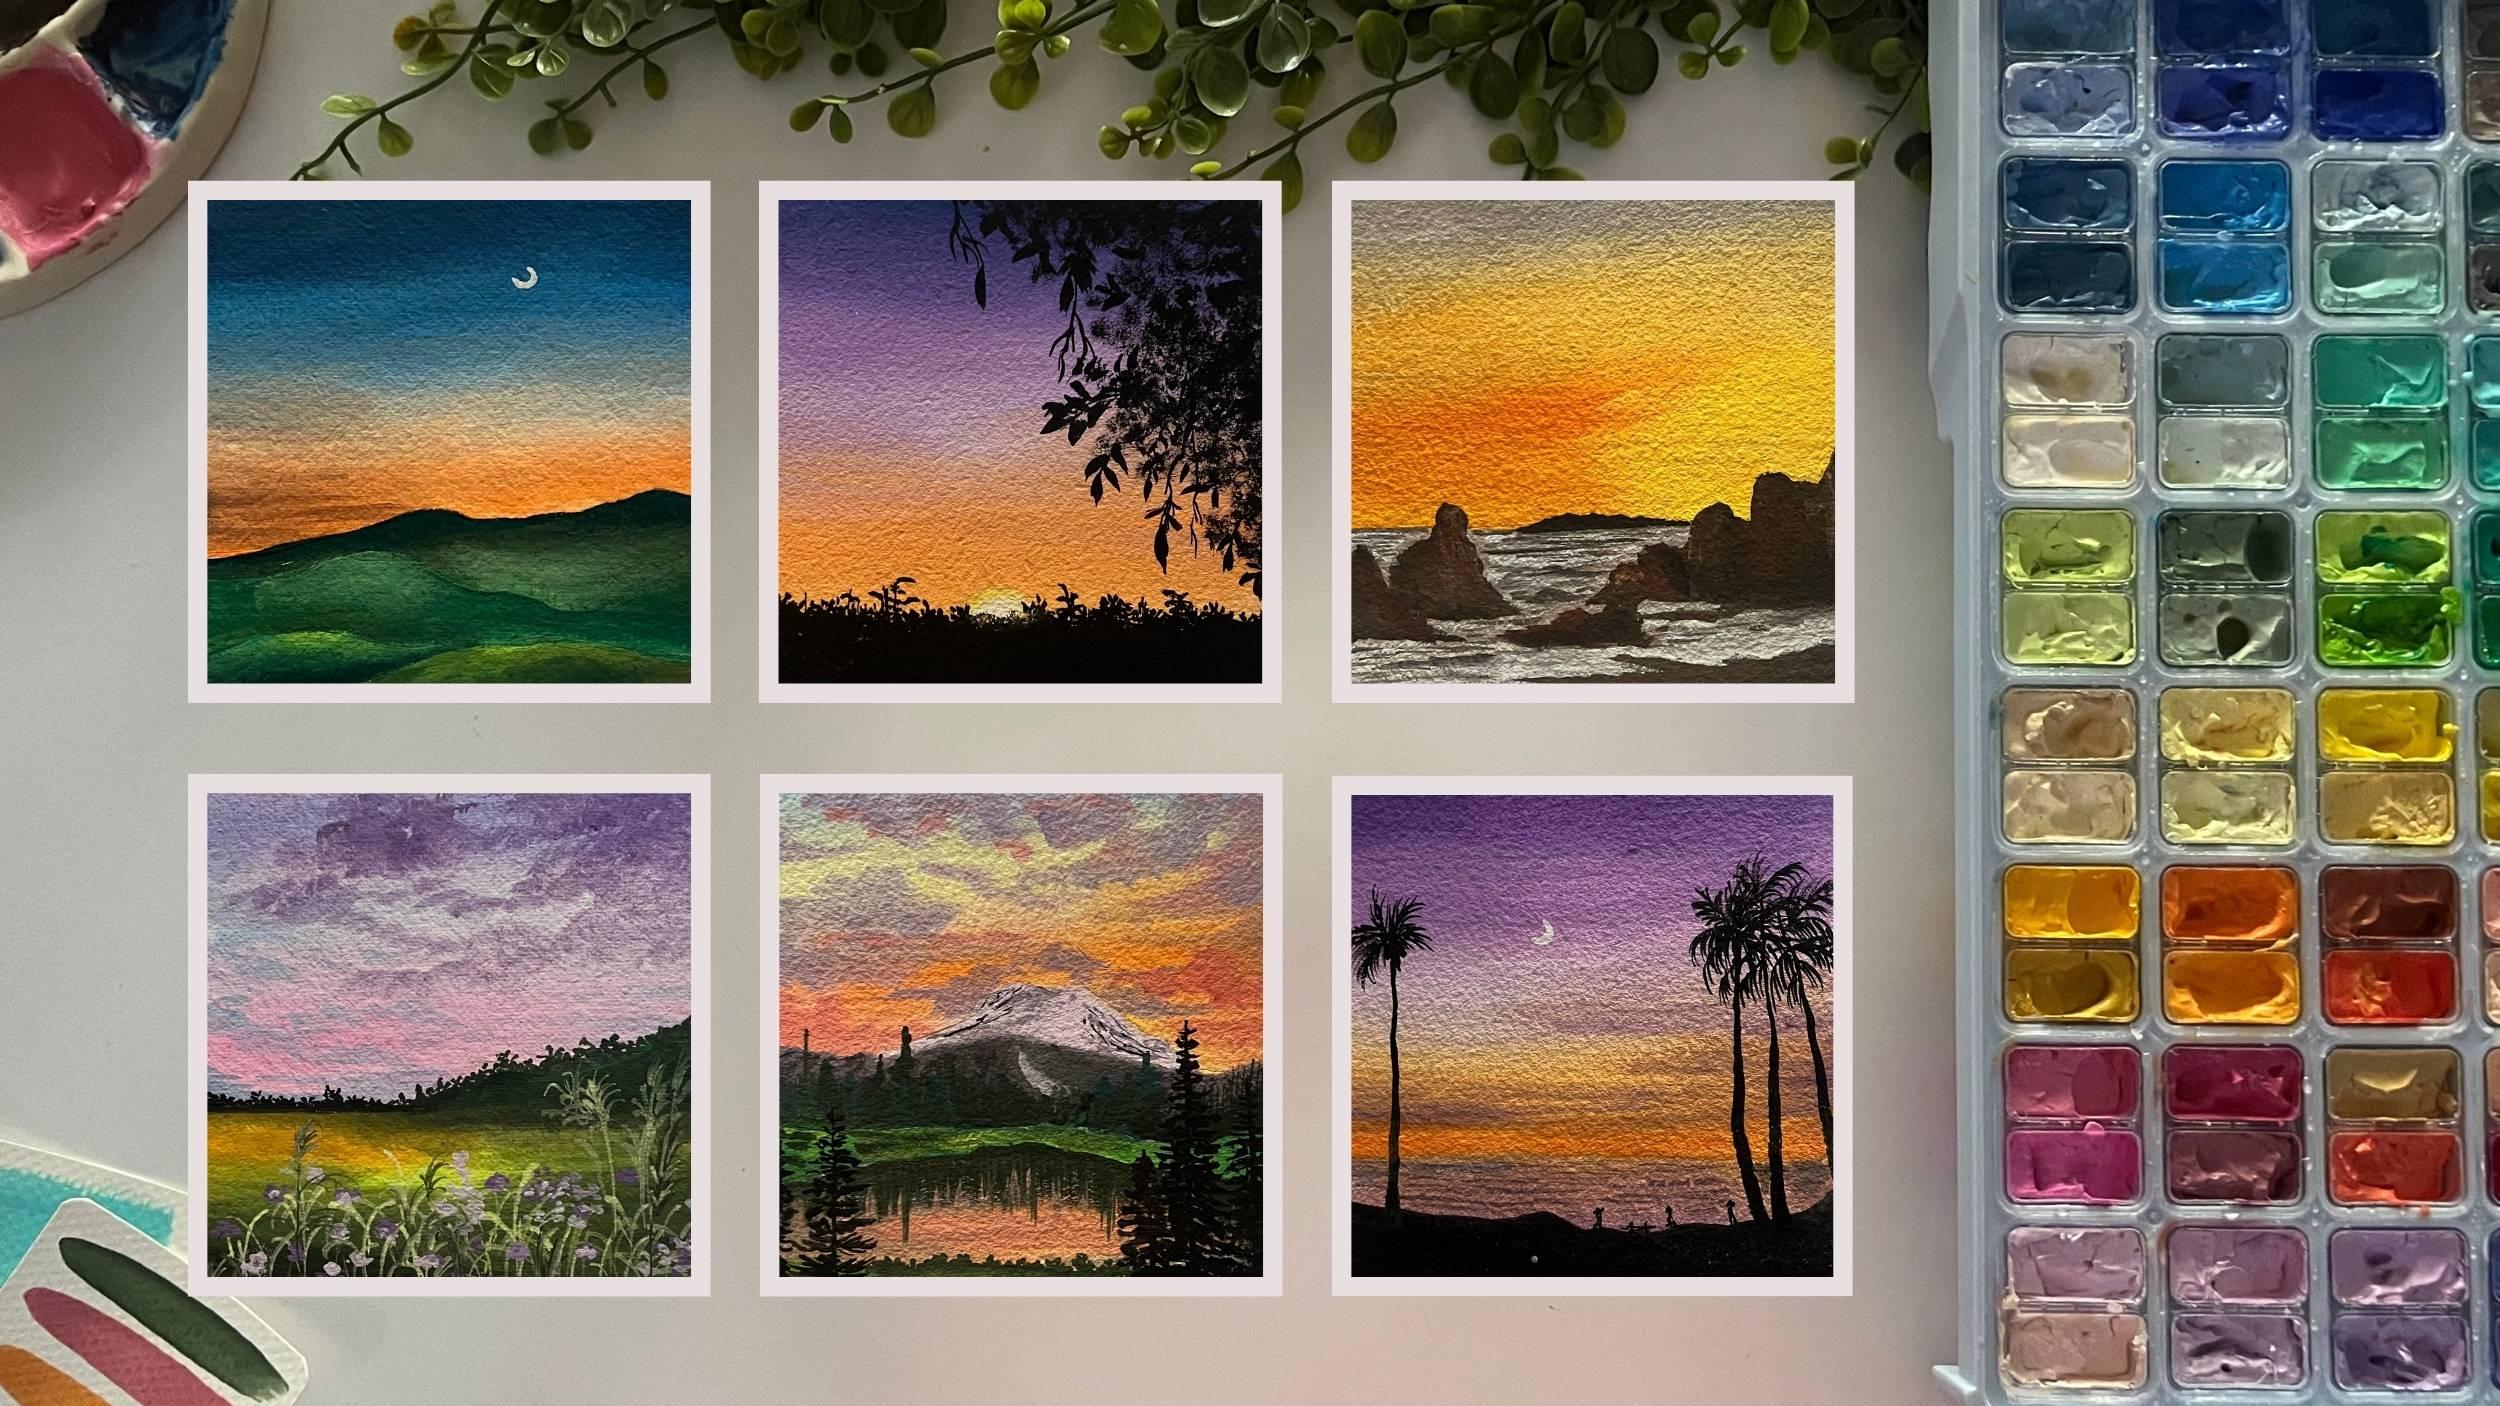
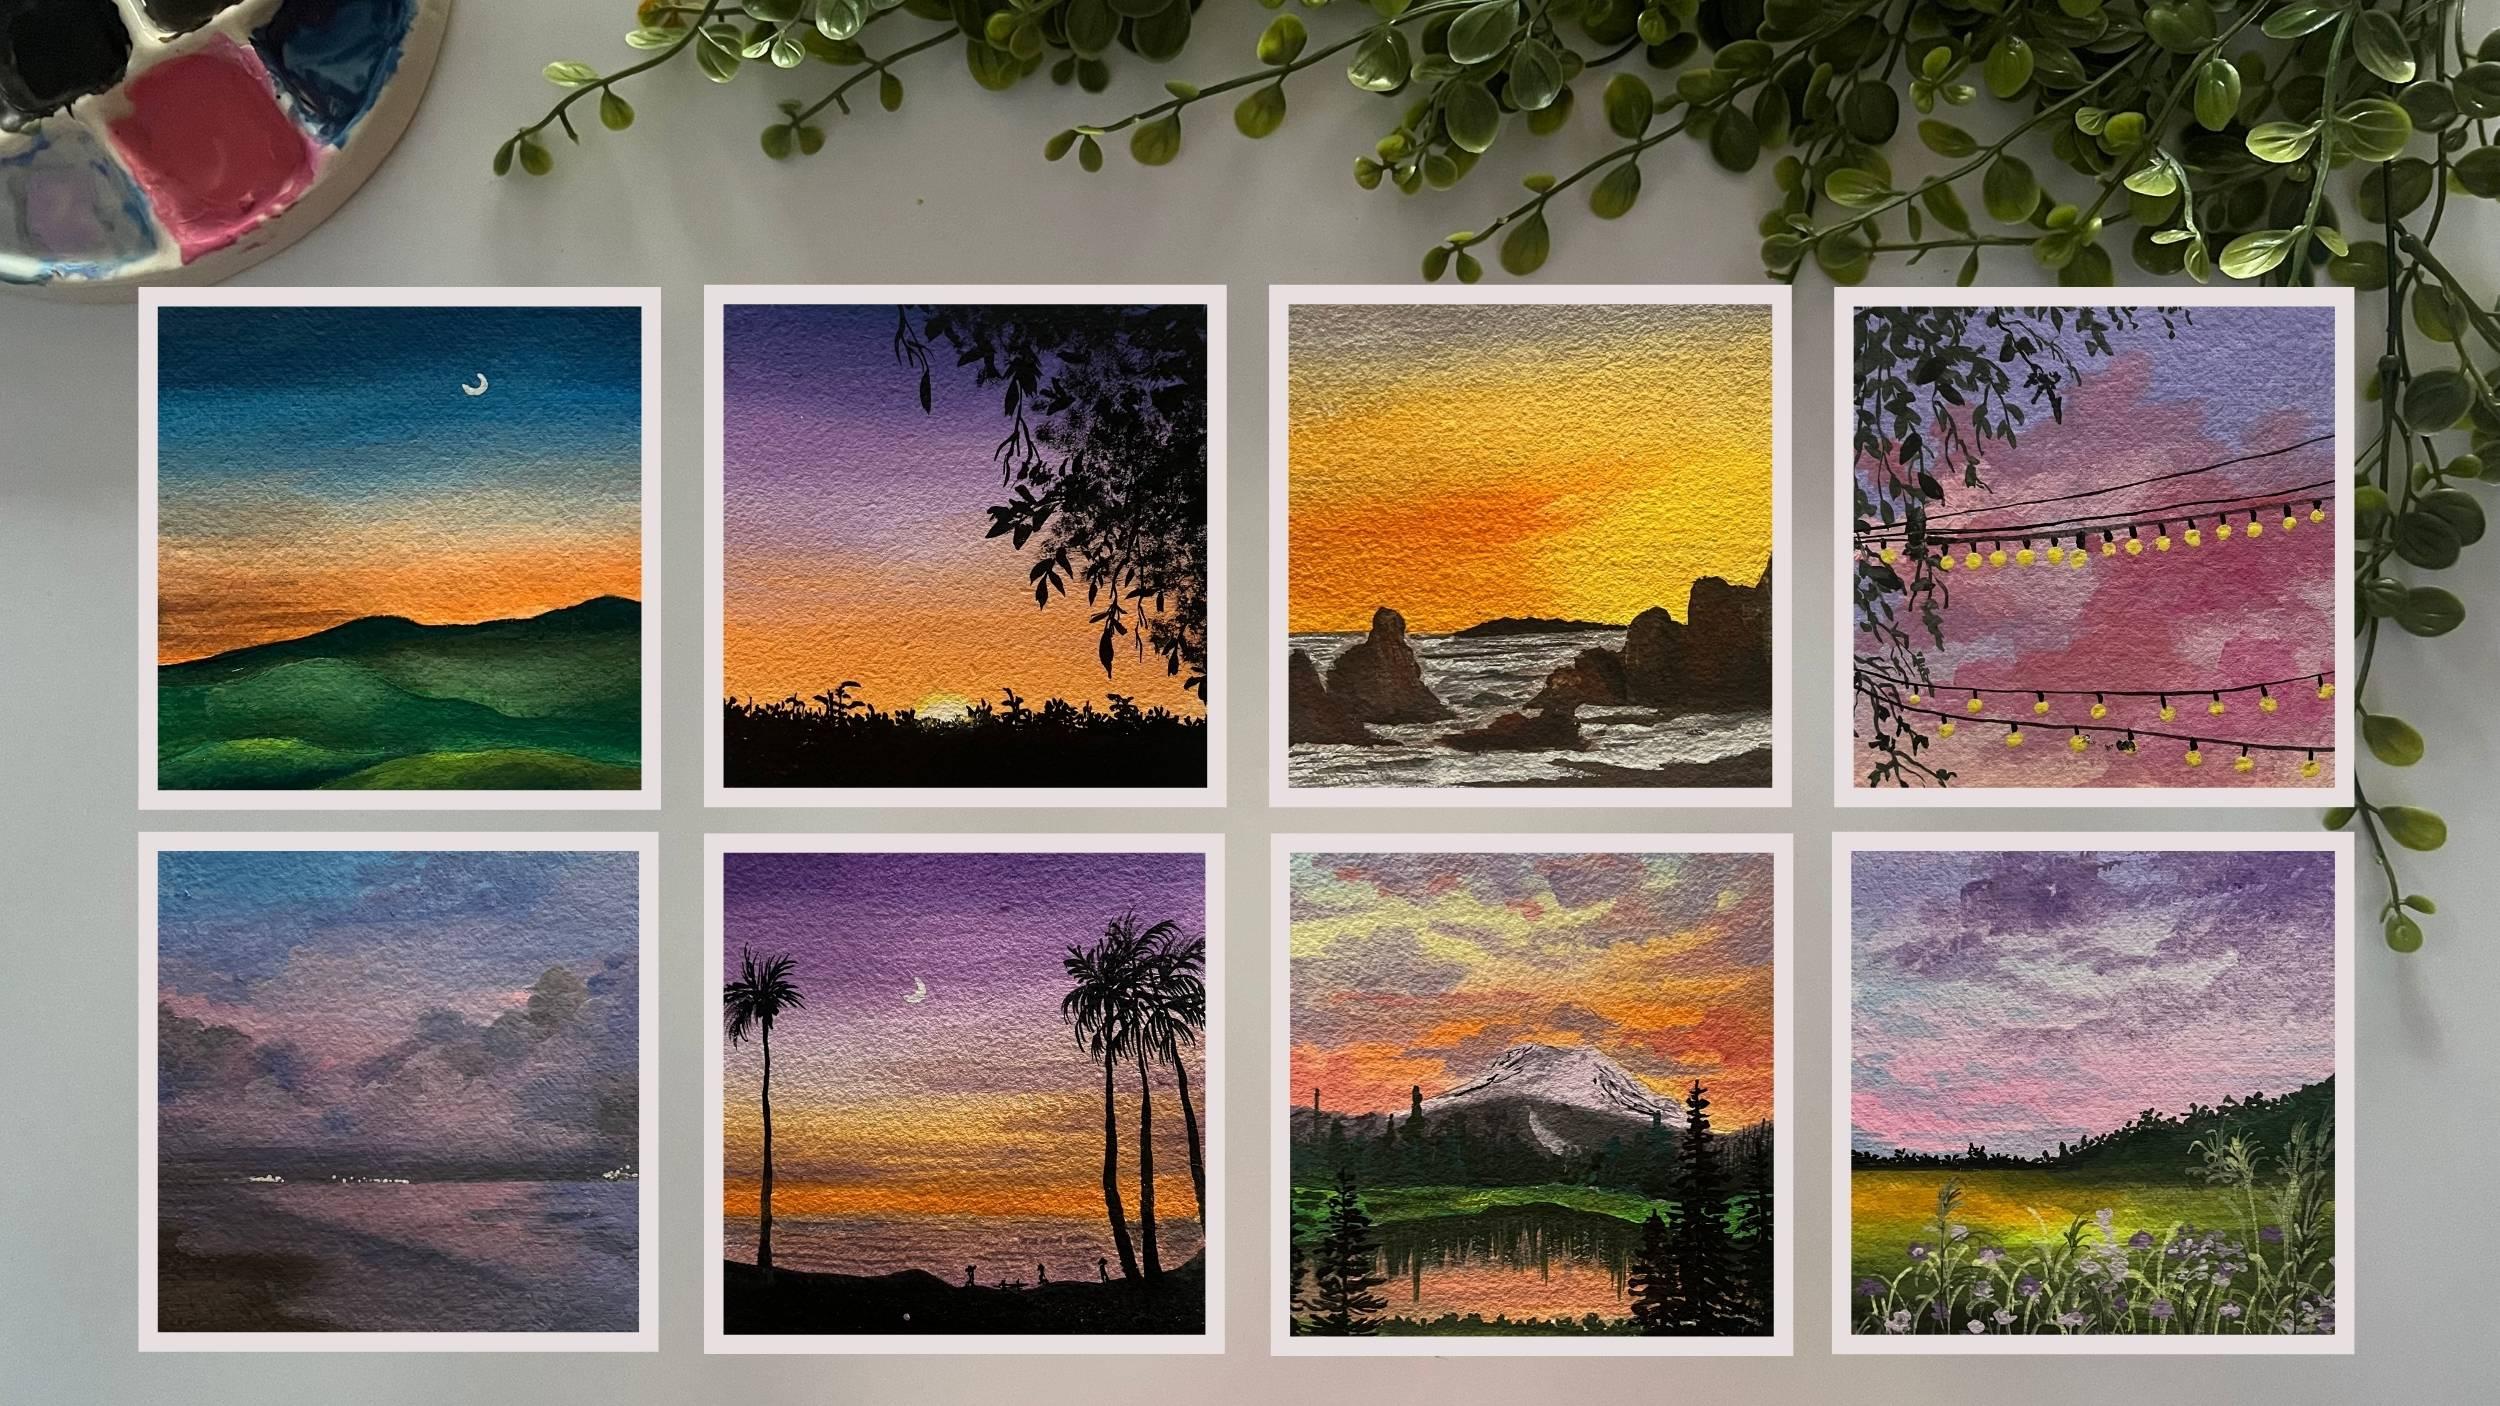
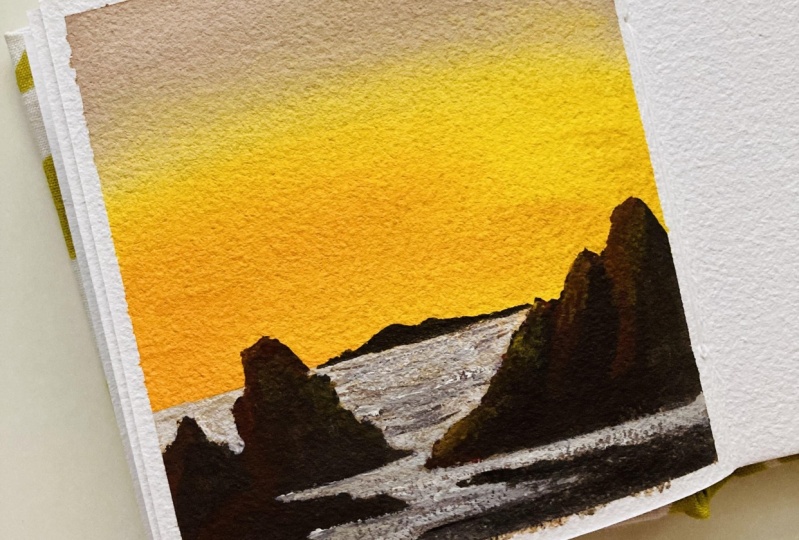
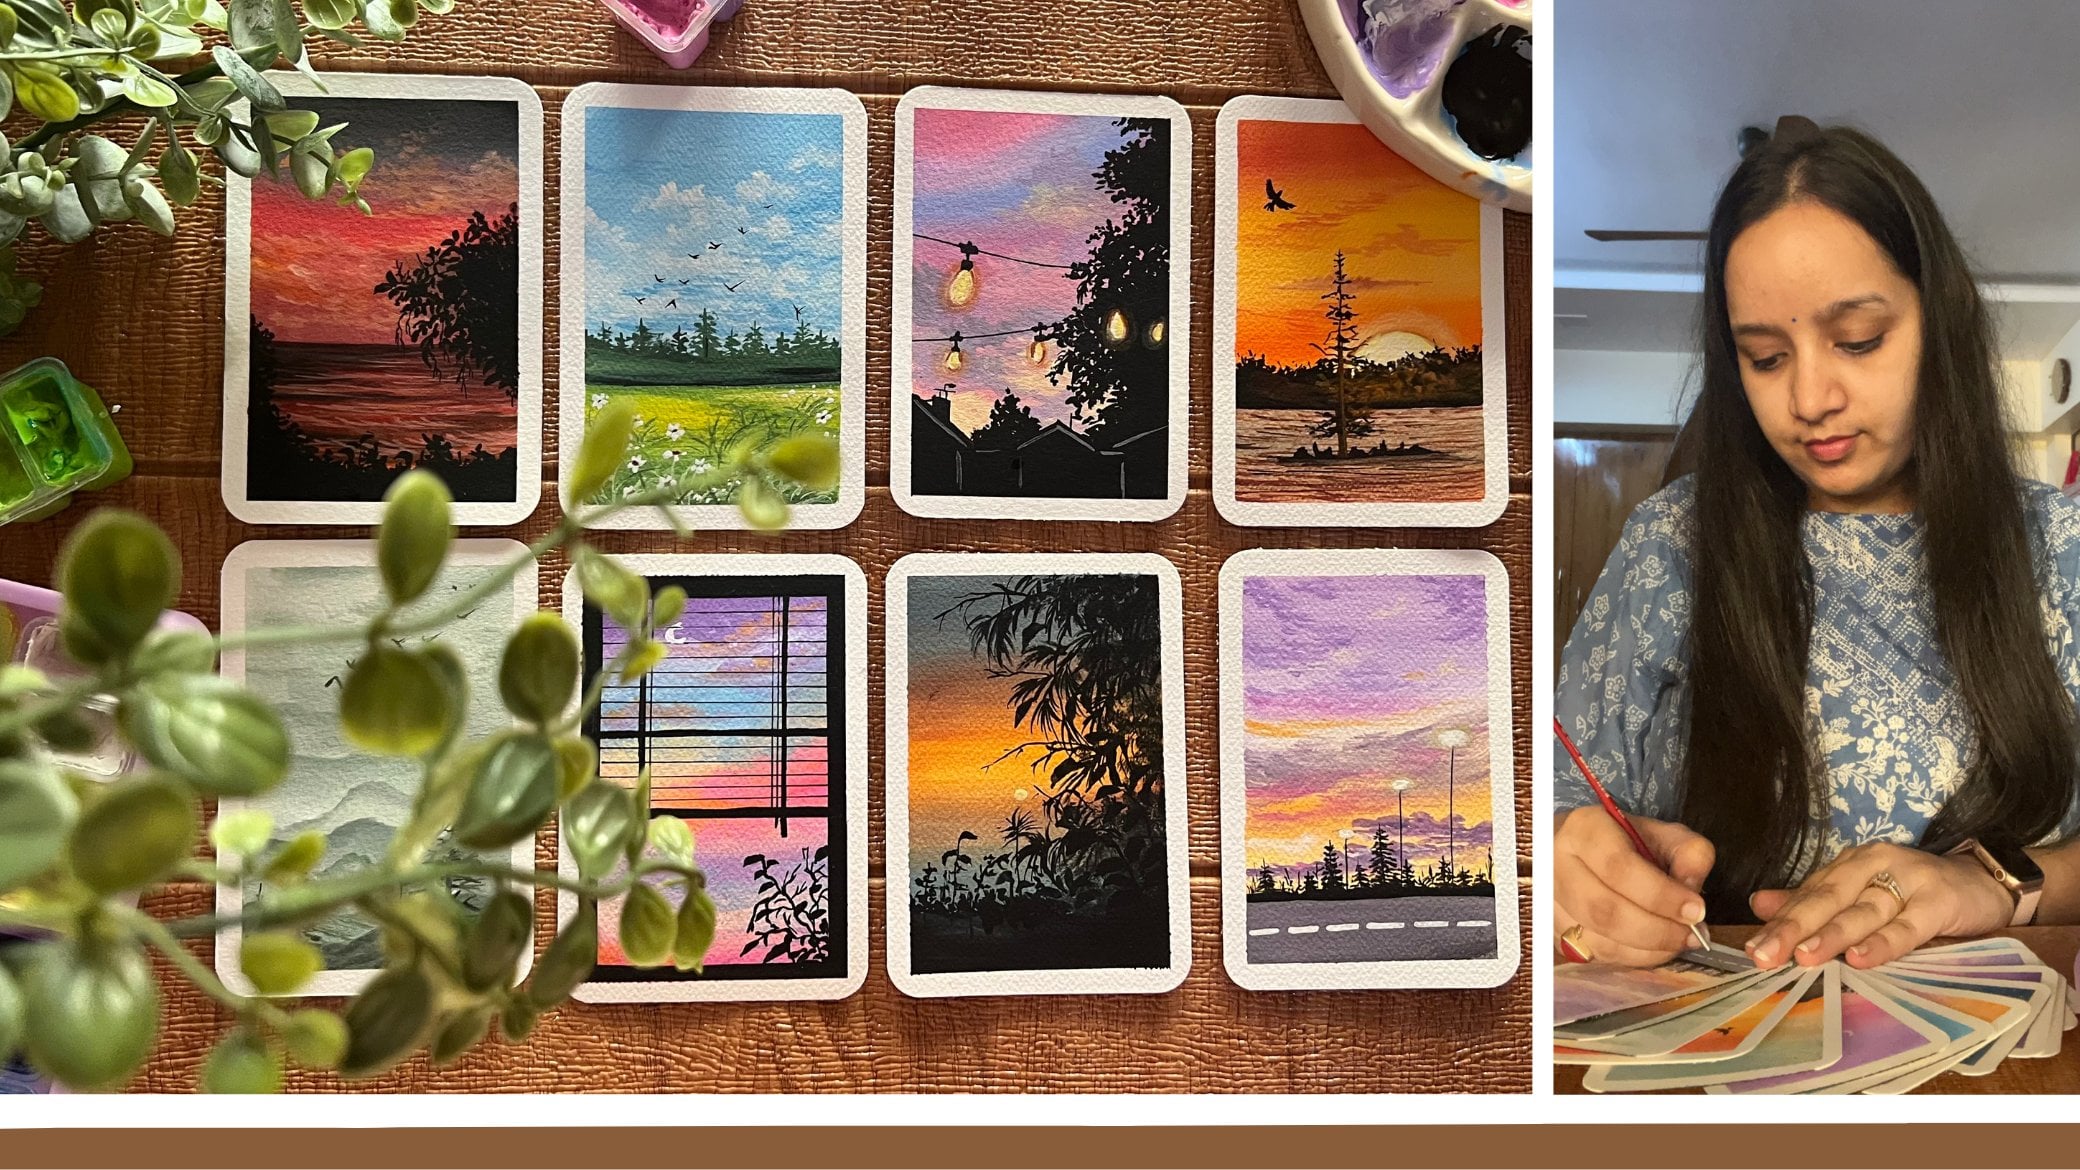
4. Day 1 - Sunset: So let's begin with the
class project for Dave one. I already have my
paper taped down, and we'll begin in with a
very simple pencil scare. I'm just marking out
two simple lines. The bottom space is going
to be the beach area. And this second line
space, the center area, will be the little water body area that
we'll be painting, and the top is going
to be the sky. Alright, so we'll first
begin in with the sky, and then we're going to
add in a few palm trees. I'm just adding very rough sketch for the palm trees here. We'll add them in detail
directly with the panes. So let's begin in
with the colors now and begin adding
them one by one. Firstly, picking in
with the sunset sky. So the sunset sky
is going to be of the violet orange
pink tones this time. So I'm first picking up
a dark violet color. Now, you may have this
basic violet color. Or else you can mix in blue and pink to get
in a violet toll. Now, first, I'm just, you know, getting it in the right
consistency on the palette. Now, as you know, my paper
is a cold press paper, but still it has a little
of the rough green texture. You will see at times it may
be a little more tedious for me to blend it because
of the texture of the paper and gage
being thick pains. It may take time to spread it. But in case if you're
using a smooth paper, it will be very easy to glide. So it's absolutely on you how you want to
choose your paper, whether a smooth green
rough grain coal press. I love the texture that comes in after the painting is done
with this rough grain texture. That is the reason I've gone ahead with this
rough grain paper. Now I've picked up a
very light lilac color next close to the violet color. Now, in case if you do not
have this lilac color, you can simply add in white to your violet to get
a similar tone. You can even add a
little of the pink to get in this pinkish
violet tone together. Now, for the third color, I've gone ahead with a further lighter tone of the violet. So again, if you do not
have this light tone, you can again add
in more white to the previous mix and get
in this very light tone. You will see this color
is almost equal to a white color with just a
little hint of the violet in A. So basically, since I have
this 112 color cote set, I have all the
lighter darker tones of the violet available, so I do not need to mix
white again and again. Now, next, I've picked up
a yellowish orange tone at the bottom closer
to the horizon line. You can mix in your yellow and orange and get this
yellowish orange color or you can even use in cadmium yellow color to
get in a similar effect. So first, I'm just adding in perfectly
at the horizon line, giving in that perfect line. Now, since I already had a very pastel color lastly
near the yellow orange tone, you will see I do not get any
muddy tones while blending. Otherwise, if you mix
in violet and orange, you may get in muddy tones. So you need to be careful about these small things because
blending needs to be right. Otherwise, if it will give in
muddy and unpleasant tones, it will not give in that effect to your landscape painting. We are ready with our sky a
very simple sky for Dave one. Now we'll begin adding
in the sea area. So this time the sea also is going to be
pretty simple one. I'm just going ahead
with the simple, you know, medium tone of
the lilac color here. Now, again, if this is not the darkest tone of the
violet color that I'm using, just a little hint
of white you can add it and get in
this similar tone. Now, I've picked up
a little hint of the yellowish orange
color on my brush and just going to add a little hint into the
violet color here, just trying to show
in little effect of the sky colors falling
here into the sea area, creating in the
perfect reflection. I'm just marking the right
horizon line so that we have in that straight
look to our horizon line. Now, I've picked up a
yellow orange color again, and I'm just giving in a little blurry effect
to the horizon line. So I'm just running the
same color again on the meeting point of
the sky and the sea. We'll give a little distinction later on with the waves effect, but first trying to create
in this blurry effect here, by just planing in again with the yellow orange color,
the violet tones. Now, at the bottom,
it's going to be a simple dark beach area
for the sunset view. So there I'm going to
directly add in black color. So I'm going to pick up
black and just add in there, and then we'll add
little details on the beach as well this time. Now, before moving
to the beat space, I'm going to add in little
cloud effects into the sky. So I've shifted into my
mop brush, as I told you, you can use in Filbert
brush round brush for blending all
of these as well. I'm first adding in the paints, and then I'll blend it with the base layer colors as well. So I'm just going to
keep a rough cloth handy so that I can
keep dab my brush. Every time you blend in
with the base layer, make sure that you clean
your brush and then in. Now, I've picked up a little of the dark violet tone as well and adding in little darker effect
onto the right side here. Again, I clean my
brush and now using just a damp brush and blending
it with the base layer. You can see I'm going
very light handedly. That is the reason even
the yellow orange mixed in with pillet is not
giving in muddy tones. After every little blend, I'm cleaning my brush
and again using a fresh damp brush to blend
in so that the colors that are lifted while blending on the brush are clean again and do not get laid over
onto the other spaces. Oh. Now, I'm going to pick up a little of
the bold orange color. In the base layer, we used
yellowish orange color. And now just using the
bold orange color. I'm adding in little sunset highlight on the horizon line. So again, you will see as soon as I add in the orange color, the sea area gets a perfect
horizon line distinction and creates in that distinct
look from the sky as well. Now, pigging in with
the black color. I'm going to fill in
this entire white space that is left with the
black color completely. Now, when you're going ahead
with this black layer, make sure that you do not
dilute your black color a lot. We need a bold layer here. We're going to add in very simple human figures
as well into this one. It's going to be
pretty quick and easy to add in those
figures as well. The pos filling in
this entire space with the black color completely. And now I'm going to go ahead with the rest
of the details. First, at the top, I'll give in a very curvy and, you know, unfinished line. We do not need a very
straight looking line. So I'm just giving
in random curves out here, filling
in with the black. Now, using the same black color
and a smaller size brush, I'll begin adding
in the palm trees. First one, I'll add on the left. Now, in the technique section, I've already discussed
how you can add in detailed palm trees as well as how you can add in
simple palm trees. I go to go ahead with quick
and easy palm trees here. I'm just going to go ahead
with simple details. So I pulled out very
small foliages. And now from that,
I'm quickly pulling out much more smaller
foliages again, and you can see how
quickly we can add in. Closer to the center point, you can see I've added in
two round to act in as the coconut hanging onto
these palm trees as well. So simple black dots or black circles that you can create and to add
in those details. The one I've added here, now two to three palm trees, I'll be adding on
the right side. So I'll quickly go ahead with the black color and
begin adding in. Now, be a little careful if your basically a
black color is still wet because if you lay
your hands out there, You know, the colors
may lifted on your hand and may get
laid onto your painting. So you need to be a little
careful while working wet if any space of
your painting is wet. The first I'm marking out the palm trees that I'll be
adding in on the right side, and then I'll begin with the foliage on the
right side as well. It's going to be pretty quick
and easy to add these in. Now, you can see
on the right side, I've added the palm trees
much closer to each other. So obviously, the foliage will also be
overlapping each other. So I'm just randomly beginning
in with the foliage. They will all be mixed merged
and overlapping each other. And you know, one
palm tree foliage covered up with the
second one as well. So that is the reason I've added the palm trees closer together
on the right side here. And now the fage also will
be overlapping each other. Now, you will see that because
of the overlapping thing, you will be unable
to decide as to which foliage is coming in
from which of the palm tree. But it's okay. That is
the beauty of nature. You may have observed a lot of palm trees clustered
together, and then you can, if you look it out
from the far view, you may not be able to recognize which foliage is falling
out from which of the tree. So the same view we are
trying to create in here. Now quickly, I'm just going to add in simple human
figures here. So just adding in small line
and just trying to add in two further small lines and
a small circle at the top, trying to show in a
simple human figure. Now, of course, these
are far from our view, and just in Silo, that is the reason we do not have
to worry about detail. Now I'm even going to add in one bench out here
on the beach space. So you can see very simple
way to add in human figures. So just a simple block first, then two smaller lines from
the bottom of the block, and then a circle at the top of the block to make it the
face of the human figure. So you begin with the body, adding two simple legs
as two small lines, and then a circle at the
top to act in as the head. You can see very
simple silo hate miniature very far off view
that we've created here. We are almost at the
end of this painting. Now before we just remove
in the masking tape. I'm just going to add
in simple waves effect. For that, I'm using in a medium
tone of the violet color, not too dark than
the bas layer of the sea and not
too light as well. And I'm just going to
add in simple lines. Make sure that the color
is just one tone darker. So this color that I
added was a little d. So I further diluted it
with a lighter tone. And I'm just adding
in simple waves. I have discussed these waves as well in the
technique section. If you refer the last
technique section, you will know the basics
of adding in these waves. So I'm just adding in
simple waves out here. Chilly, we should have
added in the waves before adding in the palm trees so that the black colt does
not get smirked. But I just missed out on the part of adding in
the waves earlier. So that is the reason
I'm adding in now, just a little tricky, but easy to add in. So just simple lines that I'm adding in to act
in as the waves. Then adding in the
simple waves as well. Now quickly using
in the white as, I'm going to add in a
small crescent moon out here in the center. Again, be careful at the spaces where your
painting is still wet, how you lay your hands. For the waves, make sure that
you use a very dark color, use one tone der
whatever base color of the sea that you have so that it gives in that perfect sunset, you know, blurry view of the sea that we
want to a in here. Come down adding
the moon as well, make sure for the
moon, your white ash is in a thick consistency. Now, let's begin removing
in the masking tape, remove your masking tape very carefully and pull it
against the paper. Otherwise, it may lift up
the paints from the edges, and you may ruin up
your painting as well because the paper may
also begin to tear off. T have that removing
in the masking tape. Now at the bottom, you can see a little of the black
color that has sat out. For that, you can just use
white ash or tet relics, or you can even use
a correction pin and just hide those pieces, and given that
crisp white finish, So here's a closer look at
our painting from Day one. You can see I've corrected that little black part that had smashed at the bottom with
the help of a correction pen, giving in that perfect
crisp white line. I hope you guys enjoyed painting this painting
with me for day one. I'll see you guys into the
Day two class project.
5. Day 2 - Simple Field : Hello, everyone. Welcome back to Class Project for Day two. Let's begin with a very
basic pencil sketch. We're going to go with a
simple field painting, having a beautiful
day bright view. So I'm first marking
out the horizon line. It's a little below the
center line as you can see, so the bottom is going
to be a field area. And at the top, we're
going to have in the sky. And on top of the horizon line, we'll just have an extended
bush area off the field. Alright, so this is the basic pencil sketch that
we've marked out. Now, let's begin
with the sky first. So for this sky, first I'm
picking up a beautiful, you know, bluish violet color. So you can mix in a little
bit of your salient blue with violet and a little
of white to get this pistil bluish violet tone. I'm beginning with this
color at the top first, and then I'll move on
to blues and pinks. So I'm done adding in this
light tone at the top. We are going ahead
with her day view, not an evening view this time. Now, next, I'm picking up a beautiful pastel blue
kind of a color. So for a pastel blue color, you can simply mix in white
along with your blue, whichever shade of blue
you want to go ahead with. But you can see this
is almost, you know, close to a white
tone of blue that we are using a very
light, bright color. Now, next, I'm going
to move on to pink. Now I'm going ahead
with the pastel pink, which is already in my palette. Now, if in case you do
not have a pastel pink, you can simply mix in
carmine or a rose color or a quin akinin rose or any pink tone with a little bit of white and
get a pastel pink color. In case if you want to make
it a little more pastel pink, you can even add a little
hint of yellow to it. You'll get a beautiful
past peachih pink tone. So I'm done with a
base layer of the sky. Now, let's begin adding in
the details into the sky. So I'm going ahead with
this dark violet color. Now I already have
the paints from the previous class
project on my palette. I have not cleaned my palette. Now Gah is a water based medium, so you can easily re wet these paints and
reuse them again. So I'm going ahead
with one tone darker than the base layer violet
that we have added. And I'm going to add in a lot of cloud dramatic
details this time. So I'm going ahead
with the clouds first. Now, for the Clouds,
I'm going to shift into my mop brush, and I'm going to go ahead with a very dry
kind of a detail. I have cleaned my brush, dabbed off all the excess water. Picking up little pigment and beginning to add in
simple cloud strokes. So in case if you feel
that there is excess, you know, pigment on
your brush, also, make sure to dab it so
that you do not have, you know, a lot
of patchy effect. I'm going ahead
with ale dry kind of a detail this time.
I'm first adding in. You can see I've hold
my brush a little far from the bristle so that I can get in these loose strokes. We're going to blend these
with the other tones as well. Don't worry, when the entire
sky will come together, you'll be able to see the
pretty view this has. Now, next, I'm going to pick up a little medium tone
of the blue color. Again, this is one layer darker
than the base layer blue. And with the same more brush, I'm just using the
tip of the brush and adding in simple
cloud details. Now, as discussed in the technique section
of the Clouds part, you can even use in
a filbert brush or a round brush for adding
in all of these details. It's not necessary to have
the exact same brush. It's more about understanding
the technique and ways of using the available tools with you to achieve in
similar details. Now, you can see very
lightly I'm adding in cloud details with
the blue color as well. Now, over the pink as well, I'm just going ahead
with loose details of a very light tone of the blue and just blending in a little with the help
of a damp brush. So we are done with
the sky pretty simple. You can see how
beautiful it is turned out with simple stroke,
simple color combination. Now let's add in the
base layer of the field. For that, I'm first
going to pick up the yellow ocher color
and add in here. Now, again, as I
told you on day one, my paper is a little rough green despite being
cold pressed. So because of that, it takes me a little extra time to blend in because of the
greens of the paper, which does not, you know, make the paints run smoothly. But as I told you, the after result of it is
pretty beautiful. That is the reason I like the texture and love
working with this texture. So I've added in
light green also now. Now moving on to a
sap green color. Now again, you don't
need the same shades. You can go ahead
with simple yellow c and a light green
and a dark green. Now, of course, the
colors will vary accordingly as they are
available in your palette, so you can simply alter the colors as per
your availability. They need not be the exact
same shades as mine. It's more about understanding the concept and understanding the technique rather
than having in the exact same shades
of the defined colors. Now, at the bottom,
I'm just going to pick up a little black and
blend in with the green, giving in a very dark effect. At the bottom, we're
going to add in loose grass strokes as well and give in little
floral details as well. At the top also here, just adding in a little
darker and blending in well. So we're almost ready with
the base layer of our field. On top of this, we'll add in the details once it
dries out completely. Now I'm mixing in my sap green with a little hint of black, creating in a further
more darker green color, and I'm going to begin adding in the bush that
we're going to add in that is going to be a little at the top of
the horizon line. Now, for this, I'm going
to add in different tones. So I've added such a
dark tone of green. Now picking up a little
lighter tone and blending in with the
darker tone going ahead. And as I go further, I'll again pick up
taker one and add it at the bottom space and blend all of these colors
well with each other. Now, on top of it, I'm just going ahead with the
tip of my brush, giving in little details. You can see I'm just using
a very smaller size brush. This is size, one round
brush that I'm using. It has a pointed tip, and using the green color at the top, I'm just adding simple
strokes to define and given more detailed view to the bush that
we are adding in. So just using the tip and creating in simple leaf
strokes at the top. Now at the bottom
here, I'm going to blend this space into
the bottom field space. So just taking it a little
more towards the right side. Now at the bottom, using
in a bigger size brush. I've just used the damp brush and blending it into
the pace layer, merging the bush area, as well as the field space, giving it a beautiful
blended view so that it does not look as if it's
separated or out of the view. You can see just
using a dam bruh, blending the bottom edge of that bush with
the field colors, how easily we could blend
in and get in the effect. Now make sure that that
light green space that we have in the field is
visible as it can be seen in my painting
because it gives in that light effect of the
daylight onto the field as well. Now at the top here on the
left side of the horizon line, I'm just going to go ahead add in a very tiny mountain range, or you can go ahead
with tiny bush detail. I'll go ahead with tiny bush
and not a mountain range. But you can see it's very tiny and just a
very small detail, and I'm just going
to take it till the green space that we have
added on the right side. So just from behind the bush, blended this space
and created in very fine details on the
left side, as you can see. For the left side, I've majorly
used in the dark color. It's almost equal to a black
color that I've used in on the left side and
got it just till the center point where the
green line was ending in. That is it. We are done with the details
on the horizon line. Now, next, let's go ahead, add in the details
into the field. So first, you need
to be sure that your field is completely dried. I'm just lending the
bottom black again. Till then, let's discuss
further about the field. Now next, for adding in the
grass details in the field, you can either use a green color or a lighter green
color as well. I'm going to go ahead with
a very light green color. You can see my green is
going to be very light. I'm going to use a mix of light and dark
green strokes both. So first, I'm picking up
the light screen color, and I'm just going to go ahead add in simple grass strokes. It's not going to cover
the entire field. It will just be reaching
half of the field space. So you can see the
strokes that I'm using are very fine and small, as well as the details that I'm adding are of a very
light green color, perfectly visible even on the dark black tone
at the base layer. So this property of quash
that we had discussed, you can see how well it works. Even the lighter
tones are visible on the darker color because of the opacity of the
pines that they hold. When it comes to watercolor, you will not get this opacity, hence the lighter tones
will not be visible on the darker colors when
it comes to watercolor. With acrylics, the same thing applies because they
are opaque medium. So of course, the lighter tones will be visible on
the taker ones. So I've just added randomly a few grass strokes with
a very light green color. I mixed in a little white
as well to my green to get this beautiful
light tone of the green, which is perfectly visible
on the taker tins. Now to this, we are
going to add in very simple wild
flower details with the lilac color of the
sky that we have in. I'm just going ahead with a little more stroke
randomly here and there, creating in more
depth into the field. So now I'm going ahead with a little violet tint at first. Then I'll shift in to a much more lighter
color than this, and then a further lighter tint. So that way, we'll get the
perfect wildflower detail having in different color
variations of the violet color. To this color that I
have on my palette, I'm going to keep on adding white and creating
in lighter tints. Now, very randomly, you can see, I'm just having the
tip of my brush to give in simple wild
flower details, no detail flow, no
technique to follow. Now somewhere at places, I'm just going to dab in the
tip of my brush and create a cluster of these
wild flowers together. At the bottom here as well, I'm just going to go ahead
and dab in these paints. You can see how
beautiful everything is turning out to be
very simple techniques, very easy details, and it creates so much depth
into your painting, giving in that realistic view. Now, to this same violet color, I'm adding in a little bit of the white to create one tone lighter than the base
lier violet flowers that we've already added. Now, my palette already has
the lighter tones as well. But since I already have
the violet on my palette, I'm adding in white so that
I do not waste the color. Now I'm going to go ahead with
this lighter color detail. Now, some of them will be
overlapping the darker ones, and some of them will be apart from the darker ones
that we've added. That way, you will get
the perfect wild flow look into our field that
we're trying to paint here. Now, going ahead with a further lighter tint for the next layer, and you can see how beautiful
everything is turning out. Go ahead with, you know, three to four color
variations of the violet color that will give in the realistic
view to your feel. Make sure some of them are
overlapping each other, and some of them
are distinctly so that you have all different
colors of file flowers, as well as a cluster of all different color ille
flowers together as well. Now, I'm going to
randomly create a cluster of this lighter color and dab them closer
to each other. Now, next, I'm just going to pick up a darker green color, adding some darker
green strokes and some, you know, bush details in
through the field as well. We're almost through
the class project just another minute or two, and we'll be ready to peel off the masking tape and
see a final painting. So now with the darker green, I'm just adding in simple
details into the field, just giving in some
darker green strokes, randomly on the
lighter green and pulling out some bush
details as well. So I'm not going ahead with
much darker green details. You can see just as highlighting strokes that I've
added in randomly. This last stroke here seems a little, you know, imbalanced. So I'm just going
to go ahead and correct it quickly
with the help of the lighter green tin and just add in some lighter
green highlights as well on top of it. Now, again, just giving in
some lighter green highlights, and then we're almost
through this class project. I'll just give in
one bush detail, big one on the right side, reaching till the bush of the horizon line that
we've added in. So just some simple strokes
here, as you can see, pulling it till the top space, giving in that
longer bush detail, overlapping onto the bush area. So that is it. You can see
just on the right side, those light details
moving on the dark color, giving in the perfect view. Let's remove in the masking tape and see a final painting. Make sure to peel off the masking tape
against the paper so that you do not tear off your edges and do not
lift up the colors. Also make sure that
your edges are completely dried before
you lift up the colors. Otherwise, it may again
tear off the page. So I'm done removing
in the masking tape. Now, here's a close view of
our painting from Day two, a beautiful daytime field with simple wild flower details. I hope you Kays enjoyed painting this beautiful painting
with me for day two. I will see you Kays into the
Day three class project. Make sure to upload your class projects if
you paint along with me. Hope to see them soon into
the class project section.
6. Day 3 - Clear Blue Sky: Hello, everyone. Welcome
back to Day three of the 30 days of ash challenge. Let's begin with the
basic pencil sketch. I'm just going to mark
out the horizon line, and that's the
only pencil sketch that you need in for
today's class project. Let's begin with the sky first. It's going to be a pretty
sunny view kind of sky, a clear blue sky that
we'll be painting with a lot of cloud details
that we'll go ahead with. So first, I'm picking
up this sky blue color. Now, in case if you
do not have this, you can simply mix in white with your cillin blue and you'll
get a similar looking tone. I'm first going to begin with this bold sky blue
color at the top. Now, next, I'm going to shift
into a royal blue color. Now again, if you do not
have a royal blue color, you can just add a
very small hint of the ultramarine blue to your white and get
a similar tone. I'm going to blend
both of these colors. Then at the bottom,
I'm further going to lighten up the sky
color creating in a bright sunny sky with the help of a
further lighter tone. Now, again, as I told you, my palette already has
ample amount of blue tones, including the lightest
pastel shades, as well as the
darkest blue needed. So I may directly pick
them up from my palette, but you can always mix lighter tones with
the help of white. So here, I've added white directly because my
brush already has blue. So when I keep plending, the blue from my blush will keep on adding into the white and
create in that light view. Now, closer to the horizon line, keep the color light only
because we'll be adding in cloud details with a very light
gray hint and blue color. So we want the cloud
strokes to stand out. So I'm just adding in very little highlight of
the blue on the white. You can see it's
a very light tone that we've created here. So now I have to wait for my past layer of the sky to dry. Until then, I'm just going to go ahead and paint in
a simple field. On the horizon line,
we're going to have in a lot of
pine tree details, creating in highlights this
time on the pine tree. So the highlight of this class is basically the cloud details, as well as the highlights
that we create on the pine trees to given that
effect of the sunny light. Now, first, I've picked up the yellow co color in the center, and now I will shift
on to the greens. And just like the previous
class project, as I told you, you can use whichever greens are available in your palette. You can always create lighter and darker tones of greens with the help of black, white, brown and blue
and yellow as well. So if you do not have
a lighter yellow, you can either mix
white or yellow to your regular green color and get in a similar looking
lighter green tone. And in case if you do not
have a darker green color, you can add black or brown to your basic green and
get in darker tones. So I've added a very big patch
of the yellow cer color, majorly in the center
as you can see. And now from the edges,
I'm going to pick up the dark green color and blend in with this yellow cer color. So you can see from the edges, I've pulled out the green color. Now at this point, if you see the blending seems
very rough and uneven, we are going to go
ahead, blend this. So basically, majorly in the
center space is what I want the yellow occ glowing space trying to show in the
sunlight falling in there. So just going ahead with simple strokes in the Now, for the picking up one more darker tint of the green color, adding in from the edges. Now, you will see that this
darker green is applied in lesser space as compared to the previous green
layer that we applied. So automatically, you will have three color tones visible
in your field space, one being the yellow occur, one being the green that we went ahead with and one is this
darkest streen color. So that is eight.
Now let's go ahead, add in the cloud
details into the sky. Now my sky is dried, so I'm going ahead
with the details. In case if your
sky is not dried, then wait for it to
dry out completely, then move ahead further. Now, for the clouds,
I'm going to go ahead with the mop brush. I am picking up a very light
gray tint from my palette. Now, in case if you
do not have it, you can simply mix in white, a little hint of blue, and a very little tint
of the black color. Black has to be just
a pinpoint color, and you will get this grayish
color into your palette. And using this graysh color, I'm going to begin adding in the first layer of the clouds. Using the mop brush, I'm just going ahead,
using in the tip, adding in the half s strokes that we discussed in
the technique section. I'm adding them
closer to each other. On top of this, I'm
going to give in details with the white
again as well. All right. Now, again, if you feel
that the color is dark, you can add in a little white to it and lighten up
the color further. So I'm just lightening
it up with the help of a little bit of white and
adding in further strokes. So you can see we've created such a big huge bunch
of the gray cloud. Now I'm picking up a
little bit of the white, mixed it with a little hint
of blue and going ahead with a little overlaying
onto these gray clouds. At places where I feel that
the color was too dark, I'm just going ahead
with white on top of it. You can see it automatically
lightens up the color, as well as gives in
ale blended view with the base layer
because you know the base was almost
a white color with a little hint of the
blue that we had added. So I've just blended a little of the darker hints with
the help of white, and you can see how
it has turned out. Now, again, going ahead
with pure white at the top on the dark blue
color and adding in details. Now, you can see I'm going with rough edge like a
dry brush kind of a stop for the cloud
with the white and not blending in it with the
blue color base layer. Just adding in a little
more highlight of the whites onto these
gray spaces as well. At the top, I just went
ahead with the white in a little dry bras stroke
giving in those details. Now, I've picked up a little of the base layer blue color
that we used at the top, mixed in with a little
hint of the white, and I'm going to add
in some blue strokes in between these gray
strokes as well, so as to give in the
background sky effect visible in between
these clouds as well. Now we're almost
the sky as well. Now, the detail left
to be add is going to be the pine trees at
the horizon line. So you can see how easily
swift ane two to 3 minutes, you could create such easy
clouds into your painting, as well as, you know, with the help of overlay, you can always
correct your mistakes with ache and get in
the details right. Now, let's shift into
a black color and a smaller size brush for
adding in the pine trees. So I'm going to begin
adding in the pine trees in different heights and
different methods. The simple methods also
that we've discussed, So first, using in
the green color. I'm adding one pine
tree here on the left. On top of it, I'm going to add in highlights with the
black color later on. So just going ahead with
the base lier here. So in the background, you have that little green view visible. So what I'm going to do is, I'm first going to add in little details with
tones of green, some lighter greens and
some darker greens. Then going to shift
into the black color. And then using in the
yellow ocher color. I'm going to create a little
highlighting spots at a few places onto this detail that we add at the horizon line. As we move ahead further, I will keep discussing and
sharing all of it with you. Now, next, I'm going to shift
into a dark green color. And first, I'm going to create in the entire bottom space, fill it completely with this
dark green color quickly. And then on top of this,
I will keep adding in the detailed pine tree wherever I wish to
at certain spaces. I'm just going to pull out those strokes that we discussed in the technique section
of the pine trees to give in as the
filling element, filling in the spaces quickly. This is not a black
color that I've used. It's a very dark, bold green
color that I've added, and just at the bottom given in a little
hint of the black. Now I'm going to go
ahead on top of this and keep giving in the
details of the pine trees. I've defined the
horizon line well, giving in the
perfect crisp line. Now I'm going to begin pulling
out strokes from here. Now, again, you can
see since my paper and my book is
movable and tateable, it becomes so easy
to just rotate, so as to get in the
details fine and right and easy to adjust as
per my hand movements. Now on top of it, let's begin
pulling out the pine trees. First, I'm just
going to pull out simple strokes that
we have discussed, and then in between these, at certain spots, I will keep adding in the
detailed pine tree. Now, you can see I'm wearing the heights of these throughout, not keeping them of
the same height. Now in between here, I'm adding
in a detailed pine tree, just pulled out a
long stroke and given the detail of the
foliage for the pine tree. We are going to add more
of it. Don't worry. It was just one that I added while adding in these
strokes as well. Now, on top of this
green as well, I'm just going ahead
with the black color, adding in an overlayer. Automatically, you will have
little green highlights in the background visible
and on top of it, you have the black main
pine tree visible. Yes. Now, quickly, in the remaining spaces
going to go ahead with the last few pine trees
that we have to add in. I'm using a size one
pointed tip brush, so I'm able to add in
these fine details with this one brush itself. Now, after this, we'll be left to add in the
highlights with the yellow cer color
that I want to create onto a few
of the pine trees. Before that, I'll quickly add
in a few more pine trees. So I've picked up the
yellow cor color. Now I'm going to add in the highlight onto
this pine tree. So just little spots on the
pine tree that I'm adding in, you can see, just using the yellow ocher
color and dabbing in. Now onto some of these
strokes as well, just adding in overlaying
of the yellow cer color. The important thing here
while doing this is to make sure that your
black layer is tried, and your yellow co
color is bold enough. Only then it will be
visible on the black color. If your color will
be too transparent, it will not be visible
on the black color, as black is a dark tone. So it's very important when
you want an opaque finish. You need to make sure that
your colors are opaque and in the right
consistency for overeering. Now randomly, I'm adding
in a few more pine trees. So you can see how
beautiful effect the highlights of the
yellow cer color creates. It just gives in that
glowing spaces and the sunlight falling onto
the pine trees as well, giving in more depth
to your painting. Now I have again
added one more tree with a light green
color on top of it. I'm going to give in little
darker strokes again. So you'll have that
little light green hints visible in this one
pine tree as well. This is how I have varied
my pine trees this time with a little hints of green on the left of the pine trees, and towards the right, you will majorly see more of the highlights of the
yellow color falling in, creating in that sunlight
effect, going ah. So very simple details, very simple highlights, but you can see the
effect of these. Now, using the green, I'm just giving little at the base layer where we had used
in the black color to give in that greenish effect. So just dabbing in little green, nding it with the
base layer black that we used a little
at the bottom. So we are almost through
the class project. I love how this
class project turned out in just under 15 minutes. Now, let's remove
in the masking tape and see our final painting. Make sure that your edges are completely dried before
you begin peeling off the masking tape and always peel off the
masking tape from, you know, against the paper so that it does not
tear off your edges. So here's our final painting, a closer view painting
from D three. The highlights of the yellow
cer and the light green on the pine trees is creating in the perfect effect
into this painting. I hope you guys enjoy painting this beautiful debut
with me today. I will see you guys soon into
the Day four class project.
7. Day 4 - Street Lights : Hello, everyone. Welcome back to Day four off the 30 days of ash. Let's begin in with
the sky directly. There is no pencil
sketch for this class. We are directly going to paint a beautiful bold sky with some street light
details into this. So I'm first beginning in
with a very dark blue color. It's almost like
an indico color. You do not have a dark blue, you can simply just mix
in a little hint of black to your blue and
get a darkish blue color. So I haven't used the
indigo color at the top. This is a very dark
blue in my palette. On top of this, I'm going
to use a little hint of the indico to darken
up at the top space. Now moving downwards, I'm going to keep lightening
up the color. So I'm picking up a
light blue tone now. So if you do not
have a light blue, you can simply mix in a little hint of the
yellow to your sorry, white to your blue and
get a light blue color. So this is a beautiful
sky blue kind of color that I have in here. Now blended both of
these colors well. Now picking up white
at the bottom. So automatically, the blue from the top will glide a
little into the white, and I will have that very
light blue tone here. So you can see I've
automatically got a very light blue effect
because of the blue that gets lifted on the brush
and then gets blended in with the white color
that we added in. Now, next, let's
go ahead and pick up the dark blue color
for the top space. Now you can either use black or you can go ahead
with an indico color. Now since I already
have the blue color. Have added a little
hint of black first, and now I'm just going to blend it with the
blue at the top. So you will see automatically the indigo color getting
formed in there. So just a little dark highlight
at the top that we need, trying to show in that
night sky coming in. Now, let's go ahead
with the rest of the sky at the bottom, where we are going to have
in the shades of sunset, which are going to be yellow, orange and pink tones. Now, I had last
added white there, so I have blended the
yellow with the white. That is the reason
I used white and not a very light
blue shade there because when I blend
yellow and blue, you get a green color,
but because of the white, you can see automatically we do not have any greens
formed in there. Now, I've picked up a beautiful, more bold yellow color,
a bright yellow color. And now at the bottom, lastly, I'm going to go ahead again with a little hint of the blue only. So just a little blue. But again, while
blending in here, be careful that you'd
not form in greens. In case if you feel the
greens are coming in, use white for blending the
yellow and the blues together. But since my blue is
a little pastil blue, I know I will not be getting
in major green out there. So that is the reason I've gone ahead and blended
in very carefully. So we are done
with the past lier of ky. Now we need to go ahead and paint in the
clouds into ky. For that, I'm going to go ahead
first with this mop brush. Now, in the technique section
I have already discussed. You can even use a round brush if you do not have a mop brush. Now, first, I've picked
up a pastil pink color, and I'm going to begin adding in some highlights
onto the blue tone. Now I'm going with a little dry brush kind of
texture this time. So I've not tipped
my brush into water. I have not added much
water to the paint. Now automatically, because of the pink you can see
and the basier blue, it's automatically
giving in a violet tint. That is because blue and pink mixed together gives
you a violet color. Now, just moving ahead, adding in a lot
of cloud details. So you will see basically
we are going to get in a lot of cloud
details into the sky because our entire
painting is focused onto these clouds and the sello heads that
we'll be adding in. Now, see, there is color that gets lifted every time
you begin applying in. So after a small space, make sure to clean your brush and then pick up fresh color. Otherwise, the color
that gets lifted will keep on applying on
the rest of the spaces, and you will not
get the bold effect of the colors that you need in. So in my case, you can see the dark blue color was
lifted on my brush. And with the pink, it would have got applied as a
darker tint only. And I would not get this
light effect coming in. Now, I will pick up the further lighter pink color
and just blend in a little here and create
little highlighting space on the top right space here. So I'm first just adding in
little of the highlight, and now I'm just going to
drag it from the edge and try to show it blended in
with the base a little. Now for the next set of clouds, I'm going to pick up a
little of the violet color. To this, I'm going to add in a little hint of
the black color. A very little tiny drop
that you need to add in. So I'm just picking the color that's already on my palette. So you'll automatically get
a grayish violet color. Now, using this in a little
diluted consistency, I'm going to begin adding
in the next set of clouds of this color
onto the yellow tones. Alright, now, make sure
again, your brush is clean, damp and dry because
we're going to go with a little dry
kind of strokes. If you will have excess pigment or your brush will
have a lot of water, the colors will
spread out a lot, and you will not
be able to achieve in the shapes that you need. So for that, you
need to maintain in the consistency of your
brush and the paints both. So just going ahead with
simple strokes, you can see, I'm just using the
tip of my brush and dabbing randomly at places, just going with random
shapes and structures, giving in that depth
of cloud detail. So with the same pilot color, I'm adding in most of the
clouds at the bottom space. We're going to further
add in more clouds. Now, you may be
wondering we have not gone ahead with a
lot of clouds on the entire left side because it's going to
be majorly covered up with a lot of leaves of black and green color
coming ahead further. So I'm majorly focusing with
the clouds on the right and the c space where they're
actually going to be visible. Now I'm just going to
go ahead with little of these bluish grayish blue sorry, the grayish violet clouds
at the top as bell. Now, let's go ahead, add in a little here on the left side. Very little, as I told you, the entire left space
will majorly get covered up with the silhot that
we'll be adding in. Now, next, using in a little
of the bold orange color. I'm going to add in
little highlights into the sky creating in a
beautiful sunset view. So at the top, we
have the dark sats trying to show the
night view coming in. So along with that, trying to show the setting
sun view as well. Now, make sure you
use a clean brush. Go with a very
gentle, soft hand. Do not apply a lot of pressure. Go very light handedly
and just drop in little orange highlights
in between the clouds, trying to show in that
sunset effect coming in. If you need, you
can use a little yellow to blend these
if you feel that, you know, the colors
are not blending in easily out for you. On the blues and the violets go more carefully
with the orange. Otherwise, they may
create in muddy tones. So now using a little of
the yellowish orange color, you can see I'm just
creating more highlights on the orange so that it looks
a little blended again. A little light color highlight that I'm adding again
here basically. So that is it for
our entire sky. Now next, what we
are going to go ahead with is our silo hate. We've gone ahead with
simple clouds here. I know at this point it
may look a little messy, but as soon as you add in the silo hate to
this entire sky, you will get to know how
beautiful everything turns out. So for that first, I'm going
to use this silt brush. Now, I have discussed
this technique also in the technique section, wherein you can quickly add in the bush detail as a
filler element first, and then to this, we'll keep adding in more of
the detailed look. So again, here you
can see I'm going ahead with a very
bold black color. My brush is damp and dry. The color also does not
have a lot of water. So you can see it's coming
in the tribra stroke, giving in that foliage detail. So we're going to
have little foliage on the bottom right side and majorly onto the
entire left side that we are going to give
in the foliage detail. Now, next using in my
smallest size round brush. I'm going ahead, adding in the detailed leaf detail to this bush that we added
first on the left side. So I'm using my size
one round brush, and you can see just
with the tip I'm dabbing in and giving
in simple leaf detail, creating in that detailed
look on the outside of this entire fold space
that we've created. So these are simple tips
and tricks that you can use to give in detailed
look to your painting. Now I'm going to
randomly pull out some branches as well
and some smaller branches from the
bigger branches and add in little leaf details as well as leave in some
hanging raw branches as well. Now, you can see just simple
details on top of that bush, gives in so much
more detailed view. If you would have
not added in that, you know, dry brush technique
with the black first, it would be very difficult to achieve this realistic look, as well as fill in
the entire space with detailed foliage. So it's always easy to give in that background detail first and then go ahead
with detailed look on the top because
it covers up half of your space and also gives
you that realistic view, creating in that blurry
effect in the background. Now, on the left
side, I'm going to go ahead with a leafy
kind of a detail. So there we're not going to
be dabbing in any of the, you know, foliage detail. I'm just going to go ahead, keep adding in leaves. So first, I've picked
up the black color, and with that, I'm going to go ahead and keep adding
leaves randomly. Now, of course,
the placement and the movement of the leaves can
be different for each one. So it may be different, but, you know, it's a simple
technique that I'm using, just pigging in with
a pointed edge, dabbing the belly of my brush, and again giving it a lift and using in that pointed tape. So my brush has a pointed tip. This is the size
five round brush, but since it has a pointed tip, it's helping me add in
all of the details just with one brush without
altering in between brushes. Also, with the brush itself, you can learn to control
the length of the leaves or the width of the leaves
that you want to add in. Now, on top of
this, we are going to go ahead with
green leaves as well. So as discussed, gouache, being an opaque medium, even the lighter color will be visible on the darker tone. So even the green tones will be visible on this dark
black color as well. So first, I'm just adding
in leaves with this color, and then we'll add in a
few with the green tone. And then lastly,
we'll be left to add in the street light
details into this painting. Now randomly, I've pulled out some branches and added
in the leaf details, and then randomly I've pulled out some smaller leaves as well. All with one brush. Now next, let's wait for this to try and then add in
the green leaves. Now, my black layer
is completely dried, and I'm going to begin
adding in the green leaves. For that, I'm picking
up the sap green color. You can go ahead
with any green of your choice that's
available in your palette. And on top of it, I'm just going to go ahead with
leaves like these. Now, one thing that
you need to be sure is that your green color is
in the right consistency. It shouldn't have
a lot of water. Otherwise, it will not
give in that opaque look. Also, your black layer needs
to be completely dried. Otherwise, you will begin
lifting up the black color, and the black and the green
will begin to blend into each other instead of giving
you distinctive views. So now you can see even
the green is visible on the black because of the opacity of this medium called ash. Now, very randomly,
somewhere I'm going ahead with
green leaves simply, and somewhere I'm going ahead with overlapping of
the green leaves. And at places I'm
just pulling out simple branches using
in the tip of my brush. Now, next, I'm
just going to pick up a little of the
yellow occur color, and I'm just going to add in a little highlight here
and there randomly. So I'm just going to mix it with a little hint of the
black, not much. I'm just going to create one or two highlighting
leaves out here. Already trying to show in that sunset effect falling
onto these leaves. And, you know, because of that, that little yellow highlight
falling onto the leaves. So that is it for the details
on the left side as well. Now let's begin adding in
the last leg of details. That's the street light effect. For that first, I'm going to pick up a little of
the black color, add in two lines to act in as the wire for holding
in those street lines. So I've shifted into my
pointed tip size one bruh. Make sure you use a fine
brush to add in this detail. And I'm just going
to pull out two of these street light lines. All right. Now, make
sure that you pull out a thin line using in
a smaller size brush. Go in very carefully so that you do not mess up with
these details. Now let's begin adding in
the street light detail. For that, first, I'm going
to pick up this gray color. You need to mix in a
very little hint of black to your white to get
in this grayish color. First, I'm just going
to mark the outline of the lamps that we
are going to add in. And then to the center of this, we are going to use in
the shades of yellow, orange and white and
given the light detail. So I've just marked
out the outside using in the gray tones. Now, first, picking
up yellow color, to add in as the
base layer first. So into the center of this, I'm just adding in
the yellow color. You can see the entire
space has got covered up. Now on top of it, I've
gone ahead with white. Automatically, when the white is blending with the
basely are yellow, there is a very light
yellow tint that gets formed giving in that perfect light effect that
we need in here. Now, until the white settles in, I'm going to use in the
black color and connect the top line along with these bulbs hanging
that we're showing in. So I'm just going to create in a plug like scene here trying to show in the handle through which it is all connected together. Now, on the outline, you can see I'm just giving
very fine black outline to given that three D effect to these bulbs
that we're adding, trying to show in
that street light. You can see I've not given in the outline to the entire space, just a little on the
top and a little on the bottom to given
that dimension effect. Now, my white is completely
dried, and on top of it, I'm just going to pick up little of the yellowish
orange color and create little more highlight
of the light effect here. Now, it's going to
be very little, not much in detail. So I've dropped in the orange
color on the outside edges. Now using in white and using the smaller
size brush again, I'm just going to
blend these into the white space at the bottom. So automatically
only on the edges, you will see the orange
highlights coming in. If you want, you can
use a damp brush or you can pick up a little
of the white and blend in. Now, using in the black, I'm just defining the
edge wherever needed, giving in that detailed
three D effect to the light that
we've added in. Now, again, I've picked
up a bold orange color, just adding a little
highlight at the top. And again, on the top in
the center that I'm adding, a little orange highlight, trying to show in that bulb
warmth effect coming in. Again, you can blend these with the help of white
and the bas lier. So just a little more dark
orange highlight at the top. So we went ahead with four layers for
creating in the bulb, first, a basier yellow, then baser white, then a
little yellowish orange color, and then the orangeish
dark tint giving in that highlighting effect. And then using in the black, defining the edges of these bulb that we've
created to give that three D effect
so that it looks distinctly from the sky layer yellow that we already have. So let's remove in
the masking tape and see a final painting. You can see now the sky looks complete with the silo
it that we've added and gives in so much
beautiful view to the entire simple landscape
that we've gone ahead with. So here's a final
painting for Day four. You can see the highlights of the green and
the yellow ck on the leaves and the beautiful street lights that
we've given in. Thank you so much for
joining me into this class and make sure to upload in your class projects if
you're painting along. And if you like this class, make sure to drop a
review so that it can help me reach
maximum students. Thank you so much once
again for joining in.
8. Day 5 - Pastel Seascape: Hello, everyone. Welcome back to day five of the 30 days of ash. Today, we are going
to go ahead and paint in a beautiful pastil sea scape. So just pinning in with
the pencil sketch, marking up the horizon line for the sky and the sea distinction. Alright, so the top is
going to be the sky, and the bottom will be the sea. On top of the sky, we are going to have in simple
mountain range. Alright, so the horizon line is a little below the center
line as you can see. So for the pastel colors, it's going to be blue with the
blends of yellow and pink. So first, we'll begin
painting in the sky. The sea is going to be a
reflection of the sky. And we'll add in a
simple sunset view as well to this pastel
landscape that we're painting. So I first picked up
a pastel blue color, which is already in my palette. It's a grayish pastel blue. Now, you can create
a similar color. You can use your cerealin blue, white, and a little
pinch of black. The black has to be
just the minute dot to give in that grayish
effect to your blue. The white will be
of the major ratio, and then a little hint
of the cerealin blue, giving in this grayish blue
color that you need in. Next, blending in the
pastal pink color with this grayish blue color. Now, as I told you, my paper
is a rough green paper, so it takes me a little time at, you know, blending at times. But as I told you, I love how the outcome comes in after the
entire painting, because of the
texture of the paper, the effect that the
entire painting has. So, absolutely, if you're
using a soft green paper, it would be easy for
you to blend in. Now, using the same
grayish blue color, blending in at the horizon line again with the pink color. So the mountain space, I've kept it empty. A little if the color
goes in, it's okay, because the mountain
is going to be of the taker color as
compared to sky color. Now, with the same colors, I'm going to go ahead and
paint in a sea as well, which is going to be of the same grayish blue and the pastil pink
color that we've added. Now, here, I'll define
the horizon line well so that we do not run
into the mountain range. Even if we do run the mountain at the horizon line will
be of a dark color, which will cover up everything. But still trying
to be careful is better rather than
having a mess later on. So after the grayish blue, again, went ahead
with the pink color. And at the bottom again, I'm just going to
add in a little of the grayish blue
color if needed, or you can directly add the grayish blue later on while adding in
the waves as well. I'm just going to add
in a little highlight and keep in right now itself. So same way you can
see it's looking exactly a reflection of the
sky that we've painted, the same color, same
blending happening in here. Now, next, I'm going to go ahead with the yellow
color and begin creating in the cloud detail
highlight into our sky. So I'm going to begin using in a beautiful, bright
yellow color. Now, you can go ahead and use in a yellowish orange
color as well, and create in these highlights. So using this filbert brush, I'm just dropping in
the cloud details, creating in little highlights with this yellowish
orange color. I'm just using in the
tip of the brush. Again, adding in these clouds, also, I've discussed in
the technique section, you can use a filbard brush, round brush or a mop brush, whichever is available with you. Each kind of brush will do
the same work that you need. Just you technique of
using in the brush is a little different because of the bristles of the
brush that matter. Now, using in a little of
the paste yellow color with this yellowish orange
color that we've added and adding in
more highlights. When you add in the
yellow highlights onto the top of the blue color, go very light handedly, because if the blue color of the baser will get activated, you may get in greenish tones, which is not what we need here. Now again, lifting
in a little bit of the pastel pink color
and going to blend in with the yellows and try to give in that soft blended
effect into the sky. If you want, you can
skip this step and let your sky have that
bold, sharp edges. But I like a little blended look with my bas lier majorly, so I'm just going to use in the basier pink and
blend these a little. Now, using in the base
layer bluish gray color, I'm going to add in little
dark highlights on top of the, you know, bluish color
that we have in. So just one color tone dark. Now, for that dark tone, again, you can add in a little
more of the blue and black to the same mix
that you used in. Now, in the same way using the same yellowish orange color, I'm going to create a
little highlighting part into the water area as well because a sea is a reflection of the
sky as we discussed. So just blending in a
little with the pink, giving in those little
yellow highlights, very little, not much
because it's not, you know, an exact same thing. It's just the reflection that
we're trying to show in. So wherever in the sky, you have the yellow space
at those spaces in the sea, you add in the reflection for the sky cloud falling into
the sea area as well. Now, for the mountain range, I'm going ahead
with a gray color. Now, I already have a
dark gray in my palette. You can simply mix
in black, white, and a little hint of the
blue to get a gray tint. Make sure you're not
using the pain screen or the black color here for the
first range of mountain. Go ahead with a gray tint only. So I've added the top line of the mountain with
this dark gray color. Now I'm going to lighten
this up further, so I'm just going to
pick up a little hint of white or the blue color
that we used in the sky, and I'm going to blend it
with this gray further so that it automatically
creates a lighter tint. You can see how even
I created my darker gray into a lighter gray with the help of the
pastal blue color, which is a mix of the
blue and the white only. So just created in the first
range of the mountain here, giving in that perfect
background effect. So my first layer of mountain
is completely dried, and now I'm going to go
ahead with the black color and add in little brush
detail on the horizon line. So just using in the
tip of my brush, I'm first defining
the top space. I'm just dabbing in
using my tip and creating in the detailed
look at the top. And then we are going to fill in the entire bottom space
completely with the black color. If you want, you can even use a green color here and
not a black color. But I'm going ahead with
a mix of the black first. If needed, I'll add in little highlights with
the green later on. So you can see I've
added in a little hint of the green also now moving
towards the right side. And I just created the
entire top space first, and now I'm adding in the complete dark bold color
till the horizon line, giving in the filling effect. And towards the right side, you can see I covered up
the entire mountain range of the background
that we created. And towards the left side, I'm going to go with a very small height to
these details that we're adding so that the background mountain
range is visible here. Now, as I told you, if you want, you can only go ahead
with the black color here for this bush detail
on the horizon line or a mix of the green
and the black altering between colors creating
and highlighting effects. Now I'm filling with the black
color at the bottom again, so you can see I've used
a mix of green and black, and now you can see the
difference in the green and the black as soon as I've
blended it with the black. I'm going to define
the horizon line well. It's not a straight line I know. Now, just defining
my horizon line first with the black
color completely. So at the top, you can see
I have the green effect, giving in that bush detail
on the horizon line, background mountain
range of the gray color. And now using in
the black color, defining it, blending in with the green that we've created. Now, you can see since my
paper is on a sketchbook, my sketch book can be moved and easily adjusted according
to my hand movement, giving me the freedom
to add in details according to the convenient
of my hand movements. Now, again, picked
up a little of the green and blending
in the black that I added in with the green so that it has that perfect effect. I recommend using
green a little bit, if possible, in case if
you do not, you know, want to give it a flat lope, the green adds in that greenery
effect to your painting, giving in, you know,
a lively effect. Now, using the dark
bluish gray color, I'm adding in
little wave effect. Now, these waves also, we've discussed in the technique
section already. That is the last technique
section, if you visit. I've discussed how you
can add in simple waves. Now this blue color has
to be just one layer. Now, I already have this
one tone darker color in my palette because you know
my palette has 112 colors, so it has a of possibilities
of one single tone as well. But in case, if you
want to create it, you can just alter
the ratio of the blue black and white and get
lighter and darker tones. For lighter tones, increase
the ratio of white and blue, and for darker tones, increase the ratio
of blue and black, accordingly as per the
tones that you need. Now, onto the
yellow, I'm going in very light handedly
giving in light effects. And on the outsides,
over the blue, you can see I'm going
ahead with darker effects. Into the entire sea, I'm just
going to quickly go ahead, add in a little of
these sea details. And then we'll go ahead with the next leg of details
into this painting. Now, as I'm moving
towards the bottom space, you can see I'm increasing
the depth of these waves. I'm adding in thicker waves. Be trying to show in that these waves are much
closer to our view, that is the reason
visible much more in a thicker consistency as compared to the waves that are closer to the horizon line, because the horizon line
is far from our view. So that's the
perspective view that goes in here while
adding in the waves. You can see how Cris cross and random that I'm going
ahead here to give in so depth and detail to the simple sea that we're
adding with simple techniques. Now next, I have picked up a very beautiful
pastel green color, and I'm just going to add in little highlights on
the horizon line. You're giving in little
lighter bush effect just closer to the horizon line. And you can see I'm
blending it with the past layer black
color so that it has that blurry
effect again because, again, this is also
far from our view. So you can see simply, I'm just picked up the pastal
green color on my brush, and I'm dabbing it on the
black color and blending it at the base layer so that it has
that blended effect again. Almost onto the
entire horizon line, I've just added in little
highlighting effect, giving in that
little more depth to the greenery area that we
have on the horizon line. Now, using in white, I'm going to add in a
moon into our painting. For that, closer to
the horizon line, I'm going to show it basically a rising moon kind of a scene. So that right now the moon will be much closer to
the mountain range. In the center, I'm
just going to drop in a basier white color and create in the bas
lier for the moon. On top of it, I'm going to add in little
highlights further. Now, using in the
blacks and the greens, I'm just going to add
in simple leaf detail coming in from the bottom here. Trying to show in
that basically, this entire greenery
spot is not in our view, just a little leaves that are overlapping RC area
coming in into the view. So I've just gone ahead with
a simple branch and using in the simple leaf technique that I've discussed with you. I'm adding in a
bunch of leaf here. Now, here also,
I'm going to keep altering between the green
and the black color. You can use either only black
or only green, but again, having in color variations
with the greens and black will help you in giving
it more realistic view. So I'm just going to randomly use in different tones
of greens in black. Again, you can use whichever tones of greens
available in your palette. They need not be exactly
the same as mine. They can vary, but you can
always create altering colors. So in case, if you want to
create lighter green tones, you can help in with yellow and white to create green tones
with your basic green color. If you want to
create darker tones, try altering between brown, black, and blues in different ratios to get
in different green tones. So it's of course, going to be a trial and error if you want to learn creating in your
own colors color mixes, basically, But in case if you want to use
direct different tones, then it's easier job. But in case if you want
to try out color mixes, I've given you the possibilities that you can create by altering the ratios for lighter
and darker tones with the basier green
color that you have. So now again, here,
I've gone ahead overlapping with the
greens and the blacks. You can see randomly
that I've gone ahead at the bottom
left side here. Now, in between,
I'm just pulling out simple strokes as well, trying to show in that
little grass effect here as well in between the
leaves that we've added in. So simple strokes just that I'm pulling out in a simple manner. I'll just go ahead with
some more details out here with some darker
and lighter tints wherever I feel the need to. And then we are almost
through the class project. We just need to add in
little highlight to our moon and the reflection
of the moon into sea. And that is eight, then
we'll be ready with our class another minute
or two to finish it up. So I just took randomly
one branch, more top, almost closer to
the horizon line, giving in some more details. And at the bottom, I
have given in more of the tabbing effect filling in the space with the taker tone, trying to show in that
entire patch area that we're trying
to have in here. Now, using a little pink effect
that we used in the sky, the pastel pink color. I'm just going to drop in into the white that
we have added, giving in that pink moon
effect to our moon. Very simply just added in
little pink highlight, and now I'm blending it in
with the white that we added. First, add in the
basier white so that you get in that opaque
layer for the pink. Now, using a little
darker pink hint, I'm going to further
add in the reflection to this into the sea as well. Very little exactly where
you have the moon there, you're just going to drop in
little lines to show in as the reflection of the moon
as well into the sea area. I'm done adding in the
reflection now using this hint. I'm just going to give in a very fine outline to the
moon trying to show in that, three D dimension effect
of the glowing moon. Just at the bottom, given in that effect and blending it in with the lighter pink tones. So that is it, I'm ready
with my class project. Let's remove in the masking tape and see a final painting. You can see that darker line
that we added to the moon at the bottom gives in so much realistic and a three
D effect to our moon. Make sure you peel off
the masking tape once your edges are completely
dried and always peel off your masking tape against
the paper so that you do not tear off the edges
and ruin your painting. Now, I will even keep sharing tips and tricks with you
that you can use to, you know, correct your mistakes in the coming class projects. So here's a final
painting for Day five, a beautiful pastel sunset, as well as a beautiful
sea reflection with a beautiful pink moon
detail that we've painted. I hope you guys enjoyed painting this beautiful pastel
painting with me today. I will see you guys soon into
the Day six class project. Till then, make
sure to upload in your class projects and do proper review if you
like this class. Thank you so much
for joining me.
9. Day 6 - The City View: Hello, everyone.
Welcome back to Day six of the 30 day
ah color challenge. Let's begin with a very
basic pencil sketch. We're going to be painting a beautiful evening
sunset sky by a, you know, sky walk scene. So just going to mark out a
very light pencil sketch. Basically, the bottom
space is going to be, where we're going to
add in a footpath view, and the top is going
to be the sky. And along the footpath way, we're going to have in the
grills of the footpath, as well as little of the bush details that we'll be adding. So I'm roughly marking out these lines for a grill
off the footpath. Now, these lines will
majorly be reflected as just the shadow
of the you know, sky color is falling on this. That is the
reflection of the sky falling onto these lines. So I have just given a rough pencil sketch for you to understand the perspective. When we begin painting, or
of this will get covered up, and then we'll have to highlight these paces with the
paints directly. So let's begin in with the sky. Now, the sky, as I told you, is going to be a
bold evening sky. So I'm going to begin in
with the shades of blue. And then move on to
a sunset color view. So at the top, it's
going to be very dark. So I've picked up a
crucian blue color. Very dark. In case
if you do not have, you can simply mix in a
little hint of black or gray to your cerealn blue and get
a dark blue color like this. I'm going ahead with
a bold consistency as you can see at
the top of the sky. Now, next, I'm going to
use a bluish gray color. Now my palette already has
a bluish ready gray color. In case if you do not have it, you can simply just add
in a little hint of black and white to your ceralin
blue and get a similar tone. So it's not always necessary
to have all of these colors. You can always create
mix and match and form in your own shades with the help of the basic
colors that you have in. It's all about trying in
different ratios and trying to see what suits the best as
per your required color tone. Always need to adjust the
whites or the blacks to get in the right hues that you need or the tints that you need, creating in the
perfect light effect. Now, next, I have picked up this beautiful
orangish peach color. Now for this, also, you can simply mix in white and a little hint of pink to
your basic orange color, or a little hint of
red and orange to your basic white and get a
similar looking peach tone. Now, when you blend this with
the blue color, be careful. Do not blend it too hard. Otherwise, you will see
a lot of muddy tones because of the orange and the
blue blending in together. So I'm using a little bit of
white at the blending point and correcting that little muddy color that
was getting formed. So you see with ah, how easy it is to
correct your mistakes quickly and get in the
right effect again. Now, next, I'm going to
pick up the yellow color. This is a bold, beautiful, bright yellow color
and adding it closer to the horizon
line completely. So closer to the horizon line or the bush area that we have, we have caught in the
beautiful sunset colors. And at the top, we have
the night sky coming in. That's how we are
done with our sky o, just going to add in a little
more details into a sky. A Now, till my sky
dries completely. Let's go ahead with the paste
layer at the bottom space. So that space is
going to be filled in completely with
the black color. So I'm going to go ahead, first, fill this space with
the black color. Then on top of eight,
we are going to give in little city view
details as well, along with a little
of the bush detail. Now this pencil sketch
will get completely hidden because of the
black color you can see. But remember how we
have gone ahead with the perspective for
the footpath grills. Later on, we'll add
in the sky colors as a shadow reflection falling onto these grill lines and create
in that three D effect. Go ahead, you will get to know what I'm talking about
the reflection part. Now, first, picking
up the black color in a bold consistency
and filling in the entire space at
the bottom here. Now, make sure you do not add in a lot of
water to your black. It has to be bold and opaque. Otherwise, it will not give you this beautiful opaque view and the underneath white
paper may be visible. So I've just gone ahead, fill in this entire space. Now at the top, I'm
going to give in some building details,
some house details, some street lights, and a
little of the bush detail at the top closer to
the yellow color. For that, I'm shifting
into my smaller size pointed brush so that I can
get in the details right. So first, I'm beginning in
with a little bit of the bush. You can see for the
bush, at the top, I'm just tapping the
tip of my brush, and at the bottom, I'm
just filling in the space. Now in between, I'm just
going to go in with some random strokes like these to act in as
the grass strokes. All of this we've discussed in the technique section where I've discussed in the bush
details with you in detail, talking about what
techniques you can use to fill in
these simple details. Now, very randomly,
I'm creating in some silo hate for
some city scape view. Now, again, these silo hate
may vary for you as well. You can go ahead and add
in any different kind of building view that
you want to add in or a different kind of city view
that you want to add in. It's not compulsory to h in the exact same city
view like mine or having the same effect like mine of the silo hate that
we're going ahead with. I always tell you it's more important to understand
the technique that we're going ahead with rather
than going ahead with the same exact thing just copy paste without
understanding the technique. Now, on the left side here, I've just added in a
very small balcony kind of a view with some
grills there as well. Now I'm going to quickly fill
in the rest of the space, then add in some street
light details as well. All of those are just
going to be in black, silo hate, no colors, nothing. So the rest of the spaces, I've almost filled it up with
the bushes as you can see. All right, now, let's go ahead with further
details into this. Make sure you're using the black color in
a bold consistency, as well as you're using the
right size of brush because you can see if we go ahead with a very bigger
size of a brush. You will not get in
these fine details. Now, in the center here, the block that I
created on top of it, I'm just giving in
little building details, creating in blocks of
different heights and, you know, house kind of that
triangular shape as well. So simple lines, giving in
that simple city scape view. Now I'm going to add in one
or two street lights as well. Again, those are also
going to be very tiny and with the
black color itself. So I added one
street light detail. Now randomly adding in
some wireline details. Very simple details. You can see I'm going
with random details. And as I told you, you can also go ahead with
random details. They need not be
exactly the same or even the placement
need not be the same, it can just from person to
person painting to painting. Adding in one more
simple detail here, you can see very simple details that I've
gone ahead with. Now, we need to wait for
this black path to dry, and then only we can add
in that grill detail of the footpath that
we want to go ahead with tang in to show
the reflection. One thing that I'm a little
unsatisfied is with my sky, so I'm going to quickly pick
up a very light peach color. I'm going to blend
this space here again. So I'm just adding
in the color here. That that little muddy space, which is formed on the left
side also gets disappeared. So just simply added in the
color, blended it well. You can see with ash, even after the
colors have dried, you can simply blend them and get them again in the
right consistency. And you can see I could hide the dark muddy tone
that was formed because of the blue and
the orange pigment. Now, let's wait for this to dry and then move ahead further. Now, using the
peaches orange color that we used in the sky, I'm going to begin adding in
the details for the grill. So make sure that your black
space is almost tried. Now, you remember
the diagonal lines that we had given in
with the pencil sketch. So I'm going to mark those
three diagonal lines with this peach color. Now, I'm just going to
go very light handedly. Now my paper is a little
rough green, as you know, so it may be a
little difficult for me when I go in light handedly. But I'll just go ahead with over laying and try to get
in the right texture. Now, even if my
lines turn thick, I can later on correct it with the help of the
black color again, giving in wherever I want
to give a head then, you know, covering space again. Same way, I'm going to go ahead with two
more of the lines. Remember, they are a little diagonal in view that we
have to go ahead with. I'm going ahead very slowly and carefully so that I go
ahead in the straight line. Again, as I told you, even if
the lines are not straight, you will be able to correct
them with the help of black color because the
base layer is black color. You can see as soon as
you add in these lines, they automatically
begin to create that three D effect of the
grill that we want to achieve. We are going to go ahead
with simple techniques like these to create simple
effects into our painting, giving in that lively view
to your landscape painting. Now, going ahead with
the last line that is in the center here and
adding in the detail. I'll try adding
in one more line, but this is not going
with the diagonal view. I'll quickly cover
this line that I added halfway through with the black
color again and hide it. You can see with ash, it is
so easy to just cover up these lines quickly and get the thin view
that you want to. Now, the bottom
and the top line, which have turned out
a th than needed, I will cover these up with black again and get them in
the right consistency. Now, in the c, the two poles
that we're going to add in, those also we'll add and create in the three D effect
moving further. Now, I'm just adding in
one more line at the top, and I will just
try to, you know, get in the perfect view for
the grill that we want. So now let me explain why
we added in four lines. The bottom thick
line is actually the footpath pathway that is
there for the walking space, and the top three lines are
the grill that we have added. So now we are going to
pick up the black color and just connect
these lines together, adding in the center pole. As soon as you add in this
center pole black line, you will see your
entire footpath grill begins to have
that three effect, giving in that realistic view of the footpath pathway that
you're trying to add. Now, quickly, using
in the black color, I will just define these
lines in a thin manner. So wherever I feel that these orange lines have
turned a little thick, I will just quickly overlay
and correct it with the black color and give it that perfect thin effect
of the grill here. Now, in case, even if your
lines have turned out thick, I would recommend you
to again go ahead, use the black color and add a very thin line underneath
this orange color. Because as soon as you add in this thin line underneath
the orange color, you will see that it gives in
a realistic three D effect, giving in those
shadow effect falling onto this black
space of the sky. Now, lastly, I'm just
going to quickly add in a small moon into the top of the sky using in
the white color. And on top of it,
I will just give in little blue details as well. Now you can see the grill despite the base layer
was black color. Still, when you add in
that thin black line with the orange just underneath
that orange color, it gives in a more
three D effect, trying to show that at
the top of the grill, you have the reflection
of the sky colors. So make sure after adding
in that orange line, you again go ahead with one bold layer of the black color underneath
the orange line, which gives in that
three D effect to your grill of the painting. Now, with the blue, just adding in little highlights
onto the moon, and we are ready with our
class project for day six. Let's remove in
the masking tape. I will just add in little
more white highlight to the moon on top of the blue, and then let's remove
in the masking tape. Now, make sure you remove
in the masking tape once your edges are
completely dry and always pull off the masking tape against the paper
so that you do not tear off the edges nor lift
up the colors from the edges. So here's a final
painting for Day six. You can see the black
line underneath the orange is visible and gives
in that realistic effect. I'm emphasizing on that part, so make sure you add in
that three D effect. I hope you guys enjoyed painting this beautiful sunset
view with me today. I will see you guys soon into the Day seven claus project.
10. Day 7 - Stormy Seascape: Everyone. Welcome back to day seven of the 30 day
course challenge. Let's begin with a very
basic pencil sketch. We are going to be painting in a stormy kind of
a seascape today. So I've just marked
out the horizon line, so the top will be the sky, and the bottom will
be the sea and the beach area that
we'll be painting. Now, we are going to be painting a very stormy kind of a
sky this time and a very, you know, a simple,
stormy kind of sky reflection falling onto
the sea and the beach area. So this bottom will be the beach area that
we'll be painting. It's going to be very different techniques than
what you may have explored until now into
the class projects. So let's go ahead and begin. It's going to be
of very, you know, violet and blue tones that
we are going to go ahead with to show in that evening
storm kind of a view. So I'll begin with the
violet color first. So I've picked up a
very pastel kind of, you know, bluish
violet color here. Now, this is equal to a royal blue color
also you can call in. So if you do not
have a similar tone, you can simply pick
up a little of your violet or the purple color, a little hint of blue and
white and get a similar tone. Now at the top, I'm adding in a little bit of
the blue color. This is a beautiful sky blue
color that I'm adding in. You can simply mix in cereal in blue and white
and use it here. So I've added that at the top and blended both of these here. Now, next I'm going ahead
with one more tone, lighter violet color or a
lilac color. You can call in. Now, for this color, you can
simply add in more white to your violet mix and create in a very light lilac color tin. If you want, you can even add
a little hint of pink along with the violet
color that will give you a more beautiful lilac tone. Now I have picked up
a pastal pink color and adding it here closer
to the horizon line. Now for this color, you
can simply add in white to your scarlet or a rose tone. Any pink that you
have in your palette, you can simply add in a little
hint of white and create this pastal pink color and add it closer to
the horizon line. Now on top of this pastil pink, it's majorly going to be the stormy cloud effect
that we'll be painting in. So that is the reason I've
added in that pink at the bottom so that it
becomes easier to blend in. Now let's begin adding in the details of the storm
effect that we need. So I've picked up a
grayish blue color with a little hint of
the violet that it has, and using my round mop brush, I'm beginning to move in
in circular motions and creating in that cloud effect closer to the horizon line here. You can see I'm just turning my brush in circular motions, creating in that effect. I discussed this with you in the technique section
of the Clouds as well, that you can even use your
simple round brush or a fill bird brush to
add in the same detail. Just that, you need to
keep moving your brush in round circular motions to get in those details
of the clouds. Now, at the top as well, I'm adding in little
detail with this cloud. Now at the bottom,
you may feel that, you know, it's looking
very unfinished. So we are going to be adding in different colors there out, creating in that stormy effect. At the top, I'm just
planning it into the sky, adding in little more details. Very simple, very
simple strokes, just using in the simple
color for now at the top. At the bottom, let's go ahead
with some lighter tones and create in more depth into this stormy cloud
that we needed. Now, again, for lighter tones, you can go on adding in
white into your palette. Now, I have picked up a further light violet violet color. Now, again, since my palette already has so many
lighter tones, I don't need to keep
on mixing them, but you can always go ahead, mix in white or black to get in the different tints and tones
for your color variations. Now, I'm picking up randomly
a little of the dark tint, light tint and keeping them
blending into each other, creating in that fluffy
effect into this Tommy sky. So now again, I have picked up a little of the lighter
tint and going to blend it with this
darker tint here on the left that we
have already added. At space where you feel you need a little darker hint again, you can simply pick up the darker color and keep blending. The point here while
blending in and creating in this
stormy effect is that your brush needs to be a little clean so that you can
get in the effect right. And also, you need to go in very carefully
so that you do not overlay all of the lighter tones with the darker tones directly. You need to create a
balance so that each of the color variations
is visible perfectly. Now, I'm picking
up a little bit of the light pink
color and going to add in little effect
here in the center. Again, I'm just going to use a damp brush and blend
this in and create in that lighter effect
and blend in with the violet clouds that
we've added in at the top, creating in a soft
edge to these clouds as well that we've
added at the top space. Now, at the bottommost
pace of the sky, closer to the horizon line, I will again go ahead with this darker tint and
fill in and blend in. So you can see at the top, we had the darker
effect on the clouds. Then we move to a lighter
tint, blended them. And then again, closer
to the horizon line. I've gone ahead with
this darker tin. So you can see the stormy effect that we're trying to create in. As soon as we'll add in
the details of the sea, all of these will begin
to look more in sync with each other and given
that beautiful effect. Now, the s will be a
reflection of the sky colors. That is the same blue violet pink tones
that we have used. Alright? Now, I'm just using a little more darker
hint here and giving in that little
more cloudy effect. So that giving in that
fluffiness as well and showing in more cloud
breakage into our sky. Now, let's go ahead
with the sea. For the sea, I'm going to use this gray blue tone that we have been using in for the sky
clouds that we have used in. And using this, I will create
in the base layer first. Now, this time, the
beach area, also, we are going to paint in
in a very different way and blend in in
with the sea space. Alright, now, picking
up a little bit of the lilac color as well and
just blending in randomly. This is just the base layer that we are creating
in of the sea, and then we'll go ahead
with more details. Mm So I'm done adding in
the base layer. Now I'm going to pick up
the same pink that we have in the sky in the
center that we use, the light pastil pink color, and I'm going to add in
highlight of that into the s as well at the same spot
where we have it in the sky. So in the center space, adding in the reflection. So as I told you,
the s is going to be a reflection of
the sky colors only. Now, when you add in the pink, go in a little light
handedly so that it does not blend in
completely with the blue, rather it gives you that
bold effect as well. Now I picked up a little of a darker tint as well that
we used in the first layer. Again, blending it all in. Now, on the edges, if you
need to blend, again, you can use in the
Baslaer blue and the lilac color to
blend the pink into the base layer off
the sea and have those beautiful edges
on the edge as well. Now, again, with a lighter pink, just giving in little effect. Now I know all of this may seem such a mess for you right
now, but believe me, when you go ahead further, keep on adding in the
layer and the details, all of eight will
begin to make sense. Also, if a little of the color placement goes here
and there for any of you, it's perfectly okay,
because when you go ahead, add in the waves detail, all of these will
begin to make sense. So now next, I have picked up a little bit of a grayish
color, not a black taint. It's a very dark gray
color that I've picked up and adding it in
the beach space, marking out the outline. Now the beach and
the sea is going to have a very soft,
blurry effect. So I have to blend in and given that blurry effect at the meeting point of
the beach and the sea. So using in the patier colors, we'll blend these and create in that blurry effect as well. That is, I'll try to take the blue color overlapping
onto this gray, giving in that water
coming onto the beach area and that blending effect
into both of these spaces. So I've picked up the
blue color, added a line. Now I'm going to clean my brush, and using the dam brush. I'm just going to pull out strokes towards the
sea space and given that stroke effect and try to show in that blended
and that blurry look. You can see with the
first layer itself, we've gotten that blurry effect. I'll still go ahead, given a little more crisp detail to this blurry effect of the
beach that we need in. This is just the base
layer Now, again, here the important is your
brush needs to be clean. You need to get in that
perfect crisp effect to get in that view of the blurriness of the sea and the
beach blending in. Now, from the sea space, I have picked up
the lilac color, and I'm going to overlap
it onto the beach area, given those strokes so that we can define in that
beach line that we had given in with
the pencil sketch that comes in more
in a prominent view. So again, I'm just pulling this thick layer
now from the edge. You can see and giving in that
detailed view blending in. So now here, while overlaying, you can see I'm
defining the curves of the beach area as well
with this lilac color, giving in that detailed view. Now, on to the horizon line, I'm going to give in little
more dark cloud detail. So I've just picked
up a very dark tint of the grayish blue color, and I'm going to just add in a small fine line and give in little cloud
details at the top, blending in with
the violet colors. So very little effect, giving in with that
blending effect, because here we are
going to add in little light details as
well on the horizon line, trying to show in that life out there on the horizon line. Now, using in one tone
darker bluish violet color. I'm just going to keep on
adding little wave details. Now, in the center diagonally, I'm going to give in that
little crashing wave effect. To that, also, I will give
in a soft blended view. First, at the top
right side of the sa, I'm just adding in simple waves. I've used the dark
same blue color that we used in the pasiler. If you always want, you can
keep on adding a little hint of the black and the baser
color to create darker tints. And for lighter tints,
you can add in white. Now, as I told you from the
left to the right bottom, I'm creating in this beautiful
crashing view effect. Now I've added in
simple strokes first. Now to this, I'm going to add in some flowing water
kind of a view. And then I'm going
to blend these a little into the base layer
and given that soft effect. So now I'm just pulling out strokes towards
the bottom side, giving in that crashing effect. Already trying to show in
the flow of the water, moving towards the beach area. You can see same blue
color that I'm using. You can mix in can blue with a little hint of black
and a little hint of the prucian blue color
and a little hint of white to given that
pastel effect to this color. All right, now, I am going to blend this into the
pasteleer again, given that soft blurry effect. So on the top, again, use the past layer and
blended it in. Same way at the bottom also, giving it more soft
and blurry effect because we have this stormy
kind of view for a sky. We don't need bold details
anywhere into a painting. Now, at the bottom, here again, blending in with a little
of the S wave details, very simple, very crisp. I know it may be a little
tedious for you at first to understand these
easy techniques also. But when you give it
a try, if you want, you can go ahead with one on a rough sheet and then go
ahead onto your main project. Now at the top, just adding in a little more of
the wave detail. And to these also,
I will give it ale blended effect by just using a damp brush and quickly blending it a little
into the base layer. So we are almost done with, you know, waves into
the sea, that is eight. Now, I'm going to define the
horizon line crisp again. So for that, I'm going to use
one tone darker gray color. And I will just quickly tilt my paper because my base layer, sorry, my bottom space, that is the sea area is wet, and my sky is dried. So I can lay my hand over
the sky space as it is dried and add in this thin
line on the horizon line, giving in that distinction. You can see how beautifully the beach has blended
with the sea area. Also, the waves, as I told you, I have blended them so much in depth with the
base layer itself, and given that blurry effect to the base as well,
giving in that, you know, stormy effect
coming into the sea as well, giving in that crashing
effect to the waves. So that dark line I
have blended it with the sky colors with
using in the dam rah. I added the line,
used the dam rah and blended it into the gray color of the sky that we had added in. O Now, using a little bit of
a pastel gray tint. I'm going to add in
little cloud effects into the sky here as well. So just going to use the filbert brush and go ahead
in round circular motions. So you can see how using
a filbert brush also, you can just move your
brush in circular motions and add in little effect
with this darker tint. Now, I did not add
the gray hint while we were adding in the
details previously in the first layer of
the sky because I wanted the previous
colors to dry out, and then we can simply blend it and get in
the effects, right. Now, I will just use
a little lighter hint and blend these
here again wherever needed to create that
different variations into the stormy
effect that we need. So you will see at
the top dark color, then a little light hint, then again, dark,
then again, light. So I've gone ahead with
so many layers to create so much variations into the storm of the
sky that we need. This is how you will
need to work with layers to create in the
depth into the stormy view. You need to add one layer, wait for it to dry, go
ahead with another layer, then create little
light dark hints here and there and
keep on blending them, creating in that depth into the storm effect of the
sky that you need in. Now, using in the white color, I'm going to quickly add in very small light effect
on the horizon line, only on the darker color that we have closer to
the horizon line. Just very simple dots. So you can see this
is trying to show in so much life on the horizon
line out there and on, you know, endpoint of the beach that we're
trying to show in. Now, same way, I'm
just going to add in little more light onto the right most side here
on the horizon line. And we are ready with our
class project for day seven, a beautiful, stormy
view in the sky. You can see the
clouds is so rough, so stormy, giving in so many
color variations of gray, blue, violet, lilac tones, and then the darker tones
on the horizon line, where you have in
the light effect. Now I'll just cover
up a little light here where I feel the
light has gone in excess. So just ding ale bit of that dark gray color again
in between the white. And then let's remove in the masking tape and
see our final painting. So make sure you remove in your masking tape very
carefully against the paper. Now, here you will
see I messed up with my masking tape removal because
I went ahead too quickly, which tore off my
edges of the paper. Now on the right more side, you can see it's
most of my edge and created such an ugly
view to my painting. But as I told you with ash, it's so to correct
in the mistakes. So let's go ahead and
correct this area here, and you will see and understand that everything
looks as if nothing happened. So I'm going to use
the same colors where, you know, which
color was placed, I'm going to add in there
on the ripped part of the paper and blend them again
into the sky and the sea. So I'm using the grays
and the blues where they are right now in the sky
and going to blend them. So you can see I'm
keeping it raw and real and letting you
understand with Kash, how you can correct
your own mistakes and get in the right
details again. So on the rightmost edge here, I used in a little of a
gray dark cloud effect, giving in one more dimension to the clouds and just going to blend in with
the lighter tint, dabbing in on the top side. Same way here, also, I'm going to quickly add in and correct on the
left side as well, and then correct the s area
as well on the right side. Now, for the sea area, I'm using the lilac tones
that we had used, the darker and the lighter
tins and blending them all in, giving in that soft
blended effect. So you can see how easily
you can correct your error or even the mess up with the masking tape when it
comes to medium called. So we've corrected
all our flaws. Now, here's a closer look at
the painting from day seven, the stormy effect
into the sky and the sea and the
soft blended look of the waves and the beach area. I'm just going to
quickly cover up a little of the light
that we've added on the left side
because I'm a little unsatisfied with so much
of the white effect. So just going to cover
up a little quickly. So I'm done with the
final correction finally, and we're ready with our
painting for Day seven. It was a little challenge because of the mess
up that we had. But here's a closer look at our final painting
from Day seven, the stormy view of
the sky and the sea. I hope you guys enjoy
painting this with me, and I will see you guys soon
into the next class project. Till then, make sure to drop a review if you like this class. Thank you so much
for joining me.
11. Day 8 - On set of Rains: Hello, everyone. Welcome back to day eight of the
30 days of cosh. Today, yet again,
we are going to be painting another stormy sky. But this time we'll
give it a field view. So let's go ahead with just
marking out the field space. So this time, the field area, I will mark out a
little diagonal. So from the bottom left
moving to the top right. Alright. The top
will be the sky. We're going to paint
a rainy kind of sky view as if the rain
is about to pour in. We'll first begin with a base layer blue
color for the sky. Previously, in the last
class project, if you see, we had gone ahead with the
base layer of the blue and the pink tones and then added in the violet and the
gray cloud details. So this time we're
going to go ahead with just a base
layer blue color. And then on top of it, we're going to go
ahead with tonal variations of the blue to create in the cloud
and the stormy effect. So now, first, I'm beginning
in with a, you know, bluish gray color, which has
a very little hint of gray. Not much. It's more
towards the blue side. So if you do not have
a similar tone, again, you can simply mix
in ceilin blue, white and very little
pinch of black. It just has to be like 1% to get in that grayish
hint to your blue mix. So to the entire sky, I'm just going to give in one flat layer of this color first, and then on top of eight, we'll begin with
the cloud details. Make sure you do not add in a lot of water while
adding in this. Go ahead with a good opaque
layer of this color, because at certain spaces, this color will
also be visible in between the cloud details
that we'll be adding in. So you can see I've given one flat layer of the
entire color here, and this is the paste
layer of our sky, a grayish blue color to
given that thunder and the, you know, storm effect
to our rainy blue sky. Now let's begin adding in
the cloud details to this. Now, first, I will begin with one tone darker color
than the base layer. So basically, you can just add 1% more white black to your same mix to get
one tone darker color. And I'm using the
same filbert brush, moving in in circular motions. We're going to create
a fluffy cloud effect, giving in that
thunder effect with the blue shades that
we're going to use. Now, you can see
I'm going randomly with this dark tone at spaces. We'll go ahead with
one lighter tone as well, moving ahead further. First, with the darker
tone at random places, I'm just dropping in
some cloud effect, moving my brush in
circular motions. So as I told you, you
don't always need that mop brush that I use in each
class project if you see, I'm trying to use in
different brushes, different ways so that if you do not have one
particular material, you can still do the same thing with the available
material at your end. So I've added the details
with the darker color. Now I'm going to move
on to a lighter tone. Now, this is going to be like a light blue color
that I'm using. So you can simply mix in more
white to your cellin blue. I have multiple tones of light blue as well readily
available in my palette. Now, in between randomly
between the dark tones, I'm just adding in
simple cloud highlights with this lighter color. Now, when you add this, you have to be careful
about one thing. You need to be very
gentle on your hands. If you apply a lot of pressure, the basier colors
will get mix in, and you will not get
the light effect, rather, you will
get one, you know, a blended color effect of the dark and the light
of the base layer. So you have to be very
gentle on your hands. Plus your colors
need to be opaque. So do not add a lot of water or, you know, do not have a lot of water into your brush as well. Now, random leaf or blending, I'm picking up the
dark tone as well to blend in the dark
and the light tints. So you can see the
previous class project, the technique used here
is quite different. In the previous class project, we went ahead color by color. In this class project, we are going ahead with one
color at a time. Then again with the next color, then again, blending
all of them together. So, you know, this time, you already have base
layer colors more, and then you add in
the lighter tint. Now I'm going to add in
very tiny yellow highlight as well into the sky. Just giving in that little
sun ray coming in in between. It's going to be
very, very minimal. So I'm going to pick
up a pastel yellow. Now, in case, if you do
not have a pastel yellow, it's a simple mix
that you can create lot of white and just a
little hint of the yellow. You can see how
bright my yellow is, adding in little glowing
effect at certain places to give in that little sun
effect coming in in between. Last year, added in little
of the yellow effect at the bottom closer to the
horizon line on the left side. So that is it for our sky. We are ready with our
stormy rainy view sky with just that little sunlight coming in between a few of the clouds. Now we'll go ahead
with the base layer of the field and then move on
to the details further. So for the field,
we are going to go ahead with tones of green. Now I'm going to pick
up the color first and just add in in
the entire space. And at the bottom, I
will just darken up this space with a little hint of black or a dark green color. Again, if you do not have
the same tones of green, as I told you, you can use any tones of greens that's
available in your palette. You can create lighter and
darker tone mixes of the green by adjusting it with the help of yellow and
white for lighter tones. Brown black and blue for the darker tones of your base green color
that is available. Now, for the bottom,
I'm just picking up a little bit of the black
and blending it all in. You can see just
blended everything in, and at the bottom, you
have the dark effect, and at the top, you
have the light effect. Now, my sky is completely dried, and on the horizon
line of the field, I'm going to begin adding in simple pine trees using
in the black color. Make sure that your
sky is completely dried before you begin
adding in these. Now adding in the pine trees, I've already discussed in detail in the technique section, giving you different ways
of adding in pine trees, different ways to
adding it quicker, some detailed pine trees, some simple pine trees, creating in a blend
of everything to give it a natural effect. If you have a closer
look at the thunder sky, you can see it's giving in that perfect rainy effect as if the rain is just
about to pour in. Now, on the right most side, I'm just giving a small cartage view with
the white color. I will add in one more
layer of the white to make it bold and a opaque. So I added first layer.
It was a little dull. Now, I added the second layer. You can see it's
bold and opaque. Just a simple cottage view
that I'm going to add in. We'll add the rest
of the details into this cottage later on. Just create in this white
patch and leave it for now. Now, back to adding
in the pine trees here on the horizon line. I'll quickly go ahead at
them in different height. I'm not going to take
them much taller. I'm just going to keep them
very short and subtle, and I'm going to
add it completely on the entire horizon line. Then in the field space, we'll be adding in very
simple grass details and some yellow
wildflower details, which are again going to
be simple and quick one. Now, in between,
you will see I just go ahead with simple
details as well, just giving in
simple bush details. On top of it, I'll
give in those simple, you know, strokes that
we had discussed, just the pointed strokes
to fill in the space. You can see I'm
going with a very nominal height of
the pine trees, not taking them too tall
into the sky this time. Now, in between here, again, going ahead with a little of the simple bush detail filling
in the space completely. We're almost through
adding in the pine trees, and then we'll move on
to the grass till then our green layer of the grass will also
be dried completely. Now, you can see I go
ahead with, you know, the pine tree height across, you know, with every pine tree. No pine tree close to each
other is of the same height. They will keep on
wearing in height with every next pine tree
close to each other. Now overlapping
the cottage, also, I've just added in
a small pine tree, and in the rest of the
space towards the right, I will just give in
little bush detail in front of the cottage. So, you see, you do
not need to add in a lot of detail to
the cottage also, but at the background, it gives in a little
beautiful view. Now, randomly in between, I'm just adding in
little strokes, trying to vary in the heights, and giving in little more
depth to the pine trees. So just simple strokes that I'm pulling out of
different length, losing in the pointed tip of my. Now next, using in a
light green color. I'm going to begin adding in the grass details
into the field. I'm using a very right pastal
green color. You can see. I'm going ahead with
bigger grass strokes directly completely
from the bottom till the horizon line. You want you can go ahead in layers with the grass
strokes as well. I'm going ahead
with simple layer. And now again, these grass strokes can
keep varying for you. You can add them and moving
in different directions, or you can keep them moving
all in one direction as well. I'm going ahead with
simple strokes, some overlapping,
some sm, some big, very random details,
just going to fill in this entire space with this light green color
strokes off the grass. O O. Even on the left side, you can see I'm going ahead with simple strokes to fill in
the entire grass details. Somewhere I'm going ahead with bigger strokes from
bottom to top. Somewhere I'm going
ahead with overlapping. Somewhere I'm going
in two layers that is two rows of the grasses
overlapping on each other, creating in trying to create
in more and more depth. If you want what you can do is you can use multiple variations of the green color to create in these grass details as well. That will give you
more realistic view. So you can see I'm going ahead with little different tones of the lighter green
because my palette already has a lot of green
at the bottom of it. So automatically when it mixes
in with the light green, they're creating in different tonal variations of the green. Now, using in a
medium yellow color. I'm just pining to give in the wildflower
details at the top. So using the yellow, I'm
just dabbing it at the top, where we haven't added
in the grass details, because at that space, I want to show in an entire cluster of the flowers together. So just going to use
the yellow color and keep dabbing in using
the tip of my brush, which will give in that
beautiful range of the wildflower detail
altogether there. Now, some of the wild flower, I'm going to add in overlapping onto the pine trees as well. Now, even on the grass area, I'm just going to begin adding in the same
wild flower details. Now, since we are adding
in these wild flowers, you will see I'm just
going ahead, dabbing in. You don't need to add
in any particular shape of the flower or a
particular size. You can just go ahead,
keep on tab in the color, giving in that beautiful
wild flower field detail. You can see how I'm adding
some of the wild flowers, overlapping the pine trees, giving in some of the
wild flowers, taller, going ahead into the
pine tree range as well. Now, as I move towards
the bottom side, there I'm not going to fill it completely with
the yellow color. There, I'm just going
to randomly add in some wild flower
details here and there, not going to fill in
the entire bottom space so that the grass details
are also visible. So you can see at the bottom, I've just added in
randomly at certain spots. Now, using in a little
bright shade of the yellow, going to add in
some wild flow on top of this dull yellow
color that we've used. Now the reason in the
first layer I used a little dull yellow is because we are having a
storm view in the sky. So but of, because of
the sky reflection, if you go for a picture Q view, you will see that
the field will also be visible in a
little dull range. So I'm just adding
little highlights with a little bright
yellow of the wild flows, just a few here and
there randomly. O Now, lastly, I will just
sprinkle a little of the tiny, tiny
flowers randomly. Now in case, if
you're not confident about adding these directly, make sure you cover up
your sky first so that you do not drop
them into the sky. Wherever my drops have gone in, I'm just blending it in quickly with the blue color
into the sky. But in case, if you
are not confident, make sure you go
ahead very carefully. Alright, So, I'm just adding
in that darker color of the cloud and correcting in
the mistake that has come in. So you see with Kash, it's so easy to correct
in mistakes anywhere any time and get in your
details right again. But in case, if you're
not that confident, make sure you cover up
your sky part so that the sprinkles do not go
into that space at all. Now lastly, let's begin adding
in some lines into a sky, that's going to be
simple violines. For that, I'm going to use in the black color and
my pointed tip. You can add these using
in a pen as well. On top of the cottage, I'm just added in very
simple roof detail with a little gray hint. Now I'm using a dark gray
color to add in the violines. I'm not using a pure
black tint here. You can use a pure black
tint if you wish to, or you can also use in this simple gray tint
to add in the lines. Now, I'm just going ahead, going tip of the brush and
adding in these lines quickly. So I'm adding in three
to four of these, you can see, since I'm
using in a gray color. It's getting in the dull
effect into the sky, giving it that perfect
blended stormy effect view that we are
trying to achieve in here. So I've added five of
these majorly all, towards the bottom
side of the sky only. Now, randomly at places, I'm just sharpening up these lines and just given in
little connection details, very simple ones that
I'm trying to add in. And that is it,
we are ready with our class project for
day eight as well. I'm just correcting
the line here, which went out of proportion. So you see, again, so easy to correct in the mistakes
using in the coach colors. Whereas with watercolors,
it would have been a little difficult to correct
in the mistakes if, you know, they would have gone out of
proportion like this. So let me give you
a close view of everything before we remove
in the masking tape, very simple detail, simple ways to correct in your
errors as well. Now, let's remove
in the masking tape and see a final painting. Now, make sure you remove the masking tape
against the paper. In the last crass project, you had seen how I had messed
up with the masking tape, peeling off my painting as well, but we could easily
correct it in easy ways. So I'm just going to quickly, very carefully remove
in the masking tape. Again, I guess my left side painting is
getting peeled off, but again, I can
still correct it. I'll go ahead carefully
and remove this part. So here's a closer look at
our painting from day eight. I hope you guys
enjoyed painting. Another stormy sky with
me for this class. I will see you guys soon into
the Day nine class project. Till then, make sure to upload your class projects and do proper review if you
like this class. I will see you guys soon
into the next lesson.
12. Day 9 - Street View: Hello, everyone. Welcome back to Day nine after 30 days
of course challenge. Today, we are going to paint a beautiful evening sky with some cotton candy cloud
details, very simple ones. But this time, the blending
will be a little different. We do not have any
pencil sketch. I am directly pining in
with a sky blue color. Now you can see this time
I'm going ahead diagonally and not in the simple
straight manner that we go ahead usually. All right, I've got ahead
with the blue color. Now, next, I will leave a little gap and add in the
next patch of the blue color. Then using in white, I will blend both
of these patches and add in little pink
highlights later on. I've gone ahead added in
the blue patches first and then we'll go ahead with
a little bit of the white. Even on the left top, I'm just adding in a little bit of the blue patch
and keeping in here. Now, we are going to pick up the white color and blend
all of these out here. I've picked up the white
directly, and again, for the white also, you can see I'm going ahead diagonally. Now when you go
ahead diagonally, you will see in your sky, you get a flow off the
sky and the clouds. When you blend horizontally, the movement and the layout of the sky will look different. And when you blend diagonally, that time also the movement and the layout of the sky
will look different. So that is the reason try and go ahead blending in
diagonally here. Now, at the top as
well, I will just add in little white
highlights on the blue creating in
little more variations in the blue space
out there as well. Now at the bottom, the
space that I've left, there we are going to add in little past cotton
candy cloud details. There we'll directly
go ahead with a base layer pink and begin
adding in the details. And then we'll give in
a simple street view here for the silot that
we'll go ahead with. First, let's quickly go ahead, add in a per pastel pink color. Now for the pastel pink color we've discussed the
mix multiple times. You can use any basely
or pink that is available and add in white
and get a pastel pink color. I'm just blending in this pink with the blue that we've added in into the entire remaining
white space at the bottom. So we are done adding
in the pink as well. Now let's go ahead, begin
adding in the cloud details. So for the cloud, I'm first
going to begin in with a grayish blue color for
the first set of clouds. It's going to be very
light and very limited, not much of it that we'll
be going ahead way. Now, I already have
a reddy grayish blue in my palette as you know. So again, I've discussed
the mix of this also. You can just add in a
little hint of black and white to your blue and get a
similar looking graysh blue. The black hint has to be
very, very, very minute. Now, I'm just randomly
first adding in little highlights of the clouds with this grayish blue color. Now, next, I will pick
up a little pick of the pastal pink that we
added in the paste layer and I'm going to add in little
highlight of the pink onto the white space in
between the blues here. Now, this pink also, I will add in diagonally and
blend in diagonally only. All right, so just adding in little diagonal strokes here
and then quickly using a, you can blend it into the base
layer white that you have. You can see
automatically you get in that little pastal effect into the sky here over
the white as well. O Now, using one tone
darker pastel pink, I'm going to begin adding in the next set of clouds
closer to these. For this, again,
you can just add a little less white to your pink as compared
to the paste layer, or you can simply add in
a little red along with white and pink to get a
peachsh pastel tone here. I'm going to add in randomly some yellow color clouds as
well, blend them carefully. Now, when closer to
the bluish gray color, you blend in the yellow cot carefully so that you do
not get in the muddy tones. If you want here, you can
use white for blending if you're not confident
about blending these colors directly
with each other. Now, again, randomly, I'm picking up shades
of pastel pink, you can keep on
altering the shade of pastel pink by adjusting the proportion of white into your carmine rose
or scarlet color. So I've just used in the grayish blue
shades of pastel pink and shades of yellow
to blend in and create this cotton candy
cloud at the bottom here. Then on top of this,
once this dries out, we'll give in the
silo head detail. I've just added some
last dark cloud details on the right side,
and that is it. We are ready with our sky.
We'll wait for this to try before we begin adding in the silo head detail
to our painting. Soy sky is completely dried, and we are going to begin
adding in the silo hate detail. First, I'm picking up a
dark grayish blue color, and I will add in a
simple mountain range onto the right side here. It's a dark grayish blue. You can simply just add in
a little hint of black to your crucian blue color and very little
hint of the white. Now, along with
that, I'm adding in little of the black
color and blending in. So you will see we have
two total variations, one, the grayish blue, and one
blackish blue at the bottom. So this is how I've
just simply created in one simple mountain range
at the bottom right side. Now, next, for the mountain
range on the left side, I'm going to go ahead
with a green color. Again, for the green
as I told you, you can create in
your own greens with the help of the
base green color. I'm using a medium
sparin tone here, and I will add in
the second bush kind of a range onto the left side, overlapping a little off
the right side mountain. Filling this space completely
with this green color, you can see going
ahead carefully, creating in the details for the siloate that
we'll be adding in. Now, even into the
green at the bottom, I will just blend in with a
little hint of the black. So I just added a
simple black patch. And using a dam brush, I will
blend it with the green. So at the bottom, you
will automatically see the darker effect trying to show in that shadow
effect at the. All right, so just blended it
with the baseer green here. Now, into the street view, I'm just going to use
in the brown color. I'm going to use in
the Burn Ciena and mix in with a little bit of the dark brown
color that I have. And using this brown tone, I'm going to add in
the first pole here, which will be the street
light that we're going to create to create in
the street view. So I'm going to use in
brown this time because we have a beautiful pastil
sky that we've created. So I'm not going to use
in the black color. Now, make sure you
go ahead adding in these lines in
minute details, do not use a thick brush. I'm using a pointed tip brush, so I'm able to get
in the fine lines that I need for my poles. Now onto the second
one that I've added, I'm going to create in a very different kind of a pole detail. I'm going ahead with one
line closer to this, which will just reach
a little towards halfway of this first
line that we've added, and I'm going to
connect both of these. Al right now again,
these details and silo hate may vary
for each one of you. They need not be
exactly same like mine. You can go ahead with your own reference for the silo hate. I'm just going ahead with a random silo hate
reference that I found and adding in the
details accordingly. You can first wait and watch the entire
kind of details that I'm adding in and
then go ahead with your own kind of silo
hate that you wish to. Now, into this, I'm going to a simple street light detail. A light just created in
the street lamp as well. Very simple details, we are not going to add in much
of the colors here, but we'll be creating
highlights onto these poles to show the reflection of the clouds falling
onto the poles here. Now at the bottom
here, just adding in a simple block as
well. All right. Now till the time this
brown details try out, we're just going to add in simple details with a
little darker green color. So just going to create
a little bush kind of a patch or a simple tree. You can call in that
I'm going to add in. For that I'm using the
darker green color. Now, what you can simply do is just add in a little
hint of the black to the past green that you've used on the left bottom side. I'm just using one to
darker green color. I'm going to add in a
simple detail here and simple bush in between the two
poles that we've added in. O You can see just along the poles as well, just adding in
simple bush detail. Go ahead very carefully
so that you do not ruin any of the details that
you've already added in. Also make sure that your
bas or green and browns are a so that they do not blend
in with this that you add in. Now moving towards the
blue mountain as well, I will add in simple
details with the green. The green will be visible on the blue because of the
opacity of the colors. You just need to make sure
that you use the colors in a bold consistency so that they have the perfect view as well. It's all about the
consistency that gives in the opacity to
the ash pains that will make it visible even on the and the lighter tones
alternatively how you are. Now let's add in
little highlights to the poles that we've added. For the highlights I'm
using in yellow color. Now make sure that your
browns are completely dried, use a pointed tip brush and go ahead with a bold
bright yellow color. Now using this and just using the tip of the brush
on the brown pole, I'm just going to
add in fine line. This will automatically show as the shadow of the sky colors
falling onto the pole, reflecting the light of the
sky onto these poles as well. Very fine yellow lines that I'm adding onto the poles
that we've created. So onto these pole as well, I'm adding in the yellow line. On the bigger pole on the right, I had added the reflection
towards the right. And here on some part, I added the reflection
on the left and on the remaining part
at the bottom space, I've added it onto
the right side only. I'm done adding in
the reflection or the shadow effect
of the beautiful cotton candy clouds
onto these poles. Now, using in a black
waterproof pen, I'm just going to add in
some bar lines into the sky. You can use in a
very fine tip brush and the black color to
add in these lines. I'm going to go ahead
and just use in this 0.3 n waterproof pen. It's important that you
make sure that you use a waterproof pen so that even if you have to
correct in any mistake, this ink will not spread out. In case if the pen will
not be waterproof, and if you want to correct
any mistakes in ash, it will be difficult as the pen will begin to bleed the
lines that you add in. All right. Now, I'm just
adding in some simple lines. Now you can see the
pen is kind of a little tricky at times
because of the pains, the nip lifts up the pains and the lines do not come in easily. So you can again
run your pen onto a rough paper quickly and then
add in the details again. I've roughly marked
out the light lines that I need on the
left side as well. Now I've quickly just got my pen into the right
consistency again. I just scribbled a little
onto a rough sheet. Automatically, the ink
is come up again and the paints that
had come in again, cleared from the tip. Now just correcting
these lines and giving them a dark bold
color consistency. Very fine lines
that we've added, make sure you do not
go in with bold lines. Let's remove in the masking tape and see a final painting, make sure you remove the
masking tape against the paper. Now this time, we have
a new blooper that is a You can see the paints out
here on the left side have leaked because maybe the masking tape may
have loosened up or they have been excess water while adding
in the details on the left. That is why the leakage. But again, let's go ahead and find a trick
to correct this. So you can either use white
ash or white crylic or you can use this correction pen
to correct this as well. This correction pen is kind of an acrylic paint,
which is permanent. Now, this is white in color. So I just need to
begin pressing in the tip and press the h pen. So automatically, there
will be white ink that will keep on coming and will
cover up the mistakes. You just need to be sure
about one thing that the pins out here on the edge
have tied up completely, only then go ahead with
correcting of the correction pen. I'm just pressing the pen.
Automatically, the white ink is coming out and correcting
in the space that I want to. You can see all of the mistakes of the leakage that happened on the left side have got corrected with this correction
pen simple technique. Don't worry if you do not
have this correction pen, you can use white
ache or white clic. White cric more preferably because a again will, you know, activate your paste
layer colors that have leaked and may blend in and
may create a muddy color. Otherwise, you need to
use gash very carefully, light handedly and in
the right consistency. With the correction pen, you can see I could simply correct in the mistake and get in
the right edge again, the white clean edge
that we needed. Now you need to be sure about how you want
to go ahead with. There are various
ways. So, these are the proof that not every
time everything is correct, if you would have seen in
the previous painting, the paper got tripped off, in this painting,
there was a leakage. But it's about learning
how to correct them rather than discarding
of the piece completely. Now, I'll just use a little hint of the white quash and give a fine line on the outside again and blend
this all in we ll. Here's a closer look at a
painting from Day nine. You can see the silo, the
shadow details onto the poles, the yellow color giving in that beautiful shadow effect
of the sky falling onto these poles and the
simple mountain silo heate details that we
added at the bottom space. I hope you guys enjoyed painting this and
also learned how you can correct your mistakes if the color leaks out
onto your white edges. I will see you guys soon
into the next class project.
13. Day 10 - Field: Hello, everyone. Welcome back to day ten of the 30
days of course. Today, we are going
to go ahead with an evening sky field view. I'm just marking the
outline of the field. Now, in the field, we
are going to have in three to four patches of the field that we are
going to create in. That is, we are going to create, you know, perspective view
of the field this time. We'll try to create in the green layers in
different perspective views. So we are going to have
in basically four kind of green field view. Alright, so I'm just marking
out the four patches. Now, again, this may not
be closely visible to you. Let me give you a close view. You can see the
pencil sketch now, the four field parts
that I have marked out. Alright, the top
will be the sky, and the bottom will
be the green field, which we'll be painting
in parts this time. So, first, let's begin with a dark evening night sky view that we are going to
be painting in here. For the sky, I'm
first picking up the beautiful dark
blue prucan color. You can just add in
a little hint of black if your prucan
blue is not that dark. At the top, I'm
beginning in with this dark bold
blue, you can see. And then moving ahead further, I will lighten up this blue a little with the
grayish blue color. Then a little hint of white, and towards the bottom side, we'll go ahead with little
oranges shades to give in that beautiful sunset
effect into a sky as well. Now, next, I'm using in the
dark grayish blue color here, and I'm going to blend it with the dark plcion blue
that we've added in. All right. Now, again, to this, you can simply to
your cellin blue. You can just add in a
little hint of black to get this second layer of the blue color that
we're adding in. And we are just blending in
both of the blues together. Now, next, I'm just
going to use in, either you can use a very
light pastel blue color, or you can use in
white here because orange and blue when mixed together gives you muddy tones. So before blending
in the orange, we need a very light
pastel layer so that the orange does not
give in muddy tones. So I'm picking up a very
light pastel blue color, which is readily
available in my palette. You can use white, and automatically the blue
from the top layer will get blended in with
the white and give you that light
pastel blue effect. Now, next I'm using this
yellowish orange color. Now between the yellowish orange and the last line of blue, I'm going to leave
in little space. I'm going ahead very
carefully along the line of the field area that we've marked out this time. And now I will pick up white
and blend in the orange and the blue because I do
not want any muddy tones, so I'll go ahead very
carefully here while blending. I'm using this peach color, which is equal to a white
color and blending in. You can simply use in
white also and blend in. As I told you, since my palette has so many beautiful shades. That is the reason
I'm going ahead using in the, you know, best possible colors,
which will create much better blends or much better transition into the sky. But even if you use white, you will almost get a similar
transition because white when blended with orange will give you that peach
is tone again. Now, using in a little hint
of the burn Ciena color, I will just create
little highlights into the sky here and blend
them into the base layer. So I'm just going to
add in a few lines and blend them into the
base layer orange that will automatically
just create little darker highlights on the left side here into the sky. Since we are creating in
that sunset evening view, you will automatically
see that this will just act in as a little
highlight into your sky, giving in that vision coming in. So I just blended in. I
will just go ahead with a little more of the browns
here and blend them again. Very little light
lines that I'm adding in using in my smaller
size filtered brush, and you can see quickly I'm blending it into the base layer. We don't need bold strokes, just giving in little
darker highlights on the left edge here,
blending them all in. For blending, you can use
in the base layer colors, which will help in blending. So I've picked up a
little brown when the brown strokes
reach the blue space. I picked up a little
of the blue and blended them into the
base layer again. Now, last layer of
brown adding in these, and this strokes, I will
not blend in completely. I will just give them
a soft edge a little, trying to show in some dark
cloud effect into the sky. So that is it, we are
ready with our sky, simple dark brown
details that we created on the left and then little cloud highlights
with the brown. Now let's begin with the greens. So I first picked up a
beautiful dark green color. I'm adding it at the top
of the first mountain, sorry, the first field
patch that we are creating. So if we're going to create a patchy field detail this time, so the patches will
be in four layers. All the four layers will
be visible distinctively. So we need to keep on painting
each layer one at a time. First into this, at the top, I've given in the
dark green detail. Now shifting into
a sap green color. I will blend this in. And then I will shift on to a lightest green color
and add it at the bottom. Now, each patch has to stand out distinctively and show in
that separation point. So each patch will create, you know, the darker
space at the top, and then towards the bottom, we'll create in the
lighter space so that automatically each patch
will be visible distinctly. And somewhere where you have the darker color at the bottom, then you will begin
with a lighter color at the top of the next patch. Go ahead, you will understand
what I'm talking about. So I've just added
in the lighter green color here and blended in. Now, till my first patch dies, I will paint this patch
at the bottom here. Again, I'll go ahead
with the same technique, darker color and then using in the lighter
tints to blend in. So this time I use the
darker at the bottom, and now the lighter green
at the top. All right. Again, when we'll paint
in the second layer, you'll understand why I added in the lighter
color at the top here. Because in the second layer, I'm going to add in
the lighter green at the top and the
darker at the bottom. So again, for this bottom patch, I added the lighter at
the top so that it is distinctly visible
then the second layer that we'll be adding in. Now, I'm picking up a
very light green color and creating in little highlight at the top here on this bottom third patch
that we are painting. Now, if you want to create this beautiful pastel green color, you can simply add in a
little hint of yellow and white to your green and
create in this green color. You can see it is giving
in that glowing effect at the top of the patch, giving in that
patch field detail perfectly that we
need. All right. Now, let's go ahead
with the fourth mountain range here
at the bottom. Now here, I will use
in a little hint of the dark brown color first
in the base as well, and then again, quickly blend it with the greens that we have in. So I've just added a
very dark brown base. Now I'm picking up
the saprne color, and I will begin blending in. You just need to make
sure that each patch is visible distinctly from the previous patch
that you add in. So you need to keep the two adjacent green colors of each patch different so that
they stand out differently. Now I have picked up a beautiful right pastel
green color again, and at the top of
this patch as well, I will add in the
pastel green color. You will see the third patch had the dark color at the line meeting point of the
third and the fourth patch. So automatically when I added the light green color at the
top of the fourth patch, both the patches are
standing out distinctly. So you just need to keep in
mind this one thing, that is, both the patches of both patches which are adjacent
to each other. The joining line of both patch has to have different
colors in each patches. Automatically, that
will create in the perfect patch view that
you need for your painting. Now, in the fourth
patch, I will add in little greens later on
once this dries out, till then, I will quickly
go ahead with that c patch. For the center patch, I'm
first going ahead with the medium green
tone in the c and then we'll c in the depths and the lighter depths at
the top and bottom. Into the entire patch here, I'm giving in first one
basely of green color, and then we'll go ahead
and c in the depth. A Now, towards the bottom of this, I'm beginning to add in the darker tones at the
top of the second patch, we'll have in the
lighter colors. So I'm just beginning to
darken at the bottom, using in one to darker color. Now, at the top,
I'm going to use in a bright green color and create the lighter
patch at the top. So I've just created a
little more darker depth in the center of
the second patch. Now let's move on to the
light pastel green color that we've been using in
the other patches as well. Again, as I told you to
create in this lighter mix, you can simply add in yellow and white to your green
to get in this color. Just blending them all quickly. I know this may be
a little tricky for you guys to go ahead and blend
in in such small spaces. But with practice, believe me, it will be looking like a very simple task
to go ahead with. Now, at the top of this, I'm adding in this lighter
green color patch so that it will stand out distinctly from the first layer that
we have added in. The whole motto
here again is that each patch has to stand out distinctly from
the previous patch. So for that variation, you just need to make sure that the colors of the two patches
that we are creating. So the colors that
are adjacent on the meeting line are not same. One has to have
the darker color, and the other has to
have a lighter color. I'm just going to go
ahead and blend in a little more darker tone into this second layer
at the bottom side. At the top of the second patch, we are going to have
in the lighter tone at the bottom of
the second patch, we are going to have
in the darker tones. Because in the third patch, you can see we have the
lighter tone at the top. So to stand out distinctly
from the second patch, the second patch at the top has to have in the darker tins. Now, to this last patch here, I will again just go ahead and rework the colors because this patch colors is
standing out very distinctly from the
other patch colors. So I'm going to use in the same greens and just blend them. At the top here, also, we are going to have
in the lighter tint, and at the bottom, we're
going to have in the tint. Now, let me give you a
closer view so that you can see how each patch is
standing out distinctly. Again, the key I'm repeating, the line where both
the patches meet, the colors there have
to be different. So if your first patch
bottom ends with a color, your second patch top has
to has a lighter color. Now, at the top
here of the second, I will just add in a little more lighter green
because it is still not standing out distinctly
from the first one. So in the first at the top, you can see bottom side of the first patch has
the dark color, which is meeting
the second layer. So automatically,
the second patch at the top has to have
a light green color. Now, just in the center
of the first one, I will add in little light
highlights with ash. It's so easy to work again
and blend in the colors and get in the right shades and transition that you need in. You can always
keep on reworking. My paper is also 400 GSM paper, so I know even the
multiple layers will not buckle up or create
any crinkle to my paper. So you can see each of my patch of the field is standing
out distinctively. The two adjacent colors of
two patches are not the same. If the first patch bottom
has a darker color, my bottom layer patch has a
lighter color at the top. Automatically each patch is standing out differently
in the field. Now, using in the white ah, I'm going to add in a small
moon into the sky here. Make sure you're using a smaller size brush
for adding in this, and I'm just going to add
in a simple moon out here. So that is it, Let's remove in the masking tape and
see a final painting. Make sure you remove the
masking tape against the paper, and once your edges are completely tried
so that you do not tear off the paper or the
edges or lift up the colors. So here's a closer look at
our painting from date ten, a beautiful night
view field painting. You can see how each green patch of the field is standing
out distinctively, and I hope you could
finally understand the technique that I'm trying
to convey out to you here. I hope you guys
enjoy painting this. Again, you can create
your various shades of dark and light greens
and use them here. I will see you guys soon
into the next class project.
14. Day 11 - Sunset Seascape: Hello, everyone.
Welcome back today 11 of the 30 days of
ash color challenge. Let's begin with the
basic pencil sketch. We are going to be painting
a beautiful seascape today. It's going to be a
beautiful sunset seascape that we'll be going ahead with. So I've marked out
the horizon line. Now, below the horizon
line into the sea space, marking out a rock area. Now, this rock while painting, we will divide it into three to four rocks
stuck together, but we will give in
those three d dimensions directly with the paints
while painting in. So for now, I'm just marking out the rock space. All right. And the area just below the
horizon line will be the sea. And at the bottom
right side here, diagonally, we are going
to have in a beach space. Again, if you remember in
the day seven class project, how we had blended the beach area with
the water body space. Same way here, also, we'll give in that soft
edge, but this time, the difference will
be, we'll be giving in the crashing wave
foam effect as well. So that will automatically help you create in that
soft blend directly. Even on the left, I've added
in two rocks out there. So that is it for a pencil
sketch for this class project. Let's begin with the painting. If you want, I'll just give
you a closer view as well. I will quickly just
correct this rock, and then I will begin
in with the sky first. Now, as I told you,
it's going to be a pretty sunset night view kind of a sky that we're
going to go ahead with. So I'll be going ahead
with the color tones of gray and yellow. Here's a closer view at the pencil sketch, the rock spaces, the beach area, and
the water body, and the horizon line
that we've marked out. So we'll begin in with the sky. So as I was discussing
for the sky, I'm going to go ahead with tones of gray, orange and yellow. Now, if you do not
have gray tones, I have discussed the
mix multiple times. You can mix in a
little hint of blue, black and white, and get
a perfect grayish tone. I'll begin in with a very
light tone of the gray. So if you want such a
light tone of cray, you just need to add in very little hint of black to add a little hint
of brown as well. This will give you this
brownish gray color that I'm going ahead with
at the top of my sky. Now, by now, you may
be knowing that I may sally blend my colors
directly on the paper here. So you can see I add the color, then dip my brush into water, because you know my paper
has a little rough green. And since the greens, because of the greens and
the thickness of the paints, it takes a little while
to spread them evenly, so I prefer blending them
directly on the paper rather than adding more water on the palette unnecessarily. Next, I'm going to pick up
a orangish yellow tone, and I'm going to add it
closer to the horizon line. And then in between for
blending both of these, I will use in the peach color. Now, I do not worry if you
do not have the peach color. You can simply use in the
white color to blend in because when the orange
and the grayish tone, they will all blend in together. It will give in that peachis
tone that you need in. Now, first, I'm adding in orange only in the half space
here you can see. Towards the right
side, I'm going to add the bright yellow color to give that sunset effect coming in there from
behind the mountains. So I'll pick up a very bright yellow color from my palette, add it towards the right side here and blend it
with the orange. Oh. I will just pick up a little more of
the yellow and again, add in the perfect layer. You can see in between
the gray and the orange, I've left that gap to use a very light pastel
peach color to blend in. Now, if you do not have
the pastel peach color, please go ahead, use in white. It will give you
an 98% same effect that I will be getting in here. So you can quickly, because if you see my peach color will be almost a white tone
that I'm going to use in.'s such a light color
that I will be using. I'm just giving a little
more bright effect to the yellow so that I have
that perfect sunset effect, and you can see the yellow and the orange are blended
together each other. Perfectly, giving in
those sunset pipes closer to the horizon line. Now let's pick up this light peachish yellow
color and blending. You can see this is almost equal to a white color
that I told you. Alright, so you can simply
use in white if you want. You need not worry of
having in the same tones. Now, because of this pastel color that we use for blending, you will see we do not get
any muddy or uneven tones while blending two such
odd colors together, being a gray and an
orange together. Otherwise, if you would have directly blended them without the help of white or
a light pastel tone, you would have gotten a
lot of a muddy patch, which would make the sky look
very uneven and unpleasant. Now, into the sea base layer, I'm going to go ahead, add in the same gray color that
we used into the sky. Now my mountain pencil sketch may get hidden because of this. But by now, you may
know where you have to place in your mountains and where your details
have to go in. Now, this is again,
just the base layer. This will almost get covered
up with the details of the waves and the foam effect that we'll be giving in here, and then little of
the wave details as well with different
color tones. So for now, just
adding in a base layer to give in the color
block to our water space. Now, for the sand space, I'm going to use in the Burn
sienna color and add in at the bottom right side here and blend it with
that grayish color. So to my burn Siena, I've added a little bit
of the dark brown as well and got in this dark
brown tone mix. Now I've not used
direct dark brown because that was
storing out too dark. So mixed in a little bit
with the burn sienna, giving it this blended view, and adding it at the
bottom space here. Now, using a damp brush, I will blend this dark grey
and this dark brown together. Just running at
the meeting point. You can see we got
this soft blend, just as we blend the
colors in the sky. Same way, you need to go
ahead, blend in here. So towards the right here, a little space of the rock
of the water was left, so I just added
in the gray color here and blended
it well all again. Now let's begin adding in
the details head further. So I'm going to pick up a
little more darker color at the bottom and just given this darker highlight because I had added in the gray color. So it got up a
little lightened up. Now let's go ahead further. So for the rocks, I'm going
to use a dark brownish tone. I'm not going to
use a black tone. So remember to use
a brownish tone, that will give you a
beautiful rock detail. And since, you know,
it's an evening time, it will look like a
blackish silohate that we're trying to add in. So you can see I'm just marking the entire block first of
the rock that we have in, and then going ahead further, I'll use the burn
Ciena color and create the differentiation
into the rock space, giving in the lighter spaces, which will separate each
rock from the other. So we'll create
kind of three rocks closely stuck to each other, and we'll give in
that three D effect using in the lighter
brown tones. So same way even
on the left side, I will first go ahead and
ma in these rock spaces. We had added the pencil sketch, so you can follow that
if visible or you can add in the rocks in your
own space as you wish to. A So at the bottom here as well, I'm just pulling out a
little of this rock detail. Okay? Now, when we go ahead, majorly white foam will
come in and cover up these spaces and blend
all of it together. Now, I'll quickly add in the first base
layer for the rocks on the left side as well, two rocks closer to
the horizon line. So I've marked the outline
in case if you wish to see because the pencil sketch
was no longer visible. Now I will quickly fill this in. You can see I'm not using a black color,
marking it out again. I'm using a dark brown
color from my palett. You can mix in black
to your basic brown if you do not have a
ready dark brown color. Now let's go ahead,
pick up a little of the burn sienna color and
add in the highlights. So I will begin, you know, distinguishing
three rocks here. So first, I'm just adding in
more of the lighter brown, that is the burn Sienna highlight onto this
entire rock space. And then I will use
the darker color and create in the highlighting. Now, onto each rock, towards the left side, we will keep the Burn sienna
color highlight to show the effect of the sunlight from the left falling
onto the rock, because of which, on the left, you will have the
sunlight effect. And on the left side rocks, we'll have the sunlight effect
falling from the right, creating the highlight on
the right side of the rock. That is the perspective view of the light that we are
considering here. So now onto these rocks, which are on the right side, I have to keep the darker spaces onto the
right of the rocks. So I'm distinguishing
each rock now, so you can see I created the darker line towards
the right side. So you can see now three
different rocks stuck together because
of the lighter and the darker tone technique
that we've used, and the light effect on this
side of the rocks is falling on the side because of the
light coming in from the left. All right? I will just add in a little more lighter highlights here as well. And we're almost through
the class project just details of the
waves to go ahead with our skies ready,
O rocks are ready. Now comes in adding in the
details for the waves. So first, we'll go ahead
with the white quash. Onto the rocks, you
can see I've created two color variations with
the brown tones only. Now using in the white quash, I will begin adding in
the details of the waves, so I will first
out a foamy line. Now, when I'm adding this, I'm not adding a lot of
water to my white quash. I wanted a little dry brush
kind of a detail here. So I'm just going ahead with
a damp brush and going ahead with a thick consistency of the paint and adding these here. So I've marked the outline
for the foamy space. Now I'm going to keep on
pulling in the white quash. Now, even in the Ca area, I'm going to give in
little foam effect. So I'm giving little
dry brush detail with the white quash first. Then on top of this, we'll
add in the wave detail, which will balance
these white foams and not let it show so. So for now, to go ahead
and make it simple, I'm just adding in the dry brush into the entire sa space. All right, not adding
an entire white patch. It's dry brush technique
that I'm using here and adding a little
dry brush texture. Now at the bottom,
I'm going to pull out a little dry brush towards
the beach side here. You can see trying to show in that foam effect
coming on the beach. So adding details
slowly and swiftly. We're done with a white part. Now let's go ahead, add
in some wave details. For that, I'm going to first use in two to three
tones of gray and a little darker
blackish gray tone to add in waves in
different color variations. So just going ahead
with simple waves. We've discussed
these technique of adding in the waves in
our technique section, where I've shared how
you can simply add in detailed waves
in easy manner. All right, so just going
ahead. Adding in the waves. For the waves, I will
just go ahead with two to three color
variations, as I told you. Now, when you need to create
in the color variations, what you can do is for
creating in lighter tones, add in more white for creating
in little darker ins, increase the temper ratio of browns and blacks for
forming in your gray. So as I told you,
now you can see the white drybrush that we
had added is almost hidden. Now, you just have little
foaming effect here and there. Now, using a little darker gray, I'm adding in some darker
crashing wave effect as well into the center area. Closer to the rock space, trying to show those waves
crashing the rocks out there, creating in that
foaming effect that is visible there in the center
with the white there. Now, towards the bottom as well, I will quickly just add in a
little of the waves effect. And then we are almost
through this class project. We'll just add in a very
small mountain range on the horizon line in
the center space before we peel off
the masking tape. Almost through the details
for the waves you can see. Now, lastly, I will just pick up an almost brown blackish
gray color actually, and just add in
some darker waves randomly here and there
to give in more depth. You can see this
will not be much, very limited giving in that
more detail and TD view of the crashing waves or those thick waves
closer together. Now I'm just going to go ahead, add in the details further. So first picking up a little of the yellowish orange color, I will just add little
highlights on the rock, just simple lines on the rocks to give in little more sunlight color effect
falling on the rocks. At certain places,
I will blend it with the basier brown
at certain places. I will just let those
little lines be visible. Even on the left side here, I'm adding in, but
on the left side, I'm blending it with the
base layer brown using in the dam brash because I don't want much of
the bold effect. So quickly using
in the dam brash, you can see, I'm
just blending at certain places into
the base layer. Now using in the black
color on the horizon line, I'm going to quickly add in
a very small mountain range. Alright, just going ahead
and quickly creating in this swift mountain range in the center of
the horizon line. So that is it. We are ready with our class project for day 11. Let's remove in the masking tape and see a final painting. I will just give in a little
more clear white detail in the center of the beach area. D brush, Here, I feel that the waves just giving in white effect again before
we peel off the masking. So let's remove the masking tape and see our final painting. Make sure your edges
are completely dried, and you peel off
the masking tape against the papers so that you do not tear off the
white clean edge that we need for our painting. Go ahead very carefully while peeling off
the masking tape. You can see the waves
look so realistic because of that white dry brush technique that we've given in. So here's a closer look at
our painting from day 11. The waves detail are my
favorite from this painting. I hope you guys enjoy
painting this with me. I will see you guys soon with another seascape for day 12, which will be a beautiful
pastal pink seascape. Make sure you plod
your class projects, and if you like this class, do drop me a review so that it can help me reach
maximum students. I will see you guys into
the next class project.
15. Day 12 - By the Sea: Hello, everyone. Welcome back to Day 12 off the 30 days
of colors with Kash. Let's begin with a
basic pencil sketch for our day 12 class project. Now, in this class project, we are going to be painting
a beautiful pink sky and, you know, simple water
space in between. But this time we'll be going ahead with a
lot of reflection and a lot of details
into our painting. So I'm just marking
out the spaces. Now, I'll give you
a closer view of all the details that
we're trying to add in. So at the top, we're
going to have in the sky. Then we are going to have in two snowy kind of
background mountain ranges. Then we are going to
have in a layer of pine trees in front
of the mountains. Then the sea wherein the reflection of the
pine trees will be there, and then a very simple field
area at the bottom space. Now, I'll quickly
ducken this up for you, so this will be the first
mountain range out here, which will have
the snow details. Then we'll have in a second
mountain range here. All right. Then this third line
that I'm marking will be the line for the pine
trees that we'll be adding. Now, this area in the bottom center will
be the water space, where we'll be adding in the
water and the reflection. So mountain, mountain, then we'll move on
to the pine trees, then we'll move on to the sea, and then a simple green patchy field detail
at the base layer. Alright, so this is
how our class project is going to be
structured for day 12. So now let's begin
with the sky first. So first into the sky, I'm going ahead with a very
light grayish blue color. Now, for this color, you
can simply add in a lot of white and just a little
1% ratio of black into your cereal
blue color to get this pastel grayish blue
sky kind of a color. Now, next closer to the blue, I'm going to go ahead with a very light pastel
yellow color. Now, for this pastel yellow, you can simply mix in a lot of fit to your normal
permanent yellow color that you have in and just add it closer to the blue color. Now, since I'm using
all the colors alter in a pastel consistency, so it will be easy for me
to blend without having in any uneven or unpleasant
tones in between. But in case if you still
feel that your blue and yellow mixed together
may give you green tones, you can use in a little hint of white in between for
blending these two so that you get that
smooth transition from the yellow and the blue, and you do not have any
green tones in between. But since I'm using
pastel tones, you can see blending becomes easy without the
use of white as well. Now, picking up a
peach color closer to the mountain range that we have in and adding
it completely, blending in with the yellow. Now, for the peach color, you can mix in red, orange, a little hint of yellow and
white and get a similar tone. Now, you need to
adjust the ratios of the colors of yellow,
orange and red, and see a little trial and error because you know some of you
may have darker red tones, some of you may have
a darker yellow tone. So you need to adjust the mix accordingly to get
your tone right. On the right side here, blending in with the
orange color into the sky. Now, along with the yellow here, I'm just going to use
in a little bit of the yellow as well
and just blend in. Now, I am not running
these colors into the mountain range because
the mountain range is going to be a
very light tones. So that is the reason
you can see this time, I've gone ahead
slowly into the sky, marking the outlines
perfectly so that we have the right shades for the
mountain range coming later on. Now, using a lilac color, I will begin adding in some
cloud details into the sky. I'm using my smaller
size filbert brush, and I'm just going to keep
adding in some s strokes closer to each other and
create in some cloud details. For this, you can simply
mix in a lot of white to your violet or purple color
of your palette and get this. In case if you do not
even have a violet color, you can mix in a little
hint of blue, pink, and white to get in
this, white consistence. The ratio of white
will be more to get in this pastel tone
of the lilac color. So very carefully, I'm adding in the lilac clouds
into the entire sky. Then we'll go ahead
with the further details into the sky here. So as I keep telling you, you don't always need
the same kind of brush. You can add these same details, even using a round brush if you do not have a filbert brush. If you have a mop brush, you can add those
with the mop brush. If you have a round
brush, you can add these with a round brush. Now I'm picking up a
little pastal pink color to add in the further details. Alright, now, again, if
you do not have this, you can simply mix in white
along with your crimson, scarlet, rose color, which have a pink shade
available in your palette. You need to just adjust the consistency and the
proportion of white, depending on the color
shade that you need or the color shade of pink that's
available in your palette. Now, with this
pastal pink color, I'm adding highlights over the lilac clouds
that we've added. I'm using the same smaller
sized filbert brush and going ahead with
the details here. So now, overlaying as well, and you can see somewhere, I've let the lillac
clouds also be visible. Very carefully again, not running into the mountain
spaces this time because I want the colors at the mountain space to
be perfectly visible. Now, again, I will
just lift up a little of the lilac color,
and at certain places, I will blend a little
of the pink with the base layer lilac
so that we have some soft blended
clouds as well. And then we're almost
ready with our sky. Then we'll move on
to the next layer of details into our structure
painting this time. So just adding some
smaller grandom clouds here and there, and that is it. We re with the sky completely. Now, into the first
mountain range, using in the very light
consistency of the lilac color. I have further lightened up this color with
the help of white, and just adding it as the first layer of the first
mountain range at the top. Onto this mountain, we
are going to show it as a lot of a snow mountain. So we are going to add in a lot of texture
details later on. So make sure the first
layer you add in in a very light lilac pastil color that is almost equal to a
white tone that you can see. Now, for the next
mountain range, I'm going ahead with
a darker consistency of the lilac color. So I've just added
a little hint of white black and purple
color to create this. You can go ahead and mix it in the right
proportions that you need. So you just need a
grayish purple color for the second layer
of the mountain here. On the first layer of
mountain that we have, that is the lighter mountain, we'll be adding in texture
with the darker colors. And on this second
layer of mountain, we'll be adding in texture of snow with the lighter colors. What we're going to show is that the first mountain range
is completely snow filled, only a little of the mountain, that the darker patches that
we'll be adding is visible. And for the second
mountain range, we're going to show
that the entire mountain is visible with just a little of the snow
details with the lighter tones. I've just darkened
up a little of the second layer
because as I told you, we'll be adding in the
lighter highlights on this, trying to showing very
small snow collections at spots on this mountain range. Now let's go ahead
onto the next layer. So I'm going to pick up
green tones and just add in an entire green patch here into this layer just below
this mountain range. And then you'll pull out pine tree details from top of this. We'll be adding a similar
reflection of this as well into the
sea area later on. Now, I'm randomly
shifting in between greens that are
available in my palette. You can go ahead with the greens that are available
in your palett. You need not have the exact
same shades of green as mine. So I'm filling this entire
space with the green first. Once my top mountain
range will dry, I'll begin adding in the pine
trees as well for now just giving in the base layer
details everywhere. All right. Now, even in the bottom
most part of our painting, there also, we are going to
have in the green tones. So I will quickly go ahead, add in the green
color there as well. There I'm using in
the Sap green color and filling in the entire space. Again, here also you can keep on altering between the greens that are available in your palette. I have picked up a little of the light green for the
top space at the bottom, added in a little of
the sap green color. Again, for greens,
as I told you, you can create lighter
and darker tones. For lighter tones, you can use yellow and white mix in
with your basic green. And for darker tones, you can mix in brown, black, analytle hint of blues. Now, ratio, you will
have to adjust, depending on the greens that's
available in your palette. Now let's begin with the s area. For the C, I'm going ahead with the peach color that
we used in the sky. I'm going to add it
in the center space. Now from the edge, where we
had the orange in the sky, I added the orange
on the right side, and just adding in a little hint onto the left side as well and blending it well with
the peach and just adding in the base
layer for a s area. Now, you can use a little
of the yellow as well. Now, we are going to have
in little reflections, as I told you. Now at certain spots, I'm using in the lilac color
that we used in the sky. So automatically, you will have a similar kind of sky color
reflection in the sea. Now you can first add in the entire base
layer with peach, and then add in highlights
with the lilac. But I prefer leaving in the white patch and
adding in the lilac here itself and blending it
with the peach that we have added into the
base of the sea. For the sea, we have a sinful
blend of the sky colors, as you can see, not an exact
reflection of the sky. Just the colors of the
sky should be reflected. Now I've picked up one darker
tone of the lilac color. My first mountain range is dr, and I'm just going to add in
little dry brush texture to create in the snow
caped mountain look for the first mountain range. As I told you, for
the first mountain, we are going to be using in the darker color to add in the details
because we're going to show that a first mountain
is completely filled up with snow for only a little of the mountain
patches is visible. And for a second mountain range, I'm going to add in the patches with a lighter color to show in very little of the snow
onto the mountain range. So I've added the first layer of details on that
mountain range. We'll be adding in
some darker details. On this first layer of
the details dry out. Now I have picked up
the lighter color, and I'm going to add in little detail onto the
darker mountain here. I'm trying to show an
entire snow waterfall kind of a space coming out from
this second mountain range. So in the center, I've added
in this lighter color patch, trying to show in
that snowy water or an entire patch of the snow collected onto
this mountain range. Now using in the black color. I'm going to add in little texture onto this
mountain range. It's going to be very
limited, not much. And then I will just add in the pine tree
details as well. So with the black, I'm adding
very little details you can see to show in the rock details onto this mountain
range as well. Now, for the tri brush
technique as well, we've discussed in the
technique section, how you should use the paints in the right thick consistency. And also, your brush
shouldn't have excess water, nor should your pigment have
any excess water collected. Now, onto the first
mountain range, I'm going ahead with
the darker details. Now, the darker details will
be very less because we want the lighter details and the first base layer
to be visible. So you will see I've added very less darker details as compared to the lighter
details that we added. So that is how you will build details with different tones of color variations to get in the details of the snowcap mountain on your mountain range. Now let's begin adding in the
details of the pine tree. So I've just tilted
my book because it will just give me an
ease of movement. Now, using in a
dark green color, I'm beginning to add in simple strokes from the green
patch that we've created. Make sure for this that your mountain range
is completely dried. Otherwise, the colors
from the mountain will begin to get reactivated and may create problem while adding in these details
of the pine trees. Now, some of the pine trees, I'm taking them taller a little above the
mountain range as well. And then wearing the heights
throughout, you know, across the entire space, we'll keep on varying
the heights of this mountain range
that we'll be adding. So I've just added in a
little hint of the black to my green at spots to give
in little darker details. Now, in between, you
will see I will keep on adding in the detailed
pine trees as well. So you can simply go ahead
with a mix of the pine trees. This also we've discussed in detail in the technique section, how you can keep on varying the simple strokes as
well as keep on adding in some details using in the simple method of
adding in the pine trees. Across the entire
mountain range, I'm going to go
ahead and keep on adding in these details
of the pine trees. Somewhere I have varied
the green tones as well to show in that nature
has different tones, and they are not exactly
all of the same tones. So you will see in the
pine tree area, also, we have three to four color
variations of the greens. Somewhere I've added a little
more black to my green. Somewhere I've
picked up a little of the Varian green color. Somewhere I'm just
going ahead with a little black details as
well to give in some depth. So that is how you can
vary the details of the pine trees here
in the entire space. So I'm almost done with the
details of the pine trees. Now, we have to
add in reflection to this into the sea area. For that, I'm going
to go ahead with a very simple and quick method
to add in the reflection. So whenever I wanted to give in more details
to my pine trees, I'm done giving in the details. Now, for the reflection,
I'm going to quickly add in one dark green layer line onto the line of the
sea area at the top. So first, just adding in this thick line of the
green color quickly. Now I'm going to use a dry
flat brush or a filbert brush, or you can use a fan brush, or you can even use
a spoiled brush, which the bristles of which
are completely spoiled. I'm using the smaller
sized flat brush without any water or pigment, and I'm just dragging these panes towards
the bottom side. This will create the
background for my reflection. So you can see I'm just
pulling out this is giving in the drivers detail and
a rough reflection. Now, at certain spaces, we'll have to give in more
depth to the reflection. That will be quick
because we have the base layer of our
reflection ready. So you can see we created in the reflection space
very quick and easy. Now I'm going to pick
up the base layer peach color and given depth. What I'm going to do is
using in the peach color. I will just create little cuts like these in
between the greens. So you will see
automatically this is giving in so much depth
to the reflection, trying to show in
that the reflections are perfectly visible. It's not giving in that
area visibility as well. So just giving in little cuts onto this green space
that we've created. Now, make sure for this your green patch
is completely dried, and you go ahead very gently. Otherwise, the green and
peach mixed together, will give you a
very dull finish. Now, at the bottom, just
adding in a little peach again and blending in with these strokes that we've added in. Now, if you see some of our
pine trees are very tall, so we need to add in little taller reflection
at those places. So just at the places where we have the
taller pine trees, I'm going to pull out
the reflection a little taller with my pointed tip
brush and given little detail. So random places, wherever you feel that the pine
trees are taller, you can go ahead and increase the reflection length as well. Now, in the
foreground, I'm going ahead with some
detailed pine tree. I have picked up
the black color. You can go ahead with
a dark green tone, so I've mixed in a little sap
green as well to my black, and I'm adding in
very huge pine trees. I'm still left to add in a
little more reflection detail. I will add them later on
once they are completely dried so that I don't mess up the peach and the
green tones together. So here, I'm just adding in
some detailed pine trees. You can see I'm just using
in my pointed tip brush. Now, adding in these pine trees, also, I've discussed in
the technique section, the different ways
how you can add them the techniques of
adding them quickly. So I'm just going to add in
some quick pine trees here. Adding up another one here onto the left side edge as well. You can see it's a
little tilted and slant. Not everything has to be
straight and crisp always. Now, I'm just going to add in two to three onto
the right side here, and we are almost through a
class project for day 12. This was a little
detailed class project because of the, you know, detail that we have added
this time for the reflection, for the field spaces, the pine trees, the details on the mountain, which
took a little time. But still we managed to
complete this painting in almost a time
schedule of 25 minutes. Now, I'm just going to go ahead, add one more huge pine
tree on the right here. Now, this one, you
can see I've taken it a taller to the first
mountain range almost. Very quickly, you can see I
could add these pine trees. I'm using my size
one round brush. This has a pointed tip, which makes it possible for
me to add in these details. You can even use a
detailer brush if you're not having in a pointed
tip to your round brushes. I will just go ahead with
one more on the right side. Basically on both the
left and the right side, we have huge pine
trees in the c, we have the
reflection details of the pine trees and the mountain range in
the sky coming in. Now, next, using in a little
bit of the Saprin color. I'm going to add in
little bush detail onto this bottom field space that we've created
closer to the sea. So at the top, I will just add in the detail first and then blend it with the greens in the bottom space,
using in a dam brush. Or you can pick up
the baser green color again and blend them. So just going in at the top and then blending
it at the bottom space. So I added a little darker
depth at the bottom as well. Now I'm just lending all of these using in the damp
brush. You can see. Now closer to the pine trees, you can be a little careful, or what you could do is, you could first add in
this detail before adding in the pine trees and then
add in the pine trees. That may make your task easier, but this was also easy for me. Now let's go ahead and add in the details of the reflection
at places before that. Just adding in little
darker green patches onto the top area of the field. Simple dry brush
detail that I'm adding here to show in more
depth into the field. So simple dry brush with a little darker green color than the base layer is
what you need to add. So that is it. I've just added
little dry brush detail. Now, one last thing before
we remove the masking tape, I will just correct
the reflection detail. So we added a quick base
layer for the reflection. I showed you an easy technique where we just pulled out
the base reflection, then we gave in little
cuts in between to show in the natural
look of the reflection, and not everywhere
the entire reflection altogether because
somewhere reflections may not be visible. So we gave in the c
layer cuts in between. Now using in the green, I'm just going to give in little
detailed strokes, wherever I feel the need
to correct the reflection. And somewhere at places where I need the reflection to
be a little longer. I will just take the
strokes a little longer. So here on the left, we have
a huge pine tree at the top, so I've just increased the length of the reflection there. So accordingly, where you
have the longer ones, you will create the
longer reflections there. So let's remove in
the masking tape now and see a final painting. Make sure you remove the
masking tape against the paper and your edges
are completely dried. This is a very detailed
painting that we went ahead with for our date 12. I will quickly correct this small patch
at the black here, and we are ready with
our class project. So here's a closer look at
our painting from Day 12. This is absolute favorite of mine from this entire
series until now. We've gone ahead
with so much details into the mountain range, the reflections, the details
into the sky simple sea. I hope you guys enjoyed painting this beautiful painting
with me for day 12. I will see you guys soon into
the Day 13 class project. Till then, make sure
to keep uploading your class projects into
the project section, and do proper review so that it can help me reach
maximum students.
16. Day 13 - Wild Clouds: Hello, everyone.
Welcome back to day 13 of the 30 days of
course challenge. Today, we are going
to go ahead with a very beautiful
pastel pink purple sky and add in simple silhouet. So let's begin with the sky, no pencil sketch, nothing, just direct paints
onto art paper. Pause and beginning in with a medium pastel tone
of the purple color. You can simply mix in white
to your violet or purple, whichever is available in
your palette or mix in a little bit of blue pink and white to get a similar tone. You, of course, need
to adjust the ratio as per the colour tones
available in your palette. So at the top, I've gone
ahead with this pastel color, almost half of the sky. Now, next I'm going
to shift into a pink color and add it
into the rest of the space. And then we'll be
going ahead with a bold cloud detail
into our sky this time. I'm taking the violet
a little more below again and going almost till the, you know, 60%, 70% of my sky
filling up with the color. Tanips have picked up a further lighter shade
of the purple color. So you can simply add in a little more hint of the
white to your violet. And at the bottom most space, I'm going to go with a
peachish pink colour. Now, for a peachsh pink color, you can simply mix in
a little hint of red, orange and white, or you can even create directly
a pastel pink color. So this is kind of a skin tone color that I'm adding here. So you can mix in
orange, red and white. Orange and red would be
very less as compared to the proportion of white
that you'll be adding in. I'm just creating
one smooth blend from bottom to top
or top to bottom, whichever way you prefer. Now, since my tones were pastel, you can see there is no
uneven color because of the purple orange tone
mixing to each other, because of the white and
the opacity of the paints. Now I'm going to go ahead with a very big cloud detail into the center of
the sky this time. So we are going to
begin in adding in the cloud first and
then simple siloed. So almost the center of the
sky will be covered with that pink violet cloud
details that we'll be adding. For that, I'm using
in my filbert brush. You can use a mop
brush, round brush, or even a flat brush
or a filbert brush, whichever is available
in your palette. In your brush
collection, actually. Now, next I'm going ahead
with this pink color. It's not too much of a
light pink shade first. It's a medium pastel pink tone. It's going to be a huge cloud with different tones
of pink and lilac. So you need to keep on adding accordingly and
keep on blending. You can go two ways. One is adding in the entire big cloud with the
pink color first completely or going ahead and blending in
the shades itself, leaving in spaces for
other colors to come in. So I'm leaving spaces and first adding in the patches
of this pink color, then I'll pick up the
other colors and blend in with this pink tone
that we are adding in. Now, next, I'll pick up a further lighter
tone of the pink. This is going to be a very
light pastel pink color. You can see it's almost equal to a white tone with just a
little hint of the pink. So now, next, I'm going ahead with this light
pastel pink colour. You can see I'm adding it in between the darker
tones, blending in. Now, again, make sure you use the paints in an
opaque consistency. Be very gentle on your
brush so that, you know, the paints from the base
layer will not get activated, and you will get the color loop that you need for the tones. Now, next I'm going to
pick up a little more darker pink in between and
add little more clouds. Now, for these paints, you can just keep on
waving with one color. You can select whichever
pink you wish to. And you can keep
on altering the, you know, tonal variation of the paints with
the help of white. And creating in lighter
and darker tones so as to having these different
tones into our sky. Now, I will just pick up the
first layer base pink color for the sky for the clouds
that we had begun with, and I'm just going
to add in little more blending
randomly at places, and we'll be ready
with our clouds. Then next, we'll move on
to the green colour to begin adding in the sil
heat into our painting. So just blending
in at spots with the first layer of
the pink that I had begun with, and that is it. I'm ready with my
cloud for the sky. Now for the silhouette, I'm beginning in with
the green color. Before you begin adding
in the silhouette, make sure that your sky and
the cloud is completely dry. So that when you begin
adding in the green paints, they do not reactivate or blend
in with the cloud colors. Otherwise, you will not get in these silhouette
details, right. At the top, I'm
first pgning in with very simple dabbing technique that we discussed for
adding in the bushes. And then simply I'm pulling out branches and adding
in simple details, creating in leaf details
into our painting. Now, randomly in
between the greens, I will keep altering with
a little hint of black as well to give in
some darker details. You can go ahead with either black or pick in a
darker green color. So you can see I'm
just pulling out branches and adding in details. I'm just going to keep
on altering majorly with greens and very little hint
of the black in between. And somewhere I will just create little darker
greens by adding in little black or brown to my base sap green color
that I'm using in. Now, on the leftmost side here, I'm going to go ahead
with very big details. So I'm first pulling
out the branches. Now, this time, you're not going to add in a lot of foliage. Instead, we are going
to have in a lot of, you know, branch
detail this time. So that is the
reason first using the pointed tip of my brush. I'm adding in the
branches that I need, and then I'll move on to
adding in the foliage detail. Now, make sure that
these branches are very thin, crisp and small. You do not add them
in too much of a thick consistency
or thicker lines. They will not give in
that natural effects to the branches that
we need to look here. After we are done
adding in all of this foolage and
the branch detail, we'll be adding in simple
street lights this time. It's going to be very simple and quick that we are
going to go ahead way. I'm just pulling out smaller
branches, as you can see. Keep on pulling majorly
onto the left side, overlapping each
other, pulling out further smaller branches
from the bigger branches. You can see all of
my branches are moving in random
different directions. Plus, you can see, I have
been altering between black, green and a mix of black and green and creating in the dirt. Now I'm going to begin adding in simple leaf fooliage detail
onto these branches. I'm not going to fill all of
these spaces, as I told you. The foiliage detail
will be quite less because I want a branch look
to be visible this time. Very randomly, you can see I'm adding
in some foolage detail here and there at
certain places, I'm just letting the branches
be visible as a whole, not covering them with
any filage detail. At certain places,
I'm just dabbing the brush and adding in simple
leaf detail you can see, just dabbing in the
tip of the brush, creating in leaf detail. For the foilage, you can see I'm going with very
random techniques. Somewhere I'm dabbing a lot
of them closer to each other, somewhere just dabbing
in paints closer, creating in a cluster
of the foliage. Somewhere I'm giving
in leaf detail by pressing in the
belly of the brush. So going in with mixed details gives a variety
to your painting, as well as gives in that
natural effect of nature, because if you see, nothing
is same or of the same size, length, breadth, it keeps on varying with branch to
branch, even in nature. I'll just go ahead with a little more foliage at the bottom. So I'm going to first add in a few more branches
randomly at places. Now, you can see I have kept major cluster of foiliage
at the top side, and towards the bottom
of the branches, we have very less of foliage and more of the
branch look visible. If you want, you can pull out further more branches from this, so I'm just going to pull out some smaller branches from
these and let them be. Now, using in a dark green mix, I'm just going to add
in some more darker overlapping leaves onto
these that we have already added to give in
that little more colored. So I've just mixed
in simple black to my green and gotten
this dark green color. I'm done with the
foiliage now using in my fine tip line brush, I'm going to begin adding in the detail for
the street light. So I'm just going to pull out simple wire lines
first into the sky. You can see I'm using
such a fine tip brush so I'm able to get
in these fine lines. If you want, you can add
these fine lines using a waterproof pen so that you do not mess up with the
thickness of these lines. Alright, now I'm adding two lines closer to each
other here first. Now adding another
line at the top here, you can see my brush is such fine tip that I'm getting in these fine lines easily. You can still use a waterproof
pen, as I told you, so that you can get the lines crisp and clean if you're not confident about adding
these thin lines using the brush directly. In the previous projects, I have discussed with you
how I use waterproof pen, but it's important that
you use a waterproof pen. Otherwise, when you
begin adding in the details with a yellow
color for the lights, the black color ink may leak and begin to spread
because, again, gouaches are waterwaye paint, so they will begin to
spread out if you do not, you know, use waterproof pen here because gouache
pas contain water. Now I'm adding in simple
bulb handles first, and then we will use
the yellow color and add in simple street
light details. I'm done adding in, you
know, handle for the bulbs. I'm just going to
add in one more reeline on top of this here. Now, once this black
colour dries out, we'll add in the lights
with the yellow. Now at the top, I'm not going
to add in the bulb detail. It is just going to
be this one line, and at the bottom,
we are going to have in the street
light details. So the black color
that had spread here, I'm just correcting it with
the base ier cloud color. But make sure if you ever
have to do corrections, you wait for that
layer to dry first. So my black was
completely dried. Then I again, layered it with a thick consistency
of the pink color of the cloud to correct
the thickness of that black handle that we
had added for the bull. It's important that
you can it's easy that actually you can correct your mistakes when
it comes to guh, but you need to know the timing,
then you can correct it, because if you correct
the wet paint, it will again begin to spread and spoil everything further. So for any corrections, make sure you wait for the
first layer to dry out and then add now in the
bottom two lines also, I have added in the details for adding in the street
light details. Now I'm going to pick
up bold yellow color in a thick consistency and
using in my round brush, I will simply add in
yellow dots under these black lines that we've created to act in as
the street bulbs. U. Simply using in the yellow, you can see I'm adding
in these bulb details, just creating in simple
street light view. In one of the previous
class projects in day four, if you remember, we had gone
ahead with detailed lights, and this time we are going ahead with very simple lights here, but you can see even simple lights creating so much there. Now, if you see for
this line here, I have added in the bulb
details much closer. And at the bottom, I've added
the bulbs a little far. You can go ahead with a mix of both of these
kind of details, or you can go ahead with just bulbs far or
close to each other. I prefer the far one
looks much better, but since I had already
added those closer, so I let them be closer. I'm almost done with
this cast project done adding in the
yellow light details. You can see simple technique, but so much reality look to
your landscape painting. So now let's remove
in the masking tape and see a final painting. Make sure you remove
the masking tape once your edges are
completely dried, so that you do not
tear off the edges. Now, here you can see again
the paper may have been wet, so I could manage to stop the paper from
peeling off completely. So go very carefully and
slowly so that you do not mess up and lose
those white edges. Otherwise, they make the
painting look very shabby. I will correct that
spot again at the top with the help of the
green foolage detail. So again, you see with gouache, so easy to correct in
these simple errors that come in unsaid
or, you know, when things happen like this, while peeling off
the masking tape, you can easily
correct it and get the texture and the
consistency right again. So here's a closer look at
our painting from day 13, a pretty simple sky with one huge cloud and simple foolage detail with
simple street light views. I hope you guys enjoy
painting this with me today. I will see you guys soon into
the day 14 class project. Till then, make sure to drop me a review if you
like this class. Thank you so much, once again, to each one of you
for joining me and painting along with me
through the 30 day challenge.
17. Day 14 - Sunset: Hello, everyone. Welcome back to day 14 of the 30
days, of course. Today we are going to go with another simple yet
beautiful sunset painting. Now, there's no pencil sketch. We're directly going to
begin with the colors. I'm first going to begin with a very dark shade of
the violet color. I'm beginning in with a
medium tone, and at the top, we'll darken it up with
the help of going ahead further because this is the darkest violet that
I have in my palette. So I'll just add in black at the top vile blending and create a little more
dark tone at the top. And then we are going to
blend in orange this time. Now, violet and orange mixed together will
give you muddy tone. So it's very
important in between, you use white for
blending or use in a very light pastel
peach shade for blending. Now, that depends on the colors that are available
in your palette. You can go ahead
with absolute colors that's available
in your palette. Now, at the top, I've just darkened up this past
with the help of a little tint of indigo color instead of using the
black this time. So added a indigo at the top here and blending it quickly. Now next, I'm going to pick up a light shade of the lilac
color and blend in here. Alright, now, if you
do not have this, you can simply mix in
a little hint of pink, white, and violet, and
you will get this. Now again, the ratio depends on the tonal variation of the paints that you
have in your palette. Now I'm just adding in here, and then I'll go ahead and blend all of these
together well. So first, I've just
added now I'll blend these two colors
first and create a perfect transition from the very dark sky to a little
lighter tone out here. Now, at the bottom,
as I told you, we are going to be going
ahead with the orange tone. So first, I'll add in
a little bit of white here underneath the lilac color. And then I'll use an
orange for blending. This way, it will help me in avoiding getting
in any muddy tones and will give me a smooth
transition between the violet and the
orange tones as well. So now I will pick up
a bright orange color, not too dark, not too light. And I will just add it here. It's a little pastel
orange, as you can see. If you do not have
such a pastel orange, you can add in a little
hint of white to your basic vermilion or orange color and
get a similar tone. So I've just added
in the orange, blended it with the
lilac very easy method, nothing just with
the help of white. You can see we do not have
any muddy tones coming in. Now, at the bottom most space, I'm going to go ahead
with the black color. This time, our silhate
is going to be very simple yet it will give
you a pretty view. So going ahead with the black
color at the bottom space, towards the entire right side, we are going to have in a lot of foolage detail coming in later. So first beginning in with
the base layer black, it's not supposed to
be a straight line. You just need to go ahead,
fill in that space completely. On top of it, we'll be giving in little bush and simple details. Now, almost in the center space, we are going to show a
setting sun view as well. So we'll create a bright
effect there later on, moving further with the help of yellow and white in case if you want and if
you're not confident about going ahead, you know, with the white and yellow
closer to the black tones, you can first move ahead a little into this
class project, see how we are going to add in that setting sun effect and add that first and then move on to the details
with the black color. It's absolutely your
mix and match how you wish to go ahead with and how you are comfortable with. Using in this
spoiled round brush, I'm just going to begin
with the black color and create in the
background foilage. Now, using this brush, also, I've discussed in the
technique section how you can quickly just fill
in the space and create in your background
for the foilage and then just go ahead with little
detail foolage on top of this. So you can see I'm going ahead with varied range
of the fooliage. I'm not going ahead
with, you know, the foliage of same
height throughout. Somewhere I'm taking it more
towards the center space, somewhere I'm keeping it just majorly towards the
edge of the right side. From the top, I'm just pulling a little more towards
the downside. Now, remember this is
just the first layer. We are going to add in little
detailed foliage to this. So you accordingly keep this
layer such that, you know, there is space for you to add in the detailed foliage as well. Also, very important.
You need to be careful. Go ahead with the dry
brush technique here. Bush should not
have excess water. You pigment shouldn't
have excess water. You should get these details
in a dry brush method. Now I'm picking up the
bright yellow color out here on my palette, and I will add in
the first layer for the sun that we
are going to create. So it's going to
be a setting sun, so I'm just going to
add in a half circle out here and just fill
it with the yellow. And using a damp brush, I will blend this
into the base layer. This is just the first layer
for creating in a sun. So using a dam brush, I blended that on the edges into the base layer just as we create the glowing
space for the moon. We are creating the glowing
space for the sun this time. Now let's go ahead picking
up the black color, begin adding in the
detailed foliage out here. So just simple pulling out
leaves that I'm doing, I'm using my smaller size brush, and the tip of which
has a pointed tip so I'm able to get in
these fine details. You can even use a further smaller size brush
if your brush does not allow you to add in details because of
the tip of the brush. One. So randomly, you can see I'm going ahead with detailed leaves
and some branches, very thin details
that I'm trying to add in here on
the right side. The left side, the sky
is going to be visible, and on the right side,
we have the foliage. At the bottom space, we
are again further going to fill in more of the details
with the black colour. This class project will be
done in just under 15 minutes, and you will be stunned
to see what you've created out of these 15
minutes class project. Now, randomly, I'm pulling
out some branches, as you can see, simple
branch and from that. I'm just keeping on pulling
out further smaller branches, creating in more depth and realistic effect to
our nature painting. Now, somewhere I'm
going ahead with little more bold
and thicker leaves, you can see, I'm pressing
the belly of my brush, giving in detailed leaves. All of these details
I've discussed in the technique section
of grasses and leaves, wherein I've showed you each of the technique of adding
in the background the detail and how you can go ahead and fill in the spaces
a little more quicker. Now, shifting into
my detailer brush, I'm going to begin
adding in the details at the bottom black space
that we've added. For that, also, we
are going to be using the black color itself. So let's begin adding
in those details now. Now, in this close of view, you can see the yellow effect that we've created for the sun. I'm not going to add
in the black foliage there right now
because I'll first create in the white
layer of the sun as well and given that
beautiful sunset effect. And then once it dries, I'll give in the black
details in front of it. Now, in the rest of the space, I'm just creating in
simple bush details. This also, again,
we've discussed in the technique section of
adding in simple bush, using in first at the top, you create dab in your brush and create simple
leaf like structure, and towards the bottom space, you fill it completely
with the black color. So I'm just going ahead
with this simple silhohet here and giving in more
details at the bottom space. So till the right edge, I have added in the details
of this black color. Now, same way, I'm going to go ahead onto the
black side as well. But the sun space, again, I'm leaving it for now
because as I told you, I'll be adding in the setting
sun effect there first. Now, on the leftmost edge, I'm taking it a little
taller on the edge side. On the right, we already have so much of the
fooliage details. So I've kept the details out
there very small, very tiny. And towards the left, I'll create some bigger
foolage details, but not too big
because I want to let the sky also be visible
on the left side majorly. So you can see I'm using
such a fine tip brush, so I'm able to get in
such fine details. At the top, I'm
just using the tip, creating in simple
random structures, and towards the bottom, I'm just filling it with
the black color. Now, first, let's add in
the detail for the sun. For that, I'm going to
use in my round brush and the white color and going to add it a little below
the yellow space. So your white space will be smaller than the yellow
semicircle that you've created. And automatically, you
will see this is giving in that setting sun effect with
that yellow background. So now, again,
using a dam brush, I will just blend a little of
this white with the yellow. So I've picked up
a little yellow again so that the
blending becomes easier. And, you know, we have in
that perfect blend between the yellow and the white showing in that setting sun effect. Now, you can see the
white is glowing, giving in that
setting sun effect. And from the background
of the white, you are having that yellow
light of the sun coming in. And since the rest of the
sky is already orange, you get in those warm
vibes of the setting sun. Now in front of it, I'm
adding in simple details. You can see you need to wait for your white detail to
be dried completely, only then go ahead with the
black in front of white. Otherwise, both white
and black will begin to mix together and your
details may ruin out. Now, on the left side, I will just add in some
details or more with a black color before we peel off the masking
tape for this project. So just adding in simple branch of a leaf out here, alright. Now, even on the right side, I'm just pulling out
some detailed leaf, very small ones you can see, giving in that perfect
silhouette effect. Now, in between, just adding in some simple strokes
that we've discussed in the pine tree section to give it a little
more detailed view. You can go ahead with a mix of anything that you
wish for the foliage. You can even add simple
pine trees, palm trees, but make sure you just keep
the details very small and delicate this time because we're giving in a very far view, and the major highlight
of this painting is the setting sun effect and the sky with the foliage
on the right side. Now, I've just added a
little more detail closer to the sun because now my
white was completely dry. So that is it. We are almost through the painting for day 14. So let's peel off
the masking tape and see our final painting. Make sure your edges
are completely dry before you begin peeling
off the masking tape. Now, from the far view, you can see how beautiful that white setting sun
effect is coming in. Make sure you peel off
the masking tape against the paper so that your
paints do not wear off. So here's a closer look at
our painting from day 14, a very simple sunset
just under 15 minutes. The setting sound effect with the help of
yellow and white, simple techniques, blending and simple silhouette
with the black color. I hope you guys enjoyed
painting this with me today. I will see you guys soon into
the day 15 class project. Thank you so much once
again for joining me into this class and
painting along with me.
18. Day 15 - Winter Sky: Hello, everyone. Welcome back to day 15 after 30 days of quash. Let's begin with a very
basic pencil sketch for a class project for day 15. The for the class
project for day 15, we are going to be painting a very simple winter
snowska landscape. The beach is marking
the horizon line, much below the center line, as you can see, the top
area is going to be a sky. The bottom will be the
snow covered space, and on the horizon line, we'll add in some details. Now, we're going to go
ahead with a pretty blue, dark winter sky evening. So I'm picking up
the shades of blue. Now, you can use
Prussian blue or indigo. You just need one darker
blue first for the top, and there you'll keep on
diluting the colors accordingly. So I have mixed in
a little hint of the indigo along with
the Prussian blue color. Now, in case if you
do not have indigo, you can add very little
hint of the black color to your Prussian blue color or any darker blue which is
available in your palette. They need not be the exact
same shades as mine. Now, next, I'm going to pick up the crucien blue color directly, not adding in any glac
to it or indigo to it. We need to begin creating in the lighter shades as we move
towards the bottom side, just a little dark
hint at the top. I'm just beginning in with the crucian blue
colour, going ahead, bending it with a
darker tone that we've already added previously. Now, since I've told you my paper is a little rough green, it takes me a little time to blend them on the
paper right and get the right smooth transition
between the shades happening. Now I'm going to pick up
a very light blue shade as compared to the
Prusian blue color. This is, you know, a little pastel hint
to the blue color. So what you could do is
you could just add in white to your Prusien blue
and get this lighter tin. But make sure that you do
not add a lot of white. You can see it's just
one hint lighter than the previous Prussian blue
color we have been using. Twist that we are
going to add into this dark winter
sky is going to be a little hint of the
cobalt green colour, which will give it a little
Northern sky kind of hint coming into
this winter land that we are going
to be painting in. So I'm picking up
the bal green hube which is already
readily in my palette. Do not worry if you do
not have the same shade, mix in a little bit
of serelon blue, a little hint of
green and white, and you'll get
this similar tone. If you have a viridian green, that would be much
better to mix in. But if you do not have,
you can use emerald green, a little hint of sap cream
if you do not have either of the greens with a little bit of the serleon or ultramarine blue, and you'll get a similar tone. Now, again, closer
to the horizon line, I'm just picking up a little bit of the blue color itself and blending it with the cobaltrin
color that we've added. Now, make sure that you
define the horizon line well because the bottom area is going to be completely the snow space, which is going to be very light almost equal to a white tone
that we'll be adding in. So you do not want the colors from the sky to go much
into the snow space. So have that crisp line
for the horizon line. Now, next, I'm just
going to add in little detail with the
cobaltrene color on the dark blue color of the
top spaces to give it a little more of the northern light details into
our winter sky. So using in a smaller
size Filbert brush, I'm just going to
blend in a little of this cobaltrene color hue into the blue at the top spaces. Now I'm just going with
random cloud kind strokes that we've been
adding in our clouds, but you just need to
make sure you do not have to add in a lot of
pressure to your brush because if you will add in a lot of pressure to your brush the bottom dark blue colour will begin to get activated and
mixing it with the cream, it will create a neutral color, and it will not give
you the highlight of the cobaltrene color that you need over the
Prussian blue color. So it's important that you maintain the pressure
on your brush while adding in these strokes with the cobaltrene colors so that
they are visible as it is. So you can see automatically on the dark blue spaces we are beginning to have in
little highlights of the green tones coming in, creating in the light into the
night sky, giving in that, you know, the
Northern Light view into our simple winter scape that we are painting in here. Even onto the bottom, you know, cobaltrem color
that we've added simply, you can add in little highlights with
the blue colour that you've used so that it will
all look blend together. Now, since we're
giving it a little of the Luthern sky view
into our winter sky, I'm going to use a very
light pastel pink color and add in little highlights
with the pink as well. Now, again, if you do not
have a pastel pink color, you can simply add in a lot of white to your basic pink
color that you have. It can be carmine, scarlet, rose, or any other pink shade that you
have in your palette. I readily have this very
light pastel pink colour. You can see it's
almost equal to white, but it has that
perfect pink hint. Now, using this,
I'm going to create little highlights into
our Northern sky here. Same view, just as
I was adding in the details with the cobaltrien
colour with the blue. Same way using in the pink, I'm adding in the highlights. You can see it is having a soft blended look
with the base layer, but still it's visible as a highlight onto the blue tones, giving in that perfect view and the highlight effect
into our Northern sky. So it's important the pressure that you add on your
brush while adding in these strokes
because a lot of pressure will activate
the base layer's colors, and you will not
have the highlight of these lighter tones. Rather, you will
have a color mix of the pink and blue
which will act in as a purple highlight or a lighter shade of
the blue coming in. I'm just going ahead, adding
in clouds, blending them in. Now we're almost
through the sky. I will just go ahead, add a
little more blending details. You can see on the edges
each cloud detail, I'm blending it
with a base layer so that we have in that
soft Northern sky. So just using in a
damp brush at the top, wherever I've added
in the pink strokes, I'm just blending
them on the edge with the base lear blue so that it has that soft edge because I do not want any harsh cloud effect. The ready bit of sky. Now, let's go ahead
into the snow space. The fogger snow space I'm just going to pick up
the white color. Now my brush has a little hint of the blue and the cobalreen. So automatically in my white, there is a little hint of the
green and the blue tones. But you can see it's
almost a white tone that I'm using into
the base layer first. Oh The way the adding in the base layer, now using in a very
light tone of the blue. Let's begin adding in
details into the snow space. So first I'm going to create in some diagonal lines and then blend it into the base ia white. So you can see I'm pulling
out the diagonal lines from the left towards
the bottom right side. Now again, I'm going a little
diagonally, as you can see, I'm going to create
in a few lines and then using in a
little hint of the blue, I will blend them at the
bottom space moving further. And the first level, we've already added in these diagonal lines
with the blue color. Now, from the top left side, I'm pulling out a
lot of blue and blending it almost
to the center space. Same way from the bottom right, I'm going to pick up
the same blue and pull it towards the center
space and blend in. So in the center, you will
just have little highlights, and from both the top left
and the bottom right space, you will have a lot of
blue shades coming in. The center, you can see
is still light with a little of the white hint
creating in that snow effect. Now, using the black color
and my fine tip brush, I'm going to add in some
details on the horizon line. You can see the closer
look of the sky, how the pink highlights
are blended yet visible and the green highlights creating in
that Northern sky view. Now, I have added in first
the center part for the tree. Now, this time, the pine tree, I'm going to add in in a
little different manner. I'm going to keep pulling very thin strokes
towards the top side, creating in that perfect
winter looking tree detail. I'll give you a closer look
further, but right now, I'm just pulling in
very fine strokes, all moving towards the top side. At the top, my strokes are smaller in length,
moving downwards, you can see I'm
increasing the length, giving it a little
triangular view, but I'm not increasing
it too much also. I'm keeping it a little
symmetrical as well. I'm done adding
in the first one. Same way, I'm going to
add in one more here. Now, you can see I've not added these in the center perfectly. It's more towards
the right side. Do not add it in the
center because that will create the focus
onto this part, and it will look very
monotonous kind of thing. It's important to keep
it a little aligned either to the left or right
wherever you wish to, but just do not keep
it center aligned. The second one, as
well, you can see I've added it almost
of the same height. Now in the first one, I'll
just increase the height a little so that both of them do not look exactly
of the same height. You can increase the length
of whichever one you want to. It's not necessary to
keep it left or right. Now, on the left side here, I'm just going to add a little more detail
with a black color. So just at the top,
picking in with a little simple bush detail that we usually go ahead with, tapping in the tip at the
top and moving downwards, and decreasing the
length height here. I'm not going to add it
into the entire space, just taking it a little
before the center line. Now at the bottom,
till the horizon line, just going to fill it
with a black color. At the top, using the tip, I'm just going to give
in little more details with the black color itself, giving in more
little defined look to the bush that
we've added here. Now, next towards the
right side as well, I'm just going to add
a little bush detail. Again, I'm not going to be connecting all of these
on the horizon line, little details here
and there to give in a little more depth
to a horizon line. I'm using a very fine tip brush, so you can see my
details are very fine, and towards the rightmost edge, I've added a very fine line
touching the right end. So make sure you use a
delicate brush this time so that your details are delicate and they give in that detail. Now, towards the left here also, I'm just pulling
a very fine line, giving in that fine end to
the details that we've added. Now, you can see in
my snow space also. I have accidentally had, you know, a few drops
of the black spots. Now I'm going to go
ahead and correct these. So I'm using in white and
going to just overlay. Make sure before you go to
correct any such mistakes, those correction that you want to do are completely dried. Otherwise, it will be very
difficult to correct them. So I've added a layer of white, but it turned out a little
gray because my black was wet. So I've just picked up the blue again and blending it all well, and a little gray highlight
is okay into the snow space, creating in more depth
of the snow area. I'm just giving in
a little more depth with a little hint
of the create, just some simple diagonal lines, but soft and blended look. Now, just one last thing, I'm just blending in the pink
little into the base layer, so I'm just using a damp brush and running over
the pink so that it blends in with the base
layer a little because I feel the pink is somewhere
popping out a lot, which I'm not liking,
so simple blend, and you can see it's a little settled now and it's not
standing out differently. Now, let's remove
in the masking tape and see a final painting. Make sure you pull
off the masking tape against the paper and
also make sure that your edges are completely dried before you begin pulling
off the masking tape. Now, let's have a closer look at our painting from day 15. So here's a closer look at our very simple Northern sky winterscape painting for day 15. You can see the snow details that we've added at
the bottom space, giving in that shadow effect with the blues, creating
in the highlights. Very simple technique, very simple detail and simple details onto
the horizon line. I hope you guys enjoyed
painting this with me today. I will see you guys soon
into my next class project. Thank you so much
for joining me.
19. Day 16 - Winter Cabin: Hello, everyone.
Welcome back to day 16 of the 30 days
of quash Challenge. Today we are going
to be painting another beautiful
winter landscape wherein we'll be having in a red cabin with the
snowcaped mountains. So I'm beginning in
with the pencil sketch, marking out the red
cabin out here. So towards the right side, I'm marking the pencil sketch for the red cabin
that we'll be adding. If you want, you can keep the cabin towards the
left side as well, or a little towards the center, not much or not exactly the center space, because, you know, we'll be having in the
snow cape mountains and the pine trees in front of these giving in
that perfect view. Now, I'm going to
lighten up this pencil sketch because we
are going to be having very light
shades into the sky around the cabin into our
snow caped mountains. So we do not want any pencil
sketch to be visible. So I've just gone ahead. Now we'll go ahead
first with the sky, but we'll just mark out
the mountain spaces behind the red cabin, as well. So we're going to be
having in two big, huge mountains, which are going to be pretty
simple to paint. And then in front of these
on the horizon line, we'll add in a little view
of the pine trees as well, giving in little details. And the bottom will
be the snow space. Now, these two mountain, snow, the cabin and the sky. So let's begin in
with the sky first. For this sky, we are
going to go ahead with very light tone pastel
colors. This time. It's going to be shades of
blue, yellow, and pink, very light, very, very pastel
colors that we'll be using. Now, in case if you do not have these ready pastel colors, you know the hack, simply just mix in white with your
base layer colors. That is with a blue,
mix in a lot of white, with a pink, mix in a lot
of white, with a yellow, mix in a lot of white, and you'll get in the
pastel tones of blue, pink, and yellow that we use again
for this class project. So I've added a very light
layer of the blue color. You can see. It's almost equal to a
white if you compare it to my paper with just a little hint of blue that we've added in. Now, I'll just read
on my brush again and make all of these
in the perfect stoke, having and removing in all
the uneven edges at places. Now, towards the bottom side, I'm going to go ahead with
the yellow and pink tones. Now, we are not going to run the colors into the
mountain range, so be a little careful
at this point. So beginning in with the pink
color here, you can see, it's a very light pastel pink from my palette that I'm using. Now, around the mountain range, I'm going to go ahead carefully and define the shape
of the mountain. Our mountains are going to
be looking almost white with a little texture detail of the gray and the black color. So we are going
ahead with the pink closer to the mountain range. You can see I've marked out the line of the
mountain perfectly. Now, into the mountain range, we are going to be having
in very simple detail. Now at the top, you can
see across the blue space. There are a little
patch, so I'm just using a damp brush and
blending it till the top space so that
those uneven edges of the blue colour
get disappeared. Now using in the filbert brush, I'll go ahead with a very
light pastel yellow color and begin adding in the details. So I'm using a very light
pastel yellow color, as you can see. Now, in case if you do not have such a pastel yellow color, you can mix in a lot of white to your paste color yellow and
you'll get a equal tone. Now using in a little
bit of the pink. I'm blending it with the
yellow at the top and bottom, creating in more depth
into our clouds. You can see AskasPretty simple, pretty simple colors, pretty simple details that
we are going ahead with. So that is it. We are
done with our simple sky. Now, let's go ahead into
the mountain range. So for the first layer
of the mountain range, I'm using a bold white color and just adding it
into the paste layer. We are creating the mountain
as a complete snow mountain. So just giving in the entire snow detail and
then we'll give in that little view of
the mountain visible with the help of the drybush technique that we'll
go ahead with. I'm not going to run the white color into the cabin space. The cabin will be of a
bold red color this time. Now, you may be wondering why the yellow and the blue
mixed together did not give you green tones into the sky because both
white and sorry, the yellow and the blue
had white in it and were pastel in color because of which it did not give
you any green tones, even though you laid a little of the yellow over the blue
highlights of the sky. Even the second mountain
range for the first layer, I'm just adding in the
entire white color. We'll be separating both
the mountain ranges moving ahead with the help
of the Trybush technique. Now, using in a little bit
of the pastel pink color, I'm just going to add in
the bottom snow space. So basically, I added
a little hint of the pink out here so as to
show the reflection of the sky falling onto the snow
that is collected closer to the red cabin and the mountain that
we are painting in. Now, to this, I'm
going to add in little highlights with the blue that we've used in the sky. So from the edges, I'm
going to begin adding in little blue highlights as well because our sky
has blue, as well. So showing a little reflection
of that color as well, falling onto the snow
space from the edges. So in the center,
you can see I have maintained that glowing pink
space and from the edges, pulling out these
darker blue strokes. Now, with this
blue color itself, I'll define the horizon line a little more on
the left and right. So just on the horizon line, giving in little darker hints with the help of
this blue color. Now, next, using in
a bold red color. I'm going to begin painting in the first layer for our cabin. I'm using the permanent red
color from this palette. You can use any bold red which is available in your
palette by the name of permanent red scarlet or any other tone of red
that's available. So now the window that we've
marked into the cabin space, I've just marked the
outline for that, and I'm not going to add in the red colour there around it, going ahead carefully
marking the outline and filling this entire space
with the red colour. We are even going to give in little highlights with
the brown to the cabin, creating in the shadow effect
onto the cabin, as well. Now, next, I'm just going
to add in a little hint of the burnt sienna to my red color and get a little maroonish tone. And using this dark
maroon kind of a color, I'm going to paint
in the next batch of the cabin. Alright. So the roof is
going to be white, trying to show it as
a snow cape look. Now, this part, you can see, I've gone ahead with one tone darker than the front
red that I've used in. You can either directly use a maroon color or you
can create a color like this by just adding in a little hint of brown
to your red colour. Now, using the same dark
color that we've created, I'm going to mark the outline of the front cabin
space as well. So I'm just giving fine line, and using a dam brush, I will blend this
into the cabin based Leo red color that we've
added. So I've added the line. Now using a smaller size brush, I'm just going to blend
it into the red colour. Same way on the right
side of the roof as well. I'm giving in the dark line, and now using the
red color and a little of the water,
I'll blend it again. So just picked up a
little of the red again and pulling it towards the
downside, blending it. You can see now we just have little brown tone highlights on the edges of the front
part of the roof, acting in as the
shadow out there. We'll give in more
details to the cabin once this base layer
colors dry out. Now, using the blue color
that we used in the sky, we are going to begin adding in the dry brush onto the snow. This is going to be
the first layer. Make sure you do not
add in a lot of it. Go ahead very carefully. Otherwise, you know,
you may again have to use in white to
give in more depth. So I'm going ahead with
the dry brush technique. Now, we've already discussed this dry brush technique
in the technique section, wherein you need to make
sure that you do not have excess pigment or excess
water on your brush. Also, do not dip your
brush into water. The pigment has to be a little thick and you need
to drag your brush, keeping your brush tilted
at an angle of 45 degree. So you will see automatically
using the bristles, you get in little dry brush. Now, I'm first marking the outline of this
first mountain range. So towards the
roof of the cabin, I have marked the outline, and from the second
mountain range as well, I've separated it, and given
in simple details out here. We are going to go
ahead and add in a lot of pine trees into the front
of these mountain ranges. So I'm majorly worried
about adding in the right drybush towards
the top of the mountain, which will be visible,
giving in the depth. Now, you can see the white
layer is still visible because onto this drybush we are going to go ahead with
darker tones as well, creating in more texture. Now, in the same way,
I'm going ahead with the second mountain range here
on the left side as well. Now, from the left, you
can see I'm pulling this driver stroke
towards the bottom side, holding the brush diagonally, and taking these strokes
towards the bottom right side. Now, next layer, I'm going
ahead with a grayish tone. Mind it, this is
not a black color. It's a very dark grey
color that I'm using here because we are going
to be adding in the pine trees with
the black color. So make sure you use
in light tones here. You can simply add in
a little hint of blue and black and white and
get a grayish tone. So now you can see the grayish highlight that I'm adding will be quite less as compared to the blue highlights
that we added. So that we have the
white also visible, the blue also visible, and now the gray also visible. Now, I've added a little
more darker hint to this grayish mix and going ahead with little more
darker highlights. So now just added a little
hint of black to my gray and created one tone darker and adding in little highlights
with this darker tone. Now, again, this will be much less than the first
layer of gray that we've added because we want each of the color
layers to be visible. So automatically, you can
see in our mountain range, we have four colors
visible white, blue, gray, and dark gray. Now, in the seam, we onto the second mountain
range as well. I'm going ahead with the
same drybush technique with the different colors
that we went ahead with. Now, at this point, if you see, both the mountain ranges
are not separated. So using the white, I'm just
going to mark the outline again and create a
little separation to the mountain ranges. Now, at certain places, I'm just giving an
overlying of the white, trying to show in
more of the snow and hiding a little of
the dribra strokes. So with that white,
you can see we've separated in both
the mountain ranges. Now at the bottom
here, as it is, we are going to have in
a lot of pine trees. So I'm just blending
these colors so that we have that separate effect
for our mountain range. So with the help of white, I've just blended
this space out here, and this will all
get covered up with the help of the pine trees
that we'll be adding. Now, using in the line of
brush and the black color, I'm going to begin adding in
the details into the cabin. So I'm first marking the
outline of the roof. I'm using a dark
brown color here, not exact black tone
that I'm using here. Now, at the top roof as well, just adding in little highlights with the dark brown color, some strokes here and there
to show the roof because the cabin roof is completely
covered up with the snow. That is the reason
I'm just adding in these highlights out there, marking that three d dimension, giving in those little outline
edges so that it stands out from the background mountain
range that we've added. And the snow on the cabin
is visible separately. Now, using the black color, I've added a small chimney as well on top of
the cabin out here. A very simple one using
in my fine tip brush, I'm able to add in
these details swiftly. Now onto the snow area
of the cabin as well, added little highlights
with the grayish tint, simple strokes, as you can see. Now using in a dark brown color, I'm going to add in a little
more texture to our cabin. So I'm just adding
in simple lines, giving in a little more
texture to our cabin, just pulling out simple, you know, strokes,
giving in texture. Now, make sure you use one
tone darker color than the Basl or cabin color that you have so that these
strokes are visible, but don't use too much
of a dark tone as well. It just has to be
little light so that it's visible
but not too dark, such that it stands
out separately. So I'm going to go ahead with simple strokes using
in my fine tip brush. You can see I'm able to get in simple thin lines out there. So through the entire
front side of the cabin, I'm using this one
ton darker red color, adding in the details. You can see the brown
details that we had added previously
at the top to create the shadow is giving in such a three d
dimension to our cabin. Now, we've added in the
lines to the cabin as well. Now, we have to
define the window of the cabin also moving further. For now, I'm just going to add in little snow details as well. So just using in
the white gouache, I'm just creating in
very simple strokes out there at certain
tandom places, trying to show a
little snow collected onto the front part of
the cabin, as well. Now, here as well.
I'm just dropping in a little snow
collected in front. So simple white details
in front of the house, covering up a little of the
cv in that we are adding in. Now, using in the black color, let's add in the
detail to the window. So I'm just going to
define the window here, going to give in
very fine edges. I'm using in my
pointed tip brush. It's a liner brush. It is very fine. So I'm able to get
in these details. If you want, you can even use a black waterproof pen
to add in these details. If you're not confident
about adding in these details with a fine tip
brush and the black color. After this, we'll just
be left to add in the pine trees in front
of the mountain range, and we'll be ready
with our class project for day 16, as well. Now, using in my round brush, I'm beginning to add in the pine trees with the black color in front of the mountain
ranges that we have added. Now, make sure this is
the reason I was telling you to not use black into
your mountain ranges. So automatically, these
pine trees will stand out differently from the mountain
range that you've added in. So I'm adding in
simple pine trees. Again, I have discussed all of these simple techniques in the technique section
of the pine trees. Then I show you how you can
add in pine trees quickly. Also how you can use simple
strokes to act in as the filler elements for your pine tree range when
you add into any painting. Now I'm going to go ahead, keep on varying the heights of these pine trees throughout somewhere taller,
somewhere shorter. On the rightmost edge, as well, I'm just going to give in a simple bush detail
closer to the cabin. So I've taken one huge pine tree almost in the center space. Now moving towards
the left side, I'm going to keep feeding and quickly add in
the pine trees, and then we'll be ready with our painting for
day 16, as well. So you will notice no
two adjacent pine trees that I add in are
equal in heights. I try to vary them
throughout somewhere huge, somewhere very small in between. And in between, you can even use the simple strokes
that we've discussed, the simple or, you know, pointed strokes that you can use to add in some
filler pine trees. Now, this time I'm
going ahead with almost the detailed
pine trees throughout. In between, I'm adding in
some scars look as well, but going ahead with
a detailed look in the foreground here, Now moving towards
the left side, you can see I'm going ahead with very small details as well. I'm defining in the
horizon line well, giving in that
straight, perfect view to our pine trees
and the snow space. Now on the right most side, as I told you, I'm just going to give in simple bush detail. Even on the left edge, you can see I've given in
very simple bush details and just given in simple, you know, blend of
the pine trees and the bush and some simple
branches in between, as well. So that is it. Let's remove our masking tape and
see our final painting. Make sure you peel
off the masking tape against the paper. And your edges are
completely dried. Now, you can see, because
of the pine trees, both our mountain ranges are
standing out separately, one on the left,
one on the right, and a very simple cabin
detail that we've added in. So here's a closer look at
our painting from day 16. You can see the cabin
details that we've added very simple snow in
the foreground of the cabin, the highlights on the roof with the black color,
simple pine trees, simple details onto the
snow caped mountain, and a pretty simple pastel sky. I hope you guys enjoyed painting this very beautiful winter
land with me today for day 16. I will see you guys soon into
the day 17 class project. Thank you so much, once again, to each one of you
for joining me into this 30 day challenge and painting along with me
throughout the 30 days.
20. Day 17 - The Bright Day: Hello, everyone. Welcome back to day 17 of the 30 days
of course Challenge. So let's begin with our
class project for day 17. We are directly going to
begin with the paints. This time we are
going to be painting a beautiful blue cloud sky. So I'm going to begin
with the blue colour, but you will see I'm going to leave in caps for the
white clouds this time. I'm roughly going ahead with a layout of blue in the center. On the edges, I'm going to be
having in the white clouds, leaving in space for those
right now, and later on, we'll blend in
with the blues and grays as per the need
into the clouds. For the clouds,
this time, roughly leave in the white spaces. Even at the bottom,
I'm going to have in one huge white cloud. Very randomly, you can see, I'm just laying out the
blue color for now. It's a beautiful sky blue
color from my palette. You can simply mix in a lot
of white to your serlem blue if you do not have such a sky blue color
readily in your palette. Now at the bottom, you can see
I've marked a cloud space, and on the right, I have
two clouds and on the left, one huge big white cloud. Now, when we begin adding
in the cloud details, we'll blend it with the blue, create in that perfect
cloudy day sky. And then we'll add in the
details of the siloed, which is going to be pretty
simple siloed this time. Now, the spaces that
we had left blank, I'm going ahead with
the white color there. Now you may feel,
where is the white? Why is it even visible or no? Why do we even need to add it? But we need to add in
the pasteler white, so that later on,
on top of fate, we can blend it with
the blues and give in highlights of the blue into
the white spaces as well. The first roughly, I'm adding
in white into that space. You can see on the edge, it's blending in with the blue, giving in little
lightish blue effect. I'm going to add in white into all the four spots that
we have left for now. On the edge, that is the meeting point
of the white and blue. You can see I'm going
ahead carefully, such that the blue is blending
a little with the white, giving in that very light
blue effect for now. We're still going to go ahead
with a lot of blending, creating in the depth into the sky and the clouds out here. I'm onto my last cloud
at the bottom here, and I've marked out the white spaces into each of the clouds. You can see the white layer does make a difference
into the entire picture and creates the base layer for blending and giving in
the depth to your cloud. Now, using the white color and a smaller size
filbert brush, I will giving in depth on
the edges of these clouds. So you can use a smaller
size round brush, flat brush, filbert brush,
whichever is available. Now, on the edges, I'm giving in little dry
brush technique, blending in with
the blue, giving in more shape to our clouds. So you can see, I haven't
dipped my brush into water. It's a little dry brush
technique that we are falling on the edges to create the
texture into our clouds. Just on the edges, run
in with white colour. Make sure you do not add
in a lot of water to your white because we need
that dry brush stroke. You do not even have
a lot of pigment on your brush so that you get
in these details right. So just giving in dry brush and creating in the
shape of the cloud, blending in with the
blue of the sky. To all of the clouds, I've gone ahead onto the edges inside part that is the blue
space closer ones and created in the outline, lending in with the
blue, giving in that dry brush texture
for the clouds. Now, I'm running a
little of the white into the blue space
of the sky as well, giving in some smaller
cloud details randomly. Now into the center of the sky, I'm just running very simple
white spots, not much. You do not have to overdo these. You can see slowly the
sky is taking the shape. The clouds are taking its shape. We're still going to
go ahead with a lot of more detail and color pattern
into our clouds as well. So just added little white spots into the rest of
the blue spaces. Now I'm going to go ahead
with the next leg of details creating in more
depth into our clouds again. Now, using the blue that we
had used in the base layer, I'm going to use it in a very
light consistency that is just a little pinch
and blended with the white that we've added on the outside edges of the clouds. So now you can see
on the outside, we'll have very
light blue texture. I've just picked up a
very small tinge of the color on my brush and I'm blending it with the
white of the clouds. So you can see we have that light blue effect
onto our clouds, giving in that blend
between the sky, the white of the clouds, and
then the blue of the clouds. You can see I'm just
adding a drop of color. Blending it with the
pastel or white losing a damp brush so that we do
not have the dark blue. It's a very light sky
blue colour effect that we are having
into our clouds. Now, next, I'm going to pick up a very light gray hint and add in some gray highlights
into our clouds. For the gray color,
you can simply mix in one tinge of black
colour to your white and get this lightish
gray effect to create in a little more depth
and drama into your clouds, giving in more depth and
texture to your simple, cloudy sky that we
are painting here. It's a bright sunny sky that we are painting with
huge white clouds, with a blend of blue and
a little hint of gray. Now onto this cloud, which is on the right side here, I feel the gray is
a little extra, so I'll quickly pick up a little white and blend it
again with the gray. So you can see with quash, it's so easy to overdo the,
you know, errors again, or if any spot you feel that the colors are
highlighting a lot, you can again blend it with the base colors
that you want to. Now I'll just blend a
little of these gray and blue using my fingertip
on certain spots, creating in more
texture to the cloud. You need to do this while
your paints are still wet. So my paints are stil wet, so quickly creating in
little texture as well. Now, let's wait for
this to dry completely. Now my sky is completely dried, and I'm going to begin using in this pointed tip pin and
begin adding in the details. So first using in
this 0.1 nip pen, I'm going to begin adding
in some lines into the sky. Now, while you begin
adding in this, the nip of your pen may
lift up some paints, and at certain point,
it may stop working. So you can clean the nip of
your brush on a blank paper, running it to and fro and
get the ink flow again. So I've added in some line
details into the sky. I wanted very fine details. So I've used in
the fine tip pen. I'm just cleaning the tip of
my brush again because there is a little of the paint that gets lifted up and
because of it, the nip does not flow
in easily again. Oh now using this
spoiled round brush, I'm going to begin adding in the first layer for the
silo heat out here. So I've discussed this
in the technique section of adding in these
bushes detail quickly, using in this brush
technique with the help of a dry brush
or a spoiled brush. You can even use a normal
round or a flat brush, but you need to make sure
that you do not dip it into water and that your paints are also not in a
watery consistency. It needs to thick
consistency so that you can get in these dry brush stroke
using in a spoiled brush, creating in the filage
detail quickly. Now I'm going to begin
adding in shape to this foilage as well while
adding in the details here. Now, make sure you add them
in such a way that you do not cover the entire
clouds in the center area. The edge cloud on the right side will, of course, get covered up. You can see I'm just running my brush in circular
motions also at places to create more
different textures possible. Somewhere I'm going
ahead dabbing, creating in the outline space or the shape that I
want for this foolage. And towards the rightmost side, I'm just running it in
random angles of my brush, creating in different
textures possible. On top of this, we'll go ahead with the detailed
foolage as well. I'm done with the foilage
at the top right side. Now I'm going to
create similar kind of foilage at the
bottom right side. I'm going to keep
both of these foilage a little separated from each other so that now I'm just going ahead
at the bottom space, creating in the same
kind of texture. Then we'll go ahead with the detailed foilage
on top of these. Make sure that your white
clouds are completely dried before you begin to add these details with
the black color. Otherwise, the white
and the black mixed together will give you
gray hints and will not give you the bold
black detail that you need for this foilage space. Now, let's begin adding in the detailed leaves
on top of this. I'm done adding in
the basilia foilage. I've discussed this technique in the technique
section as well, which will make your job easier to add in the details quickly. Now, using in the
tip of my brush, I'm beginning to add
in detailed foliage on the inside edge. So just with the tip,
adding in detailed filage, dabbing in the tip of the
brush, creating in the depth. For this, you can use a smaller sized round
brush if you want. I'm using the same round brush
which I used for adding in the basic foilage detail because I'm just adding
in the details with this. And then if needed,
I'll shift into a smaller size brush to add in further smaller
details as well. Now at certain spots,
I'll create in bigger blocks of the
painter's bell trying to show in a lot of foolage
out there because of the entire space
turns out blackish. Same way on the
top part as well, giving in little depth
to the fooliage, creating in textures, and I'll add in the detailed
foilage there as well. Now, for the detailed fooliage, I've shifted into
my smaller size or liner brush so that I can get in very fine details because this fooliage is going to be the highlight of the
painting as well. So I'm going with
very minute details. First, using in the
bigger size brush. I added in some bigger foiliage detail you can already see. And now adding in the detailed ones using
in this liner brush. Now, randomly, I'm going to
even keep on pulling out some branches and
further smaller branches from one branch itself, and keep on creating in more
texture and depth out there. Now, you can see since
we've already created in that major foolage
detail previously. So adding in this
detailed foilage will not take you much time
and will be easier because our major space is
already covered up with the quick foilage technique that we used using in that
spoiled brush technique. So this is how you
can save time. In fact, it's not just
about saving time, but you can see it gives in the more realistic view and makes your job easier, as well. Oh Now, same way on the
bottom side as well. I'm beginning to add in
the detailed foilage and some branch detail using in this smaller sized
round liner brush, and you can see it's giving in so much realistic view
to this entire painting. So you need to go ahead with
a mix of simple techniques, plus detailed look to
create in that depth, plus make your painting easy and a quick go if you
are short of time. I want the top space as well. I'm going to go ahead with
some more detailed foolage, pull out some more branches, and then we'll just add in some simple birds
sitting onto our lines, and we'll be ready with our
class project for day 17, another beautiful bold sky with bold cloud details and simple lout to add on
to our beautiful sky. Now, from the top out here, you can see I'm
pulling out branches and giving in the
fooliage detail. Just some last detail of the
foliage that I've added in. Now let's go ahead, add
in the birds as well. So using the black color itself, I'll be adding in the birds onto the lines and a few
into the sky, as well. So now you can see
so much more details that I've added
onto the top space. All of those are
visible, giving in more detail and depth
to your foliage. Now using in the black color, I'm going to add in simple
siloed for the birds. You can go ahead with a mix of simple silo heads
wherever you wish to. Again, the placement
of the foilage, the birds, the wire lines
need not exactly be the same. You can take the foliage on the left side or a mix
of left and right. You can create little
foliage on the left, measure on the right, plus simple bird details
wherever you wish to add. I'm going ahead with simple
details for the birds, adding in some silhds
randomly on the violins, as well as into the sky. So flying bird details, simple strokes,
simple techniques. Now, just adding in a few
more at the top here, and then we'll be ready to peel off the masking
tape and see a final painting for day 17
of the 30 day challenge. I'm almost done adding in the
silhoueads for the birds. You can see I've
added in all the different silhoueads
at different spots. Now, just going to
add in some tiny, miny birds randomly
here and there into the sky before we peel
off the masking tape. You can see very tiny
ones that I'm adding in just using the tip
of this liner brush. So let's peel off
the masking tape, see our final painting. Make sure you peel
off the masking tape against the papers so
that you do not tear off the edges and do not lift off the color and
ruin those white, beautiful edges that
add on to our painting. So here's a closer look at
our painting from day 17, you can see the detailed Siluet with simple technique
that filled in the space and the
simple bods that we've added into our
beautiful, cloudy sky. I hope you guys enjoyed painting
this with me for day 17. I will see you guys soon into
the day 18 class project, wherein we paint another beautiful landscape
in colors together. Thank you so much, once again, to each one of you
for joining me into this class and painting
along with me.
21. Day 18 - Cotton Candy Clouds: Hello, everyone. Welcome
back to Day 18 of the 30 days gosh challenge wherein we are painting
landscapes and colors. So let's begin with a
very basic pencil sketch. We're just going to mark
out the horizon line. This time, we are going to paint another beautiful cloudy sky, but instead of the white
bull clouds this time, we are going to have in
beautiful pastel clouds with a simple field silhouette
that we'll go ahead with. I'm beginning in with the
same beautiful sky blue color from the previous class
project that we used in. Again, you can simply mix in cerulin blue with your white
to get in the similar blue. Now, I'm just going to mark out the cloud space
at the bottom. This time we are going to
have a huge bold pastel sky towards the horizon line. So I'm roughly marked out a random cloud shaped
with a blue colour. Now the top of the sky
is going to be filled in the bold blue color that
we are going ahead with. So just filling in with the blue at the outline that
we've marked out. Now, at the top, I'm going to randomly use in white
and at certain places create in some
lighter spots by just pending in little white
highlights into the blue sky. Not everywhere you need
the same colour spot. I'm just wanting to give in little colour
variations to the blue. So randomly at certain spots, blending in with the
white so that we have little lighter hints and shades of blue
coming into a sky. You can see with a simple
technique of blending in white, with a little hint of the blue
that we've already added, I have created in
little more depth into the top of the sky as well, giving in little cloud details. Now, do not worry of the rough blue line that we
have for the cloud. We are going to
add in the pastel colors and blend it well with the blue tones once
we begin creating in the cloud detail closer
to the horizon line. Then I'm done with the
top part of the sky, that's the blue and the white highlights that we've created. Now let's begin moving further, creating in that
cotton candy cloud closer to the horizon line. For that first, I'm going to
pick up a pastel pink color, which is almost equal
to a peaches tone. I'm adding it onto the
pink part of my palette. So automatically, I'll get a little pinkish
highlight to it. Now beginning in with this
very light pastel pink color. I'm going to first
begin airing in closer and pending in
lightly with the blue tones. Now, this will give you
a little lilac tones in between le blending, and that will be
perfectly showing the transition happening in from the blue towards the pink, yellow clouds that
we'll be creating in. So I'm going to get very
carefully color by color. Now, next I'm going
to pick up a shade of yellow and begin
adding in closer. So I'm going to keep
on shifting and juggling between
different pastel tones, which is going to be pastel
tones of pink, yellow, a little of orange, and a little of the
lilac tones as well. Now, again, even
the tonal variation of these colors
will be different. So some wear light pink, dark pink, little
lighter yellow, darker yellow to
create in more depth and details into our
cotton candy sky. Now I've added in this
little darker pink color. Now my brush accidentally had a little black color lifted up because of which
you can see the mess. So using in the pastel color,
I'm blending it again. You can see the
first pink that we had picked up was quite light, and this pink is
one shade darker. So same way, you need to keep on juggling between
different shades. Now I've picked up a lilac tone, which was already readily
available in my palette. You can mix in a lot of pipe to your purple color to
get a lilac tone. Now at spaces on left and right, I'm adding in the lilac color. Now, you can see since I'm using all these colors in the
pastel consistency already, that is the reason even
when the lilac colour is blending in with the yellow, it's not giving me
any muddy tones. Otherwise, purple mixed with yellow will give
you muddy tones. So because of the
white consistency or the white color into
these pastel tones, it's automatically making
the blending as well easy. So make sure that you
use all these colors to create the cotton candy cloud
in the pastel consistency. If you do not have
ready pastel tones, you can mix white to
your baseler colors to get in the right tone. Now I've picked up a very
light pastel yellow color I'm going to add it here
towards the bottom side. Now, next again, I've picked up a little more darker pink. You can see this
is the third shade of pink that I'm adding in. What you can do is you can
pick up a base pink colour and keep on adjusting the
ratio of white into your pink. So automatically, you can get in different tones of
the pink color. Now, you can even add
in a little hint of orange to create
in the peach tone that we used previously. Or if you want, you can
directly even keep on using the pastel
shades of pink colour. Now, again, I'm picking up a very light pastel yellow color. It's very light. You can see as compared to the first
yellow that we picked up. That was a bold,
beautiful pastel yellow. This is a very light
yellow that we are using. It's more of white,
less of yellow hint that stay in. So added it here. I'm just going to add in some more random
highlights here and there wherever I feel
the need to add in more colors and create
in more blends. So adding a little yellow onto the lilac at the top and
going to blend these again, you can see each color
is visible separately with some cloudy motions that we have tried to create in here. So it's very easy
to go ahead step by step while blending in and creating in these cotton
candy Cloud details. Simple method that we've used, but you can see each color
has a different cloud shape, visible differently
into our cloud area. Now, randomly picking
up the pink tones, I'm just going to blend
in at the top space into the blue colour of our sky and create in much
better smooth blend. Here, I'm going to
pick up the lilac colored and blend it into the sky using in my
damp brush technique, giving in little dry brr stroke, creating in that texture for
that cotton candy cloud. Now, before we move on, I'm just going to add
in a little more yellow and some darker
pink highlights into this cotton candy sky, adding in more bold yellow out here at the top right side
of this cotton candy cloud. And now I'm going to pick
up the bold pink colour. Again. This pink is in a
little pastel consistency only that I'm going to use in and create in some darker highlights onto the left side of this
cotton candy sky. Here, I'm going ahead with
this dark pink colour, creating in more
highlight into the sky, giving in more color variation
to the cotton candy cloud. Now one thing, your
placement of the clouds can completely vary and
your color placements can also keep on varying. It's not necessary to have the same placement or the same layout for this
cotton candy cloud. It's more important
to understand the technique and the method that we're going ahead with and having your own
color combinations. But just make sure that you try using in the pastel
consistencies to get in the cotton candy effect
that we want into this cloud. Now using the lilac color, just adding in little
highlights closer to the horizon line over
the yellow space. Now quickly using the dam brush, I will blend these
lilac tones that we've added at the
bottom space into the baselier colors
so that they all have a soft blended
edge together. Lastly, we'll just pick
up a little more of this light pastel
yellow that we had been using and going to blend in
with the lilac in the center, creating in a little
more highlight. So you can see we've gone
ahead in multiple layers to create in this simple cotton
cloud effect into a sky. You can use more lighter
tones if you want to create much lighter
cotton candy effect, or you can even use more
darker tones in this, but make sure while
blending you have in the right colors beside
each other so that the colors blend
easily and do not create any muddy tones
or unpleasant blending. Now, let's begin painting in
the bottom field space here. For that, I'm going to use in
the shade of yellow first. In the center, I'm
going to add in yellow, then move on to a
yellow aqua color, then to the greens and
creating in darker green. So that way in the
center of our field, we are going to have in
the lighter highlights of the yellow and the
yellow aqua color. Now using the yellow
ochre colour, and then I'll move on
to a sabren colour. You can use any green
that's available in your palette may not be the
exact same shade as mine. Oh I'm using the satcren color, defining the horizon line well and just pulling
out this color from the edge towards
the center space and blending in with
the yellow ochre color. Just in the center, we need a little highlight
of that yellow and the yellow ochre
that we've added. Rest of the spaces
will be blended in with the greens as we
are blending in now. From the edge, again, I'll put in more darker tones
moving further. So basically in the center, you will have the lighter color, then moving towards
the outsides, the color will keep
on darkening up. And towards the edge,
we are going to have in a lot of the dark
effect with the help of the black colour or you can use a very dark green color if that's readily available
in your palette. I've picked up a little of
the yellow aqua color and blending it again
with the greens, you can see in the center. I'll pick up a little
yellow again and add it in that little space closer to the horizon line
and blend it again. So you can keep on picking the previous color for
blending to make your process easier because you
could see the green out there was not blended easily
with the yellow aqua color. So I picked up the yellow ochre again
for blending so that I have that little yellow
aqua highlight visible. Same way just picking
up a little yellow, adding it as a highlight
in the center space, blending it with the
yellow och color. Now, from the edges, I'm beginning to add in
the darker highlights. You can simply mix in a
little hint of black to your saplne colour and
create a darker green tone, or you can directly use black in a little lighter
consistency on the edges and blend in with the base
green that we've added. Now, you can see
I'm adding this in such a way that the lighter
green is still visible, and then we have
the darker green. And then in the center, we have the highlight
of the yellow and the yellow ocher
color to show that cloud brightness falling
into the field as well. Now, using the green color, I'm going to add in little
details on the horizon line, create a little bush effect. I'm using the same
sat screen color. But in a little
darker consistency, I've mixed in a little
of the viridian green to this as well to create a little darker green
kind of color. And using this on
the right side, I'm going to create a
little simple bush detail. So at the top, I'm dabbing
in with the tip of my brush, and at the bottom side,
I'm going to fill it completely with this
green color itself. Now, in between, I'm using a very light green
colour as well to create a little bush with
a lighter green to show the effect of the
cotton candy cloud, giving its color highlights or the reflection highlights of the sky color onto this
bush area as well. So we have little lighter
green details in between. I'm using a lighter green from my palette to create
a lighter green. You can either mix in white or yellow to your
day's green color. Mixing a yellow will give you a much better light green tone instead of mixing
a white directly. So I'm just juggling in
between the daker green and the ightogreen tandom such that they are also well
blended with each other. Now, in the center as well, going to create a
little push detail. Now, all of these
push will not be all stuck together through
the entire horizon line. In between, we'll
have little gaps on the horizon line
as well to give a little breakage to this push
detail that we are adding. We'll add a little on
the left side as well. Again, leaving in little gaps. You can see the center. We have a little horizon
line only visible. Now, again, for this
also, you can see I'm just chuckling in between
different tones of green, lighter green, darker green. For darker green, you
can mix in black, brown blues to your
base green color. For lighter greens, you can
mix in yellow and white. Of course, to adjust
the tonal variations, you need to go ahead
with different ratios depending on the greens, yellows that you have
in your palette. So on the leftmost stage, I add a little darker highlights and then moving ahead
with the lighter green, and then I'll just add a
little more darker highlight. But you can see, again, we have a little horizon line visible in between the left and
the center B details also that we have added. Now, I'll just go ahead with a little more of the
darkest sreen color. So for that, I've mixed in a satren along with
a little bit of the black on my palette and gotten in for the
darker green color. And just going to create
little highlights onto this bush with a darker green colour into
the right space, center space, and the
left space as well. So you will have three to four colour variations of the greens. I have randomly been using
green mixing it with readily greens on my
palette so that I do not have to waste onto
any of these paints. On the left side as well, I've added in the darker
green highlights. Now after this, we
are just to lift add in a few details into
our field space, and then we'll be ready with
this class project as well. So now I'm going to go ahead, pick up a darker green
color and add in little dry brush details
onto the base of the field. Then we'll add in little
simple grass details. So for the dry brush, I've
picked up my filbert brush. I have picked up
a little hint of the sabren mixed in with black, tap my brush onto
the rough cloth so that the excess water and
pigment is all absorbed. Now having in very
little pigment, I'm just dragging
it from the edges, giving in little
dry brush strokes, moving towards the center side from the edges, that's
the left and the right. You can go ahead given this type brush using a round brush, flat brush, filbert brush, mop brush, whichever you
are comfortable with, creating a little
texture on the field. Now, along with the texture, I'm adding in little darker green highlights
also from the edges. So mixed in the
saprin with black, you can see it's darker
than the base green that we have already added and
created in the depth. Now, after this, I'm going to
add in simple grass detail, and then we'll add in
little wildflower detail using in the yellow color. At the bottom, I'm creating
in more darker depth to crave in the shadow to our
grass that we'll be adding. For the grass, I'll be using in a very light green color and using in the
pointed tip brush, I'll just give in simple grass strokes at the bottom space. So I'm using in this
light green color. Let's begin adding in
simple grass strokes. I'm just going to
pull out the grass strokes at the bottom space, not going to add in much
towards the top of the field. So simple strokes that
you can pull out, or you can use a
smaller size brush, which will give you fine
details and help you in adding in these
grass strokes simply. Mm. You can see I'm just pulling
out simple strokes, moving in random directions. I'm not going to add the
grass strokes much taller. As I told you, they're
going to be very small majorly towards
the bottom side. Same way, I'm going to add in a little onto the
left side as well. So now you can see the dark
green that we've created at the bottommost edge of
the field is giving in so much of the shadow effect to these grasses that we
are adding enough. That is the reason we created the bottom space too
dark so that we have in the perfect highlight in the background while
adding in these grasses. I'm done adding in the grass, I'll just blend
these extra strokes that I had laid previously. And now let's go
ahead use a bold, pastel yellow or a bold
bright yellow color and add in little floral detail. So I'm using my yellow colour, which is a bold
and bright yellow. And using this, I'm
just going to add in very simple floral details into the grass area
that we've added. I'm just tabbing random shapes to give in little floral detail, creating in a little more of the wildflower
kind of detail. So very simple florals
that I'm adding, you know, there's no
shape or structure that you need for these florals. You can just go ahead,
keep on dabbing randomly some yellow spots
closer to this space. Now at the center space here, you can see I'm just giving
in small dots closer to each other to create in
that wildflower detail. We'll just add in a little more floals onto the
left side as well, and then we'll be ready
with this class project for day 18, as well. Now quickly going to add in, and then I will just platter a little of the yellow color at the bottom space to give in more fine details of the
floals that we've added. Now, just tabbing in a
little of the yellow colour, giving in very fine spots, creating in more of
that wildflower look. When you begin adding in this, make sure you cover up your
previous painting if you're painting onto a
sketchbook or cover up your sky if you're not confident about these platters moving into your sky space so that you do not have yellow
spots into your ski. So that is it. We are ready
with our class project. Let's remove in the masking tape and see a final painting. Make sure you peel
off the masking tape against the paper so
that you do not tear off the edges and make sure
that your edges are completely dried so that you
do not lift up the paints. So here's a closer look at
our painting from day 18, beautiful cotton candy cloud
with a simple field detail. I hope you guys enjoyed
painting this with me today. I will see you guys soon into
the Day 19 class project. Till then, thank you
so much for joining me into this class and
painting along with me. Make sure to drop a
review if you like this class so far and keep uploading in your class
project so that we can share it with the rest of
our artist community here. Thank you so much, once again, for joining me into this class and painting along with me. I will see you soon into
the Day 19 class project.
22. Day 19 - Misty Landscape: Hello, everyone.
Welcome back to Day 19 of the 30 days
of quash challenge. Today, we are going
to paint a beautiful, misty kind of a landscape. We are going to go ahead with the tones of gray and orange. So I'm beginning in with
a medium tone of gray. There is no pencil sketch. We are directly going to paint a misty sky and then
some pine trees. I'm beginning in
with a very pastel gray color at the top. Now, this color you can
mix in by adding in a little hint of brown,
black and white. Now the proportion
of white will be the most proportion of black and browns will be very, very less. So it's a brownish gray
color as you can see. Now I'm going to go ahead with the lighter
gray underneath, and then I'll shift on
to the shades of orange. For the shades of orange, also, I'm going to create in
a lot of pastel shades. Basically, I readily have those pastel shades
in my palette, but you'll have to create in very light pastel
shades of orange. So first, I'll just add in a little hint of white
again on top of this as well to lighten this
color because I feel that this color is still
a little extra dark. So I'm just going to
lighten this up at the top. Now, next I'm going to pick up a little of the
pastel pink color, and it's going to be
very small area for the pastel pink that I'm adding in just below the gray color. For the pastel pink, mix in white with your base
layer pink color, whichever available
in your palette, more of white, less
of the base color. Now I'm going to shift on
to a peach color tone. For creating in a peach color, you can mix in orange,
red and white. Proportion of white
will be more. Orange and red would
be equivalently less. If you want a further
lighter hint, you can add in a little hint of yellow also along
with the red and orange and get this very light skin tone kind
of a peach color. I'm just laying down
the colors first and then I'll blend these
all again further. So blending in with
the pink and the gray. So I'm done with a
very simple sky. Now at the bottom, we are
going to have a misty range of the mountains that
we are going to add in and then some simple
details of the pine trees. So for the misty range of the mountains that
I'm going to add in, I'm going to go in with
various tonal variations of the peach moving
to the orange color. So now I'm picking up
the peach color one tone darker than the previous
that I added in the sky. Now, if you do not have a ready peach color in so
many color tonal variations, what you can do is keep
on mixing in the color shades with different
proportions of white and get in
the total variation. So you can go ahead, keep in a proportion
of red and orange and just keep on altering
the proportion of white. For the lightest tone, you
will add in more white. Then you will keep on adding
in lesser white into it. So I've added in just one
tone darker color than the sky peach color
that we have used in. So my first mountain
range is dried and we are going to go ahead onto our
second mountain range. For that, I'm mixing in
orange to the peach color. Now, this is still a little dark in tone than what I want. So later on after adding
it onto the paper, I will pick up little
white for blending. And now with each of the
mountain ranges that I add, I'm going to keep on adding in some details of the pine
trees with each color. So I've lightened up the color here with the help of
a little more peach. Now, do not worry if you do not have the exact same shade one, you can have the closest
shade that you can create. Secondly, if you have
the same color palette, you can, of course,
use the same shades. But for mixing in such
colors, it's very simple. You just need to use in
yellow, orange and white. Now, orange in the
highest proportion, then white and then a little
hint of the yellow colon. Now I'm going to pick
up little white and blend this and lighten this
up because on the paper, this is still seeming
dark, as I told you. So just lighten it up
onto the entire space. Now on top of this
mountain range, I'm going to go ahead with
some simple pinetree details. Now, it's going to
be very simple, spiky strokes pine
trees that I'm going to add that is the far
view of the pine tree, not the detailed ones. So just going to pick up
the same color and keep on pulling up spike like structures
from top of this space. Now I'm going to vary the height of these throughout so that we have in that natural
effect because they are, of course, not going to be of the same height in the nature. So, into the entire space, you can see I'm pulling
out simple strokes of different heights,
tall, short, small, just wearing, not keeping them of the same
length adjacent to each other. A Now for the next mountain range, I'm going to pick up a little of the bonsiena color and add
it to this mix of orange, white, and the peach color
that I already have. So just going you
can mix in orange, Bn sienna and a little hint of white to get a similar tone. Now using this, I'm
going to add in the third mountain range
at the bottom side. So first, I've picked
up the orange color, marking the outline,
and then I will pick up this mix that
we have created in. So I've picked up the
orange color without adding in any white here
to mark the outline, now picking up this color mix, and towards the bottom side, going to add it
completely and keep on lightning as we move
towards the bottom side. Now, towards the bottomost edge, I'm just picking up some simple, very light peach color. You can even use white
if you do not have this pastel peach color and just blend in with the mix of the brown orange and white
that we have already added in. Now, to this area as well, we are going to add in
the same details of the pine trees as we added to the previous mountain range. So now using in the same color. Let's begin pulling out the
strokes for the pine trees. Now I'm picking up
the orange color. And I'm going to use the
bold orange color at the top to pull out
these pine tree details. Because at the top, if you remember for
this mountain range, we used in the orange color, and then we moved
on to the mix of the orange and the brown shades. So at the top, whichever
color you have, use in that same
shade for pulling out these so that the pine trees and the mountain range
look well blended with each other and
do not look separate. In case if you feel that the color tones look a
little separate, you can add in the
pine trees and then blend them
also quickly with the bottom mountain range by
reactivating the base layer. So you can see my color
of the mountain range and the pine trees that I'm
adding is exactly matching. I'm using the same orange
color that I began with for the third layer
of the mountain range. You can keep the
color separate or you can just blend in
again with the help of a dam brush and the
same color to create in the blend into these pine trees and the mountain range. Now, you can see I've added the mountain range in such a way that all the three
mountain ranges are visible separately
and do not get hidden because of the details
that we keep adding in. Now I'm picking up some
bold black color to add in some detailed pine trees
at the bottom most space. Also make sure that
you go ahead with the next mountain range only when your previous
mountain range is dried so that the colors
do not get activated and you have a distinctive view for each of the mountain ranges. Now, let's begin adding in some detailed looking pine
trees at the bottomst space. My last layer of the
mountain is also dried. That is the reason
I'm going ahead with this black layer now. So now on the rightmost side, I'm going ahead with a detailed pine tree with the black colour. You can see I'm
just going ahead, adding in simple foliage detail. All of these I've
discussed in detail in the technique section
of the pine trees part. Win I've showed you
different ways of adding in quick pine trees that we added in the previous two
mountain ranges, showing you that they are
far off from our view, that is the reason in
such a quick manner. And then adding in the
detailed pine trees in different manners plus a
blend of the detailed and the simple pine trees
to fill in the spaces quickly and make everything look more natural and realistic. O. Now adding in another
pine tree here, but you can see I'm going ahead, varying in the heights
of the pine trees. Plus, I'll even keep on varying the thickness of the pine
trees so that we have different variations as well as the natural effects to all of our details at the bottom
most space here as well. For our day 20 class
project, as well, we are going to paint
in another beautiful, misty sky, but with
bold colors next time. Now, this next pine tree, I've again gone ahead with
one big bold pine tree. You can see this is
going quite tall as compared to the previous
one that we added. So as I'm reaching the base of these pine trees towards the
bottomost side of my paper, you can see I'm majorly
dabbing in a lot of my brush and filling it
majorly with the black color, not giving in much
detailed view, instead creating in a
patchy black effect for all of the pine trees
that I'm adding in so far. Now, next I'm going to pick
up the same black colour and add in a little
more of the pine tree, but in the simple format now. So in the previous class
project on day 15, painting the wonderland winter wonderland that we painted, we used in this style
of the pine tree and using in a blend
of that as well here. So you can see
you'll go ahead with different variations
to the pine trees, which will add in
more natural effect, giving in the nature beauty of everything different
yet altogether. Now, as I'm moving
towards the left side, you can see I'm going ahead with some tiny small
pine trees as well. We're almost through this
class project for day 19, just completing
until the left side, and then we'll be
ready to peel off the masking tape and
see a final beautiful, simple, misty pine tree
painting for day 19. H. So as I'm moving further towards
the left side, you can see I'm adding in so many small pine trees as well. I'm going to maybe add in one more huge pine tree on the left side as we move
towards the leftmost edge. But again, you can see I'm
wearing in the heights of the pine trees even
when I'm adding them in smaller heights, very small, then big and trying to make sure that no two edges in
pine trees are of the same height so
that they give in more of the natural effect to
your landscape painting. Also, if you notice one thing, each of my pine trees has
a beautiful pointed edge, and towards the
bottom, as I told you, I'm filling it up majorly with the black color by
tapping in my brush, giving in a lot of detailed
black patches so that, you know, it looks like
all of the cluster plus a lot of more pine
trees behind this, as well. So I'm not going
ahead with a very huge pine tree on the left side. I'll just go ahead with medium range heights as you can see, B on the right, we've
already added in two huge ones going up till
the second mountain range. I'll quickly add one little
bigger pine tree yard in between the smaller
ones that I've added. I'll just quickly add
in a thin stem first, and then on top of it,
add in quick filiage. Not going to add in
a lot of fooliage, also going to keep it a little scarce and quickly
fill in the space. Now, in between the pine trees, using in the black color itself, I'm just going to pull out
some simple strokes to show in some far off pine trees in between the detailed
pine trees as well. So randomly at places
just pulling out a few strokes which we used in the previous two
mountain ranges, you can see it's giving in so much more of the depth effect. So again, a blend of
the detail, simple, creating in more depth
to your painting, making it quick and easy. And towards the bottom, again, I'm just adding in a little
more of the black color, filling in the
bottom most space, creating in that patchy effect, giving in more detailed view. So that is it. We are ready with our class project for Day 19. Let's peel off the masking tape and see our final painting. Make sure that your edges are completely dried before
you begin to peel off the masking tape and peel off the masking tape
against the paper so that you do not
tear off the edges and do not lift up the
color from the edges. So here's a closer look at
our painting from Day 19, a beautiful light,
misty sky with misty mountain ranges
and detailed pine trees. I hope you guys enjoyed
painting this with me for Day 19 of this
30 day challenge. I will see you guys soon into the class project for day 20. Make sure to keep sharing in your class projects and do drop a review if you
like this class. See you soon into the
next class project.
23. Day 20 - Sunset Mountains: Hello, everyone.
Welcome back to day 20 of the 30 days
of Kash challenge. Today we are going
to be painting yet another beautiful
pine tree landscape. But this time, it's going to
be of very dark bold colors. We've painted a similar one with watercolors in my
previous challenge. So using the same
reference this time, I'm going to go ahead and
recreate it with quash. So first, beginning in with a
dark blue color at the top. Now, this dark blue color, you can either
Prussian blue indigo, or you can just simply mix
in a little hint of black to your Cerlean blue if
you do not have a darker blue readily
available in your palette. So I'm just going ahead with a dark blue colour first
at the top of aski. Now, at the topmost space, I'm going to add in
a little hint of black and darken up
the sky a little more. Right now, I'm not going too much in depth
with the blending because we are going
to go ahead with a lot of colors at the
bottom space also. So once I'm done adding in
the next layer of colours, I'll keep on blending it
with the previous color. Now I'm picking up a
paste, purple color. You can either create
one or you can readily use a lilac color if
available in your palette. For creating one, you can
simply mix in little white to your purple or violet color and get this pastel violet tone. Adding it underneath
the blue color space and blending it
with the blue and treating in a
bluish violet while blending both of the blue and
the violet colors together. You can see the black hint is only at the topmost space of the sky and not taken up
completely over the blue color. It's just a little dark
hint at the topmost area. Now I'll use a dam brush and blend both of these
colors for blending. I'm just lifting
in a little bit of the blue color again so that I get the perfect
transition happening in between the blue
and the lilac color. Next, I'll just
pick up a little of the pink color underneath
the lilac tone. It's a very light pastel pink
colour that I've picked up, blending in with
the lilac color. Very little, not much that
I'll be adding this year. Now I'm going ahead with
a yellowish orange color. So this is basically more
of an orangish side, but a little hint of yellow. It's not pure orange
color, as you can see. It's more of an orangish
yellow, not yellowish orange. Now I've added that
underneath the pink space, but I've left this little
gap in between where I'm going to use in the
peach color for blending. So then I get a beautiful
transition from the pink to the orange with
lighter tones in between. Now, again, for ceting in the peach color in the
previous class project, I told you the color makes
a little hint of yellow, pink, orange and a lot of white will give you
a peachish tone. Now underneath the orange, picking up a medium
tone of the pink color, you can see it's not a very light pink that I've picked up. I've laid it up almost
over the orange tone, blending it in such a way
that we have little hints of the orange still
visible into a sky. Next again, picking up the
lilac color that we used. But this time, I
have picked it up in a little dark consistency and then lightened it up
with a lighter color. Now, as you know, my palette has multiple tones
of the lilac color. It almost has around
12 to 14 in shades. So I have all the tonal
variations ready. You can keep alterating by
adjusting the ratio of white. If you want further lighter
color, add in more of white. If you want less lighter tint, add in less of white,
more of the base color. So I'm done with the
base of the sky. Now I'm going to go ahead,
add in the cloud details. For that, I've shifted into my smaller size filbert brush, picked up the pink that we
used underneath the orange and adding in highlights over
the lilac color at the top. I'm going ahead with very
soft smooth strokes, not gold lines that I want
to depict into this sky. Now, picking up a little
lighter hint of the same pink, I'm going to begin adding in clouds at the top space as well. You can see I'm adding
clouds from the left and the right he moving
towards the center, very loose strokes
that I'm using. But again, you will
see all of these has a very soft blend that I'm
creating with the base layer. I'm not going ahead
with bold strokes. I want very soft
blended subtle look into my cloud space here. So I've added the
pink highlights over the lilac and
the blue colour. Now I'm going to
pick up a further lighter pastel pink color and begin creating a
little more highlights over the blue at
the top left side. So then with the lighter pink
highlight at the top here, you can see very
little blended effect that I've given in. Now I'm going to pick
up the pink color in a little bold consistency. So I'm picking up this pink which I used
underneath the orange, but this time I'm
going to pick it up in a further darker
consistency and begin adding in the cloud over the
orange and the pink space. You can see it's darker than the base lear
pink that I use closer to the orange closer to the orange because of
the blend with orange, the color automatically
turned lighter. Now adding in cloud
strokes with this, again, I'm adding it
in a soft blended way. I'm adding in the
strokes, blending it with the base
leer on the edges, giving it that soft smooth look. Now, again, I'm going
to use in a little of the lighter pink
color and add in little cloud strokes over
the lilac color here. Very little, not much of it
that I'm going to add in. For creating in the soft blend, after adding in the strokes, you can use a dam brush
and some Baslier color and blend these strokes on
the edges very softly, very slowly so that in such a way that the
clouds are still visible, but they do not have
that bold effect. Now I'm picking
up the grey color to begin adding in
the mountain change. So first, I've picked up a medium dark tone of
the Greek color. It's not too light,
but not even black. I'm going to add in
one mountain range left on the right
side here first. So then adding in the
first mountain range. Now I've darkened
up the gray color. I'm adding in a little hint
of black to the same gray. Again, I have a darker
gray ready in my palette, but since I already have
a little of black on my palette and the
previous gray color, I'm just adding in a
little hint of black to create a darker version
of the same gray tone. So this is how, you know,
despite having in the colors if you want to reuse the colours on your palette
readily available, create darker tones as
well so that you can use the colors already available and you not have to
waste them because, again, quash is a water based
medium, easily reactivated. So no wastage of pains, reactivating them
onto the palette again or blending it with other tones is much easier
as compared to acrylics. Now, once the first two
mountain range dries out, let's move ahead
to the third one. Now for the third one, I'm going ahead with this very dark color, which is almost equal
to a black colour, but not actually black colour, because for the black, I'm going to be adding
in the pine trees. So I've darkened
up the gray only with a little more
hint of the black. So make sure you do not use a dark bold black for adding in the mountain
ranges here because we are going to add in
little pine tree details in front of these mountain ranges for which we'll be using
in the black color. If you will use in the black color for the mountain range, then the pine tree will
not be visible that distinctively on the
last mountain range. You can see it's a dark
gray color that I've used. When I'll be adding in the
black pine tree on top of this dark gray last
layer of the mountain, you'll be able to
distinguish the color between the dark
gray and the black. So make sure you create three
versions of the gray color. For creating in gray, you can mix in a little bit of Crucian blue, white and black. Again, for creating lighter, you will have to keep the
proportion of white extra. And for creating in darker tins, you will have to keep
the proportion of black and blue a little extra. So make sure you first
create in three versions of gray if you do not have
ready gray available, and then go ahead add in the
three gray mountain ranges. Now my mountain
ranges are dried. I am going to pick up
the black color onto my round brush and begin adding in the pine tree that
we are going to add in. So I'm going ahead with
one huge pine tree in almost the center space. So first marking
the center stem, and then I'll begin adding
in the detailed foliage. Now, I'm going to go ahead with a detailed pine tree this time, so I'm going ahead very
slowly while adding in the foilage so that the foilage
look detailed and cric. I'm not going ahead
with, you know, a quick foiage effect this time because this one pine tree
will be the main focus. And then we'll just add
in little more details at the bottom most space depending on how this one turns out. So you can see how slowly I'm going ahead with
the foliage this time, pulling out branches, and then creating foliage
onto that branch. But one thing to notice as I'm moving towards
the bottom side, I'm increasing the
length of these foliage, such that from the
top to bottom, we have a triangular shape
for our pine tree coming in. Now you can see how
the black is visible even on the darkest gray
mountain range that I've added. So the color while adding seemed to be a black color for
the third mountain range. But actually, if you see it
now, it's not black color. It's a dark gray color. That is the reason the
black color is still visible perfectly on top
of this dark gray layer. Now, as I'm reaching the end, I'm creating in very
less detailed foilage. I'm just dabbing in with the
black color a lot so as to show a lot of foilage
out there together. Now, towards the
rightmost side here, I'm going ahead with
one more pine tree, but a very small one. The main focus will be the center pine tree
that we've added. Now, in the rest of the left and right space of
this pine tree, I'm going to go ahead with
smaller virgins as needed. Not everywhere will be
a lot of pine trees. Somewhere you can even use in the simple strokes that I've discussed in the
technique section. If you want, you can refer the pine tree technique
section where I've showed you simple way of filling in the
space completely. So I gave in little simple
bush detail in the center of this and now again added
in one more pine tree. Now again, here, I'm
just going to pull out simple strokes from the center pine tree to the pine
tree on the right. You can see I'm just pulling simple strokes which
has pointed edge, trying to show in some
far off pine tree effect with very simple technique. Mm. Now, same way onto
the left as well. I'm going to go ahead
with pine trees. You can see I've made
sure about one thing that even despite varying the
heights of the pine trees, I've made sure all the
three mountain ranges are visible from
behind the pine trees. We have the lightest one
visible on the right side, the second daker one on
the left side visible and the darkest mountain range
that we added is still visible on the right side from
behind of the pine trees. So you need to make
sure about this thing because if you will hide
out these mountain ranges, what would be the sense of adding them in the first place? So, make sure you
vary the height of these pine trees
in such a way that all the three mountain
ranges are visible distinctively and perfectly
into your landscape. Now I'm done adding
in the pine tree, so I'm going to begin adding in little texture onto the
mountain range now. So firstly, I will begin with a mountain range
on the left here. Make sure that your mountain
ranges are completely dry. So I'm picking up the
light gray color, and I will just add in
little dry brush stroke to create texture onto this
mountain range on the left side. So just going ahead, pulling
out little simple texture. I'm going to make it move from left to right a
little diagonally. You can see it's
very simple strokes that I'm using creating in simple dry brush kind of texture to give in more
depth to the mountain range. So you can see I'm
going layer on layer. I used a medium tone, and now using a little
more lighter tone, I added a little more white to my gray color to create
a little lighter tone, now adding in a little
more texture and movement. You can see I'm moving from top left to bottom right diagonally, creating this texture
on the mountain range. Same way, I will add in a little texture onto the right mountain
also that we've added. For that, I'm using this
very light pray that I created by adding more white to the baseler
mountain color. The mountain color that we use for the first mountain
on the right side, I added white to it so that
we can get a lighter tine. Now, creating a little texture onto that mountain
range as well, using in this lighter color. Now, for this mountain
on the right side, we went from top right to bottom left diagonally creating
in the texture. Now I've shifted into my pointed tip brush
and I'm going to create a little more
depth given very simple, you know, details
to the pine tree. So I'm just going to add in some very simple branch detail or stick details in between. So very simple lines that
I'm adding in first. Saying way even onto
the right side, I have added in very
simple strokes. On top of it, I'm just giving in simple thorn details in between. So you can see simple
techniques that we use given so much more depth and realistic effect
to your landscape. All of these techniques I've discussed with you in detail in the pine tree technique
section where I've shown you all of these simple
thorn sticks to add in, simple, quick pine
tree, far off effect, detailed pine tree,
detailed foolage, simple foolage, all of
these discussed in detail. So I'm done adding
in the pine trees. Now I'm going to quickly add in a small moon into our sky, and we'll be ready with our
crass project for day 20. H So using in my pointed tip line of brush and the white color
in bold consistency, I'm going to add a
crescent moon in the center on the
top blue dark sky, a very small tiny moon
out here at the top. So that is it. Let's remove in the masking tape and
see a final painting. You can see how all the
three mountain ranges are visible plus the texture on the two mountain ranges is giving in so much more depth to the painting with simple pine tree details and a pretty moon. So here's a closer look at a beautiful painting
from day 20. This is one of my most favorite
from this series so far. I love the soft blended clouds, the detail on the mountains, the simple pine
tree detail that we added in the center space
with a simple moon, creating in the perfect nature
of you one would pray for. Thank you so much for joining me into this class and
painting along with me. I will see you guys soon into the next class
project till then, if you like this class,
make sure to drop a review so that it can help
me reach maximum students.
24. Day 21 - Amongst the Mountains: Hello, everyone.
Welcome back to day 21 of the 30 days of quash. Today we are going to paint another beautiful
road view landscape. So we'll go ahead
with the basic pencil sketch first and then
move on to the details. It's going to be
a beautiful view by the long drive that
we'll be painting today. So first, marking out the road
space at the bottom area, we're going to show it
across kind of like a mountainous road
pathway that we are focusing on for this class project with a
pretty bright sky view. So now, on the left and right, we are going to have in the
greenery across the pathway. So I've marked out the spaces, so the top is going
to be the sky. The bottom center will
be the entire pathway. Behind the greenery, we'll
have a small sea area here, and this entire space
out here will be the greenery space
that we mark below the sea and the top
will be the sky. So very basic
pencil outline that we've marked on going
ahead with the sky first. So for the sky, I'm going to use in pretty bright shades of yellow and blue to create a
beautiful daylight sky color. So I've picked up a very
light pastel blue color. You can see it's almost equal to a white color with just a
very little hint of blue. In case if you do not
have this ready color, you can mix in a lot of white to your blue and get
a similar color. So it's just a very light hint into a lot of white
that is there. Now, this color is, of course, readily available in
my palette because of the various shades that's available in my
palette to paint with. Next, I'm going to go ahead with a very light shed of yellow
at the bottom space. Now, again, if you do not have such a light naples
yellow color, you can mix in a lot of white to your yellow and get this
bright pastel yellow colour. And now at the bottom, I've
used a little bright yellow, blending it with the
pastel yellow that we've added and blending all of
it well with the blue. Now, my blue was also in a
very light pastel consistency, and in between for blending, I used in the very
light pastel yellow because of which
I have not gotten any green tones while blending. In case if you will have
in a bright blue and a bright yellow colour and blend it without
the help of white, then it may give you greenish
tone because blue and yellow mixed together will
give you a green colour. Now using a bright blue color almost equal to a
turquoise blue color, adding it into the sea area. The sea area is also
going to be very simple. It's a very small space
that I'm adding in. Now, in case if you do not
have such a ready color, you can simply mix
in a little hint of emerald green or
viridian green to your blue colour with a
little bit of white and get a similar looking blue
tone for the water, or if you have a
water blue colour, then you can even use that
or an aqua blue shade, whichever name it's
available in your palette, or you can simply
mix in white to your erlean blue and use
that as well directly. I'm defining the horizon
line well with a sea area. Now, if a little of
the paint goes into the greenery space or
the pathway space, it's okay because
those spaces are going to be of dark tones. Now, make sure you
give the water space completely till the left edge because from behind of the bush retails that we'll
be adding on the left side, a little of the sea may be
visible here and there, so make sure you add in
the blue color for now, because as it is there, we'll be having dark green
and black tones. Now, for the pathway,
I'm going ahead with a medium tone
of the gray color, going to add it into
the entire space here. But I'll make sure that I am not using a very
dark tone of gray. Make sure you use a medium tone of gray and then I'll be using a lighter color as well to create more lighter highlights. Now, across the pathway, I'm trying to go ahead with
the line measurements. On the edges, I'm just picking up this color from the
center and blending it, giving it in the right way. No. So, into the entire pathway, I first added one single
tone of the gray color. You can mix in this gray color with the help of little brown, black and white because
it will give you that little brownish hint for the muddy view that we
are going ahead with. Now, picking up little white, I'm creating in little
lighter effects as well. So you can simply use in white, layout at places
and blend it with the pasteler gray
that you've created. Or you can use a lighter
gray colour as well to create these highlighting
spots onto the pathway. Now, next, let's go ahead, add in little waves
detail into our sea area. For that, I'm going to use
in this medium tone of blue. I already have some dark
blue on my palette, adding in little
light blue to it so that I can mix
and use in the dark, medium blue color
tone that I need. We are going to
add in very simple effect for the waves again. This also I've discussed in the last technique section
of this class where I've shown you how you can
add in simple waves to more detail to your sea view. So just going ahead with
my pointed tip brush. This is a liner detail
or brush that I'm using and just going to add
in these simple strokes. You can see it's not a very
dark color that I'm using. It's a medium tone of blue, just one tone darker
than the base layer. That is the reason I mixed
it with the dark blue on my palette so that I do not have to waste that
dark blue color. I always tell you with gouache, you can reactivate your
colors on your palette, reuse them itself, and you
do not have to waste them. I have not cleaned my
palette since, I guess, almost the 15 class projects that we've been
painting in this class. I've been rewetting the paints, mixing in colors into the same
palette, and reusing them. Till now, as Bell, I haven't cleaned my palette, so you can see how I have been mixing lighter colors or
darker colors with the colors on my palette itself
and reusing them so that I do not have to waste
any of these because, gosh, water soluble medium
easily reactivated. You just need to be sure about the consistency that you need
for the specific details. So I'm almost done adding
in the waves detail. You can see some smaller
lines, criss cross lines. Somewhere I've added in
little thicker lines to depict some depth into the waves to give in that crashing effect of the foam closer to
each other as well. So we're done with the waves. Now we'll go ahead with the greenery details
into our painting. For that, I'm going to pick
up the sap green color. Again, you can see the
colour is on my palette. I'll just add a little more to the same color on my palette. And for lighter tones,
I'll mix in here. For darker tones
as well. I'll just add in little hint of black. So beginning in with this,
now on the right side, I'll first begin giving in
the details at the top. So using the tip
of my round brush, I'm using a smaller sized round brush which has a pointed tip. I'm just creating in some
simple grass details, which is little going to overlap onto the
sea area as well. So just using the pointed
tip of the brush, I'm beginning to add in simple crass details
at the top here. Now, at the top first, I will just create
simple leaf detail by tapping in the
tip of my brush, giving in little bush detail. And towards the bottom space, we'll just keep filling
it with colours. So in the entire top
space at the right area, you can see I've
marked out the detail. Now, towards the bottom side, I'm filling it all completely
with the green color first. Then we'll create in little
darker depths onto the edges of the pathway space with
the help of the black tones. Now, using the black color at the bottommost space here and
blending it with the green. Across the pathway line, I'm going to use in this
black color and create a little darker shadow effect
for the pathway as well. So here you can see I have
added in the black color. Now I'll pick up the
same green color again for blending in the black
and the green so that we have a smooth and
clear transition happening in between the
greens and the blacks. Now, I'll just quickly add in a little more details at the top using in the tip
of the brush and give a little more
foilage detail here. Now, on the leftmost
side as well, we are going to go ahead with
a similar kind of detail, but there we'll first go
ahead with the black color, and then we'll add
in the details with the green on top of it. So now let's begin with the
details on the left side. I'll pick up this black
color and I'll add it onto the entire left pencil
sketch that we had created. If you do not remember it, you can just have
a look first at the entire space that I'm
adding in the black color. Then later on, I'll just begin pulling out the fooliage
from this as well. So I've just given in a small
patch of the black color, and now in front of it, that is towards the
center of the sky side. I'll begin adding
in simple foilage using this spoiled
round brush technique. This also I've discussed in the technique section
how you can quickly add in this fooliage using in a brush just in a
dry, damp manner. Now, the bottom white space
that I've left there, I'm going to add in a little rock detail using
in the brown color. That is the reason I've
left it blank for now. Using in the browns,
I'll just create a simple rocky mountain kind of a detail across
the pathway there. So for that, now I'm
going to pick up the burn sienna color which is already on my palette here. I'm just picking it up in the thick consistency
and going to add it here and blend it with the black in the bottommost
space completely. So I've added the brown color. Now using the black,
I'll just create a little darker shadow
effect at the bottom space, or you can use a very
dark brown color as well if you want
across the pathway line, but blend it well
with the brown color. Now, I'm just blending in the blacks and the
browns here at the top, and then we'll wait for all
of this to dry and then move ahead further adding
in the texture to the left side part here. So now let's begin adding in some more details onto
the foiliage part. First, I'll pick up a little
of the yellow ochre colour, and onto the right side
foliage that we've created, I'm going to add in some
lighter and the darker depths. So using the simple technique
of the spoiltn brush, I'll just add in some yellow
ochre foiliage effect and then some black
colour fooliage effect. For the black, you can even
use a dark green colour if you wish to or even
use in brown tones. So randomly, you can
see I'm dropping in some lighter foiliage with
a yellow aqua color first. Now, same way dropping in little foolage with a
black color as well now, and then I will use in green colour to blend all of these well together such that you'll have little lighter
yellow patches in between and then some darker
foilage effect with the black color as well. You need to make sure
that all of these has a well blended look
with each other. So picking up the green
to blend all of these, but making sure that
they are all visible as highlight between the
entire foolage effect. So that is it. I'm done with the foliage effect here
onto the right side. You can see just ting
in a little more of the yellow ocher effect to
create in that lighter blend, and all of it is well blended with the greens
and the blacks together. Now, onto the left side,
I'm going to go ahead with a little detailed
foilage structure. For that, I'm going to
use in my detail or brush and begin pulling out simple
details from the left side. So now just beginning to pull out simple foolage
from the right side, as I told you, very
simple details that I'm trying
to pull out here. If you want, you can even use
a smaller size down brush, which has a pointed
tip and keep on pulling out this
simple foliage detail. You can see if we filled in the entire space with
a plaque first, then tapping technique
with a spoiled brush, and now just adding
in simple detail with a detail or brush, giving in so much more
depth to the entire thing. You can see I've tried to vary the shape throughout somewhere, taking it longer, somewhere just towards the left edge only. So I'm almost done adding in the details with a
black color as well. On top of it, I'm
going to give in little depth with
a green colour, and for the rock
space, I'm going to add in a little texture
with a white color. So now picking up the green
colour first and going to add in little foliage detail
with the greens, as well. And then using in
the green colour, I'll just begin dabbing in a little on the
leftmost edge as well. So make sure that your
black is completely dried before you begin dabbing
in with the green colour. O. Now, let's begin adding in some texture
onto the rock space. For that I'm using
in the white color and using in the dry
brush technique, holding my brush
diagonal and creating in little texture onto the rock at the bottommost brown space only. Now, using the white
colour and my liner brush, I'm going to add in little
details onto the pathway. Make sure you use
a detail of brush, or you can use a white
shell pin for adding in these fine line details
onto the pathway as well. So onto both sides
of the pathway, I'm going to add in
these fine lines towards the center where the
pathway is disappearing. The line is much finer. And as it moves towards the
bottom side of the paper, I'm thickening the line because
of the perspective view. You can see how easily I could just tilt my
book and add in these details because of the
free movement of my paper. This helps in adjusting your hand movements easily
as per your convenience. Now using the white colour, beginning to add
in simple center details as well on the pathway. First, towards the center where the pathway
is disappearing, I'm adding smaller lines. And as I move towards
the bottom side, that is towards the
end of the paper. I'm thickening and
lengthening up these lines. Again, this is also because of the perspective angle that
I'm trying to add in here. Now, using in the
darker green color, or you can even use a little
of the pains grey color, add a little texture onto the pathway and blend
in at certain spots. So I'm using the dry
brush technique, adding in some texture
on the pathway. And then using a tabush, I'll blend a little of these into the base of the pathway. So using a dam
brush, you can see, I've simply blended a little of these dark spots
into the pathway, creating in some darker patches
as well onto the pathway. Now, one last thing,
I'll just add in a little darker effect here and create closer to
the white color, a little darker shadow effect, blending in this
darker gray effect into the base layer
across the white line. You can see a little dark shadow effect that's
forming in here. So that is it. We are ready with our class project for day 21. Let's remove in the masking tape and see a final painting. Now, before peeling
of the masking tape, I'll just add in a
little more detail on the leftmost side here, and then we'll peel
off the masking tape. I'll just give in a
little more detailed foiage effect at certain places pulling out some more length to the foolage in towards
the center side. So at certain spots,
you can see I just pulled out a
little punch towards the center side or towards the sun and the seaside
that we've added. Now let's peel off
the masking tape and see your final painting. Make sure that your edges
are completely dried before you begin to peel
off the masking tape. So here's a closer look at
our painting from day 21. You can see the green
fooliage effect on the left side
that we've added and the simple rock brown color that we added with
a simple technique. When you have a
closer look, you can see all the colors more clearly. And on the right
side, we added in lighter foolage detail but the yellow orchard
tones and glare. I hope you guys enjoyed
painting this with me today for the day
21 class project. I will see you guys soon into the day 22 class project
till then happy painting.
25. Day 22 - The Glow in the Beach: Hello, everyone.
Welcome back to Day 22 of the 30 days of cash. Today, we are going
to be painting another beautiful seascape
with a beautiful evening view. So I'm just pinning in
with the pencil sketch. I first mark the horizon line. On top of the horizon line, we are going to have in a
little of the greenery detail, which is going to move
into the sea area as well. And then towards
the bottom side, we are going to have in
a simple beach space from which we are going to have a lot of palm trees coming in. So I'm not giving in
the detailed sketch for the palm tree right now. We are going to have in
three, one on the right, and two on the left out there. And here we are going to
show in a light space. That is from a palm tree, we'll show a light hanging in. The reflection or the light of which will be falling
onto the beach area, so we'll create a
light space there. So that is it for
our pencil sketch. Now let's begin with
the colors one by one. So first, we'll
begin with the sky. We're going to have in
a beautiful evening sky with the shades of blue pink, a little hint of yellow, and then adding in cloud
details with the violet color. So I'm first begging in
the bright sky blue color. Next, I'm going to add
in a little bit of white underneath the blue and blend
it with the blue perfectly. Then we'll move on to the shades of pink and yellow first. And then for the clouds, we'll move on to the violet tones. Now, for the yellow color, I'm picking up this yellowish orange tone from my palette. You can simply mix in a little bit of your
bright yellow with a very little hint
of orange and white. Make sure you add
in white so that when you blend in
with the blue colour, you do not get in muddy tones. So you can see while
blending, I again, picked up a little white and
blended it with the blue. So only in the half
space I've added, and in the half ed space
at the bottom of the sky, we are going to go ahead with
the tones of a you know, the blue and the pink tones. So again, from the right side, I'm blending it with
the blue a bit. For the clouds, we'll go ahead with the pink and
the violet tones. In the sky, we have the
beautiful sunset effect with the yellow and
the blue tones. So something new
that we saw into this class project is blending
half and half like this, the yellow and the
blue that we blended. Now, I've picked up a little
of the dark blue colour, and I'm going to add in a little darker depth at
the top out here. So I've just laid
down one layer, and using in white, I'll
blend it with the base layer. If you want, you can
pick up the base layer blue colour again for blending. It's not necessary that you need to pick up
white colour itself. I just want to give in a
little darker effect to the night because we are
painting an evening sky. So I want the top of
the sky to depict a little darker tone than
the rest of the sky. Now, till the sky dries out, let's go ahead and paint in the base layer of
the sea, as well. We'll add in the cloud details
once the sky is dried. So for the base layer
of the sea, as well, I'm going to use in
this same blue color which is on my palette already. It's a medium blue tone that I'm using in. And I'm
going to add in. And while adding in here, I'm going to blend
it with a little of the pink color because
as I told you, we'll be adding pink and
violet clouds into our sky. I'm going to define
the horizon line well. You can see it's a beautiful dark blue color that
I'm using here, but it again, has a little
of the white undertone. So, you know, it's
not that blue blue, but it has a little
pastel effect as well. Now, I'm picking up the pink, which is already on my palette, adding it on the left side
because we are going to have a huge cloud on the left side in the sky with the pink
and the violet tones. Now I'll blend in the
blue and the pink with the help of a little
more pink out there. So you can pick up any
pastel pink color. And for the sea, you know, I use the color
which was readily on my palette because I didn't want it to waste in that blue, you can use in a medium tone of blue or you can simply use in the dark blue
that you used in the sky in a medium consistency, blended with the white, or you can even use the turquoise
blue color if you want. So I picked up a
little violet and also added vile blending
it into the sea, because as I told
you, the clouds will be of the violet and pink tones. So just blended into the sea
area with the blue color. On the left, we have the pink, and on the right, we have the
blue and the violet tones. Now, on the right,
as well, just added little pink highlights
on the edges itself. Now, for the beach
area, I'm going to go ahead with the
yellow aqua color. So at the bottom of space, going ahead with the
yellow aqua color, I will blend it with
the blue and pink of the water area
that we've painted. Now, here I've left a
little white space. There I'm going to use
in bright yellow color and blend it with
the yellow ocher. If you remember, while I
did the pencil sketch, I told you to one of the
palm trees out here, we are going to be
adding in a light hanging from the
stem of the tree. So there I'm going to show in the reflection or the light
falling onto the sand area, creating in that glowing space. So that is the reason I've
added in the yellow there. Now using a damp brush, I'm blending the water
and the sand area that we've painted and creating a soft blend between
both of these. I do not want any
sharp distinction between the water
and this space. That is the reason blending
both of them well together. You can either use
the Baselo color or a little hint of
white to blend in. So I'm using the pink and the violet to blend in with
the yellow ochre color. You can see we've got
a very soft blend of the yellow ochre
and the sea space. Now I'm going to pick up
some white and add it over the yellow here to create
in that glowing spot. We may need a little
touch up once we add in the light details
onto the tree as well. For now, just creating in a
spot and leaving it there. Adding in a little
more of the white. First, I added in
the entire space. You can see slowly creating more at a spotlight
point out there. Now, let's begin adding in
the clouds into the sky. For that, I'm using in
the purple color first. So it's a pastel
purple that I'm using. Again, this color is readily
available in my palette. You can simply mix in white
to your purple to get tone. Now, this time into my sky, I'm going to have in
sharp cloud details. I'm not going to
create a soft blend everywhere with the
base layer of the sky, so you will see some
bold clouds this time. Next, picking up a
little of the pink and blending it with the violet
clouds that we've added. So that is the reason in the sea area while adding
in the Basler color, we added in the pink and the
violet blend with the blue already because we
were going to have in a lot of cloud
details out here. So completely till
the horizon line, I've added in one huge cloud. Now at the top space,
using the same two colors, I'm going to keep on
adding in few more clouds. You want you can vary and add
in more color variations. That is, you can add in a little more lighter lilac tone as well, or you can even use a lighter pastel pink color to create some highlights
into these clouds. You need not stick to only
two colors for the clouds. You can use three to four
colors of your choice, but you need to make sure
that all of them go well and blend well together with the purple and pinks
that you use already. So now using a
little lighter pink on the left side here
to add in a cloud. So very simple cloud details
that I'm going ahead with. Again, in the technique
section of the class, wherein I discussed
clouds in detail. I've shared all the tips and
tricks that you can use to create in the soft
blended clouds or such, you know, sharp edge clouds
that we are going ahead with. In this class, we've
gone ahead with a mix of all kind of clouds. So just adding in a
little more detail, you can see using
in the two colors, blending them to
each other, creating in different shapes
for the clouds. I've given in the cloud details. On the left side, I've
given the cloud details in such a way that we have that little of the yellow
sky still visible. So make sure you keep
such small things in mind while adding
in the details. So that is it for the clouds. Now let's go ahead, pick up
some sap green color and begin adding in the details in the remaining white space first. So I'm just going to create
in a simple bush area here. Now into this as well in
the center part of it, I'm going to show in
the lighter effect with a very light
yellowish green colour. If you do not have a
yellowish green colour, you can simply mix in a lot of yellow and a little hint of white to your green to create that
yellowish green colour. Now mixing in the sabrene with
a little hint of black for the bottom side to create
in the darker bottom edge, which is moving into the sea. Automatically that will give in that little shadow
effect also needed. You can see I'm going
very slowly from the outline because as I
told you in the center, I'm going to give in the
lighter green effect. So towards the bottom
of this bush space, you can see I've moved
into the water area very gently moving out simple strokes from
the bottom space. And then on the left edge, I gave in little black detail. Then again, sabrene
now in the center, picking up the light
yellowish green color that I have in my palette, adding in your and blending in with the sabrene on the edge. Now, when you go ahead
with this blending, go ahead carefully such
that you do not make the sabrene overpowering onto the lighter color
that you've added. So on the edges, I'm
blending in very carefully, giving in that
soft blend between the colors automatically
in the center, having in a little
highlighted spot for the bush area
that we want in. Now, after that, let's begin
adding in the waves detail. For that, I've shifted
into my line of brush using the same blue color
that we used for the sea. I'm adding in simple
wave details. In each of the class projects, you may have seen, adding
in waves is very simple. You just need a
pointed tip brush, and you need to just go ahead
adding in simple lines. Now, these lines can somewhere be straight, some were curvy, somewhere overlapping
each other, some were diagonal, somewhere
criss cross to each other. So, you know, there's
no specific method or layout that you have
for adding in the waves. The, you know, beauty lies in the imperfections
when it comes to waves. You can see somewhere I go
ahead with thicker wave lines, somewhere I go ahead with a
cluster of waves together. All of these adds on to the natural effect
of the sea area. Somewhere I use in
little darker hints as well to create more depth
to the waves as well. So here you can see,
I added a few waves diagonally moving from top
right towards the bottom left, creating in the curve into the sea area that we are
having at the bottom space. Now, on the left side as well, I'm going to go ahead add in the wave details
with the blue, and then I will
even be adding in little highlights with the pink for the waves on the left side. So pink, I will use one tone darker than the basely
of pink that we've used in the sea area so
that it stands out on the pink base that we
already have in the sea. So I'm just adding
in the highlights with the pink on the
other side as well. You can see very little tone darker than the basely or pink that we've
already been using. I'm using the same
wave technique that we use with the blue color, that the color difference
to show in the effect of the sky cloud coming into the water area
that we want to depict. Now on to the pink waves, going ahead with a
little overlapping of the blue waves as well, creating in more
depth and details. So we're done with the waves. Now let's go ahead with the
details of the palm trees. Now, the pencil sketch
for the palm trees is absolutely not visible. But remember, we had added
in three pencil sketch, one on the right,
two on the left. So I've picked up a
brownish black color. It's not exactly black,
not exactly brown, so I've mixed in a little bit of black to my brown
and use this color. Now at the bottom, I'm just
going to blend it into a yellow oka colour to show the deep rooted effect of
this tree into the sand area. So just using a dam brush, blended the base with the yellow ochre
colour, if you want. You can use a little yellow ochre colour again for touch up. Now going ahead with
the next two trees. Now, make sure you do
not use a black color here because we are going to add in little texture
on top of it. So make sure you use a dark brownish color or grayish color, not exactly a dark black color so that you can add
in textures later on with the black and the darker tone onto the bak of this tree. Same way for this as well, I'm just going to go and show the rooted effect
into the sand space. Now, adding in the third
tree on the left side, and then we'll go ahead with the foliage detail
onto these trees. We are almost through
the class project. We just need to add in
the foliage detail and then create in the effect
for the light of the tree. Now, you can see
that glowing space that is coming into view in the center towards the second palm tree
that we've added. So there we are going to add in that bulb hanging from the tree, showing in that light
falling onto the sand space. Now, begin to add in simple
foiliage to your palm trees. Again, these also have
discussed in detail how you can add in simple foilage or
detailed foolage both. When you are going
ahead with tiny trees, the quick method falls easier. When you're going ahead
with such huge trees, the detailed foliage
goes much better with the layout of the painting
that you're going ahead with. So using in the sap creen color, I'm going ahead with
the details here. Again, for this also, you can vary with the
tones of greens. You need not exactly only
keep using sap creen. You can go ahead
with a mix of greens to create in the depth
and the details here. Now, going ahead
with the foliage for the second tree as well. Now all of these
trees, if you notice, they are not completely
in our view. So we only have a few branches
of the filage visible. Now, from the third tree
that I'm going ahead with, I'm going to add a little
foilage overlapping onto the second tree and try to show in little fooliage
moving in there. So, you know,
overlapping each other, creating in more details. Plus, you can see
how quickly I've added in the foolageV
simple technique, not much of detailed look that
we need to go ahead with. So that is it for
the fooliage detail. Now I'm going to go ahead, pick up a little
more darker color and begin adding
in little texture and effect to the bark of the
tree that we've added in. So I'm using one
tone darker color. That is the dark brown mixed
with black and just added one dark line to the tree on the right side and blending
it with the lighter tints. So towards the
right, I still have the lighter color and
towards the left, I have the darker hints. And now onto the second one, adding in little texture, creating in very simple strokes, giving in a little more detail. Now, on the horizon line,
using the black color, I've added a very small
tiny mountain range, just a very thin one, not much, you know, a bigger one that we need
a very delicate looking. Make sure you do not overlap
it onto the palm tree. The palm tree has to
be on the face and not behind cut between
the mountains. Now using the black color
itself onto this second one, I'm just going to create in the darker effect on the edge, giving in more depth and detail, and then create in
little texture as well. Then lastly, we'll
just be left to add in the bulb detail
onto this tree now. So creating in that
texture that I told you, putting in simple
lines to create the wooden effect onto the
back of the palm tree. Now, first, I'll go ahead
with one more layer of white into the glowing space
so that that can dry out. Again, I'll add in white, and on the edges using
in a damp brush, I will blend it into the base
that we've already added. Even on the sea
side, I need to make sure that it has a
soft blended lo. Added a little hint of
yellow again on top of it, very little, and now
blending it again. On the top, also, as I told you, closer to the sea,
I'm going ahead, blending, creating
in that soft edge of this glowing space
that we are creating. If anywhere you feel you need to use the base
colors for blending, feel free to pick
up the base colors so that your blending
looks smooth and even. Now using the black color, I'm creating in the body
of the bulb out here. Okay? So you can see
I'm just creating a simple rectangle, and
towards the bottom, I'm going to just put
out a round shape, and towards the
center of this round, I'll add in a white dot to show the light
emitting from the bulb. Now onto this light as well, I'm going to create little highlighting spots
with a white color. For that, you need
to make sure now that the bulb dries completely. So once the bulb is
completely dried, you can see I'm
going to go ahead with the white
details of the bulb. For that, I'm picking
up the white colour in a bold consistency, picomes a fresh
paint so that I have the thick consistency
giving in that opaque look. Now, I'm just going to
go ahead and add center of the circle out here to show in that light
emitting from the bulb, which is being reflected on the sand area where we've
created in that glowing spot. Now using in little white color, I'll just create little outline to the bulb just
at certain places so that we can have
a three effect to the bulb also peeking out
from the back of the tree. Otherwise, since the tree is also dark and the bulb is
also of the black color, you can see both are
merging into each other. So just very light white
highlights, you can see, and it gives in effect, trying to show that
three D effect of the bulb hanging
out from the tree. Now, I'll just add a little more white effect to the
light of the bulb, and then we'll be
ready with this class project for day 22. This is, again, one of my
favorite paintings because of the glow that comes at the sand space of the
light that I needed. Plus, this painting I
have already painted with watercolors in one of my class if you've
been following me. So recreating paintings with different mediums is one of
my favorite things to do. And now you can see the
reflection of the light falling onto the sand area and the
bulb details that we've given. So that is it. We are ready
with our class prochq. Let's begin to remove in the masking tape and
see a final painting. Make sure that your edges
are completely dried before you begin to peel
off your masking tape. So just peeling them off
against the paper so that I do not lift up the paint
or tear off the edges. So here's a closer look
at our painting from day 22, the bold clouds, the details of the green
bosch, the wave details, the color mixes that we've used, and the glowing
spot of the light being the highlight
of the painting. I hope you guys enjoyed
painting this with me today for day 22 of this class. I will see you guys soon into the next class
project till then, make sure to keep uploading your class projects
and happy painting.
26. Day 23 - On the Roads: Hello, everyone.
Welcome back to Day 23 of the 30 days of quash. Today, we are going
to go ahead and paint in a beautiful roadside
view landscape. It's going to be
a simple painting that we'll be going ahead with So the pathway area is going to be very small
at the bottom side. I've marked the horizon line, and underneath that, I'm
giving in the pathway detail. On the left and right, we'll have in the greenery details, and this center part
will be the pathway, and the top is going
to be entire sky. So we'll first begin in with the sky and then move on
to the other details. The details below
the horizon line are going to be very
simple and quick. Plus, we are going to give
in a glowing light effect, trying to show in the lights of the car out on the pathway. So first, let's begin
in with the sky now. So for the sky,
first, I'm picking up a pastel purple color. Now, for this color,
you can simply mix in purple and white. I have added in a
very small tinge of black to give it that
little grayish purple tint. So just a very small tint, like 0.1% ratio, I would say, of black compared to
the purple and violet, adding it at the top
of the sky first. Now, next I'm going ahead
with the peach color. I've already shared
multiple times the mix that you can create
for this peach color. You just need to add in a
very small tinge of red pink, sorry, red, orange, a
little tinge of yellow, and a lot of white to
get a peach skin tone. So again, now, make sure that your white proportion has to be a lot because you can see
the peach color is very, very, very light,
almost equal to a white tone with very
little hints of the yellow, orange, red color mix. Now I'm going ahead with a
little darker peach tone. That was a skin tone previously. This is a peachesh
tone. For this, you can just mix in simple
yellow red, orange. If you want, you
can skip yellow, orange red with white,
and you'll get that tone. And now at the bottommost space, I'm going ahead with a
beautiful bright yellow color and blending all of these
well with each other. And towards the bottom side, I have picked up the
yellowish orange color. For the yellowish orange color, you can mix in orange, yellow and white and
create in this color and blend it all well with
the yellow at the top of it. Now, define the
horizon line well. Make sure you do not run into the bottom space under
the horizon line. So we are done with
the pace of our sky. Now we are going to go ahead, add in the cloud details. For that, I'm picking up
the gray color, sorry, the purple color again
that we used into the sky. Just I'm going to keep it one tone darker than
the base layer. So you can just add in a
little hint of the violet or the black to create this
grayish violet color again, which is one tone darker than the base layer and begin adding in simple
crowd structures. I'm using my smaller
size Pilbard brush. You can use round brush, flat brush, mop brush, whichever is available and whichever you are
comfortable with. Now, I'm going to pick
up the lilac color, which is basically, I'm not going to add
in the black tint to it this time and using
this violet color, I'm going to begin adding in the cloud details towards
the bottom side of the sky. At the top, I added it
in the grayish tint. You can see the
difference when I'm laying down the clouds
closer to each other. So with the lilac color now, that's a pastel violet
color that I'm using, not exactly a lilac color. I'm blending in
with the two clouds that we already
added and adding in some smaller cloud details further moving towards
the bottom side. So on the left here, you can
see I've created this cloud, a big huge one with the tones
of gray blending in with the grayish violet tone and
the violet tone as well. And moving towards
the bottom side, I'm going to, you know, keep in the clouds
very small and tiny, but a lot of them
close to each other. So you can see, as I'm moving
towards the bottom side, I'm just adding in very
simple dry brass strokes to create in the cloud detail. Majorly at the top of the sky, we've given in the
detailed clouds with different tones of
the purple colour, grayish tones, lighter tones. Now I've picked up
the light gray color. It's a pastel purple
in my palette and adding in some highlights
with this onto the clouds. For this, you can add in more white to your violet mix already that you're using
for the clouds and create this for the
lighter tone, as well. Now, towards the horizon line, I'm going to show in
the sunset effect. For that, I've picked up
the bold orange color, and I'm going to add in some subtle cloud details
towards the bottom side. So make sure you use in
a pointed tip brush. I'm using the tip of
my filbert brush. Since this is a
smaller size brush, I'm able to use the
tip in a thin manner. Make sure you use
the right brush so that you get in
these details right. So adding in these bold
sunset color effect towards the horizon line. Added a little towards the gray cloud in
the center as well. Now blending it into the base layer using
in the damp brush. If you want, you can pick up the pastel or orange
color that you used for blending in so that you have that
soft smooth blend, but still having those
darker highlights visible. So I'm blending it in such a way that it has the soft edge, but still it has a
visible look with, you know, base lear color. So I have picked up
the pasteler colour, blending it and
making sure that I still have the cloud detail
of the darker highlights. Now, next going to pick up a very bright yellow color and going to add a little
of it on the right side here towards the
bottom side to show in that sunset effect in between the dark orange and the light orange
highlights that we've added closer to
the horizon line. Now, using the
bold orange color, just adding little more
highlights closer to the yellow, blending in all well, then I will use a light
pastel yellow color and add in little highlights on
the purple clouds at the top, and we'll be ready with
our sky for the class. So just adding in
little highlights, you can see very soft strokes, but still having in
the distinctive look. Using this pastel
naples yellow kind of color and going to add in
little highlights here. Make sure you use a
yellow with the white in it so that when you blend
the violet and the yellow, you do not get a muddy tone. If you will use a
direct yellow color, then blending it with violet, it will give you muddy tones. So make sure you use the
right mix so as to avoid any uneven or unpleasant
tones in between. So we are done with our sky. Now, let's go ahead with the
details of the greenery. For that, I've picked
up the Saprine color, and I'm going to begin
with the right area here. Now, just like in one of the previous
class projects we did, towards the top side, I'm
going to keep it green, but towards the pathway side, I'm going to keep in
the darker color to show the shadow effect
for the pathway. So there I'm going to
use in a dark color. You can either mix in
black to your green or directly use in a darker
green color for blending or, you know, add in black directly and blend
it with the green. I first added a little lighter green along
with the sap green, and now towards the edge, I will add in the
darker green color. So for that, I'm just
picking up the black color. I'm going to add it
onto the edge of the pathway line where the greenery and
the pathway meets. And I'll blend it
with the green color using the basely of green again. So you can see a darker
effect that's coming in that will act in as the
shadow effect that we needed. We followed the
same technique in the day 21 class project,
if you remember. Same way, we are even
going to quickly do the same thing onto
the left side as well. You can see I have
the light green, sap green, and then the
darker edge visible. So before moving on
to the left side, I'll first pick
up the gray color and add in on the pathway. Again, for the gray color mix, you can just mix
in black, white, and a little hint of brown or a little hint of blue to
get the grayish tone. Now, you can see it's
a grayish color, not a black color
that I'm using. It's a medium to dark
tone, not too light, but it isn't even too dark, like a blackish tone. In between, I've picked
up a little of the lighter one as well
to blend in with the gray so as to show in the different highlights
onto the pathway as well. Now, let's go ahead with
the left side area. Same technique that we
followed on the right side, sap green, light green, and either a dark green
color or a black color that you need to use to
create in the details here. So I added the sap green color, then the light green color, and now adding in the black, blending it with the
green across the line of the pathway to show
in the shadow effect. Make sure that if you do not
have a light green colour, you can mix in yellow with your green and create that
lighter green colour. For blending, as I
always tell you, you can pick up the
previous color to blend in so that you have that smooth transition happening in. Now, on the right side as well, I'll just blend
little darker tones more on the edge and blend it
with the greens perfectly. So we are ready with the base. Now we have to add in little
details on the horizon line, and then we'll be adding in the car highlight
that I told you, showing in the glowing light
effect of the car this time. Now, let's begin adding in the details on the horizon line. So first, I'm going to pick up a lighter gray color and add in two tiny house details out
here on the right side. Very simple silhouette,
no much detail. And then through
the horizon line, we are going to add in
simple tree details we're using in the black color. I'm lightening my gray taint by adding in more white to it. Again, I have a
very light green, my palette readily available, but since I already had the
darker gray for the pathway, I'm mixing in white so that I can reuse that color itself. So added two tiny
house details out here on the right
side, as I told you. Now, I'm just going to go ahead
with the further details. Now, to distinguish, I used a little hint of
the black color and created that little
cut effect in between the house
that we've added. I'll just add in a little more details with
the gray color, a few more houses, and then we'll go ahead
with the next detail. Now for distinguishing
each of these, you can use little
darker tint lines in between to create a separation
line for each of them. So I'm just adding these, and then I'll just use a little darker gray
hint or a black color to just set distinction
points for each of them and show in that
little three d dimension. So using the black color
and the pointed tip, I'm just adding in simple lines on the edges, you can see. This is giving in that
three d dimension and a separation
to each of them, despite being of the same
color close to each other. Now, first, I'll just add in the first layer for the glowing light that we are
going to add in. So using in the white color, I'm just going to create in two small circles and
using in the damp brush, I'm going to blend this
out there and create the first dull layer for the light effect
that we need in. So very small ones
because we are showing a far off car headlight, so we do not need
bigger circles. Make sure you go ahead with proportion of the
size of your paper. Now using the plaque color
and the point tive brush, I'm going to begin
adding in the rest of the details on the horizon line. So very simple details. As you can see, I'm
just pulling out simple grasstkes, simple bushes. Somewhere I'm just pulling out some grasstkes and
towards the bottom side, adding in the details with the black color
filling in completely. Now, make sure in front of
the houses that you've added, you add these in such a way that from behind the houses
are still visible. Otherwise, it would have
made no sense to add these. So you can see in
front of the house, I'm adding them in very
small tiny pieces. Same way, continuing towards
the left side as well, adding in the bush detail. At the top, I'm diving
in the tip of my brush, creating in that bush effect. And towards the bottom
till the horizon line, I'm filling it completely
with the black color. Now, in between, you can even
go ahead using a blend of some pine trees or some palm
trees as well with the bush. I'm going to add in a little more bush detail and then see if I'll go ahead with some
pine trees or palm trees. Now, before moving further, I'll add in the second layer for the light because the
first layer has dried out. So the reason why I'm
breaking things in between is so that we do not have to later on wait just
for one element. So now I've added
little orange dots in the center off
to the white dots. Again, using the damp brush, I'm going to blend these and
create in that dull space. So this is going to be
the second layer for the glowing effect that
we need for our lights. Now back to the black color using in the pointed
tip of my brush, I'm just adding in
simple pine trees. We've discussed this in the technique section
where I show you the simple spiky strokes
that you can add to create in that look of
the fire of pine trees. And you can see I've varied the heights of the
bush throughout. I've not kept them of the
same length throughout. I've tried to vary them
with every segment. Now, on the left edge here, I'm adding in one pine tree, so a huge pine tree
that you can see, I'm adding on the left edge. So now just going to add
in simple foliage quickly. We're almost through
the class project, a little more details onto the pathway and a little
detail on the horizon line, and we'll be ready
with our class project for day 23 as well. I'm just going to give
a little more depth to these bushes at
certain places, increasing the length randomly wherever I feel the need to. In between, as I told you, I'll just go ahead
add in a few of the pine trees randomly at spots where I
feel that I should, again, here on the
rightmost edge in front of the
house that we added, adding in a small pine tree. You can see I'm
adding the details, still making sure that
the gray houses are visible into the background of the bushes that I'm adding. Now, using a pastel
orange color, going to add in the third
layer for the light spots. So I've added in
those light dots. Now going to use a dam
brush, blend this again. Now, for the glowing effect, we want a very bright glow, and then in the center, we'll be adding in the light effect. So across the glow
space that is there, we need the yellowish
orange color to depict the light effect. Just dropped a drop of water, so just cleaning it up quickly. Now using a bright yellow color, I'm going to add in the
glowing effect further. As I was telling you, I want a yellowish orange
glow effect in the background and a
bold white light effect coming from this glowing
area that we are creating. That is the reason I first went ahead with a layer of white, then different shades of orange, building the glow effect
one by one step by step. Now, till this layer dries, I'm going to use
my liner brush and the white color and add the rest of the details
onto the pathway. So using the white color
and my pointed tip brush, I'm just going ahead and adding in very fine lines
onto the edges, and onto the edge also, I'm going to add
in small dots to depict some light moving, you know, across the edges
of the pathway as well. So you can see I'm using
a very fine tip brush. If you're not
confident about adding in these details with
a fine tip brush, you can use a white gelpin. Now I'm going to go ahead, add in the light
details as I told you. So just simple white dots
that I'm adding across the, you know, corners
of the pathway, trying to show in
that pathway effect coming in with these lights, very simple dots onto the
white line that we added in. Now, in the center of
this light as well, just going to add in simple
details of the pathway, and then we'll just
add in the last layer of details for the glowing
light that we want. Now to the light, let's
add in the final detail. I have picked up a very
light pastel yellow color, and I'm just going to add it
onto the center again and see if I'm getting in that perfect effect or I
need to add in more layer. So make sure that your previous layer
is completely dried before you add in this. So now in the centermo space, I have added in this
bright yellow you can see. Or if you do not have
such a bright yellow, make sure to mix in a lot
of white to your yellow. You just need a little
creamish hint to your white, basically. So that is it. You can see the light is
glowing and around it, we have the yellowish
orange effect. Make sure you peel off
the masking tape against the paper and only when your
edges are completely dried. So here's a closer look at a
final painting from day 23. You can see the glowing
effect of the light. In the center, we have the bold yellow light, and across it, we have that yellowish
orange glow effect of the light and
simple details into the sky and a simple
pathway painting. I hope you guys enjoyed
painting this with me. I will see you guys one into
the next class project.
27. Day 24 - Let the Street Glow: Hello, everyone.
Welcome back to day 24 of the 30 days of Watch. Today we are going
to be painting yet another beautiful
pathway painting. So I'm going ahead with the
basic pencil sketch first. I have marked the horizon
line a little below the center line this time and marking out the pathway space. This time, the pathway is
going to be different. It's moving from the bottom left towards the top right side, and it's quite broad, as well. And it's diminishing at the horizon line
point, you can see. On the left and right,
we are going to have in the greenery details again this time as well on the pathway, this time we are
going to show in the street light glowing effect. In the previous class project, we went ahead with a glowing
car highlight effect. This time we'll be adding
in the globe because of the street light
that we'll be adding here almost in the center space. First, we'll begin with the sky. It's going to be almost equal to a night sky that
we'll be painting in. So first, I'm beginning in
with this grayish blue color. Now, again I have
this color ready in my palette You
can simply pick up serlee blue with a
little hint of black and white and create
this grayish blue color, add it at the top, and
then we'll bend in with some hold pink
colours into the sky. As I told you, it's almost
a dark evening night sky that we're going ahead with. In the previous class project, we went ahead with a bright
sky color combination. This time, it's a night sky. The glowing effects will
also be different this time. Now, next, I've picked up one ton lighter blue of the grayish blue
color that I have. You can simply mix
in more white to your mix to create the
further lighter tone. Now, adding in the pink color. First, I've added in
this light pink color. Now I've picked up a
bright pink color, added a very little
hint of eight and going to blend in
with the light pink, and then towards the
bottom side again, I'm going to pick up the
blue tone and blend in here. So towards the bottom area, I've again picked up the
same blue color that we used at the topmost pace and
blending it with the pink, you'll automatically get
lids and violet tones in between because of
the blending of the blue and the pinks together. So we are done with
the base of the sky. Now I'm going to begin
adding in details of clouds. So for picking up the blue, I blended it on the right side. Now I'll shift into a
smaller size filbert brush, and using in the pink color, I'll begin adding
in some highlights into the sky and
then using the blue, creating in some details. I'm going to go ahead with very soft details for
the clouds this time. In the previous class project, we went ahead with bold clouds, as you can see, or almost
with those rough edges. This time, I'm going to go
ahead with soft blends. So going to add in
the colors and heap them on blending into
the base layers quickly. Now using the blue in a
little darker consistency, I will begin creating
in some highlights over the pink tones
that we've added. Now you can see I'm going
ahead very crisscross and giving in the soft blend to create in the soft
depth this time. Now, just adding some last darker strokes from
the right edge with the blue color and
we're done with our pretty simple details
into the sky this time. Now next we'll go ahead with the next details at the
bottom of the horizon line. I'm going to begin in
with the pathway first. So into the pathway,
I'm going to be using in the
born sienna color. Now here at this side, we are going to have
in the glowing spot. That is our street lamp will be towards the
left side here. And from there, we'll be showing the light reflection
falling on the pathway. That is the reason
in this spot first, I'm adding in the burn sienna
color into the base layer. Now I'll pick up a little of the darkish grayish brown color and add it into the
rest of the spaces. For that, I'm picking
up the dark gray color, and I have added in a little
hint of the burnt umber to the gray and going
to add it into the rest of the space with
this grayish brown color. Now, towards the top,
I have picked up the darker tone by adding in little hint of black
to the same mix, or you can simply pick up
a dark gray color and add, and we need to
blend all of these. At this point, you can see I'm just adding in these details. They are not well
blended with each other. So now I'm just going to use in a damp brush and keep
all of these blending. I need to just make sure
that the brown colour is having in that spot
because there we want to create in the light effect
of the glowing area. So if you want for
that blending, you can pick up the
lighter brown color again and then go
ahead blending. I'm picking up the dark gray and going to begin
blending on the edges, giving in more darker depth, just giving in that
lighter spot in the left edge of the
pathway that we have. So now I picked up the same
brown color for blending and you can see I picked up a little hint of orange as well. So I just mix the brown
with the orange on my palette to create further
lighter glowing spot. Now, with every layer of the
color that you keep adding, you need to blend the edges with the base of the grey
color that you have. So I again picked up the gray
colour and blended them. You can see slowly we
are beginning to get in that glowing spot
on the pathway, trying to show that orange
light effect on the pathway. Now I'm going to
pick up a little of the bright yellow
color and create a little more glowing spot with this bright yellow
color out here and blend it with the orange and the browns that we added. You can see with every layer, the brightness is
coming to life. Just that while blending, be sure you can see as soon
as I laid the yellow colour, little of the edge
brown black colour got lifted on my brush, so I need to keep
cleaning my brush in between before picking
up fresh paint. So I added in the
yellow highlights. Now I will quickly go
ahead and blend these onto the edges again
using the grayish tint. Now, I'm going to pick up a grayish blue color and add in the first layer of mountain
on the horizon line. Maybe we'll add
another one, I'll see. It's going to be a muted tone of the gray color of bluish mix. So I have the bluish gray on my palette to that and
adding in little white and a little tinder
flare to create that muted grayish blue color. It is almost going to
be like the sky color, but just 1% darker so that
it stands out distinctively. You can see it is that
grayish blue color, but still it's visible
distinctively from the sky. You can just mix in
the black, white, and your blue color in a proportion and try
to get a similar mix. Of course, the blue and white
will be more as compared to the black because it's a mute tone that we
are creating in. Now using the darker color, I'll just add in
little highlights randomly onto this as well. Now, next, let's go ahead, pick up the green color. I'm going to pick up the random green color that's
on my palette, mix in a little more of the sabren and into the
entire white space, we are going to begin filling
in with the green colour. At the top, I'm
going to create in simple bush detail overlapping
the mountain as well, and towards the bottom
side, I'm going to fill it. And as I move towards
the pathway edge, I will add in little darker
highlights using a mix of black or green or
a dark green colour if readily available. Now onto the left side, I will have to add
in a little lighter green first closer to
this light spot because, of course, the
light will also be falling on the greenery area. So even the greenery
needs to have that bright effect where
the light is falling in. So I've added a very bright
green color out there, and now in the
rest of the space, I'm going to add
in the satin and the dark green color
and blend all of these. I'm just adding in a little of the yellow aqua highlight
as well this time. Now, if the yellow
light green colour gets completely hidden
while blending, you can again add
it on top of it and blend because quash
is an opaque medium, and you can simply
overlay again and blend in and create in
those highlighting spots. So I've blended it
with the greens. You can see I've
tried to maintain in that lighter green spot, but I will still further add
in little lighter green in the center to give in
that glowing light effect falling in there as well. Slowly, when we add
in the street light, you will see all of this
coming well together. Using the yellow ocher,
I'm blending in here, creating in that lighter
effect just above the space where we've created in the
glowing effect on the pathway. Now using a dark color on the edges of the
left side as well, I'm going to create a little depth giving in
that shadow effect. Using the black color
across the edge of the pathway and towards the
edge of the greenery space, going to blend it
with the greens. I've just added it now
and using the greens, I will blend all of these well. So even on the right side, I'm going to add in
a similar effect across the pathway line
and then blend in. Now on the left side, you can see that light green
spot has hidden completely. So once this dries out a little, I will again pick up a little
of the yellow ocher and the light green
color and create in that glowing spot till then
finishing up the details, giving in the darker depths at the bottom on the right side, and blending it with the
help of the sabcren color. So on the edges and at the
bottom of the pathway, we have got the darker tins. Now using the light green, adding in that
glowing spot again, and I'll pick up a little of the yellow ochre as well and
blend in all of it here. So blending the yellow
ocher with the light green, we've again got
the glowing spot. You can see adding in little
yellow as well if needed. So as I told you,
Quash opaque medium, you can overlay and work
again if you want to correct anything or if you
want to add in further details while
blending or after blending. Now, using a little
darker green tint, I'm going to begin adding in simple bosch details on
the right side first. Using the tape, dapping in, creating in simple texture, going ahead with different
lens as you can see, Now, as we keep
towards the left side, I'm going to keep on adding
in simple pine trees, and then on the leftmost edge, I will just create in a
simple bush detail if needed. So let's go ahead. This time, I'm not going to take
the pine trees too much tall because we are going
to add in a street pole, which will be tall enough and having in the focus
of the painting. So I do not want to divert the focus onto any
other elements, so want to keep
them minimal and, you know, in length or in size with the painting size that we are going ahead with. So moving towards the left, I've added in some smaller
bush detail and blending this into the base of the green that we have across the pathway. Now on the leftmost edge, I'm just going to add in some bigger detail of the
green color at the top again, creating in simple
foliage detail, daving in and then
towards the bottom space, going to fill it with the blend of the Saprine and a
darker green colour. So towards the outer sides, you can see I'm giving
in the detailed look and towards the bottom space, I'm just filling it with the dark green color
that we've created. I am randomly mixing in blacks and greens which
are on my palette. You can simply keep on reading the tones of
greens that you wish to. Now using in a
little of the black, I'm going to add in
some darker depth here. Now, as I told you, keep on
wearing the tones of greens, whatever available
in your palette, create your own mixes
if you wish to, as I have been doing to reuse
the colors on my palette. Now I'm just blending all of these into the base
layer of the pathway, using the darker color again. Again, at this point, if you
feel after blending, again, the glowing spot
has disappeared, you can again go ahead, pick up the paints and add in. But I made sure that I do not disappear the
glowing space this time, I added in and used a damp brush and blended
it with the glowing space. Now, let's go ahead adding
the street light detail. For that, I've shifted into my liner brush using
the black color. I'm first going to begin
adding in the pole details. So it's a very simple thin pole that I'm going to
add in and then pull out the hand for the light and add in simple
yellow light detail, which is reflecting the shadow or the light effect
on the pathway. Now, you can see as soon
as you've added the pole, you can begin to imagine
the effect of the light that's falling in the greenery
space and the pathway, the details that we've
given for the glowing area. One more thing if you're
not confident about adding in these pol details
directly with the brush, you can first use a
waterproof black pen, add in the details with that
and then if you wish to, you can give in an overlayering with the black color again. Now on the right side, I'm adding in a simple light, which is going to be a
silhouette not light details that we'll be adding
in there and adding in some simple lines
and poles detail randomly in between the greenery spaces
that we've created. So electric poles,
some simple elines. So added in simple violins on the right side and
now on the left, also adding in simple details. As I told you, all of
these, if you want, you can go ahead use in
a waterproof black pen. Make sure you use
a waterproof pen because in case if you have
to overdo any of the things, then quash is a
water based medium, and if your pen will
not be waterproof, all of these details
that you add in with the black pen will
begin to spread out, creating in black patches
onto your painting. Or if you're adding in
directly with the black pen, then it's perfectly fine. Adding in one more pole out here and adding in simple
details to these poles, creating in that
electric pol structure. So I've gone ahead with a very simple so heat for
this electric pole. Now I'm going to pull
out some violins from this pole as well and adding in some simple spring
structure connections in between these details
also that I've added. I'll give you a close
overview once we are done with all the details
into the painting. Now, pulling out
simple lines from this pole that we added
towards the right edge. Now, using the brown, I'm going to create a little of the shadow effect onto the, you know, pole as well. So you're just using the brown, adding in light effect on front of the black
line that we added. So this will automatically
show the effect of the light or the shadow of the light falling onto
the pole as well, giving in that glowing space
on the pole handle here. So these are simple details
which make it more realistic. Now using in the yellow color, I will add in one more thin
line in front of the brown. So we have a very
fine black line, very fine brown line, and now a very fine yellow line. Yellow will be the shortest, brown second and
black is oncomplete. So only in the center
space of the pole majorly, I've created this
glowing effect or the shadow effect of the light falling onto the pole as well. Now, using in the
white and yellow, I'm going to create in that glowing spot for
the light, as well. So that will be the first
layer for the light. I missed out, we
should have first created it previously only. But make sure when
you're doing this, if you use a black color, while blending or creating
in that glowing spot, do not reactivate
the black color. Otherwise, it will give you that blackish effect
out there because, again, gouache can
easily be reactivated. So after white, I've added
in a little hint of yellow and blending that as well and creating in
that glowing spot. Till then I'll quickly add in a little more details
onto the pathway, and then we'll add in
the final light detail. Now, using the white, I'm beginning to add in
the details on the edge. So I'm just using in my line of brush and using the white, adding in simple details on
the edge of the pathway. Very fine, tiny details
that I'm going ahead with. Same way going to go onto
the left side as well. Now, you will notice that giving in that perspective view, the lines which are closer to us have kept them a little tall, and as I'm moving towards
the center diminishing line, I've turned it lighter
and smaller in length. I guess I'll go ahead and
connect all of these lines. I'm not king this broken line effect that I've
gone ahead with. So I've just quickly picked up some white color and blended all of those lines that I added and created
in the simple line. And now in the center,
I will give in these a small line
effect and the detail. So very simple, you
can see how you can go ahead and
overlay details again and give in more detail as per your wish or correct the
details as per your choice. In case if you had
already added in the single line and wanted to give in these small
line details, you could again use
the brown overlaid or the base color that you used for the pathway and then give
in the details again. Now, using in the yellow color, I'm going to add in
the final light detail a bright yellow light effect
that I'm adding out here. Now you can see the light
and the effect coming onto the pole and the pathway and that little highlight
on the greenery space. All of the details put
in so well to each other and creating in so
much realistic effect. Now, across the light,
I'm just giving in a very fine orange
line to depict more of that glowing effect
of the light out there. If you want, you can blend
that using a dam brush, but be very careful because of the baseler colors and the black color that
you already have. So that is it. We are ready
with our class project. I love, love, love
how the effect on the pool and the glowing space on the pathway has turned out. Simple details,
simple techniques, but so much more depth, especially the pole,
if you see it's giving that perfect glowing effect of the light falling in there. So here's a closer look at
our painting from date 24. You can see the
effect on the pole, the details in the pathway, the greenery light
glowing effect. Then the simple details of the electric pole
that we've added, the light effect on the pole with the
browns, the yellows, the light green in
the greenery space, trying to show in all the
reflection of the light, giving in that detail of
the effect on the pathway, greenery space and the pole. I hope you guys enjoyed
painting this one with me. I love creating the glowing
spaces in this one, plus something new to
learn for each one of you. Thank you so much for joining me into this class and
painting along with me.
28. Day 25 - Blue Sea: Hello, everyone.
Welcome back to Day 25 of the 30 days of quash. Today we are going
to go ahead with a very simple
monochrome painting. So I'm first marking
out the horizon line. It's going to be a
seascape painting. We are going to go
ahead with the tones of blue and create in
simple details. For the class
project for day 26, as well, we'll be creating
another monochrome painting. But let's first go ahead with
a class project for today. So first, let's begin
in with the sky. Now, we are going to
be working in with the tones of blue,
as I told you. So first, I've picked
up a light blue color. Now you can mix in
a lot of white to your serle blue or
cobal blue and get a similar tone and add it into the entire
sky space almost. Now the sky will be of
this simple light color. But when we begin adding in the silhouette from the
left and right edges, we'll keep on waving
the tones of blue. To this blue, you need to keep
on creating darker tints. For that, you will
have to keep on adding the base blue that you're
using with the white, or you can keep on adding
blue with a little tinge of black to give in
that grayish effect to your blue if you wish to. Oh Now, a C is also going to
be of the same color. As I told you, we
are going ahead with a monochrome painting. So I'm going ahead painting in the base layer for
the C as well. Then we'll begin
adding in the details. So basically, a
monochrome painting is where you use one
color and keep on creating tonal variations
with the help of white and black and create
the entire painting. So on the left and right, we are going to give
in bush details. And for that, I'm leaving
in the space out here. And I'm going to
begin pulling out the darker edges already
into the sea. So on the left and right, I'm beginning in with
the darker tones. I've picked up one
tone darker color. Now I readily had this color on my palette, but
you can again, keep on wearing with
the help of white and black in your
paste color palette. So say if you're
using serlein blue or cobalblue with
a mix of white, you can keep on adding
more cobal blue to keep on creating
in the darker tins. And after a certain point, you can even keep adding in little tine of black to
create the darker tins. And for the lighter hints, you can keep on
adding more of white. So from the edges, I've added in one layer darker color to
begin adding in the depth. Now I'm going ahead with
further darker tone. So again, I have this
third darker color also. But in case if you want, you can just add in a
little more hint of the black color and the blue colour to create
in this darker tint. Now, using the
smaller size brush, you can see I'm pulling
out smaller strokes from the edges towards
the center side, making sure that all the
three colors that I've used so far are visible and
giving in the details. Now, with every darker tint
that you go ahead with, make sure that the lighter
tones are visible. Now, this darker
tint, you can see, I'm adding some random strokes
in the center as well, creating in some S wave details. So but I'm making sure
that all the three colors of the blue colour that we've
used so far are visible because we need to be sure and given those lighter
effects also visible because the sky is going to have the fooliage detail with these
different tints, as well. Now, let's go ahead
with the first layer of foliage into our sky. For that, I'm going to pick up the second darker tint than the base layer of
the sky that we use. Okay, and going to just use in this spoiled round
brush and create in simple foliage by dabbing in and creating in simple
foilage detail. We've discussed how we add
in the quick bush detail, the same thing I'm
following in here, and then we'll add in some detailed foilage effect as well. So on both the left
and the right side, leaving a little
space in the center, I have added in this
spoilage effect with the first
layer of the color. Now I'm going to go ahead with one tone darker color of
the same color family. As I told you, you need to go
ahead and keep on mixing in different tones and
different create in the different
tints that you need. If you're using cobalt blue, keep on it adjusting the
proportion of cobal blue with the help of black and
cobalt blue along with white. If you're using serle blue, keep on it adjusting it with
the serlean blue color. You can even use Prussian
blue if you wish to and create in the lighter
and darker tints with the help of
black and white. Now I've picked up this
second darker tint and beginning to add in the
second effect of the foolage. Now again, I'll make sure
that the first layer of foilage that we added is still visible from
behind of this. Same way, adding a little
onto the left side as well. I've left little spaces still because there
we'll be going in with the third darker tint to add in the last layer of the foliage. Now picking up the
darkest color, I've added a little
hint of black to my base color so that I get
this dark grayish blue color. I'm beginning to add in the
details on the edge itself. The technique here is
very important that you keep your brush damp
and dry and only lift up little paints
because only then you'll get this dry brush
effect of the foliage. If you will have a lot of
pigment or a wet brush, you will begin to get in
patches of the color instead of getting this simple detail. Now at the bottom here, I'm
just going to blend it with this light color and add in a simple tree branch later on, trying to show that
all of this fooliage is coming out from a tree. On the left side, we'll still go ahead add in the
detailed foliage with the darker bluish gray color that we've created and
added on the right side. So same way, adding
in the foolage detail onto the left side as well quickly and then going to go ahead with the next
layer of details. So done adding in
the detail with the darker color on
the left, as well. Now I'll begin using in
the first lighter tone and begin adding in some detailed foliage using
in the tip of the brush. So simply dabbing in
using in the tip, creating in some simple
detailed leaf details. If you want, you can keep all the three colours separately on your palette so that you do not have to again and again mix the exact same shade to add
in the detailed as well. Since I readily have the different tones
on my palette ready, so that is the reason I kept on adding in
detail by detail, going ahead step by step and not kept any extra color
on my palette. But since in case, if, you know, you are mixing your own colors, I would recommend that you
keep the colors separate. The lighter tone, the medium
tone, the darker tone, create in three tones, already swatch them out so
that you have enough of it. Plus you know which colors
you are going to be using in. Just adding in simple detail, pulling out simple leaves from the foliage that we've added in. Now, same way going ahead
onto the left side as well, adding in some simple
detailed foolage effect. Then we'll go ahead
with the next layer of details into the
sea area as well. Now, using the darker color, I'm going to add in some
detailed foilage onto the third darker color that
we had used as well and add, Okay, I just slip my blush, but no problem, I'll correct
these mistakes as well. Again, you know,
such mishaps happen, but with quash, you can easily correct all of these, as well. Now tabbing out some
darker tints out here. So very simple technique, giving in some
detailed foiage effect with this darker color as well. And as I told you,
towards the right side, we are going to add in a simple
tree bark detail as well. So just pulling out that
simple detail and pulling out simple branches into the foliage that we've added at the top, trying to show that all of
this is coming out from a huge tree out here
on the rightmost edge. Towards the bottom part, just added in the foliage
with this darker color to show in that rooted effect to the tree that we
are adding in here. So very simple details, but gives in so much more realistic effect
to the painting. Same way, just going to go
ahead onto the left side, add in some detailed
foliage effect. So on the left side as well, I've created a small tree like structure with the
fooliage that we added, gave in that little stem
detail in the center, pulled out some branches, and
towards the bottom space, added in simple foliage detail. Now, I need to
correct the mess that had happened by the
slip of my brush. So I'm going to pick up the
lighter tones and blend that while we begin adding in the
details into the sea area. Now, first in the center
of the horizon line, I'm going ahead
with the dark tone, adding in simple bosch detail
in the center as well. We are going to add in a moon
into the center of the sky, so we'll show a little
reflection of that as well falling into the sea area
moving ahead further. So I've taken up
the foliage towards the left tree almost now
using in the lighter color, blending in that mishap
that had happened, sing in the lighter tint, you can see no one can
say that the brush had fallen and there was a
paint patch that had come in. So simple effect, you can go
ahead and blend in again. With quash, it's easy to correct your mistakes as compared
to watercolors or acrylics, because with watercolors, it
will be very difficult to, you know, overdo unless and until you want to
use in darker tones. But with quash, you can even use lighter tones to
correct in the details. Now going ahead with
one more darker tint that we used in the
filage at the top spaces. And using that darker color, I'm going to add
in little detail into the sea area as well, creating in little wave detail. Make sure it's not too dark, so I'm just getting
in the right tint because I had added in
little black to that. So you can see it's
difficult for me also to get the
similar color tone. So that is why I recommend that you keep the
color mixes ready and separate so that you can use as much and wherever needed. Now, you will see again, this darker detail
that I'm pulling out is much less as compared
to the previous details. So the lighter color
had the maximum space. The second darker tone had lesser space as compared
to the lighter one. Then the third darker tone
had much lesser space, and now the darkest tone
has further lesser space. So slowly, when you keep on reducing the space or
length of these detail, automatically, you'll have
in all the colors visible. That's the technique
to be followed here. Now, in the center, adding in simple waves effect with
the darker tint, as well. Now, towards the bottom side, the space that we've left
in without waves detail, there I'm using a
dark grayish color and adding in simple
foolise detail. So this also, if you want, you can use a very dark
bluish gray color, but I'm using a
darkish gray colour with a little hint of the
blue in that as well, and going to fill it completely, creating in simple bush detail. Now, in the center, I'm picking up the blue color and going to blend in with this dark grayish color that we've added, adding in the blue and
blending all of it well. So onto the entire
dark gray patch, I'm adding in that blue
highlight such that we have a blend of the
grays and the blues. A very dark color, you can see. It's the darkest in
the monotone family that we are going ahead with. Now, using the same
dark bluish gray mix, I'm going ahead with my
line of brush and adding in simple grass details from this bottom bush area
that we've created. So I've mixed in the dark blue with a little hint of black, matching my base layer
bush effect color, and adding in simple
strokes to act in as the grass details coming
out into the water space. So I've gone ahead
with simple strokes, just moving randomly left
to right, right to left, no specific structure
or way to follow in giving in simple
details, creating in depth. Now, randomly in between, I'll just add in some thicker
strokes as well to give in a little more depth and
create in more detail. Somewhere pulling out some
longer strokes as well. You can see all of this is
coming out so well together. After this, we'll be left
to add in the moon and a little reflection highlight of the moon as well
into the sea area. So now let's add in the
detail for the moon. For that, I've been picking up the white color and
using the white Alphas, create a simple glowing space. Now by now, I'm sure you
may have learned how to create in the glowing spots
for the painting of moons, stars into your galaxy for the glowing
effect of the lights, the street lights,
the car lights. It's the same technique that
you follow the placement or the size may
vary depending on the type of object that
you are adding in. Now, I'm just going ahead, adding in some highlights with the white colour
into the sea area. So using in the white
in a bold consistency, just creating in simple
dots and lines into the center space to show the moonlight effect falling
into the sea area here, make sure that you
use the white in a bold consistency so that it stands out and is
visible perfectly. Now, to the moon, let's
add in the detail. So I'm just going
to dab this with my finger tip and create in
that glowing spot. All right. So dabbing it, creating that
dull space for the moon, I forgot to create
the dull space, so quickly using the finger
technique to dry quickly. Now using in the white colour
in a bold consistency, going to add it into
the center space to create in that moon effect. Now the moon size will
be smaller as compared to the main glowing space
that you are creating in. So I'm just creating
in the glowing space perfectly with the brush again. And I'm just adding a
little hint of the blue as well on the edges and blend it well into
the base of the sky. Now, using the white
in a bold consistency, adding the moon in the center, it will be smaller compared to the dull space
that you've created. So you need to keep the size and proportions in mind
while adding in this detail. So that is it. We are ready with our class
project for day 25 as well. Let's remove in the masking tape and see a final painting. Make sure to peel off
the masking tape against the paper and also make
sure that you peel them off only once your edges are
completely dried so that you do not tear off the edges or lift up the paints
from the edges. So here's a closer look at
our painting from day 25. I hope you guys enjoyed painting this monochrome
painting with me today. So you can see using a
single colour as well, we can create such beautiful
landscape paintings. I will see you guys soon
into the next class project.
29. Day 26 - Magic of Black: Hello, everyone. Welcome back to Day 26 after 30 days
of course Challenge. Today we are going
to be painting another monochrome painting. But this time we'll be using
in the shades of black and gray to create our beautiful
monochrome landscape. So beginning in with
the pencil sketch, I'm just marking
the horizon line and towards the bottom space, I'm marking out the pathway. We're going to have
a very night kind of a view this time
for our painting, so it's going to be a roadway
view for the night scene. So I've moved the pathway, moving towards the left side, as you can see, it's moving
towards the left bottom side. So just marked out the
pathway that both the rest of the sides are just going
to be simple pavements and the top area is
going to be the sky. So let's begin with the sky. As I told you, we
are going to be painting it with the
shades of black. So we'll be using in black, gray and medium tones
of gray and plaque. So to create in the shades, you would basically be ding in either a ready gray
shade or you can keep on creating it with the
help of black and white. So first, I'm beginning in
with a medium tone of a gray. Now to create in
different tones of gray, you can simply keep
on adjusting in the tone variation
for white with black. If you want, you can even
add a little hint of brown to create in
different gray tones. At the top, I'm going ahead with a medium tone of the cray. I'll keep on blending
all of these. And at the top, I'm going to use the darkest tone of gray. Now, make sure you do not
use a black directly. Try getting it into a
little gray tonal variation that will help you in building your element details later on. So right now, I'm
just going ahead with different tones of
gray. It's not black. So when I add in the elements or the silhds with
the black color, it will be perfectly
visible on the gray tones. That is the reason I'm
telling you to use in different tonal variations
of the gray at the moment. Now at the bottom, closer to
the horizon line as well, I'm picking up the dark
gray color that we used at the top and blending
it with the light grey. So I'm almost ready
with a simple sky. We'll add in little
cloud details if needed. And the main details
in this will be the details that we add for the street light effect into it. Now, at the topmost
area of the sky, I'm just going to add in
a little hint of black because there we are not going
to have in any silver hat. So we don't need any
overlaying there. So very little black, you
can see, I've added in, and I'm going to blend in with
the top sky moving towards the horizon line completely and creating that little
darker hint at the top. It's going to turn out
a beautiful landscape in a night view that we are
going to be painting in. Now, this side, it's gone a
little black in the center, so I'll quickly pick up
a little lighter gray or a damp brush and blend
in and turn it lighter. Just you can see with
simple techniques, you can simply lift up the colors again when
it comes to gouache. Now I've blended from
the bottom to the top, so you can see we've
got that even blend. There is no uneven
edges anywhere. Now I'm just going to pick up little lighter gray as well and blend it with the
Tarkatins here. Now, I'll just pick up
little dark gray color. And again, bend in
from the horizon line, and we are ready with
our sky completely. Now we'll go ahead with the
colors into the pavement. So the pathway that
we are painting, that is the road that we are showing into our
landscape painting will also be of the
tones of the gray color. As I told you, we are going ahead with
a monochrome painting, so everything will keep on revolving around the
black and gray tones. So create in three to four tonal variations of
the gray and keep it ready in enough quantity so that you can
keep on using them. First, I'm using in the light
tone of gray in the center, and from the edges,
I will keep on increasing by adding in the
darker tonal variation. Blending. So in the
center of the pathway, I want a little light variation, and towards the edges, I want the darker tint of
the great tones. Now, I'm going to pick up a further darker tone of the gray, and towards from the
bottom and the top, I will keep on creating in little more darker
highlights and show a distinction point
from the sky as well. So I'll pick up the third
tonal variation of the gray, and from the bottom, I'm pulling
towards the center part. And from the top of
the pathway as well, I will pull it towards
the center part. So automatically in the center, you will see a glowing
light spot that gets created with the lighter
tone of the gray color. If you want for blending,
again, in the center, you can use in a little of the lighter gray to create
in that smooth blend. Now you can see the sky is also distinguished because
of the dark gray that we used on the horizon line
towards the pathway area. And in the center
of the pathway, we have that lighter gray
highlight coming in. Now across both sides
of the pathway, we are just going
to go ahead with a very dark mix of the
gray and the black color. So it is going to be like
a grayish black color, try mixing in the
gray and the black. If you do not have gray, you can just add in a very
small hint of white to your black and add it
onto both the edges. So automatically, both the
sides you will see will be of the darker hint with that
siluet which is not in colors. It's a monotreme painting
that we are going ahead with. Then on top of the horizon line, we'll add on details and
the silhouet as well. Same way, even on the left side, I'm filling it completely
with the black color, as you can see, and
then we'll just blend in with the pathway as well and create a little
darker highlight. So on the edge of the pathway, I want to give in further
more darker tints with the help of
the black colour, so I'll shift into my
smaller size brush and add in little hints of black and
blend it with the pathway. Now, in the center, again, I've lifted up a little
of the light gray, blending in with the
black so that we have that flowing spot in the
center of the pathway. Basically, I just want to show that the side of the pathway has that blended loop
with the lou heat on the left and right with the
black tones that we've added. Now I'll just add a
little more darker hint at the bottom just as
we added previously. Again, this time I'm using
the black color to add a little darker effect because we already have that
lighter hint in the center, which will blend in
with the black and give us the darkish gray
effect that we need. So I'm done with the
pathway for now. I know you may feel
that the pathway has disappeared completely,
but do not worry. When we'll go ahead, begin
to add in more details. All of it will
turn out beautiful and we'll have that
distinct look. Now, I'm just going to go ahead, begin adding in the silhouette
on the horizon line. For that, I've shifted into my round brush and using
the black colour itself, I'll begin adding
in the silhouette on top of the horizon line. Going to go ahead with a
simple Cityscape outline. So I'm just going to
begin adding in simple, you know, structures for
showing in the buildings. So for that, you can go ahead with your own Cityscape layout. You did not follow the same
layout that I'm following. You can go ahead with
different shapes of the buildings that you want
to show into your cityscape. Plus, the placements
can also vary. Now, in between, I'm going
to use in little hints of the gray as well for blending in with the bottom
layers that we have. So whichever color
you are using, make sure it has a
blended look with the bottom black color that
we've already added across the pathway area. Well. Now, for these
details, you can see I'm going ahead very
carefully and slowly, and with every element
that I'm adding, I'm blending it with the
bottom layer so that it has that blended look and does
not stand out separately. We do not want a
bold, separate look. We want a blended look
with the bottom layer. So wherever you feel you need a little of the base layers, go ahead, add in the colors
and keep on blending. So I've just added a
little more black at the base layer and blending it in with the top silhouette
that we've added. Now when I'm adding
this, you can see the pathway
will again begin to come into picture and have in that bold distinctive effect. So for the cityscape,
you can see I'm going ahead with
random structures. There's no specific pattern. I'm just using a filbert
brush along way to keep on blending with
the base layer so that it has the
same color effect. Now, in between the cityscape, I'm adding in little of
the simple bush detail. All of these we've been kept discussing since
the past 25 days, using simple technique,
just the tip of the brush and dabbing in and then filling
it with the paste. Now, even for the
bush that I added, I blended it into the base layer of the pathway, as you can see. Now on the leftmost
edge as well, I'll go ahead with little
bush detail and then a little city silgate in
between the bushes, as well. Same way even on the left side, blending in with the dark black color at the bottom space. Wherever you feel or, you know, the blending is not going or
the colors are not matching. You can simply
overlay and blend in. So I'm adding in a little
of the black color again. And again, across the pathway, I will create that
soft blend for now. So just using the dam
brush, blending in across, but very carefully so that I do not have to overdo
a lot of things. Now I know this technique or this specific class
project may be a little difficult for a few
of you because of the blending in the
pathway again and again. But with practice, I assure you, it will be very easy
to follow along. Now at the top, I'm
giving in the dark, bold black color effect
again, wherever needed. So in the center, we have that
city, sorry, the roadway. But you can see the roadway does not have that
distinctive look still. We'll be adding in details, which will create
in that distinctive look for the roadway, as well. Since it's a
monochrome painting, not everything will have that clear crisp
line of distinction. We need to go ahead
with details in such a way that creates
that distinctive line. I'm picking up the dark
tone of gray again and I'll begin adding in
little details into the sky. I'm going to create in
simple cloud effect using in the gray tones. I'm using my smaller size filbert brush to add
in these details. You can even use a round brush, flat brrush, whichever
is available with you. Multiple times we've discussed all of these in the techniques, as well as we've
discussed these, you know, in the other
class projects as well. How you can keep on
using different brushes, whichever is available with
you to add in these details. Now for the clouds, you
can see at the top, I'm giving in a
little bold effect, but at the bottom, I'm
trying to blend in and given that soft blended
effect with the base layer. So I'm quickly going to
go ahead and keep on adding in a few more clouds
with this tacoton of the gray color and then see
if we need to shift into a lighter gray as well to add in some highlights
into the clouds. Now, at the top, I'm just
adding in simple clouds. You can see just giving
in simple strokes to add in that cluster of
cloud effect together. Even closer to the horizon line, closer to the cityscape, I added in lighter tones of the gray clouds
as you can see. Now the cityscape,
as you can see, is very small and
minimal because the cityscape is from a very far off view
that we are painting. So keeping the
perspective view in mind, things that are far off
are very tiny to our view. That is the reason keeping
them very small and minimal. Now, I'll just quickly go ahead, blend in a little of these
clouds into the base layer, giving in that soft edge
at the top, as well. Now, using the black color
and my pointed tip brush, I'll begin adding in the
further silhouette details. So we are going to
have in a lot of, you know, street lamp details. So I'm beginning to add in
these across the pathway line. Now you will see how
the pathway will have its own crisp distinction
without giving in that crisp prescription
line that we've given in. So on the left side,
on the horizon line, I've given in five lines approximately for
the street lights. On the rightmost side, we are going to having
just the hand of the street light coming
in from the outside view. That is the pole is
not visible to us. We just have the hand of the light and the light
effect coming in. Alright, so adding in
that here as well. Now, in between at
certain places, I'm just going to go ahead, add in some very
small pool details or street light details
which are again, far off view, so very
small, I'll add them. And then while adding
in the light details, let's see how we go ahead with the details
on top of these. Now I'm going to add
in the hand to all of these five lines that we already added for the
street light effect. So I'll just keep on adding in, you know, street hand
to all of these. Now, let's add in
the first layer for the car details that we're going to add onto the pathways. For that, I'm using my
smaller size down brush, and using the black color, I'm just going to
add in the body of the car for the top area. Then we'll be creating in some glowing light effect
for the car as well. Now, in one of the
previous class projects on day 23, I assume, we have already created those growing light effects
for the car on the pathway. We're going to follow the
same method here as well. It's just that we've even added in the body of
the car this time. There we only had
the light effect on the horizon line almost. So I added the body of the car. Now at the bottom, I've added in a layer of
the white color. Now, this white color, I'm
going to blend it into the base layer very
carefully on the edges to create that background glow effect for the light
that we'll be adding in. Now using a little
hint of the gray to blend in with the black
so that the car also does not have that
bold black effect and blending it onto
the outside edges into the pathway to give
in that blurry effect to the car because of the
glowing light effect. So if you ever notice a car, when the back light glows, the top of the car may turn a
little blurry to your view. Now for the light
area as well, again, creating in one more layer
of the white color because you can see the base layer gray will keep on blending
with the white, and it will not give you that cling dull effect that we need. So now we'll have to wait for
these layers to dry until then let's go ahead with the rest of the details
into the painting. So that is the
reason in between, I gave a break to the
street light effects and created in the first layer
on the pathway because, you know, the glowing
light effect will need layers to work on on
the pathway area. Now using the bold white color, I'm just going to add in
the street light details to each of the lights that
we've added one on the right, five on the left out there. Oh. Now, to these two small pools, I'm going to add in the
light effect in the center, not giving in that
hand detail there. Now using the white just
into the city area as well, I'm just going to give
in simple light details randomly at spots
of the cityscape. Then we are going to
use in white to give that distinctive line
to the pathway as well. And then we'll go on to
the glowing light effect, and we'll be ready
with our class project for day 26 as well. Now, adding in the second
layer of white here again, I'm going to blend it on
the edges and create in that glowing effect
before we move further. Now, using the white, adding
on the edges of the pathway, the line that we had created
with the pencil sketch, approximately going
onto that line, using white in a
little faded color and blending it in the
base lear gray area, creating in that
distinctive point for the pathway and the black
silhouette on both the edges. So now you can see, because
we blend it in the black, the details or everything
is coming in together so beautifully with a
simple rough white line, which is also not too prominent. It has to be in a little dullefe now using the yellow color, I'm going to create
in a little of the light shadow falling
onto the pathway. So I've picked up
a little mix of the yellowish orange color and going to add in lines and then
simply using a damp brush, blending it onto the pathway to create in that
little light effect. I know it's a
monochrome painting, why yellow and orange, but this is just a small
detail that I'm adding in. You could even create
this highlight just with the white
color itself, but I want to give in that
little hint of color so that we can create in
that glowing lights with the yellow and
orange further. Now with a black color,
adding in the details for the street car light or
the headlight that we want to create and creating
in that structure of the car that we want to go
ahead with from the back view. Now for the light,
I'm going to go ahead with a bright
yellow color and add it into the center circles that we've created with
the help of black. You can see we've created an outline of
the car and center, we had left it white. Now added in a little
hint of the yellow color. Now I'm going to
use a damp brush, blend these as well
on the edges and create in the dull
yellow effect, as well. First, we went ahead
with the white because the base layer was gray. So we needed a lighter layer
so that the yellow and the orange tones pop out perfectly to give in
that glowing car effect. Now I'm going to use in a little more darker
yellowish color than the previous color that
we used and add in one lao. And then we'll use a
little orange color. So I added in the yellow
now again on the edges, blending in the yellow as well, creating in that little
growing effect of the yellow. And then we'll move on to the
last orange tone to add in, and then we'll be ready with
the class project almost. Now, using a little of
the medium gray color, I'm just going to blend in
this glowing effect that we've created on the pathway for showing in the
shadow of the light. So blending in with the help of the gray into the pathway, giving in little cuts
in between to show in that natural reflection of the light falling
onto the pathway. Now I'm going to use
in white and add in a small moon as
well into the sky. Before that, I'll just add a little more details
onto the car. So just small lines to give it that little three
D effect to the line. Now using the white in a bold consistency to add
a small mon into the sky. So first, we are
going to create in that glowing space
for the moon as well. So I've added in a
simple white spot now using a damp brush, blending it onto the edges, creating in that glowing
space for the moon. And then into the
center of this, I'm going to add in
the bold white colour to create in that moon effect. Now, in the center of this,
adding in the white color, you can see this gives in that beautiful glowing moon
effect that we need in. Now we are ready with
our class project. Even the car light details,
you can see with the yellow. We have that light onto
the headlight effect, and then the shadow
falling onto the pathway. Peel off the masking
tape only once your edges are
completely dried off. So here's a closer look at
our painting from day 26, another monochrome with
just a little hint of the colors for creating
in that light effect. When you have a closer
look, you can see that car three effect that
we wanted to create in. I hope you guys enjoyed painting another monochrome
painting with me today. I will see you guys soon into
the day 27 class project.
30. Day 27 - The Orange Sky: Hello, everyone.
Welcome back to day 27 after 30 days of quash. Today we are going
to go ahead with another beautiful
sunset landscape. We're going to be exploring
in the color combination of gray and orange for
this class project. So beginning in with the
gray color at the top, no pencil sketch, no detailing everything with
our paints directly. I'm beginning in with a very light tone
of the gray first. You can mix in a little
hint of brown, black, and a lot of white to create
a similar looking gray tone. Then we are going to shift
into the shades of orange. Now, we are going to
shift into shades of pastel orange first because
blending in with the grey, we do not want any
uneven or muddy tones in between for blending. So I'm picking up this
reddish orange pastel tone out here at the bottom space, you can simply mix in
a little hint of red, orange and white to get a similar looking
reddish orange tone and begin in from
the bottom space. For blending in between, I will use a lighter
tone to blend in this dark pastel orange with the top gray color that
we've already added in. At the bottom, we
are going to have a simple city view silohet
that we'll go ahead with. It's going to be majorly
kind of street view details that we'll be adding
in with the street light. Now, I've picked
up this beautiful light skin tone peach color. You can create in
this color mix with your own color combinations
with the help of yellow, orange, red, or a little hint of pink with a lot of white. So just blending all of these three here and then
going to create a smooth transition happening between all the three
color shades out here. So I'm done blending
in all of these three. I'll just pick up a little more of the gray and blend in here. After this, we'll begin adding in the clouds detail
into the sky. For the clouds, I'm
going to use in the lighter tone of
the skin tone that we used in and white and a little hint of gray to add
in simple cloud details. For adding in the
clouds, you can either use a round brush,
filbert brush, or a flat brush,
whichever it is available with you with each of the brush in different class projects. I have kept sharing
the techniques, how you can add in
similar effects with different brushes
available at your end. So I'm mixing the pasteler or reddish orange
color that we used along with the skin
tone to create a medium tone of this
orange skin color. I'm going to begin using
it for the clouds. The further clouds,
we're going to go ahead with our simple technique. I added in the first
orange layer now adding in white to create in the bottom space for the clouds, giving in soft blends,
and at the bottom, just pendingate with the paste leer sky that we've created. Going to pick up a little
of the grey color as well, add on little clouds with
the grey color at the top, and then on the orange
part of the sky as well. We're going to go
ahead create a lot of clouds here and there
randomly in this one. We're going to be using in
three shades as I told you. The gray orange and the white colors to
create in the clouds. And then we'll move
on to the silhouhte for this class project. Now, your placement
of the clouds or the color combination that
you want to go ahead for the clouds can
absolutely vary as for the color combination that
you want to go ahead with. It's not necessary to have in the same placement
for the clouds. It's about building in your
own sky using the techniques. So somewhere I'm going to go ahead with darker
clouds as well, so I'm directly using
the dark bold color that we used at
the bottom layer. Again, I'll pick up a little of the white created
bottom cloud space of this dark cloud with a white
blending all of it in. So while blending, you can see, I just run my brush in circular motions dabbing
in and on the edges, creating that soft blend with the base layer of the
sky in certain clouds. That gives in a blended
effect with the base layer, as well as creates
a subtle effect to your sky because you will have it in different
types of clouds. Some of them blended
well into the sky, some of them having a
bold vibrant effect. It's a mix of sky that clouds that I'm going
ahead into the sky. Now at certain places, I'm going to randomly
go ahead just add in small colored
dots to create in some small subtle clouds
in the background with the bold sky clouds
that we've already added in. Now for this silhouette we are directly going to be
using in the black color. We're not going to
have in much detail of colour into our
silhouette part. There we'll directly be using
in black and creating in the street view
that we are going to go ahead with before that, I'll just given some
final touches to the clouds and then move
on to the silhouette. You can see I've randomly placed the clouds
here and there, but I've made use
of the color tones that we used in the paislo along with white to create in different crowd
placements into ski. Now at the top certain spots, I'm just going to add in
white and blend it into the paste layer and create
that little blended effect. So for that, you can
even quickly use in your fingertip to show that blend moving happening smoothly. Now at the bottom of space, I'm going to pick up the orange reddish color that we used and creating that little darker effect along
with the cloud. So going to blend it
completely because I feel this darker bottom cloud
is looking too loud, so I just want to give it
a little blended effect. So just quickly blend it
with the paste layer orange. So with quash, you can see
how simply you can correct in your places or overlay the colors again to create
that effect that you need. Now lifting in the black color, shifting into my round brush. Let's begin adding
in the silhouette details at the bottom first. So at the bottom, I'm
first going to create an entire space of simple
nature or silhouette. I'm going to go ahead with
simple bush and cloud details. I'm first going ahead, adding in the outline for the silhouette that we're
going to go ahead with, and then begin adding
in the further details. Now, beginning in with
simple bush details. So on the left first, I gave in simple Cityscape view
just very small ones. We're going to add in a lot of street light
effect this time, giving in that perspective view. So just going to go ahead with simple details at
the bottom first. Now at the top,
I'm just giving in detail using the
tip of my brush, and at the bottom, you
can see I'm quickly filling everything with the
black color completely. Same way, we are just going
to go ahead and fill in the entire bottom space with
different siloeds Again, the type of siloeate
also can keep wearing. But just one thing as you keep on moving towards
the right side, make sure that you decrease the length of your silhouette. We are giving in a
perspective view wherein the details
on the left side are much more closer to us and the details on the right
are far off from our view. That is the reason giving
in that diminishing effect, trying to show in that
the details are far off hence visible in
a very small way. So you can see, as I've
reached the right end I decrease the length
of the silhouette that we're going ahead
with at the top, just fell in in
simple bush details with the tip of the
brush and at the bottom, just filled in with
the black color. Now, on the left side here, I'm adding in a simple tree like structure on top of the
cityscape that we created. So I created in the
stent for the tree, and now just going to go ahead, add in simple foilage detail, using the tip of the brush, tapping in creating
in simple foolage. We've discussed all
of these techniques in the technique
section as well. Wherein I show you simple
ways to add in bosch using in a brush and creating in the
foliage detail at the top. So I've added two of
these simple trees. You can see how quickly
we could add these with simple foliage details,
simple techniques. Now we are going
to go ahead with the next leg of details
for our siloed, which is going to be adding
in a lot of street lights. Now, the street lights is also going to be in the
perspective view. So the lines that
we'll be adding from the left side
will be taller, moving towards the
right, we'll keep on shortening the length
of the street lights. Again, that's because of
the perspective view. The pole which is closer to you will be visible to you
in the largest form and then the poles which are moving far off from you will be
visible in the smallest pot. So now beginning in
from the right side, I'll begin in with
the smallest pole because this is the
farest from our view. If you're standing on
the leftmost edge, and if you have a look
at the right side pole, that will be the
smallest, giving in that perspective view. Now moving towards
the left side, keep on increasing the
length of these poles. Now I'm using in my
smaller size round brush. Sorry, I'm using my line
of brush, actually. You can see I'm able
to add in fine lines. If you're not confident
to add these in a straight manner using in the brush and the
color directly, you can even use a scale and um waterproof black pen
to add in these lines. Now, since I'm painting
on a sketchwork, you can see how easily
I can rotate my book to add in these details according
to my hand adjustments, giving me the perfect
comfort to add these. In a closer view, you can even see the blended
effect of the clouds. They are soft, subtle, having a soft blend into
the pasteler of the sky. Now, I'm leaving a lot of space in between and adding
this last pole. In between both of these poles, we are going to
show a sign board. That is the reason I've
left that gap in between. Now, the one that is on
the left, you can see, I've taken it so much tall and high enough to give
in that perfect view. Now, towards the left in between the details
that are added, I'm just adding in
some simple poles to add in some more
details of the street. These are not going to be the street lights that
we'll go ahead with. We'll go ahead with the simple, you know, pole details
of the street. That is the reason not
keeping them too tall, just keeping them in length
to give in that midsize view. Now, in between these two poles that we've left the huge space, there I'm going to go ahead with a detailed signboard overview. So there also, I'll just quickly add in the pole and keep in, and then we'll go ahead with
the details one by one. I'm going to thicken
up this pole. I've gone a little crooked, it seems so, but anyway ways,
I had to thicken this up, so I'll quickly correct
it out and create a thick pole here because it's going to
be a signboard pole. On top of it, I'm
going to go ahead with a thin line and
remove both left and right hand and give in simple box detail to create
in that signboard view. We're going to add
in simple signs that we usually view on the streets. It can be anything
that you want to go ahead with like a right turn, left turn, no entry, whichever sign you
want to give into. So I'm creating in the
board and keeping in, and then we'll add
in the detail once this layer dries out
of the black color. Now onto this huge pole as well, I'm going to give
another signboard. So just adding in a white
circle for the signboard. Then we'll add in the
signboard details with a red color later on once
this white layer dries out. Now to each of the street
poles that we've added, I'm moving in the
hands for the light. So I'm pulling out the hands
on both left and right side. So basically, each pole is
going to have in two lights, one on the left,
one on the right. All right. So just
pulling hands out in a little circular curvy
manner, as you can see. So once we are done pulling out the lights for
each of these, then we'll use in
the white color or the yellow color to add in
the street light effect. I'm using the liner brush, and you can see how
fine my details are giving in that
perfect crisp detail. Now, this one, which is
on the leftmost side, you can see, it's the one
which is closest to our view. That is the reason I'm
adding in the details here in such a huge manner as compared to the other
hands that we added. So the other hands are a
little far off from our view. So for this one, I have added in one lou head in
the black color, as you can see, and the other we'll be adding it
in the light form. Now, even on the
left onto one side, I give in a small
street light detail trying to show in it, you know, another street hole that is visible in our
picture of fame. Now, let's add in a
little more detail. So I'm using in the
orangish peach color that we use and giving in
little effect onto the poles, trying to show the color of the sky reflecting
onto these poles. So in previous class
projects as well, we've given in this effect. So just using this and
towards the black color, adding in a fine shadow or a reflection kind
of a light effect, trying to show the colors of
the light colors of the sky, falling onto the pole out here. A very fine line that I'm adding overlaying onto the
black line, you can see, so you can still see
the black pole detail, but the light reflecting
onto the poles, giving in the sky
color falling in. So towards the right side
on each of the poles, I'm going to give
in this detail. You need not give it
to each of the poles. I'm just giving it to the center three poles as you can see, the tallest one, the sign board, and then one on the
right side out here. Now, using in the bold
bright yellow color, let's add in the light
details to each of these. So we added in that
simple reflection of the sky on the pole on just the center
elements because those are the most
detailed ones. Now using in the bright yellow, just adding in simple
circles to each of the hands that we've created
to give in the light detail. Now, this light in the center, I'm going to create in a glowing space first because again, this is the most closest to our view and in the
most detailed form. So first adding in a
little orange color, going to blend it
into the base layer, create in a small dull patch to act in as the glowing
space for the light. So just using in a dam rah, blending in creating in
that glowing spot out here. We've discussed so many times how to create in
these glowing spots, so just blending it on the edges into the base layer of the sky, giving in that glowing
orange background effect for the light that
we'll be adding in. And to this light,
I'm going to use in the white color later on to
add in the light detail. Now, this leftmost pole as well, given in single hand light here, and now to this center, most important pole that is visible to us, added
in that light. Now, you can see that
glowing effect in the background that we
are getting in because of the background that we created the orange color to give
in that light effect. Now, using the red color, I'm adding in the
signboard details. So I just added in a no
parking sign giving in that simple cross and a red line across the white
patch that we created. And using the white color
and my liner brush itself, I'll add in the
other two signs in the center signboard
that we've created. So I'll create a left and right arrow to show in that left and right turn
sign board out here. Make sure you use in
a very fine detail or brush to add
in these details. If you are not confident about
adding these with a brush, you can even use
a white shell pen to add in these details. So I've shown in two arrows, one moving towards the left
and one towards the right. Simple details, simple siloed, but you can see it
is so much giving in depth view of a street you
may be standing across. Now, one last thing.
Let's quickly add in a moon into a sky on the
top right side here. I'm first going to add in a small circle and create in a dye patch for
the moon as well. And then to the center of this, I'll add in the bright
white, glowing moon effect. So quickly using in a
dampar going to blend this, create in that dull spot. I've discussed this technique in the technique
section, and by now, we've used this
technique in so many of our class projects
to create in stars, moon, glowing light effects, car light effects, so much with the same
simple technique. So now in the center,
I've added in the bold white color to create
in that moon on the edge, I'll just give in a little
more blendd effect. So we are ready with
our class project. Let's remove the masking tape
and see our final painting. Make sure you remove
the masking tape once your edges are completely dried and always pull off the masking tape
against the paper. So here's a closer
view at our painting from day 27 a simple, beautiful sunset sky with simple street view details going in that signboard detail, simple techniques, but
such a beautiful view. I hope you guys enjoy
painting this with me today. I will see you guys soon into
the day 28 class project. Till then, make sure to
drop a review if you like this class and do a plow your class projects if you're
painting along with me. Thank you so much, once again, to each one of you
for joining me into this class and
painting alone.
31. Day 28 - Lighthouse: Hello, everyone.
Welcome back to day 28 of the 30 days of quash. We are on the third
last painting of our 30 day quash
color challenge. Today we are going
to go ahead with a simple seascape with a
mini tiny lighthouse detail. So I first marked
out the sea area. At the bottom, we
are going to have in a simple greenery patch. On top of the horizon line also, we are going to have in
simple greenery space, so just making out
rough shapes to add in some rocks or
greenery patch detail. And on top of this patch, we are going to have a tiny
lighthouse across the sea, very, very tiny one that we
are going to add in here. So just adding in a small rough pencil sketch
for that as well. Going to have a beautiful blue, purple sky effect and then go ahead with the
details one by one. Now, along with the lighthouse, we are going to have in
a simple small house as well, a very simple one, no much detail, no
much, you know, detailed view to add in simple, just a small house silhouette. Now let's go ahead painting in this beautiful clasper
check for day 28. I will quickly pin my paper year so that
it does not flip over. We'll begin with the sky first. Let's begin picking up
the colors for our sky. I'm first going to begin
with a tone of purple. So I'm going to pick
up a dark violet color and begin in with this
color at the top of my sky. At the top, I've used in a little bit of the
black to blend in with the violet color
that we're using to create a dark view at
the top of the sky. Now, next I'm picking up a
medium tone of a lilac color. This is simply you
can mix in white with your violet and get
in this pastel tone, adding it at the bottom of the bold violet color that we added blended in with the black. Next, I'm going to pick
up the skin tone color. Now I've discussed multiple
times the mix that you can create for the skin colour with the help of yellow, orange, red and pink and
white and creating this color blending it with
the violet tones at the top. Now, next I'm shifting into
a bright yellow color. Now, I'm not going to add in the colors into the lighthouse, the small house that
we've added or the bottom greenery space
at the Horizon line. I'm going to go ahead carefully mark the outline
on these spaces. On both the sides,
I'll go ahead with this bright yellow
color and blended. And then I'll move on to a beautiful orange color
closer to the horizon line. Closer to the
lighthouse, you can see I've added this color
very carefully. The reason I use the
skin tone in between is so that when the violet and
the yellow blend together, they will not give
you muddy tones because of the skin
peach color in between. Now, same way, going ahead with a beautiful pastel
orangish yellow color, and across the lighthouse
and the house, going ahead carefully
adding in the colors, but making sure not moving into these silhouette spaces
that we've left out. Now, lift up a little more of the peach color and blend
in again in between here so that I have that
smooth transition happening between the violet and the yellow color and giving in that perfect clue of colours
happening in smoothly. Now, the sea is going to be a reflection of the sky
that we've painted. So I'm going to go ahead
with the same colors of the sky and create the
colors into the sea. So beginning in with
the violet color first, which is mixed in with white, you can simply add
in purple and white and create in this
similar looking prone. Next, I've picked up a little
of a turquoise blue kind of a shade which was readily
available in my palette. You can simply pick up a little of a serele
blue mixed in with white or you can add in a little hint of the
viridian green as well. And I'm blending all
of these colors at the bottom space to
create in the see detail, blending in the
pastel violet with this bluish tone of
the turquoise color. Now I'm going to pick
up a little more of the lilac color and add it on top here and blend
it over the blue. Then I pick up a little of the yellow color as well to arn little highlight
into a sea to show the reflection of the sky
falling into the sea. So just simply going
to pick up the yellow that we used in
the sky and add it over the blue area here in the sea and blend it
very light handedly. Make sure you go
ahead very light handedly because
otherwise you may get in muddy tones because of the purple and the blue in
the base layer of the sea. So it's important
to make sure that, you know, while bending
in these shades, you go ahead very light
handedly to create these highlighting spots
into the sea area. Very little details
that I've added. Same way going to pick up a little orange as well and add in little highlights into the sea on the edges, left and right. So we are done with the base
layer of the sea, as well. Now let's go ahead and add in some details of
clouds into our sky. Now, I'm going to keep on
using in different tones of the violet color to add in some cloud details into our sky. I'm using in a very light
pastel color of the lilac tone, which is readily
available in my palette. You can simply keep
on adjusting in these tonal variations
with the help of white with your Bs or
purple or violet color. And for creating in
little darker tints, you can add in a little hint of black or paints gray
to your color mix and create in grayish
purple tones as well to add in some cloud
details like these. We are going to go ahead with
the purple cloud details at the top of the sky and a little closer to the
lighthouse, as well. I'm using in my smaller size
Filbert brush to add in these details you can use in your round brush or a
flat brush as well, whichever is
available with you if you do not have a Filbert brush. Now to my violet, I've added in a little touch of pink as
well as you can see to create in one more
tonal variation of the violet color to add in the details of
clouds into a sky. So you can see using in
simple color mixing, how you can create
in different tones to give in more details. This time, I'm going to go
ahead with bold clouds, not going to give in much of the blended effect with
the base layer of the sky. They're going to be having
in rough bold edges, giving in the detailed look. Now at certain spots,
you can see I'm creating in little darker cloud
effect by just picking up a little hint of black with the pink and violet
mix clouds that I'm adding in and at
the bottom spaces creating in the darker
effects as well. Now over the yellow
and the orange space, I'm going to go ahead, creating smaller clouds moving
towards the horizon line. Across the lighthouse as well, you can see how I've added in the cloud detail in
a simple format, but making sure that
the cloud colors do not go into the lighthouse, we want a lighthouse to stay white because we are going to have in a white
lighthouse detail there. Now using in the same mix of
pink and the lilac color, I'm adding in few more clouds at the bottom side over the
yellow orange tones out here. Now, at the top,
where we've added in the darker bold clouds, I added in some
smaller cloud details in between the bigger
clouds that we added in, just using in simple strokes, creating in simple details. Now I'm going to shift into the green colour to begin
adding in the details. So I'm first picking
up a little paste and green colour which is
available in my palette. Now, for these green
tones, you can go ahead, use in whichever green is
available in your palette. Did not use in the
same green as mine. I'm just going ahead with the first layer of
the green here. Now, you can see
this green is not distinctively visible
from the sea area, but we'll be using in
the darker tones of greens and black to
create in the details into our distinctive part of that bush area
into a sea patch. So this is just the first layer of green that I've added in. Now, at the top, I'm just going ahead with a little
hint of the yellow, creating in little bush detail so that we have that
lighter patch created. Then we can go ahead
with the darker color to create in the depth
and the distinctive view. Now I'm going to pick
up the Saprine color, begin adding it from
the bottom space. So basically in the center
of this entire bush space, we are going to have
in the lighter detail. And at the top and bottom, we are going to have in
these darker details with the darker green color. Again, going to pick up a little of the black
color which is readily available on my palette and towards the
bottom most space, blend it with the
Saprine color further. The same we are going to
go ahead with the tones of green at the top
of the horizon line, the area that we've created. So I'm going to keep on
altering between light green, dark green and black colour
to create in the details. So first creating in a
very light green layer at the top of the
bosch area here, then I'll shift on
to the Saptren and the black color and
create in the details. We just want little lighter green highlights
at certain spots, and then the darker spots with the Saptrene color and
the black color mix in. For darker green, you can mix in black to your sabtren or
your basic green color. And for creating
in lighter green, you can mix in yellow
to your green to get in a bright
bold green colour. I've added in a
light green layer first into this entire patch. Now picking in with
the sapren color. At random spots, I'm just
adding in some patches and blending it with the
light green color in such a way that in between, we have certain patches of
the light green visible. So at the top line, I'm majorly going ahead
with this darker line. So in the center, you will have in that lighter green effect. And towards the base
of the horizon line, we'll use a further
darker green colour. But you just need to make sure that you blend in
these details well. So now I've picked up a
little of the black mixed in with sap green and closer
to the horizon line, you can see I'm adding in this dark effect of the green colour. Make sure that you have the different tones
of green visible. You can randomly
have in light green, dark green at any spot
that you wish to. It may not exactly be the
same placement as mine. Now, again, I'm going
to pick up a little of the light green colour and create in some more
lighter green spots. This is very random
that you go ahead with. There is no specific
technique to creating in these green patches into your painting or the
simple nature details. You need to keep on
altering between different shades of green
to create in this effect. You can see I keep altering
between light shade, dark shade, and a medium tone. So I basically use a light
yellowish green colour, sap green colour
and black colour. The darkest green, I mix in a little hint of black
to my sap creen, or you can directly
use in, you know, hookahs green if you have, or a very dark green tone readily available
in your palette. Now, you can see on the top, I have created in
such a way that there are different tones of green visible because of
the blending in. Now, same way, I'm
going to go ahead with the bottom side and create in
the depth out here as well. Now, again, going to
pick up a little of the saprene color and add it on top of the
bush space here, and then I'll mix in black
with my saprene and create in the takmos depth at the top out here and given the details. I'm going to pick up the light
green and in the center, create in that patchy detail, giving in that glowing
effect in the center. So I'm just dabbing in the
tip of my brush in such a way that it blends in
with the other greens on the same space. Now, just adding in a little
yellow ochre highlight as well at the bottom space here to create in that
glowing effect. So we are almost ready
with our painting a little more details
into the lighthouse and the small house
closer to the lighthouse, and a little more detail
into the bush area. Now, let's add in little
wave detail into our CP. For that, I'm using
in this medium tone of blue, which is on my palette, just reactivating this blue and going to add in
simple wave details. In the last technique section, we've discussed adding in simple wave details
into our painting. So I'm going to go ahead
with simple strokes and some thicker strokes
to add in the waves. So using a pointed tip brush, just adding in simple criss cross lines closer
to each other, creating in the depth,
across the horizon line, giving in a little
bold effect as well. You can see using in
simple strokes to create in the waves detail
that I'm going ahead with. Somewhere I've used in
smaller strokes closer to each other to create in
that crashing wave effect. Now, across this green area that we have in the
bottom C space, I'm going to give in
this darker effect of the waves to show in that crashing effect of wave across this bushy
patch that we have in. Now, using the same color, I'm just going to give in some more darker depths as well. So simply just
going to create in some cold wave details into our was lier here on the edges, left and right, just simple
waves closer to each other, creating in more depth. Now, let's go ahead, add in the details for the lighthouse. For that, I'm going to use in the white color for the
lighthouse bottom space. And then at the top,
I'm going to use in the brown and black tones
to give in the details. So just adding in white colour. In case if your sky colour has run into your lighthouse
space, it's okay. Make sure you use in a bold, thick white layer to
color in completely. For the house, also, at
the bottom of the house, I'm giving in the
white colour detail. And for the roof, I'll go ahead with a brown reddish tone. Now I'm lifting up
the pink colour to begin adding in
further detail. Now I'm lifting in
the bold red colour for the roof of the house. So using in the red colour, I'm going to add in
the roof of the house. I first thought of adding
it with the pink colour, but I guess the red
bold colour will give in the perfect view for this
lighthouse closer to it. You can even add in a little
hint of the born Siena to your red to get a
brownish red color for the roof of the house. So I'm done with the house.
You can see simple detail, just the roof color and the bottom white color
that we've added in, giving in such a beautiful
view for the house up there. Using in the same mix of
brown along with the red, I'm going to add in the details at the top of the lighthouse. You can refer any
lighthouse silhouette that you wish to go ahead with. You need not use
the same reference of the lighthouse as mine. I've added a simple rectangle on top of the white
space and then created a tomble structure at the top to give in the
details for the lighthouse. Now, using in the black color, adding in simple windows
on the lighthouse, or you can use a black pen as well to add in
these fine details, but make sure that
your white layer is completely dried
and you use in a waterproof pen if you want to add in these details with a pen. Now, on the edge
of the lighthouse, giving in fine black
lines to give in that distinctive three D effect view onto the house as well, adding in a small door
with the black color. Now, using in a little darker
green mixed in with black, just creating in little darker details onto the right side, and I'll blend in
with the help of this medium tone of green. So you can see I don't
need any black detail, but it has to be green,
blended in well. So again, blending
in and giving in that darker spot on
the rightmost edge, and we'll add in little
darker highlight on the bottom bush area
in the sea, as well. And then we'll be ready
with our class project for day 28 as well. On the left, also giving in little darker
hints at the top, and I'll blend it to the
base at the horizon line, just adding in darker spots, and then using in the lighter green colour, I'll blend these. You can see this is
giving in so much, much better effect, because it gives in the
darker effect as well, trying to show in different
tones of the bush visible because of the dark sky color that's coming into the view. Same way out here, adding in
the black color at the top. You can see I'm going
with very rough shape. There is no specific
pattern that I'm following added in
the black patches. Now, I'll pick up a little
of the green colour again and blend these in because I don't want a
black colour view. I want a blended dark green colour effect
out here as well. Same way towards the
bottom, as well, adding in little darker, blending in with the
greens that we've added. So you can see in
different layers, we went ahead creating
in the bush detail on the horizon line and at
the bottom of the sea, as well, giving in such a beautiful
night picture view to the green bush
details as well. Now on the lighthouse,
just adding in little more detail
with the black color, blending in with the
brown on the left edge. So that is it. We are done. We are ready with our class
project for day 28, as well. Let's remove in the masking tape and see our final painting. Make sure you peel
off the masking tape only once your edges
are completely dry and always peel off the
masking tape against the paper so that you do
not tear off the edges. Now, using in the white color, I'll quickly correct this
little mishap that has happened on the
bottom right side because of the masking tape. So quickly using in
a bold white color, adding in that crisp line for the white edge that I
need for my painting, simple ways to correct in your simple mistakes because of the masking tape error
that happens in. So here's a closer
view at a beautiful lighthouse painting from day 28 with simple bush detail on
the horizon line and into the sea and a simple sea
with simple waves detail. I hope you guys enjoyed
painting this with me. We are left with
two more paintings into this 30 day challenge, and we'll close the
challenge soon. I hope you guys enjoyed
painting this with me. I will see you guys soon into
the day 29 class project.
32. Day 29 - The Garden: Hello, everyone.
Welcome back to day 29 after 30 days of quash. Today, we are going
to be painting a simple garden sky view. We're just going to go ahead
with a simple pencil sketch. I'm going to mark out a hot
space into the garden area, which is on the left
side that I'm giving. On the right side,
we are going to have in a little fence space, and in the center,
we are going to have a simple greenery with
some flower details. On the right side here, we'll
be having a fence detail, and we'll have a
small pathway muddy pathway closer to the fence area that we'll be adding here. So that's our basic
pencil sketch. We'll have the brown
hut on the left, the center will be
the greenery space. And on the rightmost side,
we'll have in the fence area, and our top area is
going to be the sky. So we'll begin painting
the sky first. We're going to paint a beautiful light coloured sky this time. So let's begin with
the colors one by one. Temps fining in with
a royal blue colour, as you can see, it's a very light blue
tone that I'm using. You can simply mix in a little hint of
ultramarine blue or cobalt blue with a lot of white and get a similar looking
bright blue colour. Along with this
royal blue color, I'm going to blend in
lilac tones and then add in some pink and violet
cloud details into our sky. So half of the sky I have painted in with this
royal blue colour. Now I'll shift into a
beautiful pastel purple color, which is a very light
pastel pink tone. You can simply mix in
violet, pink and white. You can see since
the colours are too much of a lighter tone, you will need a lot of
white for creating in such light pastel
tone color variations if you do not have very
pastel tones in your palette. I'm blending both of
these colors well, the royal blue and the
lilac color and creating in that soft smooth transition. You can see we have an
even layout even blend. I have not added the colors into the greenery house and
the fence area space. For the clouds I've picked
up the grayish blue color. You can add in a little
hint of black and white to your serle blue
color to get this color. I've added a small patch
of cloud with this, and now I'll move
on to pink tone. So I'm using a
pastel pink color. It's a medium tone
of pink you can see, I'm blending it
with the blue cloud that I added in creating in smooth cloud effects at the top and
bottom of the blue, blending it all
well, and you will automatically get little
violet hints in between. If the pink and blue blending in together for a
pastel pink color, you can simply use in
quinacin rose, scarlet, carmine color with a lot of white to get in pastel
pink consistency. You can use whichever base
pink available with you, magenta, rose, queen rose, permanent rose,
whichever name it is. And you can use that
with a white to create in pastel consistency. So I'm going ahead
with a huge cloud at the bottom space of the sky, and at the top, I'm going to add in little hints of
the clouds as well. I'm even using in a
little medium tone of the pink on the edges at left and right to create a little darker depths
into the cloud, as well. So very simple strokes, we've kept discussing
these throughout our class as well as in the
technique section to add in, blend in different strokes
to use to add in the clouds. So at the bottom, added
in a little more darker pink and given in the perfect
shape at the bottom space. Now, at the top, I'm going ahead with the
lilac mixed in with a blue colour and adding in some self color kind
of a cloud detail. So basically, it's more
towards the blue tone, but it's one tone darker than the basi or
blue, you can see. So I used in the color which was readily on my palette that
is the bluish gray color, and I added in little
white to it so that I get it in a
lighter consistency. And using that, I'm adding in the cloud strokes at
the top of the sky. I'm using my filbert brush in a smaller size to
add in these clouds. You can use a flat brush, down brush, whichever brush
is available with you, we've discussed
adding in the clouds with all different kinds
of brushes throughout this 30 day challenge
so that you need not have everything
specific just like as I do. You can use your own
material and brushes and create in your
blends and details. Now, for the fence area
and the muddy pathway, I'm first going ahead with the yellow ocher color and going to add it as the base color. So this is kind of a
color blocking that I'm doing for this area
so that then we can just go ahead on top of
these with the shades of brown and gray and
add in the details. So simple color blocking
method that I'm using here. The center area is going
to be the greenery space for color blocking it with
the green color as well. Then on top of it, we'll go
ahead with the lighter green, darker green, some leaf details, some floral details
moving further. I'm using some lighter
green as well in the colour blocking so that
we have in that, you know, color variations in the
greens coming in while we begin with the base color
of the patchy area here. Now, at the top here, I'm just dabbing in the
tip of my brush, giving in some rough
bush shape with a saprene colour and
blending it with the light green by just
dabbing in my brush. Even on top of the fence area, I'm just going to take in a
little of the greenery space, trying to throw in some
bushes and branches moving onto the fence area that we
are going to add in there. Now, using in my
spoiled round brush, I'm going to go ahead, add in some simple dry brush
bush detail out here. Now, this technique also I've discussed in the
technique section, as well as in many of the class projects we've
kept following this. I'm using a round brush, the bristles of
which are spoiled. You can use a damp round
brush or a flat brush without dipping it into
water and picking up the paints in a little
thick consistency. So I'm picking up a
little darker green tone, as you can see, and I'm just beginning
to dab it at the top to create in that
bushy area out there. Just simple dry brush
technique to create that simple bush effect in
between our garden space. Now for that small
cottage on the left side, we're going to go ahead with
the bon sienna color and add it as a paste layer and then begin adding
in some details. Now, at the bottom of
the cottage, also, I'm going to show a lot of greenery space covering
the bottom cottage space. That is the reason I've
left that space white, and now I'm going to pick
up the green colour and blend in with the brown
out there trying to show in that bottom space of the cottage being
hidden because of the green leaves and the
greenery grass detail into the garden space. Now, using the
bone sienna color, I'm going to begin adding in the muddy pathway detail
on the right side. So I'm going to
use in the spoiled plush and just going to dab in little brown details on top of the yellow ocher color randomly. Next, using in a little of the green color as well and
daving it on the brown, blending it all well, creating in that muddy
pathway space that we need. Now, I'm mixing
in my burn sienna with a little hint
of the black color, and we'll begin adding
in the fence area first. And then we'll give on the overlapping details
over the fence as well. So you can directly
use a burnt umber or a CPR color or any medium tone of brown
that's available with you, beginning to add in
simple fence detail on top of the yellow aqua
color that we've added. And then we'll go
ahead and add in further details overlapping this to give in more detailed view. Now, in between the brown lines, I'm using in the gray
color to add in few lines. That is the reason I
had left in that gap in between and added the fence a little far off
from each other. Now, on top of it, again, using in that little darker tone of the brown color and going to add in further details to
create in that fence slope, you can even just use
in the gray color or just different tones of crowns to create in this fence area. Plus, if you notice
the strokes that I use for the fence area are
not exactly straight and trying to move my brush
a little wobbly so that it gives in that real
wooden kind of an effect. And to give it that
wooden effect, that is the reason I used in a little hint of
brown in between the gray strokes that we
added in into the fence area. Now using in this spoiled
brush technique again, I'm going to go ahead add in
a little of the dry brush stroke overlapping
onto this fence space to create in that
natural effect. Now, with the same
technique using in the Saptrine color across
the muddy area line, also, I've given in little
darker green details. Down at the top, as well, I'm just going to use in little yellow ocho colour and give in little dabbing detail in between the brown path that we
created for the muddy space, giving in little lighter
highlights with a yellow ochre with the same
technique because you could see a lot of
brown out there. So to create in that
lighter effect, I used in the yellow
ochre colour there. Now, using the
Tarke brown color, I'll begin adding in the
details over the cottage. So first, for the
roof of the cottage, I'm going ahead with this
burn sienna mixed in with the black color and creating again the roof area
of the cottage. So giving in simple details out here to create in that dip, you can go ahead using your
own siloet for the cottage. You need not follow the
same slohet as mine. For the roof of the cottage, you can see I'm just tying
in simple lines with a darker term color to create in that wooden texture
effect on top of it. This bottom line,
I'm just giving it a little thicker
texture to create in that distinctive
point between the roof and the rest
of the cottage space. And at the bottom, I'm
just going to use in this color and add in
simple strokes to create in that can sort of a detail for the cottage area on
the wooden effect. Now, using in my
detail or brush, I'm beginning to add in some
fine details of the grass. So I'm just going to, you know, pull out some simple strokes
with the green color. Again, the tones of green can
vary for each one of you, depending on the colors
available in your palette. For creating in the
lighter green tones, you can keep altering the use of yellow and white in
different proportions, and for creating
in darker tones, you can use black and
browns to create in darker tones of the green if you have limited green
colour in your palette. Now overlaying the
cottage as well, I'm going ahead, adding
in some greenery details. So I pulled out a
simple palm leaf kind of structure now pulling out simple leaf details and overlaying over
the cottage space. Whenever you go ahead
with overlaying, make sure that your base
layer is completely dried. Also make sure that, you know, we are using the paints in a good thick consistency so that the overlaying also
comes out opaque. Plus, make sure that you do
not add in a lot of pressure. Otherwise, the basio
colours will get reactivated because squash
a water based medium, so it can easily be reactivated
with wet strokes again. Now on top, you can see
I'm just going ahead with a very random greenery area that I'm trying to create
in simple grass strokes, leaf strokes that I'm trying
to pull out to give in that wild garden kind
of detail out there. Now, some strokes, I'm going ahead with the
darker green colour, adding in some darker
details as you can see, giving in simple dark details at certain places, you can see, I'm just adding in the tip of my round brush to give
in simple leaf details. Same way on the cottage as well, I'm going to go ahead
and overlay this. I simply keep on
altering the use of black colour with my sabren to create in different
tones of green. As you can see, I
have been using in this palette since so many of the previous
class projects. So I just keep on mixing the
colors that are already on my palette so that I do not have to waste the colors in any way. From the bottom of the
cottage space as well, I'm going to pull out some
bigger leaf structures overlaying the cottage area. Then we'll go ahead with some simple floral details
on top of it. I picked up some
fresh subtne color so that I have the dark
tint to my paint, and I added in a little
hint of black as well. And now I'm just going ahead
with simple branch details, as you can see, to
add in the floals. So I'm going to pull out
some smaller branches from the bigger branches
that I'm adding in. And then I'll add in
simple white floals coming out from the branches
that I'm pulling out. So basically, just trying
to add in an entire branch of flowers that we'll go ahead with into the greenery space. Now, using the bold white color, let's begin adding in
the floral details. So using the white, I'm just
going to simply go ahead, keep on dabbing in
some white dots to create in the floral effect. For this, make sure you
use in the white color in a bold thick consistency so that you have in
the bold details. Do not add in a lot of
white because after drying, it will give you that
dull effect otherwise. So I'm just going
to go ahead with simple white wild
flour kind of details. We're not going to
go ahead and add in, you know, detailed flour look. I'm just adding in
simple white spots coming out from
these branches to create in that entire
branch of floals coming in. Now, randomly, even adding in some flow details or overlapping
onto the cottage space, the branch that we
added out from there, and just pulling out some
more floral details. We're almost through
the class project, a little more of these
florals and greenery details, and we'll be ready with our
second last class project for this 30 day challenge. Now, using the darker green
color, I'm going to go ahead, add in some darker branch
details for this floorl. So you can see the green
that we had used previously was not visible much after
we added the floral. So I'm adding in some
leaf detail as well, attached to these florals and giving in some darker green
depths here and there. I just simply mixed
in the black on my palette with the
subtrene colour to get in this dark green
highlight for adding in details in between the
florals that we've added. So you can see, as soon as I added in these darker
green details, there is so much more
depth that has come into the florals because of the
darker green highlight, lifting the florals
as well along from the bottom base green
color that we had added in. Now at certain
places, I'm adding in some darker green leaves
as well randomly. Tapping in the tip of my brush, pressing the belly and creating
in simple leaf strokes. Now at the top area as well, adding in some dark
green or simple details, dabbing in the tip of my brush, creating in simple leaf kind of structures at certain
places. Not everywhere. Randomly, I've given
in these spots. I'll just go ahead with a little more of the yellow ochre detail, and then we'll be
ready to peel off the masking tape for
our class project. Using the yellow
ochre, I'm adding in simple spots in
between the whites to create in simple
bud details into these wildflower kind of a
patch that we've created. We haven't added in
detailed floral structure, as you can see. That is the reason very
randomly I'm placing these yellow ochre dots mixed in with a
little bit of yellow, which was on my palette already. And that is it.
We are ready with our simple class
project for day 29, a simple carden view
with simple details. Now across the pathway line, I'll just add in some
darker brown details and wheel peel of
the masking day. So, that is it. Let's peel off the masking tape and see
your final painting. You can see I made sure
below the fence area, there is still little yellow
oka highlights visible. And along the green side line, I gave in the darker details to show in that shadow effect. Use a closer look at our
painting from day 29, you can see the
simple greenery field that we created and
simple floral patches, the branch of white flowers that we created along the fence side. I hope you guys enjoyed
painting this with me today. I will see you guys soon into
the last class project of this challenge and then wrap
up for this challenge. H
33. Day 30 - Bright Day: Hello, everyone. Welcome back to day 30 of the 30 days
of Cass Challenge. We are on the Last
class project, and this challenge has been
very close to my heart. For the last class project, we are going to go ahead with
a simple cityscape view. We are going to go ahead
with a beautiful blue sky, no pencil sketch, nothing, just a simple painting that
we're going to go ahead with. I'm beginning in with this
bold bright sky blue color at the top of my sky. You can simply mix in
white to your Cerlean blue or to your cobalt blue color
and use this pastel color. Or if you readily have
a sky blue colour, then go ahead and
use such a bold, beautiful, bright sky
color at the top. Moving downwards, I'm going to move on to the
shades of yellow, and then I'm going to add in some pink highlights
for the clouds. Now for blending in the
yellow and the blue, I'm going to use in this
very light blue in between so that we do not get in the green tones
because remember, yellow mixed in with
blue will give you a complimentary green colour,
which we do not want. Hence in between, you
need to use in white for blending or light or
pastel tones of the color. I'm going to add in the
light peach tone which is in my palette in between before I move on to
the yellow tones. That will help me
in blending and creating in that smooth
transition between the peach tones that I'm going blue and the yellow tones that I'm
going ahead with. You can see this peach tone is almost equal
to a bite colour. You can simply use
in white as well if you do not have a
ready peach color. I'm blending in well with the
blue tones, as you can see, so that we have that smooth transition and blends happening throughout and we do not have to worry about the blends later on. At the bottom space, I'm going ahead with this pastel
naples yellow color. You can simply add
in a lot of white to your bright yellow color and get this naples yellow color. We're just adding it
at the bottom space. And I'm going to pick up
a yellowish orange color and add in little highlights
at the bottom area. For the yellowish orange color, you can add in a
little hint of yellow, orange and white and get this yellowish orange
color as well. Using this light
pastel pink color, I'm beginning to add in some
cloud strokes into the sky. So from the left to the right, moving diagonally
towards the bottom side, I have created in this one
patch of cloud in the center. Now on the edge using
in my damp brush, I'm trying to blend it into the base layer of the
sky that we have in. You can even use a
damp brush like this, so I just clean my brush, a picked up a little
hint of water. Not much dust damp brush
with very little water. Or you can use the
base layer color. So I picked up the baselyer peach color and blending in with this pink cloud to give it that soft blended
effect into the sky. I don't want bold cloud
effects into this one, so just creating in that
soft blend as well. Now using in the white, I'm going to create in
little more highlights of clouds at the top of the sky. On the blue colour space,
you can see I'm blending the pink color with the white to create in that smooth blend. And at the blue
color, you can see the white clouds are standing out so bright
and beautifully. If I'm moving my
brush diagonally, you can see the clouds are in a little dry brush stroke
that I'm going ahead with, not adding in much of
the bold cloud details, simple clouds creating
in the depth. Now, next, using in little
of the pastel lilac color. I'm going to add in
little cloud details towards the bottom of the sky. So you can simply
mix in a lot of white to your violet
color and get in this lilac tone and begin adding in some cloud details with
this color at the bottom. Now, I'm moving from the bottom left to the top right and then to the
bottom right as well, creating in simple strokes of the clouds from
left to right. And at the bottom of it, I'm going to give this
as well a soft blend. So you can see at the bottom, I'm just running
with the damp brush and blending in with
the pastelier colors. So that, again, I have that
smooth soft cloud effet. O And at the bottom of space, I've picked up the same blue color that we use in the sky, mixed in a little white and adding in some cloud highlights. Now remember, on the yellow, when you go ahead with the blue, go ahead very gently. Otherwise, the blue and
the yellow mixed together will give you green strokes
there, which we do not want. That is the reason I added white to my blue so that we can get in that pastel effect and the colors will not give you
any green tones coming in. At the top here adding in some
grayish blue cloud color, I readily have the
grayish blue color. You can simply mix in a little
hint of black and white to your blue to get in
that grayish blue color. So we are ready with the
cloud details into a sky. Now let's go ahead with
the silhouette detail. The father silhouette, I have
picked up the black color, and I'm first going to
mark out the outline at the bottom space so that
you can have a rough idea. Again, as I keep telling
you for each class project, the silhouettes can keep
wearing for each one of you. You need not follow
the same outline for the Cityscape silhouette. You can choose your
own reference and create in your own
Cityscape layout. I'm going ahead with
some bold details first and then we'll fill in these spaces with
the black color. Using in a bigger size
brush, currently, I'm using my fine liner brush to create in the
fine outline first. So you can see I'm
going ahead with huge blocks for the
cityscape this time. But on the left side,
I'll make sure we have that little of the yellow
cloud also visible. Yellow sky basically
also visible. Even on the right,
you can see I have that little yellow
sky still visible. This is just the outline. As I told you, on top of this, we'll be adding in
the black color, then creating in some highlighting effect
with the gray color. And moving further,
we'll also create in little more depth with
the greenery details. And on the sky, we'll add in simple leaf
details popping in. Now, as I told you
on the left side, you can see I'm going ahead
with smaller details. So we have the yellow part
of the sky also visible. Otherwise, it would make
no sense to add in so much of the yellow and the blue clouds and blending all of it. So I have the outline ready. Now quickly using a
bigger size brush, I'll go ahead and fill in all of the bottom spaces of the outline with the
black color completely. Now, first before that, I will just add in some
fine details again. So I'll just add in
some pole details simply and some chimney details as well to the houses
that we've added so that I do not have to shift into
my detail or brush again. So you can see I'm
simply creating in some chimney details
on top of the house, added in a few poles as well. And now using in my
bigger size brush, I'm going to go and fill in all of these spaces with
the black colour. Now, carefully using
in the black color, I'm filling in this entire space using in a bigger size downtrag, but I'm making sure
I do not cross the outline that I've
already addited. So you can see simple
cityscape coming into life with the
black color filling in. Saying there on the
left side as well. I'm just filling it in completely with the
black color first. Now, when you're adding
the black color, make sure you use a bold
consistency of the plaque. Otherwise, it will activate
the baseler yellow, and the yellow and the black
mixed together will give you a light blackish tone
which we do not want. We want a bold
black color effect to the cityscape that
we are adding in. So here you can see it was
turning out a little light, so I'm just adding in one more
layer of the plaque on top of it so that we have
the bold black effect. Now on the left side
here, I'm going to add in one pine tree using
the black color. So using in my detailer
brush and the black color, I'm adding in a pine tree, a simple one that we
are going ahead with. And then on the right side, we'll be adding in
some leaf details popping out from
the top of the sky. I'm adding a simple pine
tree using a detailer brush, which is helping me give in some detailed foolage effect simply just moving my
brush left to right, going ahead with a
triangular shape to form in the pine tree. Now on top of this center house, I'm going to go ahead with
a street light detail, so just adding in
a thick pole out here and then pulling out
the hand for the right. In between these houses as well, I'm just going ahead with
simple street light details. For these, I'm adding
in the light details with the black colour itself, one center light that I'll be adding in with the
white wherein I have just added the hand and not added in the details for
the light out there. Now, using in my
black fine liner pen, I'm going to add in some By
line details into the sky. If I'm using my 0.0 0.1 nib pen, which is helping me add
in these fine lines, make sure you use
a waterproof pen so that if you have
to by any chance, overlay anything
on top of these, these should not fade out. So that is the reason I
used in my 0.1 nib pen. You can directly add these with a black color and a fine
liner brush as well. Now on the right side, I'm going to pull out simple leaves. For that I'm using in
my round brush and the black color and pulling out simple branches
and simple leaves. For the leaves, beginning
with a pointed tip, press the belly
of your brush and lift up wherever you
are satisfied with. At the top, as
well, I'm going to pull out leaves in
the same manner. So I'm adding simple
leaves as you can see, and I'm going to lay over some leaves on
top of these as well. So you can see the leaves
are overlapping each other. Somewhere they are
visible perfectly. I'm going to pull out
one more thicker branch from here and add in more details of the leaf or pull them a little more towards
the center of the sky. So here, I'm pulling out one
fine branch and adding in one leaf detail hanging out separately into
the sky out there, creating in the drama action of the leaf details
that we've added in. Now, using in the
yellowish orange color, I'm going to add in
the light detail here because the white
would not be visible that pole and I needed a little beautiful
yellowish light effect. So I've added in
the light detail. Now at the top, I'll give in a thick black line
again to show in that outline for
the lamp Area again because you can see
that's hidden by the yellowish color
that we added in. Now using in the gray stone, I'm going to create
in some highlights onto the houses that
we've added in. So I have the redy gray
color on my palette. You can simply mix
in a little hint of white to create in that detail. So using the pointed tip, I'm just adding in
some lines onto this cityscape outline
that we created. Now, not to each one of
them, I'm going to add in. I added a little hint
of yellow to my gray, so that we have that
grayish yellow color so as to reflect the
color of the sky, that is the yellow color
closer to the cityscape, falling onto this cityscape
area that we've created. So majorly on the left side of each of the silhouette
that we've added, you can see I'm creating in these outline spots to show the light falling
from the left side, that is the reason
the highlights are happening on the
left end majorly. Yeah. Now at certain spots, I'm going to give in
some thicker lines with the same grayish,
yellow color. So I mix in yellow to
my gray as I told you. You can simply mix in white,
yellow, black, cretin. Black will be very less, white would also
be a little more, and yellow will be just a
little highlight to give in that yellowish effect to
show the color of the spy. Now I'm mixing in a
little of the light green to this dark green color
which is on my palette. If needed, I'll add in
a little hint of black. You can simply use a neutral
tone of the green color, which will be visible on
the plaque and just simply add in simple bush detail
in front of the city scape. You can see it's a
neutral kind of a green. It's not a bold, bright
green that I'm using, nor a very dark green color. So I simply mixed in black, light green and a little
of the saptren color. So the black and greens
were already on my palette. I just added a little
light green hint to this, and adding in simple bush
detail at the bottom area here, Throughout the bottom
space of the cityscape, you can see I added in
simple bush detail, which is perfectly visible
on the black color as well, giving in that greenery detail. Now, let's peel off the
masking tape and see our final and the last class
project of this challenge. So here's a closer
view at our painting from day 30 of this
30 day challenge. You can see the simple
bush detail in front of the cityscape and the gray
highlights creating in so much more detail and depth to the simple Cityscape
Siluete that we added to a beautiful
pool bright sky. I hope you guys
enjoyed painting this. And in the next
lesson, let's have a flip through of all
the 30 paintings of this challenge and see what we created so far through each day.
34. Wrap to the Challenge: So let's have a flip through of this 30 day challenge and see all the beautiful
bold landscapes that we created
throughout this 30 day. We began in with simple sunsets. We went ahead with
bold, beautiful skies, night skies, creating in cityscapes, garden
views, seascapes. Through each class
project, we went ahead, learned in so many
new techniques, different ways to
blend in clouds, creating in textures,
giving in depth, creating in shadows, giving
texture to the mountains, creating in that glueing
spaces for the moon. We learned through
a lot of it through summer landscapes to
winter landscapes. I hope you guys enjoyed painting each of these
paintings with me through this 30 day challenge and love creating in your
own masterpieces. Thank you so much, once again, to each one of you
for joining me into this class and painting
along with me. I will see you guys soon into my next Skillshare
class till then. Make sure to drop a review and upload your
class projects if you like this class
so that it can help me reach maximum students. Thank you so much, once again, to each one of you
for joining me.
 Umashree Taparia, Artist, Art Instructor, Entrepreneur