Transcripts
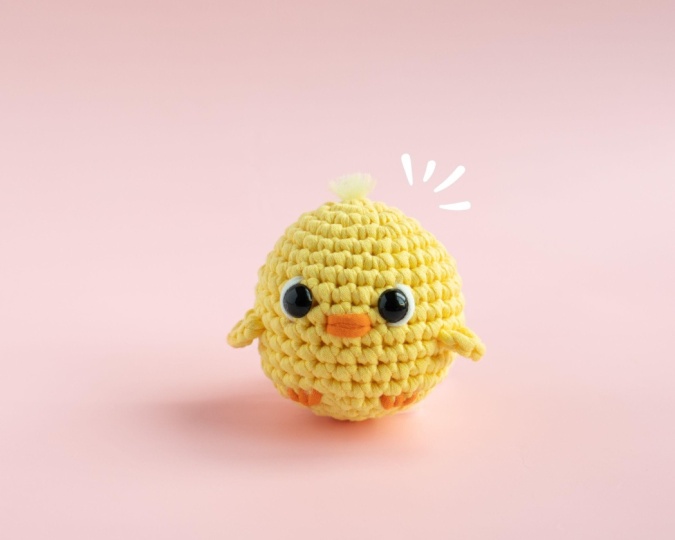
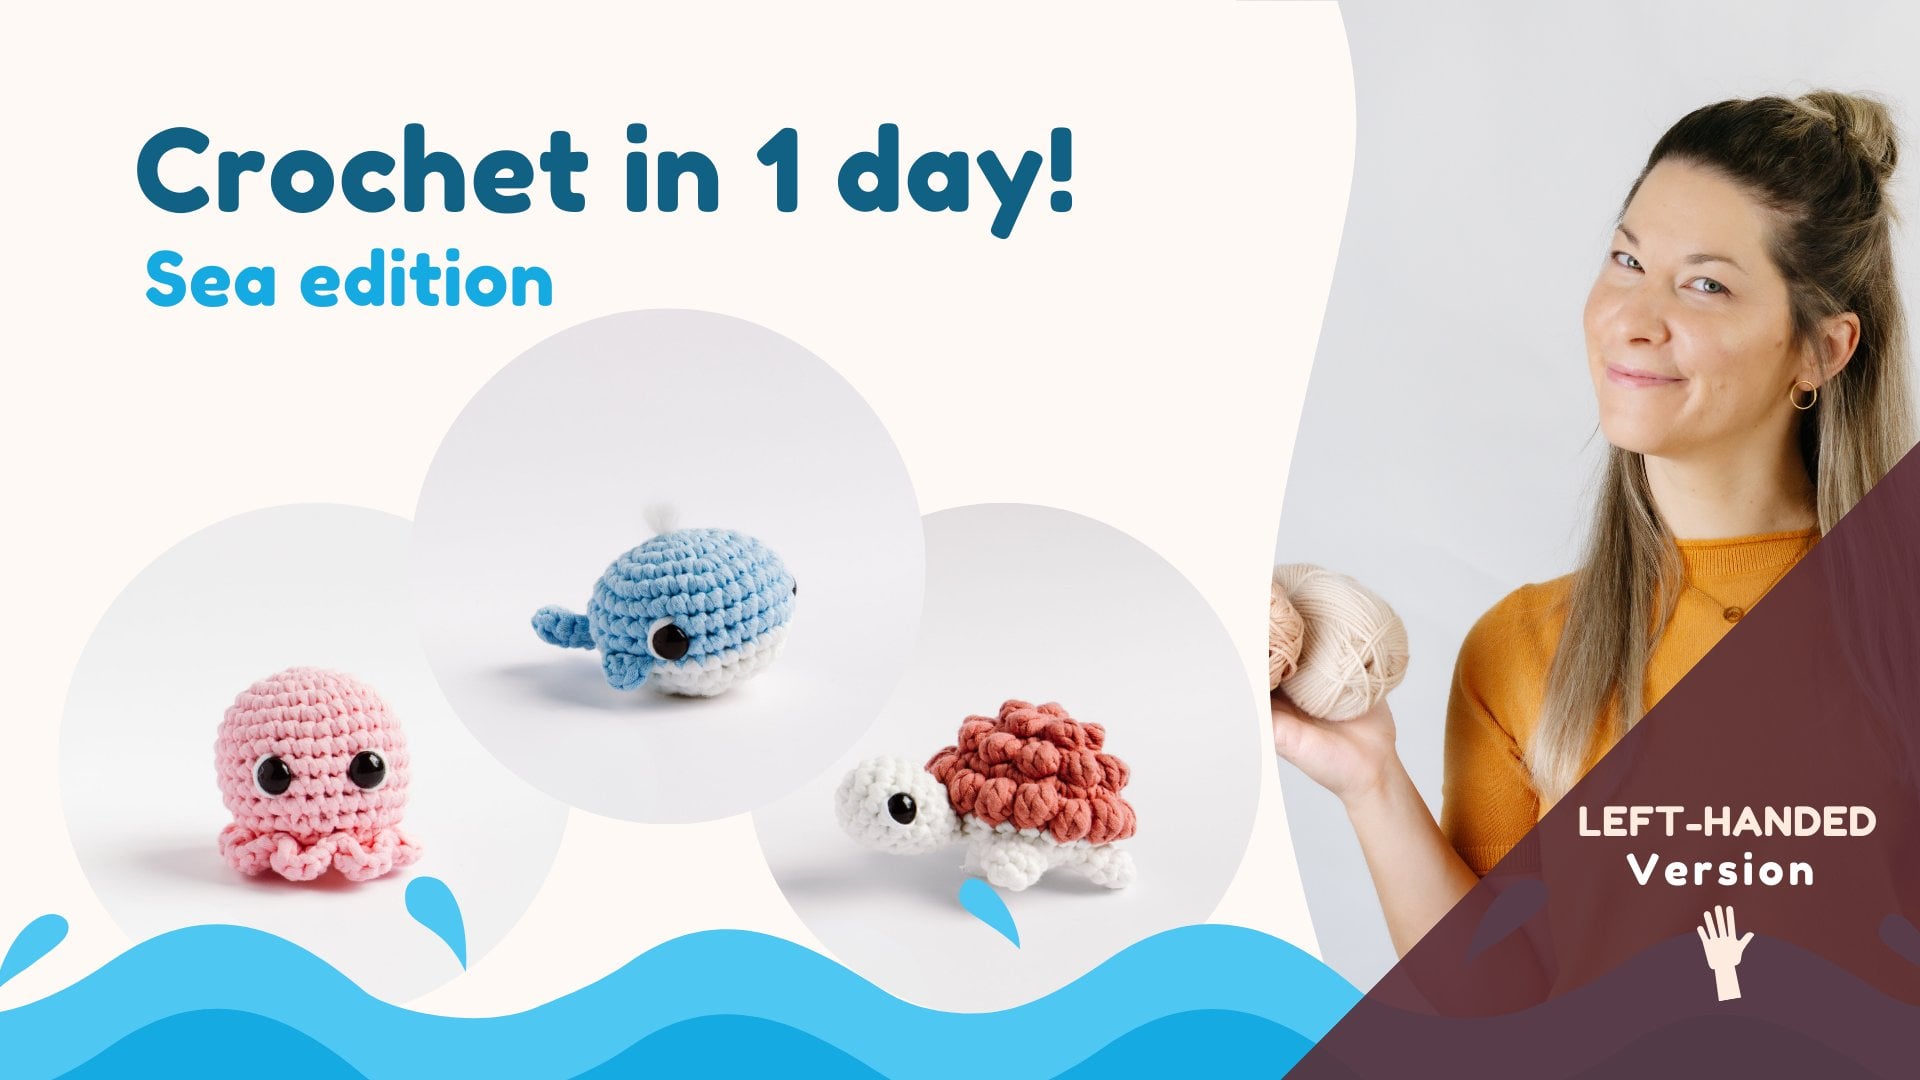
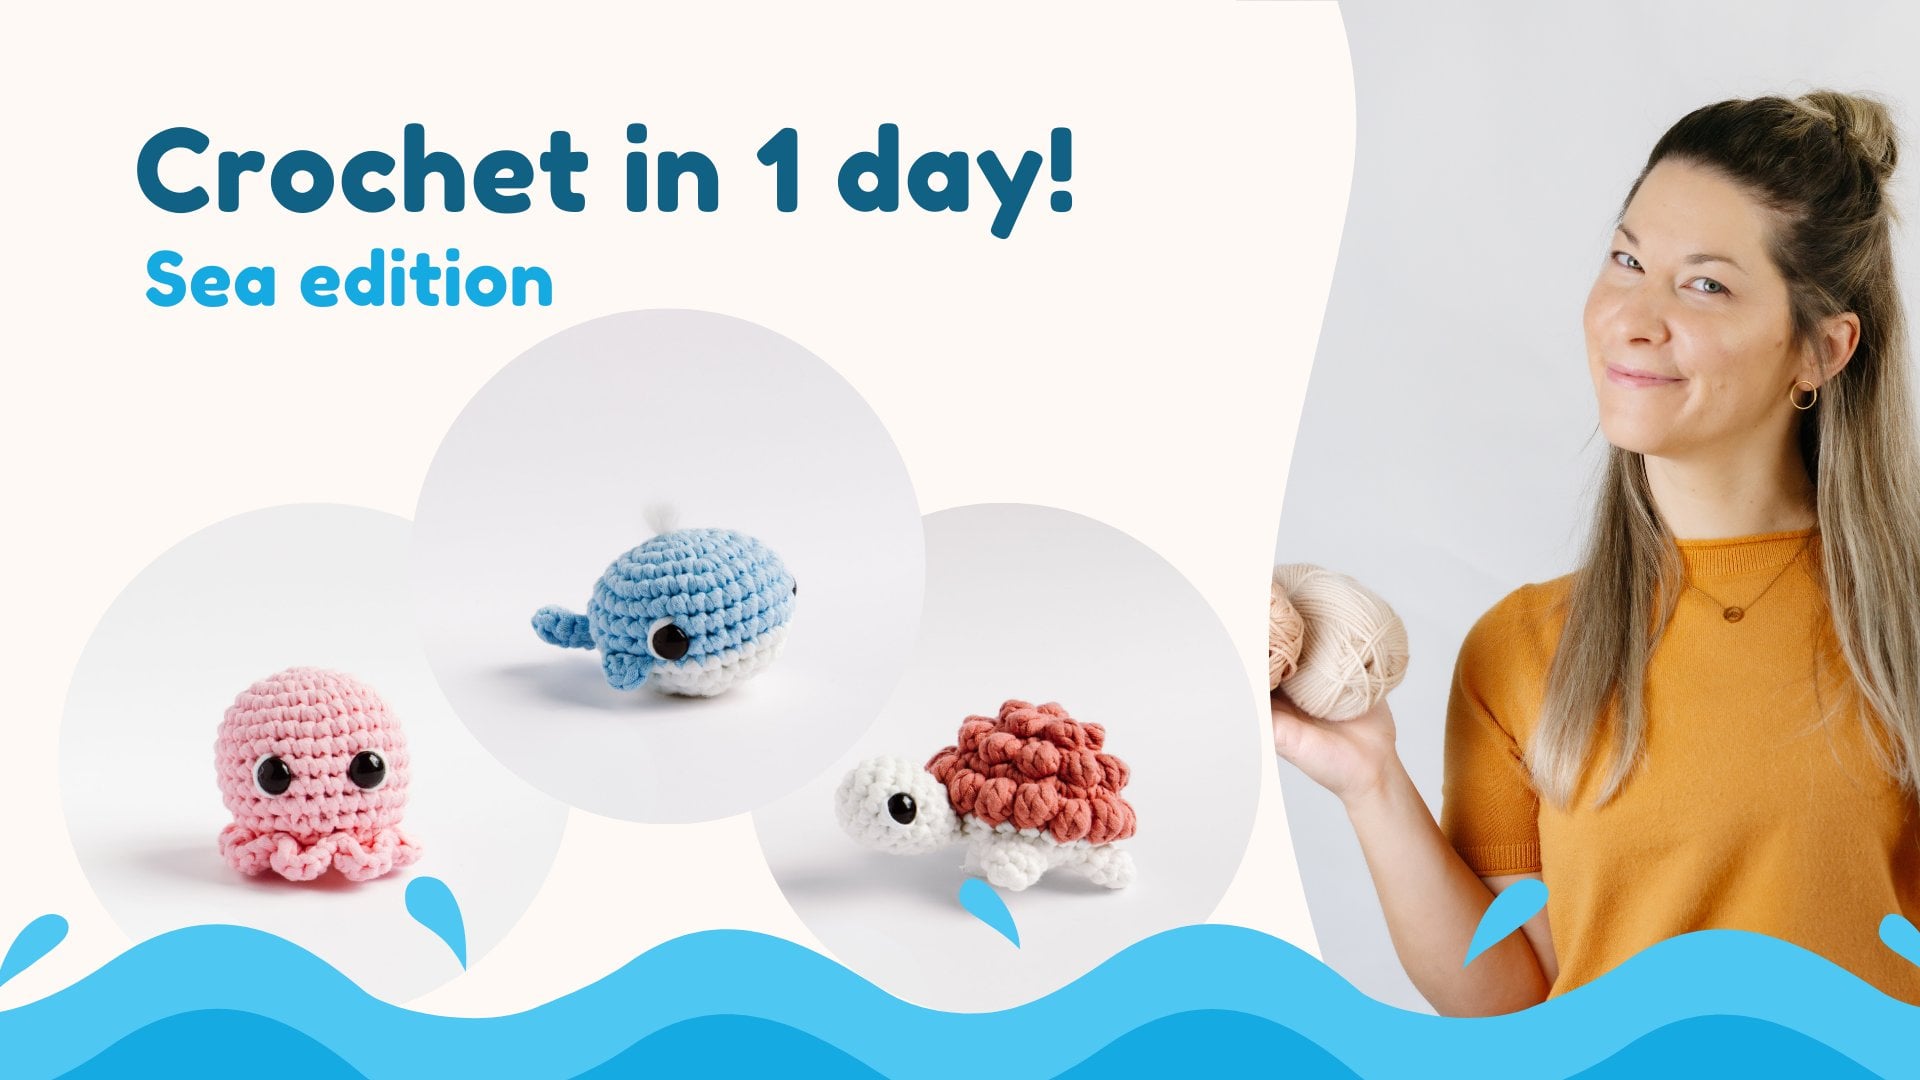
1. 3-Day Crochet Farm Animal Preview : Learn how to crochet the
cutest farm animals, even if you've never
held a hook before. Hi, I'm Indi the French Canadian crochet
designer known as Crochet Mill and I'm so happy to share with you this
farm animal class. We'll start from zero and I will guide you step by step
through the basics. While we crochet a little chick, a piglet, and a sheet. Right or left handed, everything is explained gently like we're crocheting together. Just one day you'll make your first tiny treasure and
proudly say, I made this. At the end, you'll feel
confident to keep exploring the world of Crochet
Migueum. Let's get started.
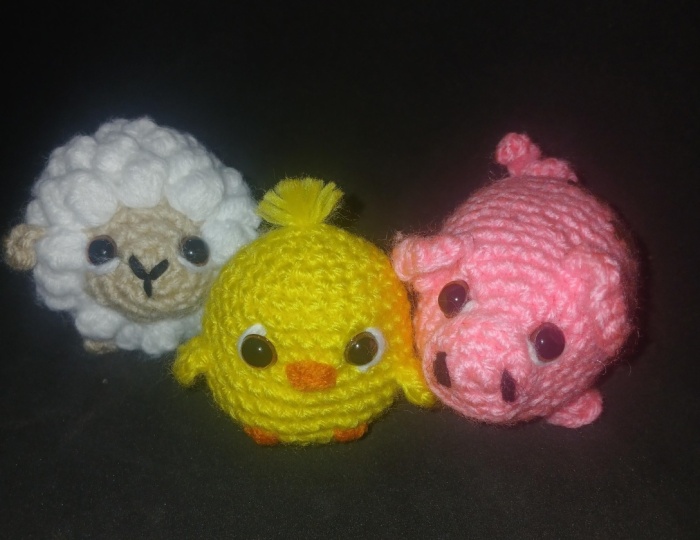
2. Projects Intro: In this course, you'll
be able to crochet three form animals from the easiest one to
the complex one. Each little creature will
integrate new technique. I can't wait to see
your little creations. Don't forget to share them with me in the project gallery below. The left handed version is linked in the
course description. To you in the next video to know the materials
you will need.
3. Materials & Techniques: If you don't have
the exact material I used for these
tutorials, no worries. You can take any yarn you want. To be able to create
the little chick, you will need about 25
grams of bulky yarn. I used the tube yarn. But you can take
any worsted weight or bulky yarn in the
color of your choice. You will also need a
3.5 millimeter hook, scissors, a yarn needle, a stitch marker,
polyester stuffing. 12 millimeter safety eyes, but be aware to not use them
if there is a chance that a children under 3-years-old could play with it
as well as your pet. I've included an alternative
with black yarn. You will also need a bit
of white and orange yarn. With the first project,
the little chick, you will learn how
to hold the hook and the yarn and how to start
a project in the round. For the pig, it's the same
material except you will need about 40 grams of pink bulky yarn and a
little bit of brown yarn. You will learn how to
start with a magic ring, how to change color, and
how to sew parts together. Finally, for the sheep, always the same materials, except you will need 40 grams of white bulky yarn and
10 grams of base yarn. By making the last project, you will learn the
no saw technique, how to add parts by crocheting, and you will learn
the popcorn stitch. Let's now start
the little chick.
4. The Chick - The Basics: Welcome to your first
crochet tutorial. Here, you will learn how
to hold the hook and yarn and how to crochet the round to create
a cute animal. You'll start by
making a slip nut. It's similar to a regular not only you won't pass the end of the
thread through the loop. The slip nut should come undone easily by
pulling on the thread. I'll show you another
way to tie it. Position the thread like this. With one hand, enter the loop
to reach for the loose end, but hold it with
your other hand. Find the other strand attached to the skin and
pull on the loop. Tighten it a little
because you are going to insert your hook into the
loop of your slip nut. Tighten the knot around,
but not too much. Your hook needs to be able to slide easily inside the loop. Your left hand will control the tension of the thread
attached to the skin. You can position it like this. Open your hand, wrap the yarn
around your little finger, passing it through the inside. And then turn your hand over and move it onto
your index finger. And with your thumb
and middle finger, you will hold the
small knot you made. You will work this way. Your index finger will always be raised to control
your tension. I'll show it to you again. You'll see after
about 15 minutes, this movement will
become very natural. Once you are
properly positioned, you can hold your
crusheHok in two ways. There's the knife
or the pencil way. You can try both methods to see which one you are
most comfortable with. Now we're going to
make our first stitch, which is called a chain stitch. This is the foundation of
every crusher project. The head of the hook facing you, you are going to pass
the hook under the yarn, so you make a
movement towards you. You are going to grab the
yarn onto the head of the hook and pull it towards
the loop to pass through it. Your index finger
will help you control the tension so as not
to tighten the loop. You make a small rotating
motion of the hook head downwards so that it can
go properly into the loop. Then you turn your hook upwards so that the
yarn doesn't slip out. You've made your
first chain stitch. We're going to
make a second one. Throughout the project, try
to keep a good length of yarn between your index
finger and what you're doing to properly
control the tension. You pass the hook under
the yarn and bring it back towards the loop while rotating the
hook head downwards. Make sure you have enough space to pass the hook
through the loop. You can pull the hook up a little while pulling
what you are doing downwards and also
release the tension a little with your index finger so the yarn can pass
through easily. You know, I'll have two chains. We would be ready to
start the first round. But if you would like
to practice holding the yarn and the hook more
and get good tension, feel free to continue
making chain stitches. And when you are ready to
move on to the next step, simply undo the chains until you have two chain stitches
under your hook again. When you have practiced enough, you can remove the hook
from the loop and pull the urn until two chains
remain, two small breads. And replace the
hook in the loop. And the loop don't
count as a chain. You only count what
is below your hook. You're ready? Let's
start the first. The basic stitch we're going to use is called the
single crochet. I'll show you how to do it. Hold the loop on your hook
with your right index finger, and you will insert it into the first chain stitch you made. You are going into
the small loop at the top of the chain. Then you will pick up the urn, always passing the
hook under it, and you will pass it
through the chain stitch. Turn your hook upwards
and reposition your fingers to carry the t loops that have
formed on your hook. You will pick up
your yarn again, always passing your
hook under it. This movement is
called a yarn over, and you will pull through
the tu loops on your hook. Have just made your
first single crochet stitch. Well done. It's important to take it
very slowly at the beginning to properly understand
the movement and maintain good positioning. Don't worry, it will go faster
once you're used to it. We're going to place a marker
on that single crochet, which will help you count your stitches and
rounds correctly. But if you're afraid of losing
what you're working on, it's not a big deal
if you don't put it in right away.
I'll show you how. The stitches always form a small braid made up
of two strands on top. You can place your
stitch marker in the If you have removed your hook, you can put it back in. Always in the direction in
which you will be working from right to left and pull on the yarn to tighten
the loop around it. We'll continue round one by making five more
single crochet in the same chain stitch in the same space where you
made your first one. You can see the
little hole it makes. You're going to insert
your hook inside. Place your right index
finger on the loop so you don't lose it and enter
the chain stitch. Yarn over, passing the
hook under the yarn, pass it through this stitch. Reposition your fingers
so that the two loops are clearly visible and not
too tight on your hook. Make another yarno always the hook towards you and
pull through both loops. You now have two single
crushes stitches made. You can make four more
still in the same space. Always in the starting
chain stitch. There will be a total of six
single crochet in round one. Try to always keep
what you're making facing you so that it doesn't
wrap around the hook. I'll let you work on making four more single crochet
in the same space. And just a quick note, your left hand is
supposed to help you. Keep your middle finger and
thumb together and as close to the hook as possible while
holding what you're doing. And to make your tension
easier to manage, you can unwind a little
bit the small skin. If you happen to miss a
stitch or make one too many, there's nothing simpler than undoing it by
pulling on the yarn. And then pressing the hook into the loop of the previous stitch. And you have now completed your six
single crochet. You can see that they all
form a small bread on top. So it's quite easy to count. Your first one being
where your marker is. And if you haven't
put a marker in, you can go backwards counting
from the last one you made. I'm very sorry about the blur, but I didn't have clear take
without my hands on it. The first round as
well as the second are the ones that
require more patience, given that we are working
in a very confined space. So don't get discouraged. It's going to get more and more enjoyable the further
the project progresses. For round two,
we're going to work on each of the stitches
we made in round one. We'll start in the
stitch with the marker. So you can remove it, but
remember where to go. And we're going to
insert our hook into the two loops
of the small braid that the single crushes
stitch forms. Like this. You make a yarno. You pass through the stitch, through the two small
loops where you entered. You make a yarno and pull through both
loops on your hook. You have just made the first
single crochet of round two. You can place your
stitch marker on it, and since we want to
enlarge our circle, we will make
increases in each of the stitches. It's very simple. We're going to make two
single crochet stitches in each of round one's stitches. You're going to enter
the same stitch again and make another
single crochet. You've just made an
increase that is two single crochet in the
stitch of the previous round. We will continue in
this way all around. You will make two single crochet in each of the
following stitches, always working through
both loops of the stitch. You have made one
single crochet. We're going to make
a second one in the same space in
the same stitch. Crochet is very mathematical. We started round one with six single crochet,
now we double that. You should have a total of 12 single crochet in round two. At the end, count if you have made 12 single
crochet in the round, counting each small break. This side is the right
side of the project. Now, let's move on
to round three. This time, we're going to
increase every other stitch. You can remove your marker, and you're going to make two single crochet in
the next stitch, which happens to be the first single crochet
of round two. So we're making an increase of two single crochet
in the same stitch. You can reposition your marker
on the first one you make. And this time, since we're
increasing every other stitch, you're only going to make one single crochet in the next one. This is where you need a
little more concentration to remember when to
make the increases. Next, you make two
single crochet in the next stitch, an increase. One single crochet
in the next stitch. You continue this method
all the way around. You make two single crochet
in the next stitch, followed by a single crochet in the next one, and you repeat. In crochet, increases
will always be made proportionally
wide across the round. As a general rule, the same number of stitches
will always be increased on each round until the
desired size is reached. You will therefore have a total of 18 stitches in round three. No Count if you have 18 stitches in round three. This is the right side, the good one, and this
is the back side, where the beginning
thread is and you can pull on it to just
close well your circle. You will notice that
the project tends to turn the wrong way as you
progress through the runs. You can correct this by forcing it to turn the
right way like this. The wrong side is a little less defined and the starting
thread is there, so it's easy to recognize. Always keep in mind that
you should crochet from the outside towards the
inside of your project. What you see in front of you should be the right
side like this. If you make a mistake
and you no longer know if you've reached
an increase or not, I'm going to give
you a little trick to know how to recognize them. You can use your hands
to fill the stitches. When it looks like this here, there is only one single
rose in the stitch. You can see the difference here when there is an increase, when there are two single
crochet in the same stitch, you can see that it forms a small cluster of two
stitches in the same space, and it's totally normal
if you're having trouble recognizing this right now, it will come with time. A little later, I'll show
you how to count the rounds. Let's continue in
the next video.
5. The Chick - Part 1: After watching the
previous video, we've reached the fourth round. We're going to make
proportional increases again. So we'll increase
every third stitch. Start by making one increase, that is two single crochet
in the next stitch. Where was your marker? Place your marker on the first stitch you made. Next, you will work
one single crochet in the next two stitches. Two single crochet in the
next stitch and increase. Followed by a single crochet
in the next two stitches. And you continue this
pattern all the way around. You will have a total of
24 stitches in round four. You can pause the video. We'll meet at the
end of the round. As I mentioned in
the previous video, your project is tending
to go the wrong way. So just pop the project outwards to always crochet from
outside to inwards. The right side is
clearly visible. So count if you have 24
single crochet in round four. So far, your little chick
should look like this. We'll count the rounds together. We can see the first one that makes the small
circle in the middle. Next, you can see the lines that the single crusher
form on each round. If you have forgotten to put your stitch marker and
you're really lost, here's how to find the
first stitch of each round. You'll notice that we're
working in a spiral. The first single crochet of
round two is right here. So the first single crochet of round three will be on this one. Since we made an increase, it will be the one
furthest to the right, and you follow along with
your eyes like this. The first single
crochet of each round is on the first single
crochet of the previous one. Don't worry, it's
perfectly normal to have some difficulty seeing
all of this at the beginning. It will come with
time. That's why it's important to use a stitch marker so you don't have
to think about it. Run five will be a simple one. You will work one single
crochet in each of the following stitches for a
total of 24 single crochet. And don't forget to place your stitch marker on the
first stitch you make. I'll let you work.
You only need to make one single crochet in each of the following stitches
until the end of the run. At the end, count
if you still have 24 single crochet in round five. Round six, we will increase
once again proportionally. We left a normal
round between the two to create a slightly more
conical shape for our chick. So you remove your marker, and you're going to make an
increase in the next stitch. Replace your marker
on the first one. And this time, you will make a single crochet in the
next three stitches. And you repeat all
around an increase, that is two single crochet
in the next stitch, followed by a single crochet
in the next three stitches. You will have a total of 30
single crochet round six. You can pause the video. We will meet at the
end of the round. It should look like
this and count to see if you have really 30
single crochet in your round. The next seven rounds
will all be identical. You will make one single crochet
in the next 30 stitches. So you can switch
your brain off, but don't forget to place your stitch marker on the
first one of each round. We'll meet at the
end of Round 13, and we'll count the
rounds together to see if everything looks
good on your end. At the end of round 13,
it should look like this. We count them together. The first round, the little
circle at the beginning. Next, you count each of the
lines, the rounds form. The second round,
third, fourth, fifth, six, seven, eight, nine, ten, 11, 12, and 13. I'll also show you how to count them starting from the
first ditch of each round. The first one of round two here, round three, round four, Five, we didn't increase, six,
we made an increase, seven, eight, nine, ten, 11, 12, and 13. If you choose to add
the plastic eyes, this will be the time to
do it. I'll show you how. Even though they're often
called safety eyes, it's strongly not recommended to use them if you
plan to give away or leave your creation around children under
3-years-old or animals. There is a risk of suffocation
if they come loose. I've provided you
with black thread if you'd like to embroider
the eyes instead. This will be done at the
very end of the project. And I've included a video of this alternative
after this tutorial. We'll place the eyes between round eight and nine
of the chick' head. Count from the first round. One, two, three, four, five, six, seven,
eight, and nine. So it's really going to be
between these two rounds. So you can put an I anywhere. And you will leave four stitches apart between the two eyes. My little trick is to count the gaps you see
between the stitches. So you're going to
place the second I in the fifth hole you see. If you're happy with
the eye placement, you can lock them in place
with the small plastic tabs. It's therefore important
to be sure you put the eyes in the
right place because you won't be able to
change them after. Make sure you push
firmly so they can't come out as long as
you hear a click. And make sure the eye
is properly secured. When everything looks good, reposition the chick on the good side and put the
hook back into the loop. We'll continue in
the next video.
6. The Chick - Part 2: Now we're going to start making decreases to close
the check's body. Here's how to make an
invisible decrease. You'll see either
the abbreviation DEC or SC two together. We're going to make two
single crochet become one. You will insert your hook into the front loop only of
the next two stitches. The front loop being the
loop closest to you. Then you will make a yarno and pull through
these two loops. You can raise the handle of the hook to help
you pull through. Then you will make a yarno and pull it through bold
loops on your hook. You just made a single crochet over two stitches of
the previous round, which makes a decrease. You can replace your
stitch marker on this one. And you will make
a single crusher in the next three stitches. Be careful not to go into one of the stitches where
you made the decrease. A little trick I use is
to pull on your hook. If you see the stitch
move, it's already worked. You go to the next one. So
we will go to this one. And try to tighten your stitch following the decrease
by pulling on the yarn. This will prevent
holes from appearing. Make two more single crushing and proceed with
another decrease. We'll make them
proportionally all around a bit like the increases. You will work into
the front loop of the next two
stitches like this. Yarn over and pull
through these loops. Yarn over and pull
through both loops on your hook and continue by making a single crochet in
the next three stitches. Once again, I pull on the hook to see which
stitch is next. Tighten it well and continue with your next
two single crochet. And you repeat all
around a decrease, which is two single
crochet together. Followed by a single crochet
in the next three stitches. You will have a total of
24 stitches in round 14. Round 15 will be similar. Only after making a decrease, you will make a single crochet
in the next two stitches. A and you repeat all around for a total
of 18 single crochet. And don't forget to reposition your stitch marker
on the first one. Again, if you're not sure which stitch is next,
pull on your hook. If the stitch moves, it's not that one. It will
be the next one. You make one single crochet
in the next two stitches, always tightening the stitch following the decrease
a little more and repeat all around a decrease followed by a single crochet
in the next two stitches. You will have a total of 18
single crochet in round 15. I'll let you continue. At the end, count if you have
18 stitches in the wrong. Your little cheek should
begin to close up nicely. On round 16, we will
decrease every other stitch. You can make your decrease by entering the front loop
of the next two stitches. Replace your marker,
you will make a single crochet in
the next stitch and repeat all around a
decrease, a single crochet. You will have a total of 12
single crochet in the round. Since it's getting smaller, use your left hand
to guide yourself so you always have the
stitches facing you. You should finish
with a single chet. Count to see if you
have 12 stitches, and then it's time to stuff the chick with the fiber
fill that's in your kit. Remove the hook. If the
starting urn was ticking out, tuck it in and
digin stuffing it. You can add small amounts at a time to ensure the
filling is even. Ideally, it should be well
stuffed, but not too much. The stuffing shouldn't
be visible sticking out through the small holes
between the stitches. So you can add more until you're satisfied that the head
is nice and round. You can put the hook
back into the loop. Now we're going to
make the last round. To completely close the check, we're going to make six
decreases in a row. The stuffing will be in the way. So use the middle finger
of your left hand to push it away so that the hook
doesn't catch the stuffing. And don't forget that
you need to work into the front loops of the next two stitches to
make the decrease. Since the space is
much more restricted, it takes a little
more dexterity, but don't give up.
You're almost finished. For a knead or finish, you will make a slip
stitch in the next stitch, the one with the marker.
I'll show you how. You will insert the hook into both loops of
the next stitch. You yarn over and pull through this stitch and through the loop on your hook. And that's it. You can take out the hook, cut the yarn leaving a good
length, and secure your work. To do this, you pass
your fingers through the loop and you find the end
of the yarn and you pull. To close the last round, you take your yarn needle, which is in the same small
bag where the eyes were, and you tuck the end
of the yarn inside. You can either weave the
yarning this way or fold the yarn back on
itself to make it easier to thread through
the eye of the needle. Next, you will weave
this yarn in to the front loop of the next
ditch from the outside in. And you will enter
the singing to all the front loops of
the following stitches, always by turning around and entering from
the outside in. And at the end, you
will pull on the yarn, and you will see that
it closes up all by itself and that it
gives a nice finish. Finally, you insert
your needle right in the center and you bring it out anywhere between
two stitches. And you pull to
close a small hole. To secure the yarn, you could go back and forth like this between two stitches. Next, bring your thread to the very top of
the chick's head. If the cheek has become misshapen
by pulling on a thread, you can easily re position
it with your needle. And don't cut the
thread just yet. We'll continue with the
other parts of the check.
7. The Chick - Part 3: To crochet the wings, we will do exactly as we did at the
beginning of the project. You will start by
making a slip note. Insert a hook into the
loop and make two chains. This time, you will make
five single crochet in the second chain
from the hook. Once you have finished
your five single crochet, remove the hook
and cut the yarn, leaving a long end. Insert your fingers
into the loop and pull up the yarn from
the end to secure it. You can also pull on the yarn from the beginning to
close your circle. And that's it for
the first wing. You can make a second
one just like it. I'll show you the
instructions on the screen, but you can always rerun the video to review
how to make it. Now that your two
wings are made, we're going to sew
them onto the chick. Insert the yarn from the beginning of one
of the wings into your yarn needle and insert it on the side of
the check right here. You can count three single
crochet from the eye. And you go down one round. You should be between round
ten and 11 of the check. So you insert the thread and bring it out just a little
higher up anywhere. This will help us
to properly attach the wing to the check
before sewing it on. Position the right
side facing up. So you should see the little
braids pointing upwards. And with the end thread, you're going to sew the wing
onto the check like this. We're going to sew it onto
these three stitches. Insert the needle into
the rightmost one. Bring the needle out and insert it into the
middle of the wing. Insert the needle at the
same point where you came out and bring it out again in the next
stitch on the left. Insert your needle into the single crochet at the
end of the wing right here. Re enter the needle at
the same point you came out and go back to
the beginning thread. Your wing is now securely
sewn onto the check. And make a double nut with the tooth threads to secure
what you just sewed. You can even them out to make
it easier to tuck them in. And with your needle, bring them to the very
top of the check. And do the same on
the other side. It should look equal
on both sides. Go ahead and bring the two strands to the
very top of the check. All these strands will form
the fetters on its head. Cut all the strings about an inch or 2 centimeters
from the hip. With the orange thread, we're going to embroider
the chick's beak and feet. So you can remove the thread completely and enter
it into your needle. Enter the round that's right below the eyes and
bring it out here. You should wrap two
stitches around the needle. If some stuffing comes out, that's perfectly normal and
you can clean it at the end. You'll make three loops with the thread to
embroider the beak. Next, we'll unborder the feet. You can bring the
thread back in at the same place you came out and bring the needle right here. This will be four rounds lower. So you should see four
clearly visible rounds. Next, follow my movement
to unbder the little feet. To make the second leg, bring the needle out
at the same level, a few single crush it further. And you can refer to the video to know
exactly where to go. And embroider the second foot. L and at the end, bring the thread out anywhere
between two stitches. Check if everything looks good. Otherwise, it's very
easy to just remove the thread using your
needle and start again. Insert the starring thread
into your needle and take the opportunity to make
another turn around the beak before bringing
it to the other one. Secure these threads
in the same way as the wings by tying
a double knot, and hiding them
inside the check. This time, cut off the Xs. Unwind the white thread
that was on the cardboard, insert it into the needle
and we'll embroideer the white highlight on
the outsides of the eyes. You can follow what I'm
doing on the screen. Oh. If you tighten the
eye clasp properly, it's possible that the white
thread will slip over it. Continue with the steps anyway. And at the end, you just tighten the white thread more so that
it stays securely in place. When you are satisfied
with what you see, you can secure the
threads by making double nuts and
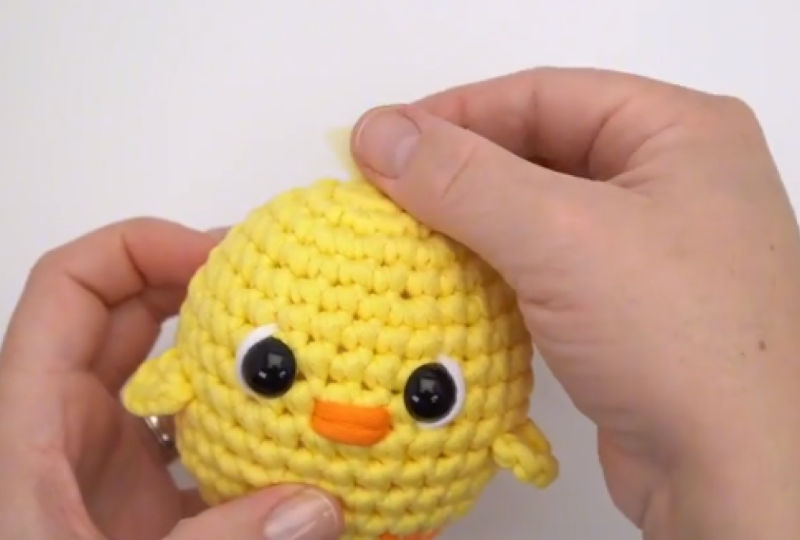
hiding them inside. B. I hope you find it very cute. At this stage, all
that's left is to make the little feathers
on the top of the head. You could leave the
threads as they are, but to have the little nylon
thread that just sticks out, you could cut what
surrounds the thread, the little cotton envelope. So when you take
your scissors to the inside and separate what is inside the envelope and you only cut
what was around it. And you do this for
all the strengths. And at the end, you can give it a little haircut. And
there you have it. You finished your little chick, your first crocheted animal. I hope you enjoyed
the experience and that you are very proud
of your little creation. See you in the next video to level up your technique
with the little pig.
8. The Lil Pig - Part 1: Welcome to the second level of the Farm Edition crochet kit. You will make the little pig. In addition to practicing the basic skills
you already have, you will learn how to start your project with a magic ring, how to change color and sew
different parts together. We will use the same
stitch that you practiced in level one,
the single crochet. You will just need a
little more dexterity and patience to sew
the parts together. But I'll guide you
through each step. Are you ready? We will
start with the pink color. I suggest you to pick
up the thread that's in the middle of the skin so that
it's easier to work with. You can start by using the technique learned
in level one by making two chains and crochet the first round into
the first one you made. Or I'll show you here how to make a magic ring
or magic circle, which is super handy for
starting a project in the round. By placing your yarn on
the front of the hook, you wrap it twice around and hold the loops
with your right index finger. Place the urn on your
left hand for tension and hold the small circle formed with your middle
finger and thumb. Simply grab the urn
while passing it through the circle and make a chain
stitch to secure everything. We will now work round
one in this circle. Don't worry, it's normal not
to succeed the first time. I'll show it to you
again and leave a good length of yarn from the beginning to give
yourself some slack. And you grab your urn anyway
you like as long as you hook it onto the end of your hook and pass
it through the ring. And don't forget to make a chain to secure what you just did. You'll see we'll have much more space to
work the first round. You're going to make six
single crochet in the ring. Try to keep the ring
straight in front of you by using your thumb and the middle finger of your other hand. The circle shouldn't spin
all the way around the hook. Try to keep it stable
in front of you. When you have made your
six single crochet, if you wish, you could place your stitch marker on
the first one you made. But this is up snow for now. It's just going to
be more on your way. Next, pull on the yarn from the beginning to
close the circle. We're going to continue
with the second round. We're going to
continue round two on the first single
crochet you made. If you haven't placed
a stitch marker, you can simply count the small braids to
find the first one. You are going to make
an increase that is two single crochet into it. Always working into both
loops of the stitch. After the first single crochet, you make a second one, always in the same place
in the same stitch. Place your marker on the
first one that you made, and you are going to
make another increase, two single crochet
in the next ditch. You might notice that
I've changed the way I write the round compared
to the first level. I'm writing the increase
abbreviation instead of telling you to make two single crochet in
the next ditch. It's just to get you used to the different ways that
patterns are written. After making your two increases, you will make one single
crochet only in the next ditch. And you repeat what is in
the parenthesis once again. You will make an increase in the next two staches so
two increases in a row. And you will finish with a single crochet in
the last stitch. You should have a total of ten single crochet in round two. And if you're wondering why we didn't increase in
each of the stitch, it's to create a more oval
effect at the pigs nose. We'll be ready to move
on to the next round. For round three, you must follow the instructions in order because nothing
will be repeated. So you will begin by making a single crochet in
the next stitch. Place your marker on it. Then you will make two
increases in a row, so two single crushe in
the next two stitches. Next, you will make one single crochet in
the next three stitches. Then two increases in a row, two single crochet in
the next two stitches. And in the last instruction, you will make one single crochet in the next two stitches. And you should have 14 single
crochet in round three. You can see that the
small oval shape of the nose is
starting to appear. And as I explained in level one, when crocheting in the round, the project tends
to roll inwards. So simply turn it over to always crochet from the outside, which is the right side of
the project to the inside. Than the fourth round
will be a simple one. You will make a single crochet in all the following stitches, but this time only into the
back loop of the stitches. So usually you work
through both loops. But here you will work only through the loop that
is furthest from you. This will create a small line on the front of your project. You can place your marker on that stitch and
continue by making a single crochet
in the back loop only of all the
following stitches. I'll let you continue working. We'll meet at the
end of the round. You should finish just before the stitch where your marker is. You can see that this creates a small line that will add
texture to the pig's nose. For the fifth round, we return as usual. We're going to work into
both loops of the stitch. You will do a single crochet
in the next four stitches. And don't forget to replace your marker after
making the first one. And continue by making
three more single crochet. And just a quick note. When you see simplify
the instructions, when you see the
abbreviation for increase, the number before the
abbreviation for single crochet does not mean making four single crochet
in the same stitch, but rather one single crochet
in the next four stitches. Next, you will make four
increases in a row. So two single crochet in
the next four stitches. And if you got lost
along the way wondering what you did a single
crochet or an increase, try to take this opportunity to observe the difference
between the two. When you make an increase, you can see that
there are really two stitches on the same space. It makes a sort of
small denser bouquet, whereas when there
is only one stitch, you just see a small V formed
by the single crochet. Over time, your eyes
will become used to it, but it's good to observe it and know it to
gain confidence. So continue to have four
increases in total. And then you will make six
single crochet in a row. So just one single crochet
in the next six stitches. And you should have a total of 18 stitches and round five. The four increases we made in a row will form the pig's head. The sixth round will be a
conventional increased one. The increases will be
proportional all around. So start by making an
increase in the first stitch. Place your marker
on the first one. And you will make
a single crochet in the next two stitches. And you repeat all around and
increase to single crochet. You will have a total
of 24 stitches in round six. I'll let you work. We'll meet at the
end of the round. Count to make sure you have
24 single crochet in total. Round seven, you will
make an increase followed by a single crochet in the next three
stitches this time. Always place your marker
on the first stitch of the increase and make your
three single crochet. And you repeat all
around and increase three single crochet for a total of 30 stitches
in round seven. We need at the end of the round. Make sure your total
stitch count is 30. And your little picture
now look like this. See you in the next
video to continue.
9. The Lil Pig - Part 2: If you have chosen to
add the plastic eyes, this is the time to place them. I'm going to show you how. Even though they are
often called safety eyes, it's strongly not
recommended to use them if you plan
to give or leave your creation lying around near children under
3-years-old or animals. There is a risk of suffocation
if they come loose. I've provided you
with black thread if you would like to embroider
the eyes instead. This will be done at the
very end of the project. And I've included a video of this alternative
after this tutorial. We'll place the ice between
round five and six. You can start counting
from the fourth round, the one where the stitches were worked in the back loop only. You can see the small line, so you can count from there, starting with the first
stitch of round four, the first one where the
front loop is visible. So the fifth round
would be just above. The first stitch of
the fifth round, which is right next to the last little line
that stands out. And you're going to count
four stitches to the left to place the eye right here between the fifth
and sixth round. It will happen to
be right before the first of the four
increases we made. The placement must be precise
to follow the shape of the head. It should
look like this. The shape of the head more
oval pointing upwards. Next, you will place
the second eye so that it is at the
same level as the first, always between
round five and six. Visually, both eyes should be at the same level and the top of the head should be
centered between them. And if we want to
be very precise, you should see all the
increases in a row that we made on Round five
plus a single crochet. When you are satisfied
with the positioning, you can insert the plastic tips to securely attach the eyes. It's therefore important to be sure that you've put the eyes in the right place because they won't be able to be changed. Make sure you push them in
firmly so they don't pop out. You should hear a
click. And make sure that the eyes
are properly fixed. We will continue with
the following rounds. The next six rounds
will all be identical. You will make a single crochet in all the following stitches. You should always have 30 single crochet in
too in each round. And don't forget to always put your stitch marker
back in the first one. I'll let you work. We'll
meet at the end of Round 13, where we'll count them together. It should now look like this. We count the rounds together. We see the first one here, the small circle
at the beginning, the second one
which starts here. The third one, fourth, where we worked in the Bloop. The five, six, seven, eight, nine, ten,
11, 12, and 13. You could also count
starting from anywhere by following with your eyes the lines that the rounds form. Now, bring the
brown yarn closer. We're going to start
the color changes. To introduce you to the
color changing technique, I've added some small mud spots to the tick. This is optional. If you ever want to continue
making it all pink, you could simply ignore the color changes and work
as in the previous rounds, a single crochet in each stitch. But I suggest you to try
this little challenge. You will start by making
ten single crochet with the pink color and place the
marker on the first stitch. Remove your hook
and count to make sure you have made
ten single crochet. Pull the yarn to undo
your last one you made because this is where
we will join the brown yarn. So you will begin making your single crochet
with the pink yarn. As usual, you enter the stitch, make a yarn over,
and pass through the stitch and stop there
before doing the last step. Instead, we're going to pull the brown yarn
through both loops. And that's how we change color. We incorporate it
into the last step of the last single crochet
of the previous color, and you continue
with the pattern. You will make two single
crochet with the brown color. After making your first one, pull the threads from behind
to tighten your color join. Next, you can make the
second single crochet with the brown color.
But be careful. You will have to change color
again in the last step. So you insert your
hook you yarn over, you pull through the
stitch, and you stop there. Go and retrieve your
pink yarn that you left behind and pull it through
the two loops on your hook. It's a little more complicated to manage two colors
at the same time, but it's a nice challenge. And then you continue by making a single crochet in each of the remaining stitches
with the pink color. I'll let you continue. We will meet at the end of the round, and you'll notice that
the pattern is really simplified to know
when to change colors. So you know that
everything will be done in single crusher stitches. So I put the
corresponding color code next to the number
of stitches to do. And at the end, you
can make sure you still have 30 stitches
worked in the round. Round 15, you will start by making 11 single crochet
with the pink color. But be careful when you
start the 11th stitch, you will add the brown
yarn in the last step. The 11th should end up on
the first brown stitch. So in the last step, you stop and pick
up your brown yarn. Make sure you take
the longest end of the yarn and pass it
through both loops. And this time, you only have one brown single
crochet to make. So you won't even complete one. You start by making
your single crochet, and in the last step, you join your pink yarn
that you left behind. Okay. And you continue
with the pink color until the end of the round. In the next round,
we're going to add two more small spots. So you'll have a little
more color change to make. You'll start by making nine single crochet with
the pink colour, keeping in mind that
you'll need to join the brown yarn at the last
step of the ninth stitch. This is where the color
change will take place. So make your single crochet and pick up the brown yarn to
pass it through both loops. Don't pull the yarn too tightly, give it some slack,
so it doesn't pull too much and
distort your project. You are going to make a single crochet with
the brown yarn. So you immediately
join the pinkworm You can pull the yarn at the
back to tighten everything. Next, you will make three
single crochet in pink. At the third stitch,
join the brown yarn. You will make two single
crochet with this color. At the end of the second one, join your pink yarn. And continue to the end with pink, single
crochet stitches. It should look like this. I'll let you continue. We will meet at the end of the round. Un 17, this is the last one
with the color changes. You should be very
proud of yourself for having completed
the sale challenge. You will begin by making
nine single crochet in pink. On the ninth, you change color. You grab your brown thread, and pull it through both loops. It's quite far, so give it some slack so it doesn't
pull on the project. Remove the thread
that is on your way and make two single crochet
with the brown yarn. At the second one, join the pink yarn that
you left behind. And take this
opportunity to pull on it to tighten
everything you are doing. You will make two
single crochet in pink. At the end of the second one, you join the brown yarn
that you left behind. And you will make three
single crochet in brown. At the third stitch, you join the pink yarn. And that's it for
the color change. You make single crochet and pink in all remaining stitches. We will meet at the
end of the round. At the end, since we have
finished the color changes, you could make a double nut with the two brown strands
to secure them. Don't pull too hard on the double nut to avoid
distorting the project. We're just going to secure
them and put them inside. See you in the next video where we will cause
the little pig.
10. The Lil Pig - Part 3: Run 18, we're going to
start closing the body of our little pig by making proportional
decreases all around. I'll show you again how to
make an invisible decrease, which transforms two
single crochet into one. You will insert your hook into the front loop only of
the next two stitches. Then you will make a yarn over, which you will pull
through these front loops, yarn over and pull
through both loops. Place your marker
on this stitch and continue by making
a single crochet in the next three stitches. To be sure to enter the correct stitch,
pull on your hook. If this stitch moves, it's not this one. It
will be the next. So you make three
single crochet. And you repeat all around a decrease followed by
three single crochet. Once again, I replaced
the abbreviation Scitud together that you saw in level one by the abbreviation
for decrease, which simplifies the pattern. I'll let you continue working. We need at the end of the round. At the end, you should have 24 stitches and
toll in round 18. The next round will be similar, but after making your decrease, you will make a
single crochet in the next two stitches
and repeat all around. Mm You can pause the video. We need at the end of the round. You should have a tow of
18 stitches in round 19. You can remove your
hook from the loop. We will start stuffing. Once again, it needs to be firm without the stuffing stacking
out of the stitches. H Remove a little bit of stuffing so it's
not in your way. Now we'll work the
last two rounds. Round 20, you will make
a decrease followed by a single crusher in the next stitch all the way around. Use the middle finger of your other hand to hold the
stuffing away from the hook. You can pause the video. We'll meet at the
end of the round. Count if you have 12 stitches
and finish the stuffing. We will now work the last round. For the last one, you will decrease six stitches in a row. And for a kale finish, make a slip stitch in the next stitch,
where the marker was. Insert the hook
through both loops. Yarn over. You pull through the stitch
and through the loop. Pull out your hook. Cut the yarn and secure it by passing
it through the loop. And close the last round
with your yarn needle by passing it through the
front loops of each stitch. Pull the yarn tightly
to close a circle and insert the needle in the center
to bring it out anywhere. And secure the yarn by making back and forth movements
between two stitches. And cut off the excess yarn. See you in the next video where will crushe the small
body parts of the tig?
11. The Lil Pig - Body Parts: Make a magic ring
or the technique learned in level one
that is two chains, and you work round
one in the first. Don't forget to make
your chain after making your magic ring
to secure it properly, and you will make four
single crochet in the ring. Tighten it. And this time, it's going to be a
little different. We won't be working in
the round, but in rows. You're going to make a chain. Turn your project
over to see the back. So you turn it like a book page, but in the other direction. And it doesn't
matter either if you really turn it like
a page of a book, as long as you see the back
of what you're working on. The chain made before
turning is used to add height to begin
a second row. You will start by making two single crochet
in the same stitch. And this instruction means in the last ditch you
made of row one, it is right here where
the small hole is. It's the first stitch
closest to your hook. You do the same thing as usual. You go through both loops, and you are going to make two single crochet at
the same place. You will make two single
crochet in the next stitch. Can two to form the
point of the ear. Two single crochet
in the next ditch. And finally, two
single crochet in the last ditch. And that's it. You've made one of the two
ears of the little pig, and at the same time, you've been introduced to
working in rows. You can cut the thread, leaving a good length because we're
going to use it to sew it onto the pig's head later and secure the thread as usual by pulling it
through the loop. Make a second one just like it. I'll put the instructions
on the screen, and you can always go back in the timeline to
reveal how to do it. To crochet the tail this time, start with a slip nut. And make 12 chains. You can count the small
loops that are just below the hook to make
sure you have 12. The loop on the hook does
not count as a chain. Make a single crochet in the
second chain from the hook. You insert into the top loop, which is right here, and you
make your single crochet. And you do a single crochet
in all the following chains. Down. And that's it. If you have one stitch more or less, it doesn't
matter at all. It won't be noticeable. And you see that it naturally
takes the shape of a cork. Cut the urn, leaving a
good length and secure it. Set it aside while
we crochet the legs. This time, we'll start
with a magic ring, and you will make six
single crochet in the ring. Pull on the starting yarn to
close the circle securely and continue with round two and the first single
crochet of round one. To find it, you can simply calculate from
the last one you made. You will make a single crochet in each of the
following stitches, working into the back loop only, the loop furthest from you. I didn't have you put a marker since this would be a
little bit in the way. So just count up to six ditches. And at the end, you will
make a slip stitch in the first single crochet of
Round two for a nicer finish. Cut the yard, leaving a
good length and secure it. You can make three
more identical ones. I'll give you the
instructions on the screen, and feel free to rewind the
video to see how I did it. See you in the next
video where you learn how to sew all
these parts on the pig.
12. The Lil Pig - Assembly: No. We will start by sewing
the ears onto the head. They will be placed between
round eight and nine. So we have round one
here, two, three, four, five, six,
seven, and eight. So it will be sewn
onto this line here. Grab an ear and insert
the starting thread, the one in the middle,
in your yarn needle. Insert the needle
between round eight and nine and the level of the
inner side of the eye. Enter the needle and
bring it out anywhere. Position the ear so that the
right side is facing you, the side where you
can clearly see the little braid formed
by the stitches. Next, enter the end of the
thread through the needle, and we're going to sew the ear. You can follow my
movements on the screen. You're going to sew into the stitches right next to the one we entered
at the beginning. And each time you enter a strand of the ear
to secure it well, you always insert the
needle from which you came out and go into the stitch right next to it to insert into a stitch
at the end of the ear. When you have
finished sewing it, join the end thread
to the beginning one. Do the same on the other side. Insert the beginning thread of the second ear into your needle. To know where to start, you can count the small
holes between the stitches. At the tenth hole,
insert your needle. Make sure the correct side
of the ear is facing you. And then it makes
sense visually that it's centered and start sewing. When you're finished and
it's to your liking, you can secure the threads
that are sticking out. Make a double nut with each one. Trim them so they are all the same length and enter them into your needle
to hide them inside. And cut off the excess. We're going to sew the
four little legs of the tig thter the thread
from the beginning, the one that's inside the
leg into your needle. And starting from the ear, count three rounds behind. So it will be between
these rounds, between rounds 11 and 12, and approximately at this point. So you insert the needle, bring it out anywhere. Position the small leg, and we're going to sew
it with the end thread in rounds 11 and 12 inclusively. You can follow my
movements on the screen. Basically, we're
going to sew into the stitches around
the starring thread that we've entered in. This gives us a reference point. So you enter one stitch
and exit into another. You enter a stitch of the leg that is
facing where you are. You go back into the
stitch you came out of to do the same thing and continue sewing in all
the stitches of the leg. And don't worry if it's not
exactly the same as I do. The important thing
is that the leg is well sewn onto the pig
and that it looks good. The sewn leg should encompass the two rounds between which you entered the starting thread. No. When you have
gone around the leg, you can go rejoin
the starting thread. Check if it sounds securely. There should be no gap
between the body and the leg. Do the same with the
second front leg. Enter the starting
thread in your needle and the same little trick to quickly find
where to place it. Count five small holes
to the left of the leg. Check if it makes sense
and start sewing. Se around the starting thread
that you just inserted. This is your reference point. And once again, we include
two rounds in our scene. Our leg will be attached
over two rounds inclusively. And at the end, you will
rejoin the starting thread. And if you ever need
to undo a sing, use your needle to pull the
thread like this and undo it. And we're going to attach the first back leg.
You do the same thing. Thread the starting yarn
through the needle and you'll insert it after the fifth
round behind the front leg. And sew the leg
with the end yarn. Same way in the stitches
around where you've entered, the leg must be aligned
with the front one. And again, you will sew it
encompassing two rounds. In this case, rounds 17 and 18. When you have worked through
all the stitches of the leg, join the thread to the beginning one and check that
everything looks good. And you can attach the last leg. You can do it by eye as long as it's well centered with
the back and front ones. When you're finished,
you can secure each strip by making double
nuts and hide them inside. All that's left is to sew on
the little corkscrew tail. Insert one of the tooth
thread into your needle. Locate the center back, which is two rounds
behind the last spot, and you will insert
your needle right next to it to the right or left. It doesn't matter as long as it's not directly
in the center, because you will bring it
out two stitches further. So the middle stitch
should be in the center. And you're going
to sew the tail. Everything will be
good as long as the extremity is
securely attached. Then you bring the thread out anywhere and you enter the
second one through the needle. And you can add a
small sewing just to reinforce it by
entering any strand. And join the thread
to the starting one. Secure and hide them. Twisting the tail on itself
to create a corkscrew effect. Insert the black thread
through your needle. We're going to embroider
the little nostriils. Insert the needle
anywhere on the top of the head and bring
it out just next to the first round and begin embroidering the
nostrils on each side. I At the end, join the thread to the
one from the beginning. It's normal if A lot
stuffing comes out. You can tuck it in with
the tip of your needle, and if you can't manage it, you can always cut
it, but be careful. Make a double nut with the
threads and hide them. Just one last and
you're finished. We're going to embroider the small white highlight
under the eyes. Enter again anywhere on the
top of the head and exit on the other corner of the eye
and enter on the other side. We want the white highlight
to be under the eye, so you do the same thing
on the other side. I join the thread to
the beginning one. And when everything is fine, secure and hide them. Congratulations.
You've successfully completed your little pig. I'm sure you're very
proud of yourself. See you in the next
video where you straighten your technique
even more with the sheep.
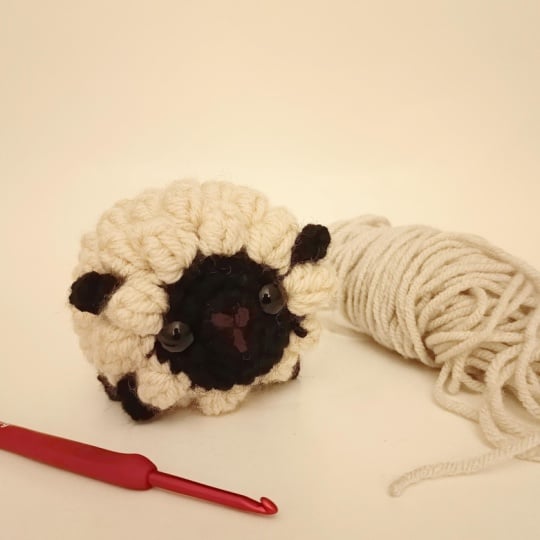
13. The Sheep - Part 1: Welcome to the third
and final level of the formulation crochet kits, where you will make
the little sheep. I'll introduce you to
the nos technique. Where we crochet directly the small parts on the sheep
instead of sewing them. Also, you learn how to
make a popcorn stitch, which add a lot of texture. Let's get started. Let's
begin with the Bay yarn. You have the choice
to use the technique learned in level one by
making two chains and round one in the first or make the magic ring that you
learned in the previous level. Also, you slowly
here how to do it. You wrap the yarn
around your hook twice and you hold the loops on the hook with
your right index finger. Place the yarn as usual
in your left hand. And hold the circle
that has formed with your thumb and nedle
finger and simply slide your hook to catch the yarn and pass it
through the circle. You make a chain
stitch to secure everything and you are ready to make the first
round in your magic ring. You are going to make
five single crochet. After making your
five single crochet, pull on the starting
yarn to close your circle and we will be ready to move on
to the next round. You will increase in
each of the stitches. Find where the first
one is right here, and you will make two single
crochet in this stitch. Place your marker on the first and continue to increase in all the
following stitches. To single crusher
in each of them. Count if you have ten
stitches in your round. In the next round, we will
increase every other stitch. So one increase in
the next stitch. Always place your marker
on the first one you made. And you will make one single
crochet in the next stitch. And you repeat all around and
increase a single crochet. You will have a total of 15
stitches in round three. We met at the end of the round. You should finish with one single crochet in
the last stitch. Count to make sure you have
15 single crochet in total and don't forget
to pop what you're doing outwards towards
the good side, to always crochet from the outside towards the
inside of your project. Round four we will increase
once every three times, you'll make an increase, followed by a single crochet
in the next two stitches, you repeat all around for a total of 20 stitches
in the round. M You can pause the video. We will meet at the
end of the round. Check that you have
20 single crochet and if the project has
flipped to the inside, reposition it the correct way. Round five, we will proceed with the color change,
but not right away. You will begin by making
a single crochet in the next six stitches and don't forget to replace the marker after
making the first one. We're going to make
the color change in the sixth single crochet. You enter the stitch
and make a yarn over, you go through the stitch, stop there and pick
up the white yarn. If it's possible, pick up the yarn that is
inside the skin. This will prevent it from moving around while you crochet. Position the yarn in your
left hand as usual and pick up the yarn
to pass it through the two loops that were
left on your hook. We'll continue the rest of the project with the white yarn. Make a single crochet
the next stitch. Next, we will make our
first popcorn stitch. There's going to
be a lot to learn, but we'll take it
slowly step by step. First, the popcorn
stitch is made up of four double crochet which
are joined together. The double crochet is
a basic crochet stitch that is slightly taller
than the single crochet. I'll show you how to do it. The biggest difference with the double crochet is that before entering
the next stitch, you're going to yarn
over your hook. Hold the loop with your
right index finger to keep it in place and enter
the next stitch. You're going to
make a yarn over, go through the stitch
as you are used to and reposition your fingers to see the three loops that
are now on your hook. You are going to
make a yarn over and pull through only two loops. Reposition yourself, yarn over and pull through the last two
loops on your hook. You've just made a
double crochet and you notice that it's much
higher than a single crochet. We're going to make three more
always in the same stitch. You yarn over, you
enter the same stitch. Yarn over, pull
through the stitch, reposition your
fingers, yarn over, pull through two loops, and finally, yarn over, pull through two loops. Repeat this two more times. Yarn over, insert
into the same stitch. Yan over, pull
through the stitch, Yan over two loops, and yarn over two loops. I'll let you make the last
one still in the same stitch. Okay. Make sure you have made four double crochet. They are a little
easier to count than single crochet since
there is more length. To transform all this
into a popcorn stitch, you're going to remove your
hook from the loop and enter the first double
crochet you made by going into both loops
of the small braid. You're going to retrieve
your loop that you left to pass it through
the stitch like this. This has brought your
four double crochet closer together to form the popcorn stitch and we will complete it
by making a chain. This will be the main
stitch of our little sheep. You'll have plenty of time to practice it throughout
the project. After working your
popcorn stitch, you will make a single crochet
in the next stitch and you can tighten it a bit more to really bring
out the popcorn stitch. We're going to repeat this
combination four more times. Let me remind you how to
make a double crochet. You yarn over before
entering the stitch, Yarn, you go through the stitch,
yarn over two loops, and yarn over two loops. You repeat that
three more times. You need to have four double
crushes in the same stitch. You can follow the
screen instructions. When you have finished
your four double crochet, you remove the hook, but be careful not to
lose your loop. Keep track of the
first one you made. You enter both
loops of the stitch and find a loop to pull
it through the stitch. Finish by making a chain. You continue by making a single crochet and
the next stitch. You repeat these two steps to make five popcorn
stitches in total. Feel free to rewind the video if you need
to know how to do them. We will meet when
you've done five. After making the single crochet following your last
popcorn stitch, you will make a decrease
of single crochet. You enter into the front loop of the next two stitches and
you make a single crochet. And you finish with a single
crochet in the next stitch. Phew, you have finally
finished the fifth round. Since you have learned
the main stitch, it will be easy to
follow the next ones, and you should now have a total of 19 stitches in the round. Note that the chain following each popcorn stitch does
not count as a stitch. Since we've finished
working with the base yarn, you can cut it and make a double not with the white thread
from the beginning. If you chose to add
the plastic eyes, this will be the time to do so. Even though they are
often called safety eyes, it is strongly not
recommended to use them if you plan
to give or leave your creation lying around near children under
3-years-old or animals. There is a risk of suffocation
if they come loose. I've provided you
with black thread if you'd like to embroider
the eyes instead. That will be done at the
very end of the project. I've included a video of this alternative
following this tutorial. We're going to place the eyes between round three and four. It should be between
the last and second to last rounds in beige. We need to make sure that
the little popcorn stitches are on the top of
the sheep's head. Place the first eye at the level of the first popcorn
stitch on the right, and the second one at the level of the popcorn
stitch on the left. It should look like this. When you are satisfied, you can secure them with
the small plastic tads. It's important to be sure
that you've put the eyes in the right place because we
won't be able to change them. Make sure you push
firmly so they can't pop out as long as you hear a click and make sure the eyes are
securely in place. We'll continue in
the next video.
14. The Sheep - Part 2: Now, let's continue
with round six. You will start by
making a decrease, always working into
the front loop of the next two stitches. Replace your marker
on what you just did, and you will make a single
crochet in the next stitch. You repeat this once more. One decrease, one
single crochet. Starting from the next stitch, you will alternate
a popcorn stitch followed by a single crochet. You will make six in total. Just a quick reminder
of the popcorn stitch, it consists of four
double crochet made in the same stitch, joined at the end, which you will finish
with a chain stitch. I'm going to show you where
to make your single crochet. Since the chain you make at the end of a popcorn
stitch doesn't count, your single crochet
will be right here in the small hole you see, which is just above
and to the left of the single crochet of
the previous round. You'll see it clearly when you
pull on what you're doing. You make a single crochet, always keeping it tight.
And you continue. You make the popcorn stitch into the single crochet of
the previous round. So you skip the chain
that you see here, and you work into
the next space, which happens to be the single crochet of
the previous round. Then you work your
popcorn stitch. A single crochet in the next stitch in the popcorn stitch of
the previous round. Tighten it well, and
you continue like this alternating the popcorn and the single crochet stitch. Make sure your popcorn
are always worked into the single crochet of the
previous round and vice versa. Mm you will finish with a popcorn in
the last stitch, the one just before the marker. You should have made seven
popcorn stitches and tall in the round and have a
total of 17 stitches. The number is odd precisely
so that you can alternate the popcorn and single crushes stitches so that they are not
always in the same place. Round seven, you can follow
the screen instructions. We will start by making a
single crochet and then you will alternate the
popcorn stitch with the single
crochet eight times. It's very important to put your stitch marker so
you don't lose yourself. Given that you practiced well with the previous round,
I'll let you work. We meet at the end of the round as long as you make sure to work your popcorn stitches on the single crochet and your single crochet on
the popcorn stitches. Mm. You should finish by working a single crochet in
the popcorn stitch, which is just before the marker. And what you see here is the
chain, which doesn't count. So you're in the right
place if there is a popcorn stitch that
separates you from the marker. On round eight, you'll
start by making a popcorn in the next stitch,
where is your marker. Replace your marker on and continue by making
a single crochet in the next stitch in
the next popcorn stitch. And you alternate popcorn, single crochet, all around. And you will finish this
time with a popcorn stitch. I'll let you work. We meet
at the end of the round. And you finish with
a popcorn stitch just before your marker. We will move on to
the next round. Where we'll do something
a little different? Your ship should
now look like this. The popcorn stitches are neatly aligned and form
a small diagonal. On round nine,
we're going to make a few single crochet
stitches in a row to leave some room to
crochet the legs at the end. You'll make one single crochet
in the next five stitches. Replace your marker
on the first one and remember that the chain of a popcorn stitch doesn't count, so you skip it and
you're going to make the single crochet
in the next stitch. The next single crochet will be right here before
the popcorn stitch. The fourth in the
single crochet of the previous round and the last in the following
popcorn stitch. And you continue alternating popcorn and single crochet
stitches until the end. Once again, make sure to
work popcorn stitch into the single crochet from the previous round
and vice versa. I'll let you continue. We'll meet at the
end of the round. You should finish with a single crochet in the last stitch. For the next two rounds, we will repeat round eight
and nine what we just did. You will start with a
popcorn in the first stitch. Don't forget to place
your marker on it. You continue alternating popcorn single crochet
stitches until the end. You will finish with
a popcorn stitch. I'll let you continue. We
meet at the end of the run. You should finish
with a popcorn stitch and we're ready to
continue with Round 11. This round will be
identical to Round nine, you'll start by making
a single crochet in the next five stitches and
don't forget your marker. And you continue with
alternating popcorn stitch with single crochet
until the end of the run. You can toss the video. You should finish with a single crochet in the last stitch. In the next video, we will start closing our little sheep.
15. The Sheep - Part 3: Now we'll start decreasing
to close the little sheet. Start by making a popcorn
stitch in the next stitch. Remember that the chain that you see right here next
to it doesn't count. So you're entering the next
single crochet stitch. You make a single crochet
in the next stitch and place your marker on the
popcorn stitch you made. We're going to make
our first decrease, but I'm going to show you
a different way to do it. This is the way we use
when working in rows. Until now, you've been used
to making what are called invisible decreases by working into the front loop of
the next two stitches. Since it's not easy to do this technique with popcorn
stitches in our way, I'm going to show you
the official technique for making two single
crochet together. You're going to insert your
hook into the next stitch. You make a yarn over, you pull through this itch,
but you stop there. You're going to insert your
hook into the next itch. Yarn over, pull through
thistg and finally, yarn over and pull through
all three loops on your hook. Once again, we've combined
two single crochet into one. But this time by entering through both loops
of each stitch, do the same thing, another decrease by making two
single crochet together. You enter the next stitch, you yarn over and pull
through the stitch. Stop there, go to
the next stitch, yarn over, pull
through the stitch, and yarn over, pull
through all three loops. You'll see why usually we make invisible decreases which are much more beautiful
than what we just did. But the result is the same. We have transformed
two stitches into one. And you'll see we
can even transform three stitches into one
with the same technique. But just before that, you're
going to make a popcorn stitch in the next stitch into the single
crochet you see here. Now we're going to make the three single crochet together. You're going to enter
the next stitch, which is in a popcorn one, yarn over, pull through
the stitch and stop there. Go in the next stitch in the next single
crochet, yarn over, pull through the
stitch and stop, and finally, enter in
the next popcorn stitch. Yarn over, pull
through the stitch, yarn over, pull through all
four loops on your hook. You've just combined
three stitches into one and you repeat
this once more. You make a popcorn stitch
in the next stitch. And. And you make three single crochet together. So you enter the next stitch, yarn over, pull
through the stitch, enter the next one, yarn over, pull through the stitch,
and enter the next stitch. Yarn over, pull
through the stitch, and finally yarn over and pull through all the
loops on the hook. Then you will make apopcorn
in the next stitch. You will make one last decrease in two stitches this time, two single crochet together. Now you should have a total
of ten stitches in the round. Our little sheet has
started to close up nicely. Now let's move on
to the last round. This round will be as
you are used to do, you will alternate popcorn
and single crochet stitches, starting with a single crochet. Always place Sir marker
on the first stitch and continue making a
popcorn in the next stitch you repeat all around single crochet popcorn stitch. Okay. It might be a little more
difficult to see where to go in the decrease of
three single crochet, but it's really the big
hole it makes right here. I'll let you continue working. We'll meet at the
end of the round and you should finish
with a popcorn stitch. To finish nicely, you can make a slip stitch
in the next stitch, the one with your marker. You enter the stitch,
you yarn over and pull through the stitch
and the loop on your hook. Cut the yarn, leaving a
good length and secure it. Now it's time to add
stuffing to your sheet. Go ahead and add small
amounts at a time. The important thing is
that it's well stuffed, but not too much so that the stuffing doesn't show
between the stitches. To close it all up, insert the thread into your needle and this time you'll insert
it from the outside in words into the next stitch by going through both loops
of the stitch and coming out in the next one to
the inside towards the outside in a zigzag
pattern like that all around. Okay. At the end, you pull on the
urn to close the opening. You can insert your needle into a few strands to
reinforce your closure. You can insert it anywhere. It doesn't matter as long
as it feels well closed. Mm. When everything is right, you can insert your
needle and bring it out anywhere below the sheet
to secure the yarn. Work back and forth between two stitches to
secure it properly. And at the end, you insert your needle inside and
cut off the excess yarn. See you in the next
video where we will crochet the small
parts on our sheet.
16. The Sheep - Body Parts: We will crush in the other
parts directly onto the sheet, starting with the ears. And if you prefer
to crush everything separately and then
sew it onto the sheet, you can watch the
following video. We'll start with the right ear. You will insert your hook
from back to front at this spot just behind the popcorn stitch that
is next to the eye. And make sure the sheep
is right side up, the top of its head
is pointing upwards. To find out the top of its head, that's where you made your
first five popcorn stitches. The junction between the
beige and white color is made directly
on those stitch. While below, you can see that
there are single crochet in white between the color
join and the popcorn stitches. Join the Bie yarn. You pick it up and
pass it through the stitch and you
will make four chains. You can pull a little on the
starting yarn to tighten it. Then in the second
chain from the hook, you will make four
single crochet. The four single crochet
always in the same chain. Next, you will make a slip
stitch in the next two chains. Use your other hand to hold the ear in place and
make your slip stitches. Just a reminder, a slip stitch is when you insert
into the stitch, yarn over, pull through the stitch and through
the loop on your hook. And that's it. You
can remove the hook, cut the iron and secure it. Now we're going to insert the last thread to
reinforce the ear we made. You enter the same
place where you inserted the hook
at the beginning, and you just pass it
into the strength of the ear just to attach it
securely to the sheep. Bring the needle out anywhere
a little further along. Put the starting thread
into your needle and do the same thing to
better secure the ear. Join the thread to D ending one. You can make a double nut
and hide them inside. Check that the ear is secure. Oh and cut off any excess. The left ear will be
opposite to the right one. You can use your crochet hook as a guide and this time enter from the front towards the back behind the
popcorn stitch, which is next to the eye. You join your base yarn and do the same thing as
on the other side. You will make four chains. Four single crochet in the
second chain from the hook. Next, you will make a slip
stitch in the next two chins. Cut the yarn and secure it. You will do the same
as the other side, tuck in the beginning
and end threads to securely attach
the ear to the sheet. It must point downwards. It's really not important where
you insert your needle as long as you feel that the ear is securely attached to the sheep. It should look like
this. The ears at the same level
pointing downwards. You can make a double not with the thread and hide them inside. Now we're going to
make the little legs. Again, if you prefer to crochet the legs separately
and sew them on, you can refer to the
following video. But I'll show you how to crochet them directly
on the sheep. Place the sheep on its back, and to recognize the
underside of the sheet, it looks like there's
missing popcorn stitches. That's where we made our
single crochet in a row. I wanted to create small spaces so we could crochet
the legs properly. It's not very pretty,
but we'll hide all that. To make the first front leg, you will insert your hook here through those two
holes where there is a single crochet stitch and you insert from the front to
the back of the sheet. You will join the base yarn. You pass it through the stitch and you will make two chains, and we will make a popcorn
stitch to form the legs. Four double crochet
in the same place. Always passing your hook through the front stitch
towards the back. You will need a little
more dexterity to hold the sheet while making
your popcorn stitch. After making your four double
crochet in the same space, instead of entering the
first double crochet, you will enter the space between the two chains and the first
double crochet like this. You will retrieve the loop with the hook and pass it through the space and you finish
with a chain stitch. That's all. You can
remove the hook, cut the urn and secure it. While we're here,
I'm going to show you another way to
secure the end thread. It's by pulling on the loop
until the arn comes out. It's a little less
strong but more aesthetically pleasing
for some projects. It's good to know. You insert the end thread into your needle and you
enter the same space that is behind your popcorn stitch to reinforce
your first leg. Join the starting
thread to the end one. And tie a double knot tightly
with these two threads. Hike them and cut
off any excess. You can do the same with
the other three legs. For the second front leg, you can insert your
hook this way. Join the base yarn, chin to, and make a popcorn stitch. Don't forget to go
into the space between the two chains and the
first double crochet to form the popcorn stitch. You finish with your chain. You cut the urn, secure it, and attach the leg by joining the two threads which you will
secure with a double nut. For the back legs, you
will do the same thing. You will insert your hook from the front towards the back. Your hook should come out
between two popcorn stitches. You join the base yarn and
you do the same thing. Chain two popcorn stitch. I'll put the video in fast forward so you can
see what I do. For the last leg, you will
insert your hook right here. It should be right next to a
popcorn stitch on the left. Can you repeat the same thing. Some Well done, you have assembled
all the small parts of the sheet directly onto it. All that remains is to
embroider its face. With the black thread, you
will unbroer its muzzle. You insert it into your needle, enter anywhere on the
top of the sheep's face, and bring the needle out
right in the center of the first round and follow my movements on the screen to
embroider the muzzle. When it's to your liking, secure the tooth
threads and hide them. All that's left is to embroider the small white highlight on
the other side of the eyes. You can follow what I'm
doing on the screen again. If you have trouble positioning it correctly on the other side, pull on the thread while
holding it in the right place. You can also use your needle to tuck it in a little
under the eye. When you're finished, secure
the threads and hide them. And there you go. Your little sheep is now
completely finished. I hope you find it super cute and that you're
very proud of yourself. See you in next video
for the final words.
17. Alternative: The Sheep - Sewing Body Parts: If you prefer to crochet
the ears and the legs of the little sheep separately and then sew them on, here's how. With the base yarn, make a
slip nut and chain four. Then make three single crochet in the second chain
from the hook. You will make a slip stitch in the two remaining
chains. And that's it. You can cut the urn, leaving
a good length and secure it and make a second
one identical, either by rewinding the
video or by posing it. You will begin by
making a slip note and four chains and you follow the instructions at
the top of the screen. Next, you will sew
them on each side of the sheep behind a
popcorn stitch like this. Make sure the good
side is facing the sheep and that
they hang downwards. You will make four
identical legs. You will start by making five single crochet
in the magic ring. Continue round two by making a single crochet in all
stitches of the previous round. M for a or finish, make a slip stitch in the
next stitch and cut the yarn, leaving a good length
and secure it. Make sure you put
the leg back on the good side and make
three more identical, knowing that you will start by making five single crochet
in the magic ring. When you have finished
your four legs, you will sew them on
the same way that you learned in level two,
just below the sheet. I'll show you where
to place them. In the end, it should
look like this. With the black thread,
you will prod its muzzle. You insert it into your needle, enter anywhere on the top of the sheep's face and bring the needle out
right in the center of the first round and follow my movements on the
screen to unroer the muzzle. When it's to your liking, secure the tooth
threads and hide them. All that's left is to embroider the small white highlight on
the other side of the eyes. You can follow what I'm
doing on the screen again. If you have trouble positioning it correctly on the other side, pull on the thread while
holding it in the right place. You can also use your needle to tuck it in a little
under the eye. Thing. When you're finished, secure the threads
and hide them. And there you go.
Your little sheet is now completely finished. I hope you find it super cute and that you're
very proud of yourself. See you in next video
for the final words.
18. Alternative: Embroider The Eyes: Since the safety ice can be dangerous for
children under three, here are the steps to follow to embroider the
eyes with thread. The same technique can be
reproduced with any animal. You can insert the black
thread into your yarn needle, and you will include the two rounds mentioned where the eyes
were to be placed. You can pass the
thread four times. Then you can put the needle back in and go make the second hide. You can then join the two
threads to hide them. And you can add the
white reflection to the outer sides of the eyes. Make a double knot and
tuck the threads in. Your little creation is now
very safe for children.
19. Final Words: I hope you enjoyed my class. And you know what? You
are no longer a beginner. You can venture into
this wonderful world of little crocheted creatures. The possibility of creation
in crochet is endless. If you'd like to discover other techniques
from this fiber art, I offer several online courses as well as modern
patterns that you will find on my website at
crushle.com or On Skillshare. See you soon.
 Emilie Bolduc, Crochetmilie - Modern Crochet