Transcripts
1. Welcome In: A Calm and Cozy Watercolor Start: Welcome to class. I'm
so glad you're here. Today we're going
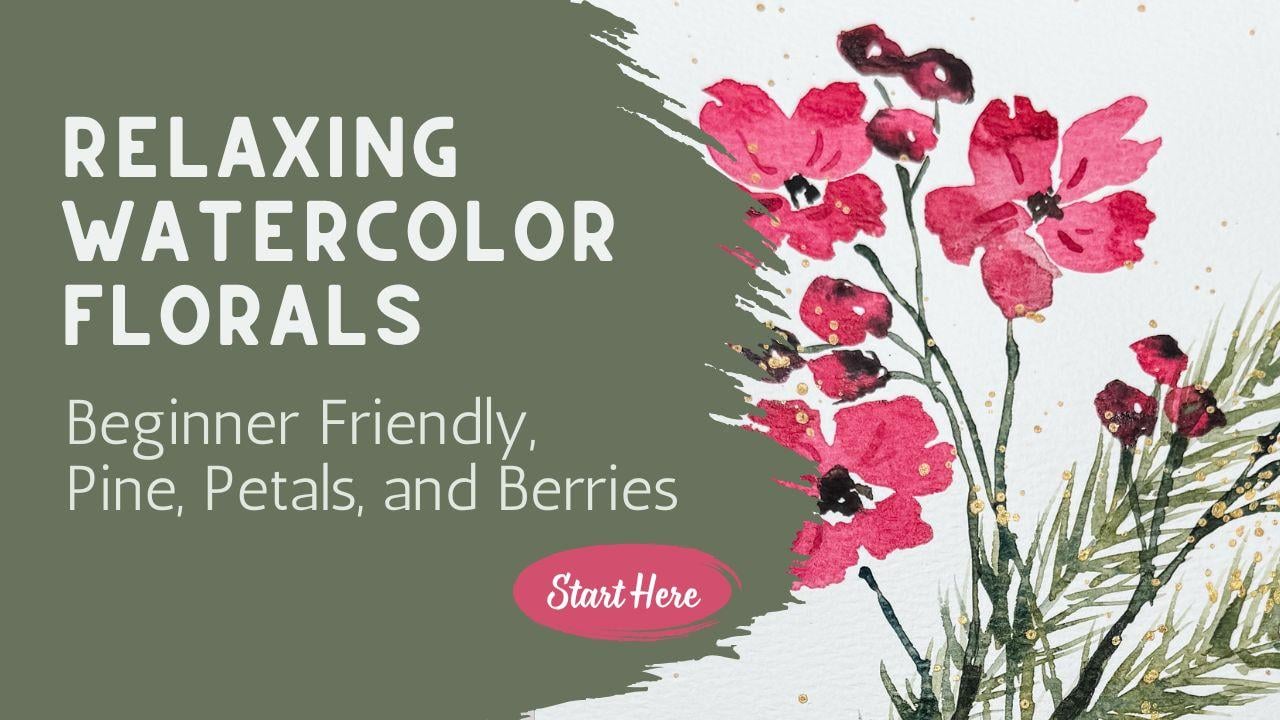
to paint a simple, loose floral and pine
arrangement that's perfect for beginners or anyone who just wants a calm, relaxing project. This piece comes
together quickly, and my hope is that it gives
you a little moment of peace while also helping you build confidence
with your brush. Before we begin the
final painting, there's a short practice lesson
where we can warm up with the same strokes and textures that we'll be
using in the class project. Take your time with it
and let it ease you in. This class is all
about letting go, having fun and learning
to trust your instincts. Your version doesn't need
to look like mine at all. You can use whatever
colors you have, arrange the elements
differently, or follow your own
style completely. Think of this as an inspiration, not instruction that you
have to follow perfectly. Remember to upload
your project to the gallery so we can
celebrate your work together.
2. Warm-Up Strokes: Loosen Your Hand and Let Go: And winter season right
around the corner. I want to show you how to make some really easy pine sprigs. You can take this
and put it into any of your applications
for watercolor. This is just such a
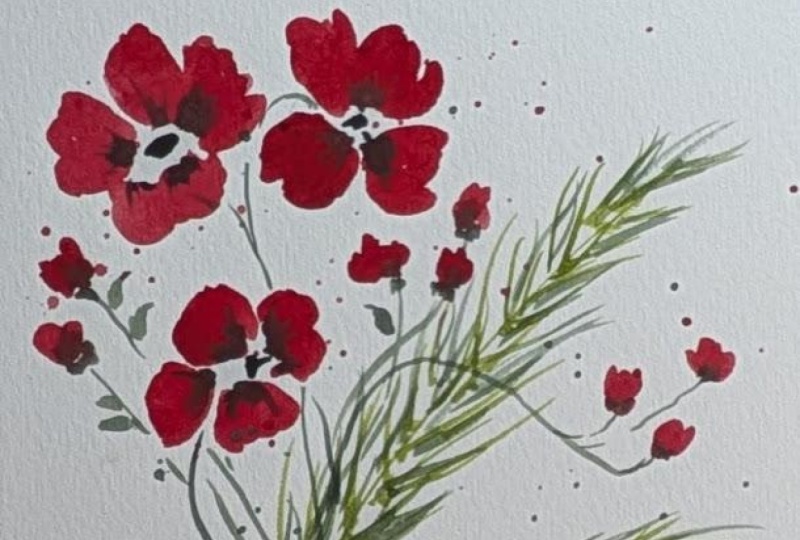
great easy technique for making some pine. So in our final project, you're going to be
making something like this with these pine bowels and so we're going to
look at that and take a really good look at how
to make those very simply. So using a script
brush or rigor brush, something like this, and
if you don't have this, a small paint brush
will also work. Around one would also work. Just make a nice line. I like to lay my hand on the
paper itself as a guide, and then I just allow my whole hand to kind
of when I make a line. It helps me from making that
a little bit straighter. Then really just simply, it's just making little
tiny pine branches pine needles that come off. Sometimes they're connected,
sometimes they're not. It doesn't really matter
because you're going to be going over this multiple times. You could use multiple
different colors of green. If you wanted to add in a little blue green
or yellow green, you could add multiple
different colors. For this application,
we're just going to use you do it
however you want. So now, as you notice, after I went through
it once and I put some pine branch needles
off on both sides, I'm going to come back
over and instead of having them all just come
out on an angle, some of them are
going to come up at a stronger angle like that. Some might come out. Some
might go straight up. It really makes it look
more full if you can create different angles of those little pine
needles coming out. Sometimes they're
darker needles, sometimes they're
little fainter. I sometimes even make
them go backwards. So however you want to do it. But I really think this makes such an easy way to make
a little pine branch. So there's an example of
a very easy pine brand. The other thing you're
going to need to do is be able to make a leaf. And for this leaf, we're going
to be using a round brush. This is around eight, but you could use whatever
size brush you have and start with little a little line,
like a little stem. I then lay my brush the belly of my brush all the way down on the
piece of paper, and then I wiggle it just to
create some little edges, and then I pick it
up gently like that. That's one half of the leaf. Let's try it again. We're
going to make the other half. Now I'm going to lay
it down and wiggle it and put a little tip there. Back in and more
paint if I want to. I could add a second one. This is the stem, I could
add a second leaf right here and have a as
one half of the leaf. The other half of the leaf. There's two leaves Leaf. We're going to wait for
those to dry before we go back in and add
any extra details. Then you can do
berries and flowers. For that, I'm just
going to use this red, this pink red, again,
using my size eight. For making those berries, I just make a very
loose shape circle. And I try to leave an
area that is white. So I can sometimes just
go around in a circle. The clearly, it's not a perfect circle
which I'm happy about. I don't want it to
be a perfect circle. And then I leave a little white, which is considered
my little highlight. I often will make them in
threes so that I'll make three different sizes or three different in a grouping,
leaving a little white. So I'm going to let that
dry for just a second and I'm going to move on
to other classes, I've showed you a
very simple one, two, one, two, and you can absolutely do that if that's what you
would like to do. For this class, we are going to make our petals
a little bit different, a little bit more like
we did this leaf, where it's just a ssh and a ssh. I'm not trying to make
it perfectly oval. I'm just going to make
another one there. Very jagged up at the top. Sometimes they are
going to be touching. Sometimes I might even
just make it kind of like an oval shape because that is showing that maybe that piece
is a little bit behind, so the flower is tipped and facing this direction
a little bit more. I like that kind of
a flower as well. So go ahead and practice
these different kinds of petals and leaves and pine. And then after this dries, actually, these are just about
right at the right spot. I have a brown. It's not so it's over here. I'll show you. It's in
my great big palette. But I just need a little bit, so I didn't put it
out. This is wet. This is just a brown.
Almost a black. It's like a sepia. So for
my berries still wet. Do you see how it is still wet? Like, the water is still shiny. It's almost pooling because
I have so much water. I'm going to come in with
just a little bit of this brown and kind
of plop it in there. And it's going to
mix with my red. And make it into a
very dark red berry and almost shows some
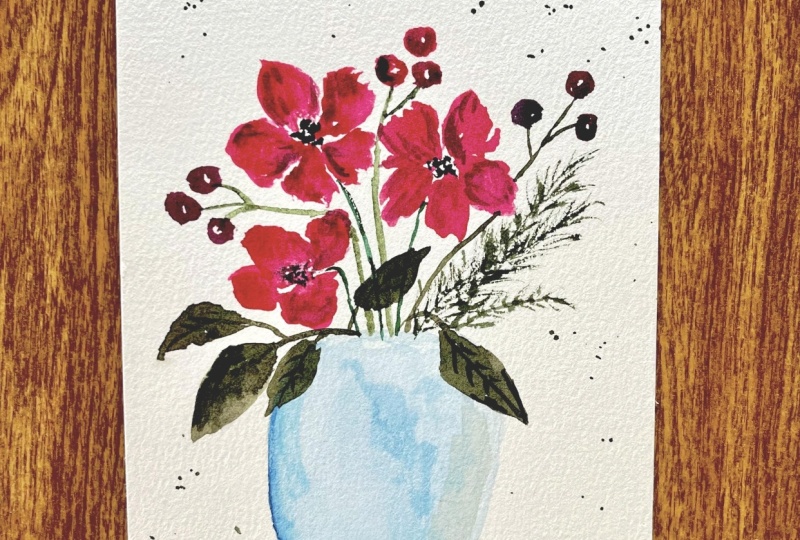
age to the berries. I finished project when
we get over to this, you can see berries
have a lot of depth that has the
highlight of the white. It's a brown and it has the red. So because they're really, really wet, they're
just going to blend. Then here for the center, I'm going to use that same
brown and I'm just going to put a little
center area here. Totally okay if it
blends into my red, my pink color that's
for my petals. So I'm going to let these dry or maybe I'll use my hair dryer
to I have a heat tool here. I'm going to dry these off, and then we're going to
add some details. The dry now. You can see they're
no longer shiny, so they're nice and dry. And over in here on
our finished project, you can see that I added just a little bit of
extra detail in here. We're going to go
ahead and add that in on these just so you
see what we're doing. Using the exact same colors, I'm not changing up our colors, and again, using this
really tiny script brush. I'm just going to
come in here add in just little tiny details
where I want to add them. You don't have to, but
if you wanted to add in just a little bit more depth of color or details,
you can add that in. As a second layer. And once that dries, that will look pretty cool. I'm going to do the same
thing with my green, maybe add in that little
vein that you see in a leaf. You know, just doesn't have to be a lot, little small details. Little small details
really go a long way, especially when it's
the exact same color as a second layer. So we're going to let
that go ahead and dry. And then up here on our branch, if you come in and
you put in another, you don't have to
do a lot, but just a few extra darker ones, that is also going to be
a really nice addition. Okay, so this is almost dry. I just remembered
that I didn't put on my little branches for these. So using the green or you
could have used the brown, I'm just going to
make them all group together so it coming
out like this. And then this one comes
down and kind of, like, merges in with this one. And this one I'm
going to have come down and come behind
and merge in. So that is how I would
group all those together. And with this, I would decide where I needed a
stem to come off of. Um, so let's move on. We're going to look at splatter. You can see on our
finished project, I got some some
blatter on there of a sparkle just because it's Christmas and I like sparkle
and gold at Christmas time. So this is just a gold
watercolor paint, and the larger your brush
and the more water, it's going to make
larger splatter marks. So I have that all ready
to go. My brush is full. And then to add splatter, I'm going to hit my
brush against my finger. I could also use it against
another paint brush, and then I can just add
some splatter to it. And every time I hit, I'm
adding more splatter. So that is the
different techniques we're going to use to
make our final project. Go ahead and practice these first and make
sure that you have the technique down before you go and get your paper out
and start the project. Can't wait to meet you in the next lesson where we
get our project started.
3. Class Project - Pine, Petals, and Berries: A Soft and Joyful Watercolor Mix: Hi, and welcome back. I'm so glad you're
here with me today. I hope you enjoyed
the practice lesson and maybe learn
something new or at least used it as a warm up to loosen your hand and
settle your mind. Today's project is meant
to feel easy, light, and relaxing, take
a deep breath. Let yourself enjoy
these next few minutes. There's no pressure here. Truly, this class is
all about confidence, having fun, and letting go. We're going to paint
this loose holiday inspired floral with
a few pine branches, some soft leaves, simple blooms, and a handful of
playful berries. You can follow me exactly, or you can take this as an inspiration and create something completely
on your own. Either option is perfect. Your project never needs
to look just like mine. In fact, I hope it doesn't
because that means you trusted your instincts and followed what felt
natural to you. You practiced all
of these techniques in my earlier lesson, we're going to just paint this together and have a lot of fun. Let's begin with
these pine branches. I love starting with
these because it helps establish the movement
of the entire piece. Lightly load your
brush with a green of your choice and start pulling
long soft lines outward. Let your hands stay relaxed. You can let them curve slightly or even cross one another. None of this needs
to be precise. We're creating a foundation,
not a blueprint. Getting those little needles
done is so much fun. This is where your
brush can dance a bit. Use a very tiny tip and flick outward in
different directions. Some can be long, some short, some group together,
others spread out. Let yourself really
enjoy this part. Pie needles are
unpredictable in real life, so let them be
unpredictable here, too. If you find your hand wanting to move a certain way, let it. Painting become so much more joyful when we stop
fighting our instincts. Might notice as you
work your greens shift in tone and depth,
and that's a good thing. The variation brings
life to your page. And if you feel like adding a touch of brown
here or there to deepen the shadows or to warm
the branch, go right ahead. This whole project is all about discovering and exploring
to see what you like. Switching over, we're going
to start working on flowers. I love these simple loose blooms because they don't require
any drawing or planning. Start by placing these
soft rounded shapes wherever you feel they belong. Maybe a pair of two together, maybe let one drift a
little further away, Let the petals overlap a
little if they want to. Let them open in
different sizes, follow the water,
allow the paint to bloom and try not
to overthink it. This is your time to
enjoy the process. How many flower heads do you want to add
to your painting? What direction do you
have your flowers facing? Maybe they're facing all up. Maybe one is facing towards you. The beauty is you get
to decide, have fun. Now let's connect our blooms
with a few delicate stems. Use the gentle hand and let that brush guide gently
across the paper. Stems never need to be
straight or identical. A little wobble makes them more interesting and maybe a
little bit more natural. If a stem goes somewhere
unexpected, that's okay. A mistake is just an
opportunity to learn or even an opportunity
to add something new. Don't be afraid of it. Watercolor teaches
us flexibility, and that's part of the joy
of this beautiful medium. Sometimes when we're painting, there's a moment when
we pause and think, I'm not sure about that, and I want you to know that
that is such a normal, natural part of the process. Every artist, truly every
single one has those moments. Instead of tightening up, try letting that feeling be the invitation
to stay curious. Watercolor gives us this
beautiful opportunity to respond instead of react. If something feels just
a little off to you, take a moment, breathe and ask yourself what
might help balance it? Maybe it's a deeper
stroke of color, maybe it's softening up an edge or maybe it's simply
leaving it alone. I've learned over and over that these so
called mistakes in watercolor often lead me somewhere better than what
I originally planned. Those so called mistakes, they teach us how color moves, how water behaves, and how our own instincts
show up on the page. Try to embrace those surprises. Let them guide you, let
them make you braver. Stay gentle with yourself. Notice what you're enjoying and trust the direction your
peace is leading you. Let's add a couple of those soft green leaves
near the bottom. Let them tilt in
different angles so the bouquet feels organic. Start with a light
wash and then add in a little darker if that is
the way you would like to go. Watch it spread and settle into those gentle
shadows. Don't rush. Just let the paint move
the way it wants to. When you start to place
your flower centers, don't worry about
getting them perfect. You can let them
bleed slightly or stay crisp if the
paper is already dry. Either way is beautiful. If you've taken any
of my past classes, you'll know that I love those little surprises that happen when the
pigment meets water. Those surprises are what give loose watercolor,
it's charm. At this point, you
might feel like your piece is calling
for something extra. That's what happened to me here. When I stepped back
and took a look at the colors and shapes
I had on my page, I felt like it needed a few berries to
balance everything out. So if that feels right to
you, go ahead and add some. We practice making
them deep red. You could also just
make them softer colors or a completely
different color if you want. Cluster a few of them together and leave one
or two on their own, just to draw attention. Add a tiny highlight if
the paper is dry and let them softly blend so that you
can have a more muted look. And remember, your berries don't need
to be where mine are. Follow what's natural
for your layout. Let your eyes guide you. Part of becoming confident in watercolor is learning to
trust your own instincts. Once everything has
had a moment to dry, this is when I like to step back and consider a few
final touches. Maybe that means
deepening the shadows, sharpening an edge
of the flower, adding a tiny line for a leaf or softening a
spot that feels too dark. Keep those designs
gentle and intentional. A little can go a long way. You can let your
piece dry naturally, or you can use a heat gun
or even a hair dryer, if you would like to
speed up the process. Just be careful
that you don't blow the paint all over your
brand new project. Keep the heat gun away
from your project, high enough that it
doesn't move the paint. Come back to your
project and add in any extra details
like the stems for your berries or adding
a little bit extra to those leaves or the
petals on your flowers. Work slowly, thoughtfully and most important, just have fun. If you've messed up, try again, grab a new sheet of paper and see what happens
the second time. What did you learn from
your first go around? What can you improve upon? I often paint several identical
pieces until I figure out which one I like best and what part of the project
worked out best for me. I do like to come back in
after I've stepped away from a dry project and see what extra little
details I can add. As we practiced in
the other lesson, we added some very
small details using our little liner brush and the exact same color that we
were painting in originally. Just layering on that
second little bit can add just the amount of details that you needed to bring
your piece to life. Look at adding them
to the berries, the petals of your flower, and even those beautiful
leaves that you painted. It's almost time for my favorite
part, the cold splatter. This is totally optional, and you should add as much
or little as you like. I love how it instantly
creates energy and light. But if you prefer
a cleaner look, you can skip it entirely. Let your personal
taste lead the way. That's what makes your
project beautifully yours. When you're finished, take a moment to look at
what you've created. Even if it's different from what you expected, that's okay. In fact, that's wonderful. Every painting is a conversation between you and your materials, and no two conversations
will ever look the same. Be proud of the work
that you've done here. When you're ready, I
would love for you to upload a photo of your painting
to the Project Gallery. It means so much to see
what you've created, and other students
really enjoy seeing how different everyone's
interpretations can be. Don't be shy. Be proud
of what you've made. Your work can inspire
someone else. As you wrap up, I also
want to gently ask, if you enjoyed this class, would you take a moment
to leave a review? It truly helps other students decide if this class
is right for them, and I'm so grateful to
everyone who leaves a review. And before we go, I want to thank you again for
painting with me today. I hope this project gave you a little moment of calm
and a moment of joy.
4. You Did It: Final Thoughts and Your Beautiful Project - Follow Me on Skillshare: Thank you so much for
painting with me today. I hope this little project
brought you a sense of calm and gave you
a chance to play, explore and trust your
instincts a bit more. Loose watercolor really
is about finding joy in the movement of paint and letting your own
style shine through. I hope you felt that here today. When you're ready, I would truly love to see
what you created. Please upload a photo
of your project to the gallery so I can celebrate your
work and cheer you on. Be proud of what you made. You are special and
you did great work. If you enjoyed this class, it would mean so much to me if you could leave
a quick review. Your feedback helps
other students decide if this class is
a good fit for them, and I am grateful for
every single one. Thank you for spending
this time with me, and I can't wait to paint
with you in the next class.
 Brenda Jones, Watercolor Artist & Teacher