Transcripts
1. Let's Start a Sketchbook!: I don't know about
you, but I have a hard time working
in a sketchbook. A blank page is a
daunting place to start. I need ideas and
a place to start. A prompt, a suggestion, an example, a starting point. I developed this class
as a way to help others, but also as a way to force myself to work in a sketchbook. I've been teaching art
for over 20 years, and I have always
had trouble sitting down and working in
my own sketchbook. Join me in this journey of ten minute sketchbook drawings. Sit down and do one
a week, one a day, or do many in a row,
whatever you have time for. I'll add more lessons to
this class over time, and all will be suitable
for beginners or anyone who needs a starting point
for drawing in a sketchbook.
2. Mark Making: This sketchbook drawing
is all about mark making. It's about warming up your hands and creating as many marks
as you can think of. There's no right way to do this. Just practice making any
kind of marks you want, using any colors that you want. Maybe you can make zigzag lines, wavy lines, circles,
squares, dashes and dots. Just feel free to let
yourself make mistakes. This is all about warming up, not making a masterpiece. Don't do a lot of thinking. Move quickly and
fill up your page. Think about turning
your markmking tool in different directions to create different widths and lines. Let this project free you up for the beginning of
our sketchbook journey. At this time, you can feel
free to mute the audio on this video if you would like
to listen to your own music.
3. Mark Making Using Non Dominant Hand: This sketchbook
drawing is going to continue with our
markmking adventure. But this time we are going to
use our non dominant hand. That means if you are righty, you need to use your left hand, and if you are a lefty, you need to use your right hand. Drawing with your non
dominant hand can be a fun way to challenge your
brain and make it stronger. When you use your opposite hand, you're helping both sides of
your brain work together, which can make you
more creative. It also helps you improve your hand eye coordination so your drawings can get
even better over time. Plus, it teaches
you to be patient and not give up when
things get tricky. Drawing with your non dominant
hand can lead to cool, surprising results that you might never get with
your usual hand, making your artwork
even more unique. Let's continue with
our mark making. Keep in mind that your
hand may get tired. So take a short break
if you need to. This won't be a masterpiece, but it is a good exercise to work our brain and
free ourselves, to make mistakes, and
to be fine with that. If you would like to
mute the audio on this video and listen
to your own music, now would be a great
time for that.
4. Controlled Scribble: In this sketchbook video, we will be creating a
controlled scribble. A controlled scribble
is scribbling, but in a more deliberate way. You pay attention
to the placement of the lines and go at a
slower controlled pace. You think about looping
and overlapping in a deliberate way to create a whole page
composition or layout. The challenge on this
sketchbook drawing is, can you complete
it by only using three colors and never having the same
color share a side? The same colors can touch corner to corner but not side to side. In order to be successful
at this challenge, I recommend starting in one corner and working
your way across the page. If you skip around, you
may run into a situation where the same colors share
a side of the shapes. Continue coloring your
controlled scribble drawing using only three colors, and remember to think
about where you are placing each color
on the drawing. If you would like to
mute the music on this video and turn
on your own music, now it would be a
good time to do so.
5. Neurographic Art Part One: Neurographic art is a meditative and intuitive
artistic process that links the unconscious
and conscious mind using braid cells
called neurons. When the artwork is finished, neurographic art ends up
resembling neurons and cells. First, we start with a
controlled scribble, making sure to overlap
and fill the page. Now, wherever there
are overlapping lines, transform the intersections into smooth U shapes and widen the lines that
you already drew. This type of drawing can enhance cognitive function and
emotional well being. Neuro art can help
reduce anxiety, improve mood, and enhance
overall mental health. Please join me in this three
part lesson as we start with this simple calming drawing and take it to a
finished colored piece. If you would like to
mute the music on this video and turn
on your own music, now would be a good
time to do that.
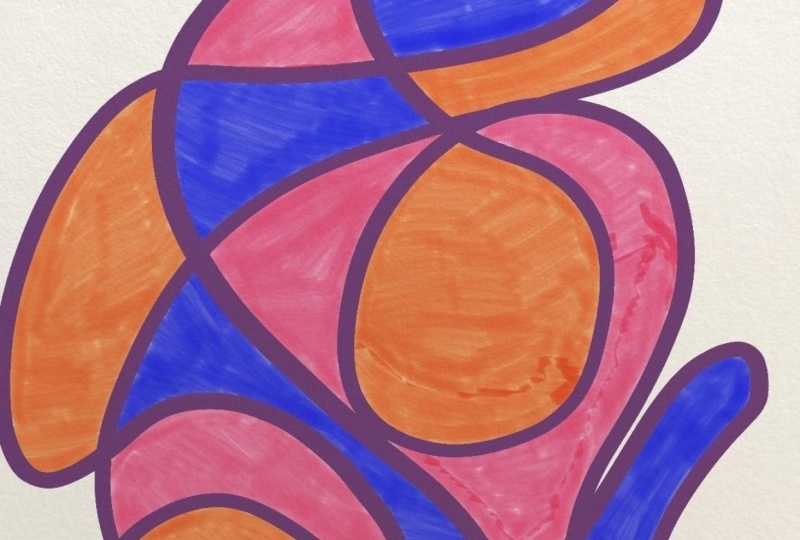
6. Neurographic Art Part Two: In the last lesson, we started creating our neurographic
art by drawing a controlled scribble
and softening the connections by creating shapes and widening our lines. Now it is time to
color. Think about using light colors because
in the next lesson, we will be adding drawings
on top with dark colors. Think about a color
combination that you enjoy, limiting your color palette
to three or four colors. The color palette I chose is the three primary
colors, red, yellow, and blue, and adding the complimentary color to
yellow, which is purple. You can use the color
wheel to help choose colors or you can choose ones
that are appealing to you. Don't worry about where
you place each color. Just place the color where
it looks good to you. If you would like to
mute the music on this video and turn
on your own music, now would be a good
time to do so.
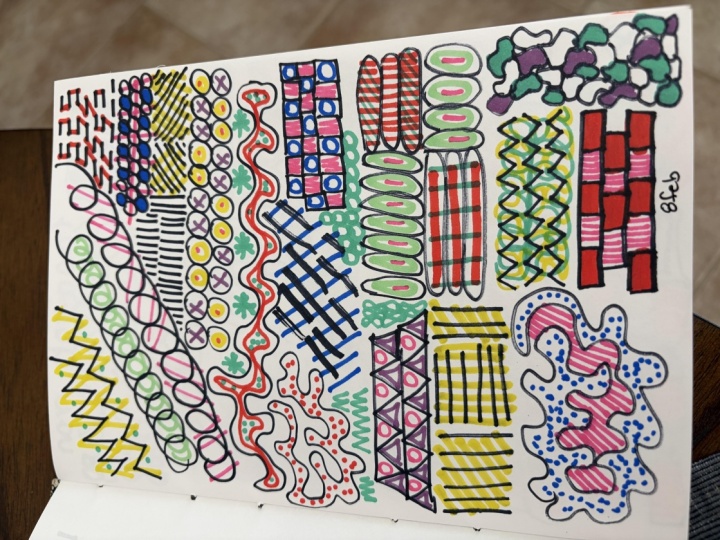
7. Neurographic Art Part Three: In this sketchbook lesson, we will be continuing our
neurographic art drawing by adding some fun patterns or doodles on top of our coloring. This will definitely make
each of our drawings unique and is a good way to try out
new patterns or doodles. Hopefully, in the last lesson, use light colors for coloring, so you can now
layer patterns and doodles on top in a
darker color or colors. Think about easy patterns
such as circles, dots lines, crossing lines, zigzag lines, curved
lines or make your own little flower doodles or other doodles
you like to draw. This is all about experimenting and not worrying
about messing up. Try new things and also try patterns that you know
you are successful at. This lesson is about building confidence in your
drawing skills by trying many different
patterns or doodles and having many
spaces to do that in. Follow along with me and copy my patterns or doodles
or create your own. Don't be afraid to
repeat a pattern in a different place if
you run out of ideas. If you would like to
mute the music on this video and turn
on your own music, now would be a good
time to do so.
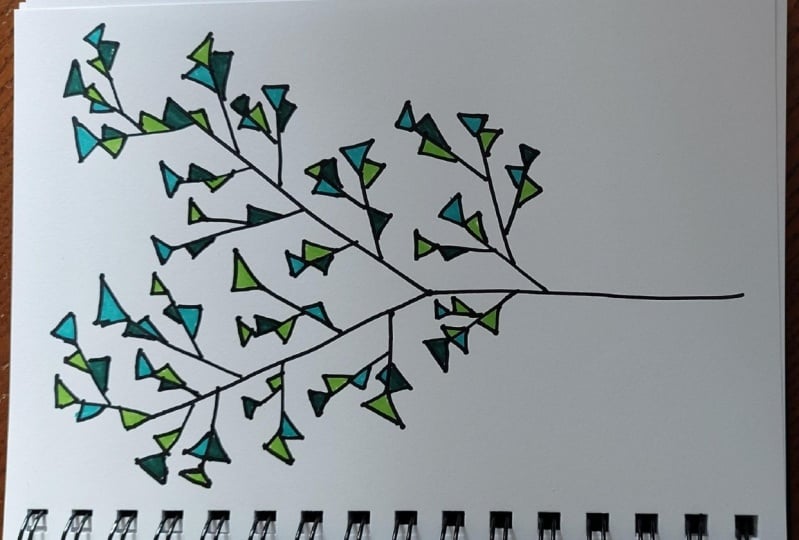
8. Abstract Tree: In this lesson, we will be creating an abstract
tree drawing. By repeating the letter Y, we can create an
interesting looking tree without a lot of drawing skill. We are going to keep drawing the letter Y and
making new branches on our tree until we feel that the tree is full enough
and has enough branches. Now that we have
enough branches, we are going to close up all of our small letter is
to create leaves. We Now to make our tree even fuller, we are going to add in more
straight lines to our tree. Once the straight
lines are done, it is time to turn those
into leaves as well by closing them up and attaching them to the
original branches. After that, we will
color in all of the leaf spaces with
whatever colors we like and have a
beautiful abstract tree added to our sketchbook. If you would like to
mute the music on this video and turn
on your own music, now it would be a
good time to do so.
9. Easy Landscapes: In this sketchbook lesson, we will be creating
four easy landscapes. Each landscape will only
use three lines and then you can experiment with different colors
on your drawings. We begin by dividing our
page into four boxes. No need to measure, just eyeball to get them close to even. In each box, draw a landscape and remember
to only use three lines. I usually use two of my lines
as the ground or water, and my third line I
use for a sun or moon. After drawing these landscapes, you can experiment
with different colors. You can use realistic colors or you can use fantasy colors. This is a great quick way to try out new color combinations. If you would like
to mute the video and listen to your own music, now would be a good
time to do so.
10. Blob Trees : In this sketchbook lesson, we will be creating blob trees. You start with a blob
and turn it into a tree. I love this lesson
because it is super easy and you get to create
interesting whimsical trees. We began by creating blob
shapes and coloring them in. I like to use bright
colors to make these trees more
whimsical and fun. After your blobs are done, you can then get creative
and turn them into trees. I start with the
trunks and then add a fun design to the
tops of the trees. If you would like
to mute the video and listen to your own music, now would be a good
time to do so. A
11. Wavy Line Op Art: In this sketchbook lesson, we will be creating op art, which is short for optical art. Optical art uses patterns to create visual effects
that appear to move, vibrate or distort
for the viewer. The patterns play with
the viewer's perception of space and depth. We begin by drawing a wavy
line across our page, adding dots onto that line, and then creating curved
lines by connecting those dots above and below
the original wavy line. After you have connected all of the dots with curved lines, you now create
taller curved lines by connecting where the
previous curved lines met. Continue until you feel you
have enough on your page, making sure you don't
make them too small, as we will be coloring them in. You can color these in now using any color
pattern you want. This would be a good
time to try out new color combinations and
see how they work together. If you would like
to mute the video and listen to your own music, now would be a good
time to do so.
12. Thanks for Creating With Me!: Thanks for joining
me in this journey of 10 minutes
sketchbook prompts. A blank page is a
daunting place to start. I hope you filled some of yours. Don't forget to upload
all of your drawings. I would love to
see them, and I'm sure others would love
to see them, too. I'll add more lessons to
this class over time, and all will be suitable
for beginners or anyone who needs a starting point
for drawing in a sketchbook. So make sure to check back.
 Vanessa Selthofner, Printmaker, Painter & Art Educator