Transcripts
1. 01 Introduction: So you have this great idea and you want to turn this idea into a finished illustration, but you just have no clue how to go about that. Welcome to this art class, or you have an idea and turn it into an artwork, but it just gets totally different than what you envision to be. And you just don't know the steps, how to get them. Welcome to this art class, to this art class is about taking an idea to a finished illustration. And I'm going to take you through my 4D process. How I do this. First part is on composition. So how do you do that? Getting from an idea to finish illustration, but for that undisclosed, take you through my thought process and an artwork I've been making. And it is autumn here at the moment, I'm going to use an autumn scene, but you can apply this to any scene, anything you want. It's just about the whole thought process, learning how you get from idea to finished illustration. So I took this photographs and there are different places in different times and said, Will it be great to get this into one painting, one illustration, one drawing and said, how do I do that? So I'm gonna take you through the steps where I just discuss how I'm gonna do that, what I'm gonna do with these photographs and how I get from this blank piece of paper to eventually some ideas. And how then eventually I'm going to, how I worked that idea out into a drawing which can be my base, for example, for painting and illustration, whatever I wanted to be. So that's what this first session is about. Going from a blank paper with an idea, perhaps some photographs, turning them into small drones and creating ideas and then finding the artwork you really like, the composition you really like. And working that eventually into a drawing that you can use as a springboard for different artworks. So this first session is about composition, where I'll take you through the steps I go through to get to a good result, a result that I really like. And I'll take you with me on these steps and hopefully create a little bit of a 4D process in your mind too. So I would say join me in this session and I'll see you in the next video.
2. 02 Materials: Welcome to this first lesson where I'm going to introduce you to the materials you need. And for composition, you don't need many materials. You need some paper. And discovery regular copy paper or as I do a sketch book paper, you're going to need, of course, a pencil and HB pencil preferably. And that can be a regular pencil. Laura, I'm you will see me use a clutch pencil like this, but basically that's pretty much the same. You may need an eraser if you make mistakes and you might see me use an eraser like this. That is a pencil eraser, but a regular eraser will do perhaps a sharpener for your pencil. And if you're going to erase stuff than I like to use a brush, either a fan brush like this, or a makeup brush like this to get rid of the rubber. And perhaps you need, or let me put it that way. You want to use a ruler to make nice squares, and that's it. That's all the materials you need. If you have these materials and even if you don't have these brushes, you can always blow the things of, but just don't wipe them with your hands because then you're going to smudge your work. But if you have these materials and say, go to the next lesson, we're going to start composition.
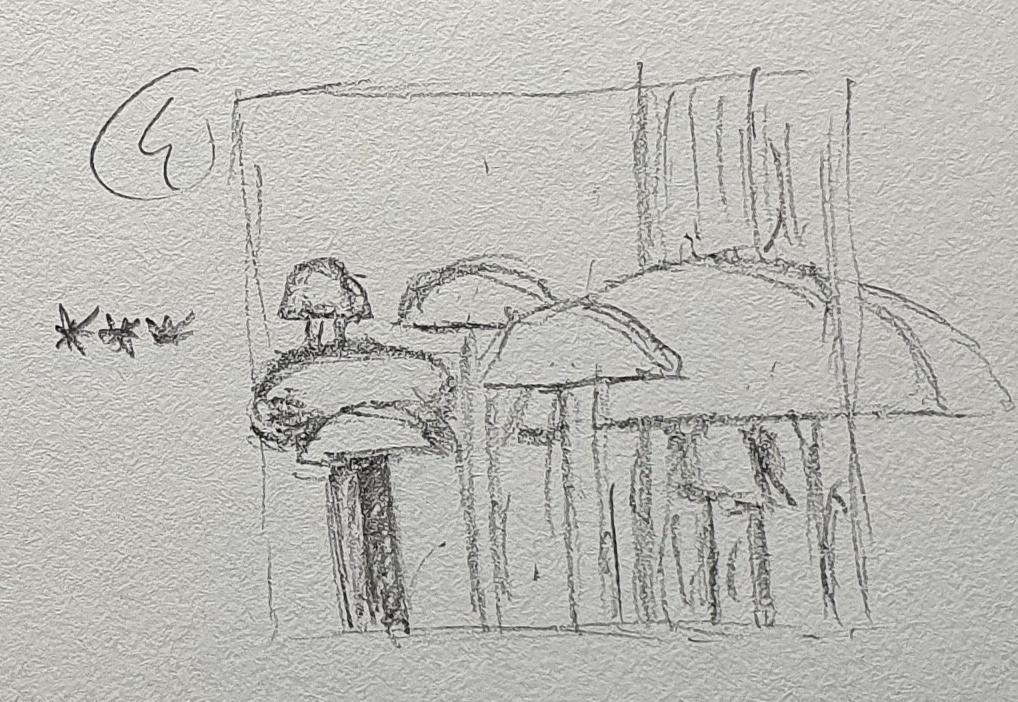
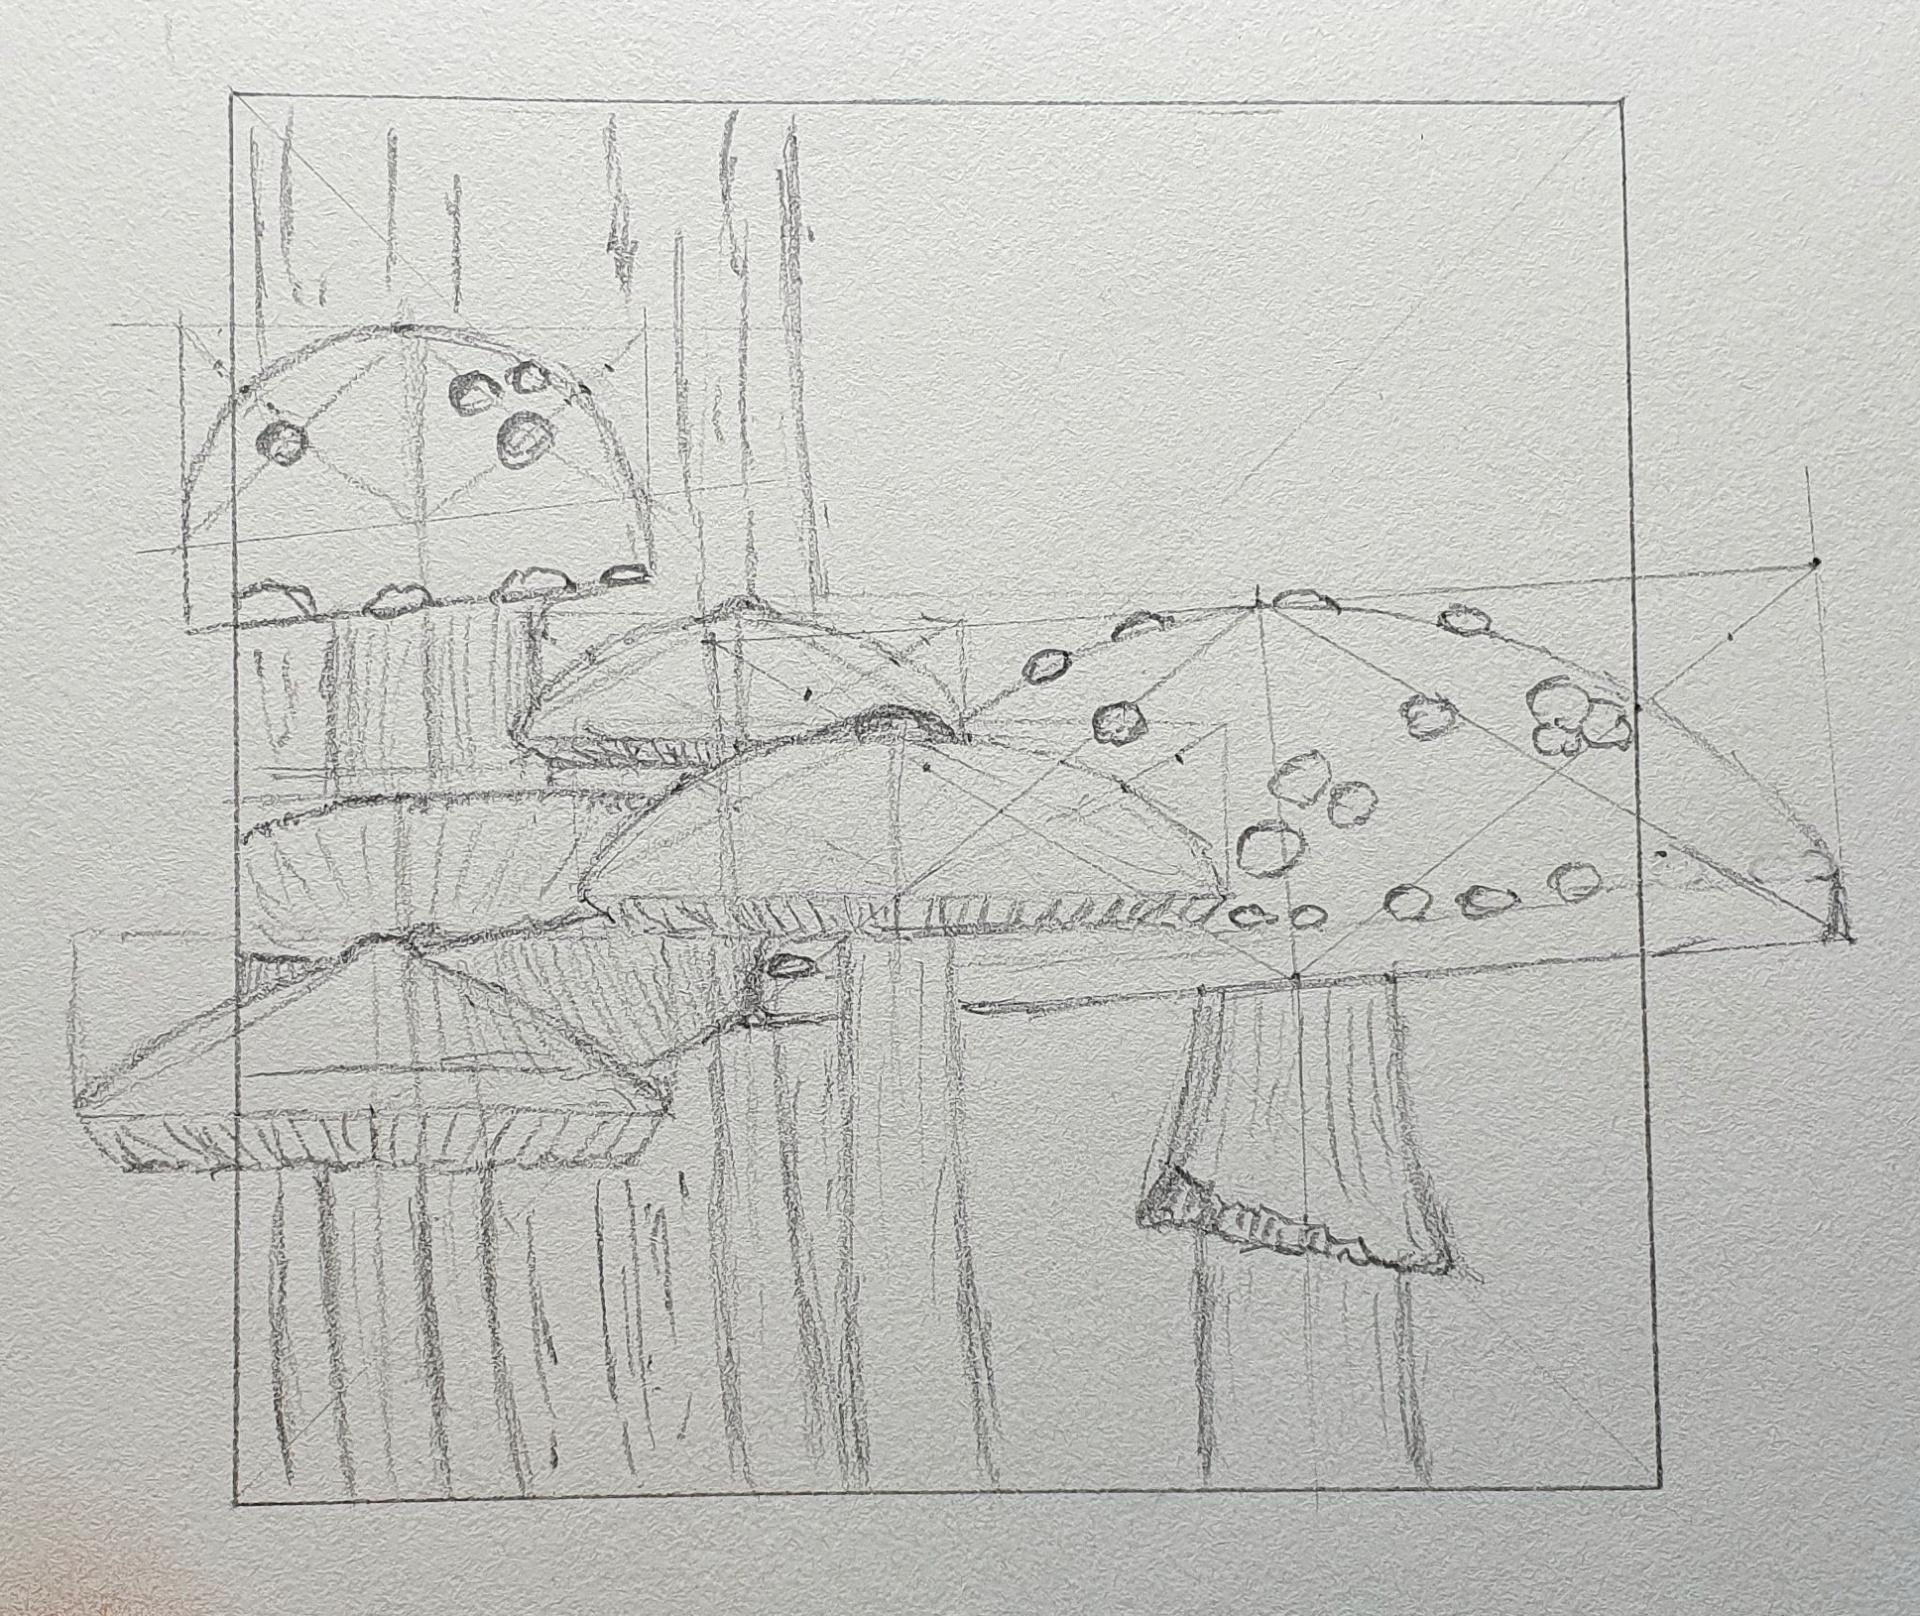
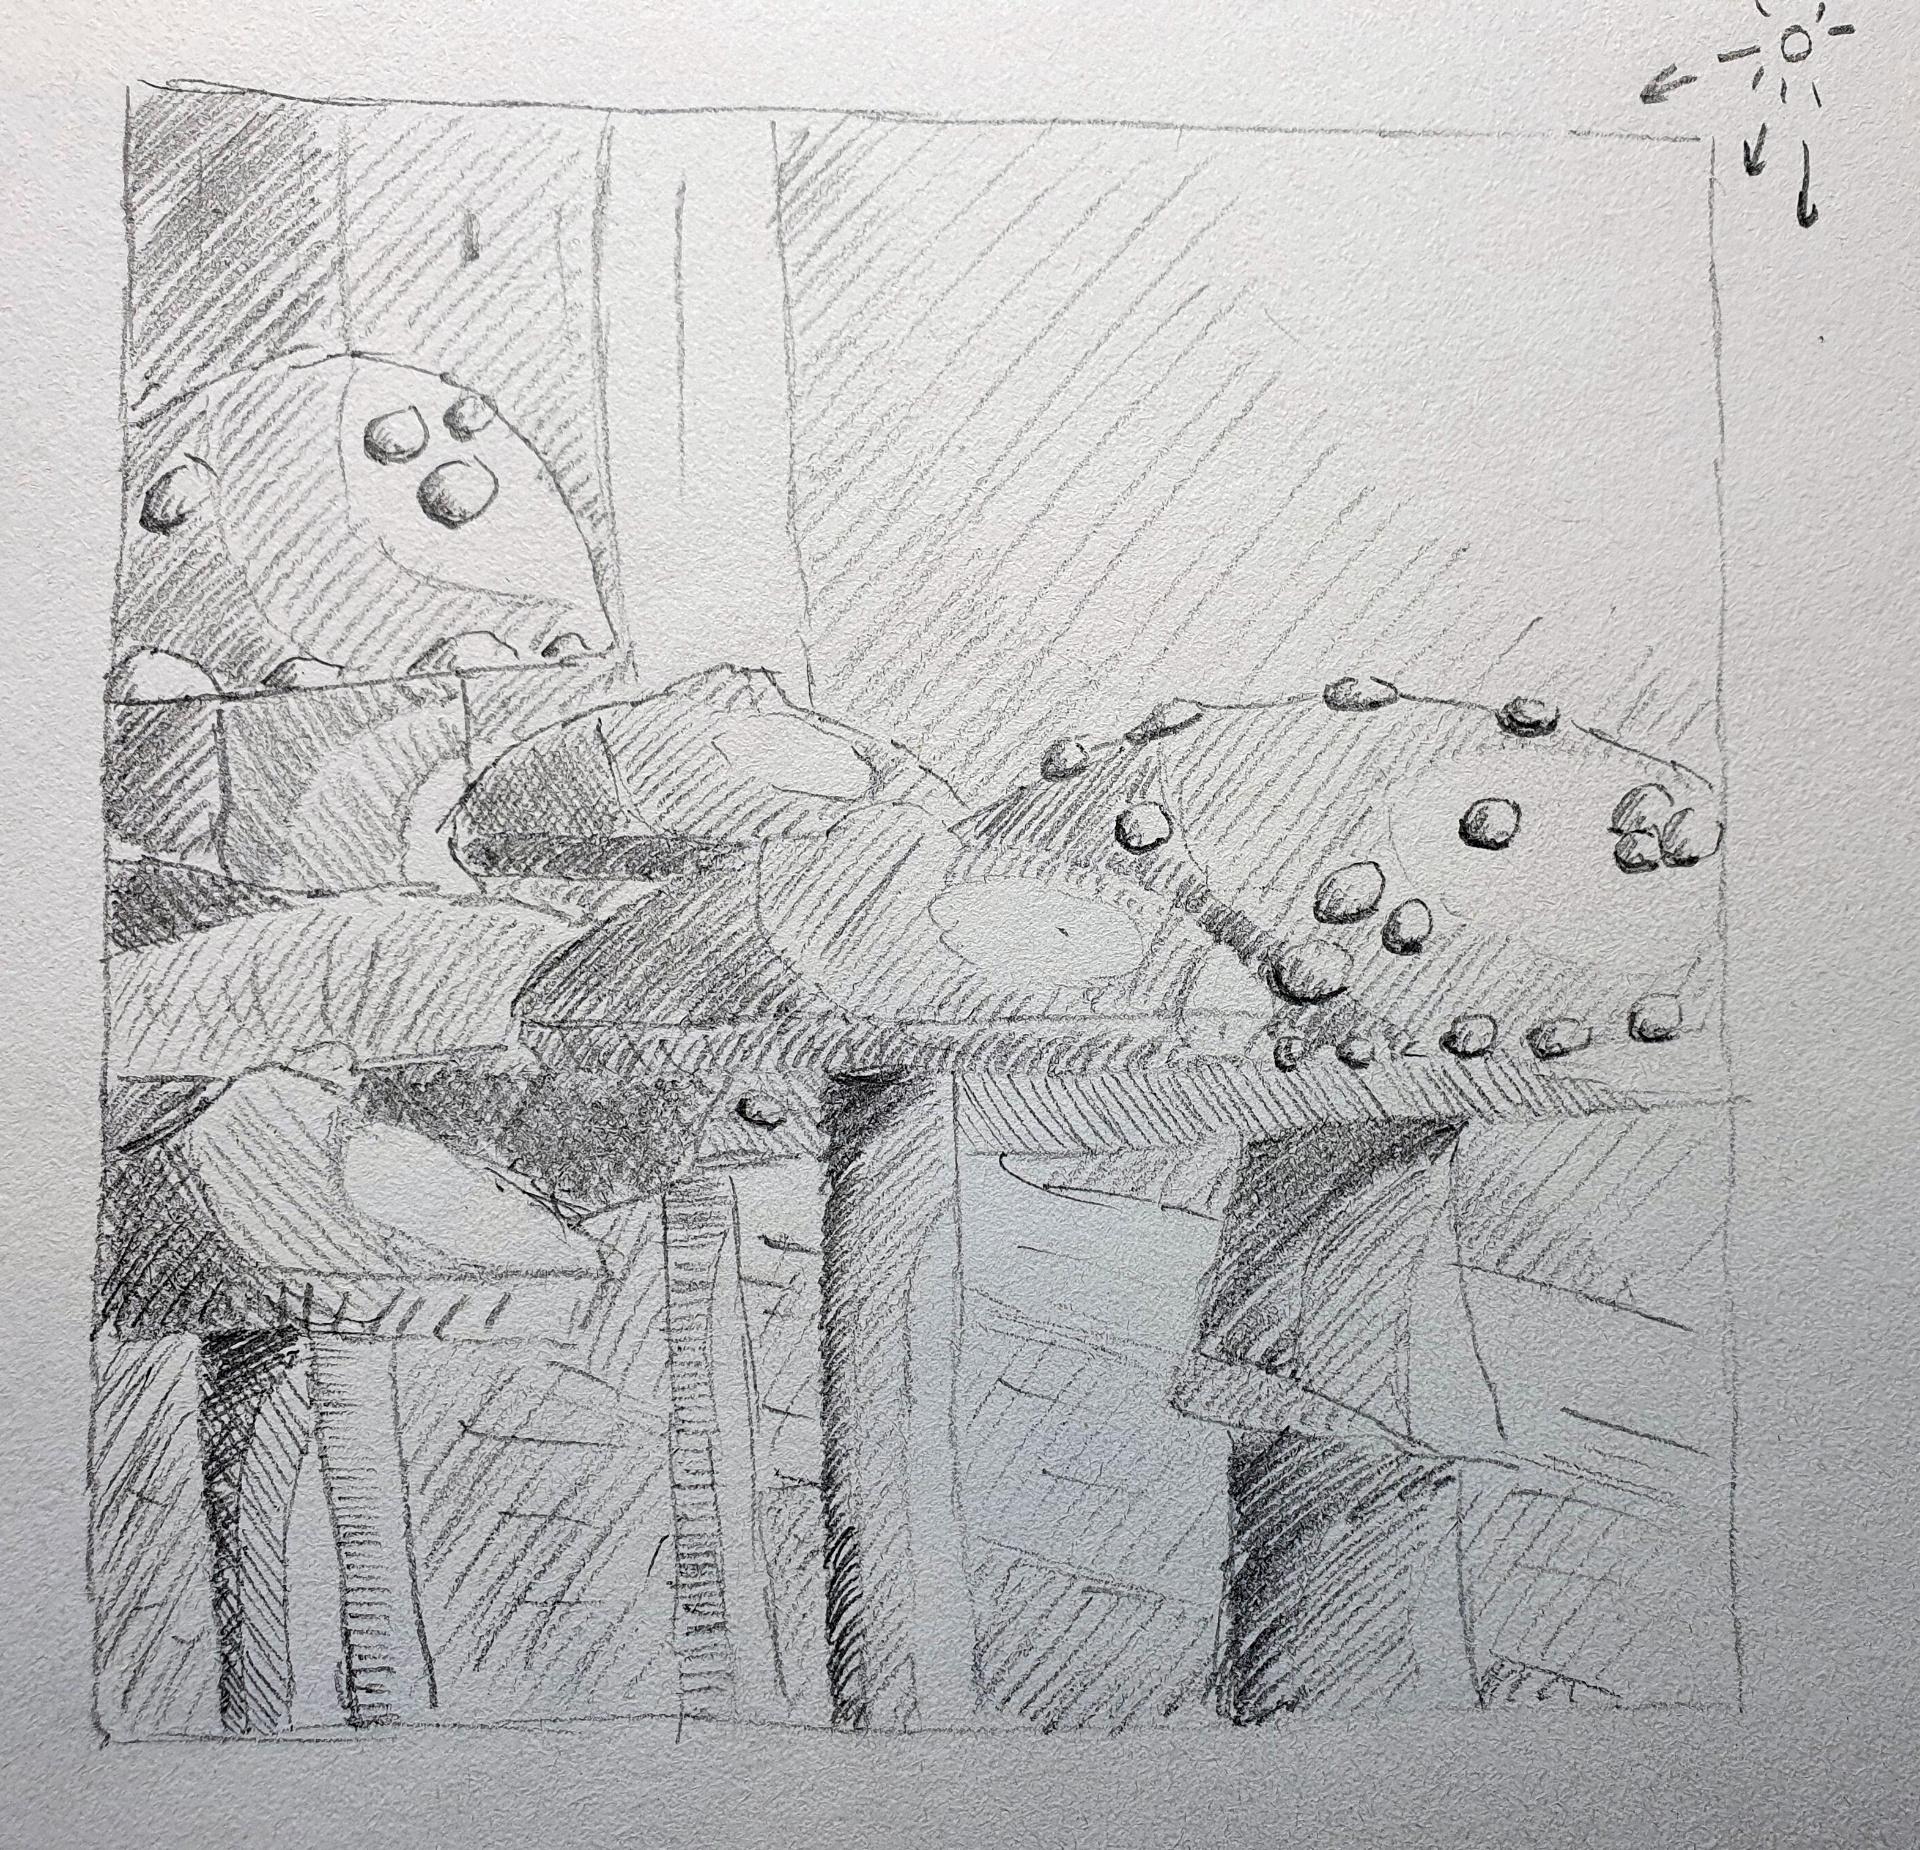
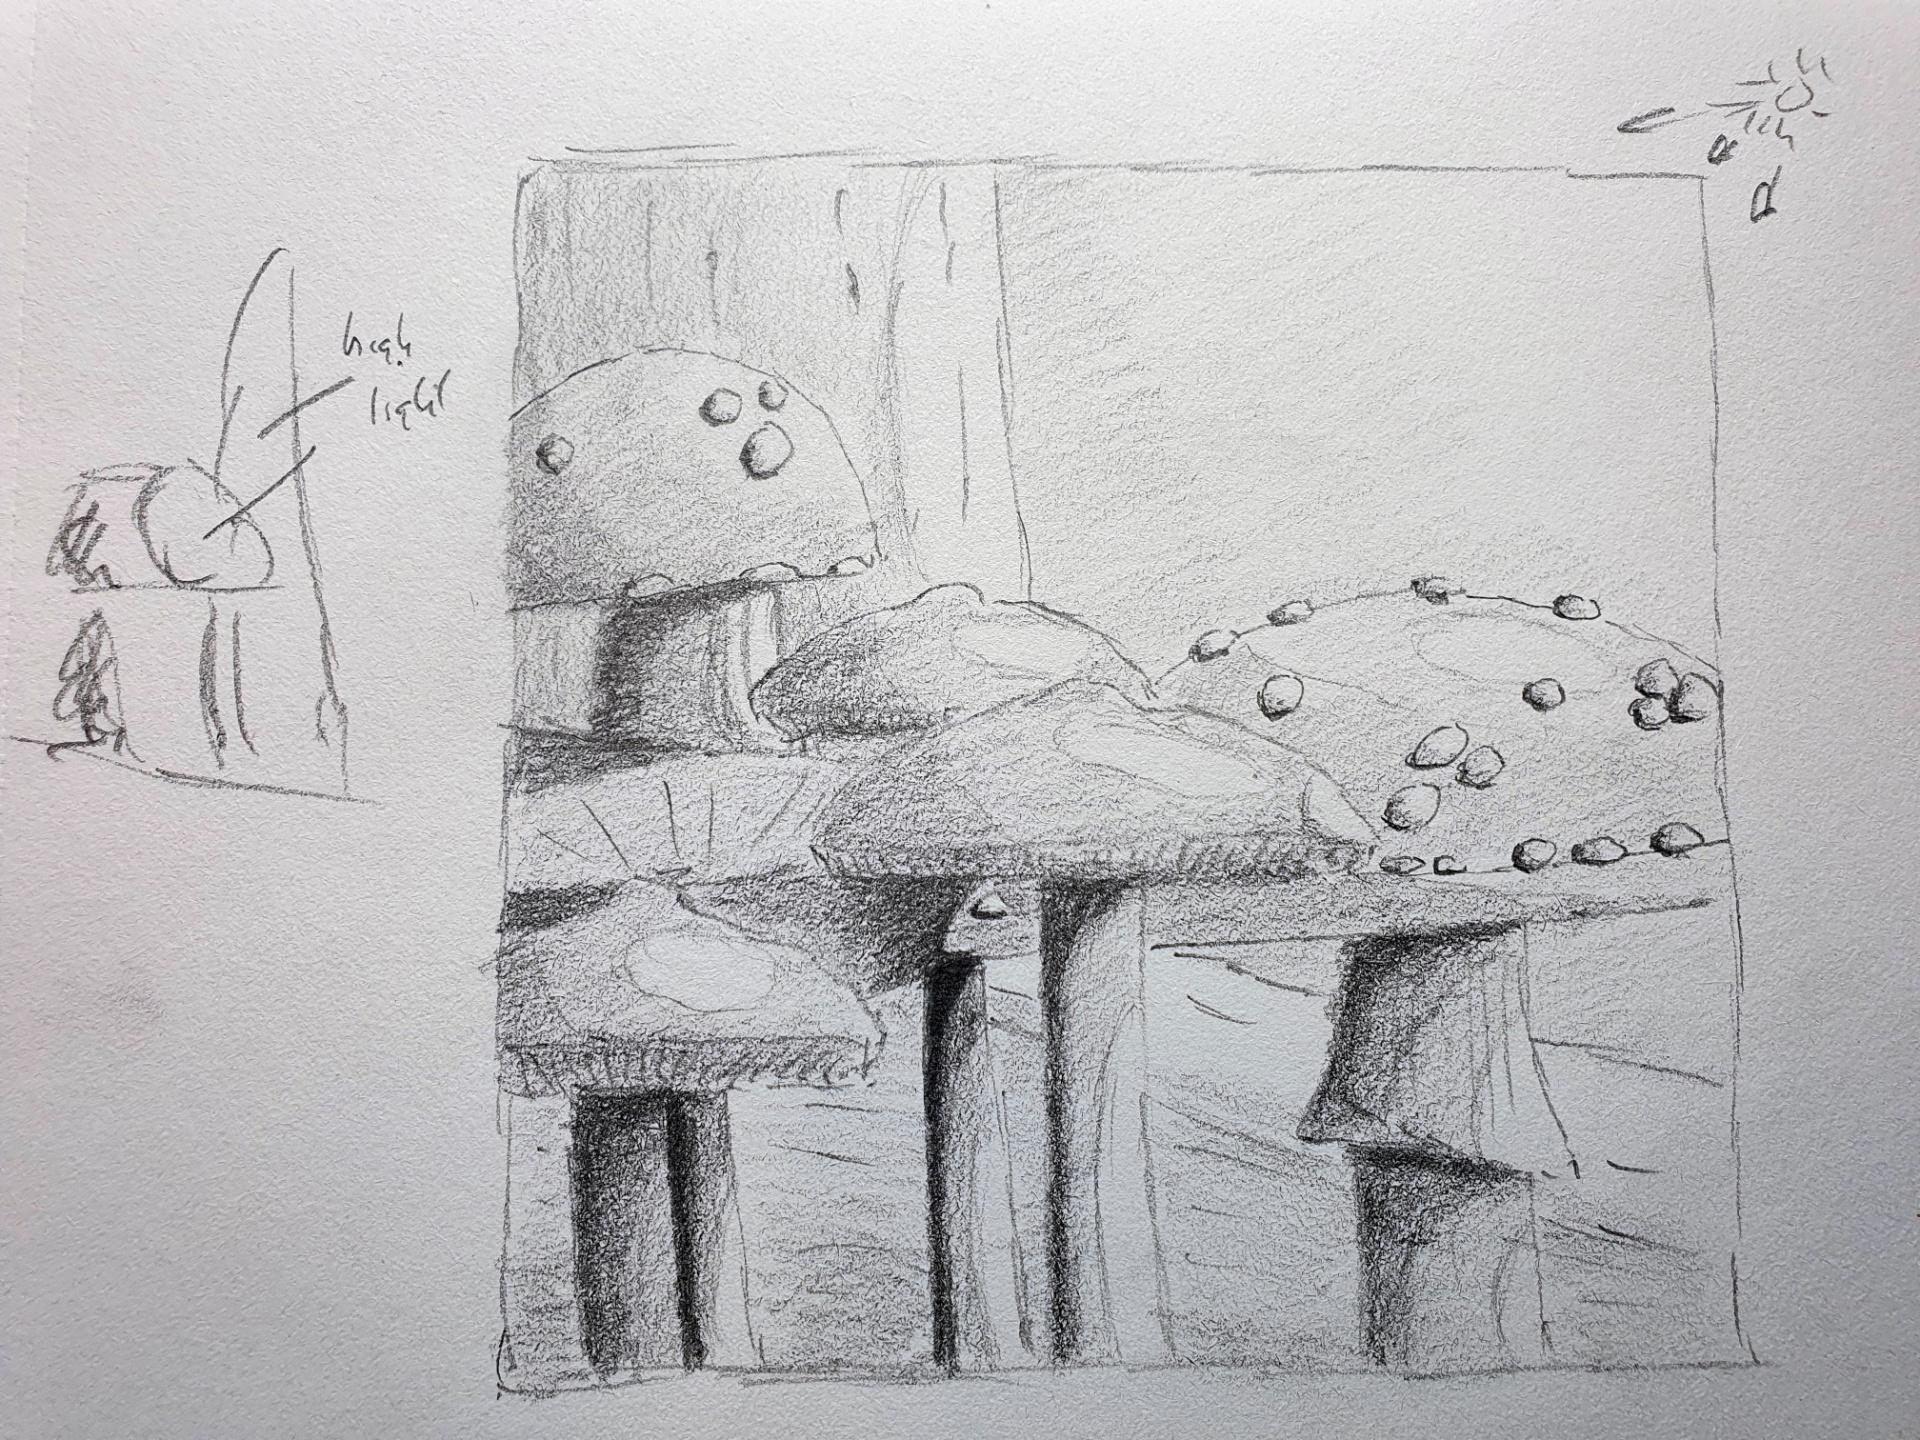
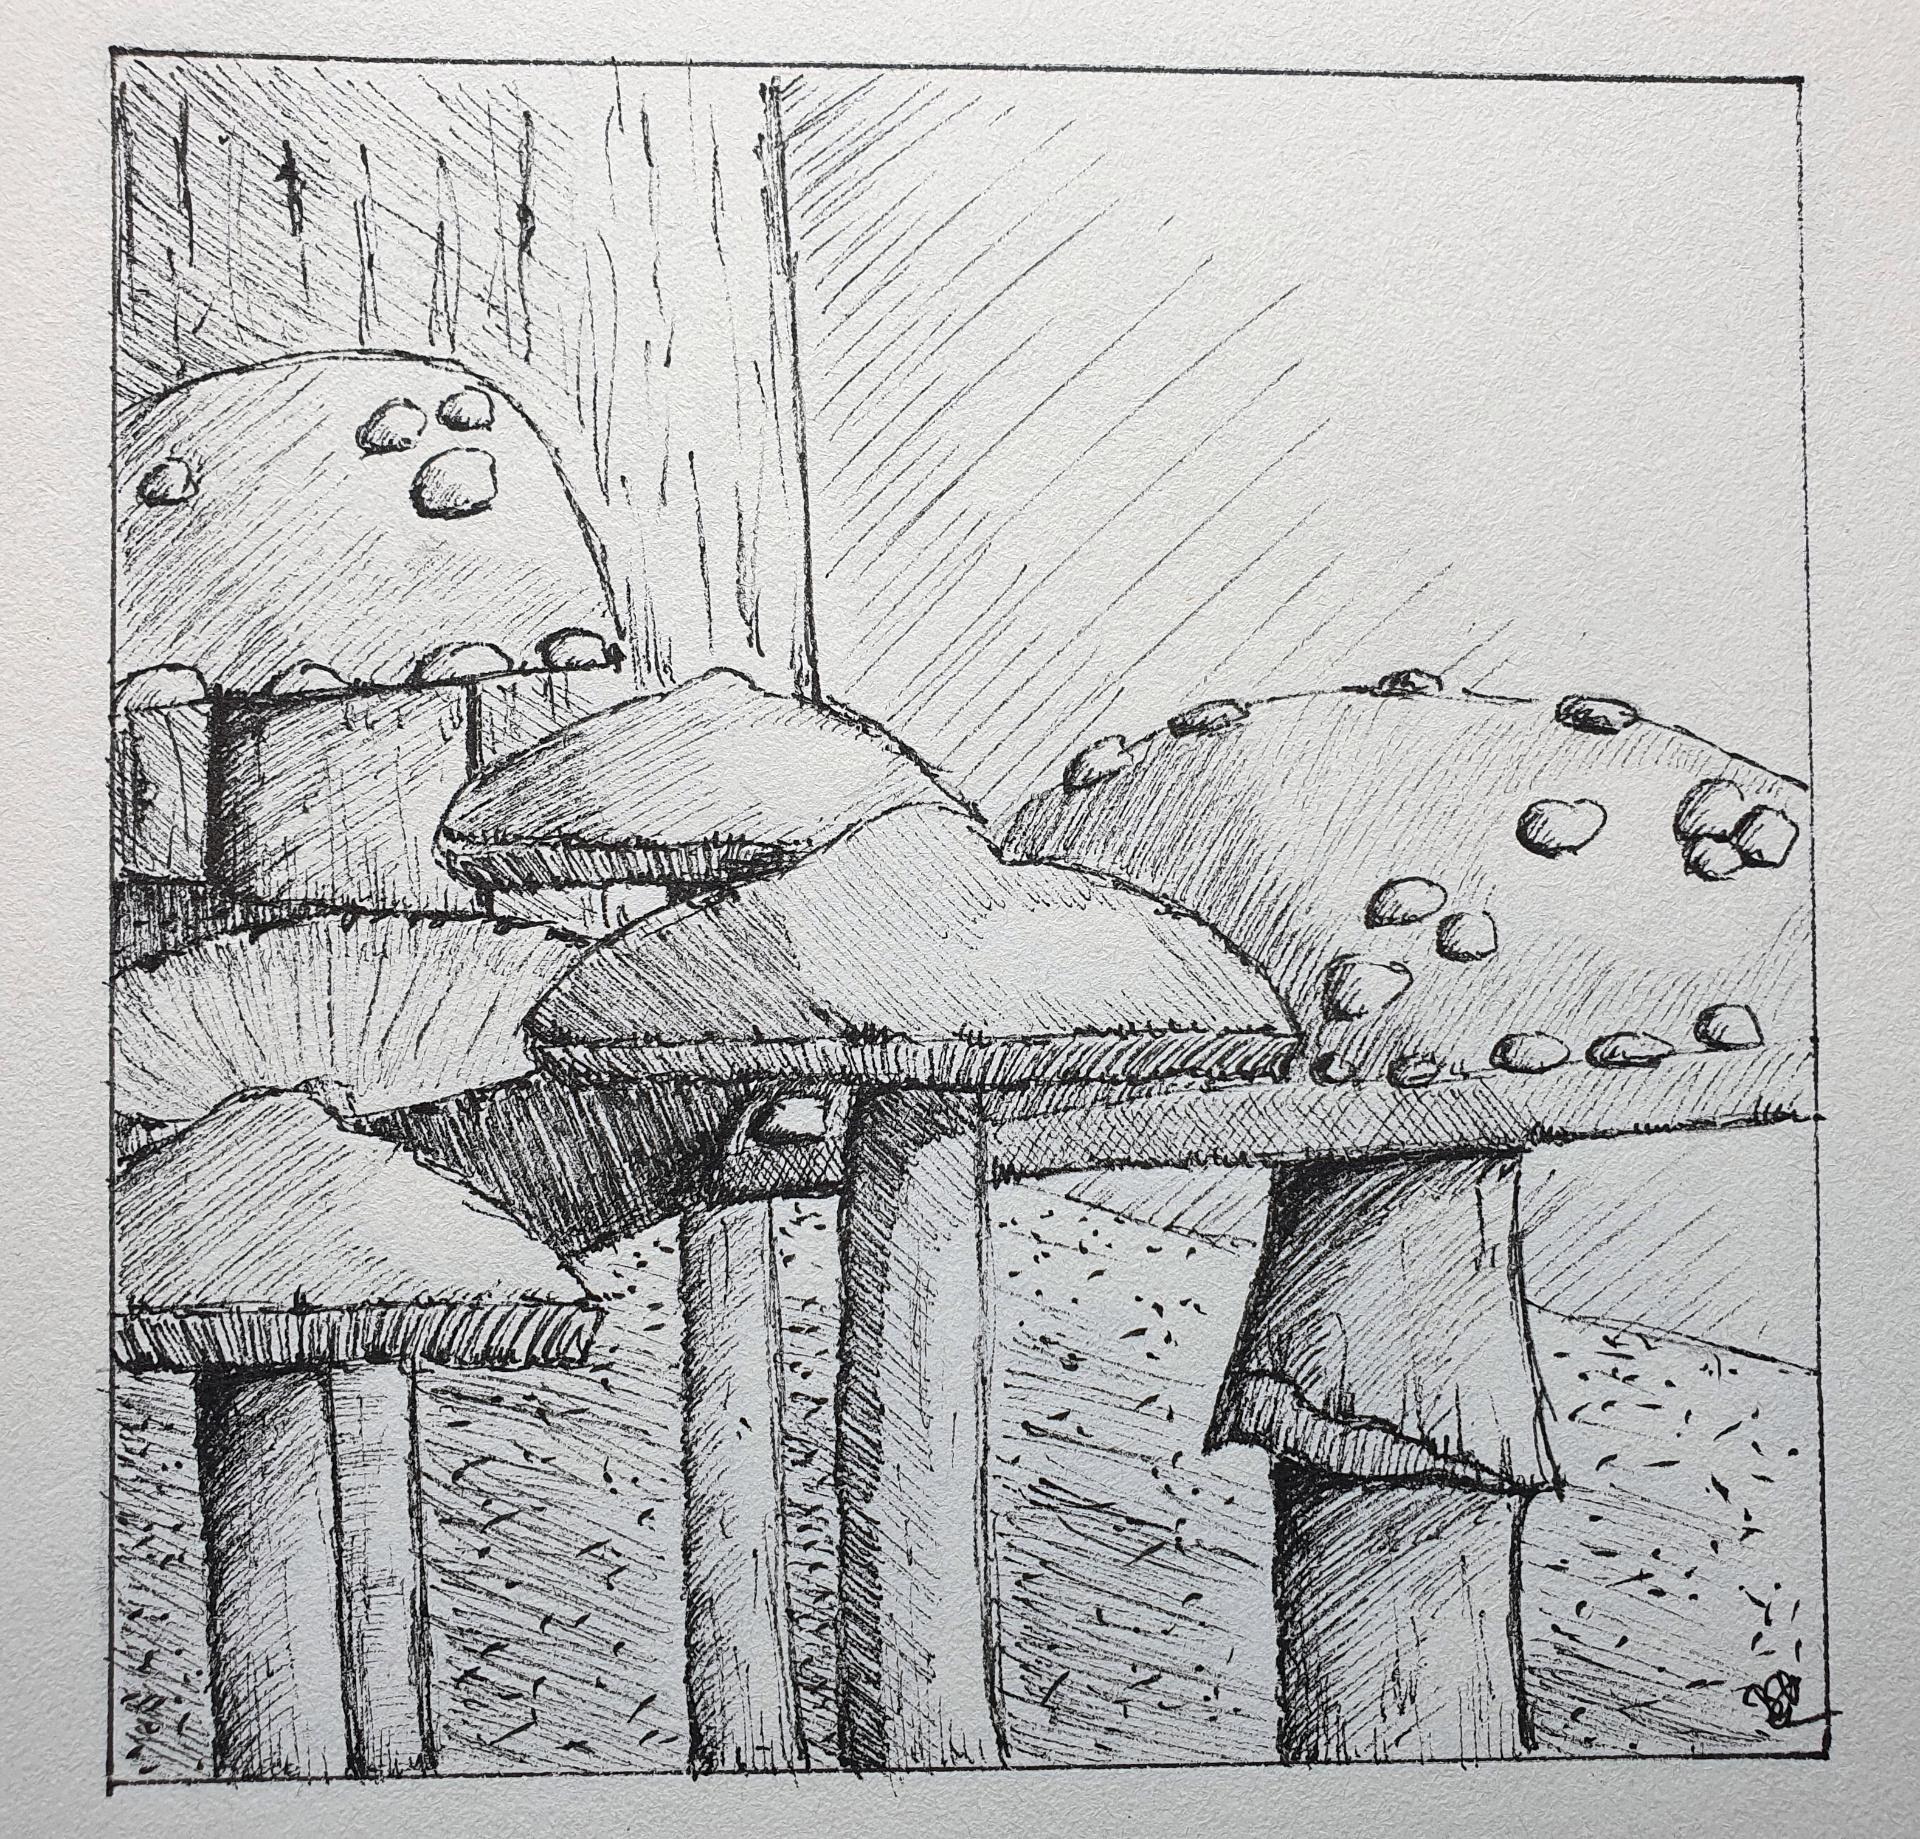
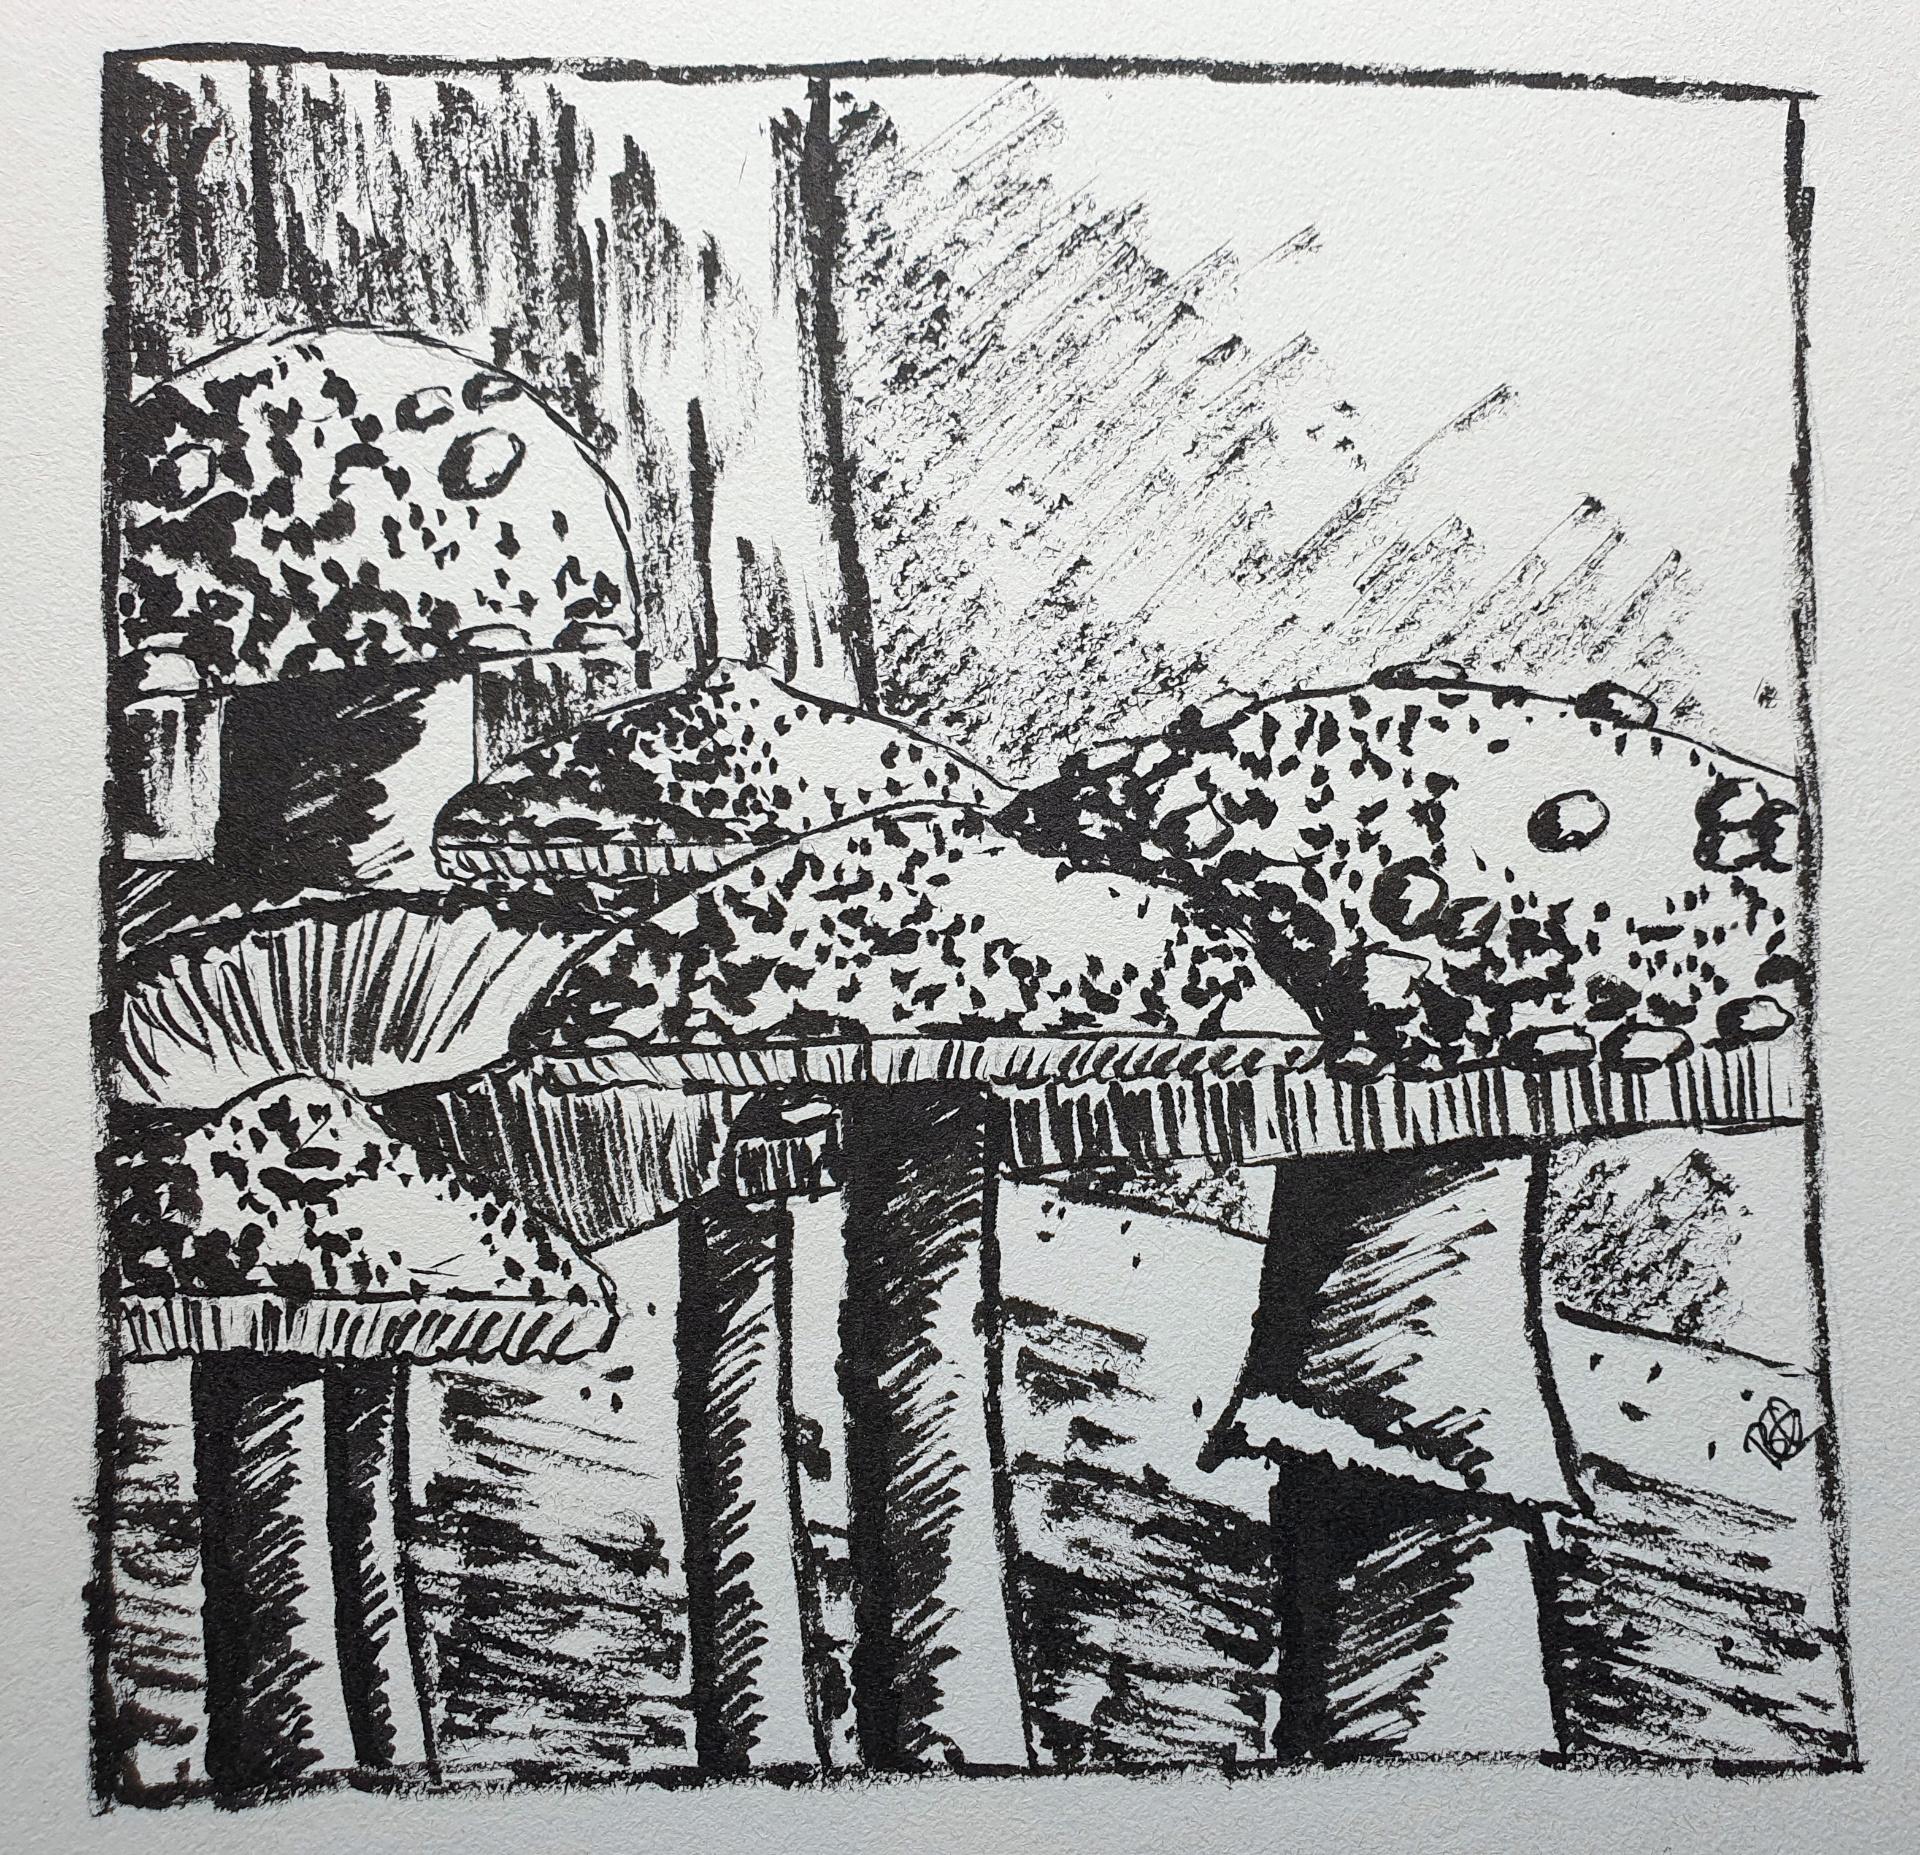
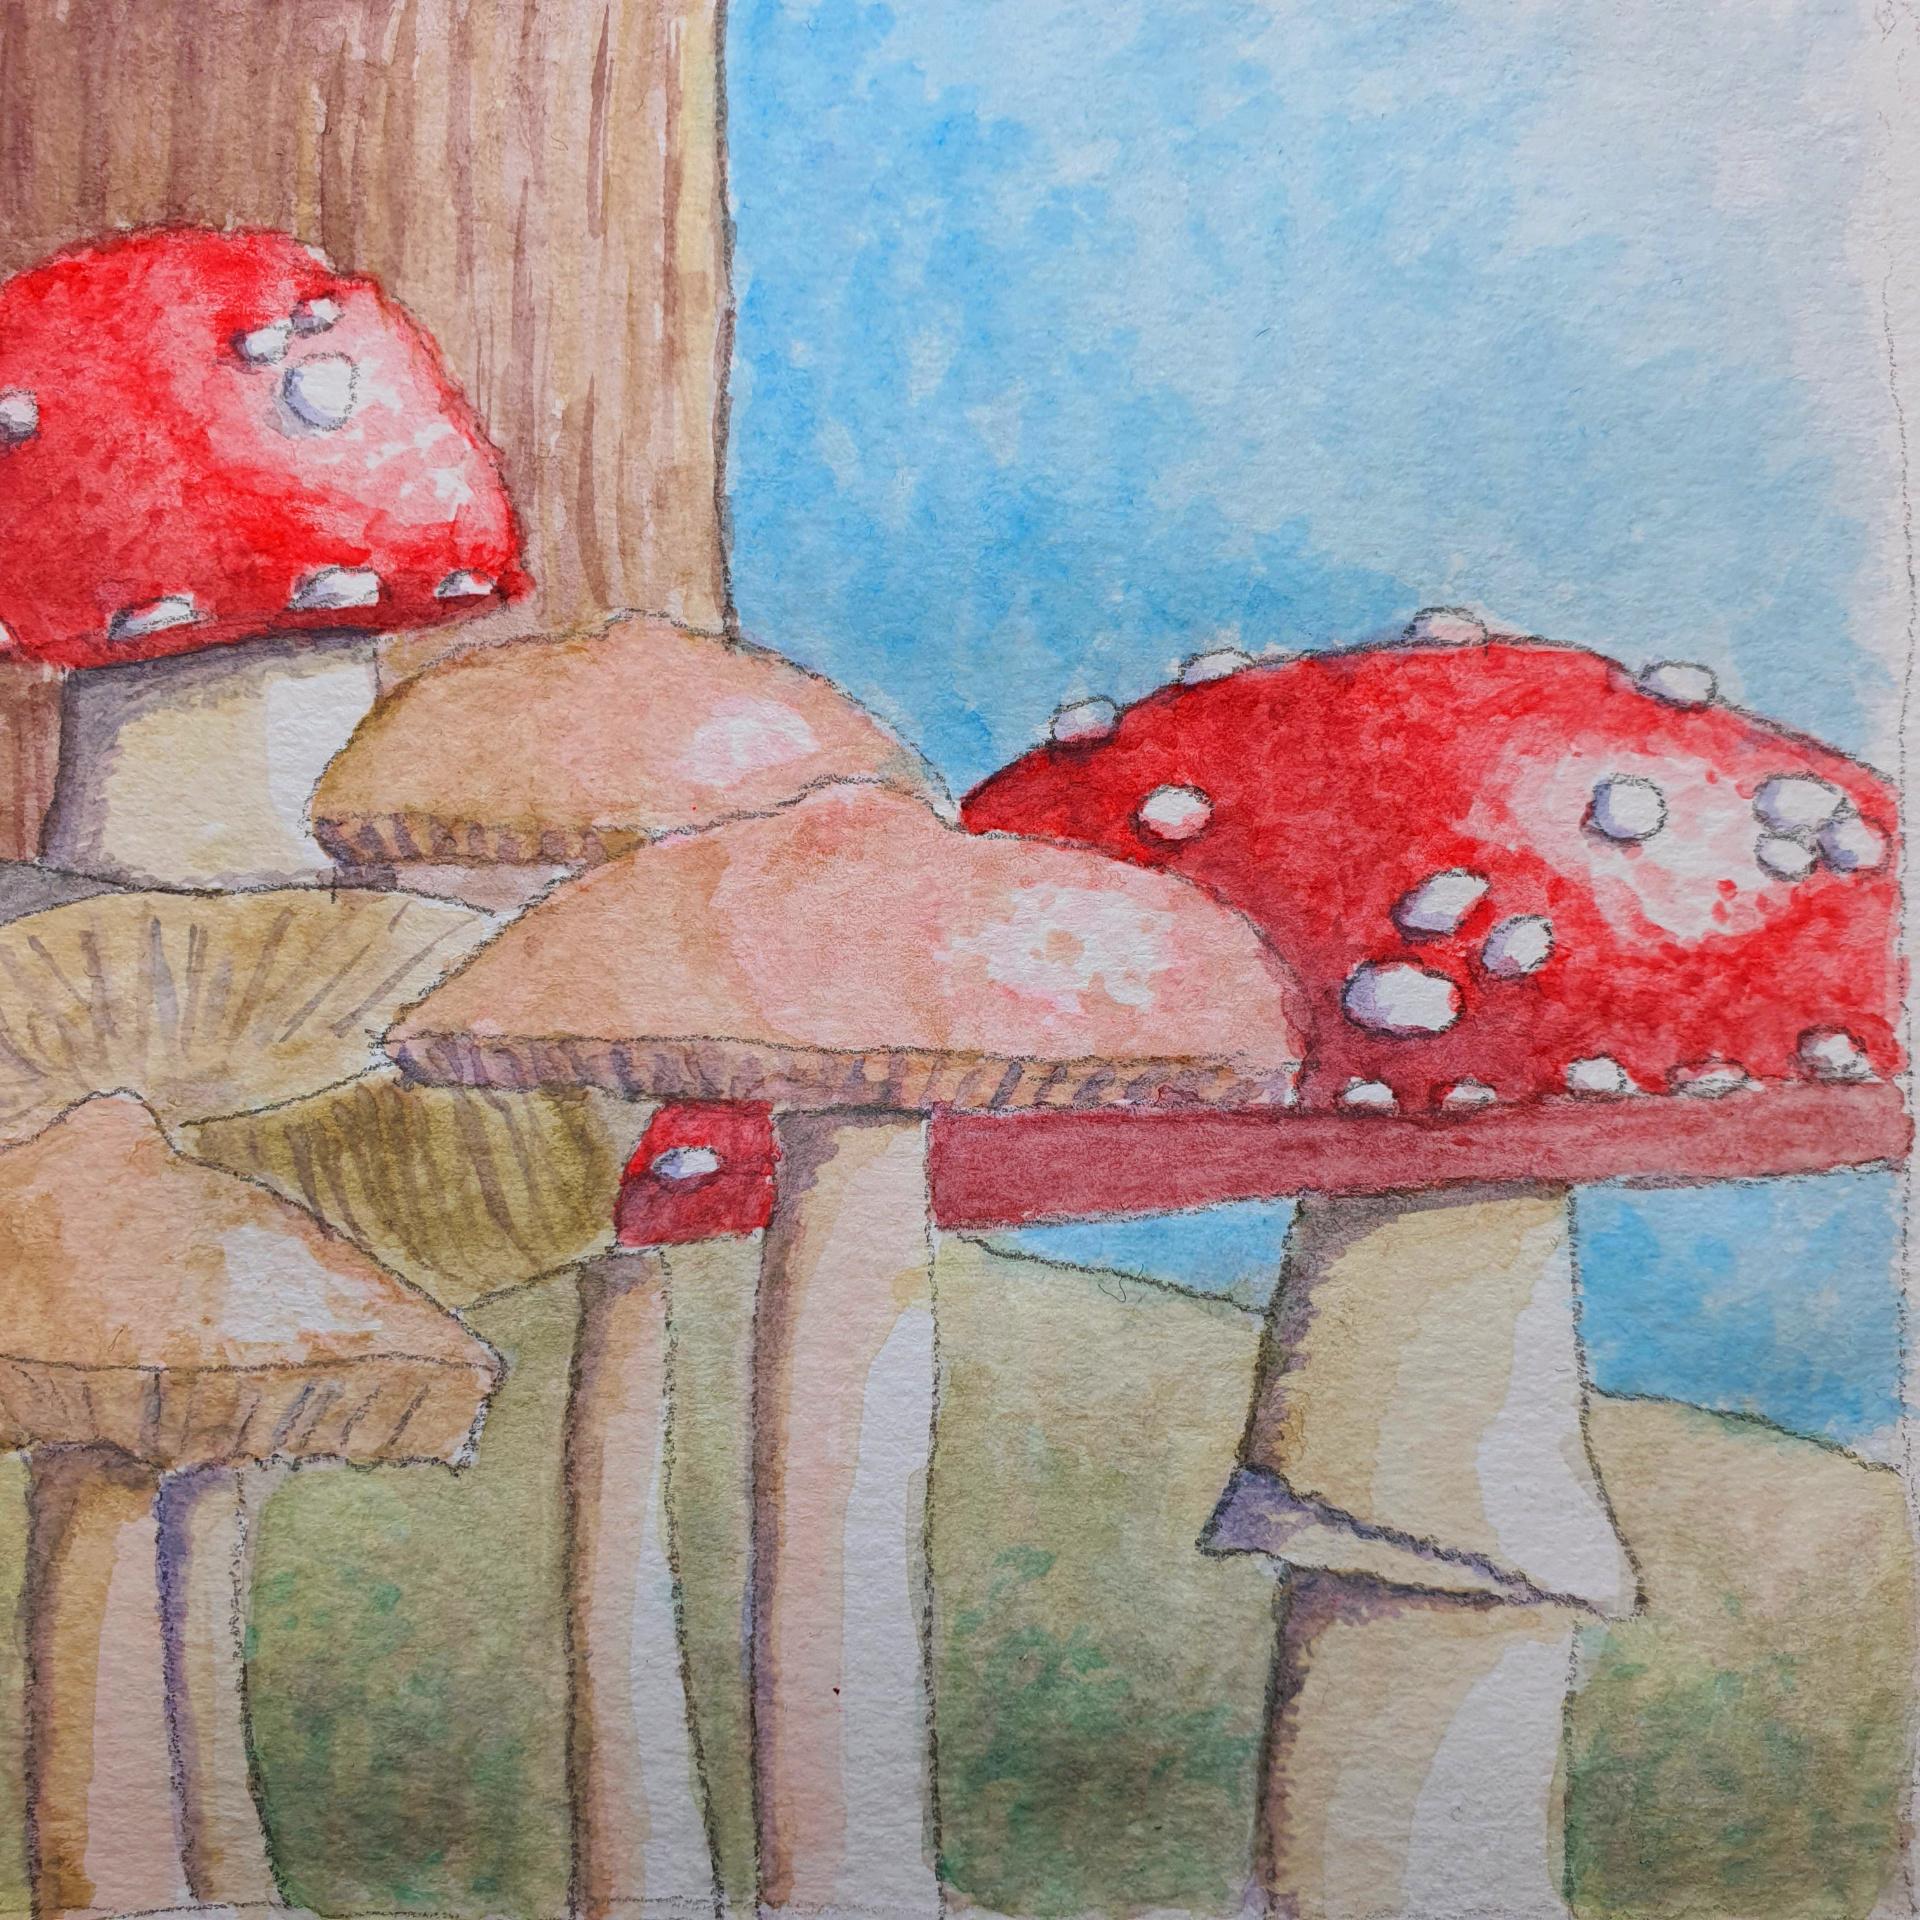
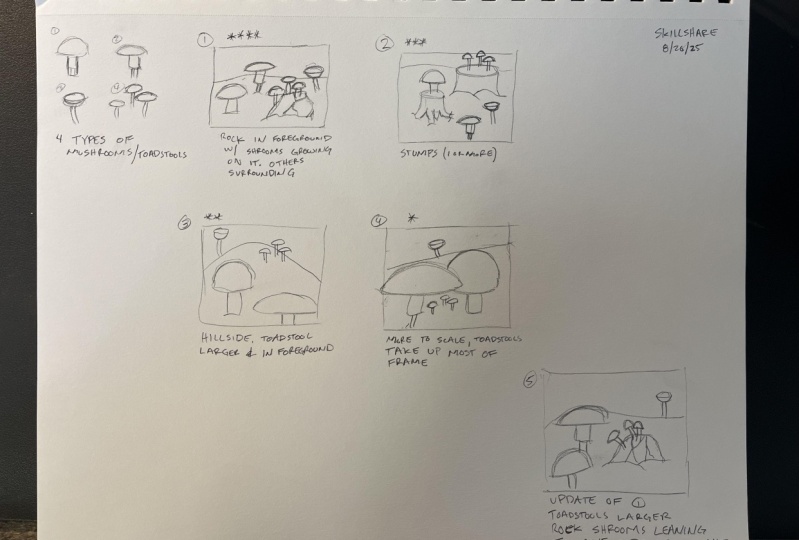
4. 04 Composition 2: Okay, so we've got our basic things we need for our composition and we got our objects. So let's start just with placing one of these mushrooms in here. And let's say, let's say r, We have to ground and let's say we put the grounding and I'm gonna just make it like that for this one. And I'm going to say, OK, I have this one, I want this one on the back. And then we do that one on the back. And just as you can see, I'm just placing it more or less randomly somewhere. And I've got these free later ones. Well, let's say I'm gonna make use of this one since in the photograph that one was higher up, so I'm going to put them right here. And that would be the one behind. And then there's the other one in front. Are either Quran goes a bit lower and then we have the last one a bit there, so that will be there. Then I would put the bake one, lets say a bit in front of this one. Let's put it a bit in the So in the corner here, not in the edge, in the corner. As you can see, it won't fit completely. And that's okay because we'll make an arrangement and when then we have this little one and let's say I want to have this little one right here. And also we're going to do a bit the same as with this one. I'm just placing it to the front. Okay. That would be the first composition. Now we could work with that. Now the next one I'm going to say, OK, that's nice, but I want them to be cluttered a little bit together. Now to do composition, really, there's all kinds of rules people follow, but one of them follow all those Lu, rules. I'm not gonna explain it. And we just kind of play along and see what we like because it's all rules. The rule first and 9s and where you place certain objects, we're just gonna do it a bit natural because if you go into nature, these things aren't arranged perfectly to. So we're just gonna do, just move them around a little bit. And the next thing I want to be half is a little bit of a clutter. And let's say, do I like the ground like that? Let's go the other way. Let's see what that brings. We're gonna go like this. And I want to clutter them here a little bit so that the focus becomes here and then the rest is just a bit empty. And let's say I want to start again with that big one. Now I want to start with the small one. I wanted small one to be really in the front and I want that big one. Let's put that nicely. Behind it's showing that that is right away a big one and a small one. Now I want these three little ones. I can place them here or I can place them, write them. Let's see, I'm going to put them here in this corner again. So then I'll make use of DevOps that goes there than the second one goes there. And the third one goes in front of it like dance, and we're doing it like that. Alright, that's a nice composition. And you get everything focus right here. And then I have that last one. The last one we could just put here to make it interesting, we could put behind that's put it here. And then the last one would be in there. Now that would make an interesting composition, wouldn't it? And let's put them just right over the edge. Okay, that will be a second composition. Now, I'm making these conversations. You can arrange them totally different if you want to. And that's the fun about making composition would just thumbnailing would just going with IDS. Let's do it a little bit different. Let's put these free ones we have. And let's go higher. And I'm going to go straight. This will be an horizon line in a bag. And let's say, I want these free ones. I want them to get the focus. And I'm going to put them, let's say in this corner. And we're going to start with the first one, right? Then I'm going to get the big one right there. And then we're going to put that one again just behind it, making it a bit shorter like that. Okay, that's interesting. And then I have the other ones, and these two go together, has about the same. I'm going to put them to put that little one here. Right bit in the back. There you go. And I'm going to put the big one, right like that, right in front of it. Alright, and then I have, only have this one left. And let's put them one right in the bank. They're not too big. Alright, that one goes there. And then it would need whatever grounds we're going to use. Now there could be a composition two, and then we're going around a little bit now. Most likely this would get the attention than these and then you will see the rest of the bag. That's just simply because the color, this one always will be prevalent. And the last composition, what we're gonna do is I'm going to move these guys over and I'm going to keep them really on the front. And start with that one again. And as you can see, I'm going. Bigger. And I'll have this one, the second one going there. And we're going to make it that long. And phi1, this one should be Fenner too. And then I'll have that third one nicely behind it. And I'm going to make that one really long and thin to just get more interested in composition like that. Now this one is a bit too thick, but I'm going to correct that. And uncle an eraser for that. Bit less high. And there you go. Good. I'm going to do it's a bit lower. Degas. All right, this one when you so that would make something interesting then I would do the big one. Was that one really in real life is quite a lot larger discipline than all the others. So I will do that one, this one behind right here. Going really large like that. And then you get really get that nice shape. Okay? And let's see if I would do that right there would be a right there. This could make something interesting. Then I have the little guy and I have that wants to. And what are we gonna do with this? I'm going to put my horizon line behind there and I'm going to put the little red guy right there in the back. Alright. And then this one, we have that last one. I'm just make that one go just in front of that little guy. Let's do that. So I work away that horizon line. And that one would come, I guess right there. And it has a bit of a fake announced a fin stock to go right behind. So this would be the front stock of this one and that stem, this one behind it would be the other one. And we could do that to get a whole different composition. Or everything happens right on the bottom here. And we're going to leave that one open. And the cat, that little composition, that little one there. Now that could work too. So we've got a few compositions. And then we're going to just choose and say, oh, which one do I like? Let's go through that and others share my fourth process review. Now that one would be a bit boring because there's a lot of space, empty space and the arrangement. I don't like that one now this one is a lot better. I like that one because you have the clutter here and you have the single one right there. This one could work too, but then we're going to need a lot of elements here. And this one here, you really don't need much elements. You could, for example, here, right in front of it, put like a lock. But 3D shape like that, say that they would work nicely here. And we've done one right behind the luck that I would work, then I have felt that up a little bit. And then in the back you could do trees or whatever or just leave it totally open. So this one could work too. So I'm going to do is this one, I'm not going to work. Now. This one I'm gonna rate and I want to say I could work with this, alright? And I'm going to integrate this one. I'm going to give it a star, one star. But I like this one a lot better. Composition works a lot better, especially if we just would leave this open or with this picture here in this picture, all kinds of tree behind it. So you would get trees behind it like that. Now, look at that. You just right away get a nice composition already. And definitely that gets to start. I prefer this one over that one. Next one, this, now this would work to, and even if you just put, let's say, a huge tree behind it, like here, breakup their composition, that would be my tree. And don't worry, we're going to later on learn how to draw that and then leave this basically open and get the tree here. Then this would work too. And I'm torn so that we'll get to and unlike this one, I do like this 12. And what we're gonna do is I'm gonna go with, I'm going to reward that one. The free stars are like that one better for going to work with. So we have that totes to a nice arrangement, but this one would work really well too. So and that's it. That is just my thought process I'm going to look at. I'm going to say, OK, can I do something with this no, too much open space. This too too much. And to not I don't write like the arrangement. This arrangement are like better because she could put these flew under an angle that they're all a bit. And then puts some trees behind it again. And ignore that horizon line I drew and go with that. Shaped like that. That would kind of work, but I like this one a lot better. This will make a nice one. But this makes an interesting because we'll close up or having some full-scale ones. So this one would be as in the photograph like this. This one would be really Because it is big, zoomed in a lot. And then on the back you have the little guys and right before that you have that other fungus. So I'm gonna do this one because I like that one the best. Alright. And that is just the fourth process that is thumbnailing. And I would be the second lesson. So your assignment is just draw four of these boxes and we're going square. Take the elements we have. So from the photographs. And then once we've taken, you've taken the element, make arrangements, and you can go the same as I do. You can just pick different ones, pick some different ones. Now in the end, you may do exactly the same as I do just to learn. But for your own 4D process, I would say create four different ones and made them make a fifth one, do this one as the fifth one and make forwards and just picked each objects and arrange them a little bit and just see what you can do with them. Go large, cause smoke. You could do even one if you do one. That will be so working to take that little cube one and put that really in the front like that, then put that really big one like that behind it. And I would work. But there you go. You get that sense of scale right away now, this would work too. And then get those three little ones. I'm going to place them right here. And they're smaller down there. The other little one behind it, that one goes there. And then the for the other little one, I'm just going to put right in front to get kind of an interesting composition or look at that, that would work great to now we need that last one. That last one is a bit larger to, so I'm going to just add it right there. And it disappears behind the others. Let's see and understand would be right behind it. You wouldn't see that one that goes there. Now the advantage of this is this composition is that you don't have open space really. You just work with these objects and there is little open space. You could do that too. You don't need to stick to the site. You can vary the size, but it needs to be a bit believable because these are, in real life, these are small, this is large, this is larger than this. Take that into account, and that would be it. Alright, so you make your compositions and then pick the one you like. And I'm going to work with this one. We're going to turn this one into a drawing. And, but that is for the next level, the next level, the next lesson. And for now, make your compositions and just move these objects around a little bit until you see some things that are really like that. And I can work with that.
 Benjamin A, Art Teacher, illustrator Art by Benjamin