Transcripts
1. Introduction: Welcome to my acrylic
painting warm-up class, where we'll focus on loosening
up with a flower vase. Have you ever sat
down to paint and you didn't know where to start
or how to get going. These Firebase projects
smoked your hands and brushes loosened up before
you start painting, a more involved painting. Or they will become your mini
masterpieces for the day. They are great for trying out how different colors
work together. Maybe you have a palette
of colors in mind and you want to try them together
before you commit to them. Not only are these
great warm-up pieces, they can be great, quick, cute gifts, or they can be low-priced pieces to sell to get more interest
in your art. I hope you'll join
me in creating multiple versions of these
expressive flower basis. Let's get started.
3. Painting Vases: To get started, I
have my stack of 109 by 12 watercolor papers. I am using £140 paper for this, but any kind of paper that will accept acrylic
paint will work. And I have black
acrylic paint ready on my palette and a
small flat brush. I'm going to have
the video playing at a higher speed for
a bit while I talk. And then when I'm done talking, I'll slow it down
so that you can see how fast it actually goes. I like to start by remembering
to keep my work loose, work fast, and don't
think too much. I find I end up liking
my work more when I do this and I
definitely have more fun. I'm going to paint a series
of ten bases with stems, one right after the other. This is called batching your art work or
you do multiples of basically the same techniques and colors all at the same time. The saves time, and you
already have the supplies out. So why not make more
than one similar piece? You'll notice as I get
about three of these done, I realized that I forgot
to paint the lines to indicate the separation
of a table and a wall. So I will go back
and add those in and then continue doing that
for the rest of the time. Trying to think of as many
shapes of basis as you can while you paint and add
as many stems as you want. And remember, keep loose, work fast and don't
think too much. I'm going to slow the
video back to normal speed now and continue the rest
of the vases and stems. I start by drawing
an oval opening for the base on this one and
making a rounded bottom. I add as many stems as I
feel looks good starting some from the top and sweeping
my brush down quickly. And starting from the bottom and sweeping my brush up quickly. I'm going to continue
painting the rest of the basis using the
same techniques, just different shapes of basis. And then at the
end of this video, before you go to the next one, you can either let your
papers dry or you can go right on to adding the colored flowers
in the next video.
4. Painting Flowers: It's time to start
painting flowers. And I am again going to
be batching my artwork, working with one color at a time and moving
from base to base. And when I am done, I will have ten different flower pictures
that I can leave as is, or add more to them. These flowers are gonna be so easy because they
are basically blobs, just a few brush
strokes for each. With a large brush. The brush I'm using is
a flat one-inch brush. I'll speed up the video and
you can see how I painted five of my papers
with blue flowers, five of my papers
with purple flowers. And I did about three
or four flowers and each one trying
to space them out. And remember, keep loose, work fast and don't
think too much. Hi For the rest
of the paintings, I'm going to continue
working with one color at a time and pulling out different
paintings to create many different
color combinations. This is also a good time to try color combinations that you
want to experiment with. If you end up not liking them, you didn't waste much time trying out how they
look together. As I'm painting, you'll
see that I have a tendency not to wash my brush
between colors. The choice that is up to you. You just want to
make sure you don't mix colors that
won't work together. Like I would not
use yellow and then purple without washing my brush. First. If I want Brown flowers. I'll speed the video up again and you'll see
that I continue to paint about three
or four flowers of each color on each painting. And they end up putting three or four flower
colors on each painting. I don't allow for
any drying time. My paint is still wet
when I add another color. As you are working, think about filling spaces that
look too empty. And you can also
overlap flowers. If you don't have enough space. When you are done,
you can go right to the next video and start
learning different additions. You can add to these
paintings or you can let them dry and do the rest of the
videos at another time.
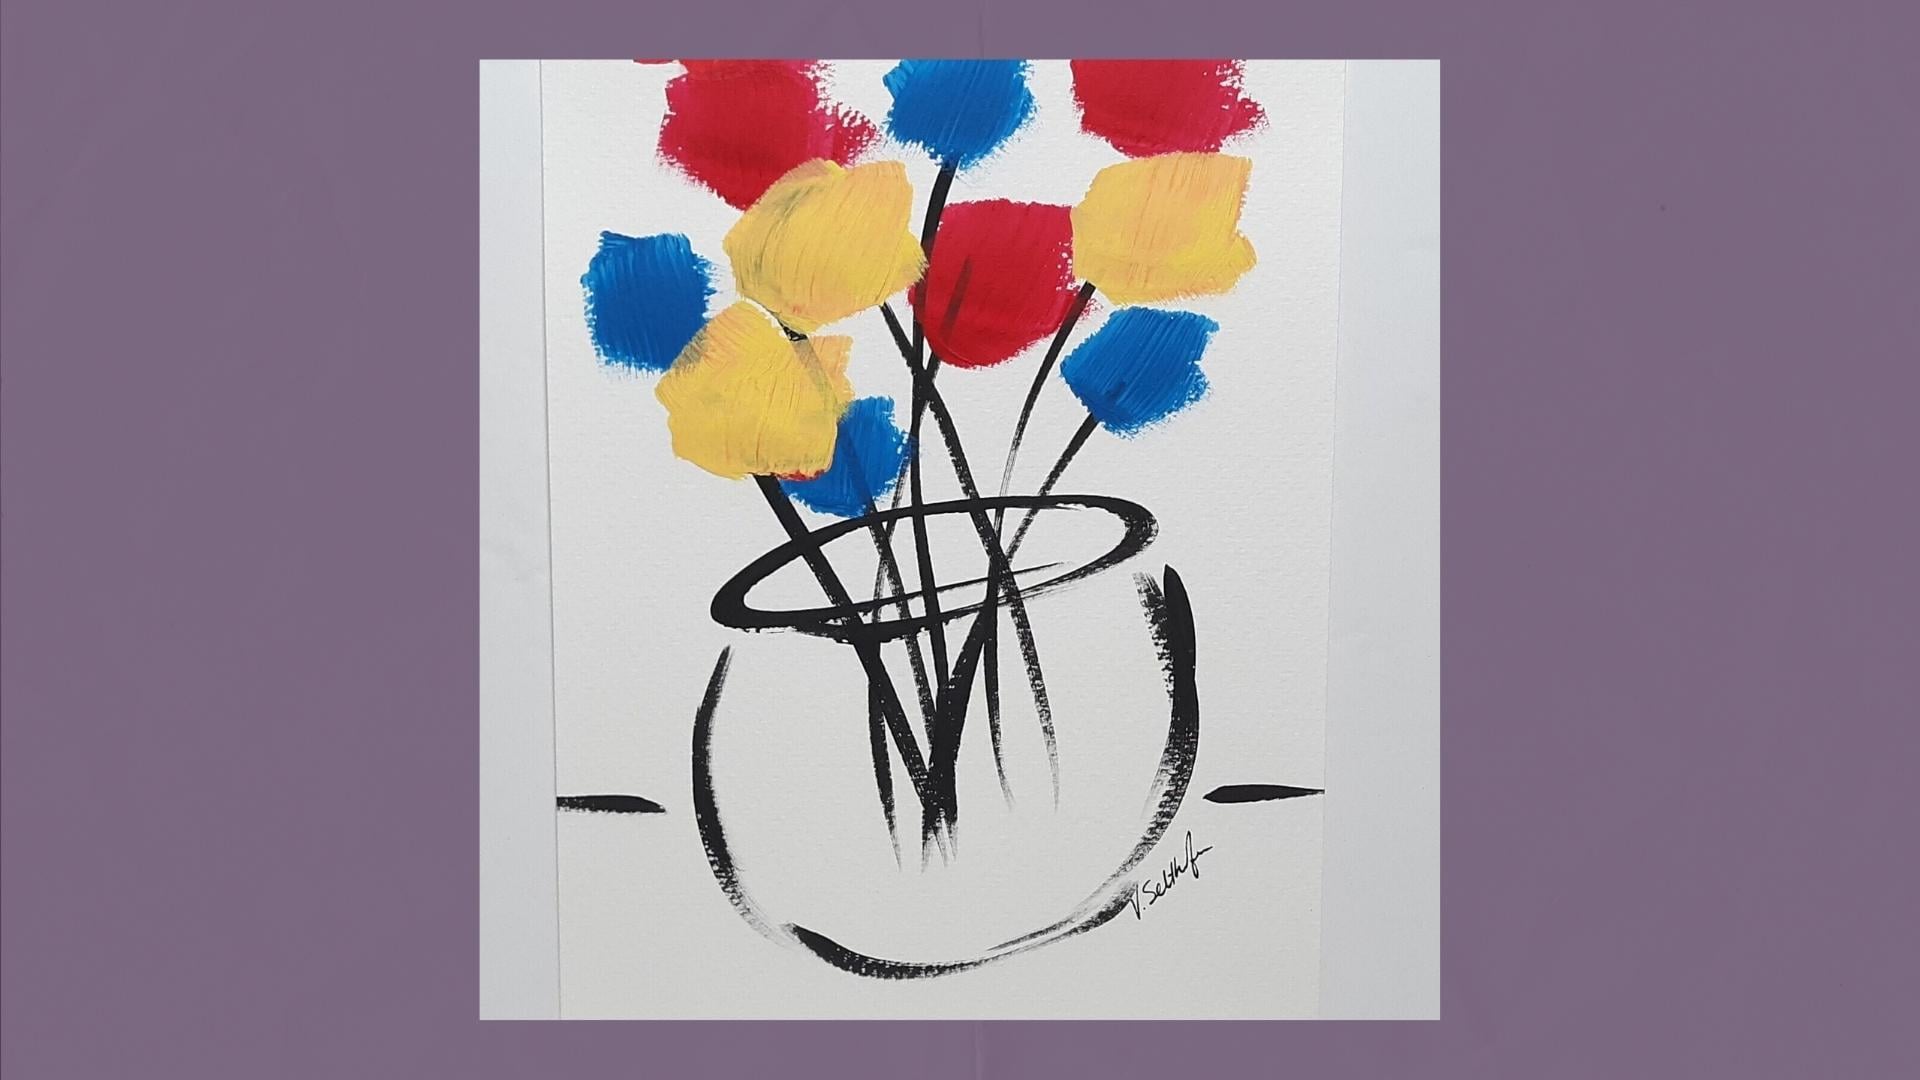
5. Addition #1: In the previous videos, we painted basis
and flowers and you can leave your lovely
paintings like that, or you can choose to
add more to them. There are a lot of different
things you could add to change the look
of your paintings. And we'll explore one
option in this video. And then you can do the rest of my videos for more options. I have one of my paintings here that I felt that either stand on its own or benefit from
something a little more. I have another one I
use this technique on, and it isn't really
simple addition and it will help you loosen up. I have black paint and
a small flat brush, and I'm simply going to
make imperfect circles. I'm going to remember
to keep loose, work fast and not
think too much. I want this to be a
quick activity to get my body arm in mind loosened up. This was a really
quick addition. And with this addition and
all of the ones yet to come, you can paint them when your
flowers are wet or dry. I usually work when
they are wet because I do all of my steps
in one sitting. Please join me in the next video for another easy addition idea.
6. Addition #2: Edition number two
is simply adding background color
to your paintings. I like to paint with
a dry brush so I get an uneven look
and I usually use one of the colors
from my palette that isn't already in this
painting for the wall. And then a color that is in
the painting for the table. And I usually don't wash
my brush between colors. I like to leave
whitespace between the flowers are based
and the background. It makes it easier to keep
this as a fast painting. And I think it makes
the flowers popcorn. I also like to use a
wide flat brush to paint the background because a lot
quicker and I like that. It kind of stops me from
trying to be perfect. It helps me accept any
mistakes that I make. I also like to paint
between some of the flowers and stems
to give the idea that you can see
through the flowers and that they are
not one solid mass. This, I have to slow down a little bit far because this is a smaller space and I
have such a large brush. Please join me in the next
video to see how I combine additions number 12
for a whole new luck.
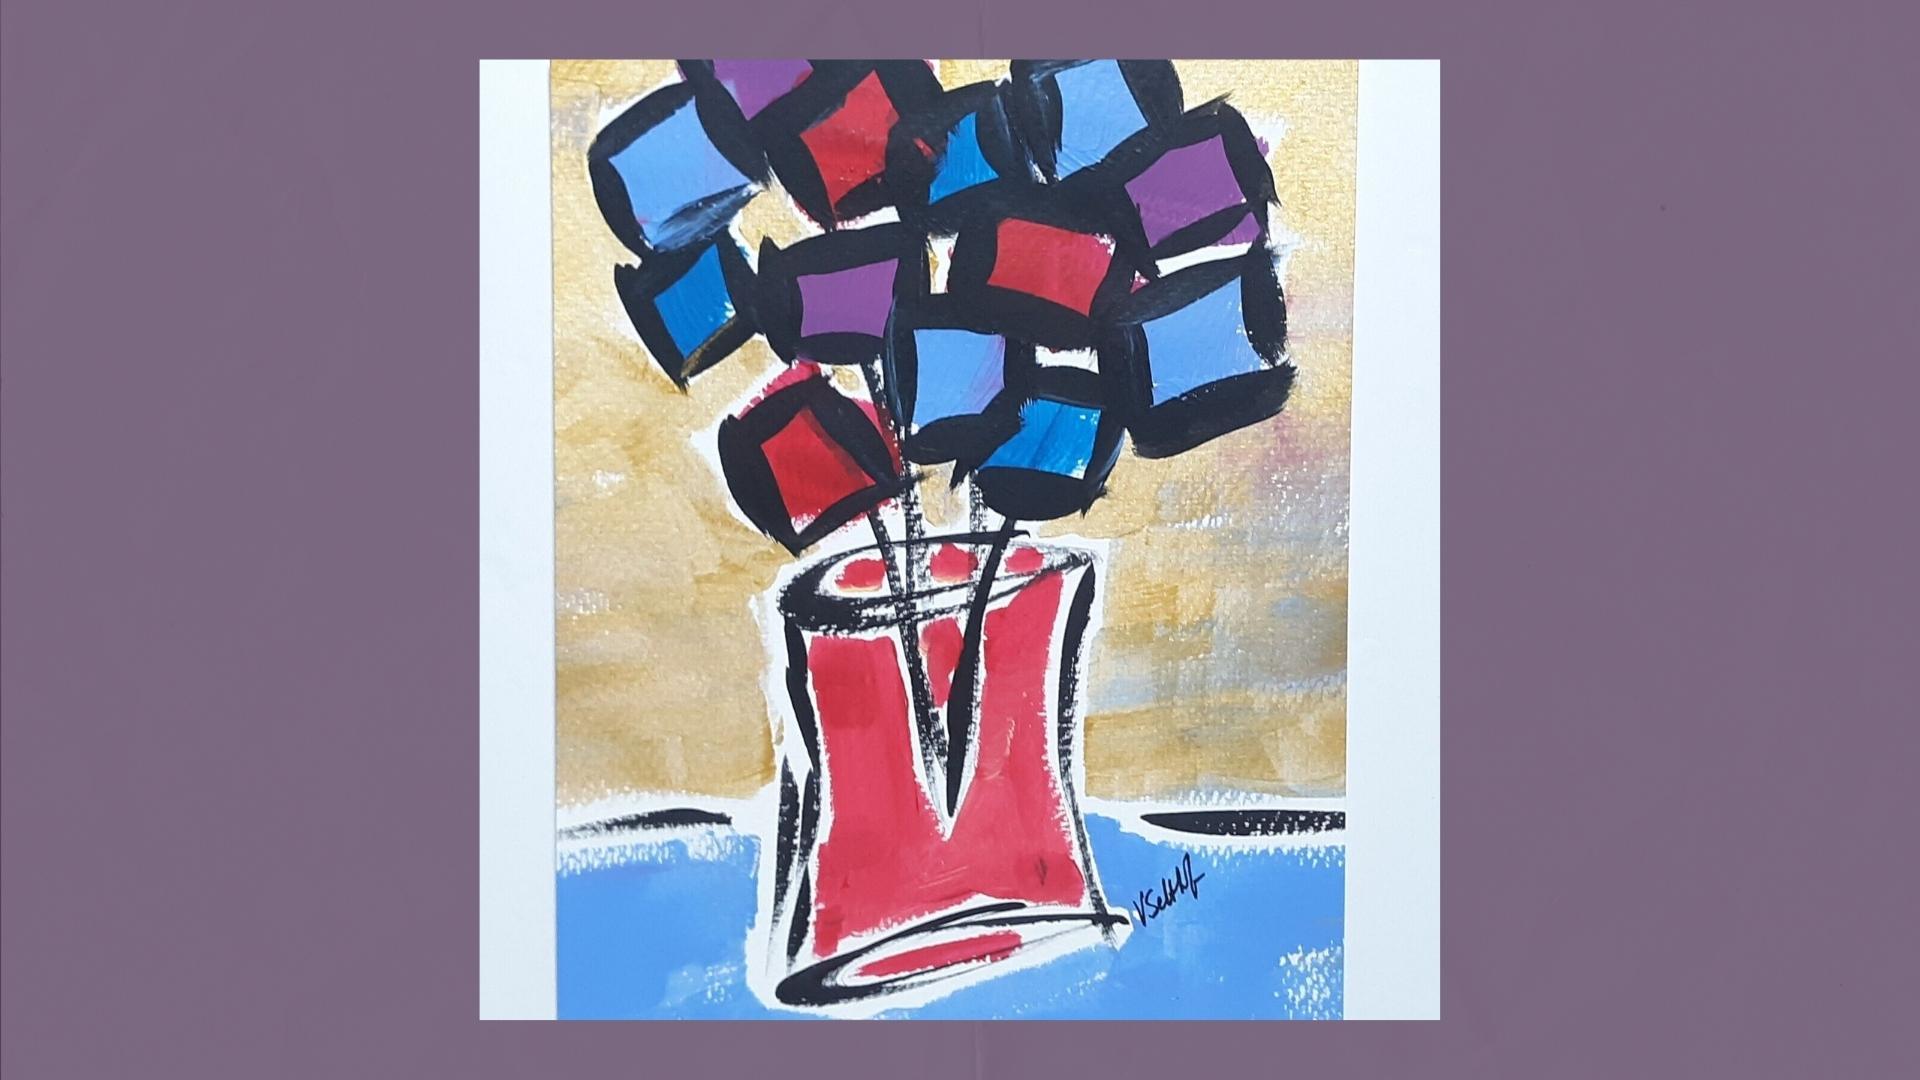
7. Combining 1&2: In this video, I'm gonna
show you how combining the first two addition ideas
can create a whole new look. I have a painting here that I've already painted the
background colors on, which was shown in the
edition number two video. With a small brush
and black paint. I'm going to paint imperfect
circles on the flowers like I did in the edition
number one video. I've already done these
and other paintings, but by combining the two, it creates a whole new look. Please join me in the next video for another edition idea.
8. Addition #3: In this video, I'm going to add another idea that you could
do for your paintings. By painting the vase. A whole new look is achieved
for your paintings. When I paint the base, I paint just like I did with the background close
to the black lines, but leaving a little
whitespace in-between. Please join me in
the next video, where I combine all the ideas
so far into one painting.
9. Combining 1 2 & 3: I already have a painting here that I painted
the background on, which we practice in the
edition number two video. And I painted the base like
we did in the last video. Now I am going to add
imperfect circles like we did in the
first edition video. So now we've added
quite a few elements to this painting for a completely different look from the rest. Please join me in the next video for another interesting idea.
10. Addition #4: I wanted to first show
in this video how adding metallic acrylic paint to the background can add a new
look to these paintings. Now that I have the
background painted, instead of adding
imperfect circles, I'm going to add
imperfect squares and move the brush quickly and sometimes overlap the squares. By adding squares
to the flowers, it creates a cubist
look and breaks up the space for a
whole different field. Please join me in the next video for another idea with squares.
11. Addition #5: In this video, I am going to add a checkerboard pattern to the
table area of the painting. I am using metallic gold
for the first color and just using the width of my
brush to make the squares. This checkerboard idea gives me the feeling that
this vase of flowers is on a kitchen table that has a checkerboard
tablecloth on it. Now I am painting
the second color in the checkerboard pattern, purposely making the
shapes imperfect with whitespace between
the two colors. This creates an implied
white line between the colors without actually
painting a white line. Please join me in the
next video where I add loose flower drawings
to a painting.
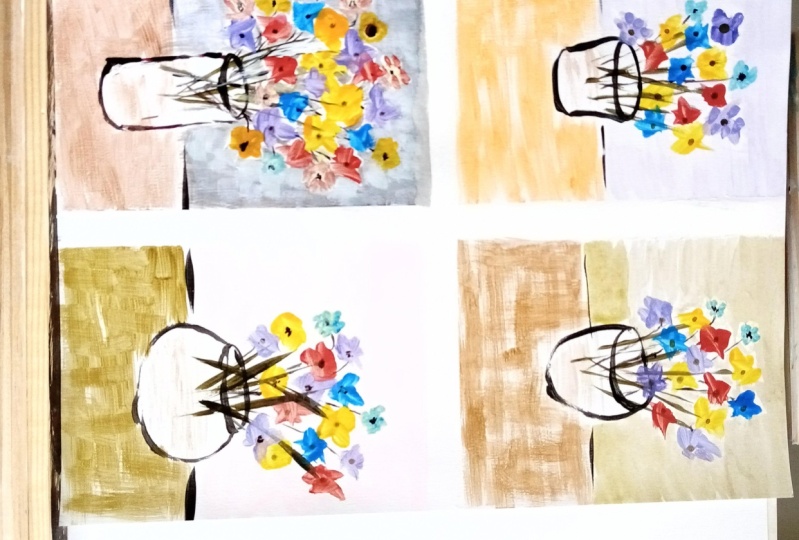
12. Addition #6: I already have a painting
here that I have added a checkerboard pattern to like we experienced
in the last video. Now I'm going to use a
permanent marker to draw on quick gestural flower shapes. I tried to use a few different
types of flower drawings, and I don't always
stay completely on the painted flower shape. I just use the painted shape as a guide for where
a flower would be, not necessarily for
what size it would be. These are all quick drying, staying in line
with the idea that these all can be quick
warm-up paintings. Please join me in the
next video where I recap all of the paintings
we did together.
13. Our Finished Work: I hope you enjoyed painting with me and I hope you will upload pictures of all of the paintings you made
for others to enjoy. If you want a warm
up before doing more tedious in both paintings, you can always do these
quick flower paintings. And remember to keep loose, work fast and don't
think too much.
 Vanessa Selthofner, Printmaker, Painter & Art Educator