

Macro Photography: The Hidden Sides of Visible Objects
Macro photos of butterflies drinking their morning dew drops and veins branching out on the back of a leaf will reveal tiny details you may not have ever noticed in your daily world.


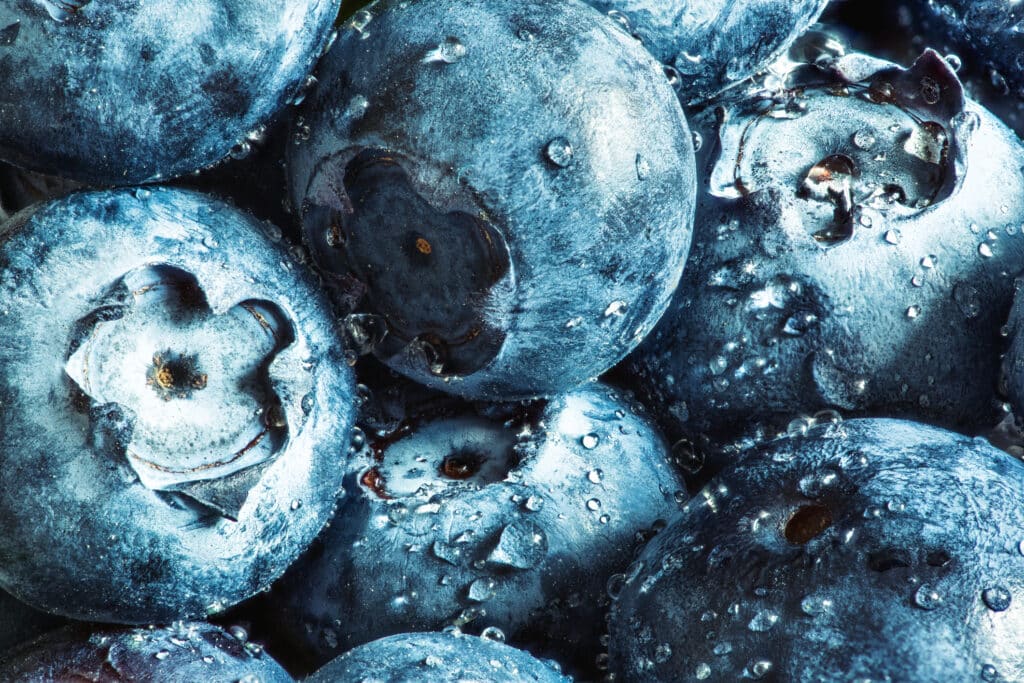
True macro photography happens when you’re able to make your subject look life-sized or bigger in your picture. This means there needs to be a 1:1 magnification ratio, which means your subject should be the same size on your camera sensor as it is in real life. If you were capturing a one-inch furry bumble bee covered in pollen, you’d need a camera with at least a one-inch camera sensor.
Macro vs. Micro Photography
If you’ve already done a little bit of research about macro photography, you might have found some information about micro photography. These two forms often get confused by beginners. Think of macro photography as an umbrella term that includes micro photography.
Even some of the most well-known digital camera manufacturers like Nikon, Canon, Olympus, or Sony refer to macro lenses as micro lenses. Macro and micro photography differ by how much magnification they use. Macro photography should have a magnification of at least 1:1 while micro photography should have at least 20:1, which means the subject appears twenty times as large on the camera sensor and eventually in your photo as it does in real life.
Macro photography subjects usually appear life-size or slightly larger, so this form of photography is often used in nature photography. Tiny subjects like a bright green tree frog or a little ladybug make the perfect subjects for macro images. Since microphotography is so magnified, it’s usually used by scientists, archeologists or forensic specialists to photograph bacteria, soil or evidence that wouldn’t be able to be detected by the human eye alone.
Pack Your Bag with Equipment You Need for Macro Photography
Like other photography forms, you’ll need to own a few extra pieces of equipment, such as a dedicated macro lens, to be able to get your macro shooting hobby going. You might start by asking a few friends or family if they have any equipment they don’t use or scrolling through online marketplaces to find what you need for less.
Macro Photography Camera
Almost any high-quality DSLR or mirrorless camera can work well for macro photography as long as you know you’ll be able to use a good macro lens with it. You should just make sure your mirrorless camera has an electronic viewfinder because it can be hard to observe and shoot your photo through a rear LCD when you’re magnified to 1:1.
If you don’t already have a camera, most major camera brands will have minute differences when it comes to macro photography so you can choose the one that best fits your photography style. Just be aware that Canon cameras calculate aperture differently than other cameras, and this is especially obvious at high magnifications like 1:1. This doesn’t mean you can’t shoot macro photography on Canon cameras, but it can be a small extra hurdle that wouldn’t make it the best camera if you’re buying it for macro shots.
Choosing Your Macro Lens
There are two main things you should look for when choosing a macro lens. The first is how much it will be able to magnify your subject. You’ll need to find a lens that can magnify your subject at least 1:1.
You’ll also need to pay attention to the focal length and minimum focus distance of your lens. Most average macro lenses have a focal length of 60mm, but for these, you’ll have to get pretty close to your subject in order to achieve that 1:1 magnification. If you’re shooting live subjects where your subject might fly away if you get too close, or in high-light environments where you might block the light with your camera, you should try to find a lens with a focal length of at least 90mm.
Lenses with focal lengths of 180mm or 200mm allow you to be the furthest away from your subject, but they can get very expensive. By staying somewhere between 100mm and 150mm, you’ll be able to find a lens with a good price-to-working distance ratio.
Diopters and Macro Filters
There used to be a time when only professional photographers with dedicated budgets were able to take part in macro photography. Today, there are a few tools that can help macro photography novices achieve a macro photographer effect without the price tag that usually comes along with it.
A diopter, also known as a macro filter or close-up lens, is a thin lens that can be screwed onto the front of your current lens. It will help magnify any subject even if you don’t have a true macro lens and work in the same way reading glasses do. Just know that these close-up filters might slightly degrade the quality of your photo with blur or distortions but are a great budget option for newer macro photographers.
If you’re interested in cell phone photography, you can also buy macro filters for your phone camera, which will help you achieve the close-focusing image quality of macro photography one might capture with a true macro lens.
Bellows and Tubes

Another way to achieve higher magnification is to increase the length between the end of your camera’s lens and its sensor. One of the most common ways to do this is to use extension tubes, which are hollow spacers that get screwed in between your lens and your camera. Bellows work in the same way, but they are accordion-like, flexible systems that go between the camera and the lens. You can also find other lens adapters that can reverse your lens, which will also help you achieve more intense magnification.
Macro Photography Ideas Ready to Impress
Now that your bag—or your online shopping cart—is filled with the tools you need to take a macro photo, you might need a few photography tutorials to best understand the camera settings needed.
Eye-Catching Flowers
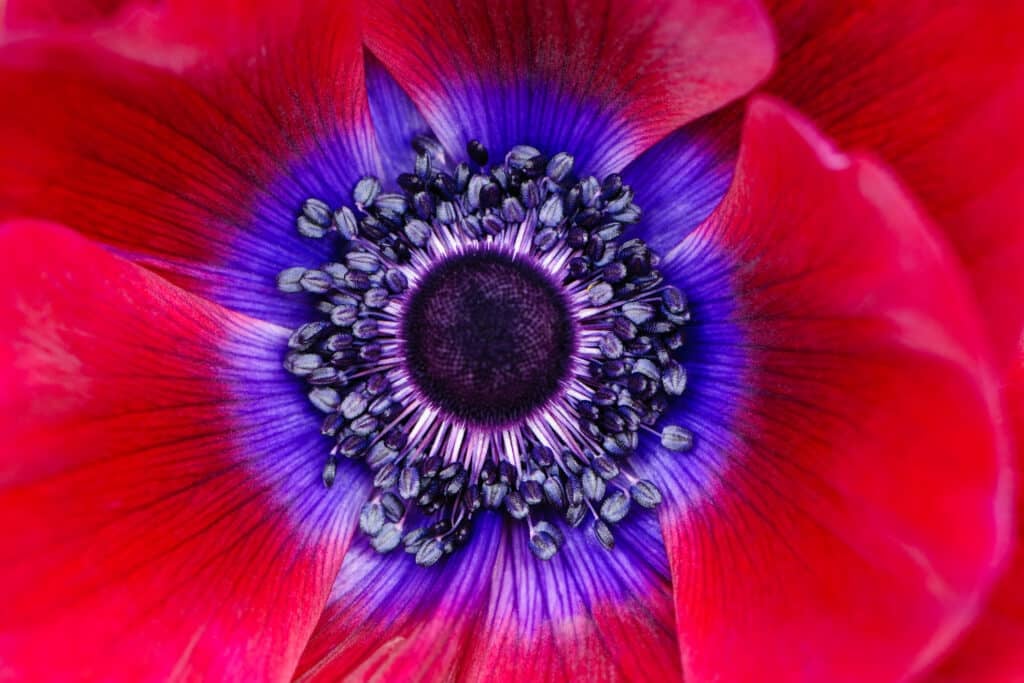
Any small object makes a beautiful subject for macro photography, but flowers and their bright colors and miniature details make particularly interesting macro photos. When it comes to flower photography, you could choose a bush of tiny cream honeysuckles and fill your screen with bright spots of white against the greenery around them. You might decide to focus on one part of the full frame, like the stamen of a lily, so your viewer feels like they’re looking right into the flower.
Inspecting Insects
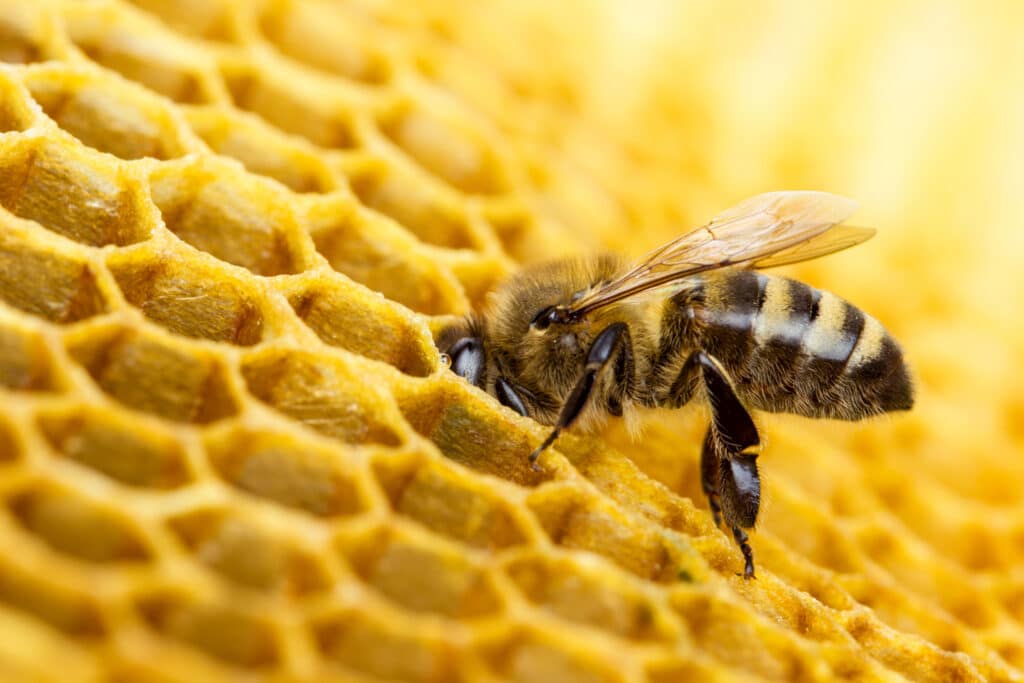
Barely in one place for more than a second, insects are one of the most difficult but intricately beautiful macro photography subjects. Since they are so small, those tiny details are hard to see from the naked eye. If you’d like to capture the holographic blues of a beetle or the geometric eye of a fly, you’re ready to dive into the world of insect photography.
Looking into Leaves
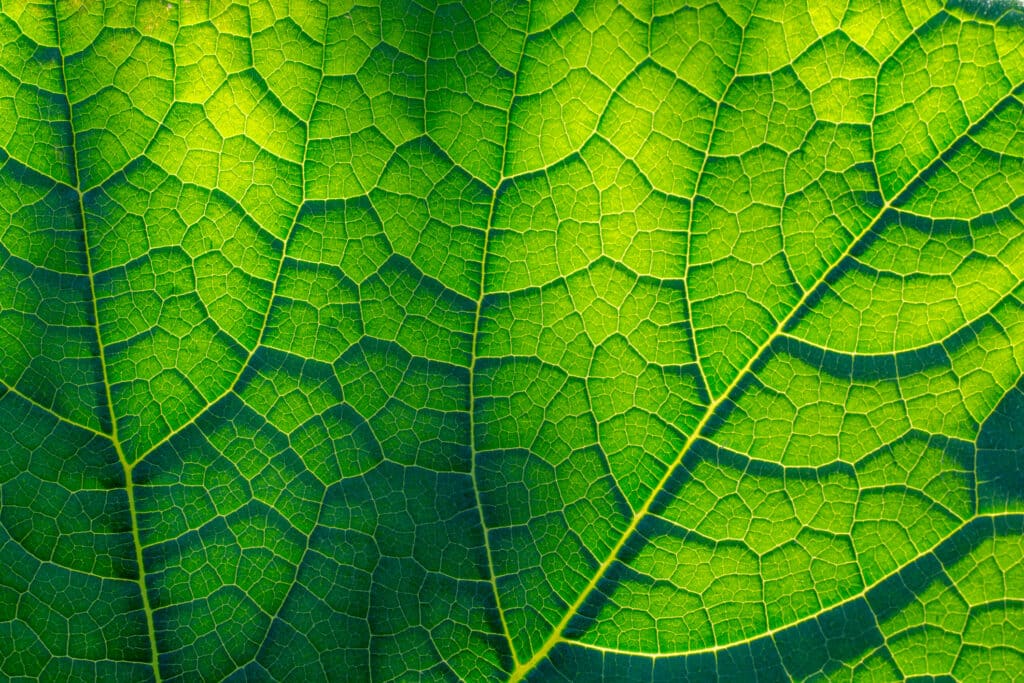
When photographers capture close-up photography of leaves, it reveals a world of branching and connecting veins that almost look like little rivers moving through a forest. Each leaf has its own unique colors and patterns that can barely be seen without the power of a macro lens, which makes it a beautiful option for plant photography.
Finding Feathers to Photograph
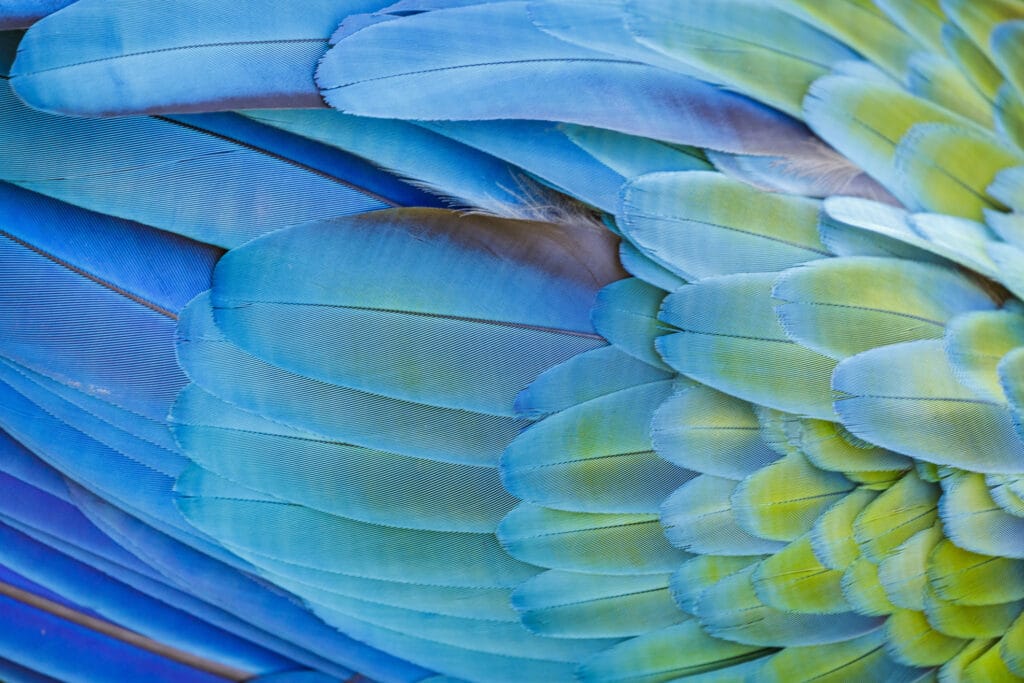
When a bird swoops by your window, you might barely get a glimpse of one of its shiny gray, brown or speckled feathers. If you’re lucky enough to find a fallen feather out in the wild, it can reveal patterns and colors most haven’t seen up close. If you’re already interested in bird photography, capturing close-up images of their feathers can be another skill to add to your photography toolbox.
The Making of a Macro Photography Master
You have the tools, the tips and the inspiration and you’re on your way to capturing your next macro subject in sharp focus. No matter what macro photography tips you’ve learned by reading books and flipping through magazines, the best way to discover the fun of shooting close-up is by snapping a few pictures. This week, try picking one small subject, planning an afternoon dedicated to capturing it and then taking notes on what you’ve learned. Before you know it, you’ll be a macro photography master.
Related Reading
Calli Zarpas
Producer & Writer by occupation. Ceramicist & Newsletter Editor by avocation.
Try Skillshare for free! Sign up for a 7 day free trial today!
Get Started- Unlimited access to every class
- Supportive online creative community
- Learn offline with Skillshare's app


