

Micro Photography: Explore What the Naked Eye Can’t See
Bigger isn’t always better—see how micro photography can uncover hidden details and reveal nature’s tiniest works of art.


Ever wondered what lies beyond the limits of our naked eye? The fascinating world of micro photography allows us to venture into the intricate details of the tiniest subjects, revealing an obscured universe that often goes unseen.
Learn what micro photography entails, discover its differences from macro photography, explore the required equipment and get inspired to create your next micro-masterpiece.
What Is Micro Photography?
Micro photography is a specialized form of close-up photography that involves capturing images of small subjects. It allows us to see the intricate details and textures that are not visible to the naked eye. With the help of advanced equipment and techniques, micro photographers can reveal the hidden beauty of everyday objects and natural elements that surround us.
Micro Photography vs. Macro Photography
Although the terms “micro photography” and “macro photography” are often used interchangeably, these types of photography have distinct differences.
Macro photographers generally capture small subjects at a 1:1 reproduction ratio, where the subject appears life-size on the camera's image sensor.
On the other hand, micro photography often goes beyond the 1:1 magnification ratio on the camera sensor, enabling you to capture high magnification of tiny subjects and explore greater levels of detail. That could mean your subject appears five times larger than in real life, or 50 times larger than in real life—it all depends on the gear you’re using and the look you’re after.
Micro Photography Equipment
While it’s certainly possible to take stunning macro photos with a smartphone, you’ll need to use more specialized gear if you want to get even closer to your subjects.
So before embarking on a micro photography adventure, consider adding a few pieces of equipment to your arsenal.
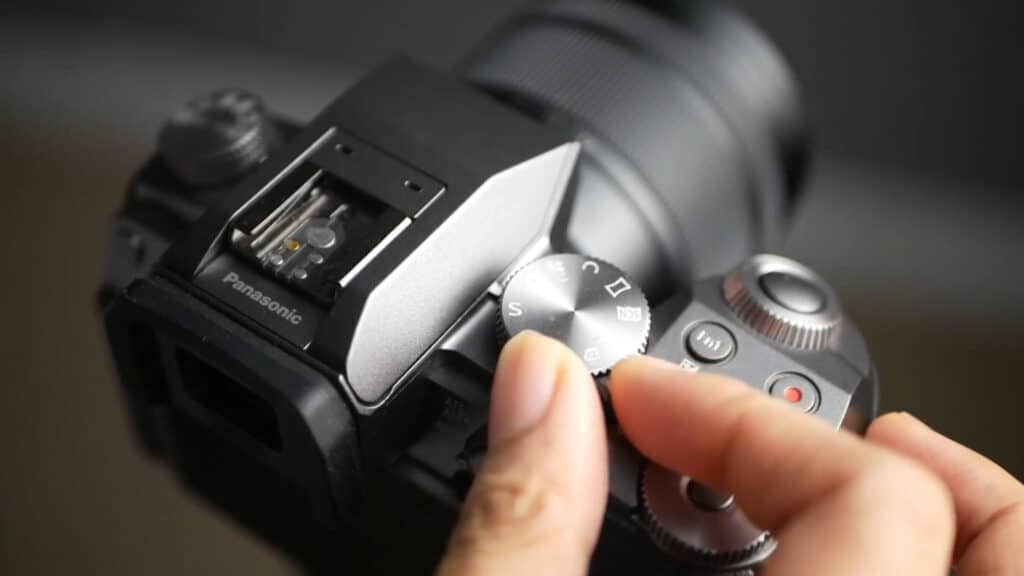
Camera
To capture every teeny-tiny detail, you’ll need a high-resolution camera. Ideally, that means a full-frame sensor and at least 24 megapixels.
If you’re looking for something that’s relatively light and portable, you might prefer a mirrorless camera with a full-frame sensor (or even a Micro Four Thirds camera, which has a smaller sensor than its full-frame counterparts).
But if you want to enjoy a large selection of interchangeable lenses and a longer battery life, a digital single-lens reflex (DSLR) camera could be ideal for you.
Lenses
In the world of micro photography, lenses are everything.
Most importantly, the lens you choose should offer magnification greater than 1x. Some macro lenses offer 5x magnification, for instance.
Also look for a camera lens with a wide maximum aperture, which helps in isolating the subject and creating a pleasing background blur.
Don’t have the budget (or desire) to pick up a dedicated macro lens? No problem—you can use tools like macro extension tubes and close-up lens filters to take magnified photos with ordinary lenses.
Tripod
It can be difficult to get high-quality close-up photos when you’re holding your camera with your hands. To remedy that issue, use a tripod to hold your camera steady and in the perfect position. Look for one that can be adjusted to be very low to the ground, as this can help you get closer to your tiniest subjects.
Lighting
Eliminate pesky shadows and evenly illuminate your subjects from all sides with external lighting equipment. A ring light, for instance, can provide exceptional results.
Microscope
Some micro photography purists maintain that “true” micro photos must be taken through a microscope. While there is no concrete definition for what constitutes “real” microphotography, a microscope can certainly help you get an even closer look at your subjects. Depending on the strength of your microscope, you may even be able to capture images of individual cells.
Micro Photography Techniques
With the right camera settings and a few inspiring ideas, you can start seeing the results you want faster.
Choose the Appropriate Aperture Setting
Moving to manual focus with a wide aperture—i.e., a smaller f-stop number)—will result in a shallow depth of field, isolating the subject and creating an aesthetically pleasing background blur (an effect known as bokeh) in your final images. But if you need a larger depth of field to maintain focus on the entire subject, choose a narrower aperture (i.e., a higher f-stop number).
Use a Fast Shutter Speed
Due to the close focusing distances involved in micro photography, even the smallest of movements can result in blurry images. To counter this, you can simply use a faster shutter speed. And if you need to use a slower shutter speed to compensate for low light, a tripod can help stabilize your shots.
Get Close to Nature
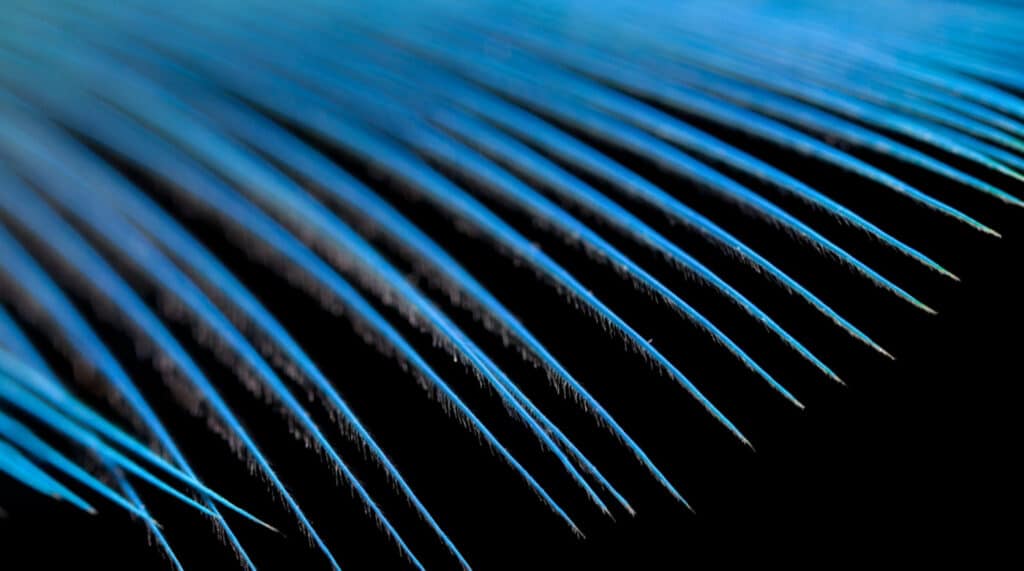
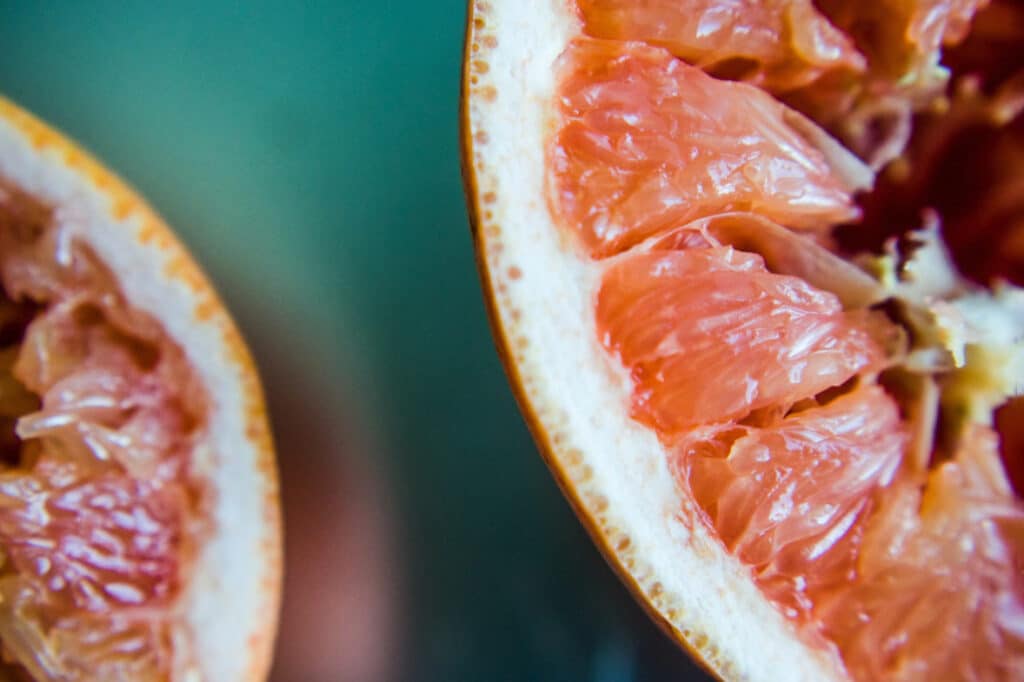
Combine nature photography and micro photography to achieve fascinating results in no time. You can photograph flower petals, pine needles, tree bark, spider webs and leaves, and those are just the organic materials you’re likely to find right outside your home.
Venture further and you’ll be able to discover even more intriguing subjects, potentially including seashells, ancient rocks, rare plants, glittering minerals and so much more.
Consider Wildlife
Your micro photography of the natural world need not be limited to non-living things. With some patience and persistence, you can capture up-close images of wildlife too. For instance, you could wait by a birdfeeder to snap photos of visiting birds, or use your most silent footsteps to get shots of a sunbathing lizard.
And if you’re having trouble getting close enough to live subjects, consider scavenging for the parts they’ve left behind—think deer antlers, bird feathers and so on.
Rethink Landscapes
While micro photography is most often associated with small subjects, it has its place in landscape photography. Focus on the tiny details that add character to landscapes, such as dewdrops on grass, intricate patterns on rocks or the delicate veins of a fallen leaf. Look for unexpected angles and perspectives to capture unique micro landscapes within a broader scene.
To expand your photographic horizons, you can even take micro photographs specifically to complement more traditional landscape shots.
Remember to Edit
Your micro photos don’t have to be absolutely perfect when you first load them from your camera to your computer. With a basic understanding of the fundamentals of photo editing, you can make your already-snapped pictures brighter, darker, sharper, softer or whatever else you want them to be.
Go Small for Big Results
Photography can be a fantastic means of capturing memories, landscapes and people the way the human eye perceives them. But one of the best parts of photography in general is that it’s not limited to what the human eye can see. And with the magic of micro photography, you can see more details through the lens of your digital camera than you ever could in real life.
So if you want to take larger-than-life photos and explore hidden worlds, grab your camera and get ready to go small.
Related Reading
Carrie Buchholz
Carrie Buchholz is a freelance writer who lives in Northern Colorado with her husband and dog.
Learn Photography with Skillshare — Start Your 7-Day Free Trial Now!
Start Your Free Trial Today!- Unlimited access to all classes
- Hands-on classes with pro photographers
- Learn offline with Skillshare's app


