

How to Use Procreate: The Ultimate Beginner’s Guide
It may seem overwhelming initially, but the secret of learning how to use Procreate is to start with the basics and practice as much as possible.


If you want to learn how to make digital art on your iPad with your Apple Pencil, Procreate should be your app of choice. It was designed specifically for this scenario and has won legions of fans (and awards) for its capabilities.
The interface may feel daunting, but there are only a few tools you need to understand to start using Procreate.
What You Need To Use Procreate
There are just two things you need to get started with Procreate:
- An iPad with OS 15.4.1 or later
- The Procreate app
It works best if you use an Apple Pencil, but it will work with other styluses, too.
Essential Procreate Features To Master
When you’re new to the app, it’s worth focusing on the Procreate features that will get you up and running as quickly as possible. That means learning how to create a new canvas, pick the right brush and colors, build your artwork with layers, and resize it for export.
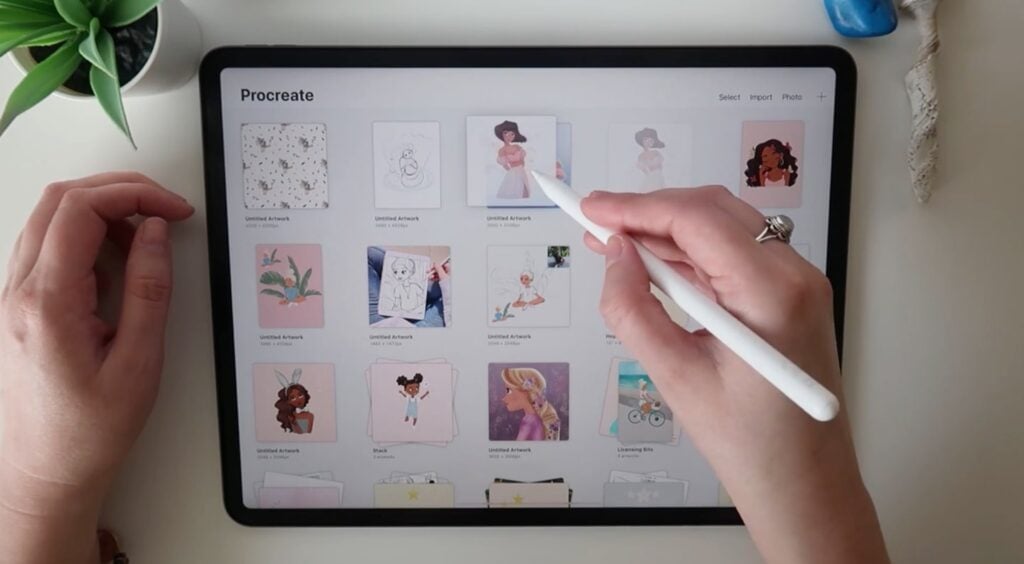
1. Arrange Your Gallery
The first thing you’ll see in the Procreate app is the gallery, where you can scroll through your existing canvases.
As you start making more art, you may find the gallery becomes a bit too messy, or it’s hard to find specific canvases. To avoid this, you can organize your canvases into groups. Just click and hold the canvas to drag and drop it.
2. Create a New Canvas
You must set up your canvas before you can do anything with Procreate. Tap the plus icon in the top right-hand menu bar to choose your new canvas size from various presets.
If none are suitable, you can create your custom canvas by selecting the ‘new canvas’ option at the top of the menu. You’ll be asked to specify a width and height in pixels and set the resolution by choosing the DPI. As you become more familiar with how to use Procreate, you’ll be able to tinker with even more canvas settings, like the color profile or background settings.
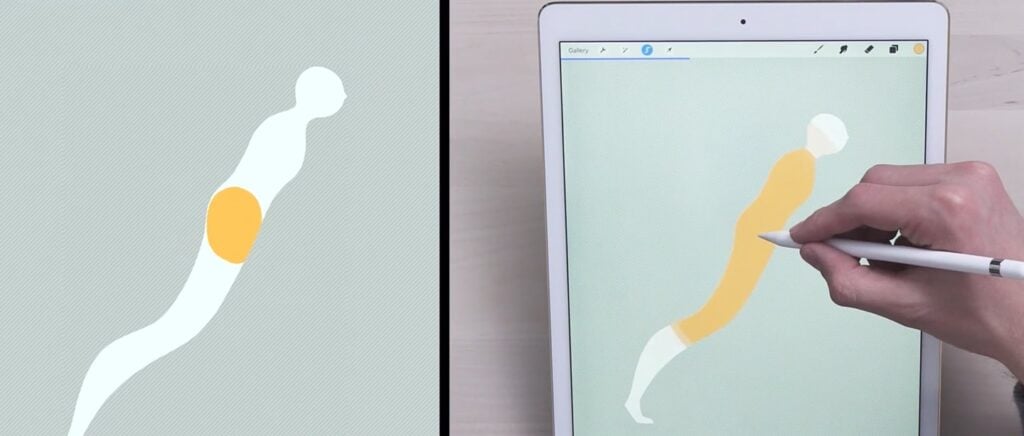
3. Pick a Brush
Your blank canvas is primed and waiting to be painted, so you must learn how to draw on Procreate next. It starts with selecting your brush.
There’s a whole range of textures in the brush library that you can choose from, each designed for a specific purpose, which you can access by tapping on the brush icon in the top right corner of the screen.
This broad range of Procreate brushes is usually sufficient for beginners, but it’s possible to expand the range by creating your own or downloading more.
When your brush is selected, use the sliders on the side menu to control the brush size (top menu) and the opacity of your stroke (bottom menu).
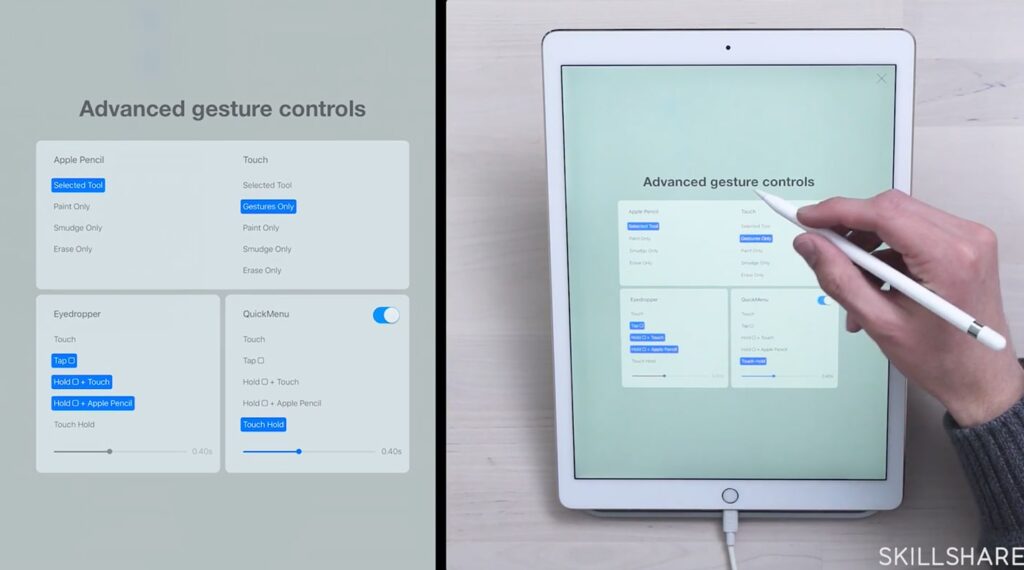
5. Get to Grips with Gestures
Since the Procreate app was designed specifically for touch, there are several gestures you can use as shortcuts. Some of the most helpful Procreate gestures include tapping with two fingers to undo and tapping with three fingers to redo:
Other default gestures, which you may use intuitively already, include:
- Pinch to zoom
- Pinch and twist to rotate the canvas
- Swipe three fingers from side to side to clear a layer instantly
- Swipe three fingers down to open the cut/copy/paste menu
- In the layers menu, pinch to merge two or more layers
It’s worth knowing that you can edit what Procreate considers a gesture with the advanced gesture controls menu. This is located in the preferences section of the actions menu and lets you decide things like only showing the QuickMenu if you touch and hold or only paying attention to touch when you make gestures to prevent accidentally drawing.
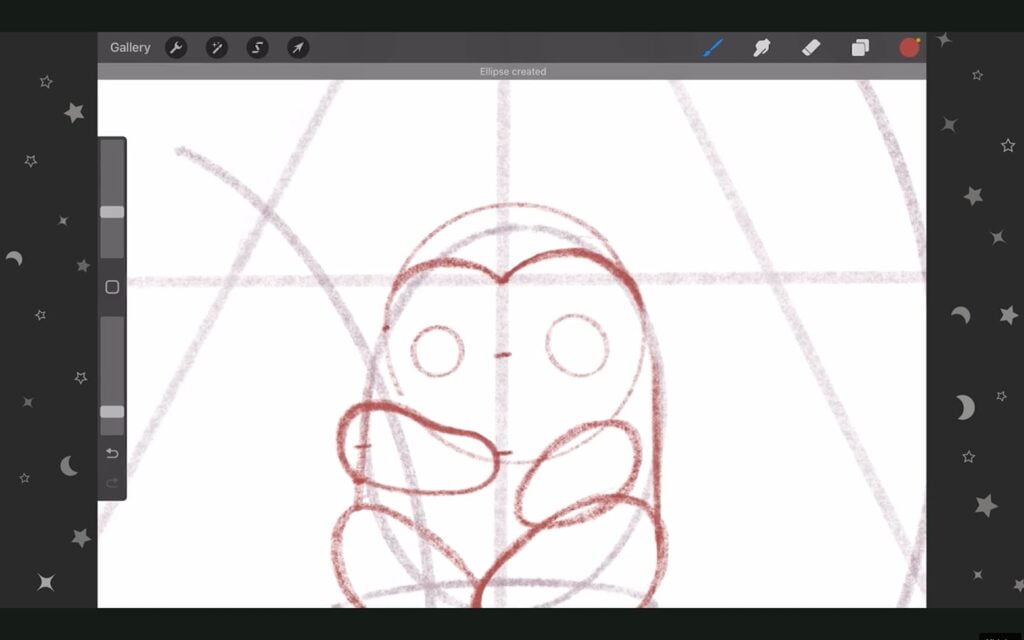
6. Sharpen Up Your Drawings With QuickShape
There’s a clever tool that will ‘snap’ any shape you draw into a perfect form, which is ideal for Procreate beginners. It’s called QuickShape, and you can activate it if you keep your pen to the screen after you draw a shape and place a second finger on the canvas.
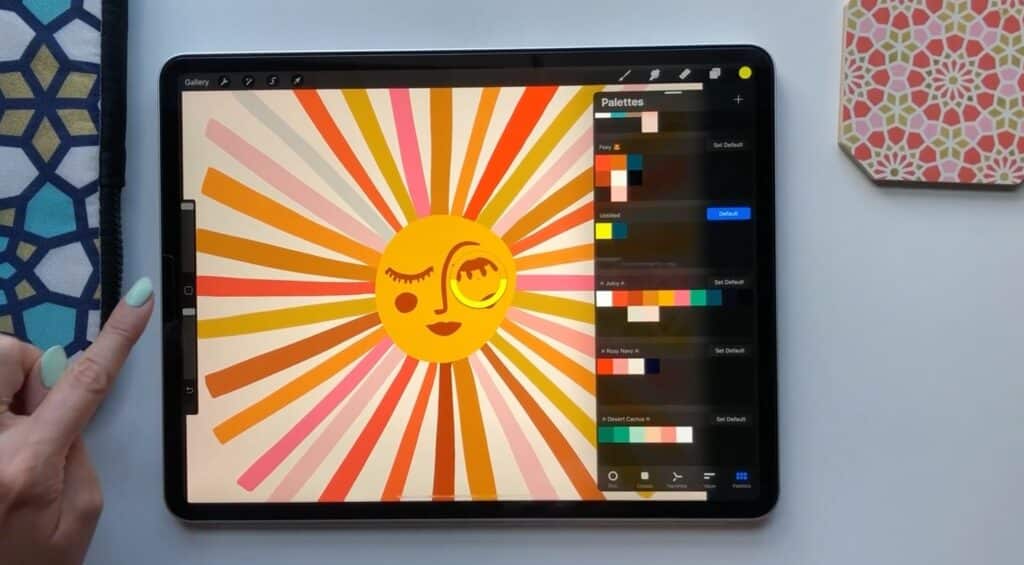
7. Create Characters with Colors
Color is one of the essential elements of graphic design and can help set the tone of your artwork. Procreate makes it easy to create contrast and harmony with complementary colors with easy color selection and tools to fill in your designs quickly.
Conquer the Color Interface
You’ll see a large color wheel and a circle when you open up the color interface. The exterior ring lets you choose the perfect hue, and the inner disc will select the saturation.
You can switch from this classic view to one that suggests the most harmonious colors, allows you to input numerical and hexadecimal values for precise color matching, or find pre-filled palettes.
Perfect the Color Picker
Sometimes, you don’t want to pick a shade from the color wheel but instead match one already on the screen. The color picker tool will do this for you; you only have to hold the square on the left of the screen and then tap on the color you want.
You can even automatically create a color palette by pointing your iPad’s camera at a source or by choosing a source file or photo. Procreate will capture the relevant colors and add them to a separate palette.
7c. Quickly Fill With Color
When you’ve landed on the right color, don’t waste time painting in your shapes; fill them by quickly dragging the color from the top right corner - or your color palette - into the shape itself.
8. Learn to Use Layers
Digital art made in Procreate will have been built over several stacked layers.
Each layer is unique and can be changed without affecting the whole of your artwork. For example, if you want to add a particular texture or detail, you can do this in a new layer so that you won’t damage the whole canvas if it goes wrong.
As this illustration shows, the image of the apple is constructed of three layers stacked on top of each other:
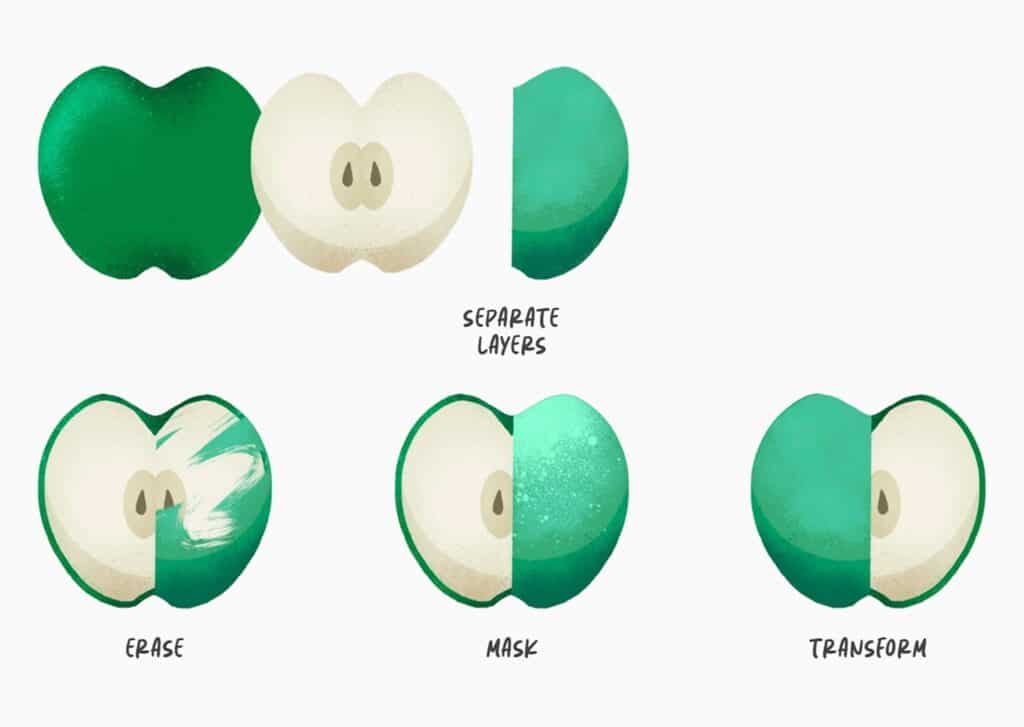
If you used the erase tool on the top layer containing the half-apple, only the light green would be removed, and the underneath layers would be exposed. If this were drawn without layers, the whole portion of the apple would be erased.
It’s important to note that edits will only be applied to the selected layer when working with Procreate.
You’ll quickly see which layer is selected because it’ll be blue. If you want to select another, tap it and watch it change color.
8a. Organize Your Layers
After a while, layers will build up, and keeping track of them will be hard. To keep everything clean, it’s recommended that you label each layer and arrange them into groups for specific elements. Gently swipe right on all the layers you want to be gathered together to group them, tap and hold to select the layer, and then drag it to move it up or down.
If you’ve made a mistake, delete a layer by swiping left. This gesture will also let you duplicate the layer to save time and avoid re-drawing similar artwork elements.
To prevent any accidental changes or edits to a layer, you can lock it by swiping from right to left on the selected layer.
When you’re ready to merge layers, pinch them together to create a single, flat image.
Discover the Magic of Layer Visibility
One of the cool features of layers is that you can control their visibility. If you tap the ‘N’ on the layer, you can choose the opacity level by dragging the slider.
You can also decide how you’d like the layer to blend with the rest of the piece. The options are shown beneath the opacity slider and let you preview each option before you choose one. This is how you can get some cool effects, like using the multiply blend mode to create a darker, more intense effect or using color dodge to brighten the image like traditional photography.
Create Cool Effects With Layer Masks
Sometimes, you need more control than simply blending layers, and that’s when a layer mask can be helpful. This tool lets you manually reveal or conceal parts of the layer below, for example, if you want to allow some of the texture or color to peek through.
You add the mask to your layer by tapping on the layer and selecting ‘Mask’ from the expanded menu. You’ll know you’ve done this correctly when you see another layer added above it.
The layer mask will be completely white, which means that all of the layer is visible. You’ll need to paint over the areas you don’t want to be displayed in black to obscure them. It may be easier to fill the layer with black to conceal it and then use white to reveal the layer where you want it to be shown.

Tips to Get Started Using Procreate
These Procreate tips will help you get started as quickly as possible and develop your confidence with the app:
- Start by drawing simple shapes. Lean on tools like QuickShape and QuickLine to get more professional-looking lines.
- Create your own color palette to save time and produce a more cohesive design.
- Practice with simple Procreate projects.
- Experiment with different brushes.
- Turn on the brush cursor to see the shape of your brush as you draw. It’s found in the preferences section of the actions menu, and you can toggle it on or off.
- Use perspective grids to help get proportions right and improve the symmetry of your composition.
- Save time by learning where everything sits in the QuickMenu.
- See what playing with the opacity of brushes and layers does to your work.
- Create a timelapse of your work to see how your piece has been crafted and allow you to share your process with others.
Everyone Can Learn to Use Procreate
You’ll graduate from your Procreate beginner status in no time if you keep practicing. Make sure you experiment with a range of brushes and tools to see what you like, and work in layers to undo anything you don’t like immediately.
If you need extra help, browse the plentiful Procreate courses on the Skillshare site that will teach you everything from designing your own patterns or lettering to making artwork that you can sell or even creating animations.
Try Skillshare for free! Sign up for a 7 day free trial today!
Get Started- Unlimited access to every class
- Supportive online creative community
- Learn offline with Skillshare's app


