

How to Draw Trees: A Step-by-Step Guide
Flex your green thumb and learn how to draw trees step-by-step with this beginner-friendly guide!


Trees are excellent subjects for beginning artists. The diversity of shape, size, color and texture offers endless opportunities to practice a variety of techniques. Drawing trees also challenges you to think about structure and balance.
Here, you’ll learn basic techniques for tree drawing, and detailed instructions for individual tree elements. Most projects use physical tools and paper, though some do explore digital options.
Materials Needed
All you need to draw a tree is a pencil and paper. However, depending on your skill level, you may need:
Beginner
- Pencil
- Eraser
- Ink pen
- Watercolor paints
- Sketchbook
Drawing enthusiast
- High-quality pencils, pens, pastels, etc.
- Tablet
- Software like Procreate or Illustrator
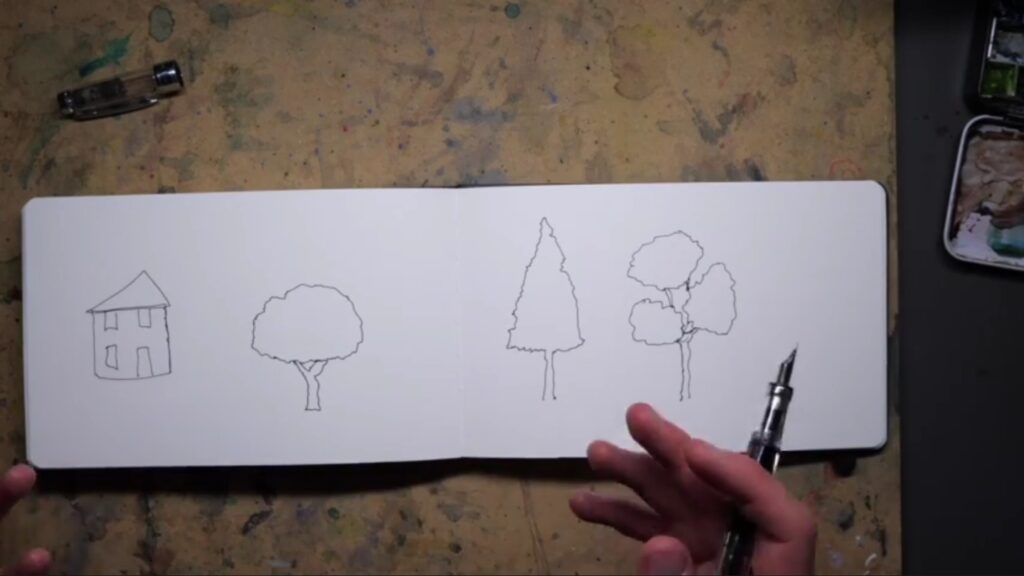
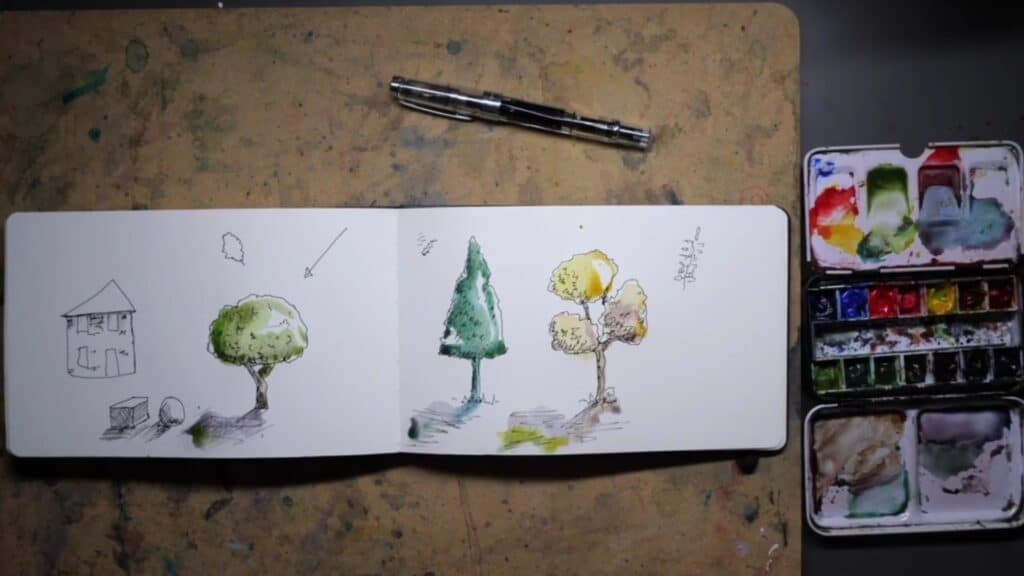
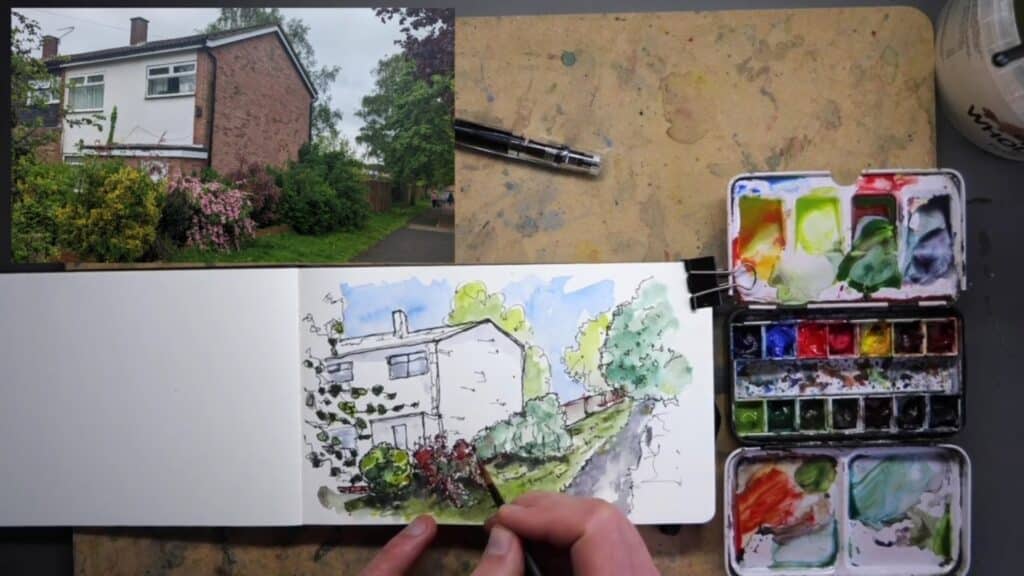
How to Draw Simple Trees for Watercolor
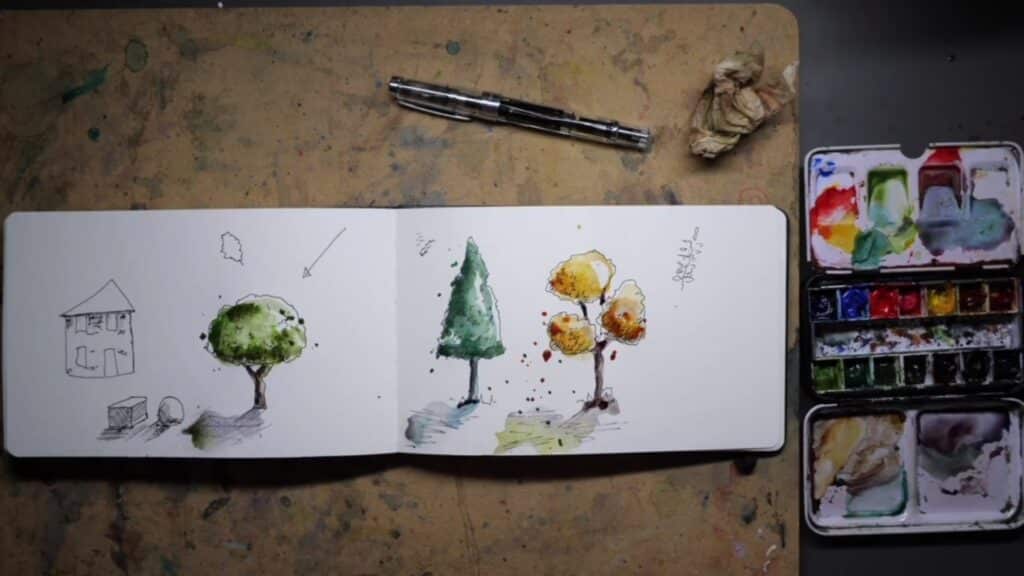
In Urban Sketching Basics - Trees, Bushes, Hedges, Flowers and Greenery, sketch artist Toby Haseler shows you how to focus on the bigger picture of shape, texture and color for a fun and stress-free sketch.
1. Simplify With Big Shapes and Immediate Textures
Imagine or look at the tree you want to draw, focusing on the outline and basic shapes. As you draw those shapes, allow the lines to include obvious texture. For example, the outline of an oak tree’s leafy top can be a little wrinkly or jagged, rather than smooth.
2. Add Details of Texture and Shading
Give the dimension of the shape by suggesting texture and shadow. For an oak tree, consider the general shape of oak leaves and sketch that into the leafy top. Don’t worry about the exact shape or number of leaves—you’re suggesting reality, not recreating it.
For shading, decide where the light comes from. Wherever it hits the tree should have few leaves or other details. Then, draw quick hatch marks for the tree’s shadow.

3. Add Light Colors that Flow Across the Page
Watercolor lends itself well to this style. Because branches move and leaves poke in and out, you can use color fluidity to imply movement and shading.
Focusing on the outer areas of the sketch, quickly add watery color with a large brush. Don’t worry if some areas stay white, especially if it’s where sunlight hits. Add more color to the shaded areas to make them darker.
4. Add Bold Color to Emphasize Shapes
Using a small brush, add bolder colors to the tree’s details. Continue focusing on the big picture and standout colors, but use the bold colors to draw attention to the more intense areas of the image.
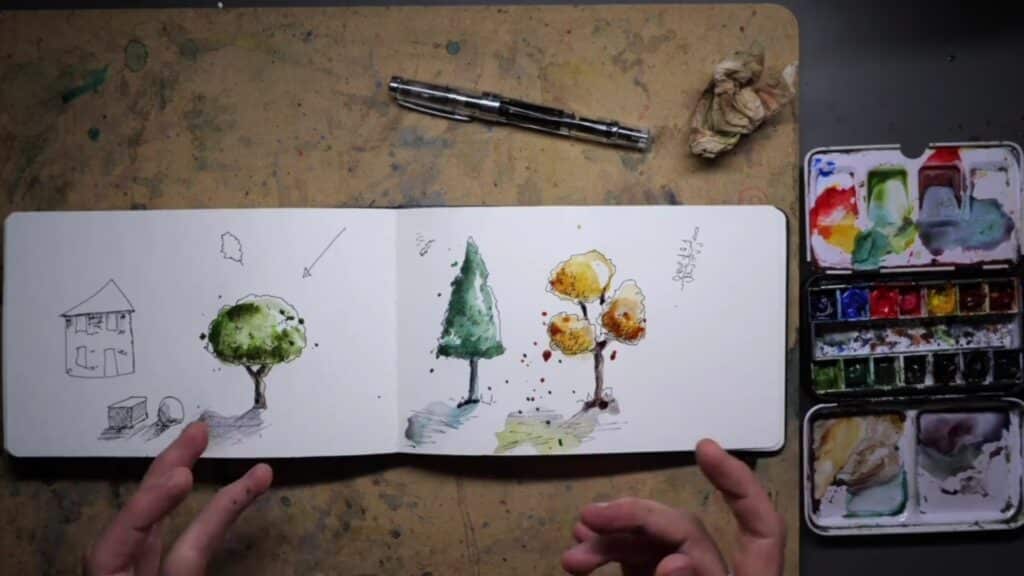
5. Bring Out Key Features With More Color and Pen Work
To bring out details the watercolor might obscure, redefine the dried image with a bit more ink. You can also highlight specific leaves, flowers, etc, with defined pops of color over the more fluid color.
How to Draw Pine Trees

In Learn How to Draw Pine Trees and How to Incorporate Them in Your Watercolor Paintings, watercolor artist Zaneena Nabeel walks you through painting various types of evergreen trees with watercolor.
1. Begin With the Trunk
Using a brush with a pointed end, paint a straight, vertical line to be the tree trunk. The top of the trunk should be very thin, then thicken slightly as it reaches the bottom. Begin with straight trees, then paint some trunks with bends or leans.
2. Add Branches
Starting at the top, draw branches outward from the trunk. Keep in mind that evergreens typically have a conical shape; even if the branches don’t reach the ground or some are missing, a cone is the natural line of the tree.
Like with the trunks, start by making branches symmetrical, then experiment with staggering them or leaving sections of the trunk branch free.
3. Fill in Foliage
Paint in the needles using dots, brush strokes or ragged lines. Strokes will give the tree more detail, while dots and uneven lines suggest needles without really defining them.
How to Draw a Tree from Nature
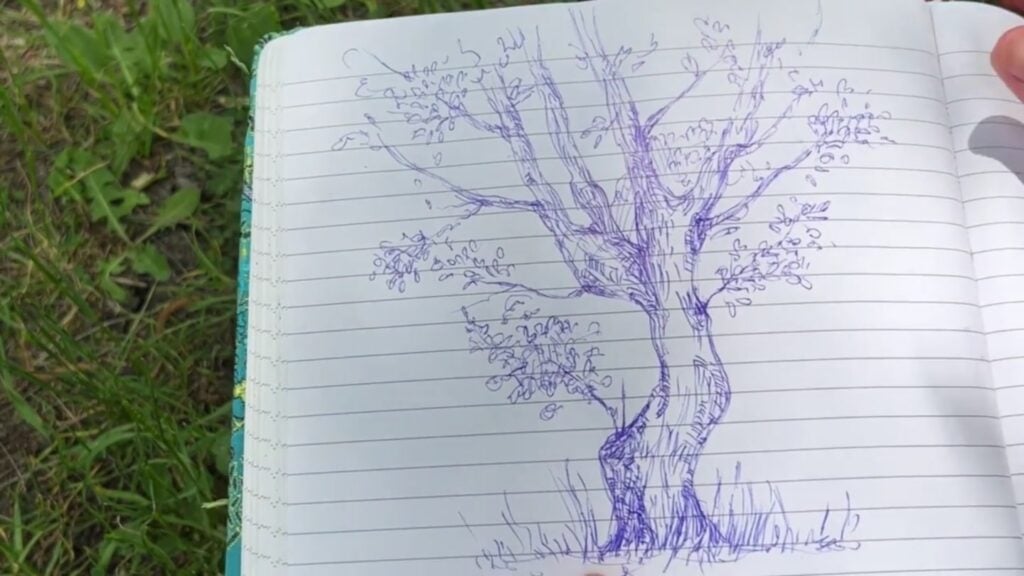
In How to Draw Trees in Nature, illustrator Maria Avramova demonstrates how to improve general drawing skills by simply examining trees and sketching them.
1. Look at the Structure of the Tree
Before you actually start drawing, look at a real, whole tree, concentrating on the trunk, largest branches and general texture of the leaves. Notice any unique angles or lines that distinguish your tree from others.
2. Sketch and Define Proportions
Start drawing exactly what you see, quickly and without much detail. You’re going for the general shapes and lines, and focusing on the overall proportions of the trunk, branches and foliage. By the end of this step, have the basic structure and shape sketched out.
3. Add Detail
Working from the core structure, start adding the smaller branches and textures that you see. Continue paying attention to the entire picture and proportions, rather than focusing intensely on specific areas.
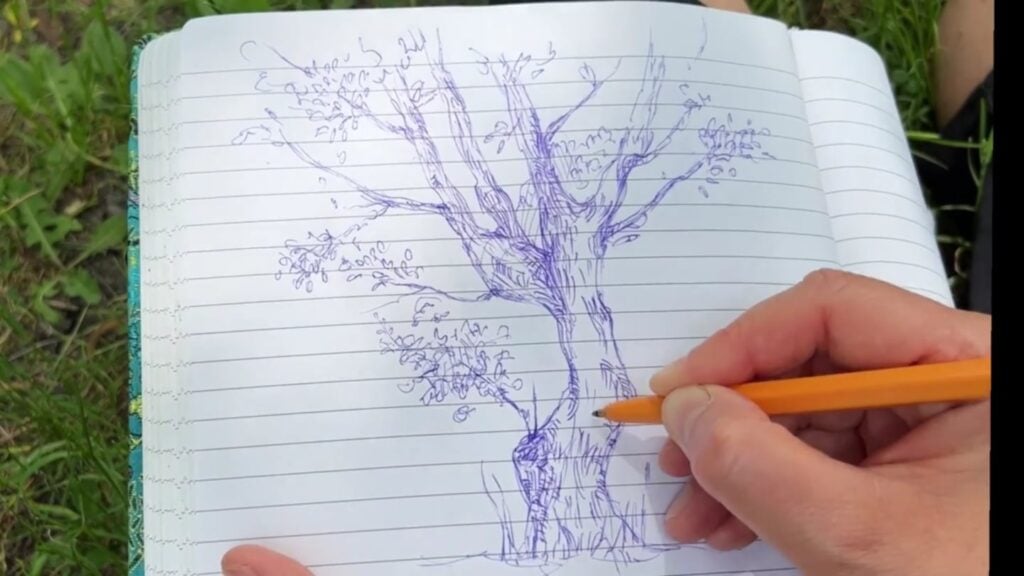
Adding detail to the spots where the main branches come off the trunk gives the visual a solid structure. While leaves are secondary to the branches in this project, including a few will add interest and life to your drawing. Allow yourself to use squiggles to suggest leaves, rather than getting super detailed.
4. Decide When the Tree is Finished
This project is about practice, and getting to know the tree itself and how to draw its unique characteristics. Since the idea isn’t to create a perfect portrait, it’s up to you to decide when the drawing is complete.
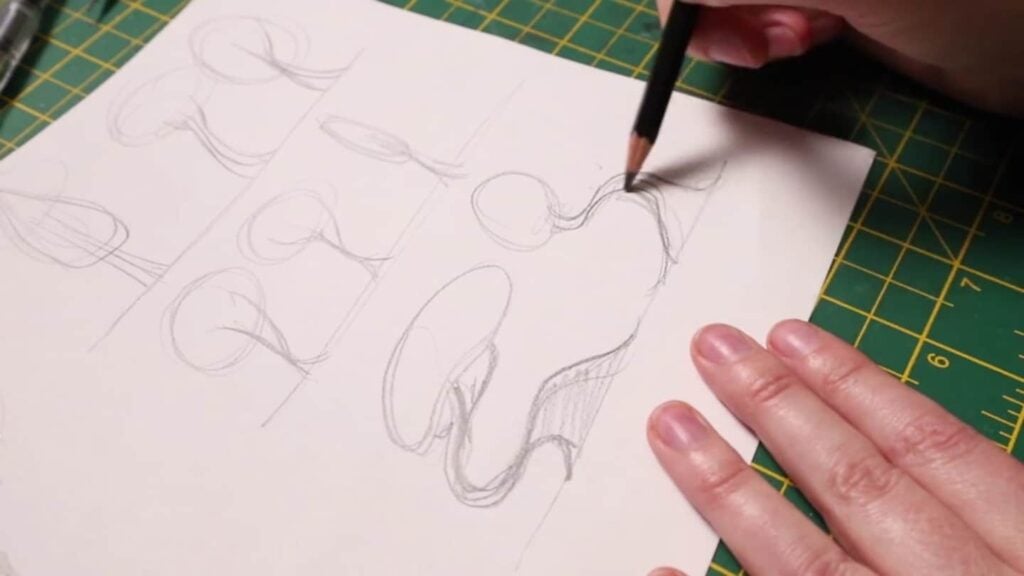
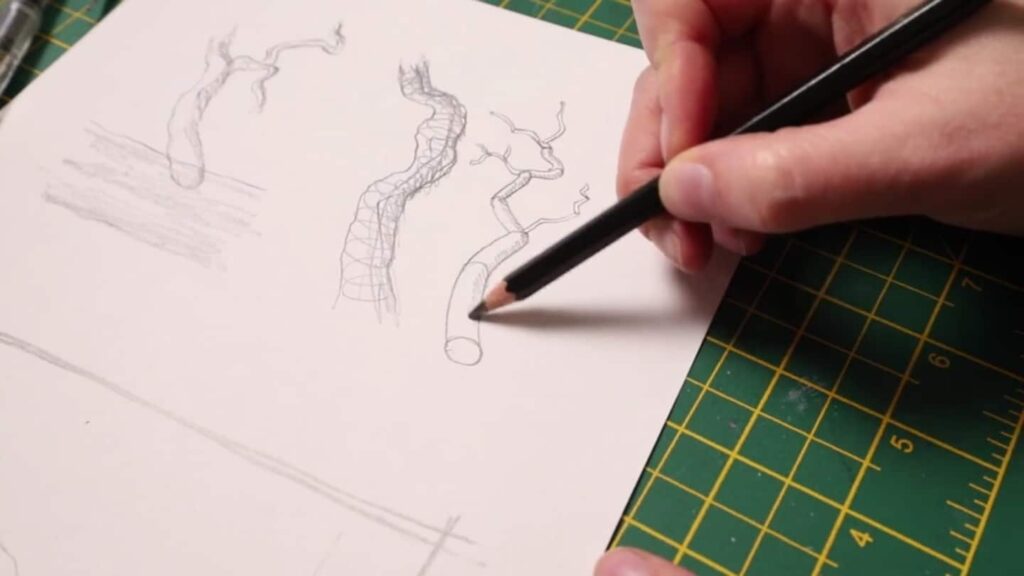
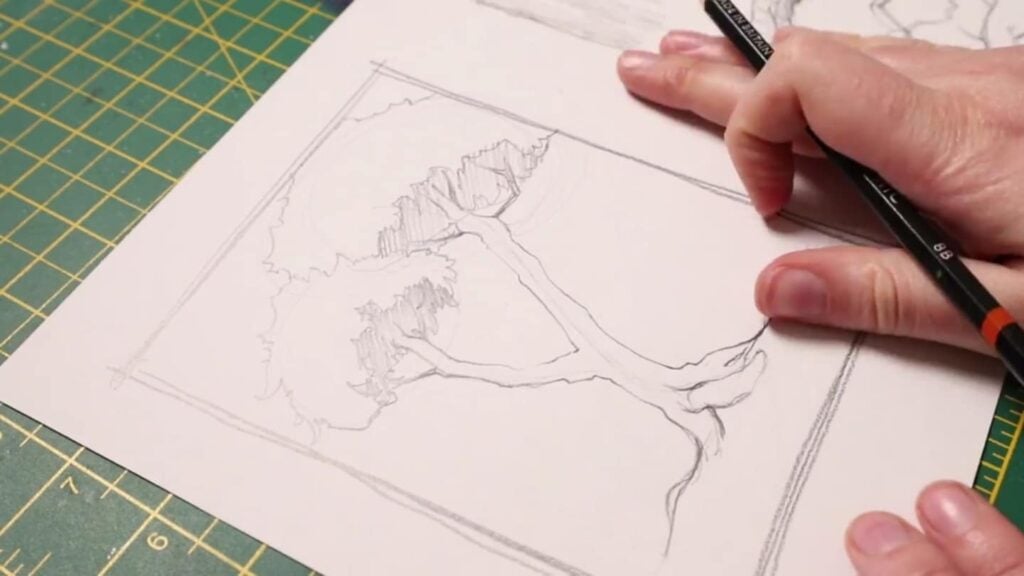
How to Draw Detailed Tree Roots and Branches
In Draw & Paint Trees | In-Depth Explanation of Watercolor, Gouache, Digital Paint Demos, painter Sarah Burns teaches you to break tree structures into simple shapes and easy-to-understand forms.
1. Study Tree Types and Practice Sketching
Start by looking at accurate images of different common tree types. Notice the general shapes, proportions and textures. Then, practice pencil drawing those different types by capturing the general lines and shapes of the trees.
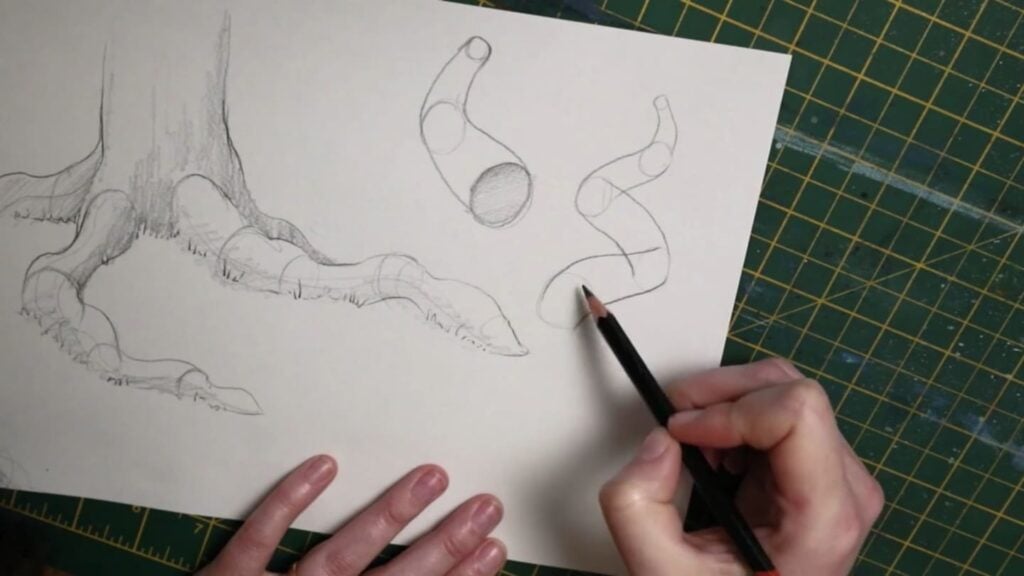
2. Draw the Trunk and Roots
Begin with the basic line of the tree’s trunk and main branches (called the “gesture” of the tree). Draw the outline of the tree’s base, considering how wide it should be to support the entire structure. Most lines will be vertical, though some may bend and be slightly horizontal. Give the outline texture based on the type of bark.
Think of roots like tubes that sweep out of the ground and up into the trunk, or weave through the dirt:
- Draw a circle near the base of the tree, then a series of increasingly smaller circles and ovals following the root path.
- Connect the ovals at their tops and bottoms with connecting lines until the lines join at the end of the root.
- Use elbows and overlapping lines to make roots come toward you from the trunk.


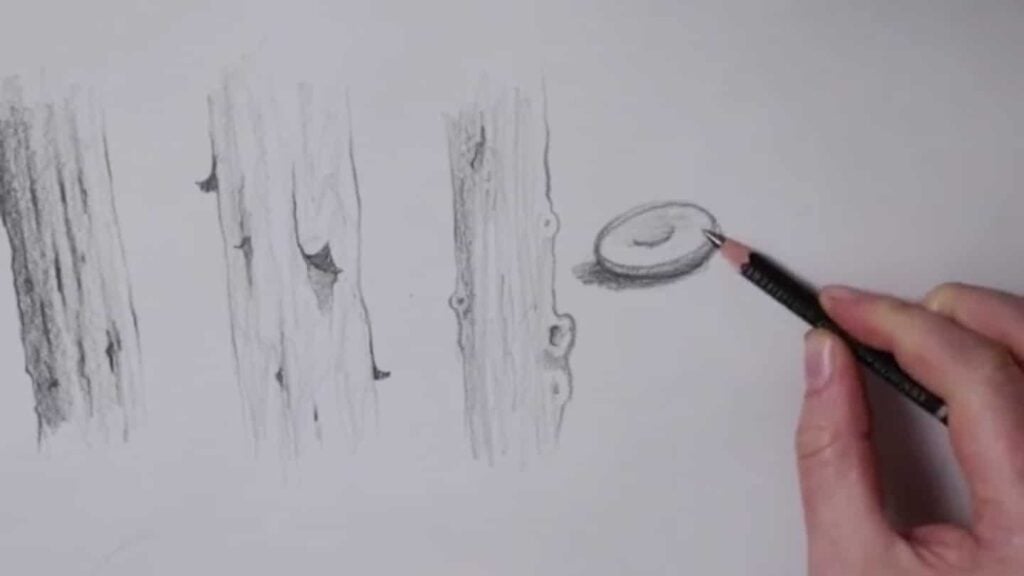
3. Draw Bark
Think of bark as a unique, thick skin on the tree. Use the side of your pencil to shade in the trunk, using different pressure to create vertical lines and the suggestion of grooves. Tip the pencil up for thinner, darker vertical lines.
Add little upturned shapes to indicate peeling bark, and funky “donut” shapes to indicate knots and holes.
4. Draw Branches
Remember that branches tend to grow out and up from the trunk, helping the leaves get exposed to the sun. Make the branches thicker near the trunk and then thinner toward the end.
Use the tube method as you did for the roots, or even draw a quick “slinky” shape in a funky line. Keep in mind that branches aren’t perfectly straight–they need to be flexible to move with the wind.
5. Draw Foliage
Leaves exist in bunches and clusters, so begin by sketching the general shape of the foliage rather than individual leaves (though the shape of the leaves can inform those general shapes). Circles, ovals and layers of these shapes work well as guides.
Add shadow to the areas with denser foliage and bring some texture to the general outline. You can add lines and curves to give some more detail.
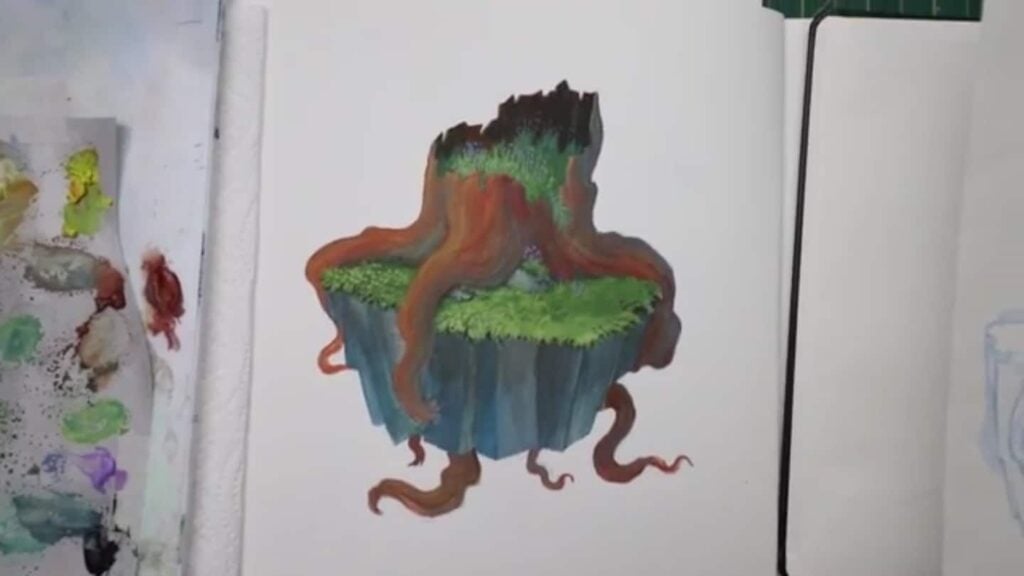
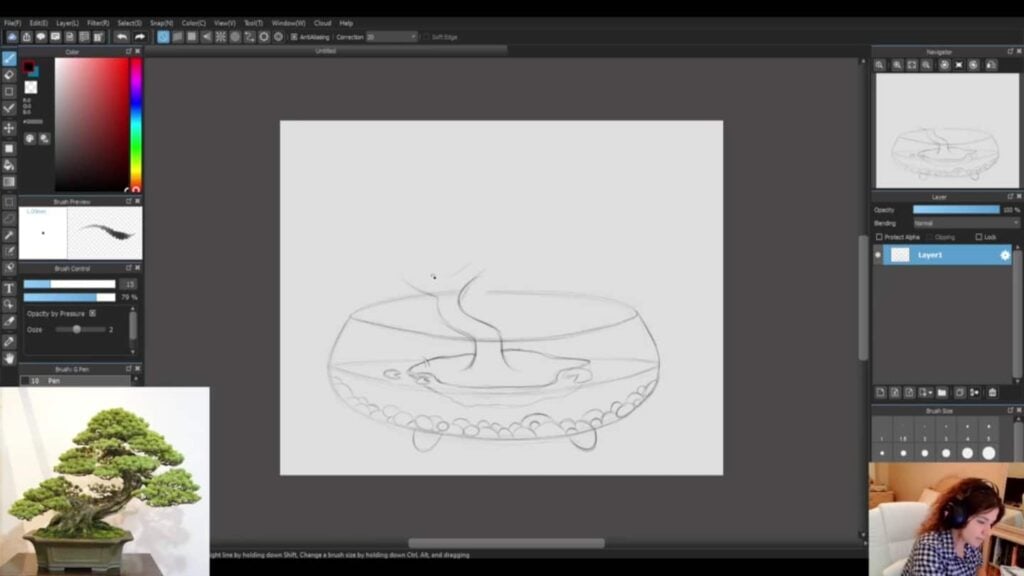
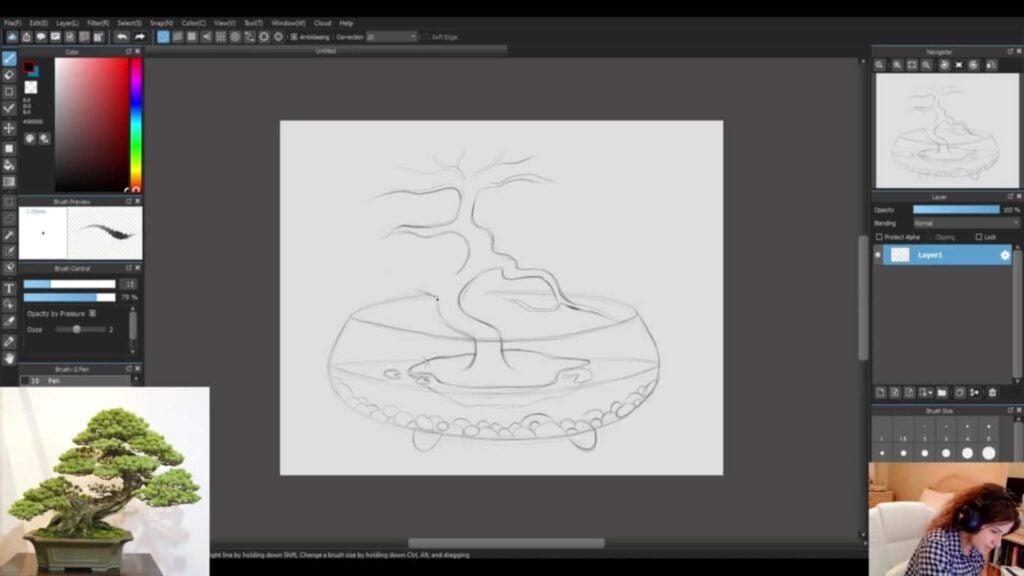
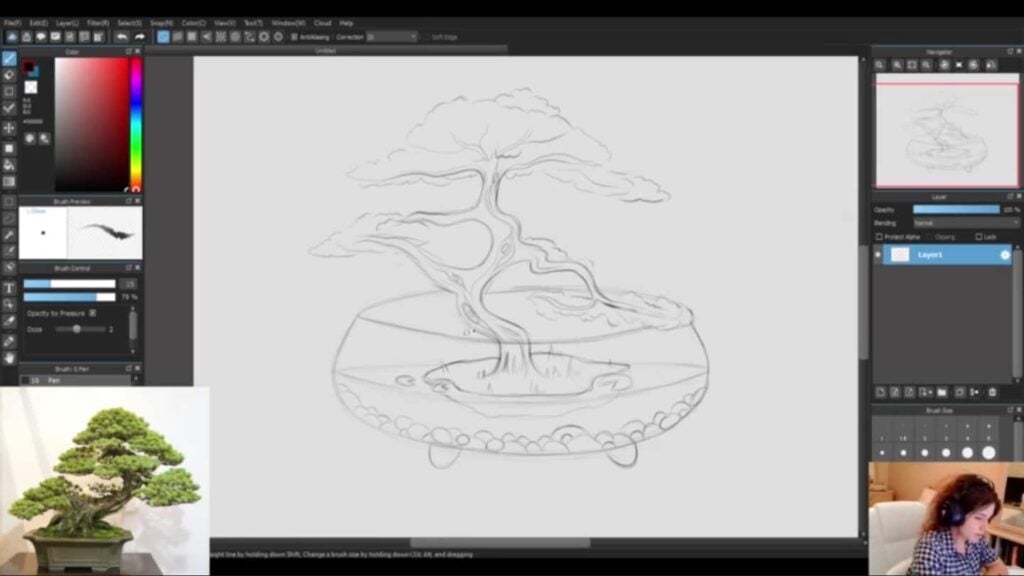
How to Draw a Fantasy Bonsai Tree
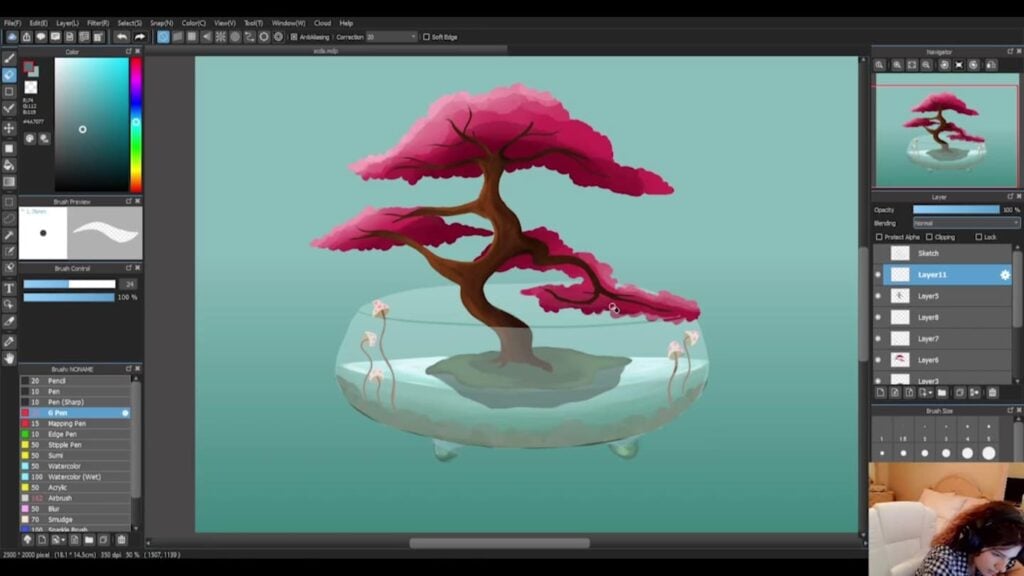
In How to Draw Trees: Illustrating a Fantasy Nature Scene, concept artist Felicia Bielby shows you how to draw a fantasy-style terrarium featuring a Bonsai tree.
1. Draw the Base
Draw a small patch of ground and a thick, wide trunk coming up from it. Bonsai trunks often have severe bends that make them nearly horizontal in some spots. To maintain balance, bend major branches out in the opposite direction, continuing this technique throughout the tree.
2. Add Branches
For a fantastic appearance, make the branches curvy, unpredictable and gnarly. Some can go up, while others point downward. Keep thinking about the general lines and how they look magical or mysterious rather than hyperrealistic.
3. Add Foliage and Trunk Details
Bonsai trees have sort of puffy clusters of leaves, which lend themselves well to a fantasy style. Don’t hesitate to make things overlap and reach in unexpected directions.
Add a few flowing lines on the trunk, maybe with smooth spirals here and there to suggest knots and holes.
Top Tip When Drawing Trees
When drawing trees, you have lots of room for imagination and creativity. However, to ensure your creations are recognizable as trees, follow these top tips:
- Base the tree on a core structure of the trunk and lines of the largest branches.
- Generally, weight and gravity should be considered when drawing a tree that could realistically stay standing.
- Use texture to suggest bark and leaves, even if you aren’t going into great detail. This enhancement will add a lot to the drawing.
Once you understand how to draw basic trees, experiment with techniques and mediums. Add watercolor or pastels for color and even more texture.
Learn to Draw Nature with Skillshare
Drawing trees is ideal, as it will help you refine general drawing skills, especially if you like depicting nature in your work.
Check out some other classes and guides to advance your techniques in nature drawing (from flowers and leaves to dogs and birds!), with the benefits of learning from professional artists:
- Learn to Draw: Daily Practices to Improve Your Drawing Skills
- 100+ Things to Draw: Easy, Cool, Cute and Fun Ideas
- How to Draw a Dog and How to Draw a Puppy: Easy Tutorial
- 21 Quick Drawing Tips That’ll Improve Your Skills
- Procreate Tutorial: Grasmere Kingfisher by Chris Hall
- Sketchbook Illustration for All: Draw Your Day With Watercolor and Pen
- 15 Drawing Styles to Learn: Ultimate Guide
- Procreate Tutorial: “The Birdie Bunch” by Jutta Schneider
- Modern Botanical Folk Art: Draw and Paint Whimsical Flowers and Leaves Using Gouache and Watercolor
Start using Skillshare to draw natural objects and beings and learn more creative skills, no matter your past experience or stylistic goals. You’ll be amazed at how talented you are!
Related Reading
Katie Mitchell
Katie lives in Michigan with her husband, kids and pets. She enjoys cooking, travel and live music.
Try Skillshare for free! Sign up for a 7 day free trial today!
Get Started- Unlimited access to every class
- Supportive online creative community
- Learn offline with Skillshare's app


