

How to Draw a Dog and How to Draw a Puppy: Easy Tutorial
Learn how to draw a dog and how to draw a puppy with this easy, step-by-step tutorial and class.


There’s a reason that dogs are man’s best friend—they’re loyal, eager to please, and the most heartwarming companions you could ask for.
Whether you want to capture your own furry friend or create a cartoon-like puppy, knowing where to start with a dog drawing can be tricky. By following this step-by-step guide, you’ll quickly learn how to draw a dog, from nose to wagging tail.
How to Draw a Simple Dog in 4 Steps
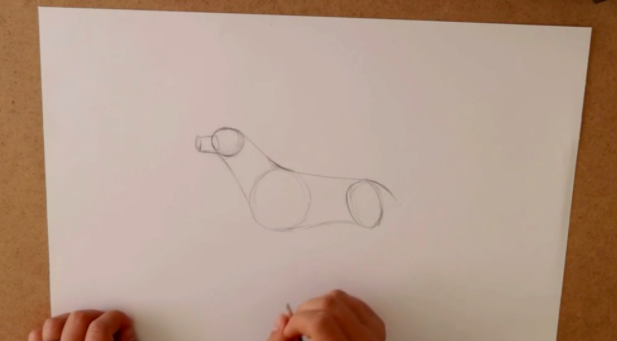
Step 1: Draw the Outline of the Body
For beginner artists, starting with simple shapes such as lines and circles is the easiest way to learn how to draw a dog. For a profile (sideways facing) dog, begin by drawing a curved line downwards. This will form your dog’s head, neck, back, and tail. Sketch a circle at the highest end of your curved line, with an oval to the left side for your dog’s nose.

Add two circles, a larger one on the left and a smaller one on the right, and connect these together underneath with a slightly curved line. Draw a straight line from the head circle down to the left circle to create your dog’s long neck.
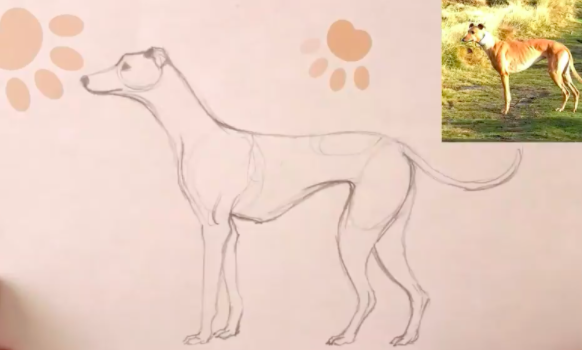
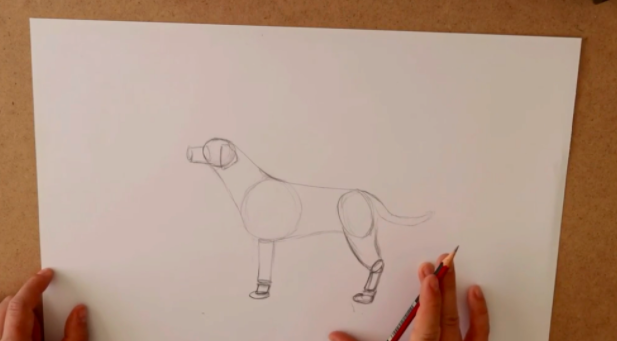
Step 2: Finish Your Simple Dog Outline
To complete your outline, draw a tube shape underneath the larger circle with a small square and oval. Under the smaller circle, draw two curved lines, a tube shape, and another oval. Your dog now has legs! Finally, add a thin, curved tube from the top of the smaller circle to give your dog a tail.
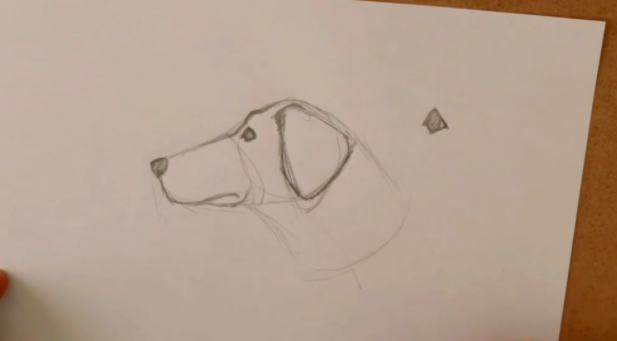
Step 3: Add Basic Facial Features
At the end of the oval on your dog’s head, draw a small square and shade this in to give your dog a nose. Lightly trace along the underside of the oval until you’re around halfway toward the head circle and draw a slightly curved line upwards to create a mouth.
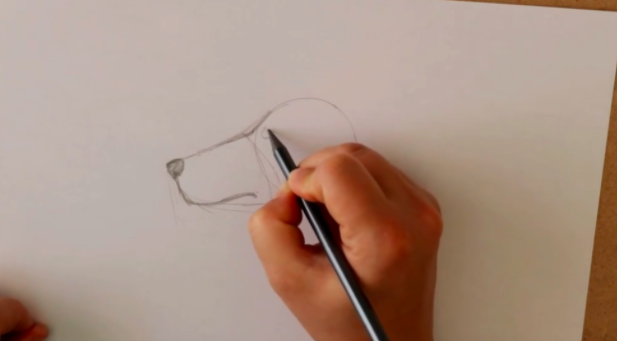
Sketch a small square and shade this in to create a realistic eye for your dog. Finally, no pup is complete without some scratchable ears! To complete the profile, draw a soft triangular shape pointing downwards from the middle of the head circle to the far edge of the circle. The two sides should meet at the base of the circle to form the tip of the ear.
Now you’re ready to try more complex techniques such as detailed facial features and fur!
How to Draw a Dog Face
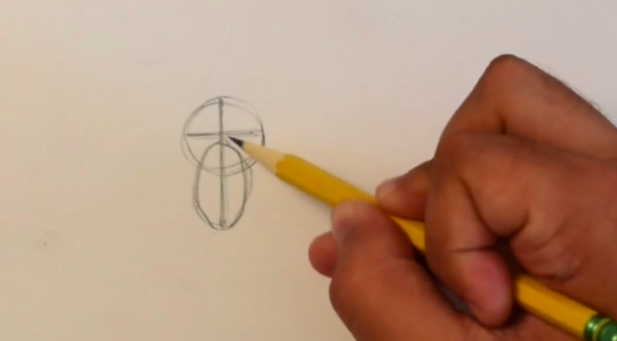
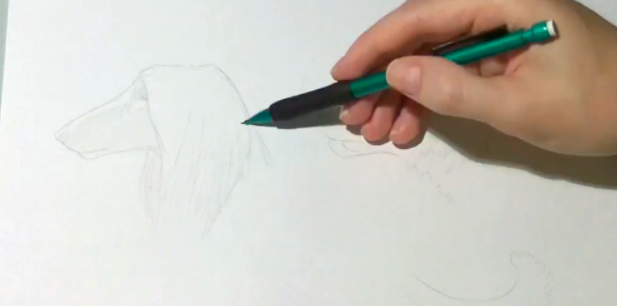
Step 1: Start With Basic Shapes
When you’re learning how to draw a dog face, starting with basic shapes is the simplest method for new artists and those looking to build their confidence.
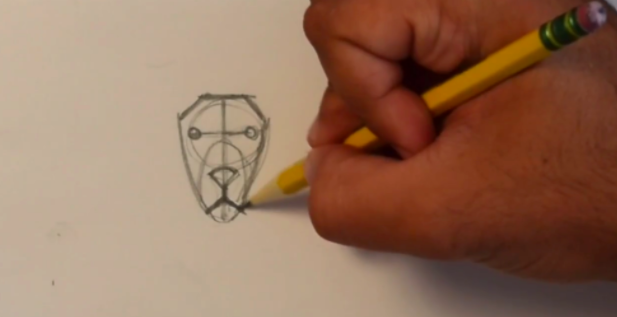
Using your pencil, start your dog outline by drawing a circle with a horizontal line through the middle of the circle. Follow this with a vertical line crossing over it within the circle. This will create a guiding point for your dog’s eyes and facial features. Directly underneath the horizontal guideline, draw an oval that stretches down to the end of the vertical line to create your dog’s muzzle.
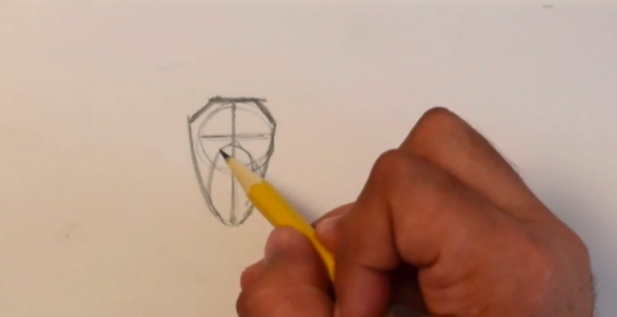
Step 2: Frame the Face
Draw a flat line across the top of the circle with a slanted line down each side. From the ends of the slanted lines, draw a connecting line on each side down to meet the oval. Place two small circles at either end of the horizontal guideline to create your dog’s eyes. Make sure that these are the same size and distance from the central vertical line.
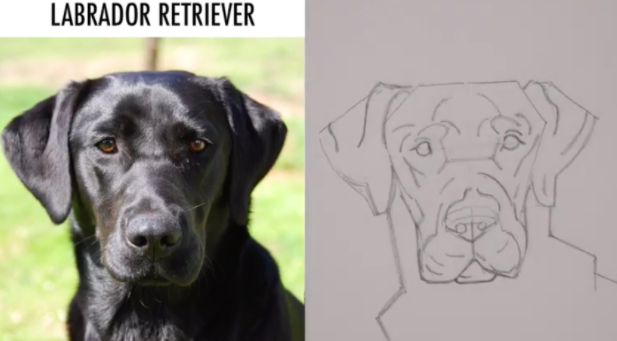
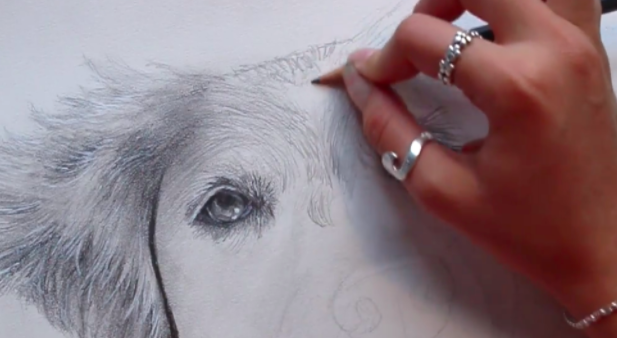
Step 3: Add Realistic Features
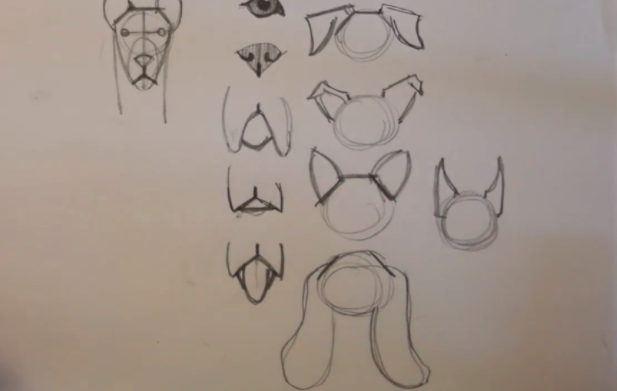
Where and how to add a nose to your dog sketch depends on the breed you’re drawing and the angle that you want the head to be facing you. If your dog is looking straight ahead, you’ll want to place the nose directly underneath your initial circle. Think of this as an upside-down triangle but with a curve for the top side. From the tip of the nose, draw a straight line down with an arrow pointing up to create your dog’s mouth.
There are many different ways that you can add noses, mouths, and ears, so it can be helpful to try out a few different variations on a separate piece of paper before you add them to your dog drawing. Once you’ve decided on the style that you want to use, you can finish your drawing!
Ready to Draw More Detailed Animals?
How to Draw Your Pet
How to Draw Fur
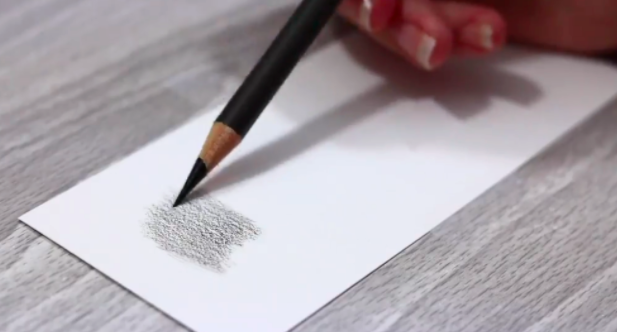
Step 1: Create a Base Layer
Lightly erase the pencil markings of your dog outline until it is barely visible. This helps your fur stand out and creates a more realistic image where the fur gives the illusion of the dog’s body rather than the fixed lines from your original sketch.
Using a sharpened pencil, shade a soft base layer everywhere that you’d like your dog drawing to have fur in this color. Hold your pencil further back with your hand to create an even lighter tone and go back and forth in the direction of the fur.
Once you’ve completed the first layer, continue to go back over the shading several times with a small increase in pencil pressure each time. This will give your drawing more depth before you add in the fur details.
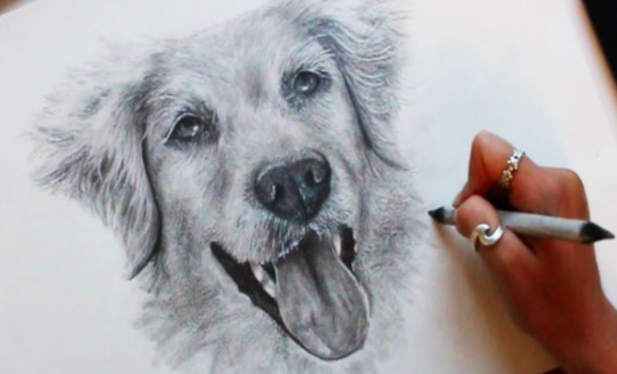
Step 2: Add Fur Lines
Fur lines are short pencil strokes that depict the hairs on your dog. You can draw these closer together or further apart depending on the breed of dog and style of fur that you’re trying to draw. It’s helpful to practice these before adding them onto your final drawing to make sure that you like the final look.
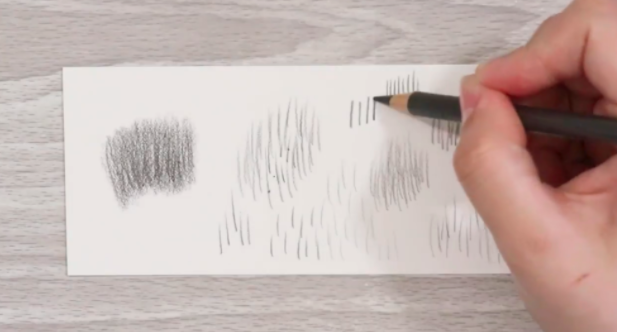
For silkier breeds of dog, long and soft fur lines will give the appearance of a smooth coat. Shorter, jagged lines are best for short-hair breeds or if you’re trying to give your dog a messier look.
A good place to start with fur lines is around the edges of your dog drawing. This will help you see where natural movement of the body would be before adding in the rest of the fur. From here, you can start to vary the strokes of your pencil to reflect different fur patterns across your dog.
When you’re ready, draw your fur lines on top of your base layer in the coloring pencil of your choice to finish your dog drawing.
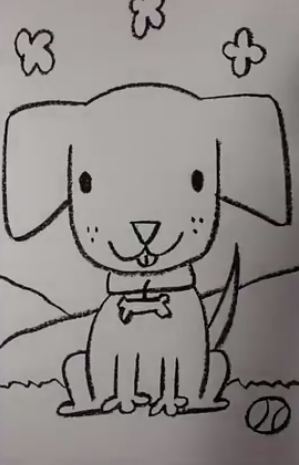
How to Draw a Cute Puppy
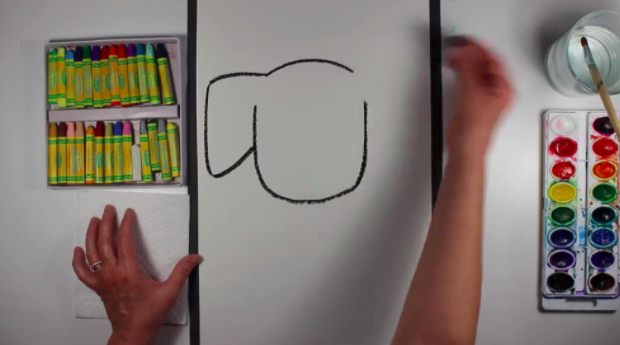
Step 1: Start With a Simple Outline
Drawing a cute character is a great way for kids to learn how to draw a simple dog. Start with a curved line near the top of your paper. Leaving a small break, draw a U-shape underneath the first curved line.
Add a straight line horizontally towards the edge of your paper from the end of the top curved line and another line going straight down, parallel to the paper’s edge. Join this line to the edge of the U-shaped curve at any angle you’d like—this is your dog’s ear. Repeat on the opposite side of your sketch.
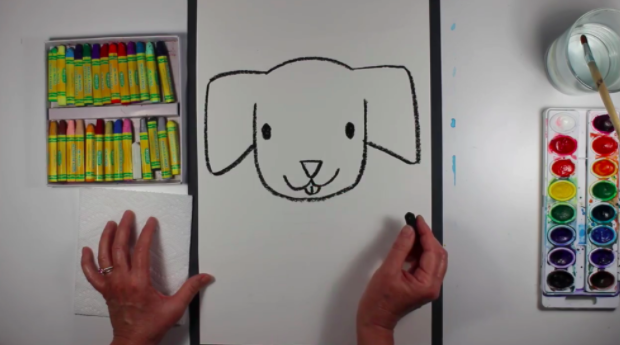
Step 2: Create Your Puppy’s Face
Add two ovals near both edges of the U-shaped curve to create your puppy’s eyes. Follow this with an upside-down triangle around three-quarters of the way down the U for its nose. Then add two smaller U-shaped curves going either side from the tip of the triangle for its mouth. To make sure that your dog is extra cute, add a small tongue underneath the mouth and some whiskers to the sides of its face.
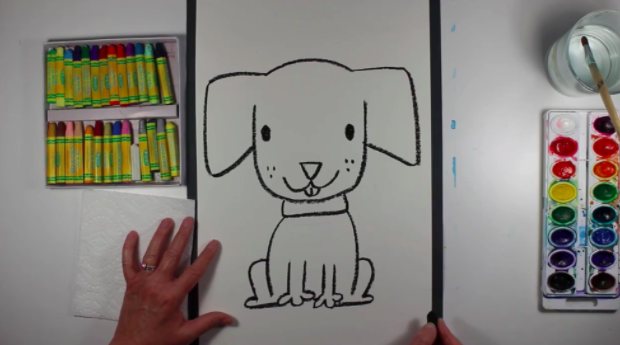
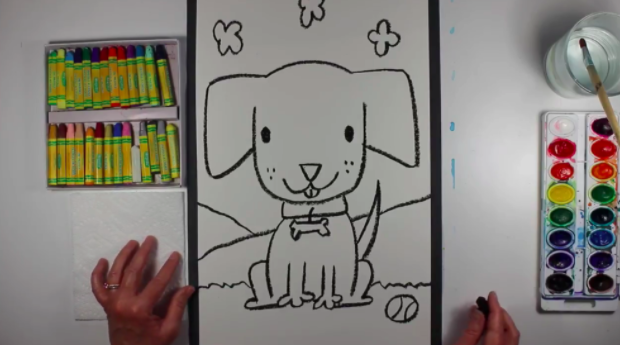
Step 3: Add the Final Touches
A long and skinny rectangle underneath the puppy’s chin works well as a collar and a base for you to draw two sides of an oval for its body. Inside the sides of the oval, draw two vertical lines with three small ovals on the ends for the puppy’s legs and feet. From the sides of the body, draw two curved lines that taper out at the ends to create the puppy’s back feet (to get this right, think about drawing half of a bowler hat!).
You can finish your puppy drawing with a tail off to one side, a tag on the collar, and some extras around the puppy itself such as a ball or a field in the background before you get started with coloring or painting!
Help Your Children Express Themselves Through Art
Building Kids Confidence Through Drawing
Try Skillshare for free! Sign up for a 7 day free trial today!
Get Started- Unlimited access to every class
- Supportive online creative community
- Learn offline with Skillshare's app


