

How to Draw a Rose by Hand: Easy Process, Realistic Blooms
Finished botanical drawings are highly intricate, but the steps you take to get there are simple. Learn a variety of methods for drawing beautiful blooms.
Table of Contents


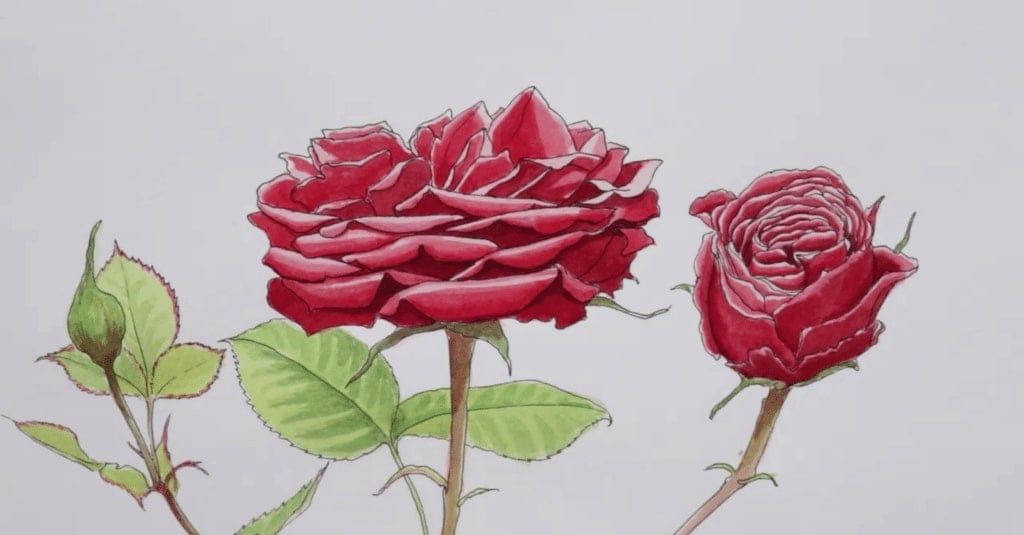
Fine art rose drawings are usually magnificent. Lush colors and delicate textures come together to create a luxurious visual that you can almost smell. The sheer beauty, not to mention realism, might lead you to assume that drawing roses is super complex.
Thankfully, rose drawing can be broken down into accessible steps for any artist, no matter your preferred style.
Quick Links
- Draw a Guideline
- Begin the Center Petals
- Fill in the Center Petals
- Draw the Middle Layer of Petals
- Draw the Outer Petals
- Add Detail With Shading and Lines
How to Draw a Rose
Numerous rose drawing methods exist; selecting one depends on your vision for the finished product. Are you going for highly realistic blooms, a simple outline or a cute cartoon? Whichever you choose, looking at real roses is the best place to start.
Spend time examining how the petals lie and how that changes as the flower tilts toward or away from you. Notice how the light hits the rose, perhaps highlighting its tiny veins and wrinkles.
If you want a relatively easy method for a simple yet realistic-looking flower, learn how to draw roses with a step-by-step process. All you’ll need is paper, a pencil with an eraser and a pen.
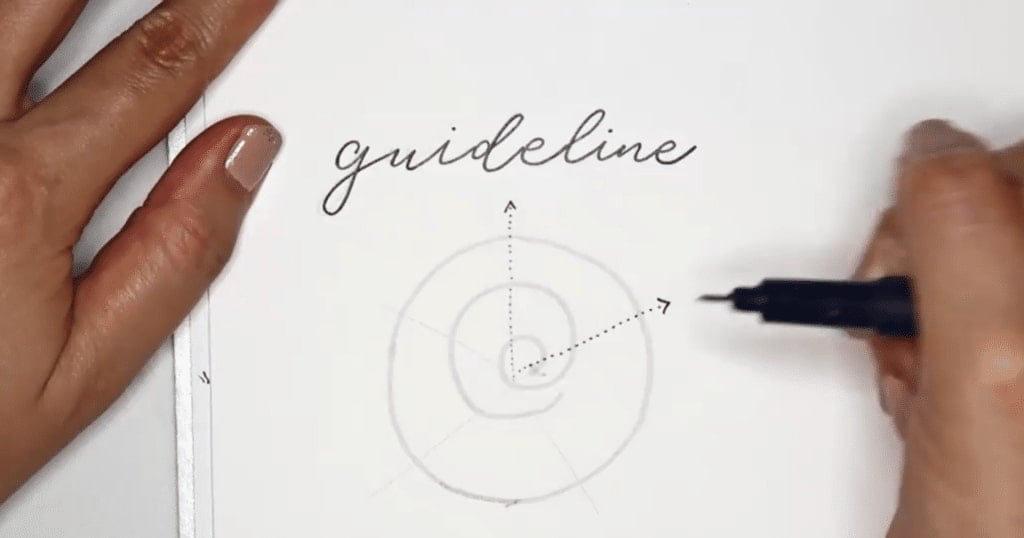
1. Draw a Guideline
Using a penciled guideline helps you keep the rose’s general shape while filling in details.
- Draw a large circle.
- Inside the circle, draw a spiral. The rose will look more realistic if the spiral is not in the circle’s exact center.
- Prepare to draw the rose itself from the center outward. No need to include the dotted line arrows in your guideline, but do keep their direction in mind.
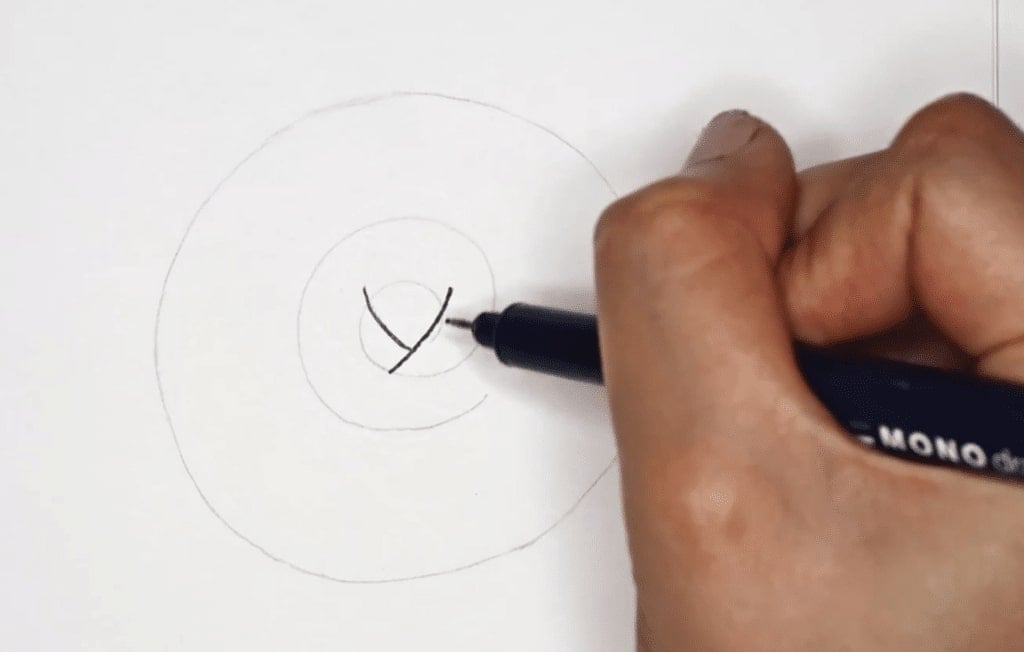
2. Begin the Center Petals
A specific mark in the center of the guideline helps you start the center petals.
- Draw a lowercase “y” shape at the very center of the spiral.
- Using a pen for the actual rose will make it easier to differentiate the flower from the guideline.
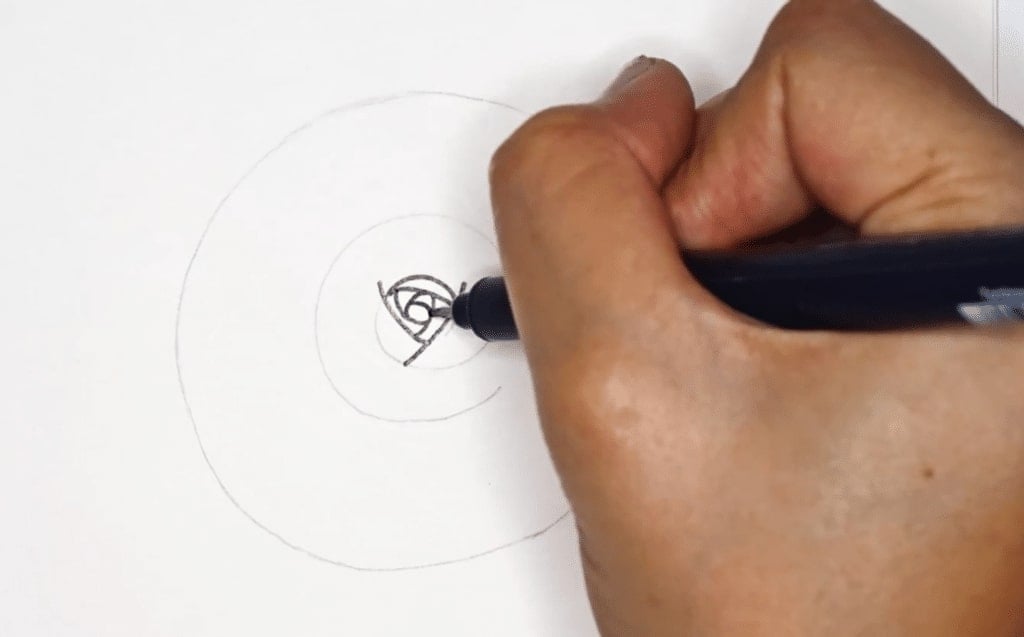
3. Fill in the Center Petals
No exact formula for this exists, so looking at a real rose for direction is helpful.
- Draw small lines within the top of the “y.”
- Consider the angle of the bloom and how that would affect the shape of the petals.
4. Draw the Middle Layer of Petals
Now the angle of your rose becomes even more important–petals further away appear more open. Getting this part exactly how you want it may take some trial and error, so consider using a pencil first.
- Draw petals hugging the center within wider, more open angles.
- Remember the tilt of the rose–petals closer to you will look smaller and turned up, while those further away will look larger and tilted back.
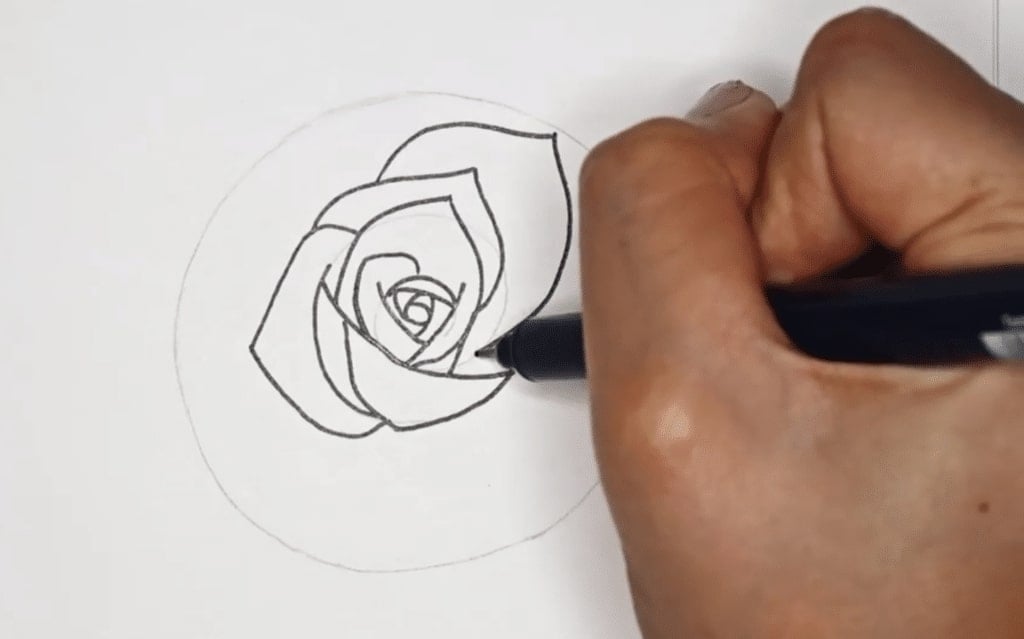
5. Draw the Outer Petals
The outermost petals are all the way open and look large and spread apart.
- Fill in the outer circle of the guideline with wide petals.
- Unlike the inner layers of petals, these are more uniform in size.
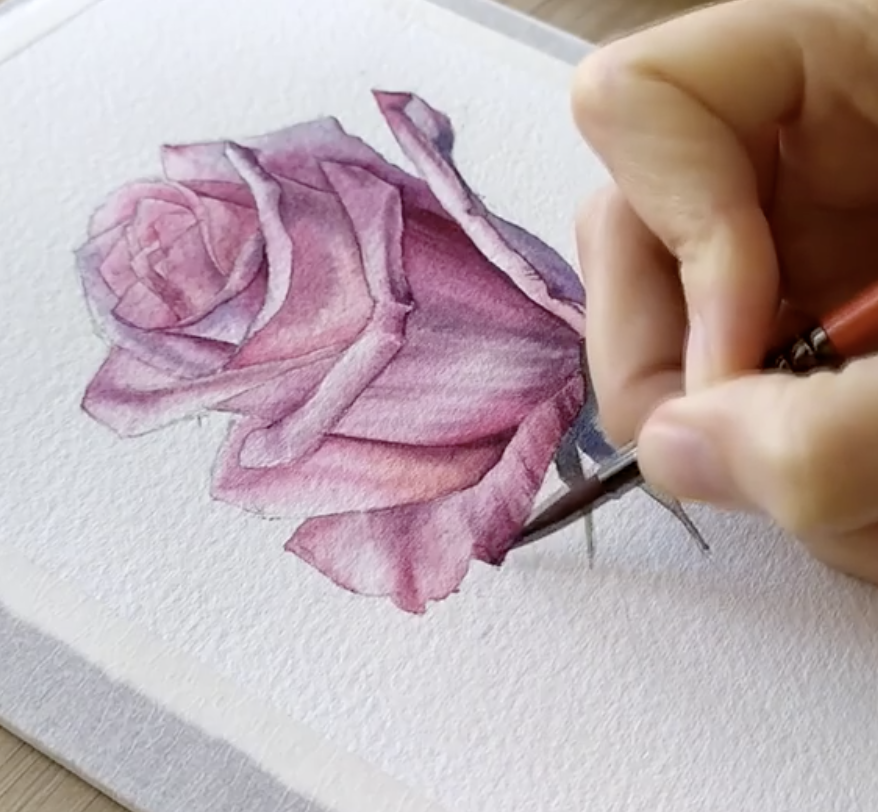
Create Rose Art With Watercolors!
Step by Step: Watercolor Rose
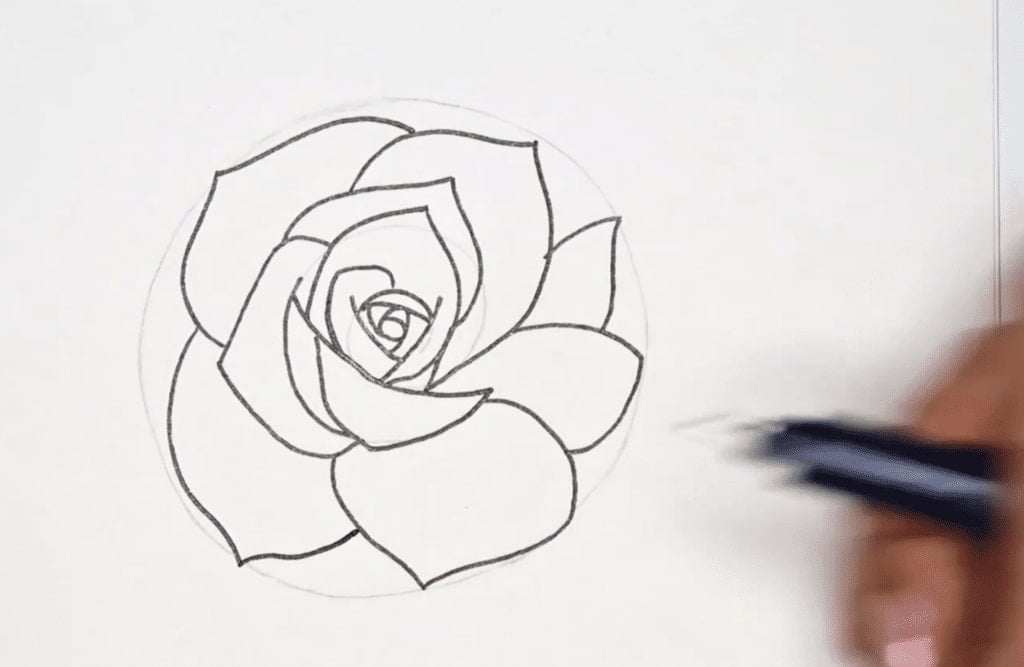
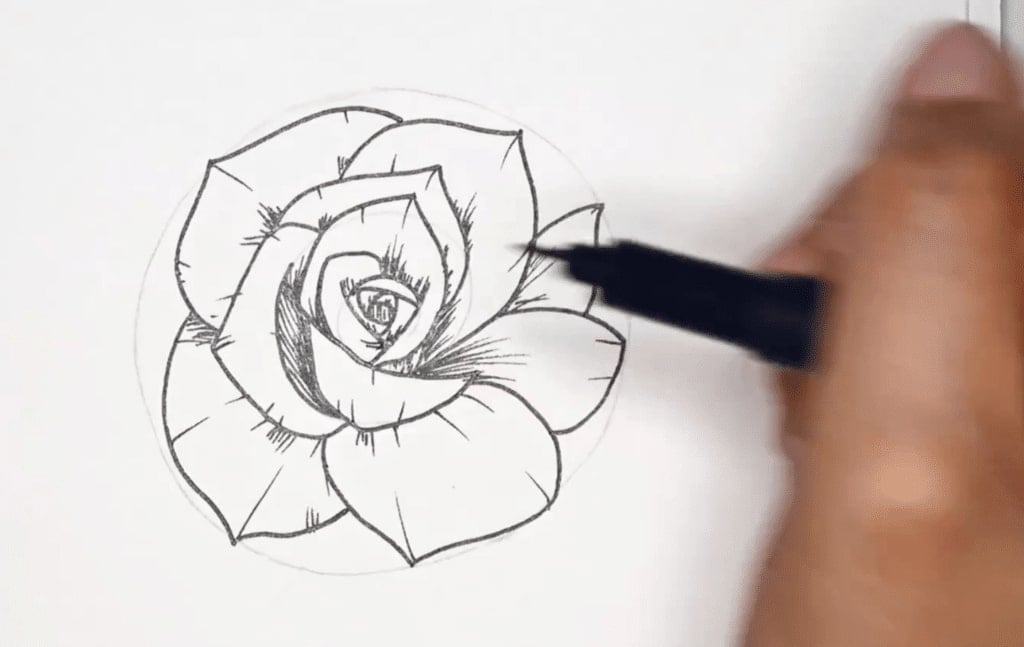
6. Add Detail With Shading and Lines
Real roses have delicate wrinkles and folds. Adding these details takes your hand-drawn petals from well-drawn to realistic.
- Determine which direction the light comes from, and add shading to spots the light wouldn’t hit.
- Beginning with the inner petals, add several dark lines close together to create shadow.
- Be conservative rather than adding shade everywhere. You can always add more.
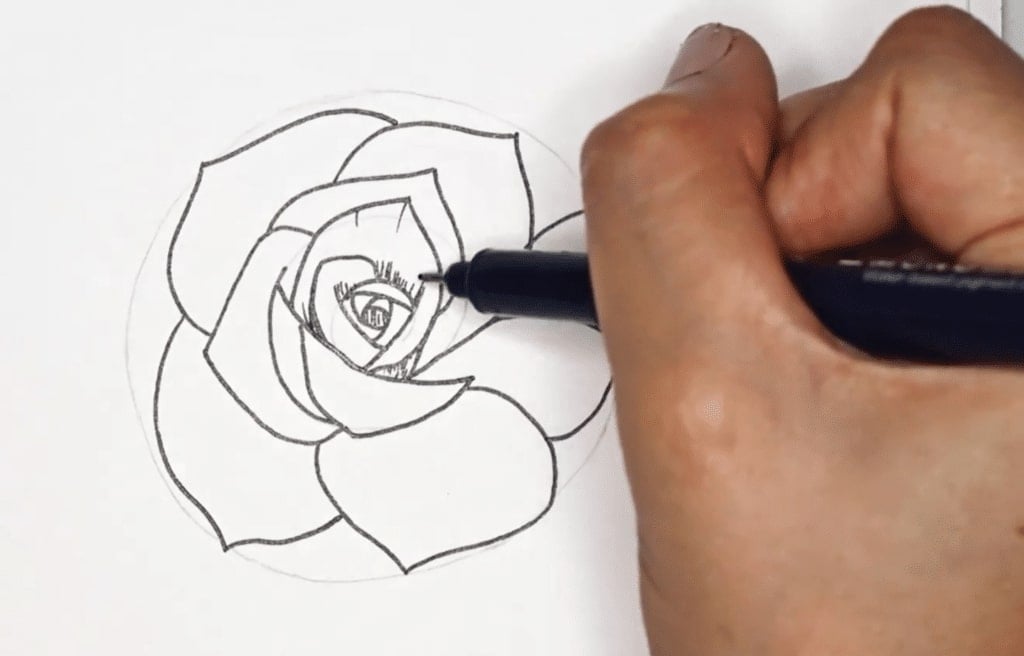
- Add thin lines to indicate small pleats and folds at the tops and bottoms of the petals.
- Consider where tension on the petals would be as you decide where to place the lines.
- Again, don’t go overboard with lines.
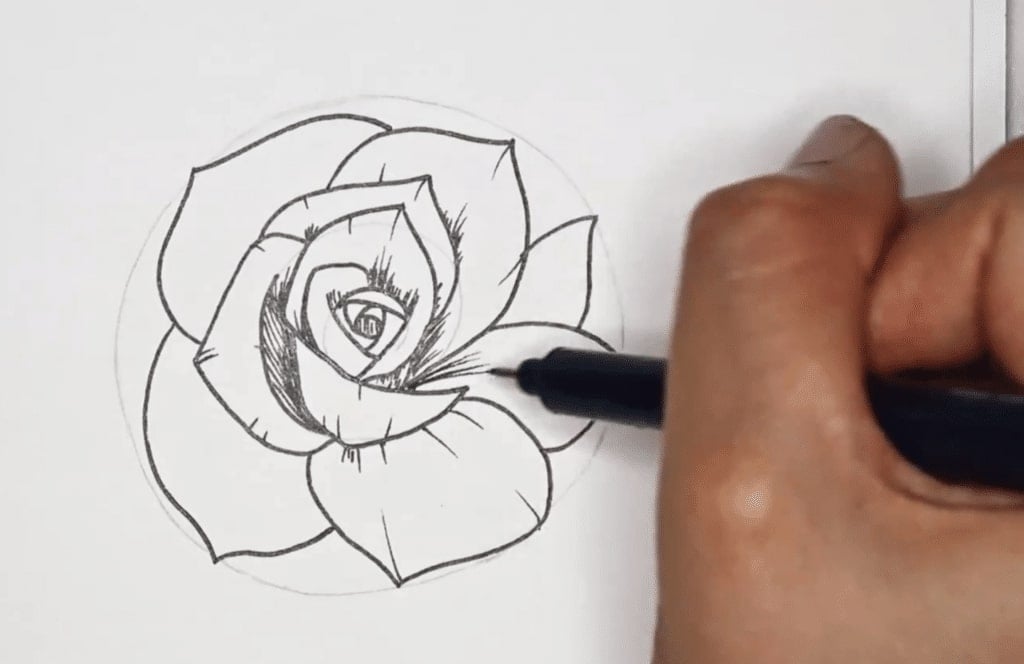
- Ensure the petals are relatively uniform in the amount of detail.
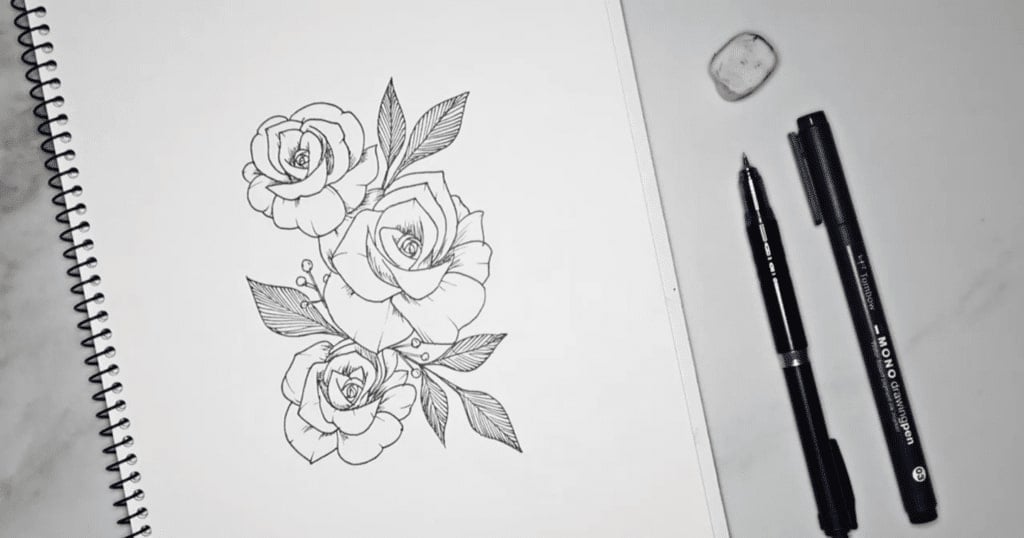
One rose bloom is beautiful on its own. However, if you want to add more, consider grouping it with other flowers, hand-drawn leaves or berries.
Easy Rose Drawing
If you can draw a heart, you can draw a rose. Learn how to draw an open rose, as well as a bud, with quick and simple shapes.
Realistic Rose Drawing
If you want to learn botanical drawing, you need to know how to draw a realistic rose and other flowers. You’ll be amazed at what you can create with step-by-step instructions and examples.
Simple Rose Drawing
Sketching a simple rose is as easy as drawing a “U” shape, closing the top with a wavy line and adding a stem. If you’re hoping to do something a bit more interesting, try drawing a neuroart rose. The finished product is lovely, and the drawing process is almost meditative.
Black and White Rose Drawing
A good black and white drawing needs texture and shading. Learn to draw a black and white rose that looks soft and realistic, despite the absence of color.
Cute Rose Drawing
Art doesn’t need to be cartoonish to be cute. However, so-called cute flowers are generally simpler and rounder than the real thing. Learn to draw cute roses and other flowers with just a pencil and glitter pens!
Long Stem Rose Drawing
The stem is a minimally complicated part of a rose drawing, though you can certainly choose to dress it up with leaves and thorns. If you’re interested in creating a rose in a digital space, you can learn how to create a rose with a stem in Blender.
Every Rose Has Its …
Poison said they all have thorns, but in this case, it’s up to you. However you choose to draw your rose, you’ll quickly see that it’s easier than you might have thought. Before long, you’ll be drawing botanical illustrations featuring whole gardens of gorgeous blooms and buds.
Ready for More Roses?
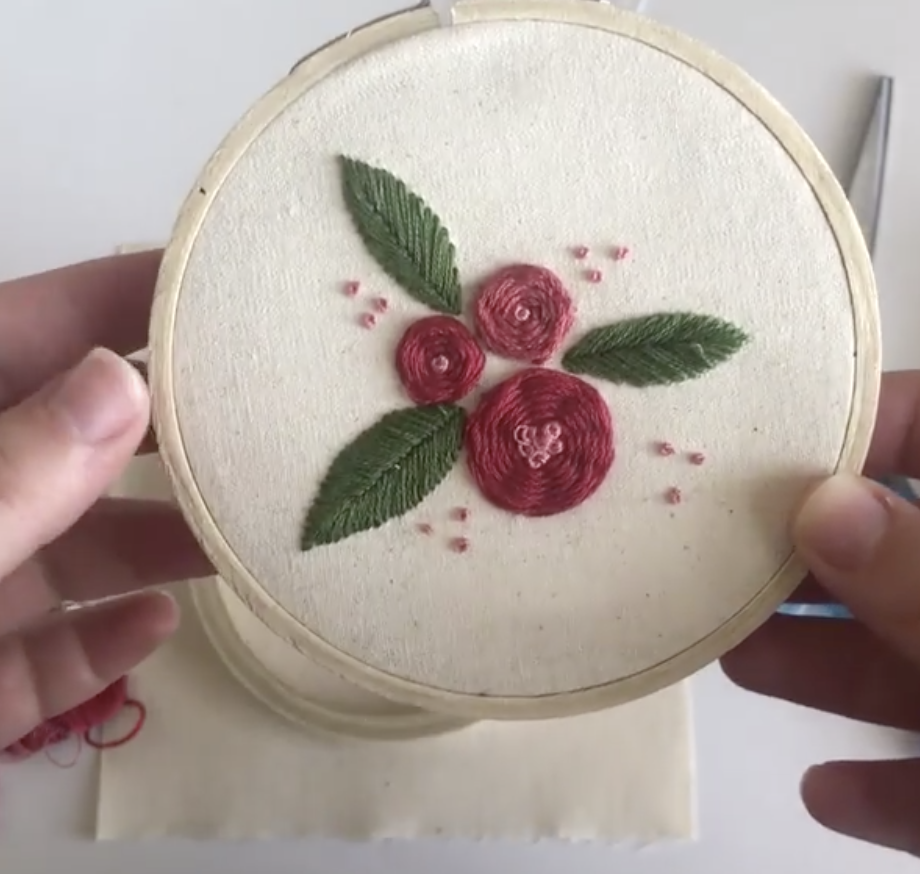
Embroidered Botanicals: Woven Roses & French Knots
Katie Mitchell
Katie lives in Michigan with her husband, kids and pets. She enjoys cooking, travel and live music.
Try Skillshare for free! Sign up for a 7 day free trial today!
Get Started- Unlimited access to every class
- Supportive online creative community
- Learn offline with Skillshare's app


