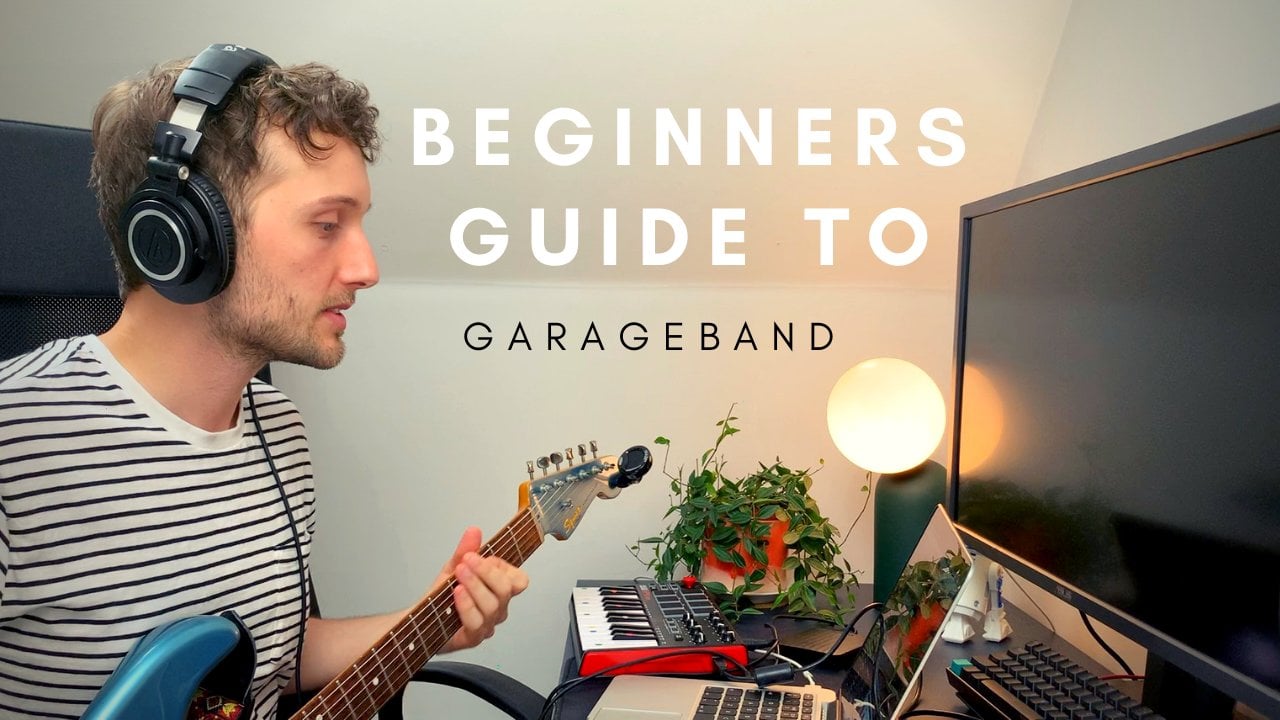
Transcrições
1. Introdução: GarageBand iOS é uma ferramenta incrível para todos os músicos, pois permite
criar músicas de alta qualidade dignas de indicações ao Grammy sem toneladas de equipamentos, espaço de
estúdio e amplo conhecimento da teoria musical. Você é livre para apenas criar e ter esse poder é uma mudança de jogo. Oi a todos, espero que estejam indo bem. Muito obrigado por se juntar a mim aqui para o meu guia do GarageBand iOS. Meu nome é Mike. Sou músico em tempo integral e instrutor de música do Reino Unido. Tenho tocado, escrito e produzido música nos últimos 12 anos e também co-dirijo
uma organização e caridade chamada Time Therapy In Musical Expression. Realizamos oficinas de música para pessoas de todas as idades, habilidades e origens. Neste curso, vou mostrar como usar o GarageBand iOS para produzir músicas incríveis. Este curso vai ser para iniciantes que são completamente novos na produção e gravação de música, mesmo que você não possa tocar um instrumento ou usar teoria musical. Juntos, vamos passar passo a passo pelo processo de produção de uma faixa. Começaremos com a anatomia do GarageBand e descobriremos o caminho no programa. Vamos ver como podemos usar instrumentos virtuais para construir e escrever nossa música. Você vai se tornar um mestre em fazer batidas usando sequências e bateria inteligente. Vamos explorar como usar instrumentos e
escalas inteligentes para escrever progressões de acordes e melodias, mesmo sem qualquer conhecimento de teoria musical. Você aprenderá a gravar vocais, guitarras e outros instrumentos ao vivo. Adicionaremos loops e amostras para adicionar interesse e aumentar nossa faixa, utilizaremos efeitos como compactação, EQ e reverberação. Vou mostrar-te como editar,
misturar a nossa música para que pareça polida e profissional. Tudo isso ao lado de muito mais. No final deste curso, você terá uma excelente compreensão sobre como usar o programa, mas também estará lhe dando muitas dicas e truques sobre como escrever músicas e produzir música. Eu vou até estar escrevendo uma música ao longo do curso para que você
possa ver o processo exato que eu pessoalmente passar para escrever, gravar e produzir uma faixa. A única coisa que você precisa para este curso é seu iPhone ou iPad com GarageBand instalado e um par de fones de ouvido. Não importa quem ou onde você esteja, você pode criar peças incríveis de música, e mal posso esperar para lhe mostrar como. Vejo-te no curso.
2. Projeto do curso: Olá a todos. Muito obrigado por se juntar a mim na minha aula. Eu realmente espero que seja útil para você e você tira um monte de boas informações para longe disso. Antes de começarmos, quero falar rapidamente sobre o nosso projeto de aula. No final deste curso, você terá um bom entendimento sobre como usar o GarageBand para gravar e produzir músicas, e eu adoraria ouvir o que você faz. Então qualquer coisa que você venha acima com no GarageBand, pode ser uma capa, pode ser apenas um loop de barra completo que você realmente gosta, pode ser uma música completa, pode até ser apenas uma seleção muito agradável de loops e amostras que você juntou que você gosta. Por favor, sinta-se livre para enviar qualquer coisa assim. Eu estarei ouvindo e respondendo a cada envio enviado e se você quiser receber algum feedback e crítica, eu adoraria fazer isso por você. Para fazer isso, tudo que você tem a fazer é fazer upload para SoundCloud ou YouTube ou qualquer coisa semelhante e enviá-lo para o projeto da classe. No YouTube e SoundCloud, você deve ser capaz de criar um link privado onde apenas as pessoas com esse link podem ouvir a faixa. Então, se você escolher, você pode apenas ter as pessoas nesta classe que são capazes de ouvir essa faixa. Eu acho que seria apenas uma coisa realmente inspiradora para ver o que outras pessoas fizeram e se preparar, e talvez isso lhe dê a inspiração que você precisa para ir e começar sua pista. Quando estamos escrevendo e produzindo músicas, muitas vezes
ouvimos as mesmas partes uma e outra vez, às vezes por horas e horas de cada vez e nossos ouvidos e nossa mente ficam cansados com isso e eles começam a perder contato com o que está acontecendo. É aí que os ouvidos frescos e a mente fresca de outra pessoa e a opinião fresca em uma pista podem ser tão importantes para ajudar a moldar isso e empurrá-lo na direção certa. Mais uma vez, gostaria de salientar que adoraria ouvir qualquer coisa que
faça e ficarei mais do que feliz em agir como o ar fresco é para você. Obrigado, pessoal. Vamos continuar com a próxima lição.
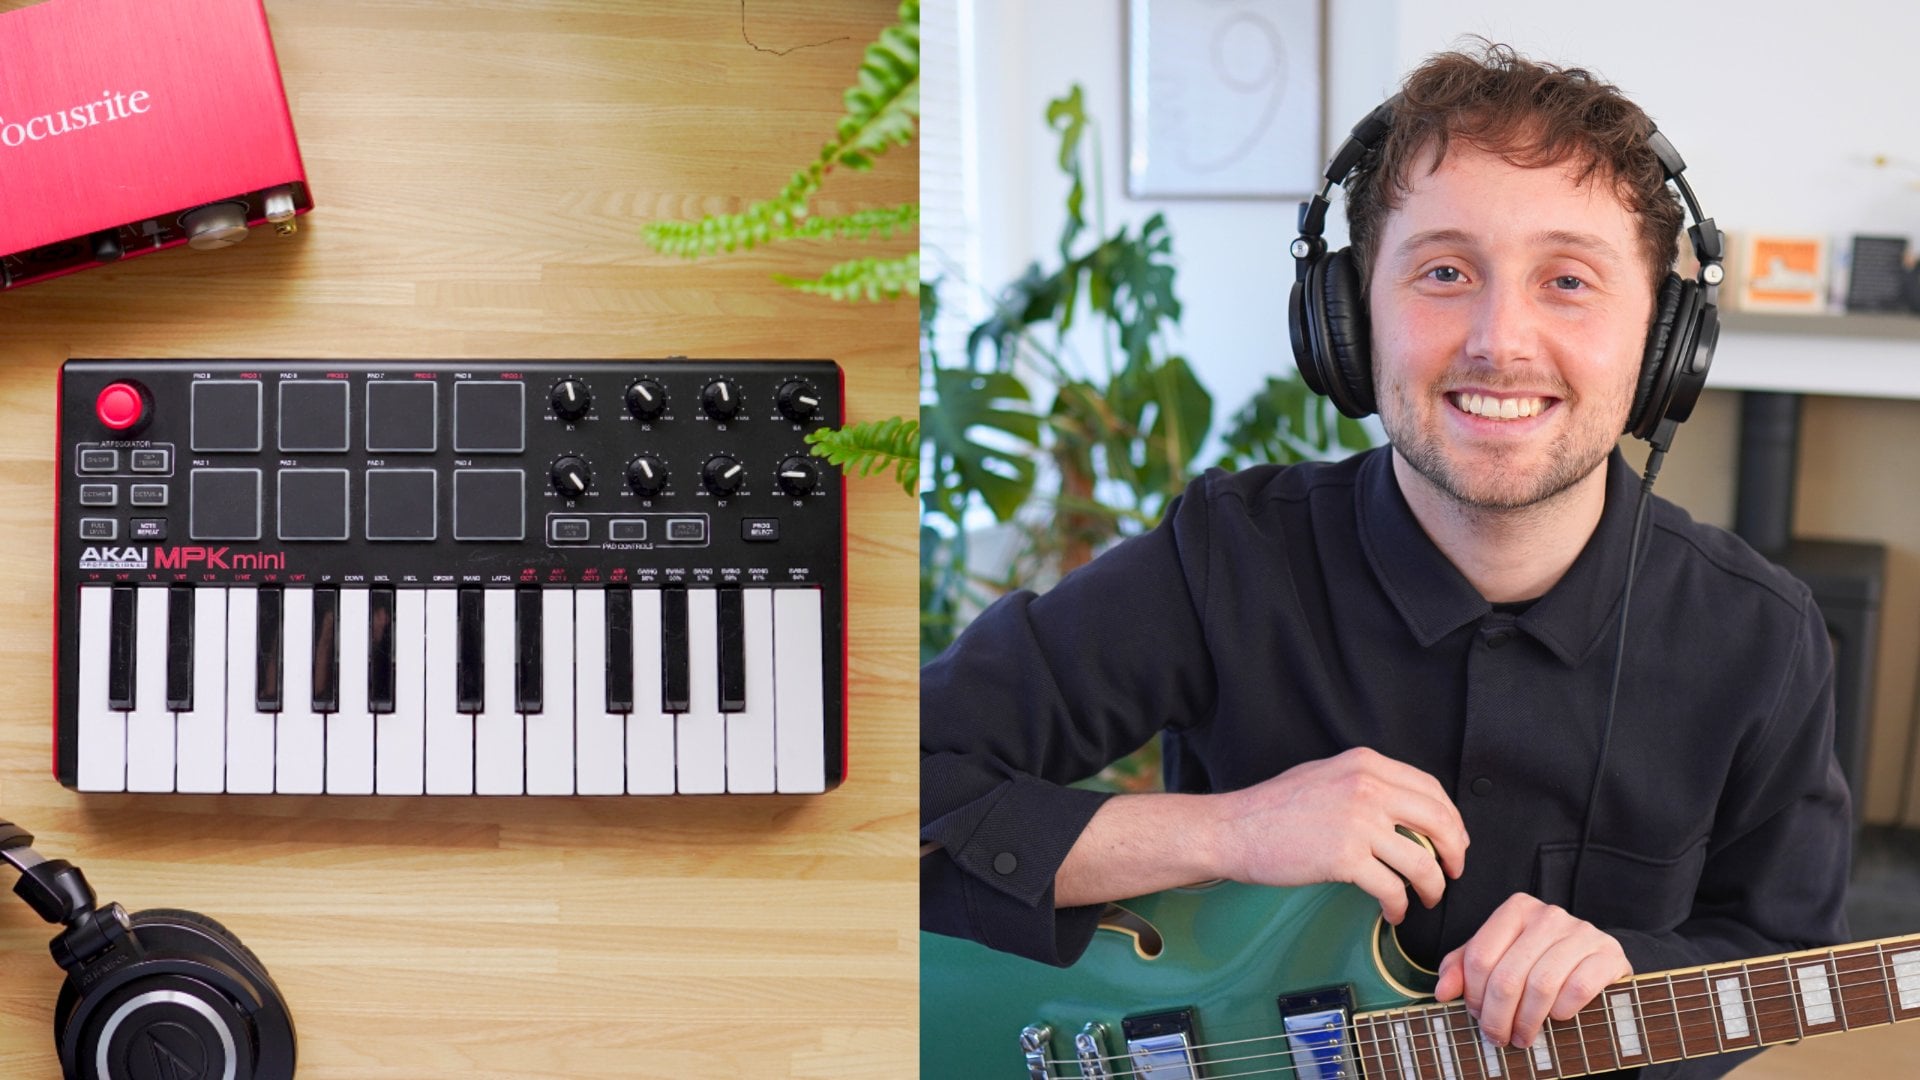
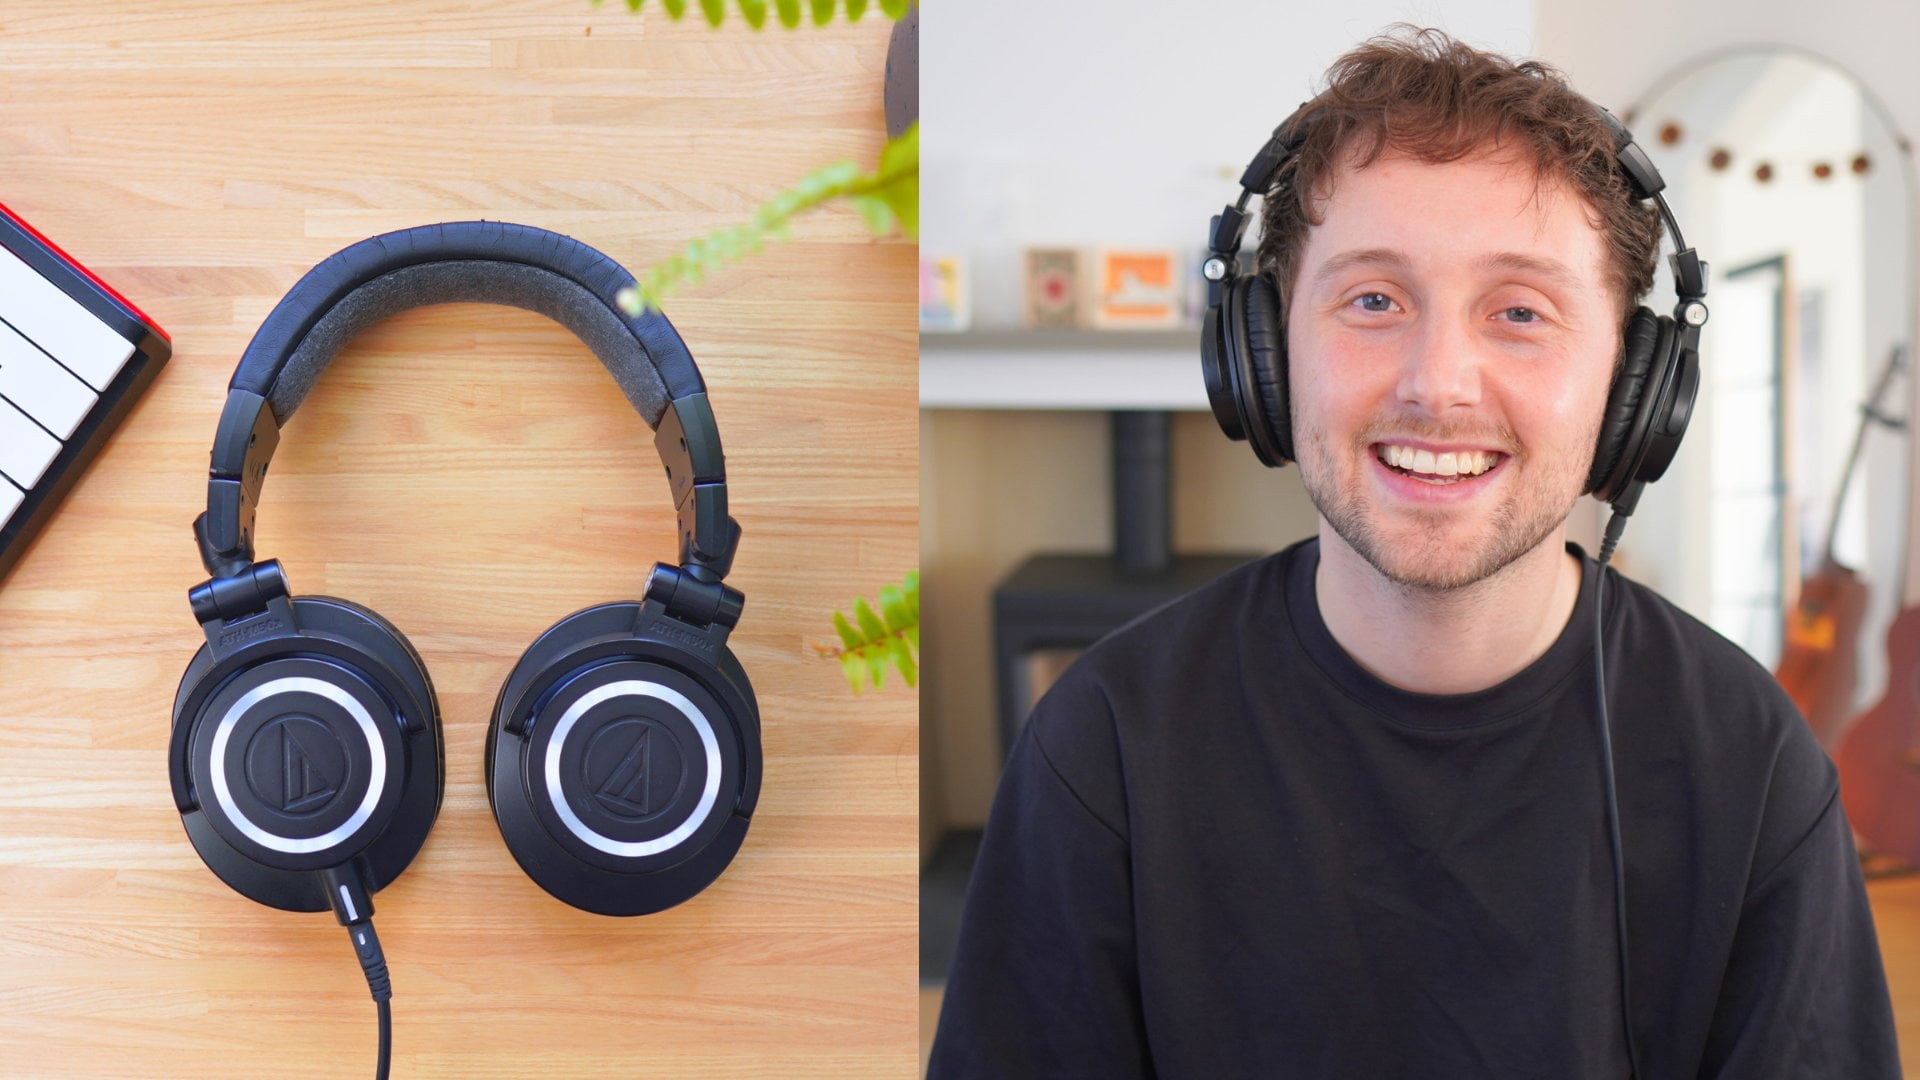
3. Equipamento: Ei, todo mundo. Bem-vinda de volta. Nesta lição vamos falar um pouco sobre engrenagens. Como eu disse na introdução, você não precisa de nada para participar neste curso além do seu dispositivo e alguns fones de ouvido. Isto é apenas se você quiser atualizar para alguns métodos de gravação de alta qualidade, eu acho que alguns de vocês estarão interessados em. Vou deixar links para alguns equipamentos recomendados na aba Recursos se você quiser verificar isso. Primeiro de tudo, vamos falar sobre o kit de engrenagem principal que precisamos, e esses são nossos fones de ouvido. Por que os fones de ouvido são tão importantes ao gravar? A primeira razão pela qual precisamos de fones de ouvido é para evitar qualquer interferência durante a gravação. Se você estiver gravando qualquer fonte de áudio com um microfone como sua voz ou uma guitarra acústica, você precisa ouvir a música e ouvir os cliques para que você saiba
quando tocar, quando estiver no tempo e se estiver tocando o alto-falante, o som da música ou do clique vai voltar direto para o microfone e ele vai simplesmente colidir e fazer muitos sons horríveis, então não podemos ter isso. Além disso, tão bons quanto iPhones e iPads são, seus alto-falantes não são da melhor qualidade, especialmente para qualquer coisa relacionada à música. Com fones de ouvido, você vai ser capaz de ouvir o que está
acontecendo muito melhor e você vai apenas ser uma mistura e mestre para um nível que você nunca faria apenas com os alto-falantes. Os fones de ouvido ideais são aqueles como este, todos os que passam pelo ar serão ótimos. Mesmo fones de ouvido como este serão ótimos e eles
serão muito melhores do que os alto-falantes internos. O próximo passo de marcha que vou falar é de uma interface. Novamente, você não precisa disso, isso é apenas se você quiser gravar usando microfones de
alta qualidade ou você quiser conectar uma guitarra, isso é usado para isso. Nossa interface funciona conectando nosso microfone ou uma guitarra na parte inferior, selecionando o ganho e, em seguida, distribuindo-o para o USB, que entra em nossos iPads. Uma alternativa disso para guitarras é algo chamado de iRig, há também um incrível [inaudível] se você está interessado em gravar guitarras, definitivamente confira isso também. O próximo é um microfone. Obviamente, se você quiser gravar vocais de
alta qualidade ou guitarras acústicas ou qualquer coisa baseada em áudio, você precisará de um bom microfone para se conectar à nossa interface. Eu recomendo microfones condensadores, eles podem praticamente fazer todos os vocais, guitarras, qualquer tipo de instrumento, eles fazem um ótimo trabalho para gravar. Teclado MIDI. Os adesivos são de uma lição que eu estava ensinando enquanto atrás, dividi-los realmente. O que um teclado MIDI vai permitir que você faça é tocar nossos instrumentos virtuais usando as teclas aqui. Se não gostarmos de tocar um teclado em uma tela, podemos comprar um desses, conectá-los e tocar qualquer instrumento da nossa biblioteca virtual no GarageBand usando as teclas e os pads aqui. Se você tem um teclado MIDI ou outra coisa, você pode querer considerar um pedal sustain. Quando isso é pressionado, ele só vai sustentar os nós que estamos jogando em nosso teclado. Filtro pop. Agora, isso só vai evitar qualquer barulho de ar desagradável. Quando estamos cantando, nós naturalmente projetamos nosso ar e isso pode interferir com o microfone. Ter um desses na frente da nossa boca quando gravarmos, vai torná-lo agradável e limpo e reduzir qualquer um desses interferir ruídos de ar. Agora, se você estiver usando um iPad ou um iPhone com relâmpago e quiser conectar um teclado MIDI ou uma interface, você precisará de um desses. Este é um adaptador de câmera. O que isso vai fazer, ele vai alimentar um teclado MIDI ou nossa interface, porque não há energia suficiente saindo do nosso iPhone ou iPad para alimentá-los corretamente. No entanto, se você é uma das pessoas sortudas que tem um iPad Pro com o USB-C, basta usar um documento e a energia do USB-C será suficiente para alimentar os dispositivos. Nesse caso, tudo o que você precisa fazer é conectar um Hub USB ao iPad e, em seguida, conectar seu teclado ou interface Midi pelos slots USB no hub. No entanto, se fizer o Hub USB, certifique-se de obter um com uma tomada para auscultadores para poder ligar os auscultadores enquanto estiver a gravar. Essa é a nossa lição sobre equipamento. Vejo-te na próxima lição.
4. Anatomia: Primeiro, vamos passar pela anatomia do programa. Então aqui vai ser onde eu mostrarei a vocês como o programa é definido, o que todos os botões fazem, e como trabalhar nosso caminho em torno do programa. Não se preocupe se você vê algo no programa como gravação multi-track ou quantizing ou você me ouvir mencionar sobre assinaturas de chaves, não se preocupe com isso. Eu vou quebrar tudo isso no curso, é apenas para dar a vocês essa visão geral. Antes de abrirmos o programa, lembrarei você de atualizar seu iOS e atualizar seu aplicativo GarageBand. Se houver algum problema ou bug, isso deve resolver tudo isso para você. À mão CAM, olá mãos. Vou usar um lápis para este curso
só para deixar bem claro para o que estou apontando. Você não precisa de um lápis para trabalhar com o GarageBand, é claro
que pode usar os dedos. Vamos em frente e abri-la. Se você já usou o GarageBand antes, provavelmente verá uma tela como esta, e isso será apenas todos os seus projetos e músicas recentes. Aqui no canto superior esquerdo, esta é apenas uma maneira de mudar nossos projetos antigos e ordená-los com etiquetas e ir para nossos projetos de exclusão ou essas coisas. Aqui em cima, temos o botão mais, que vai nos abrir um novo projeto, o que vamos fazer em apenas um segundo. Esta pequena grelha aqui, vai permitir-nos encomendar os nossos projectos mais antigos. Em seguida, este botão do microfone, se clicarmos
nele, ele vai abrir um novo projeto com um microfone bem ali para nós. Isso é ótimo se você tem uma idéia em sua cabeça que você quer sair muito rapidamente e colocá-lo no programa, você pode usar isso para isso. Vamos entrar em um novo projeto pressionando este botão mais. Sim, assim que abrirmos um novo projeto, GarageBand pode nos perguntar com que instrumento gostaríamos de começar? Vai nos levar direto para nossa tela de seleção de instrumentos. Você pode ver aqui que temos um monte de diferentes instrumentos e amplificadores e gravadores de áudio para escolher, estamos indo contra todos eles individualmente ao longo do curso, e também podemos selecionar Live Loops. Agora, eu vou falar sobre isso um pouco mais tarde porque é um pouco mais envolvido, mas se você quiser chegar a ele, é onde nós encontramos. Nós também podemos jogar e gravar aplicativo de terceiros. Se você tem um app de teclado legal que deseja colocar no GarageBand, aqui é onde podemos fazer isso. Também temos uma biblioteca de sons, uma vez que clicamos, ela nos mostrará muitos sons diferentes que
podemos adicionar às nossas bibliotecas do GarageBand. Temos tambores e teclados e montes de coisas legais aqui, se quiser expandir a biblioteca. Só por agora, vou abrir um teclado e vou mostrar o resto do programa a partir daí. Para abrir um instrumento, basta
clicar nele e ele vai abrir para você. Vamos dar uma olhada no que está nesta página. No topo aqui, temos este botão de página, que se clicarmos vai nos levar de volta aos nossos projetos recentes. Estes três quadrados aqui vão trazer nosso painel de instrumentos novamente, então se você quiser trocar ou trazer um instrumento, é onde nós fazemos isso. Este próximo botão será nossa visão do projeto, então uma vez que clicarmos
nisso, ele vai nos trazer aqui para nossa tela de visão geral do projeto. Agora, isso vai parecer muito familiar se você já usou algum programa de gravação antes, como GarageBand ou Ableton ou qualquer coisa. Você pode ver que nosso teclado está selecionado aqui, e quando gravarmos ele vai preencher este espaço aqui. Você pode pensar nisso como um espaço de projeto. Você deve ter notado onde pressionamos o botão de exibição do projeto agora ele foi alterado para um teclado. Este botão vai levar-nos para frente e para trás entre a nossa tela do projeto, esta e a nossa tela do instrumento. Eu tenho nosso teclado selecionado, então eu vou pressionar esse botão, ele vai trazer de volta a nossa tela de instrumentos. Vamos voltar para a tela do projeto. Em seguida, são esses três controles deslizantes, uma vez que clicamos sobre isso, ele vai abrir nossas configurações para o nosso instrumento selecionado. Vamos entrar em tudo isso mais tarde, mas é aqui que você vai encontrar seus efeitos,
suas configurações, sua saída, todas essas coisas. O próximo é o nosso FX. Vamos falar sobre isso mais tarde e pode parecer um pouco confuso porque você acha que fx é onde nossa reverberação, nosso eco e outras coisas vão estar, mas no GarageBand iOS, isso é realmente como uma ferramenta de DJ. Volto a falar disto mais tarde, mas é muito fixe. Em seguida, este é o nosso botão Desfazer, esta seta aqui, e nós temos nossos controles de mídia. Vamos gravar algo rapidamente. Quando estivermos prontos para gravar, queremos voltar para a nossa tela de instrumentos e vamos gravar, ele vai contar conosco, e vai parar de gravar. Então, quando
terminarmos, vamos apertar o botão de parar. Você pode ver que agora está verde onde gravamos. Se voltarmos para a tela do projeto, você verá um pouco mais do que está acontecendo. Você pode ver que nosso piano gravado começou a preencher este espaço do projeto. Se jogarmos isso, você pode ver este cabeçalho de faixa está se movendo através de nossos projetos e está mostrando exatamente o que está sendo jogado e onde. Você pode ver que essas barras brancas são basicamente as notas que estão sendo tocadas, e elas são o que chamamos de notas
midi porque elas estão sendo tocadas em um instrumento virtual. Digamos que estou feliz com essa parte, mas eu quero gravar outra parte depois, podemos arrastar nosso cabeçalho de pista para qualquer lugar que quisermos. Digamos que se eu quisesse começar a gravar daqui, eu poderia arrastá-lo direto para lá, voltar para a tela de instrumentos. Você ainda pode ver nosso projeto e cabeçalho aqui, o que só ajuda se você quiser mover isso em uma data posterior e dizer que eu quero gravar outra batida. Incrível. Vamos voltar para a tela do nosso projeto, e você pode ver que ele está gravado ambas as partes lá, a menos ,
digamos, eu não gostei dessa tomada. Então, com nosso botão Desfazer, podemos desfazer o que fizemos pela última vez, mas digamos que eu apertei esse botão por acidente, você pode manter pressionado o botão Desfazer e ele lhe dará uma opção para refazer. O próximo é o nosso volume principal que podemos mudar aqui. Isso vai mudar o volume do dispositivo em que você está,
então tenha isso em mente. Agora, se eu puder chamar sua atenção aqui embaixo, podemos ver outro botão de adição, que se apertarmos vai nos permitir colocar um novo instrumento. Se quisermos começar a colocar esses instrumentos em camadas, vamos tentar colocar um kit de bateria. Vamos gravar rapidamente em alguns tambores. Incrível. Se voltarmos para a tela do nosso projeto, você pode ver que isso foi escrito lá também. Você pode notar que enquanto jogamos, há um clique no fundo, que é o nosso metrônomo, e podemos ligar e desligar isso aqui mesmo. Você pode ver que é cinza se está desligado e azul quando está ligado. Nosso metrônomo é basicamente uma batida padronizada que vai manter nossa música no tempo. É a cola que puxa tudo junto especialmente quando começamos a trabalhar em uma pista antes de termos qualquer bateria ou qualquer coisa que realmente nos mantenha no tempo. ponta superior maciça sempre joga junto com o metrônomo. Vou mostrar-lhe como configurá-lo em apenas um segundo, mas é basicamente para tornar nossas vidas muito mais fáceis quando se trata de editar e configurar nossa faixa. Sim, só vai certificar-se de que está tudo a tempo, tudo está junto. Então, sim, sempre jogue junto com o metrônomo. O próximo aqui são os nossos laços. Basicamente, o que os loops são é que eles são uma enorme biblioteca de diferentes sons e amostras, riffs, bateria, é praticamente qualquer coisa que você possa pensar, há um loop para. Você pode realmente ver aqui em baixo há mais de 3.000 loops. Estes são usados para aumentar nossa música, podemos usar batidas de bateria dos loops em nossa música ou riffs de guitarra, podemos usá-los para criar efeitos legais. Na verdade, há tantos loops aqui, você pode realmente fazer uma música inteira apenas usando os loops. Eu sei que muitas pessoas gostam de fazer isso, mas novamente, vamos falar disso um pouco mais tarde. A seguir estão as nossas configurações, vai
haver um monte de coisas importantes aqui. Temos nosso metrônomo e nossa contagem. Se você notou antes quando batemos recorde, nos
deu um 1, 2, 3, 4 contando, então podemos ligar e desligar isso aqui. Podemos desligar a contagem visual, podemos mudar o som do metrônomo, se quiser. Podemos mudar o nível do metrônomo aqui embaixo, então se você quiser muito alto. Muitas vezes recomendo ter um tiro de aro muito alto, por isso é muito claro para ouvir. O próximo é o ritmo. Isso é basicamente a velocidade da música, então quanto maior esse número, rápido
a música será, e quanto menor esse número, mais lenta será a música. Podemos usar as setas se quisermos ser realmente específicos ou podemos
arrastar para cima e para baixo se quisermos fazer movimentos mais dramáticos. Por exemplo, se eu levar isso para 60 batidas por minuto, ele realmente diminuiu. Se eu levar para cima, será um pouco mais rápido. O que também podemos fazer é usar esta configuração de ritmo de toque. Se você preferir vibrar e bater isso em uma velocidade suave que você está olhando Sco, ele vai combiná-lo com o que você definiu. A próxima é a nossa assinatura chave. Se você não sabe o que é isso, isso é basicamente como o ritmo do nosso metrônomo e a batida da nossa música em geral. O principal realmente é 4/4 e se você é um iniciante, honestamente basta bater 4/4, ele provavelmente vai ser o que você quer de qualquer maneira e 4/4 é realmente chamado base
comum porque ele é usado basicamente todo o tempo como, cada música pop, cada música rap praticamente usa 4/4. Vai ser aquele 1, 2, 3,
4, 1, 2, 3, 4. Se mudarmos isso para 3/4, então será 1,
2, 3, 1, 2, 3, 1, 2, 3. Nosso 6/8 vai ser bastante semelhante a 3/4, mas vai soar mais como 1,
2, 3, 4, 5, 6, 1, 2, 3,
4, 5, 6, 1, 2, 3, 4, 5, 6. Esse tipo de coisa. Espero que tenha gostado daquele kit de bateria. A próxima é a nossa assinatura chave. Por favor, não se preocupe muito com isso. Sei que assim que algo acontecer, pode
parecer assustador e esmagador. Vou estudar mais sobre como usar isso em nossos instrumentos inteligentes e nossa lição de Scos. Mas usamos isso para tornar nossas vidas mais fáceis em termos de teoria musical e conhecimento. O GarageBand está nos perguntando qual assinatura de chave você gostaria de escrever? Nós diríamos, eu gostaria de aprender C maior por favor e GarageBand diria: “Aqui estão os discos que funcionam, aqui estão apenas escalas que funcionam, então você não precisa saber como colocá-los todos juntos.” Isso tudo vai se juntar usando isso segue na chave. Eu recomendo deixar de fora por agora, mas você sempre pode desligá-lo mais tarde. Temos o nosso governante do tempo. Quando tivermos isso marcado, vai mudar a tela do nosso projeto entre batidas e barras e tempo, então em segundos e minutos. Eu recomendo deixar isso em nossas batidas e barras, então nosso padrão. Mas saltar entre isso e o Time Ruler é realmente ótimo. Se quisermos escrever a cerca de três minutos, podemos ligá-lo para ver quanto tempo a nossa música dura. Nós temos nosso desvanecimento, porque isso vai simplesmente
desaparecer automaticamente nossa música quando isso estiver marcado. Nós temos o nosso bloco de notas, este é exatamente o lugar onde podemos anotar qualquer idéia ou qualquer letra. A seguir é jam session, então este vai ser o lugar onde você pode se conectar com outras pessoas na sala. Também temos o GarageBands no iPad ou no iPad e você pode se encaixar, o que é muito legal. Em nosso avançado, temos gravação multi-track e vem um pouco mais tarde, resolução de áudio de 24 bits. Isso só vai aumentar ligeiramente a qualidade de áudio de nossas gravações. Eu não necessariamente isso irritado se você está tentando economizar espaço no seu dispositivo. Eu pessoalmente vou marcar isso porque eu quero a mais alta qualidade de gravação possível. Executar em segundo plano, isso só vai permitir que o GarageBand seja executado enquanto você usa outros aplicativos. Você pode conectar seus dispositivos MIDI Bluetooth aqui e, em seguida, vamos enviar relógio MIDI. Isso só vai se conectar a dispositivos de mídia externos se eles
quiserem compartilhar como um BPM e o tempo de sua música. Mas eu não acho que muitos dispositivos usam isso, então não se preocupe com isso. Em seguida é este botão de Ajuda, que é tão útil, se você alguma vez se perder no programa ou você esquecer o que algo faz, basta clicar sobre isso e ele vai lhe dar todas essas pequenas dicas úteis e dicas e apenas dar-lhe uma pequena descrição do que cada coisa faz. Em seguida, temos este botão mais e isso vai estender nossa pista. Se clicarmos nele, vai dividir nossa música em seções. Podemos estender uma seção e escrever sobre uma seção grande, que é o que eu gosto de fazer. Se você talvez dizer uns 50, isso vai estender a pista para fora, então você pode ver que vamos ter um sol mais longo. Ou podemos apenas configurá-lo para automático. Isso só vai estender a faixa à medida que escrevemos e gravamos, então nem precisamos pensar nisso. Mas o que também podemos fazer é dividir nosso projeto em várias seções. Vamos dividir isso em 8 barras. Vamos adicionar a Seção B. Neste caso, poderíamos ter a Seção A, poderia ser o nosso versículo e então a Seção B poderia ser o nosso curso. Quando nós temos isso assim, ele basicamente usa uma seção de cada vez na tela. Isso é realmente útil, especialmente no iPhone. Se você está tentando trabalhar em uma faixa de quatro minutos e você quer um pouco mais de espaço para ver o que está acontecendo, então o que podemos fazer é deslizar entre seções como essa. Por agora eu vou fazer esta primeira seção cerca de 25 barras. Então, se eu quiser me livrar de qualquer uma dessas seções ou movê-las, eu posso fazer isso assim. Também podemos duplicar essas sessões. Digamos que você queira ter uma estrutura muito semelhante do seu primeiro verso ao seu segundo verso, você pode duplicá-los e ele vai basicamente copiar e colar com esses instrumentos para você. Isso é muito útil. Em seguida, se viermos aqui, podemos puxar nossa tela de instrumentos e temos um par de opções diferentes aqui. Este controle deslizante vai ser onde ajustamos o volume. Este botão vai silenciar a faixa, então se quisermos ouvir o som da música sem aquele piano, podemos fazê-lo assim ou podemos solo e instrumentos, então basta apertar essa música por conta própria apertando o botão do fone de ouvido. Isso vai ser muito útil quando você vem para misturar e você só quer ouvir um instrumento de cada vez para que você possa brincar com esses efeitos e apenas ouvir o que está acontecendo é aquele instrumento sozinho. Podemos usar essa solitária para isso. Se tocarmos em nosso instrumento, temos mais algumas configurações aqui também. Podemos excluí-lo, podemos duplicá-lo, então se quisermos fazer uma cópia exata desse instrumento, podemos fazer isso, podemos renomeá-lo, mesclar e automação virá um pouco mais tarde. Mostrar grades, isso vai ser mais a ver com nossos Live Loops, eu acho que é mais tarde. Nós também podemos mudar os ícones de como esta pequena imagem aqui se parece. Estamos quase lá. Vejamos algumas coisas que podemos fazer com nosso som gravado. Uma vez que
clicamos nele, podemos encurtá-lo para dizer se eu não gostei desses dois acordes e eu queria que terminasse, digamos lá, igualmente eu posso alongá-lo de volta para fora. Se tocarmos em nosso som gravado, ele vai desistir de algumas opções aqui para cortar, copiar e excluir ou podemos fazer loop,
então, se gravamos esta bateria de quatro barras, e queremos que isso continue por toda a verso inteiro, podemos acertar loop e ele ia nos permitir fazer loop aqui pelo tempo que quisermos, então ele vai apenas repetir tudo na primeira barra. Vale a pena notar o que fizermos a esta primeira seção que escolhemos para loop, então digamos que se eu cortar
isso, também vai cortar nosso loop. Apenas mantenha isso em mente. Também podemos dividi-lo. Digamos que se eu quisesse metade desta seção de tambor aqui, eu poderia trazer este pequeno botão de tesoura para onde eu quero que ele se dividisse e então eu apenas puxá-lo para baixo. Se eu mover isso, você pode ver que eles são agora duas seções separadas. Então isso eu posso mover ou aparar, e este é um pequeno arquivo independente. Podemos editá-lo. Vou falar disso um pouco mais tarde, porque é um pouco mais profundo. Podemos renomeá-lo. Se entrarmos em configurações, também
podemos alterar alguns dos bits aqui. Mas novamente, vou falar disso um pouco mais tarde. Esperemos que isso lhe dê um pouco de urso dentro do GarageBand e como trabalhar de forma em torno dele e com esse tipo de abertura raspada parece realmente intimidante e bandas muito acontecendo, mas espero que você tenha começado a quebrá-lo lá em baixo. Em seguida, vamos começar a construir nossa música com alguns tambores. Vejo-te na próxima lição.
5. Baterias virtuais: Em seguida, vamos falar sobre bateria virtual. Para acessar a bateria, nós vamos vir e pressionar este botão “Plus”, e nós vamos encontrar bateria aqui. Há algumas opções diferentes de quais tambores podemos tocar. Esta lição, nós vamos para a bateria acústica, então vamos clicar sobre isso. Eu vou começar esta música com bateria porque eu sinto que muitas vezes dá a música um monte de ritmo e direção e depois encontrá-lo resulta em uma faixa um pouco mais otimista. Todo mundo é diferente. Algumas pessoas gostam de começar com letras. Algumas pessoas gostam de começar com guitarras ou melodias. Não há resposta certa ou errada e é totalmente dependente da música que você quer fazer também. Se você está se sentindo um pouco confuso sobre como escrever bateria, não se preocupe porque nas próximas aulas, eu vou mostrar a vocês como você pode inserir bateria sem qualquer conhecimento de como os tambores realmente combinam. Podemos tocar o kit de bateria de forma intuitiva com os dedos. Então, se você quiser mudar o som da bateria, que clique aqui em cima. Ele vai nos dar um monte de opções diferentes em diferentes kits de bateria que podemos usar. Vamos para o pássaro azul. Incrível. Podemos tirar muitos sons diferentes do nosso kit de bateria. Isso ficou muito claro quando pressionamos nosso botão “Ajuda” e vai nos dar um monte de informações sobre como podemos alterar a maneira como esses tambores são tocados. Por exemplo, aqui no tambor, temos três tipos diferentes de sons de armadilha que podemos acessar. Temos o nosso tambor normal, um bastão lateral e um tiro no aro. Também vai de diferentes opções em nosso prato de passeio. Temos nossa carona e nossa campainha. Temos um hi-hat fechado, hi-hat
aberto, e o nosso pedal para o nosso hi-hat. Você percebe aqui em cima no prato do acidente, quando clicarmos nele, ele vai tocar não só o acidente, mas também o baixo tambor. Mas se você quiser apenas reproduzir o acidente por conta própria, podemos usar dois dedos, ou, se entrarmos em nossas configurações de faixa, descer para Gravação, então
temos a opção de desligar isso se quisermos apenas acertar o prato em sua próprio. Vale a pena notar em nossos kits de bateria também, se colocarmos dois dedos para baixo, ele vai tocar esse tambor para nós. Agora, quanto mais eu puxar meus dedos, mais rápido ele vai se tornar. Poderíamos tentar isso com a armadilha também. Mais uma vez, quanto mais longe o meu dedo se afasta, ele vai tocar mais rápido. Quando estivermos prontos, podemos jogar uma batida. Vamos tocar “Gravar”. Vamos ver como isso seria. Agora, também podemos mudar para um kit de bateria eletrônico, se quisermos. Vai mudar um pouco de você, mas a idéia vai ser a mesma. Você pode ver aqui que temos alguns chutes. Temos uma maraca e uma armadilha, e um monte de coisas legais aqui. Isso funciona exatamente como o outro kit de bateria, só que nós vamos estar pressionando pads em vez daqueles tambores virtuais. Vamos tentar escrever uma batida com este kit eletrônico. O que você vai notar com os kits elétricos é que nós
temos algumas opções para diferentes efeitos aqui. O que eu amo dos instrumentos virtuais que encontramos na faixa de garagem, eles serão mostradores semelhantes para esses efeitos. Agora todos eles fazem coisas completamente diferentes e se eu tentasse explicar cada um deles, este curso seria tão chato e provavelmente seria muito difícil de entender. Muitas vezes sinto que a melhor maneira de aprender o que um efeito faz é simplesmente transformá-lo todo o caminho para cima e ver como isso afeta o som. Por exemplo, você pode ver o que esse cristal faz, corte baixo. Há uma tonelada de sons diferentes que podemos fazer usando esses efeitos, mas não fique muito atolado, o que isso faz? O que é que isso faz? Não sei como isto funciona. Isto é tudo muito confuso. Brinque com eles se quiser, e deixe-os se quiser. Está tudo bem. Nós também podemos ir para percussão e nós temos alguns kits realmente legais aqui também. Quão legal é isso? Cada um desses kits funciona um pouco diferente. Mais uma vez, se clicarmos no botão “Ajuda”, podemos ver exatamente como podemos alterar esses tambores e como eles são tocados. Por exemplo, este gongo. Posso acertá-lo sozinho. Vai fazer aquele lindo som ressonante. Ou eu posso arrastar minha caneta para fazer aquele som inchado. Incrível. Outra gorjeta aqui. Se você não gosta de jogar junto com o metrônomo, sei que algumas pessoas acham isso um pouco anormal e às vezes você sai de colocar. Se você gravar um kit de bateria nesse metrônomo, e enquanto estiver perfeitamente no tempo, você pode deixar de fora esse metrônomo ou desligá-lo se quiser. Porque o que nosso kit de bateria está fazendo, é que ele está basicamente assumindo o papel do metrônomo, que é para nos manter no tempo e colar tudo junto. Isso é muito bonito para os nossos tambores virtuais. Em seguida, vou falar sobre como você pode mesclar e sobrepor gravações para sobrepor uma carga de sons. Então eu vou entrar no resto dos sons do tambor pouco depois. Vejo-te na próxima lição.
6. Mesclar/Gravações de várias tomadas: Em seguida, vamos falar sobre sobreposição e mesclagem de gravações. O que isso significa? Ouvi você perguntar. Gravar instrumentos virtuais no GarageBand é incrível. No entanto, pode ser desajeitado e difícil entrar exatamente no que você está pensando. Por exemplo, se eu quiser tocar este kit de bateria e eu quero ter um chute, uma armadilha e um chapéu alto, tudo indo ao mesmo tempo. Como bastante envolver meus dedos e pode ser realmente complicado para puxar fora, e é o mesmo com piano ou a guitarra, é difícil fazer tudo de uma vez e gravar tudo perfeitamente. O que podemos fazer é usar nossa ferramenta de mesclagem para basicamente mesclar duas gravações diferentes na mesma faixa. Por exemplo, essa batida de bateria que programamos na última lição é ótima, mas eu realmente gosto de ter um chapéu alto em cima de lá também. Se eu clicar na faixa que eu quero mesclar essas gravações, aqui estão configurações, configurações de faixa, gravação. Temos duas opções aqui. Nós combinamos gravações e gravações multi-tomadas. Agora, quando as gravações de mesclagem estão ativadas, ele vai fazer aquela coisa que eu falei há um segundo atrás, onde ele camadas acima e gravações multi-take vão criar novas tomadas cada vez que gravarmos sobre o nosso anterior [inaudível]. Deixe-me mostrar como isso funciona. Tenho gravações fundidas. Vou voltar à nossa tela de instrumentos. Vou voltar ao início da nossa pista. Hit record, eu vou colocar alguns chapéus altos. Se voltarmos para a tela do nosso projeto, agora você pode notar que há muito mais informações MIDI aqui, e que são nossos chapéus altos, e nós adicionamos um acidente lá também. Você pode fazer isso com qualquer instrumento virtual no GarageBand. Não funciona da mesma forma com o áudio. Para guitarras e vocais, tem
que ser faixas completamente separadas. Mas porque isso é tudo baseado virtual é assim no programa, podemos colocar esses sons para que possamos criar faixas realmente complexas usando isso. Agora, se eu quiser mudar isso para gravações multi-faixas, eu tenho que desligar isso primeiro porque eles não podem trabalhar ambos ao mesmo tempo. Vou ativar gravações multitomadas se eu gravar. Se eu voltar para a tela do nosso projeto e você pode ver lá que ele é gravado novamente. Mas a nossa tomada ainda está lá. Se clicarmos aqui, vá para “Takes”, você pode ver que nossa tomada bruta ainda está lá. Este é o lugar onde se você está gravando vocais e você quer fazer muitas tomadas diferentes e, em seguida, escolher o melhor mais tarde,
você pode apenas gravar uma e outra vez e, em seguida, selecionar uma dessas tomadas mais tarde, e isso é praticamente tudo. Agradável e fácil, mas super, super poderoso para criar muitas tomadas diferentes, mas também para sobrepor nossos sons de instrumentos virtuais. Eu vou pegar vocês na próxima lição onde nós vamos dar outra olhada naqueles kits de bateria. Te vejo lá.
7. Baterista inteligente: Em seguida, vamos olhar para outra maneira de inserir bateria, e isso é realmente bateria inteligente. Bateria inteligente são realmente grandes se você não tem certeza sobre como os tambores funcionam, ou eles vão juntos, ou você não sabe como criar batida você mesmo, ele basicamente faz isso para você automaticamente, mas você ainda tem muito controle sobre o som e a dinâmica do instrumento. Vamos clicar neste botão mais como sempre, e vamos para Smart Drums. Os tambores inteligentes são muito simples. Temos essa grade aqui, e como você pode ler, temos silêncio, simples, barulhento e complexo. Agora temos diferentes partes de nossos tambores aqui, e podemos arrastá-los para esta grade. Dependendo de onde os colocamos, vai começar a fazer um som. Se quiser um som mais simples e silencioso, podemos arrastar o nosso pontapé até aqui. Se quiser um som mais alto e complexo, arraste-o para lá. Então, se quiser parar com essa batida, desligamos com este botão aqui. Digamos que temos um monte de coisas dentro, e nós ficamos um pouco confusos, e nós estamos tipo de uma segunda preocupação com isso,
nós apenas clicamos no botão lá em baixo, e eles vão embora. Vale a pena notar que os tambores inteligentes vão funcionar em conjunto com o ritmo que definimos em nossa música, modo que, se você quiser uma música de som mais rápida, só
precisamos mudar esse ritmo em nossas configurações novamente. Sim, podemos começar a experimentar alguns sons. Legal, isso soa bem. Se quiséssemos mudar o som do kit de bateria, basta sair clique aqui, e temos um par de sons diferentes do kit de bateria que podemos escolher. Incrível. Se quisermos apenas brincar com a carga de diferentes batidas, podemos pressionar este botão de olhar de dados aqui em baixo, e isso vai apenas randomizar onde todos os tambores são colocados. Podemos tentar essas diferentes ideias aleatórias. Então, se chegarmos a um que gostamos do som, podemos dizer apenas fazer esse chute um pouco mais silencioso. Talvez um pouco mais silencioso e menos complexo. Sim, você ainda pode personalizá-lo a partir daí. Quando você estiver pronto para gravar seu kit, você só tem que vir aqui, clicar no botão Gravar, e ele vai gravar tudo para você, mãos livres. Lá vai você, uma maneira muito simples de colocar bateria. Vejo-te na próxima lição. Vamos começar a falar sobre sequências de batidas. Vejo você lá.
8. Sequenciador de beat: Em seguida, vamos falar sobre beat Sequencer no GarageBand, outra maneira muito legal de fazer batidas de bateria. Vamos trazê-lo com a nossa tela de seleção de instrumentos, entrar em “Sequenciador de batidas”, e ele vai mostrar esta tela. Então a maneira mais fácil de explicar isso é se eu tocar nossa faixa, você pode ver essas caixas brancas atravessando a tela. Agora, se eu começar a desenhar, ele vai ir da esquerda para a direita e vai tocar os sons de bateria que eu selecionei. Temos um pontapé, armadilha, palmas ,
chapéus e alguns toms. Se viermos aqui, podemos adicionar mais, se quiser. Vamos colocar Conga lá, seria legal. Há toneladas de possibilidades com isso. Você pode realmente se aprofundar com as batidas que você faz e exatamente como eles vão juntos. Vamos, por enquanto, apagar estes. Vamos colocar alguns chapéus em vez disso, ver como isso soa. E se eu quiser fazer uma batida mais fria? Legal. Isso soou legal. Isso, assim como a bateria inteligente, vai refletir nossa velocidade de nossas músicas. Aquele BPM de que falamos antes, o ritmo da música vai cair perfeitamente em linha com isso. Temos algumas ferramentas diferentes aqui em baixo. Temos nossos passos dentro e fora, isso é o que usamos para desenhar em nossas batidas. Podemos selecionar a velocidade. É assim que esses tambores estão sendo tocados. Agora, se eu quiser mudar a velocidade, eu posso mover esta linha na caixa. Quanto mais baixo eu tenho, e quanto menor esse número, ver esse número lá, mais silencioso ele vai ser jogado e vice-versa. Se eu levar isso para cima, vai ser tocado ainda mais alto. Você pode ativar e desativar o Sequenciador de batidas usando este botão “ON”. Vamos apenas fazer uma brincadeira. Você pode ver, apenas com essa velocidade sozinho, podemos realmente dar um pouco de sensação ao nosso kit de bateria para que pareça um pouco mais variado. Em seguida, temos Note Repetir. Isso nos permitirá repetir nossas notas dadas. Se eu pressionar aqui, e então eu posso arrastar isso para cima ou para baixo, dependendo de quantas notas mais eu quiser adicionar. Então vamos tocar isso de novo. Você vê como isso é jogado três vezes? Podemos aumentar isso para oito. Mas você pode fazer alguns sons realmente legais usando essa função Note Repetir. A seguir, temos o Chance. Isto vai ditar a probabilidade de que a batida que selecionamos vai tocar. Se tocarmos na caixa, podemos fazer este quadrado no centro menor ou maior. Espero que, é melhor você ver lá, essa porcentagem é a probabilidade de que o tambor vai ser tocado. Vamos usá-lo na armadilha porque é um pouco mais óbvio. Vamos fazer com que 30 por cento de chance. Bata ali, bate lá de novo, bate ali. Você pode fazer batidas muito variadas e
interessantes usando isso. Ao usar o Velocity, o Note Repeat e o Chance ,
se pressionarmos um pouco mais, será um pouco mais fácil selecionar
a porcentagem exata que queremos seguir. Temos o nosso ciclo, início e fim. Se quisermos, digamos, fazer essa metade, só vai tocar a armadilha da mesma vez. Podemos fazer isso. Também podemos deslizar por este painel de instrumentos e solo e silenciar algumas dessas faixas. Aqui em baixo neste botão “Info”, podemos mudar o tamanho disto. Se quiséssemos fazer 32 passos em vez de apenas 16, você vê que temos toda esta nova seção aqui. Se você quiser tornar esta segunda seção mais variada, podemos fazer isso. Em seguida, temos o comprimento do passo. Isto é basicamente o quão rápido é ou se queremos mudá-lo para trigêmeos. Deixa-me mostrar-te. Se selecionarmos 1/8, será muito mais lento. Corremos 1/16 antes. Então temos 1/32, o que vai ser muito rápido. Então também podemos mudá-lo para trigêmeos também. Na verdade, gostamos disso em 1/8 trigêmeo. Incrível. Aqui, há um monte de coisas para brincar lá. Sei que muitas pessoas adoram essa Sequência de Beat, particularmente as pessoas que gostam de música de armadilha e rap e outras coisas, isso é incrível para isso. Ei, pessoal, Mike do futuro aqui. Mike do passado esqueceu de explicar algumas coisas. Só estou aqui para resolver isso para ele. Não se preocupe, Passado Mike. Se voltarmos a este botão “Info”, você verá que há um modo de reprodução. É aqui que podemos mudar a forma como essas barras brancas se movem pela tela. Em frente, eles parecem como eles fizeram antes, ou podemos ir para trás, então eles podem ir da direita para a esquerda, ping pong, que é para frente e para trás ou há aleatório, o que parece loucura. Eu não sei como você trabalha com isso, mas no caso de você querer usá-lo, é assim
que você faz. Também aqui, temos uma opção para ajustar o balanço da batida. Aqui é onde podemos ajustar a frouxidão do jogo. Se eu desligar a tela, é uma batida muito reta e apertada. Mas se eu mudar isso para algum balanço pesado 1/8, ele começa a se soltar um pouco. Mas eu posso mudar isso para balanço de luz se eu quiser um pouco menos. Você pode adicionar um pouco mais de uma sensação humana e mais
solta aos tambores se você sentir que eles são um pouco robóticos e um pouco apertados. O 1/8 e 1/16 está se referindo à nota mais próxima para a qual você quer que ele seja arrastado, ou há balanço leve e pesado dependendo da intensidade que você deseja que o balanço seja. Mas basicamente, basta escolher o que soa melhor. Ok. Tchau. Temos este botão de tipo de novo. O que isso vai fazer é aleatorizar completamente a seleção de batidas aqui. Você pode ver que é apenas totalmente aleatório e podemos ir para uma tonelada, ter uma escuta. Eu acho isso realmente útil para apenas randomizar. encontrar uma batida que eu gosto do som e então eu posso apenas ajustá-lo e mudá-lo para o meu gosto. Ou aperto este botão aqui, há um monte de padrões pré-fabricados que podemos escolher. Você pode ver aqui há toneladas. vez, podemos selecionar um desses, e então podemos mudá-lo ao nosso gosto. Diga, se eu quisesse me livrar disso, fazer isso um pouco louco, e adicionar mais alguns desses lá. Acabei de colocar o meu pequeno toque pessoal, mais que não fosse muito bom. Se você aparecer com um padrão que você realmente gosta, você pode apenas apertar o botão “Salvar” e você pode fazer uma
batida personalizada para que você possa voltar para ele, se quiser. Também podemos mudar a batida de bateria que está sendo tocada. Você pode selecionar entre acústica, percussão e elétrica. Vamos ouvir um kit diferente. Quão legal é isso? Tantas opções diferentes lá. Tanta possibilidade de criar batidas incríveis. Novamente, mesmo que você não tenha certeza de como os tambores vão juntos, mas então há tanta profundidade nisso que aqueles de vocês que realmente gostam de tirar o máximo proveito dessas sequências de batidas, você tem toneladas para trabalhar. Então, por fim, quando
estivermos prontos para gravar, vamos apertar o botão “Gravar” e ele vai tocar para nós. Esse é o nosso Sequenciador de batidas. Em seguida, vou mostrar como usar o Auto Drummer, que é uma das minhas formas favoritas de inserir bateria no GarageBand. Estou muito animada para te mostrar. Apanho-vos na próxima lição.
9. Baterista automático: Então, bem-vindo de volta. Em seguida, vamos olhar para o baterista automático. Auto baterista é uma das minhas maneiras favoritas de inserir bateria em [inaudível] banda. É muito fácil, mas há muitos tambores complexos que podemos fazer para isso. É perfeito porque você não precisa ter nenhum conhecimento sobre como os tambores funcionam ou andam juntos. Para trabalhar em um baterista, como sempre, vamos clicar neste botão mais. Nós vamos realmente sair desta seção de tambor. Vamos encontrar o baterista que deveria estar lá. Uma vez que clicarmos no baterista, ele vai mostrar esta tela. Então você pode ver que já está escrito em alguns tambores em nossa pista. Novamente, isso mapeia o BPM e o ritmo de nossa música, e está escrito em alguns tambores lá para nós. Então isso está escrito em uma batida elétrica e moderna. Você pode ver aqui, o nome do nosso baterista é Dez, certo Dez? Se clicarmos em Dez você vê que podemos realmente mudá-lo. Temos muitos bateristas diferentes aqui. Então você pode ver que temos acústica e elétrica, então aqui estão alguns elétricos, Magnus, Leah, Jasper, Kyle, Logan ,
Darcy, muitos bateristas aqui. Todos eles vão ter seu próprio estilo e seu próprio chute diferente. Então tenha uma boa jogada com muitos desses bateristas. Vou dar mais um pontapé acústico com o meu som hoje. Então vamos com Curtis para começar. Legal, então isso soa bem. O que mais temos? Eu realmente gosto do som desse chute. Então eu vou com Mason, que é o nome dele. Depois de escolher o baterista com o qual está feliz, temos muitas opções aqui para mudar a forma como ele toca. Então, para começar, temos algumas predefinições aqui, então estas serão apenas batidas diferentes predefinidas. Vamos tentar a Montanha do Rei. Há apenas um monte de variação nessas predefinições. Vamos começar com aquela predefinição básica de Back Roads. O que podemos fazer aqui, realmente [inaudível] para nossos bateria inteligente mais cedo, temos uma pequena grade com suave,
simples, barulhento e complexo. Dependendo de onde nos movemos, este ponto amarelo vai refletir a batida da bateria está sendo tocada. Novamente, se quiser algo alto e complexo, podemos trazer mais para este canto. Igualmente, se você quiser algo mais simples e suave, podemos trazê-lo de volta lá. Vamos, por agora, trazer isso para o centro. Então, a seguir temos swing. Então, se você não sabe o que é swing,
é basicamente uma maneira mais solta de tocar o instrumento. Não vai ser perfeitamente no tempo, vai ser sempre sonolento e muito solto, e eu vou te dar um exemplo. Temos algumas opções aqui sobre o quão intenso queremos que o Swing seja. Temos leve e pesado para o nosso 1/8, e leve e pesado para o nosso 1/16. Vamos tentar primeiro sem nenhum balanço. Agora vamos adicionar um pouco de balanço pesado. Você vê como é realmente solto e preguiçoso lá em cima. Então vamos tentar de novo, mas com um balanço de luz. Vê isso? Nós também podemos mudar para a nota 1/16, vamos apenas mudar um pouco mais. Legal, então isso só dá uma sensação humana e preguiçosa. Agora você não precisa usar swing. Não se preocupe em tê-lo ligado ou desligado, é totalmente apenas dependente do que você gosta do som. Então temos algumas opções sobre como o kit de bateria está sendo tocado, para que possamos selecionar quais partes do kit de bateria queremos que ele toque. Posso desligar o Hi-Hat, se quiser. Posso fazê-lo tocar os Toms. Posso tirar esse pontapé. Posso adicionar alguns pratos. Então temos mais percussão aqui. Então temos alguns pandeiros, algumas raquetes, e algumas palmas. Então o que podemos realmente fazer é mudar como ele está tocando as peças do kit de bateria. Temos três opções para percussão aqui. Então isso vai ser nossos pandeireiros, agitadores e palmas. Se eu tocar a percussão, você pode ouvir exatamente o que vai acontecer. Só vai mudar a batida daquele pedaço de percussão. Então podemos fazer o mesmo com nossos Toms, e isso muda se selecionarmos para Hi-Hats, temos um monte de opções diferentes aqui. O mesmo com o nosso chute e a nossa armadilha. Incrível. Há um monte de coisas que podemos fazer com isso, e podemos criar uma batida de bateria que é realmente adaptada às nossas preferências e ao nosso som que gostamos. Então também podemos selecionar a frequência e a intensidade que queremos que seus Fills sejam. Então, se eu virar isso todo o caminho para baixo, você vai ouvir que ele não toca nenhum Fills realmente. Mas, igualmente, podemos aumentar isso, e ele vai ficar um pouco louco. Encha aí e outra ali. Então, por último, o que podemos fazer, e esta é uma das minhas coisas favoritas, certifique-se de que você usa isso, é o nosso botão Seguir. O que isto vai fazer é fazer com que o nosso pontapé e nossa armadilha sigam outro instrumento na nossa pista. Por exemplo, eu gravei um pouco de teclado mais cedo, e soou assim. É um pouco básico de piano lá, mas com nosso baterista, podemos fazê-lo seguir como o piano está sendo tocado usando isso. Então, marcamos esse Seguir e então podemos selecionar aqui qual instrumento queremos que o chute e a armadilha sigam. Se eu clicar em Piano de Grão, e então eu toco ambos ao mesmo tempo. Ele está acentuando onde esses acordes estão sendo tocados e isso pode ficar muito complicado se você tem uma peça de guitarra ou piano mais complicada, ele vai realmente muito bem seguir a maneira como o outro instrumento foi tocado. Mas sim, grande Top Tip aqui, use esse Follow, Kick & Snare. Faz um impacto tão grande em suas músicas e é tão legal. É literalmente como ter seu próprio baterista pessoal escrevendo em sua pista para você. Vou usar o baterista de carros nesta música que vou escrever. Eu realmente vou ter uma peça por aí agora com os sons que eu quero que o baterista faça. Então eu acho que vou torná-lo um pouco alto e um pouco mais complexo. Vou virar os preenchimentos para cerca de um médium. Eu quero que ele toque o Hi-Hats no verso, eu pensei que isso combina muito bem. Então vamos apenas ouvir aqueles diferentes sons Hi-Hat. Então, uma vez que temos uma peça que
gostamos, podemos então adicionar em outra seção, que é realmente feito aqui já para nós. Então, se voltarmos para a tela do projeto, você poderá ver que está escrito em baixo para saltos para nós. Agora podemos, obviamente, excluir estes e tirar qualquer, cortá-los e editá-los como quisermos. Eu só vou deletar isso por enquanto, e eu vou mudá-lo à medida que passamos. Por enquanto, digamos que este será o nosso verso. Então eu tenho nossos vértices mais silenciosos, tambores
mais reservados lá. Então, para o refrão, eu quero que ele seja pego um pouco talvez seja tocado no passeio. Talvez seja um pouco barulhento. Se eu voltar para a tela do baterista e depois vamos brincar com isso. Então, sim, eu quero isso nos pratos, isso soa bem. Então, para o refrão, eu queria focar na melodia. Eu vou desligar esses preenchimentos porque eu não quero que os enchimentos e os tambores interrompam o que está acontecendo com o tipo e as guitarras demais. Vamos alterar as predefinições que Back Roads novamente, adicionar esses pratos. Sim, vamos deixar isso aí. Abaixe um pouco esses preenchimentos. Vamos talvez adicionar umas palmas. Incrível. Temos um verso e uma estrutura de tambor de coro lá, com o qual estou muito feliz. Então não se preocupe se em algum momento você quiser voltar a isso porque você pode mudar isso a qualquer momento se você decidir mais tarde que você quer mudar algo. Se você quiser inserir uma nova seção de baterista, nós só temos que vir aqui, tocar em “Criar” e ele vai criar uma nova região de baterista para nós. Vou voltar para o baterista automático assim que começarmos a desenvolver nossa música e eu posso ter uma sensação mais do que as guitarras e outros instrumentos estão fazendo. Mas isso fez uma boa base para trabalharmos. Então esse é o nosso baterista. Em seguida, vamos analisar como podemos construir sobre esses tambores e adicionar coisas como teclados, guitarras e outros instrumentos virtuais. Vejo-te na próxima lição.
10. Teclado virtual: Bem-vinda de volta. Em seguida, vamos olhar para o nosso teclado virtual. Então, para descobrir que vamos chegar a mais, e aqui está o nosso teclado. Você pode ver no fundo aqui temos Smart Piano, Alchemy Synth e Sampler. Agora, nós vamos chegar a cada um desses individualmente, mas primeiro vamos apenas tocar no teclado e ele deve trazer algo como isso. Pode parecer óbvio, mas para tocar isso, vamos pressionar com os dedos. Para mudar o som do nosso teclado, que temos que pressionar aqui e temos toneladas de sons diferentes. Cargas de órgãos legais, pianos elétricos. Então temos montes de sintéticos aqui, que vamos olhar em um segundo. Vamos começar com o nosso Classic Grand, porque era um bom lugar para começar. Aqui à esquerda, temos nosso seletor de oitava, então ele só vai descer a oitava ou mais para baixo o piano. Podemos ir mais longe e igualmente, podemos ir para cima e outro para cima, mas ele pára em cerca de quatro. Então temos a nossa alavanca sustentada aqui. Podemos ligar isso e isso vai sustentar essas notas para nós, ou se você quiser um pouco mais de controle sobre seu sustain, uma vez que você pressioná-lo para baixo, ele pode sustentar e quando você decolar vai agir como um pedal de piano faria. Podemos ter um pouco mais de controle sobre nosso sustento dessa maneira. Temos uma escala de seleção aqui. Eu vou chegar a isso em uma lição separada porque vai levar um pouco mais de explicação, então não se preocupe com isso por enquanto. Este próximo botão aqui nos dá um par de opções diferentes para o nosso teclado. Isto é muito fixe. Podemos selecionar um teclado duplo se você quiser jogar assim. Eu não sou muito de tecladista, como você provavelmente pode dizer. Você também pode alterar quantas teclas são exibidas. Pode ser um pouco mais fácil nesta configuração onde as teclas são um pouco maiores. Mas se você é um homem louco absoluto e você quer ir para um conjunto como este, você também faz isso, embora eu não sei como você faria isso porque eles são tão pequenos. Vamos voltar para a nossa visão padrão e eu vou mudá-la para a boa, grossa, então é agradável e fácil. Temos algumas opções diferentes aqui também. Temos nossos controles de velocidade. Uma vez que ligamos isso, você notará que isso aparece à esquerda. Isso vai nos dar mais controle sobre a velocidade dos instrumentos. Se tocarmos bem e gentilmente, vai nos fazer nota mais silenciosa, mas se tocarmos mais forte, vai fazer uma nota mais alta. Isso é muito bom, mas pode ser muito fácil tocar acidentalmente um pouco forte, porque não é tão bom quanto jogar em um teclado real, então podemos selecionar a velocidade que queremos trabalhar dentro. Então, se você quiser que ele fique bem quieto, nós podemos pegar a extremidade superior direita para baixo e vai ser mais controlado na zona média. Seja claro se quisermos fazer cada nota bem alta, podemos falar assim. Você pode apenas reduzir o tipo de jogo que você quer alcançar. Então temos os nossos principais controles. Uma vez que ligamos isso, vocês verão aqui, ele vai nos dar algumas opções diferentes de como movemos para cima e para baixo o teclado. Em Glissando, vamos ser apenas estáticos, mas se pressionarmos novamente ele vai rolar. Agora podemos mover o teclado para cima e para baixo manualmente, e você pode ver onde estamos no teclado. A seguir temos o nosso arpejador. Vamos ligá-lo e ver o que isso faz. O que um arpejador
faz, vai tocar as notas que pressionamos para baixo, vai combiná-lo com o ritmo da nossa música, e soa um pouco assim. Que legal, certo? Isso pode ser tão complexo ou tão simples quanto você quiser. Podemos fazer um monte de coisas para mudar como esse arpejador funciona. Se pressionarmos isso novamente, você pode ver que temos algumas opções aqui, então podemos alterar a ordem da nota, podemos ter as notas tocadas como eu as joguei. Se eu subir aqui primeiro e depois aqui embaixo, e então no meio, ele vai tocá-los na ordem que eu pressionei, mas se eu quiser que eles simplesmente subam, eu posso selecionar isso aqui, e então não importa em que ordem eu pressioná-los, As notas vão sempre subir. Igualmente, posso descer. Pode ir para cima e depois para baixo, ou podemos torná-lo aleatório, o que nos dá um riff variado muito legal. Incrível. Então eu vou deixá-lo ligado como jogado por agora, e então nós também podemos alterar as taxas de notas. Isto é basicamente a rapidez com que essas notas estão sendo tocadas. Então [inaudível] você pode ser louco, e nós temos pontilhado, então isso vai ser apenas um pouco variado. Então temos trigêmeos. Por último, temos a nossa gama de oitavas. Você deve ter notado, enquanto eu estava tocando lá, não estava apenas tocando as notas que eu pressionei para baixo, ele também as toca em uma oitava acima. Podemos mudar quantas oitavas o nosso arpejador passa por aqui. Então, no momento, está em dois, se eu selecionar um, vai ser muito claro, por eu estou pressionando para baixo. Então, se eu quiser fazer duas oitavas. Posso fazer três, quatro. Olá a todos, Mike do futuro aqui de novo. Uma última coisa sobre o arpejador. Se o tivermos ligado, verá que há um controle de trava aqui. Se ligarmos isso e tocar nosso arpegiador, ele vai travar no lugar, uma vez que pressionamos as notas para baixo, então isso significa que eu posso apenas pressionar aqui ou pressionar para baixo ali, e ele vai tocá-lo para Mãos livres. Uma vez que dizemos tocar um acorde, então assim, ele vai girar ao redor, e então eu posso mudar o tom desse acorde apenas pressionando uma nota de cada vez. Você vê que os acordes se tornam mais baixos. Podemos brincar com o tom desse acorde. Ok, tchau. Você deve ter notado quando eu estava alternando o teclado soa mais cedo, que há um par de opções diferentes quando clicamos em alguns pianos diferentes. Você pode ver aqui neste piano elétrico, nós temos um controle de passo e nós temos alguns efeitos incríveis aqui. Como eu disse antes, haverá toneladas de efeitos nesses instrumentos virtuais. Apenas tenha uma boa brincadeira com eles. há realmente nenhuma resposta certa ou errada para muitos desses efeitos, eles são puramente para adicionar caráter ao instrumento que está sendo tocado. A melhor maneira de descobrir o que cada efeito
faz, é apenas aumentá-lo. Não tenha medo de experimentar, há realmente, como eu disse antes, nenhum certo ou errado, e é apenas sobre se divertir também. Eu acho que muitas vezes você vai vir acima com pequenos riffs
legais e pequenas idéias legais apenas de brincar com os efeitos e se divertir com ele. Isso vai ser um pouco diferente em cada instrumento que selecionarmos. Novamente, eu não vou entrar muito neles porque vai ser muito denso e um pouco de uma lição intensa. Além dos sons mais tradicionais de som e teclado, também
temos o nosso Alchemy Synth. Estes vão nos dar uma carga de diferentes efeitos e opções para mexer com ele. Como você pode ver aqui, a tela parece um pouco diferente. Temos um pitch e um modificador, e então temos alguns efeitos predefinidos diferentes aqui. Eu posso mover essa caixa azul, e você pode ver aqui, dependendo de onde eu movê-los, isso vai mudar todos esses efeitos para nós. Torna-o agradável e simples, em vez de ter que jogar com todos aqueles mostradores. Então, neste teclado autônomo, temos toneladas de efeitos legais lá. Agora, se você quiser ir um pouco mais em profundidade para controlar esses efeitos, você pode deslizar sobre a tela superior e você pode entrar no nitty-gritty com todos esses controles. Vale a pena notar no nosso Alchemy Synth, e com alguns dos diferentes sons de teclado, temos outra opção aqui agora. Então nós temos Glissando, nosso pergaminho, e nós também temos Pitch. Com isso podemos basicamente usá-lo quase como um Kaoss Pad ou um touch pad. Deixe-me voltar a um dos sons mais básicos. É aquele ponto azul, enquanto você o move para cima e para baixo ele vai mudar o tom da nota, e nós poderíamos fazer isso com vários dedos. Cria coisas muito legais como essa. Você deve ter notado, quando mudamos para o nosso Sintético Alquimia, só trouxe outro botão aqui. Agora, se pressionarmos isso, é o nosso seletor quadrado eficaz coisa, ele vai para o meio. Agora o que podemos fazer com isso é mover nosso dispositivo e ele vai
mudar o efeito que está sendo usado ou qual predefinição está sendo usada. Então, se eu tocar um acorde e, em seguida, mover o iPad ao redor, essa predefinição de efeito vai mudar. Quão legal é isso? Podemos literalmente mover nosso iPad para fazer alguns sons legais, então sim, há um monte de coisas legais com que você pode brincar aqui. Tenha uma boa experiência e se divirta um pouco, e te vejo na próxima lição.
11. Instrumentos inteligentes: Bem-vinda de volta. Em seguida, vamos falar sobre instrumentos inteligentes. Instrumentos inteligentes são ótimos para tocar acordes facilmente em nosso dispositivo, mas eles também funcionam muito bem para pessoas que não estão muito familiarizadas com a teoria musical e como juntar acordes. Vamos começar agora. Nesta lição, vou me concentrar no piano inteligente,
mas vale a pena notar que você pode encontrar o mesmo sistema de instrumentos inteligentes em cordas, baixo, guitarra e instrumentos mundiais. Vamos entrar em todos esses individualmente um pouco mais tarde, mas a idéia é basicamente a mesma. Vamos mostrar-lhe abrindo um piano inteligente. Vale a pena notar que podemos nos mover entre a tela do instrumento padrão e a tela do instrumento inteligente usando este botão aqui. Parece um acorde vermelho. Se pressionarmos isso e desligarmos, eles vão no meio. Como podem ver aqui, temos muitos acordes diferentes, e podemos tocá-los com os dedos. Por exemplo, há um C lá e quanto mais alto subirmos nesta barra branca, mais altos serão os acordes, e aqui embaixo estão nossas notas de baixo. A de baixo e a de cima cinza são a mesma nota, mas uma oitava à parte, e então a do meio é a nossa quinta. Essa é basicamente a segunda nota mais importante, mas não se preocupe muito com isso. No exemplo do piano, você quase pode pensar nessas notas cinzentas como sua mão esquerda tocando as partes básicas e as partes brancas, tocando os acordes mais alto no piano. Usando isso, podemos tocar nossos instrumentos mesmo que
não tenhamos que conhecer todos esses acordes e todas essas formas e outras coisas. Você pode notar aqui em cima também, que
nós temos um recurso de reprodução automática. O que isso vai fazer é tocar os acordes para nós e nós só temos que selecionar quais acordes queremos. Vamos tentar entrar em um, e você pode ver que ele traz a visão ligeiramente diferente. Se eu tocar em f, você pode vê-lo começar a tocar para nós. Agora, se quisermos adicionar a base às suas notas, você pode digitar isso. Então, se você quiser tocar os acordes mais altos e as notas de baixo ao mesmo tempo, você pressiona a letra. Cada um desses números diferentes só vai tocar essa progressão de acordes, um pouco diferente, e então podemos costurar uma costeleta e mudar com as notas de baixo e os acordes. Uma mistura e combinar e criar alguns acordes de som realmente agradáveis dessa forma. Vamos desligar a jogada automática por um minuto. Agora, você pode notar que nós costumávamos ter nosso sustento novamente, então isso funciona exatamente como aconteceu no piano virtual. Podemos brincar com essas notas sustentadas. Todos os acordes que nos vão apresentar vão trabalhar juntos. Se você notar lá, todos eles trabalham juntos, que a diminuição no final vai ser um pouco estranha. Não sinta que você tem que colocar esse diminuído, é só lá porque tecnicamente funciona na teoria da música, mas maioria das pessoas fica longe de notas diminuídas porque eles são realmente estranho som como você pode ouvir. Você pode perguntar por que ele selecionou esses acordes para nós e como todos eles trabalham juntos. Isso volta ao que eu estava dizendo no início sobre nossa assinatura chave. Porque dissemos ao programa que estamos escrevendo em Dó maior, está apresentando todas essas chamadas para nós porque todos eles trabalham em Dó maior. O que podemos fazer é dizer como escrever um pouco de piano usando os acordes inteligentes, e então poderíamos ir até a base inteligente. Como a nossa assinatura de chave ainda vai estar em C maior, todas essas notas inteligentes base vão funcionar com ela também. Significa que não precisamos pensar na teoria da música, o que vai junto, só funcionará perfeitamente. Agora, se mudarmos a assinatura da chave, digamos mudá-la para D, você percebe que todos os acordes mudaram agora, mas não importa porque eles vão trabalhar juntos ainda. Pela nossa soma de hoje, vou escrever em “E maior”. Por que escolhi outra gorjeta? Porque vou escrever com guitarra mais tarde. guitarra funciona muito bem com E maior porque muitas
dessas notas abertas vão funcionar na escala E maior. Significa que vai funcionar perfeitamente com essas notas abertas sendo tocadas na guitarra. Sim, não se preocupe muito com a assinatura da chave, é apenas uma maneira que podemos realmente
unir nossos instrumentos inteligentes e também nossas balanças, que eu vou falar um pouco mais tarde. Todas essas assinaturas chave realmente é apenas mudar o tom de nossa música, não
vai mudar como eles progridem necessariamente, mas nós também podemos mudar se é uma chave maior ou menor. Basicamente tudo o que significa é sons principais um pouco mais felizes e um pouco mais edificante e sons menores um pouco tristes e um pouco mais sombrios, vamos ter uma escuta. Então você vê, é só um pouco mais escuro. Mas por hoje, eu queria ser bom e otimista, eu vou mantê-lo no major, legal. Digamos que você queira ir um pouco mais em profundidade com esses acordes. O que podemos fazer é vir até aqui para Configurações e, em seguida, pressionar Editar acordes, e o que podemos fazer é clicar em nosso acorde e podemos mudá-lo para o que quisermos. Não fique muito envolvido nisso,
esta é apenas uma opção se você quiser obter mais profundidade com os acordes. Não há nada de errado em ficar com os acordes que já foram definidos para nós, mas esta é apenas uma maneira de mudar esses acordes, eu poderia mudar isso para qualquer coisa que eu quisesse. Eu posso mudá-lo para E diminuído, E diminuído adicionar sete, e então esta é a nossa nota base. Isto vai mudar as notas de base aqui em baixo. Podemos criar acordes estranhos como esse. Não se preocupe se você se misturar um pouco em escrever um código personalizado porque nós temos este botão aqui em cima onde podemos apenas reverter para o acorde original. Sim, usando os instrumentos inteligentes, podemos apenas escrever algumas progressões de acordes e movimentos realmente legais muito facilmente, então vamos tentar fazer isso agora. Fácil, eu nem estava pensando no que eu estava fazendo agora, eu estava apenas me movendo e brincando e tudo funciona muito bem juntos. Outra dica aqui, se você vai escrever para a assinatura da chave e você está um pouco confuso sobre como talvez colocar uma progressão de acordes juntos. Uma dica útil é sempre começar ou terminar em nossa nota raiz. Se a nossa assinatura de chave estiver em E maior, essa será a nossa nota raiz, ou eu gosto de chamá-la como nossa nota de casa. É o lugar que se sente confortável e seguro, se você ouvir. Veja como se resolve bem nesse E. Vamos tentar começar em outro lugar e depois terminar em E em vez disso. Ele só vai trazê-lo de volta para casa e você é como, isso é concluído muito bem. Digamos que você escreve uma progressão de acordes como essa e isso soa muito bom e você pode totalmente correr com isso e apenas usar os acordes que estão lá. Mas se você quiser, como apimentar um pouco mais, o que podemos fazer é voltar para a seção de edição de código e então podemos adicionar um pouco de tempero aos nossos acordes. Contanto que você não mude nenhuma dessas seções, então nosso D e o maior e menor, podemos brincar com essa seção que só vai adicionar um pouco de sabor ao nosso acorde, mas ele ainda vai ficar dentro da assinatura da chave. Você vê isso como dado ao nosso acorde D um pouco de sabor. Se eu mudar isso de volta para nenhum, ele dá muita diferença de opções e de repente esses acordes soam muito mais profissionais e um pouco mais interessantes do que os acordes padrão. Vamos tentar mudar essas três notas e ver se conseguimos algo um pouco mais interessante. Temos DAE e DAE novamente, mas vamos mudar esses para torná-los um pouco mais interessantes. Se você vai fazer isso, eu recomendo tocar os acordes enquanto movemos isso, para que você possa ouvir as diferentes notas, linda. Que bom é isso. Acabamos de mudar o número final dado cada tempero ao nosso acorde e de repente isso soa muito mais complicado e bonito para mim, pelo menos. Vou te dar um pouco antes, depois e agora depois. Tão fixe. Mais uma vez vai acabar com aquele E porque é a nossa bela nota de casa. Outra gorjeta muito importante. Se você é um iniciante e você não tem certeza sobre quantos acordes você deve usar ou exatamente o que você deve estar fazendo. Basta tentar escolher três ou quatro acordes e fazer, Eu disse sobre ou começar ou terminar em nossa nota raiz, e a partir disso sozinho, você deve ser capaz de construir uma grande música. Por exemplo, lá que a progressão DAE eu tinha, isso foi tão bom que você pode facilmente escrever uma música com apenas esses três acordes e isso realmente não é apenas um truque iniciante também. Como os Beatles são quase todos os seus eram apenas três ou quatro acordes. Na verdade, a maioria das músicas pop são apenas isso, três ou quatro acordes e você pode estar pensando menos bem e bem, mas pessoas como os Beatles estavam por aí há muito tempo, e a música apenas veio um longo caminho desde então. Mas, por exemplo, Billie Eilish, uma enorme sensação global no minuto. Sua música, Everything I Wanted, apenas quatro acordes, mais ou menos tocados uma e outra vez na mesma ordem, e essa música é incrível. Você realmente não tem que ficar muito complicado com suas progressões de acordes para fazer uma boa música. Mantenha-se simples, confie em mim, você pode encontrar suas coisas mais eficazes dessa forma. Ter essa progressão de acordes é uma grande base, mas não vale a pena perder-se. Uma vez que tivermos essa base, podemos brincar com coisas como nossa dinâmica,
adicionando instrumentos e, em seguida, levando-os embora, mudando melodias. Todas essas coisas vão variar até nossa música, modo que você quase começa a perder a noção da progressão do acorde. Uma lição realmente importante lá, espero que você tenha gostado disso e eu vou vê-lo na próxima lição.
12. Escalas: Bem-vinda de volta. Em seguida, vamos falar sobre Scales. Agora, não se preocupe, eu sei que isso pode soar como uma perspectiva bastante assustadora e é como, “Eu não conheço teoria musical além de escalas. Não, obrigado.” Mas não se preocupe, GarageBand facilita uso de balanças. Não precisamos saber nada sobre teoria musical. Vamos saltar para isso agora. Vou explicar escalas no teclado,
mas vale a pena notar que a função [inaudível] de escalas está disponível no teclado, nas cordas, no baixo,
na guitarra e nos instrumentos mundiais. Se clicarmos no nosso “Teclado” e depois fecharmos os acordes, você pode ver aqui temos o botão Escalas. Quando clicarmos nisso, ele vai nos dar uma lista de várias escalas diferentes. O que as escalas realmente
são, são um grupo de notas que funcionam bem juntas. Cada um tem suas próprias características únicas e sons únicos, tão realmente semelhantes aos nossos instrumentos inteligentes. banda do GarageBand vai olhar para o que a assinatura de chave inventou e vai dizer,
“Incrível, eu vou fazer essas balanças para que eles se encaixem na assinatura da chave.” Novamente, nós realmente não precisamos saber a teoria por trás disso, nós podemos apenas focar no jogo. Dependendo da chave no motor que temos selecionado, os mais apropriados vão aparecer mais em direção ao topo. Porque estamos em uma chave maior, você pode ver lá em cima que tem mais
dessas grandes escalas que podem funcionar bem com a nossa chave principal, mas se pararmos aqui e mudá-lo para E menor em vez disso, você pode ver que mudou que e é [inaudível] alguns dos que vão funcionar melhor no topo. Vamos voltar para a nossa chave principal e vamos tentar com a nossa grande escala primeiro. Ele vai mudar a visão para, em vez de ter as notas brancas e pretas, ele só vai ter esses retângulos brancos. Enquanto eu toco
isso, é apenas a escala, então não podemos ouvir uma nota ruim. Você pode notar essas notas acinzentadas aqui, elas são nossas notas raiz. Isso só vai refletir o que nossa assinatura chave é, então novamente, vai ser E. Um pouco como eu disse em nossa lição de instrumentos inteligentes, que vai ser como uma nota inteira,
um lugar agradável e aconchegante, confortável, para dizer que se fizermos um pouco riff, resolve muito bem. Eu gravei a pequena progressão de acordes que criamos na última lição, então vamos tentar tocar nossa escala maior acima disso. Vê como isso funciona? Vamos tentar outras escalas. vez, cada um deles vai ter um pouco de uma característica diferente. Grande pentatônica, muito bom. blues principal vai ser um pouco mais misterioso. Há cargas para brincar com essas escalas, mas podemos facilitar para nós mesmos e escolher entre duas escalas diferentes. Isso é tudo escala natural, então nosso major e nosso maior pentatônico. Se formos menores, escolheríamos entre nosso menor, que é nossa escala natural, e nosso pentatônico menor. Essas são as principais escalas que são usadas principalmente no Ocidente em uma música pop, e lá eu acho que cerca de 99 por cento das pessoas estarão usando, alguns apenas ficar com eles se isso parecer um pouco esmagador. Mas no caso de você querer escrever uma música estilo japonês, você pode usar essas escalas para isso. Eu, pessoalmente, gosto muito de usar as escalas pentatônicas, eu sinto que o que você toca usando-as parece ser bom. Agora podemos juntar várias dessas coisas que aprendemos. Podemos tocar nossos acordes usando nossos instrumentos inteligentes, podemos usar escalas para fazer uma melodia, ou uma parte principal, e podemos usar nossa função de gravações de mesclagem para mesclar tudo na mesma faixa. Tenho o meu acorde gravado aqui, tenho a minha gravação ligada, posso voltar para a nossa tela de instrumentos com as nossas escalas, e posso apertar “Record”. Eu criei um lindo pedaço de piano sem nenhum conhecimento de como tocá-lo. Este é o lugar onde você quer atravessar no curso é, você não precisa saber teoria da música ou ser capaz de tocar um instrumento para ser capaz de escrever música agora, você pode usar esses recursos para sua vantagem e apenas escrever belas peças de música. Obrigado por se juntar a mim nesta lição. Mal posso esperar para te ver na próxima.
13. Sampler: Oi, todo mundo. Bem-vindo de volta. Nesta lição, vamos falar sobre o nosso Sampler. Um Sampler é o que podemos usar para gravar nossa voz ou qualquer outro som que possamos encontrar, e então podemos brincar com esses sons usando um teclado. Nós vamos abrir um novo instrumento, e você pode ver no teclado, ele diz Sampler lá, então você vai bater lá e ele vai trazer esta tela. Como eu estava dizendo antes, podemos usar esse sampler para tocar qualquer som que pudermos gravar com nosso dispositivo. Eles têm alguns sons pré-fabricados aqui. Se clicarmos aqui, podemos ver o banco de som. Temos algumas risadas, e ohs, e crianças aplaudindo. Vamos brincar com o latido. Se você selecionar isso, e então nós podemos tocar esse latido no teclado. Mas a minha coisa favorita sobre o Sampler é o facto de
podermos gravar os nossos próprios sons nisto. Se você estiver usando o microfone no próprio dispositivo, ele deve pegar imediatamente, como você pode ver aqui. Você vê enquanto eu estou falando, o microfone está pegando, e isso é apenas uma leitura de quão alta minha voz é e quão bem ela está sendo captada. Se eu aumentar mais a entrada, você verá que está batendo bem no topo, agora. Não queremos isso porque isso vai causar pico. O que queremos é que ele fique embaixo do topo, e podemos mover esse discagem de entrada para cima e para baixo até que ele pare de atingir o pico. Eu vou falar no volume que eu vou gravar, então sobre lá, e isso não está chegando muito, então eu vou ficar feliz com isso. Também podemos alterar algumas dessas configurações pressionando aqui. Podemos alterar o nível de entrada para que seja feito automaticamente, que não tenhamos que definir isso nós mesmos. Você vê aqui você pode obter um pouco mais de uma leitura detalhada de quão perto estamos de pico. Parece-me bem, mas podemos ligá-lo para automático, se quiser que isso faça por nós. Também temos um botão para o monitor aqui. O que o nosso monitor vai fazer vai permitir-nos
ouvir de volta o que estamos a tocar e a gravar. Quando estiver pronto para gravar, vamos apertar o botão vermelho, e ele vai começar a gravar. Aqui temos a minha pequena amostra, e vai começar a gravar. Então você pode brincar com essa voz. O que você deve ter notado que o Sampler fazendo lá é quando eu apertei o botão de gravação,
ele espera até que ele realmente pudesse ouvir um som antes de começar a gravar. Se eu ficar muito quieto, e depois falar, só vai gravar quando notar um sinal. Mas digamos que você tenha algum ruído de fundo ou algo mais acontece, você pode facilmente usar essas setas para cortar onde deseja que a amostra comece e termine. “ Então fale. Fale, fale. Fale.” Se eu só quisesse essa conversa, eu poderia cortá-la e ter isso, “Fale. Falar. Fale.” Eu quero fazer um objetivo para tentar obter uma amostra para esta música. Vamos tentar uma nova gravação. Sim. O que também podemos fazer com um Sampler é descobrir como gostaríamos de soar, sim, ou algo assim. Então você também pode descobrir como você realmente soa,
sim, o que é mais parecido com isso. Como basicamente todas as minhas chamadas são “Sim. Sim. Sim. Sim. Sim. Sim. Sim.” Sinto muito por isso. Agora também podemos brincar com o Sampler, invertendo-o, “Haey. Haey.” Parece que estou fazendo uma oração japonesa ou algo assim. “ Haey.” Podemos fazer um loop. “ Sim. Sim. Sim.” Parece o inferno. Também podemos entrar em detalhes onde podemos ajustar algumas coisas. Esta caixa aqui vai ditar a rapidez com que a nossa amostra desaparece. Tem um belo desbotamento em um minuto. “ Sim. Sim.” Mas talvez um pouco afiada demais. Se arrastarmos esta linha um pouco mais, “Sim”, aguenta um pouco mais. “ Sim.” Mas você ganha um pouco mais disso depois do barulho, então podemos tirar isso um pouco mais se quisermos. “ Sim.” Podemos brincar com isso para ajudar a guiar a trilha. “ Sim. Sim” Incrível. Não se preocupe muito com isso,
se você gosta do som da amostra como ele é, você pode deixar isso. Então podemos brincar com as afinações. Este é mais ou menos o arremesso, “Sim. Sim. Sim,” ou o ajuste fino. Mas porque é apenas em uma nota, eu não acho que vai realmente fazer muita diferença. Mas se você estiver usando uma amostra mais longa, você provavelmente notará mais de uma diferença. “ Sim. Sim. Sim. Sim, sim.” Se gravarmos uma amostra que realmente
gostamos, podemos bater aqui, e então temos um botão lá para salvá-la nossa biblioteca
para que possamos sempre voltar a ela. Se você não quiser gravar sua própria amostra, podemos realmente mexer com alguns dos sons que estão no GarageBand ou outros sons que gravamos em nosso telefone de outra hora. Se viermos aqui para Sample, e depois ir em Importar, podemos selecionar a partir dos Apple Loops ou de nossos arquivos. Aqui vai ser onde os sons e gravações do nosso dispositivo vão ser guardados. Você pode ver aqui que temos uma música de um de nossos alunos. Vamos voltar ao Apple Loops por enquanto. Vamos voltar ao Apple Loops um pouco mais tarde, mas eles são basicamente apenas um enorme banco de sons que podemos utilizar em nossa música. Mas podemos filtrar os sons usando a barra de pesquisa. Vamos brincar com um pandeiro. Aqui temos um pandeiro. Nós só temos que pressionar este botão para adicioná-lo à nossa Biblioteca de Amostras, e então nós temos nossa amostra lá dentro. Agora o que podemos fazer é bastante interessante, porque podemos controlar o tom e a nota do instrumento. Podemos transformar algo como um pandeiro, que é apenas um instrumento de percussão de uma nota, quase em uma pista. Você vê? Quão legal é isso? Sim, esta é uma daquelas ferramentas que é muito boa para ser experimental. Tenha um bom jogo com ele, e espero que você goste do Sampler. Uma boa. Apanho-vos na próxima lição.
14. Cordas: Olá. Bem-vindo de volta. Nesta próxima lição, vamos falar sobre as cadeias virtuais no GarageBand. Podemos usá-los para criar um som muito bonito em peças orquestrais ou podemos usá-los de uma forma mais moderna para adicionar uma vibração muito legal à nossa música. Nós vamos descer aqui, adicionar um novo instrumento, vamos encontrar nossas cordas. Você vai notar que temos um par de opções diferentes para nossas cordas, vamos começar com as cordas inteligentes. Todos os instrumentos inteligentes no GarageBand são muito semelhantes, há apenas algumas pequenas diferenças, então muitos dos mesmos princípios que falamos em nossa lição de instrumentos inteligentes serão exatamente os mesmos aqui. Como você pode ver, nós temos nosso Autoplay, nós temos nossos acordes dispostos aqui, e nós podemos mudar esses acordes chegando às Configurações,
Editar Acordes, e novamente, nossa Assinatura de Chave vai refletir o que são os acordes apresentado a nós. Eles parecem um pouco diferentes agora porque tocamos com nosso piano inteligente e nosso instrumento inteligente, então vamos imitar um ao outro. Mas se quisermos mudar isso de volta, basta ir para Editar Acordes e depois aqueles acordes que mudamos. Só vou bater em Revert. Muito semelhante ao nosso piano inteligente, podemos usar estas seções para tocar acordes. Quanto mais baixo vamos, mais baixo
o acorde, e quanto mais alto vamos, maior o acorde. Você pode cortar e mudar ao redor com estes, ir entre diferentes acordes e diferentes seções do nosso acorde. Novamente, porque isso está ligado à nossa assinatura chave, todos esses acordes vão funcionar muito bem juntos, além deste diminuído. Novamente, não se preocupe muito com
isso, faz sentido musical, mas não significa que tenhamos que usá-lo. Se olharmos para cá, vai mostrar-vos exactamente que cordas estão a ser tocadas. Temos alguns violinos,
algumas violas, violoncelos e baixos,
e podemos selecionar exatamente o que está sendo tocado selecionando e desselecionando os holofotes. Como podem ver, os holofotes estão fora da base agora, o que significa que serão tirados, e eu poderia fazer o mesmo com os violoncelos. Se eu só quiser aquelas cordas mais altas, apenas usando violas e violinos, eu posso fazer isso e igualmente, eu poderia tirá-las e usar os violoncelos e os baixos. Assim como nossos outros instrumentos, podemos usar o Autoplay. Então, se viermos aqui, temos algumas opções diferentes para diferentes sons de cordas. O que também podemos fazer com nossos sons de cordas é criar uma onda. Eu gosto de usar isso porque soa realmente natural e pode adicionar um monte de profundidade a uma música e eles soam realmente realista na minha opinião. Para fazer isso, temos que esfregar o dedo para cima e para
baixo e vai criar essa onda. Agora, quanto mais rápido eu fizer isso, mais alto será, e quanto mais lento eu mover meu dedo, mais silencioso será. Você pode realmente ficar bastante intrincado com a forma como você o usa. Novamente, dependendo de onde eu começar a tocar o acorde, baixo ou mais alto o tom vai ser, então se eu quiser fazer uma nota baixa, ou uma nota realmente alta. Então, se eu segurar meu dedo, ele vai sair muito bem. Isso é basicamente as cordas inteligentes. Agora, podemos voltar para a nossa tela de seleção e selecionar Notas, ou podemos alternar entre os acordes e as notas usando esta pequena seção aqui. Agora, podemos selecionar as cordas que queremos usar, e então podemos tocá-las usando o pescoço do instrumento. Agora, podemos usar escalas dentro de nossas cordas também. Isto é super útil. Novamente, se você não tem certeza
de como tocar violoncelo ou se não tem certeza de como tudo isso funciona, podemos usar nossas balanças e isso vai facilitar para nós. Eu realmente gosto do grande pentatônico e ele vai trazer uma visão ligeiramente diferente e todos eles vão estar em caixas, que na minha mente é muito mais fácil de gerenciar também. Basicamente, em cada quadrado diferente haverá uma nota diferente e as caixas cinzentas serão a nossa nota raiz. Porque temos a assinatura da chave em E maior, vai ser E. Todas essas notas cinzentas podem ser iguais. Apenas maior ou menor passo. Novamente, porque selecionamos essa escala, todas essas notas vão funcionar bem juntas. Para esta música, acho que vou usar um pouco de cordas. Vou tentar ser um pouco criativo. Eu vou apontar para um tipo mais de música funky. Mas usarei nossas cordas para criar o que chamamos na música como um drone. Tudo o que o drone realmente é, é como um som ambiente que corre por toda a nossa música e basicamente ajuda a engrossar a nossa música. Eu realmente gosto de escrever em torno de um drone porque eu sinto que ele começa a engrossar enquanto eu estou tocando e gravando em torno dele e apenas ajuda a dar minha mente um pouco de uma direção. Porque estamos escrevendo em E, meu drone vai ser um acorde E. Eu vou tocá-lo, eu acho que sem os violinos e os baixos, então é mais como um som médio. Eu gosto muito de lá. Eu só vou gravar um pouco e, em seguida, loop para o resto da minha faixa um pouco mais tarde. Lá está ele. Boa, pessoal. Vou pegar a próxima aula.
15. Violão virtual e baixo: Em seguida, vamos falar sobre a guitarra virtual e o baixo no GarageBand. Para encontrá-lo, vamos apenas adicionar um instrumento. Vamos passar pela guitarra primeiro e depois pelo baixo. Como você pode ver, assim como muitos outros instrumentos no GarageBand, temos algumas opções diferentes sobre como tocar nosso instrumento. Temos nossa guitarra inteligente, notas e escalas. Então vamos começar com uma guitarra inteligente. Novamente, todas as mesmas coisas que falamos em nossa lição de instrumentos inteligentes serão aplicadas aqui. Temos muitos acordes que funcionam com a nossa assinatura chave. Então, para tocar nosso instrumento, vamos ajustar a corda como se fôssemos uma guitarra de verdade. Ou podemos simplesmente pressionar a letra na parte superior do acorde para tocar todas as notas de uma só vez. A única coisa sobre tocar os acordes de uma aba como essa é que eles podem parecer bastante antinaturais. Eu recomendo sempre strum, se possível, ou podemos apenas tocar nota única de cada vez. Podemos usar o recurso Autoplay, assim como com os outros pequenos instrumentos. Podemos mudar a guitarra que estamos tocando. Se batermos aqui, podemos selecionar como uma limpeza elétrica, temos hard rock, retro wah, e root rock. Montes de sons muito legais lá. Como você pode notar, à medida que mudamos entre as guitarras, isso nos dá alguns efeitos diferentes para brincar. Aqui está um pouco de eco. Temos um impulso de agudos oi-drive. Isso só vai mudar dependendo do que temos selecionado. Assim como o resto de nossos instrumentos, podemos usá-los para criar progressões de acordes legais. Eles vão trabalhar bem juntos porque estão na mesma assinatura de chave. Mas, novamente, este diminuído pode ser um pouco chato, então não se preocupe com isso se não funcionar. Além dos acordes, também podemos tocar as notas, muito semelhantes às cordas. Só vou trazer a guitarra e a chave, e podemos tocar como imaginamos. Podemos usar nossa função de escalas se você quiser torná-lo realmente fácil para nós mesmos. Queremos usar uma escala maior ou menor. Também podemos dobrar a nota na guitarra para que possamos criar esses acordes. Vamos ligar para o nosso baixo e vamos ver o que é diferente. Assim como nossos outros instrumentos pequenos, temos nossos acordes inteligentes. Temos o nosso Autoplay. Assim como com a nossa guitarra, temos mais algumas opções sobre o som que queremos escolher. Temos mais alguns com o baixo porque temos alguma base eletrônica que vai parecer um pouco assim. Novamente, dependendo do baixo que
selecionamos, teremos alguns efeitos diferentes e assim como a guitarra e as cordas, podemos mudar para notas. Ou se não tivermos certeza de como tocar um baixo, podemos voltar às nossas escalas e utilizá-las. Além disso, na guitarra, podemos dobrar nossas notas. É aqui que vamos continuar construindo nossa música. Tenho os sons dos tambores com os quais estou muito feliz. Mais tarde viemos com o piano, mas acho que é um pouco diferente do que eu quero criar hoje, então eu vou pegar a bateria e nosso drone com nossas cordas e eu vou escrever nossa progressão de acordes usando meu baixo. Vou manter as coisas bem simples hoje e me juntar ao que eu estava falando antes. Vou escrever nossa música com apenas quatro acordes ou quatro notas. Eu escolhi quatro notas aqui dentro da escala E maior. Começando o baixo. Isso vai ser a nossa progressão de acordes, mas para torná-lo um pouco mais interessante, eu vou saltar entre as notas principais e algumas outras notas apenas para tornar essa linha de baixo um pouco mais complexa para que eles soem um pouco mais como este. Sabe, eu fiquei com a progressão dos acordes, mas acabei de fazer alguns pedacinhos para torná-lo um pouco mais interessante. Vamos gravar a ideia, os tambores e o drone. Se você está gravando um instrumento virtual e você percebe que talvez não seja perfeitamente no tempo ou você está um pouco fora, não se preocupe com isso porque eu vou mostrar uma ferramenta realmente incrível chamada o quantizer um pouco mais tarde, que vai nos permitir encaixar em nossas notas, é o momento perfeito mesmo que não tenhamos jogado dessa maneira. Ótima. Temos uma boa base lá. É uma hora [inaudível], eu preciso resolver esse drone e fazer algumas outras partes. Mas temos uma boa base lá. Vamos continuar construindo isso na próxima lição.
16. Instrumentos Mundiais: Ei, bem-vindo de volta. Em seguida, vamos falar sobre instrumentos mundiais. Agora, eles são o nosso último instrumento virtual a sair da nossa lista, então vamos entrar nisso agora mesmo. Agora, eu não professo ser nenhum instrumentista profissional do mundo, então eu sinto muito se eu causar qualquer ofensa ao pronunciar qualquer um desses instrumentos errado. Gostaria de dizer que isto é uma pipa, espero. Todos os instrumentos mundiais serão um pouco diferentes, mas vale a pena notar que todos eles têm
os mesmos acordes inteligentes e escalas de que falamos antes. Há acesso aos acordes, nós viemos até aqui para acordes, e temos uma configuração muito semelhante a esses outros instrumentos inteligentes. Mais uma vez, podemos tocar os nossos acordes, podemos usar a reprodução automática, ou podemos selecionar a partir das nossas notas. Atualmente é selecionado para grande pentatônico, o que é perfeito porque eu não sei como tocar pipa. Muito parecido com as nossas guitarras. Podemos tocar o instrumento apenas pressionando a corda. Vale a pena notar, estes selos vermelhos são a nossa palestra. Neste caso, vai ser o nosso E. A mesma nota, tom diferente. Com a pipa, podemos usar esta ferramenta aqui embaixo para basicamente selecionar o quão rápido queremos escolher a nota. Se eu pressionar meu dedo para baixo em nosso E, e então eu posso deslizar meu outro dedo para cima e para baixo este dedo, e quanto mais eu chegar para
a direita, mais rápido ele vai pegar essa nota. Podemos fazer o mesmo com nossos acordes. Também podemos usar esta barra branca na borda para dedilhar nosso acorde aberto. Passando para o nosso próximo instrumento mundial, temos um erhu. Talvez seja assim que se pronuncia essa palavra. Vamos ouvir o que isso parece. Isso parece muito legal, eu acho. Novamente, essas grandes notas, pode ser uma palestra. Podemos usar este controle deslizante aqui para mudar o vibrato de nossas notas. Isso é basicamente, o quanto está se movendo. Vou te mostrar um exemplo. Temos um efeito de cavalo aqui. Este próximo botão vai nos permitir jogar algumas emoções com nossas notas. Essa é a nossa nota de pé, quando eu apertar este botão para baixo, vai tocar essas emoções para nós. Este botão aqui em baixo vai permitir-nos tocar uma nota de graça, mas parece um pouco assim. Novamente, assim como nossos outros instrumentos, podemos escolher entre uma escala, e podemos selecionar nossos acordes, e podemos usar a mesma função vibrato aqui. Mais uma vez, temos a nossa reprodução automática lá, se quisermos usar isso. Um pequeno lembrete de que se você ficar um pouco perdido ou você esquecer o que alguns desses botões fazem, nós podemos apenas apertar este botão “Ajuda” no topo, e ele vai nos dar aquela grande descrição sobre o que cada coisa faz. Eu sei que os instrumentos de palavra podem não ser a escolha mais popular para muitos de vocês, mas eu realmente quero que nós para entrar aqui porque ainda há tantos sons incríveis que você pode fazer com estes, especialmente se você está indo mais no rota de criar música
cinematográfica ou música bastante atmosférica, sons
melódicos, trilhas sonoras de jogos de vídeo, todas essas coisas. Ele só permite que você fique um pouco mais criativo e tenha um pouco mais de diversidade com seus sons. Eu realmente adoro usar esses instrumentos, mas não saber como pronunciar seus nomes. Um enorme bem feito se você chegou até aqui no curso. Estes são todos os nossos instrumentos virtuais cobertos agora. Em seguida, vamos analisar como podemos editar e quantificar esses instrumentos virtuais e MIDI para fazê-los soar realmente bom. Então vamos passar para a gravação com microfones e guitarras. Vejo-te na próxima lição.
17. Como editar MIDI: Ei, bem-vindo de volta. A lição de hoje vamos analisar a edição do MIDI. MIDI é basicamente a informação que damos ao nosso programa de gravação para lhe dizer como reproduzir instrumentos virtuais. Agora, como essa informação é virtual, está em nosso dispositivo, podemos alterá-la e mudá-la mesmo depois de jogá-la. Isso torna muito fácil para nós mudar essas notas para tempo e basicamente apenas cortá-las e mudá-las depois de tocá-las. Porque já temos um pouco de base gravada, vou usar isso como exemplo hoje. As barras brancas como você pode ver aqui, essa é a nossa informação MIDI e isso é basicamente dizer ao instrumento o que tocar. Para mudar isso, mudá-lo, podemos clicar no arquivo de som, clicar novamente, e então podemos ir para “Editar”, e ele vai trazer esta tela. Você pode ver todas as nossas informações MIDI aqui. Cada uma dessas barras verdes é a nota que tocamos. Vamos tocar uma música e ver exatamente como essa informação MIDI está sendo lida. Espero que isso faça um pouco mais de sentido. Você pode ver como nosso cabeçalho de pista está se movendo ao longo da pista, ele está passando por cima dessas informações de visibilidade verde, que está dizendo ao instrumento como tocar. Como eu estava dizendo antes, nós podemos fazer algumas coisas para editar as informações MIDI que foram colocadas. Podemos ouvir a nota que está sendo tocada apenas tocando na nota, e podemos ouvir quanto tempo está acontecendo também. Você percebe que as informações MIDI base mais longas significa que é uma nota mais longa e as mais curtas, significam que é mais esfaqueado. Podemos editar isso agora pressionando a nota e, em seguida usando a seta no lado para mostrar para encurtar nossa nota, então é mais uma facada, ou novamente, podemos arrastar isso de volta para fora como era antes, e vai haver um pequena de uma nota sustentada. Agora, nós também podemos mover essas notas ao redor. Digamos que se tocarmos a nota errada para começar, mas o resto da fita foi muito bom, podemos colocar isso no lugar. Se clicarmos em uma nota, você verá que temos uma opção para cortar, copiar ou excluir, e também temos uma opção para velocidade. Agora, se clicarmos nisso, ele vai te dar este controle deslizante. Agora, a velocidade é basicamente o quão difícil tocamos essa nota ou aquele instrumento. Quanto mais alto para a direita vamos, alto essa nota vai ser tocada, e vice-versa, mais à esquerda, mais suave vai ser tocada. Podemos usar isso para diminuir a intensidade que podemos ter jogado. Ou talvez se atingirmos uma nota muito forte, mas o resto da fita foi muito bom, podemos mudar essa velocidade na tela. Também podemos usar esta função de edição MIDI para mover nossas notas para o tempo. Digamos aqui, por exemplo, eu sei que é apenas essa hora, eu posso selecioná-lo e então apenas dar-lhe um pequeno empurrão no lugar e então ele vai ser perfeitamente no tempo. Mas eu vou mostrar a vocês uma maneira realmente fácil de
fazer isso automaticamente em toda a faixa usando quantização, e isso está chegando muito em breve. No canto superior esquerdo aqui, você percebe que temos um botão de lápis. Se selecionarmos isso, podemos desenhar em nossas notas. Digamos que você queira adicionar algumas notas, podemos desenhar as notas assim
e, em seguida, com a mesma função, podemos tocar para tirá-las. Agora eu sei que muitas pessoas realmente gostam de escrever instrumentos dessa maneira, especialmente com coisas como percussão e bateria. Sinta-se livre para vir aqui e ter um bom jogo com essa caneta, tente desenhar em algumas notas, e talvez seja assim que você vem com algumas melodias ou riffs legais. Você percebe que quando eu criar uma nota, vai ter um certo comprimento. O comprimento dessa nota é ditado pela última nota que introduzimos. Se eu quisesse fazer isso mais curto, eu poderia arrastar curto. Então, toda vez que escrevo um novo, vai ter o mesmo comprimento. Sim, uma ferramenta muito útil lá. Espero que tenha gostado disso. Apanho-te na próxima lição.
18. Quantização: Bem-vinda de volta. Nesta lição, vamos falar sobre quantização. Agora, você pode estar pensando, “Quantização soa como uma palavra assustadora, eu não estou interessado nisso.” Mas é uma ferramenta incrivelmente útil para encaixar nossos instrumentos virtuais no tempo. Por exemplo, se você colocou uma batida de bateria no GarageBand que você realmente gosta, mas não é perfeitamente a tempo porque você não é um robô. Podemos usar o quantizer para encaixar essas notas no lugar para fazer o som realmente apertado e juntos. Podemos usar o quantizer em nosso arquivo de som sozinho se quisermos apenas uma seção para ser quantificada, ou podemos selecionar a faixa como um todo que tudo o que entra nessa faixa seja quantificado. Se você quiser quantificar apenas uma seção de cada vez, clique na seção que deseja. Clique novamente, vá para Configurações, e então você tem Quantisation aqui, e então nós temos nossas configurações lá. Ou se você quiser quantificar a faixa como um todo, como eu disse, queremos que nossa faixa seja selecionada com o cinza. Nós vamos chegar aqui para nossas configurações,
“Configurações de Rastreamento”, “Quantisação”, e lá está nossa quantização. Há algumas maneiras diferentes de usar o quantizer. Temos Straight que é um quantizer típico que vai encaixar todos esses bits no lugar para nós. Temos o Triplet. Mais uma vez, vai ser o mesmo, mas isso vai encaixar no lugar para trigêmeos. Se você está escrevendo suas batidas em trigêmeos e sua assinatura de tempo está em trigêmeos, essa é a que você quer usar. Ou temos o Swing. Swing vai adicionar um pouco de frouxidão à sensação de nossos instrumentos, então em vez de estar perfeitamente no tempo, vai se sentir solto e vou até vocês um exemplo disso em apenas um minuto. Por exemplo, eu tenho uma batida de bateria aqui que está realmente fora de tempo. Eu vou ligar o metrônomo para que você possa ouvir o quão fora do tempo é e então nós vamos empurrá-lo para o tempo usando nosso quantizer. Horrível. Como resolvemos isso? Porque eu não estou escrevendo em trigêmeos, eu vou estar usando o quantizer Straight. Uma vez que clicarmos nisso, vai nos dar algumas opções diferentes. As opções aqui estão basicamente nos perguntando qual é a nota mais próxima para a qual você quer que nossas informações MIDI sejam arrastadas. Você só quer que ele seja arrastado para a nota 1/4, ou para a nota 1/16, que é muito mais complexa? Mas se você realmente não sabe sobre isso, honestamente não se preocupe. A melhor coisa a fazer é passar por cada um e ver qual deles soa melhor. Vamos selecionar 1/4 e ver o que isso fez com nossa bateria. Quão legal é isso? Arrastou-se perfeitamente no tempo para nós. Se eu mudar até 1/8, você verá como isso pode mudar. Porque meus tambores estão tão fora de tempo, você pode realmente descobrir que eles foram arrastados para o lugar errado. Vamos ouvir de novo. Eles realmente foram arrastados para o momento certo lá e você pode ver como realmente isso deu a ele uma sensação diferente. Eles são quase como baixo offbeat, mas eles estão no tempo e é para isso que essas opções de quantizer servem. É, quão intrincada é essa batida, e exatamente como você quer encomendá-la? Novamente, não se preocupe com isso se parecer esmagador, basta passar por cada um até que pareça certo para você. Uma vez que você tenha sua trilha no tempo, você pode notar que uma ou duas notas estão pouco fora do tempo ou não exatamente onde você quer, e é aí que podemos usar a função Editar MIDI que falamos sobre a última lição apenas entrar no ar e movê-los se precisarmos. Vamos apagar essa bateria por enquanto, porque eu estava usando isso como exemplo. Vamos voltar para a parte do baixo e ver se o quantizer pode ajudar a resolver isso. Isso é bonito no tempo. Há algumas anotações que não estavam lá. Vamos ver se conseguimos resolver isso usando o quantizer. Eu vou para Straight em 1/16. Vamos voltar e ver o que isso fez. Incrível. Isso parece ótimo. Há uma nota lá que eu vou mover um pouco, mas isso é praticamente perfeito agora. Vamos tentar ver o que o balanço faz com isso. Isso vai realmente mudar a sensação do baixo. Podemos selecionar entre 1/8 ou 1/16, e podemos selecionar se queremos que o balanço seja leve ou pesado. Vamos tentar pesado primeiro para lhe dar uma idéia realmente boa sobre o que ele faz. som muito diferente. Ainda está a tempo, e isso ainda é totalmente utilizável. Depende do tipo de som e saída que queremos. Vamos tentar no ajuste da luz. Isso é realmente um bom equilíbrio lá de ser arrastado bem para o tempo, mas também é adicionado um pouco desse elemento mais humano. Se eu tocasse esse papel de baixo na vida real, provavelmente não tocaria corretamente. Ter aquele pouco de balanço só introduz aquele sentimento humano a ele. Isso é outra coisa que eu quero passar com o quantizer. É incrível e é tão útil arrastar essas notas para o tempo, e fazer nossa música soar muito apertada e juntas. No entanto, você pode perder um pouco desse sentimento humano. Usando esse balanço, ou entrar no MIDI Edit e talvez apenas mudar como algumas
das notas quantizadas podem fazer uma música soar um pouco mais humana e um pouco mais aterrada. Não se sinta culpado por deixá-lo nesse momento perfeito. É apenas sobre o que soa bem. Faça o que quiser, e o que achar que soa melhor. Esse é o nosso quantizer. muito, muito útil. Basta ter em mente que isso só funciona com instrumentos virtuais e não coisas que o microfone e guitarras ou um instrumento que você grava com o microfone. Obrigado rapazes. Apanho-te na próxima lição.
19. Conectando uma interface: Em seguida, vamos falar sobre gravação de microfones, guitarras e baixos. Vou te mostrar por que estou fazendo isso com o microfone em nosso dispositivo. Mas como eu disse naquele vídeo [inaudível], se você quer gravações da mais alta qualidade com microfones
profissionais ou com uma entrada direta com nossa guitarra, você vai precisar de algo que falamos antes, que é uma câmera se estiver no iPad mais antigo. Se você estiver no iPad mais novo, precisará de um dock e precisaremos de algum tipo de interface de áudio. Um pouco como eu disse anteriormente, a interface de áudio vai basicamente pegar nosso sinal de áudio de um microfone ou guitarra e traduzi-lo em nosso dispositivo. Como estou usando um iPad mais antigo e esses dispositivos precisam ser alimentados, precisarei de um adaptador de câmera para fazê-lo funcionar. Vou pegar meu adaptador de câmera e vou ligá-lo à energia. Isto está ligado à parede. Então eu vou pegar minha interface e eu vou ligar isso lá também. Então eu vou pegar isso e conectá-lo no meu iPad. Se você está usando um equipamento de olho, eu acredito que eles se conectam à porta auxiliar, esta aqui no topo. Então, se entrarmos em um microfone, quando o conectarmos, ele deve nos dar uma mensagem como esta, que é basicamente apenas confirma que o dispositivo está conectado e está funcionando. Está nos perguntando se gostaríamos de ativar o monitoramento. Monitoramento só vai nos permitir ouvir exatamente o que está acontecendo em nosso microfone ou nossa guitarra enquanto estamos tocando ou cantando. Vamos ligar isso, mas certifique-se de que você tem fones de ouvido conectados caso contrário, haverá problemas de feedback. Depois vou ligar a minha guitarra e ligar isso à interface. Uma vez conectado, vamos tocar nosso instrumento ou cantar no nível que esperamos gravar isso, e então vamos definir nosso ganho. Enquanto jogamos, você pode ver que há aquela luz verde chegando lá em cima. Agora, eu posso ajustar o ganho aqui do lado. Eu quero apenas configurá-lo para que quando eu estiver jogando, que a luz é agradável e no sorriso. Se você definir muito alto, ele ficará vermelho, que significa que está atingindo o pico e o sinal de áudio está sendo distorcido, então não vai soar muito bom em tudo. Como isso. É isso que queremos evitar. Você vai apenas tirar isso. Eu vou jogar no nível que eu vou gravar. Tornou-se verde, por isso sei que sou bom para gravar. É assim que conectamos nossa interface de áudio.
20. Como gravar guitarra e baixo: Ei, pessoal, bem-vindos de volta. Hoje, vamos estar olhando para gravar guitarras e baixo. Nós vamos descer aqui, pressionar o nosso “X”, e nós vamos encontrar a guitarra. Agora, vale a pena notar que o baixo e a guitarra que você vê aqui são apenas guitarras virtuais, então não queremos chegar a isso. Se vamos ligar nossa guitarra, precisamos continuar e precisamos encontrá-los sob AMP. Vou olhar para a guitarra primeiro e depois vamos para baixo. Mas ambos são extremamente semelhantes, eles só têm diferentes presets e amplificadores diferentes. Vamos clicar em “Limpar” e vai trazer o nosso amplificador. Isto é espantoso. Podemos usar este amplificador como faríamos com um na vida real. Se você é um guitarrista, você provavelmente sabe o que todos esses mostradores fazem e você estará em casa com isso. Só tem uma tonelada de efeitos. Podemos selecionar nossos QEs, nosso ganho, nossa saída. Temos um pouco de reverb e um pouco de tremolo. Para gravar guitarra e baixo, eu realmente recomendo que você use um iRig na interface. Significa que o sinal é muito claro e é muito rico, e você vai ter um ótimo som dessa maneira. Mas se você estiver em movimento e não tiver um em mãos, você ainda pode usar o microfone. Só não vai ser tão alta qualidade. Se eu desligar minha interface por agora e depois vir aqui, você pode ver que ele traz um par de opções
diferentes sobre o que fazer com o nosso microfone. Como você pode ver, como estou falando, há uma entrada chegando aqui. Se eu pegar minha guitarra, você pode ver que foi pego com nossa entrada ali. Agora, queremos ter isso semelhante à interface de áudio. Queremos ter uma gravação, mas não queremos que ela vá para o vermelho, como você pode ver lá. Nosso nível de entrada é muito alto lá. Queremos ter certeza de que nosso sinal está sempre
verde e não está em pico porque quando ele atinge o pico, ele distorce e soa horrível. Se você quiser facilitar para si mesmo, você pode clicar em “Automático” e isso apenas fará o trabalho para você. No entanto, eu quero ter um nível consistente, então eu vou selecioná-lo sozinho. Podemos ligar nosso monitoramento também e isso vai nos
permitir ouvir o som enquanto estamos tocando. Você pode ouvir que ele está vindo através do amplificador agora. Vale a pena notar, se você estiver usando um microfone em seu dispositivo, você vai ter que colocar o microfone ao lado de uma guitarra acústica ou você vai ter que colocá-lo ao lado de um amplificador de guitarra para que ele possa captar o som. Aqui em baixo, temos o Portão Noise. Isso vai ajudar a eliminar o ruído de fundo e entrada, mas vou falar nisso um pouco mais tarde. Com o resto da lição, vou mostrar-vos com a minha guitarra directamente ligada à interface. Mas tudo o que eu explicar ao longo desta lição vai para o mesmo, se você estiver usando o microfone do dispositivo ou não. Vou ligar o chumbo à minha guitarra. Está ligado à minha interface, e depois vou ligar a minha interface de volta. Assim que tivermos tudo ligado, podemos começar a brincar com o nosso amplificador. Temos um monte de efeitos legais aqui, um pouco de reverberação e um pouco de tremolo. Podemos então mudar a predefinição usando este botão na parte superior. Temos montes de predefinições de amplificadores diferentes aqui. Tenha um bom jogo com isso. Todos vão soar completamente diferentes. Eles vão ter suas próprias configurações de discagem diferentes e todos vão soar muito legal. Então temos alguns sons mais distorcidos e de processo aqui. Eu realmente gosto desses efeitos processados. Eu acho que há um monte de efeitos legais e predefinições lá. Também nesta página, temos um sintonizador, que é super útil, uma enorme ponta superior. Eu sei que é o mais óbvio que eu poderia dizer, mas sintonize seu instrumento antes de gravar. A quantidade de vezes que gravei uma batida de bateria e, em seguida, fui direto para a guitarra, então só mais tarde para perceber que a guitarra estava sempre um pouco fora de sintonia e ele apenas joga tudo fora. Certifique-se de sintonizar antes de começarmos. Nós também pode deslizar através dos diferentes tipos de sons
amplificadores de guitarra indo para a esquerda e para a direita. Você pode ver que temos mais uma Lâmpada Estrela da Fender. Este é obviamente o mais de um Volks, um Marshall. Há apenas toneladas de diferentes aqui, então você pode gastar muito tempo ficando realmente experimental e apenas tendo um ouvir os diferentes sons que estão disponíveis aqui. Você não só tem um monte de presets incríveis de amplificadores, mas também tem pedais aqui em cima. Agora, cada predefinição vem com alguns pedais pré-selecionados, mas podemos cortar e alterar estes dependendo do som que queremos. Posso arrastar isso para fora da tela, e se eu quiser selecionar um novo, eu só acerto esse espaço vazio e ele vai trazer uma carga desses pedais. Vamos tentar um pedal WAH. Posso adicionar esse compressor. Isso está dando um pouco de vibração. Alguns destes, podemos sincronizar com o nosso BPM também. O tremolo, vai ser o mesmo que o BPM. Eu vou levar com aquele pedal WAH, eu gosto dessa vibração, mas talvez eu alterá-lo um pouco. Não se preocupe se em algum momento, você quiser mudar esses pedais ou esses sons, você pode fazer tudo depois de ter gravado também. Eu realmente gosto do som disso até agora. Vamos tentar trazer o eco de volta. Ótima. Eu amo o som disso até agora. Adoro esses pedais. Eu realmente gosto do amplificador que está sendo usado. Posso ajustar algumas coisas mais tarde, mas por enquanto, isso é perfeito. Vou colocar uns acordes divertidos sobre o baixo e a bateria. Incrível. Há uma pequena idéia que eu gravei lá. Você pode ver como ele realmente está começando a se juntar agora, o baixo e a bateria, e a guitarra tem tudo colocado muito bem. Sim, estou feliz com isso. Voltando para a composição novamente muito rapidamente, como você percebe lá, eu só toquei quatro acordes e eles apenas imitam o que está sendo tocado no baixo. Agora, eu só vou usar os mesmos quatro acordes em nosso coro. Vou tocar-lhes um pouco diferente. Em vez de dedilhar esses acordes e deixá-los sustentar, vou acrescentar um pouco mais, esse tipo de coisa. Espero mostrar que você não precisa ter muita mudança nas progressões de acordes para fazer uma boa música. Você pode fazer esses quatro acordes funcionarem. Vamos tentar ir para onde estaria o nosso coro. Não se preocupe muito com a colocação ou exatamente onde as coisas estão definidas agora. Eu sempre acho que é melhor apenas obter todas as suas idéias para baixo primeiro, e então toda a edição, corte e mudança, nós podemos fazer mais tarde. Vamos dar a nossa guitarra de coro uma jogada agora. Agora, eu poderia apenas refazer uma ou duas dessas tomadas de guitarra só para ter certeza que elas são realmente boas e eu estou muito feliz com elas. Porque eu tenho minha guitarra montada e eu estou na mentalidade de gravar guitarra, eu vou gravar um pouco de chumbo, e então eu vou descobrir exatamente o que fazer com ele e onde colocá-lo mais tarde. O que eu posso fazer é clicar em nossa faixa de guitarra e duplicá-la para que seja exatamente as mesmas configurações, então não precisamos ir entre elas e encontrar essa predefinição e os pedais que eu realmente gosto. Então eu posso gravar um pouco de chumbo para os meus acordes, agradável e fácil. Porque eu quero criar um pouco mais de um tom de lead, eu só vou mudar algumas dessas configurações porque eles são um pouco mais líderes. Vamos tentar o pedal WAH. Vire um pouco os presentes. Talvez voltar para baixo os médios e o baixo, adicionar um pouco mais de ganho. Incrível. Mais uma vez, posso mudar isso um pouco mais tarde. Feliz com isso por enquanto, então vamos gravar. Como eu disse antes, exatamente
o mesmo processo funciona, apenas o mesmo, mas com baixo, nós só temos que selecionar isso aqui em baixo. Vamos ter todas as mesmas configurações, alguns ajustes, presets, amplificadores, cabeçalhos, tudo vai ser o mesmo, apenas no baixo. Eu rapidamente queria mencionar, se você não sabe tocar guitarra e você está interessado em aprender, meu amigo Marc Barnacle tem um incrível guia para iniciantes para guitarra, que você definitivamente deve verificar se você está interessado. Marc me ensinou muito sobre guitarra ao longo dos anos e ele é honestamente um professor fantástico. Definitivamente vá verificar se você está interessado em aprender. Obrigado por isso, pessoal. Vejo-te na próxima lição.
21. Como gravar áudio: Ei! Bem-vinda de volta. Em seguida, vamos falar sobre gravação de áudio. Gravar áudio pode ser qualquer coisa, desde uma guitarra acústica, um instrumento acústico como um violoncelo ou um violino, um piano ao vivo, vocais, qualquer coisa que você possa gravar com o microfone. Podemos usar o microfone interno em nosso dispositivo para isso ou podemos conectar um microfone usando uma interface, qual falamos anteriormente, para gravar esses sons. Eu recomendo se você quiser uma gravação de alta qualidade, usar um microfone, se possível. Mas para a demonstração de hoje, eu só vou usar o microfone no iPad porque eu acho que é o que muitas pessoas vão usar. Se chegarmos a isto e encontrarmos o Gravador de Áudio. Vamos clicar sobre isso e ver quais opções ele nos dá. Como pode ver aqui,
aponte o iPad para o som que pretende gravar e, em
seguida, toque em “Gravar” para começar. Temos alguns efeitos aqui. Isso vai mudar o som da minha voz. Vamos ligar o monitor para que eu possa me ouvir. Vamos ver o que alguns destes fazem. Eles vão ser apenas alguns sons divertidos diferentes que podemos usar para mexer com a minha voz. Eu realmente amo este auto tuning um. Você pode usar isso para parecer um pouco Kanye West. Todas as coisas de Bon Iver usam essa sintonia extrema. Você pode ver aqui à esquerda, muito semelhante aos nossos controles de guitarra, nós temos um seletor de entrada. Então nós queremos apenas ter certeza de que nós definimos isso para um nível onde nossa gravação não está atingindo o pico. Se vou gravar com a minha voz, vai ser muito alto. Você pode ver que está chegando lá. Isso significa que o sinal de áudio vai ser interrompido e vai soar muito ruim. Reproduza ou cante no volume em que você deseja gravar. Então nós vamos apenas definir isso para que seja agradável e no verde. Aqui à direita, temos nossas saídas. Isso é básico e só afeta o volume, que vamos chegar mais tarde assim que soubermos o quão alto nossas faixas serão. Nós também podemos entrar em nossas configurações de entrada aqui, que vai nos mostrar uma lista de algumas das outras opções. Nós temos nossos níveis de entrada para que possamos ditar isso aqui, ou podemos deslizar isso para Automático. Temos um monitor, que também podemos acessar aqui. Isso só vai nos deixar ouvir de volta o que estamos tocando e gravando. Temos o nosso Portão Noise. Vou chegar a isso daqui a pouco. Estas são apenas algumas das predefinições divertidas. Como você percebe, uma vez que eu clicar neles, vai nos dar alguns efeitos diferentes. Você pode apenas brincar com o efeito aqui, mas nós vamos nos concentrar mais nos sons do estúdio hoje. Se você clicar lá e clicar novamente, ele irá lhe dar uma carga de diferentes predefinições dependendo do que você está gravando. Se estivéssemos gravando com bateria, temos um monte de presets legais para eles aqui, teclados, guitarra acústica, vocais e alguns efeitos de produtor. Então temos os nossos efeitos divertidos no final. Vamos tentar um pouco de guitarra acústica para começar. Uma vez que eu clicar em uma predefinição, você vê, ele vai trazer alguns efeitos para mim. Só vai nos dar alguns efeitos que soam muito bem com uma guitarra. Obviamente podemos cortá-los e trocá-los se quiser um pouco mais de som. Você tem alguma presença. Mude o tom. Podemos realmente brincar com essas predefinições, encontrar um som que gostamos. Cada um vai ser um pouco diferente. Não há realmente certo ou errado em escolher esses efeitos. Você só quer ter certeza de que sua guitarra é agradável e perto do iPad. Seu nível de entrada não está atingindo o máximo. A partir daí, apenas brinque com esses efeitos. Os principais efeitos como compressor e reverberação, vamos entrar em um pouco mais de detalhes mais tarde. Mas sim, jogue até descobrir algo que goste. Exatamente o mesmo processo vai para nossos teclados e tambores. Cada um só vai lhe dar uma exibição ligeiramente diferente de efeitos. Você pode simplesmente escolhê-los e alterá-los para uma fechadura. Lembre-se, que você sempre pode alterar esses efeitos mais tarde. Se você talvez decidir que quer um pouco menos
do compressor ou um pouco menos reverberação, tudo
isso pode ser alterado mais tarde. Vamos dar uma olhada nos vocais. Com vocais, eu pessoalmente gosto de gravar primeiro e depois brincar com as predefinições e os efeitos depois. Vou cantar algo sobre a nossa faixa até agora. Eu não acho que vou usá-lo na versão
final porque eu não sou um bom cantor. Eu só quero mostrar a vocês o processo de gravação de vocais e como tudo vai junto. Ao gravar vocais com qualquer microfone, nos deparamos com o problema quando usamos certas palavras. O que eu quero dizer com isso? Quando dizemos palavras como Pete, com um P, soa como uma injeção de ar no microfone e pode fazê-lo fazer algumas coisas estranhas. Por exemplo, Peter pega o pudim. Esse foi o melhor exemplo que pude pensar. Agora, em nosso dispositivo, se estivermos longe o suficiente, podemos evitar esse problema. Por exemplo, Peter, pegue o pudim. Não é assim tão mau. Mas eu sei que muitas vezes as pessoas gostam de se levantar e se aproximar do microfone, então podemos usar um filtro pop para nos livrar dessa interferência do vento. Peter pegue o pudim. Peter pegue o pudim. Mas novamente, você não tem que usar isso, é só que se você está achando que está tendo problemas com aqueles P, Peter. Eu vou começar a gravar um pouco antes do curso realmente chegar apenas para me dar uma chance de me preparar e então nós vamos bater “Record”. Acho que é bom o suficiente. Eu realmente não sou um vocalista, mas eu acho que é legal só para mostrar algumas coisas. Vamos ter uma escuta para algumas das diferentes predefinições que podemos usar. Vou somar minha voz, na verdade, para que você possa ouvi-la um pouco mais clara. A primeira coisa que notei pouco antes de chegarmos mais longe, você
ouviu todo aquele barulho de fundo? Isso shh? Podemos nos livrar disso usando algo chamado “Portão do Ruído”. Se chegarmos às nossas configurações de entrada, você pode encontrar nosso Noise Gate aqui embaixo. Quando desligamos isso, basicamente vai ajudar a bloquear fundo e qualquer ruído indesejado. Não vai cortar tudo o que não queremos ouvir. Se há um estrondo bem alto no fundo ou algo assim, não
há como nos livrarmos disso. Mas entre as minhas linhas lá, havia o ruído de entrada. Agora, o Noise Gate detecta as partes mais altas da música e percebe essas como a base que queremos e, em seguida, corta tudo o resto sob um certo limiar. Podemos determinar onde esse limite está usando esse controle deslizante. Quanto mais agressivo você quiser que o Noise Gate funcione,
podemos deslizar mais para cima e menos agressivo, você pode descer. Vamos ouvir isso agora com nosso Noise Gate ligado. Você vê, ele cortou completamente esse ruído de fundo. Agora você deve ter notado que ele faz um corte ligeiramente no vocal lá. Vamos ajustar a agressão do Noise Gate. Desligue um pouco e veja como isso o afeta. Talvez seja um pouco mais suave. Isso corta muito bem o ruído de fundo. Vamos brincar com algumas predefinições diferentes e ver que sons diferentes podemos fazer. Vamos para “Radio Ready”. Eu realmente gosto do que temos lá. Eu gosto daquela configuração estéreo extrema. Aumentei um pouco o compressor. Eu baixei o tom sempre tão ligeiramente. Vamos ouvir como isso soa para o resto da nossa pista. Eu acho que para uma gravação em um iPad, isso soa muito bom. Nós só realmente arranhamos a superfície lá em alguns dos efeitos que podemos usar. Podemos, obviamente, juntar esses vocais e criar harmonias. Um grande parabéns se você chegou até aqui, você agora sabe como usar cada instrumento e todo tipo de amplificador, baterista, teclado, tudo neste painel de instrumentos, você sabe como usar. Quão incrível é isso? Temos muitas informações agora, mas há ainda mais para aprender sobre o GarageBand. Mal posso esperar para te mostrar um pouco mais. Apanho-te na próxima lição.
22. Gravação de múltiplas faixas: Ei, todo mundo. Bem-vinda de volta. Nesta lição, vamos falar sobre gravações multifaixas. É aí que podemos gravar uma ou mais fontes de cada vez, digamos que podemos gravar um kit de bateria com muitos microfones ou mesmo apenas com um microfone e um instrumento virtual, podemos gravá-los ao mesmo tempo. Para encontrar a opção para habilitar isso, o que temos que fazer é ir para Configurações, Avançado, e então temos uma opção aqui para Gravação Multi-Track. Vamos marcar isso. Você vai ver mais à esquerda aqui, nossa visão mudou ligeiramente. Temos esses pontos vermelhos agora. Quando pressionarmos esses pontos, eles ficarão vermelhos e isso permitirá que essa faixa seja gravada. Por exemplo, aqui temos nossa guitarra virtual e um microfone, e posso permitir que ambos gravem ao mesmo tempo. Você vai notar aqui em cima no nosso botão “Gravar”, que
temos um pequeno número 2, que significa que essas duas faixas estão prontas para serem gravadas. Como eu não preciso ver a interface do microfone enquanto eu gravo, eu vou para a interface da guitarra em vez disso. Então, quando estiver pronto, basta ir e clicar em “Gravar”. Se voltarmos para a tela do nosso projeto, você pode ver tanto vocal quanto minha guitarra virtual lá foram gravadas. Sim, um zumbido horrível lá por mim, mas isso te dá uma boa idéia de como essa gravação multi-track funciona. Isso é ótimo, especialmente quando emparelhado com uma interface com múltiplas entradas que podemos gravar, kits de
bateria, bandas inteiras, realmente o céu é o limite de como podemos gravar assim. Espero que tenha achado útil. Vamos começar a rachar com a próxima aula.
23. Loops: Ei, bem-vindo de volta. Em seguida, vamos falar sobre loops. Loops, um pouco como eu estava dizendo anteriormente, basicamente um enorme banco de amostras de som e pequenos pedaços frescos riffs e pedaços que podemos usar em nossa pista. Se vieres para o canto superior direito, tenho um botão de loop ali. Nós vamos pressionar sobre isso e vai
nos mostrar um monte de opções diferentes para nossos loops. Temos sons de bateria,
temos sons de piano, sons baixo, qualquer coisa que você possa pensar. Como eu disse antes, há mais de 3.000 sons diferentes que eles usam aqui. Eu sei o que muitas pessoas gostam de fazer é, na verdade apenas usar os loops para criar suas músicas, o que você pode fazer totalmente. O que é realmente bom nisso é todos
combinam com o nosso ritmo e a nossa assinatura chave. Cada um pode não corresponder perfeitamente porque há tanta variação, mas muitos deles como você verá, vamos trabalhar com essa assinatura de chave. Podemos filtrar os loops, seja pesquisando ou usando as seleções de pesquisa aqui. Podemos selecionar por instrumento para dizer que se queremos uma parte de guitarra, vai trazer uma carga de partes de guitarra. Você pode ver aqui que há um 146 e para ouvi-los, nós só temos que tocar um deles. Montes de variação. Agora, se clicarmos em X aqui, também
podemos pesquisar por gênero. Vamos ouvir alguns sons de funk. Então também podemos pesquisar por descrição também. Se queremos um tipo específico de som, então vamos dar uma olhada no limpo. Há tanta coisa para brincar aqui. Uma vez que você encontre um loop que você gosta, tudo o que temos que fazer é pegá-lo e arrastá-lo para a nossa música. Ele vai criar uma nova faixa aqui e então nós podemos fazer loop para exatamente onde queremos. Se eu só o quiser para o verso, posso arrastá-lo até lá. Vamos ouvir o que isso soa como todos juntos. Legal, certo? Isso combina com o ritmo e a assinatura da chave e funciona lá dentro. Eu não acho que é muito certo estilisticamente, mas você pode ver como ele é, dado que funciona. Uma maneira muito útil de encontrar um loop que gostamos é tocando nossa música e, em seguida, apenas passando por esses loops para que possamos ouvir como
eles soam com nossa música enquanto estamos pesquisando. Eu acho que nesta música, eu vou usar uma amostra para um pequeno colapso, então eu quero uma batida legal para romper entre o nosso verso e o nosso coro e eu encontrei este que eu realmente gosto. Eu vou pegar isso e eu vou arrastá-lo para dentro Acho que as guitarras vão cortar e eu só quero o baixo e a bateria. Acho que vai soar um pouco assim. Isso vai mudar essa música, fazer um pouco mais funky, e agressivo, e adicionar um tipo diferente de tom à nossa música. Mas para demonstrar o quão poderosos esses loops podem ser, eu vou apenas silenciar todas as minhas faixas e eu vou criar uma pequena melodia rápida apenas a partir dos loops. Aqui está um som de bateria legal, parte de baixo
muito legal lá, e nós temos um pouco de guitarra lá também. Vamos ver como isso soa juntos. Quão incrível é isso? Você pode usar tanto ou tão pouco desses loops quanto quiser. Eu realmente gosto de usá-los para estofar uma música, adicionar interesse, talvez tirar alguma inspiração para algumas das batidas de bateria, as linhas de baixo. Isso me leva a fazer nossos próprios loops. Se voltarmos para o navegador loop, podemos selecionar arquivos e podemos usar nossos próprios sons para usar como loops. Digamos que se você, há uma porta rangendo, isso soa legal, se você gravar isso com seu telefone, você pode colocá-lo no GarageBand e usá-lo como um loop ou você gravar talvez algum ruído de chuva ou algum barulho do mar, você pode usar que para o som atmosférico. Há um monte de possibilidades lá. Tudo o que temos que fazer é pegar e arrastar para nossa música, assim como você tem loops. Tenho uma música de um dos nossos alunos lá. Isso não vai funcionar, mas é assim que se faz. Isso é loops, um monte de possibilidades incríveis lá. Estou ansioso para ver o que você vem acima com e eu vou vê-lo na próxima lição.
24. Como editar/criar um SWell: Em seguida, vamos falar um pouco de como podemos editar, cortar e mudar nossas faixas e algumas opções legais que temos no programa. Nesta lição, eu também vou ensinar a você como criar uma onda usando loops em alguns dos recursos de edição que vamos falar. Vamos clicar na nossa pista e seguir para Configurações. Você pode ver aqui que lhe dá um monte de configurações
diferentes sobre como podemos cortar e mudar nossa música. Aqui podemos ajustar o ganho, nossa velocidade. Vamos ter um rápido antes e depois em algumas dessas especificações. Você vê que a corrente precisa ser um pouco mais rápida, realmente não funcionou. Mas desacelerá-lo realmente fez uma batida muito legal diferente lá. Podemos optar por fazer um loop. Isso só vai fazer um loop automático para nós. Existe o nosso botão para seguir o ritmo e o tom. Isso se encaixa muito bem em nossos loops porque ele vai combinar com esse ritmo e nossa assinatura chave. Então nós temos uma opção para reverter e então nós também podemos transpor para que ele vá para cima e para baixo semitons para mudar o tom. Vale a pena notar se você ficar um pouco perdido nas opções tudo o que você precisa fazer é pressionar que “Reset All” e ele vai levá-lo de volta para suas configurações originais. Há um monte de coisas legais bastante experimentais que
podemos fazer com esses recursos aqui, mas o que eu vou mostrar hoje é usar o efeito Reverso para criar uma onda. Para criar uma onda, vamos usar alguns loops diferentes. Um deles é um prato estrondoso. Vou digitar “Crash”. Isso vai ser divertido. Vou arrastar isso. Vamos deixar isso aí por enquanto. Também vou usar um submarino. Este é apenas um efeito de
estrondo muito baixo que vai funcionar muito bem com a ondulação. Nós vamos colocá-lo lá embaixo e eu vou apenas fazer o loop
de volta para que seja apenas um longo. Também vou usar palmas. Essa parece-me boa. Vou cortá-la um pouco. Vou arrastá-lo até lá e pegar o loop de volta para que seja só um aplauso. Acho que a onda vai funcionar muito bem do nosso verso para o nosso coro. Vai criar aquele grande jorro em nosso refrão. Vai criar um pouco de excitação, um pouco dessa energia. No momento, eles vão soar como um pouco de bagunça. Mas aqui é onde vamos fazer um pouco de magia. Vou reverter o nosso prato. Entre em Configurações, Inverter
e, em seguida, arraste-o para que ele termine pouco antes do curso. Vai soar mais assim. Vou fazer exatamente o mesmo com a queda do submarino. Então podemos adicionar essas palmas no final para criar um pouco de um fim nele. Então eu só vou cortar esses tambores um pouco curto. Então eu só vou adicionar um pouco de reverberação para essas palmas. Mais uma vez, eu vou para Reverb e alguns efeitos um pouco mais tarde. Isto vai torná-lo um pouco menos seco. Vamos ver como isso soa agora. Quão legal é isso? Por último, vou apenas fazer este loop. Vou copiar e colar. Eu vou reverter isso de volta ao que
era e isso vai adicionar mais um pequeno acidente no nosso coro. Legal. Temos uma onda muito legal lá nos levando ao nosso coro. Há muitas coisas legais que podemos fazer na edição, mas isso é apenas um pequeno exemplo de algo que você pode fazer. Adiciona uma pequena camada de tipo à sua faixa. Obrigado, pessoal. Apanho-te na próxima lição.
25. Loops ao vivo: Em seguida, vamos falar sobre Live Loops. Live Loop é basicamente uma maneira alternativa de usar nossa tela de produtos. programas de gravação tradicionais são muito parecidos com isso. Eles sempre têm uma linha do tempo e você tem o seu início e fim. Com um Live Loop é um pouco diferente. Ele basicamente divide cada som em um pequeno loop com o qual podemos brincar, trazer e sair, cortar e mudar, e fazer algumas coisas realmente legais. Nós não vamos adicionar nenhuma das coisas Live Loop em cima da nossa música atual. Vou começar um novo projeto, só para não marcarmos nada. Você pode ver no topo aqui podemos selecionar entre faixas e loops ao vivo. Agora, se pressionarmos Live Loops vai trazer tela diferente ao que estamos acostumados. Estes são todos sons predefinidos diferentes com muitos instrumentos e loops já carregados. Mas só por agora vamos começar
uma nova faixa para que eu possa explicar o processo com você. Como você pode ver, parece um pouco diferente, nós não temos essa tela longa do projeto em vez disso temos muitas dessas pequenas caixas. Cada uma dessas pequenas caixas pode conter um som ou um loop. Se eu clicar em uma dessas caixas, ele me pergunta se eu quero colocar um loop ou usar um instrumento. Se eu clicar no instrumento, vai nos levar de volta ao nosso painel de instrumentos. Isto vai ser muito familiar para vocês agora, espero. Eu poderia ir para a bateria. Vamos tentar talvez um kit elétrico para hoje. Então, se gravarmos algo usando nosso instrumento. Agora podemos voltar para a nossa tela Live Loop Project usando este botão aqui. Você vê lá que ele gravou em um pequeno loop para nós. O que podemos fazer com Live Loops é pressionar essa gravação. Vai tocar para mim e vai dar voltas e voltas de novo. Agora podemos continuar adicionando muitos sons e gravações a esta grade e podemos começar a construir a música dessa maneira. Vamos tentar adicionar talvez um loop agora. Se clicarmos em nossa caixa cinza, também
temos uma opção para loops. Se você clicar nele, ele abrirá nosso navegador Apple Loops. A última, parece muito fixe. Então tudo o que temos que fazer exatamente como fizemos antes, nós apenas vamos arrastar para dentro,
e em vez de estar na tela, ele vai ser apenas contido nessa caixa. Podemos clicar neles um por um, ou se clicarmos aqui nesta seta, vai tocar tudo nesta coluna. Vamos tentar isso. Você vê que estes estão jogando ao mesmo tempo. Vamos adicionar mais algumas coisas. Vamos voltar aos instrumentos. Quando estivermos prontos, como antes, vá bater esse recorde. Incrível. Vamos voltar ao nosso projeto. Vamos ouvir os sons juntos. Eu vou manter isso curto e doce hoje. Estou feliz com isso como um pequeno verso. Eu encontrei com loops ao vivo, a maneira mais fácil de gerenciá-lo é para cada coluna para ser uma seções musicais diferentes. Podemos facilmente ir, nossa primeira peça. Então eu posso clicar na próxima seção para talvez um pré-refrão e, em seguida, a próxima sessão para o refrão. Mas ainda podemos misturar pedaços, mas essa é uma boa maneira de pedir nossa música. Se você vai escrever uma música inteira assim, isso é. Nesta tela também podemos arrastar isso e
temos as mesmas opções que fizemos em nossa tela normal para que possamos,
solo, silenciar e ajustar os volumes, também
podemos entrar em efeitos de instrumentos IIT. Isso vai ser o mesmo que o nosso projecto normal 2. Agora, se você está vendo o canto inferior esquerdo aqui, isso é como nossos títulos de edição. Quando temos isso pressionado, podemos fazer algumas coisas diferentes em vez de ligar e desligar esses sons. Se eu clicar no agora, você verá que eu posso gravar, excluir, cortar, copiar, editar e usar algumas configurações. Se eu bater editar, ele vai trazê-lo de volta para a nossa tela de projeto regular e nós podemos fazer todas as mesmas coisas que fizemos com nosso kemari e as outras coisas que falamos no curso até agora. Posso clicar nele e cortá-la. Eu clico nele e loop, dividi-lo, editá-lo, cortar, copiar, apagar, todas essas coisas são iguais. Eu posso ir para as configurações e usar quantisação. Décimo sexto notas podem encaixá-lo no tempo para nós. Sim, tudo é aplicado nesse curso até agora que podemos fazer aqui. Basta clicar em Concluído para voltar. Em seguida, além disso, temos configurações. Aqui é onde novamente, podemos ajustar algumas das coisas que aprendemos no curso. No entanto, você vai notar que há algo diferente aqui e esse é o nosso comprimento. Podemos alterar a quantidade de barras e batidas que está nesta amostra. Também podemos ter uma função automática. Ele só vai encaixar automaticamente no comprimento certo. Com este botão de edição ativado, também
podemos mudar algumas outras coisas. Se eu pressionar nossa seta para ativar nossa coluna, nós podemos duplicar tudo isso aqui, então isso vai apenas copiar e colar para a direita. Podemos nomear cada seção. Sim, isso é bom para rotular como verso, coro, pré-refrão, o que você quiser fazer. Também temos algumas configurações aqui, então vamos dar uma olhada neles. Um Começo Quantizado, eu vou chegar em apenas um segundo. Mas também temos esse Modo de Reprodução. Se clicarmos nisso, vai nos dar algumas opções diferentes. Vamos dar uma olhada em cada um desses. Re-gatilho. Quando eu pressionar aqui, é óbvio que vai começar, e se eu pressioná-lo novamente, ele vai rerigger esses loops. O próximo é jogado por pressionado. Isto só vai tocar quando tivermos pressionado
para baixo e vai e vaiparar uma barra depois que eu tirar minha mão e então temos apenas uma peça e uma parada. Bastante direto. Então vai parar. Você percebe que enquanto eu estava acionando e desativando lá, às vezes
leva um segundo para sair ou encaixar. Isso é chamado de Time Snap e é uma forma de quantificar o início da nossa barra. Parece um pouco confuso, mas basicamente significa que tudo vai ser colocado no lugar no tempo com a música. Por exemplo, se eu tivesse isso desativado, eu poderia pressionar o Reproduzir e, em seguida, pressionar o botão Parar, e ele pára imediatamente. No entanto, isso pode ficar complicado quando você está tentando alinhar várias faixas diferentes ao mesmo tempo, porque eles não vão se encaixar no tempo um com o outro. Uma maneira melhor de demonstrar isso é se eu tocar uma faixa e depois a próxima. Porque eles não foram quantizados e esse tempo instantâneo não está funcionando, eles não vão chegar a tempo um com o outro. Só vai funcionar se eu pressioná-los perfeitamente a tempo, que é realmente muito difícil de fazer. Mas podemos ajustar isso usando esta seção aqui em cima. O normal está em um bar e eu recomendo deixá-lo lá. Mas se você quiser que seja um pouco mais rápido e um pouco mais rápido para mudar entre sons, podemos usá-los aqui. Com este botão de edição ativado, eu também posso mover esses sons redondos e eu posso segurar cada um deles para baixo e selecioná-los todos se eu quiser movê-los juntos. Vamos tentar jogar mais alguns sons aqui e tentar desenvolver uma música rápida. Incrível eu gosto desse, vamos usar isso. Outra maneira que eu gosto de manter isso bem organizado para que seja fácil gerenciar é ter todos os seus tambores em uma linha, todas as suas guitarras na outra e
mantê-lo sucinto assim para que não fique muito confuso. Caso contrário, cada caixa faria algo ligeiramente diferente e seria muito difícil entender e acompanhar o que está acontecendo. Essa foi uma hora ruim. No entanto, usando a magia do nosso quantizado, podemos fazê-los encaixar bem no lugar. Vamos direto no 116, ver como isso soa. último, encaixado perfeitamente no tempo, então use para aquele quantizer. Vamos adicionar um pouco de base. Vamos quantificar para que pareça agradável e apertado, e vamos ver como isso soa agora. Isso parece incrível. Vamos ver como isso soa juntos. Incrível. Quão legal é isso? Eu acho que eu quero ter um pouco mais de swoop ou inchar para nos levar do nosso verso para o nosso coro, então vamos procurar um desses nos loops. Isso é tão fixe. Vamos adicionar isso. Eu vou adicionar isso em separado porque eu vou saltar entre o verso para o coro apenas para ver como soa. Você percebe que todos esses sons são como um círculo, que significa que eles apenas loop continuamente. Agora com esse som mais tarde, eu não quero que ele circule. Só quero tocá-la uma vez entre o verso e o refrão. Vou apertar o botão de edição, pressioná-lo, apertar as configurações e, em seguida, desligar o loop. Você verá que é transformado de um círculo em apenas um arquivo WAV de aparência regular. Isso significa que só vai tocar uma vez, uma vez que eu pressioná-lo. Muito rapidamente enquanto estamos aqui, aquele começo quantizado que falamos há um minuto atrás. Podemos ditar exatamente como cada som usa esse início quantizado ou a função de snap de tempo. Nós também podemos ditar que jogar velocidades stop. O que eu falei antes, o jogo enquanto pressionado e o re-gatilho, também
podemos fazer isso para cada caixa individualmente. Novamente, é um pouco mais avançado, sinta-se livre para deixar isso por enquanto, se isso parecer esmagador. Uma vez que você encontrou uma idéia ou progressão que você gosta, nós podemos gravar isso, obviamente. Vamos bater recorde. Vou acertar a primeira seção. Vamos brincar duas vezes. Você pode bater no riser e pausar. Aqui, pare quando estivermos prontos e é isso que está gravado. Agora, mal surpresa. Há outro botão aqui em cima que pode parecer familiar, que nos levará de volta à tela do projeto. Isso gravou tudo para nós na tela do Projeto. Vou voltar aos nossos loops ao vivo aqui se quisermos adicionar mais alguma coisa. Podemos saltar para frente e para trás entre nossos loops ao vivo e nossa tela de projeto regular e começar a construir nossa música dessa maneira. Para mostrar um pouco mais, vou começar um novo projeto e ir com um dos loops ao vivo predefinidos. Vamos tentar rock. Você pode ver aqui que há muitas progressões e
sons pré-fabricados usando Apple Loops que podemos ter que brincar. Podemos jogar um de cada vez, ou podemos usar o seletor de coluna. Essa é uma introdução aos loops ao vivo. Agora você pode usar isso em oposição à tela do projeto, se você quiser, ou você pode usar como um híbrido entre ambos. É apenas uma opção muito agradável de ter e eu acho particularmente para pessoas que não têm muita certeza sobre a teoria da música e só querem jogar esses loops ao vivo, ver como eles soam e criar progressões como essa. Isso é ótimo. Ok, obrigado por este pessoal. Apanho-te na próxima lição.
26. Como desenvolver nossa música: Ei, pessoal. Bem-vinda de volta. Na lição de hoje, vamos analisar o desenvolvimento da nossa canção. Vou usar todas as ferramentas que falamos no curso até
agora para desenvolver ainda mais nossa música, colocar mais de uma estrutura verso-coral no lugar. Eu vou falar sobre como podemos mudar a forma como tocamos os instrumentos, para mudar a dinâmica e a sensação de certas seções, e sim, começar a realmente completar nossa estrutura musical e como tudo vai rolar junto. Isto vai ser mais como uma aula de produção e composição. Como eu disse algumas lições atrás, eu escrevi um pouco de baixo novo aqui, e agora eu uso exatamente os mesmos quatro acordes ou quatro notas, e eu apenas mudei um pouco de como eu estava tocando eles para que eu pudesse cantar junto ao refrão. Só um pouco mais de uma linha de base agitada. Então eu apenas improvisei e no final, apenas bati as notas por si mesmos e deixá-los tocar. Isso me fez pensar que talvez o segundo verso pudesse começar muito frio e talvez pudéssemos trazer os tambores para baixo, e pode ser agradável e silencioso. Mas voltaremos a isso em apenas um segundo. Primeiro de tudo, vou cortar este drone. Eu vou colocar isso no início,
só para que nós temos o drone vindo imediatamente, e então eu vou loop que ao longo da música, então é o corredor deles. Você também pode notar que tudo vem de repente, o que pode ser bastante problemático. Vou mover tudo um par de barras para a direita. Você pode notar que a guitarra está lá. Mais uma vez, eles estão vindo de repente. O que eu vou fazer é só esticar as guitarras um pouco mais
para que possamos obter um pouco mais desse som orgânico à medida que ele entra. O GarageBand é muito inteligente nisso. Começa a gravar quando não estamos gravando, então eu posso arrastar o arquivo de som de volta e ele vai ter aquele som orgânico. Vê como isso soa suave? Agora soa um pouco mais natural. Acho que quero que alguns tambores nos tragam. Vou ao nosso drama e criar uma nova seção. Essa é a nossa pequena introdução de tambor lá, e tudo está de volta no tempo. Pela nota daquele baterista, vou fazê-lo seguir a guitarra. Se você se lembra de mais cedo, podemos usar nosso chute e nosso laço seguir para seguir nossa guitarra. É aqui que nomear suas faixas pode ser útil. Eu não sei qual é a minha guitarra rítmica de verso, então eu vou voltar para uma parte da tela e nomear essa. Vamos fazer e seguir nossa guitarra de verso. Vamos ver como isso mudou. Muito mais agradável. Tão bom. Eu realmente recomendo usar que siga para cada um no baterista. Isso faz com que seja muito mais como um membro envolvido da banda, em vez de apenas uma batida separada. Também temos a nossa guitarra principal. No entanto, eu acho que onde normalmente haveria vocais lá, ter essa guitarra principal é bastante forte, então poderia interferir com a melodia dos vocais, então eu vou apenas mover isso para o verso e ver como isso soa. Vou usar exatamente a mesma guitarra de verso do meu primeiro verso em um segundo. Só vou copiar e colar. Vamos ver como isso soa com a guitarra principal. Parece legal. Uma boa. Este é o início do nosso segundo verso. Vou adicionar um pouco de bateria nesse segundo verso. Mas antes que me esqueça, vou dar o nome a este nosso coro violão e vou fazer os nossos tambores seguirem isso também. Então siga a guitarra do coro. Vamos adicionar outra seção de baterista aqui em
cima e eu vou torná-lo realmente agradável e relaxante. Acho que vou ter isso nos símbolos. Eu vou ter isso muito simples e suave. Acho que quero que os tambores parem. Quero que pare com essa linha de base indo duh duh. Incrível. É aí que eu acho que eu quero mudar
totalmente de ser agradável e quieto e relaxar para quase como um pouco de colapso e algo que é completamente contrastante o que acabamos de ouvir. Isso vai adicionar um pouco de interesse em algo inesperado. É aí que eu acho que vou usar essa batida realmente louca de mais cedo. Tonifique isso para baixo. Então acho que vou ter a batida elétrica e em seguida, nosso baterista automático Mason também tocando junto com ele. Então vamos criar outra faixa de baterista. Vamos fazê-lo muito barulhento e simples. Vês como ambos trabalham juntos e fazem uma boa batida lá? Eu realmente gosto
disso, é aqui que eu posso usar o meu sim de mais cedo. Você se lembra daquela amostra boba que eu fiz? Agora, isso pode parecer um pouco tolo, mas eu gosto. Vou deixá-la lá dentro. Acho que vamos ter uma base muito poderosa para ir junto com esse colapso. Vamos voltar para o nosso baixo. Uma boa. Está realmente começando a se juntar lá agora. Eu acho que essa transição entre este verso e o coro é onde eu quero usar aqueles barulhos inchados que nós criamos antes. Eu vou mover todos eles para cima. Eu quero agora inchar as palmas para deixar um pouquinho de silêncio completo. Só vou adicionar um pouco de silêncio antes de trocarmos de volta para o verso. Isso vai adicionar ainda mais ênfase ao nosso coro e torná-lo ainda mais poderoso. Uma boa. Agora eu vou apenas copiar e colar todos os nossos pedaços de coro anteriores para o segundo refrão porque eles podem ser exatamente iguais. No entanto, eu recomendo se você está realmente se aprofundar em composição e você quer fazer algo realmente único e muito especial, gravar esse refrão novamente pode adicionar aquele pouco de variação e
torná-lo um pouco mais original e dar que o segundo refrão uma sensação ligeiramente diferente. Mas sim, por causa do tempo de hoje, eu só vou copiar e colar. Desculpe por ser preguiçoso. O verso do coro soará assim. Acho que o primeiro verso parece muito bom. No entanto, eu acho que eu quero colocar um pouco de teclado ou
outra coisa lá apenas para engrossar a primeira seção. Eu realmente gosto do som desse teclado. Vamos colocar no nosso grande pentatônico para que seja muito fácil para mim jogar. Vamos ver o que descobrimos. Quero manter esta música muito curta, doce e simples. Vou deixar que ele se espalhe no segundo refrão. No entanto, eu acho que vai soar muito legal se aquela guitarra principal voltar no segundo coro. Acho que vai fazer um triunfo e um final muito otimista e feliz. Normalmente não gosto de solos de guitarra e isso, mas hoje, estou me sentindo um pouco louco. Acho que vou imitar o que fizemos com a guitarra principal mais cedo, mas basta adicionar um pouco mais no final para fazê-lo progredir mais e dá-lhe a sensação de que algo se desenvolveu. Desculpe-me enquanto eu tomo cerca de 100 tomadas para fazer isso direito. Não. Acho que foi isso. Estou muito feliz com isso. Eu realmente gosto da progressão. Eu acho que isso soou bem legal. Nós temos um pouco de trabalho a fazer em termos de adição de efeitos e mexer com outras coisas, que nós vamos chegar até você em seguida. Mas estou muito feliz com essa estrutura, como as coisas entram e saem, os diferentes níveis de dinâmica. Estou muito feliz por termos conseguido escrever que apenas usando quatro acordes, apenas usando a mesma progressão, nós acabamos de mudar [inaudível] entrar e sair. Estamos quase lá agora. Em seguida, vamos olhar para efeitos e maneiras de fazer esta música soar ainda melhor. Estou ansioso para vê-lo na próxima aula.
27. FX: Ei, pessoal, bem-vindos de volta. Em seguida, vamos olhar para o FX. Agora, isso é um pouco diferente dos efeitos como reverberação e compressão. FX é, na verdade, uma pequena aba que podemos abrir no GarageBand, você pode vê-lo aqui. Podemos usar isso um pouco como uma ferramenta de DJ. Enquanto nossa música está tocando, nós podemos manipulá-la, e mudá-la, e adicionar algumas coisas realmente legais em tempo real. Acho que a maneira mais fácil de explicar isso é apenas pular direto e mostrar do que se trata. Uma vez que eu clicar no botão “FX”, vejo que ele traz este painel aqui. Agora, cada uma dessas seções diferentes, enquanto atropelamos o dedo, vai manipular o som da nossa música. Vamos ouvir o que alguns destes fazem. O primeiro é um filtro. Vai permitir-nos cortar esse high-end e low end, e realmente manipular a frequência do som. Então podemos usar este botão de bloqueio para bloquear exatamente onde essa frequência vai ser mantida. Ou podemos usar este botão aqui para fazer aquilo sobre o iPad de novo, para que possamos movê-lo. Vamos tocar a faixa. Podemos manipular o som movendo nosso iPad. Então o que também podemos fazer com esta seção, mas também esta seção também. Basta clicar aqui em cima e podemos alterar o efeito que é usado. Temos o Repetidor. Vamos ter um pouco de Reverb. Incrível. Tudo bem. Há montes de diferentes com quem podemos brincar aqui. Sugiro vivamente saltar e apenas ter um bom jogo ao redor com todos estes e ver que tipo de efeitos você pode adicionar à sua música. Muitos sons muito legais que estamos tocando com eles. Podemos mudá-lo de volta para o filtro por enquanto, e vamos rever esses outros bits. Em seguida, este controle deslizante aqui é basicamente vai puxar e empurrar nosso sinal. Este estágio 1
aqui vai digitalizar o nosso sinal. Temos um efeito de câmera lenta bem aqui em baixo. Podemos fazer um mais rápido do lado direito. Temos um tipo de som giratório. Eles têm um botão de rebobinar lá. Então temos outro painel aqui que podemos cortar e trocar como o da esquerda. Você pode usar todos eles simultaneamente e você pode criar alguns sons únicos realmente legais, e realmente mudar o som ea sensação de nossa música. Vamos fazer uma jogada dessa. Você começa a essência lá. Não sou o melhor a usar isso. Sou um pouco profético com meu DJ e habilidades. Eu acho que eu vou usar isso, mas de uma maneira muito simples em que eu vou usar este filtro para lentamente trazer esses tambores para fora logo no início. Um pouco assim. Simples redemoinho lá para trazer os tambores e lentamente introduzir a música também. Como você viu lá, tudo que você tem que adicionar esses efeitos, é ir para a parte da música que você quer esses efeitos, aperte “Gravar”, tocar na coisa que você quer. Então, uma vez que você vem até o fundo aqui, você vê que um pouco de informação FX está lá em nossa pista. Assim como antes, podemos mover isso, ou cortar e mudar mesmo depois que você jogou. Veja, sim, certifique-se de ter um bom jogo por aí com isso. É muito divertido. Eu acho que um monte de pessoas que gostam de música elétrica, e em seu DJ realmente se daria bem com isso. Boa, rapazes. Apanho-te na próxima lição.
28. Introdução à mixagem: Ei pessoal, bem-vindos de volta. Nesta lição, vamos olhar um pouco para misturar. Vamos falar sobre reverberação, acertar nossos ganhos e volumes, e começar a fazer nossa música soar muito bem. Vamos ter uma escuta, e vamos ter um pequeno ajuste dos volumes em primeiro lugar,
para ter certeza de que tudo está em um bom nível. Eu normalmente faço esta seção por seção. Vou me concentrar no verso, primeiro lugar, para verificar se está tudo bem aí. Os níveis lá, estão todos soando bem para mim. Eles são agradáveis e equilibrados, eu posso ouvir tudo agradável e claramente, e eles vão trabalhar muito bem juntos. O que vou fazer a seguir é adicionar um pouco de reverberação. Agora, reverberação é basicamente, como o som reflete e como soaria em uma sala. Por exemplo, se eu estivesse cantando em um buraco, esse som seria completamente diferente do que se eu estivesse cantando em uma sala, ou em um pequeno clube, ou algo assim. Podemos adicionar efeitos de reverberação às nossas faixas, que
possamos fazer nosso instrumento soar como se estivessem em uma determinada sala, em vez de apenas gravá-lo seco. Vamos começar com nossos tambores. Você pode adicionar reverberação clicando em sua faixa, chegando em nossas Configurações do Mixer, entrar em Plug-ins & EQ, Editar, pressionando um botão “Plus”
e, em seguida, encontrar uma reverberação de faixa lá. Agora aqui temos todas as nossas diferentes configurações de reverberação. Isso é realmente ótimo se você quiser ficar realmente específico com um certo som de reverberação. Você tem seu Predelay, seu Spread, Reverb Time, você pode ficar realmente em profundidade com como o reverb soa lá, mas por hoje eu vou mantê-lo realmente agradável e simples. Eu só quero um pouco básico de reverberação por cima, e eu quero que todos eles soem como se estivessem na mesma sala. Fazemos isso voltando, e depois descendo aqui para Master Effects. Lá você pode ver que temos um reverb e um slide de eco. Um eco vai ditar o quanto de um retrocesso do som existe,
é quase como um atraso. Se eu soar nossos tambores e depois tocar-lhes seco, seja, sem reverberação, só para podermos ver como eles soam sozinhos. Então eu vou começar a deslizar em algum reverb, e eu definir um pouquinho de eco também. Lá nós fomos de um som de bateria muito seco e chato, para aquele de um que tem muito mais vida e muito mais interesse sobre ele, e ele se sente muito mais tangível, parece que está em uma sala, parece que está sendo interpretado por uma pessoa. Aqui é onde podemos obter um pouco mais em profundidade com a reverberação que é usada. Se clicarmos em “Master Effects”, então
temos algumas opções diferentes usando essas setas, quanto ao tipo de eco e atraso que estão sendo usados. Aqui temos uma carga de diferentes efeitos de eco legal, e aqui temos muitos efeitos de reverberação diferentes. Como você pode ver aqui, eles também têm o nome de um espaço diferente. Eu amo isso porque ele realmente traduz o som e o sentimento que queremos que nossa música vá para. Sinto que esta música é um som mais apertado, quase como um clube. Eu posso imaginar pessoas em um pequeno local ouvindo essas coisas. Eu vou selecionar “Clube”, mas digamos que se você quisesse escrever como uma peça orquestral, onde você quisesse como um grande salão, isso soaria completamente diferente. Song está em um salão enorme, e esse clube é um pouco mais apertado e um pouco menor, mas novamente, podemos ajustar quanto de reverberação quebra usando este controle deslizante. Impressionante, isso é apenas dado um pouco de vida ao nosso kit de bateria lá. Eu sugiro usar uma reverberação na maioria das faixas, ele só vai dar que um pouco mais de vida que falamos. Agora vou voar para a pista e adicionar um pouco de reverberação a cada instrumento. Vale a pena notar com os Master Effects, se eu definir a reverberação no Club, será o mesmo para todos os instrumentos da nossa pista. Não podemos ter a nossa guitarra num buraco de câmara e depois as nossas cordas num clube. Isso funciona muito bem, porque você quer que todos os nossos instrumentos soem como se estivessem sendo tocados no mesmo espaço. Você vê que é apenas dado a ele um pouco extra de vida, um pouco
extra de interesse, e isso soa muito mais real e realista agora. Outro par de pequenas dicas, se você quiser ajustar o ganho de qualquer uma de suas gravações, o que você tem que fazer é tocar na gravação, toque ganho, vá para Configurações, e você pode ver aqui em cima, nós temos nosso seletor de ganhos. Se você quiser controlar a intensidade da saída, podemos mudar isso lá. Além disso, você pode ter visto em nossos Efeitos e Plug-ins & EQ lá, nós apertamos “Editar” e apertamos “Plus”, nós temos uma tonelada de efeitos diferentes lá. Estes são fantásticos para adicionar um pouco extra de interesse e intriga à nossa canção. Temos nossa música soando bem e equilibrada agora, e tem um bom pouco de reverberação para fazer soar agradável e realista. Na próxima lição, vamos dar mais um passo para cima e dar uma olhada no movimento panorâmico. Estou animado para mostrar como isso funciona. Vejo-te na próxima lição.
29. Pan: Bem-vindos de volta a todos. Nesta lição vamos falar sobre panning. panorâmico é basicamente a arte de mover um instrumento para a esquerda ou para a direita. Parece muito simples, e realmente é, mas pode ser muito,
muito eficaz em dar espaço à nossa música e fazê-la parecer realista. Se você imagina ver uma vida ruim, esses membros se espalham da esquerda para a direita. Eles não estão todos de pé na frente um do outro. Um, isso pareceria muito estranho, mas dois, soaria muito estranho. Embora os sons estariam vindo na mesma direção,
embora os sons se sobreponham uns aos outros e seria difícil ouvir cada coisa individualmente, então usamos o movimento panorâmico para espalhar esses sons exatamente como faríamos se fôssemos um show ao vivo, e talvez dar à guitarra algum espaço para a esquerda. O cantor me dá espaço no centro. Talvez o tecladista um pouco mais para a direita. Podemos construir um palco, se você fosse. Para acessar panning, viemos aqui para nossas erupções mistas. Então você pode ver logo abaixo do volume aqui temos pan pista. Podemos deslizar para a esquerda, se quiser que o som se mova para a esquerda. Igualmente podemos movê-lo para a direita antes de ser movido para a direita. Para demonstrar isso, vamos para a nossa guitarra, vamos tocá-la e tocá-la, e vamos nos mover por aquela panela para baixo. Viu como estava se movendo por lá? Vamos usar o exemplo que dei anteriormente, e vamos tentar mover cada instrumento para o seu pequeno espaço. Eu, pessoalmente, deixo os tambores e o baixo bem centrados porque
eu acho que eles são os instrumentos de ritmo central, eles querem ser bons e centrais. Vou mover minhas guitarras em um segundo. Mas nós temos alguns desses efeitos de teclado que eu vou mover para a esquerda. Vamos mover nossa base um pouco para a direita só para dar um pouco de interesse. Vamos dar uma olhada na nossa guitarra principal. Vamos mover isso para o seu próprio espaço também. Vamos mover essa flecha para a direita. Vamos mover esta batida de tambor, talvez para a esquerda um pouco. Outra coisa que podemos fazer com o movimento panorâmico é usá-lo ao lado de rastreamento duplo. Rastreamento duplo é onde pegamos dois do mesmo som, então a mesma parte da guitarra,
mas, em seguida, girando um caminho para a esquerda e um caminho para a direita. Dá-lhe uma boa propagação. Para fazer isso, podemos clicar em nosso “Rhythm Guitar”. Vou usar isso como exemplo. Podemos clicar em “Duplicar” e ele vai copiar e colar todos os mesmos efeitos que estavam em nossa faixa original. Então podemos pegar nossos sons, copiá-los, e depois colá-los. Então podemos usar a panela para espalhar uma esquerda e outra direita. Vou dar-te um antes e um depois para veres a diferença exacta. Você vê como isso realmente mudou o espaço que essas guitarras estão tocando dentro. Soa muito grande, e muito grande, e gasta muito espaço em nossos fones de ouvido, muitas vezes
você verá que as pessoas usam o mesmo método de rastreamento duplo quando você está usando vocais também. Incrível. Com sorte, você pode ouvir que estamos começando a espalhar os diferentes instrumentos em nossa pista, dar-lhes o seu próprio espaço. Espero que você possa começar a ouvi-los um pouco mais claro e dar-lhe um nível extra de profissionalismo. Incrível, obrigado, pessoal. Em seguida, vamos falar sobre automação. Vejo-te na próxima lição.
30. Automação: Em seguida, vamos falar sobre automação. Gosto de pensar na automação como um ajudante robô. Você pode usar nosso amigo robô autômato para ajustar o volume para nós ao longo da música. Digamos que você tem um solo de guitarra chegando e você quer que o volume seja acumulado apenas para essa parte. Podemos dizer ao nosso amigo robô, aquele solo de guitarra que quero que aumente até mais oito dB, e quero que seja muito bom e alto. A automação no Garageband iOS é apenas mantida em volume, por isso é agradável e direto. Vamos dar o exemplo mais cedo de aumentar o volume para o nosso solo de guitarra. Meu violão aqui parece ótimo porque é bom e tranquilo ponto na pista, mas o solo de guitarra aqui, eu acho que precisa de um pouco de impulso. Podemos encontrar automação clicando na pista que queremos adicionar automação, e então você pode ver lá nós temos automação, então vamos clicar sobre isso. Você pode ver que a linha fina não é zero dB, e nossa linha cinza, ligeiramente mais espessa é onde nosso volume atual está. Posso ajustar o volume atual movendo essa linha para cima e para baixo. Vou te mostrar o que quero dizer com solo na pista. O que podemos fazer é selecionar nossa caneta aqui, e então podemos adicionar alguns pontos à pista, e então desligá-lo para mover os pontos, e então podemos dizer ao programa onde queremos que esse volume seja aumentado, onde queremos que ele para descer. Podemos fazer experimentos com volumes. Eu posso dizer usar isso para fazer um pouco de como um inchar com uma guitarra, ou eu poderia usar este o mesmo recurso para fazer uma faixa ou a música desaparecer. Mas para a nossa pista, eu acho que eu vou fazer isso um pouco mais alto e então eu quero que ele seja um pouco mais alto, então talvez como aqui em cima. Eu gosto do nível lá, e eu adicionei em um muitos pontos. Se eu quiser me livrar disso, eu só tenho que ligar nossa ferramenta de
caneta e eu vou tirar isso. Eu também vou criar um pouco de desvanecimento para que termine bem também. Acaba bem e sem problemas. Quando voltamos para a tela inicial, você pode ver a linha cinza da automação lá. Vale a pena notar que depois de automatizá-lo porque estamos programando como queremos que esse volume funcione, esse mostrador torna-se redundante porque já programamos como queremos que ele funcione. Basta ter isso em mente se você estiver indo para usar o autômato, torna-se um pouco mais complicado de misturar, então eu sugiro usar a automação depois de ajustar os volumes. Este é um guia rápido sobre a automação no Garageband. Vejo-te na próxima lição.
31. EQ: Em seguida, vamos falar sobre o QE. Se você já usou um mixer ou um amplificador de guitarra antes, você pode ter visto baixo, meio e agudos e usando esses mostradores, podemos mudar a frequência de nossos sons. Podemos aumentar o baixo ou reduzir os agudos e isso vai mudar o som geral. Nosso equalizador ou nosso equalizador, é uma versão mais sofisticada desses mostradores. Podemos ficar um pouco mais intrincados e manipular o som com mais precisão do que com esses três mostradores. Para encontrar o nosso EQ, vamos para as nossas configurações de mixer e vamos para plug-ins & EQ e vamos procurar EQ visual. Como você pode ver aqui, nós temos baixo, meio e agudos, e eles vão se alinhar com esses três pontos. Podemos manipular cada uma dessas bandas diferentes movendo esses pontos. Se eu quiser aumentar nossos médios, eu tenho que levar isso para cima e se eu quiser diminuir, eu só tenho que tirá-lo para baixo. Você pode notar que já aconteceu um pouco de EQ aqui, que muitas vezes acontece quando usamos presets ou alguns dos instrumentos virtuais, eles muitas vezes foram EQ um pouco para nós. Vamos entrar logo no assunto. Vamos tocar nossa faixa de baterista. Sim, podemos ajustar os agudos. Nós só vamos trazer mais o high-end. Os médios e o baixo. Isso é novamente uma representação visual mais clara do que está acontecendo com o som. Podemos clicar no botão do analisador aqui em baixo, e se voltarmos a tocar, podemos
ver as ondas sonoras. Você pode ver onde nosso som está principalmente sentado. Este foi um tambor aqui temos som em todo esse espectro de frequências. Temos o pontapé, mais a extremidade do baixo, e os símbolos nos chapéus altos mais ao longo da extremidade dos agudos. Podemos expandir isso com este botão de seta aqui para baixo se você quiser uma visão maior e você pode ver à direita aqui que temos um controle de ganho. Se quisermos trazer tudo para cima ou para baixo, podemos fazer isso aqui. Podemos usar o equalizador para reduzir sons que não gostamos. Podemos usá-lo para exagerar as frequências que gostamos, então, por exemplo, no baixo, se você quiser mais low-end, podemos aumentar a frequência dos graves. O que também podemos fazer é moldar o EQ de
cada instrumento para que ele tenha seu próprio espaço no espectro. Porque quando todos os nossos instrumentos estão tocando, muitas dessas frequências vão se sobrepor e tornar um pouco mais difícil ouvir cada coisa individualmente. EQ-ing cada instrumento para dar-lhe o seu próprio pequeno espaço neste espectro de frequências, deixa muito claro para ouvir e faz com que eles se destacem muito bem. No GarageBand iOS é muito simples, então só temos esses três pontos. Mas muitas vezes você verá em programas de gravação mais avançados eles terão muito mais desses pontos para que você possa ficar realmente intrincado com ele. Mas eu gosto muito de como isso é simples. Eu acho que os laços muito bem quanto à forma como você usa o EQ melhor, e apenas fazer ajustes graduais e movimentos muitas vezes pode ser a melhor abordagem porque no final do dia e ainda
queremos que o nosso baixo soe como uma base. Não queremos manipulá-lo tanto que pareça completamente diferente. Com isso em mente, vamos entrar em alguns instrumentos e talvez ver se podemos moldar nosso som, então é um pouco mais agradável. Por exemplo, lá, que high-end é apenas um pouco exigente, então eu só quero tirar a extremidade superior fora sempre tão ligeiramente. Então eu só quero trazer um pouco desse pontapé. Certifique-se de voltar entre o solo e a faixa completa, porque o que estamos tentando fazer com este EQ é fazer com que ele se encaixe com o resto da música. Podemos EQ então parece ótimo por conta própria, mas quando você puxá-lo para a música e acompanhá-lo com todos os outros instrumentos, pode não soar o mesmo, para saltar para trás entre o solo e a faixa completa da banda. último soou bem para mim. Vamos para o nosso baixo. Você vai notar também, com esses dois pontos no final, quando os levantamos ou baixamos,
eles criam o que chamamos de prateleira e podemos manipular isso para fazer uma curva se quisermos obter todas essas altas frequências para fora. Mas isso só vai nos permitir moldá-lo um pouco mais fácil. Mas se você olhar para os médios, vai criar mais como uma colina. Aquele baixo, eu só quero trazer aquele low-end. Você vê que está fazendo aquela prateleira bonita para mim, então toda a parte baixa vai ser afetada a partir deste ponto. Eu vou
moldá-lo sempre tão ligeiramente em torno do meio porque é onde a nossa guitarra vai estar sentado, então eu não quero ajustá-lo muito, mas eu só quero ter certeza de que uma guitarra tem um pouco de espaço. Nós só estamos fazendo pequenos ajustes aqui e vale a pena notar, se você é um iniciante e você só quer fazer músicas, você não está realmente muito preocupado com a mistura deles, você não precisa fazer isso. Isso é totalmente, se você quiser entrar no nitty-gritty disso. Vamos para as guitarras agora porque eu acho que eles definitivamente precisam de algum trabalho. Estou tirando algumas dessas frequências graves para dar ao baixo um pouco mais de espaço. Eu só quero tirar aquelas frequências ligeiramente duras, mais altas, o que eu fiz lá. último, nós passamos por uma tonelada de nossos instrumentos lá e nós apenas demos um pouco de ajuste e um pouco de Sculpt para fazê-los se encaixar com nossa música um pouco mais. Agora realmente não há nenhum certo ou errado com o
QE e eu acho que é realmente importante apenas experimentar. Nosso EQ está lá apenas para nos dar essa escultura sobre o nosso instrumento e como eu disse anteriormente, para dar-lhe espaço dentro da nossa canção, e para permitir que todos os nossos instrumentos trabalhem juntos em harmonia. A razão pela qual não há um tamanho único para todos com EQ, é porque cada música vai ser muito diferente. Como você EQ uma música com apenas uma guitarra acústica e uma voz
seria completamente diferente de EQ-ing que guitarra em uma mistura com bateria, baixo, cordas e muitas outras coisas. Mas o que quer que faça, não se intimide por isso. Como eu disse, realmente não há certo ou errado, é tudo preferência pessoal e como você acha que soa melhor. Cabe a você, o produtor, escolher o que acha que soa bem. Se você quiser tornar este processo ainda mais simples para você, o que você pode simplesmente fazer, é entrar em nossas configurações de mixer e apenas ajustar os graves e os agudos em nossos plug-ins na seção EQ aqui. Isso é uma introdução ao QE. Espero que tenha gostado disso e eu te pego na próxima lição.
32. Compressão: Bem-vindos de volta, pessoal. Na lição de hoje, vamos falar sobre compressão. Agora, juntamente com EQ e reverberação, a compressão é um dos efeitos mais importantes a serem discutidos ao misturar. Então, o que é compressão? Ao gravar, há naturalmente um alcance dinâmico, o que significa que temos algumas partes muito altas e algumas partes mais silenciosas. Um ótimo exemplo para usar é para cantar. Às vezes você vai cantar muito alto e muito poderoso, e outras vezes, você vai ser mais controlado e um pouco mais silencioso. Isso causa problemas na mistura porque uma vez que você definir um nível, muitas vezes
você verá algumas partes parecem muito altas, enquanto outras partes podem parecer muito silenciosas. É muito difícil obter um nível consistente, e quando temos muito desse alcance dinâmico, muito mais alto e claro, a gravação pode parecer fraca, então usamos compressão para basicamente espremer as partes mais altas para que toda a gravação seja mais consistente, e como resultado, soa mais punchy, mais confiante, mais presente, e faz uma mistura muito melhor. Eu tenho exibição aqui para deixar as coisas agradáveis e claras. Estas partes pretas são as nossas gravações sonoras. Partes como esta seriam muito mais silenciosas, enquanto essas partes são muito barulhentas. Você pode ver aqui temos um nível muito misto por causa desse alcance dinâmico. Nós combatemos isso definindo um limite, um certo volume. Neste exemplo, é menos 15 dB. Tudo acima deste limiar, então todos aqueles bits realmente altos, nós podemos esmagar para baixo, e isso vai fazer nosso som muito mais consistente e um nível muito mais agradável no geral. Esta é a aparência de uma potência sonora descomprimida,
e é assim que uma comprimida se pareceria. Vês como é mais consistente e até mesmo? Vamos voltar para a nossa pista para ouvir como isso soa. Por exemplo, vou usar o nosso drama. Vamos isolar isso, e depois encontrar esse compressor, vamos entrar nas erupções de mistura, plug-ins e EQ, e então nosso compressor está lá. Podemos ligar e desligar isso com este botão aqui. Agora, eu vou entrar nessas configurações em apenas um segundo, mas por enquanto, eu vou comprimir fortemente para que você possa ver a diferença que o compressor faz. Legal. Você percebe a diferença lá, era muito mais punchier e muito mais confiante e na sua cara. Se você quiser manter isso muito simples para você, podemos voltar e há uma configuração de compressor aqui. Então podemos ajustar a intensidade do compressor a partir daqui se você quiser mantê-lo simples para si mesmo. Mas se você quiser ir mais longe nas configurações, podemos fazer isso também. Nosso limite de compressor é onde estabelecemos essa linha. Se voltarmos ao nosso gráfico,
nosso limite é o quão alto ele tem que ficar antes de começar a se comprimir. Quanto mais alto definirmos
o limiar, menor será a compressão. A proporção vai ser a quantidade de compressão que ocorre acima do limite, então podemos configurá-la para ser realmente agressiva se você quiser que tudo seja compactado, ou podemos fazer um pouco de uma mistura. Assim, podemos ajustar a intensidade de quanto é comprimido usando a proporção. Quanto maior a proporção, mais intensa será a compressão, e quanto menor a proporção, menos intensa será a compressão. Um um-para-um não vai ser nenhuma compressão. Para fazer o som do compressor um pouco mais orgânico e natural, temos algo chamado ataque. O ataque será a rapidez com que o compressor começa a funcionar. Quanto mais longo
o ataque, mais suave será. Mas se você quiser um compressor realmente agressivo, podemos acabar com esse ataque, e vai ser um pouco mais apertado e um pouco mais rápido para acionar nosso compressor. Então, ao usar compressão, porque estamos derrubando essas partes mais altas, muitas vezes
isso pode resultar em nossa trilha ser um pouco mais silenciosa do que normalmente seria. Para compensar isso, temos um sinal de ganho. Chamamos isso de ganho de maquiagem porque estamos adicionando jogo de
volta por causa do que perdemos com a compressão. Então temos um controle deslizante misto aqui para que possamos ditar exatamente quanta compressão vai ser em nossa pista. Novamente, eu realmente não gosto de muitas regras em torno de fazer música. No entanto, eu acho que uma grande dica para quando se usa um compressor é fazer ajustes ao ouvir a faixa como um todo. É fácil brincar com todas essas opções quando solo porque podemos ouvi-las claramente. No entanto, o que estamos tentando fazer com o compressor, é fazê-lo perfurar e se destacar, e precisamos saber como isso está se encaixando com o resto da nossa música para realmente fazê-lo funcionar corretamente. Então vamos desligar o solo, e vamos começar a brincar com este compressor, com o objetivo de fazer
com que tudo pareça agradável e presente. Mas com esta música, eu não vou usar muita compressão porque eu quero que seja uma faixa bastante relaxada. Não quero que fique na sua cara, então vou fazer uma compressão leve. Particularmente, os tambores só os fazem brilhar. Você pode ouvir todos os pequenos elementos dos símbolos lá e isso faz com que eles apenas se destacam um pouco mais. Isso soa bem por enquanto. Eu vou para a nossa base e adicionar um pouco de compressão lá também. Vamos entrar em nossas primeiras guitarras. Outra dica superior, eu sempre gosto de estar pressionando este botão On and Off no compressor. É muito bom ouvir exatamente a diferença que você está fazendo. Então, se você está sempre voltando e vindo, você vai ouvir essas diferenças e você vai ouvir onde você quer ir e que diferença está fazendo. Eu realmente espero que você possa ouvir a diferença lá. Pode ser apenas sutil para você agora, mas quanto mais você usá-lo, mais aparente compressão se tornará. Dá-lhe aquele soco extra, aquela energia extra, e acho que fez parecer mais profissional. Essa é uma breve introdução sobre como usar a compactação. Não fique muito intimidado com isso, e lembre-se, a coisa mais importante que você pode fazer agora é experimentar e ver o que soa melhor. Semelhante ao EQ, não há um tamanho que se adapte a todos com compressão porque depende totalmente da sua faixa individual. Então use isso para se capacitar e pensar, eu vou usar o compressor como eu acho que soa melhor, e quanto mais experiência você tiver com um compressor, melhor você se tornará. Basta entrar lá, ser experimental, e eu prometo a você,
você será incrível em produzir uma compressão antes que você perceba . Acho que essa é a nossa música, pessoal. Quão excitante é isso? Acho que vou desvanecê-lo no final, talvez apenas ajustar ligeiramente o amplificador de guitarra principal, mas isso é puramente apenas uma preferência pessoal. Obrigado, pessoal. Apanho-te na próxima lição.
33. Música finalizada: Ok. Olá.
34. Como exportar: Ok, então terminamos. Nossa música é feita, é gravada, é misturada e está soando muito bem. Uma vez que você está nesta fase, obviamente você vai querer compartilhá-lo com as pessoas, certo? Para fazer isso, temos que voltar para a tela do nosso projeto e é, My Song 16, que queremos. Vamos clicar em “Selecionar”,
selecionar o que queremos
e, em seguida, ir para “Compartilhar”. Podemos compartilhar nossa música como um projeto para que possamos
enviá-la para nossos amigos se quisermos que eles trabalhem nela ou gravem algo nela. Podemos compartilhá-lo como um toque ou podemos apenas compartilhá-lo como música. Nós vamos para este. Agora eu sempre recomendo que você exporte em arquivo WAV
descompactado porque isso vai ser a mais alta qualidade. No entanto, se você quiser um arquivo menor para dizer enviar a um amigo, o iTunes Plus da mais alta qualidade ficará bem. Mas por hoje vamos usar descompactado e então só temos que apertar “Compartilhar” e ele
vai salvá-lo onde quisermos, então eu vou enviá-lo para o meu Mac. Ele vai enviar mais compartilhamento de arquivos e isso vai ser como feito. Um enorme parabéns se você chegou a este ponto onde você escreveu e gravou sua música, não importa o quão longa, curta ou complexa pode ser. Você chegou ao ponto de exportá-lo, e agora você tem sua própria música. Mais uma vez, eu gostaria de enfatizar se você quiser enviá-lo para mim, eu absolutamente adoraria ouvir o que quer que você tenha feito. Estarei ouvindo tudo o que é enviado para mim e se você quiser qualquer crítica ou feedback, eu ficaria mais do que feliz em ajudar com isso. Muito obrigado se você ficou comigo até aqui. Vejo-te na última lição.
35. Considerações finais: Um enorme bem feito para você se você chegou até aqui no curso. Eu realmente espero que você possa tirar um monte de coisas boas
longe disso e que você tenha gostado do curso. Só quero dizer umas coisinhas antes que o curso termine oficialmente. Algo com que eu realmente lutava nos primeiros dias de gravar e escrever minha música era que, eu não gostava de nada do que eu fazia. Eu realmente me esforcei para escrever o que eu achava que era boa música, e por causa disso por muito tempo eu não escrevi, gravei ou fiz algo assim. Acho que muita gente luta com isso. Eles escrevem uma música e não é como eles gostariam, e eles começam a pensar, “Eu estou terrivelmente nisso, eu não posso fazer isso.” Eu acho que é o mesmo com muitas coisas, não apenas música. É tão fácil começar a escrever e ficar irritado com mesmo porque você não está produzindo a música que você quer. Mas isso só mostra que você realmente se importa com o seu ofício e você se preocupa com a música que você está criando. Mas eu acho que é realmente importante lembrar disso, se você pensar em seu artista favorito, agora, eu garanto que eles terão tido centenas, se não milhares de músicas que eles escreveram que eles odeiam. Mas para escrever aquelas músicas realmente especiais, eles tiveram que passar pelas más primeiro. Toda vez que você escreve uma música que você não gosta, você vai crescer e se adaptar e aprender com isso. Mas a chave é continuar. Não deixe que uma ou duas dessas músicas ruins te
derrubem e faça você pensar que não é um bom artista. Eu acho que a chave para pregar essa idéia é apenas se divertir com o processo. Você não precisa levar isso a sério. Outra coisa com a qual eu realmente me esforcei,
é que toda vez que eu sentava no meu laptop ou tablet, eu sinto que eu preciso criar essa música incrível, e se eu não o fizesse, eu ia ficar desapontado. Mas muitas das faixas favoritas que eu realmente escrevi, vieram de apenas mexer em torno. Conectei meu teclado e encontrei três notas que eu gosto do som, jogar um efeito estranho lá. Mesmo agora, só estou brincando e me divertindo. Fiz algumas das minhas músicas favoritas. Acho que já chega de waffle por hoje. Por favor, deixe-me saber se você gostaria de aprender um pouco mais sobre alguns. Eu absolutamente adoro fazer esses cursos e eu realmente quero ser guiado pelo que vocês gostariam de ver e o que vocês gostariam de aprender. Por favor, sinta-se livre para me enviar uma mensagem no Instagram ou me dar um e-mail, ou acompanhar as discussões da aula. Uma última coisinha. Você já fez tanto por mim observando o curso até agora. Cada minuto realmente faz grande diferença. Eu realmente espero que você tenha gostado e você tenha tirado um monte de boas informações dele. Uma revisão é absolutamente enorme para pessoas como eu fazendo cursos on-line, isso realmente me ajuda. Sou genuinamente apaixonado por ensinar e fazer coisas como música o mais acessíveis e fáceis possível para as pessoas. Saber que estou fazendo isso, não só me faz sentir muito bem, mas também me aponta na direção certa para fazer mais cursos e ajudar as pessoas ainda mais. Se tiver tempo, agradeceria muito. Obrigado antecipadamente se você fez isso. Obrigado mais uma vez, pessoal. Foi um prazer fazer este curso e eu, como seu professor, te pego em breve.