Transcripts
1. Estelle Introduction : Hi guys. My name's Estelle. I've been working in the fashion industry for over 15 years, working as a creative pattern quarter and fashion designer on couture, High Street and high-end markets. And if there's one thing I could tell you about my experience isn't as glamorous as many envisage. It's a quick pace work environment and you'll often be working to tight timescales. So it's essentially you can produce accurate and detailed cards. I've put this course together to enable you to learn the basic functions of Adobe Illustrator. And by the end of this course, you should have created simple calves with detail M, and you'll feel more confident using the illustrator package. I look forward to working alongside you. And I really hope you're gonna enjoy this course. And if you have any questions, please feel free to send me a message. I really hope you enjoy it. Thanks a lot.
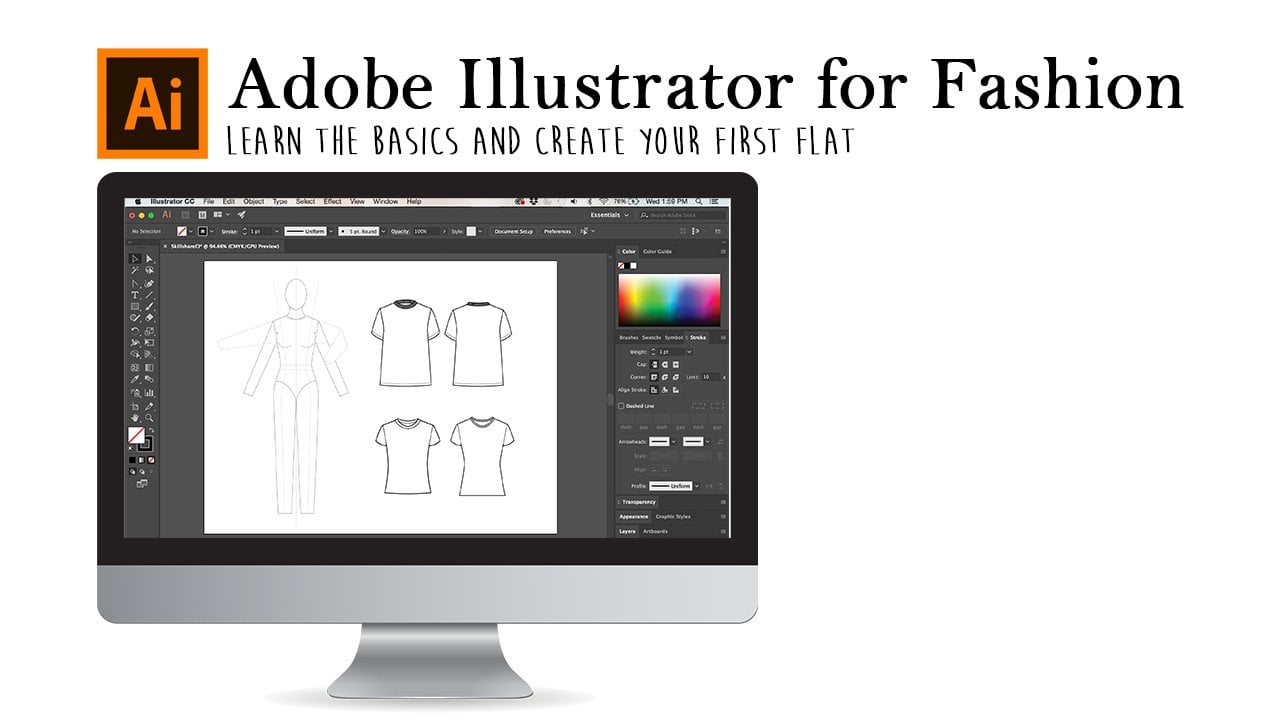
2. Introduction to Adobe Illustrator: Thanks for joining me my Beginners Course for fashion design using Adobe Illustrator. In this tutorial, I'm going to go over the basics really illustrates program and some of its features. So let's get started. First, you need to open your Adobe Creative Cloud and then open your illustrates up. Okay, so we're going to create a new document. So select, create new on the left side of your page. And this will open up new windows, new document. We're going to select the A4 option. And as you can see, we have the option of portrait or landscape. There's also two column outs, RGB and CMYK. So because we're doing mainly printed work, I always select CMYK. Okay, you've now opened a new document to take a look at the functions that you have available tier, the top bar is the command bar. And as you can see, this axis is all the other functions of illustrator. If we select Edit, for example, you can see it brings up a list of options. We can use. Some of these have f function which is called the SHOFCO. These are good to know and make working and illustrate quicker, but don't worry about these at the minute. As you went through a stomata, you'll soon pick these up and it'll become instinctual to use them. On the left of the page, you'll find the toolbar. Take look all these tools. Some of them have got embedded tools, and these are visualized by a triangle symbol found in the lower right corner of the tool icons. We click on these, you can see the extra tools that are embedded in there. Okay, so our workspaces opened in the essential mode. I'll change it to the printed, improve them so you can see how the pallets on the right have altered. The workspace can be altered to suit your requirements. And there are eruptions for pre-set workspaces and go into work in the central classic workspace. At this stage, we just want to use the pallets that we need. So let's start get integrates with some of the tools. Let's start by creating some Shapes. I'm going to select the rectangle to quickly create some shapes, not worrying too much about what they are. At this stage. With the Rectangle tool selected, move across to your board and single click. Move the mouse away, precedent dragging. And when you're happy with the size, released the mouse and you've created the first rectangle. Repeat until you've made to rectangle shapes. So we're going to have a look at some of the other tools, the zoom and the stroke infile. Here we have our fill, which are the minute is white and upstroke is block. Both of these can be changed and even switched around. If we come over to our palace and look at the stroke volume value, we can see it's set at one. To show you the effects, I'm going to change a stroke value to gray and select the zoom tool and zoom in. And you can see clearly how the depth of the stroke because altered. Each of these objects can now be moved by selecting the top black arrow on the left-hand side of the toolbar, which is called the selection tool. Select the object, the light to move and move it around the board accordingly. When using Illustrator, it is important to understand about layers. Layers can be ordered on the board and can be put in front or behind or the layers. To do this, we'll need to open our layers palette on the right-hand side. And here you will see you, you're created laze. To alter the order we can select from the last pellet and drag to re-position. They are also quick ways to do this process by using short quotes. Okay, so I'm just going to zoom out, select the tool, which is shown as a magnifying glass on the left-hand side of the toolbar. Click the options on your keyboard and click anywhere on your board. We'll zoom out. And finally, we're just gonna have a quick look at your viewing modes. So by default, you always work in a preview mode which shows all the objects you've created in full color. And there is also an outline mode which shows all the lines that created without the stroke or fail to quickly access the outline mode, press the command and why on your keyboard and comeback to your preview mode Command and why again on your keyboard will return you to preview mode. I hope you've enjoyed this course and I'll see you on the next one.
3. Workspace: Hello and welcome to my beginner's guide to cut design using Adobe Illustrator. In this tutorial, I'm going to explain about setting up your workspace. I've created a new document and my workspace is opened in the Essentials classic. This provides me with the basic tools and palates I require to change the settings to a different workspace. We can come to the top of our screen and select the down arrow, which will bring up other options. We can also reset back to the essential classic if any changes have been made. We can also access these options by coming to the command bar, selecting window and workspace. And as you can see, we have the same options available in the Windows command bar. We can also want o takeoff other actions which will open further pallets or close them to adapt our workspace further, we can come to the command bar, select Illustrator Preferences. And he opens some further options which we can change to suit our requirements. Our palettes may be open but aren't always show in all the features available. For example, we can see the stroke and the weight value, but none of the other features are show him. They are there. They've just been condensed. To open them, click on the Jew arrows to the left of the palate and click until you are able to see all your available options. And as you can see, this works on other Palace where there are dual arose. Make yourself aware of the palettes that you have opened and don't be afraid, select and explore the functions available here. These can always be closed or simply reset the word space. I hope you've enjoyed this tutorial and I'll see you on the next one.
4. Saving your work: Hello and welcome to my beginner's guide for CAD design using Adobe Illustrator. In this tutorial, I'm going to show you how to save your work. We're going to start by creating a new airport. Here, I'm selecting the A4 option, portrait mode and CMYK color mode. And I'm going to alter the title in the preset details. Ok, so a page is opened, and let's assume we've created our artwork and we're now ready to save. We're going to go to the file in the top command bar, open and select Save. This will open a window, given as the options disable our work in the Adobe Cloud or on our computer. You'll need to select one of these options and new work will be saved. Hope you've enjoyed this class. I'll see you on the next one.
5. Creating and manipulating object and layers in Adobe Illustrator: Hello and welcome to my beginner's guide to cut design for Adobe Illustrator. In this tutorial, I'm going to get you used to use in more of the tools. We'll be using the readymade tools and will be manipulating these to alter the shapes. Will also be used in the fill and stroke tools, adding color and odour in our labs. So let's get started by creating some Shapes. I'm going to select the Rectangle tool and clicking and dragging. I'm going to create my first shape. I'll repeat this until I have two rectangles. Okay, so we're now going to look at the fill in stroke on the open toolbar, you should have an option for fill and stroke. Goto stroke value an altar to ten. As you can see, the stroke, which is the outline around the shape has increased. I'm now going to go to my left hand toolbar where I can find my fill and stroke. And I'm going to alter the stroke color from black to green. And from pair, we can go to us watch Library on the right-hand side of the screen, we can select an altar to any color we require. This can also be done for the Philip, the shape. And if we come across to the left hand toolbar and select the fail and showing it is at the front of the stroke. We can now go to our swatches and select a colour to fail. Within the shape tools, we have a selection of shapes to choose from. If we select the rectangle tool from the tool bar and click on the embedded tool options. We can now access the additional tools. I'm going to select the Star Tool, and I'm also going to alter the fill to pink and the stroke to blow creates a star-shaped anywhere on your outboard. And you should see the new color options by selecting the bacteria from the tool bar and selecting the star, I'm able to move it around the outboard. If we click on the fill and stroke showing the original settings of white and black are star will revert back to the white fill and black stoke settings and the stroke because also reduce down back to warm. The stroke can fill can be quickly switched by clicking on the arrows located slightly to the right of the fill and stroke tool. And as you can see, the file's now black. And as the stroke is white, we are unable to see it as we are working on a white canvas. Ok, so I'll quickly change them back so you can see the process again. Now we have some brightly colored objects. It will make it easier to understand about the layers, an order in them. I'm going to move the star in front of the two rectangles and select the code rectangle. We have options of moving our layers. We can either select, rearrange in our layers palette or we can transform them by selecting object from the top command bar and verbose lectin arrange. Here we have the option to bring things forwards or send them backwards. And each of these has Ashoka as shown next to the command. Okay, so I'm going to reposition the rectangle to be in front of the star. And we'll take another look at rearrange near layers by using the last pallet. If we come across to the last pallet, I'll reposition my legs again by selecting the star layer and dragging it to the bottom. Each of the other layers is now in front. We're now going to look at the direct selection tool and the outline mode. If we select the white area from the toolbar on your left and click on a point of the star. We can see it is showing up all the points that are making star-shaped. These are called anchor points if we move into our outline mode by pressing command and why we can see the anchor points without any of the fill and stroke. With the direct selection tool, we are able to adjust the anchor points by selecting a move in them. I'll revert back to our preview mode by pressing command and why. He can see how the shape has been altered more clear leg to revert back to the stars original shape, press command and zed. We can also select multiple anchor points by selecting the up-arrow key on your keyboard and selecting the required anchor points, manipulating the shape accordingly, again by pressing command and said, this will revert you back to original shape. When in this lecture mode, you'll see your object has what is called a bounding box. Using this, we can move our object and even turn it on the page. I hope you've enjoyed this course and I'll see you on the next one.
6. Duplicating objects: Hello and welcome to my beginner's guide to cut design using Adobe Illustrator. In this tutorial, I'm going to show you how to duplicate your objects. Okay, so firstly, you need to create a shape and make sure it's selected with the black arrow from the toolbar on the left. Move it into position. Now hold down the Alt key and release your mouse. Next, Lee released the ALT key. Repeat until you have as many of the objects is you require. I'm also using a technique that allows me to constrain my moves. And Sherman, the object moves perfectly in a horizontal or vertical way, which is adjacent to my previous object. To perform in this way, you need to also press the Shift key on your keyboard in addition to hold in the old key on your keyboard, I hope you enjoyed this tutorial and I'll see you on the next one.
7. Creating Text: Hello and welcome to my beginner's guide to cut design using Adobe Illustrator. In this tutorial, I'm going to show you how to use the type tool to create text. Come across to you toolbar and select the Type tool indicated with a T. Here you can see there are imbedded tools that were also able to use. But to keep it simple, we'll just select the Type tool. Click anywhere on your canvas. And as you can see, we have created a place holder to start writing our texts. As soon as we start typing. This will replace the placeholder type in any texts you'd like to select the black arrow key, and you can now move the texts as with all the other objects in the pallets of Bravar Canvas, we have options that allow us to alter our fund, resize and also alter the cooler. Click on the character, and as you can see, there are many funds available to choose from. If you hover over these, you can see the text is changed him. We also have the option to change our texts from regular it italic or bold. And again, as you hover over these, you can see how the text changes. The sizing can also be altered and as previously, hovering over the options will show you the changes. You can also import your own size m by clicking in the box and type in the required size. The color of the text can also easily be changed by coming across to the Swatch palette and choosing from the available color options. I hope you've enjoyed this tutorial and I'll see you on the next one.
8. Using the Pen Tool: Hello and welcome to my beginner's guide to cut design using Adobe Illustrator. In this tutorial, we are going to look at the pen tool. The Pen tool can be tricky to use, especially when creating curves. So the more you can practice, the better you obey, and you'll soon have it mastered. With a new document. Opened, click on the arrow on your pentose. Open up your embedded tool options. Here you can see you have the pen tool, the app, the anchor point to delete and point tool. And the anchor point tool. When using the pen tool, it's important to understand about the stroke and fail. And it's always good practice to check these before starting to use the pen tool. With the pen tool, you are able to create open and closed objects. Closed objects are good for the garment shape. An open objects can be used for details because the file's why and so is all converse. If the file's set of why we aren't going to see it. And this can create problems. So we need to make sure our Phil has no fill. We can do this by making sure we have the Fill box selected. Select in the box with a red line through it. This indicates there is a no fail. So we've now got a black stroke and unknown cola fail. So we can get started using the pen tool. Move over to Canvas and click unreleased. Move across and click unreleased. Move down, click on release, and across, Crick and release. And move up to your first anchor point. And when the Pen tool has a circle to the right click and release, this indicates that you have a closed shape. You've now created your first closed shape. Don't worry if you're shaped doesn't look like mine. As I use the constrain action, which helps to draw straight lines vertically and horizontally. And we'll look at this a little bit further in this session. To alter the shape. Select the white arrow, the direct selection tool, and click on one of the anchor points and alter accordingly to revert back to its original shape, simply press command runs ad on your keyboard. Ok, so we're now going to take a quick look at creating curves with the pen tool selected single click on your canvas, moved towards you second anchor point and press and drag using the mouse. Without released them. You should see a set of curve handles appear. As long as the mouse button is pressed down, you are in control of the curve and can still shape it. If I want to now create a straight line, we will need to click on the anchor point, and this will close one of the curve handles, but keep the candle for the curve we've already created. By pressing the Shift key, I can constrain my line. Okay, so I'm going to create another curve shape. So while precedent drag my mouse again creating handles. And from this I'll create another curve, but this time I'll not press and drag. So no handles are created. Making MAN next shape a straight line until I click and press and drag and create a new curve. So I'll close the curve for my next anchor point by clicking on the last stank point. And now I can click and create a straight line when you finish creating your shape. If you hold the Option key on your keyboard and click anywhere on the canvas, this will finish your selection. You are now free to open up any of the tools you may require or further create some other shapes by selecting the white arrow in your toolbar, we can now alter the shape by clicking on any of the anchor points and move in them directly. Or we can even alter the shape of the curves by clicking on the handles and move in them are objects is also movable around the canvas by selecting it with the black arrow tool. Okay, so I'm going to show you how to create shapes by using the constrain action. So by holding the shift key, you can see that the lines are created in Angular moves. Holding down the Shift key, click and move your mouse around the canvas and click away. Great some shapes. As I said earlier, you'll get better with practice to take some time to get used to using the pen tool and have a play around creating straight and curved lines. I hope you've enjoyed this tutorial and I'll see you on the next one.
9. Pen Tool Adding and deleting anchor points and creating curves: Hello and welcome to my Beginners Course for cat design using Adobe Illustrator. In this tutorial, we are going to be working with the pen tool to add and delete anchor points will also be converted into curves. We'll start by creating a rectangle shape. Select the Rectangle tool for me, toolbar and click and drag on your canvas to create a rectangle. Here you can see we have created a rectangle that has full rank points with one in each corner. Move across to your pen tool and open the embedded tools, selecting the anchor point tool, moving back to rectangle shape, hover over the Created Lines and clicking on the line, add an anchor point. And as you can see, I've added an extra three anchor points. Now using the y Tara tool, we can now select any of these anchor points. And when one is selected, we can nudge it with the arrow keys on your keyboard or move it with the mouse and to revert back to the original shape, press Control and Zed as many times as needed. Now we go into delete anchor points. So go to the Pen tool, click on the embedded Tools and select the delete anchor point tool. Come across TO shape and select the anchor points to delete. For this exercise, I'm going to leave the anchor point which I've created on the left-hand side. Now with the white arrow tool selected, click on the anchor point and drag it outwards until you have created a pointed shape. And I come across to the pen tool and select the anchor point tool. And showing you select the anchor point with the pointed shape, hold and drag. Now this will create a curve shape which now has handles. Repeat again on another rank point. Remembering to click and drag to create the curve and the handles. By right-clicking on the anchor point, your shape will revert back to its straight lines. I hope you've enjoyed this tutorial and I'll see you on the next one.
10. Creating your first shape Vest Shape: Hello and welcome to my beginner's guide to CAD design using Adobe Illustrator. I'm happy to say that you're now ready to move on to your first fashions sketch. We're going to start by creating a simple vest shape. And in the next tutorial, I'll show you how to include a top stitch detail. Start by opening the file attached to this lesson. I've named it vest first shape. This template will help when creating the lines and curves. If you prefer to work without it, then simply open a new document and title it best-first shape. Ok, so we need to start by setting up our workspace by creating a center front line. Go to the view in the top command menu, scroll down until you come to ruler. Move across to show rulers and select. As you can see, you now have rulers at the top inside of your workspace. Moving arrow within the left side ruler area, press and drag. Drag the ruler to roughly the center of the best shape and release. You now have a cyan colored line down the center of your art work. To make sure it is in line. Select the Fest shaped with a backer at all, and moving with the mouse or with the arrow keys on your keyboard, move. So the bounding box is in the center of the new ruler line. Now we need to look the best shaped layer so it doesn't cause any problems with your new shape. Come across violas palette and click on the upper left in the space between the I and the less title. This lab is now locked so we are unable to edit or move it. We're going to start creating our new shape. So we'll need a new lab. Come down to the last pallet, and at the bottom of this you'll have an option to create a new layer indicated with a box with a plus symbol inside it. Click on this, and you've created a new layer. We're going to rename this lead vest. Double-click on the lead title and alter the title. Check that your stroke is set to black and that you have no fill selected, select the Pen tool and we go into get started with creating the shape. Coming across to your canvas and click on the center front line at the base of the neck line. Ignore the curved neck line for now and move across to the top shoulder point, clicking and release him. Move across to the neck shoulder point and click and release. This time we're going to move down to the under arm and click and drag, which will create a curve with handles. Because the next line is straight, we need to close the last handle. Click on the anchor point and this will close it and keep the curve we've created. Move down to the waist area and click and drag to create a line with a slight curve. Click again on the anchor point, close lost handle, and move down to the ham line, clicking and dragging to create a curve. Again, we need a straight line. So we'll close the last handle and will move to the center front holding the Shift key to create a horizontal line. We'll click unreleased. I'm going to show you how to create a mirror image of your shape to create a whole shape. So we finished using the pen tool. If you hold down the Option key and click anywhere on your Canvas, this will finish your pen selection. You now have a half best shape made up of anchor points. Each of these anchor points can now be altered and moved. And by using the curve handles, we can adjust the curve lines. You may need to make some adjustments to your shape. Tried to make it as close as you can to the template. Again, ignoring the neckline For now, we need to make sure that our first and last anchor points are in line with one another. Select to white Arbor tool. Click on the first anchor point at the neckline and holding the shift key, click on the last tank point at the headline. Go to your command bar, Select Object, path, and average. This will bring up a new window. And as we weren't taught to points to meet vertically, we are going to select vertical and click OK. You may not notice any difference, but we now know for sure that they are in line with one another. So like the shape with the black arrow tool and Chrome across to the tool bar to select the Reflect tool. This tool is embedded within the rotate tool. The Reflect tool puts a target icon in the center of your shape. We need to move this target to the center front of our shape, which is the ruler line we have created earlier, tried to put this as close to the ruler as possible. Now holding your mouse moved to the opposite side of your canvas. You can see that this is moving your shape. We need to copy unconstrained the shape. So by holding the Shift and all keys and move it into position, you have now created a copy on the opposite side of the page. So what the minute, these are two shapes. We need to make sure that they are just one shape. To do this, select the white arrow tool and click and drag outside of the shape at the Center for neckline. This will select both of the shapes and keypoints. And as you can see, they aren't meeting in the middle. So we'll firstly need to average the anchor points as we did earlier in the tutorial. The quick key for this MOOC is depressed command, an old INJ on your keyboard. And this time we need to select both. As you can see, that moved to meet at the same point. We now need to join both the points. And we do this by pressing command and Jay on our keyboard, the shape also needs joined in it, the ham. So we'll move down to the hem center front anchor points and repeat the process of averaging and then join him. The shape is now one object. And as you can see, we're able to move it around the board at the minute or neckline is pointed. And we want to change it into a curved neck line. Come across TO pen tool and select the anchor point tool. Click on the center of her neck line and point, and click and drag. Your shape should now be changing into a curve line. Hold the Shift key to keep us move controlled curve. I hope you've enjoyed this tutorial and I'll see you on the next one where we create some details.
11. Creating your first shape Vest Details Layer: Hello and welcome to my beginner's guide to cut design using Adobe Illustrator. This is the second tutorial in creating your first fashion sketch. And in this tutorial we're going to add the detail lab, creating top stitch in for the vest. We now have our best shape finished and we can start to add the details law. It's important to be organized with the allies when using Illustrator. So for the details lab, we'll create a new layer. Click on the Create new lab and change a name by double-clicking on it and renaming it to details. We're going to use the shape we've already created. So we'll need to make sure we have the vest layer open so we're able to select the anchor points of the shape with the whiteboard tool selected, click on the center from Nightline anchor point and press command and say, which will copy the shape. Select your details, and paste your shaped by pressing command and va. A copy of the neckline has now appeared on the canvas and is held in your details. With the black arrow tool selected, move the new shape position in it, just slightly underneath your existing neckline. And using the white are a tool just at the anchor points and the handles until you have a shape that is equal all round. We now need to change the shape to a dashed line. So we can come across to our strokes window, changing the cap to round cap and selecting the dashed line. We need to input the values. The dash value needs to be out to PT and the gap at two PT. And as you can see, the line is now dash. At this point, you may want to hide the template page. And to do this, go to the Layers window, the template page we'll have opened as layer one. On the left of this you will see an eye symbol. By clicking on the eye symbol, you will laugh, is hidden from the canvas, but still remains within your lair palate. Ok, so we're going to carry on with our top stitch detail by adding up the arm hole, select the vest layer. And with the white arrow, select the underarms, anchor point. Press command ansi to copy and reselect your details. Press command V to paste the copy. As we have selected an anchor point which has two parts coming from it, we have created a shape which we don't need. Simply select the lower anchor point and Delete on your keyboard. You should now be left with the arm hole shape. And that's with the neckline. Move and reposition and change to a dashed line, selecting the round caps and ticking the dashed line. Your settings should still be set at 2 a dash and a 2 gap. Instead of repeating the process on the other arm hall, we're going to use the Reflect tool again. Make sure you've selected the shape with a black arrow tool and select the Reflect tool from the tool bar, your target market to roughly a center Freud position, holding the Shift and Alt key, move the mouse until you've created a new shape on the right side of your shape. You may need to move this into position, will finish by adeno top stitch at the headline, select the best lair. And with the white arrow tool, select the center frozen ham and point. Copy the Shape command NC, and select the details layer and paste the Shape command. And they come across TO stroke layer and change to a round cap and dashed line and move into position. I hope you've enjoyed this tutorial and I look forward to seeing you on the next one.
12. Create a front and back skirt: Hello and welcome to my Adobe Illustrator, cause for cat design. In this tutorial, I'm going to show you how to create front-end Max-Cut shape using a mannequin template. Open the mannequin template that is available to download with this tutorial. The mannequin layer will be locked, so it doesn't affect your new actions. Open a new layer and rename it skirt shape. We're going to be used in the Pentaho. So check, but your stroke is black and the non-physical is selected. Select Japan tool and move across to the canvas. And we'll start off at the center front waste. Hold the Shift key and come across to the side waste. Click to create an anchor point. Move down to the hip point and click and drag to create a curved shape from the waist to the hip. Right-click on the anchor point to remove the last handles as we want to move down and come down to just below the knee and click and drag to create a slightly curved line. Again, we need a straight line. So we'll recollect to remove the last handles, come across to the center front and holding Shift, Click and release our last anchor point. Take a look at the shape you've created and make changes where they are needed. Remember, we only need to make half a shape as we're able to use the Reflect tool to quickly copy it to the opposite side of our page, making sure the skirt is selected. Come across to the Reflect tool and then show your target is positioned at the center front line. Move into position with your mouse files holding the Shift and Alt key amylase in our have to house vitiate that need join him with why territorial selected, click and drag outside of the waistline center front to select the 2.5 and points to the object, select path and average, and click on both. And okay, we also need to join the two points. So again, make sure they're selected, go to objects path and this time join, repeated the center from the hemlines, but this time use the quick keys. So to average will press Command Alt, INJ, and okay. And to join command and j, this will have joined your skirt. You skirt will be now one shape. By herd in the mannequin lag, you can take a better look at the skirt shape and make any adjustments you may require. A fitted skirt like this will require shaping. So we're going to add two dots, which we'll put in a new lab, and we'll call this skirt details. Select the Pen tool will create a showdown shape with a slight curve. And when you happy with the shape, makes sure the shape is selected and user Reflect tool to copy to the opposite side of the skirt. Remembering to move your target to the center front line. The front of this gate is now finished. So we'll move on to make in the back. Create a new layer, renaming it back skirt. We're going to use the shape of the front skirt. So we just need to select the correct, correct layer. And with the Black Heritage, select the shape, press command NC to copy the shape, we select the back skirt layer and press command V to paste the skirt shape. Move it to the side out of the way of your other objects and drag a ruler guide to the center back of the shape. Our labs can be repositioned and it's good practice to keep them in order. Create another layer and call it packs skirt details. For the back of the skirts, I'm going to create to deeper dots using the same pen tool technique as earlier. And I'll make any adjustments to the shape if needed. I'm also going to reuse the Reflect tool again to create the Dart on the opposite side of the skirt. Then using the pen tool, I'm going to put a straight line down the center back, showing the seam line. I'm also going to use this line to create a stitch line next to the scene. So I'll copy the shape by selecting it and holding the Shift and Alt key I can drag to copy and constrain the shape comic Ostia stroke palette and select the dashed line, making sure you have a 2 dash and a 2 gap. And now I'm going to create a vent using a stitch line. Sometimes when using the pen tool you can come across problems. And this is a good example because the stitch line is selected. And I'm wanting to create a shape that goes near this line. When I click on it, instead of creating the point of a new shape, it adds the anchor point to the existing shape. In this instance, you can either de-select, reshape or started to point away from the shape. I'm also going to add stitch in to indicate there is a zip. And if we zoom in, we can take a better look at our details and make amendments as needed. Your design where it will always look more professional. Credential, your details look good. I'm going to finish this skirt by adding a zip Polish shape. Use the pen tool to create a simple shapes indicate the zip polar. As you can see, the dashed line was still selected to change this de-select from the stroke palette. We're still able to see the stitch line which is underneath our news it. So we need to get the shape or white fill and then reposition our objects. The final thing we need to do is glue par layers, so they will move as one object. To do this, use the selection tool and coming outside of the black skirt, select all of the shape, making sure not to overlap your selection with the front skirt. Go to object, unselect group. Your shape and details are now grouped together and can be moved as one shape. Repeat this for the front sqrt. Now hide the mannequin template and reposition your front and back skirt shapes. And to remove the guides, Go to View guides and Hide Guides. Congratulations, you've now finished a front-end back skirt. I hope you've enjoyed this tutorial and I'll see you on the next one.
13. Button and Button Hole: Hello and welcome to my beginner's guide to cut design using Adobe Illustrator. In this tutorial, we'll be creating a button and a button hole. Open a new document and name it button and Button Hall. Come across to your last pallet and rename your New Layer two button. Select the ellipse tool and have your fill set wide on a black stroke. Now on your canvas, create an ellipse shape. Copy the shape by holding the Shift and options K and drag and release. Rescale holding the shift key to constrain to a smaller shape. Move into position in the center of your fish shape. These shapes on quiet cities centrally to one another. And to make sure they do, we can use a function which will align both shapes centrally, come up to the top palette and select Horizontal Align center. Both shapes are now aligned to the center point I want to put to take a stroke on the outer edge of the button. So I'm going to change the fill to three PTA. And I'm going to create two button holes, creating a smallest circle shape anywhere on the board. And I'm going to change the strove to know 0.5 PTA. I'll copy the shape holding Shift and options K and copy and constraint to the left, which means both shapes are aligned and with them both selected are moved them into position so that the rounded rectangle tool and create a shape in between the button holes to represent the thread and move into position. Okay, we now have our button. We want to create a garment button hole. For this, we'll use a rounded rectangle tool and create a shape. And for this shape will set to a non-fatal, come up to your command bar, select effect, distort and transform, and then zig zag. This will open a window and your shape should have changed. If not, make sure your preview is selected. Make sure absolute is selected, and your points are smooth. And move the sliders for the sizes and enriches per segment until you are happy that you are shaped now looks like a button Hall, as this shape was our last action. It is at the front of all our other objects. So we need to send it to the back. To do this, we can either use quick K, Oh, come to the command bar and select object, arrange, center back. You'll also see the Quick key commands at the side of this function. And as you can see, we can no longer see the ridges which cross with the button moved to reposition if needed. We now need to group all of the objects so that we are able to move them as one object when using the direct selection tool. To do this, click and drag outside of all the selection until all objects are selected. Come to the object Ungroup to duplicate and align, click and drag, hold down the Shift and options K. If you want to duplicate without align in, hold the options key and click and drag. Repeat for third button for making sure the space in his noticeably different. We now go into evenly distribute the buttons. So select all three buttons with the selection tool to U top palace and select Vertical Distribute top are pollutants have now been evenly spaced. We can now move these And even resized by using the bounding box when resizing hold the Shift key to maintain the shapes and proportions. During this tutorial, I've mentioned about quick keys. If you'd like to know more, please take a look at the copy of the Quick Keys which I've listed within the course material. I hope you've enjoyed this tutorial and I'll see you on the next one.
14. Guides & Rulers: Hi guys and welcome to my beginner's guides cut design using Adobe Illustrator is a quick tutorial about Guides and rulers and some problems that may occur. Okay, so I've mentioned how to add rulers and guides in previous tutorials. But I want to quickly show you how to lock the guide so they don't cause any issues when trying to connect and points to access the rulers Go to View. Rulers, show rulers or Command and are pressing command in R gets rid of the rulers and pressing again, they'll return from the rule red. You can drag a guideline horizontally overt clay. Okay, so I'm going to quickly create a shape with a black stroke and no fill and reflect the shape with the Reflect tool, which I've talked about in previous tutorials. Okay, so I'll zoom in so you can see the problem with the minute the pastor to individual shapes and we want to join them together. So we select our selection tool and drag outside of the two anchor points to connect. What is happening here is our guide is also been selected and this creates problems when trying to connect. So what we need to do is lock the guides to do this, go to View guides, look guides, and our guides and our logged and will not interfere with our selection. If you're using a lot of guides, it may be a good idea to actually create a Guides layer which can be locked. I hope you've enjoyed this tutorial and I'll see you on the next one.
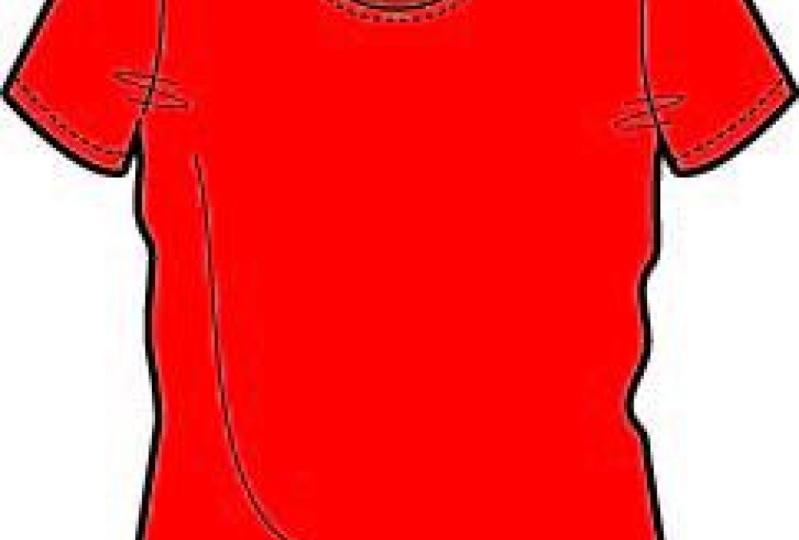
15. T-Shirt (Part 1) : Hi guys, and welcome to my beginner's guide to cut design using Adobe Illustrator. In this tutorial will be used in the mannequin template to create a T-Shirt with stitch detail and color. Start by opening the mannequin template, making sure the Larry's locked and create a new layer name minute T-Shirt. Select Japan tool and check you have a black stroke and a no fail selected. Coming across to the mannequin and starting at the center back neck, create your half T-Shirt shape. Finishing at the center front hemlines. Once you finish making any changes you require with the direct selection tool and with the past selected, select your Reflect tool and drop the marker at the center from guideline. Hold the Option and shift k and copy and constrained to the opposite side, select the direct selection tool, making sure your guides are locked during the shape at the neck and headline with a quick Keys, old and command and j to average and command INJ to join. Now changing that line into a curve line. Using the anchor point tool will add a seam line at the sleeve with a curved path and we'll reflect it to the opposite arm hole. Make sure you've selected the shape with the selection tool first. Now we'll at the stitch line on the sleeve Ham to do this, select the anchor point of the sleeve ham at the syndrom command and C to copy and commanding V to paste. And we don't want this part of the PAF, so we'll select it and delete it. And I come across to stroke palette and change to a 0.5 PET with a rounded cap and a dashed line. A dashed line wants to be a one PTA for both Dash and gap, move into place. And again, we'll reflect to the opposite side. And what we could have done was to actually do the arm hole and also the stitch line. And we could reflected both of these together which would have made it quicker. P, the stitch line for the ham line. And you can either change using the stroke palette or reifi pickup your eyedropper tool and click on the sleeves ditch line. It will copy the effect. Move again into position. Now we need to create a front neck line. Select Japan to create a straight line from the neck edge to a point along the center front. Select and reflect. And we need to join this. So we'll Command and alt and j to average. And command and j to join them will change the anchor point into a curved paths like in the anchor point tool. Holding the shift key to constrain the curve, we need to add the stitch line to the neck, repeat by copy and a moving into place with the anchor points in handles for the curves and change in the stroke into a dashed line. And now we'll add a color. So make sure you T-Shirts shape is selected. And make sure you fill palette is in front of the stroke. Come across vehicles and select any fill color. In the next tutorial, I'm going to show you how to add some further details to your T-Shirt. I hope you've enjoyed this tutorial and I'll see you on the next one.
16. T-Shirt (Part 2) Further Details: Hi guys, welcome back to the second part of the TCGA tutorial. In this course, I'll show you how to use the pencil tool to alter your shape. Use a pen and curve tool to create fabric movement details. And we'll use a shape building tool to separate your shape for re-coloring. Will also create an outline around your T-Shirt. Okay, so we're gonna get started using the pencil tool. This tool is embedded within your shop and a tool in your tool bar. Select the pencil tool hover over to this side, same of the T-shaped. And you'll see the cursor changes from an x to a polos. The plus indicates that your over your path and you are able to make changes, create a shape along the path. And when you're finished, you will see your path is now altered. Next, we'll use the curvature tool to add some movement details at the under arm. This is a tool you may not have used yet. So it may be a good idea to have a play around with this to get used to how it works. Troponin UNC point anywhere on your onboard and come below when drop another anchor point. At this time it looks like it's creating a straight line. When we come back hook to authored anchor point position, you can see the path starts changing into a curve shape. Ok, so drop your final anchor point and select the shape. We can now change this loop by using the profile within the stroke pallor. And we have a few options to choose from. The one I've selected gives a softer edge. So I'll resize and place in position and reflect it to the opposite side. It also want to give my t-shirt a feel of movement in the fabric. And to do this, I'll select the Pen tool and create a curve shape on the body of the T-Shirt. And again, I'm going to change the profile and reposition until I'm happy. The profile is a great tool for adding differential thickness to your stroke. Okay, so next I want to change the color of the baton egg so there is a contrasting color. And to do this, I'll need to change the bottleneck into a single shape. And we have a great tool for doing this. And the Minotaur t-shirt and details are all separate. So we need to join them altogether. To quickly do this, press command in a to select all, and command and G to group all selected. Your t-shirt and details are now all grouped and can be moved as one, come across Kyoto palette and select the shape building tool. And as you can see, as you move across your T-shirt, you can see how it is highlighting areas that can be separated. Click within the back neck. Now with your selection tool, select the bottleneck by double-clicking it. This will put us into an isolation mode where we are only able to edit the selected areas to quickly change the color, come down to your fill color and click on it. This will open a color picker window where we can choose a cooler which can be darker or lighter than the original color. As it's back, neck, I'll change to a dark shade and it doesn't need to be too far away from the original color. You can now see the colors altered to the darker shades selected. And finally, I want to show you how to add an outline stroke to your T-shirt. First we'll hide the mannequin template to create the outline stroke or selection must be grouped, which is something we did earlier. Make sure you have the T-shirt selected. We need to use the Appearance palette. If it's not open, go to the windows and select a parents in the pallet on the right hand side, open the options and select at New stroke, select the stroke to four PTA with around cap and smooth corners to get rid of any strange edges. Now at the minute, are T-Shirt isn't looking good as it's put four-stroke onto the whole selection. To alter this, we need to drag the new stroke to be repositioned below our contents box. Our content is now in front and we are left with an outline stroke on Artesia. And they have a detailed t share with color and movement and an outline stroke. I hope you've enjoyed this course and you've had fun creating your cats. Be sure to check out my other courses and I hope you have a great day.
 Estelle Pearce, Fashion Designer, Pattern Cutter