Transcripts
1. Introduction: Do you want to
learn texturing in substance painter from scratch? Then I welcome you
to this new course, Complete Guide to
Substance Painter 2022, where we will be going through
the complete process of learning substance painter
from a business perspective. And we will be also working
on three complete projects. Hello everyone. My name is Andy Keith Robert, and I will be your
instructor for this course. This course is divided into seven different sections and has over ten hours of
video material. You will be provided with all the resource files that are required to proceed
with the course, including the substance
painter files, textures, alphas, everything. We will go over all the
important tools and concepts and Substance Painter together and nothing will be skipped. This course is aimed
at complete beginners. So the only thing you
need for discourses, a copy of substance painter. Even if you do not have
substance painter, instead of buying it, you can get an educational
license if you're a student and get it
completely for free. Or you can also get
a trial version for 30 days to try it out. Before buying, we will
go over each and every step in this course together
and nothing will be skipped. The course does not
have any kind of time lapses so that you can
follow every step easily. In the first section,
we will start by focusing on learning the
basics of Substance Painter, like the UI basics
and navigation. We will also learn about the different windows
and functions. In the second section, we
will learn how we can import our model from the 3D program
to substance painter. Learn to set up a new project
in Substance Painter. We will also learn
to bake mesh maps. That is a very important
part of substance painter. That 3D program that I
will be using is Blender, but it is completely optional as you can do the same stuff with any other 3D modeling
package like Maya or max, so you can use anything. Also, the course is created in such a way that you can avoid all this stuff directly and only focus on the texturing
part in substance painter. Third section is the most
important part of our course, as we will be learning all about the important tools and
concepts of Substance Painter, we will go over the
basics of painting, learn about several types
of layers and tools. We will also learn things
like masking, smart mask, generate a smart materials, several types of projections
and a lot of cool stuff. In the fourth section,
after we are comfortable with all the tools and options
and Substance Painter, we will finally start working on a project that is our
fire extinguisher model. We will learn to texture this
model from start to finish. We will use the functions
and concepts that we learned in Section three
over here and apply it in, in an actual project, we will create several types of realistic materials
like painted metal, iron, rubber,
plastic, glass, etc. We will learn how we can
add things like dust, dirt, color variation,
etcetera, what textures. We will also learn
about the opacity map that will help us in
creating a glass material. At last, we will
be learning to add stickers to our model to
give it that final edition, fifth section, we will be learning to export
the textures that we created from Substance
Painter for different programs. In this course, I will
be showing you how we can export textures
from Painter, blender, and Unreal Engine. But the process
remains pretty much the same for any other software. Also, I will also be showing you how we can set
up those textures properly in Blender and Unreal Engine so that everything
is up and running. In the sixth section
of the course, like the fire
extinguisher model. This time we will be completely texturing at real model
from start to finish. We will be learning
how we can use some of our materials and turn
them into smart materials. We will also learn to
apply symmetry on to our model and learn to
paint height information. We will also create various
materials and at the end, I had some alphas and stickers
to finalize our textures. In the seventh section, that is the last
section of our course. This section is for
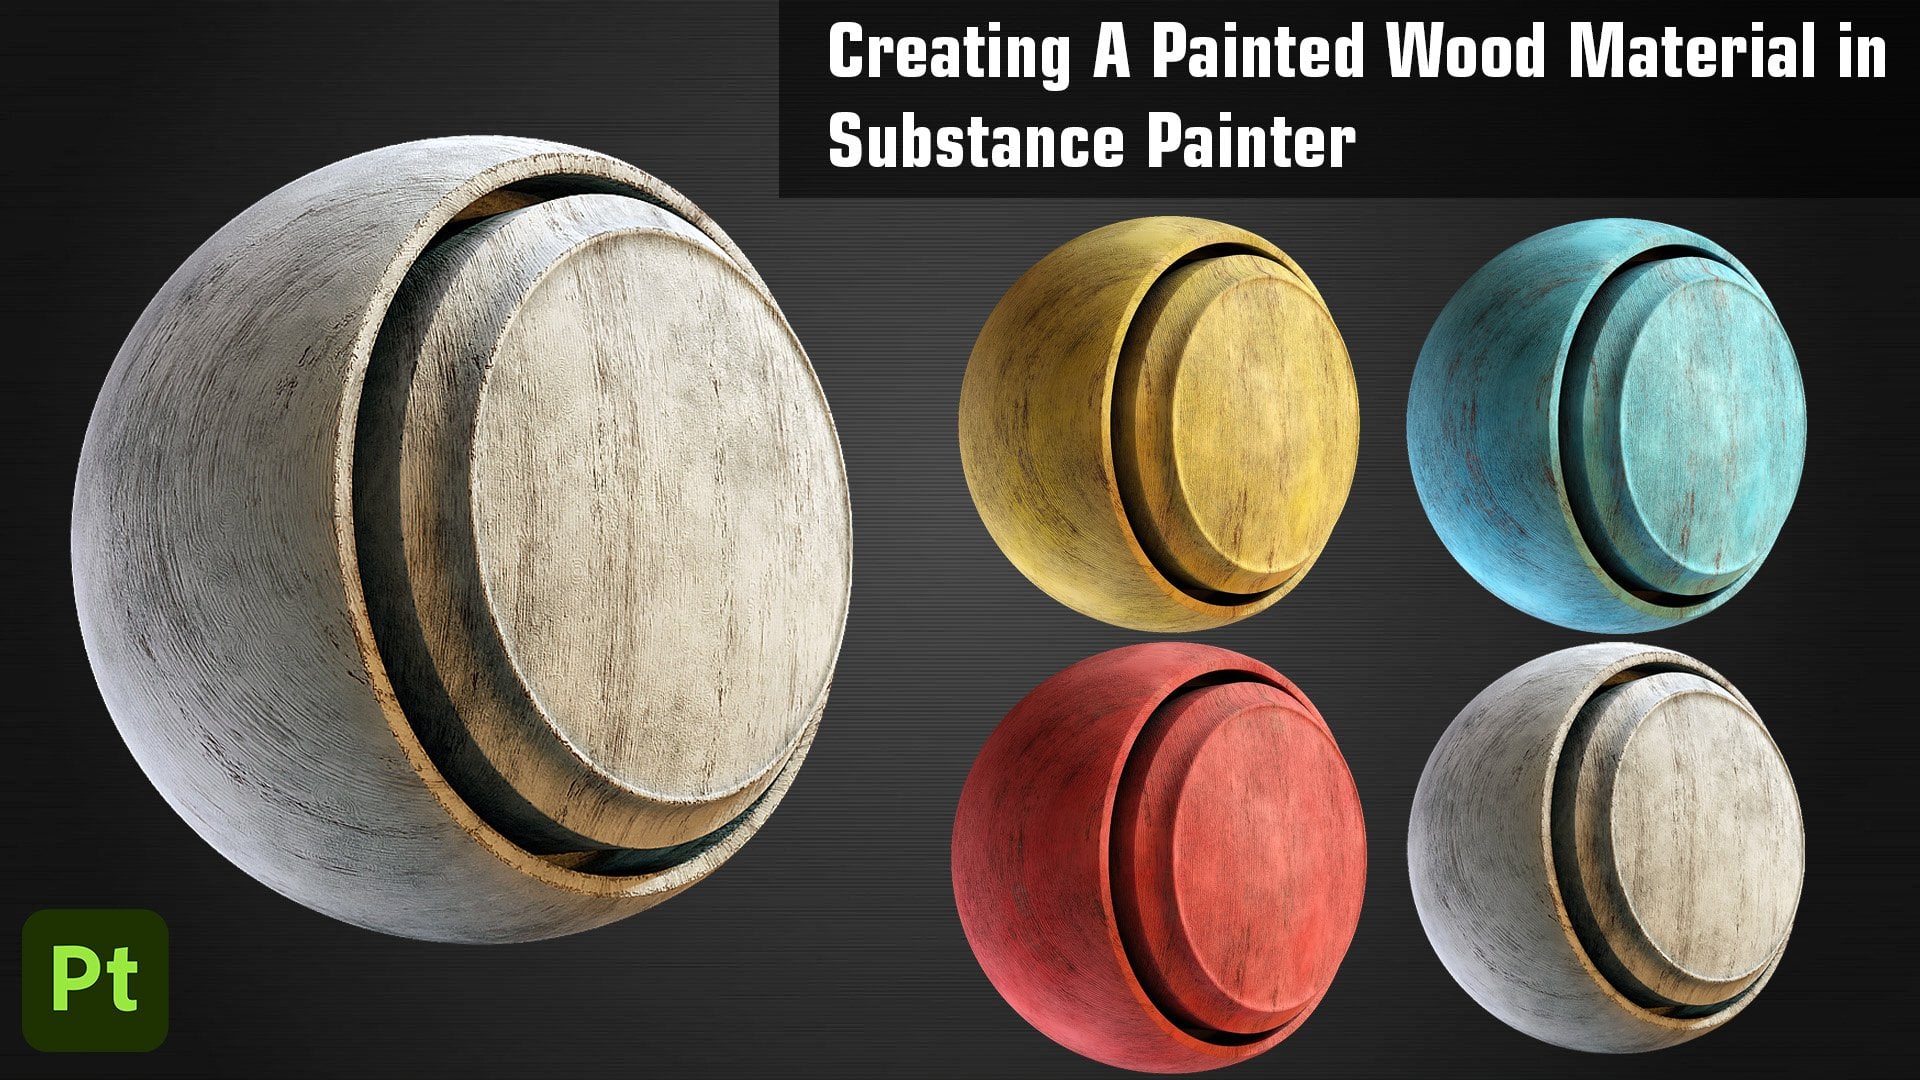
all the bonus content, we will learn to create a realistic wood
material and texture. This table completely
topics that I was unable to show you in the main course will be added to this section, like use of the MSF channel, anchor points, baking
what prediction, etc. This section will be
updated for awhile and I will keep on adding
new reduced to this. I will also be open
to suggestions from you all so that I can add even more stuff to this section that
you want to learn. So we will be learning
a lot of things. I hope to see you
there in the course.
2. Viewport Basics: Hello and welcome. This lecture we
will be going over the viewport and UI basics
of socialist painter. So to start, let's close
this welcome window. And if you are starting off substance painter
for the first time, you will find all your
windows placed like this. So for me personally first, I will just rearrange them quickly and show
you how to do it. So it is pretty simple. You can just drag and drop all your windows
whichever way you want. You can just select
them and drag them and place them however you like. For me personally,
I like to place the assets over here at
the bottom, like this. And the properties I
like to place over here. Yep, something like this. So that the layers and a
texture sets settings are more together because we rarely use
the texture sets settings. So it will be like this. Only layers and properties are the ones that are
used the most than the shelf and texture set list we really don't need
much space for, so I can just list them
over here like this. And yeah, I think this layout
works pretty well for me. So if you want to copy that
or you can just follow all the steps that I did and have your layout,
something like this. Or if you want to go
for something else, you can definitely go for it. Also, if you feel like you have messed up your
layout somehow, you then go over
to Window and just select Reset UI and everything
would be back to default. So yeah, so currently we don't have any models are predicting
our substance painter. So just for the
sake of learning, let's open up a sample project. So to open that, you need to go over to File
and select Open Sample. And just open up this
Mi'kmaq sampled reject. Don't worry, I will teach
you how we can import our models and set up our
projects and everything. But for now, just to go over
all the viewport basics, I have opened up
a sample project. As you can see now
everything has popped up in our texture
cyclists in our layers, and also in a property section. But we don't need to worry
about these windows for now. We will go over them
in the next videos. For now, let's focus
on this 3D window. To move around this 3D
window, it is pretty simple. You just need to hold Alt
and use your mouse buttons. So to rotate your
model in 3D window, hold Alt and use your left mouse button
and drag it like this. Rotate your model. You
can use your scroll wheel along with OIT to pan like this. And then you can use Alt and right-click to zoom in or out. Alternatively, you can also zoom in or out using your
scroll wheel like this, just by dragging it up or down. And if you want to pan, you need to hold
Alt and click with your scroll wheel like
this, and then drag it. So early, these are the three
main shortcuts that you need to learn to move around
in Substance Painter window. So make sure to get
comfortable with them. So just hold Alt and use your left mouse
button to rotate. You can use scroll wheel, like right-click the
scroll wheel to pan around your window and
right-click to zoom. I rarely use the alt
plus right-click. I just use my scroll wheel to zoom in or zoom out. Alright? The next thing is, if you are maybe lost in the
window like this, you can just click f. And you can see we will
focus over our model. Just hit F to focus. Alright, so the next thing is if you will hold Alt and Shift, then use your left mouse button. You will snap the camera
in 90 degrees like this. So it is pretty
helpful while working. So just hold Alt and Shift and use your
left mouse button. Snap the camera while rotating. Also, if you would have noticed, if you will click
any of the buttons, like if I hold Alt, you will see this small
window over here which has all the shortcuts
written related to oil. So alt plus left
is camera rotate or plus middle is
camera translate. Similar way if you hold Shift, you will find all
these shortcuts that are related to shift. We will learn all
these shortcuts like one-by-one as the
course progresses. But for now, I'm just telling
you all the shortcuts that you need to not
overwhelm yourself. If you would like hold control, we will find all the
shortcuts related to control. Alright, so now if we will
press F1 on your keyboard, you will find a 2D window
along with these 3D window, which is basically your UV map of the selected texture set. We can also like paint over this 3D window and
also this 2D window. So if you have selected this layer and just
select this paint tool, don't worry, we will go
over all this in detail. But for now, just select this paint tool and
paint like this. You can see we are painting
over here in the 2D window. As soon as we paint
over here in the 3D. Similarly, we can
also paint over here, and it will show up over
here on the 3D window. So you can print
on both of them. The benefit of this 2D window is if you want to stamp
something directly like a sticker on to the UVs
or navy if you want to paint like a straight
line, like this. If we want to know the shortcut for painting a straight line, we just need to hold
Control and Shift. We will go over this later on. Definitely don't
worry about that. If we will press F2 again, you will be back
in the 3D window. So F1 is for 2D window, F2 is for 3D window. F3 is for just for
the 2D window. If you have both opened up, you will press F4 to switch
between both of them. Although I don't see
the use for this, but yeah, it is there. Let's press F2 to come
back to the 3D window. Alternatively, you can also access all these
options from over here. As you can see over here, F1, F2, F3, and F4. You can also like if you want, maybe select 34,
just the 2D window. Go over here and open 3D
in a window like this. I think they use for this is if someone has a two
different monitors, they can place the 2D
window or the 3D window on a separate monitor and then
work over it on there. I personally don't
see a use for this as I just have a
single monitor only. So I will close this, press F1. Also, as you can see,
this particular model is divided up into three
different texture sets. We will learn about texture
sets in the next video. But just to show you guys, if you will select
the body from here, you will see as
soon as I selected, the UVs have changed
to the body. And if I select the base, we will see the UVs are
again change to the base. Now, if I select the body, this time, I can now paint
over here like this. You see, if I select the base, then I can paint over here. Also one more thing, the same shortcuts work over
here in the 2D window also, hold Alt and use your
left mouse button, will rotate it like this. Again, you can
hold Alt and Shift to snap them in proper
90-degree angles. I think that makes it easier. You can again hold Alt and
use your middle mouse button. Just click it to pan around
the window like this. And use your right-click
to zoom in or zoom out, or just use the scroll wheel. The same shortcuts that work in the 3D window also
work in the 2D window. I will select the texture
set, head back again. Now press F2 to come
back into 3D window. Alright, so the next
thing that I want to show you guys is if you will click
over here on this icon, you can switch between the perspective and
orthographic view. Like this. Perspective view is
the view that we will stay most of our time sin. But orthographic view is like
a 2D view for the 3D view. So it sounds kind of confusing,
but it is really not. Let me just
demonstrate it to you. So hold Alt, shift to snap
your camera like this. And now, if it will change from perspective to
orthographic view, you will immediately
see the difference. So this is the orthographic view and this one is the perspective. You can see the base over here. It looks kind of 3D, but as soon as I shift this
to orthographic, it is now completely flat. The whole model is
now completely flat. So the orthographic
view is basically a 2D view for our 3D model. So now you can hold Alt and Shift and then snap like this. And you can see it
is perfectly to D. If you change this
into perspective, you will immediately see the difference between both of them. Again, orthographic view is like very useful when we're stamping stickers onto our model that requires a certain
bit of accuracy. Perspective you can kind of
get a little bit inaccurate. So whenever I am stamping stickers or something like that, I will just move on to
the orthographic view. Also, you can switch
between both of them by pressing F5, F6, like this. Alright? So the last thing that I want
to show you is if you will hold Shift and then
use your right-click, you can move the environment
lighting like this. So this way you can
view your model from all different angles and in a different bit of
lighting while rotating, you can also see the roughness
and everything properly. It is like a nice bit of
a shortcut to remember. So just hold Shift and
use your right-click. Move around the
lighting this way. Alright, so yeah, I think
this much is enough for the basics of the
UI and the viewport. We will continue from here
in the next lecture where we will learn more about all these windows that
are over here. The sheriff, the properties, window layers, texture set, and the texture set list. We will go over everything one-by-one. Thank you
for watching guys. I'll see you in the next one.
3. Texture Set List and Settings: Hello and welcome
to this lecture. We will be going over texture
secularists and Texas and settings in this video,
these two windows. So what is the texture? Same texture set is basically the materials
that are added by your models in the 3D program you're
working like Blender, Maya Max, exit from the
materials that are added by U300 models are converted
to texture sets as soon as you import
them into substance Beta. So to understand this a
little bit more clearly, let me show you by an example. Alright, so here I have
opened a blender and we have this fire extinguisher
model that we will be texturing completely
later on in this course. I will be using a little
bit of blame NetFlow, these foods to show you a
couple of things like how we can import or export
from a 3D program. Who Substance Painter
and things like preparing your model
for Substance Painter. But you can use any 3D
program of your choice, like Maya or math. It does not make a
huge difference. Alright, so let's
check this model. So this model currently has
two different materials. If you select any object and click over here on the
material properties, you will see this
metal material. So this metal material has been applied to few
objects over here. And if you select
this pipeline thing, you will find this rubber
and plastic material which is applied
to these objects. So this model currently has
two different materials, and let's import this model
into substance binder. So you don't really have to
follow my steps right now because I'm just doing this
for explanation purposes. We will go over exporting
models to Substance Painter and setting up projects in the next section in
complete detail. But for now, let's just
quickly see what happens. Alright, so I have created a new project in
Substance Painter and important this fire
extinguisher model into it. Otherwise, just quickly pausing the video because I
forgot to mention the substance files I was using while I was
recording this video. So I am adding this part of the video later on while eating. So to use the substance files
that I did in this chapter, you just need to go into
your resources files folder that was provided
to you with the course. In here you will find
every single thing related to the course that
I'm using in these videos. So even if I forget to mention
something while recording, like I did just now, so make sure to go through
this folder and you will definitely find all the files
that you were looking for. So for this chapter, if you go into the
substance painter files, you will find these
two substance files, fire extinguisher one and
fire extinguisher do. These are the two
substance files that we will be using in this video. Also, if you wish to check out the blender file we were
working on earlier, you can also find it over here in the blender file folder. You will find all the files to the goals in the
resources file folder. Make sure to go
through it properly. All right, now, I have
created a new project in Substance Painter and important this fire extinguisher
model into it. And as soon as you see over here in the texture
set list window, you will find this metal
material and the rubber and plastic material
that we added in Blender appearing
as texture sets. It is pretty easy
to understand that whichever material you
add in new 3D program, they will be converted to the texture sets in
Substance Painter. Alright, so let's look
over this window now. You can turn on and off a
particular texture set. If you want to work
in isolation with this particular texture set only you can disable
the metal one, or you can disable this one. Also conveniently you can
just click over here. So this is the focus mode. If you select this metal texture
set and click over here. All of the texture sets would be disabled automatically
as we just have to. So this one is disabled. And if you click over it
again, it appears back. Also there is a quick
shortcut for this. You can press Alt plus Q. So that is the isolation
mode for the texture set. As soon as you select this, you can see the other
one disappeared. Alright? Also you can click on this icon. So basically if you have multiple texture sets
and you want to just hide them all at once and maybe enabled just
fixing a single one. Or if you want to just select, Show, you can select
from over here. Also you can invert inverted. Basically if one is hidden
and one is visible, if you invert it,
it will just flip. These are the couple
of settings over here. Also, if you double-click
on the texture set, you can also change
the name for it. Maybe we want to change the
name to like painting method. We have updated at
material or texture set to a painted metal so we can just double-click over
it and change the name. Maybe we want to remove the eye and just name
it rubber plastic. Fair, you can do these things. You can also go over here
in the settings section and select the
short descriptions. By doing this, you will see this node description written
under your texture set. You can just double-click
on it and give your texture set
some description. So I'm just Writing anything, you can give it a description
if you want, but I don't think
it is that useful. We can just hide this. Alright, so one more thing
that I want you guys to understand before
adding materials or texture sets onto
your own models is that every texture set has to
be UV unwrapped separately. So what I mean by that is
if you will just press F1, you will see the 2D view, that is the UVs of your
selected texture sets. So currently we are in the
painted metal texture sets. So these are the UVs for
just the painted metal. If you will select the
rubber and plastic one, you will see a
different set of UVs, that is for these
particular objects that have the rubber and
plastic texture said. So make sure you
always UV unwrapped all the objects separately that have separate
Texas x. Alright, so let's take the example
of this model only, although this model
can be easily UV unwrapped on a
single UE will lead. But because this model has
two different texture sets, we need to UV unwrap
them separately. So first began UV unwrap the objects that have the
painted metal texture set. And then we need to UV unwrap the objects that have the
rubber plastic texture same. So we need to UV unwrap
them both separately. But let's see, this
model only had a single material or a single
texture set all over it. We can UV, unwrap it
on a single UV only. So let's just quickly see
how that would work out. I will move back to Blender. Here I have to
click duplicate it, the old fire extinguisher
to create a new one. The difference between both
of them is one of them is the older one only with two different materials
or texture sets, namely the metal and
rubber and plastic one. And this other fire extinguisher only has a single
material or texture set that is fire extinguisher applied to all of its objects. So let me just help you
quickly visualize this. If I go over here in the Viewport Display and
change the color of it. Now, these are the
colors of the materials. So these all objects are purple. That means all of them
have the same material. That is the fire
extinguisher one. And this one is for
the metal material. All these red objects
have the metal material and all these green objects
have the rubber and plastic. But now let's quickly import them into Substance
Painter and let's see. Alright, so now we're here in Substance Painter
and as you can see, we have three different
texture sets. Now, if you enable
and disable them, you can clearly see
what all objects are, the texture sets applied to. Now, if you press
F1 for the 2D view, you can clearly see that for the fire extinguisher
texture sake, if I select the fire
extinguisher texture set, all the UVs are unwrapped
on the same UV layer. While for the metal
and the robotics, you say they are each
on different ones. So I hope my point is clear now, just remember to always UV unwrapped different
texture sets on separate UV because
different texture sets will have different
textures at the end. Okay, so now onto
the next thing. If you have like a lot of
texture sets in your model and it is getting confusing
to select them from the list. There's also a quick
little shortcut to select the texture sets fast. So I will press F2 to
come back in 3D view. So now to use the shortcut, you just need to press
control and OIT. Use your right-click, as
you can see over here also, that control plus Alt plus rightly is for texture,
sex selection. So do use this, just hold
Control and Alt and click over any object using a
right-click like this. As soon as I do
that, you can see the texture set is
selected over here. If I select this object, you will see the metal
texture set is selected, and so on and so forth. So this is a pretty handy
shortcut that you can use when there are a lot of
texture sex in your project. And it is getting
kind of confusing. So you've been Buccleuch
just hold Control and Alt and select the
object that you want to currently paint
on or texture like this. Alright, so the next thing is, let's move on to the texture
sets settings window, if you will click on over here. There are three main tabs. The first one is the
general properties. If you click over here, it is the channels
and the mesh maps. Alright, so let's start
by general properties. As the name suggests, these are the general properties for the particular texture sake, the name, the description,
and the size. So size is pretty important. It is like the output resolution of your particular texture set. So to just quickly show you
how this size option works, I will just drag and drop
a very simple materials. So maybe we can drag
and drop this one. Plastic cables branded drag
and drop it over here. Like this. So currently, the
texture sizes for k, you might have a different one, but for me it is foci I, if I will set this to
a very low number, like 256, you will see
as soon as I do that, the textures are really
blurry because I've reduced the resolution size for this
particular texture set. So now the textures
appear to be very blurry. If I keep on increasing it, you will see the textures get more sharper as soon as
I increase the size. This option is very handy. Sometimes if you're
working in for K and your project is getting
very sluggish or laggy. You can decrease the size
for that particular texture set and Substance Painter
will be like pretty smooth. Again, generally, I
suggest you guys to work in maybe 1024 or 2048,
only known painting. Forgive because it can
get quite sharp in it. I generally like
to work into kick. Also one more thing that
I want to mention is you can use different texture sizes for different texture sets. So if I just drag and
drop it over here, you will see for this
metal texture set, the size is still forking. And for this one, I think
it is reduced to five. You can have different
texture sizes for different texture sets. Alright, so the next
step is your channels. We have multiple various
channels over here. So these are the, what channels are the texture map that will be your final textures
that you can use it like Blender Maya
or Unreal Engine. So we have the base color, the metallic roughness,
normal and height. But as we go further
down the coast, we'll be learning more about various specialized channels and learn how to add and use them. Like for example, if you
want to make something look, then you can click this plus icon and
add the MSF channel. Or maybe you want
to make something or transparent or
semi-transparent, then you will be using
the opacity channel. There are different channels
for specialized things, so we will be learning
that later in the course. Also, there is this
gear icon we can use to change the format
of the particular channel. I don't really think
we will be using that because the default
values work just fine. So next you will
see these couple of options that we will
be going over at a later stage in the
course because we really don't use them at early stages of learning
Substance Painter. Alright, so the
next is mesh maps. That is a really, really important part of
Substance Painter. Whenever we create
a new project, generally the first step that
we need to do is start by baking your mesh maps before even starting the
texturing process. Mesh maps are basically
a set of maps that use receptions painter to perform
various stuff like these. Maps will be used when
we will be using some of the advanced features like
smart mask, smart materials. Later on sections of the course, we start with the
baking process. You just need to click on
this big mesh maps button. And this window will
pop up over here. So we will be going
over the whole process of setting up your project
in Substance Painter, starting in Blender
and learning how to export your model into
Substance Painter, then creating a new project and then finally
making the mesh maps. So we will be covering all
that in the next section. So don't worry, mesh maps
are really important, but not that hard to bake. We just need to click a few
buttons and we will be done. I think this much is
enough for this lecture. We will be going over the layers tab or the Layers
window in the next video. So thanks for watching. I'll see you in the next one.
4. Layers: Hello and welcome guys. Alright, so in
this video we will be going over the Layers window. So let's fire up the sample project that we
were working on earlier. So go over to File Open Sample. And again you will be
using the Mi'kmaq project. So double-click on
it to open it up. Okay. So before starting,
you should know that substance painter works
on a layer based system. That just means we
stack layers on top of each other to keep on adding
details to our material. Like we can start by
adding a base layer, then we added dust
or dirt layer on it. Then we can add a
color variation layer and so on and so forth. It is very similar to
Photoshop in that case. So there are a lot of things and options that are in there
in the Layers window. Like if you click over here, you will see there are a lot of options that we can go through. So obviously we won't be
going over everything that the Layer window
has to offer right now. Because if we get
really confusing, so we will learn
everything in a bit by bit manner so that even
understand everything properly. Alright, so let's start
with some of the basics. First, let's select this
already added basically, and just hit on this delete icon so that you can
remove the layer. So basically we have two
different types of layers. We have a fill layer and we have a paint layer to create
a paint or a field, and you just need to click
on any one of these icons. So this icon is for
the fill layer, and this one is
for a paint layer. If you will click on it, you will see as soon as you do that a fill layer, one is added. So let me show you
the main difference between the fill
layer and the layer. Alright, so as soon as
you click over here, a layer is added to
your layer stack. But you can notice nothing
happened in a model. And the reason for
this is the color and everything is
same as the default. So that's why nothing happened. As you can see,
we have currently in the hair texture set. I click over here and tried to change the
color of the layer. You can see we can easily adjust the color of the
hair texture set. Not only we can
change the color, we can also increase
the metallic value. One is for completely metal
and 0 is for nonmetal. Also, we can increase
the roughness. Roughness is how much
light it reflects. So one is for no reflection and zeros for
complete deflections. As you can see. If you hold Shift and
use your right-click, you can rotate the light
and you can see they are actually reflecting
the environment light. Let's increase the roughness. And the next odd,
normal and height, but we will go over them in a later onstage, not right now. Alright. So this was for failure. And let me show you what
a paint layer does. I will select this
layer and hit Delete. And let's add a paint
layer this time. So now you can see as soon
as you add into paint layer, there are a lot of
properties over here that are related
to the paint layer. If you will add the philia, the properties are
completely different. Let's select the paint
layer this time. And also I will delete
the fill layer. Alright, so the main difference between a paint and affiliates, as soon as you select
the base color and you tried to change
the color of it, you can see nothing happens. And the reason for this is
this is the paint layer. So what do we do
with this red color or all the settings over here? So as soon as you make a change, maybe I said this to metallic,
decrease the roughness. And from over here, select the paintbrush tool and
try to paint over it. You can see this is the main difference between the branch layer and the familiar. With the philia, you
will change the color or the properties of the
complete layer at once. But with the paint layer, I can paint like this. Then maybe I want to
change the color blue. And now I can paint with blue. I can change the
color once again, the green maybe I want to change some of the
properties like say, this non-metallic
increase the roughness. Yeah, I can do that too. But with the failure, it
is completely different. You can see this icon. You can enable or disable
a layer from here. Let's disable this one. Again, I will add a fill layer and change the color to red. You can see the complete
head is of red color. If I change it to blue, then the color of the
complete layer changes. So this is the main
basic difference between Fill and paint layer. Obviously, we will go over this in detail in
the next sections. You can enable or disable
the layers from over here. Let's delete this one. And the next thing that
I wanted to show you is if you click over
here on this 100 number. So this is the
opacity of the layer. I think you understand it, which is pretty much
as the name suggests. If you decrease the opacity of the layer will
be transparent. And if you increase it to 100, the lead would still
be completely visible. But you will notice as
soon as I send this to 0, the layer does not
completely disappear. Over here you can clearly see that the paint
strokes are over here because this opacity
channel or opacity, because this opacity
thing over here works connected to this
drop-down menu. So what is it exactly? So currently we are
in the base color. So if I set this to 0, as you can see over here. Setting the opacity of 0
to the base color channel. So what I mean by
that is basically only handles the
color information. So if I set this to 0, the color information is 0. That's why the whole
layer is black and white. But if I set this to, let's say a 100 again, and I change the channel
from over here to metallic. And now if I degrees
these two are 0, you will see the
metallic properties of these paint strokes are being reduced to 0 and they
are now nonmetal. If I set this to 0 and I
go back to base color, and I sent this to 0 also. So now you can see the latest
completely disappeared. But still if you see over here, you can see the roughness
values are different. So if I go over here and the roughness channel
and I degrees this to 0. So you can see the roughness is also disappeared over here. Like it is a pretty good
thing to know that this opacity thing and this drop-down over here works
connected to each other. So let's take them back to a 100 and the metallic also 200. Let me show you what is the use of this height thing over here. While selected this paint layer? Let's set the height
value to 0.5. Maybe. Try painting. And you can clearly see
that the paint strokes are looking as if they are elevated because of the height
value we have provided. They are not like actually
not elevated in real, but it is seeming as
if they are elevated. If I set the height
to a negative value. So it will give us an
inverted effect as if our brushstrokes are going
inwards into our model. It is like a really
good thing to have. We can give heightened four to all our models using
different stuff. Obviously, we are not only restricted to this pain
restaurant or leak. We can go over here in the
brushes section of our shelf. Obviously, this is a little bit out of topic for this video, but let me just
quickly show you. I will change this
default brush to brush. And you can see now I'm painting some kind of
damage to our model. If I decrease the height
to negative value, I will be doing it inwards. It is a pretty nice
thing to have, but obviously I won't go
more in detail because already we are a lot of
off topic for this video. So let's come back to it. I will delete this layer and set the drop-down
menu back to base color. Let's see. The next thing that I
want to show you is if you have multiple layers. Obviously one more thing, if I change this color to red, you can see nothing happens because this layer
is at the bottom. If you remember the substance, painter works on a
stack based system. So if you move this to
the top of the stack, then only this layer
would be visible. Otherwise, any layer which is at the dog
wouldn't be visible. Next thing if you want
to group three layers, like these three
layers, you want to group them into a single folder. You can select all
three of them. And now there are
three ways to do it. You can just hit right-click
and then group layers. You can see this
folder is created. So that makes it a little bit
convenient and organized. You can rename this
folder to anything. Another way to do it
wouldn't be good. Just select all three
of them and then press Control G, like this. And the last way would be to use this icon over here,
just click on it. I had a group and
now select all three of them and drag and
drop them over here. This way you can create
groups for multiple layers. Okay, So for the introductory
video of the Layers window, I think this much is enough. Obviously, there are a
lot of things that we need to discuss more
about the Layers window, like you must be wondering, what does this
drop-down menu didn't. So these are like
the blending modes. If you have worked
with Photoshop before, obviously you would
know about them. They work in a similar way
as the Photoshop ones. So we won't be going
over these things are this menu or
this menu right now, because this section is
just for the introduction of all the main windows
of the substance painter. In the third section,
we will be going over all the tools and
the functionality of substance B into in depth. In that section, we will be going all over these properties and everything related to the properties windows,
the Layers window. For now I think this is enough. Let's delete this folder. And before ending the lecture, I just want to quickly
show you one more thing. If you go into your
sources folder and open up the substance painter files and open up this drill
underscore final. Alright, so now it is opened up. So this is another one
of the models that we will be completely
texturing in this course. And the reason I wanted to show you in this video is because this substance painter file is the completed file for
this particular model. And I'm done with
all the textures. So if we will see you over
here in the Layers window, I have properly organized all the layers into
proper folders. Like this plastic glossy
stain is for this. Material if you will
just disabled it, wait for it to load. You can see we have
to wait a lot so that the texture is set so that it is a little
bit more faster. Yeah, I think now we wake up. So you can enable
and disable it and see this yellow one is
for this bottom folder. This folder is responsible
for this material. Over here. It is the same plastic material, but it is a black color. So I made it in a
different folder. The iron material over here on the drill and on all
these nuts here, the rubber material
for the grip and everything, and the height info. It is like a little
bit of advanced stuff, but we can also paint
all these grips and everything using
our paint brushes. So yeah, that would be
something to do when we shrink. This is pretty cool. And all these stickers and
the alphas that I use. So you can see them over here. So as I was talking, the substance painter works
on a layer based system. So let's dissect this
particular material over here. I will disable all the layers. And you can just see how the layers work if
I enable this base. So this is pretty much
just the yellow color with a little bit of
reflection, nothing else. Then what I did was I added a little bit of dust
as you didn't see, deviate a little bit of
more realistic feel. I did not rename this layer of leaves me
with these two edges. Because if we enable this, you will see it is
a little subtle, but still adds a lot to the
material on all the edges, you will see a little
bit of discoloration or fading away of
the color over here. Then there is some kind of color variation over our model. Then for the next layer, I will just quickly
zoom it in over here because this bumps layer
is fairly certain, it will just click over here. You check the layer data. It just consists of height value and if
you will enable it, I don't really see any change. Let's set the texture
size two foci, the details on this
layer are really subtle, so I think we will need
a bigger texture size to showcase them properly. So I will take it two foci. Also. I don't really know if it would be visible to you in the video, but I'm pretty sure
it wouldn't be visible to you in
your own files. Alright, so I think it
is pretty visible now. Enable and disable it. You will see these small
bumps over the surface of the texture to give more
detail to our texture. Obviously, they won't be
visible from far away, but as soon as you zoom in, you can clearly see
all these bumps all over our plastic material. Obviously that adds a lot. And the last layer is
basically your first layer. Add a little bit of more dirt
and some color variation. As you can see. We added different layers
on top of each other to create a final realistic
looking material. This is how stuff works in Substance Painter,
you, if you want, you can dissect the
rubber material, is disable everything. So this was the base, then a little bit of white
overlay or white color to make it feel as if the
rubber is used already. And this is like
the sharpen filter which we will discuss later on. What are filters? This
is roughness variation. So this, as you can see, adds a lot to the material. Before this, the whole roughness of the material was
pretty much the same. But as soon as we
add this layer, you can see it adds a lot to our material and it makes it
look even more realistic. A little bit of edges,
stuff over here as you can see some damage,
some discoloration. And the last one,
some more dirt and stuff just to make things a little bit more finalized. Yeah. I just wanted to show
how things work. Obviously, we will be creating this complete texture
or for this model. Furthermore, in our course,
I hope to see you there. It will be a lot of fun. Okay, so thank you
guys for watching. I'll see you in the next one.
5. Shelf and Properties: Hello and welcome guys. So in this lecture we
will be going over the assets or the shelf window and the Properties
window over here. So to start, let's open up
the Mi'kmaq sample project. Once again, go over to
File example DoubleClick. Alright, so this big
window over here at the bottom is basically
all your assets. This is all the stuff that
substance has provided to you. We can share your models with. And trust me, there are a
lot of cool things in here. But obviously it is not limited
to that only you can add your own stuff over here like custom texture, brushes,
materials, etc. We will go over that
later on in this video only how you can import
stuff into the shelf. But first, let's get to know the shelf window a
little bit better. So if you see these
icons over here, these are the different types of things that the shelf
is divided into. So currently we are in the materials section
or the base materials. The next one is smart materials. Then we have smart masks. And after this, we have filters. Then the brushes,
alphas, textures. And the last one is environment. So you can go to
the shelf display. It is divided into
several different things like materials, smart materials. And yeah, if you will click once again on the
selected I can, for example, we are currently in the smart materials section. I click on this icon once again. Now you can see the
complete library all at once without any filters. So this is like all the
stuff of the library, all these things in just
a single window league. So just click on any of the icon once again to view
that particular stuff. Like if I click over here, I will be back into
waste materials section. Alright, so before getting into more about
the shelf window, Let's get to know these
things a little bit. So first, we have base
material and smart material. You would think what is the main difference between the two? So it is very easy
to understand. This material is basically
just a single layer. So let's just drag and drop
any one of these over here. Maybe I will draw this
gold pure material. So as you can see,
as soon as I drag this Goldberg material
onto the head, now the complete Hades
of gold Muskegon, and you can see this
layer over here. Let's select this layer
and delete this one. So we have this one
single layer of gold with all the
settings already done. You can change them if you want, however you may like. Alright, let's disable this now and check out
the smart materials. In the smart materials section, we have this gold
damaged smart material. Let's drag and drop this
and see what happens. So as you can see, this one is a lot different from
the earlier one. This one is like
a complete folder with multiple different layers. So we have the
base layer that is same as the gold pure,
then we have some. If it's green, you can
enable and disable it. We have roughness variation. We have all these
different layers on top of this gold pure base material to make the material realistic. So the basic difference between the two is that
the base material is just a single layer with
no added effects over it, or adding layers of different
types of things like edges, roughness, and et cetera. And smart materials
is like a set of different layers that make
the material look realistic. So let's just delete both of
them and try something else. You can try any of the smart
materials like this problem. You will see all these edges and everything make the
material realistic. So this is like a smart material that has multiple
different layers. If you go back in
the base material, you can drop any layer you want. It will be just a
single layer only. Alright, Next, let me just
show you what a smart masks. So obviously you don't know
about masks right now, but just to show
you a little bit what all things you can do
with Substance Painter. Let me just quickly show you. First I will go back to base material and
let's add a goal. We all material again. So now let's say I want
to add a little bit of dust in this gold
pure materials. So what I will do is I will
create a new fill layer. If you remember, we can create a fill layer from this icon. I will set the color to black. I would give it a
pretty rough value. Next, I will go into
the smart math section. You can see all these
different smart mass like desktop illusion does. Lastly, the soft. So let's write this surface and drag and drop it
over here like this. And as soon as we do that, you can see how this film is not dispersed into like dust all over the
bold girl material. Like this. We can remove this mask and
we can try something else, like the dust soft. See how this smart mass work. Obviously, as I said earlier, if you don't understand
all this right now, it is completely okay
because right now I'm just demonstrating the different capabilities of substance. We will go over all
these functions and features in detail in
upcoming sections. So let's move further. And the next we have
filters over here. So let me quickly show you what we can do
with these things. I will delete both of
these previous layers, and I will show you the use of figures
by maybe an example. So first, let's move
back to base material. And I will drag and drop
this one over here. Like this. Let's move back to filters now. I will use the blur filter. What this filter does is
basically as the name suggests, it will bleed over your texture. So the userFilter, you just
need to select the layer, click over here and
select Add Filter. As soon as you do
that, you will see this Properties
Filter over here. Now you can drag and drop
the filter like this. And you will see as soon as you drag and drop the blur filter. We have it over here and now our texture appears
to be blurred. You can set this to 0 and
keep on increasing it. This is how filters work. Let me show you by
another example. If you just remove this filter and let's
drag and drop this one. Hsl perceptive. Using this filter, we can change the color of our
already added texture. So maybe we don't
like this red color. You can change the hue, completely changed the color. We can also increase or decrease the saturation and lightness. That is the lightness
or darkness. It, if you increase it, it will add whites and if you decrease it, it will add draft. Filters are really good way to enhance the texture
even more, again, we have a lot of windows
with us over here, but we cannot go over each and every one
of them right now. But if you want, you can
definitely experiment with this a little bit and try
out different filters. I will move further
and quickly go over the rest of
the remaining ones. So let's delete
this older layer. And the next, as you
know, is brushes. I've already gone
over this ones, but let's add a new paint layer. Scroll down and change
the color to maybe glute. Now, as you remember, we can select any
one of the brushes and you can just
directly start painting. You need to just
double-click on the brush and that particular
brush would be selected. And you can see each bridge
has a different feel to it. So you can again
experiment with this and see how each and every workout. Obviously there are a lot of them which even I haven't used. I do have some of the go-to
brushes like these dots. You can try out and see which
one works best for you. Alright, let's move
next with lead. To go back to your basic brush, you can select any one of
these basic hard, basic soft. So we go back to basics soft. And let's move next to
the alphas section. So alphas are pretty
easy to understand. You can consider
them as stickers. So the white parts get painted on and the black
part gets ignored. The reason I'm telling you
this is because if you want to create some of your own Alphas using Photoshop, you
can easily do that, is makes sure to remember the white part gets tamped
down or gets painted on, the black part gets ignored
by the Substance Painter. To show this in action, the brush give it any color and just double-click on any
of the alpha you want. So maybe let's select this one. And as soon as you do that, you will see over here,
alpha is selected. Obviously, as I said, we will go over this in detail. But right now, you
see over here, if I stamp this, I can paint this alpha and using my brush. If I want, I can
change the color, give it roughness value, give it height,
and again painted. And you can see, you can
double-click on any other alpha. And you can see we are painting that particular
alpha as a sticker. This is the basic use for it. Next, again, let's quickly move further. We have textures. So textures, obviously first I will delete this older layer. If you will scroll down
in the texture section, you will find a lot of these black and white maps
often named with grunge. There is like a really
important use for this, which we cannot learn right now. First, we need to
know what masks are. So after we have
learned about masking, we will learn about
all these grunge maps and how to add them. That is for later on part
because it is quite advanced. But if you want to add
some of your own texture, I can show you how to add them. Let's say you imported your
texture into the shelf. You can just go ahead
add a fill layer. And let's say we will
drag and drop this one. You can just drag it and
drop it on the base color. We have our texture. If you want, you can
increase the tiling from over here or the rotation. So all these settings, these
are pretty self-explanatory. But again, as I'm
saying, again and again, we will go over this in detail in this section
three of our course. So let's quickly
delete this and move over to the last one,
that is environments. So if you remember I told
you about a shortcut, if you hold Shift and
use your right-click, you can rotate the lighting. But if you want to
change the lighting, you can come over here in the environment section and just drag and drop it like this. And you can see our
environment lighting has completely changed. Hold Shift and use your
right-click, rotate it. And you can just write
any one of these. You can use any one of
them, which you might like. I generally use the
default one only because I think that
one works the best. So I will just drag and
drop this panorama. That is the default one
over here once again. And yeah, alright,
so now that we have learned all about the different
sections in our shelf, Let's come back to
the base material. So now let's learn how we
can improve our own assets, like materials, brushes or
textures and the shelf. So in Substance Painter, there are multiple
ways through which you can import anything
into the shelf. But by far the
easiest one and the one I use the most
would be to open that particular file in file explorer is going to
your resources files folder. Double-click on it and you will find this Textures folder. Again, open it up and there are multiple
textures that I've created to make it easier for you guys when you will be
texturing our main projects, that is the fire
extinguisher and the drill. Let's import any
one of the texture. So I will select
this devolve logo and drag and drop
it on the shelf. So it is that easy. Just select the particular file and drag and drop it
over here like this. As soon as you do that, we will see this window pop up. So now what we need to do is, as you can see, it is
undefined written over here. So just click on it
and make sure to select this as the
texture because we are importing this particular
file as a texture and not as the environment colored or Alpha I will select as texture. Next thing you need to do
is you need to select where you want to embed your
resources student over here. So here are three options. The first one is the
current session. So let me tell you
the difference between all three of them. So what current session does is it will import your file
to your current session, then it needs that
particular file will stay in the shelf for as long as this current session of Substance Painter goes on. If you will glow
substance painter, the file would be
removed from the shelf. The next time you, Leo Burnett, The next is you can invoke this file, this
particular reject. That means despite would
show up in the shelf for this project Totally and in art is that is this week my project. If you create any new project, then you won't find
this file in the shelf. And the last one
is you can invoke the asset to your own
library of assets. That means this particular
file will stay in the shelf forever and you can use it on any project
that you may like. For this file, I will just
select project and hit Import. As soon as you do that, you will see your
file is imported over here in the
texture section, because obviously we
selected as textures. So now after importing, you will notice
that you cannot see any other assets
except the textures. If you click over here, you
will see everything is blank. And the reason for
this is because the literature search
query applied over here, what you do is you
can just click on this cross and remove this. Now you will see
all back over here. Also I mentioned there are some other ways to import
assets and Substance Painter. One of them is clicking on
this plus icon over here. Click over here. Then you will see again
this window pop up. Then you can click Add Resources from here and then
navigate to your fine. So let's quickly do that. Maybe we can import
something else. Let's import this alpha. This alpha makes sure to
select Alpha over here. And I will import
the resource to this particular
project only leads to select project and
then hit Import. Now you will see it over here. Now we have Alpha search query for this, remove this filter. When another way would
be to just go over to file and hit
import resources. But I rarely ever use this. The most easy one,
we're going to just drag and drop
all the fights. You can also do
multiple files at once. Next thing is, you
can click over here. So as you can see, currently
it is all libraries. But if you will
click on this arrow, you will see all the
different options you can select project. So you can see there is nothing
here because we haven't imported anything into
the base material section for this particular project, but we haven't voted and alpha. And also these are all the big mesh map
texture, so ignore them. We have this texture that we
just imported began again, go over here, select
Starter assets. So start our assets is basically only the substance acids removing all your
own imported assets. These are only the
assets that are provided to you by substance. And the last one is your assets. These are the assets
that you have imported yourselves
and will remain a part of your shelves
permanently so that you can use them on any
project you like. Alright, so let's come back to all liabilities and there are a few more things about the
shelf that you must know. If you will look over
here at the bottom, there are a couple of
buttons over here, so let's talk about them now. One of them is this
one filter by parts. So if you click over here, you see this list
pop-up over here. So this list over here is kind of similar to all
these options in here, but this list is
a little bit more extensive in the
number of sections. So right now you see
most of the options are grayed out over here and
only materials is visible. That is because we
are currently in the materials section
of the old libraries. So as I mentioned earlier, you just need to click
on this icon once again to view the complete
library all at once. Just click over this icon once. And now we can view the
complete library all at once. And you will see
all the options are now visible and you
can easily select each one of them and
respected things in it. So as I said, this
list over here and these options are
kind of the same. But you see, if you select
alphas from over here, you can only view the Alphas. But in this particular list, even the alphas are
divided into a lot more different sections like
the basic brush settings, including, so you can easily go through
them without having to search for a
particular Alpha-2 much you can easily
look for it from here. Even in the materials section, you can see there are a
lot of different sections. This list is quite useful. To use it. You just need
to click over here. And let's close this one. Come back to at all libraries over here and select all
libraries from here. And here. Now we can disclose this. The next button over
here is saved searches, so it is pretty handy one
and very easy to use. Just click over here and
you will see this pop-up. Currently, there are
no searches over here, but here you can save
a particular query that research often so that it's easier for you to
come back to it. So let me just show
you how we can do it. For example, let's say I
search for food over here. And I want substance
painter program to remember this particular query so
that I can come back to it. So just click over here. And now you will see this all
good option is over here. So now let's say I'm
in my base materials. I quickly want to open up
all the word related things. So I will just click over
here and click on this. You see immediately
this pops up and I can access all the wood related
materials and everything. Yeah. So let's go with
one more example. Let's search for plastic
and live over here. And you will see this
plastic problem over here. Now we can just
easily go through all the Save
Searches one-by-one. Say, I think this button
is also pretty handy. The next ones are these
three buttons over here. So this one we have
already talked about, this one is for
importing resources. This one is also kind of useful. Let's say I searched
for something like, again, let's search
for goods over here. But now I want this
particular instance of shelves to open
in a different tab. I will just click over here. Now you see we have
this old word tab as a different tab and we have our original shelf next to move the search
from over here, and we have a shelf over here. And this tab has
a different tab. You can just pop it out of over here and basically
be somewhere else. This way you have like maybe you use something
quite a lot so you create a hidden in different
dab for it so that you can access it very easily. But let's just
close this for now. This way you can
just open anything. Maybe you clicked on
plastic, then click Go here. The plastic materials or a different tab so that you
can easily access them. These buttons are useful and it is good to
know about them. Last one is it just
resets all your query. So maybe this is over here. You can just click
over here and we'll reset everything and you will be back to your old libraries. So yeah, I think this is
it about the shelf window. We are done with it. I will just turn this, save searches but then off
because I rarely use it. Next is the Properties window. In my opinion, I think the properties window is the most important window
in Substance Painter, but there isn't much to tell about it from an
introduction point of view, because there isn't much to it except of
this new learning. All the properties of
different tools and layers, which we will be going over anyways in detail in
the later sections, you can select any
tool from over here, like the paint tool
or the eraser tool, or the prediction blue maybe, or maybe you can select
any layer from here. Maybe you added a fill layer. All the properties related to it would appear over here in
the Properties window. So obviously we cannot go over each one of
them in this video. So let's just go over some of the properties of
the paint tool. I will add a paint layer over here and select the Paint tool. I will just be going over
some of the basic ones. So the first one we
have over here is size that is pretty
self-explanatory. If you increase this, but you will increase the size
of the brush over here. And if you decrease it, you
will decrease the size. Right now if you paint, you can see we are
painting nothing. The reason for this is
the color of our brush is same as the
color of the head. So let's just change it to red. Now we can easily
paint like this, can increase the size and
paint however you may like. Next, I think we
have stroke obesity. So stroke opacity is basically the transparency
of the stroke. You can see the
preview over here. So if you set it to 0, you can see the rest
stroke is invisible. Now, if you set it
to 25 per cent, we are now painting at
twenty-five percent opacity. We also have spacing. Spacing is basically, you will see the
preview over here and you will understand what is it when you will
increase the spacing, you will notice now
the brushstrokes are spaced far away
from each other. And as you keep on
increasing the gate further and further,
that is spacing, you can paint now a bunch of dots spaced
evenly between each other. Because the spacing is
28 is so low that we do not even see the dots and the paint in a
continuous motion. But if you increase the spacing, you will see all the
specific dots like this. Next we have over here is angle. So if you try to change
the value of angle, you will see nothing over here. And the reason for this, every single one of
our brush stroke is just a single circle. And if you change the angle, nothing really happens
because they are rotating among themselves and it
is not really visible. So to visualize this
particular property, Let's go over here in
the alphas section. And I will select this
particular arrow alpha. So double-click on
it to select this. Now, if you increase the angle, you will see it is
rotating over here. Pretty self-explanatory. Again, let's set this back to 0. And when cooled it, a property that we have over
here is followed. But if you've
enabled fall apart, you will see now if
you start painting. So now you will
notice that the Alpha is following the path
of a brushstrokes, which I think is pretty cool
and it is really useful in some use cases like when we are grading
stitches for fabric. We can use it over here. Next we have jittered over here. So jitter is basically
to add randomness. If you increase the Size
Jitter, you will see now, some of, you will see now, some of you will see now that some of the
alphas are too big. You will see now. You will see now that the
size of all the alphas are, the arrows are different. And we have added a bit of
randomness in the size. So that is Size Jitter. If you increase
the angle jitter, now they're all at
different random angles. If you increase the position. Now they are all at
random positions. So yeah, it can be
useful sometimes when we need to print something
like dirt or dust. We also have flow, but it is kind of confusing
to understand it first, let's remove this
arrow from over here and select our
old shape Alpha. Just type in shape over here. And select this shape Alpha, that is the default one. I will set this back to 0, angle back to 0
and position also, let's set the spacing to 20. So the flow and stroke
opacity are kind of similar. But let me just show you if you degree the stroke opacity, you will see the
stroke completely goes transparent as I
set it to 0 slowly. But as I decrease
the flow value, you will see that the
brush stroke starts to get transparent at the edges
first and then at the center. So I'm hoping that you are
able to visualize this, how the flow value works. As soon as you decrease it, it starts to get a little bit
transparent over the edges. And as we keep on moving, it moves towards the center. And then the brushstrokes
gets completely failed. While in the case
of stroke opacity, it is just uniform all over. And as you decrease
the stroke opacity, it will get transparent
as you set it to 0. But the whole stroke would
get transparent as a whole. Whereas in the case of flow, it starts with the edges and then moves
towards the center. So yeah, it is kind of a
weird property to understand. I rarely use the flu, but it is nice to
know what it does. So basically the flow Jitter, if you invest 200, you can see now that
your brush stroke has different values of flow
at different points. See how it works in this way. Let's see what we can go next. For now. I think these all
properties are enough. The rest of them, these alignment back face
and the alpha stencil. Everything remaining, we will go over it properly when we are studying about the
paint tool as a whole. I think this much is enough
for this video guys. Don't honestly, we
can go on and on by checking out
different levels and layers and all their properties. You can select each and
every tool and it will have a different
property over here. You can even select
a different layer, like a fill layer, and it will
have separate properties. We will go over each one of them in their
respective sections. But for now I think
this much is enough. Thank you for watching. I'll
see you in the next one.
6. Display, Shader and History: Hello guys and welcome to the last lecture
of this section. In this video, we will be going over the
remaining windows, which are not quite
visible at first. But if you look over
here in the corner, you will find these
four buttons. So these are for your
display settings, shader settings,
history, and logs. So to start off, let's
just quickly open up the Mi'kmaq sample project file, open sample, and open
up being quite alright. So to start off, we have
the display settings. You can just click on this icon and you can just move
this window anyway, you like if you
want, you can dock it over here anyway you want. But I think it is better to
just keep it over here only. The first thing is environments. So as I told you, we can change the environments from
here in the shelf. You can just select them and drag and drop
them like this. Wait for a second to
load here, it is done, but also you can do it from
here in the display settings. Just select the
environment map from here. And now you can change
the environment map lighting from over here. Also, we have a couple of
more settings like you can increase the environment opacity so that
now it is visible. The reason it is so blurred is because we have the
environment blurred, set to 35, which we
will set it to 0. So now we can see
the environment that is currently being used
by Substance Painter. If you change it over
here, it will be visible. This is the environment blur
and also we have exposure. So increasing the exposure will increase the brightness
of the environment. But I suggest keeping
it at default only. So next we have rotation, if we will increase
the degree that you will rotate the environment, which can also be
done by holding Shift and using your
right-click like this. So now let's just set everything back to normal. I will
select them line. I will select the environment
map I spend Rama over here, set the opacity to 0. Exposure also to 0. The blood was at 0 only and rotation can be anything,
it does not matter. Yeah, next two
shadows over here. So if you will enable this, you will start to see shadows linear model, where
it's self-explanatory. But I highly suggest you disable it at all times because it can mess up with
your textures. Because let's say if you are texturing at the
back of the head, you don't see anything because the shadow is
covering everything. So you cannot paint properly, you cannot see your
textures properly. It can mess up with
your texturing process and cause them to
look very weird. So let's just disable
it at all times. You can maybe enable the
shadows when you are done with the texturing to just see
how the loop on your model, but rest of the
times to disable it. You also have this
competition mode that is for the quality
of the shadows. If you increase it to intensive, the quality of the
shadows would be better. And the last one is the opacity. You can increase or decrease
the opacity of the shadow. Alright, so let's save it now. Next we have the
camera settings. You can change things
like focal length and field of view like this. That is about it. Next, we have post effects if you
will enable both defect, there are a lot of
stuff that you can do. Like you can enable
their connection and increases or
decreases saturation. I don't think it
is quite visible. So let's first add a
material to our model. Let's use, again. If I increase the saturation, you can see how it changes the contrast and
all those kinds of things. Next, you can also add
stuff like Vignette. Vignette is like
darkening of the corners to create more focused in
the center of the screen. There are lots of stuff. We also have glare. Glare is like the
Blue Host effect. If you will rotate the light
you can see over here. This is the glare effect. These effects are
like just used to make the model look good. Then we have tone mapping to adjust the exposure
and everything. So all these things
add a second cause you to create disruptions in
your texturing process. I highly suggest you
rarely turn them on because I really don't see
any use for them exactly. But we will be using
tone mapping later on in the course to improve the colors of the substance
painter even better, to make them more accurate
for other programs. But that is a different thing. So I will disable the
post effects now. Next is temporal anti-aliasing. So you can enable this one, because if you disable this, you will see all
these jagged edges on the corners of your model, at the edges over here, over here, you can
see all of them. If you will now enable this, you will see all of them
have now disappeared. You can also increase the accumulations to improve the quality of anti-aliasing. But yeah, I think 16 is fine. It works perfectly. All right, next we're subsurface
scattering. But to activate
subsurface scattering, you need to have
subsurface and new models. So subsurface scattering is
like a scientific phenomena. I don't know the
exact definitions, but it is like when light, when it creates two objects
and kind of stays inside it and creates like a glue
like effect, like for example, in candles or in human
skin around the ears when light is around the ears or are in the leaves of trees. That is subsurface scattering. If you add that in your models, you can enable it from
here to check that out. Next, we have color profile. Through here we can change the color profile of
Substance Painter, if you will enable this, you
can see everything goes. Readied up. But now you need to select the
profile from here, like maybe we can say the ECS, because Substance Painter
works in linear color space. So as soon as you do
that, you can see how the colors are not very
saturated and popping. You will disable this and you can see it looks really flat. So I will show you how to
do this exactly how we can achieve the ECS color
profile and Substance Painter. But for now, let's close
this out and disable this. Alright, so at the bottom, if he will come over here, you have the Show
Mesh wireframe. So now it will enable it. You will see the wireframe of your model like
this on top of it. You can increase or decrease the opacity of it are
also change the color. Lastly, we also have
this grid enable this, you will see the grid
on all different axes. Again, we have the
opacity for it. But yeah, these settings are
additional settings which are not really related to the texturing part of
the substance painter. But yeah, they are good to know. Some of these I've skipped
out because like this one, hide stencil when
painting because like right now we don't
even know what sensors are. So when we will be
going over census, we will cover these settings. Alright, so I think this is
it for the display settings. All right, So next we have
the shader Settings tab. In this tab we have all
different kinds of presets of shaders that are provided
to us by substance. We have all these
shaders over here, but I rarely ever
use any of them. Like most of the
times, I will just use the default one that is
this ASM metal roof. And the only time I have to use a different shader is
like when I have to use the opacity map
because we cannot use opacity maps on
the default one. So we have to change
it to this one. This one over here, PBR metal
roof with alpha blending. So this one over here has
the support of opacity maps. So yeah, besides these two, I rarely ever use
any one of these, like display or daughter
to whatever it is. I just use the default one. And after that I sometimes
use this one later on in the course when we will be texturing our fire extinguisher, we will use opacity maps. So for that we will use this
shader PVR metal roof with alpha blending because we will be adding
things like glass. So for the glass material to
work, we need transparency. So you have we will
be using opacity map. So yeah, besides that, I think it is best not to
mess around with the options because I think they were best at the default value. Next, we have the
History tab over here. So all our actions
that we perform in substance painter would
appear over here. Alright, so let's say I
will disclose this for now, or maybe we can just
move it over here. I will select this layer
and start painting. And you can see
as soon as you do that add stroke is
written over here. We will do one small
upstroke is written again. The reason we're not seeing our paint strokes or because
the layer is at the bottom, so let's move it at the top. Yeah. As soon as you do that, you can see that over here
move layers has appeared. So all the actions that you perform appear over here
in the History tab, I think now it is very clear if you will
add a fill layer, you see, if it will
select any of the action. It will take Substance Painter
to that particular step. As you can see. I think this is a very handy tap and that is the
complete use for it. I will disclose it now. The last one we have is logs. Logs basically has all
the important messages or errors related to
substance painter. You can also right-click
and clear all of this. Let's just close it for now. Alright, so with this, we are done with the first
section of our course. In the next section,
we will go over how we can do better model too important to
Substance Painter and things like baking
HashMaps and much more. So I will see you here. Thank you for watching.
7. Exporting your model into Substance Painter: Hello and welcome to the
second section of this course. In this section, we will
be learning how we can export our model from blender
to Substance Painter. Then setting a project
in substance being done and making the mesh maps
and things like that. So as I mentioned before, that I will be using Blender
as my main 3D program. But obviously you can use
any one of your choice, like Maya or max, because the steps
remain universal. Alright, so I've opened up my fire extinguisher
underscore, start blend phi. So you will find this file
in your resources folder. So just open it up in the
blender files folder. You will find it over here. So just double-click
to open it up. Alright, so as you remember, we were working
earlier in this file. So we have these two different
fire extinguisher models, but this second one I just created for
demonstration purposes. So we don't really
have to use this one. What you can do is you will find this collection over here. So just disable it. The fire extinguisher
underscore test, we will be just using
this collection. Alright, so now let's go
over the complete process of exporting from blender to substance painter in a
step-by-step manner. So obviously the very
first step would be to complete the modeling
of your assets. Because once you
take the model into painter and start adding
textures and everything, it can get difficult
to make changes to your existing model or add something new in
the modeling part. So make sure you are
happy with the modeling before you start with the
actual texturing process. For this course, obviously, I'm providing you with
all the models so that we can put all our
focus into texturing. And we don't have this banner
time on modeling stuff. We can forget about the
first step for now, but always remember it when you are creating your own assets to finish with the
model first and then only start with the
texturing process. Alright? So the next step would be to decide on the materials
for your model. If you remember, I mentioned in the first video that the
materials you add in your 3D program are converted into texture sets in
Substance Painter. So make sure to add
them efficiently. Also don't add a lot
of materials because it would mean there would be do any texture sets in
substance painter. And it basically means that there will be
a lot of textures. So if you're working on
something like a video game, it can cost you a lot of memory. So try to keep the
materials to a minimum. For this particular model. As you already know, it has
two different materials. We have already
worked with this. So the red colored one is the metal material and then the green one is the rubber
and plastic one. Also, I could have easily
done the texturing of this complete model
on a single material. But just for
demonstration purposes, I have added two
materials so that we have two different texture sets to work with in Substance Painter. Next step would be to
UV unwrap your models. So again, if you remember, I mentioned that we
need to you and wrap our models according to the
datasets are materials. That means the objects with the same materials will be
uv and wrapped together. And if they have
different materials, they need to be UV
unwrapped separate team. So as this course is not
about UV unwrapping, I've already created the UVs for these models. So
do check them out. Let's head over to
the UV Editing tab. Also, if you don't
know much about UV unwrapping and want
to learn about it. You can find a lot of free
tutorials on YouTube that can get you started on
this topic, alright, to check out the UVs all
at once first we need to select all of the objects
with the same materials. So there is a shortcut
for this in Blender. You just need to
select one object. You need to press Shift plus
l and this menu will appear. So just select material
from over here. Now all the objects with
the same material and be selected like
this as you can see. So now press tab and you can
see all the UV's over here. Next you can select this pipe, then redshift plus n,
and then material. It could select all of the objects with
the same material. Now press tab and you can
see the UVs over here. These are the steps
that you need to follow with all this
out of the way, our models are ready for being exported to
Substance Painter. So let's do that. We export something
out of blender, you just need to select it. Just select all of the objects
of this fire extinguisher. After selecting this,
go over to File Export, and I will be exporting
it as an FBX. And this window will pop up. So make sure to select selected objects and
active selection so that only the objects that
we have selected get exploited and nothing
else get exported. And also make sure to select mesh because we do
not want anything else to get exported like a camera or some
lights or anything. Although there is
nothing in this thing, but makes sure to just
select mesh from over here. Next, what you can
do is let's rename this to fire extinguisher. Find it. Because this will
be a final export. And just hit export over here. Okay, Let's move back and
open up the export folder. And I will export it over here. Alright, so now the
export is just open UP. Substance Painter. Alright, so now substance
painter has opened up. You can close this
welcome screen. And to create a new project
in substance break down, go to File New, and this window will pop up. So don't worry, We do not need to change much in this window. Just go to File and
first select your model. So the Select button, and I will select this
fire extinguisher underscore final model that
we just exported right now. The next thing is you can change this document
resolution to look in. Because working in for cake
and get laggy and choppy. So just select two keyframes
over here because we can always upscale and
downscale substance only. You can set it to get from here. So next we have this
normal map format. There are two different options
that it takes and OpenGL. So both of them have
exactly same capabilities. The only difference being that the green channel is
inverted to one another. So we will be selecting
a nominal lab format as OpenGL because
Brenda supports OpenGL format for selecting any option here does
not matter that much because we
can always change it later on while
exporting the texture. Let's just select OpenGL
and rest of the settings. We can just leave
them as they are because we aren't
even using them. Then add default, and
now let's hit Okay. So as soon as you do that, you will see your model is not exported into Substance Painter, let's press F2, fullscreen,
the 3D view port. Now, let's check a model
for some potential issues. And right away, you will
notice that your main cylinder over here at the center
is looking very weird. We can see through it. So this problem is caused
because of incorrect normals. And this is something
I did intentionally to show how we can
fix this very easily. Also, your model won't have this issue because
the resources file, I've added the correct
one without any problems. So you can just watch the video to see how we can fix this. To fix this issue, we need
to go back to Blender. And over here in the
corner, click on this icon. You will find this option with the face
orientation Britain, and just enable this checkbox. And you will see this blue
color and this red color. So basically, you
need to know that blue color means the object
has correct normals and red means that it has red means that it has
incorrect normals. So how we can fix this? Just select the object with the incorrect normals press tab. There's a to select everything. Then just remember the
shortcut Shift plus n. So Shift plus n, you do
that and normals are fixed. Let's select this object again, press Tab, press a to
select everything. Redshift plus end. And now all the
normals are fixed. So now what we need to do is first let's disable
this from here. We need to export this model
once again to select all of them over to File, Export. And Vx. I will again select this fire
extinguisher underscore. Finding. The new file replaces
the old one. So all the settings
are already done. We just need to hit Export. Now come back to substance. We will create a
new project now. So go over to File New. Select this one again and rest. Everything remains the same. The changes are already
done, so just hit. Okay, now, let's say discard. Now the new model is
important to substance painter and a new project
has been created. You can look around
your model to see for any kind of
potential issues. But I think everything
looks perfect now. We have successfully exported a model from Blender and imported it into
Substance Painter. Now to end this lecture, let's just quickly save this substance painter
fight, hit Control S. And I will just quickly
move over to the directory. I want to save this act. Alright, so I will save it
over here and let's name it as fire extinguisher
underexposed start. So any of the people
that do not have blender and just directly want to start with the
texturing process. They will be using this flight in the
lecture on sections. Then we will start
with the texturing of this fire
extinguisher project. Just open up this fire
extinguisher underscore start. This will have everything
ready for you. So you can just start with
the texturing process. So now let's hit Save. And yeah, I think
we are done for this lecture. I'll see
you in the next one. And you're watching.
8. Baking Mesh Maps: Hello and welcome to
this lecture everyone, where we will be going over the process of basing
the mesh maps. So making mesh maps is
an important part of any substance
painter project and is needed to be done
at the very beginning. Because if you don't pay
your mesh map substance, won't be able to calculate many of the staff
regarding your model, like edges, curvature,
thickness, etcetera. And you won't be able
to use features like smart masks as smart materials. So you're making HashMaps
first is important. So let's start by
opening up our project. I will go to file open racing. And let's select the first only. Alright, so before starting to make the mesh maps of first, let's see what happens
if we don't make them. So I will just delete
this older layer. Go over to the smart
materials section. And as I said, if we
don't pick them HashMaps, we won't be able to
use smart materials. So I researched for steel. Here in the third section. You can find the
steel painted one. Just drag and drop it
over here like this. And you see it looks nothing
like the icon over here. And the reason for this is because we haven't
being done mesh maps. So that's why substance
cannot calculate anything and the material
appears to be this way. So now what I will do
is I will just click on this icon and disabled
the material for now. And let's start to
being the mesh maps. I will go over here in this
window texture set settings. And you can see this button
over here, make mesh maps. So just click over it. And this huge
window will pop up, which looks really
intimidating at first. But don't worry, big image
maps is like really, really easy with substance. Most of the stuff, you can
leave it at default and there are only a couple of few
changes that we have to make. Alright, so in the
left side we have all the mesh maps that
are going to be baked. You can select or
deselect them by enabling or disabling
this checkbox, I can. And in the right side we have all the parameters related
to these mishmash. So there are two
different types, meters. One of them is the
common parameters. So over here, these parameters are common to all
of the mesh maps. So if you change anything, it wouldn't be applied
to all the HashMaps and other parameters are specific
to each and every map. So as you can see over here,
normal Baker parameters. So this particular mesh
map has no parameters, but you can click over here
to check for other maps. Like as you can see,
all the different maps have different parameters. And if you want to go
back to the common ones, you can just click on
this common button and you will see all the
common parameters over here. Alright, next thing
that I want to address is that these three
maps that you see over here at the bottom that are
disabled by default are the new mesh math that I just added in this new update
of Substance Painter. So if you do not see
them, don't worry, you just need to update your substance painter and you will start seeing
them over here. Although we won't be using them, because we do not
need them right now. But we might discuss
about them later on in the advanced
section of the course when we will learn baking of high-quality details of a
model onto a low-quality one, because two of these
maps that are the height and opacity map need
a high poly model, if you will, just
hover over them, you can read the
description over here. So this baker allows
you to extract a height map from a
high-definition map and over the opacity
also at this beaker allows you to create opacity
map using a hypokalemia. As our fire
extinguisher model does not have a high
polish to bake from. We cannot use this
even if we wanted to. Alright, so now
let's go over some of the properties that
we need to change. So just click on
this common button. And yet, first one that we need to go over is this output size. So this is the solution
of all the mesh maps. So generally I think having two key as the resolution
works fine. But for this project,
I'm just going to move for for kids who have
the highest quality, we can also move or aid kit, but I think that is overkill. Just select foci over here. Do remember that if
you have a low NPC, It might take a little
while to bake them at foci. So just go to here when
cave that's the case. We had two girls who works best, but I will just go for,
for K For this one. All right, Next we
have applied effusion, which applies a kind
of overlap between the different UVs by
blurring out the edges. So we can enable this. Next, you will see this
whole section over here. So from here we can add a high poly mesh with all the details that I was
talking about earlier. Then what will happen is substance will use
that high poly mesh and take all its details and
bake it onto a normal map. And that normal map, we can
use it without local image. So that way we get
the nice details of a high-quality image onto
the loop, all human. And that saves us
a lot of memory. Also like if you don't
understand all this right now, don't worry, you don't have to. Because this is all a
bit advanced stuff, which we will be
going over later on. But if we want to add
a high polymerase, you can just click over
here and then select that, and then you can add that. But right now as we don't have a high poly mesh with a
fire extinguisher model, what we can do is we can
just enable this option, use low poly mesh as
the high polygon. So you're just enable that. And all these settings
are related to that baking process only
from high-volume, low poly. So yeah, let's just
skip all this. And then we have anti-aliasing that reduces the jagged edges. So that's why it useful. I will just set this
to four by four. Maybe that would work fine. And the rest remains the same. Everything works best
at default values. That is, also, if you want, you can just click over these ambient occlusion
curvature and the thickness. I think you can increase the secondary
rays from over here. Right now they're at 64. But if you want better quality, you can increase them
to 8000 protocol, which are also we have
the secondary days and for the thickness,
you have secondary days. But I will just
keep it at default. But I'm just telling you if you want more quality
video mishmash, you can increase the secondary
rays from over here, but the rest just works best at default values and we do not need to change anything
more than that. Now what we need to
do is you can see this big metal and being
selected textures over here, this big metal, we just pick the mesh math for this
one single texture set. But obviously we
don't want that. We want them to wait
for all of them. So I'll just select baked, selected textures,
just click on it. And now the beginning
process has started. So now it might take
a little while. What I will do is I
will just fast-forward the video and meet you when
the baking process is done. Check, check, check, check. Alright, So the
biggest fish now, so click on the Okay
button and let's look around a model for any
potential big issues. So I don't think there are any. Are they came out pretty
good and pretty clean. Alright, so now let's come
back to the layer section and we can enable
back this teal paint it smart material now
and see how it looks. Now as you can see, it looks
a lot better and lots of similar to how it looks
in the preview image. You can see all these
edges over here have the edge damage with
the proper material. And yeah, so this is what I was exactly trying to explain. All those mesh maps helps us
in sprinter to calculate all of these things like edges,
thickness, curvature, etc. Now I will just delete this
deeper into smart materials. You can use the Delete button on your keyboard to
delete any layer. Alright? Also, if it will go in your
diction set settings, you will notice that
all the mesh maps that are appearing over here in their respective slots
earlier everything was empty. And another thing,
if you want to view your mesh maps onto your model, you can also do that. You see this little
drop-down menu over here. You can do any kind of
texture map from over here. If you scroll down, you will find the mesh
map section and you can select any HashMap like
word space normal, or ambient occlusion, curvature. You can view them on your model. You can do them on your model
from this drop-down menu. Also, there is a quick
little shortcut for this, you can press V on your keyboard to scroll through all the
mathematics one-by-one. And now if you want to come
back to your normal material, just press M and you will see what you did would appear over here and we are back to normal. So not only we can view
the mesh maps from here, we can also view all
the channels like the base color,
metallic, roughness. But right now everything
is currently empty because we do not have any
kind of layer over here. So our material is
also empty right now, if you press M back again
to see the material. So to view all those channels, Let's quickly drag and drop a simple smart material are
important to our model. So I will drag and drop
this one this time. Alright, so the material is
appearing over our model. And now let's check out
the different channels, like base color, metallic,
roughness, normal. And last one is height. So the channels which
do not have any kind of information will appear empty like the height and the novel. They don't have any
information right now in this particular
smart material, so they are appearing MT, but the base color, metallic and roughness you
can easily see. Also there is a
shortcut for this one. The B shortcut is for
all the mesh maps and there is a shortcut for all
the channels like this. C is for all the channels like base color,
metallic roughness, and B is for all the mesh maps, and M is for coming back to
your material like this. Alright, so I hope
this is clear now, I will delete this
smart materials and I think this is
enough for this lecture. I will see you in
the next month. Thank you for watching.
9. Updating the Project: Hello everyone and welcome to the last lecture
of this section. In this video, we will go over how we can
update our project. What I mean by that is, let's say you imported
your modelling, the substance painter
bake the mesh maps and everything and started with
the texturing process. Hathaway, utilize
that a certain part of your model has messed up. Uvs are the normals are incorrect
or something like that. So for stuff like these, you don't have to worry at all. You won't have to do
all your texturing. Once again, we can just easily update the FBX file
with the new woven. So we will be learning
that in this video. So for this specific video, I have created an FBX file that has the same fire
extinguisher model, but all the UVs are wrong. So you can find it over
here in the exports folder. So this one over here,
it has wronged written in its name so it is
easier to identify. Alright, so we will
create a new project with this FBX file and see
how we can replace it. Alright, so now in
Substance Painter go over to File New Project. And again in the file section, select this model,
fire extinguisher, wrong, it open, and rest of the settings remain the
same and now hit Okay. So now just to show you how bad UVs can affect your model, what we will do is first
let's delete this layer. And I will just drag
and drop this material onto my model like this. And over here also. So to make the problem
more abrogate, click over here on the
metallic texture sec, and select this layer
and increase the tiling. Maybe something like 30. And you will see how bad
the UVs actually are. So obviously we cannot work
with something like this. And it is the same thing with
the rubber and plastic one, if you will increase
the tiling to 30, you will see how
bad everything is. Alright, so to fix this issue, but we can do is go over
to reject configuration. And this menu will pop up in the file
section, go to select. And this time what I will do
is instead of the wrong one, I will select the correct one. So that is fire extinguisher
underscore final. Just select this f vx vy, and now hit Okay, make sure whenever you do this, this option is enabled, reserve strokes
positions on mesh. That way your brushstrokes
positions would be preserved by substance and it
will be way easier for you. And now just hit Okay. And immediately you see
everything is perfect. Now all the UVs are fine and the texture is
showing up properly. Now, this is the usefulness
of this command. You can just go over to Edit Project configuration and change the file with the
correct FBX file and all your issues
will be resolved. But obviously, this thing
also has its limitations. You cannot just
completely change your model and still
expect this to hold up. Generally, you can
do things like changing your UVs,
changing normals. Also you can make
little adjustments like moving any
model up or down. You can also remove any parts of your model that won't
cause any issues. But if you add anything
to your model, then you have to pay caution
because it can go wrong. So just make sure to
make a copy of a project before you do that so that
if anything goes wrong, you have a backup
file to work with. But in my opinion, I
would just avoid them. Next thing that I want to
mention is if you change the UVs of your model and then
update it in the project, you have to always be
bake all the mesh maps. Makes sure to remember is
anytime you change your UVs, just leaving the mesh maps. Alright, so I think this
is it for this video. You can just close this
project and not save it because I was using this project for
demonstration purposes only. We really do not
need to save this. And now we're done with the
second section of our course. In the next section, we will
go over all the tools and features that substance
painter has to offer for us. That is the most
interesting part. I think we will learn the most in the third
section of the course. So I hope to see you there. Thank you for watching.
10. Paint and Eraser Tool: Hello guys. Welcome to section
three of this course, where we will be going over the tools and features
of Substance Painter. So in this video,
we will be going over the paint tool
and the eraser tool. Alright, so to
learn these tools, Let's open up a
substance file and I will just go in with my
fire extinguisher one. So go to File, hit Open. And now I will just quickly
head over to that file. Over here, this one fire
extinguisher underscore. Start open this up. Alright? First thing that I want to do is, as you can see, all these jagged
edges over here, you can go over to
the display settings. And as we have learned earlier, we can enable temporal
anti-aliasing, which you solve all
these jagged edges and now our model abuse
to be smooth. Alright, so to start, you can see all the tools
are currently disabled right now because we do not
have any layer over here. Now makes sure to select
your metric texture set and just click on this
icon to add a print layer. And you will see that all the
tools are active right now. And we have selected
the paint tool and we can easily
paint over our model. You will notice that you cannot paint over these areas because obviously that are a part of the rubber and
plastic picture sets. So that's why we cannot
paint over them. We can just paint over
the metric lecture set. Alright, to start, let's go over the options over here
at the top first. So the first thing you see over here, if we hover over it, you can read that this is
the brush outline goes up, basically right now we
have selected this one. Brush outline goes up, but we can also select full preview because that just means it will show the color and
everything of the brush. Let's say you go into
the brushes section of our shelf and you
select maybe this one. Now you can see we can
easily see the brush if I change the color from over here in the base color section, you will see that also. So that is basically
the youth for it. You can also change this
to a processor Kazaa. And I think this
one is the worst because we cannot really see
how our brush looks like. So I will just set this back
to brush outline goes up. I think this one works the best. Alright, so I will go back to my basic soft brush and let's set the
color back to white. And the next thing is size. So size is pretty
self-explanatory. We've already gone over
these properties, ones. So you can change the
size from over here also. But I think it is
a bit tedious to grow over here and then change
the size or go over here, change the size, then
start painting again, change the size,
then start painting. I think the better option would be to just use a shortcut. The shortcut for
this is old control. And then hold your
right leg down and move your mouse left
and right, like this. Make sure to only move
it left and right because for up and down there
is a different shortcut. So let me go over
this once again. Hold Control, old
right-click and then go left and right with
your mouse like this. And you will change the size
of your cursor when easily. I think this is a
really great shortcut. You can just hold Control, right-click on the fly. You can change the
size of the brush. Start painting. Again, change the size of it. Start painting. I think that's really a lot better
than going over here or here. I think that color right now
is too similar to the model. Let's quickly change it
back and keep it that way. I will change this to maybe blue so that it is
easily noticeable. So I hope you understand
this shortcut will control right-click and then move
your mouse left and right. Alright, so the
next thing you will see over here in
this small icon. So let me just tell you
first if you are like me and using the keyboard and mouse to use Substance Painter, you really don't have
used for this option. But if you have a drawing tablet to work with Substance Painter, then you can use this one. So this option is called
the pen pressure. So beneficial basically decides how thick or thin your
brush stroke will be according to the force you apply on the stylus
of your bank tablet. It tries to emulate
real-world brush. If you have a drawing
tablet with you to use with Substance
Painter, That's great, but to be good at texturing, you really do not need
a drawing tablet, so don't worry about getting it. I'm also using a
mouse and keyboard, so, um, I'll just works fine. Amongst won't be able to emulate a paintbrush
because it cannot, because it cannot calculate how much force your
fingers are putting. But a stylist of a drawing
tablet can easily do that. So if you have that, you
can enable this option. I think it would
be really great. So the next one is float. We have already gone overflow. But slow is basically
if you decrease it, you can see the
preview over here. You can also decrease
it from over here. If you decrease,
it will start to decrease the opacity
of the edges first. And as you keep decreasing it, it will start to move
towards the center. And if you set it to 0 or one, the paint stroke is
completely faint now. So it is pretty easy to understand if you
start decreasing it, it just gets a little bit soft at the edges
as you keep going. Then it moves
towards the center. In a similar way, the stroke opacity feature
decreases the opacity of the whole stroke
at once, like this. So you can see the difference
between both of them. Flow starts with the edges and then move
towards the center. And stroke opacity just goes full-on for the whole stroke. We also have this pen
pressure option for the flu. But as I said, if you don't
have a drawing tablet, you do not need to
turn this on or off, leave in any way you want. And stroke opacity we have already discussed
next we have spacing. Spacing also. We have discussed if you
increase the spacing, you will see that
your brushstrokes are now very much spaced out. And you can see all these dots. Because the spacing is
set to a very low number, we cannot really see that
our strokes are actually in the form of dots because they are too close
to each other. But as we keep on increasing it, we can easily see that are strokes are in the
form of a dot. Alright, next is angle. Angle also we have
already discussed, but I will also tell you a quick little
shortcut for angle. So first let's go over
to the Alpha section and let's select maybe this one. Just select this one.
You can see now we can easily paint this
alpha using a brush. We do not want to
discuss that right now. We are discussing angle. You see if you
increase the angle, now you have rotated
the Alpha this way. But as I was telling you, there is a quick
shortcut for this, because I think for
options like these, it is not very
feasible to go over here and then change it and
then come back over here. You can just hold Control. Now this time, hold your left
leg and move up and down. You see you are
rotating the alpha. Again. I will go over
this once again. Control, left-click, and then move your mouse
up and down like this. You can easily paint it at
whatever angle you may like. What you can do is you can note all the shortcuts in some kind of notebook so that it is easier for you
to remember them. And I suggest you
that you try to learn these and try to
incorporate them in your workflow because
your work will get a whole lot faster if you
learn all the shortcuts. All right, what I will do
now is I will just delete this paint layer because
it has gone too messy. Just delete this and
let's add a new one. So now we have a fresh layer. I will set the angle that to 0. And next is fall apart. So if you enable fall apart
and then try to draw, I think our spacing is
too much right now, so I will decrease
it to maybe 15. Let's try 50. So 50
is really close. Let's try maybe a 100. Now if you are painting, you can see that the
Alpha is following your brushstroke in
apart wherever you draw, it tries to follow you. So this command is also
very useful and a good, alright, I will undo everything and let's
turn off fall apart. Next is jitter. Jitter is basically randomness. If you increase this, first, I will set the Alpha
back to our default one. So click on this empty slot over here and let's search for shape, because shape is the basic one. So over here, this one, alright, I will set
the size jitter 200. And you can see now the size of a brushstrokes is very random. So get my point. Jitter is
basically for randomness. If you set the size jitter 200, the size of a brushstrokes
would be now random. If you increase the
flow Jitter 200 now the flow would be random
along with the size. And you can set all of them 200 to have a completely
random brushstrokes. I think this is also
sometimes useful, but yeah, this is a pretty useful
command and we can use it in a workflow to create randomness
within our textures. Also, one more thing that
I forgot to mention is if you want to access
your properties window, you can also do so by
hitting right-click over the 3D window like this. We can appear anywhere. You can right-click and you can easily just change the
settings from over here also. You see that it's quite handy. I would just control Z to undo. Alright, let's set
the tutor back to 0. Next we have the alignment
of a paintbrush. So if you click over here, there are four different
types of alignment. Camera, tangent wrapped,
anion, planar and UV. So Tangent grab and tangent planes are pretty
similar to each other. And the tangent wrap
one is the default one. And let me show
you what it does. So as soon as you put your brush over the surface of the model, you can see the brush
automatically rotates to it and tries to stick with
the surface of the model. We will see as soon as
they go out of the model. And as soon as I go in, it will immediately stick
to the model like this. You see it rise to always stick to the surface
of the model, no matter the curvature for it will always stick
to the surface. It will rotate itself. You can see we can
easily paint like this. First, let's set the spacing. As soon as I go on to the model, the brush with
stick to the model. That is basically tangent
wrap and tangent plane. They're both very
similar to each other. Next we have is camera. Camera. You will
see as soon as I go in, nothing really happens. Stays the same, the
brush stays the same. You will see the difference now. As soon as they go in the model, we will see in tangent wrap, the brushstroke sticks to
the surface of the model. But in camera, it stays according to the
new board, like this. So now you can paint like this in our different
kind of way. It can be useful
sometimes when you have to pay it from
a perspective. You can see we are painting
in a different way. So this is the
difference between Tangent grab and
anion plaintiff. And the last one we have is uv. Uv. Let's set this back
to tangent wrap first and press F1 on the keyboard
to bring this menu. Now what I will do is
I will zoom in over here and try to paint
along this line. So I'm painting over
here like this. Let's first increase the size
of the brush a little bit. And now I'm painting like this. You will notice that when I'm painting paint strokes not
only go over this thing, but also go over the top
part of our model over here. But let's say we don't
want that to happen. So now I will set this to UV. And now if I paint like this, it will paint on
that particular UV said only and not
on any other ones. You see it is pretty handy. If I set this back
to anion wrap, you will see it is now painting on both of these UVs
at the same time. Because it is considering it is a single brushstroke like this. But actually we want it
to be just over here. So I will set this to UE. And now I can easily paint like this just on this thing
that you received. This is the use for
the UV alignment. And I hope I'm clear
with all of them. So press F2 for 3D view. Now we have back face culling. For backfill swelling, we need to go back to tangent wrap. Alright, so by default
back face culling is on. Let me show you what it does. First, I will decrease the size, very small, something like this. And also if you go over here, let me just show you there is a hardness option over here. So set the hardness
option to a 100. So basically the
hardness option, as you will see over
here in the preview, the hardness of the alpha. There is also a quick
little shortcut for this. You can hold that.
And then right-click and then move your
mouse up and down. You see now the hardness
of the alpha is changing. This is 0 hardness
and this is 100. So the difference
between the two is you can just paint it and
see for yourself. This brush stroke is kind of
soft and this one is hard. If you remember, controlled
plus right-click and left and right is
for size increase, the brush size
increase or decrease. And then up and down
is for increasing or decreasing the hardness
of the alpha like this. We will go over
this more when we will cover this in
the alphas section. But for now let's
set the hardness 200 and set the brush size
to be small like this. And now start
painting over here. You will see at the back
we see nothing over here. And that is because back
face culling is on. But let's say we turn this off. And now you start
painting over here. You'll see now that
the brushstrokes are coming at the back also. So basically this is back face culling. Should
turn this on. It will only paint on the front and not
on the back faces. But if you turn this off, it will paint vote on
front and the back. So that is basically
back physically. I think turning it on at most
times would work the best. But for some use cases
you can turn it off. Alright, so the next
one we have cyberspace. So currently it is set to texture because I was
checking some things, but the default
size spaces object. Let me show you what
is the difference between object and viewport. First, set this to object. Let's set the size of the
brush to something like this. And you paint a dot
over here like this. And then you zoom in using your scroll wheel and then
painted dot over here. And you can clearly
see like both of them are the same size. But if you set this
to viewport Alexa, you paint a dot over
here like this. And then you zoom in.
And then paint a dot. You can see the size of the
brush stroke has changed. So the viewport is
basically the size of your paintbrush will change
according to your Zoom, according to a
viewport position. So if it is very zoomed out, the brushstroke would
be pretty large. And if you zoom in, it
will be really small. I think it can be
useful sometimes, but mostly I will
just set it to Object totally because that
is the most accurate. It will remain the
same brush size at any kind of U-boats setting. So if I'm over here, then I will zoom in and it's
still remains the same. So basically in the
object size space, the size of a paintbrush remains related according
to your object. As you can see in the
viewport size space, the size of your
paintbrush domains relative according
to your viewport. And then we have a final one and the third one that is
texture size space, which is honestly really
similar to object size space. In this one, the size
of a paintbrush remains relative to the 2D
texture over here. So it will remain
relative to that. So nicely it works in a similar way as the
object size space. And as I said, I will be mostly using the object
size space only. So now let's see back to
the default object size. All right, Next we have Alphas, so we have already discussed, we have already
discussed about them, but let me just go
over it once again. If you go into the alphas
section off the shelf, you will find here a lot of black and white images
that are called alphas. Double-click on any one
of them and you can simply stamp them on
your model like this. But also any alpha you select, you will see some special
properties over here that are specific to that certain
alpha only liking this one. You can see if we
changed some of the settings are alpha would be different
according to them. You can also decrease the border width and you can
see the preview over here. So you can see how we can create a whole lot of different Alphas just from a single one only. You can maybe select
some simple ones. Let's search for Square and select this very simple
square rectangle Alpha. Stamp it like this.
You can easily see we can stamp a
square over here, but also you can change
the size of it like this. So yeah, that comes
in pretty handy. We can also change the
contrast if you set this to 0. Now you can see
there's a little bit blurred out on the edges. There are a lot of things we
can do with certain alphas. Obviously, each one of them has a specific
property to it. You can just select any of
them and try to work with it. So you can see we can create a whole lot of different types of shapes with only
a single Alpha. But also the main properties of many alpha would be hardness, which I've already shown you. Like if you select this one. Right now, the paint
stroke is kind of fade. But if you hold Control and then hold you right-click and
then move it upwards. You can see over here the
hardness is increasing. Now you paint it. You can see easily see the
difference between the two. Now I've set the hardness to 0. So at 0 it just
disappears completely. So I will increase
it a little bit. And you can easily understand the difference
between all of them. I think that is a
pretty handy property. So just remember the
shortcut hold Control, right-click and move
your mouse up and down. And left and right is for size. Alright, now you
can just go through and check some different Alphas. Let's see this one,
stamp it like this. Let's change some
settings over here and see how they react to it. I think you get my point. Each and every alpha has a certain set of
properties to it that you can change and get very different results
according to your needs. Yeah, I think this is it
for the alphas section. Next we have stencils over here, but we will go
over them later on when we will learn about
the prediction tools. So we will learn about distances along with the prediction
tool over here, this one. And at last we have these settings which we
have already gone over, but let's go over them quickly. I will select shape over here. And let's quickly
select this one. That is a very basic one. The first one is
obviously for color. We can give you a paint
strokes, any kind of color. And if you remember, this
is a paint layer so you can change the color of your paint stroke and it
won't affect the older one. As you can see, we can have both green colored and blue colored paint strokes
in the same layer. We cannot do this with a field. If you remember. Now I think you get my
point. Next is metallic. If you set this to one, now your brushstrokes
will be metallic. And if you set this to 0, then
they will be non-metallic. Let's set the hardness to one. Next we have roughness. Roughness would not
reflect any light. There will be no reflections, but 0 would be a whole
lot of reflection. We cannot see like this, but here you can
see it this way. If you set metallic 21, I think it would
be better visible. Yeah. You can see now the reflections along with the
metallic property. So the normal channel doesn't really have anything
to paint with. We can select some things, but we won't go over
this right now. We will go over it later on. It is a different topic
for a different video, we'll go over normal painting
at a later on stage. But for now height, you
already know if we increase, our paint strokes would
look kind of elevated. And if we decrease it below 0, they will look as if they
are going inside our model. You can change the
brush to see it a little bit more
evidence like this. I think you get my 0.1
more thing that I want to show you is you can also disable
channels from over here. So let's say I only want to
paint the color channels, so I will just click
over here when my one and turn them off All. And now I'm just
only painting color. If you change this
to maybe blue. Now you see I'm only changing the blue color and not the metallic or the
roughness properties. But if I turn back on the
roughness and set it to one. And now along with color, I'm also painting the roughness, but not the metallic because
metal is turned off so metal it is taking from the
earlier paint stroke only. It is kind of confusing I think. But yeah, if you
turn everything off, you will be just painting on a single channel and you can work according
to your needs. Maybe you can turn
off color and then you are painting only
with the metallic. So now you see I'm painting
metal is over here. This is non-metals. If I
painted over here again, I will get the metal back. So I think you get my point. Now. Also, I think this is too messy, so I will just
delete this layer, add a new 11 more thing that
I want to show you is if all the channels are turned on and if you only
want to select one, maybe like, let's say we just want to paint
the roughness. You can hold Alt and then
click on this channel. And now you see only
roughness is selected. And now if you try to print it, you will see we are only
painting deafness over here. Now the model appears to
be very love to paint over here now you can see the
reflection is gone. This way. You can just paint
on a single channel only if you turn back on color. Now you are painting both
color and roughness. Or if you turn back
metal and roughness, you can paint in
different combinations. I think you get my point now. You can maybe experiment
with this a little bit to get the hang of it. Alright, so I think it is fine now we are done
with the pin tool. And last thing that
I want to mention is this video had to cover both the paint and
the eraser tool. So if you just
select the eraser, it is basically the
same as the paint tool. All the properties
are same over here. But the only difference
is you can erase stuff now, like this. But as I said, similar
to the Paint tool, you can also, it is
certain channel. So let's say I turn off all
the channels from over here. Now I'm only removing the color information and the height information
still stays there. If you just press Control Z, now turn off the color channel and just enable the
height channel. Now, I'm only moving
the height information, but the color
information stays there. So I think it is a pretty
handy thing to know. It can give you a
lot of control over your textures with what you can delete and
what you cannot. Also, if you select a different
kind of brush, you can, is it in a more
organic way like this? You see also, if you use
the shortcut once again, hold Alt and click over
height once again. Now all the channels
will be selected again. So basically hold Alt, Click on any channel. That channel will be selected and the rest would
be disable it. If you hold Alt again
and select this one. Now all of them are
selected back again. I think this is it
for this video. I will just delete
this layer quickly, add a new one because I forgot
to mention one last thing. So this is the last last
thing for this video. Let's come back to
the Paint tool. And one thing we
forgot over here that is this Eigen lazy mouse. So I think that is quite useful. I must go over it. If you go into the
brushes section and select the basic soft. If you remember, I was
talking about pen tablet earlier and how we can use it with pen pressure
and everything. But as I said, I'm on
a mouse and keyboard. But let's say I want to emulate the effect of a drawing tablet. My best bet would be lazy mouse. So if you enable this, you will see that you will get a lot more control
over your paintbrush. So let's say you want
to make a precise true of creating an S shape. So first let's turn
this off and I will try to create an S-shape. First, let's give
it a proper color. I will turn off metal and
let's turn everything back on. And let's set back metallic
to 0, roughness to 0. Also, I will set
the height to 0. And let's try
painting an S shape. Now I will turn on lazy mouse and then tried
to paint this S-shaped. Before that I will decrease
this distance to maybe four. And now let's try painting. You can see with this I get a more precise and a
smooth brushstroke. As compared to this S. This is looking like
very shaky and wavy. But although this is also
not a very perfect shape, but at least the
brushstroke is very smooth. So I think you get my point. What lazy mouth does is if
you increase this distance, you will get a little bit
more controlled way a stroke. But keeping caution that if you keep on
increasing this number, it will be harder and
harder to control your stroke because now
the diameter is too large. And you see now I
cannot even pain probably say I tried to find a proper balance between this. I think value of five or
six would be pretty good. So you see, I think
this is very useful in emulating the effect
of a drawing tablet. Obviously it is not as perfect, but I think it helps a lot when we have to paint
something very precise, maybe like a curvy line or something that we
cannot really do without this because
we are getting very shaky and VV deserts. You see, I think this
tool helps us a lot. It just needs a
little bit practiced. So yeah, you can
turn lazy mouth. You get a little bit more
control with your brushstrokes. Alright, next over here we have some different profiles
for our lazy mouth Only. You can just try them
out and see what they do because I honestly don't really know what is the proper use for them or
the difference between them. But you can try each one of
them and get the feel for it. Alright, so the last three
icons over here are four, mirror symmetry and
radial symmetry. And they have a
separate video of their own in this section only. So don't worry, we will be going over them in a later on video. So I think this is it
for this video, guys. Thank you for watching. I'll
see you in the next one.
11. Basic Material Settings: Hello and welcome everyone. In the last lecture,
we learned about the pin tool and
the paint layer. So in this video we will be
going over the Fill Layer and some of the basic material
settings related to it. Alright, so let's
go over to File and open up our fire
extinguisher start project. I will just quickly go
ahead and display settings and again, enable
this anti-aliasing. So to add a fill layer, you can just click over here on this icon and a fill
layer would be added. So now you will see overhead. None of the tools
are active because we cannot really
paint over a failure. We can paint over a paint layer. But for a failure,
it will just fill the complete texture
set with its contents. As you can see, you can
change the color over here. It will affect the whole
texture set all at once. If you change the metallic value or you change the
roughness value, it will affect your
complete texture set and not just a single byte
like in a paint layer, fill layer, as the
name suggests, it will completely
fill your model. If you add a paint
layer on top of this and then try painting, you can see we can paint
over the field layer because the paint layer is
on top of the fill layer. If you will move this down, then you won't be able
to see the paint layer. So I think you understand
the difference between the paint
layer and fill layer. By now, we have already
gone over it so many times. Also, the paint layer won't retain the
information on its strokes, like we have already painted
with the white color. And now I've changed the color
to purple or blue maybe. Then I paint over it
and you can see we can find both the colors
at the same time. So the paint layer does not retain any kind of information. You can change the color, metallic properties, toughness, anything of your paint strokes, and you won't see any change on your earliest strokes that
you have already painted on, but this is not the
case with a failure. I will just delete this paint
layer now and we won't be discussing about it and we'll just discuss about the failure. So as I said, unlike the paint layer, if you will change the color, you will immediately see
on your texture set. Anything you change, you will immediately see the effects. Alright, so all these basic settings that we can
change the color, metallic roughness, we
already know all these, so I will just quickly
delete this failure. And let's come over
here in the shelf. In the base materials
section of the shelf, you can just click
over this icon. On the very first, you will see all these
different materials. So basically all these
different materials or different kinds of filters, you can just drag and
drop any one of these, like the brass pure, if you will drag and drop it, you can see it is
just a fill layer with some predefined properties. You can change them
if you want to, but then you will change the physically correct
properties of brush. So I suggest you don't do that. The roughness, metallic,
everything is perfectly set. But here you can
change it a little bit to fit your needs. We will drag and drop
the gold material. Then you will see it is
just the same fill layer with some different properties, maybe the color or something. Then we have Ireland. Some of the very
basic materials. You will see it is a little
bit different over here, but basically it
is the same thing. You can change the roughness. And there are some extra
properties over here, like this roughness variation kind of thing you see over here. You can adjust it like
even increase the scale of it or the brushing intensity. All this, this is basically a failure just with a little
bit of more properties. You can also enable or disable
any channel from overhead. Like if you don't want
this roughness thing, you can just disable
the roughness channel completely and the normal to
remove all this information. So I think you get my point.
Let's delete this layer. You can try some more of these. We have some more like this one. All these are
basically fill layers but with some extra
settings because these are provided to you by
substance so you can change some of the
things as you like. Let's see, we have Would. You can also use
wooed over here. You can change the number
of fibers to this. You will see closely fibers are increasing and decreasing. If you increase the layers. Also you can disable any
channel you don't want. Like if you don't want
this height information is disabled it from here. You can see the difference. Alright, so I think
you get my point. Anybody here you want
to use from over here, you can easily do that as a base material and then
you can build upon over it. But let's say we want to add our own material that we have
downloaded from somewhere, and we want to add that particular material
onto our filters. So how can we do that? So let's see. I will open up Google and the Google search
for ambient CG. So basically this is
a free website where we can get lots
of free textures. So just click on this first
link and you will find this website is a
pretty great website for different kinds
of materials. Hdri is 3D models, everything is over here and
everything is for free. You can even use them in
your commercial projects. Acidic materials. You can see all these
materials over here. So let's say you want to add some kind of material
on your project. So you can select any one of the materials that
you might like. I will just quickly
go over here in the search bar and type in metal and search for
all the metal materials. And maybe I will
select this one. So click on it and I
will download this into K. Wait for the
download to finish. Now I will just quickly bring over my downloads directory. Right-click and
let's cut this file and I will paste it in
my tutorial directory. And I will just paste
it in the basic folder. So if you don't want to
download it from over here, you can also find it in
your resources files. Now right-click and let's
extracted over here. Alright, so now open
up this folder. Now here're all the texture maps related to this material. We do not need to bring each one of them into
Substance Painter. So I will just select the color. Then the displacement, displacement is basically
the height map. Then select the metal and
we have two normal map, normal map Derek texts
and normal map OpenGL. So if you remember our
predictors in OpenGL, so I will just bring this one. And last one is roughness. Now to bring them
into Substance, Painter just drag and drop
them onto the shelf like this. Now select all of them. You can just press Control
a to select everything, or you can just drag
your mouse like this. Select all of them. Now click over here and select Texture. And now all of the texture
maps are selected as texture. I will import them to this particular project
only and hit Import. Alright, so now all the maps
are over here in our shelf. Now to add them to our model, we just need to go over
here, add a fill layer. Alright, so how can we bring these texture maps
into the fill layer? You select the base
color, that is this one, and drag and drop it into the base color
section like this. And you can see have the
texture over here on our model. Next for the metallic, you can find a metallic map. So this one metal is drag and
drop it onto the metallic. Next, let's drag and
drop the displacement. Then we have the normal. And the last one. This one is roughness. So you see now all
of the maps are over here and we have
successfully imported a material from outside
and brought it into Substance Painter and then created a filler
material out of it. So you see how easy
it was to do that. You can also view your model
in a different lighting. You can just hold shift and right-click and rotate
your environment lighting to just view your model from all
different angles, in all kinds of
angles of lighting. Alright, so now let's say
you are feeling like this. Height map is looking
like too much. The height information is like going to overboard and
it is like in your face. And we don't want
it to be this much. We want to tone down the
height values a little bit. So what you can do is right now there is no light
slider over here. But what you can do
is you can go over here, click on the height. And now if you remember
this opacity value, if you decrease it
from over here, you will see if you set it to 0, the height value
completely disappears. Let's give it a value of 50. Maybe. You see now the
height information has been reduced to half. Again, further, tone
this down to maybe ten. So that is very faint. Yeah, I think that
looks pretty good. From over here, you
can change the opacity of different channels,
of different layers. Maybe you selling base color and then reduce the
base color value. You will see now all the
color information is gone. This way you can tone
down or increase. So this way you can
just tone down some of the channels that you feel
like are getting too much. Alright, so next let's
look over some of the settings through which
we can adjust the material. Over here in the UV
transformation settings, you can change things like
tiling, rotation and offset. All these options are
very self-explanatory, but let's see what they do. If you increase the tiling, you will see as you
keep on increasing, the scale of the
material decreases. And if we increase it
to a very big number, you will see that
our material is being repeated over
and over again. So obviously, going for a large number for the
tiling value is not a very good choice because
people would be able to see your repeated textures
over and over again. I think a value of somewhere around two or
three would be pretty good, I think, because this way, no one would be able to
notice that the texture is repeating and it looks
pretty unique language. Next, if you disable
this lock icon, what will happen is
you can increase or decrease the tiling on the
both x and the y axis. So you see now the texture
is being stretched on the y-axis because the tiling is of different
values on both axes. Honestly, I don't
recommend doing this. I always keep this lock
enabled so that I only have to change one value
for the tiling, like this. Next is rotation. If you
increase the rotation, your texture will
start to rotate. This is sometimes
useful for when you have good materials and you wonder would lead
him to go this way or this way on your model. Then you can use rotation. Let me just quickly show
you with an example. I will disable this fill layer. Let's remove this filter. Select the base materials, and let's again bringing
this wood material, drag and drop it over here. If we set the rotation to 90. Now you will see
all of these would linings are going like this on the y-axis and when it was at 0 level going on the x-axis. So you have this option is
pretty useful for that. I will just delete this layer again and let's
enable this back. Next is offset. So offset is basically moving the texture on the
x and the y axis. So this one is for the x value. If you move this, you
will see your texture will start to move
on the x-axis. And this one is for the y. Okay, so these were some of the UV transformation that
we can do from over here. I'll let, so let's go in a bit more depth in
this because we have prediction filtering and UV map over here that we haven't
gone through yet. We have different
kinds of predictions and all these settings. To go over them, I will
just quickly delete this villa or we can just
turn this off for now. Okay, So one thing
that I completely forgot to mention, if you will, just quickly press F1 on your keyboard to bring
up this 2D view. All these settings
that we did just now, tiling, rotation and offset. Everything you can do
from over here also, you can do so by just using
this transform tools. So if you want to
move the texture, you can just do so by
moving it like this. You can see the offset values
are changing over here. Also, if you want to
dial the texture, you can just scale it down or increase the scale
of it like this. But right now as you can see, the scale is not uniform. It is scaling in both the axis
and in a non-uniform way. To scale it uniformly, you need to hold Shift and
control both at the same time. If you do that, you can see
now the scaling uniformly. If you will just hold Control, you will see that whenever
you scale anything, this pivot point won't
change its position. So let's say you just do
not use any key bind. You just use your mouse
and tried to scale it. You can see whenever
you scale it this way, the position of this
pivot point is changing. Whenever you increase
or decrease the scale, the pivot point is moving
from its location. But if he will hold Control, you will see the pivot point is not changing its position. Now. If it will hold control, the pivot will not
leave its position and you can scale it
whichever way you like, but it is still not uniform. So if we want to
make it uniform, we need to hold both Control
and Shift at the same time. And you can scale in this book. And if you just hold Shift, you will scale it uniformity. But as you can see, the position of the pivot is changing. You see the position
of pivot is changing. That's why our offset
is also changing. But if we will hold
both shift and control, the value of offset
won't change, only the tiling will change. These are a couple of shortcuts
that you must remember. Hold control to not change the position of
the pivot and hold both control and shift
the scaling uniformly. Alright, to rotate, you can just rotate it from over here. Like this. And if you will hold
Shift while rotating, it will snap like this. At 45 degrees angles. That is pretty useful. I think. The next word you can do is you can also change the location
of this pivot. Maybe you want to place it over here and now it will rotate it. You can see it is
rotating from over here. Now. That is the
use of this pivot. Also, there are a couple
of tools over here. You can see this one if you
will, just click over it. The transform tools
are gone now. Go over it again, they are back. This one is just for
the size of the icons. I think medium is
fine or maybe small. This one is to
flip it like this. And this one is to
flip it vertically. So this one was horizontally
and this one was vertically. Next one is to
reset pivot point. As you see, we changed the
location of the pivot point, but we want to again keep it at Center for we can
just click over here. And the last one is reset. So all the changes that you have made over here to these values, if you click on
this Reset button, everything would be say. So maybe you are feeling like
you have gone too far with the editing and you want to set everything back to normal. You can just click
over here and you can see all of the values
are back to normal. Let's quickly hold
Control and Shift again and I will scale it down. Maybe three times. Yeah, like this. Alright, so I think with
this, let's move on. I will disable this layer and again, bringing this material. So drag and drop it over here. Now let's talk about
the difference between the different
kinds of projections. For me personally, the two most use predictions
for me, or UV projection, and the next one is
private in the predictions most of the times you will
find using one of these two, and these two are the most
used ones and most important. Alright, so let's go with
a UV protection first. So this prediction is the
default projection if it will just quickly best
effort to bring this view back. So basically all these UV
islands that you see over here, that texture is directly
projected onto them. But the main problem with
this type of prediction is, let's try and
rotate our texture. As you're rotating, notice all the different
pieces of the model or the different UEs to be precise as if the texture is specific
to each one of them. You can see they're all
rotating differently and a texture feeds
like different for each model and it does not
feel connected at all. You can see, for instance,
while degrading, compare the rotation over
here with this piece. You can see the difference. Another problem with UV
protection is if will go at the back over
here of our model, you will see this huge
you receive over here. So these are UV seams
that or something you have to add value
or UV unwrapping. There is really no
other way around it. You can add them smartly so
they are not really visible, but there will be cases when
they wouldn't be visible. So what can you do at that time? So for stuff like these, you can go with
privacy in a mutation. Let's quickly change
the prediction from over here and see
what is it about. So as soon as you do that, you will notice that the
whole texture has changed. This is rejection and
this one is Dr. Nina. And now notice the texture on all the different
parts of the model. As compared to the
UE prediction is notice the dark part
over here with the body. So this is in UV. All the different pieces and now this isn't trapped in them. Now the texture feels a bit
more connected and it feels like the complete model is
part of the same texture. If I try rotating it, let's set it at 90. You can see the
texture feels very connected as if it's a
single texture only. You can even increase
the tiling and see that. So basically
triclinium prediction, what it does is it
tries to project the texture from three
different planes, are three different axes
that are the x, y, and z. The UV seams have increased
in this type of position, but they are not really visible. And the reason for that is this hardness option over here. If it will increase this to one, you will see all these
themes over here. You can see the texture is being projected from three
different angle. And that's why these
teams are visible. But we have option over
here through which we can just kind of blurred them or
merge them with the texture. If you set this to 0, you can
see it is not even visible. All the seams are
not really visible. And now, if you go
at the back of them, audit will see no UVC over here, which was earlier in
the human projection. This ugly thing, if we just remove it completely
with Dr. Dana. And I think this looks
a lot, lot better. Obviously, there will
be cases where UV looks better and there will be cases when prepping it looks better. So the best thing to
do would be to just experiment with
your model and try different types of
prediction to see what matches with your
needs own model. And you will find it. Maybe some people like
the UV prediction better. So he, obviously
they can go for it. But right now, let's
just set that to Dr. Lena and let's go over some
of the properties of it. So I will now press F2, come back into 3D view. So the first setting
is hardness. Hardness is basically
you understand now, if we will increase it to one, all the scenes that are
being caused because the texture is being projected from three different angles, wouldn't be visible
if you set it at one. And if you sit here at 0, they will be merged with the texture by just
blurring them out. And I think it does a
pretty good job with it. Next over here is styling, which is the same as the UV one. It just styles your texture. You can set the rotation back
to 0 to tile it this way. I think at 90 it
looks much better. Alright, Next, if you
will open this up, these are the 3D
prediction setting. I rarely use them. But what you can do is you can move the texture
like this on the x, on the y, and z. You can also rotate it
on different angles. We just get the best
look for texture. And obviously you
can scale them. Scaling on a different
axis does not really make sense because it will make your texture inconsistent. So the best option
would be to just use the tiling feature
from over here. One thing you might
have noticed is if you increase the
offset too much, protection just completely
goes away from over here. So if you don't want
that to happen, you can just change
the shape crop from over here to projection, extends outside shape like this. This way, the texture would
be infinite and you can do as much of setting you want
on all of the axes. So yeah, let's get back to 0. And if we change this
back to crop to shape, you can see it will
just go away like this. This was basically trapped in a prediction and all the
settings related to it. I think private
and prediction is a pretty good option to go
for if you have bag UVs, like if you're new resumes are really visible all
throughout your model. In wrapping up,
prediction would be your best bet because it can just magically make
all the seams go away, which I think look
very, very leave their visible in front of
your model like this. I think Dr. Dina is a really
great option to just remove all the UVs and to just make a texture feel a little
bit more consistent. Alright, so now let's go over some of the other predictions. Alright, so we forgot to go over the options over
here at the top. Let's quickly do that. Basically it is the same
as the UV protection. All these options that we
can change it over here. We can also do it
from the 3D view. Like you can move the texture
like this if you want to, you will see the values
change over here. Next, you can rotate them. Also. You can just press W, E, and R for the shortcuts. W is for moving
east for rotating, and Iris for scaling. These three items,
move, rotate and scale. Let's quickly the
set everything. Next, this one is just to
flip the texture like this. You can see over here the
scale goes to minus one. You can get a transformation
in x by this, and you can meet a transformation
in y by using this one. And this one is for z. As you can see over here. The last icon, as I
told, is for resetting. And these two icons over here, this one is for turning on
or off the transform tool, and this one is for a
couple of settings. You can increase the manipulator
size. The grid sepsis. Basically, if you move your texture like
this and hold Shift, it will snap in 0.2 units. But if we will increase it, maybe to one, now it will
snap in one units like this. Same is for angle,
angles for rotation. So currently it is 45. If you press E and try to
rotate it by holding Shift, it will rotate at
45 degree angles. Alright, so I think
pretty self-explanatory. Let's restore the
transformations now. Alright, let's check out
the next projection now, if you go over here and then
select planar projection. So try better prediction
was basically projecting a texture from
three different planes. And planar projection is
basically projecting the texture from one single plane only
as you can see over here. Alright, so let's
go over some of the properties of
planar projection. First, I will just disabled
that calling for now. And you can see the
single plane over here. Rest of the settings are
pretty much the same, but let's go over them. First one is styling. You can increase the
tiling like this. You can rotate the texture. Again, you can offset it. So next we have the 3D
prediction settings. Over here, we can change
things like the offset, the rotation, and scale of the plane that is
projecting the texture. One thing that I want to mention is the difference between the UV transformation
settings and 3D prediction settings
is basically that. For this, let's just quickly
enable it ethically. And I will increase the offset value to have this texture
fading away like this. This is because of
the depth colleague. I will explain this later on. Alright, so to show
the difference between the UV transformation settings and the 3D projection settings, basically, you can try to
rotate the texture like this. And you will see
that the texture is rotating over here
like this way. But if you try to rotate the texture from the 3D
prediction settings, you will see that the
complete orientation of the texture changes. If I set it at 90, you can see now the
texture is from the top. You can adjust the
offset like this. Now earlier it was facing this way but now displacing
from the top side. So basically this is
the difference between UV transformation
and 3D prediction. 3d prediction settings
only work for the texture only if you
are changing the offset, we are just changing the
offset of detection. But if we change the
offset from over here, we are changing the
offset of the plane that is projecting the
texture onto our model. It is a completely
different thing. Alright, so with
that out of the way, let's just reset
the transformation. We have everything
back at normal. I will set the
rotation back to 90. And yet now the 3D
prediction settings are done scale and everything is
pretty self-explanatory. It will scale up the size of the plane that is
predicting the texture. Let's go over depth
calling now that killing is basically used to create
a fade away gradient, like you can see when I
increase the Z value. This gradient that is being created over here that is
because of the cooling. If you're disabled
this, it will go away. That is basically you can
increase the hardness value, will have a sharp like this. So basically this
is depth calling and the next one is
back face culling. So what we can do is let's just quickly disabled that's calling for now and enabled
back face culling. So you can see as soon as I
enabled back face culling, the texture got removed
from all these places. So basically how you
can understand is, let's say you're facing the model from over here
like this in the front. And let's set it to
orthographic view. So now you're facing the
model from over here. All the feces that are not visible to you are
your back faces. So basically all these faces
that are not visible or the back face is basically so because they are
not visible to you, the texture won't be
appearing over there. Basically that is
back physically. So the texture is
facing over here from the front and all
the faces that are not visible to you from the front side won't have that
texture up here over them. You can see over here, basically that is back face culling. You can adjust this with
the angle property. As you keep on increasing it, the texture will start to
appear on all those faces. Because now the angle
has exceeded 90 degrees, but if he will decrease it, it will start to go away. And hardness is
basically the sharpness of the texture from
over here, like this. One quick example of back
face culling would be that let's just increase the
hardness of from over here. And in the rotation settings
of a 3D prediction settings, set this to minus 90. You will see it as kind of created a snowflake effect where the snow only false on the top faces and not
on the back faces. So it can be used for
effects like these, where you want to add like
dust from only at the top of the model or things
like snow moss. And yet for stuff like that, it can definitely be used. Alright, so let's just
disable back face culling now and set the
rotation back to 0. The plaintiff prediction
works really well for models that are basically
planar in shape, as you can see for
models like these, it is really getting
stretched over here. Well, let's say if we
set the rotation back to 0, you can see. The planar projection
is holding up pretty well for this model also. So you never know
you can try out different predictions to see what fits your modern the best. And I think this one is
looking pretty good this way, We do not see any kind of
themes or stretching causing, caused because of the
planar projection. Maybe a little bit over here.
But that would be fine. I guess. Also the planar
prediction is very useful for placing
stickers onto your model. So let's quickly
go over that also. I will just disabled this layer. Alright, so now
let's just quickly open up our resources folder. And if we will go into
the textures folder, you will find these fire
extinguisher textures that I've added to use later
on in the course. But let's just placing this one, I will just drag and
drop it over here. And let's select it as texture and important
this to the project. Hit Import. All right, so I will create a new
layer, new fill layer. I will drag and drop it like this over here in
the base color section. So now let's see in the
prediction from UV planar. And you will not notice
the texture does not quite look like
how we want it to. So what we can do is you can see all these tools over here. We already discussed them in
a private and a prediction. They are pretty much the
same over here also. So let's just select the
scaling tool from over here and scale the
texture down like this. You can also use the
shortcut that is the W, E R, R is for scaling. You can see the texture
disappears from over here. But what we can
do is press W and move it over here at
the forward like this. And you can see the texture
is repeating again and again. It is tiling texture, but we do not want that. So I think now is a nice time to discuss this UV wrap option. Right now it is set to repeat, but you can set it to none. And this way the texture
won't be repeating. It will be just a single
texture over here like this, and this is what we wanted. We can also set this to repeat
horizontally like this, and repeat vertically like this. Let's just set this
to none right now. Also this option works with
all types of prediction. If you just disabled this layer for now and enabled
this back on, select the word
American Chetty layer. And let's set this back to none. And what you can do is
decrease the tiling. And you can see now the texture
is not repeating anymore. Even the word picture is
over here like a sticker. And if you set this to
repeat horizontally, it will repeat like this. And repeat vertically. It will repeat this way. If you set it to repeat the texture wood tile
all over the model. I think it is a
pretty handy command. Let's disable this back
now and enabling this one, we can also rename
the layer to sticker. Alright, so now we have easily placed us ticker
like this over here. But there is one more tool
over here at the top that was not in the tribe
and a prediction that is this surface tool. So while selected this texture, just click on this surface tool and it will change to this. Basically you can just
move your texture all over the model very easily
with this surface tool. And this tool is pretty handy. You can see the texture. We're going to rotate
it a little bit. Let's just control
Z at everything. And you can make minor adjustments
with this very easily. I think it is a particular tool. And planar projections can be very well used to stamp down stickers or any flat thing on
the surface of your model. I think it works pretty well. Alright, so now I
will just delete this layer and enable back
the Buddha American Chery. Like this tool again translate tool so that the surface
to lose the weight. Alright, so let's change the prediction from
planar to spherical. So I think by now
you get the point. Rest of the predictions are
spherical and cylindrical and spherical is basically
in the shape of a sphere. You can see the texture is
kind of weird over here because it is in the shape
of a spherical projection. This type of prediction
works really well with obviously
spherical objects. Not so much with
this kind of model. But if we want to,
we can make it work. We just need to make
a lot of adjustments. And I don't think it
is worth their time. In this kind of prediction
would be really useful when something
is spherical. And obviously all the
settings over here at pretty much the
same the tiling. You can see it is
not repeating right now because the UV
unwrap is set to none. So if you said to repeat, it may start to repeat. Now. We have the rotation, the offset, all the
staples settings. We can change the offset of the fear that is
projecting the texture. You can see if you
increase the x value, the texture moves
towards this way. Basically this is
spherical projection and the next one is
cylindrical projections. I think for this type of models for cylindrical
projection would work very good because this model is basically
a cylinder only. We have other pieces also, but we can separate them out and give them a different
type of prediction. But I think it
works really well. There is one new
command over here, angle, as you can see, you can place your texture this way in the form of angles. I don't know The
perfect use for it, but I think it would be useful
for some type of things. With a cylindrical projection, you can decide the
angle this way. And the rest of the settings
are pretty much the same. We have the tiling rotation offset and then the 3D
prediction settings. So yeah, I think with this
all the predictions are done. The last rejection, that is, the walk projection is
kind of a different one. And we will be covering this prediction in
the bonus section of our course because I
don't think it is really useful from a beginner's
perspective view. It is a really great
feature though, and we will definitely discuss
it in the bonus section. Alright, so I think
the last thing that is remaining is this
filtering option that we did not discuss. So let's disable this layer
back and enabled this one. But I will do is,
if you remember, we decrease the opacity of the height channel
from over here, I will set this back to 100. So makes sure all the channels
are back at a 100 opacity. Alright, so now
let's go filtering, in my opinion, filtering is
not really that important. I've never ever change this from bi-linear HQ to anything else. But basically what it does is if it will change
this to shop, you will notice this kind of
texture changed over here. The texture is a little
bit more sharper. Changes back to HQ. I don't know if it is
noticeable in the video, but it wouldn't be noticeable
in your substance painter, you can switch
between both of them and just quickly
see the difference. Basically the sharp one makes the texture a little
bit more sharper. But I've never ever
used this command. I've always said the
filtering to HQ. And the last one
that is nearest, basically it also
does the same thing. It makes the texture look
a little bit more grainy. You can see for yourself if
you set this to nearest, you will see that the
texture feels kind of grainy and a little bit
more sharper than use with. As I said, I've
never ever changed the filtering option and I
don't recommend changing it. Bi-linear HQ is I
think by far the best option and we can
keep it at default only. Alright, so I think this is
it for this video, guys. Thank you for watching. I'll
see you in the next one.
12. Masking: Hello and welcome everyone. In this video, we will
be going over masking, which is I think one of the most vital and useful
part of Substance Painter. So if you are aware with
masking in Photoshop, it is almost the same as that. So a mask and Substance Painter is basically a black
and white image that decides whether
a particular layer should be visible or not. In terms of masking, the black color means invisible
and white means visible. So just make sure to
remember this thing. It might not make sense
right now, but it will, when I will show you how
masks actually, well, so black leaves invisible
and white means visible. Alright, so to start off, let's open up our fire
extinguisher project and showcase how
we can use masks. What I will do is first
let's start by adding a fill layer onto our
metal extra set like this. And also I will
change it back to perspective in the last video, we set it to orthographic
and I forgot to change it. Now I will set the color to red. Let's make it a little
bit shiny and also give it a little bit of
metallic value like this. Alright, so this is
our paint layer. Let's rename this to paint. Next, I will create
another layer and give this a dark color. And I will make this rough. Also, I will disable
all the rest of the channels except the color
and the roughness channel. Because we only need these two. Alright, so I will
rename this to dust. So as you can see, we have our paint layer over here and then we have our dust layer. So obviously we do
not want that does to appear over the
paint layer like this. We only want to appear it in some of the
places that we want. So how can we do that? In things like these, we always use masks
because obviously we don't want this whole layer to be
visible like this dust layer. We only want it visible to be in some areas to add a mass, what you can do is you
can go over here In this icon and we have
different types of things. We can add a white mask, a black mask or bitmap mass. But for now I will
just add a black mask. And mostly we will be using
this only add a black mask. Alright, so let's do that. As soon as you do that, you
will see that your layer has completely disappeared
from over here. So don't worry, the
layer is still there. So basically what happened
is if you remember, I told you that that means invisible and white
means visible. So as we have added a
black mask to this layer, this layer is invisible now
and we cannot really see. So to make this particular
black layer visible, what we can do is we
can start by selecting our brush from over here and
then click on this mask. And as you can see,
the white color is selected right now. And if you try to
paint over here, now the layer starts
to become visible wherever we paint with a brush. So basically this is
the way we use mask. As I'm painting with white. And I told you that white
means visible and that is why the layer is appearing wherever I paint with
the white color, if you will, just quickly
press S1 in C over here, you can paint it this way. Also one more thing, if
you go in this section. Over here, let's press F2, go over here and select
the mask like this. You can see that wherever
we paint with white, the dust layer will
appear just to wet it. And now if you scroll down, so here you can see
that you can only choose between two colors
that are white and black. And that are the
only two colors we need for painting on masks. Obviously, we have shades
of black and white. If you will, paint with
a little bit gray color, only some part of
the layer would appear and restaurants
stay invisible. So yeah, that is for later on. Let's set this back to black. And you will see now if I
start to paint over with that, texture starts to disappear
wherever I paint. And if I again
select back white, now again, the deciliter would appear wherever I
paint with white. So I hope I'm clear with masks with this type
of demonstration. White means visible and black
means basically invisible. You can basically it is the texture wherever
you don't want that layer to appear by
painting with black color. Alright, so let me just tell you a quick little shortcut to
switch between these colors. You can just press X and you can see why it
appeared over here now. And if you press X again,
a black has appeared. So now what we can do is
first let's right-click on this mask and I will
just hit clear mask. So all this pain goes away. Now let's go over in
the brush section. And I will select
this dirt brush. And what you can do is to give this sort
of a dirt effect. Let's scale this brush down and try to paint over
here with white color. So press X to switch
back to white color. Now if you paint over
here with this brush, you can see we're giving it a dirt kind of effect like
this by painting over here. This is the actual power
of Substance Painter. We can now add
different types of layers and add different
mass to them and start painting on them to create various different layers of different kinds of
details on the texture. And even just paint the dust wherever
you want, like this. Maybe you want to
change the brush. Obviously not this one. You can also do things like obviously all the brush settings that we have already gone over, like decreasing the hardness so that it is a
little bit faint. Alright, so now you
might think that we can do all this with
basically a paint layer. Also select, say I disabled this dust layer and I will
add a bent leg quickly, and I set the color to black. I will start painting
over here with this brush to create
some dirt effects. Now we can argue that what
is the need for mass? We can basically
use a paint layer and along with the paintbrush, we can easily dollar
effects on the paint layer. But the main power of
mosque is if you will just delete this paint layer and
enable back the dust layer. So as we have added this
mask on a fill layer, we can again select
this fill layer. And whenever we
want, we can change the color, color of this dust. However, we may like. We can also do things like increasing or decreasing
the roughness. You can also do
things like selecting the height channel and
giving it a height later on, maybe later on, we think I want my desk to have a little
bit of height values. We can easily do that. But all of these
things we cannot really do with a paint layer. If you remember, if you just add a paint layer, you
can paint something. But now if you
change any values, if you change any value,
the oldest strokes that you have already done
won't get changed. But the new paint
strokes that you make will have all these information. But as soon as you set it
back to 0, you can change. Nothing really happens to these two integers for the
next strokes that you make. So that is my paint
layer basically cannot be used for
these kinds of threat. So I will just delete
this paint left quickly. Alright, so now we have
our mask over here. And I hope I'm clear with this. If we are painting
with the white color, we are making the layer
appear over here like this. And if you are painting
with the black color, Let's press X to switch
back to black color. We are removing detection. So just a quick check to
see if everything is clear. Let's create another layer. And you will see as
soon as we do that, it will overlap all
our other layers. Let's give this a
completely different color. And let's rename
this to yellow dust. Again, I will add a black mask. And you will see as
soon as we added a black mask, layer
completely disappeared. And now again, we
can select a brush. And you can see we are
currently painting with white. So if you paint over here, you can see the yellow
color starts to appear. And if you press X
and you are deleting the yellow color texture
because we are painting with black and black
meets invisible. Alright, so I hope I'm clear
with the masking process. This is very, very important to make sure everything
is clear to you. Next, let's just quickly
delete both of these layers. Now let me show you
what white mass does. Basically the same thing. It would be just inverted. So we'll create another layer. Let's keep it at white only. And this time let's
add a white mask. So you can see as soon as we add a white mask, nothing
really happens. Because if you remember, black means invisible
and white means visible. Because we have added a
white mask to this layer. This layer stays completely visible and nothing
really disappears. And if you try to paint with white over here,
nothing really happens. But if you paint with black, you will see wherever
you paint with black, the layer beneath that
is the paint layer will start to appear
wherever you paint with. It is basically the same as the black mask only
it is just inverted. So adding a white mask
is sometimes useful. But most of the times we will be adding a black mask only. Alright? So let's quickly
delete this layer now. Alright, so now let's go over another great use for masks. I will quickly
delete this layer. And this time let's use a
rubber and plastic texture set, because we have always been
using the metal texture set. So this time let's use this one. Now we'll just quickly disable the magnetic sheet sets so
it is easier to work with. So as you can see, there are three different
objects in this texture set. One of them is this one, the other one is this. Also actually, there are
four different models. One of them is this one,
this one, this one. And this rubber bite. One thing that I want to
mention it if you're wondering about this gray color over here. So basically this
is the shadow of these models that are of the
Mac at Texas Tech like this. So just don't worry about them. They are here because of
the macro texture set. This piece and this
piece over here. So that is why we are seeing these gray colored
shadows like chemo here. Alright, so now
let's say we want to have red color over
this circular thing. We want the rubber
pipe to be black. And these two models, we want them to be yellow. So how can we do
stuff like this? So now let's add a fill layer, makes sure to select the rubber
and plastic texture set. I will delete this older layer
and add a new fill layer, give this a red color. And you can see now all of the pieces have the
same red color. But let's say I only want
it to appear over here. So till now we were using mask basically like we
added redress layer. Then we added a mask
and tried to paint over it on our model to give
it a dance-like effect. But let's say I want
this red color just over this circular thing and not over all of these
rest of the objects. So you will think, I will add a black mask
and just start to paint over this using my brush
like this, all over it. But I think that process
would be really tedious. So what tasks like this we have just the perfect
tool to work with. If you see this one over here, the polygon tool for
now just select it. So basically this tool, along with mass, work
together perfectly. What we can use this for is you will see these four
different modes over here. So the first one, let's just
keep the first one for now, I will select this one polygon. So now you can see we can choose the color
either white or black, as it is in the case of a mask. So I will choose a white
color and I will select, I will click on this
face like this. You can see as soon as they do that the red colored
appeared over here. Basically what just
happened is I painted this particular face with
white color in this mask. So as you remember, white color means visible. So as soon as I
painted it with why the red color started
to appear over here. So you can just, you can see as soon as I
select all the faces, the red color is starting
to appear over them. And if I switch the
color back to black, obviously you can
use the shortcut over here also like this. Now, if I select them
using the black color, the red color is disappearing faculty the second
mode over here, that is this one polygon field basically selects
one phase at a time. Make sure to set
it back to white. Select one phase at a time. But if you select this first
one, it will just select, I think, half a face at a time because it is
a triangle field. So it divides a single-phase
into two triangles. So it feels this way. I never really use this one because I don't think
I've ever found a use case to fill just a single triangle and
then fill another triangle. Basically the most used one is this one that the mesh will. So basically what it does is as soon as you click over here, we'll see now the whole
model is off red color. So perfect. So this is exactly
what we wanted. And I think this is a great, great use for mass. We just divide the layers into
different pieces of model. Alright, so now I will
add another color. This time I will
add a green color. Let's say I want a green
color to appear over here. You will notice that this
circular ring is also green color because this layer
is on top of the regular. If you move this under this, you can see the red color back. But don't worry, even if
it stays on top of this, it won't really
matter because as soon as we add a black mask, now the green color has
completely disappeared. And we have already selected this tool and we are
already in the mesh screen. So I will just
quickly click over this and you can see we have easily
selected the green color. So how easy was that? I will rename this to red, and let's rename this one to be. Let's quickly add
a yellow color. Just to demonstrate
everything properly. Rename this to yellow
and add a black mask. And this time I want
the yellow color will appear over this piece. So in this click on it. And you can see how
we have created three different layers with three different colors on three different
pieces of the model. So that is a great,
great use for mask, along with adding
effects like dirt, dust, roughness, variation,
everything like that. Mass can be used for
this purpose also will divide up the layers
between different models. Let's quickly add a
black colored layer also for our white cells, lack, add a black mass to
this and now select this one. If you notice just click back on any of the mass
from over here. Let's select this one,
the yellow colored one, and now press F1
for the 2D view. You will see that I have skipped this last word of this tool, that is the UV chunk. What this basically
does is I will just quickly Right-click
and clear this mask. And now let's select
the UV junk food. So what this basically
does is it fills colors basically on the basis of
the UV Islands over here. So you can see as soon as I
click over here on the top, you will see just this top
faces selected because in the UVs It was only
this much like this. Then it has selected only
disliked because in the UVs, It was still here only. So again, I rarely use this one, but definitely sometimes
it is very useful. So you can select the
faces on the basis of the UV islands like this. Let's just go back to Nashville and select it all
at once, like this. Now press F2 to come
out of the 3D view. There are also a couple of
other commands that you can access related to mass by
just right-click in the mask, like this, like
this one over here, you can remove the mask completely or you
can clear the virus. So clear mask will
basically reset the mass and delete
all its information. It will be back to your
normal black mask. I will hit Control Z and
then we have invert mask. Invert Mask, as
the name suggests, the areas that are
white will become black and the black
areas will become white. You can see it over hills. So as soon as they inverted, you can see the white colors or non-black and the
black ones are right. And over here, you can
see the results of this. If you convert this mass, this piece was only a yellow. Now these two are yellow and this one is back to
its original color. You can also visualize this by going over here in
the mask function. And this one is currently black and all of them are white. And if I now invert this, basically, this is Invert Mask. Press M to come back
to your material. Next, we can also copy and paste the mass using
just right-click. Alright, so these
were the couple of commands that are
useful right now. Alright, so in this video
we learned about mass, and we'll also learn how we
can use this polygon tool. In the upcoming videos, we will be learning more
and more about mass, like in the next video we will be starting with smart masks. So these are some predefined
masks that are created by suggestions to help you
with your texturing process. Then we will also be
going over generators, mosque editors, and lots
of different things. So right now we're
just scratching the surface of masking. In the later on videos,
we will go more in depth. Alright, so I hope to see
you there and you watching.
13. Smart Masks: Hello and welcome
everyone. So in the last lecture we
discussed about mask, and in this video we'll
be going over swat mask. So first let's open up our
fire extinguisher project. Alright, so one thing that
I wanted to mention before starting is I just forgot to
tell this in the last video. We can use our mask with
smart materials also, like we were using a mask for different failures
and everything, but we can also use
them with materials are smart materials provided
to us in our shelves. Let me just quickly show you. Alright, so maybe
we drag and drop this iron pure material onto over and make a
texture set like this. Then we can use this
rust material over here. Alright, so now I
will go ahead and add a black mask to this rust. Now you can select a
brush from over here. Select any type of brush
like this dirt too, and you can just start
to paint the rest effect onto your iron material. So basically you can
do the same thing with all the smart
materials also. Because smart materials is basically just a group
of different layers. So the base materials
are basically just fill layers with
pre-defined settings. And if I will, just drag
and drop smart material, let's say maybe we use
this deal scratched. So basically this
is just a folder with different
filters over here. As you can see that
it already has different types of layers
and masks added to it. So therefore, we can see all of these effects over
here on a model. So if you add something
on top of this, let's just quickly add anything like maybe this bowl
damaged material. Now we can add a mass
to this complete folder like this is go over
here and a black mask. Now, you can see in the gold material on your
iron material like this. Basically you can mask
with any type of layer, with a paint layer fill layer, or even with folders with all different layers
like this also. This is what I wanted to show. So let's just now
quickly delete this. And now I will be
going over smart mass, which is the third
section of our shelf. Alright, so again, let's drag
and drop an iron material. And then I will drag and
drop and rust material. Alright, so as you know, we can obviously add a black mass to this and then use a brush to start painting over our model. But let's say we
don't want to do that because sometimes
we have a UE model. We cannot just sit there
bending on it for ours using our small brush going into each corner and Travis and just trying to
paint it like this. So instead, we can just
quickly use a smart mass, which will make our
work very easy. You will just see for yourself, go over to smart mass and we will find a rust
smart mask over here. Let's see. Alright, so we
have these different risks. Smart mask over here, who search for rest. And let's see. I will use this normal
rust smart mask and drag and drop it over here. And you can see as soon as we do that automatically
this layer has been masked out and we already
have effects on our model. Now, if you will
click on this mask, you will see this mask
editor over here. So basically this
is a generator. All these smart masks are
created using generators. So you can click
on this generator and you will find all
these different settings. Don't get overwhelmed
by these settings. Basically, these are
just different sliders, which you can easily
understand by just moving them like this. You can see basically this
is the global balance. If you will decrease this, the effect will start
to slowly go away. And if we will increase, it, will start to increase. You can also use
things like contrast. Make the effect of
the cubic sharper. And it will decrease the
contrast you can see now. We can also use blood over here, which is blurred, the
effect like this. But I don't think it is
useful in this type of case. So let's set it to 0 only. Also, there are loads and loads of different
settings over here. We will go over them when we are discussing properly
about mask editor. But you can just write now, turned down the sliders
and see what happens. We'll see for yourself, we also have this global invert
option over here. If we will set this to true, we will see now the
complete mask is flipped. So that is also quite handy. Sometimes. Also you can visualize
this mask by going over here and checking
out the mask option. And you can see all
the areas that are white currently have the effect, and the areas that are black
do not have that effect. We can also view
any mask by just holding Alt and clicking
over it like this. And to go back to the material, you can just click over here.
Click on the Fill layer. Alright, so now you
can just go over the mask editor and try out some of these
different settings. Move the sliders and
see what happens. We just figured out some things for yourself, but don't worry. In the next video, we
will be going over generators and different
types of masks, editors. And through that, we
will learn how we can create some of
our own smart mass. If, let's say we
don't want to use any of the smart
mass from over here. We can also create some
of our own by just going over here and
adding a generator. But that is for the next video. For now, let's just use a couple of different
other smart mass. So I will click on this X icon to remove
the mask from over here. And let's drag and
drop another one. So let's use this one
stayed scratches. You can see all the
different masks have different type of results. You can try out the
different options and see what suits
your needs the best. Again, every mask would
have this mask and that you can use to edit
the settings of the mask. Alright, so let's
do something else. I will just delete this layer, and this time I will
add a fill layer. Let's set this to black color and give it a enoughness of 0.8. I think. I, let's say
I want this does to be added on the corners and
the crevices of my model. So one mass that I use pretty frequently is this
just occlusion one. So I will just drag and drop
it over here like this. Now, if we will see
closely over here, all our corners, crevices, edges have this dust
mask over here. And it looks very
organic and natural. And I think this
mask is pretty good. We can just select
it from over here. Now you can just select
the mask from over here. And as you can see, this has a different type of generator. You can adjust the dirt level. So basically generators would be different but most
of the properties would remain the
same as this one has this dirt level, that contrast. This also has a invert
option that you can flip. We also have Dr. Dana. So basically right now, this mask is using
a UV projection, you can say, but if
you enable Dr. Dana, it will use travelling
a prediction. Also, we have this
grungy amounts of brand is basically the dirt particles, if we will increase, you will see in the dirt is increasing. You can fine-tune
these settings and find the perfect match for you. You can also adjust the grungy scale if you will increase this, the tiling of the dirt
will increase like this. I think increasingly
too much makes the effect very
repetitive and obvious. Let's set it back to default. Yeah, we also have a
masking over here. So if we will increase
this property, you will see that
the dust will start to go away from
some of our edges. I don t think it is
that noticeable, but you can see over here, if we set this to 0,
the dirt is increased. But if you keep on increasing, this would start to
go and bit by bit. Alright, so I think this
mask is pretty good. We can also use a
couple of other ones. Let's remove this one. We also have this dust soft, which will give us
this type of effect. Again, you can edit it
however you may like. Let's move this one and see what type of smart mouse
you like the best. We also have the edges
mask over here, like this, edge density will add a distinct damage
towards your edges. All these masks
and try them out. Sometimes you will
also have a filter added to your smart
class, like this one. This one will basically sharpen
the effect of your mask. You can see as soon
as they're disabling, the math gets a
little bit blurry. But if I enable the
sharpening effect, you can also increase
the sharpening density like this one. These are some filters that
you can add to your mass. If you remember, we added
some filters to Ophelia. So basically you can add a filter to your
mosque also for you just need to select like
this and click over here. And then you can add a filter from over here to
the mosque also. Alright, so now I will show you a very neat little
trick that we can use to edit our mass even further and make our models
look even better. Let's just rough this out and I will again add
the desktop version. Let's increase the dirt
level a little bit. Also, you can select
this fill layer at anytime and you can
change the color of the dirt layer
and you can see it is updating right over here. Alright, so now let's
select the mask. I will also rename
the layer, does. Alright, so till now we
know that if you want to add things like dust,
dirt, roughness, variation or anything like that, we can just add a layer and then we can directly use smart mask. And we will have a
nicely masked out there that we can
easily edited using the sliders and everything
that substance has provided us and other ways
just to add a layer. And then we will manually painting using the
paint brushes, which is obviously
very time-consuming. Like if you wanted to add
this, just like this, disabled this layer, add a
new layer, a black color. And if you wanted to
paint in manually, we need to add a
black mask and just start painting it
over here like this. And this is like very
tedious and time-consuming. But let's say I wanted to use both of these methods at once. Like we have added a smart mask, but we want to edit it a little
bit using our own brush. So if you're wondering if
we can do that or not, we can definitely do
it and it is really easy to do so right now, if you select this
layer over here, you can easily paint
over it using a brush. But let's delete this folder
layer and enable that. This dust layer, which already has this
smart mask over here, that is the desktop nutrients
smart mass that we apply. And if you click over this mask and try to print
it using a brush. You will see that
nothing really happens. So how we can paint over it while having our
mask still enabled. So we need to add a
paint layer, this mask. So now to do that, we need to add a paint layer to this mask. So not a normal
paint layer that we can add from over
here like this, but a paint layer to the mask. So to do that, you just need
to select your mask first. Go over here in the
effects section and add up paint layer. As soon as you do
that you will see a paint layer has
appeared over here. And now if I try
to paint over it, you can see we can easily
paint over that model along with the
smart mask effects that we can still see over here. The great thing about this is, so now let's say
you are not liking this part of the
smart mass that much. So you can to switch to the black color and you can just delete it like
this. Very easy. So you see the rest of the
smart must still stays there, but we have easily
removed a part of the mass that we did
not like that much. And we can easily remove the parts of the mass that
we do not think that good. Or if the mask is just
looking too much, we can remove some of the
areas like this also manually. If you want to add
some dust on your own, you can just press the X to
flip the color to white. And now you can
easily paint over your mask as you remember
why it means visible. So now the dust is being
visible wherever I'm painting. And if I switch back to black, now I can remove the dust
because black means invisible. I think this is a really,
really great too. We can also have the nice
effects of a smart mass, and we can also use a paint layer to add
some effects on our own. You can choose any brush and just start to paint
over here like this. Also lets say you are feeling like your paint layer
is just too much. You can also disable it
from here like this. Or you can also
decrease the opacity of the layer if you
want to, like this. Also, you can decrease the opacity of the
mask from over here. This will just reduce the effects of the mass
if you set it to 0. I mean, it will completely
just remove the effects if you set it to 0, like that, the effects of the
mosque or too much, you can definitely reduce the
opacity from here a little bit just according
to your needs. Alright, so let's sit
back both of them, a 100. I think this is a really,
really great too. You can do this with any kinds
of masks you then you just need to select it
and go over here in the effects section
and add a point here. And basically then
it is just the same. You can set up any kind of brush and start
to paint over it. Using a brush. Make sure to select the
paint lead while painting. If you just select the mask
you won't be able to meet. You need to select the
paint layer from over here. All right, Let's see,
move this paint layer. As I told you, we can also
add some filters to our mass. You can go over here
and add a filter. These filters work
in the same way as any nominal field w2. You can go into the filter
section of this shelf. And if you remember, we use blood when we were
learning about filters. So you can use that
blur on the mask also. As soon as you do
that, you can now see the mask is really blurred. And if you keep
on increasing it, now the mask is
completely blurred. The sharpen filter,
the sharpen filter that was used earlier is
also one of the filter only. You can drag and drop
the sharpen filter. And as soon as you
do that, you can see that the dust is very sharp. Now, you can reduce the
intensity like this. These filters, you
can try them out. We will keep going over them
as the course proceeds. So let's just remove
this filter now. I will disable this
layer for now. And let's add a new layer. And this time let's try to give some roughness
variation to a model. So how can we do that? Just quickly disabled all of the channels except
the roughness channel. If you remember, we can
also do this by just holding Alt and clicking
on the roughness channel. Now only roughness is selected. Rename this to
roughness variation. I think adding
roughness variation to your model is really, really important
because in real life, a lot of roughness
variation going on in all the props
that are around us. So I will add a
black box to this. And again, let's use the
smart mass. This time. Let's see. Let's try using dusk
plastic. Drag and drop it. And it is not really that
noticeable at first. But if you zoom in over here, you can see that the surface has some kind
of reference variation. Obviously it is
not that obvious. So let's select the mask editor and try to increase the balance. Okay, I just don't think this
is a very good smart mass. Let's use something else. Let's try this one. I think this one
works a lot better. So select the mask editor and let's increase
the balance of it. Also, what you can
do is you can go over here on the failure and increase or decrease
the roughness from over here to see what fits best. Obviously something like this, I think looks pretty good. It is necessary to add some roughness variation
to your model. In the upcoming
videos, we will learn more and more different
ways to use masks. So don't worry, there
will be a lot of options in variations
for you to use from. Like we will be also
going over how we can use these different black and
white textures in our masks. That is for the upcoming videos. Alright, I think this
is enough for this one. I will see you in the next
one. Thank you for watching.
14. Generators and Mask Editors: Hello and welcome everyone. In this video, we
will be going over generators and mask editors. So let's open up
our project first, head over to File recent files and open them the fire
extinguisher start five. Alright, so in the last video, we went over smart
masks and how we can use them and customize them
according to ourselves. So generators and
smart masks are basically one and the
same thing you can say that spot masks are created
out of different generators. So smart mass basically already has everything
set for us, all the values,
textures, everything. But if you use a generator, we have to do
everything ourselves. Alright, so to add
a generator first, we need some layers over here. So let's just quickly, again add iron material that
I will add rust material. Now on the rest fine layer, Let's add a black mass to this. And now to add a generator, just head over to the Effects
menu and hit Add generator. Alright, so as soon
as you do that, you will see the generator
empty option over here. You can click over this
empty slot and you will see all the generators appearing
over here in this window. And you can select any
of them from over here. Also, you can view all your generators over
here also in the shelf. To do that, just click over this option and make sure
to be in the old libraries. So click over this base
material once again. Alright, now if you open up starter assets and select
generators from over here, we can see all the generators have started to
appear in a shelf. Now, let's click on
this once again. Alright, so we have
all our generator. So over here, let's
go over them. If you remember, I told
you guys that baking mesh maps is rarely necessary
because substance painter, you lose those mesh
maps for features like smart masks and generators. So if you see over here now, you will find all the generators related to your mesh maps. Go over the texture
set settings. And these are all the mesh maps like the ambient occlusion. You can find the ambient
occlusion generate over here, we have curvature position
workspace normal. So you will find all
of these over here. We have whitespace normal
position and go H0. Alright, So to try out, Let's just drag and drop the ambient occlusion
generator over here. And basically it does
something very expected. But first, we need to
just flip the mask so enabled global
invert from over here. And now you will
see all the rust appearing in corners and crevices because that is what basically the
ambient occlusion mask. If you go over here and view
the ammeter pollution mask, you can see it kind of
looks something like this. The areas are white and in all the corners you will
find these dark shadows. Now if you check out your mask is basically the same thing, but it is just flipped
out like this. You can increase the
global balance. Like this. Also, you can increase the contrast all
the basic settings. You can increase the blur. Let's come back to our material. So press N to view the material. You can open up this
ambient occlusion section to further adjust it. Next, let's try
out the curvature. Drag-and-drop the curvature. As you see this time, it masks out using
the curvature map. If you look at the
bottom of a generator, you will find this image inputs. So basically image inputs
are all the mesh maps that are currently being used by
this particular generator. So the curvature
data obviously uses the curvature map along with whitespace normal and position. If you see for the
ambient occlusion, you can see that it uses
the ambient occlusion along with whitespace normal
and position gradient. Let's drag and drop
this time the position. And basically these are
all simple generator. This one you can create a
top-down gradient like this. Nothing much we
can do with this. If you open this up, you can change it
from top to bottom too, front-to-back like this. Now you can see the
mask is in the front. If you increase the
balance like this. You can also change
it to right-to-left. X shifted back to 0
for front-to-back. And you can see now the
mask is on the right side. If you want the mask to
start from the left side, basically you just
need to enable global inward or just invert. And you can see now it
is from left to right. Yeah, Basically this is what you can do with the
position generator. You can create gradients
from different angles, like top to bottom,
bottom to top. And basically this is what the position generate again, do. We have some other generators
also like this dirt one? We have already seen
this one when we were using the dirt up
nutrients smart mask. You can decrease it and you will see it works something that really it has added
like all the dirt in the corners and the edges
over here. Next, let's see. We also have the Metal Edge VM, which I think is one of
the important generators. It will damage to your model considering that it was a metal. Because as the name
suggests, metal edge view. So if you look over here
in the image input, this one uses the curvature
and the ambient occlusion both along with the position
and the workspace normal. So here are, I think, some
self-explanatory settings that we have already gone over. Many times you can see for ourselves we have
the where level. If you increase it, the damage
will start to increase. We have the contrast. Then we also have
inverted over here. We have tripe linear blending. If you increase it. Now it is basically
drive then a projection. Then we have the grunge amount. If you increase this, then this dirt will increase. And the grunt scale
will basically increase the tiling of the dirt. So I suggest keeping this
amount at a low number. Next, we have this Use
Custom grunge option, which I think is really cool. If you set this to true, you will see that your rust
effect disappears completely. But don't worry, that is because this custom slot
over here is empty, we can use a texture
over here and that will be used as
your custom range. Subrange basically means
all these dust particles that you see over here. So with the help of this option, we can use a grinder of our own. So to do that, first, let's head over to the
texture section of our shelf. So to do that, click over here and just select
all libraries. And now from over here, Let's select the texture
section. So this one. And I will turn this off. So now in the shelf search bar, Let's search for brunch. And you will find
these variety of grunge maps that are provided
to us by substance painter, which I think is
really, really good because we have all these
different variety over here. We can use any one of
these that we want. So let's put a drag and drop
any texture map that V like. Obviously you can go for anyone. Let me see. I will maybe go for this one. So we will drag and
drop it like this. And you can see as
soon as we do that, we have a completely different
mask effects from earlier. You can now do the
same thing with any of the grunge map or
the textures over here. Just drag and drop
them like this. And you can see we now have a completely different
mask effect, which I think is really, really great about this tool. You can see this
weird tiling effect. So let's just
decrease the scale. And I think this way it
would look much better. Some of them obviously won't
work for your use case. You can try out with this
variety of grunge maps that we have over here and use any
one that you might like. Also, as soon as you
add the grunge maps, you will have these extra
settings over here regarding to this grungy map only you can do things like increasing or
decreasing the balance, contrast, and some other
settings that you can go over. We also have the invert option. Alright, so I think
this is really cool. The metal edge
we're generator is, I think really important. And you can create various different nice
effects with this. We can see with each
and every grunge, we're getting a completely
different effect. So by now you understand
the possibilities of this. Let's just remove this generator now and let's go
over something else. I will again click over here. And let's come back to
the generator section. We also have some
other generators that are not used that much, but are pretty
useful if need be. So like this auto stitches one, you can use this
with fabrics a lot. Like as soon as you drop it, you will see all these
teaching effects over here at the corner. And you can control
them like this. You can do stuff like adjusting the street sides,
the stitch width. So when you are texturing like clothes and stuff like that, fabric and everything,
you can use this, which I think is pretty cool. We also have this
fiberglass effect, which I think is very nice. We also have this
dripping brush generator. Let's drag and drop this one. I think this one pretty
much matches our needs because we are using a
raster layer right now. You can adjust these sliders
and see what they do. Basically, all of them
have the similar setting. We have the usual contrasts, the balance we have inward. This one also has some
nice settings like we also have this
gripping intensity. If you increase this, you can see now the rust
is dripping away. You can also adjust
the smoothness. I think this generator is
trying to simulate the effect. That's why we also have
the samples amount. Really cool. I think we can create some
nice effects with this. Alright, so let's remove this
one and next what we have, we also have this
UV border thing, which I think is really cool. I don't really know
the use for it. If you drag and
drop it like this. Now press F1 to view
your duty view and you can see it has masked out all your UV borders like this. Maybe it will be handy for
some kind of situation. But I think it is pretty
good to know about it. Next, we also have
this light generator, which I think is really unique. Drag-and-drop it. And you will see this spot
over your model of rust. And you try to move this
slider and you will see it kind of moves
like a spotlight. So basically I think it can be used for things
when you have to create a damage on a crop that is being caused
by some kind of light, light by sunlight or
some kind of light that is constantly being lit at the part of a model and it has been damaged
because of it maybe. So that way we can use this light generator
that kind of fit. We have all these settings so that you can find the
effect a little bit. Alright, so I think this is it for all the basic generators. At last we have our mask editor, which I think is the most important generator of them all. If you drag and drop it
over here and scroll down, you will see that it uses all the mesh bags double-spaced, normal position,
thickness, curvature, ambient occlusion, all of them. Basically with using this, we have complete
control over our mass. We can adjust
anything we want to, and we can create any type
of mass that we want. You will see that we
have different columns for different mesh maps. We have the thickness. You can increase or decrease
the opacity from over here. And if you open this up, you will find more settings related to the
thickness mesh map. We obviously have the position, all the things that
we can do using just the position generator. We can do it from over here
using the mask editor. That's why I think it is really important and really extensive. Because it has all
the mishmash and we have complete
control over our mask. Then we have obviously the ambient occlusion
and the curvature, which I think are the
two most important ones. Check, check, check. So currently you
will notice that all the HashMap sliders
over here that are the ambient occlusion
world space position and thickness are set to 0. Only curvature is set to 0.5. That means that the
generator is only using the curvature nochmal right
now to create the mask. And rest of the other mesh
nerves are not being used. So if you want to
use other mishmash, we need to increase
their opacity. Like you will see
when I increase the position gradient
opacity to one. Now we can see the effects of the position gradient
mesh map over here. So in a similar way,
we need to increase the opacity of any of the mesh
maps that we want to use. But for now let's just
use the curvature only. And I will set its
opacity to one. If I set the opacity of
curvature also to 0, the mask will be
basically empty. You can see nothing
really happens because we do not have
any HashMap to work with. All of them are set to 0
opacity and the mask editor, at least newest one mesh
map to drive the mask, we need to set the
curvature to something. Let's set it to one. And now if you click
over here on this arrow, now we have more settings
related to curvature so that we can find the
control over the mask. So first thing we see
over here is brightness. Brightness is basically
same as the balance. If you will increase
this, the effect of curvature map will
increase over the mask. You can see that we also have these lots
of different settings. Sharp, fine, soft. These are basically two control over different
kinds of curvature. So let me just show you
how we can do that. Before that, we will also
go over this mold for us. Right now the mode
is set to edges, but this is pretty cool if it will set these two cavities. You can see now the mask is
shifted towards the cavity, is now all the rust is inside
the cavities of the model. So I think that is pretty good. You can use a curvature
map for edges. Now, let's take two edges. And you can also
set it to cavities, and you can also set it to be, we'll basically now we have both of them cavities
and also the edges. So now let's go over
these curvature settings. I will increase the
brightness to maybe 0.15. Alright, also we have
this contrast over here. These are some of the basic settings
that you know by now, all of the masks have these. Alright, so now it's set
contrasts back to 0. And now press F2
for the 3D view. What I will do is I will set all of these curvatures
settings to 0. That way we can see
that effect properly. Now as you can see,
everything is set to 0 and our mask is looking
now pretty basic. So first let's increase the
shot and see what happens. So we need to see a
little bit closely. If I set this to one, you can see all over these sharp angles, we can see a little
bit of rust over here. Let me just show you once again. Now it is set to 0. You can see nothing over here. But now that I sent it to one, you can see a little bit rust appearing over here
on the sharp angles. Next, if I increase the fine, we'll see a little bit more of the drug to appear over
some of the areas. This way, if I keep on increasing the
different curvatures, you will start to see the
rest of years more and more. This way you can really control your mask on whatever
curvatures you want it to. So now I'm creating for
the medium curvatures than the large ones you can see now the effect has
reached over here. And if I do the big ones, then basically the complete
model is being affected. Now. The last one is huge. Now the dust has basically
covered a complete model. I think that is pretty
great that we can control all these
options over our mask. For different types of
types of curvatures. Let's decrease the
huge and the big ones because we don't want the
effect to be that much. Yeah, I think that
is pretty nice. Also, we have this
blending mode over here. I rarely changes,
but you can change it to different ones and
see what kind of works. But I rarely change this. I keep the guide
Linear Dodge only. Also we have this inverter, which you basically know by now, it will just flip your mask. Alright, so the
curvature is done. Now let's close this out and let's set the ambient
occlusion opacity to 100. And as soon as you do
that, you will see over here along all your edges, mask got a little
bit chipped off. If I set this to 0, you can
clearly see the difference. Now open up the settings for ambient occlusion and there are a couple of
settings over here. Obviously we have the balance. If you increase it, you
can see the effect starts to grow away along
the edges over here. And if you set it to
0, so now basically the mask is all gone because
the balance is set to 0. So we need to set
it to something. Maybe something like this
would be pretty good. Obviously, we can do things like adjusting the contrast blur. And yet we have
this invert option, which are pretty
stable commands. We have this with
every kind of mask. Then obviously we have
the blending modes. Again, you can change them
and find out what works best. I suggest keeping it at the default only,
so let's undo it. Alright. So next we have the word space normal and the
position gradient, which basically work the same as the generator over
here you can see this workspace normal
and the position generator that we already
went over earlier. So basically it is
the same thing. Let's quickly see
what they are about. I will set the world space
normal opacity to one, open up the settings menu
for word space normal. And let's see. We can decrease the brightness
a little bit. And to see this effect properly, let's set the contrast to one. Alright, so currently we have a top-down
gradient like this one. You can see currently top to
bottom is set, if you will, set this to 0 and increase
for front-to-back. Now we have a
front-to-back gradient. You can decrease the
contrast if you want to make it a little bit
smoother, like this. Just the balance and
the brightness settings to find the proper
setting for you. Again, we can now
set this to right to left like this set
front-to-back 0. And now we have this
gradient from right to left. We can also invert the
texture like this. So now we have it
from left to right. Basically this is
what it is all about. You already went over
this when we were learning about these
individual generators, verse base, novel, and position. Alright, so now I
will just quickly set the world's best
Normal opacity to 0 and set the position to one. And basically the position
also is the same thing. It creates different gradients top to bottom, left to right. I don't really know what is the exact difference
between the two of them. But they basically
do the same thing. Let's set the contrast to one. And you can see this effect
is from top to bottom. We can invert it. Now. We have bottom to top
this and right to left. I think all this is
pretty self-explanatory. We have already gone over this. I will set the position
gradient opacity to 0. And the last one we have
over here, this thickness. Let's set the
opacity to 1 first. And thickness does not
have really much options. We can just increase or
decrease the brightness. That will increase the effect
of the thickness mesh map, we can adjust the contrast. And then we have blood. So basically if you will
go over here and check out the thickness mesh
map over here, you will find this
black and white image. So basically the thickness measurement decides which parts of the model are thick and which parts of the model are thin. So wherever you see
the white color, it means the model
is thickest over there and wherever
you see black color, that means the model is
finished over there. And that is, I think,
pretty self-explanatory. Now model this cylinder
part is the thickest. So now press M for the material. So that's why when we
increase the brightness, basically, this whole part is
not masked out all at once. And then if we slowly
increase the brightness even more than these
parts are covered. So the reason for this is because this part of the
model is the thickest. So yeah, you can
adjust these settings. You can also invert them. Alright, so here now I will set the thickness opacity to 0. And I think these
were all the settings related to the mesh
maps over here. So now if we look
over here at the top now we will find a couple
of global settings. That is the global
blurred, global invert, we have the global balance
and global contrasts. So basically to be settings, you can control your
complete mask all at once. Now we will just adjusting the different individual
aspects of our mask by using the different mesh maps like ambient
occlusion curvature. But through this, we can
control everything all at once. That's why they
are called global. You can just see for yourself if you increase the global balance, the complete effects increases
or decreases at once. And if you set it to 0, now basically the complete
mosque is one. You can adjust the contrast. Then obviously we have the Blur setting along with the inward. So let's set this
to default 0.5. And now you must be wondering
that we have done all this, but our mask still
looks pretty basic. It does not have that
organic and realistic field to it like all the
other smart masks have. And that is because if you scroll down and look over here, we have these two empty slots. To add two different
textures are two different grunge
maps that we did earlier with that HBO generator. So let's do the same thing now. I will quickly head over
to my texture section. So click over here, select all libraries and we can just select textures
from over here. Let's close this and
search for grunge. Alright, so now let's drag and drop some of these textures. Let's see we can
drop and even be like, let's try this one. I will just drag and drop it over here in the
texture section. But as soon as I do that, you will see nothing really
happens with a mask. And the reason for
this is currently the texture one
opacity is set to 0. Let's increase the opacity. And as you keep
on increasing it, you will see the
effect over here now. And our mass is starting to look pretty good now because of, just because of
this texture only. So as soon as you
add any texture, you will see a couple
of settings over here. So let's see them now. We can obviously increase
or decrease the balance of the grunge map that we added to increase or
decrease its effects. Then we have the contrast. And then some maps even
have these settings, like to flip them. This way. I flip them vertically. You can see whatever
you might like. We also have the tiling
amount if you will increase this and the texture
will start to die. And as I've said, if you
increase the number too much, it will look very repetitive. So just keep this
number at a low amount. I think 123 would be fine. But I think over here when
it looks pretty good, we can also rotate
this by 45 degrees. If you want to. This also looks pretty good. Let's set this to false now. And now you will see
over here we have this nasty little UV seam. So how can we fix this is
pretty easy to scroll up. And in the texture opacity, we also have a couple of settings related
to this section. So we have the settings over two areas we have
over here also. And then we have some settings related to the texture
over here also. Just open this up again. You can invert the texture. Then again we have the scale. If you increase this, the
texture will start to tie. You have the contrast
and brightness. You can adjust them
and see the results, how they work for your needs. But we have this
triplanar over here. So we were discussing
about this UVC. So as soon as you enable this, you will see now the UV
seam is gone completely. Terminate the project is saving. Yeah, So as I said, because now the texture or the grunge map is using traveling up rejection. You don't really have this same. And we also have this
tribe in a contrast, we can increase it, but
if you increase it, you will see all
these projection, all these seems caused by the projection from
three different planes, as we discussed earlier. So let's keep it at
a lonely like this. I think this looks
pretty good. Also. If you see this little
line over here, I think it is starting
to look like a UVC. Again, we can easily fix this
by just going over here, then adding a paint
layer to this. It is a little bit of work, but definitely we can do this. We can select a
nice little brush and just is this
away very easily. See, it was pretty easy to do. And we have done it very organically so that
it looks natural. Alright, so let's go
back to the mask editor. And this time, let's add a second texture
to this because we can add a little bit more
variation with the mask editor. We can add two
different textures. So let's go with
the texture section again, search for grants. And this time let's drag
and drop something else. Maybe let's try this. Again. Nothing happens because
the opacity is set to 0. Let's increase the opacity
for the texture too. And as you do that,
you can see that our mass will start to
get even more detail. I think the mask editor gives us a really fine control of
how we can do things. Again, we can see
the same over here. This open up texture
to enable Dr. Dana. And yeah, it is gone completely. So now I think our mask
looks very, very good. Obviously it is not exactly
like a rest mass because we were doing just random things to learn how we can
use the mask editor. But I think it looks pretty
good and acceptable. We can create
something like this. We can also adjust the settings
for the second texture, like increasing or
decreasing the balance. So most of the times
as smart mask, we'll just do its job. And you can easily create various unique variations by just using only the smart mass. But if you want to create
something of your own, if you want to create
a custom smart mask, then you can obviously use mask editor because it gives you a fine control of
creating your own mask. And I think it does a
pretty good job at that. You can also try some more
textures from over here. Let's just change them. And you will see
the effect changes completely as I've already
discussed this earlier. Alright, so with this,
I think I've covered everything related to
the mosque editor. You can just try a couple
of things on your own. Play with the blending modes. We also have the blending
modes for the texture. I think over here,
you can change this to anything you might like. But yeah, blending modes, I would just suggest not to
mess too much with them. Alright, one more
thing that I want to mention is currently
we are only using the grunge maps because
grunge maps are used for adding like dirt
and things like that. But substance not only
has like grunge textures, it also has a lot of
different kinds of texture. If you go over here, we
also have this float forward to create wrinkles
and everything on your cloth. Or if you're creating a fabric, we also have these
spots texture, which I think but rarely they integrate to create
micro details. If you drag and drop this, it can also have
some nice effects. We not only have
the grunge maps, but we also have some various
black and white texture that you can use. We also have a couple
of patterns, textures, which would be pretty cool, I think while creating fabrics, like you see this one over here. Not only have benchmarks, but a lot of different
black and white pictures, but yeah, larger idea of grunge
maps you can easily find. And I think with these many
amount of texture maps, you can create
endless possibilities of different materials
and textures. Alright, so I think this is it for the mosque editor guys. I hope you had fun and learned a lot. I will see you
in the next video. Thanks a lot.
15. Geometry Masks: Hello and welcome everyone. In this lecture, we will be
going over geometric mask, which is a fairly
recently added feature. And I think it is really
handy and easy to use. Alright, so let's quickly
open up our projects first. We have this iron and rust layer that we were working
earlier with. So let's just quickly
delete them both. And if you remember a few videos back when we were
learning about masking, we learned how we can create different layers and we can separate it out on the models. Like we add the
red colored layer. We set the color to red. Then we added a black mask. And now let's say I want to add this red colored layer
over this complete model. What is complete cylinder? I mean, so I will go over
this tool, the polygon tool. I will select the Nashville mode and just click over here. So right now as the
white color is selected, this this cylinder is now filled with this
red colored layer. Similar way we added
multiple colors, like maybe this
time a green color. Now again add a black mask. Then already the tool selected, I can maybe select
this thing over here. So yeah, we did this when we
were learning about masking, which is a really nice thing. But Geometric Mask makes
this task very, very easier. So we really don't have to add masks for
this type of thing. What we can do is, let's
delete these layers. Learn how we can do this
with geometry mass. So again, quickly
add a fill layer. Let's give this blue color. Now let's say you want to add this blue color over this piece. So how can we do that option for geometry mask is
this button over here. So when you will click on this, you will see our view changes. And now we can select all of the pieces of models
that we have. And if you select anyone, we can see that we basically de-select the material
from over there. Now click on this
fill layer again. You can see the
material is removed for those pieces
that we clicked. And this number is
written over here. So basically this nine signifies, if you
will click again, we have all these
pieces of model that we exported from Blender
into Substance Painter. We can select and basically de-select them from over here. So you can see are
de-selected now all of them and 0 is written over here. That means this layer is
being used by 0 models. So if you click
over here again and select any one of
them, like this one. You can see now one
is written over here. That means that one piece of model is using this
particular layer. I will quickly
rename this to blue. This time. Let's add
a red color layer. And now I want to add this red color over
this bottom piece. So again, how can I do that? Click over here. This time just to make
everything quick, right-click and hit exclude all. This will remove the material
from all of the pieces. And now you can easily
just select this one. And you can see geometry mask makes this task
very, very easier. You can add multiple
different layers like this. Right-click, exclude all and select any of the
pieces that you want. This way, you can again click over this right-click
and hit include all. This way. It will include
everything. Exclude all. Let's select this or this now. But there is one small little limitation
of Geometric Mask. Let's quickly go over that. I will disabled the
texture set rubber and plastic so that it
does not block our vision. What I will do now I
will create a new layer. And let's just
delete all of these. Yeah, we really don't need them. I will maybe create
another color, yellow. And right-click over
here and exclude all. You will see if I hover
over this piece of model, it is selecting both of them. And if I click over this, now the yellow colored layer
is given to both of them. And let's say you
only want it to add the yellow color
over this thing, but you cannot really do
this with the geometry mask. It will be added
to both of them. And if you're wondering what
is the reason for that, the answer for this is if you will head into
your blender file, into our resources folder. And in the blend of files, open up this fire
extinguisher start. And we will immediately
know the answer. If you look at our model and select this piece
in Blender also, we have joint both of them. Both of them are a
single mesh basically, substance treats them as
a single measurement. That's why when we are
using geometry mask, basically it adds the yellow
color to both of them. You can click over here. So this is our
cylinder or 00 for basically both of them are
joined into a single mesh. And that's why
this is happening. You can see over here, have the cylinder 004. So there are two ways
to tackle this issue. One of them is just press
tab over here in blended. Select both of them. So press a, press P to separate them and
select by loose parts. And you will see now both of
them are separate objects. But if you don't
want to do this, so now that we have done this, we need to select our
complete model again, export it and open up it
in substance painter, I think that would
be really tedious. So we'll just close the blender
file and hit Don't Save, because I really don't
want to save this change. I will keep it this way only. But how can you
tackle this issue? Basically by adding
a normal mask, right-click and hit include all. Now add a black mask to this. And now we can select this tool, the polygon tool, select the mesh fill mode and
easily select this thing. And now only one of them
is selected because when we are using
the polygon tool, for some reason it
will treat them both as separate mesh only. So yeah, that works best for us. And if you face this problem
by using geometry mask, I've shown you the
two solutions. You can do whatever you want. You can either add a novel
mask and do it this way, or you can move back to
Blender, make the changes, and then bring back the model
includes Substance Painter. You would need to
go over here in the Edit menu then in the
project configuration settings. And from over here
we can re-import a new model into substances. We have already gone over
this in the last section. Alright, so with
this out of the way, let's go over one more thing.
Let's remove this layer. Also, this geometric
masking can be used with all these layers
and smart materials. Also, if you want to try
it out, you can do so. It's drag-and-drop,
anything you want. Like drag and drop
this aluminium. Right-click, exclude
all, and then select anything you
want. Like this. I think this is pretty handy. And it is very quick. As against two adding
a mask, I think. So, yeah, let's
delete both of them. You can do the same thing
with the smart material also. Right-click exclude all, and then just select these species. Alright, so next thing that
I wanted to go over is first let's just quickly drag
and drop a few materials. Exclude all, and maybe
select this one. I will just select one for each. Alright, I think these
are enough materials. So the thing that
I want to go over is this button over here. When you click this,
you will see that the only geometry that you selected will be shown
over the new 3D view. Basically, this is the
use of this command. I think that was pretty useful. We can use it sometimes. And if you select this layer, this geometry shown now, whichever geometry is being used by this particular layer. If you select any of the layers, you can see as soon
as you do that, it will change the
geometry over here. You can use this
button for that. Now, just turn this off. Alright, so this was all
about geometry mask. I think that is a pretty
useful feature and you should use that
in your workflows. Alright guys, so thank you for watching. I'll see
you in the next one.
16. Effects and Filters: Hello and welcome everyone. In this video, we will be going over the Effects menu here. So I've already opened up my fire extinguisher
file and let's start. So to start off first, we need some layers to
work with over here. Let's just drag and drop our trusted iron
and rust material. And we can start
working with them. Click on the Effects menu. And the first thing that we have over here is add generator. So basically for the
last two videos, we have been going
over generator solely. But to quickly show you
how we can use them, we first need to add
a black master this. And then we can click on the Effects menu while
this mask is selected, and then add a generator. Now basically you can use any generator that you
might like over here. You can see the effects
over here very clearly. So again, we have gone
over all these properties. You basically know properly
what a generator is. So let's just remove this one. Let's just keep it over here
only for the time being. Alright, so the
next option that we have over here is
add paint layer. So we have learned
about this too. So let's say we are not happy with a mask in a
particular area. We can easily just click
over the mass force, makes sure to select the mask and not select the fill layer, because we can also add
a print layer to this. And if you do that,
you will see we can now plain white
color over our layer. And we really don't want that. We need to add a paint
layer to the mosque, only, select the mask and
then add a paint layer. And you will notice now, if you start painting
with white color, you're basically
painting the rust layer because white means visible in terms of masking and
press X to switch the color. And now we're
erasing the effect. Do it in a more organic
and natural way so that it does not
feel this abrupt. You can just select
a brush row here. And I know that I always
select this dirt brush, but obviously you can select any brush that you might like. Maybe this one, just to
give it an organic field. Like this. This way, like it
feels much better. You can in-between press X and add some things and
then remove them again, press X so that you can create
some kind of this effect. Basically you understand the use to edit your mask even further. You can add a paint layer
and do all sorts of things. Add your mask effects
or remove them. Also, you can control the
opacity of the paint layer, as you can see over here. If you reduce this
to 0, basically all the paint layer
effects are gone now and the older mosque comes up. I will just remove the
paint layer now and also remove the smart mask
or the generator. And next we have
add a fill layer. So basically till
now we have learned many different
ways to use masks. We can either use a smart mass, we can use generators. You can also paint it by hand. So there is one movie. When you add a
black mask to this, you can also click over
here and add a fill layer. So basically now
what will happen is you will see these empty slot over here and you can head
over to the textures menu. And in the same way, Let's use a grudge map
this time again. Let's drag and drop this one. And you can see now
this texture that is a grunge concrete
does t is all over our model in the form of arrest. So basically we can
use mosque this way. Also you can control all these settings
balance, contrast. If you go over here, you can
also increase the tiling of this offset and
all those things. Also, if you see
the same over here, just change this to privately
now and we're good to go. You might be thinking what is the difference between using a smart mouse generator or using a fill layer
directly this way. So basically as you know, the smart masks and
generators are limited to things like edges,
cavities, and thickness. We go over all those things. But using a fill layer
directly like this, what it will do is
it will go away a complete model using the fill layer or using the
texture that we have used. You can go over here
in the mask and CDS. Basically now this
picture is covering a complete model in
the form of rust. So yeah, that is a
difference between using a failure
and a smart mask. Just to contrast. Alright, so I think
you get the point. Let's remove the fill layer
now and see what's next. Then we have the levels. So basically bring back the failure quickly so that we can use the
levels with it. Let's adjust the texture
a little bit first, I will decrease the contrast. I think this is better.
Now you can select the mask and let's
add a levels to this. So basically now you will see overhears something like this. If you have worked
with Photoshop, I think it would be pretty
familiar with this. So basically by using levels, we can adjust the color
range of our mass. We can adjust the values of the blacks and the
whites in the mass. So if we will go over
here, visualize the mask. And you can see over here, if you try to move
some of these sliders, you can see if you
increase this one, the white area increases. If you increase this. The black area increases and therefore our
contrast increases. So you can play with
these settings. Honestly, I really don't know what exactly all of these do, but I just tried to play with it and try to get the
results that I like. I do not know what the specifics
of all the sliders do. So you can just play with
them and try to adjust it. Basically, it works
in a similar way, like balance or contrast with work that we have with
our textures over here. We can adjust those
things with this. But there is one better
thing about this, that right now we are using
the levels with the mask, but what we can do is
let's just remove both of them and also right-click
and remove the mask. Now you have selected
the fill layer. Okay, First, we are
currently in base color. Let's go back to a material. Now we can add a levels
effect to this layer also, we are not adding
it to any mask, but to this layer particularly. So now add it. And now you will see it
is different over here. So right now it is showing
you effected channel. So basically right now it is only affecting the base color. If you try to adjust
these sliders, you will see the color of
your rust would change. So you can do these things
also with the levels effect. As you can see over here. Alright, let's reset
this, this time. Let's choose the roughness. So basically now
what will happen is now we are only affecting
the roughness channel. So Blake, close attention to the roughness values
of the layer. If I try to adjust them, you will see some
areas have become reflective now and some
are now very rough. That is because we are
adjusting the values away. And now you can see the complete layer is very reflective. That is the great thing
about the levels effect. We can use it together
with a failure or material so and affect
all these channels. And now in a similar way, you can select any
channel from over here and an affected using
your levels effect, using this button, we can
basically reset the effect. We can also invert it like this. So now all the areas
that were earlier shiny, rough and all the
rough areas are not shiny, basically invert option. So we have basically that
was the levels effect. Next, let's go over
the filters again. Select this, and
let's add a filter. So this time we are
adding a filter to lock fill layer that is rust. So make sure you remember
that we are not adding it to any mask but to the
rust fine layer. So let's go over the
filter section over here. And we have already
gone over some of the common ones like blood. We have also used
Sharpen from over here. Let's try something like We also have blurred
directional. First select the
filter and let's drag and drop
blurred directional. So it works similar to blood, but you can also control
the angle in which the texture or the
mask is being blurred. As you can see, if
you rotate the angle, then your blood anger
is also being rotated. So basically that is the
difference between the two. Cross it down. You also have bevel level won't really work that well
with these kinds of effect. But let me just
show you how we can use the bevels. So let's see. This time. Let's add a black mask. Let's go ahead and
alphas section. And I will use the square. Now just paint using
the square like this. If you are wondering why it
is not painting correctly, you will see your GTR overheads to just set the status of 0. I will paint properly like this. Alright, so this time I will
add a filter to my mask. Add a filter and select the
devil filter this time. Now you can see the effect of
the Bevel filter properly. Basically it works similar as a Bevel filter that
would work in blender. You can increase or
decrease with distance. It will just smoothen
out the edges. You see. I think it is pretty cool. We can use it for
several type of stuffs. I think you can adjust
all these sliders and pretty much get the
idea what they will do. So I think that is pretty good. Next, let's see, let's
remove this one. We also have already
gone over sharpened. But if you use the
sharpen filter and increase the intensity, you will see that nothing
really happens because we have added the sharpen
filter to our mask. So basically it is sharpening
the edges of these squares. So basically that
are already sharp. So do use the sharpen
filter properly. We need to select
the fill layer, add filter, and add a
sharpen filter like this. Now you will see yours
effects on the rust layer. Make sure you pay
attention where you add your filters and
all these effects. If you want to use
it on the mask, then first select the
mask, then add them. Otherwise they won't show
the effects properly. Let's add another filter and let's see what we
can also go over because a lot of
them are not really offered use as a
business perspective. I'm not really going over them. We also have these
matte finishes, so let's see how
we can use them. We have this iron pure material. Basically if you want,
we can also create this iron pure material
very easily on our own. Delete this add affiliate. Basically said the
metallic value to one and set the
roughness value to 0.2. Maybe we have iron
pure material with us. So if you see overhead these
matte finishes material, I think they are pretty cool to use different types of metals. If you add a filter
and let's drag and drop this one, matte,
finish it off. I think the most basic one. As soon as you do that, you will now notice that
iron materials look really nice with
all the toughness variations and everything. It looks really realistic. So you can do things like controlling the
brushing intensity. If you are not liking
the effect too much, you can reduce it so
that it is very faint. But still there. I think it adds a lot of value to the texture. Rather than displaying thing. A lot of stuff that you can do, you can increase the scale. Grunge will increase the amount of these particles,
dirt particles. We also have brushing warp. As with all other
things, you can also use a custom range. Set this to true, and basically add your own
texture from over here. Like this. Now you can see your own
grunge added to this. I think pretty cool and
very useful when we will be texturing our fire
extinguisher and stuff like that. Also, you can use tribe Lena, I think we will have
a faint little UVC. Move ahead. So now if we set desert
right there now, I think it is still there. But now not very no disabled. Yeah. I think this looks very obvious and this
looks a lot better. I type in asserting would
just remove all your seams. Nice. There are different
types of matte finishes. Select the filter and you
can drag and drop any one of them for different
types of metals. What is this? This is matte
finished, galvanized. And please the scale of it. I have never really used this, but maybe it is useful for some kinds of different
types of metal. You also have this over here. I think this is pretty good. You can use it for
different types of metals. So as I'm telling you, you can use these
different matte finishes and check which one
you like the best. We also have this
one. Let me see. Yeah. This one rashly, I think
this is also pretty common. This degree is the
brushing intensity. I don't think we needed this
much and increase the scale. Basically, this is
the matte finishes. We also have this
HSL perceptive. You drag and drop this. I don't think it would work
that good on this material because basically it is a
white color fill layer. So let's use colored
material for this. Maybe materials. Now add a filter
to this and this time let's use the
HSL perceptive. So basically you can control
stuff like hue saturation. So who is for color saturation? So you understand this. Now the colors are more vibrant. And if you decrease this, this is now basically
black-and-white D saturated. If you increase the lightness, whites would increase in
your texture and your hand. If you decrease it, it
would become darker. Alright, let's remove
this and let's see what more we
have here with us. We also have
contrast luminosity. Most of them are pretty
self-explanatory. You can just drag and drop
and see what they do. You can also control
things like the shadows, mid tones, and highlights. For a better, finer control. I rarely use this. But yeah, you can definitely
do if you want to. Next, we have this mask outline, which I think is
really, really good. Let me just show
you what it does. Let's remove everything.
Add a fill layer. Let's give this a red color. And I will add a
black mask to this. And right now we have
a square shape brush, but it's going to brushes
and select the basic soft. This one. Alright, let's
go back to filters. Okay, One thing before starting. Currently, we are painting
on a mask directly. We don't have any layer
over here in our mask. So we cannot control
this pain restroom. But if you add a
paint layer to this, you can basically paint on
your mask only directly. The only difference would
be now you can control the opacity from over here
along with the blending modes. So I think it is a
good practice to just first add a paint
layer and then start painting on your
mask rather than selecting it and just
directly painting over it. Because now you cannot really
control your paints, true? You can also work in
a non-destructive way by just adding a paint layer. Use a paint stroke, another paint layer,
then use another stroke. So now this way
both your strokes are on different layers. I think that is pretty
good. You can increase or decrease the opacity
of one single stroke. But if you don't add
any of these layers, basically all your
strokes would be on a single layer and you
cannot really control it. Alright, so back to the
mask outline freedom. So let's quickly just
draw some shapes like this to three strokes.
That would be enough. And now I will select
the Mask, add a filter. And this time drag-and-drop
the mask outline. So now as soon as you do that, you will see earlier. Umass was something like this. But now basically your
stroke has an outline, as the name suggests,
mask outline. I think it is a
pretty cool effect. And you can use it
for maybe things like creating graffiti and stuff like that because
they have a lot of outlines. Like maybe let's disable this. And you tried to like create letters like this on a graffiti. If I tried to write my name. And now enabled mosque outlines, you can see it is kind of
looking like a gravity. Obviously it is not perfect. But yeah, we can see the uses
for this type of filter. You can adjust the weight, the blood, and the curve shape. Really cool effect. Also you can directly paint like this. Also. Really nice
to paint this way. So yeah, that was the
mask outline filter. Let's remove this. Let's see. Next. We also have transform
over here with us. So if you add a filter again
and add transform to this. So now we have added up to
transform that to our mask. So basically what we can
do now, just a second. All these paint strokes
that we have made, if you decrease the scaling, now we'll see that tiling
over your material. You can also offset them. If you want to maybe offset, offset them on the
Y, rotate them. It might be useful for you
to know about this filter. You can also add the
transformed data to basically a layer also. But I don't see how
it would be useful because you basically have all these features
over here also. But if you want to, you can add filter and then
select the transform. You see you can control
things like dialing, offset, even rotate the texture. Let's move this. Alright, so I have gone over
a couple of more filters. You can maybe try out some of these on your own
because a lot of them are pretty self-explanatory and the rest that are remaining, we will go over them in the
last section of our course. That would be the bonus section. Also, I think this matte finish, a water drops filter
is also really good. If you select the layer, add a filter, drag and
drop this one over here. You will see that your red
layer has water droplets. So if we want to add
that kind of threat, you can basically
use this filter. You can control all
sorts of things like the drop
amount, their scale. Really good filter. You can drag and drop
all these matte finished filters and see the
different effects. This one is appealing effect. You can see over here
on this paint layer. Let's remove the mask. And you will see more properly. I think it does a
really good job of creating that
paint like feeding, but you can do all these
sorts of things with the mask also and have a
better control, in my opinion. But yeah, you can definitely
use them if you want to. Alright, so let's
remove the filter. I think this is enough
for the filter section. We have gone over
a lot of them and mostly all of the important
ones I've already covered. The important ones are basically the sharpened mask
outline inward. We also have inverted over here, the blood bevel and
blood directional, all of these things also HSL perceptive is also
quite important. And we also have walk. Walk. We can also use, Let's drag and drop lecture
first. Maybe this one. Add a filter. It will give
it this kind of wavy effect. Very useful sometimes. That is basically walk. So now if we will click
on the Effects menu, we basically have three options left that are the anchor points, color selection,
and compare mass. So don't worry, we
will go over them, but we will go over them
in the bonus section of our course if you want
to learn about them now, just go over to the
bonus section and you will find a video
related to these three, because I don't
really think they are important for a beginner. Anchor point is really
useful and really important, but we will go over it at a
later point in the course. If you want to learn them, just head over to the bonus section. And yeah, I think this is it for this video and the Effects menu. So thanks for watching guys. I'll see you in the next one.
17. Layer Blending: Hello and welcome guys. So in this video
we will be going over some of the
important blending modes. So as you know already, that substance painter works
on a leering based system. So let's say we have
two different layers. Let's quickly add them. I will just drag and drop
this plastic fabric layer. And let's use this
gold current material. So we can see that the
golfer material is at the bottom and this plastic
layer is at the top. So now the gold
pure material is at the bottom and the plastic
fabric layer is at the top. So basically, when we're
using the default, the layer on the top would
be visible and the layer on the bottom won't be visible at all as you didn't
see over here. But we also have this Blending
Mode option over here. So what exactly is this
blending mode basically tells Substance Painter that how two layers must be
mixed with each other. So click on this normal
written over here. And we can see all the
different blending modes available to us in
Substance Painter, we will be discussing some
of the important ones and their use cases in
a more practical way. Because to be honest, you won't be using most of them at all. And even I don't know what
some of them exactly do, it is much more important
to learn some of the practical uses of particular blending modes
that are really important. That learning what
each one of them does. Alright, so to move forward, just to give you an example, Let's change the blending
mode of the top layer from normal Linear Dodge that is AD. So as soon as you do that, you will see
something like this. And basically I don't think
this is a very good example. I will just add a different
layer instead of gold. Let's instead add
maybe a good layer. And I think that would
be a better example. I will change the
blending mode for the plastic layer from
normal to Linear Dodge. And as you can see now, both of the layers are being added. And we can see the color of the bottom layer along
with the top layer also. So now in this case,
the linear dodge that is the blending mode, is being used on
these two layers. And the color contents of the top layer are being
added to the bottom layer. That's why we can
see both of them. So that is a little example of what blending modes can do. But let's say we add a third
layer on top of all this. So let's just drag and drop
this over here at the top. And as I told you
that blending mode, besides how two layers must
be mixed with each other. So as these two layers, so this one has the
normal blending mode and this one has Linear Dodge, and this one has the
ad blending mode. But basically we add
the third layer on top of this data has a
normal blending mode. So that's why we
wouldn't be able to see anything related to
these two layers. The only thing that is
basically visible is, is this height Shani. And you might think why is that? So right now all the blending
modes that we are changing, we are only changing them
for the base color section. If we now change the channel
from this color to height, you can see for the
height channels, all of them have been
said to Linear Dodge only that means all the high
channels are being added. That's why we can see them all together because they
are being added. If we change this to
normal for all of them. Basically now you
won't be able to see any of the height
channel information because we have
changed them all to normal blending mode
in the height section. But let's just undo everything
and bring them back. So just make sure to
remember that blending modes can be different
for different channels. We will be right now only playing with the
base color channel. So let's come back over here. As I said, these two layers were mixed using
the blending mode, but as we added a third
layer on top of this, so that is why we
cannot see any blending going on in our
base color channel. But if we change this from
normal to Linear Dodge, and now you will see
that all three of the layers are being
added in our base colors. So basically that is linear dog, but still you might not exactly understand the useful
this like what exactly we can use
this linear dodge that is the add
blending mode for, that will help us in texturing. Now I will tell you a
very useful thing about the Linear Dodge blending
mode that will help us in creating our
textures a lot. So what we can do is let's just quickly delete
all three of them. And one more thing
that I want to mention is that this normal
blending mode, that is a default blending mode, does not have
anything to do with this normal channel or the
normal map that we have vague. Basically, normal means default. So this is the default
blending mode. That means no blending or mixing on would be going
on with the layers. The layer that is
on the top would be visible over the layer
that is at the bottom. So that is basically the
normal blending mode. You can consider it as a default blending mode
that does nothing. Basically. I was talking about
the printing mode. So what we can do is again, we can use our trusted I didn't feel materials
and the rust layer. But this time we
won't be changing any of the blending
mode over here. Instead, we will
add a mask to this. Now, let's quickly use
a cool smart mask. You can use any one you like. But I think it would be
better to use edges, strong edges, strong scratched. Let's drag and drop this one. And wait for a second and you will see something like this. I don't think it is that good. Let's use edges strong. Select the mask editor. And let's increase the
global balance like this. We have something of this sort. We have our rust layer and we
have added a mass to this. Let's quickly remove
the sharpen filter. We need it right now. If you remember in the
previous lectures, I have told many different ways in which we can create masks. One of them is obviously we can drag and drop a smart mass. Another one of them is we
can use a paint layer. Then we have generators
that we can use. And one more thing
that I also told you that we can
also add a failure. So let's just quickly select this mask and I will
add a fill layer. And you will just
understand in a bit, what am I doing all this? So let's go over in
the texture section. Let's search for a
cool-looking range map. Select the one that
has a lot of contrast, I think will be much
easier to show you. Let's just use this one. I'm liking this one. Drag
and drop it over here. And let's increase the
contrast a little bit. And I will decrease the balance. So now you must have noticed
as soon as we added, the effects of our
masks are now gone. There's just disable
the fill layer. And now you will see our mask
has appeared back again. That is just wrong mass
that we just add it. But as soon as I enable
this fill layer, the effects of the
mask are gone. Now, basically, if you
notice over the edges, this is the effect of unmask. It has strong edges. That's why all the
edges are maxed out. But as soon as I
enabled the fill layer, the effects of the mustard one. So let's say you want
to add both of them. You don't want the effects
of the mass to go over. You want to keep them both. So what we can do now, as you might have
guessed by now, we can just quickly go over here and change the
blending mode from normal to Linear Dodge Add for the top layer,
that is Ophelia. I will change this
to Linear Dodge. And as soon as you do that, you will see are any strong
mask is showing up right now. Along with that filled in. Well, I think this
is really, really important thing to
know and understand as it can help you a lot when creating more detailed masks. As you can see over here, we have added the effects of the smart mask along
with the failure. In a similar way, you can
also add two different feel. There are two different masks to create various
different effects. And also it will save
you a lot of times. These were the practical
use case scenarios or different blend modes
that I was talking about. Alright, so to understand
what exactly happened, we can also visualize the mask. So let's go ahead and
set this to mask. And let's just disable
the fill layer for now. And you can see this
is a mask editor or we can just quickly set
this back to normal. And now basically this is
the effect of a failure. If you will turn
off the failure. This is a muscular digitally. You can see both of them are completely different
from each other. But as soon as we said, grungy map to Linear Dodge Add. But basically it will
do is it will add the whites of both the
masks are both the images. And that is why now we have a mass that effects
of both of them. Fairly straightforward
but really important. What we can do is let's see. First let's go back to material. And if you remove this mask
and either from over here, and let's add a new fill layer. Go ahead in the texture section and let's drag and
drop another failure. So maybe this directional noise. Again, we can set the blending
mode to Linear Dodge. And you can see now both of
the effects that add it, you can change this
back to normal. It won't really matter. Or you can keep it at
Linear Dodge really big because the blending mode of the bottom layer
won't really matter. In this case, we can do the same thing if we add
two different smart mass. Let's quickly do that also. So let's use this
dirt smart mass for one of them and
for the other one. Let's just use this one maybe. Now we have two
different mask editors. Just said the top
one to Linear Dodge. And now we have the
effects of both of them. What we can do is let's just reduce this mask a little bit. As you can see now we have the effects of both
the smart masks. So basically, you can
use Linear Dodge to add the whites or add the color contents of
two different layers. Alright, so let's move further. I will remove both
of the smart masks, and this time we will exact
opposite of Linear Dodge. We will use the subtract tool. Let's quickly add two
different failures. So I'm looking for a grunge
map that has a lot of contrast in it, maybe this one. So let's first add a fill layer and then just drag and drop it
over here like this. Let's increase the
contrast a bit. Next, I will add
another failure. And this time let's use
this directional noise. I think it would be easier to show that effect using this. This and first I will set
the balance to 0 for now. The reason for this is so that I can show you the
effect properly. Let's head over to the mask. And if you turn
this off, basically this is the figure
that is at the bottom. Let's enable that
directional noise and we see nothing because the balance is set to 0 and also the blending mode
is currently at normal. So now if I set
this to subtract, so now that I've set the
blending mode to subtract, right now, only the effects of the first layer are being shown
because the second layer, that is the layer at the top. As is balanced at 0. So it makes no difference
adding this layer. But as soon as I start
to increase the balance, you will see the effects. You can see as I'm
increasing the top layer is being subtracted
from the bottom layer. Set the balance again to 0. And just notice over
here, over this area, as soon as I increase
the balance, you can see how the top layer is being subtracted
from the bottom layer. I can also increase
the contrast. And that way it would
be more visible. So basically this is
the exact opposite of the Linear Dodge blending mode. Now the top layer is being subtracted from
the bottom layer. Let's go back to material
and see the effect. There is really handy. You can mask out some of
the effects this way. Let's increase the balance
for this one also. Now we can see it
even more properly. Let's go back to the mask. And let's say if you change
this back to Linear Dodge, then you will have a
completely different effect or both of the filters
are being added. Yeah, I think you
get the point now. Subtract blending
mode can be used to remove the top layer
from the bottom layer. Something like this. The subtract rendering
mode is helpful when, let's say you have a smart mask or affiliate that you like, but you are feeling
like it is too much. So you can add another
failure and subtract from it to mask out some of the areas
and listen it's effects. And yet again, we can, using discrete a variety
of different effects. We have a lot of
failures over here. So you can use different
blending modes with different failures, and obviously you will
get different inserts. It is a lot of experimenting. Find the right lectures for you. Let's adjust the
mask a little bit so that I can show you a couple
of more blending effects. Something like this. I
will decrease the balance. Alright, so now I will
come back to my material. Let say I wanted to make this rust effect a
little bit darker. Now I will change
the blending mode of the fill layer that
is complete failure. So blending mode over here, I will change this to Multiply. And you can see that everything
went a little bit darker. So the multiply
blending mode will multiply all your dark value. So it will result
always in darker color. So as you can see, when
you set this to normal, it is a little bit bright, but as soon as you
set it to multiply, your defect is now a
little bit darker. If you want to have a little bit darker effect
on your fingers, you can use the multiply. You can use a multiply
blending mode, and the divide is obviously
the opposite of this. It will create
everything bright. I rarely use the white material. Let's set this to multiply. And also if it will
change the blending mode over here to multiply, then also you will get the
same effect as subtract, but it will be a little
bit more softer. So let's go back to mask and let's change
this to Multiply. You will see it does not change, but the effect is now
a little bit more softer as opposed to subtract. So practice a little bit more harsher and multiplies
basically the same thing, but it's a little
bit more softer. If you see the same over here, press M for the material
you can see the scene. Let's change both of
them to privately now. And you won't have
this same issue. Everything is fine now, these were a couple
of blending modes that are really important. Next, I will just delete
both of these layers, and now we will go over the
past through blending mode. This one, I think this one is also really,
really important. So let's say I will
delete this layer, I will go back to
base materials. Let's add a wound layer. Select the geometry mass, exclude all, and just
select this thing. You can select any
one of them and just basically adding different
layers to showcase something. Again, exclude all,
let's select these two. Let's add another layer. Again, Let's add this one. Right-click exclude
all, and just select these two, maybe. All right, so let's say I wanted to add a filter
to all three of them. Let's say we wanted to add the VOC freedom to
all three of them. So how can you do that? One way would obviously
be over here, select the fill layer and add a filter, then drag and drop. Sorry. We need to drag and
drop it over here. The drag-and-drop, the
bulb filter over here, select this layer again, add a filter. Drop. This walk finito. I think you get the point, but this thing is
really, really tedious. And it will take us a
lot of time for us. If we have a lot of
different layers, you cannot just keep
on adding filters or any different thing
that we need to add to multiple different
layers at once. So for these types of things, we can use the past to blending mode as
the name suggests, it will let effects
of a layer or the contents of a layer
passed to the bottom layers. So what that means
is lets you move all these filters,
add empty layer. To add empty layer, I will
just start to paint layer. And basically setting
this to pass through, what will happen is
anything this layer has will pass through all three of the layers
that are below it. So basically it flattens the bottom layer
into the top layer. So anything you add, this layer would affect all the
layers that are below it. So let's see this in action. I will add a filter to this and drag and drop
them. Walk over here. And you will see
this wall filter is affecting all three of them. If you increase this, you can see the ball filter is
affecting all three of them. Basically that is
passed through because all these three layers
are below this top layer. And we have the pass-through
blending mode selected. This wall filter would pass through all three of the
layers that are below this. Let's add a new base material. Maybe. Let's add this concrete. We had this one concrete bare, so let's add this one. But this one I will add top
of this layer, like this. Right-click exclude all. And let's just select
these two pieces. And you can see it is not
being affected by the war. And that is because
the boundary layer is above the ballplayer. But if you move this
below the top layer, you can see it has
started to effect now. So basically that is the
pass-through filter. In the upcoming videos
when we will discuss the clone tool and
the smudge tool, you will learn that
for these two also, we need to use the
past to blending mode. But yeah, that is
for later on video. So you can use any kind of filter overhead
that you want to. Let's go over the filter section and maybe select
a different one. Let's select this
HSL perceptive. And now if I change the
hue of this filter, you will see it will affect
all three layers below it. But I think it is pretty
clear by now that anything this layer has will affect
the layers that are below it. Alright, so these were
some of the blending modes and they uses that I
wanted to show you. Obviously there are a lot
more different blending modes that you can see over here. But as I said earlier, most of them you wouldn't
be even using at all, right, now, I think knowing this much is more than enough. But if you want to
learn a little bit more about the other
blending modes, but you can do just go
in the resources folder, open it up and you will
find this link's texts. White. Open this file up, and you will find a link
to a page that basically shows all the blending
modes with proper examples. So you can use that
if you want to learn about a blending mode. So let's open it up,
just copy this link, and paste it in Google's growth. Basically, this is the documentation
of Substance Painter. And now we will scroll down, you will find a list
of blending modes. And basically this has a little bit small
definition about each and every blending mode and also has examples that you
can see over here. You can see the effects of all these blending modes like
this is an inverse divide. And you might understand
that most of them, I'm not really that useful for us and we won't be
using much of them. But yeah, if you want to learn about a particular
blending mode, just go over here and you can learn about it
through an example. But as I said earlier, knowing this much is
more than enough, so don't worry too
much about it. Alright, so I think
this is enough for this lecture. I will
see you in the next one. Thank you for watching.
18. Projection Tool and Stencils: Hello and welcome everyone. In this video, we
will be going over the prediction tool and
stencils. So let's start. So the prediction
tool is over here, the third tool over here. So to use it, you first
need to add a layer. So let's start by
adding a paint layer. So let's start by adding
a paint layer because we cannot really use the regression
tool with the failure. Alright, so the prediction
tool is mainly used for stamping of stickers
and things like that. It is used to project textures
onto your model to use it. If you click over here, you will see this empty square. To use it, we need a texture
to project on a model. Alright, so we will go
in the Resources folder. And in the textures folder, you will find this fire
extinguisher textures, and let's drag and
drop any one of them. Let's use maybe this one. I will export it
as a texture and make sure to select reject
over here and hit Import. Now, to use this texture
with your prediction tool, you need to select
the layer first. And now at the bottom of
the property section, you will find all
these channels. So what we can do is
we can disable all of them except the color channel. So let's drag and
drop this texture into the base color
channel like this. Now as soon as we do that, you can see this
texture over here. If you start to paint it, you can see now we're painting over our model
using the texture. But the size is really huge. So what we can do is either we can increase the scroll like this to adjust
the size of it. Or I think there is a better way to adjust the size, rotation, and the position of
this texture over here, you need to press S
on your keyboard. And as soon as you do that, you will see your view
changes a little bit. Now you can change the texture. You will see all these
settings over here that S plus middle, S plus left. So let's go over them. So hold S and then use your left-click to rotate
the texture like this. And I'll let say if
you have a texture at a weird rotation like this, and you want to bring it back
to 90 degrees perfectly. So just hold Shift together
with S and left-click, hold Shift and left-click, and then just snap it like this. Next press S, then hold your right-click and you didn't increase or decrease the
scale of the texture. And the last one is old. And then use your middle
mouse button and then you can change the location
of the texture like this. I think it is fairly easy. Now let's use the
orthographic view. Hold Alt, then hold Shift, and then snap your
model like this, basically at 90 degrees. And now basically we can
easily paint like this. Let's come back to
the paintbrush. And now you can see
we had easily painted this texture onto a model
using the prediction tool. And I think it works perfectly. Now what we can do
is if you would press Control Z to
undo everything, Let's go back to the
orthographic view. Again, select the
prediction tool. So just to show you how it will work with the
other channels, you can maybe enable the
roughness and the height. And if you increase the height to something like maybe 0.5. And let's set the
roughness to one. You'll see now that
when I'm painting it, you have the height values and the roughness value
into our texture. But I think that is quite handy. But if you remember, as this is a paint layer, you won't be able to change
these settings later on. So make sure to have the
proper settings that you already want because you won't be able to change them later on. So if you want to change the
settings that are later on, then you won't be able
to the prediction tool. Then we have to do it
through the method of planar projection that I've already taught you when we
were going over predictions. You can just add a
fill layer this time. And now just drag
and drop it into the base color like
this. Let's press F1. Do the 2D view properly. Select this as Lena prediction. And now from over
here, select this. Let's decrease the scale. Set it to none. Again, scale this down, and we can also
paint it this way. Using it this way, what
will happen is now we can change all the
settings that we want. Let's go over here and increase or decrease
the roughness. I don't think it is
visible this way. Right now the reference
is at one and you can easily change it
however you may like. You can see that the
roughness is changing. Now it is very reflective. You can also change the height. You can see that when I'm increasing or
decreasing the slider, it is showing up over here. Also change the metallic value. So yeah, if you want to
have the option to change your properties of the
texture at a later onstage. Then use a fill layer along
with planar projection. As I said, you can also use the prediction tool very easily. I think both the methods
are pretty good. Just one of them is
non-destructive and this one is disrupted because we cannot really change any
of the properties. Yeah, I think this is it
for the prediction to. Let's go over the stencils now. So to use the sensors, if you remember when you are going over all the paint tools, we studied the Alpha, but you can see
this tensor section over here. We left this. Let's quickly go over this now. So basically the
prediction and stands the tool or the one and
the same thing almost, but there's a little
difference between the two. If you drag and
drop this texture onto this tensor like this, you will see the same
thing appears over here. You can change the size of it using S, all those settings. But now your texture
is black and white. So the thing is, the stencil
tool basically works with black and white images
and data Alpha images. So if you want to
use an Alpha image, Let's go into the
alphas section. So this is the Alpha section. You can easily drag and
drop any of the image. And now we can paint this
arrow onto a model like this. Where basically that
is the difference between a stencil and
a prediction tool. If you try to use
the prediction tool together with the Alpha. This time, let's drag and
drop this Alpha. The texture. Now if you tried to print it, you will see that
it treats the alpha like a texture only
and not as alpha. Basically it will paint the black color also
along with the white. We don't really want
that because we want the paintbrush to ignore the black color because
we are using it as Alpha. So the prediction
tool would read everything as a texture only. But the stencil tool would treat alphas as basically Alphas. So yeah, if you drag and drop this alpha
into the stencil, you can see that it will ignore all the black colors and only the white would be painted on. You can change the
color if you want to. And you're basically
both are the same thing. But since it can be used for
all these alphas over here, you can also change the
settings if you want to here. Let's use it with an example. So let's say we have all
these textures over here. But if you go back
the previous section, you will find all these Alphas. So to breed these textures, I can use a stencil tool. So let's drag and drop this
one into Substance Painter. This time select as alpha, and import this
into your project. Let's delete this
layer, add a new one. Let's remove the stencil. Now let's say you tried to use this with the
prediction tool. Drag and drop it over here
in the base color section. And you can see when
you try to paint this, the black color is
also painted on. And we don't really want that. We only want to paint
this text over here, also x plus F2. We just want the text to appear. So there are two
ways to do this. Basically, one of them is, let's go back to
a breadth-first. Basically one of them
is if you double-click, you will see this alpha
is in your brush now. So basically you can stamp
it this way, like this. But the problem with this thing is it is not really precise. And let's say you want
to change the size of your brush from over here
and then stamp it again. Now you don't really know the correct position for your brush. But with the stencil,
what will happen is let's say we
remove it from here. Let's come back
to a basic Alpha. Now I will use this
Alpha with the stencil. Let's place it like this. Now the thing is,
I can change any of the settings of
my brush, anything, the flow stroke opacity
and this thing will still stay over here only I can easily increase or
decrease the size of this. Just hold an increase
or decrease it. Move it anywhere I like. As long as I don't change
the perspective of my view, this tensor will stay just over here only and it won't change its position if I just move my mouse to change
some of the settings. Whereas if you use this with alpha tampered overhead only, but then you realize, oh, the size was too big, then you need to
reduce the size. And now you've lost the complete
position of your Alpha. I think when we want to stamp or something with precision and accuracy than just basically use this tensor because it
won't change its position. And if you just want to paint
something very quickly, you can just basically
use the alpha. Now let's try to paint this. And you can see only
the text is painted. And this is what we want it. So perfect. Till now we were
using the paint tool, but let's see how we can use
it with fill layer also. Let's just delete this,
add a fill layer. I will set it to red color. Now I want this alpha
that we just brought in. I want this alpha to use this
fill layer as a red color. So what I will do is I will
add a black mask to this, then add a paint layer that I'm working in.
The paint layer. Again, drag and drop this
into the stencil section. And now basically just
paint it like this, which decrease the
size a little bit. Alright, so remove the stencil. And the only difference
between using a fill layer and paint layer is now
even select this, changed the color whenever you like the roughness or
change the height, you can see if I
increase the height now it is looking as if it is
embossed a little bit. I think using it
with a failure is really better than using
it with a paint layer. Because of the fill
layer, you can change all of these settings
whenever you might like. Maybe you want to
change the color of the text or the color
of any of the thing, or the roughness or
the metallic values. So you can easily do that. But with the paint layer,
we cannot really do this. We can also adjust the
opacity of this if you want to come over here. Basically this was the
prediction tool understands into basically both of
them are only used when we want to
project something. When you want to
project some texture or alpha onto our model. So mainly the abbreviation
tool is used for all types of textures and stickers
and everything like that. And the stencil is
basically used for just black and white
images are alphas. That is the basic difference. Rest everything remains
the same throughout. Basically this is it for the
position and the stencil to just make sure to
remember all the shortcuts, will just delete this
layer and this quickly, Let's go over them once
again one last time. So we already have this texture we have with us with
the prediction tool. Just press S to edit this. You can hold your right-click
to increase the scale. Use the middle mouse button
to change its position. And left-click is for rotating. And if you hold Shift while holding S and
your left-click, then you can rotate it 90
degree angles like this way. If you forget any
of the shortcuts, as soon as you hold S, you will see all
of them over here. Also, sometimes you might
lose your texture like it is placed somewhere else
already size too much, or it is rotated
at a weird angle. What you can do is just hold and click over
this reset button. I forgot to tell
this. You can just reset everything like this. And now it is at its default
position for just hold S and right-click to
reduce the size of this. Basically this is it
for this lecture. Thank you for watching. I'll see you the next one.
19. Normal Painting and Particle Brushes: Welcome everyone. In this video, we will be going over how we can paint over
our normal channel. And also we'll be going
over particle brushes. Alright, so to start off, let's just quickly
add a paint layer to our metal texture set. All right, So if you will
hold over your brush, you will find this
physical paint option. So just select this.
And let's give this a red color and just click over
your model like this. And it will start to see, you will see some kind
of animation going on. You will see this
animation time that this brush animation
ran for 4.4 seconds. So basically this type of brush simulates the effects
of a particles. And whenever you click
it or you painted, then these particles
would be created that would basically simulate
your paintbrush. It can be useful sometimes. So this is the very basic one. I don't think it is that good. But if you just go
here, click on this. Head over to all libraries, open up starter assets. And in under the preset section, under the research section, you will find these
particles, select them. Now over here you
will find a couple of different particle brushes. Let's select this broken glass. Now, as soon as you
click over here, you will see this broken
glass effect that is simulated using
this paint layer. I think it is a
pretty cool feature that you can use
to create some of the complex effects like
this broken glass thing. You can also increase the size, but that way the effect
is not that visible. So it is best to keep
it at a lower size. For this, you can change the settings such
as changing the color, giving this metallic value. Also changing the height. Something like that. Let's try some more brushes. We have the bone effect, should create a burn
effect like this. Then we have electric lines. Some of them look pretty good, but I don't really
know the use for them. But yeah. If x looks really nice, maybe we can use it some time. Next, we have the phase. Basically all these
different types of effects. We also have fracture, which will create
something like that. Really good to watch them doing all these simulations
and animations. This leaks one is pretty good. You can create these leaks or maybe dirt leaks
using this brush. I think it is really useful
and can be used sometimes. We then also have leaks heavy. What you can do is basically, let's just quickly delete
this layer instead, we will add, go over
to all Libraries, select the base materials, and let's drag and drop
the rest fine material. Also, let's use
the iron material and place it below
the rust material. Alright, so now I will add a black mask and also
add a paint layer. Now, go back to the basics and in the particle brushes,
Let's select the league. And now you can paint
these rust leaks like this on your model. I think it is a
really nice tool. And we can do stuff like this, like when paint these
leaks over here. Along with the smart
mask and everything, roughness variation is added, effects would look pretty good. Then we have some more stuff
like this organic thing. We can also simulate
the rain effects. Like maybe you want to add water droplets of your
screen like this. You want to create a texture
with water dripping away. So you can use this rain
particle brush also. Alright, so you can just experiment with
them, go over them. There are a lot of them,
and just see what they do. Alright, so next, if
you select any brush, like maybe this one only, and go into the settings, you will find some of the basic settings of your paintbrush. But if you scroll
down, you will find a couple of physics
setting also over here. So I don't understand
most of them, but you can move the sliders left and right and
see what they do. Like if you use
this leaks heavy. So basically one of the
important settings is this duty. So if you reduce duty, then more particles would be emitted because it is
basically distance, time, and the
amount of time that a substance painter would wait before releasing
another particle. So let's say we
increase this to 0.05. So now as you can see, there are only three or four particles that are being emitted
because we have increased the time
between each particle. And if he reduced the time, Let's say we set this to
0.001 and now paint it. You will see there
are a lot more particles than the usual. Basically this is the DT. And then you can play with all these different settings
and see what they do. My computer is lagging
a little bit because I think if I increase
this too much, then we have spawned
speeds, bonds spread. Now there will be spaced
out, I think a little bit. Now that I've been
pleased this pond spread, basically, I have
increased response rates, so now they're spaced
out a little bit more. So you can try out these
different physics setting. I don't play with them too much. I just go with the
default ones only. If you double-click. Now we're
back to default settings. Just double-click on any of them and you will be back to
the default settings. Alright, let's undo everything. And basically these were
the particle brushes. Also one more thing. Let's
say we paid something using these particle
brushes like this. I've painted a couple
of these effects. Now if you select
the eraser tool and now select the
physical eraser, you can also use these same
effects with the eraser also. I think that is also
pretty good like this. Now we're erasing the effects
using the particle brushes. You can also use
that if you want to add some organic effects
to your texture. Alright, so basically
this was all about the physical pain and
the particle brushes. If you just look over it below the particle
versus we also have these tools which also
work in a similar way. There are some really nice
handy tools that we can use, like the screw bold one
that I really like a lot. Basically just select
this and now you can easily paint screws
over your model. We cannot really see. Let's just remove both of these layers and now
add a paint layer. Select the screen. Now, you see we can just easily stamps
screw bolts onto our model. We also have a lot of different types of events
like these cracks. One, you see we are painting height and normal inflammation
like our model is grabbed from over here. And it even looks realistic. That is also a nice tool. We also have you can also create zip effect to
decrease the size. Maybe you are creating
a fabric or a jacket. You can use this
to create a zip. Also, one more thing that
I forgot to mention was, I haven't told you guys how we can paint in a straight line. First, let's select the
normal restaurant over here. And to paint in a straight line, basically what you
have to do is you basically just have
to hold Shift. So let's say I need to start
painting from over here. So first I will just click
over here like this. Nothing really happens but I
have clicked over here once. Now if I hold Shift, you will see a line is connected
between the two points where I clicked earlier and
wherever I'm moving my mouse. Wherever you want to
start the painting from just click over
there once like this. Now you can see hold shift and this line would be
connected like this. Wherever you click, you can just hold shift and you
will see this line. I think you get the point now. Alright, so the next step
is click over anywhere, hold Shift, you will
get this straight line. Now, just click using
your left-click. Basically, this way you can
paint in a straight line. Just click anywhere you want, then hold shift that again. While holding Shift, click
using your left-click. Basically this way we can
paint in a straight line. Also one more thing while
doing all of these things. If you hold Shift and
Control at the same time, then what you can
do is then you can snap your straight
line like this. I think 15 or 30 degree angles. I think this is also quite
useful when you have to add a line exactly at
90 degrees like this. This is perfectly straight, but if you want to
add a diagonally, you can just leave control and
you can paint it this way. Pretty easy. Alright, so let's again go over some of the tools. We also have these
stitches effects like when we are
creating fabrics. Really nice. You can see it looks
quite believable also. So you can definitely use these
in some of your projects. We also have this option. If you want, we can
paint over here. Show this very like effect as if the metal was
welded over here. We have this thing also. Then we have some of the
random effects like this one. I don't know what I would use this form, but we have this. We also have this
IV branch effect that you can use to paint some land textures like this. I rarely use this.
But yeah, we have it. We also have these leaves. And then we also
have this blur tool. So basically as soon as
you select the blur tool. We are now moved to
the Smudge tool. So basically the blur tool and the smudge tool over
here are the same. You can just smudge your
paint strokes like this as if you are smudging
something with your finger. That's why the icon over
here of the finger. We are smudging hard paint
strokes with a single year. That is the blur tool or the
smudge tool from over here. Again, let's undo
everything and okay, so next, I hope you get the point now you can just try out all of
these on your own. Basically we just select
it and start painting. We also have this
footsteps effect. Some of the glitter effects. This one actually adds
roughness variation. It is not really visible. But you can see over
here as I'm painting, it is adding some scratches. I think this is it for all the particle brushes
and tools over here. So next let's go over
normal painting. So delete this layer, delete everything that we
might have painted earlier, and let's add a new layer. And you can see
the pebble tool we have selected is
still over here. So let's go back to our
brushes and basically select the basic soft
brush from over here. And now remove this substance
material mode like this. And now we have our
basic paint layer back and now change the color. And you will see
now we can easily paint over our paint
layer like this. But if you're just
disabled all of the channels and leave
just the normal channel. You can see we have
our paintbrush, but we can basically
paint nothing. So what is the use of this? Let's just quickly go over that. If you look into the texture
section and open this up, you will find all these
hard surface textures. So just select the hard
surface from over here. And you will find a couple
of these normal textures. What we can do with them is
just drag and drop them, select them and drag and
drop them over here. And as soon as you do that, just stamp on your
model like this. And you can see we're
stamping them up like Alphas, but this is a little
bit different. I hope you have
noticed this by now. And let's increase the
hardness to 1 first. And this again. And it is looking as
if you have actually created this model
into a real model. But in reality,
nothing is over there. It is basically all texture. If you just place it over here, you can see basically
everything is flat. But the normal map texture
is making it look like as if we have all these rivets
and cavities over here. If you hold Shift
and right-click, you can basically move
the lighting and you can see it also reacts
to the lighting. And that is basically the
use of the normal map. If you disable this layer, you can see nothing is
actually over here. It is basically all the
effects of the normal map. I think it is
really, really cool. Let's erase this one. And let's add a couple of more things to see
more properly. You can do things like
adding the net bold effect. Maybe let's drag
and drop this one, this crew, scale it down. You can see we had painting the scribbled in a
materialistic fashion. What you can do is you can also enable the metallic
channel from over here, set the Metabolists to one. And now when you paint it, it's as if you are painting
real screws onto our model. I think that is
really, really cool. Quickly just go over here and select the full preview Kazaa. And let's disable the
metallic channel now. And you can see
your normal texture over here very clearly. You can add some more of
these, like this one. Basically that is normal
painting when you are creating some hard surface modeling
and texturing them, I think it would be really, really useful for
those kind of things. You can use some of these effects to add some
more details to your model. Like maybe some veins. Makes sure to set
the hardness at one. Like this. We can also add some details
to even this piece also, like we add a handle over here. You see? And it looks really realistic as if he had actually
model this piece. If you again enabled
back the metallic, you can see we are
painting it this way. Obviously we have this
circle like King over here, but we can just select
the eraser tool and just delete it. So click over here, hold Shift Control and
basically I'm erasing it. That bit of work, but I think
we can definitely do that. Zoom in a little bit too. It is more perfectly. I think it adds a really nice
bit of effect and detail. It is looking as if we
have really model this, but actually we have not. Basically this is all the
work of the normal map. You can see clearly
overhead that the model is actually flat. But the normal map
texture is making it look like as the VM model, this piece of geometric. And it is also reacting
to our light perfectly. It is a really nice way to add some details
into your model. Again, select the brush,
mislabeled the metallic, and you can drag
and drop any one of them and use them
however you may like. You will also find some
parameters over here. With this grid, we can change the grid size to
make it more dense. One more thing that I want to
mention is if you tried to paint with this nominal texture
on the model like this, you will see it is painting
in this circular shape. So if you don't want
that to happen, you can just come up
over here and remove the alpha from the Alpha slot. And you can see now
it isn't squared, which is the expected result. If you don't want this
alpha to come up over here, you can just remove
this and then you won't get this
circular shape. Let me just bring back
the alphabetically. And then we have multiple
different types of normal textures that you can
use to create these details. I think you get the
point now you can use all these normal map
hard surface textures to further detail your models. I think it is not really useful
with this type of model, but with any type of robotic model or a
hard surface model, you can add a lot of details
only in the texturing face. And not really modelling
anything like this. We have easily created
event like thing for sci-fi type
hard surface model. And it looks really
believe we will also, but obviously not for
this kind of model. I think you get the point
dispersed for nominal painting. And yeah, I think this
is it for this video. We went over the
physical paint brushes. So the particle brushes, some tools and also some
normal painting effects. So I think this stuff was pretty easy and really
fun to understand. So thank you guys for watching. I'll see you next time.
20. Mirror and Radial Symmetry: Hello and welcome everyone. In this video, we will be going over meter and radial symmetry. So this time, instead of
the fire extinguisher file, I will be using the drill underscore start
substance painter fight because it is a
little bit easier showcasing these
features in that model. So let's open it up now. Go over to File Open. You will find this
file in your sources finds into Substance
Painter folder. This grid underscore starts to double-click and open it up. Alright, so now we
have this over here. Let's go over to
the layer section and a painting is already added. Let's just delete this
and add a new one. Alright? To enable symmetry, you need to just click over
here on this icon. Click on this, and as
soon as you do that, you will see this line
dividing up our whole model. And as you are hovering
over the model, you can see this
other point that is basically replicating
our movements. So if I decrease the size of the brush and increase the
hardness a little bit. Let's try painting
over our model. And you can see our
paint strokes are basically being replicated on the other side of the model. So that is basically
mirror symmetry. If you want to replicate your paint strokes
on any of the axes, the x, y, and z, then you can use a
mirror symmetry. Right now, if you click
over here on the settings, currently we are
using the mirror x. That means we are replicating the paint strokes on the x-axis. You can also go ahead
and choose the y axis. Now we are replicating
over the y-axis. But as this model is not really symmetrical
on the y-axis, that's where it won't
be that good to replicate on the y-axis. And also we can choose the
zed axis over here like this. But again on the z axis also this model is not
really symmetrical. It is only symmetrical
on the x-axis like this. So that way it works
perfect for us. Alright, next thing
that I wanted to go over this, right now, this line or this
plane that is cutting our model exactly in half
is right in the center. Like this. And that is because the origin points of all of
these models are correct. That's why the line is
perfectly at the center. Or sometimes you might face
the issue where this line is exactly not at the center and you have to set
it up yourself. So click over the
settings icon and you can see over here under the
x written over here, we have a slider over here. So if you move the slider, you can see that we are moving this plane that cuts our
model exactly in half. So let's say I
moved it over here. And now according to
Substance Painter, our model is divided into two of these parts that
are really unequal. But as you paint, you can
see it will paint this week. So make sure you're
this line is exactly at the center when you are trying
to use mirror symmetry. Alright? We can adjust the line
however you may like, and set it back to 0 if you want it exactly
at the center. But yeah, as I said, sometimes with your model, things can go
sometimes wrong and it won't be exactly
at the center. So you might have to
set it up yourself. If you enable mirror
symmetry and you don't really see a line
anywhere on your model. What you can do is
just go over here and another display session
just enabled show plane. So now this whole plane is being shown that will cut
your model in half. Also, let's change this
orthographic view. This way you can
easily visualize where your plane is
currently right now. And then you can easily
move it this way to exactly at the
half of your model. Again, it might take some
trial and error to move it exactly at the center if it
is not already by default. But yeah, with our model, everything is correct.
So let's set it to 0. If you change the
axis from X to Y, you can again do the same
thing over here also. You can change the axis
according to you, like this. You can set it up
over here also. You see basically this
is mirror symmetry. Set it back to 0. You can also
reset this from over here. Let's set it to x, and then we have some display
settings over here. This one basically shuffling. This one is for intersection. Intersection is basically
this line you see over here. If you've disabled this, then you won't see this. You can change this red color, whichever color you want to. Alright, so the next
option is show Kazaa. When we're hovering over
our model like this, we can see these red
colored dot over here. So that is basically
a Gaza that is moving along replicating our paint
strokes and movement. So that is the cursor. If you go over here and just
disabled this, now you will see you're
not really seeing that red colored small
dot or the cursor. Let's just enable that. I think it is pretty handy. The blue cart whenever
you are painting. Alright, so the next option is hide while painting,
which is enabled. So as you see right now, it is visible right now, but as soon as you
start painting the red colored because
it goes away. So if you disable this option, it will stay on at all times. So now it is visible at all
times even while painting. So yeah, let's keep
it this way only. Alright, so the next we
have the manipulator size. So basically, before learning
about the manipulator size, Let's learn what is
the manipulator. Right now we learned
how we can change the axis just by changing
the slider like this. But let's say we don't
want to use this. You are a little bit
more intuitive controls, so you can enable this one. And now you see, now you can use this transform tool
to just basically move. Lean around like this, I think is pretty handy to use. You can just use it and
place it over here. But if you want a little
bit finer control, definitely use these
numbers over here. You will see as soon
as we change them, is values over
here are changing. Basically, both of them
are the same thing. You can either change
this from over here from the slider or you can just
select this arrow like this. You can also do the same thing for all the different axes. Alright, so let's just
quickly we said this. And the manipulator size is basically the size of this icon. You can increase
or decrease this. Let's keep it at 0 for
writing wasn't a default. Alright, so basically
this is mirror symmetry. Let's go over radial symmetry. Radial symmetry basically
allows us to paint in multiple different
locations at the same time. And in a radial or a circular pattern will just quickly understand as
soon as we enable this. You will see as
soon as you hover your paint brush
over your model, you will see all these dots. Earlier when you
are using symmetry, only two dots were available. But right now you didn't
see a lot of them go over here and you
can increase or decrease in number of
dots from over here, you get maximum set it to 16. And now there are 16 dots. And you can minimum
set it to two. So basically same as
the mirror symmetry. Alright, let's set it
back to eight for now. Let's see how we can set
the radial symmetry up. So first I will
just go over here, hit this reset icon,
reset everything. And now we have our manipulator right over here at the center. Alright, so let's start
by choosing the x-axis. And you can see as soon as I move my paintbrush
over my model, you can see all our
paint brushes are all the other
Khazars are all over the model and we cannot really see how we are controlling them. But what we can do is
we can go ahead and change the value
of the x and the z and set it up properly. Instead of doing that, I think the best way to do
is just move this thing. And let's say we want a
floral pattern over here. So I will place
it over here like this and just start painting. You see now we are painting in a radial symmetry. Like this. We can create pretty good
Florida designs with this. You can also increase
the count if we want to, and you can also
increase the angle. You can visualize
this over here. If you increase or decrease
the angle, what will happen? Let's set it to 364 now to
have the complete circle. Now you see we are painting
in this radial fashion. Alright, so now let's
try to change up the axes a little bit and
set it up differently. I will set it on the z-axis. Now you see we can paint
over it like this. If you hold Alt and Shift at the same time and snap
your view like this, you can set it exactly
at the center over here. This is basically
trial and error. You have to do it
again and again. You might have to
do it a few times, but yeah, you will get
it right eventually. Alright, let's select this. I will set the angle span 2360, and let's set the
count to eight. And now I can paint over all of them at the
same time like this. You see over all these
hands or things, they are eight in
number so I can paint on all of them
at the same time. So that is pretty much
the practical use for radial symmetry like thing. You don't have to like
if you're disabled this, you have to print on
all of them one-by-one. Let's say I want to paint some height info on all of them. So I will just enable
the height channel, decrease it like this. And I want to be in these straight lines
like this over here. Actually in the real
model also we will, we will be painting
some lines like that. Let's say we want to do that. But we do not need
to go over each one of them and then add
these lines like this. We can just quickly enable the radial symmetry and easily do that on
all of them at once. You see how easy that was. I think that is the use for radial symmetry and I
think it is pretty cool. So yeah, that is pretty much it. We have all these settings
also here, enabled show axis. Let me show you this
line that is the axis. For your radial symmetry. You can enable or disable,
Show interaction. That is basically
this point over here. Then we have all
the similar setting the sugars are and
hide while painting. And last one is
manipulator size. So this is our
manipulator that we can use to change it
whenever we like. We just need to place our
manipulator properly and rest. Everything would
work just as fine. Alright, so basically this was
meter and radial symmetry. I think they are
pretty useful tools to use a substance painter. And we will be using them
while we are creating a drill. Extremely open up the
final fight to show you how I use the mirror symmetry
and the radial symmetry. Go over to File Open. Let's discard this and
open up, breathe Final. And you can see all
these height info, all these lines that
you see over here. All of them I've painted
using the dosimetry and these lines that I was talking about earlier and
I also showed you, these are all painted
using the radial symmetry. Symmetry is a pretty handy
tool and can be used in many different ways to save up some time on your
texturing process. Alright, so I think this
is it for this lecture. We continue from here, the
next one, and us watching.
21. Remaining Tools: Hello and welcome everyone. So this is the last video of this section three
and industry do, we will be going over some of the remaining tools
that are these three, the smudge clone and
the material become. So let's quickly open up our
fire extinguisher project. Alright, so to start with, we need a couple of
materials to work with. I will just drag and
drop this wood material. Let's select the geometry mask. Right-click and
exclude everything. And I will just
select this piece. Next. Maybe we can I
add something else? Maybe dysplastic material. Again, select the geometry mask, right-click and exclude all. And let's just select this one. So we have at least
two materials now. So now I will select the
smudge tool from over here. But as you can see,
we cannot still selected because right now we are still in the
field layer and we cannot really
paint in a failure. We first need to either add a black mask to this or we can just directly
add a print layer. Now all the tools are active and you can see we
can paint over this. Alright, so if I select
the smudge tool now, we have already gone
over this much tool. Basically the smudge
tool will try to emulate as if you're smudging something
with using your finger. Basically it will blur out your paint strokes or anything
you have on your failure. But as you see, I'm trying to use the smudge tool
on this fill layer, but nothing is really happening. And the reason for
this is currently this layer blending
mode is set to normal. So we need to set
this to pass through. Now try to use the
smudge tool and you can see we are smudging. You see overhead closely held also using the
smudge tool properly now. And the reason for this is basically the
pass-through layer. What this will do is it will flatten the bottom layer
into the top layer. So, so basically what will
happen is whatever is below this layer would be affected by the
contents of this layer. Now we are painting on the
top layer on this one, but both of the layers that are below it are being
affected by it. And let's say what I will do is let's add another
good material. On top of this layer, add a geometry mask over here. Now select this layer again, and let's try to use a smudge tool and you can
see nothing really happens. But as soon as they drag
and drop it on top of this. Now you will see the smudge
tool that was earlier, it was invisible has appeared. Now, basically to
use the smudge tool, you need to set the layer
blending mode to pass through, then you would be able
to use it easily. Alright, so basically
this is the smudge tool. But you can also do is
if you disable all of these layers and just
select the Paint tool, choose a color and try to
paint over this like this. Then you can basically select the swatch tool and select
your paint strokes like this. Also one more thing. Let's just quickly delete this layer and add
a new paint layer. So let's say you use your
paint brush like this, something on this layer only and then try to
use a smudge tool. Then you will see
it works perfectly. And the reason for
this is right now, we're smudging the contents
of this layer only. But if we want this much, the contents of a
different layer that is below this top layer. Then we need to set
this to pass through. And then only we will be able
to smudge them like this. As you can see. As soon as I set
this back to normal, you will see that all of the
smudging effects are gone. Now, make sure to set
this to pass through. All right, Let's
delete them off. Maybe we can keep
the materials at least and just
delete this layer. Next we have the clone tool. So basically add
another paint layer. And the clone tool,
basically the same as the clone
tool in Photoshop. So what you need to
do is select this. And if you remember
in Photoshop, we can take a sample
area and then we can replicate the same
thing over somewhere else. So what you need to do is hold V and then use your left-click. And you will see this
box appear over here. And now this is our sample
source and our tribe renting. Again, you will see
nothing really happens because we have set
this to pass through. And as soon as they do that, you can see the material
is appearing over here. You can select this now as the sample source and
try painting this over here. So basically this
is a lone tool. You can select any of the
sample source and just start to paint using that idea to replicate the
contents of that area. So yeah, pretty
self-explanatory. Just hold v, then
use your left-click. Select your sample
source like this. And then just start painting. Pretty easy. So now if we will just
press over the clone tool, you will see there are two
different types of flow rules. One is relative source and
other one is absolute. So first, let's select the relative source that we
were working with earlier. As soon as you select a sample
area and start painting. Let's say I have painted this much and then try
to move your brush. And you can see that
the sample source is moving along with your brush. Basically that is relative. And now select the
absolute source. Let's select this area as the sample area and
now try printing. So right now we are done with the painting and as soon
as you leave your mouth, the sample area is
back to where it was. And now you can move
your mouse anyway, you like it will start
taking the samples from that particular area only and not from anywhere else. Basically, that
is the difference between relative and absolute. Alright, so let's quickly
again delete this layer also. And now I will add
another material. Let's delete this wood
material, this American Chetty. And instead I will
add a material. Right-click exclude
all I select this. We have three different
types of materials. And now if you add
another paint layer, select the Paint tool. And let's select the material. You are already familiar
with the color picker solid is basically this.
You can click over here. And then you can color pick
from any part of your screen. As soon as you click over here, the color would be selected over here and
you can paint with that. So what is the difference
between a color picker and a material is very
easy to understand. As soon as you select
the material picker. You can see as you are hovering over any
of the materials, you can see the icons change. So let's say I selected
the gold material. So make sure to pay attention over all of these properties. As soon as I select
the bowl material, you will see not only
the bold colors changed, but also the metallic value is set to one and roughness
is set to 0.2. So basically, the
material picker would not only identify
the color properties, but also the metallic roughness, normal and high all
of these property. So now if you paint, you can see I'm painting with
the gold color. Again, select the
material pickup. Let's select word this time. This time metallic
is automatically set to 0 and roughness
is set to 0.43. Yeah. Basically that is
material picker. You can see as soon as I click over any of the new material, the properties change according to that particular material. Alright, so basically
this old material, because you can use it to
identify the properties of a particular material and start painting with all
those same properties. You don't need to like, check over the gold foil
material and then remember all your
properties then go back to the paint layer and place
all those properties. You can directly use this
tool and click over here. And all of those
properties are now does. Now we can easily paint with a paintbrush using
the gold material. Basically, these were
the remaining tools. And with this, our
section three is over. Now, we have learned
about many of the main features of
substance painter. Obviously there are
still a lot of things to learn and lots of
things to go over, but we will keep on learning new things as the course
proceeds further. In the next section, we
will finally start with the texturing process of a
fire extinguisher model. So now from the next section, instead of just
learning the new rules, we will be going over workflow
processes a lot more. And I think that is the
most important thing. I mean, anyone can tell
you how I paint tool or an eraser tool or maybe
a fill layer would work. But how to use them properly, in proper scenarios, how
the industry uses them, and how we can use them
in our textures and models to get the perfect
and realistic results. We will be learning that from
the next section onwards. Yeah, it will be a lot
more fun from now on. I hope you will learn a lot.
Thank you for watching.
22. Creating a new Project and Paint Material: Hello and welcome to the
fourth section of this course. In this section, we will be sharing the fire
extinguisher model. So in this first
lecture, we will create a new project and add
some basic materials. So let's start. I wouldn't go over to file and let's create a new project. Already familiar with
all these settings. So I will just quickly
go through them. I will click on the
Select button and select my fire
extinguisher model. So this is the one fire
extinguisher understood. Final. Select this one hit. Okay? And as soon
as you do that, you will find your
model over here. So as you all know,
the first step is always to bake the mesh maps. So we have again
already done this. So let's quickly do it. Go over to the texture
sets settings, select big mesh maps. Set this to four K, enabled both these settings. And just said the anti-aliasing
to four-by-four rest, everything remains the same. If we want to improve the
quality a little bit more, you can increase the risk for the ambient occlusion
furniture and thickness, but rest everything
is pretty good, I think so I will just hit
big selected textures. Alright, so now it
might take awhile. I will just resume the
video when it is all done. Alright, so the
bank is done now, so just hit Okay. And now just quickly
check for your model for any kind of
potential baby shoes. But I don't think
there'll be any. Alright, so everything
seems pretty good. One thing that I
will do is go over to display settings and enable temporal anti-aliasing so that we don't have all
these jagged edges. Now before starting, let's
save our projects first. So go over to File Save, and I will just leave it
as fire extinguisher. Final. So now if we were heading
to the Resources folder, Substance Painter
files, we have now two different fire
extinguisher files. One of them is fire
extinguisher underscore start and other one is fire
extinguisher finding. The reason we have two
different files is if anyone does not
want to go through all the process of creating a project and baking
and all that. They can just directly
use this file, fire extinguisher,
and this will start. In this file. Everything
is already done for you, all the HashMap and everything. And you can directly start with the texturing process and
the fire extinguisher underscore final file has the complete texturing already done for the fire extinguisher. So if anyone wants to check
how I did a particular thing, they can also do that. Alright, so now let's close the resources folder and we can now start with the
election process. Finally, let's delete this layer and we will start with
creating a metal paint layer. So let's start by adding
a fill layer first. And I will rename
this layer to metal. Alright, so I will set the metallic value to one because obviously
this is a metal. And the next thing
that I will do is I will select this
base color channel, and let's make the color
a little bit more darker. I think somewhere around
here and we find 0.653. So now we have our
metal materials. And as I told you, if it will go in
the filter section, we have this lag finish filters. So let's add that now to get a little bit more
realistic metal. So go over here,
let's add a filter. And the one that I will
be using is this one, matte finish it off. So let's drag and drop this one. And now we have
something like this, which I think looks
good right off the bat. But what we can do is we can maybe reduce the
effect a little bit. I will maybe set this to 0.3. I think that is better. And we can also increase
the scale if you want to. Yeah, I think this
is pretty good. Alright, so this is
basically a metal, nothing too complex, pretty
straightforward stuff. And now next let's
add another layer, and this time I will
rename the layer to paint. First, let's set the base color. I will click over here. And for the saturation, I will set the value to
somewhere around 0.744. And the value would be 0.575. For fire extinguisher, we
need kind of a red color. So obviously you can go
for any kind of color. But I think I would be
going for these values. If you want to get
exactly like mine, you can just copy these values. Alright, so now
let's close this. The next thing that
we will do is I will use the roughness
a little bit. So maybe around 0.25. Alright, so I think
this looks pretty good. And now as you can
see currently, these two materials are
all over our texture set. So basically we don't want that. One thing that we can do is we can select each one of them. Right-click exclude all,
then select this thing. Then again for this
one also right-click exclude all, then
select this thing. But then we have to do this for each and every single layer. And that is pretty tedious
because we will be adding a lot more layers in
this metal paint materials. So what we can do is
let's undo everything. Now it is again, all
over our texture set, we can just simply add a folder. Let's rename this
folder to metal paint. Now, just select
both of them and drag and drop them into
the metal paint folder. Now basically we can
just click over here, right-click and exclude all. Then just select this. And now we basically just had to select one time for
this complete folder. And now we can add any layer. It will be added over this area. As you can see. If you want to add for
the complete picture set or for a completely
different materials, we can just simply add a
layer outside of this folder. And that will basically affect
your whole texture set. So let's delete this now. And also I will
delete this layer. Alright, so the next
thing is, as you can see, the paint layer is covering
the metal layer completely, but obviously we
don't want that. So now we will create some edge damage and
stuff like that. So it's time to
add a black mask. And now I'd been cleared
completely disappears. Don't worry, we will
now add a generator. And for the generator, obviously we can select any and if you want to go
a different path, you can obviously do that, but I will select
the metal edge here. I think it would
work really well. And you can see we do not
get the expected result. The reason for that is we need to just invert a
complete generators. So basically set this to true. Now you can see we have
got what we wanted. Alright, so let's adjust the
generator now a little bit. So the first thing
that I want to do is I want to increase
the contrast to one because I want this to
be pretty sharp like this. Next I will increase the range amount because I
think now it is very less. We can increase the amount. Maybe 0.6. Yeah, something like that. What we can do afterwards
is we can just decrease the overall beer levels and
everything would be fine. So let's decrease
that. We're level. Maybe 0.6, I think. Something like that is fine. We can decrease the contrast
a little bit. Maybe 0.85. Yeah, that looks better. And one more thing that
I want to do is I also want to add some
height information. So just select the paint layer and if you increase
the height channel, you will see how it
reacts with the mask. So obviously we don't
want it to be that much. Let's set it to maybe
0.0050.01 is fine, I think. In that matches good.
Alright, so next, select the mask, and now I
want to add another failure. As you remember, we can add multiple different failures and smart mask and add
them together. Alright, so go over here
and let's add a failure. And you will see immediately the effects of the mask
completely disappear. But don't worry, we will change the blending modes
and bring them back. So head over to the
texture section. Let's search for grunge. Dusty. I will be using a
particular arrangement. This one range does this graph. If you want to, again,
you can use this one, but if you don't want to, you don't have to use this.
You can use any one. You might like to just drag
and drop it over here. Again, we have
something like this. First we need to invert
this, set this to true. And again, I will
increase the contrast 2.5 and increase
the balance also. I think 0.85 would be nice. Don't worry if you're feeling like the effect is too much. We will reduce it by painting
with our own brushes. So don't worry about that. These are tiling also to do that the grungy is a
little bit smaller like this. Alright? Now what I will do is to bring both of
the effects back. What we remember is we can set the blending mode
to Linear Dodge. But as soon as we do that you can see everything disappears. So don't worry, the reason
for this is if you set this back to normal and
let's go into our mask. We can see the mask is
now pretty much inverted. So that's why the Linear
Dodge option is not working. Because in Linear Dodge, we basically add the
whites of both the masks. And as you can see, we currently cannot
really add the whites. Because if we add the
whites of both the masks, we get something like this. It basically all disappears and only some sports
are remaining. So how can we avoid that? Let's go back to material and instead of using
the Linear Dodge, we need to use the opposite. So we will be using
the Multiply. And that way you can see
both of the effects are now they're the grunge dusty also along with
the metal edge v. Alright, so I think
that is a lot better. And now select the
drug just to fill layer and just move towards
the back of the model. And we can see that
over here that fill layer or the texture is
ending very abruptly. You can see the scratch. Ends abruptly. So to avoid that, we can just change it from
UV protection to Dr. Dana. Now you will see this kind
of weird towards the front. We can just increase or decrease the tiling and see
what fits, right? I think setting the typing value at three gives us a nice result. Yeah, I think three is 4 fifth. We also don't have
those big scratches and we really don't need them. Yeah, I think this
looks perfect. Now you can see that we have added a paint layer and
to that we have added some edge damages and
just overall some surface damage using the different metal generators
and the fill layer. And yeah, I think it
looks pretty good. All right, so next
what we can do is we can add a
print layer to this. And if you remember
using this paint layer, we can edit the mask on
our own using this brush. So because we have
inverted our mass, if you will use the white brush, it will make the metal layer disappear, which is this one. And if I paint with
the white race, you can clearly
see that the edge damage on the surface damage we painted using
the metal layer, it is going away. And if I press X to switch
to the black color, you will see that it will
make the metal layer visible again because we
have inverted our mask, the role of the white and
the black color is also inverted. Pretty basic stuff. Let's undo everything. Because obviously we won't
be using this type of brush. Alright, let's select
the paint layer. And now I will go into the brushes section and let's
select this dirt brush. What I will do is
basically I will just paint over
some of the areas. Like as you can see over here, there is no damage here. So let's add some worst. I will set this to orthographic, then hold Alt and Shift
at the same time. Snapped my view like this. Where I can just easily
paint over here. If you remember,
the shortcut for increasing the size of
the brushless holding control and using a right-click to increase or decrease
the size of the brush, make sure you are only
moving your mouse left to right. We
increase the size. Now you can paint, you can see, alright, so let's paint
in a straight line. If you remember, we need to
click anywhere like this. Then hold Shift. You will see this line hold control to make the
line snap at 90 degree. Then just click over here. And you can see we have
painted like this. Let's do the same thing. What we can do is just say, well the rubber and
plastic for now, I will undo this and
let's enable symmetry. And I will use the
symmetry on the y-axis, sorry, on the z axis like this. You can come in handy. Now I will again start to
bring click over here, will shift and control. Try one more time. Now you can see it is added
on both the sides. And let's join them and use the size of the brush
and let's just join them. Yeah, perfect. Again, you can just
press X and if you want, you can remove some of the
areas that you are thinking. Or too much like this. So I mean, that
looks pretty good. We can add a little
bit extra damage over here also at the bottom. So again press X to flip
back to the black color. Hold Control and Shift. But first click over
here like this, then we'll Control Shift and add some more
damage like this. You see pretty easy. Alright, so next what I will do is let's disable the symmetry. And I will increase
the size of the brush a little bit and press
X for the white color. And now I will be removing the effect from a
couple of areas. I feel like it is too much like this so that the effect
does not feed too much. I'm just using my
white brush and just painting over
some of the areas. Remove the extra effect. In-between. You can just
press X to flip back to black color and add a couple
of damages like this also. And then again, this x
and remove the damaged. We just make it feel a
little bit more organic. You can also change the brush if you want to, like
maybe this one. I don't think it is that
good for adding an effect, but we can definitely use
this to remove or some ADLs. We can maybe add
this also like this. I'm just showing you how we
can experiment with things. You don't necessarily have to use all these
different brushes. All right, so now I think
it looks pretty good. Obviously, we can go
ahead and even more. If you want to, you can
spend some more time with it and just keep doing it till you feel like everything
seems right. So I think this is fine
because later on we will be adding more effects
like rust then some dirt. So overall, adding this much of metal edge
damage is fine. Let's save our projects first, hit Control S to save. And I think this is
enough for this video. We have added a metal layer, then we add the paint layers, added a couple of
mass to them who have some edge damaged and some
sofas damage like this. Then we also use
the paint layer to add some custom
damage on our own. If you want, you can
select the paint layer and also give it a little
bit more height. You can see how it
affects our models. I think setting
the height at 0.2. That looks pretty good. And you can see even at
a matte, finish it off. It's showing you
what paint layer and that is usually pretty good. I think our material is
coming along nicely. So this is enough
for this video. We continue from here in the next one. Thanks
for watching.
23. Adding Rust Layer: Hello and welcome bye. So let's continue to retail our
texture even more. So I've already
opened up my fire extinguisher underscore final
substance painter file. So you all can also do the same. So let's start by adding
a new field layer. So make sure you have selected this paint layer and
then add a fill layer. The reason I'm telling
you this is if you will select this layer,
the paint layer, and then add a fill layer, it will add on top
of the painting. But maybe if you have
selected a different layer, like the metal one, and
now you add a fill layer. It will be added in between. So just make sure
to remember this. If you select this folder,
then add a fill layer. It will be added outside
the folder like this. We can just drag
and drop it inside. And I will rename
the layer to rust. And to add the last effect, I will use this rust fine layer and drag and drop it
into the base color. Like this. You can see the rust
is looking quite shiny because we have to
adjust the roughness of it. So obviously dust is
not that reflected, so I will set the
roughness around 0.8. I think. That's pretty good. Next, let's add a
black mass to this. And let's go in the
smart math section and search for smart masks. You can try any one
of these smart masks. Let's drag and drop
this surface rust one. And you will start
to see its effects. We have this rust
effect over our model. We can select the
mask editor and tried to increase it a little bit from the global
balance like this. But I will be using a
different smart mask. This one is also pretty good, but let's use a different one. Let's remove this and I
will be using this edge. Just drag and drop it over here. Now we have something like this. Select this fill layer, and let's just increase
the balance a little bit. Basically not this much. First I will set
this to five Lena, because you can
see the seam over here said district Friday now, yeah, this is better. Let's increase this to 0.66. Maybe. Writing 0.65 is pretty good. What we can do is we can
add another generator to select the mask and go over here, add
another generator. So this time I will
be using a generator. Click over here and let's
select the dirt generator. Now again, you will notice that the dirt generator
replaces our mask effects. If you turn this
off, you can see the mask effects are
completely different. So we need to add them
both now change from normal blending mode
to Linear Dodge because we haven't inverted
our mask like earlier, we can directly use the
linear dodge function. And as soon as you do
that you can see both the masks have now been added and we have
a complete effect. We also have a dirt mass and we also have our edge
rest mask over here. But I will select the
dirt mask and reduce the dirt level because obviously right now it is too much. Let's reduce it.
Somewhere around 0.3, I think is 0.3 is less. I think let's set this to 0.35. And what we can do is we can
also decrease the contrast. Along with it 2.35. Let's turn off the
dirt effect and see how much it
affects our model. Not that much. I will increase the
dirt level 2.45. Yeah, I think that
is much better. You're going to turn on and off the dirt generator to see
how it affects your model. And if you feel like this is too less, you can increase it. Let's also increase the
grunge amount a little bit. I will set this to 0.5. I think now it
looks much better. We can just maybe reduce
the dirt level a tad bit because right now I think it is just a little bit too much. So set this to 0.45. And I think this way are
thus layer looks perfect. Obviously we can increase or decrease it at a later on state, but for now, I think
it looks pretty good. You can turn on and off the rust layer to see how
it affects your model. And you can see how the layering system in
substance works. You can add different
layers and then keep on adding more
details to our model. Right now I think I met with pain materials starting to
come along really well. What we can do next is you
will see this line over here. So let's try to remove
it a little bit. I will click the Mask,
add a paint layer. So now let's head over
into the brushes section. And again, I will quickly
use my toothbrush. And right now we are adding the rest effect because we
are using the white color. But let's use the black. Select the paint layer again, X to switch back to black color. And let's try removing this. What we can do is we can
press X in between and just add a little bit of
rust effect here and there, so that it does not look weird. Let's try this
concrete rush. This. We can remove the flag
was way that sex again. And we can create this
rust looping spot in that is also pretty cool. This writing, it looks fine. If you want, you can select this bond Mach brush and just paint the raster
effect like this. So just press X
first to switch to white color and then
try painting with this. And we can clean this bone
mark like thing using a layer. But in that also
looks pretty good. Let's remove this. And yeah, I think thus layer is
looking fine right now. Let's move on with it. What we can do is,
before moving on, I think the last effects
with too much over here. Just quickly select
the dirt to brush. I will decrease the flow. And plus x for the
black color and just lighten this up a little
bit from here like this. Yep. That looks much better. Obviously, if we don't
like this later on, we can basically disabled this paint layer
and add a new one. But for now I think this way it looks really nice, I think. Alright guys, so
now we're done with the restaurant and I think
this is it for this video. We learned how we can add this rust effect to our
model and adjusting. And in the upcoming lectures, we will be adding more
layers like roughness, variation, height,
and different things. We will be learning a lot. I will see you there
and you watch it.
24. Improving the Colors of Substance Painter: Hello and welcome guides. So this is just a very quick
lecture in which I will be showing you how we can improve the colors of Substance Painter. So if you remember when we were learning about the
display settings, I mentioned that I will show you how we can improve the
colors off of some splinter. So let's quickly do that now. Look over here on
the display settings and just scroll down. And you will see these
activate post effects. So just enable this and then open up this
tone mapping option. First, let's enable tone mapping and just open it
up from over here. And as you can see,
the substance painter works in a linear space. And linear color
space is not really that good because we can get some different results when we export our textures to
unreal and blender. If you want a models
to look the exact way that they will look
in Unreal are Brenda, we need to do just a
couple of changes. The first change the
function from linear log. And you will see instantly everything goes a
little bit darker, but don't worry,
it will improve. Scroll down a little bit and you will see this activate
color profile. Again, enable this. And now the scene is even more darker. So what you need
to do now is just click over this profile
and select this ACEs underscore UE for that is for Unreal
Engine four log. Click over here. Well, I tell
her son are so much better. You will start to
notice it yourself. Just quickly disable this and see the difference
between the two colors. This is linear space and
this is a new ECS provides. I think it looks a lot, lot better and display our textures also look
a little bit different. What I will do now
is I will make a couple of changes
to my texture also. So first let's select
this metal here, this one that we added, the first, select
the color for this, and I will make the
color a little bit more darker so that it is
not this visible. I will set this around 0.5. Yeah, immediately
you can see that it looks a lot better this week. Instead of having the
pure white color. Also reduced the rust
effect a little bit more because earlier
it was working fine, but now I think it
is moving too much now that we have updated
the color space. So let's set this
to 0.4, I think. Yeah, that looks fine. So you have basically this
is what the video was all about and you're watching,
I'll see you in the next one.
25. Finalizing the Metal Paint Material: Hello and welcome guys. So
in this lecture we will be continuing further in creating
our metal paint material. We will finish with the metal paint material in this video. So let's start. I will now add the roughness
variational layer. So click over here
and add a fill layer. And as we are adding the
roughness variation layer, we only need the
roughness channel. So if you remember I told
you about the shortcut, hold Alt and just left-click
on this roughness like this. And now only the roughness
channel is selected. You will see now you can control
the overall roughness of the model because this
layer is at the top. Let's set it to point to
make it a little bit shiny. But obviously we don't want
it all over the model. So we will add a
black mask to this. First, let's rename this
to roughness variation. Alright, now I will
add a black mask. And let's add a
fill layer to this. Viewing the lecture
section and search for some range map C. Let's add this 15007. If you want to
follow the exactly, you can use this one range
maps uniquely to seven. So I will drag and drop
it over here like this. So I don't know if it
is visible right away, but if you disable and enable
the roughness variation, you can see the changes. Also. You can go over here in the Mask section and
just look at the mask. First thing that we can
do is let's set this to Dr. Dana so that we
don't have this scene. Alex increase the
tiling a little bit. I will set this to be too. Yeah, let's press M
or material again. And I know the roughness
variational layer is not really
visible right away, but it is really subtle and
adds a lot to the material. You can, I think, have
a look at it yourself. Right now the roughness
variation layer is disabled. And now if I enable it, you can see the difference. I think the texture looks a lot better with the roughness
variation enabled. You can also hold Shift and use your right-click to
move the lighting. And you will see how
the different areas of roughness react
to the lighting. But now if I disable, this is all pretty flat. Yeah, let's enable
it back again. And let's add a
new layer to this. Obviously you can go
back to the failure and increase or decrease the roughness however
you may like. If we set this to one, you can see it pretty
clearly visible. The contrast or the
difference between the two reference
values is too much. So I think setting it to
point to what we predict. Alright, let's move further now. And I will add a new layer. And this time we will be adding
some height information. So now hold Alt again and
click on the height Shannon, who at some height information. So again, I will
rename this to height. Alright, so let's start
a black mask first. And I will set the
height value to 0.1. I know this is too much, but we will reduce it later on. Set the height value to
0.1 in the fluid layer. Now let's select the mask again and again,
add a fill layer. And this time I will be using this one lacking white spots, we end up new spots, one. So I think this is a
pretty great texture for creating grainy hide stuff. So just drag and drop
it and you will see it. You can kind of see how
the height map reacts. Let's select this and you
can read the degrees, the height value from overhead. Obviously, using it too much, it looks very, very near. And even 0.1 is a lot. So let's first set
this to 0.005. Yeah, very light. Now what
I will do is go over here, select the black
and white spots. First. Let's set this to try planar. Now I will just increase
the scale for this. So let's set the scale
pretty large because I want the the texture to be
readied any small. So I will set it around 15, is not really visible. Let's go over to mask and it
looks something like this. Obviously not willing to deep red press M,
review your material, and let's go in the
height fill layer and let's increase the
height value to 0.01. Maybe. You can kind of see it
appearing over here. And I think it looks pretty
good. It adds a lot. You can enable and disable
and see it for yourself. But honestly, I think the surface of the fire
extinguisher is pretty smooth. So this much is I
think too much. I will set this to maybe 0.008. And again, this is a
very personal thing. You can change it according
to your preferences. But I think having this much of height
value looks pretty good. Obviously, if we
enable and disable it, it is not really visible. But if you look at it closely, then you would be able
to see very clearly. I think the 0.008
is also too much. I haven't sent it
back to 0.005 only. I think that is the best value. Again, as I said, it is
really a preference thing. You can raise it if you want to. But I think having this
one is fine because I think it added the subtle
bit of detail to our texture, even if it is not that visible. You can see that
our metal texture is starting to look really good. Now, I'm pretty
satisfied with it. I will be adding one last
layer to this though. And that would be off
paint dripping effect. Because I am imagining this fire extinguisher that
Rick was in a building where painting and
stuff was going on and it will have some
like paint leaks. So I will create
another failure. And let's rename this to pain. And all these settings are, I think pretty much fine. Or maybe I will make
the color a bit darker. So let's set this to 0.6
and add a black mask again. And this time I will
again add a fill layer. And in the search bar of
your texture section, let's search for leaks. And you will find a lot
of leak grunge textures. You can use any one
that you might like. We have this branch leaf spots, grunge need small, large, something like that
I want to add, if you will, drag
and drop this one, runs leak large, increase
the contrast of it. And obviously this is huge. So I would say to try planar. And then you can
increase the tiling. But I think this is looking too much and it was
very over-the-top. I don't want the effect
to be this much, I just want it to
be very subtle. So instead I will maybe
use the grungy leaf small. So drag and drop this one. So I think this
is much better to my preference and needs. I will increase the
contrast to maybe 0.6. And I will decrease the balance because they affect
too much 0.4. So yeah, I think
this looks perfect. Maybe I will change the
dialing a little bit. A value of three, I think
would be pretty good. This is what I was
talking about. You can see the effect is really subtle and it adds a
nice bit of detail. It looks as if some of the veins scenes got
leftover on the metal. And it adds a bit of detail
and a story to our texture. I think it looks pretty good. Alright, so I think this is it for our metal paint texture. And you can see we have added multiple different layers
and add a lot of detail to our texture before
I started off with a base materials that
would be a metal layer. Then we added some
paint effects over it. And you can see how basic
it looked at that stage. Then we add some rust, some roughness variation,
some height values, and a little bit of paint. And you can see our material
came along pretty well. I think we are done
with the first part of texturing of fire
extinguisher model. Obviously there are a lot
of things still left. We have to add another
metal texture, some robotics shell
plastic textures. And also we will be adding
a lot of stickers to this. There's still a lot to do. But I think but I think McAlpin texture came
out pretty well. So yeah, this is it
for this video guys. Make sure to save
your substance, the interference and hanging watching. I'll see
you in the next one.
26. Adding the Iron Material: Hello and welcome guys. So let's continue with
our texturing process. In this video, we
will be creating a simple iron material for
all these pieces at the top. Alright, so let's close
this folder over here, and I will add a new layer. Let's create a folder also. I will drag and drop this new
fill layer in the folder. And let's rename
this folder to iron. And we can rename
this layer base. Basically this base layer would be a simple iron material. So set this to metallic and I will set the
roughness to 0.2. Yeah, I think that's
everything is fine because that is also fine. We can again click over
here on the geometric mask, right-click and exclude all. And just select these pieces, this one, this one. And these two nuts. And this thing also over here, don't select this
top piece overhead. This will be a glass material. So just leave this one and you will see this
nine written over here. So that means this folder or this material is being used
by nine different objects. They are, make sure nine
is appearing over here. Alright, so now we have a very
basic iron material setup. Let's add a little bit
more detail to this. I will open this up, click over here so that we
can add a new fill layer. So this layer would
be our dirt layer. I will rename this to dirt. And let's give
this a dark color. I think this one is fine. And also give this a
roughness of around point a. Now what I will do is I will
disable all of the channels except the color and the roughness because
we only need these two, we do not need the
metallic channel or the normal and the height. So these two are fine. Now go ahead, add a black
mask to this and I'll simply, I will be using a smart mask. So go over here and
I will drag and drop this just
occlusion smart mask, which I think works pretty
well for these type of stuff. As soon as you drag and drop it, you will see in all the
corners and crevices, this dust layer is
starting to appear now. Now what I can do is just select the dirt generator and let's
increase the dirt level. May be around 0.5. Yeah, I think that's fine. You can enable and disable this dirt layer and you
will see how much of an effect only adding a single dirt layer has
added to our material. It looks much, much better now. Alright, I will
add another layer. So I will just duplicate
this base layer, selected press
Control C and Control V. And now we have a
duplicate of this base layer. I will rename these two edges. Now we'll change the color
of this Edges layer rest. Everything will be the same. I will select the color
and set it to pure white. So you can see the
difference between the two. Now you can see the
difference between the two. Basically both of them
are the same layer, the only thing
that is different, the edges layer has a
brighter palette like this. And now I will again add
a black mass to this. And now we will be using
a edges smart mask. So let's drag and drop. This
edge is strong smart mass. This one drag and
drop it over here. And now you will see
something like this. All of the edges are masked
out using our edges layer. Select the mask editor. Now just decrease the
contrast a little bit and increase the
balance. Yesterday. I think somewhere around here. And then what we can do is just go over here in the
Opacity section and set the opacity of these 250 that it is not
that much visible. Now it is like very subtle. But still there. It adds a nice bit of effect. This dirt layer. I will
go back to this and add a faint layer two,
this looks good. We select a brush, I will select this dirt brush, scale it down, and press X. I will remove some of
the effects from over here. So as you can see,
it is looking very obvious that we have removed
something from over here. So what we can do
is you can decrease the flow of the brush
to around five, maybe. This way you will notice
that it is very faint. I think this way it
is not that obvious. Also press X in-between and
add a little bit of dirt. Yeah, I think this
looks much better. That way. It wasn't leaving a
little bit too much, but now it's fine, I think. Alright, so now we have
set up our iron material. You can see it was not that many layers as it was
in the metal frame one. But I think for this
particular material, these many layers do
the job perfectly. What we can do is one
thing I forgot to do. We can select the base layer and let's quickly add
a filter to this. And I will be using that
matte finished refrigerator. You just drag and
drop this over here. Alright, now I
will just increase the scale of the brunch 16. This way it looks even better. I will also add this filter to the Edges layer because basically it is the
same layer only. Select the fill layer, add a filter and drag and drop
this smack finished off. Let's set the scale
events to 16. Yeah, I think that
looks pretty good. Now. I think we should decrease the brushing intensity just
a little bit and let set the brushing intensity
to go into yeah, I think that's better. I'm just switching between
the two to see what's better. I think that looks pretty good. Let's do the same thing for
this one also point to want. We can also reduce
the opacity of the dirt layer just a little
bit to maybe around 85. That in a little bit lighter. As I've said a lot of times, all these things that I'm doing, a really preference based, you can go for any different
values that you want to. You should follow me to
see the texturing process, but you don't have to follow me exactly all the steps that I do. You can maybe switch up
some of the things like this intensity value that
we talked about there you can definitely add
a little bit of your own flavor to these values and things so that you get a model a little bit
different to mine. And yet your textures look
a little bit of your own. Alright, so in this
video we created our iron material and I
think it looks pretty good. We will continue from
here in the next video. Thanks for watching. I'll
see you in the next one.
27. Adding the Rubber Material: Hello, Welcome guys. So let's continue
with the texturing. In this lecture, we will be
creating a rubber material. So this time, let's select our rubber and
plastic texture set. And if you want, you can also disable the metric
texture set for now. Alright, I will give you
this older layer and let's add a new fill layer and
also create a folder. I will rename this folder to verbal and drag and drop this field layer
into the folder. And let's rename
this layer as this. Now select the fill layer, and let's select a
base color for this, I will be going
with a black color. So somewhere around 0.150
for the value over here. Also, select the geometry math, right-click and exclude all, and just select this
piece over here. Also, the roughness is pretty
high for a rubber material, so I will set this to 0.6. Alright, next layer that I will be adding would be a
color variation layer. So let's just duplicate
this base layer. I will hit Control C and Control V. Rename this to
color variation. And this time what I will do
is I will make the color a little bit more
darker than this. Somewhere around 0.05. You can see this color variation is a little bit darker
than our original data. So let's add a
black mask to this. And also I will set the
roughness value to 0.8. You also have some
roughness variation along with the color variation. And let's add a fill layer to this guy over here in
the texture section. And let's search
for another branch. Let's see. I'm going to
look for a dirt grunge map. So I think this one range dirt, scratched, drag and
drop it over here. You can see it is kind
of living like this. Obviously, I think the effect
is too much right now. So what I will do is I will just select the opacity
and set this to 30. As you can see, it
adds a nice bit of variation and setting it
at 30, looks pretty good. Let's adjust the balance and the contrast a little
bit. So let's see. We increase the balance, the color variation increases, but we do not want
this to be this much. So let's decrease the
balance a little bit. Let's try 0.45. I think
this looks pretty good. Now what I will do is I will add another color variation there. We'll just duplicate this layer. For each color venetian
their negate this. Again, select this, and this time I will go
for a lighter color. So let's set this around 0.2. You can see this
is a lighter color than, than our base color. It's time we will
be going with this. Again, select the
fill layer over here. And obviously we won't be
using the same range maps. Let's remove this one, and let's try something
else this time. Let's drag and drop
this one. You want. You can also go over here in the Math section and see
how your mask looks. Let's set was wrapped in a
protection and see if it makes a difference
at just the Tylenol, this press M for
the material view. And this way it
looks pretty good. You can see just by
adding color variation, it gives a nice bit of
detail to your material. Alright, let's move further. And this time I want to add a little bit of sharpening
effect to these layers. So instead of selecting each and every mosque and then adding
a filter from over here, we will use the trick
that we learned in the last section that is just basically adding the
empty paint layer and setting it to pass through. Now I will add a filter to this filter section and let's select the
Filter, sharpen filter. So you can see how it
affects somewhat easier if we increase the
sharpening density, it will look
something like this. Obviously, I don't think
this much is that good? I will set this to 0.5. Maybe. 0.5 is pretty good. Alright, let's rename
this layer to sharpen. Let's start a new layer. And this time I will be adding
some roughness mediation. We already added some
color variation. This time some
roughness variation. Now, if you see the base color, base color height
0.6 roughness and both the color variation
layers had pointed. So this time let's go
a little bit bluer or the roughness variation
uncertainty is 2.4. It also has some
shiny areas over it. I will remove all
the other channels except the roughness channel. Alright, so let's add
a black mask to this. And again, the failure. In the texture section, I will again search for branch. Let's see with grunge
maps, we can use. Let's try grunge maps 001. I'm just randomly selecting any rent map and just
dragging and dropping it. When you are creating
your own textures. It might take a little bit of experimenting with
this kind of stuff. But I think that's
the fun part of this. Let's just adjust
our grunge map now. So first I will set
the prediction to Dr. Dana and I will increase
the tiling a little bit. We can also set this to mask to see probably how
everything is going on. I think somewhere around three. Now let's adjust the
balance and the contrast. I think 0.3 for balance
and 0 for contrast, I think that would
be pretty good. You can just enable and disable the roughness variation
layer to see what it adds. As you can see, it adds a
little bit of shiny spots to our rubber material
because the roughness is currently set to 0.4
degrees it even more, you will see that your
model gets even more shiny. But I think for rubber zero-point for value
would be fine. If you disable it. You can see that it was
pretty rough earlier, but now we have some
Chinese ports also, fair, I think it looks good. Next, I will add one
more layer. This time. We'll just use it to add a little bit of
dirt hidden there. So now let's enable that
the metal texture side. And let's see first I will
rename these two edges. Also increase the roughness. Pretty high, 0.9, I think. Let's add a black mask. And this time I will be using the desktop version smart mask. So as soon as we add that
you can see now we have some dirt in the corners
and all these places. But obviously this
is pretty harsh. Don't want it this much. So first I will set the base filler opacity equal twinkie, that it is very light. You can see this
way, it looks nice. And then we can select
the dirt generator. And let's see. We'll try increasing the
level as you do do it. I think this much is fine in giving it too much
does not look that good. I think keeping the effective
here looks pretty nice. And these are rubber
material is also pretty much done at the last layer that we will be adding is
the height layer, because right now everything
is pretty smooth. So let's just add a fill layer and only enabled the
height channels. So hold Alt and just
select the height Shannon. And I will set the height
value 2.1 for now. And if you remember, we
already did this when you are creating the
metal paint material. Be named is too
high it Let's add a black mask. Add a fill layer. This time, let's try the black and white sports to
drag and drop it over here. And you can see how it
reacts with the material. Looks even more like
a rubber pipe now. But obviously the texture
is pretty huge right now. The first lets you in the
prediction to five cleanup. Also, the tiling is
quite large right now, so I will increase the tiling. I will give it a pretty
huge number, like 40. And you can see it looks
something like this. I think it looks pretty good. We just need to decrease the
height value a little bit. So go back to the
height fill layer. And let's set this to 0.05. Yeah, I think
something like this is perfect or rubber material now it looks pretty good to me. If you want, you can add
a couple more layers of dirt or anything like that. But yeah, from my side, I think it looks
pretty nice and it fits really well with
the rest of the model. If you want, you can
also add a little bit of scratches to this
height layer only. Just select the Mask,
add a fill layer. And if you go into lecture section and search
for some scratches, you will find some
pretty good ones. And see which one we can use. Let's try something like this. Will be something like this. But first we need to change
it to linear dodge add. And you can see we
have added some kind of scratches to another pipe. But obviously, because
the height value is currently set to positive, they are coming outwards. So let's set this to
negative or 0.05. And now they're like this. You can adjust the fill
layer a little bit, like certainly try planar. And if we increase the balanced, then the scratches
texture would increase, remove or replace
our sports texture. So I don't think it would
look bad, but as you can see, if we increase the
balance too much, now our sports fracture is
removed from these areas. Let's keep the balance
at a low number only. We can increase the scratch
styling to increase the number of
scratches like this. Yeah, I think it
looks pretty nice. If you want, you can also
increase these things like Scratch length than
Scratch masking. Scratch masking is
basically it will remove some of the
edges randomly. You can just write it out. Right now you can see some
of the edges over here, but as you increase
the scratch masking, some of them get a little bit lighter and some of
them get removed. It is a nice command
to just remove some of the random scratches if
they're getting too much. And there are obviously a
lot of different settings. As with different
types of grunge maps, we get some custom settings, like we have this
scratch dirtiness. We also have double
scratch, all the stuff. Two degrees this you can see the number of scratches
has increased. But I don't think it fits
really well on a pike. This amount, I think
looks pretty good. And we can just go with this. You can enable and
disable it and see how it looks and also check
out from your mask. You can see how
the scratches are added over a black
and white spots. Say I think that is fine. So visualizing your mask this
way helps us to do some of the options like Scratch
dirtiness or the double scratch. You will also be able to see the scratch masking
effect properly. You can see as I increase it. So the scratches are
getting removed. They are really nice. You can increase or decrease
the length of the scratch, but I think at one it was fine. Alright, now I think
it's pretty clear. So press M for the
material view. And I think that rubber
material is done. Now, we added a lot of different layers to this
and you can see which each different layer we added a bit of detail and variation
to our rubber material. So basically first
was the base layer, then we added some color
variation than a sharp, unfiltered and roughness
variation and edges, and finally, some height. So whenever you are
trying to create some new texture
for your own model, you need to approach
it this way. Only the law you have
noticed that each and every texture I created was
pretty much the same way. I added a base, added a couple
of effects like roughness, radiation, color variation,
some dirt and you stuff. And yeah, basically if you just stick to this kind of plan, you will get a pretty convincing deserts
for your textures. As you can see
this for yourself. Metal texture of a texture
and iron lecture also, I think they look
all pretty good. I think this will be
it for this video. We will continue from
here in the next one, you like the plastic material. That is, I think
the second last one and last one would be
the glass material. And finally, we will add a
couple of stickers towards fire extinguisher model and then I think we would be done. There is still a lot
more soft to grow and I'll see you in the next
video. And you're watching.
28. Adding the Plastic Material: Hello and welcome everyone.
So let's continue the texturing of a fire
extinguisher model. In this video, we
will be creating a plastic material so we can disable the
metal texture set. Let's head over to
the robot in plastic. Alright, again, create a new folder and also
add a new fill layer to it. Rename this folder to plastic. And this will be our base layer. Select the base layer and
let's give this a dark color. Like this. I want a plastic material
to be pretty rough, so I will choose a roughness
value of around 0.1. So it is very shiny,
but don't worry, we will add edges and
roughness radiation, then it will look fine. I will just make the
color a little bit lighter. This is fine. Alright. Click over
here on gimmicky mask, right-click exclude all and
just select these species. Next, let's create a new layer. And I will only be using the roughness channel because this is the toughness
variational layer. And just select the
roughness channel. I will add a black mass to this and rename
this to roughness variation antigen Rita and I will select the Metal
Age we're generator. Let's try adjusting
the probabilities. Now, I will increase
the VM level. I think right now it is very contrasty for a plastic
type of material. I think a contract
should be low. Yeah, this looks much better. I think 0.9 is fine. Then what I can do
is we can reduce the grunge amount a
little bit around 0.25. And also let's select the fill layer and increase
the roughness to 0.5. Yeah, I think now
it is too much. So let's go back to my college career and
decrease the VM level. There's Phi is 0.85. I think that looks pretty good. Let's stop the
probabilities. I think I find it looks fine right now. What we can do is if it
is looking too much, you can go over here in the roughness channel and
then reduce the opacity of just the roughness
channel like this so that it blends in with
the overall material. So maybe we can set
this to around 80. Yeah, I think it looks nice. Next let's add
another fill layer. I will go back to base color, and this time let's
rename this scratches. I will add a couple
of scratches, add a black mass to this. And also for the fill layer, I will just keep the roughness along with the height Shannon. This time I will be using a
failure as we did earlier. We can search for scratches over here in the
lecture section. And let's use the same texture. Grunt, scratches, rough, drag, and drop it over here. And you can see
something like this. I will go over here
and heading to the Mask section so I
can edit this properly. So let's see. First I will just quickly set this to
ripen a prediction. Increase the dialing around
three, I think it's fine. First, let's increase the
tiling a little break. I think a value of
four looks fine. And also increase
the balance just a little bit around 0.7. So right now the scratch masking
is set to point to find, I will just set this to 0 so that none of the scratches
are being masked. If you want to reduce the
quantity of the scratches, you can do so from over here. But I think it is fine. Let's press M and go back to a material and
see how it looks. Pretty subtle, not that visible. What we can do is go here and increase the
roughness to around 0.6. With that, it is
a little bit more visible. Yeah, like this. And also I will set
the height value at around negative or 0.05. Okay, This is too much, so let's set it to 0.005. Yeah, now it is pretty subtle. So let's just quickly see how it fits with the rest of the model. I think it looks fine. It looks really nice actually. We will be adding a
couple of more layers. Let's go ahead and
add another layer. This one we will be using
as edges were pretty basic. I will go into the
smart math section and we can use one
of the edges mask. So I will try this edges dusty. So drag and drop it over here
and wait for it to load. And now we have
something like this, which looks fine, I guess
let's adjusted a little bit. I will select the mask editor. I will increase the
global balance. We're pretty high
value, let's say 0.9. Obviously this white colonies looking pretty bad right now. So what we can do is just
in the base color section, reduce the opacity and reduce
the opacity to around 20. And obviously right now we
have selected a white color. But I want to go for a
darker color like this. I think this fits pretty
well with the model. Yeah, I think this is fine. What we can do now is let's
just duplicate this layer. And this can be our dirt layer. You select the mask over here, remove the mask editor, and let's select
any one of these. So let's try this,
just stain spot mask, drag and drop it over here. The mask editor. And let's try using the global balance so
you can see how it works. Obviously this is too much, so let's set it around
0.5 only I think is fine. I will just quickly go
back to the fill layer and make the color a
little bit more darker. And on here I think for
both of these layers, the value to around 0.26. This way it blends a little bit more properly with
the rest of the material. You can disable
all these layers. So this was our base
layer, very deflected. We added some
roughness variation than a couple of scratches, then some edge damage and a
little bit of dirt overall. I think a plastic
material is pretty good this way and it looks fine with the rest of the material also. This is it for this video guys will continue from
here in the next one where we will be creating our glass materials.
I will see you there.
29. Adding the Glass Material: Hello and welcome everyone. In this lecture, we will be
creating a glass material that is elastic material
for depression. So for the glass material
to work properly, we need the opacity channel. If you add a fill
layer over here, let's rename this to blast. You can see all these
different channels like the color method,
rough, high abnormal. Along with this, we also need the opacity channel
because a glass has transparency to control that we need the opacity channel and
we currently don't have it. So how can we add new
channels into our shader? We need to go to
the texture sets settings and click
over this plus icon. And you can try finding
opacity over here. We won't find it in this list because fewer hover over
here unsupported by shader, you will find the opacity
texture over here. So currently it is
unsupported by this shader. So the reason for this is if you click over here on
the shader settings, the default shader, that
is the ASM metal roof, does not support the
opacity texture. So we need to change this. Just click over here and
now select this one, PBR, metal roof with
alpha blending. As soon as you select it. Select this. Now the
settings are changed. We do not need to
change anything over here. Just close this out. And now again, click
on this plus icon, and now you will find the
opacity texture over here. So let's click over
here and add it. As soon as you do that, just check out your field
layer and you will find another channel is added over here that the
Opacity channel. So let's enable this one
and let's see what happens. Currently it is set to 0, but as you decrease it, you will see that your model is starting to get transparent. So basically that is a use
for the Opacity channel. We can make things
transparent with this. And obviously for creating
a glass material, we need the opacity texture. So I will again create a
folder there, swimming buddy. Yep. And drag and drop this fill
layer into the glass folder. Over here on the on
the geometric mask, right-click and exclude
everything. And just say.
30. Adding Stickers: Hello and welcome everyone. So mostly the texturing part of the fire
extinguisher is done. Now we will add
some stickers onto R5 extinguisher to make it look a little bit
more realistic. So select the metal texture set. And first let's start by adding all the sticker
textures to our shelf. So go into your
resources folder. And in the texture section, in the fire extinguisher folder, just select them all and drag and drop them onto the shelf. You can just drag
select them like this. Instead of pressing Control a, and then just select one of
them and select Texture, export them to the project
and just hit Import. As soon as you do that,
you will see your shelf is updated and all the
textures now appear over here. So if you remember, I
mentioned that we can use the planar projection
for adding stickers, where we add a fill layer. Then we drag and drop our texture onto the
base color like this. Then we can just first disabled
UV wrap from over here, set this to none and also select cleanup prediction. Let's see. We can then reduce the scale and place our texture
over here like this. But this way the
problem is we need to add multiple
different failures. Then I have to add
another failure, then drag-and-drop
another texture. Then we have to do all
those same things. So instead of doing all that, what we will do is we
will just directly use the prediction tool that we went over in the section
three, this one. So do use a prediction
tool first, we need to add a paint layer. So instead of adding
a fill layer, if you want to do it through
the planer projection, we need to add a fill layer. But for using a prediction tool, we just need the paint layer. Click over here and excited. Alright. What we
can do now is just select the prediction tool
and drag down over here. You will find all these
channels over here. So this dragon Robert
texture onto the base. Let's start by adding this one, because this one will
be at the center. So first what I
will do is I will set my view to orthographic, then hold Alt and Shift
at the same time. Use my left-click to
snap it like this. Alright, so hold
Alt shift and snap. Make sure you do it correctly. Hold Alt shift and
snap it like this. Alright? Now if you remember,
there were a couple of shortcuts to adjust the image size and
the prediction tool. And now if we will press S, You will see now the image
is active like this. You can see all the
shortcuts over here. So just told you a right-click and drag it down like this to decrease the size of the sticker or the texture
that we are using. S Again, let's
increase the size. And I will try to roughly place it at
the center like this. Now just use your brush to
paint the texture like this. You can be the size of the brush and also set
the hardness to one. And with lead paint, the
complete texture like this. Disabled a prediction tool, select the brush tool
and you can see we have easily painted our sticker
texture onto the model. Alright, so let's keep
on moving further. Now we really don't need
to create more layers. We can add the other
sticker textures on the same layer only. So let's just rename
this to sticker. Alright, select the
prediction tool again. And let's drag and
drop this one. Hold Alt and Shift again, and then snap it
over here like this. Now we just need
to first scale it up and try to place
it perfectly. Yeah, I think this is perfect. So again, use your brush
to paint the texture. Let's move over
to the other side and just try to zoom in
and placed it accordingly. Not in visa degree
the size of this because the size remains
the same as the other side. So just try to place it
by zooming in or out. I think this is perfect. All right, Let's keep
on moving further. So if you drag and
drop this one, this picture, you will see
this is the complete texture. And these two are basically, I've divided them into
different textures. So basically the same thing. This one is complete and these two are divided into two parts. So we will be using these two only instead of using this huge when you just scale it up
and place it over here like this and just Let's paint
it on the other side also. Makes sure to disabled
the rubber and plastic so that we can easily
paint over here. I'm just roughly trying to
place them together like this, but you can spend a
little bit more time on this and place
them perfectly. That you're deserts come out perfect. I think this is fine. I will just paint
it again like this. We are seeing some v. I
get the edges over here. Let's press Control Z
and painting once again. Let's try this. See other jagged edges
are still there. Let's try increasing the size to focus and I think then
they will be removed. Yeah, So I think
setting the size to four k makes them a
little bit better. It's fine. I think. Over here
we don't see any. Alright, let's go further. I will drag and drop.
And there's this one. Hold Alt and Shift and place your fire extinguisher over
here at the back like this. I think this is fine. The brush to remove this prediction tool. And yeah, I think our
stickers look pretty good. When we have set
the size to form. These jagged edges
are not that visible. When we will add
some more damages and stuff like that to it, it won't be really
that much visible. So that's fine, I guess enabled back the
rubber and plastic. And also set this
to perspective. All right, So now all these thicker textures are looking a little bit brighter in
comparison to the other model. So what we can do is
just go over here, select your sticker layer. So basically this
is artistically, you can see enable and
disable it, respond. You can just select it
and add a filter to this. Remove the search
query from here, go in the filter section
of the shelf and drag-and-drop the
HSL perceptive. And now we can adjust the
colors of Justice Scalia. You will see if I
change the hue, we are changing the colors, but obviously we do
not want to do this. We just want to
decrease the lightness. You can see if I
decrease the lightness, the texture turns a little
bit darker. Obviously. We want to decrease
it just a little bit. So maybe I will set it to 0.4. You can see this fits a lot better with a fire
extinguisher model. Without the filter, it looks
a little bit brighter. I will maybe decrease the 2.38. Yeah, fine, I think. Okay, So I completely forgot about adding a logo over here. So if you can read, if you go
back in the sources folder, you will find this logo image. I did this earlier.
This was not added. She just drag and drop this
one also on the shelf. And select as a texture. Let's hit Import. Now.
Select your sticker layer. Let's go back to
orthographic view, will Alt and Shift again
and snap it over here. The prediction tool. And drag and drop this logo onto
the base color channel. Alright, so let's make
sure it is in the center. S. Then reduce the size
of this. Let's see. I think this much refined. And also disabled the rubber
plastic textured set, the brush tool, and
let's see how it looks. I think a little bit too much. Let's reduce the size
just a little bit. Like the prediction rule again. Here. It is, this term over here. The leg, the
prediction to login. Screen tip. Now,
select this brush. Let's see. Yeah, I
think this looks fine. Alright, one more thing
that I want to do it, if we go here are libraries
and select the project, you will only see
the texture that you haven't voted
in your project. All these ones, and the rest
of them are our mesh maps. Let's move it towards
the back of the model. Set this back to orthographic. And let's use this texture also. Somewhat of a slip. We can just use this
selection tool, drag and drop it over here. And I can decide was
fine, Let's paint it. Alright, so now I think varsity
good textures are done. I don't know about
the size of the logo. I think it looks fine. Yeah, I think it is fine.
We'll just move forward. If you want to increase
the size of it, you can just erase the logo and the size of the
texture and paint again, but I think it is fine. Alright, so I think this
is it for this video, we added all the sneakers to
our fire extinguisher model. And in the next lecture
we will be adding damages to our sticker textures, make them look a little
bit more realistic. And the next lecture will
be the final lecture in the texturing process of our fire extinguisher
model. I'll see you there.
31. Finishing Touches: Hello and welcome back. Let's continue from where we
left off in this lecture, we will be adding some
damages to our stickers. Alright, so let's start. Alright, to start off, I will just create a new folder. And let's rename
this two stickers. And drag and drop this
mean sticker layer into the stickers folder. Instead, I will
rename this to base. Alright, Next I will just
right-click on this layer and duplicate this over here. And I will rename
this to speaker, or I will rename
this to damage it. We will be working with
this layer later on. So just move it below
the base layer. For now, just disabled it. Right now. Basically both of them
are the same layer, but later on we will be adding a couple of effects
to it to make it look like as if the sticker is
damaged from some of the areas. Alright, so enabled
back the base and just disabled the damage
effect layer for now. So start off, select the base layer and add
a black mask to it. And now I'll add stickers
have disappeared because we have added a black mask
and Latin means invisible. To bring them back, we can
just add a fill layer. And we will now control
our mass to a fill layer. So to do that, we
first need to select the texture we want to use
with the mask for this, go in the texture section
and search for paint streak. And you will find this
particular texture. So just drag and drop this one. I will be using this. You can see the effect
is something like that. Obviously it's too harsh. So first set the
contrast to one. It looks something like this and now increase the balance. I think for this
particular effect, we have to set the
balance around one only. Because even setting
it at somewhere around 0.98 is pretty drastic and we do not want
this much damage. Yeah, I think one is
the perfect value. This looks fine. Next, we can maybe increase
the tiling a little bit. Then, now we can maybe increase
the tiling a little bit. So that effect appears
over here also. I think this looks pretty good. All right, so right now
the damage does not look realistic or that organic, but we will be adding
now the three that were damaged effect layer to make
it a little bit better. So to do that, let's enable back the damage effect layer and now select it and
add a filter to it. And the filter that
I will be using is go in the filter section
and you will find is blurs, look fainter, drag and
drop it onto the filter. Let's disable the base there so that we can properly
see the effect. So basically this
will get damaged fat layer and we
added a filter to it, blurs glow filter, the blood flow filter create
some kind of this effect. And I will increase the
intensity to max one. Now if we will enable
back the base layer. Now you will see that
the damage is a lot more organic and realistic with this bloodflow
filtered adjective. So this was our damaged effect. You can just disable it and see the effect of
it on your own. This is the doubt the
damage effect layer. And now we have added. And you can see now the sticker damaged looks a
lot more organic and natural. I think this way it
looks pretty good. It also adds all these things
over here at the corners, which makes it look as
if the sticker paper was damaged from over there and
it's spread out a little bit. Obviously, it does not
look that perfect. But what we will do is we will be adding paint
layers of our own. And we will try painting
over these layers and try to make them a
little bit more connected. So first, what I will
do is I will select the damage effect layer and I will add a
black mass to it. Okay, so instead of
adding a black mask, Let's add a bitmask because I only want to
remove some of the India. So instead of adding
a black mass, I will just use a white mask. Disabled the rubber
plastic layer. You can see over here this
blurred slope effect. You can see over here also, it does not look that good over these areas where there is
no damage particularly, so I will remove it
from those areas. First, let's go over
in the brush section, search for pain. And now you will find
all these brushes that we will be using. So double-click on
any one of them. Scale them down, make sure that the lid is black only
you can switch colors. An x like this. Let's just remove
some of the areas. You don't have to
remove it completely because I think some of it adds a little bit value to our
texture. Don't remove it all. You can definitely people will remove all the excess
areas from over here. Over here, it's fine. Just to say again, it is saving. Alright, so I will remove this border color
from over here. Does not look that good. Lecture to not just
remove it completely, because at a later stage, we will be adding damages on our own by selecting
this base layer. Then we will need all these areas a little
bit, not that much. Let's come over here at
the bottom now and remove some of the areas over
here like this one. I think this is fine. I will
add a couple of damages over here to make it a
little bit more connected. So for now, I think the damage effect layer
does a pretty good job. Next, I will now select the base layer and again
add a paint layer. Now this time we are editing
the main stickers layer. You can see we are adding
damages on our own. The first thing that I will do is while this brush is selected, just scale it down so you
can hold Control and use your right-click and move it
left and right like this. To scale it down. I will add some damages on
the edges like this. Make the sticker texture feel
a little bit more natural. I won't add the damages
all over the speaker, but on the edges like
this, start off. What you can do is
you can also add damages by painting
in a straight line. We have already gone over this. Just click over here, then hold shift
and you will find this line and hold control. Snapping. Just click on it, click on the model now. And you will see that
the damage is added. We use it a little
bit more properly. So let's set it to
orthographic view. And now let's try adding
the damage this way. So click over here,
hold Control and Shift. I think it looks pretty nice. Actually. I will do the same
thing on the top also. Now I can go over
some of the areas and just add a bit
more damage than usual it so that it does not
look when you do predictive. And we have some variations. You can also increase
the size of the brush and increase the damage
in some of the areas, make it even better. Like this. You can see over here
using this brush makes it look like
as if the stick up paper was being torn away from here and the damage
effect layer over here, it does a pretty
good job of adding an extra layer of realistic, nice to watch Ticket texture. Let's move over
here at the bottom, and I will add a couple of
damage over here like this. And also at the top. So that the damage effect
layer looks pretty good. Along with this, you can see the effect of
the damage effect layer. I think it adds a lot of
value to our textures. Also, I forgot to tell
you you can change your brushes and have a lot of different
kinds of effects. Obviously, you don't have
to use the same brush. You can keep on changing them. You have various effects. On the bottom logo. It is a little bit too much, so I will go back to
the damage effect layer and remove some of
the areas like this. It is a little bit more subtle. Let's look at it
from a little bit far away from over here. I think everything
looks pretty nice. But we can definitely add more effects just to see
how everything works, I will go back to
the base layer, select the paint layer, and again add a
couple of damages. You can also increase the hardness that the
damage is sharper. The contrast. Let's change the brush now, let's try this one. Let's see how this one works. I will increase the
hardness to one. Something like this. I don't know if it looks good. Let's add some damage
in the center also. I don't think it is brush
does a pretty nice job. I would say maybe
this one, maybe the hardness of this one also. Now I'm just painting
and trying to see the effects of all
the different brushes. I'm not finding something
I like that much. Definitely not this one. Again, I love this brush
over some of the areas. We can also add damage to
the partners. Like this. That looks pretty nice. Definitely, I would recommend you guys to spend some
more time with this. On doing it until
unless you feel satisfied with the results
of his ticket textures. Because stuff like
this is really up to personal preference and how
you want things to look like. You might want a fire
extinguisher model to look new. So you don't want all these
damages cannot add them all. You want to make it
look even more older. Then you can add
even more damages. I will suggest you
experiment with all these, use different types of brushes, use different fill layers for the mask that we used over here. Not only the paint brushes
that we're using over here, you can just remove
this search query, select any one of the
brushes that you want, and try painting
effects with it. I'll just quickly, I'll just quickly try adding a
little bit more effect over here at the center. But rest of it, I think
it looks pretty nice. We can add a couple of
large damages like this. Over here I think is fine. Next, what I will
do is I will add another filter to further increase realistically
some stickers. So select the base layer, that is our main layer, and add a filter to it. Let's go back to
the filter section. And this time I will be
using this drop shadow. Drop shadow is
basically you will see a little darkening of
the area around the sticker. As if a little bit dust has
been collected around it. You can see over here also, we will be using this effect, postulates reasonable
size of this. So that the effect is
towards both of the sides. As you can see. I've
suggested this tense. I think I will just set it to 0. If you increase it to one side, you will see it is only
towards the bottom. And if you decrease it, it is only towards the top. Let's set it to 0 for now. And you can see it is equally in both directions.
These are spread. You will see that the effect spreads even more
and darkens a little bit. We definitely don't want that. So keep this Friday at 0. I think this weight is fine, but we just need to reduce the opacity a
little bit to maybe 0.4. In this way, it
looks pretty nice. Size 2.5 Navy. One thing that I
completely forgot, we also have a stick
over here at the back. So let's quickly select
the damage effect layer and reduce some of the damages. I completely forgot
about this one. After removing this, I
will just quickly select the base mask and
then the paint layer. And let's add a couple of damages over here at the corner. Also, I will do the
same thing with this. Also is old control and shift. It go here first and
reduce the size of the brush and rolling shape and just add
damages like this. Brush newer to only
add damages like this. Yeah, that's right. Then ask some heavy damages over here. You can also apply a
couple of other brushes. I'm justifying different brushes and chip off some
damage like this. Well, again, select the
damage effect layer and remove some of the areas. I think that too much. So yeah, I think this way it
looks pretty good. Obviously, as I
told you earlier, I suggest you guys to spend
some more time with it and and keep on experimenting with all
these different brushes and different types of failures
and different filters. We'll have the perfect look
for a fire extinguisher. But I think from my side, we are done with the texturing of a fire extinguisher model. There's come back to the
perspective view and first let's hit Control S
to save our textures. And we're done the
texturing and we are done with this
section of our course. In the next section, we
will be going over how we can export all
these textures that we have created into other softwares
like lender and Unreal. So you have, we will be doing
that in the next section. I will see you there. I hope you guys learned a
lot and you're watching.
32. Exporting Textures to Blender: Hello, Welcome everyone. So in this section we will
be learning how we can export our textures from Substance Painter, two
different softwares. So we have our layers and
textures all done over here, so we just need to export
them. Will do that. Go over here in the top
left corner and click on the File menu and then
select this export option. And this window will pop up. You can alternatively
directly use the shortcut for
exporting the textures, that is Control, Shift and
E. That is also same thing. It will bring up this
window over here. Alright, so this window has all the settings related
to your Exporting. Let's go over them one by one. So the first step is
the Settings tab. That is basically the
most important tab, which has all the
settings and overhead. In the left you can
see global settings. And then there are two
of the texture sets. Global settings are
basically all the settings. If you change
anything over here, it will affect all the
texture sets at once. Let's say I wanted to set
the size for the textures. So I have set it to
for k from over here. So now this has affected
all the texture sets. You can go here in the metal, you can see the sizes for k and the rubber plastic
also the size is focused. But let's say you
want to change one of the particular settings in
a particular texture said, then you need to go in that particular texture
set by clicking over here. So let's say I wanted to change the size for the
rubber and plastic. I can click over here and then change it from over
here to two k. Maybe. That is basically it. But
generally you won't ever change the settings for any
particular texture said, because we will be changing all the properties all at
once by global setting. So we do not really
need to go in each and every texture set
and do them separately. Also over here we
have the output maps. So these are all
the maps that will be exported from
substance painter. You can enable and disable any one of them that you
want to from over here. Alright, so now I
will go back to the global settings and
let's go over them now. For the first one is
output directory, which is pretty
self-explanatory besides the parts where your
textures are to be exported. So let's click over it
and create a new folder. I will quickly head over
to my resources over here. Right-click and let's
create a new folder. And I will rename this
to substance X shares. So that you can
differentiate between these textures that we used
for the texturing process. And these are the different
textures that would be exported that under
the final textures. Let's create a new
folder over here and rename this to
fire extinguisher. Here again, I will create
a new folder and name these two blender just to
keep everything organized. Because first, we will be exporting our
textures to Blender. Now select folder, and you can see this path has
appeared over here. So the next is output Template. So basically these are different templates that are created by Substance Painter only to make your work a
little bit easier. Let's say you want to export your textures
to Unreal Engine. You can directly
go over here and select the Unreal
Engine four template. And now you're Texas would be exploited according
to Unreal Engine. But we want to export
them to blend us. So if you scroll up over here, you will find a blender
template over here that is the blender
principled be SDF. Select this. Also, if you don't find this output template over
here, this blender one. Because if I remember correctly, in the older versions
of Substance Painter, we did not really have
a blender template. We had to create one on our own, but in the newer versions
the update was made and now we have a blender template
by default in substance. So if you don't
find this template in your substance painter or you have to do is update
it and then you will find it. Alright, so let's select
the blender template now. The next is filed by
file type is basically the different image file types that you want to export
your textures too. So I will be just selecting
PNG and from over here, you can select 16 bits. Alright, so the next
is the texture size. This is the resolution that your textures would
be exported to. These are all resolutions, but over here we also have eight K If we want
maximum quality. But I think I will be fine
with four guilty, alright? And the last is padding and
you won't ever have to change this option because I think
it works best in default. But if you want to understand
what exactly is padding, you can head over to the
Resources folder and open up this links Phi and just
copy the second link. So this is the link to the
documentation for bedding. And here we have a very
nice animation that we can see and understand
what exactly is fighting. Over here, you can read the
definition for the budding. Its purpose is to
dilate the borders of the UV islands to fill empty
areas with similar pixels. What this basically
means is we can understand it very
easily with this image. Just click on it,
and let's zoom it. Now, as you can see over
here in this image, we have all these empty spaces
in between the UV eyelids. And later on, after padding, all those spaces are filled
with similar colored pixels. Padding is useful when
texture is used at a very low resolution in game engines and something
related to maps. You can read it over here. We have everything
related to padding, why we do it, and why it is useful to have tricky
technical stuff. And as I said earlier, we really don't need
to get into that. Let's just close it up
and back to exporting. As I said earlier,
we only need to set this to default
because it works best. We would ever have
to change this. So these are all the
settings that you have to make any ad.
This is pretty much it. You just have to do all
these settings every time you export something
from substance painter, you just need to change the
output templates sometimes to maybe Unreal Engine or something else like PVR,
metallic roughness. But yeah, basically, That's it. We can change some of
the specific settings over here for the
texture set like this. You can see over here, these are all the global settings
that we just did right now. And if you want to
change any specific one, you can do it from over here. Alright, over here
at the bottom, we have the Export button that we will be seeing later on. Next, we have the same settings. If you will click on
it, it will basically save all these
settings for later on so that it remembers
all these settings and you do not have to do
them again and again, cancel. Basically pretty self-explanatory
reset is to reset all the settings
that we just made so that you have
everything at default. Alright, so now the
next tab over here, this is the output templates. So these are all the templates that we just saw over here. So basically the reason for
creating a separate tab for this over here we have
all the templates, but also you can add your
own templates over here. Like if you press
this Plus icon, you can add new export presets, create your own
template for textures. Also, you can duplicate
the older ones, like maybe you want to make some changes to the PV
of metallic roughness. You can right-click and
duplicate this and select it. You can rename this to
anything and you can drag and drop any of the
maps from over here. Like maybe you want to use
the MAC map or the opacity, anything you can make
all those changes. But really I don't think you
will be ever using that. Because if you use a popular softwares like Unreal or blender
or anything else, all of the templates would
be already available to you and you can just basically select them from over here. For me personally, earlier when we didn't have a
blender template, I had to sometimes go in here and create a
blender template. But now that we have a
blender template by default, I really don't have the need
to use this tab because I basically switch between
two or three templates. That is the blender and unreal
one, sometimes a unity. So yeah, that's basically it. Last one is the list of exports. These are all the
textures that would be exploited for
your texture sets. Basically, this is just
an informative tab. You cannot really change
anything over here. So this is basically just to see all of the textures
that will be exported. Alright, so let's get
back to the settings tab. And finally, I will hit export. And now you can just wait for the textures to be exported. It might take a little, right? Alright, so all the
textures exported. Now you can just hit
Save Settings over here so that it remembers
all these settings. Now if we will go in
the resources folder, in the substance
painter textures, right extinguisher blender. You can find all these
textures over here that we will be using now in Blender. So open up your blender and open up the fire
extinguisher blender, fine. Maybe you can directly
do it from over here in the resources folder. Let's close this Blender files and open a fire extinguisher
underscore start. Now what I will do is
before starting to do anything in this
particular phi, I will go over to File and
Save As and create a copy of this fire extinguisher file so that we have two
separate files, or the final and the start. So this one is the
final because we will be adding all
the textures into it. Alright, so go over
in the shading tab. You can change the
view to viewport shading so that you can
view your textures. So now as you can see, the metal materials right
now selected over here, you can change
between the materials by selecting the
particular object. So if I say them
despite you didn't see the rubber and plastic
material is selected. Now, if I select any of the object that is from
the metal material, then you will see the
metal material over here. So first let's select
the metal material, open up your resources
folder and head over where you exported
all your textures. Over here. Now I will be one by one adding all the texture that are
related to the metal material. So now let's first start
with the base color. I will just select
the base color, drag and drop it over here. And now connect
the color channel to the base color like this. And you will see now the, all the color information
is added to your model. Let's do this one by one
for each and every channel. Next, let's add the metallic. And now I want to mention one thing for all
of the channels, except the base color channel, you have to set the color
space to non collapse. It is already done, but make
sure if it is not already, you have to set
this to non-color. Because as you can
see over here, all these channels that are the metallic displacement,
roughness and alpha. All of them are black and
white grayscale mask, so you need to set them to non-color also for
the normal map all you need to set it to non-color for it
to work properly. So except base color, all of them would be set to
non-color in the color space. Alright, so with
that out of the way. Select the color channel
and connect it to metallic. Alright, Next, let's drag
and drop the roughness, the color to
toughness like this. And you can see now the
roughness values are added. Your model is kind
of looking shiny over the area that
is supposed to be. You can select any of
the map and press M. You just mute it or to
just remove it for now. And you can see it effects, as you can see, all of the
metallic information is gone. Now, select the metallic
map and press M again, and now all the
metallic information is back. Let's keep on moving. And this time I will
add the normal map. So we cannot really connect
the nominal map directly. We need to first transfer it to another node for first aid is to non-color redshift plus a. And let's search for
a normal map node. Connect this to the color
channel and now connect this novel not known to
the normal, like this. And you can see everything is looking pretty good right now. Next, let's add the alpha. As you can see over
here, we cannot really see through a glass right now. Let's move to the rendered view. And now we will. First, let's quickly fresh
Shift a and add and light. Maybe a point light. Increase the power to
500 so that it is a little bit easier to see all of the stuff in the
render view mode. Yeah, I think this
is fine for now. The material again and this time we will be adding the Alpha map, will drag and drop it over here, set it to non-color, and connect the Alpha map to see over here in the
alpha channel like this. As soon as you do
that you can see now, you can see through
your glass over here. So yeah, pretty handy stuff. The last one is, I think we
have the displacement map. I sometimes really don't use it, but I will just show you
how we can use that. Drag and drop the
displacement over here. Second two nonpolar. Now we need to connect it over
here in the displacement. But first, it needs to go
through another node like the normal map redshift plus
a search for displacement. And now plug the color
channel into the height. Now connect the
displacement, displacement. Alright, all done now. So one thing that I wanted to mention is if you render out your fire extinguisher model and you feel like the
displacement value is too high, you can just decrease the scale from over here and
it will be fine. And if you are not
liking it completely, you can also directly
remove it from over here by holding
Control and using a right-click to
create a slice like this is telling
you this to show. Now what you can do
is select one of the texture like this
press control plus. So this is the mapping node. But now you can do is
place it over here and quickly connect all of the vector node over
here in the vector. The reason I'm showing you this, we won't be really
using it right now, but it is pretty much
a rule of thumb to add these mapping nodes so that you can properly
control your texture. You're going to
increase or decrease the scale of the
texture like this. As you can see, you can, Let's take that 1 first
rotated and stuff like that. We won't be really using it
for these kinds of textures because these are set textures that are created in
substance painter. First off, like vote and all that texture that you
might be adding to blend. It is nice to add a mapping notes so that you
can control it. So yeah. All right, so now you can
see all of your model. I think it looks pretty good. You can duplicate this point. You may be at the
back also like this. Yeah, I think that textures
came out pretty good. And now let's do the same
thing for the rubber. Also. Select the rubber and
plastic material. And now let's one-by-one,
drag-and-drop them. So first is base color. The base color. Next,
let's drag and drop. The metallic. Metallic is completely black because it is exactly
no metal in this. So that's why I said
this to non-color. As I mentioned earlier, sometimes it won't be
changed to non villa. So make sure you do
that on your own. The color to metallic like this. Thanks to its roughness. Set it to none color. The color to roughness. We don't really have
an Alpha Matte for this because we don't
have opacity maps, so we have no Alpha
map over here. Next is normal. A normal map. And then these two color
normally do normal. Again, see, it feels
like it is behaving weirdly because we have not changed the color
space to normal. Now, I think it
reacts perfectly. So I think the last one to
add is the displacement map. So let's do that now. Redshift pay, and let's
add a displacement node. Now grabbing drawn to
displacement to the height, like this, set it to non-color. Basically we are done, again, select the Base Color
press Control D will have the mapping
node and collect an alkyne in the
vector channel to all the data channels over
here in the pictures. Alright, so now we're done. We have added the
texture to Blender. And I think our textures
look pretty good over here. They look pretty much
exactly the same as the textures over
in substance painter. So now you can press shift
in the blender window. First, let's go back to Layout so that you have full screen. The rendered view. Just wait for it to load and
first redshifted. And let's add a camera. You can set up the
camera accordingly. You can press Control Alt and 0. Go over here in the View
enables camera to view. And now you can move the camera and place according to
your fire extinguisher. Disable it now so that your camera does
not change position. Also, I will suggest you
go with the shading tab, changed from object to world. And over here you
can add a couple of HDRI maps for shift taste, search for environment, texture. And over here you
can add HDRI maps. So they are really useful, but I will not be adding them. You can add them on your own. Alright, so if we will press
0 on the number pad now, you can view your
fire extinguisher, and I think it
looks pretty good. You can press F2. You can see all the render
settings over here. And if we will press F2, wait for it, and
it will start to render it out. As you can see. Now you can do all these things. I won't be going through
all of them because the cost value does
not cover that much. You get. Heather, displacement is not looking that great
As I said earlier. So what you can do
is close this out. And over here also is
being displacement map. So let's decrease it. Now. I will go back to shading overhead and the object move to the viewport shading so that it is a little bit faster. Alright, now select
your metal material. I will just set the
displacement to around 0.1 or both of them. Now let's press SQL once again and see if it is
appearing over there. Now you can see
the surface looks pretty smooth and it
looks pretty nice. Overhead also the
scratches look alright. Now, as I'm saying, if you are not liking
the displacement thing, you can completely
disable it because it can sometimes cause him
to look pretty bad. So yeah. I will be also if
you're feeling like some of the stuff is too much like the scratches over here. You can go back to
substance degrees, then re-export your textures. All of that is pretty much okay. You can do all of that stuff. I think now with this fire extinguisher model
is now completely done. We have textured everything
and now we have exported it to blend up and everything
is working perfectly. In the next video, I will be showing you how we can export the same textures
to Unreal Engine just to cover two
main softwares. Yeah, thank you
guys for watching. I will see you in the
next one. Okay, guys. So before leaving,
I quickly want to show you the
completed render. You can zoom in over
the parts and I think our texture came out pretty
good and pretty realistic. Glass material or Ireland, everything looks really nice. I think even the rubber
material looks really good. We can maybe turn down the
scratches a little bit. But yeah, except that I
think it looks really nice. Overhead of plastic also
came out pretty nice. This was pretty much a
fire extinguisher texture. Fair. Thank you for watching.
33. Exporting Textures to Unreal Engine: Hello and welcome guys. So in this lecture, I will be showing you how we can export our textures from substance
painter who Unreal Engine. So the process of
exporting textures to Unreal Engine is a
little bit tricky. It is not that straightforward
as it is in blend up. There are a couple
of things that you should know,
but don't worry, I will be covering each
and every aspect of exporting to Unreal Engine
from substance painter. So let's start. So the
first thing that you need to do is press
Control Shift and D. And we have this dialog box
for exporting our textures. Over here, everything
is already done. We just need to
change the output Template from blender to scroll down and select
Unreal Engine four, pad. The file type, I will
change it to daga and it gets plus the drink because I think it gives
the best results. Go over here, select
the output directory, and now it is in Blender. Come back one step
and let's create a new folder and rename
this to find reading it. Hit Select Folder, and
now everything is done. We just need to hit Export. All right, so the exporting
is done now you can just quickly check it in
your resources folder. We have all the
textures over here. Click open up Unreal Engine now, and start by creating
a new project. Wait for it to open up. So now head and Unreal
Engine select games over here and then
select a blank project. You can select the
project location anywhere you want to
save it on your PC. All of these settings
are fine at default. And I will rename
this project to fire extinguisher
and just hit Create. Alright, so the
project has opened up. Now, I will quickly hit update over here and let's
dismiss this. We have this level by default, so we really don't need
to create a new level. We can just export
our fire extinguisher in this level only. And I will show you how we
can import our model into Unreal Engine and also
import our textures. Let's start over here
in the content browser. If you don't see this
window of content browser, you can just press control
space and it will pop up. If you want to make it stay, you can just select
docking layout. Now right-click and let's create a new folder first and
reading these two models. And again, I will
create another folder and rename this to textures. Alright, select the model folder over here on the Add button. Select Import to this one. Now head over to
your exports folder in the Resources folder, and just select this fire
extinguisher underscore final. And now hit Import. All right, so the
import is done. You can see both our
materials are also imported, the metal and the
rubber and plastic. Now select all of your
models except the material. Just select all of them and drag and drop them onto the scene. And you can see now we have a fire extinguisher
model over here with us. You can press Control G
to group them together so that it is easier to move
them around and selecting. Alright, now it is the turn
to export our textures. So important our textures, because we have already
exploited them from Substance Painter
and now we have to import them in Unreal. Go over to Add again. It important in the
textures folder. And now in the Unreal
Engine folder, select them all
and just hit open. All right, so now we have our
textures over here with us. Let's come back to the model and double-click on the
metal material over here. Let's make it full screen. Remove this, press Delete, and now press Control plus space to bring up
the content browser, open up the textures folder and only select
the metal texture. So this one over here, you can see Mel is written. So this one, this
one, and this one. Drag and drop it over here. Alright, so the thing
that you have to remember is the first
one is the base color. So this goes into base color. The second one is a normal map, is directly goes
into the normal. So the third picture
is a path to texture. So if you open up
Substance Painter, you will see that the name of this output template is
unreal engine for PAD. So basically what it means
is the third texture has three different textures
patterns into a single one. So what you have to do is now, instead of connecting the RGB, it has three different textures in three different
color channels. So select the R channel and plug it into
ambient occlusion, like the green channel. And plug it into roughness
and select the blue channel, plug it into metallic. So the reason we have
used this Unreal Engine four bad is because
it saves us a lot of memory and we have not
three different textures combined into a single one only because all three of them
are grayscale pictures. That's why they have been compiled into three
different color channels. So yeah, just make sure
you remember this always. It will always remain the same. So r will be always
for ambient occlusion. Green would be for roughness and blue with before metallic. If you go over here
in substance painter, in the output templates and
select Unreal Engine four. You would be able to see over here for the second picture, if you hover over the
arch and you can see it is written mixed ambient
occlusion, gray scale. And over the green channel, it is roughness and over the
blue channel is metallic. So this is the advantage of having this output
Template window. We can easily study all the
different output templates. In the blender one, you
can clearly see that all the different channels have their own
separate textures. Like metallic has a different
roughness, different. But in Unreal Engine four bags. One texture has three
different channels over here. So the ambient occlusion,
roughness and metallic. So this saves us a lot
of memory and yeah, make sure you just
remember this. So now let's come back to Unreal Engine and just hit save. Alright, now come back to
the main level and you will see that first it
is pretty dark, so I will just quickly go
over here and add a light. Let's add a point like that. We can easily view our model. You can go over here and increase the intensity
of the light. Alright, so the first
thing that you will be noticing is the
model looks really, really shiny for
no reason at all. Even on the areas that it is not supposed to be shiny
like over here on the metal and even on the surface of the main
fire extinguisher. And the second thing that
you will notice this, we really do not
have opacity map and a glass material is not
really looking that great. So these are the two things
that we need to fix. So the first thing is
pretty easy to fix. You can just open up the
metal material again. And the problem with this
bad picture is there is one little setting that
you have to change it, select the texture from over here and then
double-click over here. This window will open up. You just need to disable sRGB
from over here, like this. And as soon as you do that, you will see an error
is read the error. So the error is
sampler type is color, should be linear color. Sampler type overhead is
set to currently color. Let's change this to
linear. Before saving. Quickly, come over
here and now hit Save. And just look at your model now. Now you can clearly see that
all the areas that were earlier very shiny or
looking perfectly fine now. And they are looking at how
they're supposed to look. Even the metal material
is looking now fine. Basically that was it. The only change that you
have to make is just select this texture and makes sure to disable sRGB
from over here. And then over here
in the material, make sure to change the
sampler type two linear color. Right? So the next
problem is we do not really have a glass
material over here, but don't worry, we
will fix that later on. But first let's add a rubber
and plastic material. Now open it up. Let's delete this and
make it full screen. Press Control plus face. Select all three
of these textures and drag and drop
them over here. The base skull and
into base color, the normal, into normal. Now, our channel for the texture goes into
ambient occlusion, green goes into roughness, and blue goes into
metallic. It's saved. And obviously everything would
be really shiny right now, but we will just fix it quickly. You can see the rubber material
is also looking shiny. To do that is selected
double-click over here, disabled SRGB and change the
sampler type from color to linear color. Now who'd saved? Lose everything, and yeah,
everything looks perfect. Now, the only thing that
we have to solve this for this class
material over here. So what we need to do
is we cannot really make changes to this
metal material. Because if you make the changes, then our whole model
would be messed up. So what we can do is just right-click over here
and first duplicate this and rename this to
metal underscore loss. So this will be our
class materials. So what we can do is first, let's right-click and
go over to group. And I want to ungroup this so that I can select
this piece only. And now you can see overhead this piece has the
metal materials. So let's click over here and change it from metal
to metal and glass. So basically right now both of them are the same material, but now I will make changes to the metal glass
material, open it up. And we need to do a
couple of settings. So the first thing that
we need to do is change this blend mode over here
from opaque to transduce it. Alright, next, just
scroll down and the lighting mode change this to surface translucency volume. And also enabled two-sided. Now I will just quickly go
back to substance painter. And I will show you
one thing if you will click on here,
Unreal Engine four, that you can see that in
the base color section, if you hover over here, we have the opacity map that is connected into the
alpha channel. So what we basically
need to do is come back here and we have
the base color over here. Select the alpha channel and
plug it into the opacity. Wait for it to compile. Now just hit Save. And now you can see that our glass material is
working perfectly. I will go over here
and decrease the camera speeds so that
I can move properly. Yeah, that was basically, you can see now our
glass looks the same as it looked in
substance painter. You can look around
your complete model and see if it
actually looks fine. So you can see that
it looks same as if Substance Painter and we have
fixed all of the issues. So you have, these
were the couple of things that you should remember. The tricky part about having a glass material
is basically you have to keep it in
a separate material like we did over here. We had a different material for glass and a different
material for rest of them. That is basically if you applied this metallic glass material to maybe something like this, you will see how messed
up it is looking. You just need to remember
this one thing that for glass materials or anything
related to opacity mask, you have to create a
separate material for it. And also one more thing
that I want to mention is if you don't find
these settings over here, you, what you need
to do is just click outside anywhere on
the empty space. If you have selected
any of the textures, you won't find those settings. Just click outside or just select this
main node over here, then you will find
all the setting. So the only couple of settings
you need to make is set the blend mode using
enabled two-sided. And then go over here
to lighting mode and set this to surface
translucency volume. Now you can just connect your
Alpha channel to opacity. And the last would be
working perfectly fine. Hit yes, and that was basically it for all
of our materials. Now, we have fixed
all of the issues. And this is basically all the things that you need to know while exporting from substance
painter to Unreal Engine. So thank you guys for watching. I'll see you in the next one.
34. Creating Drill Project and Baking Mesh Maps: Hello, Welcome guys. In this section we
will be completely texturing our second model
that is a dual machine. So in this first lecture, we
will be basically creating a new project and making all the mesh maps,
all that stuff. So if anyone wants to just
skip all this process, they can directly use
the drill underscore, start Substance Painter fight
in the resources folder. You will find it over here. In the substance painter files. We have the driller discourse
dot file that you can use. This file has everything
already done for you so that you can directly get
onto the texturing process. So if you want that
even just skip this video and start the
texturing from the next video. Alright, so with
that out of the way, I will go back and in the
blender files folder, open up this really
underscores start file. And here we have a real model that we will be
texturing completely. If you will go in the
materials section, you will find this
drill material. So basically this
complete model only has a single material or
a single texture set. That is the drain texture sec. I have already UV
unwrap this model. You can press a Hoover in the UV Editing section
and check the UVs. So here are all our UV islands. We can also check the
face orientations, but everything is
probably correct. Go over here and enabled
face orientation. And you can see everything
is colored blue. That means all the
normals are correct. Now to export this model, just press a and
select everything. Then go over to File
Export and then Export as FBX Export folder. I will save it as real
underscore start. Make sure to enable selected objects and active collection. And I only want to
export the meshes, not any other type of objects. So just select the
mesh and hit Export. Alright, so it is done. Now, if you go into the
resources folder, you will find this
drill underscore start FBX file in your exports folder. So now let's get back to Substance Painter and
create a new project. So basically, all the
settings are pretty much same as the fire
extinguisher project. We just need to select
the FBX file over here that we just exported on Select and select this real
underscore start. Now, okay. Alright, so first I will go ahead and display
settings and just enabled activate
temporal India JC, remove the jagged edges. And now if we know, the first step is to
always bake the mesh maps. As you can see, we only
have one texture sake. We will be making mesh maps only for this
particular texas had only when the texture sex
Settings select bake mesh maps. First thing I will
select the size as 40. And as I've said earlier, if you have a computer
with those specifications, you can go for two
key or wonky maybe. But at least suggest
to go for ticket. But I will be going for for currently enabled
both of these options and set the empty leasing four-by-four and
rest everything. Default is completely fine. So just hit vague
selected textures. Now just grab a cup of coffee and wait for the
weekend to finish. And I will resume the
video when it is done. Alright guys, so it's
finished now for it, okay. And quickly check your model
or any kind of big issues. Like we can get some
shading issues. Sometimes. I don't think there are any. So obviously we will start the texturing process
in the next video. But before ending,
this looks good. We save our projects,
hit Control plus S. And I will save this as
written on the final, because we will be doing all the texturing in this final leaf. I will save it with underscore
final and now hit Save. Alright, so our
predicted Save now, so I will see you
next video where we will start with
addiction process. Thank you for watching.
35. Creating the Plastic Material: Hello and welcome guys. So in this lecture we
will be starting with the texturing process
of our model. So I've already
opened up the drill underscore final
substance painter file. So to start off with the
texturing process first, I want to show you
something new in the Resources folder and in the textures than
the drill folder, you will find these two
new images that I've added that had basically offer real life drill model
that we can use as a reference image to see what all textures we have to create. So there are a couple
of different materials that we are going to make. One of them is this main
yellow plastic material. Then we obviously have
the rubber material. Over here, we have
the iron material. And at the bottom you can see these two black colored
materials are clearly different. So this one over here
is the grip material, that is our rubber material. And this one is basically a plastic material only
but with black color. So these two materials are same, the yellow and the black
one overhead the bottom, we basically only need
to change the colors. So this one is yellow
and this one is black. So first I will start by creating this yellow
plastic material. Alright, so we can just
close it right now. So if you want to
check something or take a look at the
reference images, you can do that to get a little bit more idea what we will be texturing
in our project. Alright, so let's start. I will delete this layer one
that is added by default. And I will create a new layer, new fill layer, and
rename this to base. And also, let's start
by adding a folder. Drag and drop this base
layer into the folder and rename this one
to yellow plastic. Alright, select the base
and for the base color, obviously we will be
going for a yellow color. So I've already decided
on a color h value, I will say 2.11980. For the saturation, I
will set it to 0.836. And at last we have the value, so this is 0.767. So something like this. Now I will just quickly open
up the reference image. You see on which all areas I have to add this
yellow plastic layer. Over here, this piece, this one, and this one. So basically three pieces. So click on here
on geometric mask, right-click and exclude all. Select this one, this
one and this one. Basically these three only. I will also set the
roughness to 0.1 because I want that plastic
texture to be kind of lossy. Don't worry, we will
add more layers on top of it to make it look
a little bit better. Right now for the base layer, I think everything is fine. Let's create a new layer, and this will be our dust layer. So let's select the base color. Obviously for dust, it
would be kind of dark. Somewhere around here. I will set the roughness
two-point date. And I will quickly add a black mass to it and
also add a generator. I will basically be
using a generator. Does something like
this. Obviously this is too much right now. So I will decrease
the dirt level. Maybe let's set it
around 0.4 for now. And we can now increase the
grunge amount a little bit. Around 0.5, I think. Yeah. Let's decrease
the dirt contrast. Maybe I will increase the
dirt level even more. I think this is pretty subtle. I only want to add dirt
like in all these areas in the corners and crevices and
not too much on the surface. I think around here along the
edges little bit is fine. But yeah, I think this much for our dirt
layer is pretty nice. If we wanted more
over the surface, you can decrease the contrast
and you will start to see around the surface
a little bit more. But let's set the
contrast around 0.3 only. And yeah, I think
that's pretty nice. Let's move ahead. And I
will create another layer. And this can be an Edges layer. I will keep the color to white only because I will be
reducing the opacity. So add a black mask. And let's go into smart
Mask section and search for smart mass relate to edges. I think I will be using
the edges blurred. So dragon Rome, this one. And we have something like this. Let's reduce the global
balance to around or M2. Yeah, I want some
sort of this effect. Obviously right now
it is too much. Let's reduce the opacity to 50. Even more, right
thing, around 30. Yeah, that's fine. I, this next move further. Let's create another layer, and this will be our
color variation layer. So you can choose any color, makes sure that it is in
the shoes of your lonely. So let's go for orange color. And this will be a colorway. Recently, I had a black mask, and this time we have
already used the generator, then use a smart mass. So let's go with the
fill layer. This time. We have a lot of options
that we can choose from. Let's search for grungy
math. Let's see. Let's try this one. So we have something like this. Obviously we have to
reduce the opacity. But first let's adjust
all the settings. So I will set this to
try planar projection. And let's increase the tiling. I think around three
would be fine. Let's reduce the balance
a little bit now, I will circulate around for maybe also we can make a little bit switch
up in the roughness also. So let's increase the
roughness to 0.4. Yeah, I think it is pretty good. We just have to reduce
the opacity now. So let's try 20. Can maybe increase it a tad bit because it is not really
that much visible. Let's go into base color
and choose a darker color. This way it looks pretty good. Let's duplicate this layer. And this one we are
color variation to. We can add two different
color variations for the base color
of the second layer. Let's go for a
brownish color, maybe. Something like this. Let's select the mask
and remove the failure. For this one, I will be
using the smart mass. So let's remove
the search query. And in smart mass section, while I was experimenting
with different masks, I found this edge rest
mass to be pretty good. So I will be using this one for the second color variation. And you can see it adds
this kind of effect. We have our collaboration
layer all around the edges. I will select the
orange filled layer at the top to adjust the eye will increase the
balance a little bit. The effect definitely goes
a little bit overboard. But what I will do
now is I will just reduce the opacity
from here to 15. And this way, I
think it looks fine. Maybe we can reduce
it leverages big 68. Now I think our material
looks pretty good. We have added all these
different layers. The first one was
the base layer, then we added some dust in the corners and crevices to make it a little bit more believable. And some edges and two different color variations to add a little bit of damage. And along with the
color variation, we also have some
roughness variation with these filters only. So at last time will be just
adding a highlight layer. I add some bumps to
a plastic layer. So let's rename this to height and hold Alt and just
select the height channel. Set this to 0.1. And
let's add a black mask. The failure and the filter
that I will be using is so drag-and-drop the cells
worn texture over here. And immediately you
do not see anything. First you set this to five painter and I will
increase the tiling, do a pretty large
number like 60. And you can see we have
some kind of this effect, which we definitely don't want. We want bumps to appear
over our plastic surface. I think we need to
invert the height. So select the fill layer
and instead of 0.1, set it to negative of 0.1. Now you can see all these bumps, but obviously the height
value is still pretty huge. So I will decrease
it to negative of 0.05 or maybe negative or 0.025. Yeah, I think that is better. Let's go back to the
cells one texture. And in the noise parameters, you can even increase the
scaling of the noise. If you increase the scale
from over here, you can see. How it is affecting our texture. So I will increase it to
a huge number like 128. This way it is pretty subtle. And it adds a lot to
a plastic material. I think this way it
looks really good. Alright guys, so these are yellow plastic material is done. Let's close this
folder like this selected and just duplicate it. Right-click and
duplicate layers. Rename this to black plastic. I will right-click
and hit Exclude all. First open it up and give
this a different color. Obviously, black color like
this for the base layer. And now, click over here, select the geometry
mask and we need to select the areas
that we want to add. The black plastic material
on over here, over here, on this one. Over here. I think all these areas we want to add the black
plastic material. We can check it in the
reference image also. So here you can see over
here on this piece, and this one is a
rubber material, so we only want the black
plastic material did here only. Now you will see some issues with our black plastic material. We can see this orange color
that is looking pretty bad. So let's open up the folder. And for now I will disable both the color variations that we have,
something like this. Next, first, let's
select our base layer. And I will go into base color and just make the color a
little bit more darker. Something like
this. For the dust, I think it is fine. We can make the color
a little bit lighter. Now for the edges, the
edges layer also looks a little bit weird over here because the edges
are pretty sharp. So you can go over here
in the mask editor, reduce the global balance
to around 0.1-six. Now it is pretty
light, maybe 0.17. And we can just reduce the
opacity from here to ten. Yeah, that's pretty good. Even then, if you feel like
this looks weird to you. So you can go here, select
this and add a paint layer. And basically just
select a brush and remove some of the areas and make it a little
bit smoother like this. But I think it is fine. So now let's enable back
our color variation layer. What we need to do is
we just need to select the base color and make it in the shade of black only
that we would look good. Let's take it around 0.2. Select the mask and
there's degrees. The tiling around
one I think is fine. Then you can just
decrease the balance. Basically just experiment
with the values a little bit. Next, what we can do
is click over here on the channels and select
the roughness channel. And right now we can see there is a lot of difference
between the two roughness. So we can just turn down the opacity of the
roughness channel or this color variation
layer so that they are little
bit evenly mixed. So let's set it around 50. That way it looks
much better. I think. Let's come back to
the base color. And I think for this particular
black plastic material, only one color variation
layer is fine. So I will delete the older
color variation layer. Select it and just press Delete. Alright, now I think our
material looks pretty good. I also want to add this black plastic
material layer over here on the trigger and button. Just click on the geometry mask, select this and this also. For the rest of them, we will be using the rubber material. For this video. I think
this much is enough, guys. We will continue from here in the next one. Thank
you for watching.
36. Creating Smart Materials: Hello and welcome
guys. In this video, we will be learning how we can create our own
smart materials so that we can speed up the process of texturing of a drill machine. So as you already know, we still have to create this rubber material and the
iron material over here, but we already did that when we were picturing a fire
extinguisher model. So we will be using
those materials in our reading machine
project because there is no point in creating those
materials from scratch. Once again, that would
be a waste of time. To create those smart materials. First, we need to open up the fire extinguisher
model project. Go over here in the
file, recent files, and I will open up the
fire extinguisher final. Alright, so the
fire extinguisher final file has opened up. Now what we need to
do is basically, first let's create
the smart material out of this iron folder. Right-click on this folder and basically just select
Create smart materials. And as soon as you do that, you will see this
iron material has appeared in your smart
materials section. What you can do is right-click
and rename this to. Let's rename it to
something else so that we can easily identify it. So I will just rename this
course underscore IRA, so that we can remember that this particular smart material
is related to our course. So over here, next, let's go into the rubber
and plastic texture set. Right-click on
your rubber folder and hit Create smart material. And again, as soon
as you do that, you will see it in your library. Right-click. And let's
rename this wiki. Alright, so with this, our job over here in
this project is done. So now let's switch back to a
drill machine project file, recent files and rail
underscore final. Alright. Lets you move
the search query. And if we go into the smart materials
section, search for, of course, we find both
of these materials, the iron and the
rubber material. So just drag and drop
them onto your model. First, the rubber,
right-click and exclude all and just select
all these pieces. We can also drag select like this to make our job
a little bit easier. Alright, so I think
these all pieces should have the rubber material. We can do the minor
adjustments later on, but for now, let's add
the iron material. Again, right-click and
exclude everything. Select this. These three over here. Then let's also
select all the nuts. Alright, so I think
this was all of it. Also. We still have
these species overhead that have no material right now. But let's quickly open up our reference image and see what all we need
to add over here. So open up the resources folder
and let's quickly look at our reference image where
it's not really bacteria, but over all these pieces, we need to add the yellow
colored plastic material. Select the yellow plastic and
add it on all these pieces. On this one we can maybe add
the black plastic material. And at the top also, because in the image
altar at the top, we can see this black
plastic material. And overhead also, I will
just basically add this only. And also we need to add the black plastic material
on this button also, I think we forgot about it. Now. We can adjust the materials a little bit
according to our needs. So first obviously we
have the rubber material. You can see all the scratches
and lots of damage over it. So I don't think we
will be needing all of this on this kind
of grip material. So I will be four now, turning off the height
values like this. This weight is
better. Next, let's select the roughness
variation layer. Select the grungy map for it. And let's try to
adjust the tiling. So we decrease the
tiling do around one. Let's just set this
back to UV protection. Alright, now I just want
to increase the balance a little bit along with the contrast so that the roughness variation is
visible properly like this. Let's take it around 0.55. Yeah, this way it
looks really nice. But there's a little
bit of issue. If you can see you have
because of the UV projection, we have a little bit of
visible see more here. So let's just remove this. We can just simply go over here and add a
paint layer to this. Now let's go into the
brushes section and quickly select any brush and just
remove some of the areas. Make the scene a little bit more mixed with the
rest of the model. This now it is not
really visible. Ahead. Also, a little bit of seamless visible rest. All is good, I think. Yeah, rest everything is fine. One more thing that
I quickly want to changes before proceeding. Let's close this up and
select the yellow plastic. And I will remove it from this object and instead
add it to this one. We had already added the black plastic
material to this one. So just click over
here and remove it from this one and
add it to this. Basically just switched
between the both. And this way it looks
much better. I think. That's again, open up
our rubber material. We definitely don't want
the height information, so you can just select
it and delete this. I will just select the
edges layer and duplicate this and rename this to dust. Quickly create a new layer. Click over here and remove this. Select the Smart mask
and the smart mass that I will be using is
this one does surface. Drag and drop it over here. Wait for it to load, and it kind of
masks out this way. Now let's select
the mask window. And before editing any
of the properties, I will just quickly
go to texture set and reduce the size from two to k. Because I feel like my substance painter is
getting a bit choppy. Now we can see now the
level is working perfectly. It is working pretty
much in real time. Earlier it was lagging a lot. As we have inverted
this mass builder, if you increase the level, the effect over here would
decrease, as you can see. And if you decrease the level, then the effect would increase. So basically, I want to increase
the level a little bit. I will set it around 0.65. Maybe. We can reduce the
opacity from here, around ten. So that the effect
is pretty subtle. Like this. I think it
looks really nice. With this. I think our rubber
material is perfectly good. We can proceed with
the iron material. Now. Open up the iron
material folder. And really I won't be
doing much with this. I will be just creating
another dirt layer. So just select this,
duplicate, this. Click on the mask,
and remove both of the layers from
over here in the mask. Let's add a generator to this. And I kinda want to use
a curvature generator. So select this and click on the curvature generator and we have something of this sort. Before editing the properties
of the curvature generated, Quickly select the
fill layer over here. And I will enable the
metallic channel. Let's set the metallic to one and reduce the
roughness to around 0.4 so that the dust
is not that harsh. And now we can go back in
the curvature and just reduce the global balance
to around 0.3 maybe. And also reduce the opacity
from over here to 70. This writing our iron
material looks really nice. Next what we can do is we
can add another layer, and that will be
new paint layer. And we will be adding more
details to our nuts over here, make them look even better. So if you remember
in the section three of the course in one
of the lectures, we learned about how we can use this normal channel to paint various details
onto our model. So we will be doing that. Click over here. And if
you remember correctly, we can open up the
textures and select the hard surface and hold Alt and just select
the normal channel. And I will be
dragging and dropping this view cross round onto
the normal channel like this. And you can see it is
appearing over our brush. First, go over here and
set this to orthographic down by holding Control and using your right-click and
moving it left and right. I think a size of around
this much would be fine. Obviously, we need to
increase the hardness. Let's set the
hardness around 0.8. Obviously right now, it
does not look that great. And the reason for this is because the texture
size is small. It is said to, to get right now. And the size of the nut is pretty small
compared to the texture size. If we increase the
texture size two for k, you will see that the nut
would be a much better. Wait for it to load. You can see now it looks much, much better compared to earlier. And we can just quickly
stamp them over here. Would all are nuts. In overhead is done
hold Alt and Shift and snapping towards
the back like this. Hold Alt and Shift again
and snap it over here. And let's add it to this one. This is the last one. And with this or not slip pretty good. Set it back to perspective. And we can rename
this layer to nuts. With this or Ireland material. Anyhow with this
or iron material is also pretty much done. Basically, I complete texturing of the drill model
is almost done. We just need to now add all the height
information over here, along the grip and over here. And then we need to
add the stickers. Still a little bit
of stuff to do, but definitely are texturing is coming along pretty nicely. So I think this is enough
for this lecture guys. Sure to save your projects. And I will see you
in the next one.
37. Adding Height Information: Hello, Welcome guys. So now that our texturing is
almost done in this lecture, we will be adding some
height information over here along the grip
section of the drill. And overhear also, just select this iron material
folder and let's add a new fill layer so that it is added at the
top, like this. Double-click. And let's rename this to hike. I only want to enable
the height channels. So hold Alt and click
over the high channel. I will be setting a height
value of negative of 0.1. Now let's add a
black mask to this. Alright? So set your
hardness to one. If you start painting over here, you will see that we are painting a height value
of negative of 0.1. That's why it looks as if the
surface is going downwards. So this is what we want it. Now I will just decrease the
size of my brush to around 0.8 so that it is fairly
small, something like this. And also make sure the
hardness is set to one. Alright, hold Alt and shift
and snap your view like this. Make sure to set the view to orthographic instead
of perspective. And let's zoom in over
here. Before starting. Make sure to enable
symmetry like this, so that when we paint the
grip over here like this, it appears over here also, so that we only
have to do it once. Let's begin hold Alt and
shift and snap your view. Also, if the axis of your
mirror symmetry is messed up, you can just click over here and set the axis and all the
settings from over here. We have already gone over
this in section three. So select the x-axis. And I'm pretty sure
that it will be here in the center
only, but if it's not, you can adjust it by
moving it on this slider. Set this to 0. And
yet, Let's start. I will hold Alt and shift
and snap it like this. Let's start from over here. I will just click over here once like this to create a dot. Then hold Control and Shift at the same time to create a
straight line like this. And now I will be just
repeating this process over and over to create the
shape of a grip. Extend the line till here so that it goes
through all over the board. Now maybe you can
just pause the video and try to do this
stuff on your own. It is pretty representative. Just click over here once
then hold Control and Shift. And just try to keep
it evenly spaced. That way it would
look much better. When you have reached till here. You can again hold Alt and Shift and snap your
view this way. And now it will be easier to
add these lines this way. Just zoom out once and see how everything
is looking fine. Yeah, I think I'd replace
coming along pretty nicely. Let's keep on moving
further and finish this. But once again, just click
over here once that hold Control and Shift or
the straight line. And just click once again. You don't have to get
dislike a 100% perfect. The lines can be
a little bit off. It does not matter that much because from far away it
won't be that visible. Let's add one more over here. I think that's perfect. You can see that if
you disable this, it adds a lot of detail. Your model. This
way it looks pretty flat and now it
looks really nice. So let's add them
over here also. Again, select the mask. And let's start painting. So I think this is pretty good. Now what we can do is select the mask and we can
also add a filter to this over here in
the filter section. And the filter that I will
be adding is a bluff. Eta is drag and drop it onto
the filter slot over here. Now, it looks this way. Obviously this is too much, so I will decrease the blur
intensity to around 0.1. I only did that to make all these grid lines a
little bit smoother. As you can see, this way. Disabling blur, they
look kind of harsh. Enabling it makes it a little bit better than maybe easy to, no, I think 0.1 was fine. I just want it to be
ready started there. That's perfect. Let's move on over here. And for this we need to use the radial symmetry instead
of using the mirror symmetry. So click over here and
select radial symmetry. And it is not aligned properly, so we have to do it on our own. The first thing that we
want to do is we first want to set the origin
point correctly. Just click over here and
taste somewhere around here. So as you can see, we need to use the radial
symmetry over here. So we need to set the
point here at the center, hold Alt and shift and
snap it like this. And just move it over
here. Like this. Just about at the center. Make sure it is roughly
at the correct place. Alright, That seems
pretty good to me. Now, who will hover your mouse? You can see this is
kind of what we want, but we want to make it
a little bit better. So first, click over here
and set the angle span 2360. Increase the count to eight. Because there are
eight of these things. And now, if you will move
your mouse like this, you can see the radial
symmetry is working perfectly. So yeah, this is what we wanted. Hit Control Z. Now hold Alt and shift, and we will be working
just on this one. Firstly, go over here and hold Control and Shift and create
a straight line like this. And now it will be
replicated over all of them. Pretty nice. Now I will just reduce the
size of the brush to point to. And add one line
over here like this, and another one over
here. Like this. If it is kind of slanted, what you can do is instead of holding Control and
Shift at the same time, just hold shift so that you can create a
straight line like this. And we had roughly
parallel to this top line. And this way it
looks much better. Alright, let's move further. And I will be adding a
couple of lines with the same rationally here also, start from somewhere
around here. Or just shift this time. Do not hold control because the line would
be kind of slanted. Just hold shift and
add a line over here. And again, I know the lines
are looking kind of jacket, but don't worry when we will set the text size to fork it, they would look pretty
good. This time. I'm just clicking over here. And then holding Shift to create a straight line
will not hold control. And yeah, we're done. So from far away it looks pretty good. The jagged edges or not
even that much visible. But if you want to see
it a little bit better, just go over to the texture set settings and set these two foci. Wait for the
textures to combine. And yeah, as you can see, the jagged edges
are completely gone now and the lines look
completely straight. This way it looks
much, much better. And now as you can see with all the height
information added, looks much, much
better than earlier. You can disable the layer
and see it for cells. Alright, I will set this back to k because it is much
easier to work into it. This is all the basic hygiene
for that I wanted to add. Obviously, if you want to
go for some more stuff, you can add some
more lines even here also are any kinds of different stuff that
you want to go for. I think you should
definitely go for it. You can select any of the
alphas from over here. And this basically start to paint on your own,
Select the mask. Obviously in our
disabled symmetric, you can select any alpha promo here and create some
shapes that you want to. It's totally up to you to create a couple
of other layers and clean some more stuff. Maybe what I will do is
I will select the arrow, search for arrow and we have a couple of arrow
alpha over here. Maybe I will select this one and stamp one over
here on the brush. Like this. Maybe let's reduce
the size a little bit. Yeah, we can stamp
one over here also. If you want to rotate the Alpha, you can also do that by going over here and
setting the angle to, I think do 70. No one AD. Alright. Alright, so yeah, these are all the haiku
for that I wanted to add, but definitely as I said, you can search for some
more alphas over here. Like we have this
sine power alpha and a lot of other ones like they also have
some texts over here, like caution, security. If you want, you can add
a little bit more detail and stamp them over
some of the areas. But in the next video, we
will be adding a couple of stickers on all the empty spaces that you can see over here. Over here, we make our drill look a little
bit more complete. So yeah, that will add a
lot of more detailed into art real model and it will make it look even
more realistic. I will see you in the next
video. Thanks for watching.
38. Adding Stickers: Hello and welcome guys. This lecture might
be the last lecture for the texturing
of our drill model. We will be adding a couple of stickers and adding
some finishing touches. And then we will be done with
the texturing of our model. So first let's create a new folder and rename
these two stickers. And before starting,
we need to add our sticker textures to
our shelf over here. So open up your resource folder. And in the texture section, you will find all
these textures, basically all of the
stickers that we will be using in this real
model, or alphas. Select them all and drag
and drop them over here. And this time make
sure to select them, export them as Alpha
and not as textures. Select Alpha. Go over here and select
project and hit import. All of them are now
imported over here. You can remove the search filter and we can directly access them from going in the alphas section and just search for devoid. And basically all our Alphas
that we will be using. So now I will add a fill layer. And let's set the
color to yellow. For the first failure. I will be copying
the yellow color of this yellow plastic layer. That is our main layer. This one. Select the base layer. Click over here, and let's just remember all three
of these values. But 19836767. Let's enable this bag. And over here, I will just put
those value, 119.8360.767. Basically the same color
as we used over here. Rename this to yellow. Now, let's add a black mask. Because to use these Alphas, we obviously need a mask. Now if you will try to
paint with white color, you will see that
you are painting the yellow color because this is a fill layer and this is the yellow color
that we are printing. And right now the
brush is set to white. That's why the color is being, or the layer is being visible. If you will press
X. Now the color is set to black and now you will be removing the
layer. Pretty basic stuff. We have already gone over
this a lot of times. But instead of using
any kind of brush, what I will be doing
is first risk X and switch to white
color. Go over here. And first, let's quickly open up this image or the reference. So as you can see over
here at the bottom, we have this kind of shape. Just quickly select this alpha, double-click and you will
have something like this. So scale this alpha by
holding Control and using your right-click and moving your mouse left and
right to scale it up. And as you can see over
here in the image, this is stamped with
a yellow color. So I will stamp it over here. Make sure to just
place it properly. Let's try once again. I think that is pretty good. Hold Alt and shift once again, make sure this is set to orthographic and
hold Alt and Shift again and snappier view
on the opposite side. And we will be stamping our
sticker over here also. If you want to move your
lighting towards this side, just hold shift and now use your right-click and you can place the
lighting like this. See everything properly. I think that is pretty good. Let's quickly, once again, open up our reference image and check what all
we need to do. Next, we have a DeWalt logo
over here with black color. Now what we will have to do is we need to create
another layer with color black so that we can stamp this alpha over here. First, let's rename this to black and add a black
mask to this obviously. Now if you stamp it
with this alpha, you will see now we're
stamping with black color. With me. We will be selecting
the logo for us. So just double-click
on the logo. Scale it up a little bit. In standard over here. Right? That's pretty good. Hold Alt and Shift again and
snap your view over here. And stamped logo over here also. Okay, one thing that I do
want to mention is we can do all of this stuff by
using a single paint layer. Also, I will just quickly
disabled this thicker layer. And this is just for
demonstration purpose. You do not have to
Paul, follow me. Let's quickly add a print layer. And now what I will
do is go over here at the bottom and quickly just
set the color to yellow. I'm just randomly selecting a yellow color just to
show you something. And now I will again
select this alpha and you will see this
appearing over here like this. I can easily stamp using this alpha over
here with a yellow color. And now I can quickly
select this one, the default logo one, set the color to black. And again, stamp it over here. Then maybe I can select
some other Alpha, then stamp it over here. But I can even change
the color to be white. And just use this single
layer only for stamping all these different Alphas with different colors just by using
a single paint layer only. But the disadvantage of
this would be like if I want to change the color or
anything at a later stage, I won't be able to do this. But now I will disable this layer and enable
that my sticker layer. The benefit of doing this with a fill layer and along
with the mask is now I can easily increase the
height of this yellow layer. Now that I want to, I can maybe increase the height of the black layer if I want to. You can see over here
it is being shown. We can, sorry, snap
with that over here. I can change any of the
channels that I want to. I can visa degrees or roughness. You can see that it is
being updated over here. You can also change
stuff like the color. Yeah, this is basically
the advantage of using a fill layer
along with the mask. We have complete control over our layers even after
we have painted and we can change the
information of any of the channels that we want
to add later on street, maybe the color
or the roughness, anything that we want. So let's just undo everything
back to how it was. And I will delete this older layer that we just created for
demonstration purpose. This paint layer, delete this and enabled
back sticker layer. Next again, select the mask for the black layer over here. And this time select this 1.51 h. Because if you see
in the reference image, you have this over here. So I will stamp it over here. And again hold Alt and shift
and snap when viscerally. Alright. Now if
you have noticed, we now need to create
a white colored there. Yeah, I think it is pretty repetitive and
self-explanatory by now. So I would suggest you guys too, right, standing up all
these stickers on your own. Now I have added a white layer. I will add a black box
to this leg, edema. And with the Stanford up
over here and over here. Alright, while this white
layer mask is selected, I will select this
alpha DeWalt eight, scale it up and stamp it up
over here also at the back. I think it looks
really nice over here. I know what this empty
space we can use this one. Like this. Yeah, I think this makes our
Brill looked pretty good. Let's wait for the
project to save. Alright, let's keep on
moving further and we will be adding some
stuff over here also. Add over here. If you open
up the difference image, you will see that over here
we have something like this. And if you move to the
next image, zoom it out. And over here we have a
different type of thing. So we need to design
them both separately. Alright, so let's do that first, I will be starting
with this one. So as you can see,
the texts written over here is with
black color only. So we will be using
a black layer. We do not need to create
a new layer for this. We can just select the mask and double-click on this
alpha DeWalt eight. Scale it up according
to the size over here. Then just stamp it up. And you can see we have the
sticker appearing over here. But you will notice
that it looks kind of weird because in the photo also, you can see between this surface
and this tick over here. We also have another
little paper like surface that we do not have
created in our own models. So let's add that now. It is kind of a yellow
colored surface only, but it is a little bit
lighter than a main color. So we cannot reuse
this layer again. I will just select this
and duplicate this layer. So hit Control C and
Control V. Select the mask, right-click and let's
remove mask for now. I will rename this to
yellow to select the layer, select the base color, and let's make it a
little bit lighter. We just decrease the
saturation to around 0.6. I think rest everything
is just as fine. I'm just rounding
off the values. So 0.12 for the hue saturation
0.6 and value 0.76. I think this color is a little bit lighter
than our main color. Now we can add a
black mask to this. This time instead of using the Alpha or the
paintbrush from over here, we will be using this tool, which we have already worked
with, the polygon tool. And while we are in
the second mode, that is the polygon
field is drag select all of the
phases like this. Now we have something
of this sort. We can select all of the
faces that we want to. Basically, I want all of these phases to have this
particular material. And I will be selecting
them this way. You can just press X and again, select the faces that you do not want to add this material. Alright, so I think this is perfect because we have selected
all the faces this way. You will see at the back also, we will get this
material over here. So that's pretty
handy because as you can see over here
in both of the photos, we have this yellow
colored paper like material between the
sticker and the main body. It is good that we have
added this way. Right? Now. I think our main circle
over here looks fine. Without this layer,
it looks weird. And with this, I think
it looks pretty good. One thing that I want
to explain before proceeding is that you
might be wondering why both sides of the faces were selected when you're masking
out this yellow to layer, as you can see over here. Both of the sides have this yellow to layer over here also. And we have this over here also. We made the selection on
one single side only, but the faces were selected
on both the sides. The reason for this is, let's first select the mask. So the reason for this
is because we were selecting all the
phases by drag, selecting like
this, so forth plus X for the white villa so that
we can select the faces. So your drafts and
acting like this. And whenever you drag
select faces in a mask, all the faces will be selected, even the ones at the back. So if you look at the back now, we can see these spaces are also selected along with deeds. Again, if I select this, press X and make a
selection like this. Now all the faces
are being removed. So they are being removed
from both the sides. Whenever you want to
select the back faces, just align them
properly like this, and make the selection
by dragging out. This is something
you should remember because it can save you a lot of time but also
mess up your work a lot. So whenever we want to
select the back face is also align them
properly like this. Let's say I want to select all the faces over
here on this face, along with the back
face over here. I will just make a
selection like this. If you will go at the back now, you can see now these spaces are also being selected
along with this one. But let's say you do not want
to select the back faces, then you can select
one piece at a time. Let me just show you, let's say I only want you to
select all these top faces, but not the ones at the back. Then what I have to do is I just have to select them like this, like clicking on each
one of them one by one. Now, if we will look
at the bedside, none of the phases are
selected over here, because we made a selection one-click at a time
for one single phase. And that's why only the faces that are clicked over here are selected and not the ones
at the back. And do this. And in our case, we want it to select
both sides of the faces over here also
add over here also. So it worked out perfectly. But let's see what happens
if we only want to select one single side of
the face is over here. Obviously one option is to just select each one of the base one at a time like this
and make a selection. But this is very
slow and tedious. But if you make a selection, then you know what happens. All the phases at the back
would also be selected. So let's say we made a
draft selection like this, and both sides were selected. And now we want to remove all
the phases from this side. Over here. Obviously, as I said earlier, one method would be to
just this x first while the black color and just de-select them one
by one like this. But as I said earlier,
this is very slow. So what is the quick
way to doing this? The quickest way of doing
this is aligning your view in such a way that only one side of the
faces are being selected. So maybe something like
this from the top. Now what you can do is make
a drag selection over here, just on one side of
the model like this. And you can see all of the
phases are now de-selected. While over here, all of
the faces are still there. It is pretty easy. What I
basically did was I've unmuted. For select this tool, press X, make sure to
be in the black color. And I have set up my model, aligned my view in
such a way that only one side of the
phases are being selected. And now I made a draft
selection like this. And yeah, pretty easy. Alright, so let's
not do this because we want the faces
over here also. Now again, let's proceed
with our stickers. So now if we will open
up the reference image, Let's see the next one. So here you can see we have this black color logo and
this black strip over here. And then some stuff
written with white pillar. So first we will be
using the black layer. Let's select the normal. Scale it up a little big. And standard over
here like this. Okay, Nothing really happens
because obviously this is a black color and
in the cases of mass, black means invisible. So press X to switch to white color and now
stamp it over here. We have this. Next what
we can do is search for square and then select
this square rectangle. And if you scroll down, you
can see the size x and y. Let's adjust it in such
a way that we can create this trip over here with
black bachelor degrees, the size Y2, 0.15 maybe. Alright, so I think
that's putting the correct size at
the first trial, lethal just fanfic like this. And maybe we can increase the size a little
bit of the square. Let's see, I think it
looks pretty good. Let's check our reference image I can do is select the
eraser and laziest. It is the law books. And I will increase the size
of the logo a little bit. Make sure to come back and brush and select the devolved Google. Scale it up a little bit. Flips it a little bit
downwards, like this. Yeah, I think that is fine. Next, let's select
the white layer. Because this is a white color, but we have to put this
XR logo with yellow. Let's see how we do that. I will fill in this alpha now. Stanford up over here,
the white color. Now what we can do is first
let's select the eraser tool. Remove the alpha from over here. I think I, by mistakes in it predicts nowadays
the Excel logo. You want to add it
using the yellow color. But the problem now, if I
select the yellow color over here and select the brush tool, then select the XR logo. So now we are in the
yellow color layer. Now if I stamped
it up over here, nothing really happens because our black layer is on top
of the yellow to layer. If I move this on the top, now again, things are messed up. So the only solution for this is that we have to
create a new layer. Now what I will do is I will just select
this yellow layer that is at the
bottom. Duplicate it. So press control C, control V, and move it at the top of the stack of this thicker layer. Now I will select the mask, right-click and remove mask. And let's add a
new mask to this. I had a black mask. Now we have added a team months that already has no information. Now you can easily stamp on
this Excel logo over here. Like this. They're pretty easy. And I think our stickers are almost done now we wait for the
project to autopsy. Alright, let's see
the difference image. We have this one thing
over here that we can add. This. I will again, let's
quickly add a new fill layer, set the color to black. I had a black mask. Let's rename this to black
to select this logo. Over here, it up accordingly. And you stamp it like this. Hold Alt and Shift snap
your view like this. Understand what I
have over here also. Now what I want to do is like
now it kind of looks like, and in the reference image, it looks a little bit in gray. Simon Sinek the field there, and give it a height
value of 0.1. Maybe even more. Let's try this. Try one. Yeah, I think one is fine. Next, I will also
decrease the roughness a little bit of this coin too. Yeah, that's pretty good. I think with this are
stickers are almost done. I think they are all
done. We can now add some stickers
on our own apart. We just make the ligament Beta. First, I will just
select the mask and let's add a blur
filter to this. We just smooth out these
edges a little bit. Drag-and-drop them, know, Theta, we have something of this sort. I will decrease
the intensity 2.1. And yet, this looks nice. Now if you want, you can go
back to the Alpha section. Let's search for the volt. Again. We can
create a new layer. This time, let's just create a paint layer that we
can see the values. I will select this logo. Down over here. I will disable all the channels and just
keep height enabled. So we'll enable high. Let's set this to minus 0.1. And we can stand up a loop
over here also like this. This also I think, adds
a nice bit of detail. This way you can add different stickers
all over the model. Not only these Alpha, you can search for any of
the alphas from over here, like maybe an ad or
something like that. We'll add some more
details into your model. If you will go back to
the reference image. We have something like this over here on this part of the model. If you want, we can
create this also. Alright, so let's just
quickly do this from leak. So let's minimize the
reference image now. And the first thing
that I will do is we have this layer one over here
that we created just now. The DeWalt Dove over here. I will move this out of
the stickers folder. Let's collapse the
stickers folder. And we have this
older height layer. All these grips and
everything that we created. I will create a new
folder and just drop both of these layers
into the new folder. Rename this folder to height, that we have everything
properly organized. We can rename this
layer to reward logo. Alright, so now we have to
create this stuff over here. This. So for this, we need to add
a couple of more failures. So first I will just add
a field day with me. Only enable the height channels. So hold Alt and
select the height. Set the height value to 0.1. Let's start a black
mask to this. And let's see search
for spread in the alphas and select this one. Now, right now, I'm creating
these lines over here. Let's adjust the
x value. I think. Yeah. I will check it around
going to maybe. Yeah, I think
that's pretty good. But before that just enabled symmetry so that it is
added to both the sides. Let's see, I want to add
this around the middle, only somewhere around here. You can see it is being
added to both the sides. And let's add one like this
and another one over here. I think this is pretty good. Now I will just select the
mask and add a filter to it. And you'll will be
using a Bevel filter. Just smoothing it
out a little bit. Yeah, I think that
is pretty good. You can see the bevel
trade that is doing. It just smoothen out
the edges a little bit. Next, let's create
another layer. This time we only need the color channel along
with the high channel. Because now we are creating
this yellow box over here. So I will set the
color to yellow. But before that, let's
add a black mask. Select the layer now
for the base color, Let's just click on
this color picker. And we can color
pick from over here. I think I will set the
height to negative or 0.1. Now let's get back to the mask. Again. We will be using
the square alpha only increase of x now to one and decrease the y
to around 0.8, I think. Let's see 0.7. Yeah, I
think this is perfect. Stamp it up over here like this. Now what we can do is again, we can add a bevel filter. Because if you see over here, the edges are smoothened
out a little bit. Let's try doing that. What I will do first is
let's just undo everything. And I will decrease the size
of my square a little bit. That we have, a
little bit of space. We use the bevel feta I
disliked will be fine. Now again, add a freedom. Yeah, I think this is fine. Their sympathy with
smoothing a little bit. Yeah, I think
that's pretty good. So now we have to be in
this last thing over here, this negative net-like things. So we can just basically
use a paint layer for this. So instead of adding
a new paint layer, I will be using
this paint there. That is for this DeWalt logo. Enable the height and the
metallic along with the normal. Instead of roughness, I have
enabled all the channels. The Lexi first, I will
enable this from over here. And we will be using
these pictures. Normally textures will drag and drop this texture
onto the normal, can. Remove this alpha first. We really don't need
this right now. We're into the alpha
section, search for shape. And we have this circle. This is what we will be using. First, we need to set
the metallic to one. And now if I stamp it over here, we will see that the color is still appearing to be yellow. The color is not white. And the reason for this is because the yellow layer is on top of the
divorce double layer. Move it on the top like this. And now if you will
stamp it over here, now we have the white color
that we have selected. Let's make it a
little bit darker. And yeah, I think
this is pretty good. Now we can disable the symmetry. Now let's collapse
the height folder. And now we basically have
completed the texturing of a drill model that we have organized all the textures
into different folders for us, we have the yellow plastic, then the black plastic. Then we used a
couple of materials, the rubber and the iron. Then utilize the height channels to add some more information. Let's move it over here. And at last, we
added some stickers, the finishing touches
to our model. And I think now it
looks pretty good. Again, I will suggest
that you should experiment with all these
things a little bit. You can maybe add a couple of
more alphas here and there, make it even more detail. But I think I've
covered all the basics that you will need to texture your own models and create realistic stuff in
substance painter. I think this is it for the
texturing of the real model. Let's save your projects. And in the next
lecture, we will be exporting all our
textures into Blender. We have already done this with the fire
extinguisher model, but let's do it once again
with the grill model also and see how our
modern loops in Blender. Anyway, watching
in the next one.
39. Exporting Textures to Blender: Hello and welcome guys. So now the texturing is
done for our model. So in this lecture we will be exporting our
textures to blend up. Alright, so we have already done this for the fire
extinguisher model, but let's do it again
for the real-world. So just radically press
Control Shift and E. And now click over here and let's select
the output directory first. The resources folder in
substance painter textures. Let's create a new folder. And I will leave this
as drilled in here. Listen, create
another folder for blender and hit Select Folder. Next, let's select
the output Template. Like Blender principle,
VHDL file type will be PNG and 16-bits size, I think for k would
be good enough. Alright, so these were all the settings that
we have to make. Everything is pretty
much fine now, we can just hit Export and
wait for the export to finish. Alright, so the export is done. Now, let's cancel this, open up our resources folder. You can check the
textures over here. All of them have appeared. Go into the blender files and let's open up brilliant
or school start. Alright, so the blender file
is opened up and again, I will create a copy of this. So go over here in the File, Save As, and let's save this one as really
underscore final. Alright, let's go into
the shadings tab now. While the brilliant
material is selected, because we only have a single material in the drill model. I will open up the textures now and just drag and
drop them one by 1. First, the base color. Let's go into the rendered view or the Viewport Shading mode. Connect the base color. It is looking pretty good. Next, we will be
bringing the metallic. Change this to non-color, now connected to the
metallic channel. Then we have a roughness map. All this stuff we
have already done. We are doing it once again
fall and we'll model. So that's why I'm
not explaining much, just quickly going
through it. Alright? After this we have a normal
map and the displacement. So first set this to non-color. Let's press Shift a and
add a normal map node. Both of these and then connect the normal map to
the normal channel. Alright, so the last one is the displacement to
non-color, the shifting. And let's add a
displacement node, the color to the height, and now the displacement,
the displacement. And I will just set
the scale to 0.1 as we did for the fire
extinguisher model. So now all the textures
are now connected. We just need to add
the mapping node now to select them, the
first one, base color, press Control T, and just connect the vector to the vector of
all the textures. Alright, so the texture is completely added now and
our material is complete. Let's save our blender file
and come back to the layout. Now we can head over
to the render view. Obviously, right now
no lights are added, so it would be pretty dark. Red shift a and we can
simply add a point light. You can increase the intensity
from over here to 500. And now I would suggest you guys to set up the lights
according to you. You can create a basic
lighting setup like this. One at the back of
the room light. You can maybe increase the power for the back leg or
something like that. So I'm basically just
doing some random stuff, adding some lights
here and there. And trying to create something. You can do all of these stuff according to your preference. What we can do next is we can basically add a camera,
so press shifting. And let's add a camera. Now press Control Alt and 0 over here in the View tab
and enable camera to view. Now you can adjust your
camera accordingly. Disabled it. So now
the camera is fixed. You can change stuff like the solution and all
that from over here. Like if you want, we can
increase the resolution to 144 TP so that the
vendors are more clear. All the Render Settings you can change from over
here on this tab, like the sample amount
denoising and all that stuff. Alright, so I think this
pretty much we have added our pictures to Blender. And now we can
just quickly press F5 to see your rendered image. And I will just skip the video when the
render is done now. Alright guys, so the
render is finished. Now you can see
all these details over here of our texture. And I think our models and the textures came
out pretty good. I think it looks really nice. Obviously the lighting is
not that great right now. So you can spend some
more time with it and create a nice
looking lighting setup. I have a very basic lighting and it does not look that nice. But yeah, I would suggest you guys to spend some
more time with it. With this, we are done
with the texturing of our drill model also, and we finally exported
our textures to blend up. I will not be showing you how we will export this
to Unreal Engine because we have
already done this with the fire
extinguisher model. And I don't think
there is any point in showing you guys all those
same things again and again. So yeah, let's finish up this
section of our course now, we are done with the
texturing and we have finally successfully
exploited all our textures. So yeah guys, I think this
is it for this section. Thank you for watching. I'll
see you in the next one.
40. Exporting the Wood Textures: Hello and welcome guys. So now we're finished
with our main course and we will be starting
with the bonus section. This section is mainly
for the stuff that we're not able to be the
part of the Marine Corps. Like start off,
we will learn how to create a realistic
wood material. We will learn the use of MSF channel and some
topics that were left in our main boards like anchor points, what
prediction, etc. We will be learning a lot. So to start, let's just
create a new project. And in this first lecture, we will be creating
the Woodmont area. So go over to phi, it new for creating
this good material, I have prepared a table model. So you can go over to File, click Select, and select
this wooden table FBX file. Now the rest of the settings
are pretty much fine. Just hit Okay. And we
have this sort of tables, so we will be now creating
a Woodmont idiot. So first I will just
go over here with Lee and enable importantly
anti-aliasing. And the next step is obviously
you bake the mishmash. You can see over
here we just have one text set, the
default material. I think I forgot to change the name of the material
while we were in blender. You just double-click over
here and rename this to good. Alright, now I will
hit big mesh maps, set the size to poke. It, enables both
of these options and also set the anti-aliasing
to four-by-four. All right, now let's just sit back and wait for
the bank to finish. Alright guys, so the
bakers and now hit Okay, and quickly check
your margin for any kind of baking
or shading issues. So I don't think there are any. So now we can start with the
creating of wood material. Go back to the Layers tab and let's remove this layer one. For the base material, I will be basically using
this good American JD. I think this is a pretty good
base material for a word. Just drag and drop it like this. Alright, so the first thing that I will do is
as you can see, all the fibers are
lined up this way. I will set the rotation to 90. The texture lines are a
little bit better like this. You see, this looks
much better than this. Alright, Next I will
increase the roughness because right now the
mood is pretty shiny. I will increase the
roughness to around 0.6. Alright, so now I want to make the world a little
bit darker in color. So I will just select the color and adding a darker color
for the saturation, I will set it to 0.667. And for the value I
will set it around 0.4. Yeah, that's nice. You can open up these
technical parameters. As you can see, the
height information is looking too much right now. If you scroll down over here, you will find this
height range option. Set this to 0.01. Now
you will see that the height value is not
that visible. Next dive in. Let's see, I will decrease
the luminosity a little bit, make it a little
bit more darker. Around 0.45 item would be fine. Then we can also decrease
the contrast a little bit. Yeah, pretty nice. Let's also degrees of saturation to 0.45. And yeah, I think
this looks fine because I want to go for
a data with material. That's why I have made
all of these settings because earlier it was
really, really bright. Alright, after this,
I will just go over here and try to adjust the
offset of the texture. Will have a little
bit of more of these darker areas
over my wooden table. I think this looks nicer. I will just set
the offset to 0.2. Next, we'll head over to
your resources folder. In the texture folder, you will find this new
wooden table folder. Just select all
of these textures and now drag and drop
them into the shelf. As you can see, these
three architectures, but this one would, would plants underscore
alpha, this one is alpha. So make sure to just
select this one as alpha and risk-free as textures. Now go over here, select
the project and hit Import. Also before
proceeding, Let's just quickly see what
projects to just hit Control S. And I will save it in the
tutorial directory. I will save this as wounding. They will find it. Alright. Now create a new fill layer and drag and drop this texture. Wood planks texture over
the base color like this. Who have something of this sort. What we can do now
is we can disable all of the channels
except the color channel. We will be using this layer as an overlay layer to
add some detail. We'll just rename
this to overlay. Basically what we can do is first let's increase the tiling. Yeah, that's pretty good. And I will just set
the opacity now to 25. Now you can see this overlay adds a lot of details
to our texture. And it is already looking
much better as you can see. Also one more thing
that I want to do is we did this for the
fire extinguisher. I will just improve the
colors a little bit and set the color space to ACEs like we did for the fire
extinguisher model. I think for what to do
it for the bill model, but yeah, let's just
quickly do it for this one. So enabled activate
post effects, enabled tone mapping and
set the function to log. Next, enabled activate
color profile and select the color profile. Aces underscore UE for log. Alright, so now I
think I've alerts are much more brighter
and nice-looking. Alright, so I think I would
overlay layer is fine. We really don't have to do much. I will now add a new layer, and this can be a
dirt layer as always. Let's rename this to dust, the roughness to around 0.8 IT and base color to obviously
adaptable like this. Add a black mask. And the mask that I will
be using is this one. Edges blur. Drag and drop it
over here like this. And we have something like this. It looks pretty
good, but I think it makes a lot more darker. So select the mask
editor and just decrease the global balance around 0.3, I think would be really good. Yeah, this is certain and still adds a
little bit of dust. Alright, next, I will add a little bit of edge
damage over here. For that, I will just duplicate this would overlay layer
selected press control C control V. Let's place it
on top of the dust layer. I will rename these two edges. And let's just say
the opacity to 100. Alright, let's see, I will
add a black mass to this. Next, let's add the generator. So this time the
generator that I will be using is a masquerade as simple. As soon as you do
that, you can see that the edges are
maxed out now. So now we will just adjust the balance and
contrast a little bit. Mainly I will only be adjusting the contrast, so
let's increase it. You'll see, as I keep on
increasing, the contrast, effect becomes more
compact and shifts towards the edges only while earlier
it was more spread out. Let's increase it to around 0.6. I think. You can also hold Alt and click
over this edge mask. Only view the mask like this. So you can see it has masked out the complete edge like this. Let's go back to the material over here and go
back to material. Alright, so next
what we can do is come down over here and
provide a texture input. Search for a range map
in the texture section. Because right now, if
you will see the mask, it basically does
not have any kind of details or
organic field to it. It has just masked out the complete edges
in a very flat way. We can maybe drag and drop
any of the grunge map. Let's see. Maybe this one. Now go over here to the top and increase the texture
opacity to one. Don't want to increase
it this much, so I will maybe set
it around 0.25 m. Now, adding now what edge
view looks much better. It has a bit of
organic feel to it. We can now even increase
the global balance a little bit to compensate for it. Alright, now let's press M
and view back the material. I think now it
looks pretty nice. Already, I think are good material is starting
to look pretty good. You can see we started out with this basic looking
good base layer, then we added overlay, then some dust, and then
finally some edge details. Alright, so let's keep
on moving further now. Next I will just again
select this layer duplicate. It would be acting as
a volunteer layer. So I will just double-click
and rename this too. We'll click over here and
remove the mask editor. This time, let's
add a fill layer. And the grunge layer that
I will be using is grunge. Raci. This one drag and
drop it over here. Let's hold Alt and click over the mask to see how it looks. I think it's pretty
huge right now. So let's increase
the dial into three. Next, let's decrease the
balance. 0.3, I think. Yeah, that looks very nice. Now press M to
view the material. And now you can see
on all these areas, it has added a
little bit of dirt. I think it looks really nice. So now our material
is almost done. We just need to add a
couple of more layers. We'll first add a normal layer, add a fill layer, and just
enable the normal channels. So hold Alt and select the
normal channel like this. Now let's head over
to the textures that we imported in the
start of the video. So to access them easily, you can just go over here in all libraries and
select project. And here are those textures. So now I will drag and drop. This would underscore normal. Over here. You can see what kind of information it adds
to your model. If you enable and
disable this layer. So now I will just increase the tiling of this normal maps. So set the tiling
to around three. Or maybe let's try to, I think yeah, I think
two is pretty good. So it makes it look even more like a realistic
wood material. As you can see over here, we have all this
novel information. You can enable and disable the layer and check
for yourself. What we can do first is
let's rename this to normal. And also I want to reduce the intensity of this
normal map information. So we can go over here and reduce the opacity
of this layer. But if you set this to 0, you will see that nothing
really happens because currently In the
base color channels, so click over here and
change it to normal. And now you can
reduce the opacity. You will see now as you keep on decreasing it and set it to 0, the normal information is
completely disappeared. Now, let's set it around 50. Yeah, I think this adds a
certain bit of information, which looks really nice. Now we only have to add one last layer for adding
some more harsh damages. So click on the Fill Layer icon and let's add a new fill layer. I will be using this one
would underscore albedo and drag and drop it on
the base color. Like this. We can maybe increase the
roughness to around 0.8. And also let's disable
the channels such as metal and normal
because you don't need it. Height we will be
using later on. So first let's add
a black mass to this and rename this to damage. Also, let's go back
to the base color now and now add a black
mass to this. Alright, so the way we
will be using this mask is basically instead of adding a smart mask
or a field layer, we will be painting on
it like this on our own. But what we do is
we will click on this rejection I can
prediction tool. I mean, you will be using the Alpha image that we just imported into Substance Painter. So just go over to
the Alpha section. And this one. We'll just scroll down and
drag and drop it over here. Alright, so now we have
something like this. First set it to orthographic, hold Alt and Shift and
let it snap it this way. Now if you remember to rotate or move the image in
the prediction tool, we first need to press S, then use your
right-click to scale it down and I want to rotate it. So use your left-click
to rotate it like this. And then hold Shift
to snap it like this. Alright, now what we can do is basically scale
it up a little bit. And we can create damages
over here like this. Make sure to set the
hardness to one. Let's quickly go back to the brush tool to
see how it looks. Right now it does
not look that great, but we can go over here, select the fill layer and just give it a height
of around 0.5, or maybe a little
bit less around 0.2. I think now it
looks pretty good. Set this back to perspective. I think instead of giving
it a positive height value, we need to give it a negative. Yeah. Set this to negative or 0.3. Maybe. This looks really good. What we can do now is
select the mask again, select the eraser tool, and let's erase some of the
extra stuff from over here, like this and this. Alright, let's go
back to the brush to remove some of the areas to make it a little
bit smoother. Yeah, this looks pretty good. I think. Let's
proceed further now. We can select the mask, select the prediction tool, and let's add a couple of
more damages like this only. We can add damages
to different parts of the model like
over here also. Decrease the size, rotate it. And a couple of
damages like this. Set this back to orthographic so that it is easier
to work with. Obviously, we don't
want all this over here at the top to set
this back to black. Remove it like
this. Really easy. I think it is just a
bit of work to do. But yeah, it is
definitely worth it to make your good material
look even better. You can add all these small
damages to different parts of the model S and
rotate it once again. Feeling like the height
values looking just too much. So select the fill
their back again. And let's set it to negative of 0.15 so that it is
a bit more subtle. Alright, so now I will
keep on moving further. And what I suggest you
guys to do is you don't really have to follow
me exactly for this. You can just experiment
with this image a little bit and add the
damage according to you. Now I will just keep on
adding the damage without really talking that much so
that I can work quickly. Alright? Alright guys, so I think this much is enough for the demonstration purposes. Obviously, it is not that
perfect in terms of details. It looks fine, but definitely I can do a
better job than this. But right now, just for the
sake of recording the video, I have added a lot
of damage around the table and I think it looks
really nice and organic. So yeah, I will suggest you guys to do it according to yourself, experiment with this image. And you can not only
use this immediately, you can use any kind of brushes available to you is
Substance Painter, and use them as well to create the best looking possible
damaged for this table. But yeah, I think
this much is enough. Let me just quickly add a couple of more
damages here and there. And then we will
call it on this. Alright, so I think
this is pretty good. We are done with
our material now. And in the next video, I
will show you how you can export all these textures
once again to blend up. Alright, so thank you
guys for watching. I'll see you in the next one.
41. Creating the Wood Material Part 2: Hello and welcome back. So now that we're done
with our bone material, we will be exporting
our textures from Substance Painter and
importing them to Blender. Now, first I will just select all of these
layers over here. And let's group them into a single folder and rename
this folder to put. Alright, so I think by
now it is pretty easy for you guys to export and
import stuff here and there. So let's just quickly
press Control Shift and E. You open up this export window. I will head over to my
tutorial directory and we click create a new
folder over here. David. It's Select Folder. Output template I will
be selecting as blender. File type would be
PNG and 16-bits size. Obviously I wouldn't
be going for, for K, but you can size I will be
going for for k. Alright, so rest everything
is pretty much okay. Just hit Export now. Alright guys, so the export
is going now so quickly, let's open up our blender fight. From over here, we have this routing table
underscore final. Let's head over to
the shading tab. Now. We have this single
material over here, over our complete wooden table. So I will rename this to good. Alright, so now let's just import our
textures one-by-one. Open up the substance
painter textures. And here we have
all our textures. So drag-and-drop the base color. Connect these two
base color over here. Then we can bring
in the metallic. Obviously don't forget to
change this to non-color. Then we have a roughness map. And the last two are
normal and a displacement. The first let's connect
denominator app. So press Shift a and we
need to add a nominal map. Note the color to
the color over here, then a nominal to
the normal channel. Make sure to change
this to non-color. And the last one
is displacement. We need to connect it over here. Press Shift a again, let's
add a displacement node. Connect this over
here like this, and connect the
color to the height. And j is to not get them. All right, So all done now, we just need to add
a mapping note to select this base
color press Control D. Now we have the snapping node and
now disconnect all of the inputs and outputs. Alright, so the
material is done now, we can head over to the layout tab and select the rendered
view from over here. So right now as you can see, it is currently set to EV. The first, let's
just add a light, press Shift a and a point light. And you will notice
right now that the render engine and everything
is really responsive. And the reason for
that is because the render engine is
currently set to EV, which is a lot more
responsive than cycles. And basically it is
real-time engine. So that's why. But it is not that realistic in terms of lighting
and everything. Now to get more
realistic results, we can just set this
to overhear cycles. And now you will see you're
starting to lag a little bit, because now I've changed
the rendering it. Alright, so set this
from CPU to GPU. If you have a GPU, can make use of it and it will be much quicker on your GPU. You can also enable the
noise so that it will add a little bit of viewport
de-noising to your textures. And I think our table
looks really nice. Wood material came
out pretty good. You can add a couple of
lights here and there to just make it a little
bit more visible. Alright, now we can
basically add a camera, Shift a, and let's add a camera. It's Control Alt and 0. You can open this up and select View and
enable camera to view right to it just to view
according to you and now disable it so that
it remains fixed. Alright, so now all the lighting setup and cameras and
everything is done. One thing that I want to change is I will just select this and maybe what we did for displacement on
all the other materials. I will set this to 0.1 and now go back to Layout 0 on your numpad to
view the camera view. And now let's just quickly press F2 L will see are
rendered image. And see how it looks. Let's wait for the
render to finish. Alright guys, so
the render is done. Now I can zoom in and
see all these details. If you're feeling
like their resolution is a little bit too
low for your taste. And the details are not
even that much visible. What you can do is
basically go back over here and increase the
resolution from over here, and then you will have more
details in your render. But for now I think our
material looks really good. You can also save your
renders from over here, go over to image and hit
Save so that you can maybe post them somewhere
or take them to Photoshop to edit
them even more. I think with this,
we are done with our creation of
the Woodmont area. So let's close this, save our Blender files and thank you for watching. I will see
you in the next one.
42. Emissive Channel: Welcome guys. In this lecture, I will be showing you how
we can use the MSF channel. So basically we have
different channels divided up for different tasks. Like we have the base color for the color information than the roughness channel
for roughness values, and so on and so forth. Later on in the course, we also learned about the
opacity map that decides what parts of the texture would be
transparent or visible. And now we will be
going over the MAC, mac that decides the area of the texture that
would be emitting light. So this channel is really useful when you
have two textures, something that emits light, like maybe a bulb or tube
light or any kind of screen, monitor, mobile phone, etc. So to start, I will just
open up my drill model only. I really don't have anything
texture that emits light. I will just show
you how we can use the MSH channel and then you
can use it in your projects. So basically what
I will do is just open up this yellow
plastic folder, select the height layer, and let's add a new
fill layer first. Alright, so we will just
basically make this layer MAC just to see how the emissive channel
works and how we can do that. Alright, so first we need to add the emissive channel
into our shader. So go over to the
texture set settings. And in the channels section, we can hit on this plus icon and just go ahead and
add the MSF channel. Now you can see as
soon as you do that, we have a new MSF channel
over here in our fill layer. So we can use this to
create them as if channels. So go back to the layers
and let's enable this. But we can do is we can disable
all of the other channels except them is if channel
and rename this to emissive. Now you can just click over here and select any
color you want. So let's go for something
yellowish only. And right now it
looks kind of weird, but I'm just doing it to demonstrate how we can
use them as a channel. So obviously it does not
look that great or not drill model because
model is not really MAC, but yeah, we're
just learning how we can use the
different channels. Alright, so now basically
everything is done. We just need to
export our textures back and check them in Blender. So press control, shift and E. And basically all the
settings are already done. We just need to hit
Export. Export is done. Now, you can open up your resources folder and the textures folder
in the drill machine. You will find this
emission map over here. So now we can use this in Blender to drive our
emission channel. So go back to Blender files and let's open up the
grill final model. Head over to the shading tab. Wait for the textures to load. Alright, what I will do is I will just go to
the rendered view. Alright, so everything
is loaded up. Now what we can do is we have these three points
lights over here. So what you need to
do is just disabled all the lights in your
scene just for now, like this is disabled
all of them. So you're seeing is pretty
dark, just like this. Next word you need to do
is open up this folder. The one with all your textures. And just drag and drop
this emission map onto your material connected
to the vector like this. Somewhere along here. For now. Let's change this to non-color. Now, connect the color channel to the emission over
here like this. And wait for it to load. Now as soon as you
do that, you will see it looks
something like this. It is not really looking like
as if it's emitting light, but it actually is
emitting light. So to showcase this,
just press Shift eight, add a plane, and let's
place the plane over here. This select the material again. And under the emission option, you will see the
emission strength. Increase in emissions strength. You will see your texture has started to
grow a little bit. And you can see it is
costing this light all around the area over our plane
that we have just added. So basically this is the
use of the MSF channel. Obviously, right now
it looks really weird because what kinda drill
every slide like this. But yeah, if you're
creating models like maybe a mobile screen
or a monitor or tube, lightbulbs, anything like that. You can use them,
receive channels for those kinds of models. And it will look really,
really great service. This is the use of
the message channel. Also one more thing that
I want to mention is make sure to set the
color space to sRGB only. Because if you set
this to normal, you will see the color
of your light is gone now and it is basically
white colored only. Just make sure to remember this, that the color space for
the MEC map is SRGB. Alright, so let's go back
to Substance Painter. And you can do a lot of
things with this MSF channel. Only. Basically all
the things that we learned when we were
texturing our model, like adding a mask to
it or adding any kind of like adding a mass to it or adding any
kind of smart material. Everything totally
work with this also. Like, let's just do it quickly. We can we be, let's
try doing heavy, and now let's select
the grunge maps, try to adjust it a little bit. If we even export
something like this, the light would be emitted from all these small dirt
particles or grungy areas. As you can see, it would be automatically
updated in Blender. Just switch back
to this mode first Viewport Shading and now go
back to the rendered view. You will see now your
texture is updated. It looks something like this. Obviously it looks
really, really weird. But yeah, you can definitely use the MSF channels with all the things that we
have already learned. Let's remove it. Also right-click and remove
the mask from over here. Obviously, you can also change the color of the light
to any color you want. And what we can do is we can also go over here in
the texture section. Let's search for some nice-looking texture
with different colors. Don't really have
anything right now. But even if you like or drop this camo pattern onto
their message channel, you will see if you
export this now, it's Control Shift T
and just hit Export. Go back to Blender and again, refresh it once by going
back to viewport shading. Now back to rendered view. We'll see now it is lighting
up in this camo pattern. Obviously the emissive strength
is too much right now. I think. It looks kind
of weird this way, but yeah, you can
definitely use textures also to use with
the MSF channel. Alright, let's remove this. And yeah, basically this was
it about the MSF channels. They are really, really
useful when you have to picture something
that emits light. I hope you understand
even better now that how we can use
different channels, aside from these five, that are the five basic ones. We have learned about the
opacity and the MAC map. Alright, so I think this
is it for this video. You can delete this MAC
layer and quickly, again, export your drill textures so that they don't really mess up in the
actual blender file. And also make sure to just don't save your blender file when you're closing
the blender file, just don't save it so that
any of these textures that the MAC ones that
you were that we were using just don't
get actually saved up. Alright, so now you can
enable back the point lights. And yeah, this is back
to our original model. And also let's
delete this plane. You can just close it and hit. Don't Save. All right guys. This is it for this video.
Thank you for watching.
43. Anchor Points: Hello and welcome guys. So in this lecture I will
be showing you how we can use anchor points
in Substance Painter. So it is a very useful feature. Alright, so to start off, I will just go into the
file and we will be using this Mi'kmaq
sampled project just to showcase the
anchor points feature. When we were going
over the Effects menu, all these options over here. So we left the anchor point to study in the bonus section. Alright, so the time is now. So let's delete this layer. And to start off, I will just create a pretty basic material. I will drag and drop
iron roof material. And again, I will be
using the rust layer. These two. And now
what I will do is go into the
smart math section. And let's use this. Let's see, I will be using this edges strong scratched this one. So drag and drop it
onto the rest fine layer so that we have
something like this. Alright, next what I want to do is I will add a paint layer. And let's rename this
layer to normal. And I will put this layer in
between of these two layers. I will explain later on why. So just put this
normal paint layer in between the iron
and the rust layer. Alright, so let's scroll down and select the
normal paint layer. Scroll down and I will turn off all the channels except
the normal channel. So if you remember
when we were going through the section
three of our course, we learned about all
these different features. So we also learned
about normal painting. So if you quickly go over
here in the starter assets, let's head to the
all libraries first. And in the texture section, open it up and in the
hard surface section, you will find all these
normal textures that we can use to paint over our model. So maybe let's try this one. So drag and drop it
over here like this. And let's set the
hardness to one. And just paint it
over here like this. 23 times. You can maybe try out some different ones
like this one, or maybe something
else like this. So just stamped 34 of these different
normal map textures. And then I will be showing
you the use of anchor points. Alright, so I think this
image is pretty much enough. So now what I want is I want this rust effect
that is over here. And we are using this mass
to drive that rust effect. We can increase or decrease
the global balance. What I now want is I want this rust effect to
appear over here also on all these edges are the normal map textures
that we just painted. So how can we do that? One obvious way would
be to just click on this mask at a paint layer. And then basically let's
scale it down the brush, give it a hardness of one, and just basically start painting over here
manually like this. Obviously this is very tedious and does
not even look good. It looks really bad. So to do it procedurally
all by itself, by social sprinter only we
will be using anchor points. So let's close this. So the user anchor 0.1. Let's select this
normal paint layer. Go ahead and add an
anchor point like this. The name of this anchor
point is normal. We really don't have any
kind of settings over here. Basically, we have
added an anchor point. Now we can go over to your mask and select the
generator like this. And if you scroll
down over here, you will see this used
micro details option. Set this to true. And as soon as you do that, you will see a couple of
options have appeared. One of them is micro
details menu over here. And the other one, if
you set this to true, you will see these two
options over here, micro nano and micro height as all these information
that we have added, our normal information. So that's why we will be using micro normal. So
click over here. You will see these
anchor points tab go over here and select this
normal anchor point. You can see as soon
as you hover over it, it is highlighted over here. So select this. You will see nothing
really happens, but don't worry first
what we need to do is as soon as you selected this
normal anchor point, you will see the
reference channel. So the reference channel is
currently set to base color, but obviously we want to
use the normal channel. Select the normal channel. And as soon as you do that, you can see all that nicely
massed outermost layer has started to appear on all these edges over the normal map we just
painted. You can see. Now select this
curvature generator and if you open up this
micro details section, you can adjust the curvature
intensity like this. And also if you increase or
decrease of global balance, you can see now you can control all of these
settings at once. Even on these edges
that we just painted right now using a normal
map textures over here. So basically this is the use of anchor points
really, really useful. As you might understand
by now, also, if you open up this
micro details section and you set this to false, this micro normal option. You will see now all
the effects are gone. So make sure this
is set to true. Now, I will show
you another thing. You can go back to your
normal layer and now select any of the normal
map texture from over here. And now if you
paint over a model, you will see automatically
the last effect is starting to show up on your
layer using the smart mask. So we are currently
utilizing the anchor point. This generator is utilizing this anchor point and
providing us with all these details over the normal map textures
that we have just painted. So now you can just try this out with different kinds of
nominal maps like this. And you will see your
cost-effective starting to show up. I think this is really, really
cool and really useful. Alright, so let's
undo this for now. And now what I will show
you is that we can do the same thing with different
types of generators. So let's say, I said this curvature generator
and remove it for now. And this time instead
of using a smart mask, just go over here,
add a generator, and let's select a metallic. So pretty much the same results. Now what we want is we want this first effect that is being added by the
Metal Edge via generator. We want it on all these
edges that we have just painted using the
normal map pictures. Alright, so again,
could do that, just scroll down and you will see micro normal
and micro Height. Select micro normal, select the anchor point,
and select Normal. Again, change base
color to normal. Now nothing really happens. Open up this micro details
section and make sure, as I said earlier, micro
normal is set to true. So again, we have
done the same thing with a different
type of generator. So you will find this
micro normal option in all different
kinds of generators so you can use it with any kind of smart Moscow
generator, anything. So yeah, really, really
good and really useful. Now, you must have noticed that we have the
micro normal option, but we also have the
micro height option. So let's see how we can
use the micro height. I will add another paint layer. So select this normal layer
and add a paint layer. This time, let's
rename this to height. Disabled the normal channel, and we only want to use
the height Shannon. Alright? So what you can do is let's decrease the height value 2.5. Let's set it to negative of 0.5. You can just start painting with your brush like this anywhere. And now what we want is we
want the rust effect to appear on all these things that we are painting using our
height channel. So basically it is
the same process. But now we just have to use the micro height
thing over here. Go back to metal edge view. Select micro height. Go over to anchor point. Okay, we forgot to add the anchor point to
the height layer. To select the height layer, go over here and first
add an anchor point. Now you can go back
to metal edge view, select micro height, and don't select the
normal anchor points, select the height
anchor point like this. I think nothing really happens because we still have
to set this to true. And also come down over here and change the channel from
base color to height. So couple of things
that you must remember and as soon
as you do that, you will see now the rust effect is appearing over here also. You can adjust all these
different settings. And yeah, that's pretty much it. You can increase the
VM level and it will start to affect all
these stuff over here. Also, you can select
your height layer and maybe you can use a brush
also to paint on your model. Like maybe I select this crystal brush and
paint it over here. You can see the rust
effect is still appearing. Let's degrees the hardness. Okay, let's use a
different brush. You can see whenever
you are painting any kind of heart
ICT information, the rust layer is appearing with it because of the anchor point. So basically, yeah,
that is a use of it. Let's now delete both
of these layers. And I will show you
a different kind of way to use anchor points. Basically right now, we were
just using paint layers. But let's say what if
we have a fill layer? I will add a fill layer. And let's just disable
the height channel on it. Set the height value
to negative or 0.1. Name this tooth scratches, maybe rename this
to hide scratches. And this time I will be adding a black mask and add
a fill layer to this. Go into the texture section, and let's search for scratches. And let's just use this one. Grunt scratches, rough,
drag and drop it over here. And now you can see
we have these kind of scratches all over our model. Firstly, select metallic sphere
and I will just decrease the grunge amount so
it is a little bit cleaner so that we
can see properly, alright, come back to
the ground, scratches. And you can see we have this height layer attached
to a mosque and we have, and we're using a failure
that is this growing scratches rough to
control that mask. Like this. You can adjust the
styling and everything. Obviously you already know
about all of this stuff. You can also go back to
your highlight layer and adjust the height
from over here like this. Let's right now set it
to negative of 0.1. So our main use, basically, we want the raster effect to appear on all these
edges over here. All these scratches. Basically, it is pretty
much the same thing. You just need to select the mask this time instead of
selecting the layer. So make sure to select the mask. Go ahead and add anchor point. Go back to metal edge view. And this time you can see both of them are
broken reference because we have deleted
both those layers. So just remove them for now. Set both of them to false. Just to set everything
back to default. Now select micro height, go to anchor points and select this height scratches mask. You will notice that this time we really don't need to select the channel because we are
basically selecting a mask. So already we have selected
the height channel. We don't need to select
a channel over here. So just come up over here in micro details and enable
the micro height. As soon as you do
that, you will see now the rust is appearing
in all those scratches. Obviously it is a
little bit too much, so decrease the
curvature intensity. You can also decrease the height detail
intensity or increasing. Basically we have
this kind of result. Now. We have placed the anchor point and connected it along
with the metallurgy. Or you can come
back to the mask, select the brunch, rough. And now if you decrease
the balance over here, you can now control both
those things at once. You can control the
mask along with the rust effect over here. Yeah, I think very useful. You can set this to try planar. You can basically do all
those normal things. And the rust effect would be still working pretty much fine. I think that is
really, really useful. So now that you
understand the basics of anchor point and
how we can use them, we will be using them
in our drill model now to see how we can implement
them much more properly. So let's delete all
these three layers. Basically, we can just close this project and
open up the project. And what we will be doing
is, if you remember, we painted all these
grip information over here using
the high channels. We've painted all
these grid lines. And over here also, let's say I wanted
to add Dirt in all these corners and crevices of the grip
that we painted. So we can easily use the
anchor points for that. So let's see how we can do that. Let's close this folder and
open up the height folder. And now just quickly
check which layer is responsible for all
these information. So I think it is
this bottom one. Now select the height layer. Select the mask, go over here and basically
add an anchor point. The name is already said. Let's rename this to
maybe grape mask. Now we can add a
layer over here for the dirt on top of
this DeWalt overlayer. So add a fill layer.
And basically now it covers the whole model. So what I will do is
rename this to dust first. Let's add a black mask. And I think I will
just use a generator, Metal Edge, we're generator. Obviously we don't want
this type of results. So what we will be doing
is first we will just quickly set the micro Height, select the anchor point
and select the grip mask. You can see it
highlighted over here. Now just come up here, open up the micro
details section and enable micro height. As soon as you do
that you will see now the dirt is
appearing over here also in between all
these grid lines that we have just painted. You can just set it to true and false to see how it
affects your model. So you can see overall
these areas also. But now, obviously we don't
want the middle-age via generator to appear on all these things like
overhead over here. So what we can do is
basically just decreased the view level and it will be removed from all
the other areas except the I think that is
pretty useful for us. We can maybe set the VM
level 2.25 and degrees of contrast 0 maybe also increase the grungy
amount a little bit. So that we just have
a little bit of dirt here and there
around the edges. And now basically
what you can do is go ahead and set the opacity
to something like ten. And if you enable and
disable this layer, you can see it adds
a bit of vet into our grip information like there is a bit of dirt
collected in there. I think it adds a bit
of value to our model. And it looks really nice. So you have basically
this is how we can use anchor points, but makes sure to use the micro height when
you are using it with height information and use micro normal for
normal inflammation. And one thing that I forgot to mention was if you remember, I placed the normal and
the height layer between the rust and the iron layer when we were working
in the sample project. The reason for this is one
thing that I forgot to mention that is very important rule when using these anchor points. That is, the anchor
point layer must be always below the generator. Let's say if I drag and drop this height layer on
top of the dust layer, you will see that it has
stopped working now. So like an actual anchor. So if you understand
what an actual anchor, basically anger is like a
heavy metal object that we dropped down in water to
stop the ships from moving. So it is always at the
bottom of the sea. So make sure your layer is
always below the generator. So maybe you can
remember it this way because it is
an anchor point, so it will stay always below
the generator like this. Then only it
wouldn't be working. If you move it at the top of
the layer or the generator, then it would stop working. So yeah, basically
just remember this, that the anchor point would always stay below
the generators. So that's why I
placed the normal and the height paint lead
between the rust and the iron layer that
I mentioned earlier, but I forgot to
explain later on. So yeah, I think
this is a nice bit of addition to our model. Maybe you can tone down
the effect a little bit from over here
in the view level, maybe decrease it
a little bit more. But rest of it, I think it
looks really, really great. Alright, so let's just save our substance painter project. And this is it for
Anchor Point guys. Thank you for watching. I will see you in the next one.
 Aniket Rawat, 3D Artist