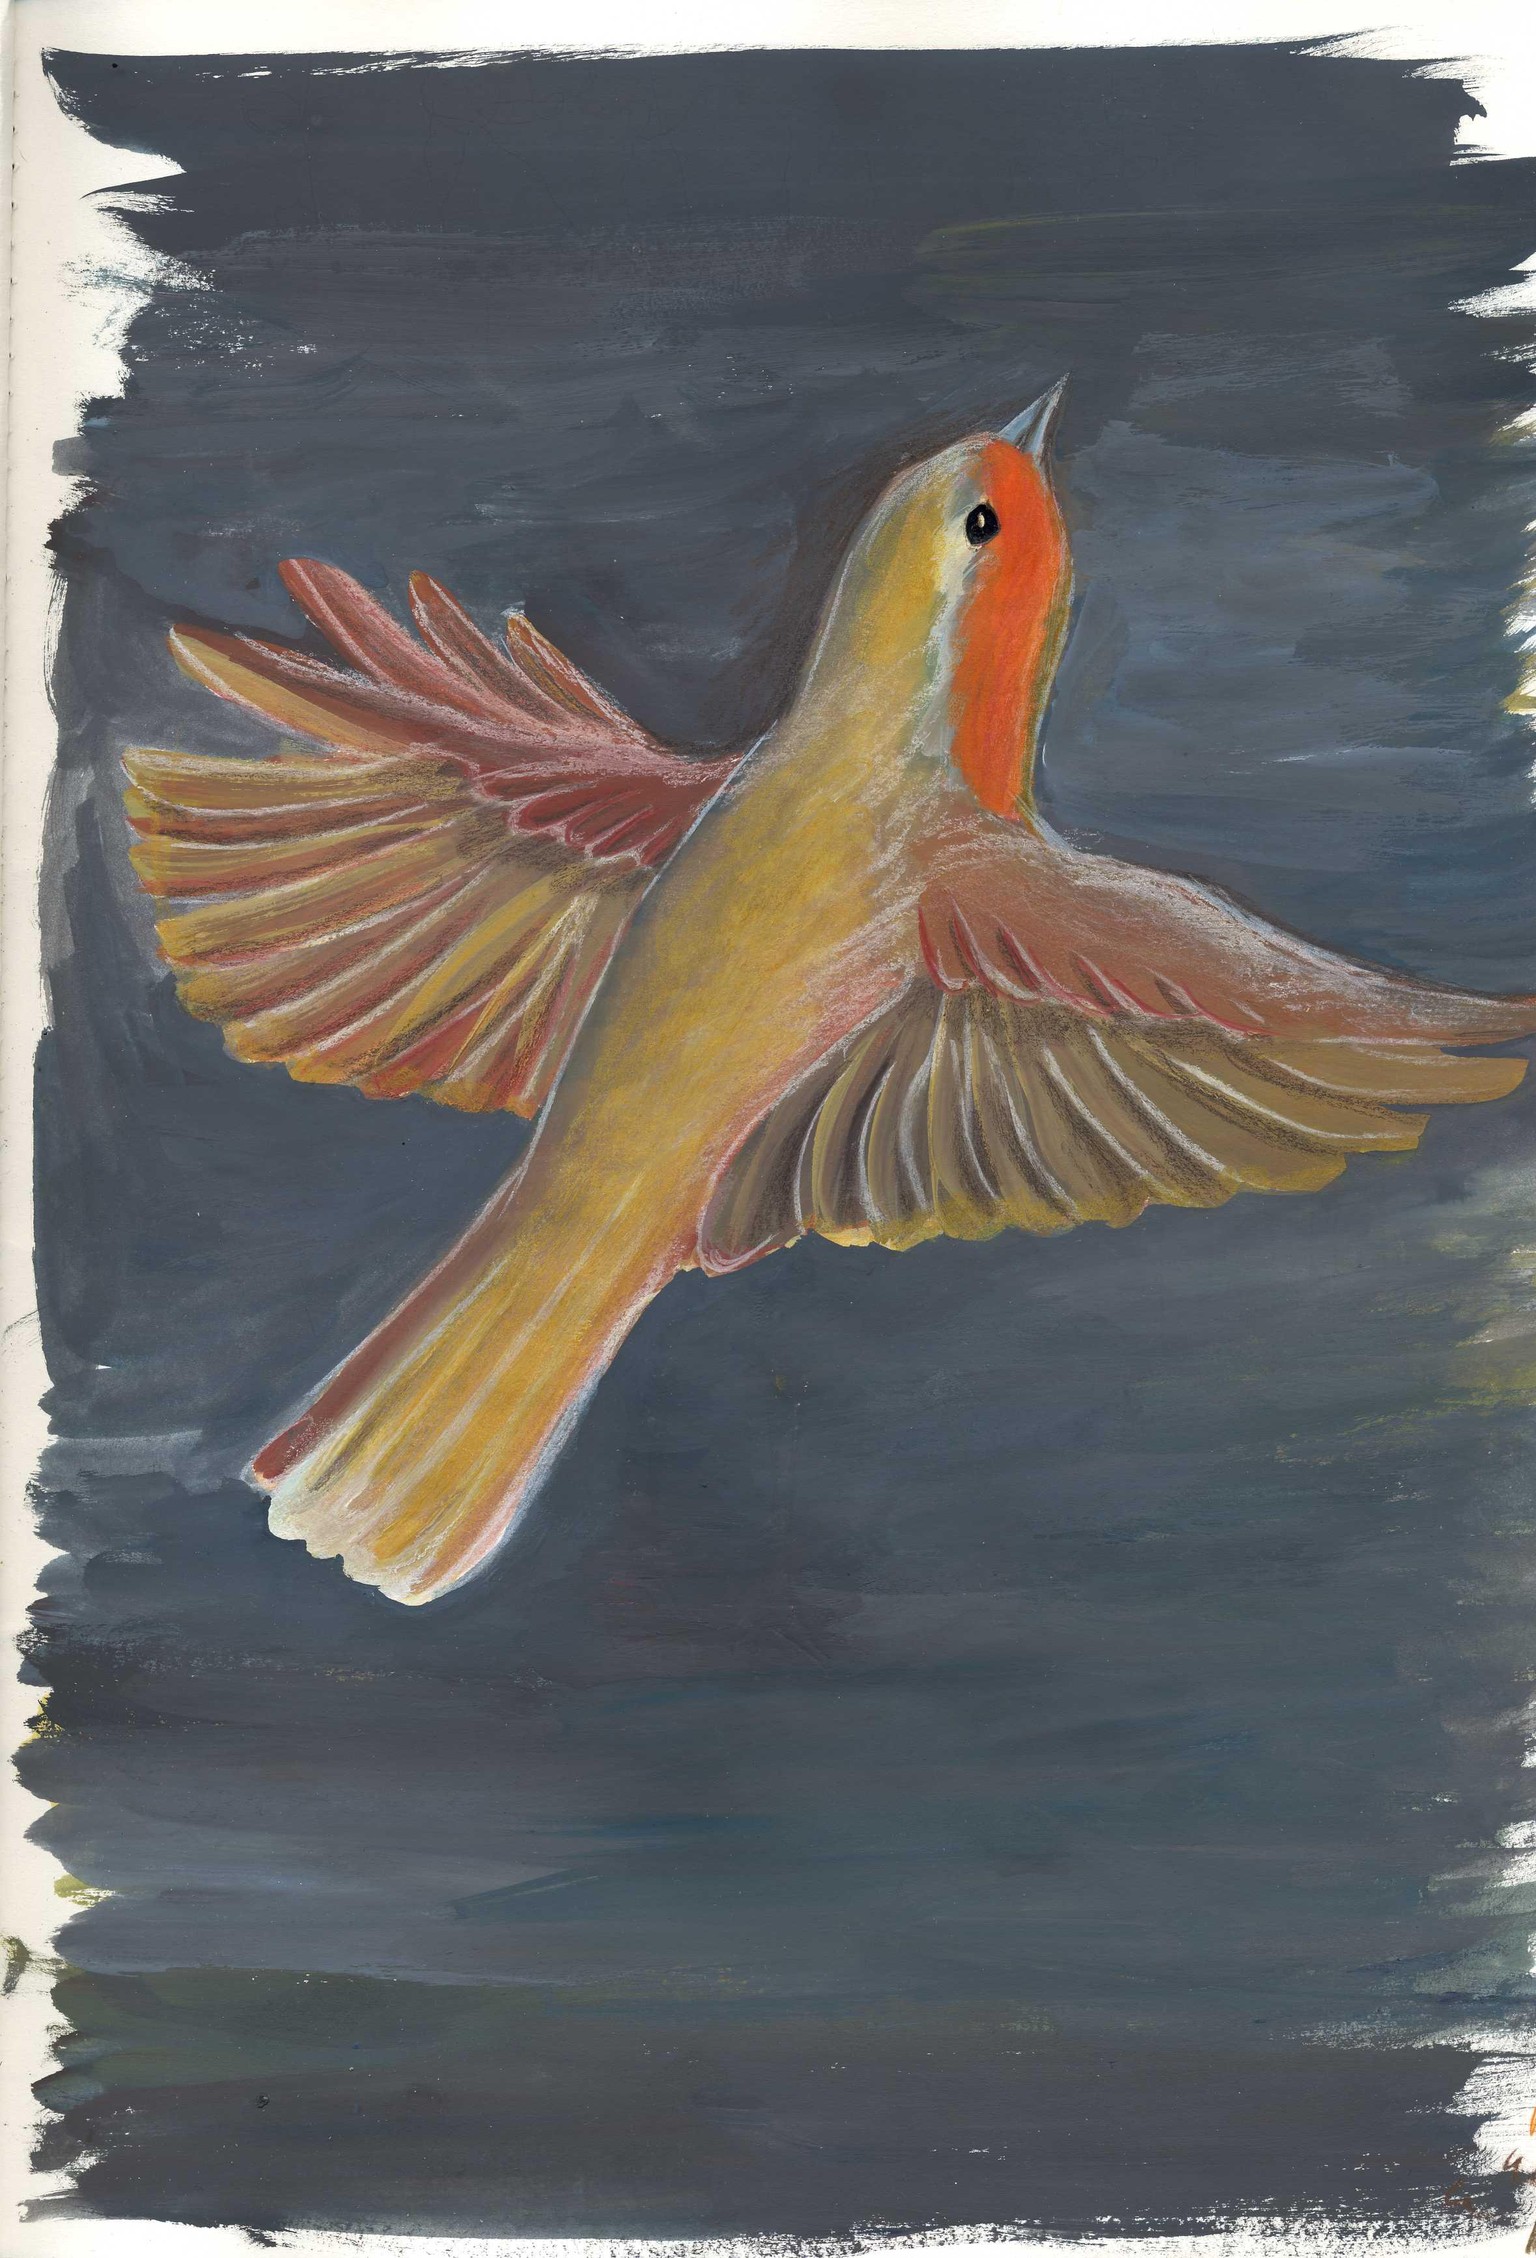
European Robin
Alanna, thank you so so much for your sweet little class! I definitely need this kind of practice because I'm an expert at perfectionism. I enjoyed this process so much. I usually work with watercolors, not gouache, but when I do, it feels so playful to me and it's so forgiving. It's a really kind medium. During this process I really wasn't thinking a lot, I didn't even practice any marks separately, just went with my gut and felt so much joy. And I'm in love with the finished peace. This is the original raw scan:
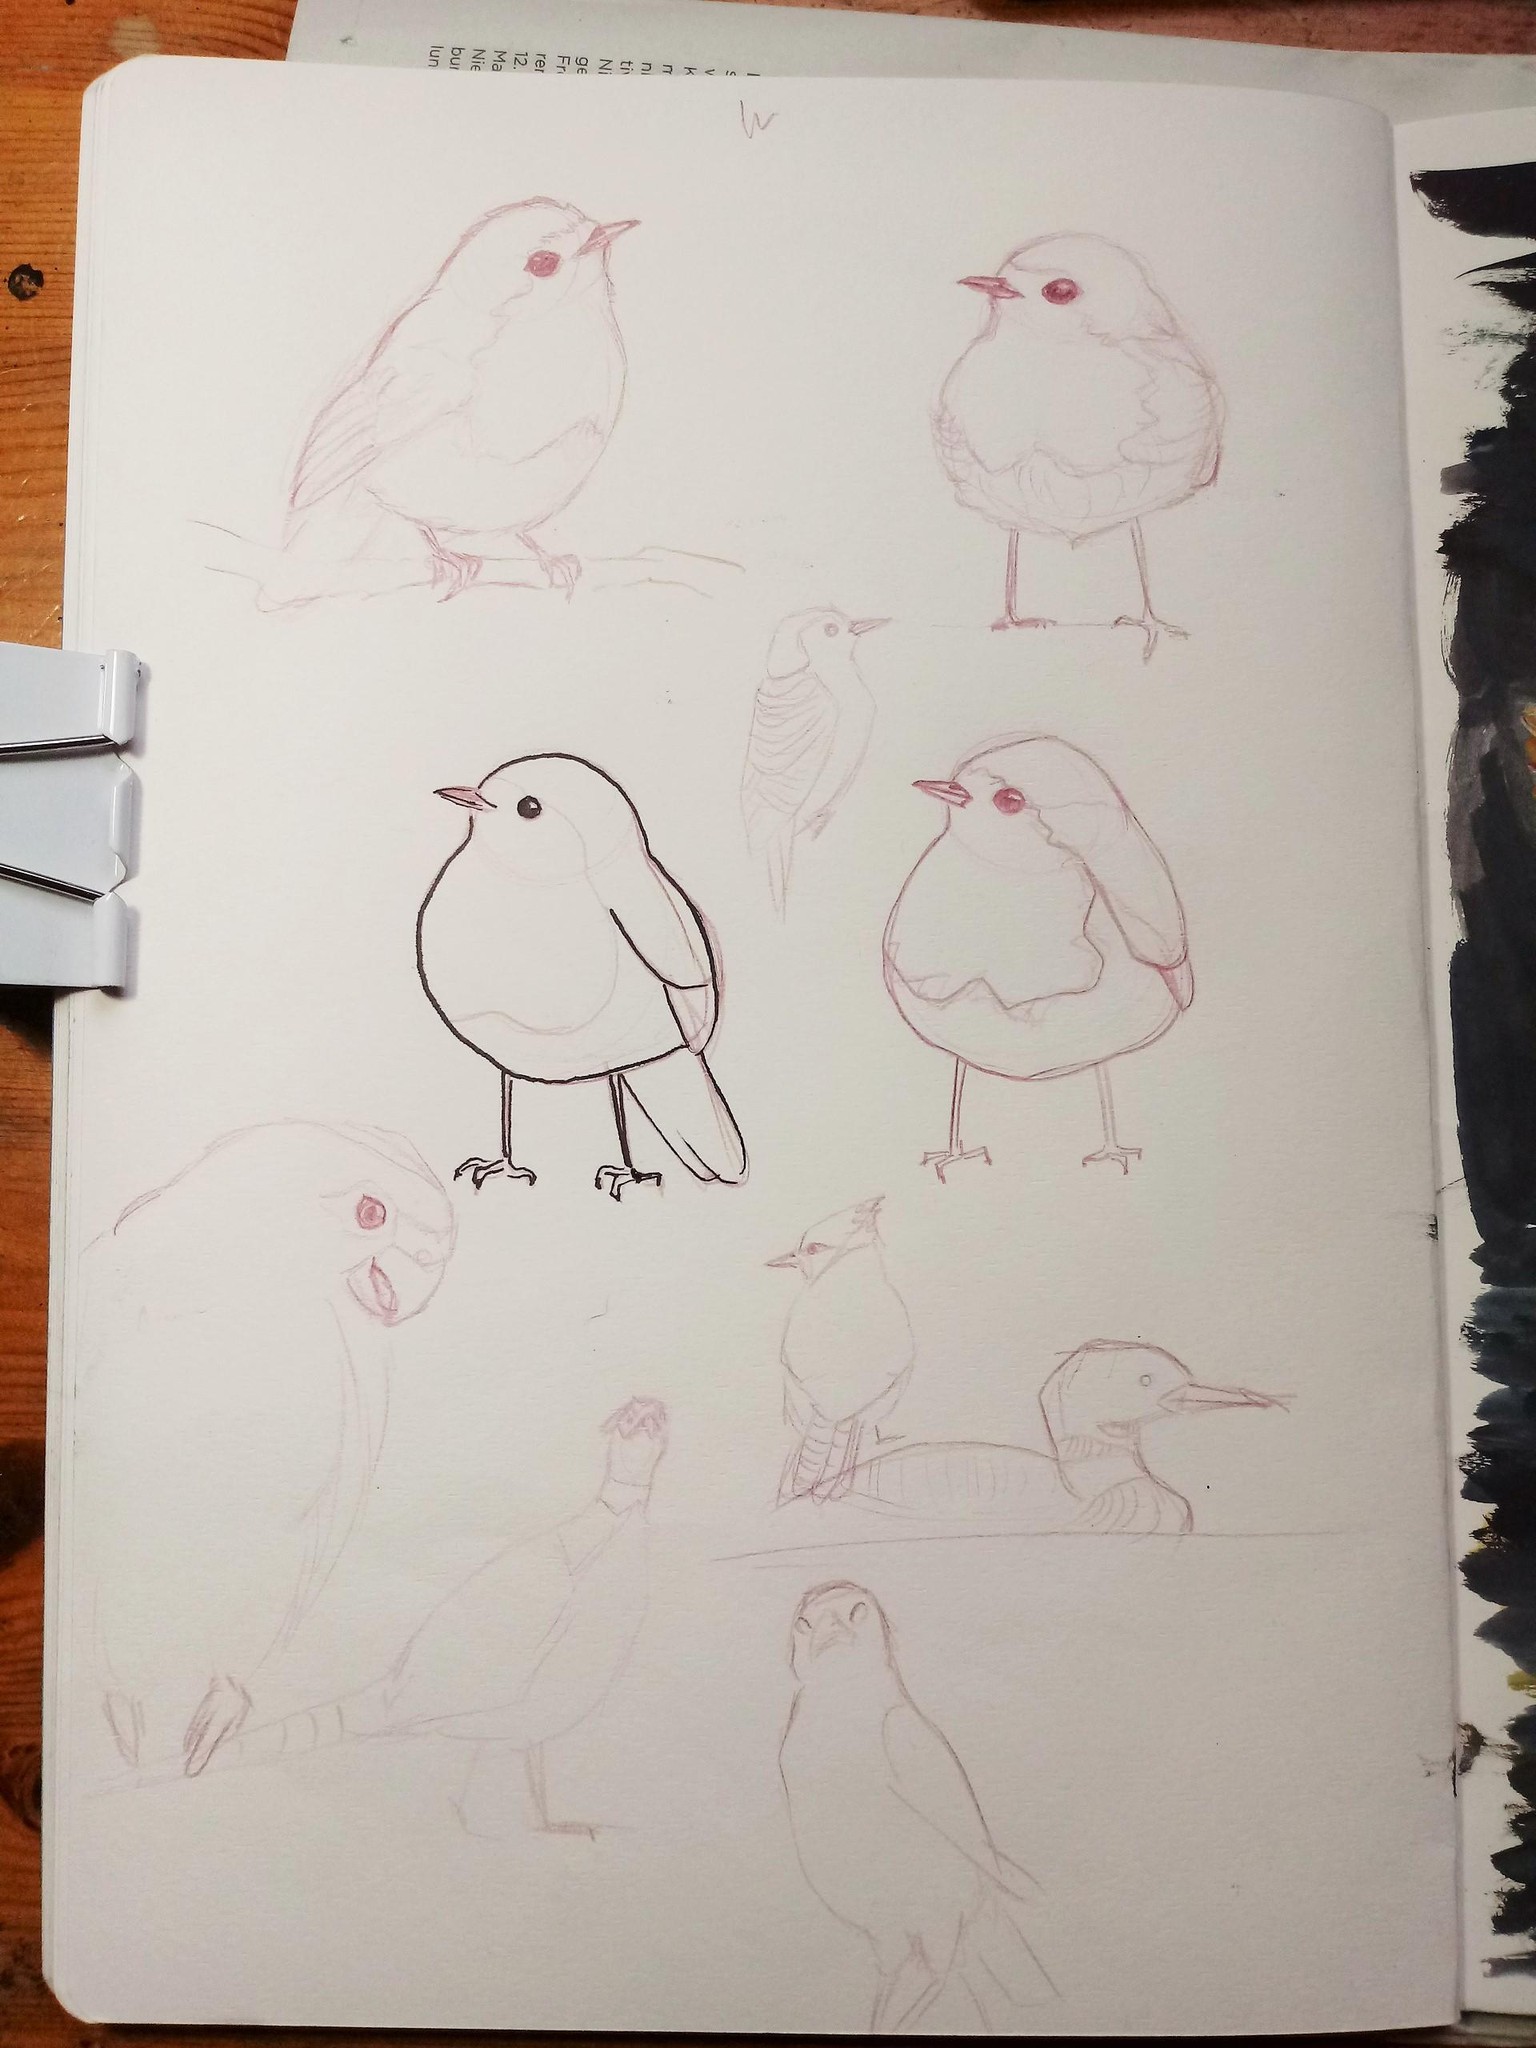
These are some sketches I made beforehand. I wanted to paint a robin, so I studied it a bit and tried some stylizations just for fun. And that I did some 1- and 2-minute-sketches to loosen up. I didn't take a picture of the 5-minute sketch for my final painting, but this was the underpainting: yes, so ugly, omg...
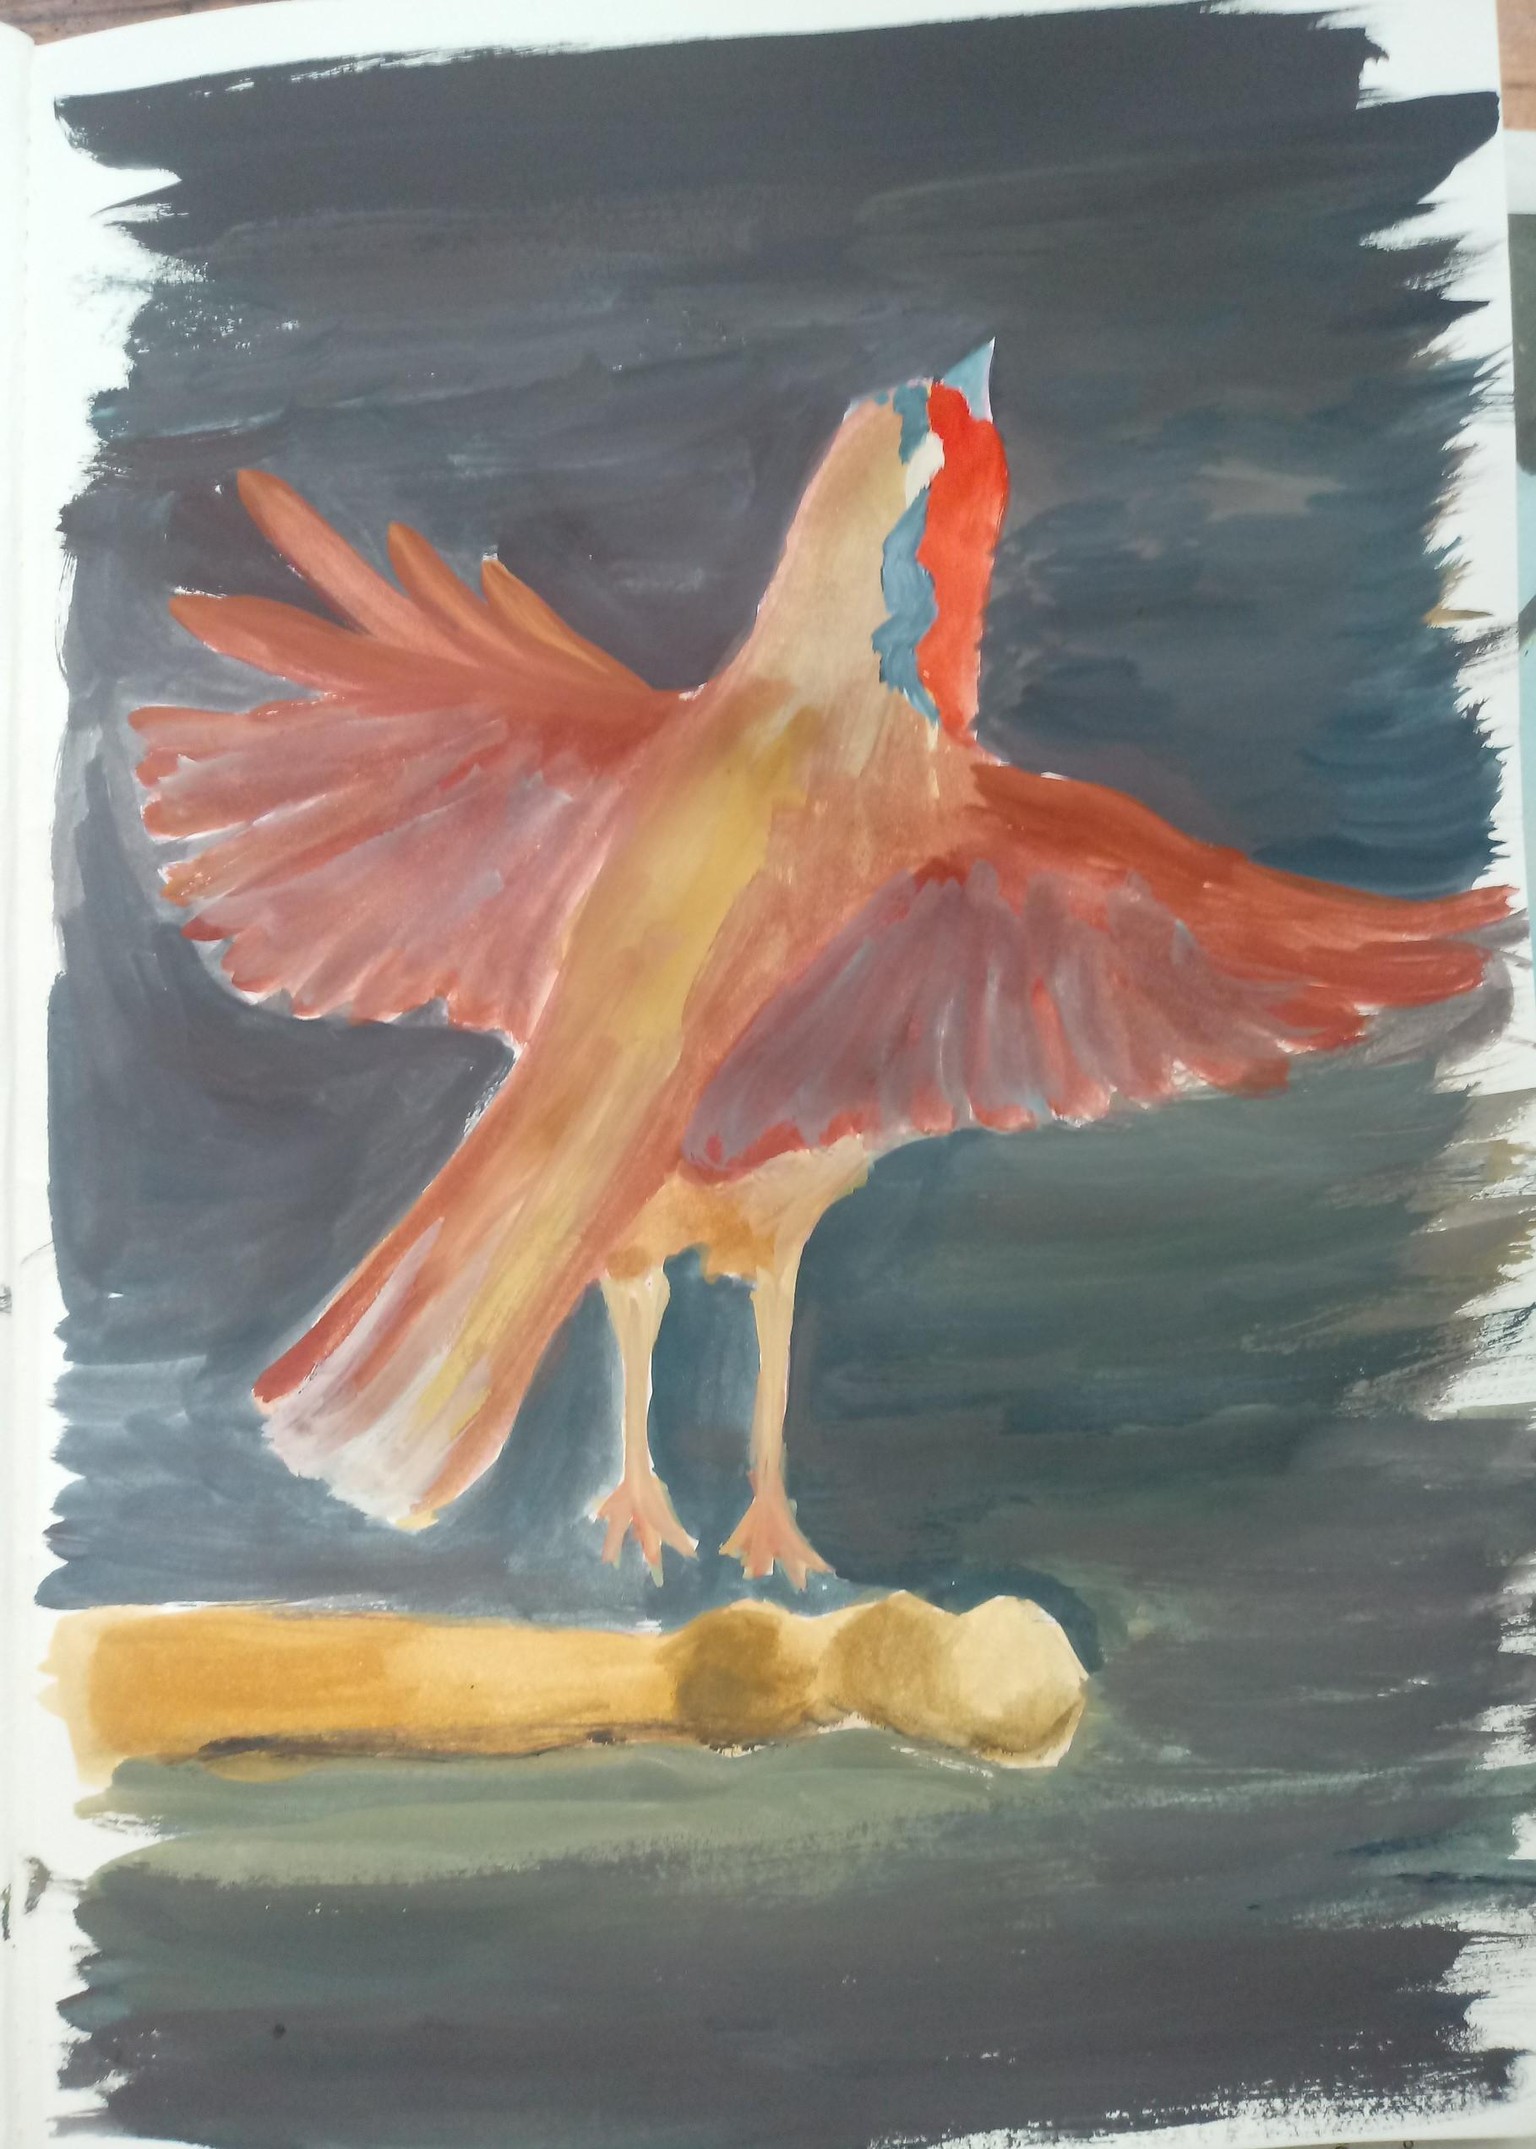
Then I went in with more layers of gouache. I used a no. 6 roundbrush for the underpainting and a no. 5 angle brush for all secondary layers and details. At the end, I added some texture and lines with white pastel stick and colored pencil. I also changed some colors with the colored pencils, like the orange chest for example. As you can see, I painted over the legs and the twig in the end.
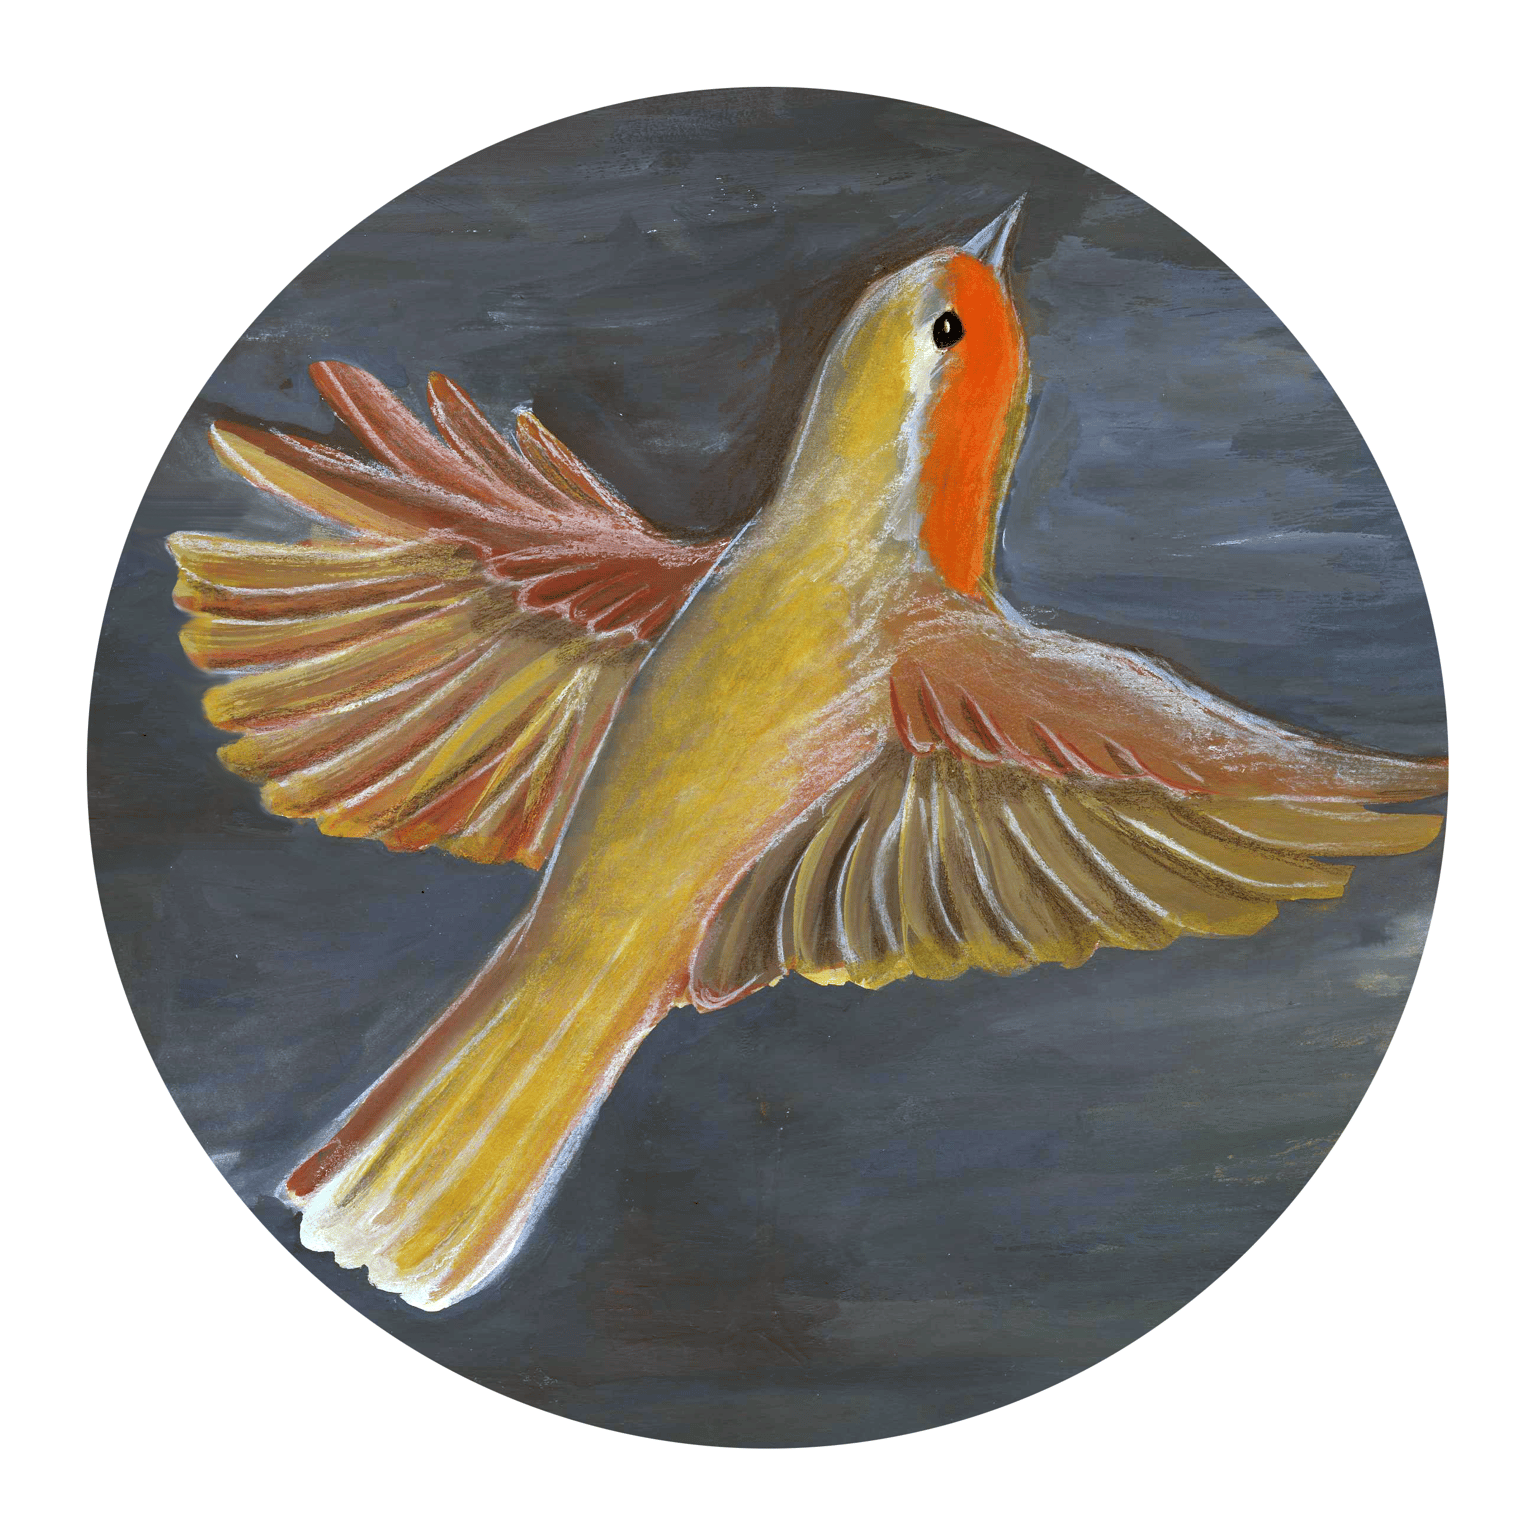
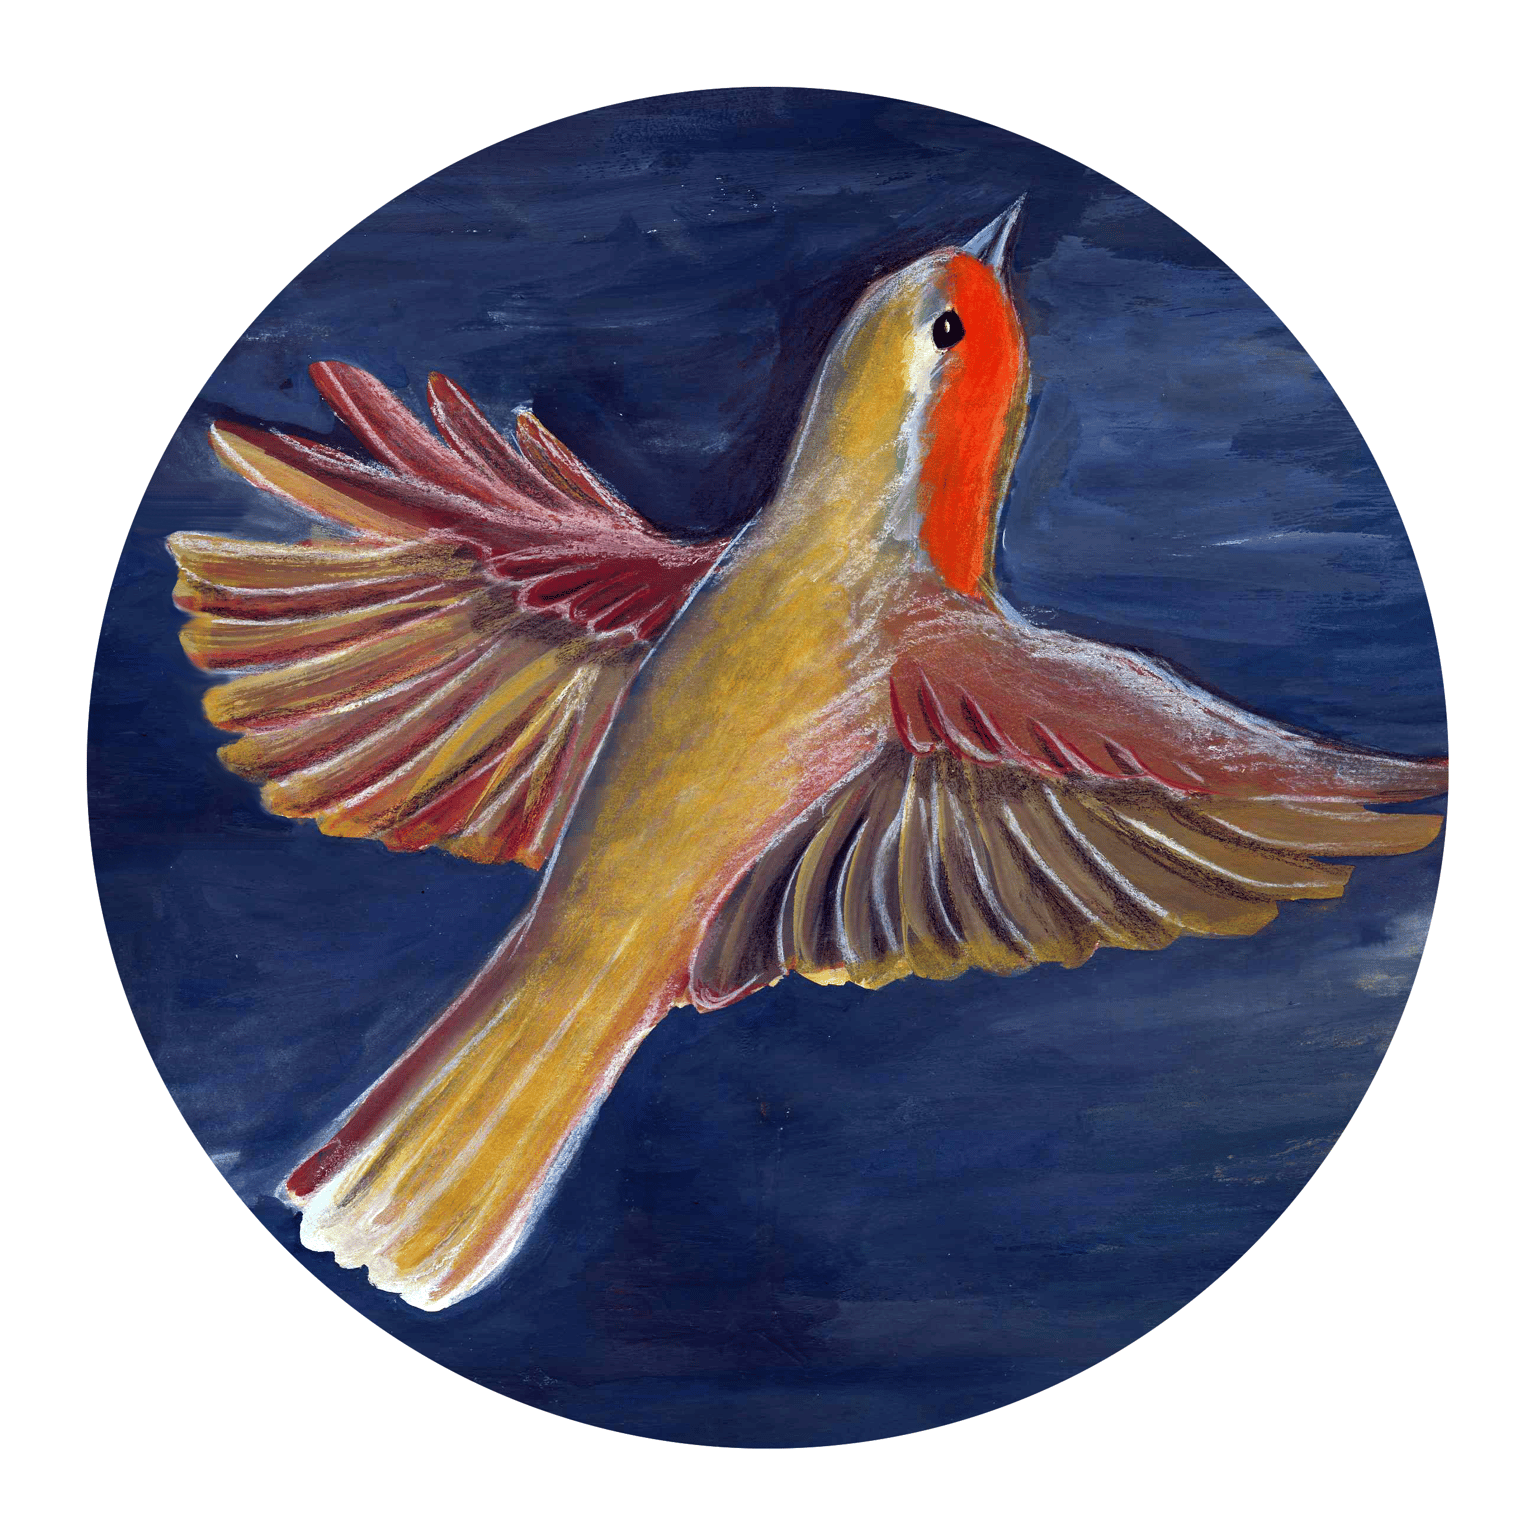
The background was way darker than I wanted, but I went with it. I like the finished peace, but I wanted to see what I could get out of it with some digital editing and these are two versions: on the left with just some edits to the dynamics and on the right I used the adobe auto color correct function because it's alwasy interesting, what it suggests. I like the result a lot because I just love high contrasts and deep colors.
Thank you again for your great class!!