Engineer Pass, CO
FINAL PHOTOS
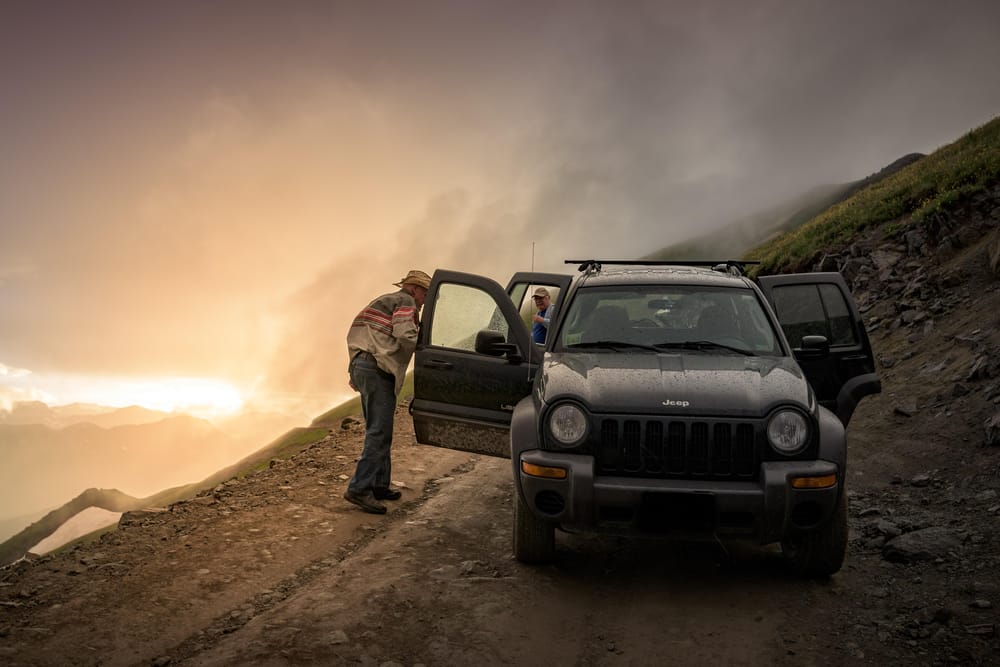
The following photos were taken while descending Engineer Pass outside of Ouray, CO. After driving over the saddle of the pass we found ourselves engulfed by thick clouds and rain as the sun was setting. We had limited visibility of the muddy road ahead and absolutely no view beyond the drop-off on the passenger side of the Jeep.
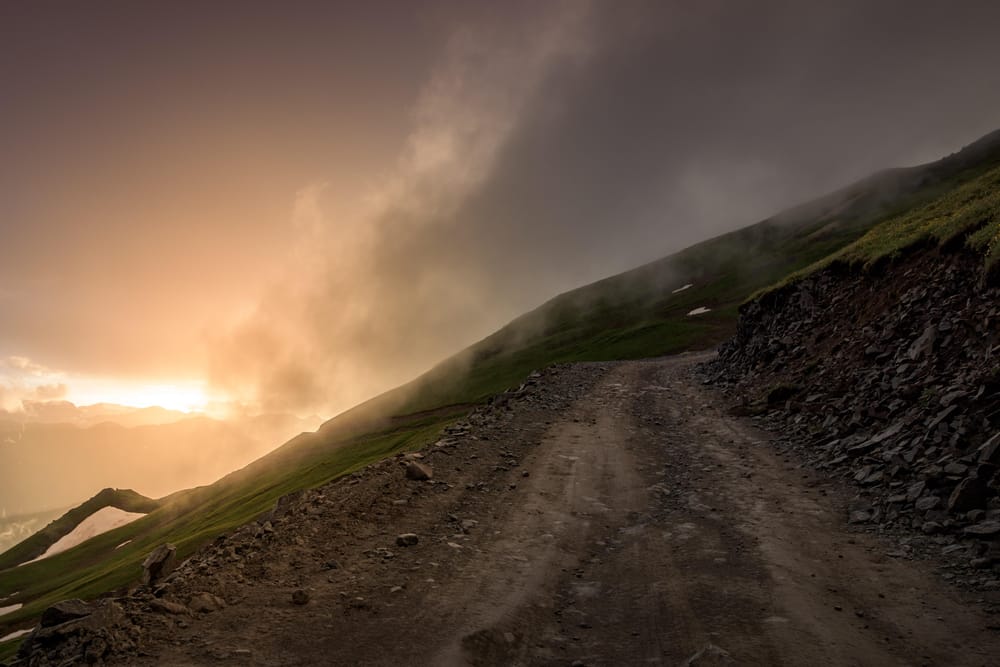
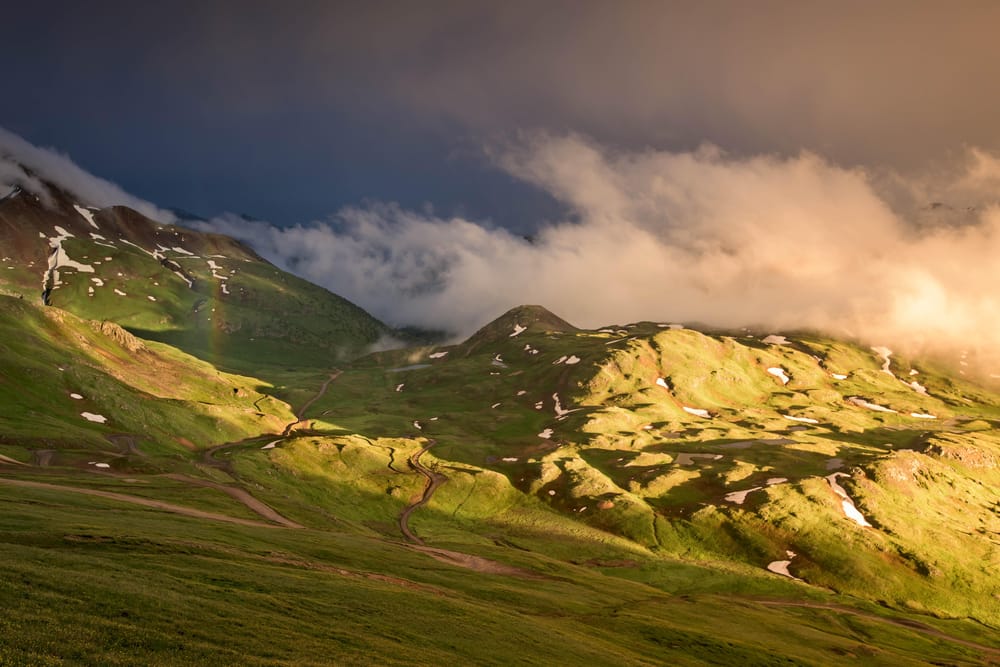
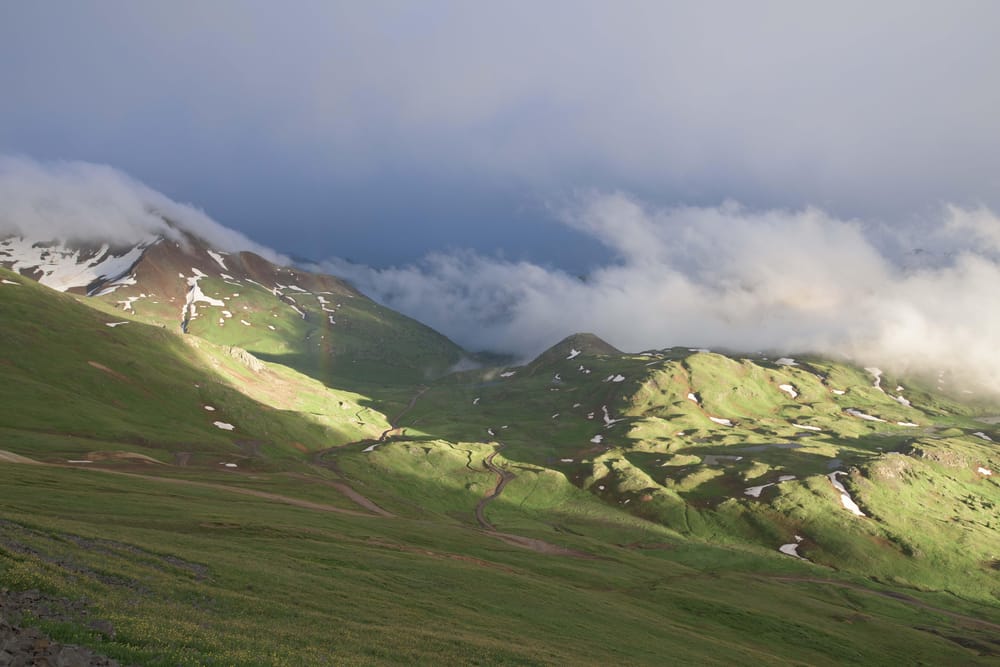
As we were manuvering through our third switchback the sun pierced through the clouds and bathed the basin below in warm light, mixing with the purple alpenglow. The view brought our friend to tears, who had just been near panic due to her fear of heights. A rainbow also formed over the road.
We grabbed our cameras and jumped out of the car for only a minute to capture some photos, but the moment was short-lived due to the coming nightfall. The sky soon turned to ink-black and we did our best to navigate the 4WD trails using our high beams but we took a wrong turn. We eventually made our way out of the mountains and back to Ouray after 3 AM.
ORIGINAL PHOTOS
Here are the original photos captured in RAW along with a brief overview of the edits.

24 mm, f/4.0, 1/125 s, ISO 220
- Cropping: Eliminated the bright area on the left of the frame, which didn't fit with the dramitic feel I was trying to achieve.
- Lens Corrections Panel: Enabled profile corrections for my SIGMA 24 mm f/1.4 Art lens. I didn't realize this at first, but Lightroom did not automatically recognize my lens so I needed to manually configure the profile correction by clicking on the profile tab. This is worth double-checking in the future.
- Basic Panel: Increased contrast (+25). Reduced highlights (-100) to preserve detail in the sky near the sun. Increased blacks (+40) to recover detail in the shadows of the stones on the side of the road, but there are still some small clipped blacks in these areas. Increased clarity (+40). Increased vibrance (+25).
- Detail Panel: Applied sharpening (50) with masking (95) to focus sharpening only on the ridgeline and some of the stone texture. Applied luminance noise reduction (25).
- Effects Panel: Increased dehaze effect (+20).
- Linear Gradients: Applied a gradient vertically down from the top of the frame with negative exposure (-2.25) to darken the sky and create more emotion in the clouds. Applied a gradient at an angle from the upper left corner of the frame to warm the temperature (30) of the clouds and boost the tint (60) of the purple alpenglow. Applied a gradient vertically up from the bottom of the frame with negative exposure (-1.25) to guide the eye into the frame. The outer boundary of each linear gradient extends well beyond the edge of the frame to create a subtle gradient that still guides the eyes. I revisited these gradients numerous times, and each time I throttled back on the amount of tint I applied to the sky.
- Radial Gradient for Sun: Applied a radial gradient with maximum feathering (100) centered about the sun to boost exposure (1.50) and boost color temperature (warmer by 90) to get a warm sunset.
- Adjustment Brushes: Applied two adjustment brushes over the patch of grass on the right side of the frame to boost exposure (1.00) and boost color temperature (warmer by 10) to give it the appearance of being lit by the sunset.
24 mm, f/4.0, 1/125 s, ISO 900
- Cropping:
- Lens Corrections Panel: Enabled profile corrections for my SIGMA 24 mm f/1.4 Art lens.
- Basic Panel:
- Detail Panel:
- Effects Panel:
- Linear Gradients:
- Adjustment Brushes: