Window, window on the wall - which is the fairest view of all?
Hello, window-wonders! Thanks so much for popping into my class - I really hope you’ll enjoy playing with frames and creating so many beautiful views.
In filming the class I created a few different windows and, as I couldn’t fit them all into the class, (especially some of the earliest experiments) I thought I’d share them here.
First up, some pen variations (check out the image below)...
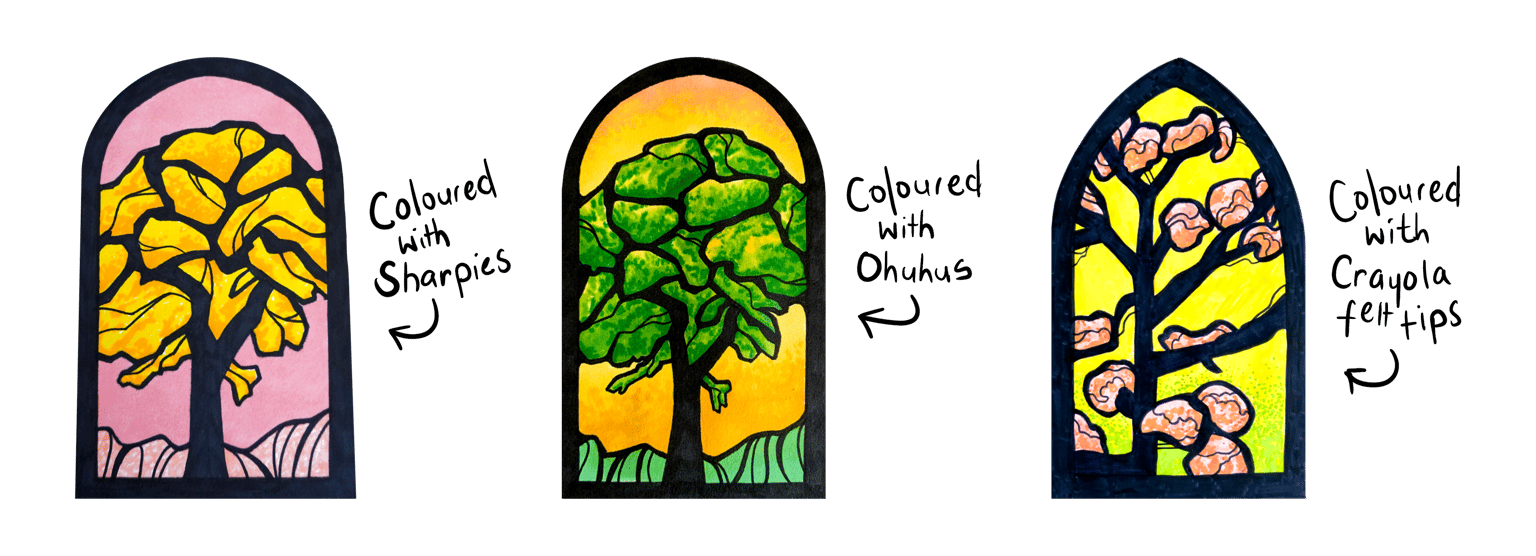
On the left you’ll see my Sharpies Window. This was drawn on Mixed Media Paper, and is a variation on my main class demo, the Golden Trumpet Tree. As the Sharpies were harder to blend I used stippling to create texture and shading in the tree leaves. I also included a black-line hilly horizon line, which I really enjoy, and I loved the gold on pink combo of this window.
In the middle you’ll see a green variation of the same tree, coloured with Ohuhu Markers. Combining the yellow and green in the branches was very satisfying, and the golden gradient background helps to focus the eye in the centre even more. I took this window a little further later, so we’ll come back to it in a moment…
On the right is my Crayola Pens Window. I had a very limited number of these pens, so this window embraces a neon glow! Much like the Sharpies, I used stippling and scribbling to “blend” the colours, and placed the subject to the side of the frame.
So let’s move on to some later experiments…
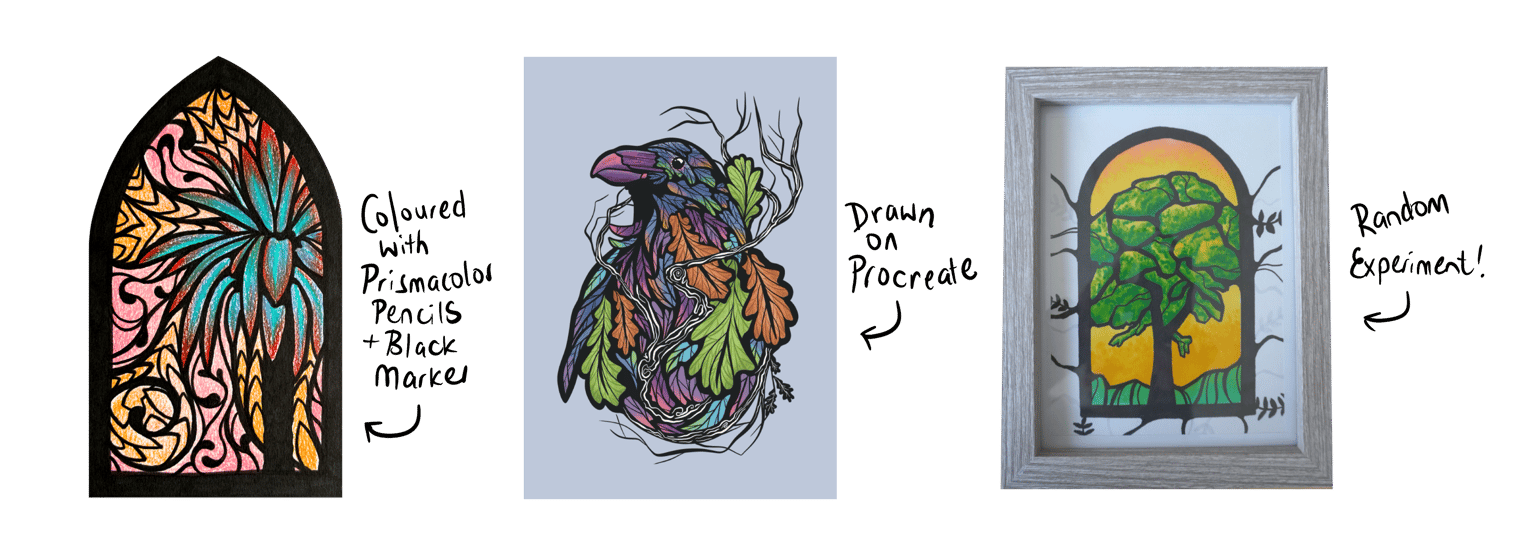
On the left is my Pencils Window. This used Prismacolor Pencils, with a black marker for the outlines. I had loads of fun doodling patterns with the pen. These patterns were a part of the background, yet became a feature in themselves!
In the centre is my Digital Window - which lets the shapes dictate the frame. This was drawn on Procreate but uses all of the same principles in construction as the analog windows. Adding white on top of some of the black lines gives them even more of a dialog with the subject, making sure they not only support the structure but contribute to the narrative.
On the right is that green tree again! - but this is a later version which I did some doodle experiments on. It’s not the best photo, but I hope you can see that I tried extending the lines from inside the frame, outwards to the edges of the paper. And I then put the whole thing inside another frame! This was purely to see what it would look like, whether it was a good idea or not… I’m not sure on it myself, but what do you think?
I hope these examples show that there are plenty of ways to go with this process, and that not all of them need to succeed to be useful. These windows are a way to get your fingers moving and your eyes seeing a little differently. They can be tried out in a sketchbook in half an hour and maybe never seen again, or thought about and pored over to create something you want to stare at for hours.
Start with a frame, fill it up, and then let your pen keep expanding the view.
Thanks for reading,
Keep making happy!
Gemma