Transcripciones
1. Introducción a los fundamentos de Blender 3D: Hola ahí. Mi nombre es Dan Scott. Y en este curso de Blender
Essentials, he contado con la
ayuda de un buen amigo y maestro animador Robin Rudd Ahora, hemos trabajado duro juntos para asegurarnos de que esto
esté a la altura de lo mismo, traiga sus propios
estándares de computadora portátil a los que está acostumbrado. Así que prepárate, salta y
disfruta de Blender Essentials
con Robin Rudd Hola. Soy un modelo de tres D de Robin hecho usando
las mismas técnicas que aprenderás este curso. Modelado, texturizado
y animación. Bienvenido a Blender
tres D Essentials. Vamos a abrir Blender
juntos por primera vez, y va a sentirse como la cabina de una nave espacial
alienígena Al menos así
me sentí cuando
entré en tres D por primera vez, pero no te preocupes,
te cubro la espalda. Mi nombre es Robin y soy diseñadora y animadora de tres D, especializándome en tres
D para diseño gráfico Mi software de
elección es Blender, que suena raro
porque es un software libre, pero no dejes que el
precio te engañe. Este es el mejor
software de tres D que he usado. Puede hacer casi de todo, desde las
listas hasta los efectos visuales de Hollywood, pero me han dicho que no tenemos 1,000 horas para este curso, así que me emparejé con lo esencial del
diseñador Al igual que, sin
aviones de combate, sin castillos, estaremos haciendo cosas
que sean útiles en el diseño. Y hay proyectos lo largo del
curso donde puedes practicar lo que estás
aprendiendo y obtener algunas bonitas
piezas de portafolio también, y cada uno obtiene su
propio resumen único para que tus proyectos se vean distintos de todos los demás
que están tomando el curso. Comience con un recorrido por la interfaz de usuario única de
Blenders, y luego haremos
una botella de tres D. Aprenderás a
hacer tres formas D y hacer que parezcan de vidrio. Aprenderás a
hacer tres personajes D y a animarlos. Nos fijamos en el renderizado, que es como haces imágenes, y te voy a mostrar
técnicas de cómo envolver un diseño alrededor de un modelo de tres D. El curso es para cualquiera que
se sienta intimidado por tres D, tal vez seas diseñador gráfico o artista de motion graphics Simplemente tienes curiosidad sobre cómo la gente hace esos
tres gráficos D. Sea lo que sea que te haya traído
aquí, aprenderás todas las bases para hacer casi cualquier cosa en tres D, y
lo llevaremos paso a paso. Así que vamos a meternos en ello. ¿
Qué dices, Tiny Robin? ¿Eh? Bueno,
tienes la señal de apagado. No, tengo la intro.
Tú hiciste la señal. Te veré en la
primera. Empezó contigo. Por supuesto. Suave.
2. Primeros pasos con Blender: Bien, estás en el
curso. Esto es. Yo solo un momento, vamos a empezar
a aprender Blender o vas a empezar a aprender Blender. Te
voy a enseñar. Creo que te va
a sorprender lo capaz que es este
software porque, bueno, si has
notado el
precio , es software libre. Pero no estoy siendo hiperbólico
cuando digo que en realidad es el software general de tres
D más capaz que he usado ¿Y cómo es eso posible desde el software libre?
Es todo un asunto. Tiene tenemos muchas fiestas. Es la Fundación Blender, que es apoyada por
donaciones de usted y de mí, pero también de, como,
grandes corporaciones. Y ellos grandes corporaciones, les gusta que Blender sea solo este
hub central para construir alrededor. Y entonces, empresas como, creo que es Invidia es uno
de los mayores patrocinadores, creo que Meta y Google, también, un montón
de grandes empresas Y esto es lo que
mantiene a Blender a flote o más que a flote, en
realidad, está creciendo. Al igual que, está creciendo muy
rápido como base, como comunidad, como software. Voy a salir
en una rama aquí y decir que en apenas unos años,
creo que las licuadoras van a ser estándar de la
industria para la
mayoría de los trabajos de tres D. Eso podría volver a morderme. Eso no sucede.
No, creo que lo hará. Entonces todo eso para decir, creo que hiciste la elección correcta al
comenzar a aprender licuadora, pero ya he terminado de blabbering.
Vamos a entrar en el curso. Lo primero es lo primero,
tienes que descargar Blender. Entonces soy onblender.org, y al momento de grabar, estamos en Blender Pero no me
sorprendería que ese número haya subido para
cuando vengas aquí. Salen con
una actualización importante. Se siente como cada dos
meses más o menos. Entonces presionarás el botón de descarga
grande, y se detecta que
estoy en un sistema Windows. Probablemente también
detecte la tuya, pero encontrarás todas las versiones aquí
abajo en el menú desplegable. Así que solo presiona el botón de
descarga. Entonces mientras eso es la descarga, también sigue adelante y descarga los archivos de ejercicio que
vienen con un curso. Encontrarás el enlace de descarga en
algún lugar de este sitio web. No sé la
disposición del lado. encontrarás. Y también
recuerda que puedes cambiar la velocidad a la que hablo
usando la rueda de dientes, que está en la esquina en uno de estos lados
del reproductor de video Algunas personas piensan que hablo rápido. Algunas personas piensan que hablo lento. Ya sabes, afinarme
a tu gusto. Ten cuidado. Si vas demasiado bajo, sonaré borracho. Todo bien. Cuando se descargue,
simplemente instale blender como lo haría con cualquier otro software en su computadora, y la primera vez que la abra, debería verse así. Es posible que te aparezca una ventana
pidiéndote que configures algunos ajustes,
solo tienes que pulsar Ok. Los valores por defecto están completamente bien, y entonces estarás aquí Verás una pantalla de presentación en el medio y el resto
del programa a su alrededor. Así que simplemente haz clic en algún lugar la ventana gráfica de tres D para descartar la pantalla de barra diagonal y
bienvenido a Blender Bien, un poco de
configuración antes de comenzar. Subamos aquí
al menú de edición y bajemos a las preferencias. Y debajo de la
pestaña de interfaz de la izquierda, tenemos la escala de resolución. Cuando hago clic y arrastre eso, eso escala
todo el programa. Muy útil para pantallas más grandes. A lo mejor quieres
encogerlo. Voy a poner el mío en 1.5, creo que será un tamaño
cómodo para leer. Voy a encerrar eso La única diferencia que deberías ver entre tu interfaz y mía es aquí abajo en
la esquina izquierda. Este pequeño icono del ratón. Esto es por mostrarte lo que
estoy pinchando con el ratón. Entonces cuando dejé clic,
verás que el botón izquierdo se ilumina. Cuando hago clic en mi
rueda de desplazamiento, eso se ilumina. Si estás en una Mac, eso podría ser algo un poco confuso. Volveré a
eso en un momento, pero también mostrará
mis pulsaciones de teclado. Entonces si hago clic en B, puedes ver B aparece aquí. Voy a hacer clic derecho para cancelar eso. C, eso aparece. Y si mantengo pulsado Mayús, verás ese botón,
y si presiono A, ya verás, Oh, presiono Mayús A, voy a tratar de no oscurecerlo con los menús como lo hice justo entonces Estoy en una computadora con Windows, así que cuando iPress Control, eso aparecerá como barra de
control Comando Si estás en una Mac, presionas Comando cuando iPress Control Y cuando presiono Alt, los usuarios de
Mac presionan Opción. Entonces Control A para ti en una
Mac sería Comando A. Bien, si estás en una Mac
y usas un mouse Mac, probablemente
te confundimos. Cuando dije, hice
clic en mi rueda de desplazamiento. Los ratones Mac normalmente no tienen
una rueda de desplazamiento en la que se pueda hacer clic. Y esto también va para, digamos que trajiste tu propio portátil y estás usando un touchpad Bueno, así que si te
tomas en serio las tres D, probablemente
deberías conseguir
un mouse de tres botones. Pero si te encuentras sin
uno, esto es lo que haces. Vuelves a editar
y preferencias, y abajo en la pestaña de entrada, tienes un botón para emular
un ratón de tres botones Y mientras estamos aquí, adelante y comprueba
si tu teclado tiene un teclado numérico en
el lado derecho. Esa es esta grilla de números. Si no tienes esa grilla, entonces sube aquí para
emular también Numpad De esa manera, cuando presiono, di uno en mi teclado numérico, solo
presionas el
número uno donde
sea que esté en tu teclado Y eso debería ser
en términos de configuración. Creo que estamos listos para
comenzar a usar este programa.
3. Descripción de Blender: El programa puede hacer efectos visuales para Hollywood y mundos
para videojuegos Y por eso
hay muchos botones. Pero no necesitas
conocerlos todos para
hacer cosas que sean
útiles en el diseño. De hecho,
vas a estar usando el mismo 5% una y
otra vez a lo largo de tu carrera. Y esos son el 5% en el que nos
enfocaremos en este curso. D es muy
diferente a otras herramientas, y es mucho para asimilar. Al igual que, no
hay muchos botones
o íconos de
aspecto familiar aquí, y lo pillo. Puede ser abrumador.
Pero te lo prometo, es muy posible
aprender por ti mismo en línea.
Así es como lo aprendí. Este video va a ser solo una visión general
del software. Sólo voy a
mostrarte las diferentes áreas
que vamos a visitar una y otra vez
más adelante. No vamos a
profundizar en nada. Todavía no hace falta tomar notas. Solo quiero darte
una idea del contexto, donde están las
diferentes cosas para que cuando luego
profundizemos en cada parte, tengas un poco de idea de como se conecta
al todo general. Solo siéntate por ahora,
déjame mostrarte los alrededores. Entonces, bienvenidos al mundo
de los tres D. Primero de, ¿cómo te mueves en tres D? Bueno, para dar la
vuelta al centro, presionarás hacia abajo el botón
central del mouse y arrastrarás. Recuerda, tengo un pequeño icono aquí
abajo y verás cuando presione el botón central del mouse. Yo en realidad, se apaga cuando empiezo a moverme. Creo que
eso es un pequeño bicho. Todavía lo estoy sujetando.
Si usas un mouse Mac, solo
usarás el sensor táctil así para moverte. Y si estás en el touchpad de un
portátil, presionarás hacia abajo con dos dedos y solo te
moverás así También se llama track ball aquí
arriba en la esquina
derecha. Si presionas eso y
arrastras, también orbitarás alrededor
orbitando es como se llama esto Segundo, tenemos zoom y solo me
desplazaré hacia dentro y hacia fuera
en mi rueda de desplazamiento
que hace eso y tú te desplazarás como sea que
hagas en tu sistema Además, está este botón por
aquí debajo del trackball, que es una lupa La forma de usarlo es
hacer clic hacia abajo sobre él, mantenerlo presionado el clic y luego simplemente moverse hacia arriba o hacia abajo. Eso acercará y alejará.
Entonces tenemos panning. Lo que haces manteniendo pulsada la
tecla shift mientras haces clic en el
botón central del ratón o la forma en que te
mostré cómo orbitar
alrededor de tu sistema. Y también está este botón de
mano que usas la misma manera que haces clic
hacia abajo sobre él y arrastras, y luego puedes moverte de lado
a lado y arriba y abajo. Así es como mueves la órbita
de
tu cámara con un botón central
del mouse, desplazas los panecillos del botón central del
mouse y los zoom de desplazamiento Pero, ¿cómo se mueve el
objeto en la escena? Bueno, vamos a darle clic
con un clic izquierdo y podemos ir a la
barra de herramientas a la izquierda aquí. Esta, esta es una
herramienta de movimiento con las cuatro flechas. Haremos clic en eso y aparecerá un artilugio
. Esto es un artilugio Si tenemos alguna de las
flechas sobre ella y la
arrastramos, podemos moverla
en tres espacios D. También puedes hacer clic en los
planos pequeños entre las flechas, y eso
te permitirá moverlo en el plano de esos dos ejes. Entonces ahora mismo lo estoy moviendo sobre el eje rojo y azul
al mismo tiempo. Y también puedes hacer click en medio
del Gizmo y eso lo moverá con la mano libre desde
la perspectiva de la cámara La siguiente herramienta es la herramienta de rotación que te dará un tipo
diferente de artilugio Y si mueves el mouse
sobre cualquiera de estos círculos, resaltará ese círculo, y eso te permitirá
rotar sobre ese eje. Si mantienes pulsado Control, incluso chasquea creo
que son incrementos de diez grados, si quieres ser
precisos al respecto Y si solo haces clic en
el centro de la bola, puedes girarla con la mano libre. Si no estás satisfecho
con tu rotación, te puede gustar a la mayoría de los
softwares control o comando Z para deshacer y puedes hacerlo
tantas veces como quieras La siguiente herramienta es la herramienta de escala, la herramienta de escala
estirará su objeto. Obtienes otro
artilugio y puedes estirarlo en
un eje a la vez o uniformemente desde el
centro o en cada plano, que
lo estirará dos Y esta herramienta final, esta es una combinación de todas las
demás herramientas diferentes. Si no quieres ir por aquí y hacer clic en cada
uno cada vez, tienes el movimiento, tienes el giro y tienes
la escala todo en uno. No quiero,
quiero algo más emocionante. ¿Cómo lo borro? Lo borras presionando
Eliminar en tu teclado. ¿Y cómo agregar algo nuevo? Bueno, eso está en el menú de
anuncios de aquí arriba. Si hacemos clic en eso, obtenemos todas las cosas que podemos agregar
a nuestro mundo de tres D. Y muchas de estas cosas nunca
vas a usar. Y la mayoría de las cosas
que vas a usar están bajo el primer
menú llamado mesh. Una malla es un objeto de tres D. Entonces, cuando quieras un objeto de tres
D, agregarás una malla. Entonces vamos por, digamos, un cilindro, y puedes agregar
tantos objetos como quieras. Volvamos a AdMnu y sí, hagamos la más divertida
. Vamos a hacer el mono. Y podemos ir a la herramienta de
movimiento y
podemos mover al mono
encima del cilindro. A lo mejor usaremos la herramienta de
rotación para que
parezca que está
descansando sobre el cilindro. Vuelva a darle la vuelta
a la herramienta de movimiento. Lo voy a mover un poco hacia abajo hasta que sienta
que está descansando ahí. A lo mejor quiero escalar
esto para que sea más
como una plataforma. Escalarlo en este plano
que solo lo escalará en las dos direcciones horizontales y no en la vertical
para simplemente aplanarlo. Ahora tenemos una pequeña
plataforma para ello, pero notarás que
todo es gris gris es aburrido. Así que vamos a agregarle algo de color. ¿Dónde hacemos eso?
Eso es en esta ventana. Esta ventana tiene muchas pestañas. Visitaremos algunos de ellos. El dedicado al color es el inferior, el materialtab Entonces iremos aquí, y con
uno de los objetos seleccionados, haremos clic en Nuevo, lo que agrega
un material a ese objeto. Y el material tiene
un montón de ajustes, pero el más importante
es este, el color base. Así que vamos a darle un supongo,
como una especie de verde azulado, bonito color verde azulado sin ningún
motivo en particular, pero no podemos verlo en
la ventana gráfica de las tres D. ¿Qué da? El
motivo es por defecto, el viewpoard de tres D solo
muestra todo en gris, cual es muy útil
para entender tres formas D sin
distraerse Pero tenemos diferentes modos de
visión, y esos están todos aquí arriba, las cuatro
bolitas que hay en la esquina. La primera bola, esta
es la bola de estructura metálica. Si hacemos clic en eso, vemos nuestras
tres D en modo wireframe, y podemos ver a través de
nuestros objetos, muy útiles El siguiente que es
el modo gris, en el
que recién estábamos. El siguiente después de eso, este es el modo de vista previa de material. Cuando haces clic en eso, tu sistema podría ahogarse un poco Al igual que, no es raro que
se quede rezagado, no sé, diez a 15 segundos
mientras solo está cargando todo lo que
necesita en su sistema. Eso probablemente solo ocurrirá
la primera vez, aunque. Y con este seleccionado, podemos ver el bonito color
en nuestro objeto. Y podemos ir al
mono y podemos agregar material a eso también. Ahora en esta ventana, no
hay material aquí, así que haremos clic en nuevo. Y este material,
podemos hacerlo un poco podemos
hacerlo como marrón oscuro. Siento que tal vez un
poco desaturado , que sea un color mono Y el modo de vista final aquí arriba, esta es la vista renderizada. Cuando hacemos clic en eso,
seguimos viendo color, pero también vemos información de
iluminación. Vemos una sombra, y
vemos reflejos, y esos dependen de
las luces de nuestra escena. Y sí tenemos un objeto ligero. No lo puedo ver ahora mismo. Eso es porque está fuera de vista, pero sabemos que
tenemos uno porque está en la escena outliner de la
derecha Esta es una lista de
todos nuestros objetos. Y si presionamos esta luz, ahora
hemos seleccionado la luz, y ahora podemos alejar el zoom hasta que veamos que tenemos
la luz seleccionada aquí. Vayamos a la herramienta de movimiento
y movemos esa luz y verás que las sombras y la información de
iluminación
reaccionan ante eso. Así puedo acercarlo
un poco más, hacerlo un poco más brillante y obtener una bonita
iluminación de reembrand en el mono Este arte fino que estamos haciendo
aquí en traer tu propia computadora portátil. Entonces digamos que
estamos súper contentos con lo que acabamos de hacer y queremos
tomarle una foto a este mono. Acerquemos y tomemos
una foto en tres D, eso se llama renderizado. Y vamos al
menú render aquí arriba para hacerlo. Ahora, no te confundas. Aquí también hay un
botón de renderizado. Este es un espacio de trabajo. Si hacemos clic en esto,
entonces cambiará todo
el espacio de trabajo para que sea algo diferente.
Eso no es lo que queremos. Volvamos al
layout donde estábamos, y este es el botón que
quieres, renderizar a la izquierda. Entonces hacemos clic en Render y
hacemos clic en Render Imagen. Lo hace. Sí obtenemos una imagen, pero es de la vista equivocada, y eso es porque blender no renderiza desde
tu vista actual, renderiza desde un objeto de cámara, que también tenemos en escena. Lo verás en el outliner.
Haga clic en eso y aleje. Podemos ver ahí está nuestra cámara. Este es el ángulo desde el que
estaba tomando la foto, para que podamos mover esto
a donde lo queramos. Podemos moverlo un poco
hacia abajo, tal vez girarlo de nuevo a, tenemos que cuidarlo, no hacer clic en el fotograma
de la cámara, eso cambia la distancia focal. Voy a deshacer eso y solo haz clic en el Gizmo,
asegúrate de hacerlo Se en el mono, y luego volver a
renderizar y renderizar la imagen. Esta es una
forma muy difícil de obtener el encuadre que deseas porque no puedes
previsualizarlo antes de ir
a renderizar, ¿verdad Entonces, la forma en que la mayoría de los tres
artistas D prefieren establecer la posición de la cámara es mirar
a través de la
cámara y moverse. Para ello, vamos al botón de
la cámara por
aquí a la derecha. Haces clic en eso y
vas a la cámara. Pero notarás que si
empiezas a
moverte, saldrás de la
cámara de inmediato. Entonces hay un pequeño
botón secreto que personalmente creo que debería ser más prominente para la cámara te
siga por ahí. Volvamos a hacer clic en la cámara
y presionar esta pequeña flecha hacia arriba aquí a la derecha
de la bola de pista, que abrirá un nuevo menú. Aquí, hay un montón
de cosas poco interesantes. No te preocupes por eso, pero
baja aquí para ver, y hay una opción de bloqueo de vista, y podemos bloquear la cámara para ver. Sé que esto está demasiado oculto,
pero ahora ya sabes dónde está. Y ahora, si orbito alrededor nuestro mono presionando
la rueda de desplazamiento, la cámara me seguirá. Para que pueda puedo
acercarlo y obtener una composición de aspecto agradable
en el mono y luego desmarcar la cámara para ver para que
pueda
volver a salir de la cámara e ir al
render Menú renderizar Imagen Y ahora renderiza desde
ese punto de vista. Si estoy contento con esto y
quiero guardar esta imagen, entonces voy a la imagen dentro
de esta ventana de vista de render. Voy a Imagen, guardar como, y puedo guardarla en
algún lugar de mi computadora como cualquier tipo de
imagen como un PNG, un JPEG, incluso cosas
de las que nunca
has oído hablar como voy Targa, probablemente no hayas usado a menos que trabajaras en tres
D en los 90 Y crucialmente, hacer clic en
este botón es independiente de guardar el archivo de su proyecto Si quieres guardar
este archivo de escena y volver a él y
trabajar en él más tarde, tienes que ir a Archivo, Guardar como, y eso te permitirá guardar un archivo de mezcla de puntos que
podrás abrir más tarde para seguir trabajando. Cerremos
aquí este pequeño menú haciendo clic
en el borde del mismo. Cuando nuestro cursor se convierte en
una pequeña flecha, podemos arrastrarlo y simplemente
arrastrarlo todo el camino hacia la
derecha hasta que desaparezca, y eso es todo para
la rápida descripción general. Ahora conoces básicamente cada paso del flujo de trabajo de las
tres D, y lo que haremos a continuación es
entrar en detalles sobre cada uno.
4. Tu resumen de diseño: Se trata de proyecto aleatorio
generator.com. El objetivo de este
sitio es generar un brief aleatorio para todos los
que estén tomando este curso para
que cuando sigas
junto con los proyectos, no termines haciendo
exactamente lo
mismo que todos los demás. Todos obtienen un breve un
poco único, aunque hay
puntos en común, y cuando
sigas el curso, harás algo
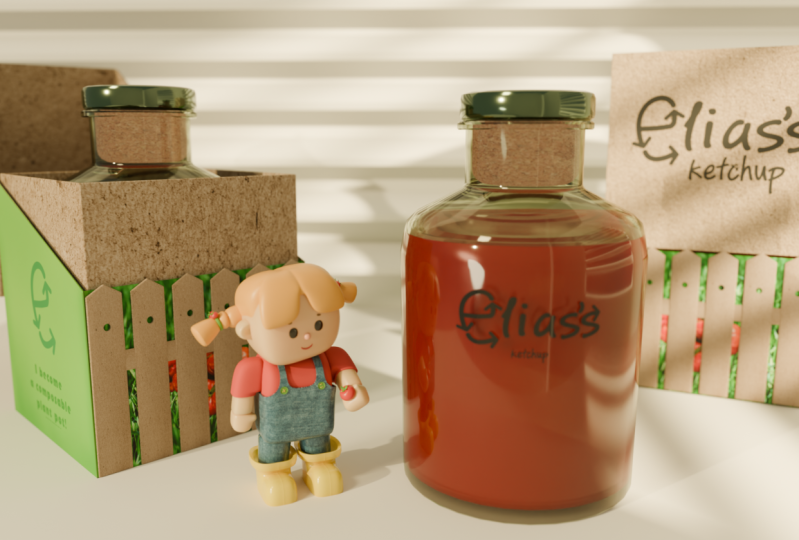
que no se vea conspicuo Entonces, para este curso, hagamos
clic en Blender Essentials aquí y demos clic en
Generar mi proyecto. Y obtuve una marca de aceite de chile industrial
y vanguardista. Entonces nuevamente, el tuyo será
diferente al mío, aunque el tuyo
también será un líquido que esté en una botella para que hagamos
tipo del mismo producto. Pero si no estás contento
con lo que tienes, puedes bajar aquí
y hacer clic en Reintentar, aunque no tienes permitido hacer clic en él más de tres veces, ¿de acuerdo? Entonces, vamos a leer el mío. Te ha contratado Daniels, una nueva
marca de aceite de chile con un Hmm. Chicos, tenemos que enmendar esto con un estilo industrial y vanguardista Como artista residente de tres D, es su trabajo ayudar a definir la estética visual y el
lenguaje de forma del producto. El lenguaje de las formas, ¿así es básicamente cómo se ven las tres
formas D de esta marca? la misma manera que podrías
hacer una paleta de colores, artista de
tres D podría
diseñar un lenguaje de formas. El cliente quiere que
tengas plena libertad creativa. Necesitarán tu ayuda
con el contenido de las redes sociales, el diseño de las botellas
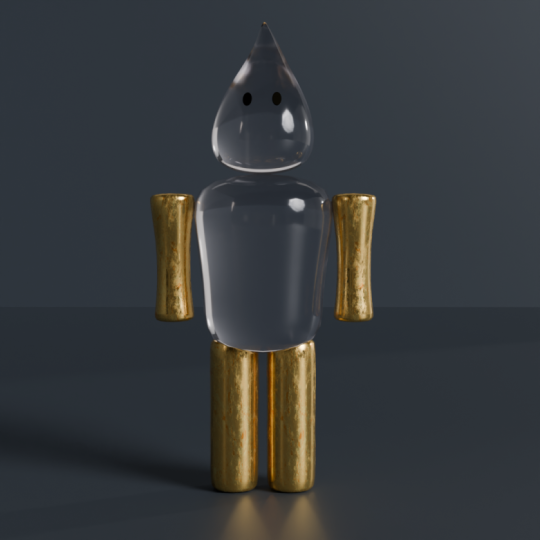
y el empaque. Adicionalmente, buscan una mascota de tres D
para
representar a Daniels y una animación con fines
publicitarios Así que estoy contento con esto, y
haré clic en Descargar como PNG, y este será
el resumen del proyecto para todos mis proyectos en el
futuro.
5. Recorrido por la interfaz: Hablemos de
la interfaz de usuario y un poco más de detalle. Ahora estoy en un nuevo archivo
y llegué aquí haciendo clic en Archivo Nuevo en general. Eso abre un archivo completamente nuevo. Y esta ventana es donde
hemos pasado la mayor parte de nuestro tiempo. A esto se le llama la ventana gráfica
tres D. Aquí es donde hacemos todos nuestros tres trabajos
de D. Aquí abajo, hay
otra ventana. Esta es la línea de tiempo, y
puedo reproducirla haciendo clic en Reproducir, y el cabezal de reproducción
se reproducirá, y verás tu
animación si tienes alguna Nosotros no, así que ahora es
muy aburrido. Puedo arrastrar eso de
nuevo al inicio. Y por cierto,
sé que es mucho cuando lo
estoy repasando sin
contexto como este, pero solo quiero
darte una visión general. No te preocupes por los detalles. Vamos a
volver a todos estos botones más adelante. Te voy a familiarizar
con lo que hacen todos ellos. Pero por ahora, está
bien simplemente
sentarse y tratar de
tomarlo lo mejor que pueda. Arriba a la derecha, tenemos
nuestro Scene outliner. Outliner es una lista de todos
los objetos de tu escena, y es genial para
organizar cosas También puedes organizar las cosas
agregando nuevas colecciones. Hay un nuevo
botón de colección en la parte superior derecha. Cuando haces clic en eso, obtienes esta caja en la que puedes hacer
doble clic para renombrar, y yo llamaré a esto decir Luces, y puedo hacer clic en esta luz
y arrastrarla a las luces. Funciona como una carpeta. Debajo del esquema, está
la ventana de propiedades, y puedes cambiar el tamaño de cualquier ventana haciendo clic entre ellas cuando tu cursor se convierte en
una flecha de dos puntas y puedes cambiar el tamaño de la forma que
quieras Esta ventana de aquí abajo, esta
es la ventana de propiedades, y tiene un montón
de pestañas diferentes. La pestaña superior, esta
es la pestaña de renderizado. Estos son todos los
ajustes para renderizar, que si recuerdas,
así es como hicimos una imagen. Entonces, cuando haga una imagen, utilizará todos estos
ajustes para hacerlo. Y esa es la pestaña de salida. Aquí es donde cambias
cosas como la resolución de tu imagen de salida y la velocidad de fotogramas de tu
animación, cosas así. Y entonces podemos saltarnos
a esta es la escena. Y en escena, lo que
aquí es útil es cambiar las unidades. Me gusta usar los valores por defecto, que es métrico y metros.
Eso es lo que disfruto. Pero he escuchado que algunos
de ustedes por ahí disfrutan de las unidades imperiales,
y no voy a juzgar. El siguiente paso después de eso,
esa es la ficha del mundo. Aquí es donde cambiamos. Bueno, el mundo mundo
¿Qué es el mundo? El mundo es todo lo que rodea nuestros tres objetos D. Es como infinitamente lejos. Y lo podemos ver si
entramos en vista renderizado. Recuerda, aquí arriba,
las cuatro bolas, puedes cambiar la forma de
ver tu mundo de tres D. Si haces clic en el que está más a la derecha, lo
vemos con información de
iluminación El momento, es muy gris. Tu luz puede ser más
poderosa que la mía. Pero si vamos a la pestaña Mundo y cambiamos el
color del mundo, entonces podemos cambiar
la forma en que está iluminado. Entonces ahora todo es azul y la caja está iluminada con
azul desde todos los lados. Y
devuélvete eso a algo así como un gris oscuro y enciende
el modo viewpard gris Vamos a pasar por encima
de la siguiente pestaña que no
es muy útil.
¿Sabes qué? Podemos saltarnos
éste también y esto por ahora y esto no vas a usar, esto no vas a usar, no en
el transcurso de este curso. ¿Se puede decir que el
curso del curso? No esto, no esto, sino hasta aquí abajo,
tenemos los materiales. Esta pestaña solo está disponible
si tiene una malla seleccionada. Si haces clic en una
luz, verás que cambia y
se convierte en un icono de luz. Esto depende del contexto. Entonces, si hago clic en una malla y hago
clic en la pestaña de materiales, aquí es donde
damos a nuestros objetos información de
color y sombreado Pero cuando hago clic en una luz,
se convierte en una pestaña de luz, y ahí es donde
cambio el poder de mi luz, el
color de mi luz. Si hago clic en la cámara, entonces
se convierte en una pestaña de cámara, y puedo usarla para cambiar la distancia focal de las cosas de la
cámara como esta. Y este es el espacio de trabajo
predeterminado. Algo que sí hace que la interfaz de usuario de
las licuadoras sea un poco única es que el
espacio de trabajo es muy maleable Es fácil agregar
y quitar ventanas, y eso puede ser muy útil. Por ejemplo, tal vez
queremos poder ver nuestras tres escenas D desde dos
ángulos al mismo tiempo. Lo que harás es ir a uno de los bordes
de las ventanas,
digamos, al borde superior,
clic derecho y podrás dividirlo. Hagamos una división vertical. Ahora cuando me muevo
, puedo mover el split y dar click
para confirmarlo. Y ahora obtengo puertos de vista 23d. Haz lo mismo moviendo
el mouse hacia la esquina
hasta que se convierta radical y luego haz clic y arrastra a la ventana y
eso hará lo mismo. Yo también puedo dividirlo en. A lo mejor quiero usar
esta ventana superior para ver mi
escena de tres D desde arriba. Puedo pasar al track
ball de la derecha y
hacer clic en la flecha que apunta arriba, la azul que dice Z. Si hago clic en eso, entonces la estoy
viendo desde arriba Esta de abajo
tal vez quiera ver
eso desde X. Voy a hacer clic en X. Ahora tengo tres vistas separadas de mis tres escenas D
desde diferentes ángulos. Esto puede ser muy útil. Pero también
se puede cambiar el tipo
de ventana que esta es. El tipo de ventana que
está en la parte superior izquierda, es este pequeño desplegable de aquí abajo. Y verás que esto
es diferente entre esta ventana y esta ventana
porque esta tiene
el ícono de outliner,
y esta tiene un ícono de ventana gráfica de tres
D. Pero no tiene por qué serlo. Puedo hacer clic en esto y obtendrás muchas opciones
diferentes. Hay tantos
tipos de ventanas, pero solo usaremos
sobre no lo sé, como cinco de ellas, y ya
conocemos la mayoría de ellas. Esta es la ventana gráfica de tres D. Y por aquí
tenemos la línea de tiempo, que es la misma que a continuación. Ahí está el outliner y
la ventana de propiedades. Esos son los que
ya tenemos abiertos. Y si hago clic en el outliner, ahora esta ventana se convierte también en
un outliner Así que realmente puedes empezar a
fastidiar las cosas.
Y me refiero a eso. Eso es lo
que me pasa todo el tiempo. Hago un lío con toda
esta ventana, y solo quiero volver
al valor predeterminado. ¿
Cómo se hace eso? Bueno, el truco para hacerlo es
revisar los espacios de trabajo aquí arriba Estos son básicamente
presets de ventanas. Si estás haciendo
animación, puedes clic en el espacio de trabajo de animación, y esto es lo que las cosas
blender son
las ventanas que quieres abrir
cuando haces animación. Y puedes agregar uno nuevo haciendo clic en más
por aquí, y agreguemos una nueva versión
de lo que acabamos de tener, que es un layout general. Si hacemos eso, entonces
volvemos al default. Y así es como fastidiar tu interfaz y volver a arreglarla.
6. ¿Qué son los polígonos?: Como es una pequeña teoría sobre cómo las computadoras ven
tres objetos D. Pero para uno, no es
aburrido y para el otro, no se
te permite saltarlo. Seremos muy rápidos,
pero esto es sumamente importante de entender
para el futuro de nuestro trabajo en tres D.
Para demostrarlo, simplemente
eliminaré
todo lo que está en el archivo predeterminado y
agregaré un nuevo objeto. Recuerda, sumar está aquí arriba en el menú de anuncios debajo de malla,
obtenemos todas nuestras mallas Y para este ejemplo, usemos una esfera UV. Obtenemos una esfera, pero
notarás que no es una esfera lisa. Es una esfera con un
montón de cuadraditos. ¿Y por qué es eso? La
razón de eso es que una computadora no puede en
tres D, mostrar curvas. Las curvas son básicamente imposibles. La computadora solo
entiende líneas rectas, y la forma de
falsificar una curva es agregar suficientes líneas rectas. Cuando agrego un objeto, me sale un pequeño menú aquí
abajo a la izquierda. Ahora dice agregar UVSphere
porque eso es lo que hice. Y presionaré la pequeña flecha
aquí para ampliar ese menú, y obtengo ajustes para ello. Los ajustes que me
interesan ahora son los segmentos y anillos. Si hago clic en los segmentos
y arrastro hacia la derecha, aumentaré el
número de polígonos Y verás cuanto más agrego, cerca
se acerca
a verse suave. Al menos en ese eje, agreguemos algunos en el
otro eje también. Y verás que me
acerco más y más a la ilusión de que
en realidad esta es una pelota perfecta. Pero el problema es que cuantos más
polígonos agrego, más gravoso
es en Y si te metes en
las decenas de miles de polígonos en una escena y realmente rápidamente puedes cuando empiezas a trabajar
con objetos complejos, entonces va
a correr muy lento Es la razón por la que los videojuegos a principios
del 2000 se veían
tan dentados en comparación con actualidad porque se necesitan computadoras
más potentes
para mostrar más polígonos Y no sólo eso, sino trabajar
con objetos de alto poli. Así lo llamamos cuando
hay muchos polígonos. Es difícil modelar con, es
difícil de texturizar. Todo es más complicado
con muchos polígonos, razón por la
cual hay formas de fingir
tener muchos
polígonos sin
tener realmente muchos polígonos Es muy común
cuando eres nuevo en tres D solo querer
agregar un montón de ellos. Pero quiero que
intentes abstenerte de eso, y te
mostraré cómo. Volvamos a reducir el policunto
a algo cercano a donde empezamos a
donde está muy facetado Y no muy alta resolución. Haré clic derecho sobre la bola
y haré clic en Sombra Suave. Creo que esto es genial porque
la malla no ha cambiado. Si entro en la vista de
estructura metálica aquí arriba, la primera bola, verás que
los polígonos siguen siendo grandes, pero hay un
algoritmo inteligente para simplemente fingir en
la superficie para fingir tener
suavidad Probablemente se pueda decir por la silueta que la
silueta no se ve afectada por ella. La silueta sigue puntiaguda, pero en la superficie,
tenemos una versión falsa
de ese sombreado Yo sólo pienso que es genial. Pero notarás que el menú aquí
abajo ahora cambió de Ad UV sphere a Shade Smooth porque el menú solo muestra
lo último que acabas de hacer. Así que en realidad tendrás que recordar que cuando
agregas un objeto, tienes que cambiar la configuración antes de hacer cualquier otra cosa, o la configuración desaparecerá. Entonces eliminemos esto
y agreguemos un nuevo objeto, pero vamos a agregar malla, y voy a agregar un cono para
esto solo para mostrarte que si hago clic derecho en este
cono y sombreo suave, esto no reacciona de la
manera que realmente queremos porque
trata de suavizar lo
que se supone que es agudo
en la parte inferior aquí. Al igual que este borde aquí no se
supone que sea suavizado, pero sigue
tratando de suavizarlo. Y por cierto, estoy dibujando en pantalla manteniendo
pulsada la D y dando clic. No
te sirve de ninguna manera, pero es muy útil
para mí para enseñar. Entonces, si tienes un objeto
que se supone que tiene algunas partes lisas y
algunas partes afiladas, haces clic derecho y haces clic en
Shade Auto Smooth en su lugar, lo que intentará mantener esas partes afiladas del objeto. Entonces, si le quitas algo
a este video, solo recuerda, trata de tener el menor número
posible de polígonos para
definir las formas
7. Otros tipos de objetos: Hablemos de algunos
otros tipos de objetos. Eliminaré todo lo
que esté por defecto, seleccionándolo y
presionando Eliminar. Y en el menú add aquí, tienes un montón de opciones. Tienes tantas cosas que
puedes agregar. Así que vamos a intentarlo. Primero, quiero agregar una imagen
porque he descargado una imagen de online de un perro de aspecto muy triste
que me gusta mucho, y quiero ponerla
en mi escena de tres D. La forma de ponerlo en
tu escena de tres D
no es importarlo como referencia, y no es
importarlo como fondo. Es para importarlo
como un plano de malla. Eso te dará un objeto tres
D de la imagen. Voy a hacer clic en eso, lo que
abre un visor de archivos, y voy a ir a la carpeta donde he descargado
esta imagen, haga clic en ella y haga clic en
Importar imágenes como planos. Y es raro porque la imagen se ve gris y es
gris en ambos lados, pero eso es,
claro, porque
estamos en el modo de ventana gráfica equivocada Tenemos que ir a la previsualización material aquí
arriba, la tercera bola. Y yo sólo te voy a dar
un pequeño consejo aquí. Si esto tarda
mucho en cargarse, entonces es probable que no haya optimizado los
subprocesos en su CPU. Es necesario aumentar los
subprocesos de compilación de Max Shader Y sé que eso suena
como un término de Star Trek. Al igual que, Capitán, ¿cuáles son los subprocesos de
compilación de Max Shader
en este momento? Es crítico. Pero no, básicamente
significa solo Google tu computadora y
Google la cantidad de hilos que
tiene tu CPU y poner ese número
en las preferencias de edición. Ir al sistema, y aquí
bajo memoria y límites, el inferior subprocesos de
compilación Max Shader Mi CPU tiene 12 hilos.
Voy a poner eso ahí. Eso solo significa que cada vez que haga clic en el botón de
vista previa del material, será 12 veces más rápido. Bien, este es un lindo perro. Iré a la herramienta de rotación
y la rotaré sobre el eje x, y mantendré pulsado
Control para chasquearla que
pueda obtenerla
recta vertical. Y si quiero tomar
una foto de esto, entonces voy a necesitar una cámara, y borré la
cámara inicial que estaba aquí, así que solo voy a agregar
una nueva va a agregar cámara. Y podemos ver la
cámara porque se agrega en el medio,
y podemos verla. Ahora está detrás del cuadro. Entonces iré a la herramienta de movimiento. Y muévala para que
pueda mirar la imagen. ¿Y recuerdas cómo
miramos a través de la cámara? Vamos al botón de la cámara de
la derecha para mirar a través de él. Hacemos clic en la
pequeña flecha
que se encuentra encima de ella y vamos a la cámara para ver. Y ahora cuando nos movemos,
la cámara nos seguirá, así podremos reencuadrar
la foto del perro para que me guste un encuadre
peor que el que tenía el
fotógrafo original Y luego puedo
hacer clic fuera de la cámara para ver y salir de la cámara. Y ahora si hago clic en el
botón renderizar y renderizar imagen, hace renderizar una
imagen del perro, pero está muy oscuro. Y la razón de ello es que aún no
hemos añadido una luz. Entonces vamos al menú add, y sigo volviendo
al menú add y vas
a trabajar en tres D, irás al
menú Ad todo el tiempo, por eso es muy inteligente aprender
el atajo para ello, y ese es el turno A, A para AD. Y eso trae el mismo menú justo donde está tu mouse. Entonces vayamos a la luz, y tenemos diferentes
luces para elegir. El más básico que es
solo una luz puntual. Voy a hacer clic en eso. Difícil de ver. Verás que sí
se mostró en el esquema. Nosotros sí tenemos una luz puntual, pero está en el centro de la imagen. Lo voy a mover aquí y realmente no
podemos ver el efecto
de la luz y eso es porque estamos viendo nuestra escena en modo de vista previa de material
y no en modo renderizado, lo que no toma en cuenta la
iluminación. Pasemos al
modo renderizado. Ahora ya lo podemos ver. Ahora podemos hacer una
viñeta de aspecto agradable en nuestra imagen, hacerla más brillante en el centro
y no alrededor del borde Y volveré a Render
y presionaré Render Image, lo que me da un bonito
reencuadre y peor iluminación en la foto del
perro que descargué Tenemos un objeto de texto que
te
va a ser muy útil como diseñador gráfico, el objeto de texto, lo editas presionando Tab cuando lo
tengas seleccionado, y luego podrás escribir
lo que quieras. Y encontrarás todos los
ajustes para ese texto en su menú contextual
aquí abajo en las propiedades. Hay una letra A, y
eso te da ajustes para cosas como que
tienes una fuente aquí. Puede cambiar la fuente regular en
negrita y cursiva. Simplemente harás clic en
el ícono de la pequeña carpeta, que abrirá
tu vista de carpeta, y navegarás hasta
la carpeta donde
tienes esa fuente almacenada. Y puedes ir a la geometría aquí, y si aumentas extruir, entonces eso hará que el
objeto se convierta en tres D. Así que tienes un montón de objetos
diferentes
que puedes agregar, pero en su mayor
parte, las cosas estaremos agregando son cámaras, luces y mallas, que
son tres objetos D.
8. Proyecto de clase 01: Collage: Hola, es tiempo de proyecto de clase. Los proyectos de clase
no dan miedo para uno. Son una forma de encarnar lo que aprendes porque
probablemente ya lo sepas, pero en realidad
aprendes mucho mejor si usas lo que aprendes
y no solo lo miras Hay
algo en hacerlo que
hace que se pegue un poco mejor en tu
cerebro. Entonces por eso
tenemos proyectos de clase. Son para que
lo aprendas un poco mejor, y también como bono, obtienes algo que puedes poner en tu cartera de inmediato. Encuentre este documento
que contiene todos los proyectos de clase
en los archivos de ejercicio. Así que
descárgalos y síguelos. Si aún no lo has hecho, descarga Blender usando
este enlace y ve a random project generator.com para obtener
tu breve único.
Yo ya hice esto. Conseguí la marca de aceite de chile industrial y
vanguardista, pero tú vas a buscar la tuya propia Yo usaré este proyecto para
el resto del curso, y tú usas cualquier
proyecto que obtengas. Nuestro primer proyecto eso es este. El proyecto de collage. Te han pedido que
hagas un collage
de tres D de imágenes para mostrar la
estética de la marca. Descarga algunas imágenes
adecuadas de la web y organízalas en
tres D, luego renderízalas. La imagen será
utilizada en redes sociales. Puedes descargar
gratis imágenes de stock de Unsplash o Pixaba Entonces, ¿a qué me refiero con collage? Te voy a mostrar lo que
hice, en realidad. Entonces esta es mi sumisión
para este proyecto. Esta es la marca Daniel's Edgy e
industrial de aceite de chile. Entonces, ya sabes, me conecté a Internet. Miré a Chili,
busqué algunas cosas industriales, y encontré este gran
graffiti brasileño que usé en
el fondo. Lo que quiero que
practiques aquí es poner las cosas en el espacio tres D
e iluminarlas. Entonces verás que hay
un poco de sombra debajo de todos estos. Eso es porque tengo una luz
encima, proyectando sombra, y también se te permite
agregar texto como lo hice yo, pero eso definitivamente
no es un requisito. Hablando de requisitos, solo
hay uno. Hay que usar tres o
más imágenes en la escena. En cuanto a entregables, renderice su escena y exporte
como un PNG cuadrado Eso es para que sea adecuado
para las redes sociales. Y luego, cuando
termines, lo subes a la
sección de proyecto o asignación de clase en este sitio web, el sitio web donde estás
viendo este video en este momento. Y compártelo en tus
propias redes sociales. Es una buena idea
compartir tu trabajo y
mostrarle a la gente lo lejos que
llegas en tu trabajo de las tres D. Y si quieres, puedes etiquetar en Bring Your Own Laptop en
Instagram y hay un enlace al grupo de Facebook y al grupo de LinkedIn.
Entonces te voy a dar una propina. Esto es algo que hice para
este proyecto es abrir dos ventanas separadas de tres D
y usar una de las ventanas para mirar a través de la cámara y la otra ventana para
moverse por la escena de las tres D. Y de esa manera, puedes
ajustar las cosas en tres D y ver en tiempo real cómo se ve desde el punto de vista de la
cámara. Esperamos ver
lo que se les ocurre, pero no obtendrán ningún
comentario crítico en esta etapa. No me interesa criticar tus diseños
y colores y esas cosas. Realmente solo quiero
que te acostumbras a
mover las cosas en tres D, familiarizándote con la interfaz de usuario de la
licuadora. Ese es el punto
de este proyecto.
9. Cómo agregar color y materiales: Materiales, hablemos
más de materiales. Fui a Archivo Nuevo General, y ahora estoy en un archivo completamente nuevo. Voy a añadir un material a esta caja. Eso es aquí abajo en
la pestaña de material. Recuerda, no verás
la pestaña de material si tienes seleccionada la cámara
o la luz seleccionada. Necesitas una malla seleccionada, luego tienes la pestaña de
materiales
aquí abajo y puedes agregar un
nuevo material a la caja. Se cambia el color haciendo clic en el campo grande
que es el color. No hagas clic en el
pequeño icono redondo, haz clic en el color real, entonces obtendrás un
seleccionador de color y yo puedo hacerlo rojo La caja no
se vuelve roja de inmediato porque no estamos en
el modo de vista correcto. Eso es aquí arriba. Tenemos que ir a la vista previa
del material, y luego se vuelve roja. Pero puede resultar un poco confuso trabajar con
múltiples materiales. Entonces déjame
construir una escena aquí para que
puedas ver cómo trabajar con
múltiples materiales. Voy a borrar los objetos
que no necesito. Mueve la caja un poco hacia arriba, Shift A para agregar una malla, y yo agregaré un avión. El plano es un poco minúsculo
y está debajo del cubo, así que lo escalaré un
poco usando la herramienta de escala, y haré clic en el cuadrado azul para escalarlo en el eje
horizontal. Ahora tengo piso, y
agregaré otro objeto. Desplazamiento A debajo de la malla. Voy a añadir vamos a hacer un cono. La herramienta de mover y
moverla aquí arriba para que podamos verla en lo alto del piso y
agreguemos un objeto más, y yo pueda hacer el Taurus. Aún no hemos usado un Tauro
. Muévete eso por aquí. Entonces, si tengo seleccionado el
toro, el material se ha ido
porque el material solo aparece aquí si
tengo seleccionado el cubo, lo que tiene
el material en él Pero puedo agregar el material
a otra cosa, también, si voy al Tauro y hago clic en el pequeño menú
desplegable junto a nuevo, y hay una lista de todos
los materiales de mi escena pueda hacer clic en ese material, y eso también lo aplica
a eso. Y estos dos comparten el
mismo material
que en cualquier cambio que haga
al material en cualquiera de los dos objetos se propagará también
al otro Si ahora hago clic en el cubo y cambio
el color a azul, también cambia el color a azul
en la rosquilla Y si después quiero
desvincular estos, si quiero hacerlos
para separar materiales, tengo que ir al material aquí, y ahí está
el número dos Esto significa cuántos objetos han
aplicado este material. Y si solo haces clic en eso, eso hace un material duplicado. Ahora si hago clic en el menú
desplegable, tengo dos materiales. Y uno de ellos está en el cubo. Uno de ellos está en la rosquilla. Y si cambio el
color del uno, entonces no
cambia en el otro. Y para mantener las cosas organizadas, es una buena idea cambiar
el nombre de tus materiales. Y lo puedes hacer
ya sea haciendo doble clic aquí o haciendo clic en su nombre aquí, y este puede
llamarse verde, y este se puede llamar azul. Y ahora, de nuevo, si
voy al cono y voy al desplegable y le
doy el material verde, esos ahora se comparten. Entonces, si lo cambio a rojo, lo cambia en ambos objetos. Pero el color no es el único
ajuste que puedes cambiar aquí. Son tantos deslizadores con los
que jugar. Estos son los más
importantes. Tienes aún más en
los rollouts aquí abajo, como un difuso,
tienes subsuelo Se puede jugar con todo
y ver lo que hace. Todo es divertido jugar
con él. Te voy a mostrar los más importantes. Si hago clic derecho en el cono
y hago clic en Shade Auto Smooth ahora está suavizado para que podamos decir que cuando
disminuya la rugosidad, se vuelve más brillante Si aumento metálico, entonces se convierte en un metal. Casi todo en
la vida tiene un IOR de 1.5. Este es el índice de refracción. Generalmente no
querrás tocar esto, pero puedes tocar el Alfa. Cuando disminuyes eso, eso agrega transparencia al objeto. Así que adelante mira a través de
todos los controles deslizantes, juega con ellos y mira qué tipo de efectos
puedes hacer
10. ¿Qué es el modo de edición?: Hasta ahora, solo hemos movido
nuestro objeto alrededor, pero no hemos cambiado
la forma del objeto. Es decir, hemos ido
a la herramienta de escala y la escalamos
en diferentes ejes Pero eso no cambia el hecho de que ésta sigue
siendo una forma cúbica. Nunca podrá convertirse en una
botella si hacemos esto. Entonces ahí es donde entra en juego el modo de
edición. Usamos el modo de edición para cambiar la
forma fundamental del objeto. Es como empezamos a modelar las cosas. Vamos aquí arriba a la parte superior izquierda donde dice Modo Objeto. Haga clic en eso, y eso trae a
colación todos los demás modos. No te preocupes por estos. El único que nos
interesa es el modo Editar. Estos son los, esos
son usos súper nicho, pero el modo de edición irá
entrando y saliendo dentro
y fuera de 1 millón de
veces a lo largo de este curso, razón por la
cual hay un atajo de
teclado muy práctico y muy fácil para ello. Y eso es tabulador. Presionas tabulación y las cosas cambian. Ahora estamos en modo de edición. El objeto se vuelve naranja. Obtenemos un montón de
herramientas más a la izquierda, y ahora
ya no estamos trabajando con
el objeto en su conjunto. Estamos trabajando con puntos
individuales. Entonces ahora si hago clic en un punto, voy a la conocida herramienta de
movimiento, la muevo hacia arriba. Eso mueve justamente ese punto. Y esto es lo que
hacemos en modo edición. Cambiamos la forma
del objeto. Y podemos cambiar todo
el objeto al mismo tiempo si
presiono A en mi teclado, eso selecciona todo,
y puedo escalar, y puedo escalarlo. Esto es como si lo
escalara en modo objeto, ¿verdad? No, no lo es. Y esto es
algo muy clave para entender, y es muy confuso.
Lo siento por esto. Me he estado torciendo el cerebro tratando de averiguar
cómo explicar esto Y creo que solo te voy a mostrar el efecto para que sepas lo que
pasa. Aquí está el trato. Voy a deshacer todo.
Regresa al cubo. Aquí, esto es solo
una demostración. No te preocupes por las
cosas que estoy haciendo. Te enseñaré a hacer
todo esto más adelante. Esto es sólo para
mostrarte un concepto. Iré a la herramienta Bisel. Voy a hacer clic en Edge. Y voy a arrastrar este aparatito
para biselar Esto es lo que hace el biselado. Aplana la esquina y deja una
cara de 45 grados ahí en su lugar Ahora, si salgo del modo de edición, presiono tabulador, y
ahora en modo objeto, muevo todo el objeto alrededor. Aquí es donde hemos hecho
todo nuestro trabajo hasta ahora. Y digamos que lo escalo sobre el eje azul justo arriba
y abajo. Lo escalo. Esto ya no es de 45
grados porque, ya sabes, lo
escalé, y ahora
vuelvo al
modo de edición. Presiono tabulador. Selecciono esta esquina
y la biselo. Ya no se
bisela en un ángulo de 45 grados. De hecho, bisela en
el mismo ángulo que esto es. ¿Y por qué es esto? La razón es que cuando lo
escalé en modo objeto, realidad no
cambié
la posición de cada punto No solo le dije al programa, sea cual sea la forma en la que se encuentre el objeto, estírelo a través
del eje de arriba a abajo. Es como si
imprimieras un diseño en una camiseta y
estiras la camiseta, ¿verdad? No has cambiado el diseño. Podrías volver
a la computadora. Podrías cambiar el diseño,
imprimirlo en una nueva camiseta y
estirarla igual, y ahora tendrás
una versión estirada de tu diseño. Eso es
lo que está pasando aquí. Entonces, de hecho, lo que acabo de hacer
es que hice un
corte de 45 grados en este borde, pero luego se
estiró justo después. Y podemos ver que
eso está sucediendo aquí en la pestaña objeto en el panel de
propiedades. Aquí puedes ver todas las
transformaciones de los objetos. No tiene cambios en la ubicación, ningún cambio en la rotación, pero en escala, tenemos uno, uno, y un 2.159 Ese es el eje z que está
arriba y abajo, ¿verdad? Eso es lo que cambié. Entonces,
si arrastro esto más, verás que se
estira más. Y si lo vuelvo a bajar, puedo hacer clic en él y escribir uno
para que todos sean uno. Ahora volvemos a una forma cúbica, y ese segundo corte que hice es, hecho, de 45 grados.
Siempre lo fue. Siempre hice un corte angular de 45
grados, pero la forma del objeto
se estiró después. Y no te preocupes si nada
de esto tiene sentido. Es totalmente confuso. Lo único que realmente tienes que
saber es que cuando trabajas en modo
edición en un objeto que se estira de manera diferente
en diferentes ejes, las cosas pueden empezar a comportarse
un poco raras. Si lo has escalado solo
en el eje superior y luego entras en modo de edición
e intentas hacer un bisel, por
ejemplo, no será de 45 grados como
crees que lo Pero digamos que has hecho una forma que has
estirado así, ahora
te sientes muy mal, ahora
te sientes muy mal, pero no te acordaste de que cometiste un error y estás como, espero que Robin no vea esto. ¿Qué puedes hacer? Bueno, hay algo que puedes hacer
antes de que me entere. Pondré el objeto aquí abajo en la esquina para que lo
veas justo al lado de su escala. Verás que la escala es ahora una, una y aproximadamente 2.5. El objeto está estirado,
así que eso es lo que podemos ver. Si voy al objeto, aplique escala. Aquí es cuando voy a
hacer clic, pero voy a mover la cámara ahí abajo para que
puedan ver lo que está pasando. Preste atención a la forma
del objeto y sus
valores de escala cuando haga clic en este. ¿Listos? La forma del
objeto no cambió, pero su escala sí. Ahora tiene una escala uniforme. Entonces lo que pasó ahora fue que aplicamos la escala
al objeto. Mantiene su forma, pero la escala es uniforme. Entonces ahora esta es la
nueva forma por defecto. Y si entro en modo edición
y biselo cualquier esquina, lo hará en un
ángulo de 45 grados exactamente como se esperaba Entonces, cuando tengas dudas, cuando las cosas empiecen
a comportarse de manera extraña, ve al objeto, aplica escala
11. Selección de malla: Seleccionar cosas en el modo Edición
puede ser un poco complicado. Así que vamos al
modo de edición ya sea haciendo clic la pestaña o en este botón aquí
y bajemos al modo Editar. Y para empezar, hagamos
algo que sé que te va a
excitar sin
fin, algún glosario Esto es un vértice o un punto. Esto es un borde, y esto es una cara o un polígono Realmente estoy empezando a
desear no escribir esto mano y solo
elegí una fuente en su lugar. Normalmente cambio un poco
entre la terminología. Podría llamarlo vertet.
Podría llamarlo un punto. Ahora ya sabes lo que significa,
y podemos interconectar con cada tipo aquí arriba con los tres botones
junto al modo de edición. Este primero
corresponde a vértices. Si hacemos clic en eso, y
ahora podemos seleccionar diferentes puntos o vértices y podemos decir
moverlos por separado El segundo es para bordes. Cuando hago clic en eso, ahora
podemos seleccionar aristas y moverlas alrededor moviendo
dos vértices a la vez No sólo podemos moverlo, sino que también podemos decir girarlo. Y escalarlo. No te preocupes por escalado
no uniforme cuando
estamos en modo de edición. Si recuerdas los
problemas de escalado de la última vez, no te preocupes por escalar
cuando estemos en modo de edición. En tercer lugar, esa es
la selección de fase. Ahora podemos seleccionar
caras enteras y editarlas. Si quieres agregar
a tu selección, puedes mantener presionada
la tecla Mayús en tu teclado y hacer clic en otra
cara, eso los agregará. Y si haces clic en uno
que ya está seleccionado, eso lo deselecciona. Una especie de cosa confusa
si voy a la herramienta superior aquí, que es la herramienta de selección de cuadro, digamos que quiero seleccionar
los cuatro vértices superiores Yo lo veo así,
arrastre una caja sobre él, y uno pensaría que los
selecciona a todos,
pero el de atrás no está seleccionado porque no era visible. Blender solo selecciona los puntos
que son visibles para ti. decir, si
quieres seleccionar cosas que están en la parte trasera
de tu objeto, necesitas entrar en modo Xray,
que es uno de los modos de
vista aquí arriba, la bola más a
la izquierda, bola más a
la izquierda Da clic en eso, ahora puedes
ver a través de tu objeto. Y si ahora arrastras esa caja
, también seleccionará la de
atrás. Así que recuerda, estos son los
bloques de construcción fundamentales de tu objeto. No se pueden realizar cambios en una escala
menor que un vértice. No se puede tomar un punto
dentro de la mitad de esta cara y arrastrarla hacia afuera
porque ahí no hay nada. La cara siempre debe ser solo un borde facial debe
ser siempre un borde recto. Entonces, si queremos hacer cambios que sean más pequeños que una cara, entonces necesitamos agregar más
vértices al objeto Y ese es el
inicio del modelaje, que iniciaremos
en el siguiente video.
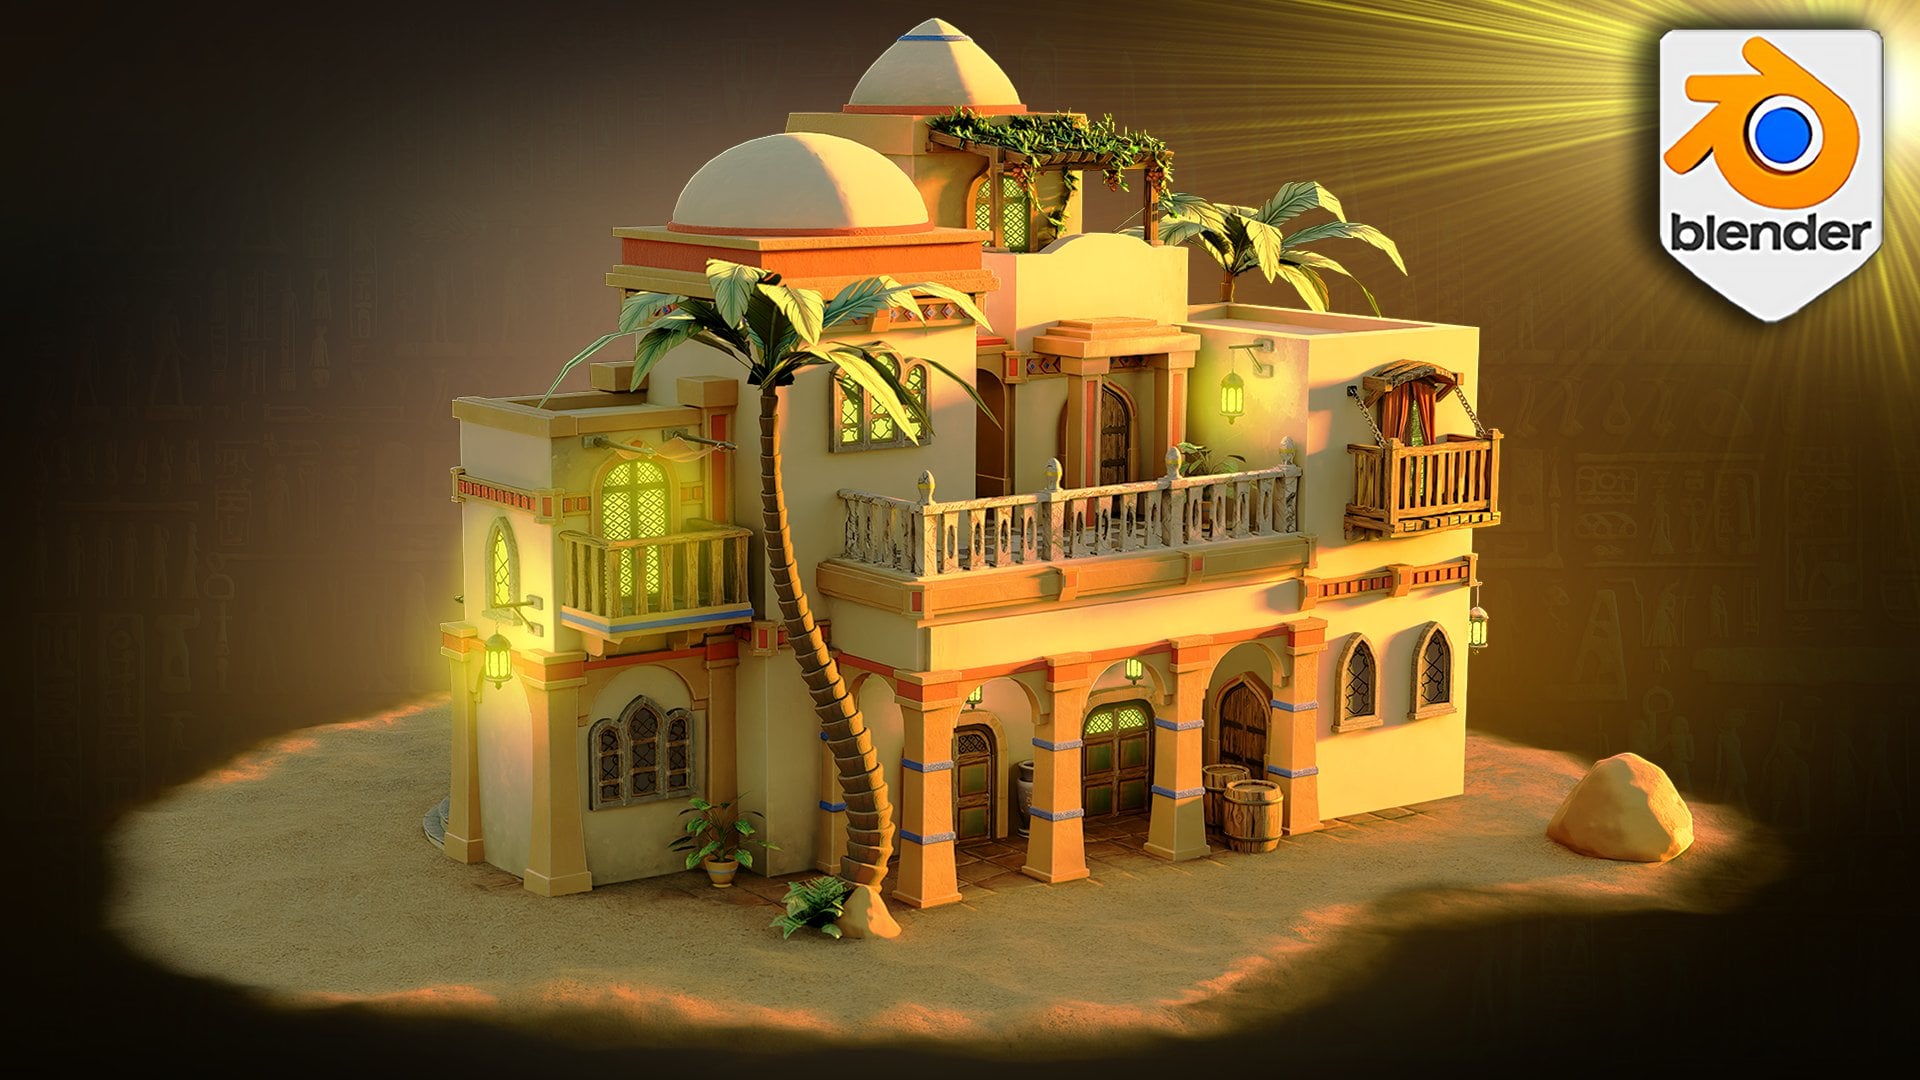
12. ¿Qué es el modelado?: Ven a probablemente la parte
más importante del curso, y
eso es modelar. Modelar es hacer
tres formas D, y va más allá de las
cosas que encuentras en el menú de anuncios como el
cubo y el cilindro. Se trata de agregar más
detalles a un objeto, hacer tus propios
objetos personalizados, puedes decir. Entonces, en los próximos videos, estaremos modelando house, y al final del mismo,
podrás modelar la mayoría de los objetos de verdad. Entonces antes que nada, tenemos
que entrar en modo edición, que es aquí arriba donde
ahora dice modo objeto, y podemos bajar al modo Editar, o podemos presionar
la pestaña de atajo. Cuando estamos en
modo de edición, la barra de herramientas se expande para mostrarnos todas
las herramientas de modelado. Y de hecho, en mi pantalla, la barra de herramientas incluso sale
fuera de la pantalla. Entonces, si el tuyo también lo hace, solo mueve tu cursor
al borde de esa ventana y
arrastra para redimensionarla, y obtendrás dos
columnas como esta Ahora bien, estas son las herramientas más
comunes para modelar. No son las únicas
herramientas en licuadora, pero si sabes cómo
usar estas herramientas, puedes modelar 98% de todos los modelos. Como, estos son lo
que necesitas, básicamente. Y de hecho,
incluso nos saltaremos algunos porque no
todos son tan importantes.
13. Herramienta de Extrusión: Empecemos por el principio
con la herramienta de región de extrusión Así que extruir región
funciona mejor con caras. Ahora, recuerden, tenemos
diferentes modos de selección. Aquí arriba, tenemos vértices, que son los puntos de esquina tenemos aristas que son líneas que conectan
los puntos de esquina, y luego tenemos las caras, que consisten en cuatro
líneas que conforman un plano Y cuando tenemos
seleccionada la herramienta
extruir región , obtenemos esto Se llama Gizmo. Es un gran signo más. Y si hacemos clic en eso y
lo arrastramos , eso arrastra la cara Pero crucialmente, esto es
diferente a
moverlo porque deja la geometría original del cubo que atraviesa aquí Hadi, vamos a presionar Control
o Comando Z para deshacer eso. Si hubiera usado la
herramienta de movimiento y la hubiera movido, no
tendríamos esa línea
pasando por la malla. Entonces, cuando usas extruir, agregas detalle a la malla Y eso es importante porque si vamos a hacer una casa, entonces tenemos que
pararnos en el medio. Entonces iré al
modo de selección de borde para seleccionar este borde que he hecho y usaré la
herramienta de movimiento para moverlo hacia arriba. Ahora tengo forma de casa. Y si hubiera movido la
cara para empezar, no
tendría ese
detalle de malla con el que trabajar. Esto es lo que es crucial
entender de mallas en tres D.
No hay nada para mí aquí para hacer clic Puedo mover toda la cara, pero no puedo dividirla
en dos a menos que tenga una línea que vaya ahí.
Vamos a deshacer eso. Extruya esta cara, presione
el modo de selección de borde, la herramienta de movimiento y haga clic en
esta arista y muévala hacia arriba. Eso me da la base
de una forma de casa.
14. Herramienta de inserción: Agreguemos una ventana
a esta casa. Cuando quiero agregar una ventana, me enfrento al mismo reto
que con el techo. Si voy al
modo de selección de cara, hago clic en esta cara, y quiero decir
extruirla hacia adentro, tengo que hacer
toda la cara a la vez Y sí, la herramienta Extruir también
funciona hacia adentro en una malla Tengo que hacer todo el muro. Supongo que eso es común
en la arquitectura moderna, pero esta es una casa clásica, así que quiero hacer un poco de
detalle en el medio. Y ahí es donde entra en juego el siguiente
recuadro de herramientas. Yo hago clic en eso, lo que
me da un círculo amarillo. Ese es el artilugio para esta herramienta. Y si hago clic en él y lo arrastre, eso mueve el
ritmo en sí mismo, y crea un pequeño ritmo en medio de la fase más grande. No sólo eso, sino que conecta cada esquina con las esquinas
exteriores. Ahora, con el tiempo, vas a tener una idea de por qué
licuadora hace esto. Para resumirlo, cada
punto tiene que estar conectado a otro punto usando una
línea y usando una cara Y así si acabáramos de tener puntos
flotantes aquí, eso sería una
malla incomprensible para licuadora Y por eso agregó
estas líneas de esquina para nosotros también. Ahora bien. He metido esta cara. Lo solté un
poco demasiado pronto, así que mi ventana es un
poco demasiado grande. Pero recuerda, cada vez que
usas una herramienta o una
función en licuadora, obtienes un pequeño menú
abajo en la esquina, que te permite refinar
lo que acabas de hacer. Entonces, si lo abro, puedo cambiar todos los
ajustes para ese inset, y tiene bastantes
ajustes,
y
los usarás más adelante en el modelado Pero por ahora, permítanme cambiar el grosor
arrastrando este liner, y eso me permite rehacer
el tamaño de la ventana Vamos a encogerlo
a un tamaño de ventana más, y luego colapsaré
el menú para no obstruir mis atajos Bien, la ventana
tiene una forma extraña. Tiene la forma de la pared, así que necesito mover
este punto hacia abajo. Para llegar a mover solo un punto, no
puedo hacerlo en modo de selección de
caras. Ni siquiera puedo hacerlo
en modo de selección de borde porque eso requeriría
que mueva todo el borde, pero no puedo hacerlo en modo de selección de
vértice Entonces voy a hacer clic en vértices. Voy a hacer clic en esa esquina y puedo moverla
hacia abajo individualmente. Y ahora que tengo una
bonita forma para mi ventana, puedo extruir esta cara hacia adentro
para darle grosor Entonces iremos al modo de selección de
fase, seleccionaremos la cara en el medio
y usando la herramienta de extrusión, extruiré en un poquito Bonito. Y puedo usar la misma técnica para
hacer, digamos una chimenea. Podemos subir aquí, seleccionar
esta cara e insertarla. A un tamaño de chimenea. Y
luego extruir eso Ahora bien, sí extruye diagonalmente, haciendo que la casa
parezca de Alicia en el País de las Maravillas Bueno, hoy estoy de humor
aburrido, así que quiero una chimenea más
realista. Si
sucede algo así, entonces recuerda, puedes usar la herramienta para agregar
geometría sin moverla. Vamos a deshacer esto.
Vamos a arrastrarlo hacia arriba, abrir el menú y ver
cuáles son las opciones aquí. Puedo, de hecho, restablecer
todos los ejes de movimiento. Si tomo este
de abajo, lo pongo a cero, y eso vuelve
a bajar a donde empezó, pero todavía hay esa geometría
extra ahí. Se extruye. Pero imagina que se extruyó y
luego se movió hacia atrás, así que se superpone perfectamente
con donde empezó. Bueno, ahora puedo ir a la herramienta de movimiento y
moverla recto hacia arriba. Y eso me da un poco más de control sobre a dónde va. También puedo aplanar este top. En realidad, vale la pena
intentar averiguar usted mismo cómo
aplanaría esto. ¿Qué harías? Hay
un par de maneras, ¿verdad? Podrías entrar en el modo de selección de
borde, presionar el inferior o el superior, y luego moverlo para que quede plano. Eso es perfectamente razonable. Sería difícil hacerlo
bien en ese punto donde
está nivelado, así que tal vez no. Tal vez en su lugar
usarías la herramienta de rotación. Entrarías en el modo de selección de caras, clic en la cara central y luego la
girarías, para que quede plana. Pero ahora es muy sutil, pero es posible que hayas visto toda
la chimenea expandiéndose en la parte superior. Cuando hice eso, cambia
el grosor en la parte superior, lo cual es, de nuevo, no
del todo correcto. Entonces, de hecho, en este caso, utilizaría la herramienta de escala. Yo escalaría esta cara
sola hacia abajo sobre el eje azul, que la aplana,
y voy a tener que
refinar eso en los
ajustes a continuación Entonces la escala de uno
significa no hacer nada. Entonces la X y la Y están
ambas en una y en Z, quiero una escala de cero, lo
que la hace completamente plana. Y puedo seguir refinando
esta chimenea, digamos al colocarla un poco, darle grosor,
y luego extruir ese metal hacia abajo. Bonito.
15. Herramienta de bisel: La siguiente herramienta es el bisel. Bisel es el ejemplo que
utilicé en un video anterior. Corta una esquina
y la hace plana. Entonces si subo a mi modo de selección de
borde que
pueda hacer clic en las
esquinas alrededor de mi techo, voy a hacer clic en eso
dándome este aparatito de palo. Y cuando saque eso
, eso lo aplana. Aplana esa esquina hacia fuera. Lo único de lo que
desconfiaría al usar
la herramienta de bisel es cuántos bordes biselas al mismo tiempo Todas estas herramientas funcionan aunque tengas
más elementos seleccionados. Si deshago eso, puedo
seleccionar este borde, este borde, y los bordes traseros, y puedo biselar todo
al mismo tiempo Si los hubiera hecho uno a la
vez, vamos a deshacer eso. hubiera hecho esto primero, y luego esto ya ves, me sale un
rincón de aspecto extraño por aquí. Entonces esto es algo a lo que prestar atención cuando
estás biselando A menudo, querrás
biselar secciones grandes a Entonces hagamos todo el
techo en un bisel asqueroso.
16. Herramientas de corte en bucle y deslizamiento: A continuación agreguemos una puerta porque una puerta plantea otro
nuevo reto, lo sé. Qué coincidencia. La casa me hace tener usar todas las herramientas que
quiero enseñarte en este video. Intentemos hacer
lo mismo que con la ventana, solo para poder mostrarte
que no va a funcionar. Voy a hacer clic en este
ritmo, lo voy a
insertar, y entonces podrías
pensar, Bien, bueno, tal vez pueda
mover esto
al suelo para ser más como
una puerta. Lo voy a mover hacia abajo. Pero una vez esto, esta carita va más allá de su ritmo
que contiene mayor, comienza a salir de error. Esta no es una malla aceptable. Esto confundirá a licuadora
sin fin porque, en cierto modo, este ritmo está dentro de
este otro ritmo, pero en esta zona, está afuera Esto no es Bueno, no se permite. No muevas las cosas afuera.
Están conteniendo caras. Y no te preocupes por
meterlo y sacarlo así. Seguirá conectándose correctamente
con todo lo demás. Esto es lo que no está permitido. Bien, entonces vamos a deshacer todo. ¿Qué estoy tratando de hacer aquí? Estoy tratando de hacer una
forma que sea así. Necesito agregar una línea
que vaya así. Necesito agregar una línea
que vaya así, y necesito agregar una línea
que vaya así. Y para eso, la
siguiente herramienta es genial. Este es el corte de bucle. Cuando hago clic en eso y me
muevo alrededor de mi malla, Blender intentará dibujar
líneas alrededor de mi objeto. Ahí es cuando me cierro
sobre otro borde. Dibujará una línea que va a
través de ese borde y todo
el camino alrededor del modelo, si hago clic ahora, ese borde
ahora está cortado en la malla y tengo más
detalles con los que trabajar. Si me gusta lo que acabo de hacer, entonces puedo ir a la herramienta de movimiento, seleccionar solo estas caras
superiores manteniendo pulsada tecla Mayús y haciendo clic en cada
una y moviéndolas hacia arriba. Y ahora puedo cambiar el
perfil de mi techo, ¿no? Bueno, en este caso en particular, acabo de deshacer eso con
Controller Command Z. puedo agregar un loop cut pasando por toda
la casa aquí Esta es esa
línea de arriba en mi puerta. Está sesgada, lo cual no es genial y se puede arreglar
escalando de nuevo en cero. Recuerda, si voy
a la herramienta de báscula, puedo como que
aplanar todo Vamos a entrar en la vista de estructura metálica, para que pueda mirar a través de toda
la casa y ver que el bucle es irregular porque está
tratando de permanecer en el medio de
cada línea que atraviesa Pero si lo escalo
sobre el eje azul, puedo o bien aumentar
esa dentadura
o disminuirla acercándome
a cero Y es difícil conseguir exactamente
cero usando el Gizmo. Entonces bajaré al menú
y teclearé cero
manualmente en la z. Eso
aplana completamente esa línea, permitiéndome moverla arriba y abajo donde siento que debería estar la
parte superior de mi puerta Ahora puedo empezar a agregar más cortes de bucle
atravesando así. Entonces voy a hacer clic aquí para
agregar un bucle vertical, y vamos a moverlo. Pero oh, no, empiezo a romper todo lo que ya
hice en mi modelo. ¿Puedo mover esta línea
sin romperlo todo? Uh, eh. Esa es la siguiente
herramienta que quiero mostrarles. De hecho, me
saltaré algunos por ahora y bajaré
aquí a Edge slide. deslizamiento de bordes me permite mover bordes sin cambiar la
forma de mi objeto. Cuando haga clic en el
artilugio y lo arrastre, verás que el borde se mueve a través de las caras en las
que está unido Así que no voy a mover los puntos más lejos de lo que realmente pueden llegar, y puedo moverlos
hacia un lado aquí. Podemos volver a
la herramienta de corte de bucle y otro bucle yendo aquí. Y de hecho, creo que esto está en el lugar correcto,
pero si no lo es, puedo volver a
la herramienta de deslizamiento Edge y moverla a donde la quiera. Y ahora tengo el detalle
necesario para hacer una puerta. Volveré al
modo de selección de caras, ¿y sabes qué? Subirás aquí 1 millón de
veces mientras modelas. Por lo que vale la pena aprender los atajos para
estos modos de selección. Y esos son simplemente
uno, dos y tres. Eso circula a través de ellos. Presionaré tres para selecciones de
caras. Vaya a mi herramienta Extruir Región, haga clic en la puerta y usando
esa herramienta Extruir Región, moveré en un poco Eso es todo para hacer una
puerta con una herramienta de corte de bucle.
17. Herramienta de cuchillo: Bien, pongámonos
raros. La siguiente herramienta que
quiero mostrarles es la herramienta
cuchillo, esta. La herramienta de cuchillo es similar
a la herramienta de corte de bucle, excepto que no te
limita en absoluto La herramienta de corte de bucle recorre todo su
modelo pase lo que pase, pero la herramienta de cuchillo le permite cortar en cualquier lugar que desee.
Se puede cortar desde aquí. De aquí a aquí a aquí
y cruzándose. Y realmente puedes empezar
a fastidiar tu malla. Cuando termines,
por cierto,
presionas Regresar.
¿Cómo lo sé? Bueno, cuando tienes
una herramienta activa, puedes ver todos los atajos que puedes presionar para cambiar cómo
funciona hacia abajo en la
parte inferior del programa. Verás que el ratón izquierdo está cortado
por ahí a la derecha. Tienes parada con clic derecho. Algunos de estos pueden ser
útiles en algunos puntos, pero también verás
regresar para confirmar. Y ahora tengo un montón de líneas
feas atravesando mi casa si quiero hacer
algo de arte moderno extraño. Pero de hecho, solo quiero usarlo
para hacer un corazón. Entonces dibujemos un corazón
aquí en el techo. Recuerden, no
hay líneas dobladas en tres D. Todo
es recto. Entonces, si quieres sumar
la ilusión de curvas, vas a tener que
sumar un montón de puntos. Entonces solo estoy haciendo clic
para cada punto. Tratando de hacer pensar que
este es probablemente el corazón más hermoso que
he dibujado en tres D. Y cuando termine,
presionaré Regresar. Nuevamente, agregó un par de líneas que cruzan
hasta los bordes aquí. Eso es solo porque
Blender tiene que hacer eso porque no puede tener una
cara flotante dentro de otra cara. Y ahora puedo ir
al modo Face Sex, seleccionar esta nueva cara
que he hecho, y esa es una
forma de corazón y extruirla Preciosa. Pero Uh oh, olvidé que quería que el
corazón entrara, no hacia afuera. ¿Cómo puedo arreglarlo? Todos los que ven preguntan, Bueno, si vas a la herramienta de movimiento, puedes empezar a moverla,
pero es un poco complicada. Como puedes moverlo hacia abajo, y ahora está un
poco sesgado, así que lo voy a mover Pero, ¿cómo sé
que es exactamente lo correcto? Bueno puedes saber si usas la Herramienta de engorde de barra retráctil Encoger y engordar hace
lo que dice en la lata.
Engorda las cosas Si lo uso en toda mi casa, déjame presionar
A en mi teclado, que es lo mismo que ir
a Seleccionar todo, selecciona todo. Y arrastre este artilugio. Bueno, puedo engordar mi
casa o puedo encogerla, lo que hace que se vea
muy extraña, en efecto Lo que está haciendo es mover cada cara a lo largo de
su propio eje de orientación. ¿Qué significa eso?
Bueno, para el corazón, está encarando de esta manera, la manera exacta en que el
palo está apuntando. Cuando arrastre el palo, moverá ese corazón a
través de ese eje exacto, permitiéndome moverlo dentro de
la casa en lugar de hacia afuera. se lo hubiera hecho a esta cara, entonces se movería directamente
del techo. Esta cara se mueve recta hacia
la derecha o hacia la izquierda, dependiendo de si se
encoge o aplana.
18. Herramienta de cizalla: H, la herramienta final que quiero
mostrarles es la herramienta de cizalla. La herramienta Shar tiene el artilugio de
aspecto más extraño de todos ellos. Sólo preparémonos
para usarlo aquí. Iré a mi
herramienta de movimiento y seleccionaré todas estas caras traseras manteniendo presionada tecla Mayús mientras seleccionas cada cara. Voy a sacarlo un poco. Y te voy a mostrar que
lo que
hace la herramienta de cizalla es que puedes
sesgar todo el asunto Entonces si presiono esta pequeña
línea y la arrastro hacia la izquierda, Eso lo arroja. Y puedes sesgar en cualquier
dirección si quieres sesgarlo
hacia un
lado así Puede dar algunos resultados extraños. Nuevamente, si selecciono
todo pulsando A, puedo hacer casa de Alicia en el País de
las Maravillas por lo que decir sesgándola un poco a
la izquierda o a la derecha Darle un sesgo. hacer algunas
formas muy extrañas para esto.
19. Atajos de modelado: Entonces estas son las principales herramientas de
modelado en licuadora. Estos son los
que volverás y
otra y otra vez, y está bien no
recordar lo que
hacen todos de inmediato. Solo estoy metiendo
toda esta información en
tu cerebro al mismo tiempo Y, ya sabes,
sé que es mucho. Lo sé, pero
volveremos a estos una y
otra vez. Y creo que cuando me
ves usarlos, tu cerebro aprende
implícitamente a pensar en
mover tres mallas D, como agregar detalle
donde lo necesitas y cómo se pueden usar
estas herramientas para
hacer las formas que Solo quiero plantar la semilla de cada
herramienta en tu cerebro, y volveremos a
estas una y otra vez. Y así sobre todo como excusa
para repetir cada una, quiero mostrarte el
atajo para ellos. Realmente ayuda aprender el atajo para cada herramienta si las vas a
usar mucho. Y como recordatorio rápido, hay una hoja de acceso directo en los archivos de ejercicios de clase, que le recomendaría que
imprima, tenga en su escritorio. Y si solo metes eso
en tu memoria muscular, será mucho
más rápido modelando. Entonces primero, los modos de selección, los tres botones de aquí arriba, esos son uno, dos, tres. Y recuerden, todo lo que presiono aparece en la
parte inferior izquierda ahí. Uno, le permite seleccionar puntos
individuales. Dos, permite seleccionar aristas
que conectan los puntos. Tres, le permite seleccionar caras. Para extruir algo,
el atajo para eso es E en el teclado Al presionar E,
la nueva extrusión se unirá a su cursor. Entonces cuando lo muevo, no estoy sujetando nada.
Sólo lo estoy moviendo. Me pegaré a mi cursor y
puedo confirmar mi movimiento
haciendo clic izquierdo. Inset, es decir yo yo presiono I y muevo el cursor,
eso lo va a insertar Puedo hacer click izquierdo
para confirmarlo. Biselado. Agreguemos algunos
detalles a esta chimenea. Iré al
modo de selección de borde presionando dos. Seleccionaré cada
esquina dando la vuelta, y la convertiré en
una chimenea de Sci Fi. Biselado es Control o
Comando B, B para Bravo. Y estoy moviendo mi
cursor hacia afuera, y eso bisela las esquinas Clic izquierdo para confirmarlo. Cortes de bucle, esos son
Control o Comando R, creo, R para Ring. Esa es mi mejor suposición. Oye, fíjate que no va a atravesar toda la malla
cuando la tengo aquí. Lo hace algunos lugares, pero no todos. ¿Qué da? Volveré a eso
en sólo un segundo. Pero primero, vamos a
hacer clic ahí, supongo. Y ahora Blender en realidad se mueve automáticamente a la herramienta de deslizamiento de
borde. Eso es para
acelerar tu flujo de trabajo. Entonces, si muevo el cursor, ese nuevo borde se
desliza hacia arriba y hacia abajo. Generalmente, sin embargo, quiero
cortar justo en el medio, así que cancelaré el
deslizamiento con clic derecho. Entonces, bien, mirando mi casa, verás que casi todas
las caras tienen cuatro esquinas. Esta cara aquí tiene
uno, dos, tres, cuatro. Esta cara aquí tiene cuatro esquinas. Esta, cuatro esquinas, cuatro esquinas, cuatro esquinas. Una pareja tiene menos.
Estos tienen tres. Todos estos aquí tienen
tres esquinas. Y por aquí, tenemos algunas caras de
monstruo las cuales tienen, no
sé cuántas esquinas. Como, hay uno aquí,
hay uno aquí. Como 20. Tiene que
ser como 20 esquinas. Estos rostros tienen nombres
especiales porque les
tenemos miedo y
queremos conocer a nuestro enemigo. Entonces estos se
conocen simplemente como triángulos. Las caras de cuatro lados,
esas son polígonos. Y cualquier cara que tenga
más de cuatro lados, eso se llama Ngon Siento lo de
la jerga, ¿de acuerdo? Yo no hice estos nombres. Un engon que es
nuestro peor enemigo. Muy, muy raramente quiero ver un gon en tu malla
porque es difícil trabajar con ellos. ¿Por qué se llama gon? Básicamente viene del álgebra, donde N es el sustituto
de cualquier número, ¿verdad? Entonces es básicamente
cualquier número que se haya ido. Y eso se ha ido como en pentágono, hexágono, es decir, una forma de dos D. Un engon que es una cara
con más de cuatro lados, y hacen que sea difícil modelar Porque si utilizo la herramienta de
corte de bucle con Control R, Blender sabe dibujar una línea a través de cada polígono de
cuatro lados, pero se detiene cuando se
trata de un engon No tiene idea de qué hacer. Y con triángulos, suceden cosas
similares. Si quiero cortar un bucle de borde a través de
este triángulo, también, no
funciona del todo
como en esta zona, ahora es mucho más difícil
trabajar con la malla. Pero al igual que, los triángulos
son un poco malos, pero no puedes evitarlos
por completo A veces sólo los conseguirás. Pero los engones se mantienen alejados de
los engones tanto como puedas.
20. Eliminación y refinado de malla: Hablemos de borrar cosas. Eliminar cosas es
algo en lo que siento que debería
ser más fácil de lo que realmente es porque
crees que solo presionas borrar
en el teclado, ¿verdad? Y tú puedes. Déjame mostrarte. Voy al modo Editar
pulsando Tab, y ahora puedo editar esta
casa que hice en un video anterior y decir, ya no
quiero el corazón. El corazón es un poco
demasiado para tener en una casa. Y entonces, bien, voy a mi modo de selección de vértices y simplemente arrastre una caja
alrededor de ese corazón Recuerda, no selecciona nada que esté detrás de una pared, así que tengo que ir a comprobarlo. Oh, no
vi muy bien este vértice, mantendré presionada la tecla Mayús
y presionaré eso Y ahora tengo todos los
vértices seleccionados, solo
presionemos Eliminar, ¿eh? Bien, trae un menú. Se pregunta, ¿Qué
quiero eliminar? Podrías pensar que esto
es un poco redundante ya que tengo vértices seleccionados, y supongo que lo es, pero
hagamos clic en vértices Bien. Ahora tengo un agujero
en mi techo. Ahora, a veces quieres un agujero. A lo mejor quieres un agujero
para la ventana, sí. Entonces voy a ir a Face select. Mantenga presionada la tecla Mayús mientras selecciona todas
estas caras, presione eliminar. Y en este caso,
eliminemos caras. Bien, eso es un agujero
en la casa, lo cual está bien, pero no
quiero un agujero en el techo. Entonces, ¿cómo vuelvo a conectar esto? ¿Vuelvo a construir esto? Como en todos los programas, hay una miríada
de formas de hacer esto, pero la más fácil
es puentear loops Aquí hay un ejemplo rápido justo lado para explicar de
lo que estoy hablando. Piénsalo como
hacer un puente. Si voy a mi modo de
selección de bordes y presiono este borde
y presiono este borde, solo
quiero hacer un
puente entre ellos. Y la
función bridge loop no se encuentra aquí. Está debajo de las herramientas adicionales, que se encuentran en
la barra superior aquí. Son los menús de vértice,
borde y cara de malla menús de vértice,
borde y cara Estos contienen todas
las herramientas de modelado que puedas desear. Y éste, ya que
estamos trabajando con bordes en este momento,
está bajo borde. Y es el tercero de los bucles
de borde del puente superior. Cuando hago clic en eso,
están puenteados. Crea una nueva
cara entre ellos, y esto es lo que queremos
hacer con nuestra casa. Entonces volviendo aquí, ¿qué
bordes queremos tender un puente? Seleccione cualquier arista que esté en los
lados opuestos entre sí. Entonces, o esto y
esto o esto y esto. Vaya al
modo de borde y puentee los bucles de borde
y los filtros en la cara. También puedes saltarte
este paso si eliminas de la manera correcta porque
hay otra forma de eliminar que te
mostraré eliminando. Veamos ¿qué
queremos eliminar? Eliminemos la chimenea. Volveré a ir a la selección de
vértices y
arrastraré una caja sobre eso No selecciona todo.
Y en lugar de dar vueltas y hacerlo
manualmente, entraré en la vista Wireframe, y la seleccionaré
usando wireframe Y como ahora puedo
ver a través de él, también
puedo seleccionar a través de él. Así que de vuelta en modo sólido, cuando presiono Eliminar,
obtengo otra opción. No tengo que borrar,
puedo disolverlo. Cuando disuelva vértices, intentará
eliminarlos y luego
volver a conectarlos automáticamente.
Vamos a hacer clic en eso. Fantástico. Lo hizo. Eliminó todo
lo que había seleccionado, y luego se llenó en la cara. Pero aquí hay algo
terriblemente, terriblemente mal. ¿Lo ves?
Hemos creado un NG. No me creas,
Esta cara de aquí, ¿cuántos puntos tiene? Uno, dos, tres, cuatro, cinco, seis, siete, ocho. Terrible. Bien, pero
no te preocupes por ello. Esto se fija fácilmente
usando la herramienta de cuchillo. Voy a ir por aquí a cuchillo, y todo lo que tenemos
que hacer es ver, Oh, tengo una línea que va
directamente por aquí, y luego termina, y luego como que continúa
del otro lado Vamos a conectar eso. Hagamos clic en este punto, arrástrelo y hagamos clic en
este punto también. Presiona Regresar para confirmarlo
y haz lo mismo aquí abajo. Haga clic, haga clic en Confirmar. Ahora he convertido mi endgon
en un pase de 34 lados. Este es el tipo
de manejo de malla al
que tienes que
acostumbrarte cuando trabajas en tres D, sobre todo si
quieres seguir trabajando en esto porque el engon nuevamente, va a dificultar
las cosas
21. Modelado de objetos circulares: No es realmente obvio
cómo modelas alrededor de las cosas. Al igual que, ahora sabes hacer, formas
cúbicas y esas cosas, pero quiero equiparte para
poder modelar alrededor de
botella porque, sorpresa de
Shack
lo
vas a necesitar bastante pronto para un proyecto Solo veamos algunos de
los retos que
surgirán cuando quieras
modelar una cosa redonda. El primero es que el cubo no
es un buen punto de partida. Se puede comenzar con un cubo. Puedes comenzar con
cualquier cosa, de verdad, pero ahorrarás tiempo
comenzando con un objeto que se parece a
lo que quieres hacer. Así que vamos a eliminar todo lo
que ya está aquí, y presionaré Mayús A
para agregar algo nuevo. Y debajo del menú de malla, elegiré un cilindro, que está mucho
más cerca de una botella. Ahora entremos al
modo de edición presionando Tab. Y una cosa que es bastante común con las botellas es
que en la parte inferior, tienen un pequeño divot
que sube así Veamos cómo
podríamos hacer eso. Bueno, presionaré tres en mi teclado para entrar en modo de selección de
fase. También aquí arriba, seleccionaré
la cara inferior. Y ¿recuerdas
cuál era la herramienta para agregar detalles
dentro de una fase? Es la herramienta Insertar. Entonces, si amplío esto aquí, encontrarás la
herramienta Insertar aquí mismo Vamos a insertar esto aproximadamente
a mitad de camino. Eso nos da otra fase
dentro de la cara, ¿verdad? Podemos la herramienta de movimiento para
moverla un poco hacia arriba. ¿Y qué pasa aquí? Bueno, es muy filoso. ¿Y cómo agregamos redondez a las esquinas afiladas?
¿Qué herramienta es esa? Esa es la herramienta de bisel,
esta de aquí, bisel. Entonces comencemos por biselar. Sí, comencemos por biselar
esta esquina afilada de aquí. Y así tenemos que entrar en modo de selección de
borde para seleccionar el borde y mantener pulsada la tecla
Mayús para seleccionar los bordes. Ahora bien, esto es tedioso dar vueltas así para
seleccionar todos los bordes Hay un par de
otras formas de hacerlo. Uno de ellos que se te
ocurra es entrar en
la
vista de estructura metálica como aquí, y luego entrar en modo de selección de
puntos Y arrastra una caja sobre
todos los
vértices inferiores y luego
entra en el modo de selección de borde Eso sí los
seleccionará a todos. Otra forma de
hacerlo es mantener presionada la tecla Alt u opción mientras se
hace clic en un borde. Eso seleccionará lo que
se llama un bucle de borde. Y un bucle es justo esto. Es como una línea de bordes dando
vueltas. Ese es el bucle. Entonces ahora podemos biselar esto Y tal vez queramos
agregar más segmentos, y eso está en este
pequeño menú aquí, aumentar la
cantidad de segmento para hacerlo más suave y luego
cerrar eso nuevamente Eso se parece más al
fondo de una botella real, y podemos hacer lo
mismo con esto. De hecho, si entro en modo de selección de
caras, selecciono la cara media, puedo
biselar esta y va a
biselar todo a su alrededor Entonces puedo aumentar
esto hasta que llene casi todo el fondo de la botella y agregarle un par
de segmentos a eso, que redondearán todo
el fondo. Si entro en la vista de rayos X, se
puede ver que esta es ahora la
forma de la parte inferior. Otra cosa común es que
querrás agregar un perfil, a mejor un poco de sangría
para sujetarlo correctamente Y lo que puedes
hacer entonces es agregar más extrusiones, extruir,
extruir y utilizando, nuevamente, el modo de selección de bucle, ahora queremos seleccionar un bucle
de caras, todas estas aquí De nuevo, podemos
entrar en la vista wireframe. Y solo asegúrate de que
estamos justo en el nivel. Incluso podemos hacer clic en uno
de los ejes aquí en la bola de pista para entrar en una vista lateral recta y seleccionar
todas estas caras aquí. Volver al modo sólido, y ¿cómo movemos todos estos hacia adentro para
hacer una pequeña sangría Porque si intentas
moverlos en cualquier dirección, puedes hacerlo como una forma de S, lo que quizás quieras
hacer. Es bastante genial. Es un efecto genial.
Control Z para deshacer eso. Pero, ¿cómo
los mueve a todos hacia adentro? Eso lo haces escalando, lo que puede parecer un
poco contrario a la intuición, pero creo que
lo entenderás cuando lo veas Si escalo todos estos hacia adentro
ahora hacia el centro, eso crea el
guión que queremos También podemos escalarlo hacia afuera
para hacer como un bulto. ¿Y si queremos una sangría
más nítida? Es posible que desee tener una pequeña línea de costura
sólida o
algo dando vueltas. Agreguemos eso
aquí. Bueno, primero, necesitamos agregar un loop
que podamos usar, y agregamos loops con
la herramienta loop cut. Puede hacer clic aquí, y luego aquí hay un truco realmente inteligente para simplemente agregar grosor
a este bucle. Ahora podemos ir al bisel, y si biselamos este
bucle, mira esto Es como si expandiera
el bucle hacia afuera. Entonces ahora hemos agregado un anillo de
caras, truco súper práctico. Y lo que quiero hacer
con estos es que quiero extruirlos hacia adentro O puedes extruirlos hacia afuera. Vamos a extruir
región y la arrastramos,
pero no funciona Estos extruyen de esta manera, estos extruyen de la misma Y otra vez, obtenemos
la extraña forma de S, pero ahora mucho más nítida.
Vamos a deshacer eso. Control o comando Z. Hay un par de formas de evitar esto Uno que se te
ocurra es extruir, y luego en los ajustes, simplemente extruirlos por cero. Entonces ahora están extruidos, pero no se han movido en absoluto. Así que acabamos de agregar geometría que
ahora está en el mismo espacio que
ya estaba, y podemos ir a escala. Y si escalamos esas caras
extruidas hacia adentro, ahora tenemos esta
costura afilada que queríamos No obstante, esto es algo tan
común
que ya hay una herramienta diseñada para ello.
Entonces vamos a deshacer esto. Y verás que la herramienta de extrusión tiene una pequeña flecha
en la parte inferior derecha, y eso significa que
hay variaciones de esta Y si mantenemos
presionada esta herramienta, obtenemos otras formas de extruir. Por ejemplo, hemos
extruido individual, ¿verdad? Si hacemos extruir individuales, no
van a estar conectados, y obtenemos este tipo
de engranaje como forma, que es bastante genial El que queremos usar ahora se llama extruir largas normales Espera, ¿qué significa eso? Extruir a lo largo de normales. ¿Qué tiene de normal esto? Bueno, lamento mucho
tener que decirte esto, pero normal en tres D no tiene el
significado normal de normal. En tres D, normal, significa exterior, que
es una es una palabra extraña. No me preguntes por qué usan
esa palabra para significar hacia afuera. Pero es un
concepto útil en tres D. Volveremos a él más adelante en el curso también cuando
empecemos a sombrear el vidrio Las normales son muy importantes de
entender en tres D, y significan hacia afuera
desde la malla Entonces, sea cual sea la dirección
que sea hacia afuera. Y si usamos esta extrusión
a lo largo de las normales, es decir,
extruir hacia afuera, y arrastramos, cada
cara va a mirar en qué dirección estoy
mirando y extruir Entonces esos son algunos trucos
para modelar cosas redondas. Creo que ya estás equipado
para empezar a modelar botellas. Para resumir, comenzamos
con un cilindro. Usamos en el ajuste para agregar detalles en las caras planas superior e
inferior. Aprendimos a seleccionar bucles
manteniendo pulsada la tecla Alt y
haciendo clic en algo, ya sea haciendo clic en
un borde o en una cara. Recuerda hacer clic en el borde que
quieras a lo largo del bucle. No haga clic en este borde, entonces va a seleccionar un
bucle en la otra dirección, y aprendimos a extruir una
normal larga para extruir todo
hacia afuera o hacia adentro
22. Proyecto de clase 02: modelado de la botella: Bien, proyecto de clase
a la botella. Este es mi favorito. Es como el
proyecto central para este curso. Al igual que, este proyecto aquí, esta es la razón por la que todas las marcas están relacionadas con la
botella. Entonces todos estamos haciendo una botella, y es importante no
saltarse esta porque los proyectos
posteriores se
construirán sobre esta. Entonces es un proyecto central.
Vamos a leerlo. te ha pedido que
diseñes una botella personalizada para la marca. Tu trabajo es modelar
la botella y su tapa, eligiendo un estilo distinto que
se ajuste a la identidad de la marca. Recuerda que en el generador de proyectos
aleatorios, obtuviste un producto y
obtuviste una identidad de marca,
un estilo para ello. Enfócate en explorar formas para hacer una botella única
para tu marca. Y usé la palabra botella, pero técnicamente no
tiene que ser una botella. Al igual que, puedes hacer una
lata de refresco si quieres, y no tiene que ser de vidrio, aunque una botella de vidrio
puede ser súper hermosa, pero también puedes hacer plástico. Se puede hacer de metal. Siéntete libre de experimentar.
Hacer algo raro. Si quieres, puedes hacer que se
vea como detergente para ropa. Aunque, ahora que dije eso, todos
lo van a hacer, así que no hagas eso. Entonces los requisitos son modelo, una botella, y es tapa. Nuevamente, no es necesario
tener una gorra específicamente. De verdad lo puse ahí
solo para recordarte que le pongas una gorra si
debería tener una, pero puede ser una pestaña, puede ser un corcho, lo que
se ajuste a tu contenedor de elección. Y mantener el
recuento de polígonos razonablemente bajo. ¿Qué quiero decir con
razonablemente bajo? Me refiero a algo como esto. Trata de no hacer tus polígonos
mucho más pequeños que esto. La regla es tan pocos
polígonos como puedas
salirte con la tuya y aún así
definir la Y me lo agradecerás porque
es
mucho más fácil trabajar con un modelo que tiene pocos polígonos que con
uno que tiene No es un requisito, pero
es una buena idea ir en línea y buscar alguna referencia
antes de empezar a modelar. Es decir, solo buscando
botellas para productos similares, buscando referencia para
el estilo de la marca. Realmente ayuda cuando
estás ahí haciendo formas de
concreto para tener
alguna referencia en el costado. Los entregables, captura de pantalla
su modelo terminado tanto en vista sólida como en vista
de estructura metálica Aquí está la vista de estructura metálica. Presioné wireframe y
apagué este toggle X ray. Cuando los rayos X están encendidos, se puede
ver a través del modelo y es un poco
difícil evaluar qué tan grandes son los polígonos Si apagas eso, entonces
puedes mostrar tu arduo trabajo, y puedes
mostrarnos esto se llama el flujo de borde del objeto. Entonces captura de pantalla esto y
póngalo en la sección de proyectos en este sitio web y también ve a Solid View y captura de pantalla esto. Y no olvides
mostrarlo de la mejor manera. Puedes hacer clic derecho y presionar Shade Auto suavizar y eso
suavizará tus polígonos Eres muy bienvenido
a publicarlo en las redes sociales y etiquetarlo en
traer tu propia computadora portátil en Instagram o publicarla
en el grupo de Facebook aquí o en el
grupo de LinkedIn aquí. Eso es gracioso. Trae una pequeña foto
de Dan luciendo machista. En el siguiente video, haré
este proyecto por mí mismo, pero sí te animo a modelar tu botella
antes de ver eso. Yo mismo he tomado este tipo por
supuesto, y te prometo que si haces
la cosa tú mismo primero, vas a tener una apreciación mucho
mejor de todas las pequeñas
cosas que hago. igual que, cuando te has topado con algo que es difícil de resolver, realmente
lo
recordarás una vez que veas la
solución a ello Y puede provocar nuevas ideas
donde puedas volver atrás
y volver a hacer el proyecto
y hacer un trabajo aún mejor. Así que tengo muchas
ganas de ver
lo que ustedes hacen. Y ahora voy a ir
a hacer el mío. Tengo una idea asesina para ello. Creo que te va a gustar. Te veré en el siguiente video.
23. Terminado. Proyecto de clase 02: modelado de la base: Fui al generador de Random
Project, obtuve una marca de aceite de chile industrial y
vanguardista Entonces lo que hice fue que me conecté y
busqué algunas botellas de aceite, y la de la derecha de aquí sí se destaca un
poco porque pensé, Oye, es industrial
y es un poco vanguardista Entonces, ¿no sería divertido
poner el aceite de chile en algo parecido a este
tipo de lata de aceite mecánico A mi me queda muy bien con el aceite de chile
porque se siente como, oh, es un poco peligroso
poner en una lata normal. Tiene que ser esta cosa de aspecto
industrial. Y también me gustan mucho las
formas de estas otras, y voy a sacar algo de
inspiración a
medida que modelo y
texturizo mi botella también. Es una buena idea encontrar referencias como esta
que te inspiren. Entonces los voy a mover
a un lado y
todavía puedo verlos y ellos
informarán a mi modelaje. Entonces comencemos con
un lienzo limpio. Simplemente seleccionemos todo y presionemos eliminar para eliminar
todo y Mayús A, comencemos con un cilindro. Ahora, tenemos que tomar una
decisión al inicio aquí. ¿Cuántos polígonos
necesitamos alrededor de este cilindro? Recuerda, si pop
abro este menú aquí, justo después de haber
agregado el cilindro, puedo agregar más vértices
o menos así que hagamos 64 Presionemos la pestaña de
inmediato para entrar en modo de
edición y comenzar a
definir la forma. Entonces mirando mi referencia, mirando esta
lata de aceite a la derecha, esta es mi principal inspiración. Entonces intentemos replicar este
tipo de proporciones. Así que saldré a la barra de
herramientas y la sacaré un poco para poder
ver todo a la vez e ir a
la herramienta de escala. Vamos
a escalar todo en el plano azul, es
decir, en ambas direcciones
horizontales hasta obtener algunas proporciones con las
que estoy contento. Algo como esto. Y empecemos por la parte inferior
y trabajemos nuestro camino hacia arriba. Entonces en la parte inferior,
quiero que haya un pequeño divot que
se vea así Porque siento que todas
las botellas tienen esto. No sé por qué.
Creo que probablemente sea para que
sobrecompense, así que absolutamente no va así y
empieza a tambalearse Pero probablemente haya
alguna
regulación internacional de la que no
estoy al tanto. Hagamos un recuadro, y voy a insertar estas
caras de acuerdo con
la ley de regulación internacional no
bamboleo
a la ley de regulación internacional no
bamboleo 0.64 metros, que es lo que
especifica la ONU y la moveré Cuando lo muevo hacia arriba, es
una buena idea entrar en vista de
wireframe para que pueda ver exactamente qué tan arriba va Me siento como algo así, tal vez hasta encogerlo
un poco. Sí, eso es bueno. Recuerda, verás esto porque
esto será de vidrio. Entonces tienes que hacerlo o yo haciendo
algo en vidrio, hay que prestar atención a cómo
se ve por dentro también. Así que voy a redondear este
borde aquí yendo al modo de selección de
borde
y Alt u Opción haciendo clic en este anillo cuando
selecciona todo el asunto y va a
biselar y tirando hacia abajo para biselar Y nuevamente, voy a abrir este
pequeño menú de la izquierda para especificar exactamente cuánto
y cuántos segmentos quiero. Así que vamos a hacer clic en
los segmentos para agregar un par. ¿Cuántos necesito?
Vamos a ceñirnos a lo menos posible. Probablemente
algo así. Y voy a arrastrar este deslizador
para ajustar el ancho. Y si mantengo presionado el turno, entonces será aún más lento, así que es más fácil de refinar realmente. Y siento que el
tamaño de los biseles realmente ayuda a definir qué tan
grande se ve el vidrio ¿Entiende a lo que me refiero?
Porque si estás haciendo, como, pequeñas botellas, los biseles serán enormes en comparación con la botella y
viceversa, Entonces es una buena idea
meterte realmente en la mente. ¿Qué
tan grande es esta cosa? Y siento que en mi mente, el tamaño de la
botella es algo así tiene sentido. Entonces hagamos lo
mismo con la interfaz. Seleccionemos caras, seleccionemos
esto y biselemos todo el camino para básicamente simplemente
redondear todo
agregando más segmentos, e incluso se puede ver
en la vista de marco Y. Cuando no tenía nada,
simplemente estaba filoso. Y luego cuando empiezo a
agregar segmentos, lo redondea. Genial. Esa es la parte inferior cuidada, agreguemos también un
recuadro en la parte superior Donde va a
estar la gorra en mi caso y mover eso un poco hacia arriba
para hacer un poco de trapecio Eso no es un trapecio. Me gusta mucho mirar en esta
referencia lo plano que es. Eso me parece muy
industrial. Así que mantengámoslo bastante plano, aunque obstaculizará el vertido Y vamos a extruir eso de nuevo y luego
redondear presionando dos para seleccionar bordes y alt o opción haciendo clic en estos y
luego biselando Nuevamente, sumando un
par de segmentos. A ver. Mantengámoslo bastante
similar a esto aquí abajo. Algo así
y haz lo mismo aquí. A lo mejor un poco más. Todavía quiero que se vea
como vidrio, no metal. Bueno. Una cosa que me gusta mucho en mi referencia es este
labio dando vueltas por aquí. Esto me parece industrial. Tratemos de replicar eso. Necesito más detalles aquí, dando
vueltas por aquí. Voy a
tener que añadir un bucle. Lo hago con la herramienta de corte de
bucle, muevo por aquí hasta que
me ponga un amarillo y haga clic y luego puedo
moverlo hacia arriba y hacia abajo. De hecho, probablemente sea mejor
deslizarlo en lugar de
moverlos porque si bien
en este caso, realmente
no hace la diferencia, deslizarse es un buen hábito en el que meterse
para mantener la forma de tu
botella sin importar cómo
se
vea después de haber agregado el bucle. El movimiento que aquí arriba, y este es el
truco que me
gusta mucho para agregar detalles de raya. Biselado que en un plano plano
solo da un bucle de caras. Y voy a tener que extruir esos a
lo largo de su normal,
significando hacia afuera Y luego puedo seleccionar este bucle manteniendo pulsada la
opción Alter y haciendo clic en ella. Y luego, si además
mantengo presionado Shift, así que mantengo presionado tanto
shift como Alt en mi teclado, puedo agregarle otro bucle,
soltarlo puedo agregarle otro bucle,
soltarlo, moverme, mantenerlos presionados nuevamente
y agregar estos dos bucles, y ahora puedo biselarlos
todos de una sola Asegúrate de no exagerar. Al igual que, puedes hacer que estos se
muevan el uno al otro y realmente
romper tu malla muy rápido. Una forma de evitar
hacer eso es que puedes soltar, y en este menú,
puedes presionar la superposición de abrazaderas, y luego no
te permitirá ir demasiado lejos. Entonces agreguemos un
par de segmentos. Y eso me queda bien. Salgamos del
modo Edición presionando Tab, y esa es una buena base.
24. Terminado. Proyecto de clase 02: modelado del gorro: Ahora sí quiero agregar un cap, y quiero hacerlo
como un objeto separado. En tres D, es una
buena idea mantener tus objetos separados si estarían separados
en la vida real. Por lo que la tapa es
técnicamente removible. Así que vamos a convertirlo también en un objeto
separado aquí. Desplaza A en un nuevo objeto, una nueva malla, cilindro, manténgalo en 64, mismo número
de vértices que la base Vamos a mover eso aquí arriba. Entra en modo edición,
tres para seleccionar pase, arriba uno, y usando
la herramienta mover, lo
moveré hacia abajo hasta que
la tapa cubra el vaso, tomaré el fondo y lo
moveré un poco hacia arriba, también. De hecho, presionaré A
para seleccionar todo. Y luego usando escala, escalaré un poco todo
hacia adentro, mirándolo desde abajo, manteniendo presionado shift para hacerlo de manera más sensible para definir tipo
de grosor de la tapa Es sólo una cápsula de plástico. Mantengámoslo bastante delgado. Entonces recuerda, esto
va a ser de vidrio, así que es una buena idea trabajar también
en el interior. Voy a tener que añadir
más detalles aquí. Vamos a insertar hasta que la
tapa se encuentre con el cristal. Entonces mirándolo
a través del modo wireframe, puedo extruirlo
hacia arriba, haciéndolo hueco. De hecho, si voy aquí
al outliner, puedo apagar el primer
objeto que hice haciendo clic el pequeño yo y puedo trabajar en esto solo y ver que
es, de hecho, hueco Volvamos a encenderlo para el contexto, y volveré al modo
Editar presionando tabulador y agreguemos la boquilla. Voy a reducir esto en agregar otra fase en
el medio de la misma. ¿Y qué tan grande debe ser
la boquilla? Mi principal referencia para
eso será ésta. Quiero replicar
este tipo de cosas. Entonces puedo ver que sí se
estrecha en un poquito, pero quiero ver qué tan
grande es en la base. Y creo que para el mío,
eso equivale a tal vez algo un
poco
más grande que esto, tal vez aquí. Y luego extruirlo hacia arriba. ¿Hasta dónde quiero
llegar? ¿Qué tan lejos? Vamos a escalarlo en un poquito, escala y no fuera así, sino en un poquito para
darle esa sensación de botella de aceite. Hagámoslo más largo.
Siento que debería ser un poco más largo. Sí, así. Y esto también debería
tener algún grosor. Así que vamos a insertar eso. ¿Y qué tan grueso es el plástico? Esa es una pregunta demente
preguntar qué tan grueso es el plástico. Extrujamos eso
también hacia abajo y mírelo a través del modo wireframe y movamos la nueva fase hasta
aquí abajo. Y de hecho, este es un reto
muy común en tres D con el que
te voy a mostrar cómo lidiar. Al igual que, para mí,
realmente no importa lo que
pase aquí. Esto va a ser plástico
opaco de todos modos. Pero quiero mostrarte
esto porque este es un reto al que quizás te
hayas enfrentado en tu modelo. Y es decir, digamos que tengo un agujero aquí que quiero conectar
a este agujero. Quiero que esto esté bien,
como sería la gorra, quiero que esta sea una
rosquilla con un agujero aquí yendo todo el camino
hacia arriba. ¿Cómo hago eso? Bueno, antes que nada, necesito
agregar una nueva fase dentro de esta y quiero que sea del
mismo tamaño que la de arriba, pero realmente no
importa cuán grande sea, pero entraré en
modo wireframe para poder ver un
poco mejor, y luego voy a esto hasta que sea más
o menos del mismo No exactamente. Esto está bien. Y luego eliminaré esta fase, presionando Eliminar y
luego borrar caras. Te dije que nunca hicieras
esto, pero está bien. Los vamos a conectar de
nuevo en un momento. Hagamos lo mismo con esta
fase. Yo también voy a borrar eso. Eliminar pase. Ahora tengo dos bucles abiertos. He pulsado Alt para seleccionar este bucle y mantener presionado Alt para
desplazar para seleccionar este bucle. Tengo ambos bucles y
quiero conectarlos. Al mirarlo en modo wireframe, así es como se ve
ahora. Ambos están abiertos. Y puedo conectarlos
usando bucles de borde de puente. Presionando eso, eso los
conecta. Y ahora, de hecho, este bucle
superior es superfluo. Realmente no es hacer
nada para definir la forma, y realmente no la necesito. Yo presiono eliminar sobre eso y decido
disolver esos bordes, disolver significa eliminar y luego reconectar lo que queda Si solo borro bordes, eso dejará un enorme,
enorme y apestoso agujero Y si presiono eliminar
y luego disolver bordes, eso va a volver a conectar
ambos lados de la misma. Entonces ahora tenemos el agujero atravesando todo el camino y luego reconectándonos en la parte inferior Y ya puedo empezar a
ajustar las tallas. Entonces presiono quiero alt o opción haga clic en este bucle
aquí y puedo
moverlo hacia arriba usando el
modo wireframe a un buen punto, en algún lugar por ahí y luego hacer
lo mismo sin un bucle Algo como esto. Y ahora agreguemos un
poco de asa. Todo se siente tan simétrico. Al igual que, todo aquí es
perfectamente simétrico, y creo que es muy agradable agregar algo de
asimetría a un diseño Así que vayamos aquí y seleccionemos
un par de caras aquí y saquemos
un poco de asa que se verá
algo así. Entonces lo que voy a necesitar, voy a
necesitar otro bucle. Entonces entraremos aquí
y agregaremos un bucle
ahí mismo y luego los
deslizaremos hacia arriba. ¿Qué tan gruesa quiero que sea
esta base? Algo así como
algo así. Y luego usando el modo de selección de cara, intentaré seleccionar
los medios. ¿Cómo sé cuáles son
los medios? Vamos a probar esos dos.
¿Están en el medio? Bueno, vamos a hacer clic
en la Z en este track ball aquí, y de hecho puedo ver todo
directamente desde arriba. Cuando presiono wireframe ahora, puedo ver el eje X
corriendo recto por aquí y puedo ver que en realidad
no seleccioné los
del medio. Tengo que ir uno a la izquierda. Entonces estos son los medios, y a lo mejor quiero uno más de cada
lado así. Extrujamos esos. Y el final ahora está doblado. Tiene la curva viniendo de
aquí, y no quiero eso,
así que vamos a escalar esos hacia abajo
en X, escalarlos hacia abajo. Y quiero que sea
completamente plano, no solo casi completamente plano. Entonces entremos en este
menú y asegurémonos de
que esa escala no sea
0.1, es cero. Pero en este caso,
quería tener un ángulo de 45 grados con este
aspecto, y puedo especificar que
en realidad quiero un
desplazamiento de exactamente uno, lo que dará ese ángulo de
45 grados. Y luego puedo extruir
vamos a sacarlo. Y como no
quiero que se apague, lo extruiré por cero
y solo lo moveré hacia abajo. Y entonces puedo escalar
esa fase final sobre cero en el eje z. Asegúrate de que en realidad sea cero. Esa es la forma que
quiero. Vamos a bajar un poco más
eso. A lo mejor, quiero que puedas
meter tu dedo debajo de aquí. Entonces tal vez voy a salir del modo
Editar solo al modo
objeto y mover todo un
poco hacia arriba. Sí, así. Entra en la pestaña y voy a hacer clic en este borde
para seleccionar todo el bucle, y voy a biselar esto para
agregar un ángulo de 45 grados Siento que es un
poco grueso, ¿no? Vamos a adelgazarlo. Seleccionaré
estas caras y las moveré por aquí y tal vez solo seleccionaré estas aristas y las moveré hacia arriba. Y estos de aquí deberían pasar por encima. Eso es mejor. Y ahora con las
formas generales bloqueadas, puedo empezar a suavizar las cosas. Entonces, los mayores candidatos para
suavizar van a ser este bucle y este
bucle, seguro. Así que voy a biselar los que
van bastante lejos. Completándolo bastante
, me siento como. A menos que quiera quedarme con eso. A lo mejor quiero mantener eso
como un ángulo de 45 grados, tal vez solo un poquito,
algo así. Y luego
suavizar la intersección entre el asa y el resto de la tapa,
eso va a ser clave. Al igual que en tres D, todos los bordes
son completamente afilados. En la vida real, no
hay bordes completamente afilados, siéntete libre de simplemente
redondear todo. Eso lo hará
más realista. Ahora vamos a seleccionar este bucle
y éste y éste. No, eso no, pero esto y simplemente repasar
todo, cada rincón. Todo necesita ser biselado. A, vamos a seguir adelante. Vamos a ir todo el camino
así, así. Todo esto se puede
biselar de una vez. Y por último, éste. Creo que eso es todo. Y luego biselado Vamos a encender la superposición de abrazaderas para que no cometa ningún error
sin verlas. Y luego agregar un par de
segmentos. No demasiadas. Siento que probablemente sea
suficiente. Y voy a biselar esto El plástico puede tener biseles un
poco más pequeños que el cristal, me parece Y vamos a biselar esto y esto. Y la parte superior también.
La parte superior también debe estar biselada.
Todo se pone un bisel Y para rematarlo,
un poco de gorra. Entonces voy a cambiar A, agregar
otro cilindro. Recuerda, separar el
objeto en la vida real significa separar el objeto en
tres D. Muévelo aquí arriba, tabula y escala todo en. ¿Y cómo quiero hacer esto? Tal vez en realidad, voy a ir a este objeto otra vez y voy a añadir un poco
de labio aquí también. Este es un buen candidato
para el deslizamiento de bordes. Si ahora apenas empiezo a
mover esto hacia arriba, empiezo a cambiar la
forma de la boquilla. Pero si lo deslizo bucle, entonces se va a
mover a lo largo de los bordes. Aquí arriba, agrega un poco de bisel,
un poco, extruirlo a
lo largo de normales Selecciona todas estas aristas
para redondearlas. Se puede ver que solo estoy
usando las mismas pocas herramientas, todas las mismas herramientas una y
otra vez. Si te acostumbras a estas herramientas, esto es lo que usas
para modelar todo. Entonces, volvamos a entrar en esta otra vez. Modo de edición, escalarlo. Y muévalo hacia arriba, así que
solo está descansando sobre ese
nuevo labio que hice, y luego mueve la parte superior boca abajo, para que cubra todo.
Esa es una buena gorra. Colóquelo en la parte superior.
Muévelo un poco, darle un poco de curva, y luego hacer lo mismo
con el fondo que
hicimos antes donde
selecciono el fondo, lo hicimos antes donde
selecciono el fondo, inserto y luego lo extruyo en modo
Xray hasta el punto
donde cubriría la botella
y luego comenzaría a
redondear las y luego comenzaría a
redondear Intentemos un pequeño
experimento con esto. Solo para que sea más reminiscente
de esta botella mecánica, intentemos darle un toque a esta
propina Voy a tener que editar tanto
la tapa como la gorra Caps. Espera, ¿cuál es la
terminología correcta aquí? Como una boquilla en una tapa. Seleccionemos ambos y presionemos tabulador para
entrar en modo de edición. Sí, puede editar varios objetos al
mismo tiempo y luego entrar en la selección de vértices de
estructura metálica y seleccionar todos los
vértices en la parte Ahora mirándolo desde
el lado perfecto, solo
vamos a hacer clic en vamos a ver, clic en el eje Y, y eso va a ver
todo desde un lado, y luego puedo mover
todo un poco y luego girarlo a
algo a lo largo del mismo. Tal vez mantenga presionado el
control para romperlo a algunos incrementos lógicos y luego moverse para que coincida con ese incremento No, eso es un poco demasiado. Algo así. Luego gírela para alinearla con ese nuevo ángulo. Y vamos a ver. ¿Eso me gusta? Yo sí. Yo sí. Creo que es hilarante. Bien, lo terminaré seleccionando todo, haciendo clic con el botón
derecho y
presionando la sombra Auto suave. Y esta es mi botella terminada.
25. ¿Qué son los motores de renderizado?: Es hora de
subir de nivel nuestro renderizado. Renderizado, es
entonces cuando la computadora toma en
cuenta
todas
las luces y las sombras y calcula
como una imagen terminada. Puedes pensarlo como
tomar una foto de tus tres D. Y en nuestra industria
en la industria de las tres D, tenemos dos
tecnologías principales para hacer esto. Uno se utiliza para videojuegos. El otro se utiliza para películas. Y en licuadora,
tenemos acceso a ambos. El de los
videojuegos, eso se llama EV y el que se usa en las películas,
eso se llama ciclos. Y a estos se les conoce
como motores de render. Ahora, IV es realmente rápido. Puede resultar alrededor de
20 imágenes por segundo. EV es lo que hemos utilizado hasta
ahora en el curso. Cuando hayas ido
a Renderizar imagen, haz clic en eso, la imagen
aparece instantáneamente. Pero eso es velocidad. Esa velocidad
tiene un costo, así que vigila. Se trata de una imagen
renderizada con IV. Esta es esa misma escena
renderizada con ciclos. Es posible que no puedas decir exactamente cuál es la diferencia, pero de alguna manera los ciclos solo se ven
mucho más realistas. Eso se debe a que los ciclos es la
tecnología utilizada en las películas, y es una forma más realista de calcular la luz y la sombra. No sólo es más realista, también
es más fácil de usar. Al igual que con EV,
necesitas todo tipo de pequeños trucos y hacks para que se
vea medio decente Los ciclos simplemente funcionan. Calcula
la luz de una manera realista, no importa lo que hagas, siempre quedará bastante bien. Se ve bien, y es más fácil. ¿Cuál es el problema?
Los ciclos son lentos. Es muy, muy lento, al
menos comparado con el EV. Cuando presionas, renderizas la imagen, se
te presentará
esto como un desastre ruidoso. Después poco a poco se
limpia a lo largo de minutos, a veces horas, pero
merece tanto la pena. Para un trabajo serio de diseño, realmente
quiero
que entiendas esto. Ciclos es la única opción real. Por eso vamos a estar cambiando
a ciclos en el futuro. El renderizado lleva tiempo. Eso es solo un hecho
del asunto y algo a
lo que tenemos que acostumbrarnos. A menos que consigas una buena computadora. Lamento decirlo, pero este es el problema que el
dinero puede resolver. Si te tomas en
serio las tres D, entonces lo que querrás
obtener es una buena GPU. Puedes encontrar guías por ahí sobre qué tipo de GPU es
buena para tu sistema, pero una GPU, ese es el componente que
deseas para renderizar. Haré todo lo posible para afinar todos los proyectos
del curso de
una manera que cualquiera
pueda participar, no importa tu sistema y
va a estar bien. Pero solo debes saber si estás
en una computadora más antigua, entonces vas a estar
esperando más tiempo los resultados. Eso es solo parte del juego. No dejes que eso te detenga. Me metí en tres D hace
aproximadamente diez años, y eso estaba en una computadora que era lenta incluso para la época. Nunca
recuperaré esas horas. Estarás bien.
26. Configuración del motor de procesamiento de ciclos: Et configura ciclos
en su sistema. Activa la vista renderizada y
luego entra en esta pestaña, la pestaña Propiedades de renderizado. Y en la parte superior, verás un menú desplegable que dice Render Engine EV y haz clic en
eso y baja a ciclos. No te preocupes por el banco de trabajo. Acaban de poner eso
ahí para confundirte. Haga clic en ciclos en su lugar, y
si está en modo renderizado, verá instantáneamente la imagen
volviéndose granulada y extraña Y cuando te
muevas, verás los característicos ciclos
ruidosos renderizados. Una cosa a tener en cuenta es que cuando te mueves a la ventana gráfica sombreada, seguirá usando el renderer EV
para mostrarte Entonces eso seguirá
siendo agradable y rápido. Pero de vuelta en la vista renderizada, hay un par de
cosas que podemos hacer para hacerlo más rápido. Lo principal es
configurar el dispositivo de renderizado. Se va a poner técnico
por un poco. Lo simplificaré como los diez mejores, lo que estoy hablando está aquí. En el menú desplegable de ciclos, tienes un dispositivo
y puedes elegir entre cómputos de CPU y GPU. Estos son básicamente dos
componentes de tu PC. Tienes una CPU y
tienes una GPU, y la GPU,
normalmente, es mucho más rápida en
este tipo de cálculo. A menos que tengas una GPU realmente
mala y una CPU demente, querrás optar por la GPU Pero cuando enciendo eso, se vuelve gris, y eso es porque no he
configurado mi hardware de renderizado. No le he dicho a Blender
cuál es mi GPU, así que aún no sabe
cómo usarla. Pero podemos configurarlo
subiendo a editar preferencias y bajando al sistema y en la parte superior aquí, tenemos ciclos de renderizado de dispositivos. Y tengo un montón de opciones. Es posible que tengas menos opciones, y cuál elijas depende del hardware
que tengas. Y así en la pantalla, sólo
voy a poner una lista de qué elegir
dependiendo de su hardware. Entonces básicamente tienes que saber
qué compañía hizo tu GPU. Tengo una tarjeta Nvidia RTX, así que hago clic en Óptica Entonces posiblemente obtenga una
pequeña lista de elementos aquí, y probablemente sea una
buena idea marcar todas las casillas de verificación que tiene aquí para habilitar todos sus
dispositivos para renderizar Al igual que si tienes múltiples
GPU, por ejemplo, entonces puedes hacer clic en todas
ellas, y en mi caso, incluso puede usar la CPU así
como la GPU Y en mi caso, verás que eso
hace que se rinda
mucho más rápido. Es mucho más rápido a la
hora de resolver la imagen. Otra cosa que puedes hacer. Esto es solo un
pequeño truco visual. No
te hace renderizar más rápido, pero puedes activar el ruido de AID, y lo haces aquí, justo debajo donde
ves el motor de renderizado, tienes muestra y luego
tienes una ventana gráfica y un Se puede activar la eliminación de ruido. Para mí, está activado por
defecto en el renderizado, pero no está activado por defecto
debajo de la ventana gráfica Pero si lo enciendo,
verás que la imagen se vuelve
completamente suave. El ruido se ha ido. Eso no es porque de repente se
rindió mucho más rápido. Ahí sigue ahí el ruido, pero el eliminador de ruido intenta
quitarlo después del hecho Y verás el efecto de ello mucho mejor si vuelvo a CPU por un momento para ralentizar mi renderizado y
hacerlo muy granuloso Y entonces tal vez sólo voy a hacer un poco más de
una escena compleja. Y verás aquí para uno, toma un momento
actualizar cada fotograma, haciéndolo un poco rezagado Y tal vez veas que
los bordes se difuminan un poco y se
lavan como si fueran
un poco líquidos. Y eso es lo que
pasa cuando hace mucho ruido y el eliminador de ruido de IA
intenta arreglarlo Entonces, si lo apago, así
es como se ve realmente, y esto es con lo que tiene que trabajar el
eliminador de ruido Pero es hacer un trabajo
muy decente. Este tipo de cosas a veces pueden suavizar los detalles finos
si tienes eso, razón por la
que
normalmente lo mantengo alejado. Estéticamente, puede mejorar bastante
tu imagen.
27. Iluminación del mundo: Bien, pop quiz, ¿
cuál de estos cubos es reflectante y
cuál es mat No
lo pienses por mucho tiempo porque es casi
imposible de decir. Aquí no hay pistas que
te digan cuál es reflexivo
y cuál no lo es hasta que agrego un tercer objeto.
Puedo agregar un mono. Y ahora de pronto, se puede
ver, se puede ver que el mono se refleja en un
cubo pero no en el otro. Entonces, ¿qué hace que
algo sea reflexivo? Casi me da vergüenza preguntar, verdad, porque es
bastante obvio, y es que tiene algo que
reflejar que aparece en él Pero en este vacío gris
que tenemos en tres D, no
hay nada que reflejar. Y entonces no sabemos que esto es reflexivo, y
eso es un problema. Si estamos haciendo un render de producto que se supone
que es reflexivo. Necesitamos algo
para que reflexione. Tener básicamente dos
soluciones para ello. Una es construir cosas a
su alrededor para que reflexione. Eso es mucho trabajo, y hay una solución mucho más simple. Podemos tomar una imagen y envolverla alrededor del mundo para
que donde quiera que mires, haya una imagen
para que refleje. Eso se llama HDDI. Es sinónimo de imagen de alto rango
dinámico. Realmente solo significa
que contiene mucha información tanto en las sombras como en
los mismos reflejos, lo que significa que en
realidad puede emitir luz. Y puedes conseguir
este tipo de imagen gratis en plyhaven.com Plyhaven tiene un montón
de tres activos D, y entre ellos,
puedes subir aquí a los activos y elegir HDRis Consigue esta lista de imágenes de aspecto
extraño. Se ven así de raros
porque son imágenes de
360 grados que
podemos envolver alrededor de nuestra escena. Pasemos aquí
a los filtros y escojamos un estudio para esto, y podrás ver un pequeño adelanto
de cómo se verán la iluminación y los
reflejos en estas bolitas de aquí abajo. Me gusta el aspecto de este
, Estudio pequeño nueve. Así que vamos a hacer clic en eso y vamos a descargarla. Este
es el tamaño de la misma. Dice cuatro K. Toma una imagen y la envuelves
alrededor de toda tu escena, y luego fotografias
solo una parte de ella, muy rápidamente
empezarás a ver los píxeles. Entonces no quieres ir por
debajo de las cuatro K, de verdad. Y entonces el formato puede ser HDR
o EXR,
no importa Entonces descarga eso. Y
luego de vuelta en Blender, queremos establecer un mundo. Ahora, ya te he
mostrado el mundo, y eso está por aquí
en la pestaña Mundo, pero se vuelve bastante complicado. Entonces queremos interconectar con estos ajustes,
no como una lista, sino como un gráfico de nodos, y ese es un
concepto muy importante en blender. Y usaremos
gráficos de nodos más adelante también. Así que bien podemos
acostumbrarnos ahora. Abriré una nueva ventana
moviendo mi cursor aquí arriba a la esquina hasta que se
convierta en un poco radical, y luego parando para
dividir la ventana por la mitad. Y esta ventana de aquí, me
convertiré en un editor de shader. Hago clic en este pequeño icono y me muevo hacia abajo
a Shader Editor Por defecto, el editor de sombreadores está editando el material
de un objeto Puedes elegir editar un material aquí o puedes
elegir editar el mundo, y lo eliges aquí arriba
en un pequeño menú desplegable. Puedes elegir Objeto o Mundo. Vayamos ahora al mundo y
obtenemos un par de nodos. Déjame cerrar esta
ventanita a la derecha. No lo necesitamos. Y aquí dentro, podemos movernos igual que lo hacemos en tres
D. Podemos desplazarnos hasta Zoom y podemos desplazarnos por
ahí haciendo clic en la rueda del ratón o sin embargo te
mostré cómo
hacerlo en tu computadora. Hablemos de
lo que es incluso un nodo porque si vienes
de programas de adobe, ese no es un concepto con el que
estarás familiarizado. Este es ese mismo
gráfico de nodos, y aquí, puedes elegir entre un objeto y un mundo
y un estilo de línea. En un momento en el que
vuelva al HDDI, vamos a ir al mundo Pero por ahora,
voy a quedarme en objeto sólo para
cambiar este objeto. Entonces estoy cambiando el gráfico de nodos a la izquierda de este
objeto a la derecha. Entonces veamos
esto. En esta ventana, tenemos dos nodos, estos pequeños cuadrados, y
cada uno tiene una tarea. Entonces el nodo más a la izquierda que
se llama nodo de textura de imagen, y esto contiene mi la derecha, este es el nodo de salida de
material, y esto le dice al objeto
lo que va en la superficie. Y a la derecha,
me sale el resultado, que es una imagen porque
estos dos están conectados. Si no están conectados, si hago clic en la superficie de la salida del material y lo arrastre,
entonces puedo desconectarlo. Yo solo lo solté y se vuelve negro porque nada va a
entrar en la salida material. Quiero que algo más entre
en la salida material, puedo hacerlo agregando,
digamos, otro nodo. Eso lo haces con
el mismo atajo que en cualquier otro lugar en licuadora. Mayús A, y quiero una entrada y quiero una
textura de imagen de textura, o simplemente puedo buscar textura de
imagen. Eso me da un nuevo nodo. Este es el mismo tipo de
nodo que el que tenía aquí. Y al hacer clic en el botón de abrir, puedo seleccionar otra
imagen de mi computadora. Digamos, por ejemplo, éste. Ahora bien, si tomo el socket
de salida de este nodo, que dice color, eso es lo que está saliendo
del nodo y lo enchufo aquí, obtenemos la nueva
imagen a la derecha. De esta manera, puedes
tener diferentes imágenes y cambiar entre ellas. Pero la belleza de los nodos es que puedes insertar cosas en esta línea para que puedas cambiar la imagen antes de
que vaya a la salida. Hagámoslo con, por ejemplo, un nodo de brillo y contraste. Es lo mismo que la
capa de ajuste de
contraste de brillo en Photoshop. Si simplemente me pongo el cursor sobre
el medio aquí, puedo insertar eso en el medio Ahora la imagen que sale de este nodo entra en
el brillo y contraste, algo sucede y luego sale a la salida
material. Se puede ver a la derecha como cambio el brillo
y el contraste, eso también cambia la imagen. Yo enchufo la otra imagen en el brillo
y contraste, entonces entonces se aplica el brillo y contraste
a esa imagen. Los nodos tienen sockets de entrada la izquierda y
sockets de salida a la derecha, qué datos entran y
qué datos salen. Esto es lo que
vamos a utilizar para obtener una textura ambiental
alrededor de nuestra escena. Tener un nodo que
diga fondo, y tenemos un nodo que
dice salida mundial, y luego tenemos una línea que
va entre ellos. Esa línea se puede desconectar. Podemos hacer clic aquí y podemos sacarlo de la
salida y liberación mundial. ¿Y qué pasa? El mundo
entero se vuelve oscuro porque no estamos poniendo
nada en la producción mundial. Tomemos de nuevo este nodo de
fondo
, lo llevemos a la superficie
de la salida mundial, y entonces tal vez queramos cambiar el color del fondo. Entonces podemos hacer clic en la muestra de color
grande aquí y podemos cambiarla a
roja, y eso la cambia También podemos tirar de la fuerza y eso cambia
la fuerza de la misma. Siempre que hagamos a este nodo
va a ser salida
al mundo. Ahora bien, este nodo en sí
tiene un par de entradas. Estos son sockets de entrada, y podemos poner o
un color en el color o tal vez pongamos una
imagen ahí, ¿verdad? Entonces agreguemos un nuevo
nodo a esta gráfica. Agregamos cosas nuevas al
igual que hacemos en la
ventana gráfica de tres D con Shift A. Lo que queremos es una textura, y aquí obtienes muchas
opciones, pero llegarás muy lejos con solo la
textura del ambiente, que está aquí Haga clic en él y haga clic de
nuevo para colocarlo, y este nodo aquí tiene
un par de opciones. Agrega uno nuevo. Podemos abrir uno. Lo que queremos ahora mismo es
abrir la imagen que
descargamos. Así que hagamos clic en Abrir y muévanse a la carpeta donde la
has descargado. Aquí tengo mi estudio
descargado. Haré clic en él y
presionaré Abrir imagen y luego tomaré la salida de este nodo y la
meteré en la entrada
del nodo de fondo. Eso los conecta.
Y en nuestro mundo, se
puede ver esa imagen envuelta
alrededor del mundo entero. ¿Qué tan genial es eso?
Y no sólo eso, es genial porque si
agregamos un avión también, puedo borrar la luz de tres
D que tengo, y todavía hay
iluminación aquí. Al igual que, estas cajas ahora todavía tienen sombra porque esta luz aquí en realidad está proyectando
luz sobre la escena. Creo que esto es alucinante, pero lo más importante es
que se puedan ver reflexiones. Eliminemos nuestros cubos
y agreguemos una esfera en su lugar, en que haré
clic derecho y sombrearé suavemente. Le voy a dar un material que
sea metálico pero no áspero. Y entonces podemos
ver el reflejo de toda nuestra escena
en esa bola. Y asegúrate para este
flujo de trabajo que
estás en el motor de render de ciclos. En EV, se ve muy diferente y no funciona del
todo. Haré lo mejor que pueda. Pero para una iluminación adecuada
basada en imágenes, hay
que usar ciclos.
28. Creación de vidrio: Porque muchos de ustedes
estarán haciendo botellas de vidrio, hablemos de sombreado
transparente Para
materiales transparentes,
querrá agregar un
tipo especial de sombreador Entonces, cuando haces clic en tu objeto y vas a la pestaña de sombreadores, presionas nuevo Blender ha elegido
automáticamente una
especie de shader para Muestra el BSDF de principios. Qué es un shader, es
una forma de describir la superficie de tu objeto de una
manera que la
computadora entienda Y el
BSDF de principios es fantástico. O haciendo cualquier tipo
de superficie opaca. Pero una vez que se está moviendo
hacia la transparencia, menudo, querrá
cambiar eso en un BSDF de vidrio Así que hagamos clic en él y obtendrás la lista completa de
todos los sombreadores posibles Vamos a subir aquí al de
cristal y hacer clic en eso. No podemos ver ningún cambio
porque estamos en modo sólido, así que pasemos al modo de vista previa de
material. Y aquí podemos ver un avance
de ese material de vidrio. Pero lo que es importante, esto
es solo un adelanto. Esto no es realmente lo que
parece porque el modo de vista previa de material en Blender usa el motor de renderizado
EV, y el motor de renderizado IV
no es físicamente preciso. Entonces, aunque hayas elegido ciclos aquí como motor
de render, esta pestaña seguirá usando IV. Y para materiales transparentes, IV no va a funcionar. No es mostrarte cómo
se ve realmente. IV está bien con la
mayoría de las otras cosas, pero la transparencia, no tanto. Así que pasemos
al modo renderizado. Así es como se ve
realmente la superficie. Todavía tengo el HDDI iluminando mi escena
que configuré antes. Y se puede ver cuando me muevo
detrás del objeto de cristal, se
puede ver que tiene
un efecto de vidrio esmerilado Se puede ver la
luz a través de él. Se ve un poco bonito, en realidad. Si quieres que
sea menos rugoso, menos esmerilado, vamos
a la pestaña materialtab. En realidad no tenemos muchos ajustes
para el cristal. Los dos únicos que vale la pena mencionar
son la rugosidad y el IOR. Entonces, si baje la rugosidad, ahora obtenemos vidrio brillante Utilice también el vidrio BSDF
para líquidos. Esto funciona muy
bien para líquidos. Lo que tenemos aquí es un
sólido pedazo de vidrio. Esto es vidrio todo
el camino a través, razón por la
cual está refractando tanto
el fondo Se puede ver el
fondo si se está deformando por dentro de esto, y no haría eso
si se tratara de vidrio delgado, y eso realmente
importa en la renderización Cycles conoce la
diferencia entre vidrio
fino y vidrio grueso. Entonces quieres tenerlo en
cuenta cuando estés modelando. Es necesario darle grosor a las cosas si realmente
tienen grosor y dejar aire dentro si
realmente hay aire dentro. La regla general
realmente es simplemente
hacerlo como es en la vida real. Cycles es notablemente bueno
para replicar la vida real, hay una manera muy fácil de convertir un objeto sólido en un objeto
delgado en licuadora Hagámoslo con
esto. Vamos a modificarlo. Así que volveré a la
vista sólida para modelar, y presionaré tabulador para
entrar en modo Editar. Y para este ejemplo, solo
seleccionaré todas las caras superiores
entrando en vista lateral, vista estructura de alambre, y seleccionando todas estas caras y
simplemente presionando eliminar Te dije que no
hicieras esto, y no
deberías vamos a
agregarle grosor a esto, así no dejaremos la superficie
infinitamente delgada
como la tenemos ahora Entonces ahora mismo, no hemos
hecho lo que tenemos que hacer. Blender todavía no sabe
que hay aire dentro de esto. ¿Es así de estúpido?
Sí, como que lo es. Si entramos en modo renderizado
y miramos a través de
esto, todavía se refracta bastante La razón de eso
es muy simple, imagina la luz que viene
de este lado. Golpea esta pared, y luego se deforma
por aquí, y se deforma justo hasta que choca contra una pared
que sale Y recuerden, esta es una pared
infinitamente delgada, así que nunca choca contra
una pared saliente, seguirá refractándose
y doblándose y siendo rara hasta que
golpee esta pared exterior, y luego volverá a salir
directamente Lo que necesitamos es que golpee una pared exterior justo después que se deformará y luego golpee una pared
exterior aquí también. Y para ello,
tenemos un modificador. Esa es una de las
pestañas de aquí. Es la llavecita. Y los modificadores son formas
realmente rápidas de cambiar tu geometría Puedes agregar detalles. Puede agregar las
características de superficie de su modelo. Hay un montón de modificadores
muy útiles, y el que queremos usar
ahora se llama solidificar,
y está bajo Bajemos para solidificar. Y solo para que
veas lo que está haciendo, aumentemos un poco el
grosor sobre eso. Y mira eso. Vamos a hacer clic derecho sobre
esto y sombrearlo auto suave
para poder ver lo que está haciendo. Añadió espesor. Eso es lo que hace este modificador. Agrega grosor al modelo. Lo realmente interesante es que no lo hace permanentemente como esto se
hace después de haber modelado El modelo sigue plano. Y si cambio
algo al respecto, digamos que selecciono este bucle. Extrujamos este
bucle a lo largo de las normales, extrudimos bordes, y luego
lo escalaré Y verás que
mantuvo el grosor por
todas partes. Y
puedo apagar esto. Si hago clic en el ícono del pequeño monitor de
computadora aquí, puedo apagarlo en
mi puerto de vista tres D, y verás que el
modelo sigue plano. Aquí arriba está completamente plano, pero encenderlo agrega grosor
a donde sea plano. Y ahora, si
entro en modo renderizado, se refracta como si fuera hueco Incluso verás el
fondo del vaso. Si tienes un modelo
completamente sólido y agregas un modificador de solidificación, le agregará grosor, y eso es muy importante para materiales
transparentes Verás una
gran diferencia real.
29. Creación de líquido: En muchos casos, también
querrás llenar esto, y te mostraré una
técnica para llenarlo. Volvamos al modo sólido, y apagaré este
modificador solo por trabajar, y entraré en el modo
tab para editar. Vamos a agregar un poco de
bucle aquí. Vamos a agregar un bucle.
Y después quiero seleccionar todo lo
que esté por debajo de ese bucle. Una buena manera de hacerlo es
en lugar de seleccionar la casilla, puedo usar la
selección de círculo, lo cual es agradable. Si hago clic en las caras, ahora puedo seleccionarlas
simplemente arrastrándolas sobre ellas. Y mientras mantengo pulsado
el botón izquierdo del ratón, puedo desplazarme hacia adentro y
hacia afuera para aumentar y disminuir el tamaño de ese círculo para que
sea muy fácil seleccionar
todas las caras que quiero. Después sólo voy a volver
a la herramienta Seleccionar caja, que me gusta tener
por defecto. Solo tomemos esta parte
del vaso y dupliquemos
esta geometría. Podemos duplicar
subiendo a mesh, duplicar o el
atajo es Shift D. Shift D ahora está
unido a mi cursor, así que si empiezo a
moverme, también mueve el duplicado
alrededor. Haré clic derecho para
cancelar el movimiento, pero aún así está duplicado.
Todavía está aquí. Y ahora sin
hacer nada más, quiero tomar esta malla, y quiero separarla en un objeto separado porque
mirando al outliner, todavía solo
tenemos un
objeto llamado cilindro, y queremos dos objetos Vamos a la malla. Separar y separar la selección,
lo que hemos seleccionado. Ahora tenemos dos objetos. Tenemos cilindro y
cilindro OO uno. Y si desactivo el modo Edición, ahora
estamos seleccionando objetos. Podemos seleccionar ese objeto
o el otro objeto. Seleccionemos ese nuevo objeto. De hecho,
le voy a dar un nuevo nombre haciendo doble clic y
llamémoslo líquido. Y voy a apagar el
cilindro por ahora. Así que sólo estamos trabajando con
el líquido. Vamos a presionar tabulador. Y lo que queremos ahora es
llenar este top porque, recuerden, no queremos que
las cosas estén abiertas. Queremos que se
cierren de alguna manera. Entonces podemos o agregar un modificador de solidificación
o podemos cerrarlo Por el momento, sí tiene
un modificador de solidificación en él. Acabo de
apagarlo temporalmente. Pero esta no es la forma en que
queremos que se comporte el líquido. No queremos que esté justo a la vuelta
de las esquinas.
Queremos llenarlo. Entonces, eliminemos ese
modificador haciendo clic en la X. Y volvamos al
modo Editar. Vamos a cerrar esto. Podemos cerrarlo yendo
al modo de selección de borde y manteniendo presionada la tecla Alt u Opción y haciendo clic en el bucle superior
para seleccionar todo eso. Y podemos subir aquí
al menú de caras y rellenar con caras. Podemos llenar o
rellenar la cuadrícula realmente no importa. Yo solo lo llenaré,
y
lo llenará con líneas aleatorias,
pero eso está bien. Eso al menos lo llena. Y ahora que es
un objeto sólido, esto se leerá más como un líquido. Entonces saldré del modo de edición
y volveré al modo renderizado. Y parece como una
gota de agua, ¿no? Si destaco ese
objeto de vidrio en el outliner, incluso lo
verás aquí, pero se ve
que se ve raro Entonces una cosa es que necesito volver a agregar el grosor
al vidrio porque
lo apago temporalmente. Recuerde, haga clic en el cristal, vaya a este modificador y
enciéndalo en la ventana gráfica Entonces eso hace que el
vaso sea un poco mejor, pero ¿por qué hay este
facetado aquí abajo Hay dos cosas a tener en cuenta a la hora de
hacer este flujo de trabajo, y ambas son muy importantes. Una de ellas tiene que
ver con normales. Recuerdas a los normales,
nuestros buenos amigos normales, que significan afuera de la malla Te voy a dar un ejemplo
usando solo un avión por ahora. Cada fase tiene un ritmo
hacia afuera y un ritmo hacia adentro, y podemos ver cuál es
cuál subiendo a
este pequeño ícono, que aún no hemos
tocado, que tiene nuestras superposiciones de ventana gráfica, y podemos bajar aquí
a la orientación de fases Si hago clic en eso,
todo se vuelve azul,
es decir, solo estoy viendo
el exterior de todo. Pero si miro al
fondo, ahí está el rojo. Ahí está el rojo de la maldad. Si ves normales rojas, eso significa que tienes
la cara trasera de algo Y nuevamente, todo
tiene cara trasera. Si agrego un cubo y lo
muevo aquí, todo es azul, pero dentro desde adentro,
todo es rojo. Y recuerdas que
te dije que nunca borraras una cara y la dejaras abierta?
Bueno, aquí está la razón. Si entro en modo Editar
y borro una cara, estaremos mirando
directamente al rojo de la maldad. Cuando hiciste este flujo de trabajo aquí, cuando separaste parte del vaso
en su propio objeto, aproximadamente la mitad de ustedes
habrán vuelto este rojo. Déjame hacer algo de magia
cinematográfica y boom, esto es lo que estás viendo. Estás viendo
todo este objeto como rojo. A veces esto sucede. A veces cuando modelas cosas, algunas de las caras se vuelven hacia adentro, pero hay formas de arreglarlas. Una vez que sabes lo que
hay ahí, das clic en él. Entras a la pestaña en modo Edición. Se selecciona todo lo
que es rojo. Si algunas de las caras son rojas, solo las
seleccionarás, pero en este caso, todo es rojo. Entonces presionaré A, solo seleccionaré todo
e iré a malla, normales recalculan Cuando hagas clic en eso,
recalculará todas las normales y todo estará orientado hacia y todo estará orientado hacia
afuera correctamente.
Es el primer paso. El segundo paso es
asegurarse de que ninguna cara se
superponga perfectamente . Entonces
aquí está el problema. Algunas de estas caras
de estos dos objetos están perfectamente superpuestas
matemáticamente Y podemos decir cuales si
solo enciendo el modo
transparente aquí sin el wireframe solo transparente Hago clic en el agua dentro, y verás que los
bordes están perfectamente alineados. Probablemente pueda adivinar por qué. Es porque duplicamos un objeto que se convirtió en
el otro objeto. Por lo tanto, es
exactamente lo mismo. Se superpone perfectamente. Y eso realmente confunde al motor
de render. Entonces todo lo que realmente
tenemos que hacer es apenas compensar esto
ya sea hacia afuera o hacia adentro. Ahora, tiene sentido
en este caso, hacerlo
hacia adentro, ¿no? Para que no tengamos
agua en el exterior. Pero este
sería incluso el caso si nuestro modificador de solidificación de vidrio fuera por el otro lado, y te lo
mostraré Voy al vidrio solidificado
y voy al modificador, y cambio el offset
de uno negativo a uno Ahora ya no está agregando
grosor hacia adentro, lo está agregando hacia afuera Si lo apago,
verás que se está agregando al exterior. Anteriormente, cuando el
offset era negativo,
se estaba sumando al interior. Vamos a agregarlo al
exterior en su lugar. Y ahora mirando en
modo transparente y haciendo clic en el agua. ves, ya no
tenemos el problema de que el agua toque el
exterior del vaso, pero sigue tocando el interior
mismo del vaso. Y no soy un apostador, pero apostaría a que si ahora
vamos al modo renderizado, sigue siendo un poco funky Sí, lo es. Todavía tiene
esta cosa extraña de facetas Entonces como dije, para arreglarlo, solo
necesitamos compensarlo
solo un poquito, diminuto. Así que vamos a entrar en la pestaña y
presionar A para seleccionar todo, asegurarnos de que
todo esté seleccionado. Incluso podemos entrar en wireframe para asegurarnos de que ese es el caso Y vamos a
encogerlo o engordemos esto usando la herramienta
Engordar encoger, esta Ahora bien, ¿queremos mover todo
esto hacia adentro o hacia afuera? Bueno, resulta que sé
que si lo movemos hacia adentro, estaremos dejando un
pequeño hueco de aire. Y esa brecha de aire aparece
muy obviamente en renders. Así que cada vez que hago este flujo de trabajo, siempre
me aseguro de
moverlo un poco hacia afuera, básicamente
moviéndolo al cristal, pero eso es
mejor que lo contrario. Y se verá muy bien una vez que
entremos en modo renderizado. Y ahora esto parece que debería verse un
vaso de agua. Entonces esa fue mucha información
técnica solo para algo
pareciera transparente, así que la voy a resumir ahora Primero, necesitas grosor para rellenar para
que se renderice correctamente. Entonces piensa en, ¿lo
quieres sólido, como el agua de aquí
o quieres agregar un grosor usando el modificador de
solidificación En segundo lugar,
desea asegurarse de que todas las normales se desplazan hacia afuera, y puede verificarlo yendo a
las superposiciones de Viewpoort y
activando
la Si algo es rojo,
entra en modo de edición, selecciona todo, y ve a las normales
de malla y
vuelve a calcular afuera Tercero, si alguna cara se superpone
perfectamente, entonces encogerlas o aplanarlas solo para compensarla un
poquito para no tener esa extraña alineación que
la computadora no puede manejar
30. Reparación de una concha defectuosa: Hay un problema que puede
enfrentar con las botellas más elegantes. No es que esto sea
particularmente elegante, pero es un muy
buen ejemplo de un problema que puede enfrentar al
usar el modificador de solidificación Entonces he hecho una sección de esta botella simulada para
que podamos ver dentro de ella, podamos ver qué pasa cuando
agrego un modificador de solidificación Entonces veamos este
detalle aquí mismo. medida que enciendo el modificador de
solidificación, agrega grosor a esta delgada pared, que
es lo que quiero Pero permítame simplemente
apagar el borde un poco, así solo vemos la
cara exterior y la interfaz. Y mira lo que sucede a medida que aumento el grosor
del modificador de solidificación Se vuelve más gruesa, más gruesa, y estamos empezando a tener una forma extraña que se dobla
sobre sí misma Entonces esta cara que entra
justo aquí, está entrando, se está duplicando y haciendo
esta extraña
forma de estrella,
lo cual, honestamente, es bonito
creará todo tipo de problemas una vez que se convierta vidrio porque el vidrio es transparente
, ¿verdad? Entonces miras a través
de este cristal y ves este desastre, y luego ves más
y no se verá bien. Y hay un par
de formas en las que podemos arreglar esto. Hay una manera fácil,
y hay una manera difícil, y tristemente, la
manera difícil es mejor. La manera fácil es justo dentro
del modificador de solidificación. Bajo el grosor de la abrazadera, podemos arrastrar hacia arriba la abrazadera
y ver lo que sucede. Como que trata de arreglar
esa zona, y lo hace. Si arregla el área
problemática, pero el grosor se reduce en la actualidad. Entonces esto te va a
dar un
grosor variable en toda tu copa, lo que normalmente
no es súper realista, aunque esta es
la solución fácil. Entonces, para muchos casos, esto
es lo que haría yo. No obstante, permítame
mostrarle también la solución difícil. La solución dura es
aplicar el modificador. Entonces, si entramos
ahora en modo Editar, seleccionamos todo. Esta interfaz realmente
no existe. Es sólo un modificador. Cuando hago clic en el menú desplegable, y hago clic en Aplicar, tengo que
salir del modo Editar para hacer eso Aplicar y volver
al modo Editar. Ahora puedo seleccionar todo. Y ahora podemos entrar
y arreglarlo manualmente. Entonces lo que haría es
entrar en modo Editar. Presionaría tres
para selecciones de caras, luego daría clic en uno de estos bordes verticales aquí
para seleccionar ese anillo completo. Entonces presionaría
eliminar, borrar las caras. Hacer una incisión
por encima del problema. Haz lo mismo debajo del problema. Entonces Alt haga clic en esta u opción
en un Mac, elimine fases. Y ahora hemos cortado
la parte problemática. La parte problemática
ya no está conectada a nada, lo que significa que podemos seleccionar
cualquier fase dentro de aquí, cualquier fase de la parte
problemática, e ir a Seleccionar,
Vinculado, Vinculado. Atajo es Control
L. Mira eso. Eso selecciona todo lo
que está conectado. Y como lo dividimos aquí, sólo selecciona la parte
problemática. Así que ahora podemos presionar Eliminar,
eliminar las caras, y ahora podemos volver a conectar
estas dos caras Entonces iré al modo de
selección de borde y Alt u Opción haga clic en
esto y luego la opción Alter haga clic en esto mientras mantiene presionada
Mayús para agregar esa selección e ir a los bucles de borde de Edge
Bridge, que une esos dos. Eso me da un interior liso mientras guardo ese
detalle en el exterior. Esta es la mejor solución para mayoría de los problemas causados por
el modificador de solidificación
31. Proyecto de clase 3: sombreado de la botella: Clase Proyecto tres, verdad
estamos
arrastrando, ¿no es así? Este es realmente el
paso final para hacer un objeto. Al igual que, ya estamos terminando
nuestra botella. Esto es sombreado, que es más
o menos agregar materiales, pero
probablemente también tendrás que modelar un poco, si recuerdas, cuando
agregas vidrio a algo, también
tienes que agregar s.
Tal vez tengas que agregar algunas cosas extra dentro tu botella si
es transparente Recuerda, tu botella no
tiene que ser transparente. Ni siquiera tiene que
ser una botella. Ahora está completamente bien. Entonces, vamos a leer el proyecto. Para terminar el modelo de tres D y prepararlo para renderizar, agregue materiales a él. Experimenta con
diferentes colores, niveles de
rugosidad y metales, lo que mejor se adapte a tu marca Si tu botella es transparente, llénala de líquido. Acabo de terminar de hacer el mío. Lo puse en un ambiente iluminado. Usé un HDRI para
iluminar mi escena, y actualmente estoy en el modo
renderizado de ciclos, que como que tienes que
ser cuando trabajas
con cosas de vidrio Y le he agregado materiales. Entonces cuando haga clic en la boquilla, por ejemplo, y vaya
a la pestaña de materiales, verá el plástico y
experimenté con algo de
rugosidad y los colores Y le agregué grosor
a este objeto. Si te muestro en modo sólido, este objeto ahora
no está completamente lleno como si tuviera un interior,
y eso lo hice. No sólo eso, sino que también agregué este objeto líquido dentro de él, que representa el aceite de chile. Por lo que los requisitos son ciclos de
uso mientras se
trabaja con materiales. Sólo recuerda eso.
No use IV. Aplica un HDRI a tu entorno de
escena, lo cual hice y agregué materiales
a tu modelo. Sé creativo. Los entregables son captura su resultado en la vista Render Y lo que hago con
esa captura de pantalla, subirla a la sección de proyecto de
clase o asignación de esta
página web. Y nuevamente, compártelo
en redes sociales. En Trae Tu Propia Computadora Portátil, Grupo
Facebook, Grupo LinkedIn. Quiero ver lo que haces. Y en el siguiente video,
verás cómo resuelvo este proyecto. Pero de nuevo, probablemente deberías
hacerlo tú mismo primero, porque la forma en que nuestros cerebros
aprenden es probarlo y fallar y luego tratar remar
realmente tu memoria para ver
si puedes averiguarlo Y si solo estás
siguiendo, tu cerebro no está realmente haciendo las conexiones correctas que
necesita para aprender esto bastante. Entonces haz el proyecto, luego mira cómo lo hice. Tengo muchas ganas de
ver lo que haces.
32. Terminado. Proyecto de clase 3: sombreado de la botella: Dependiendo de tu modelo, el
sombreado era bastante duro. Fue bastante fácil. Al igual
que, puedes darte un trabajo duro con muchos objetos
y sub objetos y demás Pero te voy a mostrar cómo me
acercaría a sombrear el mío. Entonces primero, tenemos que
entrar en vista renderizado. La vista texturizada está bien
para algunas cosas, pero como dije, no realmente
para materiales transparentes. Entonces debemos entrar en la vista
renderizada para esto. Y mi motor de render
está configurado en EV. Definitivamente debería
configurarlo en ciclos y configurar el dispositivo en GPU como te
muestro cómo configurarlo. Para empezar, la primera vez, ya
sabes, puede que se quede un
poco rezagada, pero está bien. Entonces ahora viendo esto, lo estamos
viendo en vista renderizado, pero es completamente gris. Es como, gris oscuro porque
el ambiente es gris. Entonces, importemos un HDDI para obtener una
iluminación y
reflejos realistas aquí
para poder juzgar la superficie Abriré una nueva
ventana
subiendo a la esquina hasta que
el cursor se
convierta en un poco radical y la arrastraré hasta
que agregue una división. Y luego con este
pequeño menú desplegable, entraré en el editor de shader Por defecto, el editor de
sombreadores muestra el material en el objeto
actual No obstante, quiero
ver el mundo. Entonces iré de objeto
en mundo aquí, y no necesito el panel lateral. Yo sólo puedo cerrar eso. Aquí quiero una textura de
ambiente. Entonces voy a hacer el Turno A
para agregar algo. Y luego en realidad en lugar
de encontrar cosas aquí, prefiero buscar, y ni
siquiera tienes que hacer clic en
el botón para buscar. De hecho, puedes
empezar a escribir E y V. Eso trae a colación
la textura del ambiente. Entonces voy a agregar eso,
enchufarlo al fondo, y se va a poner
rosa porque el rosa es
es el color de advertencia de las texturas
de la licuadora. Si algo se vuelve rosa brillante, entonces sabes que no
tienes una textura enchufada Entonces abramos una textura, y usaré la misma luz HDDI de
estudio que descargué de
Plyhaven Imagen abierta. Ahora vamos a ver.
Eso se ve bien. Puedo cerrar esta ventana
justo arriba y veamos aquí. Lo primero, lo más
importante es el material de vidrio. Agreguemos un material de vidrio
a la parte de vidrio. Iré a la pestaña de
materiales y presionaré nuevo. Puedo cambiar el nombre de este material a vidrio e ir a la superficie
aquí y agregar un vaso. Ahora la cosa es, esto ahora está lleno porque el
rayo está entrando en
él, se está deformando alrededor
y luego está saliendo Ese fue un dibujo terrible. Necesito agregar grosor a esto. Así que vamos a esconder todo lo demás. En realidad puedo, es
una buena idea
comenzar a renombrar objetos
una vez que tenga tres aquí Entonces esta es la parte de cristal. Esta es esta es la
tapa o el corcho, tal vez en este caso, y
esta es la boquilla. Entonces esconderé el corcho
y la boquilla por ahora y veré justo esto. De hecho, ¿por qué no tener dos
ventanas abiertas al mismo tiempo? Volveré a abrir otra ventana, y esta puede ser mi visión sólida. Entonces aquí, puedo
empezar a modelar cosas mientras veo los resultados de
nuevo en esta ventana. Entonces aquí, tenemos que
entrar en modo Editar con una pestaña, presionar tres para
selecciones de caras y hacer clic en esta cara superior o presionar Eliminar para eliminarla
y hacer clic en Caras. Ahora es completamente delgada, lo que Blender
no entiende. Entonces esto es una ilustración
del problema de las formas
completamente delgadas
que mencioné antes, que pueden ver, todavía
se está deformando
mucho aquí dentro, y eso es porque cualquier
rayo de luz que viene de,
digamos, esta lámpara de aquí
viene de la lámpara Está entrando al objeto, y va a deformarse
hasta que encuentre una salida. Y a pesar de
que me he abierto aquí, este rayo no sabe
cuándo salir de todos modos, así que piensa que la forma
sigue completamente llena. Y entonces necesitamos
agregar un modificador. Los modificadores están
aquí en este panel. Dice modificadores cuando pasas el
cursor sobre él, es una llave inglesa. Ya tiene un modificador, que es suave por ángulo, y eso es porque antes hice clic
derecho y presioné Shade Auto smooth y
eso agrega este modificador Pero agregaremos
otro también, y esa será la solidificación.
Yo también puedo buscar aquí. SOL solidifica y presiona eso. Y eso sí le sumó
grosor. Entonces ahora tengo vidrio muy,
muy delgado aquí. ¿Qué tan grande quiero que
sea esto? A ver. Estoy presionando grosor y
estoy arrastrando hacia la derecha, pero mientras mantengo presionado el turno, eso significa que lo estoy
cambiando más lento Siento que ¿qué tan grande
me imagino este ser? Me imagino que esto es tal vez
10 centímetros de altura, tal vez incluso un poco menos. Entonces este tipo de grosor me
parece correcto. Entonces, si voy al modificador, presiono el pequeño
menú desplegable junto a él y presiono Aplicar. Ahora bien, si presiono tabulador, puedo, de hecho, editar esto. Lo primero, quiero agregar un poco de
biselado a la parte superior Entonces presionaré este bucle, mantendremos presionado Shift y alt,
y presionaré este bucle. Y luego el atajo
para biselar, es
decir Control o Comando B, y voy a arrastrar hacia fuera y puedo agregarle más segmentos
desplazándose en Simplemente me desplazaré para agregar un
par y luego mantén presionado Shift para cambiar ese
perfil de manera más sensible' . s hacer
algo así. Ahora creo que me estoy dando cuenta son
algunos temas raros de sombreado. De pronto se pone agudo aquí
y es suave a su alrededor. ¿Por qué? Eso es por
el modificador de suavizado automático. Se trata de suavizar
cualquier borde que tenga un ángulo que sea
superior a 30 grados, pero al parecer los bordes aquí están muy cerca
de los 30 grados, así que algunos han terminado,
algunos están por debajo. Y si solo aumento esto, mira lo que pasa con
el tema del sombreado Desaparece. Así que en realidad prefiero un ángulo aquí que
sea un poco superior a 30. Prefiero probablemente 60 es
más sensato para mí. Y si tiro eso demasiado bajo, entonces de repente en C, ya
no se suaviza nada Si la saco un poco hacia arriba, verás que solo alisa ya la
parte más suave, pero estos ángulos agudos
aquí se mantienen afilados Y luego a medida que lo aumento,
más cosas se suavizan. Oh, 60 para mí. Arreglemos este extraño problema de
sombreado aquí abajo. Lo que voy a hacer es presionar
Tab para entrar al modo Editar y seleccionar este bucle de caras
y este bucle de caras. Después
los eliminaré, borraré caras. Y también quiero borrar todo lo
que esté entre ellos. Ahora puedo seleccionar todo lo
que esté vinculado a esta fase. Es importante
mantener el mouse sobre esta área y luego presionar L,
L para obtener tinta. Eso es selectinked Y eso es seleccionar todo
el asunto. Ahora puedo borrar
eso. Eliminar fases. Y luego volveré a conectar estas partes con la operación
que ya conoces, que es bridge edge loops Entonces entraré en
modo borde presionando dos. Mantenga pulsada la tecla Alt y seleccione esta
arista y seleccione esta arista. De hecho, bucle de bordes, y luego ir al menú de borde y hacia abajo a los bucles de borde de puente.
Eso lo puentea a la derecha. En cuanto al líquido, vamos
al modo de selección de cara
y selección de círculo. El atajo para
seleccionar círculo es en realidad C. Así que usaré el botón
C en su lugar. Presiona C. Me desplazaré hacia afuera
para aumentar el tamaño de eso y luego seleccionaré
todo en el interior. Haga clic derecho para Cancelar para que
pueda
moverme y seleccionar
este lado también. Accidentalmente seleccionas
demasiado como aquí, si toco eso por accidente, puedo eliminarlo haciendo clic en
la rueda de desplazamiento sobre eso. Bien, ¿qué tan alto nivel
quiero para mi líquido? Quiero llenarlo
hasta el borde, no. Vamos a ampliar mi selección. Podría dar la vuelta
y seleccionar todo esto, pero también puedo ir a seleccionar más o menos y un
poco más. Control Numpad plus
es el atajo. Voy a hacer clic en eso, pero
agreguemos un poco más. Control Numpad plus
agrega un poco más. Que crezca la
selección, ¿verdad? Ese es un buen nivel para
llenarlo, creo. Entonces quiero separar esto
en un nuevo objeto. Entonces antes que nada, si
lo separo enseguida, eso
lo va a quitar de este objeto, haciéndolo delgado de nuevo. Entonces necesito duplicarlo. El atajo para la
duplicación es Shift
D, D para duplicado, o puede
ir hasta mesh, duplicar. Entonces Shift D. Ahora estoy
sosteniendo esa parte interior. Está unido a mi cursor, pero puedo
hacer clic derecho para desconectarlo y moverlo justo de
vuelta a donde empezó porque ahí es
donde lo quiero Y entonces necesito
separarlo en su propio objeto. Y puedo hacerlo con
malla, selección separada, o puedo presionar P, separar y presionar selección. Ahora bien, si salgo del modo Edición, verás que tengo
dos objetos de vidrio, vidrio y vidrio 0.001, y cuando selecciono este
objeto interior, ese selecciona eso. Así que cambiemos el nombre de
eso a líquido. Eso es genial y el líquido, de hecho, necesita ser cerrado. Ocultemos el vaso y
trabajemos sólo con el líquido. Voy a entrar en la pestaña y tengo
que cerrar esta parte superior. Voy a hacer clic en este borde con la
selección de modo borde activada, que selecciona
todo el bucle y vamos cerrarlo con relleno facial, lo
llena de pase. Eso
me queda bien. Pero el sombreado sabio, también
se ve un poco extraño Veamos si las
normales son correctas. Recuerden las
normales, las normales son muy importantes para los objetos
transparentes, y sospecho que esas
están equivocadas en este caso porque estas caras aquí
solían apuntar hacia adentro Estas caras de aquí solían ser las caras internas del cristal
y luego las separo, siguen apuntando hacia adentro Probablemente.
Supongo que vayamos al botón de superposiciones
de ventana gráfica y activemos la orientación de la cara En efecto, todo es rojo. Pasemos al modo de selección de pestañas y
caras, seleccionemos todo, seleccionemos todo
y luego vayamos a la malla. Normales y recalcular afuera. Ahora son azules, y
el sombreado está fijo. Puedo apagar la
orientación de la cara y volver a encender todos los demás objetos
para ver otra cosa que era problemática que
mostré en un video anterior, y que es con caras
perfectamente superpuestas, crea algunos bichos. Así que vamos a engordar
todo aquí arriba. Pulsaré Mayús Z para entrar en modo
wireframe para ver mi
selección en el objeto, y luego iré a encoger engordar Entonces tendré que engordar esto
para meterme un poco en el vaso. Sólo un poquito. Y le puedo dar un
nuevo material, también. Quiero que esto sea aceite de chile. Entonces entremos en
el sab material
y retiremos el material
que está en él ahora mismo, presionemos menos sobre eso
y agreguemos uno nuevo Este será el
aceite de chile. Y en lugar de usar un SDF de principios, usaré un BSDF de vidrio
para eso también, bajaré su rugosidad, entonces es completamente
brillante, pero
hazlo Tal vez pueda hacerlo un
poco más oscuro, incluso. No negro, sino un
poquito. Haz que se sienta rico. Bien, genial. Y eso me
parece peligroso. Agreguemos un poco de plástico, también. Voy a ir a la boquilla, agregarle
un nuevo material a eso, y eso puede ser como un oscuro. Simplemente tire hacia abajo este valor. Nunca quieres
ir completamente negro. Blender te permite
ir completamente negra, y te permite
ir completamente blanca. que quieres mantenerte
alejado de esos porque nada en el mundo real es
realmente completamente negro. Como, esta es esa vata negra que quizás hayas
visto que es como,
es una pintura experimental que simplemente absorbe toda la luz, ¿verdad Y realmente no quieres ir allí por materiales realistas. Como que quieres quedarte
por encima como 0.01, al menos. Y entonces esto es
lo suficientemente negro para mí. Y llamemos a esto plástico. Creo que tal vez manteniendo
esto áspero y luego el corcho encima de él un poco brillante
tal vez un bonito contraste. Pero vamos a ver ¿qué tan rudo? A lo mejor
algo así, y luego
sube y agrega un material
al corcho también. Se trata de plástico brillante. Voy a hacer eso oscuro también. Algo a lo largo del
mismo tono que la boquilla y luego disminuir la rugosidad para hacerla un poco más brillante Moverse para ver cómo se refleja
la luz hace que sea mucho más fácil obtener una comprensión
intuitiva de cómo se ve
realmente la superficie. Estoy bastante contenta con esto. Un último truco que
puedes usar para evaluar
con mayor precisión tu objeto es que no estamos realmente acostumbrados a la luz
que viene de abajo. Por lo que puede ayudar agregar un piso. Desplazamiento A, plano de malla, y lo moveré hacia abajo
y escalaré eso. Intenta asegurarte de que
en realidad está tocando el fondo. Usaré la
vista de modelado en el costado aquí y la moveré hacia arriba hasta que toque el
fondo de la botella. Y eso lo hace sentir
un poco más fundamentado. Entonces, una vez que estoy feliz, puedo hacer que la ventana gráfica se vea un poco más agradable pero yendo
a la pestaña de renderizado y bajando al
muestreo de la ventana gráfica y presionando denoise para activar la eliminación de ruido y hacer las cosas un
poco más suaves, y luego puedo capturar
esto y publicarlo en
la sección de proyectos en el sitio web
33. Combinación de escenas: A menudo
modelamos las cosas por separado, aunque queramos
combinarlas posteriormente. Entonces en este ejemplo, he
modelado una botella de vino, y también he modelado una Mirándolo ahora, no sé por qué no lo hice una
copa de vino Aguanta. Ahí.
Copa de Vino. Así que he modelado una copa de vino y
he modelado una botella de vino Y si los quiero en la misma
escena, eso es bastante fácil. He abierto licuadora dos veces, y en cada una, he
abierto un modelo separado. Entonces tengo una licuadora aquí
y tengo una licuadora aquí. Y obtener un objeto sobre es realmente tan
simple como hacer clic el objeto en uno y presionar Control o Comando C para copiar, y luego hacer clic en
la otra ventana y hacer Control o
Comando V para pegar. Pero esto va a pasar mucho. Las cosas no se modelan
a la escala correcta. Entonces en este caso, la
botella es demasiado pequeña. El vaso es demasiado grande,
lo que quieras decir. Y entonces es una buena práctica modelar todo a la escala
correcta para empezar. Entonces, para comprobar la
escala de algo, hay algunas formas de hacerlo. Una es que puedes usar
la herramienta de medición aquí mientras estás
en modo objeto. Entonces, al hacer clic en la herramienta de medida solo
puedes arrastrar una línea
desde
el fondo de, digamos, la botella hasta la parte superior, y
te dirá que es, en este caso, 2.9 metros. Presiona eliminar para eliminar que típicas botellas de vino no
miden 3 metros de altura. No sé qué tan altos son, pero desde luego no eso. Entonces un truco que uso
para modelar cosas a la escala correcta es que en algún momento durante
el proceso de modelo, agregaré Shift A, un cubo de malla, y en sus ajustes, simplemente
configuraré el tamaño a la altura que quiero que sea
el objeto. Entonces A es una botella de vino típica. Es como tal vez 20 centímetros. Así puedo escribir en
dos 0 centímetros. También puedes escribir pies o piedra o lo que uses.
La piedra es peso, ¿no? Y esa es la
altura real de una botella de vino. Entonces voy a hacer clic en la botella de
vino y escalaré
hacia abajo hasta que encaje. bajaré el vaso y
luego lo moveré aquí abajo. De hecho, puedo mover la caja hacia arriba para que descanse en el
piso de la escena, y luego mover la
botella de vino aquí abajo, escalarla hasta que tenga
aproximadamente el tamaño correcto. Ahora puedo borrar el cubo y simplemente usar la botella de vino como referencia de escala
para la copa. Porque sé que las copas de
vino
tal vez son de este tamaño
en comparación con una botella de vino. Ahora bien, cuando bajes
las cosas así, si quieres seguir
trabajando en ellas, puedes encontrarte con
algunos problemas de escalado porque cuando miro
la pestaña del modelo aquí, podemos ver que la escala
es 0.025 para este objeto Y ya he hablado de escalas
raras antes. Normalmente, queremos que
la báscula sea una. Entonces si hacemos clic en un
objeto, vamos a objeto, aplicamos escala, entonces esa
escala se convierte en una sola. Entonces este es ahora el estado predeterminado sin estirar del objeto Esa es una buena
práctica otra vez para hacer. No obstante, digamos que tú, por
ejemplo, déjame
burlarme de un ejemplo rápido aquí. Digamos que hiciste
un vaso así y usaste el
modificador de solidificación, Era delgada, y después le agregaste un modificador de solidificación
para hacerlo espeso Bien, bajémoslo. Todo parece funcionar bien. Y luego queremos aplicar la báscula cuando sea
del tamaño correcto. Vamos a ir a este tamaño, moverlo sobre, e ir al
objeto, aplicar escala. Se convierte en un
iglú porque el espesor de
solidificación
es de 0.1 metros, y a esta escala,
eso es Ahora tengo que bajar
el tamaño de solidificar. Algo más
como 0.004 metros. Ahora bien, esto no importaba
cuando se
encogió la escala del objeto porque
simplemente desharé todo El objeto realmente sigue siendo
grande cuando lo escala hacia abajo. Al igual que, dice Blender,
Este modelo es grande, pero vamos a mostrarlo tan pequeño. Entonces ahora el gran
valor de solidificar realmente no importa porque Blender todavía piensa
que este vaso es así de grande, y luego agrega un
poco de Pero una vez aplicamos la
escala, vamos a objeto, aplicamos escala, ahora
sabe que el vidrio es pequeño y este
grosor es demasiado grande. Entonces este tipo de cosas a veces sucede cuando hay que escalar las cosas hacia abajo, y luego
solo vas
a tener que entrar en los modificadores y cambiar los valores
en la escala correcta Esta es una de las
razones por las que es inteligente comenzar
a modelar a la escala correcta para empezar para
que no te
encuentres con estos temas.
34. Ajustes de la cámara: Cuando quieres hacer una imagen, presionas el botón de renderizar. Sin embargo, a veces
cuando vas a renderizar, recibirás un mensaje de error. No se encontraron cámaras en la escena. Eso es porque necesitas una
cámara para renderizar. Eso es un objeto de cámara, y
está en una escena por defecto, pero
lo he borrado de esta. Así que vamos a volver a agregar una nueva cámara y hablar un poco
sobre cómo usarla. Así que presiona Mayús A y
baja aquí a donde
dice cámara que
agrega una nueva cámara. El origen de la cámara está aquí. Aquí es donde está
viendo las cosas, y este resto de la cámara muestra el
ancho de visión de la cámara. Entonces se puede decir desde
esta plaza aquí qué grande de una porción
del marco que estos objetos ahora llenan desde el punto de
vista de la cámara. Voy a abrir una
vista separada para mostrarle. Y en esta vista, presionaré el botón de la cámara del
lado derecho para entrar en la cámara. Y verás que estos objetos
sí llenan ese
tamaño en el marco. Y mirando el ángulo aquí, podemos decir que
si algo se acerca al centro de
la cámara o me muevo, efectivamente la cámara
más cerca del objeto, entonces se hace más grande
en el campo de visión. Al igual que, en este caso,
puedo decir mirando desde un lado cuando los objetos
llenarán todo el fotograma
cuando toque estas líneas. Una vez que eso suceda,
verás en el lado izquierdo, hecho llenan
todo el tamaño del marco. Ahora bien, este campo de
visión, como se le llama, de la cámara es cambiable, y se llama
distancia focal Puedes cambiar eso junto
con todos los demás aspectos de la cámara aquí abajo
en las propiedades de la cámara. Y aquí, puedes cambiar
la distancia focal. Entonces, si retiro
la distancia focal, verás que cambia
el campo de visión de la cámara y
los
objetos se hacen más pequeños, a
pesar de que todavía están
cerca de la cámara. Así es como funciona la distancia
focal en la vida real. Este es el Zoom de la cámara. Y aparte de esto, realmente
no quieres cambiar
muchos de estos parámetros. cambiar, por ejemplo, el cambio X, desplaza la cámara hacia
un lado, y esto se conoce como efecto de cambio de inclinación, y generalmente
no quieres
tocarlo a menos que sepas cómo
lidiar con el cambio de inclinación. Esto es algo avanzado que realmente solo usan
los fotógrafos de arquitectura. Pero aquí abajo, hay un
botón para profundidad de campo. La profundidad de campo puede ser muy agradable. Aumentemos la distancia
focal aquí y tengamos mi vaso cerca de la cámara y voy a mover mi botella
un poco más atrás. Y luego voy a
entrar en vista renderizado. Mantenga presionada la
rueda de desplazamiento en esta barra para moverla, vaya
a la vista renderizada. Y para poder ver
cualquier cosa, realmente
necesito una luz. Entonces, solo cambiemos A, agreguemos una luz solar por ahora. Voy a rotar eso un
poco hacia un lado. Esto es solo un ejemplo, y todo funciona
mejor en ciclos. Cambiemos de EV
a ciclos. Todo bien. En la cámara, voy a
las propiedades de la cámara, enciendo profundidad de campo. De pronto, las cosas
se vuelven un poco borrosas. Ahora tenemos que enfocar la cámara, y tenemos que elegir un enfoque. Podemos elegir
la distancia en la que
enfocarnos aquí abajo o podemos
elegir enfocarnos en un objeto específico. Hagámoslo.
Centrémonos en un objeto. Voy a elegir el pequeño
cuentagotas en ese campo, hacer clic en eso, y luego
hacer clic en el cristal Ahora la cámara se
enfocará en ese vaso, y la botella quedará
borrosa en el fondo Aquí abajo, tienes
diferentes configuraciones que estarás
familiarizado desde las cámaras. El número de parada F es lo que
controla la borrosidad. Cuanto menor sea este número,
más borroso. Cuando tire esto hacia abajo, ahora eso explota la botella
hasta quedar completamente borrosa Y cuando lo tire hacia arriba, se
vuelve un poco más agudo. Ahora bien, y si quieres que la
imagen sea cuadrada, digamos, tal vez estés publicando en
redes sociales y no quieres la relación de aspecto de 16 por nueve
que es común en el video. No encontrarás la relación de aspecto en
la configuración de la cámara. Eso es porque el tamaño de la imagen es un escenario global en el sentido de
que afecta a
toda la escena de tu licuadora, no a una cámara en particular. Cada cámara tiene el
mismo tamaño porque es una configuración de archivo y la
encuentras aquí en la salida del archivo. Aquí encontrarás la resolución
X y la resolución Y. Ese es el ancho y
alto de tu imagen. Y si pongo ambos
a 1080, ahora tenemos una imagen cuadrada.
35. Tipos de luz: Cuando se trata de iluminación, tienes un montón de opciones
diferentes. Si presiono Mayús A y voy
al menú de luces de aquí, verás que tengo cuatro luces
diferentes, y solo
tomémoslas por turno. Se puede
argumentar que la luz puntual es la
forma más básica de luz. Si hago clic en eso, me sale un punto en mi escena
que se ilumina. Vamos a moverlo por encima mi plano de tierra y
un poquito. La luz puntual,
emite luz en todas las
direcciones diferentes, y es,
como su nombre indica, un punto en el espacio, significa que es
infinitesimalmente Y pequeñas fuentes de luz
crean sombras duras. La razón por la que estas sombras son duras
es porque es una luz puntual, y eso es sólo
un hecho de luz. Es lo mismo en la vida real. Cuanto más grande sea tu fuente de luz, más suaves serán tus sombras. Pero no tiene que
ser un punto en el espacio. Si voy al
lado derecho del software,
verás en la parte inferior de esta fila, hay una pestaña ligera. Esto sólo está aquí cuando se
tiene una luz seleccionada. Y aquí, tienes todos
los ajustes para la luz. Entonces puedo, por ejemplo, bajar un
poco
el poder deslizando el deslizador para hacerlo un
poco menos sobreexpuesto Y puedo calentarlo
cambiando el color. Y de hecho puedo
aumentar el radio. El radio se
encuentra actualmente en 0 metros. Pero si lo aumento, pitenino el anillo naranja alrededor de la
luz a medida que aumento esto Verás que también aumenta. Entonces ahora la luz es así de grande, y se puede ver desde las sombras que proyecta que es más grande. Emite sombras más suaves. Entonces esto es pequeño y grande, pequeño. Grande. ¿Ves reaccionar las sombras? Bien, ese es
el punto de luz. Pasemos al turno
A, agreguemos otra luz. Hagamos la luz del sol. La luz del sol es peculiar
porque la precisión no
importa para la luz del sol. Puedo moverlo y
absolutamente no pasa nada. La razón de eso es que la
luz del sol en realidad no está aquí. Está infinitamente
lejos en una dirección, algo así como el sol real Y si hago clic aquí en el pequeño círculo
amarillo, puedo cambiar la dirección del mismo. Pueden moverlo por ahí. Y verás en
la vista de la izquierda que cambia como el
ángulo del sol. El sol ahora viene desde
un ángulo diferente. También puede rotar el propio objeto para cambiar
el ángulo del sol. Y en los ajustes de luz, hay un deslizador de ángulo, pero este deslizador de ángulo no es en realidad el
ángulo de visión del sol. Esto es lo grande que
es en el cielo, que se mide en ángulos. Y cerca de 0.5 es lo grande que en
realidad es en la vida real. Entonces esta es la dureza de las sombras del sol de
la vida real. Pero si quieres simular
tal vez un día nublado, aumentarás este ángulo, y eso aumenta la
suavidad de las sombras. Bien, borre eso. La siguiente luz es el foco. Spotlight se parece
un poco a un foco, diría yo. Básicamente, es una luz puntual que está restringida
a un área específica. Entonces esta luz puntual, en realidad, todas las luces son intercambiables. En las propiedades
de luz en la parte superior aquí, tienes todas las diferentes
luces y puedes hacer clic en cada una para cambiar la
luz a ese tipo. Pero el foco tiene
todos los ajustes de una luz puntual como el radio
para cambiar la suavidad, pero también tiene
aquí abajo una forma de haz. Y si lo arrastro,
se ve que
puedo estrechar la viga o ensancharla, y también puedo suavizar
los bordes de la viga Luz muy útil.
Y la final es mi tipo de luz favorita. Es la luz de la zona. La luz de área por defecto
es un plano gigante. Bajemos eso porque
es demasiado grande para mi escena. Y no tiene que ser un
avión. Puede ser de cualquier forma. Y puedes cambiar
la forma aquí
de cuadrado a decir, disco tal vez. Y esto es el equivalente a una caja blanda para ustedes
los fotógrafos que hay afuera. Lo que es realmente genial de
esto es, bueno, para empezar, es suave por defecto
porque es muy grande, lo que significa que proyecta sombras
muy suaves. Déjame rechazarlo.
Es un poco demasiado brillante. Sombras muy suaves, pero a diferencia de una luz puntual
o una luz solar, es muy fácil controlar la dirección de la misma porque por defecto, es direccional. Si también giro esta
vista derecha en un modo
renderizado, verás que solo emite
luz en una dirección, lo que hace que sea muy fácil controlar dónde quieres la luz y dónde
no la quieres Y de hecho, hay un control deslizante
para hacerlo aún más fácil. Esto es muy pasado por alto por los usuarios de
licuadora en general, y eso es aquí abajo,
se llama spread Y si lo giro hacia abajo, mira,
generalmente estrecho el
haz que sale de la luz hasta
que si bajo a cero, se vuelve completamente recto. Todos los rayos de luz son paralelos entre sí como si
fuera una luz solar. Pero si subo esto para
decir tal vez 90 90 grados, este será un ángulo que es parecido a una caja blanda con una cuadrícula. Es muy útil para restringir el área en la que se está iluminando
la luz Generalmente no
trato en favoritos, pero esta es mi
forma favorita de luz.
36. Renderización con ciclos: Una vez que estés satisfecho con
tu composición, querrás renderizar la imagen. Y ahora que estamos en ciclos en
lugar de IV establecido aquí, renderizado es un
poquito más complicado. Hay una cosa más
a considerar que cuando lo
renderizamos en IV y eso es
porque es más lento. Así que cuando subo aquí a renderizar y renderizar la imagen como lo
hemos hecho antes, la imagen aparece, pero
no está terminada una vez que aparece. Poco a poco eliminará el
ruido que hay en la imagen. Verás aquí arriba, es
una muestra 65 de 4,096. Este número sigue escalando. Eso es como calcula
la imagen a medida que ésta sube, la cantidad de ruido, digamos por ejemplo, en
esta zona baja. Por el momento, esto
es bastante lento porque he configurado mi
dispositivo de ciclos en CPU, que es un dispositivo de renderizado lento. Eso es sólo para mostrarte
cómo se ve. renderizado se detendrá una vez que el número de muestra llegue al
número de muestra final, que es 4,096 Lo estableces aquí abajo
en la configuración de renderizado. Bajo render, no
bajo viewport, ajustes de la
ventanilla son solo
para lo que ve aquí Pero cuando haces clic en Render, usa los ajustes que
están aquí bajo render. Y puedes cambiar
las muestras de Mac. ¿Aquí es cuando
deja de renderizar? Y cuando llegue a ese número, si tienes activada la eliminación de ruido,
restará ruido a tu imagen. Así que déjame cerrar esto
y cambiar mi dispositivo a computación
GPU para que haya
una posibilidad de que
realmente termine y luego vaya
a renderizar y renderizar imagen. Ya verás,
el número de muestra sube mucho más rápido, y de hecho puedes verlo
calculando el ruido lejos. Si me acerco aquí desplazándome, se
puede ver que poco a poco
elimina el ruido
y lo suaviza Ahora bien, para algunas computadoras,
esto sucede rápido. Para algunos, pasa lento. También depende de la
escena en cuestión. Esta es una escena muy sencilla, por lo que en realidad se renderiza
bastante rápido. Y solo me salté
un tiempo aquí, y ahora está terminado Este número se congeló por un segundo
y mira la imagen como se niega y ahí vamos Ahora ya está hecho. Esta es la imagen renderizada final,
y se ve bien. Puedo ir a Imagen y guardar como y guardar esta imagen terminada. Ahora, vas a tener que experimentar con tu propia
escena y tu propia computadora. ¿Cuánto tiempo se tarda en
terminar de renderizar una imagen versus qué tan buena
calidad necesitas? Puedo bajar aquí y puedo establecer mis muestras max en 100.
Vamos a hacer eso. Y entonces puedo
renderizar la imagen, y el número de muestra
subirá hasta que
llegue a 100 y luego retoque el ruido. Entonces el nivel de ruido es este. Es bastante extremo, y poco a poco está
tratando de retocar esto, y se ve bien Para una escena simple como esta, en realidad
puedes salirte con la tuya
con mucho ruido,
y el eliminador de ruido lo arreglará Pero cuantos más
detalles finos tengas, más
suavizará el eliminador de ruido los detalles que realmente
quieres conservar Y la forma de
mitigar eso es aumentar realmente el
número de muestras. Carácter realista
como éste es el ejemplo perfecto de esto. Si nos acercamos a él, entonces podremos ver todos los detalles
y prestar atención, sobre todo al
detalle de la piel en las mejillas. Por lo que la imagen izquierda
se renderizó con apenas 50 muestras y la imagen
derecha más cerca de 4,000. Ambos tienen un
poco de ruido en ellos, así que vamos a restarles el ruido a ambos y ver cómo se ve
eso Ambos limpian muy bien, pero cuando
miras la izquierda, se pierde mucho detalle en las mejillas en
comparación con la derecha. Tienes que
acercarte lo más posible a una imagen suave antes de eliminar el ruido
para obtener una imagen de alta calidad Y una vez que comenzamos a
renderizar animaciones, eso es aún más importante. Tenemos que tener una
imagen limpia antes de eliminar el ruido. Entonces solo vas
a tener que experimentar para ti ese intercambio. Este número de muestras MAX, es individual, para tu
computadora y para tu escena. Solo vas a
tener que experimentar con cuánto tiempo estás dispuesto a esperar por una imagen terminada versus ¿qué tan buena
calidad necesitas realmente? Y en este caso, 100 estuvo bien, pero un buen defecto es en realidad 4,096, que era el
37. Proyecto de clase 4: procesamiento de productos: Es el proyecto de clase número cuatro, el Proyecto de renderizado de producto. Ha llegado el momento de fotografiar la botella de la marca
en un estudio digital. El cliente quiere una configuración simple
pero visualmente llamativa para exhibir su botella. Diseñar un escenario con formas
geométricas y
experimentar con la iluminación. Diviértete explorando
diferentes composiciones, configuraciones de
iluminación y formas. La razón por la
que escribí esa última parte es porque nunca la
clavé en el primer intento. Siempre tengo que probar
diferentes composiciones, diferentes arreglos de
geometría e iluminación. Te recomiendo que hagas
lo mismo. Es muy fácil en tres D. Mover
algunas cosas, guardar una nueva versión, probar cosas
diferentes y
ver cómo se ve. Los requisitos son, construir un estudio usando objetos
del menú de anuncios. Ese es el cubo, el cilindro, la esfera, etcétera Copia la botella en el escenario. Eso significa abrir el
archivo de botella donde lo hiciste, presionar Control o comando C, y luego abrir un nuevo archivo y presionar el comando
controlador V, es
decir copiar y pegar. Se puede usar un HDRI, pero la luz principal tiene
que ser un objeto de luz La razón por la que escribí eso es una, quiero que experimentes
con configuraciones de iluminación, y usar un HDRI no te
permitirá hacer Esos están horneados, ¿verdad? Pero también los HDRs están
infinitamente lejos. Esa es una característica de significado no se
te permitirá
experimentar con la
caída de la luz porque la caída de la luz depende de la
distancia a la luz. Es una característica clave de la iluminación, y quiero que
veas cómo funciona. A qué distancia está la luz del objeto determina
cómo se ve. Entonces la luz principal tiene
que ser un objeto de luz. Mantener el diseño simple pero
efectivo menos es más. Así que no abarrotes tu marco con un montón de objetos
por todas partes Realmente solo
concéntrate en la composición, luz y la sombra, haciendo
algunas formas interesantes. Es realmente cierto que para este tipo de cosas,
menos es más. Los entregables renderizan
tu escena en ciclos y guardan un archivo
PNG o JPEG 1920 por 1080,
cárgalo a la sección de proyectos de clase o asignación de este
sitio web En el siguiente video,
voy a pasar por mi solución a este proyecto, pero te recomendaría que pruebes primero la
tuya, y
luego si quieres, después de ver Mi solución, si estás inspirado
para hacer algún cambio, puedes volver atrás y hacerlo luego. Buena suerte.
Te veré en el siguiente video.
38. Terminado. Proyecto de clase 4: procesamiento de productos: Bien, así que empecé
abriendo el archivo donde
sombreé la botella
y un archivo vacío Sólo quiero copiar
todo esto. Entonces, en realidad,
iré al outliner, clic en el objeto superior
y luego me moveré
hacia abajo, mantén presionada la tecla Mayús y haré clic en eso, que mira
todo lo
que hay en el medio Y luego moveré el cursor sobre el puerto de tres vistas D porque los atajos
dependen de donde esté el cursor, y luego presionaré Control
C. Luego en mi nuevo archivo, me moveré y presionaré
Control V. Lo que lo pega, y luego podré comenzar a
trabajar en el escenario Entonces antes que nada,
solo seleccionemos todo, y quiero moverlo hacia
arriba para que descanse en el piso porque me gusta trabajar en ese tipo de espacios. Y me parece lógico. También me
aseguraré de revisar
el artilugio y trabajar en un
eje que tiene sentido para mí Normalmente trabajo con el
stick X apuntando a la derecha. Entonces estaré viendo todo
desde este ángulo aquí. Haga clic en esta bola, Y menos ahora para verla desde
ese ángulo y luego subir todo hasta que
descanse en el piso. Prefiero que se
pinche un poco por debajo del piso que
flotar un poco arriba Sólo para asegurarme de que
todo esté en contacto. Todo bien. Y después
voy a añadir una cámara. Voy a mover la cámara a esa zona de la que hablé
primero. No cambie la distancia
focal, pero muévala. Acabo de hacer clic en la cámara, lo que cambia la distancia focal, pero vamos a moverla por aquí Y cuando creas una cámara, está mirando en
la misma dirección que
buscabas
cuando la creaste. Y quiero
definirlo completamente por mí mismo porque me gusta que
lo apunte directamente. Así que voy a ir aquí
a los datos del objeto, y aquí, voy a poner a cero
todos los valores de rotación. Y esto es tan genial. Es una cosa que hace la
licuadora que no
creo que haga ningún
otro software. Donde si hago clic en el número
superior y luego muevo el cursor
recto hacia abajo, puedo seleccionar los tres números y editarlos al mismo tiempo. Entonces presionaré cero y volveré, y eso ceros hacia fuera
cada rotación, y luego puedo usar la herramienta de rotación para que
apunte en un
ángulo de 90 grados de esta manera, estoy manteniendo presionada Control Eso es un comando en una Mac para
moverla hasta que esté a 90 grados. Incluso se puede ver eso
allá a la derecha, donde acabo de poner a cero
todo, la rotación X es 90 Estupendas cosas. Todo bien. Vamos a moverlo un poco atrás.
Y como un proyecto anterior, quiero abrir otra ventana. Voy a mover mi cursor hacia la esquina izquierda hasta que se convierta en un poco radical, haga clic y arrastre para obtener una división. Ahora tengo 23d viewports, y puedo presionar el
botón de la cámara en la izquierda Lo que me da una vista a través de
la cámara para que pueda trabajar en la vista correcta y pueda ver lo que ve la cámara
en la vista izquierda. Vamos a precisar la
cámara. A ver. Creo que lo que quiero es que
quiero una distancia focal larga, así que iré a la cámara, y
creo que quiero al menos
100 milímetros Ahí es cuando suelo usar
para productos de gama alta, 100 más tal vez 200. Normalmente me veo un poco premium. Entonces sólo lo voy a mover
hacia atrás, y vamos a ver. A lo mejor voy a tenerlo un
poco pequeño en el marco porque también
puedo gritar lujo. Y luego lo rotaré con una herramienta de rotación para simplemente colocarla. Mira, ahora puedo
girarlo a la derecha y puedo ver dónde
termina a la izquierda. Ahora, es un poco demasiado
sensible para mí, así que mantendré presionado Shift, que lo hace un
poco más suave, así que realmente puedo
colocarlo donde quiera. Y tal vez incluso
lo mueva un poco más atrás. Y bien, construyamos la escena. Entonces voy a cambiar un agregar una malla, y estoy pensando en cubos para los míos. Es la forma de
aspecto más industrial, creo, tal vez algunos cilindros. Recuerda, mi proyecto es
un aceite de chile industrial. Entonces quiero, como quiero que sea una reminiscencia de la industria. A ver, comencemos
con solo un cubo. Y vamos a escalar eso. Para que sea bastante grande, y pueda moverlo hacia abajo
para que esta sea la plataforma en la que se
pare la botella. Ahora, ha llegado al punto
en el que realmente no
puedo acercarme a esto. Al igual que, por alguna
razón, la cámara está atascada en otro lugar, así que puedo hacer click off
y hacer clic en ella, y aún así
simplemente no me deja acercarle el zoom. Si esto alguna vez te sucede, entonces eso significa que la cámara está centrada
alrededor de otra cosa. Y en este caso,
es la cámara, así que acercar
quiere acercar eso, y realmente no puedo pasar más allá la cámara en ninguna
otra dirección Y así para centrar la vista de
tres D
en otro objeto, hay
un atajo para ello, y eso es coma o
punto en el pad num, y eso se acerca a otra cosa Creo que probablemente si has
activado Emulatenumpad, entonces solo presionarás punto donde sea que esté en Bien, así que me he acercado a esto, y vamos a moverlo un poco más hacia arriba para que realmente
puedas ver cuándo cruza
el límite del piso porque puedes ver
la cuadrícula asomando a través de él piso porque puedes ver
la cuadrícula asomando a través Yo sólo lo quiero justo arriba. E incluso puedo mantener presionado el turno para hacerlo más sensible o para hacerlo más lento y simplemente
hacerlo bien en ese piso. Sólo para darme un poco de ventaja sobre el siguiente objeto, simplemente
comenzaré
clonando este objeto o duplicando con Shift
D, D para duplicado Puedo moverlo,
pero solo haré
clic derecho para restablecer su
ubicación, para volver a moverlo. Y entonces podré reventar
esto un poco. Y yo solo quiero, piso
debajo de esta plataforma. Entonces lo
escalaré en dos ejes, presiono el cuadrado azul aquí, escalándolo y tal vez más horizontalmente porque
creo que también quiero una pared. Y puedo moverlo
un poco para hacer esto como
una plataforma asomando. Voy a tratar de hacer de eso
un grosor uniforme para que este grosor aquí sea el mismo que este
grosor aquí. Y luego para agregar la pared posterior, solo
voy a desplazar D,
hacer clic derecho y luego moverlo hacia
arriba y hacia atrás. Y ¿cuánto espacio
quiero dejar aquí? A lo mejor, tal vez
algo así. Siempre se puede refinar más tarde y luego escalar eso para
llenar todo el fotograma. Tengo que asegurarme de que todo esté
lleno por el lado izquierdo. Y por qué no ir un poco más alto. Vamos a activar el modo renderizado
en la vista de la izquierda. El modo renderizado está
fuera de la vista aquí, así que simplemente haré
clic en esta barra con mi rueda de desplazamiento para poder
arrastrarla y luego hacer clic en
la vista renderizada. Ahora, dice compilar sombreadores de motores
EV, diciéndome que estoy en
el motor de render equivocado Entonces me mudaré aquí
a la pestaña de renderizado y cambiaré el
motor de renderizado a ciclos. Y eso es genial.
Ahora bien, en este punto de vista, no le mostré esto antes, pero me gusta
limpiarlo bastante para que se acerque lo más posible al render
final. Voy a agarrar el borde
de la barra de herramientas, voy a mover para
que desaparezca. Ahora se derrumbó en esta pequeña
flechalita de aquí. Puedo expandirlo de nuevo
o colapsarlo. Entonces aquí arriba, tengo un toggle
para mostrar u ocultar artilugios. Si hago clic en esto, mira eso, lo
limpia bastante Y luego también las superposiciones. Y cuando haga clic en eso, todo
esto desaparecerá. Reloj. Y ahora realmente se ve
como la imagen final. Pero una cosa más que
como que quiero es, déjame mostrarte simplemente yendo
al mundo y
aumentando ese color. Se puede ver un poco mejor.
Se puede ver alrededor de la cámara, y me parece que a menudo eso me
distrae de cómo se ve realmente la
imagen Entonces me gusta ir a la cámara, hacer clic en la cámara, ir
a sus propiedades de cámara. Y aquí debajo de la visualización de la ventana gráfica, hay un control deslizante de la segunda parte de pase Y si lo deslizo
todo el camino hacia abajo, entonces vamos a
ver todo a su alrededor, y si lo deslizo
todo el camino hacia arriba, entonces no vamos a
ver nada alrededor. Simplemente se vuelve negro,
y me gusta esta vista. Bien, volvamos a la pestaña Mundo. Démonos, de nuevo, un poco de ventaja
con solo agregar un HDRI Seguiré usando el
mismo HDRI de estudio que he usado hasta ahora Entonces voy a convertir esta ventana
en un editor de shader. Cierra esta pestaña por aquí
y ve al mundo Shader. Aquí, cambiaré A,
agregaré textura ambiental. Voy a empezar a
escribir ENV me muestra textura
del ambiente.
Haré clic en Abrir. Y aquí puedo seleccionar ese
HDCI que descargué y enchufar eso al color de fondo
. Eso lo carga. Ahora puede que tengas la pregunta,
¿cómo la rotas? Como yo está mal, si
es la rotación equivocada, si quiero sombras en este lado, oh, no puedes ver mi dibujo
porque lo apagué. ¿Y si quiero la sombra este
lado y
no de este lado? ¿Sí? Vamos a agregar un nodo de mapeo. Este nodo de mapeo le permite moverse y rotar a esta textura. Entonces voy a enchufar este vector
en la entrada del vector aquí, y todo se vuelve gris. La razón de eso es que yo solo es que esta entrada vectorial
espera un sistema de coordenadas. Todo se pone muy técnico. Pero básicamente, es preguntar
¿dónde está el mundo? ¿Qué aspecto tiene? W
acabo de enchufarlo es cero Sólo está vacía. Entonces no sabe qué
hacer y simplemente se vuelve gris. Al especificar un vector
a través del nodo de mapeo, necesitamos darle un vector de mundo
real. Cambiemos A, agreguemos un nodo de coordenadas de
textura. Eso también está bajo coordenada de entrada
y textura, queremos que la salida generada de esta en la entrada
vectorial de esta. Esta es solo una de
esas cadenas de nodos que tienes para
aprender la coordenada de textura, en el mapeo, en la textura del
entorno. Yo diría que esta es probablemente la única cadena de nodos
que necesitas memorizar, pero necesitas
memorizarla Entonces escríbalo en un nodo
publicado o algo
así, para que lo tengas para después porque esto es súper útil porque ahora puedo
deslizar la rotación z. Este es el único slider que me importa en el
mapeo, en realidad. En realidad, esto será mucho más claro si enciendo la renderización de
la GPU. Así que voy a ir a renderizar
aquí y cambiarlo de CPU a GPU lo hace
mucho más rápido. Y luego deslizaré
la rotación z. Mira eso. Eso
hace girar la luz alrededor. Pero el resumen del proyecto
especifica que no
se me permite usar esto
para mi iluminación principal. Así que en realidad solo estoy
buscando los detalles de reflexión aquí. Entonces me desplazaré aquí en el lado izquierdo para acercar
los reflejos, y solo lo rotaré hasta que vea una
forma de reflexión que me guste. Y terminé por no gustarme
ninguna rotación en ese HDRI, así que fui y descargué
otro y otro Y finalmente, encontré
uno que me gustó. Volvamos al puerto de vista
de tres D y agreguemos algunos materiales
a la escena. Simplemente voy a hacer clic en uno
de estos objetos, y en la pestaña de materiales, haré clic en Nuevo y
le daré un color primero. Vamos por algún color de aspecto
verde como tal vez un verde amarillento y disminuya el valor del mismo para
hacerlo más oscuro y tal vez la
saturación también, porque siento que los colores grisáceos
oscuros o apagados suelen
verse bastante Algo así. Después presionando uno de
los otros objetos, puedo seleccionar ese mismo
material en ese desplegable. Ver también que todos
los materiales de la botella están aquí ahora en la escena. Voy a hacer clic en eso e ir a la pared posterior
también y hacer clic en eso. Al mirar esto ahora,
siento que probablemente debería estar aún más desaturado y
tal vez incluso Y necesito algo de iluminación dinámica sobre esto. Y tengo una idea. Lo que quiero para esta imagen
es que quiero una racha de luz entrando por la izquierda y
yendo así y así, golpeando la pared trasera, dándonos una bonita luz de llanta por
aquí en la botella Y tal vez incluso se pueda
ver a través de la botella. Como a lo mejor va a
brillar un poco a través del cristal y a través del
líquido. Esa es mi idea. Y la forma en que lograré eso es agregando primero una luz solar. Creo que voy a usar la luz del sol. Así que bajemos al sol y
probemos por lo menos. Así que muévalo hacia arriba. El movimiento, de nuevo, realmente no
importa, pero me gusta tenerlo
aproximadamente de donde viene y luego
girarlo para que venga de lado y
luego un poco hacia la pared. Y luego para conseguir la racha, necesito oscurecerla Entonces cambiemos A,
agreguemos otra malla, un cubo, y movamos
esto hacia arriba y agreguemos un techo. Entonces voy a escalar esto
solo en el
eje horizontal para que sea plano. Y mira eso. Ya estoy acercándose
a conseguir esa racha. Shift D, click derecho
para duplicarlo y moverlo para que pueda
abrir solo una pequeña racha A lo mejor lo rotaré un poco
hacia abajo para conseguir ese ángulo que quiero. Veamos qué pasa
si aumento la fuerza. Sí, eso es lindo y aumenta el ángulo también para
ablandarlo un poco Creo que eso es lindo, pero necesita más sombra
en primer plano Entonces haré otro
duplicado del techo,
turno D, y luego moveré eso por aquí para que pueda poner
el primer plano en sombra Eso se ve muy bien. Ahora, no me gusta el
brillo de las sombras. Es demasiado brillante, y quiero una imagen de muy
alto contraste. Así que volvamos al editor
de sombreadores
al mundo y disminuyamos la
intensidad del fondo Cero lo hace completamente oscuro, así que mantengamos presionado
shift mientras arrastramos para aumentar
gradualmente eso a
un nivel de sombra que me guste A lo mejor eso es bueno, y voy a volver a la vista de tres D y hacer clic en la luz y
aumentar eso aún más. Hagámoslo más intenso. Vamos a escribir 20. Y no me gusta cuánto de la botella está
mostrando realmente por la luz, y eso es por
el ángulo de la luz. Entonces giraré
la luz del sol
alejándola de la pared hasta que me guste
la definición en la botella. Y realmente no puedo conseguir que funcione porque me gusta
algo como esto, pero en la pared, me gusta esto. Entonces, lo que en realidad voy a hacer
es esconder la botella con el techo para que
quede en completa sombra, lo cual se ve
bien en sí mismo. Y luego cambiaré A, agregaré otra luz que puede
ser un foco porque focos son bastante
fáciles de controlar para que no
se deletree en todas partes Y luego voy a usar esto para encender la botella. Lo vamos a mover. Y nuevamente, punto en la cama num para centrar
sobre ese objeto. Vamos a bajarlo
un poco y sobre aumentar la intensidad
de eso a 20 también. A lo mejor tiene que ser aún
mayor porque es tan pequeño, entonces tal vez 100, multiplicar por dos. Multiplicar por diez. Ahí vamos. Sólo a 40 mil watts,
empiezo a ver esto. Entonces estos números son quizás
tengas que hacerlos muy altos. Así que vamos a moverlo hacia atrás para que quede un poco
detrás de la botella, rotarlo para apuntar
a la botella. Eso es muy bonito. Y ahora el radio determinará
la suavidad de esa luz. Entonces si lo aumento
mucho, entonces es muy suave. Si lo disminuyo, entonces
va a ser muy duro, y la suavidad suele
equipararse a lujo Vamos a hacerlo bastante suave. Y lo que estoy viendo aquí es que el reflejo aquí es circular, lo cual no me queda genial. Prefiero cuadrados. Así que en realidad voy a convertir esto de un foco
a una luz de área, y voy a aumentar el
tamaño de esa luz de área. Y luego disminuir su propagación, lo que la hace más
parecida a un foco de atención. Y esta luz aérea se
puede estirar, así que de hecho la escalaré
en la z para hacerla más alta. Entonces tal vez un poco fuera e incluso más alto para asegurarse que el reflejo vaya
todo el camino hacia abajo. Entonces para asegurarse de
que no se derrama, disminuya el spread sobre él para realmente hacer
que golpee solo eso. Lo voy a mover aún más atrás. Y esto es demasiado intenso. Voy a tener que disminuir
la intensidad de la misma. Tal vez dividir por diez, e incluso puedo moverlo porque lo que estoy viendo está aquí del
lado izquierdo, se está derramando al suelo, y eso no me gusta del todo Así que lo voy a mover para
que no lo veas realmente. Y esa es una bonita luz de llanta. También agreguemos un poco
de luz de refracción, una que ilumine
el interior de la misma. Y para eso, creo, de nuevo, probaré
primero un foco y lo moveré de nuevo detrás de la botella y
lo apuntaré al piso
debajo de la botella. ¿Y qué pasa si
lo aumento a 40 mil? Eso es un poco agradable. Aquí, puedes ver el
antes y el después si lo
encuentro en el outliner
y hacer clic en el icono I, y puedes ver que es
sin, y eso es con Lo
enciende bastante bien. Hagámoslo aún más fuerte. A lo mejor intenta multiplicar por cuatro. Vamos a probar los extremos. Y me gusta. Voy a colocar esa luz
ahí, pero luego voy a entrar en el objeto mismo, clic en el líquido, y tal vez
voy a hacer eso más oscuro. Para obtener un
contraste de aspecto agradable en el líquido, un líquido oscuro con algunos reflejos
fuertes. Vamos a refinar el color
del fondo. Iré allí y buscaré
solo un matiz que
siento que encaja mejor con
el aspecto del aceite. Y como está empezando
a ponerse bastante ruidoso, también
iré a la configuración de
render y encenderé el eliminador de ruido
en la ventana gráfica Para tener una mejor idea de cómo se verá cuando esté hecho. Siento que a lo mejor esto necesita
un poco de luz envolvente. Duplicemos esto.
Te quiero mostrar, esto no está planeado. Quiero mostrarte
el proceso por el que estoy atravesando mientras
pienso en esto. Nunca alcancé el
resultado final en el primer intento. Siempre tengo que probar
múltiples cosas. Y estoy viendo aquí que creo que tal vez quiero que esta luz
se envuelva más alrededor. Entonces lo intentaré. Cambiaré D, duplicaré esta
luz, y luego la
moveré y la giraré. Y esto puedo disminuir el
tamaño de. Y veamos. Tiene que restringirse
más y aún menor propagación, y tiene que ser mucho más débil. Tal vez incluso le agregue un poco de tinte, un poco de azulado. Veamos que eso es antes y después de hacer zoom
antes y después mí me vendría bien.
Puedo prescindir de él. Eso está bien. Eso está bien para mí. Pero un truco fotográfico que me gusta mucho es el
uso del relleno negativo. Entonces voy a añadir solo un nuevo objeto, y esto puede ser un
plano. Un avión está bien. Y luego lo voy a mover hacia el lado opuesto
del lado Kote Lo escalaré
y luego lo rotaré. Y ahora mismo está funcionando
como una luz de rebote. La luz está entrando por
el lado izquierdo, está golpeando, y
está rebotando hacia aquí Esa es la belleza de usar
el motor de renderizado de ciclos. Eso no pasaría con IV. No es lo suficientemente realista. Pero quiero que esto
haga lo contrario. Quiero que absorba
toda la luz. Entonces le voy a dar un
material, uno nuevo, y voy a llamar a este NAG
significa negativo Y en el color,
sólo le voy a dar un negro puro. Hagámoslo también
antirreflectante. Simplemente tire de la aspereza
hasta el final. Entonces ahora lo que está
haciendo, mira esto. Si aumento el tamaño de la misma, y luego solo acerco
la botella, mira lo que pasa cuando me escondo. Más brillante, más oscuro. Por lo que agrega mucho
contraste. Es un buen truco. Así que solo lo rotaré un
poco y lo moveré nuevo para simplemente agregar algo de
contraste a ese lado derecho. Entonces eso es antes y
después, antes y después. A mi me queda muy bien, pero
siento que el fondo necesita
un poco más de interés. No es bastante
interesante. Y de hecho, ¿sabes qué? Voy a refinar
un poco la composición porque
siento que si giro
un poco la cámara hacia la izquierda, puedo colocarla en una ubicación más interesante en el marco, algo así. Y luego agreguemos algo de
interés al fondo. Empezaré con esto, en realidad, y solo cambiaré de
duplicarlo y
moverlo hacia atrás y dentro de la pared. Y creo que tal vez
lo que quiero para esto es que lo
escalaré y lo destaquaré en un poco porque son dos
que recuerden a una vigas o a
una columna para darle esa vibra
industrial, Realmente no se puede
ver el borde de la misma. Así que vamos a girarlo un poco hacia un lado para que puedas atrapar el resaltado
en un lado de él. Después colocaré uno justo detrás de la botella
y luego el turno D, moveré esa copia. Y la distancia
depende del ángulo de la sombra. Al igual que, ¿quiero
llenar el vacío entre ellos con sombra?
Y creo que sí. Así que cambia D a otro donde llene todo ese hueco
con una sombra. Y luego el turno D otra vez, consigue uno al otro lado. Eso es bastante agradable. Pero en realidad,
los seleccionaré a todos sosteniendo Shift, y los escalaré a todos al mismo tiempo para que sean un poco
más delgados para que
los pueda meter bien dentro. Así y tal vez
agregar otro a la derecha y
otro a la izquierda. Eso es un poco más
interesante, ¿verdad? Agreguemos aún más
resaltado en la pared posterior. Quiero que ese sol
sea muy fuerte. En vez de 20, hagamos 40, agreguemos más contraste a la imagen, haciéndola más interesante. Y esto, siento que se está acercando mucho
a lo que quiero. En realidad, ¿sabes
qué? Vamos a borrarlo. Siento que agrega más
al drama si no lo tengo. Se siente aún más premium. Ahora el escrito especifica
que debo renderizar en 1920 para 1080. Iré a la
pestaña de salida y los escribiré si no
están ya ahí
y están en mi caso, así que solo iré
al menú render y renderizaré la imagen cuando
sienta que he terminado. Y empezará ruidoso,
y a medida que aumenten las muestras, se volverá cada vez menos ruidoso. Y cuanto más compleja sea
tu escena, más tiempo tardará esto. Cuanto más rápido
sea tu computadora, más rápido irá. Pero una vez que en mi caso,
golpea 4,096 muestras, que especificé aquí en la configuración de
render aquí mismo, entonces va a eliminar el ruido y
se terminará Entonces, cuando hice clic hacia fuera, minimizó la ventana,
pero puedo
recuperarlo , y solo editaré
el renderizado por ti Está hecho, así que iré
a Imagen y guardaré como. Y voy a guardar el mío como un JPEG llamado BYOL product
chart Versión uno Siempre en una Versión uno porque
habrá una Versión dos. Probablemente. Nunca
serás feliz con la Versión uno. Guardar Como imagen, y esta es la imagen terminada que puedo compartir orgullosamente con el mundo.
39. Atajos de movimiento: Voy a subir de nivel
tus habilidades de movimiento. Voy a ser honesto, me he estado
conteniendo un poco porque he estado usando
los artilugios para moverme, y hay una manera más rápida Ahora bien, puede que estés pensando quizás con razón que
estoy un poco loco, alegando que usar la
herramienta y el artilugio es lento,
como simplemente haces clic en
él, y luego te Pero vas a
hacer esto miles de veces por proyecto,
moviendo las cosas. Y moviéndose por aquí,
haciendo clic en el icono, y luego encontrando el Gizmo
y haciendo clic en el eje derecho, los segundos realmente suman Quiero decir, en realidad lo hacen, y hay una
manera más rápida de hacerlo. Entonces voy a
familiarizarte con GRS. Esos son los atajos
para agarrar, rotar, escalar. Entonces volveré a
la herramienta Seleccionar, y estas funcionarán
con cualquier herramienta seleccionada. Normalmente solo
lo mantengo en la casilla seleccione, y si presiono G en mi teclado, recuerde que el atajo
aparece en la parte inferior izquierda. El cubo ahora está
unido a mi cursor, y puedo hacer clic para
colocarlo en alguna parte. Entonces G, muévelo, haga clic. Y esto funciona donde quiera que esté en
la pantalla esté mi cursor. Entonces digamos que estoy trabajando
en algo por aquí y luego quiero
mover el cubo a alguna parte, solo
puedo presionar G
y luego moverlo, y aún así va
a estar unido. Si muevo mi cursor fuera del borde de la
pantalla a la izquierda, se envolverá a la derecha. Qué genial es eso, y
voy a seguir adelante. Puedo hacer clic derecho para cancelar, y eso lo moverá de
nuevo al inicio. Incluso puedes constreñir esto al eje igual que con el Gizmo La forma de hacerlo es presionar G, y luego presionar la
letra del eje. Verás las letras
aquí arriba en el track ball. Puedo presionar X en mi teclado y eso restringirá
la caja al eje X, presione Y para
restringirla al eje Y
y Z para
restringirla al Voy a hacerlo muy
rápido solo G Y, moverlo por aquí, G, X, moverlo por aquí, y este es el método preferido de
todos los que conozco usando licuadora. Si te
conectas y empiezas a buscar tutoriales, nadie está
usando la herramienta. Todos están usando G para moverse. Y me pregunto
porque no sólo es más rápido, sino que también es más preciso. Entonces déjame mostrarte si
quieres moverlo, digamos, quiero mover este cubo diagonalmente por
el piso aquí No tengo que hacer
un eje a la vez. No tengo que GX y luego GY. Puedo hacer G, desplazamiento Z. Turnos significa todos los
demás ejes luego Z,
es decir, ejes X e Y
al mismo tiempo Entonces ahora se mueve
a través del piso. G, turno Z eso es todo. También puedo hacer el desplazamiento G X, que lo limita en
todos los ejes excepto en el eje X. Si quiero ser precisos
sobre mis movimientos, digamos que quiero mover el cubo
1 metro sobre el eje Y, sé que este es el plus del eje Y debido a la bola
de pista, la Y está apuntando
en esa dirección. Y puedo moverme por
aquí y puedo ir
al eje Y y puedo escribir un número puedo decir, Oh,
dos
en vez del 1
metro de lo que era antes, pero también puedo hacer G, Y, y luego escribir uno en mi
teclado y hacer clic en el mouse. Si quiero moverlo 10
metros hacia arriba, presiono gz10. Eso lo mueve 10 metros hacia arriba. Y la rotación funciona
exactamente de la misma manera. Si presiono R en el teclado, eso activa el modo rotar, y solo muevo el mouse
alrededor, y lo gira. Ahora bien, importa lo
cerca que estés del centro. Verás la pequeña línea. Si estoy justo arriba contra el centro y
empiezo a moverme, como, va a ser
súper sensible, pero si me muevo lejos, entonces va a
ser menos sensible. Y si de nuevo, mantén presionado el turno, como siempre lo hemos hecho
cuando queremos que
sea más lento, eso lo ralentiza. También puede mover el cursor fuera del borde de la
pantalla en un lado. Voy a envolver
visualmente a la izquierda, pero es como si estuviera
aún más lejos. Así que sólo puedo
moverlo súper lejos, y ahora va a ser
muy lento en la rotación. Es lo mismo que con
la mudanza. Yo presiono R y Z que
lo gira solo en el eje Z, R y X
lo gira solo en la X. Y lo que es muy común es
girarlo 90 grados,
así puedo hacer R, z90,
girarlo 90 grados y escalar, eso es S, presionar S
en el teclado,
luego moverlo hacia fuera, escalarlo hacia arriba,
moverlo adentro, escalarlo hacia abajo, mantener presionado turno, lo
hace más lento,
presionando dos, escala
hacia arriba por dos. Esto es lo que me permite
trabajar a la velocidad del pensamiento. Si te tomas en serio las tres D, entonces deberías acostumbrarte a
usar los atajos de teclado. Si no, está bien usar las herramientas,
pero va
a ser un poco más lento porque no
podrás moverte, rotar, escalar tan rápido si vas de ida y vuelta
entre estas todo el tiempo. futuro, voy a estar cambiando a este
tipo de movimientos porque estoy cansada de estar
constreñida por las herramientas. Pero si no tienes ganas aprender un montón de atajos de teclado
raros, está bien. No es para todos, pero te
recomendaría que intentes hacer la transición si realmente
quieres meterte en tres D.
40. Modificador de superficies de subdivisión: Estábamos modelando, añadimos
biseles a todo, como pequeños biseles de borde para
que todo quede suave Entramos en modo Editar
con tabulador, presionamos dos, seleccionamos bordes,
hicimos clic en un borde, y luego usamos la
herramienta Bisel, que está por aquí Usamos bisel o
presionamos Control o Comando B para biselar, y movemos el cursor Y luego a veces añadimos
más segmentos desplazándonos. Ya sabes, agregamos
más segmentos, y eso lo suaviza. Y típicamente, hicimos esto
con muchas aristas a la vez. Entonces a lo mejor presiono todo, A para seleccionarlo todo. Control B para biselar eso, mantenga presionado el turno para que
sea más fácil de controlar Y así es como
hicimos superficies curvas. Hay otra manera, y se llama modelado de
subdivisión, y es una forma muy
común de modelar
porque
a diferencia de este método, donde comienzas con
una forma cuadrada y luego suavizas con el modelado de
subdivisión, comienzas con
una forma suave, y luego la afinas Entonces básicamente, si la mayoría de tus
objetos van a ser suaves, entonces probablemente quieras hacer modelado de
subdivisión para Es muy divertido de usar. Te mostraré eliminemos este cubo y agreguemos
un nuevo cubo nuevo y el núcleo del
flujo de trabajo de subdivisión es un modificador Los modificadores están aquí
debajo del icono de llave inglesa. Presionamos Agregar modificador
y encontrarás el modificador de subdivisión bajo generar y
subdivisión También puedes subir
a la barra de búsqueda o simplemente empezar a escribir SUB, y es aquí la superficie de
subdivisión En realidad es tan
común que también tiene un atajo que es
muy fácil de alcanzar, y ese es Control
o Comando uno. Entonces eso agrega el modificador de
superficie de subdivisión, y la forma de nuestro
cubo cambia completamente Entonces el modificador, agregó más caras al objeto
y lo suavizó. Lo que pasó fue que en realidad lo
ilustraré para ti. Teníamos una caja yendo así. Estaba a solo un
ritmo de lo más alto. Entonces lo que
hizo el modificador de
superficie de subdivisión fue dividir este
ritmo en cuatro fases Entonces agregó una línea pasando por aquí y otra pasando por aquí, y luego movió
las esquinas para
suavizarla un poco. He movido esta esquina por aquí. Se movió esta esquina por aquí. De esa manera, ahora
se parece más a una pelota, y podemos hacer que
vuelva a hacerlo a todas estas fases. Entonces ahora mismo tenemos una
fase que es así. Y cuando agrego
otro nivel aquí, viewport de
niveles, va a subdividir eso una vez más, y va a
sumar una línea pasando
por aquí y otra
pasando por aquí, dividiendo esa fase en
cuatro nuevas fases. Reloj. Ahí vamos. Casi exactamente. Si agrego más, uno más,
uno más, uno más. Poco a poco va a
volverse más como una pelota. Ahora bien, si presiono Tab sobre esto, todavía
podemos ver el cubo. Así es como se ve
realmente el cubo. Todavía podemos ver el cubo
inafectado, también, si voy al
modificador y hago clic
aquí en el pequeño icono del monitor que lo oculta, y así podemos trabajar en nuestro objeto sin ver el modificador Enciéndalo y presiona tabulador para
editar nuestro objeto y decir, quiero mover esto boca arriba. Entonces presionaré la cara, y luego voy a usar
el atajo, entonces G, Z para moverlo hacia arriba,
y luego moverlo, y eso también afecta la forma
suave. Todavía está
suavizando ese cubo, pero el cubo ahora está estirado. ¿Y qué pasa si le
agrego más geometría? Digamos, por ejemplo,
presione esta cara aquí y la
extruyo E para extruir Eso va a extruir
la fase suave también. ¿Qué pasa con esto? E extruir Y ahora tengo una especie
de forma de L. Es realmente cúbico. Si apago el modificador. Es un cúbico. Es
como un escalón Pero cuando la enciendo, es
una escalera muy, muy lisa, y puedo empezar a
afilar los bordes que
quiero que sean afilados.
Piénsalo un segundo. Si quiero que esto de aquí
sea menos suave. Digamos que quiero mantener
esta esquina afilada aquí, ¿qué haría? Bueno, el modificador divide todas las caras y luego las
promedia, ¿verdad? Entonces esta cara gigante de aquí se
divide en caras más pequeñas, y luego
se mueven todas las esquinas, sí. Entonces si agrego un bucle
atravesando, bueno, digamos, aquí, entonces esta esquina aquí no va a suavizar
todo el camino por aquí. Se va a suavizar sólo
hasta aquí. Entonces hagámoslo. Agreguemos un bucle de soporte
con la herramienta de corte de bucle, que está aquí o el
atajo Control R, que agrega el corte de bucle, voy a hacer clic, y luego
puedo deslizarlo por encima. Y mira, eso es
exactamente lo que sucede. Ahora bien, esta parte es más aguda porque agregamos lo que
se llama un bucle de soporte. Un bucle de soporte le dice al modificador de
superficie de subdivisión que mantenga esto más nítido.
Agreguemos otro. Digamos que agrego un bucle de soporte pasando por aquí
y luego lo muevo hacia arriba. Intenta pausar el video por
un segundo e imagina ¿qué va a hacer
el objeto cuando agrego este bucle y
lo mueva hacia arriba? ¿Lo tienes? Voy a hacer clic y moverlo hacia arriba,
y esto es lo que hace. Afila todos esos
bordes que van por la parte superior. Pero sigue doblada
en esta dirección. ¿Por qué es eso? ¿Por
qué está doblada así? Bueno, eso es porque aquí
no
pasa nada . Pero también
podemos hacer eso. Controle R, haga clic en el objeto aquí
y muévalo. Y eso va a cuadrar eso también. Y ahora tenemos una tapa cuadrada. Y nunca va a
ser completamente filoso, pero se puede acercar bastante. Si mueves los bucles de soporte
muy cerca del borde. Para que puedas deslizar los bucles de soporte. ¿Te acuerdas de
eso? Puede usar la herramienta de deslizamiento o
puede usar el acceso directo, que es G, y luego G nuevamente lo
desliza a través de la malla. Entonces si me muevo eso muy,
muy cerca del borde, seleccionaré todo este bucle aquí manteniendo presionada la tecla Alt
y dando click sobre él, GG para deslizarlo. Arriba así. Ahora, todavía tiene algunos polígonos pequeños para hacer
que esa forma no sea del todo Al igual que, no es
matemáticamente agudo. Aún me quedaré con ese pequeño bisel
leve. Y es por eso que a tres
modeladores D les encanta esta técnica porque nunca vas
a conseguir esquinas súper afiladas, siempre
obtendrás
algo de suavidad, lo cual es muy natural
y muy estéticamente agradable también Ahora, no tiene que sentirse constreñido por la herramienta de corte en
bucle. No es necesario usar la herramienta de
corte de bucle para agregar bucles de soporte. Puedes usar cualquier herramienta. La
herramienta de inserción también es muy útil Atajo para eso es I. Entonces hagámoslo con esta cara. Si presiono yo en
esta cara para insertar,
eso agregará un par de
bucles que van a través del borde Y a diferencia de si agregué
un bucle de soporte, como si hiciera esto y
luego deslizara esto,
pasaría por todo
el objeto Pero con un recuadro,
puedo guardarlo solo en esta carita y mantener este tipo de afilada mientras
todo lo demás es redondo Entonces, al agregar bucles de soporte, en general, apégate al corte de
bucle, controla R y desliza cosas alrededor deslizándolas de
inmediato o presionando GG, para deslizarlas después del
hecho, para afilar las cosas Afilar el
punto de unión aquí, por ejemplo, o usar el recuadro presionando una
cara o múltiples fases y presionando I. No sé
si ya mostré esto, pero eliminemos esto y agreguemos un nuevo cubo y hagamos
el mismo tipo de La inserción es muy útil
en múltiples fases. Entonces, si hago clic en esta
fase, esta fase, y este ritmo, y
lo inserto con I, entonces va a insertar todos esos al
mismo tiempo y agregar un bucle de soporte a través de
todo el lado del objeto Y así si hago uno de Control, o puedo hacer un
Control dos, tres o cuatro para
agregar instantáneamente más niveles. Entonces presiono Control cuatro y eso agrega cuatro niveles en la
ventana gráfica por defecto Así que sólo voy a hacer cinco por ahora. Quiero todo este lado afilado, pero todo lo
demás suave, entonces puedo insertar esto y mantener
presionado el turno para que sea más lento Y eso va a agudizar
todo ese lado. Y si aún no te has dado cuenta, cuando hay un bucle de soporte solo en un lado del borde principal, este es el borde principal que
cruza aquí, borde principal definitorio. Y aquí está el
bucle de soporte que atraviesa. También debería haber un bucle de
soporte en el otro
lado, porque si no, entonces obtenemos una rampa súper
suave
entrando y luego una especie de giro
brusco saliendo. Así que también voy a añadir un
control R edge loop a través del otro lado aquí. Y eso agrega un lado súper
afilado a esta forma. Es una forma muy divertida de modelar porque es muy fácil
comenzar a definir curvas. Como decir, no me gusta la
forma en que se ve
esta curva, esta atravesando así. Sólo puedo presionar dos para seleccionar aristas y
seleccionar esta arista. Y en realidad, no
se puede ver el problema ahora porque los objetos
obstruyen la vista, pero puedo entrar en modo de rayos X. Ahora puedo ver, Oh, hay otra ventaja que no
he acertado del todo aquí. Así que en realidad presionaré Alt
mientras hago clic en esto, que selecciona todo el
bucle que va a través, y luego
saldré del modo de rayos X. Y si muevo este
bucle, digamos, presiono G y luego cambio Y para
no moverme sobre el eje verde. Ahora puedo empezar a mover
esto y muy, muy fácilmente definir la
curva que quiero. Di que lo quiero así. Es una manera muy divertida de
experimentar con formas
y obtener, como, locas, suaves y
también de obtener formas afiladas Y esto, el flujo de trabajo de
subdivisión es el que usaremos para
hacer el personaje
41. Modelado simétrico con el modificador de espejos: Quiero adelantarme, pero creo que este video te va
a encantar. Esta cosa me voló
la cabeza la primera vez que la vi, y es una manera de
hacer que algo realmente complejo se vea muy fácilmente Y es el
modificador espejo para agregar simetría porque muchas veces estamos haciendo objetos
simétricos en tres D, y no queremos
tener que trabajar duplicar Queremos automatizar eso, y lo hacemos con
el modificador espejo. Entonces con este cubo seleccionado, voy a agregarle un modificador en la pestaña de modificadores aquí, es la llave inglesa y luego
voy a modificadores y agregaré, solo
comenzaré a escribir modificador espejo
MIRR, y ahora se Ahora está reflejando este cubo, y lo está haciendo en el eje x
porque el eje X está
seleccionado en el modificador Podemos averiguar qué eje
es ese subiendo aquí
al track ball, y podemos ver que
es el rojo. Entonces, a través de esta línea roja, está reflejando nuestro
objeto actualmente Todo lo que hagamos a
un lado del mismo
va a ser copiado
al otro lado del mismo, cruzando el centro del objeto.
Entonces déjame mostrarte eso. Entraré en modo Editar y presionaré tres para el modo de
selección de fase aquí arriba. Voy a hacer clic en esta cara
y quiero insertarla. Puedo hacer eso ya sea
con la herramienta de inserción o presionando I en mi teclado Y voy a mover eso
y luego lo extruiré con E y luego lo
sacaré, y miraré eso También sale del otro
lado . Vamos a seguir adelante. Voy a extruir esto de nuevo, tal vez escalarlo
y extruirlo Escalarlo. Extruirlo. Como, ¿qué tan genial es eso? Así que rápidamente puedes hacer que algo se vea
bastante interesante. Incluso voy a mover esto hacia arriba, y tal vez voy a cortar bucle aquí
mismo para que
pueda extruir esto. Y ahora aquí hay
algo interesante. ¿Qué pasa si esto cruza el
centro? Te voy a mostrar. Entonces movamos esto hacia
arriba G para moverlo, y luego Z para
restringirlo en el eje azul, así lo moveré hacia arriba
y luego lo extruiré Y cuando
cruzo el centro, se ve bastante bien. Si lo muevo fuera
del otro lado, verás que lo
hace por aquí también. Entonces no sólo copia
de izquierda a derecha, sino que también copia
de derecha a izquierda. Cualquier cosa que haga a cualquiera de las
partes va a ser copiada
al otro lado. Entonces en modo de edición,
si presiono Seleccionar, esta naranja es la única
geometría que realmente he hecho, y todo lo demás se acaba agregar en la parte superior usando
el modificador de espejo. Pero la cosa es
que normalmente no me
gusta que la geometría se cruce
consigo misma así Entonces, entrar en sí mismo
y salir de sí mismo como lo está haciendo en esta área normalmente no
es Bueno. Entonces lo que casi siempre hago
es que quiero acortarlo. Quiero que sea un espejo justo de un lado a otro y no de este
lado a otro. Y para ello, tenemos que
activar la bisección para este eje. Entonces nuevamente, estamos
trabajando en el eje X. Entonces aquí bajo bisecta, quiero
encenderlo para el eje X. Hagámoslo. Y pasa
algo raro. Se convierte en un objeto súper
extraño. Y la razón de ello
es cuando
bisectamos, tenemos que elegir un eje
para copiar sobre el otro Y yo estaba modelando por el
lado izquierdo, y quería
copiarlo al lado derecho, pero Blender, por defecto, optó por hacerlo de la manera opuesta. Si entro en la pestaña,
déjame hacer este eje un
poco mejor. Cualquier cosa que esté a la
derecha de esta línea central, eso es solo medio
cubo aquí abajo, y esta varilla de aquí está siendo copiada
al otro lado. Y es por eso que estamos consiguiendo
este extraño objeto de aspecto. Así que vamos a darle la vuelta haciendo clic en
flip para Xaxis también. Entonces ahora este es el
resultado que buscaba. Estoy tomando lo que hay del
lado izquierdo y lo duplico
al lado derecho sin tener esa cosa
asomando el final aquí Entonces cualquier cosa que cruce sobre la línea central
es simplemente cortada. Entonces, si apago bisectar
por ello por un segundo, ya
verás, vamos a cruzar esa
línea Si lo enciendo,
entonces eso está cortado. Y todo lo que empiezo a
hacer por la derecha aquí, si lo extruyo, lo
extruyo otra vez, nada de esto tiene ningún efecto Lo único que
tiene efectos es lo que hago en el
lado izquierdo del objeto. Así es como suelo trabajar. Ahora bien, tampoco estamos limitados a hacer esto solo
en un eje. este momento
lo estamos haciendo en la línea roja, pero podemos reflejar en la línea
verde al mismo tiempo. Encendamos el eje
Y y comencemos a modelar, digamos, el lado aquí. Voy a insertar esto y tal vez extruirlo un
poco hacia adentro Y lo que puedo ver aquí es que cuando estoy
extrudiendo hacia adentro, es muy difícil de
ver porque está duplicando el otro
lado Estoy haciendo un agujero
y moviéndolo, pero está agregando una cara
encima aquí porque está tomando esta cara y la está
reflejando hacia este lado Entonces déjame encender bisectar ya y ver si
muevo esto adentro, y este es el
lado correcto para bisectar, lo está haciendo del
otro lado también Si no viera un efecto, si fuera así,
todo es plano, entonces
sabría que está reflejando
el lado equivocado, el letrero
en
el que no estoy modelando , y tendría que voltearlo Pero en mi caso, desvoltear
es lo correcto. Vamos a insertarlo de nuevo,
tal vez sacarlo. Y se está moviendo
hacia fuera en ese eje. Vamos a agregar un bucle aquí. Y como también estoy
reflejando en el eje X, también
puedo empezar a modelar en
la dirección X. Así puedo agregar geometría yendo esa manera y agregar un
bucle que va así. ¿Qué tan genial es eso? Al igual que, puedes hacer tan
rápidamente algo que se vea bastante intencional. Y eso es lo raro
porque permítanme desactivar este modificador por un segundo haciendo clic en el
pequeño icono del monitor. Así, este es
el objeto que hice. No tiene absolutamente ningún sentido. Es solo geometría aleatoria. Una vez que lo empiezo a simetrizar , de
pronto, parece que se
supone que es Bien, vamos a ir hasta el final. Agreguemos también
la dirección z. Duplicarlo también hacia abajo. Y vamos a biseccionarlo. Y como se ve bien, entonces no necesito
voltearlo si se viera así, entonces tendría que
voltearlo porque está borrando todos mis detalles. Entonces, qué genial es que con
solo unas pocas operaciones, solo unos pequeños
trucos de modelaje que ya conoces, puedas hacer algo
como esto súper fácilmente. Me encanta esta herramienta, y la estaremos usando para nuestro personaje antes de hacer eso, necesito explicarme un poco de cómo
funciona bajo el capó porque necesitas saber cómo licuadora decide
dónde está el espejo. Y si muevo este objeto, vamos a golpear G y X para
moverlo sobre el eje X. Se nota que
no está reflejando sobre el
centro del mundo, que está aquí porque entonces
el objeto cambiaría ahora Se está manteniendo su forma. Entonces lo que está pasando
es que el espejo está mirando el punto de origen del
objeto, y eso es esta naranja.en
el medio . Creo que se
puede ver eso. La pequeña naranja.En el
medio del objeto. Ese es el punto en el
que Blender mira lo que hay a la izquierda y a la derecha de esto y de dónde
reflejarlo. Ahora bien, si muevo mi
objeto en modo objeto, que es donde estoy ahora,
estoy en modo objeto aquí arriba. Entonces ese punto de origen se mueve. Sin embargo, si estoy en modo de edición, el punto de origen no se mueve. Permítanme simplemente apagar
el modificador por ahora. Entra en modo Edición. Iré a seleccionar todo lo que he seleccionado
toda mi geometría y veré el
punto de origen a medida que lo muevo. Voy a golpear G y X para moverlo
sobre el eje X. Mira eso. La geometría se mueve, pero
el origen se queda puesto. Entonces ahora el origen está en un
área completamente diferente del objeto. Y permítanme simplemente apagar los ejes Y y Z para que
esta siguiente parte sea un poco
más fácil de entender. Intenta imaginar cómo se verá
el objeto cuando vuelva a encender este espejo. Sepa que Blender
mirará lo que está a la izquierda
del eje X de este punto de origen y
lo reflejará hacia el lado derecho. ¿Cómo será el
objeto final ahora? ¿Qué es C? Esto es. Ahora bien, si
entro en la pestaña, mira esto. Tomó todo
a la izquierda
del pequeño punto naranja y
lo refleja a la derecha. Ahora, lo que es súper genial, y creo que te va a
encantar esto es que puedes mover cosas con el modificador de
espejo habilitado. Entonces, si ahora golpeo G
y X, mira esto. Lo estamos viendo actualizar en vivo. Y si vuelvo a encender
los otros ejes también, solo
estoy manteniendo presionado mi botón mientras muevo el cursor sobre para
habilitar todos esos. Entra en la pestaña y luego
empieza a mover esto alrededor. Mira esto. ¿Qué tan genial es eso? Así puedo mover esto hacia abajo y encontrar formas de
aspecto interesante. Puedo mover esto,
hacer esto realmente grande. Incluso puedo rotar todo
y mirar eso. Es así como, ¿cómo harías incluso
algo así sin la
simetría? Es una locura. Entonces se puede decir que
obviamente me encanta esto. Por lo general, no vas a estar haciendo
cosas así con él. Lo estaremos usando
para hacer nuestro personaje que
podamos hacer
solo la mitad, y la otra mitad
se hará automáticamente. Pero diviértete con esto. Este
es un flujo de trabajo muy potente.
42. Separación de objetos con espejos: Entra en un poco
de detalle sobre
cómo separar objetos
entre sí Entonces un ejemplo muy común
de esto es con los brazos, permítanme simplemente hacer un brazo y entrar en modo de edición
para moverlo para no mover su punto de origen y luego reflejar eso
sobre su eje Y. Ese es el eje verde,
y ahora está espejado, y
probablemente también vamos a tener un modificador de superficie de subdivisión en él con un par
de bucles de Y un recuadro en la
parte inferior y superior. Ahora necesitamos separar
estos brazos el uno del otro porque por el momento,
son un solo objeto Si hago clic en la casilla y hago clic en un brazo, se seleccionan ambos, y si empiezo a rotar, rotan juntos,
lo cual no es animable Si quieres animar un brazo separado del otro,
necesitas separarlo Pero la forma en que normalmente separamos algo no está disponible
para nosotros en este momento Es decir, entramos en pestaña, y luego subimos a la malla y separamos y
compramos piezas sueltas. Le is solo hay una
parte aquí, y eso es esto. Esta es la única
geometría real que tenemos. Este es un fantasma R hecho
por el modificador espejo. Entonces lo que tenemos que hacer es
aplicar este modificador espejo. Así que haz clic en el pequeño menú desplegable, haz clic en Aplicar, y ahora eso se
ha convertido en geometría real. Lo que sea que
hizo ese modificador es ahora geometría real. Ahora podemos ir a malla, separar por partes sueltas. Y porque estos no están físicamente conectados
entre sí, eso les hace partes sueltas. Ahora son objetos separados.
43. Dibujo: Mucha gente querrá
dibujar en su modelo
al principio. Como, en un momento,
vamos a modelar un personaje, y muchos de ustedes
van a querer dibujar tal vez una boca
sobre el personaje. Quiero desafiarte a que intentes darle forma en tres
D la mayor parte del tiempo. Entonces, si hay una boca abierta, tratando de esculpir realmente esa cavidad en tres dimensiones en lugar de simplemente
dibujarla en el modelo Cuanto más puedas
esforzarte para hacer eso, más profesional en
general, va a verse. En muchos casos, realmente
no quieres agregar mucho volumen. Como en mi ejemplo de Mini Robin, tengo el bigote y
tengo las cejas, y esas básicamente están
dibujadas en el modelo Entonces quiero
mostrarte cómo lo hice. Entonces comenzaré con solo el turno A, agregando un cubo de malla para comenzar, y esta puede ser mi cabeza. Entonces iré a la pila haciendo clic en modificadores y agregaré modificador y buscaré superficie de
subdivisión en eso, y aumentaré el
número de divisiones en la vista para decir tal vez
cinco que sea una buena cabeza, y luego quiero
agregar un objeto que
pueda ser como mi objeto pueda ser como mi Entonces cambiaré A, agregaré, y sigue siendo una malla, pero quiero un objeto dos D. Y el objeto dos
D más básico es un plano. El plano no es
un objeto de tres D. No tiene volumen. Es completamente plano, pero es un buen comienzo.
Luego agregaremos volumen. Entonces presionaré tab para editar esto, y luego lo moveré hacia arriba
presionando G para agarrarlo y luego limitarlo al eje z presionando Z en mi teclado Después lo moveré hacia arriba
y haré clic para confirmar, luego escalarlo hacia abajo
presionando S y moviéndolo hacia adentro. ¿Cómo conformar
esto a la superficie? Quiero dibujar en la
superficie con este plano. Bueno, para hacer eso, tengo que
usar los ajustes de ajuste. Y esos están aquí arriba en
el pequeño icono del imán. Haré clic en eso y
activaré el chasquido. Ahora, por defecto, se ajusta a
incrementos, no a superficies, es
decir, que si presiono G para
agarrarlo y empiezo a moverme, no pasa nada por
un tiempo hasta muevo lo suficiente como para que
encuentre un incremento de 1 metro, y luego se ajusta Oh, este no es el
comportamiento que quiero, pero puedo cambiarlo haciendo clic en un pequeño menú desplegable
junto a chasquear Y en vez de incremento, bajaré a enfrentar proyecto Presionemos ahora G para agarrarlo y moverlo sobre la esfera
y ver qué pasa. Ahora se ajusta a la esfera. Es muy difícil de ver en este momento, pero si hago clic y
luego muevo mi cámara, se
puede ver que
en realidad está conformada En realidad no se puede
decir que está sucediendo mientras
lo estoy moviendo porque no cambia forma desde la perspectiva
de la cámara, pero sí, de hecho,
se mantiene conforme a la esfera Ahora vamos a deshacer todo eso, traerlo de nuevo a la parte superior y ajustarlo directamente hacia abajo
viendo desde arriba, presionando G, y
luego simplemente haciendo clic. Y eso lo encaja
directo a la superficie. Ahora quiero empezar a
modelar en él, pero es muy difícil de ver porque está dentro
del otro objeto, algo así, y es muy
difícil decir lo que estoy haciendo. Entonces también subiré aquí a la configuración de la ventana gráfica
y activaré el modo de rayos X. Ahora puedo ver lo que estoy haciendo. Independientemente de donde
lo esté poniendo, siempre
puedo ver dónde está. Volveré a ver todo desde arriba
y luego simplemente haga clic en modo de selección de
borde aquí arriba
y haré clic en un borde, y luego extruiré
ese borde presionando E para extruir y luego
sacarlo y Ahora bien, ¿qué pasó en tres D? Si me muevo y la veo
desde un lado, esta nueva parte sigue conformada a la esfera.
Sigamos adelante. Voy a subir, y presionaré E para extruir, tal vez
moverlo por aquí, R para rotarlo,
tal vez S para escalarlo y mira eso y
sigue conformándose Y seguirá haciendo
eso. Así es como hice facial aquí en mi modelo. E, extruir eso, escalarlo
con S, R para rotar, G para mover E S, R. Y esa es una base
bastante buena Ahora vamos a darle grosor. Hacemos esto con un modificador
y ya lo has usado,
es el modificador de solidificación Entonces SOL solidifica, agrega eso, y eso agrega grosor Va por el camino equivocado. Entonces cambiemos el desplazamiento
de uno negativo a uno. Ahora puedo desactivar el modo de rayos X. Eso le agrega grosor. Y sigue siendo bastante
fácil de editar porque recuerden, si voy al modo Editar ahora, no
estoy editando ese objeto
tres D. Sigo editando
ese dos de ribbon. Así que todavía puedo presionar ese borde final y
presionar E para extruir, moverlo, y se le agregará el
grosor También podemos suavizar esto
agregando un modificador de
superficie de subdivisión a esto Así que minimiza este modificador
y agrega uno nuevo, superficie de
subdivisión, y eso apila otro
encima de la solidificación Entonces voy a agregar un par
de niveles a eso. Y tal vez hasta quiero ahora hacerlo un poco
más grueso para poder
verlo . Y eso es bastante agradable. A lo mejor incluso quiero
compensarlo a cero para
que se desplace hacia abajo y hacia arriba
al mismo tiempo como si estuviera en medio
del objeto Entonces puedo apilar
un modificador final sobre esto y ese
será el modificador espejo. Entonces MRR, espejo, agrega eso y
bisecciona sobre el eje x. Ahora le he dado bigote a la
esfera.
44. Modelado de ropa: Hablemos muy rápido
sobre la ropa. Me he burlado de un personaje
rápido aquí. Tiene formas bloqueadas igual el personaje que
se supone que debes hacer más tarde, y quiero darle
una camiseta a este tipo . Entonces, ¿cómo hago eso? Bueno, comencemos con los hombros porque esos
van a ser clave para
hacer una camiseta. Ahora mismo, tengo un modelo aquí con un montón
de modificadores en él. Entonces el modelo en sí
se ve así. Acabo de entrar al modo de edición
presionando Tab y
es bastante blocky Encima de ese bloque,
tenemos algunos modificadores. Déjame apagar los dos inferiores, solo
ves el
primero y eso es un modificador de superficie de subdivisión Sin eso,
tenemos el bloque
con la superficie de subdivisión, la suaviza Luego hay un
modificador de espejo que lo
refleja al
otro lado del cuerpo,
y luego hay un modificador
suave, y luego hay un modificador
suave, que se agrega automáticamente botón
derecho y
haciendo clic en Sombra Suavizado. Simplemente podemos ignorar eso. Eso es solo por hacer que
se vea suave en lugar de facety si hice una sombra plana, entonces se puede ver
que está facetada y luego sombra lisa, la
suaviza. Cuando estamos agregando ropa, tenemos que ser conscientes del orden de
los modificadores, porque permítanme simplemente burlarme una demostración muy rápida
aquí con un avión, moviéndolo y
otro avión por Entonces en el primero,
agregaré una superficie de subdivisión. Y agregarle un par
de niveles, y luego un solidificar Solidificar agrega grosor. Entonces estableceré el
desplazamiento en uno y aumentaré el grosor.
Entonces eso es lo que hace eso. Ahora bien, ¿qué pasa si
agrego estos mismos modificadores, pero en el orden opuesto
en este otro plano ¿Qué crees que
va a pasar? ¿Cómo crees que
va a quedar esto? Si primero agrego la solidificación y luego la superficie de subdivisión?
Bueno, vamos a ver. Entonces solidificar, compensar uno, agregarle algo de grosor,
aproximadamente lo mismo, y luego
una superficie de subdivisión Pero con algunos niveles. Mira eso. Entonces,
¿por qué sucede esto? Es porque el objeto está leyendo los modificadores
de arriba a abajo Entonces este primero alisó el plano plano en un círculo plano y luego le
agregó grosor Y el solidificar solo agrega
este grosor recto. Para este, primero
agregamos grosor y
básicamente obtuvimos un cubo, y luego alisamos toda
la forma del cubo, así que incluso suavizamos ese
grosor que agregamos Esto es muy importante entender cuando
estamos agregando ropa. Porque lo vamos a hacer basándonos en el modelo que
ya tenemos . Entonces hagámoslo. Presionemos Tab sobre esto y
pasemos al modo de selección de caras. Quiero seleccionar todas las caras que quiero que se conviertan en ropa. Entonces creo que quería
bajar a esta línea aquí. Entonces haré clic en Alt en este borde
para seleccionar todo el anillo, y luego Alt Shift
haga clic en este, para seleccionar este anillo también, y luego mantén presionado Mayús para
seleccionar esas dos caras superiores. Por lo que ahora se selecciona todo esto. Y entonces
separaré esto en un nuevo objeto. Ya lo hemos
hecho antes. Es de malla, duplicado. Eso hace un duplicado
de lo que hemos seleccionado, solo lo saca a relucir, y
ahora está unido a mi cursor, así que voy a hacer clic derecho, que lo lleva de vuelta
a donde acaba de estar, pero seguimos en
el mismo objeto. Simplemente tiene múltiples elementos. Así que vamos a separarlo
en un nuevo objeto yendo a malla, selección separada. Entonces eso nos da un objeto
separado. Y si presiono tabulador ahora
para salir del modo Editar, podemos ver que
tenemos un objeto aquí y tenemos
un objeto aquí. Y este es mi objeto de ropa, y quiero agregarle
grosor. Entonces hagámoslo. Añadir
modificador, solidificar, establecer el desfase en uno,
y luego vamos a ajustar
el espesor Entonces ese es el inicio de una playera. Ahora, de nuevo, ten en cuenta dónde en la pila va
la solidificación Entonces, por el momento, tenemos superficie de
subdivisión, luego espejo, luego solidificamos Y esto es bueno. Esto está bien. Puede reordenarlos
arrastrando los puntos en el lado
derecho del modificador que pueda arrastrarlo
hasta la parte superior, y eso suavizará
toda la prenda. Entonces el borde
se volverá bastante afilado, en realidad, porque el borde
del mismo se suaviza Entonces, de manera contraintuitiva, el
alisado en realidad hace que se vea más
nítido en este caso Así que asegúrate de que esto es después del modificador de
superficie de subdivisión Agreguemos una camisa abierta para
que me veas hacerlo de nuevo. Iré al
objeto del cuerpo, entraré en tabulación, y en este caso, no
tengo la
geometría que necesito separar. Entonces voy a
tener que añadir eso. Controlaremos R en un corte de
bucle y haremos clic aquí, y luego Control R, haga clic aquí. Sé que voy a necesitar
uno en el lado también,
así que voy a hacer clic aquí también. Porque ahora si escondo el otro objeto y he hecho un trabajo terrible nombrando
mi objeto aquí, simplemente
voy a hacer clic en la
cabeza y esconder eso, hacer clic en los hombros, esconderlos, hacer clic en los brazos, esconderlo para
que pueda
ver lo que estoy haciendo Al entrar en la pestaña,
seleccionemos estos lados
yendo todo el camino hacia abajo. Selecciona el lado del objeto y selecciona la parte posterior,
todo en la parte posterior. Solo estoy manteniendo presionado el turno
mientras hago clic en cada cara. Y en la parte superior aquí, quiero
una abertura para la cabeza, pero seleccionaré una
forma de U en la parte posterior. Y deja el fondo abierto. Después
lo duplicaré ya sea yendo a mesh y duplicar
o haciendo clic en Shift D, eso lo separa, click
derecho para cancelar, pero simplemente cancela el movimiento y trae de vuelta el duplicado Todavía está aquí. Si presiono G para agarrarlo, todavía está aquí, y luego presionaré P para
separar o podemos ir a malla y separar P selección. Eso me da un objeto separado. Entonces ahora tengo dos objetos,
el cuerpo original, y la camisa en el costado, y le agregaré un
modificador de solidificación Establezca el desfase en uno y
aumente el grosor. Ahora, parece que está
suavizando por el lado aquí, pero eso es porque la
he sombreado suave Así que clic derecho
y sombra suave. Recuerda, ese tipo de falsificaciones
una suavidad a todo. La malla no es lisa aquí. Es completamente plano. Entonces, si voy a mi
vista de wireframe y apago el rayo X, se
puede ver que
es, de hecho, duro No es suave, pero está pasando
esta falsedad suavizante Entonces, si hago clic derecho y
sombreo Auto suave en su lugar, intentará mantener
esa nitidez Entonces puedo desocultar todos
esos objetos que
escondí antes e intentar que coincidan con el grosor de la
ropa de la derecha Ahora
parece que lleva una camisa abierta en la parte delantera. Entonces esta es una forma de modelar la ropa para la que creo que
vas a tener un buen uso.
45. Proyecto de clase 5: modelado de personajes: Es el proyecto de
modelado de personajes. Es hora de poner a prueba nuestras habilidades de modelado de
superficies
de subdivisión , ¿eh? Dice, La marca
busca una mascota divertida y
reconocible para usar
en materiales de marketing Tu tarea es diseñar y modelar un lindo personaje de tres D que se ajuste a la personalidad de la
marca. Para un reto extra, puedes hacer del
personaje un animal. Eso significa que si te sientes realmente cómodo con el flujo de trabajo de la superficie de
subdivisión, puedes intentar hacer un animal Los animales son bastante más duros que el personaje de bloques
que voy a estar haciendo Pero si te sientes
seguro, adelante y pruébalo. Así que concéntrese en crear formas
atractivas con objetos
simples en bloque No intentes hacer ninguna forma orgánica realista y
redonda todavía. Estaremos usando el modelado de
superficies de subdivisión, que aprendiste en los videos
anteriores, lo que significa que las cosas se
completarán, pero trata de
mantenerlas bastante bloqueadas Una buena referencia es
mi modelo mini Robin. Este tipo está en bloque, pero aún tiene algunas formas
atractivas Así que trata de enfocarte solo en las proporciones y no te preocupes
demasiado por intentar crear, curvas
interesantes y esas cosas. Puedes llegar bastante lejos
con solo formas en bloque. Por lo que los requisitos son
usar modelado de subdivisión. Eso significa usar el modificador de superficie de
subdivisión y agregar bucles de soporte
para afilar las aristas. Separe las extremidades para que
puedan moverse de forma independiente. Va a ser
muy importante para la siguiente sección donde
animemos a este personaje, y necesitas poder animar toda la lente Y cuando termines, solo captura de pantalla de tu
personaje otra vez. Todavía no hay necesidad de renderizar. Lo haremos más adelante y
lo subiremos a la sección de proyecto de clase o asignación
en este sitio web y lo compartiremos en redes sociales. Eso es en Bring Your Own
Laptop en Instagram, y el grupo de Facebook está aquí y el
grupo de LinkedIn está aquí. Y en el siguiente video, haré ese personaje robot, pero primero trata de hacer tu
propio personaje, mira qué obstáculos te encuentras, y luego
los resolveremos
46. Finalizado, proyecto de clase 5: modelado de la cabeza: Bien, estoy en un nuevo archivo y es
hora de hacer mi personaje. El mío va a ser un
robot porque tengo esta marca industrial de aceite de chile, y creo que tener un carácter
industrial siendo, como, un tipo robot,
eso va a ser divertido. Y quiero
darle una boca movible porque en mi animación posterior, quiero que pueda
bajar la mandíbula como si
estuviera comiendo comida muy picante.
Creo que va a ser divertido. Entonces comencemos con la cabeza. Voy a añadir Shift A, un cubo de malla. Y luego vamos a redondear
esto de inmediato, yendo a la
pila de modificadores y agregando A. Modificador de superficie de subdivisión Voy a añadir un par
de niveles ya. Entonces tal vez cuatro. Y luego comencemos a
definir la forma de esto. Quiero que sea un
poco más ancho de lo que es alto y tal vez menos profundo. Algo así. Y empecemos a afilar los bordes En realidad, ¿sabes
qué? Presionaré el control R para agregar un
bucle en el medio. Y mientras estoy en modo de deslizamiento de
borde, voy a llevar esto
a la izquierda. Y luego en este punto,
solo voy a agregar un
modificador de espejo para que
pueda trabajar en el lado izquierdo
y no tener que
preocuparme pueda trabajar en el lado izquierdo por la mano derecha. Entonces voy a añadir un modificador.
El espejo está justo aquí. Haga clic en Espejo. Ahora mismo estoy trabajando en
el eje verde. Entonces apaguemos X y
encendamos Y y luego activemos la bisección, y está copiando el lado equivocado, así que volteemos eso Y la razón por la que está
bajando así es porque cuando agrego este bucle
solo en el lado izquierdo, mira, si apago el espejo, va un poco hacia abajo
porque está alisando tanto el lado
derecho. Entonces para arreglarlo, voy a tener que agregar
otro bucle por aquí. Controla R, agrega un bucle y
trae eso por aquí, lo que endereza eso Ahora voy a añadir otro bucle pasando por aquí en el medio. Haga clic ahí y haga clic derecho
para cancelar el deslizamiento. Después quiero seleccionar
con el modo de selección de fase. Esto, esto, esto y
este ritmo,
dejando ese, y luego extruir los hacia abajo analizando E. Eso lo extruye y deja un agujero para mi boca
que quiero aquí Ahora, necesito afilar
esto porque no me parece
muy robótico Así que agreguemos algunos bucles más. Sé que necesito un bucle pasando por aquí para
agudizar eso un poco Entonces controla R, haz clic en el bucle y bájalo,
afinando eso hacia arriba. Y entonces también vamos a
afilar esto, traerlo, y
tener uno aquí, también. Todo se
espeja automáticamente, lo cual es agradable. También voy a añadir uno pasando por aquí y aquí para
agudizar eso Yo que se ve bastante robótica. Pero de nuevo, obtenemos
esta extraña costura porque no estoy trabajando
del otro lado, así que vamos a agregar otro bucle por aquí para
deshacernos de esa costura. Eso es lindo. Pero me lo he
puesto un poco difícil
aquí arriba. Pero eso está bien. Simplemente presionaré vértices y seleccionaré cada
uno de estos aquí arriba, y
los bajaré un poco porque no me gusta
el perfil de mi cara Eso se ve bastante bien. Afilemos este lado superior, controla R, trae esto
para hacerlo más cuadrado ¿Y me gusta el trasero? Creo que sí. Aunque este fondo de
aquí podría ser más redondeado. Entonces creo que la razón por la
que no
es redonda es porque tengo un
bucle de soporte yendo aquí y aquí. Entonces básicamente está
suavizando entre estos dos puntos. Entonces, si los muevo más
lejos , entonces eso lo
suavizará. Ahora bien, si solo muevo todo
esto hacia arriba, entonces eso va a estropear el frente, así puedo hacer solo la parte de atrás. Permítanme seleccionar este
bucle y simplemente
cruzar todo el camino hasta el final
y hacer lo mismo con esto. Entonces puedo moverlos
todos hacia arriba presionando G, y luego bloquearlo en el eje Z presionando Z y moverlos hacia arriba. Y eso redondea un poco más el
trasero. Eso es lindo. Yo puedo
hacer lo mismo aquí. Y esta vez, voy a hacer un atajo para seleccionar todo
este bucle, y eso es mantener
Control o Comando en un Mac y dar clic al final, que solo selecciona toda la fila desde el inicio hasta el
final de donde hice clic Y luego voy a mover estos hacia abajo. Genial. Vamos a
darle una gran ronda sí. Cambiaré A, agregaré una
malla, y esta vez, haré un cilindro, y este cilindro puede
girar sobre el eje Y. R Y, 90 para rotar a 90 grados. Y luego entraré en
modo edición y comenzaré a escalar. Lo escalaré hacia abajo
y lo moveré. Sólo puedo moverlo mano libre. No hay necesidad de constreñir.
Muévelo a aquí, algo así, y luego le agregaré un
modificador de espejo. Así espejo. Ahora, dice que está
reflejando en el eje X, pero agregó en la
parte superior. ¿Por qué es eso? Bueno, eso es porque
giré en modo objeto. Y cuando haces algo
en modo objeto, simplemente gira
el eje de los objetos. Entonces esto ya no es correcto. Pero creo que probablemente Y sigue siendo
correcto. Sí, sí, lo es. Entonces hacerlo sobre Y ahora está bien. Presionemos tabulador y solo
trabajemos en la escala de estos. ¿Qué tan grande quiero que sean mis ojos? Algo así. Y los voy a acercar a la cabeza. Y presionaré I para insertar
y E para extruir adentro, darle unos ojos como anteojos, y luego yo para insertar otra vez,
y luego E para extruir y luego E Esto se ve bien, pero
el proyecto dice que tengo que usar el flujo de trabajo de
subdivisión Entonces hagámoslo. Vamos a agregar un modificador de superficie de subdivisión Estoy cansado de ir por aquí, así que presionaré Control cinco, que automáticamente agrega
un modificador de subdivisión con cinco niveles en él
porque presioné cinco, y se ve un poco funky Entonces lo primero es que se está
doblando por dentro. Entonces ese es el mismo
problema que tenía antes. Necesito un bucle de soporte por aquí. Así que presiona tab, Control
R para agregar un bucle, y no puedo ver nada. Entonces iré por aquí
y encenderé la vista de rayos X. Voy a tener
que cancelar eso en realidad, y luego activar la vista de rayos X. Controle R, agregue un bucle. Por aquí, eso lo
endereza. Ahora, otra cosa rara
es que es como una estrella. Es como plegarse sobre sí mismo, haciendo que esta llanta se forme. Y no soy un gran admirador de eso. El motivo de eso es un problema que ya hemos
tocado antes. Este de aquí es el
temido final desaparecido. Es una cara con
muchos vértices. Entonces todos estos vértices están
conectados a esta cara, y eso confunde al algoritmo de
subdivisión Está tratando de suavizarlo, pero no sabe qué
hacer en este lugar. Ahora, eso no será un problema si estás
alisando una superficie plana. Pero en este caso,
está tratando de agacharse aquí y entrar y
no sabe qué hacer aquí. Entonces todo lo que tenemos que hacer es
asegurarnos de que la pistola esté
sobre una superficie plana. ¿Y cómo lo hacemos?
Es muy sencillo. Simplemente lo insertamos una vez más. Yo para insertar y traerlo. Ahora el gon está en el mismo plano plano que estas caras, y
estas caras están bien. Estos son todos
polígonos de cuatro lados. Gon está bien. Es plano, lo que lleva a que
no haya problemas de sombreado. Ahora, quiero afilar
algo de esto aquí. No soy un gran fan de
lo suave que es esto. Entonces agregaré otro
anillo pasando por aquí, lo
deslizaré y
lo afinaré un poco Puede hacer lo mismo por
dentro, en realidad. Trae esto aquí, y voy a afilar el
interior aquí también. Agrega al menos uno en
el centro ahí. Lo que ahora parece más robótico. Muy bonito. Vamos
a darle algunas orejas. Así mismo, malla, cilindro, y he aprendido de la última vez, así que para no meter
mi modificador espejo, entraré enseguida al
modo Edit y no empezaré a girar
en modo objeto, y giraré sobre el eje x, R X 90, y luego G,
Y para moverlo. Sé que son muchas cartas. Todavía puedes usar los artilugios, ya
sabes, en algún momento me convertiré en
segunda naturaleza Entonces S para escalarlo hacia abajo. Y lo voy a mover
a su lugar mano libre. Esto, creo, voy a
hacer clic en el icono de
la X en el track ball para
verlo desde el frente, y luego lo moveré
hasta que en realidad apenas toque porque entonces se
suavizará aquí y se verá
como que está pegado en
lugar de estar soldado, lo cual creo que
va a ser genial. Da clic en este G Y para moverlo, tal vez S para
escalarlo un poco, G Y y vamos a controlar B
biselarlo y presionar caras, entrar en esta, yo para insertar, y tal vez E para extruir Y ese es un buen
comienzo. Controlemos tres en un modificador de
superficie de subdivisión Tenemos el mismo
tipo de problema. Está haciendo el
extraño patrón de llantas. Entonces ficha, y puedo
esconder esta cabeza. Haré clic en la cabeza y arriba en el contorno o haré
clic en el icono. En realidad, comencemos a cambiar el
nombre de las cosas. Así que la cabeza. Y esto son los ojos. Esto son oídos. Voy a ocultar la cabeza, haga clic en
el icono I en la cabeza. Entonces puedo ver lo que
estoy haciendo. Presiona tabulador y esta parte necesita ser incrustada, yo para insertarla. Sigue haciendo lo de las estrellas porque necesitamos
insertarlo una vez más, yo para insertar y eso
quita la Está haciendo
lo de las estrellas por aquí también, haga clic en eso yo para
insertarlo y está haciendo la
estrella e insertarla de nuevo Voy a dar la vuelta a la
cabeza para ver el contexto, y esto es bastante genial. Afilemos las cosas aquí arriba. Agreguemos algunos bucles de soporte. Entonces controla R y trae esto hasta que me guste la
curvatura de este lado. Entonces probablemente algo así. Quiero que sea bastante filoso, y quiero que esto
sea bastante agudo, agregue un bucle ahí y
agregue un bucle aquí. Haré lo mismo
aquí para
agudizar esto . Eso parece mecánico. También agreguemos línea
que lo atraviesa. Entonces un bucle aquí, Control B para biselarlo. Mantendré el turno para que sea
pequeño y luego lo extruiré
hacia adentro usando la herramienta de extrusión
y extruiré a lo largo de las O como prefiero
hacer, usar el atajo que
es Alt E para extruir, y luego obtengo todas las opciones
de extrusión y puedo hacer
extruir caras a lo largo de
normales Eso se ve bien. Haga clic derecho, Shade auto suavizar en eso. Y voy a hacer lo mismo en la
cabeza, sombra auto lisa. ¿Lo hice en esto? Yo creo que sí. Sombra auto lisa.
Y en el aire, voy a añadir un modificador. Agregaré el
modificador espejo a través del eje Y, apagaré X y encenderé Y. Eso trae eso, y lo
moveré hacia abajo para que quede en
medio de la cabeza. Y eso se ve divertido.
A mí ya me gusta. Démosle la boca
que tanto necesita. Shift A, agrega un cubo, y este cubo
solo necesita llenar la boca. Entonces voy a entrar en modo X ray
y apenas desde cada ángulo, voy a tratar de ponerlo
recto dentro de la boca. Entonces voy a
empezar por un lado, presionar tabulador, y luego G para mover todo por encima hasta que toque
la esquina aquí, G, muévelo aquí. Y luego comprimo vértices y selecciono todos
estos vértices y GX los mueve hacia adentro luego selecciono estos vértices
y GZ Y luego míralo desde el
frente haciendo clic en la X, y puedo seleccionar todo, seleccionarlo y escalarlos en. S Y, escalarlos hasta si es. Después, sal del modo Editar. Eso es bastante bueno. Sin embargo, probablemente tendré que ajustarme
un poco. Una vez que agrego el modificador de
subdivisión, superficie de
subdivisión
en algunos niveles Eso lo hace completamente redondo, así que esto necesita
mucho afilado Yendo a la pestaña Control
R. Y en este caso, creo que simplemente voy a
trabajar simétricamente sin agregar un modificador espejo solo para mostrarte cómo hacer eso Control R, simplemente haga clic en
eso en el medio. Hago clic derecho para no deslizarlo, y luego puedo controlar los biseles B, pero puedo biselarlo Puedo biselarlo hasta llegar al punto donde empieza
la curva Entonces estoy mirando la
curva de la cabeza, y siento como
que empieza ahí y
termina como ahí. Entonces ahí es donde yo también quería
para este objeto. Entonces Control R, haz lo mismo
aquí, haz clic en el medio, y luego Control B,
aumentalo hasta que sienta que la
curva es bastante similar. Entonces voy a hacer lo mismo aquí. Control R, y esto es
bastante suave, de hecho. Siento que tal vez necesito
suavizarlo más de lo que es posible. Entonces tal vez voy a tomar
todo este borde, esto, esto, y esto y mover eso
sobre el eje X para redondearlo aún
más de lo que es posible
con solo el modificador. Por lo que sigue ese
contorno. Eso me gusta. Bien, agreguemos un bucle de soporte
más en la parte posterior para afilar eso, no es que lo veamos
mucho. Y luego veamos. Creo que esas caras superiores tienen
que salir un poco. Ocultaré la cabeza,
entraré en
modo de selección de caras y seleccionaré todas estas caras luego mostraré la cabeza y G Z para moverlas hacia arriba para que la
llenen un poco mejor Está bien si se
cruza. Eso es lindo. Quiero que tenga una boca
más gruesa, aunque, editemos esto
y esto juntos. Haré clic en
ambos, entraré en la pestaña, y luego mirando desde el frente, entraré en Wireframe View en selección de
vértices y seleccionaré todo en la parte inferior Todo tan abajo. Voy a salir de la
vista de estructura metálica y luego G Z. Ahora puedo ajustar
esos dos juntos ¿Y qué tan grueso lo quiero? Algo así.
47. Finalizado, proyecto de clase 5: modelado del cuerpo: A vamos a hacer el cuerpo a continuación. Simplemente seleccionaré todo
aquí y lo moveré hacia arriba G Z, lo
moveré arriba para que cuando agregue algo
nuevo, agregue cubo. Voy a añadir a continuación. Siéntete
como que está bien. Entremos enseguida al
modo Edición y solo escaléelo en X. ¿Qué tan flaco es este tipo? ¿Qué te parece?
Algo así. Y luego en escala Y, Y SY. Quiero que tenga un cuerpo minúsculo. Después G Z para moverlo
hacia abajo, G para agarrar. Vamos a
reducirlo de nuevo en Z, S,
Z, escalar hacia abajo, y
GZ moverlos hacia arriba. Su cuerpo probablemente debería crecer
un poco yendo hacia abajo, así que si solo lo estoy
mirando desde el frente, puedo volver a entrar en la vista
wireframe, seleccionar estos vértices inferiores
y escalarlos en Y S Y. Escalarlo un poco, y luego ver desde el otro lado,
escala X un poco, haciéndole un poco haciéndole un poco Controle cuatro para agregar una superficie de
subdivisión. ¿Cómo elijo los niveles? Es básicamente sobre la intuición. Sé más o menos lo grandes que quiero que sean
estos para definir
la forma. Sé que tres va
a ser muy poco. Cinco puede ser demasiado, así que
acabo de empezar con cuatro. Entonces entrando en la pestaña.
Y por cierto, en un momento u otro, probablemente
agregarás demasiados niveles y
empezará a retrasarse bastante Simplemente baja los niveles,
y deberías estar bien. Porque cuando empiezas a
agregar geometría, correcto, si agrego un bucle yendo aquí
y uno aquí y uno aquí, empiezas a agregar
muchos polígonos El modificador de superficie de subdivisión
agrega muchos polígonos. Entonces crece exponencialmente
con cada bucle que añades, y vi que eso sucedía
con las orejas, especialmente Solo veamos
el marco de alambre. Y en realidad no
me está mostrando los nuevos polígonos que está agregando porque la
visualización óptima está encendida Pero si lo apago,
verás cuántos en
realidad está agregando, y son bastantes
polígonos. Esos son diminutos. Entonces, si puedes salirte con la tuya con
dos, entonces gírela a dos. Y en este caso, puedo. La
boca aún está sombreada plana, así que haga clic derecho,
Shade Autosmooth Eso es bueno. Y
volvamos al cuerpo y afinemos
todo en Es todo agudizar la parte superior, controlar R, arrastrar esto a la parte superior Es bastante cuadrado, así que quiero que
estos sean bastante afilados, y quiero que este
lado sea agudo Agreguemos un modificador de espejo. Refleja en el eje Y y bisectar, y de otra manera, no de esa manera Entonces agreguemos otro
bucle de soporte en el otro lado. Muy bonito y uno de atrás a frente. Yo sólo puedo tener
uno en el medio, creo. A mí me gusta esa redondez. Y luego vamos a darle
una sección de cadera por separado. Justo cerca de la parte inferior. Controla R para agregar un bucle
en algún lugar algo así, y luego hacer ese mismo
truco que con el aire. Control B para biselarlo, y luego voy a extruir esto
con extruir a lo largo de
normal esta herramienta,
a E para mí, extruir caras a
lo largo de normales, luego mover estos hacia adentro Me da una
sección separada para eso. Es muy agradable y puedo afilar eso agregando algunos
bucles de soporte a su alrededor. Bueno. Necesita un cuello, Turno A, malla. Hagamos un cilindro para el cuello y solo entremos en
modo de edición y escalemos hacia abajo. Y está apegado
en un lugar raro. Seleccionemos todo en la cabeza y solo
avancemos un poco. GX para que
realmente se adhiere a la
cabeza y no a la boca Y luego en el cuello,
puedo hacer clic derecho, matizar auto
liso, suavizarlo. Y presionaré de nuevo Mayús A, malla, cilindro, y trabajaré
en los hombros a continuación, tab. Y los hombros
deberían ser bastante delgados, así que de hecho volveré a entrar en modo
X ray, tab, escalarlo hacia adentro, pero solo
escalaré en
los ejes X e Y, así que desplazaré Z como en no z, y ese tipo de lo
hace más flaco Después lo rotaré
R sobre el eje X,
X, y a la derecha 990. Salga del modo de edición, salga del modo de rayos
X y muévalo hacia abajo. Ahora puedo escalarlos
en un poquito. S Y Bonitos hombros. Haga clic derecho en Shade Autos mover. Y vamos a darle algunas armas. Desplaza A en otro cilindro, entra en modo de rayos X,
tabulación, escala en no Zs o Mayús Z.
muévalo hacia adentro. ¿Qué tan grande
quiero que sea esto? A lo mejor un poco menos. Y luego viendo
todo desde el frente, lo
trasladaré hasta
aquí. Es demasiado grande. Escala hacia abajo, G para moverlo. ¿Qué tan grandes son los brazos? Me siento
como tal vez así. Para este tipo. Y necesita
dos brazos, obviamente. Entonces espejo en el eje y. Y como lo moví todo
en modo edición, el origen, el puntito anaranjado sigue en el medio,
es
decir, que se
reflejará sobre el medio. Clic derecho, sombra Autosmooth. Pero sí, el brazo definitivamente
necesita una superficie de subdivisión. Modificador de superficie de subdivisión, añádele un par de segmentos Es muy malo porque
no tengo ningún loop de soporte
y es muy largo. Agreguemos un
bucle de soporte en la parte superior. Y un recuadro en la
parte superior porque está haciendo lo raro dentado Entonces yo. Eso es bueno. Y al fondo,
voy a hacer lo mismo, Control R, arrastrarlo hacia abajo. Presiona esta cara y presiona
I. Redondea eso. Todavía estamos consiguiendo la
forma de estrella, así que una vez más. Y diablos, hasta lo
extruiré con palabras y presionaré de nuevo solo
para agregar algún detalle Y sigue haciendo
la cosa. Yo una vez más. Siempre que esté haciendo la
cosa, solo presiona I. Genial. Y quiero un
segmento separado para las manos. Vamos a agregar un nuevo bucle bajando por aquí y
¿qué tan grandes son las manos? Algo así y
Control B, biselándolo,
y Alt E, extruyen caras a
lo largo de normales hacia adentro Y en realidad puedo ir
sólo un poquito, y luego un poco más por Alt E extruir cara
a lo largo de normales otra Porque si apago el modificador de superficie de
subdivisión, se
puede ver que lo que
acabo de hacer es que primera ronda agregó este bucle y la segunda ronda
agregó este bucle Básicamente agregué mi
propio bucle de soporte. Pero otra forma de hacer esto es
si deshago esto deshacer, deshacer, puedo alterar, extruir
fases a lo largo de las normales, ir por todo el camino, y luego Control R,
agregar un bucle yendo aquí Eso hace
lo mismo. Control R, a la una aquí, dos para afilarlo. Así que entra en modo Editar y
agrega otro bucle de soporte aquí y aquí. Muy bonito. Esa es mi mano, y
esa debería ser más profunda. Entonces seleccionaré este anillo. Voy a usar la herramienta de engorde retráctil, que está aquí, que
también es Alt S, así que Alt S, que la encoge, la convierte
en un cambio de
segmento aún mayor, y puedo escalarlo Entonces voy a ver todo desde
el frente en la vista de estructura metálica, seleccionaré vértices,
seleccionaré todo esto, luego S Z para escalarlo Oh, no estaba en modo rayos X, así que no seleccioné
los traseros Entonces hazlo de nuevo,
selecciona todo eso. S Z, escalarlo. Eso es mejor. Voy a añadir un segmento
para el hombro también. Control R, arrástralo hasta aquí, Control B, y tE
extruir pasan a lo largo de
las normales, tráelo Control R,
bucle de soporte, soporte aquí, y aquí, eso es bueno. Divertido. Las piernas
obviamente no son diferentes. Cambio A, malla, cilindro. Yo solo estoy haciendo las
mismas cosas una
y otra vez
aquí, voy a tabular, moverlas hacia abajo, escalarlas hacia adentro, ver desde el frente para
posicionarlo correctamente. ¿Quiero piernas cortas?
Sí, las piernas cortas son lindas. Mueva estos hacia arriba. Y haga clic derecho en Shade Auto
Smooth, Controle cuatro, agregue una subdivisión, luego agregue algunos bucles de soporte
aquí y aquí,
e inserte en la parte superior Ni siquiera tengo que
ver lo que estoy haciendo porque sé
que va a funcionar, yo y yo en el fondo. Y agreguemos un
segmento para la rodilla. Entonces haga clic en el medio, Control B, saque esos. Ahora tengo dos nuevos
bucles en los que puedo hacer clic
Alt, hacer clic en Mayús Alt, y biselar ambos
al mismo tiempo y Alt E
extruir caras a lo largo de normales ¿Sabes qué? En este momento, me gusta que va a entrar y luego abultarse
y luego salir. Sí, me gusta. Reflejar hacia el otro lado en
el eje Y, biseccionar Y dale los pies.
¿Qué forma o pies? Mis pies, en este caso, también
serán cilindros. Agrega cilindro, muévalo hacia abajo. Escalarlo en el eje z y
escalarlo en el eje Y
para alargarlos. Escala hacia abajo, ¿qué plano? Algo así como eso. Muévelo sobre X, GX, GZ, para moverlo en la Z, y S para escalarlo GY, OGX para moverlo hacia adelante. Y Control cuatro. Modificador de superficie de subdivisión. Tengo que insertar la parte superior e inferior al mismo
tiempo esta vez, I. Y luego agregar un
bucle de soporte en el medio Eso es un pie.
Tiene que ser más corto. Tab, seleccione todo
Bpressing A, escala con S, X,
y encoja hacia abajo. GX, muévelo. Eso es lindo, y luego espejo. A pesar de que, ¿viste que sigue ahí
el patrón extraño, así que llegó a insertarse una vez
más en la parte superior Lindo. Sin embargo, necesita pies
más gruesos. Entonces pestaña A para seleccionar todo
y luego encoger engordar, alts, espesarlos Y eso es bastante bueno. Ahora, quiero darle un delantal porque
se trata de un robot de cocina. Está trabajando con aceites. Necesita un delantal, y
yo necesito una excusa para agregar algún tipo de ropa solo para mostrar la técnica que le he
mostrado antes. Entonces déjame pasar por y renombrar todo muy rápido y luego agregaré el delantal. Fresco. Tengo que esconder la
cabeza y la boca. Oh. No le cambié el nombre a eso. Boca. Escóndete eso. Mantener el cuello y ocultar
los ojos y las orejas. Bien, bien. Haga clic derecho en
Shade Auto Smooth. Eso no estaba encendido. Entonces seleccionemos las caras que
necesito para el delantal. Así que entra en la pestaña y recuerda, utilicé un
modificador de espejo en esto, es
decir, que solo modelé un lado y se reflejó
hacia el Ahora como que he perdido la
noción de qué lado estaba trabajando y de qué lado
solo soporte bucles. Y si eso alguna vez te
sucede, está bien aplicar
esto como geometría real. Entonces iré a la pequeña
flecha y haré clic en Aplicar. Pero está gris
porque dice que esta operación de modificador
no está permitida desde el modo Editar. Bien, entonces saldré del modo
Editar al modo objeto. Haga clic en la flecha, aplique y vuelva al modo agregado,
y ahora es simétrico. Entonces es un poco
más fácil trabajar con él. ¿Y qué necesito
para el delantal? Seleccionemos esta cara al menos, y esto y esto y esto. Creo que quiero que el delantal
cubra todo el vientre. Entonces esta también, esta parte. Y estas dos esquinas. Y en la parte superior, supongo, puede cruzar como
dos correas aquí. Y abajo del otro
lado, cruzan así. Pero sí quiero un
poco recortado aquí, y no tengo la geometría
para eso. Entonces, ¿qué hago? Bueno, vamos a
traerlo por ahora, y puedo agregar más geometría
al nuevo objeto.
Eso está bien de hacer. Desplaza D para duplicar esta parte y luego
haz clic derecho para moverla de
nuevo a donde estaba, y luego P, separe la selección para obtener un nuevo objeto y luego
tab para salir del modo de edición. Entonces ahora tengo este
nuevo objeto que
se extrae del vientre y
puedo esconder el objeto del vientre. Y solo edita esto. Si entro en tabulación, puedo agregar esa parte de la que
estaba hablando. Control R, agrega un bucle
aquí y un bucle aquí. Agregar un bucle aquí y un bucle aquí, y luego puedo borrar estos, borrar caras, lo que
hace un agujero en él. Y creo que puedo
borrar estos para borrar caras. Sí, está bien. Y de hecho, creo que al
hacer clic en estos, puedo disolverlos,
eliminar Disolver bordes. Disolver solo
los elimina y se vuelve a conectar. Ese tipo de
parece un delantal. Tal vez no necesite esta
parte posterior, haga clic en esto, Control, haga clic en esto para seleccionar todo
entre eliminar pase. Eso es más
parecido. Vamos a mostrar el cuerpo para ver cómo encaja Se ajusta cómodamente como debería. Entonces agreguemos un modificador de
solidificación. Establezca el desplazamiento en uno, para que vaya hacia afuera
y no hacia adentro y solo agregue un poco de grosor
a él. Muy bonito delantal. Yo como que
quiero que sea más redondo en el fondo bajo para
que puedas ver su cuerpo detrás de
ese pequeño bisel Y la razón por la que
no se está mostrando en este momento, permítanme simplemente ocultar la solidificación
en el Viewbard es porque tenemos un bucle de soporte pasando
por aquí y uno por aquí, haciéndolo muy, muy agudo.
Vamos a traer esos. De hecho, tal vez pueda
disolver esto. Vamos a probar eso. Todos dan click en esto, borran
y Disolven bordes. Y sí, está bien. Eso está bien. Entonces
hagamos lo mismo aquí. Alt haga clic, elimine,
disuelva bordes y luego disuelva esto también. Eso lo redondea, y
agreguemos un bucle de soporte, en realidad, para darle
una redondez agradable Y luego encender el solidificar
y tenemos nuestro delantal. Enciende los oídos, los ojos, la cabeza y la boca, y creo que
este es mi personaje.
48. Finalizado. Proyecto de clase 5: separar objetos con espejos: Repasemos y solo
separemos todo lo que
necesito separar para animar esto porque por el
momento,
los brazos son un objeto, las piernas son un objeto Todo lo que está espejado
es un objeto. A ver. No necesito los
ojos y los oídos, esos van a estar
unidos a la cabeza, esos no necesitan
separarse . Esos
no se mueven, de verdad. La boca es un objeto, y quiero que esto
se mueva, así que eso es bueno. El cuello es un objeto. Los hombros, no
necesito los míos para moverme, puede
que necesites los tuyos para moverte, así que ahí podemos ser diferentes. Sin embargo, los brazos, esos
necesitan ser separados. Apliquemos el modificador espejo. Lame el pequeño
desplegable y aplícalo. Eso los convierte a
ambos en objetos. Seleccionemos todo
y seleccionemos y todo, y luego malla, separemos
por partes sueltas. Así que eso nos da dos
objetos separados en modo objeto. E incluso pienso que quizá
quiera rotar las manos. Entonces separemos también
las manos. Seleccionaré ambos y entraré en
la vista frontal y presionaré tabulador para entrar en modo de
edición y luego
entraré en wireframe para
mirar a través de él para poder
seleccionar también los lados traseros, modo de selección de
vértice y
seleccionar todo lo
que pertenece a Yo haré lo mismo por aquí. Y luego P para separar y luego selección separar
sólo la selección. Eso me da una mano separada aquí y una mano separada aquí. Bien, bien, bien. Cambiemos el
nombre de todo. Quizá quiera separar las caderas
del cuerpo. A lo mejor quiero rotar
alrededor de las caderas. Hagamos
lo mismo ahí. Entra en la vista frontal, pestaña, entra en wireframe y
selección de vértice y solo selecciona la parte inferior, P selección
separada Eso me da eso
como una parte separada. Y está abierto, sin embargo. Entonces, si gira, vas a ver dentro de él. Entonces, en realidad, vamos
a cerrar ese agujero. Voy a esconder el cuerpo
y el delantal. Da clic en esto y
entra en modo Editar, y solo necesito
cerrar este agujero. Entonces seleccionaré todos
estos bordes en este lado, y luego lo mismo aquí. Y voy a tomar estos bordes, también. Y ve a enfrentar y llenar. Llena todo.
Y eso es bueno. Y tal vez le haga lo mismo
al cuerpo sólo porque
soy completionista Tab, yo alt hago click
en esto, en realidad, que selecciona todo el
anillo y voy a la cara, rellena. Voy a separar las piernas. Tab, demasiado pronto, sólo
puedo seleccionar esta parte
y esta parte no es real, ir aquí
al espejo, aplicar,
pestaña, seleccionar todo con A,
P, separados por partes sueltas. Eso me da estos dos
objetos separados y
lo mismo con los pies. Aplica la pestaña P por partes sueltas. Y si necesitaba que
las piernas se doblaran, también necesitaría
separar estas en tres segmentos separados. Pero en mi caso,
no van a doblarse. Y una vez que termine con todo eso, puedo hacer una captura de pantalla de mi modelo
así y publicarla la sección de tareas,
y estoy muy contenta. Creo que este es un chiquito
lindo.
49. Trabajar con múltiples materiales: Es posible que desee agregar diferentes materiales a
diferentes áreas de su objeto. ¿Eso es posible?
Por supuesto, es posible. Todo es posible en
tres D. Así que la forma de
hacerlo es primero tienes que
ir a la pestaña Material, agregar dos nuevos materiales. Voy a hacer clic en Nuevo. Y eso
agrega mi primer material, y luego haré clic en
el pequeño plus
aquí arriba para agregar una nueva ranura de material. Simplemente agrega un espacio para que el
objeto sostenga el material, pero aún no hay
material aquí. Para agregar uno, o bien
tenemos que elegir un
material que ya existe del menú desplegable o hacer clic en Nuevo para agregar
un nuevo material. Y el primero
que puede ser piel, en este caso, y a lo mejor
quiero un
material diferente en los ojos. Por lo que la piel puede ser de un color marrón oscuro. Los ojos pueden ser un vacío espeluznante completamente
negro. Ahora, en mi objeto, tengo un
modificador de superficie de subdivisión que lo suaviza Entonces, si escondo eso, es un
poco más fácil si lo
arrojo plano para ver la malla
real en la que estoy trabajando. Otra cosa que
puedes hacer en realidad, en lugar de apagar esto
cada vez que quieras editar, es que puedes apagar la
cajita al lado,
que la desactiva
cuando está en modo de edición Entonces, si voy ahora al modo de edición, se
puede ver tanto
la versión
lisa la
versión no subdividida, la malla real Si apago esto, entonces al entrar en modo Editar
se oculta la versión suave, lo que me permite editar
la malla original, lo cual es muy útil. W en modo edición, iré al modo de selección de
fase y
seleccionaré una fase en cada I y luego iré a
seleccionar Linked Linked, que selecciona todo lo
que está unido a eso. Como los ojos son elementos
separados, no
son objetos separados, siguen en
el mismo objeto, pero no están
conectados a nada, es
decir, son elementos
separados, eso selecciona todo el I. Oh, vamos al material, y para poder ver
lo que estamos haciendo,
entremos al modo de vista previa de material en el puerto de vista. Y eso lo podemos ver. Bueno, antes nada, está parpadeando un poco Eso es solo porque
estoy en modo edición, pero en cualquier caso, todo
mi objeto tiene
el material skin, y para agregar los ojos, solo
tengo que seleccionar esta malla, hacer clic en los ojos,
y hacer clic en una señal. Ahora cuando salgo del modo Edición, se
puede ver que los ojos tienen un material negro y espeluznante
separado Ahora bien, vale la pena volver a
repasar solo los diferentes
modos de selección que hemos aprendido. Entonces sabemos que al hacer clic en
una cara y luego cambiar al hacer clic en otra
nos permite seleccionar más caras. También sabemos que al hacer clic en
una cara y Control o comando al hacer clic en una
lejana se selecciona una
línea completa entre ellas. Aún no te he mostrado
es que también puedes seleccionar un área rectangular
de la malla haciendo clic en una esquina del rectángulo
y manteniendo tanto control o comando y mayúsculas y
haciendo clic en otra. Y eso selecciona una
selección rectangular sobre eso. También sabemos que con
esta herramienta seleccionada, la herramienta de cuadro de selección seleccionada, podemos seleccionar una caja. Pero eso no va a seleccionar la
parte trasera sólo lo que vemos. Entonces, si queremos
seleccionar la parte trasera, tenemos que entrar en la vista
wireframe, y luego podemos arrastrar una caja y seleccionar todos los lados del mono Eso es útil para
seleccionar cosas. Y además, no lo hemos
usado mucho. Pero ahí está la herramienta de selección de
círculo, que prefiero accediendo
usando el atajo C, que me da el círculo
pequeño. Y cuando haces eso
con el atajo, puedes desplazarte
hacia afuera para aumentar el tamaño de ese círculo y
luego pintar tu selección. Después haz clic derecho para Cancelar
para que pueda moverme. Si no lo hubiera hecho,
entonces al hacer clic en la rueda del mouse
eliminaría la selección. Esto, sin embargo, es un
poco diferente si
seleccionas la herramienta,
si seleccionas la herramienta, entonces puedes moverte
usando la rueda de desplazamiento, y tienes que hacer clic y luego desplazarte
para aumentar el tamaño. Y para poder eliminar
de esa selección, tienes que subir aquí y dar
click en modo restar Zano puede agregar diferentes materiales a la misma malla, muy útil.
50. Sombreado avanzado: Haz una inmersión profunda en los materiales porque hay un par de deslizadores
más que
debes saber a la hora de hacer
modelado de personajes porque puedes hacer casi todos los materiales con los valores que te he mostrado, solo el color metálico
y la rugosidad y al menos si también
usas el sombreador de vidrio Pero hay tres cosas más como
algo avanzadas, y esas pueden ayudarte a lograr un par de materiales más que
quiero mostrarte ahora. Y para ello, tengo algunos objetos de aspecto
interesante. Entra en modo renderizado. Y se puede ver que he
configurado una imagen HDR1. Este es uno que he
encontrado en línea con una fuente de luz fuerte
para mostrar estos ejemplos. Y el primero, ese es
este objeto de aquí mismo, y ese es un oído. Porque lo que
vamos a hacer en éste es agregar dispersión subsuperficial, y eso es lo que se
puede ver en mi oído Cuando estoy de nuevo iluminado por el sol, empiezan a brillar un poco, como la luz entra en el
oído y se mezcla alrededor En mi carne, lamento
ponerme desagradable por un momento. Y entonces la luz
sale con un color, y eso se llama dispersión
subsuperficial, y podemos hacerlo
con un material Entonces vayamos a la
pestaña de material y agreguemos un material a esto y bajemos al subsuelo Estos son los ajustes
para el subsuelo. Entonces, para configurar esto, primero
vamos a
acercarnos a mi piel con esto. Entonces le voy a dar un color que se
acerque al color de mi piel, que tiene que ser
muy pálido, en efecto. Y luego disminuir un
poco
la rugosidad para hacerme
un poco más sudoroso Entonces voy a bajar al
subsuelo aquí y voy a aumentar el peso
0-1. Eso quiere decir que está encendido. Puedes hacer medio encendido, medio apagado, pero en general, mantenlo completamente encendido si
quieres mantenerlo encendido. No podemos ver una gran
diferencia aquí. La razón de ello
es porque la escala es muy pequeña y
esta oreja es muy grande. Si voy a la herramienta de medida aquí y arrastre de
arriba a abajo, podemos ver que mi oreja
mide 1.5 metros de altura, y eso quiere decir que
voy a tener que salir de los valores regulares
para el subsuelo Aumentaré la
escala de 0.05, lo que tendría sentido para un oído realísticamente escalado,
y eso es mucho mejor Ahora bien, si miro la oreja desde atrás y dejo pasar el
sol por ella, podemos ver que se ilumina. Déjame apagar eso para que veas
cómo se veía
antes y luego
¿qué tan genial es eso? Ahora, todo en el
subsuelo está configurado para imitar la piel porque ese es el caso de uso más
común para Y el radio es
uno de esos ejemplos. Entonces el radio consta
de tres valores. Esos son rojos, verdes y azules, y esa es la cantidad de
cada color que se dispersa. Ahora bien, estos valores
corresponden a piel. Si estás haciendo
otra cosa que no sea skin, debes hacer clic en la parte superior, arrastrar hacia abajo para seleccionar todas
y configurarlas todas en una. Eso solo hace que el
subsuelo sea blanco. Entonces, para la mayoría de los otros casos de uso, solo hazlo blanco, y
puedes comenzar a mezclar. Como si no hago verde, solo cero sobre el verde, entonces
se va a poner morado, ¿verdad? Y puedes empezar a jugar
básicamente con valores RGB aquí. Pero en general, sí, apégate a uno o al color de la piel. Y meterse con la báscula
hasta que estés feliz. En mi caso, necesitaba
algo así como cuatro. Si lo pongo en uno, entonces
va a ser menos prominente. Ahora bien, no todo el mundo
va a querer usar el subsuelo porque el subsuelo tarda mucho en renderizarse puede ver que es muy ruidoso comparado con todos
mis otros objetos. Especialmente puedes
ver que si voy a mi configuración de render y
paso de GPU a CPU, que es más lento en mi sistema, puedes ver que este
objeto izquierdo se resuelve mucho
más rápido que el correcto. Así que el subsuelo es
notoriamente lento de renderizar. Entonces es algo prohibitivo
para algunos proyectos. Pero si puedes, entonces puede agregar vivacidad a tu objeto Así que usa esto para la piel, úsalo para plástico translúcido
como legos, gran deslizador El siguiente por el que quiero
pasar es el valor del brillo. Y para eso, aquí tengo
un objeto de tela. Entonces iremos a su
material y agregaremos una nueva. Y para prepararme para esto,
quiero hacer algo así
como un color denim. Así que haz ese tipo de
verde azulado y bastante oscuro. H. Y luego agregarle algo de
rugosidad. El denim no es muy brillante. Ahora por el momento, parece
un poco plástico. Parece plástico rugoso. La razón por la que podemos
distinguir las telas de los plásticos es porque
a lo largo del borde aquí, se
puede ver que las telas se
iluminan un poco. que captan la luz, y eso es por las
pequeñas fibras o pelos que sobresalen, y esos captan la luz. Y puedes simular eso
con el valor shen. Abajo en el material,
aquí está el brillo. Y a medida que aumente eso, mira. borde del material se ilumina, y eso es aún más
prominente si es luz de fondo. Yo esto es sin
brillo, con brillo. Aumentarlo al máximo hace
que se vea más como terciopelo. Si hago más como 0.2 0.3,
eso es más como mezclilla. Y además, puedes meterse
con el valor de rugosidad. Si eso es bajo, entonces ves que
encoge el efecto, y si es alto, entonces
crece el efecto Puedes afinar eso,
afinar el peso. Incluso podrías hacer tinte
metiendo con el tinte, eso te dará
algunos efectos chiflados Puedo darle un
brillo verde a su alrededor, y eso no es realista, pero puede ser divertido para
algunos materiales Entonces esa gallina, muy
buena para telas. Y por último pero no menos importante, he construido una antorcha, y eso es para demostrar
el valor emisivo Entonces agreguemos un nuevo
material, y de hecho, agreguemos otro material nuevo porque quiero que este
último sea emisivo Y quiero agregar
eso solo a la cima. Así que déjame entrar en modo Editar, y voy a entrar en modo de selección de
cara y Alt haga clic en este anillo y Mayús Alt haga clic en
esto y esto
y esto y esto y subir
y subir y el último. Oh, eso no funcionó. Entonces usemos
la herramienta de selección de círculo. Y con el modo de agregar
seleccionado, haga clic en. Después ir al material emisivo y asignarlo
a la selección No pasa nada porque los
materiales son idénticos, pero hagamos que algo
suceda bajando a la emisión y
subiendo la fuerza. Para, hagamos diez.
Ahora se enciende. Y no sólo lo hace, se ilumina por sí mismo, ilumina el
mundo que le rodea. Entonces, si muevo esto con G, lo
agarra y lo muevo
a la tela, y voy a darle la vuelta a esto hasta 100 para
que podamos ver esto de verdad. Se puede ver que esto incluso ilumina todo a su alrededor. Entonces es como si se hubiera
convertido en una luz. Y a diferencia de una luz, puedes asignarla a solo una
parte de un objeto. Y eso es muy genial. Podemos hacer eso más
de una antorcha de color fuego, como un oscuro, así.
Eso es interesante. Veamos cómo juega eso
con el subsuelo. Pongamos esto de este lado. Mira eso.
Incluso podemos ver el subsuelo Entonces esos son tres valores
interesantes con los que puedes jugar en un material. Tienes la dispersión del
subsuelo piel y
para los plásticos Tienes brillo para las telas, y luego tienes una misiva
para las cosas que
51. Proyecto de clase 6: sombreado de personajes: Bien, tiempo de sombreado. Clase Proyecto seis. Ahora que has modelado a
tu personaje, es momento de
darle vida con materiales El cliente quiere que la
mascota se sienta amable, sencilla y acorde
con su marca Ustedes saben esto.
Siempre apegarse a la marca. Usa materiales para diferenciar
partes como piel, pelaje, ropa, ojos
y cualquier accesorio. Piensa en rugosidad, acentos
metálicos y cómo crear contrastes
interesantes Y también recuerda lo que has
aprendido sobre la
dispersión del subsuelo para
piel y plásticos Máquina para tela y emisión para cualquier cosa
que brille Requisitos
revisar regularmente sus materiales con un renderizado de ciclos. Se te permite usar EV
cuando trabajas en esto. Algunas computadoras tienen que hacerlo porque los ciclos simplemente
no son factibles, pero debes
registrarte regularmente los ciclos porque el render
final está en ciclos y es una buena idea
registrarte allí ocasionalmente mientras
trabajas para que no cometas ningún error enorme que se
muestre en el render final. Utilice un HDDI al renderizar. No te preocupes por la
iluminación avanzada en esta etapa. Solo encuentra un HDDI que te guste. Es posible que desee construir
un pequeño telón de fondo, solo un color uniforme que
realmente pueda ayudar con la legibilidad Los entregables renderizan
a tu personaje con ciclos. No aceptaré renders EV,
no para este proyecto. Guárdela como PNG o JPEG, subirla a la sección de proyectos de clase o asignación
de este sitio web. Y si quieres, puedes
compartirlo en Instagram, etiquetar al traer tu propio Laptop. El grupo de Facebook está aquí y los
grupos de LinkedIn aquí mismo. Obtenga estos enlaces en el documento de la guía del
proyecto.
52. Terminado, proyecto de clase 06: prepara tu personaje: Terminemos este personaje. Le daremos algo de
material, algo de color, y lo llevaremos al escenario
donde podamos comenzar a
mostrarle esto a gente orgullosamente mostrando a la
gente este modelo gris. No tan genial como mostrar algo que es como un activo final
terminado. Lo primero que tenemos que
hacer es decidir, ¿queremos trabajar en
modo renderizado o modo de previsualización de material? Las dos bolas de la
derecha en esta línea porque quiero trabajar
en modo renderizado. El modo renderizado es lo que
vamos a hacer. Al final, vamos
a renderizar nuestro personaje. Sin embargo, trabajar
en modo renderizado no
es muy divertido en
un sistema más lento. Entonces puedo hacerlo porque
tengo una GPU muy rápida. Puedo trabajar
en modo renderizado. No todos pueden,
y eso está bien. Por eso tenemos el modo de previsualización de
material. Así que el modo de vista previa del material
funciona en tiempo real. Utiliza el motor de renderizado EV, que es un
motor de renderizado en tiempo real. En la ventana gráfica Aunque hayas seleccionado
ciclos como el motor de rasgado, lo cual voy a hacer ahora, iré
a ciclos y encenderé la GPU Y cuando vaya al modo de previsualización de
material va a poner en marcha IV, y estoy mirando a mi
personaje a través de EV. Va a dar una
vista previa de tus materiales. No exactamente de la misma manera que
van a verse en
modo renderizado, sino bastante cerca. Entonces trabajar así
es como la mayoría de la gente, supongo
que tendría que hacerlo. Yo, sin embargo,
voy a presumir mi sistema y activar el
modo renderizado y trabajar así. Ahora, está muy oscuro porque no tengo
iluminación en mi escena. Entonces abramos una nueva ventana, vayamos al editor de sombreadores, y volvamos de
objeto a mundo Entonces estoy cambiando
el shader del mundo. Y aquí, voy a
añadir una imagen HDCI. Agregamos una textura
ambiente ENV. Aquí, sólo voy a abrir
mi navegador de archivos. Y creo que probablemente voy
a difuminar esto. Es decir, no sé por qué la
gente lo difumina exactamente, pero me temo que
tal vez algunos de ustedes los técnicos por ahí puedan
hackearme o algo así, si pueden ver mis
datos. No lo sé. Vamos por esta. Este es un HDRI que descargué
de Internet Y tiene una fuerte iluminación
desde un lado, que me gusta. hora de hacer sombreado,
me gusta usar una iluminación fuerte y
dura porque me
permite ver los
detalles de la superficie con más facilidad Si es suave, quiero decir, puede
ser más
estéticamente agradable, pero es más difícil contar pequeños detalles porque,
lo suaviza Entonces la luz
viene de atrás. Déjame cerrar esto.
La luz viene de atrás, y eso no es lo mejor. No quiero trabajar
en el lado de la sombra, así que necesito rotar a
mi personaje. Sin embargo, girarlo puede
crear algunos problemas. Entonces, si selecciono
todo mi personaje y presiono R y Z para
rotar sobre la Z, y luego escribo 90, 90 grados, presiono return, entonces
efectivamente gira. Sin embargo, gira alrededor
del punto medio de su cuerpo, y el punto medio
del cuerpo está aquí. El punto medio de la cabeza
es como aquí, probablemente. Por lo que promedia y gira alrededor de la
parte frontal del cuello. decir, si quiero
seguir trabajando en este tipo, ahora
va a estar desconcentrado. Al igual que, no está exactamente en
medio de la línea verde. Entonces mientras estamos
trabajando en el tipo, trata de no hacer esto. Trate de no rotar al tipo
sin volver a centrarlo. Y la manera de hacerlo es,
voy a deshacer hacer todo mi dibujo,
traerlo de vuelta ahí. Y voy a ir por aquí a
este pequeño eslabón de la cadena. ¿Y aquí es donde
giramos alrededor? Podemos rotar alrededor de un
montón de cosas diferentes. Por el momento, sólo lo
giraremos a tres D cursor. El cursor de tres D es este tipo de boya de vida
en medio de la escena Este fue el medio
cuando modele esto, y todavía va
a ser el medio Esta es la mitad
de toda la escena. Así que vamos a rotar alrededor de eso. Entonces presionaré R y
Z y 90 otra vez. Y ahora cuando lo
miramos desde arriba, en realidad
está en el
medio. Eso de vuelta. Y entonces quiero otro
trasfondo para él. Este es un
trasfondo que distrae, y quiero
poder ver lo que estoy haciendo en el contexto adecuado Entonces cambiaré A, agregaré una Z simple para moverla hacia abajo,
y luego escalarla. Hagámoslo en modo edición. Escalar un modo objeto siempre
es un poco dudoso. Entonces presiona S y arrástralo hacia afuera. Para darle una palabra para pararse. Y luego solo para la parte posterior, presionemos dos para seleccionar
aristas y seleccionar esta
arista y esta arista y E Z para extruir sobre el eje z
y conseguirle un telón Luego suavizaré el telón de fondo
seleccionando estos bordes, Control B para
biselar y arrastrarlo hacia afuera y desplazarme hacia
arriba para agregar algunos segmentos, y eso suaviza
el telón de fondo y luego haré
clic derecho Ahora tengo un bonito, bonito,
parejo fondo en el que trabajar. Y le voy a dar un color a eso. Entonces iré al material, agregaré uno nuevo, lo volveré a llamar. Quiero trabajar en el contexto en el que se
va a mostrar. Tengo que decidir qué tipo de antecedentes quiero ponerle
a este tipo. Yo solo tipo de
color de fondo verde para la botella. Entonces a lo mejor voy a agregar ese
mismo color de fondo para este tipo para que pueda
colocarlos en la misma escena, y sé que va a
funcionar. Entonces hagámoslo. Vamos a darle un
color verdoso. Uno ligeramente oscuro. Si realmente me importara esto, volvería a probar el color exacto que
ya usé, pero solo lo haré de memoria. Fue algo
así, creo. Y luego
aumentemos la rugosidad para deshacernos de ese brillo
en el fondo Fue así, pero
vamos a aumentar eso, hacerlo mate, y este es
un buen lugar para trabajar.
53. Terminado. Proyecto de clase 06: sombreado de tu personaje: Empezar con, como, el material principal que
quiero a través de la mayor parte del chico. Y siento que debería
ser una especie de plástico. Me recuerda a un
pequeño robot de juguete y no
quiero hacerle metal. Quiero hacerle plástico, y quiero que se
vea pequeño y lindo. Así que vamos a hacer clic en la cabeza en un nuevo material y llamarlo principal. No me gusta nombrar
materiales según el color que tienen y pocas veces después de
la materialidad del mismo, así que no lo nombro verde y
no lo llamo plástico Lo nombro principal porque entonces si alguna vez vuelvo y lo cambio, siempre va a ser
el material principal, pero si se llama metal
verde y luego lo hago en plástico
negro después, entonces eso va a ser incómodo. Entonces solo lo llamaré principal. Y seleccionemos un color que vibre bien
con un fondo inmediato voy a, como, rojo porque ese es el
color de mi aceite de chile. Creo que ese tipo de obras.
¿Y un amarillo? Sí, pero
no es exactamente la vibra que buscaba en
mi esquema de color anterior. ¿Sabes qué?
Simplemente decidí que ya te
enseñé a traer imágenes, así que traeré ese
render como referencia. Shift agregan una imagen. En este caso, en realidad podemos
agregar una imagen de referencia. No necesitamos un plano de malla. Un avión de malla recogerá la
iluminación de la escena. Una imagen de referencia no lo hará. Entonces puedo abrir esa
imagen que rendericé antes y
acercarme mucho más, mira, mira eso. El color de mi
fondo estaba muy apagado. Vamos a acercarlo
a donde estaba. Fue más así. Y
luego el color del aceite. Eso es de
color rojo más profundo. Más como esto. ¿Estás gritando a
tu monitor ahora mismo? ¿Estás gritando que aquí
hay un cuentagotas? ¿Por qué no simplemente hacer clic en
el cuentagotas? Debería haber explicado esto,
pero voy a hacerlo ahora. Generalmente me mantengo alejado del cuentagotas cuando
trabajo en tres D, y hay un par
de razones para ello Vamos a usarlo ahora
para ver qué pasa. Si hago clic en el cuentagotas,
y luego hago clic en el rojo. No muestra,
y eso es porque una imagen de referencia no está en
realidad en la escena de las tres
D per se. Es como una pantalla
superpuesta. Y por lo tanto, acabamos de muestrear el suelo justo detrás de él. Pero eliminemos eso y,
en su lugar, agreguemos un plano de malla de imagen. Ahora se agrega como una malla real en la escena de las tres D. Pero
fíjense en lo que pasó. Ahora también se ve afectado por
las luces, y ahora mismo está
en la sombra, es
decir, que si lo probamos, no va a
ser el color verdadero. Va a ser
algún color modificado, que tampoco es lo que queremos, aunque ahora el
muestreo va a funcionar. Pero vamos a
tener el color equivocado. Esto no está bien. Bien,
hay una tercera opción, y esta es la mejor si
realmente necesitas probar un color. Y es decir, se puede
abrir una nueva ventana, abrir un editor de imágenes. Y aquí puedes abrir la imagen, o ya la he importado para poder encontrarla
en el desplegable. Aquí está la imagen sin modificación de
iluminación, y aquí puedo muestrear
el color exacto. Pero sigue siendo raro por
un par de razones. Uno, este es ese fondo
verde refractado a través del rojo, lo que
significa que no es el rojo puro También en esta vista de tres D, todavía la
estamos
iluminando, lo que
significa que este color
se ve diferente este color y por
todas estas cosas, a
este color y por
todas estas cosas,
cada vez que quiero seleccionar
un color en tres D, lo
veo porque
acabo de aprender que con el tiempo, que
significa que este color
se ve diferente a
este color y por
todas estas cosas,
cada vez que quiero seleccionar
un color en tres D, lo
veo porque
acabo de aprender que con el tiempo, el globo ocular es la forma más rápida de llegar
al Y ahora podemos simplemente
mover esto a un lado. Sólo vamos a esconderlo
en el outliner. Haz clic en el ícono del ojo
y los chicos se van. Entonces, para este material, trabajemos en su materialidad. No solo trabajamos en color, también
trabajamos en estos otros
deslizadores Entonces la rugosidad
creo que tal vez una
superficie brillante puede ser divertida, y luego quiero agregarle
algo de subsuelo subsuelo es bueno para
la piel y para los plásticos, cualquier material translúcido, y es más visible
en la iluminación posterior Así que me voy a mover hacia
atrás para poder verlo con la iluminación trasera
encendida y subir el peso a uno. Aquí no es visible porque estoy trabajando
a gran escala. El tipo es probablemente muy
grande. Vamos a medirlo. La cabeza en sí es,
sí, de unos 2 metros, así que definitivamente necesito
aumentar la escala
del subsuelo, digamos a tal vez 1 metro. Es bonito. Eso agrega algo de translucidez. Y cambiemos
el radio porque ahora
es un valor skin, y vamos a cambiarlo solo por uno. Generalmente buena idea para un
plástico. Entonces veamos eso. Eso es antes y después. Antes y Después. Así como una suavidad y un juguete como uno.
Veamos de hecho. Al igual que si en cambio
aumentara la rugosidad, una mayor rugosidad
con un montón de subsuelo también
es bastante hermosa Me recuerda más al caucho. ¿Y sabes qué? Me
gusta mucho esa estética para esto. Así que agreguemos ese material
a otras partes también. Vamos a agregarlo a las orejas. Y al cuerpo. A los brazos, piernas y para las
otras partes aquí, quiero un color de acento
o un material de acento. Vamos a agregar un nuevo material a los hombros o ¿dónde
quiero trabajar en esto? A lo mejor quiero trabajar en ello en la boca
porque está más expuesto, más fácil ver lo que estoy haciendo. Este nuevo será acento. Y muchas veces,
siento que hacer un contraste en la
rugosidad puede ser A lo mejor voy a hacer un
material brillante para esto y hacerlo como un color
negruzco oscuro El brillo de Zalmat juega
contra la aspereza. Ese es un contraste muy agradable, pero en algunos casos, tal vez debería ser similar, lo que lo hace aún más
amigable en este caso. Comprobemos el subsuelo
en esto también, pongamos los radios en uno
y subamos el peso, y luego la báscula
a uno también Eso es antes y después. En realidad no puedo ver
ninguna diferencia en esto, probablemente porque está muy oscuro. Entonces voy a apagarlo. Tenerlo solo aumenta el tiempo de renderizado innecesariamente Entonces, en general, mantenlo
apagado si no lo necesitas. Pero voy a añadir este material
al cuello, también. Acento. Siempre puedo volver atrás y cambiar la forma en que se ve
una vez que está en todas partes. Realmente me gusta simplemente esparcir mis materiales por todas partes antes empezar a refinarlos porque entonces llego a
verlos en contexto Y definitivamente necesito este material de
acento más lugares. Así que vamos a agregarlo a. Empecemos por la parte superior
aquí y lo agreguemos
al anillo que une
la oreja a la cabeza. Puedo abrir un nuevo editor, un editor de tres D que es gris, y puedo trabajar en este mientras veo lo que estoy haciendo
en este izquierdo. Así que vayamos a tab en
modo Edit y seleccionemos este anillo, y luego puedo hacer crecer mi selección con select más o menos. Puedes ver el atajo para
eso es Control Numpad plus. Eso solo amplía la selección. Y expandirla una vez más, Control plus en el numpad Y de hecho, vamos a esconder
la cabeza un rato,
solo para asegurarnos de que he
seleccionado todo en este lado, y no lo he hecho. Entonces, seleccionemos este anillo dos con Mayús Alt y hagamos clic aquí, y luego haga clic aquí para
agregarlo a la selección. Alt era seleccionar un cambio de
anillo es agregar, y luego voy a agregar un
nuevo material a esto. Necesito otra ranura de
material aquí para poder tener dos
materiales, agregar una ranura. Y luego en esta ranura, voy
en el menú desplegable, seleccionaré el
material de acento que hice y luego lo asignaré a
esta parte de la malla. Entonces puedo destapar la cabeza
y ver cómo se ve. Por suerte para mí, el error se
reflejó al otro lado, así que no tuve que hacer el trabajo doble, y eso me gusta Así que hagámoslo al
hombro también. Entra en pestaña, selecciona
la cara superior, y luego solo Control
plus y
expándela hasta que haya bajado hasta
la parte inferior del hombro. Agrega una nueva ranura ahí, pondré el
color de acento y lo asignaré. Eso se ve bien. Haz lo
mismo del otro lado. Tab, presiona la parte superior
más más más más más más y firma el acento. Y hagámoslo por
las rodillas, también. Genial. Ahora para los ojos, empecemos realmente con el color de acento solo para
separarlo del resto. Y luego como es un robot, realmente
me gustaría que
estos brillaran, pero tengo la sensación de que
si brillan en el medio, se verá un poco
loco. Vamos a probarlo. Agreguemos un nuevo material
llamado emisivo. Y aquí dentro, solo voy a agregar
algunas emisiones de fuerza, digamos cinco por ahora, y seleccionaré esto. Vamos a hacer el color de
fondo verde y
entrar en la pestaña y asignarlo
al centro. Haga clic en emisivo y asigne. Y sí. Sí,
definitivamente se ve loco. No sólo eso, el
centro tiene una estrella, y eso se debe a que
el modificador del subsuelo trabaja en esa cara final ahí dentro Si quisiera, podría
insertarlo una vez más, y eso me
desharía de esa estrella Pero sí se ve bastante
espeluznante en este punto. Entonces, no hagamos eso.
En su lugar, agreguemos el emisor al anillo por aquí y luego un poco de
negro brillante al centro Entonces Alt haga clic en este anillo
y desplace Alt haga clic en este anillo y asigne el
emisor a eso en su lugar Y agreguemos un nuevo material, que será negro. Y va sin rugosidad. La razón por la que quiero ir
completamente negra es que tu pupila es un agujero oscuro, así que en realidad puede ir
a negro completo Entonces hagamos clic en este
polígono central y luego Control plus en el numpad para
aumentarlo hasta que sea toda esa sección, y agreguemos este material, que aún no he
dado nombre Voy a llamar a este alumno. Eso es mucho más lindo,
mucho, mucho más lindo, aunque se siente como si estuviera realmente asustado o
sorprendido o Cambiemos eso. Es decir, se
te permite
comenzar a cambiar el modelo
una vez que estés en esta etapa. Nunca sientas que
solo necesitas agregar materiales una vez
que hayas llegado a esta etapa. Cuando veas los materiales, puedes tomar decisiones más
informadas sobre otras cosas como tal vez dónde están los alumnos. Y
eso es lo que voy a hacer. Así que voy a entrar en la pestaña y solo seleccionar a los
alumnos así. Míralo desde el frente haciendo clic en el Gizmo aquí arriba, y luego lo haré, veamos Vamos a escalarlo hacia abajo. S para
escalarlo y bajarlo un poco, y luego lo moveré con G. Por aquí. Eso es un
poco más lindo. Vamos a moverlo aún más. Eso es mejor. Y
entonces ¿sabes qué? ¿No
sería divertido que pareciera que llevaba gafas?
Hagámoslo. Cambiemos A, agreguemos
una malla, una esfera UV, y en modo edición, moveré esto porque quiero
duplicarlo más adelante, y necesito que el origen
esté en el medio. Entonces lo voy a mover en modo de edición y solo G, moverlo por aquí, S para escalarlo, GY, moverlo sobre el eje Y. Y solo quiero llenar el I.
Y luego voy a hacer clic derecho
y sombra suave para que
sea menos facetado y
agregar un modificador de espejo. Mir en el g.
Eso es correcto. Está reflejado, y
luego agrega un material, uno nuevo, llamaré a este vidrio y lo
convertiré en un sombreador de vidrio Ahora mismo, está esmerilado. Frosted no es lo que quiero, así que vamos a disminuir la rugosidad
a algo cercano a cero De hecho puedo ir a cero para esto. Y ahora se ve
aún más tonto. Eso es hilarante. Sabes, eso realmente me gusta. Pero por el color
de la emisión, no
estoy seguro de que me guste
eso, en realidad. Entonces vayamos al emissivo
y miremos el color. Aumentemos el valor a
Max para que quede realmente
claramente resplandeciente, y luego tal vez disminuya la fuerza para que
podamos ver el color Incrementa la
saturación, quizás, luego vuelve a aumentar la
fuerza. A ver si eso me queda mejor. ¿Qué pasa si hago
20 aquí solo para ver? Oh, puedo ver
que pasan dos cosas. Entonces una cosa es
que me gusta. Entonces tal vez
lo baje a diez, pero te voy a mostrar la
otra cosa que noté, y es que le está iluminando la
cara. ¿Puedes ver eso? Se puede ver alrededor de los ojos. Le está agregando brillo a la cara. Entonces, si lo apago,
se ve así. Y si lo enciendo,
se ve así. El motivo de eso
es fascinante. Es por la
forma en que modele esto. Los ojos entran en su cabeza, es
decir, ese lado resplandeciente, este lado en realidad está
brillando en sí mismo, y luego no está golpeando su pared posterior, está
golpeando primero la cara, y luego se
dispersa por el
subsuelo dispersándose en la
cara, lo cual es subsuelo dispersándose en la
cara Y la manera de arreglarlo, porque realidad no
me gusta
su aspecto, es simplemente llevar
esta parte trasera de los ojos hacia afuera
para poder bloquear la iluminación Entonces si presiono tabulador
para editar el ojo, y luego puedo ocultar la
cabeza mientras selecciono. Voy a tener que arreglar este
lado, las formas de estrella. Recuerdas cómo
hacer eso con yo recuadro, y luego tendré que
hacerlo una vez más Puedo ver a la
derecha que sigue ahí. Ahí vamos. Y luego Control plus y plus para seleccionar
toda la parte trasera Y tal vez probablemente necesite adelantar esta parte también. Entonces hagámoslo más una vez más. Y luego voy a mostrar la cabeza para que pueda moverme en contexto
y ver lo que estoy haciendo G, para mover Y para
limitarlo al eje Y, y luego moverlo hacia adelante
hasta que en este punto, puedo ver que esta primera línea está golpeando la otra línea y no quiero
moverla allá allá Entonces presionemos ahí y luego controlemos menos para
reducir la selección, y ahora solo he
seleccionado la parte posterior, y ahora puedo moverla hacia adelante. Entonces GY, muévelo hacia adelante hasta que
pueda acercar
el zoom en el lado izquierdo y
asegurarme de
guardarlo lo más lejos que pueda
sin que se encienda. Se puede ver que a
medida que lo muevo, pronto estalla y ya
no se enciende. Genial. Eso soluciona ese problema. Y luego para el
delantal, veamos. Intentemos solo
material de acento y veamos cómo se ve
eso. Quiero decir, es lindo, pero siento que está cubriendo
demasiado, ¿no? Cambiemos ese modelo también. Pasemos al modo de edición. Y como esto se hace
usando un modificador, es muy fácil de cambiar, pero voy a ocultar el
modificador en modo de edición. Entonces aquí dentro, iré
a la solidificación y luego la apagaré en modo
edición para que pueda
ver lo que estoy haciendo Pero mantendré el modificador de superficie de
subdivisión en modo Edición para poder ver
la forma en que se curva Y con este bucle seleccionado, presionemos G dos veces
para deslizarlo en bucle. Eso es lo mismo que esta herramienta. Y luego simplemente deslízalo hacia arriba. Y luego haré lo mismo
con este bucle, lo deslizaré hacia arriba. Cubre tal vez solo la
mitad del torso. Sí, eso me parece mejor. Y ahora que todo está
básicamente donde lo quiero, volvamos a la
primera decisión que tomamos, que fue el material principal, y cambiemos eso para que ahora se ajuste a todo
el contexto porque
siento que a lo mejor ahora está
un poco demasiado oscuro. A lo mejor quiero que contraste aún más
con el negro. Entonces intentaré simplemente aumentar el valor para ello, que
es el brillo. Y siento que eso
va por el camino correcto. Se siente más brillante, más como
juguete, y eso me gusta. Veamos qué tan grande de escala
quiero en el subsuelo. Ahora veo que al parecer escribí el número equivocado
cuando lo hice antes. Estoy bastante seguro de que
intenté escribir uno, ¿no? Y entonces probablemente me
lo perdí y escribí cuatro en su lugar. Volvamos a uno, y
ahora es un poco menos intenso. Veamos aquí. En la
parte posterior, es claramente visible. Se puede ver en el brazo
que se está iluminando. A ver eso. Eso es sin
subsuelo y luego con Entonces claramente está haciendo algo, pero no es tan
visible desde el frente. Tal vez aumentar la escala a
dos. Que campos bastante buenos.
54. Terminado. Proyecto de clase 06: renderización de tu personaje: Vamos a configurar un render
preliminar solo para poder
compartirlo de la mejor manera posible. Lo que podemos hacer es
desplazar A en una cámara donde pueda restablecer todos los valores de rotación
porque a medida que lo agrego, está apuntando en la
dirección donde lo agrego. Simplemente eliminaré todos los datos
de rotación escribiendo cero para cada valor de
rotación y luego G,
Y, lo muevo por aquí, y luego puedo
girarlo como RX 90, presionar Retorno y luego R
Z 180 para darle la vuelta. Y luego en esta
ventana, haré clic el botón de la cámara para
entrar en la cámara, y luego la voy a mover hacia atrás y tal vez esta debería
ser una imagen cuadrada. Entonces iré a la pestaña de salida del
archivo y
escribo 1080 tanto para X como para Y, y luego volveré a acercar
la cámara. ¿Cuál quiero que sea la
distancia focal? Solo vamos a acercarlo
. Y luego GZ, muévelo un poco hacia abajo Vamos a limpiar esta
ventana gráfica, sí. Entonces, subamos aquí y apaguemos las superposiciones de las ventanas gráficas para poder ver
realmente qué
es esto sin ningún desorden visual Veamos también cómo se
ve con la eliminación de ruido encendida Iré a la pestaña render y en la ventana gráfica,
activaré la eliminación de ruido No estoy seguro de lo bien aparece
el ruido en
la compresión de video, pero era bastante ruidoso,
y ahora no lo es. Y me gusta mucho cómo se ve, pero un consejo profesional más es
probarlo en un par de ajustes de iluminación
diferentes. Así que hasta abriré una nueva ventana. Voy a dividir este de nuevo en
dos lo convertiré en un editor de shader, y luego iré al mundo Y luego aquí solo seleccionaré
otro HDDI que tenga Tal vez hagamos esta. Es como una puesta de sol. Ahora realmente ves el
subsuelo, ¿no? Y para esto, siento que a lo mejor
el emisivo es demasiado brillante. Estaba pensando eso en el
anterior HDDI, también. Entonces tal vez
bajarlo solo a la mitad, como dos. Vamos a probarlo. Y un escenario de iluminación más. Intentemos esto y
una vez que me sienta feliz, y lo haga con esto, iré a render
y Render Image. Abrirá la ventana de render, y si la expando un poco, podemos ver 22, dos, dos que está en la muestra
aproximadamente 100 de 4,000. ¿Por qué dice 4 mil? Bueno, en la
pestaña de render, he establecido mis muestras MAX en
4,000 y algo así. Y una vez que llegue a
eso, dejará de renderizar, y puedo guardar la imagen. Y esta es la imagen que
voy a compartir con todos en la sección de asignaciones
en la página web y, ya
sabes, en tu
portafolio y lo que sea, si estás orgulloso, que
creo que deberías ser. Al igual que, has completado
un personaje. Este es el objetivo principal de mucha gente con TD es poder hacer
un personaje como este. Entonces iré a Image ahora que
ya está hecho, y guardaré como, y lo guardaré como PNG
y lo llamaré
versión uno de sombreado de caracteres. Guardar imagen.
55. Asociación: Antes de que podamos animar algo, tenemos que unir
objetos juntos Imagina solo mover tu torso hacia adelante y los brazos se quedan
atrás, eso no sirve de nada. Entonces, para demostrar
cómo adjuntar las cosas, he hecho un hombre cubo. Ahora bien, si tuviera que
mover este cuerpo, como caminar, no
viene ninguno de los otros objetos, ¿verdad? Pero podemos cambiar eso con
un proceso llamado crianza de los hijos. Es una palabra rara de usar, pero básicamente es
una referencia a la nueva estructura jerárquica
en el programa de tres D. Como un objeto
reina una especie de objeto sobre otros. Y eso significa que es la
crianza de ellos. Entonces, el objeto superior
es el padre, los que se le adjuntan, son los hijos, y esa es
la terminología que utilizan. De hecho,
una vez me
metí en una situación rara cuando estaba aprendiendo licuadora, y estaba buscando en Google
cosas relacionadas con esto Y así empecé a
escribir en Google, cómo quitar licuadora infantil. Me atrapé como,
no estoy seguro de querer eso
en mi historial de búsqueda. Como si me estuviera moviendo niño. De todos modos, así que la forma
de hacerlo es hacer clic en un objeto y
luego hacer clic en su padre, el objeto principal al que
desea adjuntarlo. Y puedes ver que en Blender, cuando tienes varios
objetos seleccionados, uno de ellos se selecciona con un naranja más oscuro y otro
con un amarillo más brillante. Entonces en este caso, el brazo es el resaltado naranja más oscuro y el cubo grande es
el amarillo más brillante. Eso significa que el cubo grande
es el objeto activo. Siempre será el
último que seleccionaste. Entonces ahora la cabeza es esa. Y
si hago clic de nuevo al cuerpo, manteniendo el turno quieto, ese
es ahora el objeto activo. Y también se puede ver
eso en el outliner. El activo es el que está más destacado que los demás. Y así hago clic en el brazo, y luego hago clic en el cuerpo, y voy a objetar hacia abajo a
padre y obtienes opciones, solo ignóralo todo. Aprenderás lo que hacen
estos a tiempo. Pero para este curso, sólo
nos importa el
superior, que es objeto. Queremos padre de un
objeto a otro objeto. Así se
llama. Y ahora, lo que pasó es que
no vemos diferencia, pero el único cubo se quita
de la jerarquía. Y ahora está dentro
del otro. Si ahora hago clic en el
pequeño desplegable, podemos ver el cubo principal
y el brazo está dentro de eso. Eso significa que este es el padre
y este es el niño. Ahora, en la vida real, si un
objeto está unido a otro, entonces ese otro objeto también
se une al
primero. Ese no es el caso en tres
D. Cuando se trabaja así, sólo
va por un lado. Ahora bien, si muevo el cuerpo alrededor, si lo muevo hacia adelante, el
brazo sigue a lo largo. Y eso es bueno. Ese es
el comportamiento que queremos. Pero el brazo mismo,
si lo movemos, el cuerpo no lo sigue. Y fíjese también en la pequeña línea va entre ellos que
indica una crianza de los hijos. Entonces eso significa que esto
está apadrinado a esto. Entonces solo ten eso en cuenta que el orden en el que
seleccionas las cosas cuando crianza importa porque es solo el objeto activo el que
controlará otros objetos, y este no
controlará al objeto principal. Eso es realmente bueno porque
si giramos el cuerpo principal, sí
queremos que el brazo
siga adelante. Pero cuando giramos el brazo, no
queremos que el
cuerpo siga adelante. Eso es lo que queremos.
Sigamos adelante y hagamos clic en todos los demás objetos
y los padres también. Puedes hacerlo con
múltiples objetos a la vez. Asegúrese de hacer clic en el último
cuerpo y luego ir al objeto, objeto padre. Ahora en el outliner,
todos los cubos están dentro de este cubo principal Cuando muevo el cubo principal hacia adelante, todo
sigue a lo largo, pero aún podemos rotar todo de forma independiente.
Eso es genial. Pero hay una clave más para hacer esta plataforma como se le llama. Cuando
uno une las cosas y las
hace más fáciles de animar,
eso se llama aparejo Estamos haciendo una plataforma aquí. Ese último punto es, ¿de dónde rotan las cosas? Es muy raro rotar el brazo desde el medio
porque está unido aquí. Podríamos, por supuesto,
cuando animamos esto, podríamos girarlo y luego moverlo y luego
rotar y moverlo, y eso sería posible, pero podemos hacer que
gire desde este punto Eso se remonta a
algo de lo que ya hemos
hablado antes respecto
al modificador espejo, y ese es el punto de origen, este puntito naranja aquí. Cada objeto gira
alrededor de su origen. Y recuerdas si movemos
algo en modo edición, el origen se queda puesto, ¿verdad? Entonces, si entro en modo edición con
tabulador y luego muevo el brazo, el punto de origen no se mueve. Ahora está en la esquina superior izquierda. Y ahora cuando giro el brazo, gira alrededor de ese punto. Hay una manera más fácil de hacerlo. Si modelizamos así, en realidad
podemos simplemente
mover el punto de origen. Podemos hacer eso subiendo a opciones y luego
efectuar solo orígenes. Tenemos tres
opciones diferentes ahí todas útiles por
derecho propio, pero orígenes, si hacemos clic en eso, vemos un eje y nos movemos
solo el origen. Si presiono G para agarrar, ya no muevo el objeto. Yo sólo muevo el origen. Y para ello,
también podemos usar el Gizmo. Entonces movemos esto hacia arriba y otra vez. Y luego ir a opciones y
apagar afectar orígenes. Ahora el brazo gira alrededor del punto que queremos
en todas las direcciones. Asegúrate de pensarlo en todas las direcciones, por cierto. No solo
lo mires desde el frente, míralo desde un lado, míralo desde
arriba, asegúrate que el origen esté
en el lugar correcto. Y podemos hacer esto
por cada extremidad. Entonces ve a afectar solo a los orígenes, muévelo hacia abajo, mueve esto hacia arriba. Arriba y arriba, vuelve a las opciones, apaga solo los orígenes. Esta cosa te puede confundir si la dejas encendida
y no pasa nada Simplemente comienzas a mover los
orígenes y no el objeto. En fin, ahora tenemos una
marioneta que podemos mover. Así puedo mover
todo haciendo clic en el cuerpo, y luego puedo empezar a
mover las piernas hacia adelante
y hacia atrás y agitando el brazo Entiendo que no
siempre es obvio lo que
se aparenta de lo que Al igual que, en algunos casos, sabes que la
mano, por ejemplo, debe estar apacionada a la muñeca, es
decir, que mover la mano
no mueve la muñeca,
pero mover la muñeca sí mueve la mano, ¿
verdad Pero, ¿qué pasa con el cuerpo
y las caderas, por ejemplo? Bueno, como
regla general, el centro de gravedad
es tu fuente. Entonces en los humanos y en la mayoría de los animales, esas serán las caderas. Empiezas con las caderas y todo lo demás se
aparenta a las caderas Entonces las piernas se
aparentan hasta las caderas, el cuerpo se
aparenta a las caderas, y luego encadenándose de eso, obtiene el cuello
parentado al cuerpo,
la cabeza apacionada al cuello, y así sucesivamente
y así sucesivamente,
bajando por la y así sucesivamente, bajando Pero, como, el punto superior en
la jerarquía, si quieres, ya
sabes, este diagrama, en la parte superior, tienes caderas. Y si alguna vez quiero quitarle algo a su
padre, también puedo hacerlo. En un par de formas, puedo
o bien ir a objeto y padre y limpiar su padre o puedo ir dentro del outliner y
puedo encontrar el objeto Puedo arrastrarlo y mirar el pequeño indicio que
aparece por encima del cursor, dice, moverse dentro de la colección, controlar para enlazar,
cambiar a padre. decir, si mantengo presionado turno, déjalo caer, eso lo despatenta. Lo mueve fuera de ese cubo. Ahora cuando muevo el cubo, el brazo ya no está parentado, y puedo arrastrarlo de nuevo dentro
del cubo manteniendo presionado Shift nuevamente y soltándolo sobre el
cubo, y ahora está parentado Así que eso es lo básico del aparejo.
56. Animación con fotogramas clave: Ahora vamos a aprender el bloque
de construcción
más fundamental para hacer animaciones en blender. Ahora, animaciones, mucha gente en realidad no sabe
lo que significa la animación. Ahora, la animación solo significa
hacer que algo se mueva. En realidad, viene de darle
vida a algo muerto. Eso es lo que significa
etimológicamente. Así que animar en licuadora
significa hacer cosas. Muévete. Y esa es la razón por la mucha gente se mete en tres
D en primer lugar. El
bloque de construcción fundamental de una animación, es
decir, el encuadre clave Ahora bien, si has
usado after effects u otro software de animación, ya
sabes keyframing El fotograma clave es la forma en que
animamos en una computadora. Normalmente no animan fotograma
a fotograma como lo hacían en los viejos tiempos donde tenían que
dibujar cada fotograma individual Hacemos que la computadora haga
mucho del trabajo por nosotros. Entonces solo decimos que queremos un objeto aquí al
inicio y aquí al final,
y la computadora se da
cuenta de qué hacer en el medio.
Esos son marcos clave. Dices el inicio y dices el final y la computadora se
da cuenta del movimiento. Así que tus fotogramas clave viven aquí
abajo en la línea de tiempo. Vamos a expandirlo un
poco para que veas
lo que estamos haciendo. línea de tiempo se puede fregar haciendo clic en el cabezal de reproducción
arrastrándolo Podemos jugarlo
golpeando play, pause. También podemos jugarlo golpeando Barra
espaciadora en algunas computadoras. Pero cuando configuraste licuadora, te
preguntaba, ¿para qué
quieres usar la Barra espaciadora? Para algunos de ustedes, cuando
presionan la barra espaciadora, esto sucede. Te levantas una barra de búsqueda en su lugar. Para esas personas,
jugarás la línea de tiempo con barra espaciadora
Shift pero puedes cambiarlo yendo a editar
y preferencias y bajando
a la tecla Mapa y configurando la acción de la barra
espaciadora para que juegue Entonces la barra espaciadora reproducirá
y pausará la línea de tiempo. También podemos por aquí, establecer
los marcos de inicio y final. Entonces, si no queremos una línea de tiempo
que tenga 250 fotogramas de largo, podemos ir al final y
podemos decir 50 en su lugar, digamos. Así que simplemente haré clic en
mi rueda de desplazamiento para deslizar esto y
luego desplazarme hacia Zoom. No, un fotograma clave es solo para
un valor único a la vez. ¿Qué quiero decir con valor? Quiero decir, los deslizadores de aquí, como los deslizadores de ubicación
y los deslizadores de rotación Y cada uno de los controles deslizantes, casi todos los
deslizadores en blender se pueden animar con fotogramas clave y lo haces haciendo clic en un
puntito a la derecha de él, donde dice animate property
cuando pongo el cursor sobre él Animemos la ubicación X. La
ubicación X es la ubicación
en el eje rojo Cuando la arrastre, mi pelota
se mueve de izquierda a derecha. Déjame hacer clic en ese puntito
y el número se vuelve amarillo. Amarillo significa que hemos
establecido un fotograma clave. El punto se convierte en un diamante, y si hacemos clic en la esfera, también
obtenemos un diamante en la línea de tiempo. Ese es
nuestro fotograma clave. Y recuerden, tuvimos que fijar uno para el inicio y el
final de nuestro movimiento. Entonces digamos que queremos que nuestro
movimiento termine en el frame 50, entonces vamos al frame 50, y luego ¿dónde queremos que esté la
esfera en el frame 50? Digamos que queremos moverlo hasta aquí y ver
los cambios de color. Esto significa que ha
cambiado el valor, pero no ha establecido
un nuevo fotograma clave Entonces el
símbolo de fotograma clave ahora está vacío. Aquí no tenemos un fotograma clave. Es naranja para decirte que
has hecho un cambio, pero no
lo has guardado como fotograma clave, así que tenemos que hacer clic en
el pequeño diamante para ahora guardarlo como fotograma clave Eso pone un fotograma clave
en la línea de tiempo. Y si pulso Play, podemos ver que la esfera
se mueve de izquierda a
derecha a lo largo de la línea de
tiempo. Esto es genial. Al igual que, esto me encanta. Esto todavía me
parece mágico. Y también note cuando hago una pausa entre ellos,
el número se vuelve verde. Un valor verde significa que
existen fotogramas clave en esto, pero actualmente no estás en uno Entonces, si lo muevo a un
fotograma clave, ahora se vuelve amarillo. Entonces verde significa que está animado, pero actualmente no estás en un
fotograma clave Entonces esa es una manera de saber si este valor es en realidad keyframed
donde estás actualmente Y no es obvio
necesariamente. Se podría pensar, bueno, se
puede ver aquí abajo, pero digamos que tiene múltiples
valores animados. Digamos que también animamos
el valor Z. Entonces el valor Z
comienza en uno aquí, hacemos clic para pequeño diamante. Muévelo al fotograma 50, y luego lo movemos hacia arriba, y luego volvemos a hacer clic en
el diamante, y ahora nuestra animación
se ve así. En un momento, simplemente se levanta. Y entonces, bien,
podríamos pensar, bueno, podemos ver que el valor z está
animado porque es verde, y aquí tiene un fotograma clave Sí, es amarillo, y
tiene un fotograma clave aquí. Sí, es amarillo. Pero
en la primera, no
es amarilla porque ahí
solo tenemos un fotograma clave
para la ubicación Entonces espero que eso tenga sentido. Se puede ver dónde están los
diferentes. Pero voy a repasar una manera de obtener otra visión general sobre lo que
se anima donde más adelante. Ahora bien, si no estás satisfecho con un fotograma clave,
querrás cambiarlo. Digamos, no queremos
que empiece aquí, queremos que empiece
aquí en su lugar. Bueno, entonces tenemos que
ir a ese fotograma clave. Tenemos que cambiarlo. Y entonces esto es un poco de
rareza con licuadora Si ahora golpeas el diamante, no
va a
establecer un nuevo fotograma clave Se va a quitar
el fotograma clave, y luego volvemos a hacer clic en él y establece un fotograma clave
en ese punto Eso es sólo una rareza a la
que tienes que acostumbrarte. Si quieres
cambiar un fotograma clave, tienes que
cambiarlo y luego
apagarlo y encenderlo para
establecer un nuevo valor Si bien la forma más común de animación son las ubicaciones
y las rotaciones, no
olvides que
cualquier cosa se puede animar Entonces, si agrego una cámara, la cámara tiene un
montón de valores, también, y digamos, por ejemplo,
la distancia focal, la distancia focal se
puede animar. Puedo empezar a las siete,
fotograma clave eso. Al final, podemos ir
a 166 fotogramas clave que, y luego la cámara
cambia su distancia focal ¿Y qué aspecto tiene eso? Se ve así,
parece que está acercando. Puede fotogramas clave de intensidad de luz, y puede fotogramas clave
casi cualquier cosa Deja que tu mente se vuelva loca con esto.
57. Editor gráfico: Este no sería un curso de animación
adecuado sin hacer una pelota que rebota Como, todo el mundo lo hace. Todos hacen la pelota que rebota, y hay una buena
razón para ello. Entonces estamos haciendo la pelota que
rebota. Y la razón por la que estoy haciendo la pelota que rebota es para
enseñarte sobre otro concepto de
animación, que creo que te
va a encantar Te da mucho
más control sobre cómo mueven
las cosas en comparación con
los fotogramas clave Pero comencemos con
marcos clave y construyamos hasta ello. Entonces lo que voy a hacer es hacer
clic en esta bola e iré a sus propiedades de objeto donde pueda ver sus transformaciones. Y si deslizo el deslizador de
ubicación X, se moverá hacia adelante y hacia atrás, izquierda a derecha. Eso es bueno. Así que agreguemos un fotograma clave para
eso en el fotograma uno de aquí abajo. Agregaré un fotograma clave
en la ubicación X, y luego moveré mi cabeza de reproducción
para decir el fotograma 50, luego moveré el
control deslizante de
ubicación X a, bueno, digamos aquí No hace falta que deslice
el deslizador, por cierto. También puedes moverlo
usando decir el Gizmo. Puedes moverlo así, y el control deslizante de ubicación
cambiará así también. Así puedes moverlo en
tres D viewboard y luego hacer clic en el diamante para
agregar un fotograma clave aquí abajo. Ahora bien, si toco la animación, traigo de vuelta al inicio
y presiono espacio para reproducir, se va a mover de un lado a
otro. Eso es bueno. En realidad, incluso voy a
reducir mi línea de tiempo porque estoy jugando y
luego pasa esto y luego hay un
montón de nada. Así que a la derecha aquí, voy a cambiar el inicio
y el final para que el final diga frame 50. Ahora va a hacer bucle
cuando llegue al final. Simplemente haré clic en
mi rueda de desplazamiento para deslizar esto y
luego desplazarme hacia Zoom. Y eso es bueno. Ahora bien, ¿ si quiero que la pelota se mueva
más rápido? ¿Cómo haría eso? Bueno, por un lado, podría decir
que va más lejos en la
misma cantidad de tiempo, o puedo hacer que vaya exactamente igual longitud en
menos tiempo. Entonces, si hago clic en el último fotograma clave
y presiono G para moverme, o simplemente puedo hacer clic
y arrastrarlo y
lo muevo hasta el
punto medio en 25 fotogramas, verás que se mueve más rápido
porque se mueve exactamente la misma distancia, pero en solo 25 fotogramas en
lugar de 50 La primera idea a recordar es que puedes cambiar el
tiempo de las cosas simplemente
moviendo los fotogramas clave más cerca o más
lejos unos de otros Pero queremos controlar cómo
se mueve entre los puntos, y no obtenemos ese
control en la línea de tiempo. Necesitamos un
tipo diferente de editor. Y ese tipo diferente de
editor es el editor de grafos. Entonces, vamos a ampliar
aún más la línea de tiempo, solo traerla a colación. Y por aquí a la izquierda, donde podemos cambiar
el tipo de ventana, iremos a la sección de
animación y luego bajaremos
a Graph Editor. Esto parece un poco confuso. Pero vamos a esconder
este panel de la derecha. No lo necesitamos para la
totalidad de este curso, luego desplazarnos hacia fuera y
ver qué está pasando aquí. Ya lo sabes si ya has trabajado con animación en
otro software antes. Este es el gráfico de animación, y te muestra visualmente el cambio que hiciste
en este parámetro. Entonces podemos ver a partir de
esto que aquí
hay un fotograma clave y aquí
hay un fotograma clave Esos son los
mismos que en la línea de tiempo. También podemos ver en
el lado izquierdo que tenemos algunos valores. Tenemos cero, tenemos
cinco, y tenemos diez. Esos corresponden a
un valor de ubicación. Entonces podemos ver con solo
mirar la gráfica que va de cero a justo por encima de cinco. Y mirando esto, podemos ver, efectivamente,
va a 6.4. Entonces sabemos que esta bola
se mueve de X cero a 6.4 en 50 fotogramas con solo
mirar la gráfica. No sólo eso, sino que
podemos decir que hay una ligera curva de
flexibilización a esto Eso quiere decir que no es
una línea recta. Puede ser difícil de ver, pero no
es del todo recto. Se curva así. Se llama curva S, y podemos cambiar la curva S
haciendo clic en los manejadores. Cada fotograma clave tiene un controlador, y este es el manejador, y podemos hacer clic en
este y arrastrarlo y cambiar el
perfil de la curva Entonces podemos decir, por ejemplo, derribar esto, y ahora
tiene una nueva moción. Ahora podemos ver que se mantiene
cerca de cero por más tiempo, y luego cambia
más rápidamente. Y la forma en que se ve en el
puerto de tres D view es así. Comienza muy lento y luego se
acelera hacia el final, o podemos hacer lo contrario. Podemos traer esto así, y mover esto así. Y ahora se mueve rápido
y luego se detiene poco a poco. Y no sólo eso, en realidad
podemos ver que se rebasa un poco porque esto ahora está apuntando hacia arriba, así podemos hacer que suba
y luego hacia abajo otra vez, y arriba y abajo en el valor X
significa derecha y luego izquierda Entonces esto es súper poderoso. Hagamos otra gráfica, una curva en S pero mucho más nítida. Así que vamos a mover estos
mangos más allá de los
demás para realmente
agudizar esta curva S. Hazlo bastante empinado. Y la forma en que
se ve es así. Poco a poco empiezo, y
luego se mueve rápidamente sobre, y luego se
detiene gradualmente de nuevo. Se puede ver lo
poderoso que es esto. Apenas con los dos fotogramas clave, podemos cambiar completamente la forma en que la pelota se mueve
entre los dos puntos Ahora bien, hay un par de formas de cambiar donde están los mangos. Como te mostré, puedes
hacer clic en ellos y arrastrarlos. También puedes presionar
G para agarrarlos. O puedes hacer clic en el fotograma clave ahí encendido
y rotarlo con R, girando así y
escalando S así Puedes escalarlos
y girarlos alrededor. También tenga en cuenta,
digamos que tenemos un fotograma clave aquí en el
fotograma 25 también Vamos a agregar un fotograma clave, que como fotograma clave en el editor de
grafos dos Cada fotograma clave en realidad
tiene dos asas, una a la izquierda y
otra a la derecha Entonces, eliminemos ese fotograma clave
central haciendo clic en él o arrastrándolo sobre
él y presionando Hablemos de diferentes
tipos de asas. Entonces estos son mangos Bezier, el mismo tipo de mangos
que tienes en Illustrator, y cuando estás editando una
curva de Besier en licuadora, Si hago clic con
el botón derecho en un fotograma clave, puedo elegir el tipo de manejador Tener algunos tipos de
mango diferentes. Las imágenes realmente explican cómo se ven
en la gráfica también. El vector es simplemente recto. Si hago clic en vector,
entonces es recto, no importa lo que
haga a la derecha. Hagámoslo con el fotograma clave
correcto también. Vector de clic derecho. Hago lo que haga ahora mientras
los mueva, van a ser
rectos pase lo que pase, y recto significa inicio y parada completamente
abruptos Si hago clic derecho y pongo
el asa tipo dos libres, entonces puedo cambiar el lado izquierdo y derecho
independientemente uno del otro. Si no están en libre, si están alineados, entonces los mangos van
a cambiar según otro a tipo de
espejo del otro lado. Si hago clic derecho, configuro el tipo de
asa en automático, va a tratar de
suavizarlo sin
importar cómo se vea. Entonces,
volvamos estos a donde estaban
y seleccionemos todo con A y haga clic derecho y fijemos los tipos de asa en
automáticos para todo. Ahora va a tener
una curva de suavizado. Y si voy por aquí
y agrego un fotograma clave en el medio y hago clic derecho y lo configuro en
automático también, a
medida que lo muevo,
puedes ver que se ajusta para intentar que sea
suave sin importar dónde esté Pero eso puede llevarla a
rebasar a veces. Entonces en este punto
aquí, he decidido, quiero la pelota aquí y luego
se rebasa un poco Entonces si no quieres eso,
entonces vas a autoclamped. En cuyo caso, este
es el valor por defecto. Voy a tratar de suavizar
automáticamente, pero nunca va
a pasar de horizontal.
58. Cómo animar un balón que rebota: En realidad definamos ahora el
movimiento de esta pelota. Borraré el fotograma clave central y solo dejaré estos dos ¿Y qué quiero que haga? Quiero que sea como
si fuera arrojado desde el lado
izquierdo y luego se ralentiza
hacia el final. decir, necesito que este
primer fotograma clave sea bastante abrupto,
no demasiado suave. Así que voy a rotar esto
así, lo que
significa que va a cambiar rápido y luego poco a poco llegar a un alto. Eso me queda bien. Ahora agreguemos otro eje
también de animación. No animemos
solo la ubicación X. Animemos Z dos
para que rebote. Entonces presionaré G y
luego Z para moverlo hacia arriba y ¿a qué altura
quiero que comience? A lo mejor empezar aquí
alrededor de la Z ocho, puedo decir, y luego agregar
un fotograma clave en el fotograma uno Ahora podemos ver dos gráficas aquí. Podemos ver la
gráfica azul y la gráfica roja. Los vemos superpuestos uno
encima del otro. Esto está completamente bien cuando
estamos trabajando en dos ejes, pero puede ser bastante
complicado si estás trabajando como diez
controladores al mismo tiempo Así que por aquí a la izquierda, puedes usar el
menú desplegable y ver todo lo
que estás animando Oculta diferentes canales
y muéstralos y haz clic en ellos o haz doble clic para
seleccionar todo lo que hay ahí dentro. Entonces, si hago doble clic en X, y selecciona todos
los fotogramas clave X, cosas como esta hacen que
sea más fácil de manejar Pero por ahora, estoy bastante bien. Voy a animar esto, y
lo que voy a hacer es establecer el segundo fotograma clave en un punto en que siento que debería
haber golpeado el suelo Entonces comenzaré a tocar
mi línea de tiempo mientras esté aquí, y luego en mi mente, me estoy imaginando lo rápido
que quiero que caiga Entonces solo estoy jugando,
y luego como
siento que debería golpear el
suelo, lo haré una pausa de nuevo. Así que reproduce pausa. Así de rápido siento
que debería golpear el suelo. Alrededor del marco 18. Entonces agregaré otro fotograma clave ahí donde cae
al suelo Entonces lo voy a mover al
suelo. Y en mi caso, golpea el
suelo alrededor de 1 metro,
y luego haré clic en el fotograma clave, y eso agrega otro
fotograma clave Y si miro esa animación, así es como se ve. Eso está bien, pero
no
parece que esté bajando
porque también se está relajando Es como humedecerse
antes de que golpee. Es como si estuviera
anticipando golpear el suelo y no
quiere golpear demasiado fuerte. Entonces cambiemos este
fotograma clave inferior a un vector. Clic derecho, tipo de mango, vector, lo que significa que es
completamente recto. Y luego volvamos
a ver eso. Mucho más realista. Pero queremos que rebote. Entonces veamos qué tan lejos
quiero que esté el segundo rebote? Juguémoslo y comprobemos. Rebotar ahí.
Lo detengo en este punto, y quiero que aterrice ahí. Entonces presionaré de
nuevo la ubicación z para agregar otro
fotograma clave allí Y entre esos
a medio camino, agregaré otro
fotograma clave z donde lo
traigo un poco.
Agrega un fotograma clave. Necesito acercar un poco, pero quiero acercar solo
verticalmente, no horizontalmente. Quiero traer este fotograma clave aquí
arriba y este
fotograma clave aquí abajo poder ver qué
tan alto es
este comparado con Eso lo puedo hacer con una pequeña barra de
desplazamiento a la derecha. Puedo
desplazarlo hacia arriba o hacia abajo, o si presiono el borde, puedo comprimir donde está la parte superior y donde
está la parte inferior. Aunque prefiero usar un método de desplazamiento
diferente, que funcione tanto
horizontal como verticalmente,
y que es mantener
presionado el control o Comando en una Mac y haciendo clic la rueda de desplazamiento y arrastrando Y eso me permite acercar
independientemente X e Y, y puede parecer un
poco confuso, solo mirarme haciéndolo, pero prometo que es muy intuitivo una vez que lo
haces tú mismo. Enmarcaré todo esto y
luego convertiré este fotograma clave también en un
vector de tipo handle, así que está rebotando Y entonces, ¿qué tan alto
quiero que rebote? Tal vez cerca de la mitad
de alto que el primero. Juguemos eso y veamos
cómo se ve. No tan mal, pero
tampoco genial, tampoco. Por un lado, ahora en contexto, se siente como si estuviera bajando
demasiado lento la primera vez. Movamos ese primer fotograma clave
para que caiga más rápido. Eso es mejor. Y se siente como si estuviera subiendo en
esa segunda subida. ¿Ves eso? Oh, como
que me arrastra, es decir, siento
que tiene que ser más abrupto. Entonces
hagámoslo también. Y una buena regla general es que quieres que el ángulo que entra en este fotograma clave sea el mismo que el ángulo que
sale de él Y eso pasa cuando pongo
el fotograma clave por aquí, entonces puedo ajustarlo arriba y abajo hasta que sienta
que está exactamente bien Y luego voy a mover este fotograma clave para hacer un bonito arco
parabólico Veamos eso. Bien. Siento que el segundo
salto es demasiado alto. Entonces tal vez baje eso. Eso es mejor. Pero se siente como que se
estrelló contra el suelo en el último Como si estuviera arrastrado hacia abajo. Entonces tal vez expanda ese
solo fotograma. Mejor. Y para el siguiente rebote, en lugar de agregar el
fotograma clave manualmente, sólo
voy a copiar lo que tengo aquí Así puedo tomar este
fotograma clave y puedo cambiar D para duplicar, y luego
puedo moverlo Y eso solo
duplica el marco. Y puedo mover eso
tal vez hasta aquí para comenzar, y luego duplicar esto y
cambiar D y moverlo por encima. Esto no quiero mover
el eje arriba y abajo. En este espacio de coordenadas, eso significa Y. Simplemente presionaré X, lo que lo limita en
el eje X en este espacio Es raro
hablar de eje, ambos. Estamos moviendo el eje de la pelota, y tenemos un espacio de
eje diferente en esta gráfica. Pero lo que quiero decir
es en este espacio, quiero moverlo
horizontal o verticalmente, y eso significa X o Y. Aunque estemos animando la ubicación Z de la pelota,
espero que eso tenga sentido Echemos un
vistazo a la animación, límites límites y límites El último
se siente como si estuviera de nuevo estrellándose contra
el suelo fin el fotograma clave
necesita repasar uno y siento que
también es un poco demasiado alto. Vamos a bajarlo un poco. Vamos a intentarlo de nuevo.
Genial. Y luego uno más. Acercaré el zoom usando
esa técnica, y luego Mayús D,
duplicaré esto y cambiaré D,
duplicaré esto. E intenta tal vez así. Mi último se siente
un poco demasiado largo. Llevemos ambos fotogramas clave en un
solo fotograma y veamos cómo
se ve eso .
Eso es mejor. El primer rebote es un
poco demasiado alto para mí. Vamos a bajar eso. Y se siente como si estuviera escalando. ¿A qué me refiero con escalar? Siento que cuando va hacia arriba, va así
contra la gravedad. Al igual que, está jalando más de lo que lo haría
si estuviera rebotando Y eso me dice
que va subiendo demasiado lento. Así que lo traeré sobre
un cuadro también. Genial. Y entonces todo lo demás tiene que ser traído junto con él. Un marco. Para mí, animación siempre ha sido sobre simplemente ajustar hasta que
las cosas se vean bien. Estoy seguro de que algunas personas tienen una intuición sobre dónde deben
ir los fotogramas clave Yo no, así que solo necesito
mirarlo 1 millón de veces y
ajustarme en consecuencia.
59. Exagera el movimiento: Entonces, cuando estoy contento con cómo
rebota y estoy
bastante feliz ahora, agreguemos algo de
caricatura a esto haciendo que permanezca en el
aire un Podemos hacerlo
escalando las teclas superiores. Entonces, si presiono S sobre esto, puedo escalarlo
y moverlo para que permanezca en el aire por
más tiempo. Mira esto. Y luego choca contra
el suelo. Y qué efecto
tendrá esto es para uno, hará
que se vea
más caricaturesco, más exagerado, y para el
otro, se verá Entonces hagamos eso aquí
también, escalarlo, escalar esto, y también esto. Parece mucho más pesado
ahora y más caricaturesco. Así que vamos a dedicarnos a
la caricatura, sí. Vamos a agregar un poco de
calabaza y estirar. Esta parte me encanta
estirarla a medida que acelera, y luego aplastarla
mientras golpea el suelo Entonces para hacer eso, voy a mirar
la escena desde un lado, simplemente haga clic en el Gizmo, y luego entraré en la vista de
estructura de alambre para que pueda ver más claramente la rotación de
la pelota Ahora bien, si gira,
en realidad puedo decir que sí. hubiera estado en una visión sólida, realmente no se
puede ver, ¿verdad? Entonces, la forma de agregar un squash
y estirar es buscar los fotogramas clave de impacto donde golpea el suelo como
aquí, justo ahí Queremos aplasta
en este punto. Entonces animemos la escala z. Ese es este valor. Está bien probar los diferentes
y ver cuál es el correcto. Entonces puedo averiguar que la
escala Z es la indicada. Lo que puedo hacer es
arrastrar esto hacia abajo y puedo aplastarlo en este fotograma
y agregar un fotograma clave No solo eso, sino que necesito
moverlo un poco ahora porque ahora está flotando
sobre el suelo, ¿verdad? Entonces necesito G Z,
moverlo más hacia abajo, y luego actualizar el
fotograma clave de los límites Entonces la ubicación Z aquí puedes ver por aquí
que ahora es naranja, lo que significa que aquí hay un cambio que no se guarda en un fotograma clave, lo que significa que tengo que hacer clic en
el pequeño diamante
y volver a hacer clic en él Pero lo que pasó, cambié el tipo de asa porque
agregué uno nuevo. Entonces, o puedes hacer clic
derecho y simplemente cambiar el
tipo de manejador nuevamente a vector, o puedes pasar por alto
todo eso simplemente haciendo clic en ese fotograma clave y
moviéndolo en el editor Así puedo acercarlo,
y luego G Y para
cambiarlo y moverlo
así. Yo prefiero esto. Ahora vuelve a tocar el suelo, y luego un marco después de esto, quiero que se estire
en sentido contrario. Entonces, lo que tengo que hacer es primero escalarlo,
estirarlo en esa dirección
y agregar un fotograma clave Y luego necesito girarlo para que siga la
dirección en la que está viajando. Entonces necesitamos animar
otro valor, y esa es una de las
rotaciones. Comprobemos cuál. Entonces, si giro X,
no está bien. Gira Y, eso es todo. Entonces quiero darle la vuelta así. Agreguemos un fotograma clave en este
punto donde era correcto. Queremos mantener la rotación en este punto donde es
simplemente recto arriba y abajo. Fotograma clave ahí, luego
en el siguiente fotograma, lo
giraremos así Y luego un par
de fotogramas después, agregaremos un fotograma clave para volver
a escalarlo Así que solo vuelve a escalarlo a uno, que es completamente redondo y
luego agrega un fotograma clave allí Entonces, si hago doble
clic en la escala Z, puedes ver cómo se ve el
gráfico de escala si me acerco. En el punto de impacto,
es en este punto, y luego se escala para
estirarlo, y luego volver a cero en
el transcurso de unos pocos fotogramas. Y deberíamos hacer
exactamente lo
mismo del otro lado del
lado del espejo. Entonces, en el marco anterior, queremos estirarlo
en sentido contrario. Así podemos duplicar este fotograma de
estiramiento, desplazar D, y luego moverlo por
aquí,
limitándolo a X. No lo
muevo accidentalmente hacia arriba y hacia abajo Entonces así, ahora se estira
exactamente de la misma manera, pero lo rotaremos
para apuntar de esta manera. Agrega un fotograma clave. Entonces la rotación, si hago doble clic en eso y
luego alejar el zoom para mirarlo. Oh, es enorme. Entonces, escalemos la gráfica
para poder verlo un poco mejor. La rotación oscila gradualmente
de un lado a otro. Esa es la rotación.
Bien, volvamos a la escala. Amplíe aquí. Y luego unos
fotogramas antes de esto, quería volver a uno. Así que solo presiona uno
y agrega un fotograma clave. Entonces lo que hace es que
entra, redondo, se estira. A medida que golpea el suelo,
aplasta,
luego gira
alrededor y se estira hacia luego gira
alrededor y se estira el otro lado y poco a poco
vuelve a redondear Veamos cómo
se ve eso en tiempo real. Regrese al marco uno, vuelva a la
vista sólida y mírelo. Es muy difícil de ver. Realmente no lo
ves, de hecho. Simplemente lo sientes, pero podemos exagerarlos un poco más si queremos
verlo un poco mejor Lo que podemos hacer es mantenerla estirada
un poco más. Entonces podemos tomar este
fotograma y éste, y podemos escalar esos
X para escalar en el eje X, y podemos escalarlos
un par de fotogramas más. Veamos cómo se ve eso. Siento que eso es
bueno. Simplemente manténgalo estirando un poco más. Genial. Y luego hagamos exactamente el mismo proceso para
el siguiente rebote. Entonces, sobre el impacto, lo
reducimos en Z, no
tanto esta vez. Escalarlo hacia abajo en Z.
agregamos un fotograma clave. Necesitamos que la rotación sea cero para que esté escalando
justo hacia abajo. Entonces cero en la rotación,
fotograma clave eso. Y tenemos que moverlo hacia abajo. Entonces tomaré la
tecla de movimiento, la agarraré con G, y luego Y para
limitarla hacia arriba y hacia abajo, y luego la moveré para que realmente
esté impactando Entonces el marco anterior, lo
escalamos un poco, no tanto como la última
vez porque no
tenemos tanta velocidad
entrando en esto, ¿verdad? Entonces agrega un fotograma clave ahí y agrega ese mismo
fotograma clave en el otro lado, entonces Shift D, muévalo Y el mango aquí es un poco raro como el
mango es súper largo porque se copió de aquí donde hace mucho sentido,
pero ya no lo hace. Entonces, seleccionemos esto
y esto y
haga clic derecho y configurémoslo en
Autoclamp para actualizarlo Entonces ahora se estira,
se aplasta,
y luego se estira de nuevo.
Pero tenemos que rotarlo. Entonces la rotación es correcta
aquí, pero no aquí, así que gira entrando, agrega una llave, y luego
gira saliendo. Agrega una clave. Y luego un
par de marcos entrando. ¿Cuántos elegí aquí? Teníamos uno, dos,
tres, cuatro, cinco. Entonces hagamos lo mismo
aquí, uno, dos, tres, cuatro, cinco, y luego
vuelve a uno en la escala. Escriba uno y agregue una clave. Lo mismo del otro lado.
Uno, dos, tres, cuatro, cinco, escala de nuevo a
uno, y añadir una clave. Entonces ahora se está estirando, está entrando, aplastando,
y estirándose de nuevo. Vamos a verlo
jugando la animación. Eso me queda bien.
Y para el rebote final, lo que voy a hacer es
simplemente copiar lo que
hice por aquí para no
tener que volver a hacerlo Para no copiar cosas
que no quiero copiar, ocultemos la ubicación. La ubicación X es la pelota que
se mueve de izquierda a derecha. No queremos cambiar
eso. Tampoco queremos
cambiar la ubicación Z, que es el rebote. Solo queremos cambiar la
escala y la rotación que contribuyen al
aplastamiento y estiramiento Y luego escalaré
para ver todas las claves, y quiero llevarme todo
alrededor de este rebote, todo lo que contribuya
al squash y al estiramiento, y lo voy a
copiar al siguiente impacto, que está en el fotograma 37. Desplaza D X para
moverlo solo sobre la X. Si no hubiera presionado X, se movería libremente, pero al presionar X
solo se mueve horizontalmente y luego moverlo para que suceda en
el siguiente impacto, entra,
aplaste, y luego sale Pero en este caso, necesitaba
hacerlo con menos intensidad. Volveré a hacer zoom. Voy a tomar ese aplastamiento y voy a
disminuir la intensidad de la misma. Entonces ahora mismo va
bajando todo el camino hasta aquí. Entonces vamos a G Y para
moverlo sobre la Y, aplastarlo con menos intensidad, solo un poquito
esta vez
porque no está rebotando muy alto Entonces para el estiramiento,
bajemos esos fotogramas clave No lo estiremos mucho. Entonces otra vez, tenemos que
corregir la ubicación Z. Entonces volvamos a encender
la ubicación Z y simplemente moverla hacia abajo hasta
que golpee el suelo. Entonces ahora como
automatizamos la calabaza
y estiramos para esto. Y luego para el hit final, lo
voy a aplastar un poco
más y luego poco a poco lo
traeré de nuevo. Entonces en la final, lo
aplastaré a escala 0.95 y agregaré
eso y me aseguraré de que
la rotación sea cero Y antes de eso, lo
estiraré un poco, solo lo más mínimo y lo
rotaré entrando Oh, se me olvidó la llave
enmarcando la báscula, así que vamos a escalarla otra vez. Enmarcarlo clave. Luego entra, y luego se despliega y
vuelve a escalar
uno con el tiempo. Y necesito ajustar
la ubicación Z. Entonces impacta,
vuelve al suelo, y luego con el tiempo, se expande un poco y así tiene que volver
a subir. Así que aumenta la
ubicación Z en este punto. Para que a medida que se expande, se quede en el suelo.
Creo que ya está hecho. Veamos nuestra obra maestra. Eso me parece un rebote de
bola de dibujos animados. Ahora, eso parece muy complicado
por solo un rebote de pelota. Pero te prometo, por un lado, te volverás mucho más rápido
cuanto más hagas esto. Pero por el otro,
puedo asegurarles que el rebote de la pelota
en realidad es bastante complicado. Es engañosamente complicado. Si puedes dominar esto, entonces puede dominar
casi cualquier animación. Entonces te animo a que pruebes
este ejercicio por ti mismo. Puedes seguir adelante y simplemente hacer exactamente lo mismo que yo, o puedes intentar darle a tu pelota otro
personaje que yo, tal vez hacerla más
hinchable o más ligera
o hacer que vaya más lejos si
estás listo para un desafío Te animaría a hacer
esto para que te pongas cómodo en el gráfico de animación
porque esa es la clave sin juego de palabras destinado a toda la animación en blender
y en casi todos los programas Al igual que, el editor de gráficos
es una habilidad central. Así que prueba este ejercicio y
haz que tu propia pelota rebote.
60. Procesamiento de video: Y ahora volvemos a renderizar
porque renderizar una animación no es
lo mismo que renderizar una imagen. Acabo de poner
algunas luces aquí,
dos luces y un telón de fondo y un par de materiales para la
pelota y el fondo. Y estoy en
vista renderizada a la izquierda aquí. Estoy renderizando con ciclos, no con Evie, pero en realidad
tendremos que
discutir eso para este video Pero por ahora, solo tengo esta
animación que hicimos en el último video donde
rebota la pelota y quiero
renderizarla. Solo vayamos a un fotograma y vayamos a renderizar
y renderizar Imagen. Renderizará la imagen en la
que se encuentra tu cabeza de reproducción, y podrás guardarla de la
misma manera que
lo harías con cualquier otra imagen Sin embargo, esta no es una manera
fácil de renderizar una animación, como ir a
cada fotograma, renderizar y luego guardar
la imagen. No, no, no. Queremos automatizarlo y tal vez ni
siquiera solo automatizarlo, sino quizás guardar un archivo de
video fuera de él y no solo 50 imágenes. Entonces antes que nada, tenemos que
decirle a Blender dónde guardar todo porque lo
hará automáticamente. Y eso es en la pestaña de
salida del archivo donde
establecemos la resolución de salida
y la velocidad de fotogramas. También establecemos la ruta de salida. Y por defecto
menos establecido en temp. Simplemente definamos eso. Ahora, si lo mantienes en PNG, va a ahorrar 50 PNGs Pero quiero guardar un
video de Blender, y puedes hacerlo
porque Blender renderizará cada fotograma
y luego al final, los
combinará en un video. Puedes hacerlo cambiando
el formato de archivo a una película,
y la única película disponible es el video FFmpeg Solo necesitamos cambiar una
cosa sobre esto porque el valor predeterminado es WAC y que
está bajo la codificación Nadie usa Matroska. Haga clic en eso y elija MPEG cuatro. Eso es
todo lo que tenemos que hacer. Ahora puedo ir a renderizar
en lugar de renderizar imagen, puedo renderizar una animación. Cuando haga clic en eso, no importa en qué fotograma esté
en la línea de tiempo, volverá a saltar al fotograma uno, y comenzará a renderizar,
renderizará cada
imagen y luego al final, las combinará en
un video FFM BC Acaba de terminar el marco uno. Ahora dice en el marco de la oreja
izquierda dos, y me dice
cuánto tiempo tardó el
fotograma anterior en renderizarse. Marco anterior en este
caso, tardó 14.8 segundos. decir, si solo traigo
una calculadora aquí, tengo 50 cuadros, así que 50 veces 14.8 o vamos a
redondearlo hasta 15 Eso va a ser 750 segundos divididos por 60 para obtener minutos. Va a tomar 12.5 minutos renderizar
toda la animación. Aquí es donde entra el otro motor
de
render porque es
mucho más rápido. Si cierro esto y
voy a la pestaña de render, cambio de ciclos a EV
y luego vuelvo a hacerlo. Renderizar animación de renderizado. Y mira eso. Hace
varios fotogramas cada segundo, y se está
acercando para terminar. Ahora está a mitad de camino terminado. Entonces esta es la situación en la que quizás quieras
usar IV para animaciones, donde tienes que renderizar 50
fotogramas y no solo uno. Pero nuevamente, los ciclos
van a verse mejor, y renderizo todas mis
animaciones en ciclos. Y a veces tengo
que renderizar toda la noche. Puse mi computadora para
renderizar cuando me voy a la cama, cuando me despierto a la mañana siguiente, ha estado renderizando
durante 8 horas seguidas o dependiendo de cuántas
horas de sueño tenga, y luego se termina
por la mañana. Eso no es del todo infrecuente. Es una muy buena excusa
para salir a tomar un poco de sol. Pero si tienes
prisa, puedes hacer tu escena para que
puedas renderizarla con EV, y entonces no tardará tanto. Así que vamos a revisar nuestro
resultado ahora que ya está hecho. Aquí está la carpeta
donde la guardé, y tenemos un video de hecho
llamado ball bounce, y dice el rango de fotogramas, así que uno, dos, Oh, 50. Bueno, hagamos doble clic en él, y esa es mi animación renderizada. Entonces realmente es tan
sencillo como eso. Se renderiza de la misma
manera que una imagen, pero tardará mucho más. Ahora, un truco más que
quiero mostrarles, que realmente ayudará
con el realismo en la animación. Esto va tanto para EV como para ciclos es bajar aquí
y activar el desenfoque de movimiento. Cuando el desenfoque de movimiento está activado, se va a
desdibujar a medida que se mueve. Entonces, si voy a renderizar
y animación ahora, se nota
que se está
difuminando y que se ve mucho más agradable cuando estás
reproduciendo el video Probablemente sea difícil ver alguna
diferencia, pero créeme.
61. Renderización de una secuencia de imagen: Estás empeñada en renderizar
tu animación en ciclos. Estás como, va
a tomar 10 horas, pero no me importa. Quiero usar ciclos. Se ve mucho mejor,
y yo estaría de acuerdo. Normalmente renderizo en ciclos, incluso para animaciones largas, y renderizo durante más de diez horas. En realidad ahora mismo estoy
esperando un render que me lleva 120 horas. Cuando haces eso, tienes que renderizar un
poco diferente, o tienes que ahorrar un
poco diferente. Así que permítanme cambiar
al
motor de render de ciclos e ir a la salida final. La última vez que renderizamos
un video FFMPEG. Esa es la forma más fácil de hacerlo. Pero el problema con eso es, digamos que renderizas
durante 10 horas, y luego tu programa se bloquea
en la hora número ocho, hablando por experiencia
personal, ¿obtienes el 80% de un video? No, no, no, no. No, no se obtiene ningún video. Si no completas
tu render, no
obtienes ningún video. Es por ello que el
valor por defecto no es el video, sino un PNG. Aunque prefiero JPEG,
ocupa menos espacio. Pero si presiono render ahora, déjame cambiar a
EV solo para no tener que esperar tanto y renderizar mi animación. Lo renderiza. Y si voy a la
carpeta donde la he configurado para guardar, esto
es lo que está haciendo. Guarda 50 imágenes, y va a ser como un flipbook si voy
a la primera, entonces solo puedo mantener presionada la
tecla de flecha derecha y se juega
como un Pero, ¿cómo puedo compilar
esto en un video? Bueno, puedes hacerlo en
after effects o
premiere o Resolve. Esa es la forma más
común de hacerlo, pero también puedes
hacerlo en licuadora. Así que sólo
te voy a mostrar cómo hacer eso. Déjame copiar esta ruta de archivo para que pueda usarlo en
blender en solo un poco. Después en licuadora, voy a
abrir un nuevo archivo nuevo, general, y seguro
voy a guardar esto. Después voy a subir aquí a mis espacios de trabajo y
voy a hacer un nuevo espacio de trabajo Haz clic en el punto más,
baja a la edición de video y presiona Edición de video. Eso convierte a Blender en un software
de edición de video. Apuesto a que no pensaste
que eso era posible, ¿eh? En realidad, Blender puede
hacer muchas cosas. Al igual que, incluso puedes hacer cosas de
pantalla verde y seguimiento de
movimiento, y es una locura lo
que puedes hacer en Blender. Pero solo quiero
compilar un video. Entonces arriba en la esquina izquierda, voy a poner mi
ruta de archivo que copié. Y ahora abajo en la línea de tiempo, puedo presionar Mayús A para agregar, igual que en cualquier otra
ventana, Mayús A, agregar una imagen o secuencia, lo que abre esa
carpeta que tengo aquí. Seleccionaré la primera imagen. El orden es importante aquí, y luego presione e para seleccionar todo aquí o
simplemente haga clic en el primero, vaya hasta abajo y cambie, haga clic en el último,
agregue Tira de imágenes, y cuando presiono Reproducir, eso
simplemente lo pone en un video. Voy a tener que recortarlo, establecer el marco final a 50,
igual que en el original. Entonces puedo ir a la salida de mi archivo, y ahora puedo guardar un video de FFM
Peck donde quiera Como aquí, Y en la codificación, lo
pondré en MPEG cuatro y
luego me aseguraré en la parte inferior aquí bajo post procesamiento que el secuenciador esté encendido Debería estar encendido, pero el secuenciador es, este
es el secuenciador Si esto está apagado,
no va a renderizar
lo que sea que esté aquí. Y luego podemos ir
a renderizar animación. Pasará muy rápido porque en realidad no está
renderizando las tres D, es solo renderizar
las imágenes como un video. Y ahora en esta carpeta, tengo todas mis imágenes
y límites de pelota la película, Regreso de la pelota.
62. Proyecto de clase 7: animación de personajes: Has subido de nivel desde el balón. Es hora de hacer un personaje
completo. Estoy entusiasmado con este
, si no se puede decir. Esto es como, sé que hay
más curso después de esto, pero siento que ahora te estás graduando como que te estás
graduando La animación de personajes me
parece, como, el pináculo de la animación Breed Al igual que, si puedes hacer esto, si
puedes hacer un personaje,
puedes sombrearlo. Puedes animarlo
y renderizarlo. Básicamente conoce tres D. Como si fueras tan capaz
cuando puedes hacer esto. Y entonces, bien, vamos a
meternos directamente en ello. La marca quiere ver
a la mascota cobrar vida con una
sencilla animación Arañarás a tu personaje usando crianza de los hijos y animarás una
breve animación ociosa Apenas unos segundos, un sutil movimiento para darle a tu
personaje algo de personalidad. Que el personaje se ponga de
pie en un solo lugar. Piense en respirar,
parpadear, balancearse, ondear o cualquier pequeño movimiento que agregue vida sin estar por encima Para un desafío adicional, haz el bucle de animación sin problemas. Entonces lo que estoy pensando aquí es que no trates
de caminar. Caminar es, para uno, mucha molestia que hacer, y para el otro,
realmente no tenemos todas las herramientas. Tenemos que hacerlo bien todavía. Entonces, si quieres mover a tu
personaje por la pantalla, te
he preparado
para la dificultad a menos que
tengas un personaje mariposa o algo que no camine, vas a tener que
tomar una decisión al respecto,
pero el proyecto es, que tu personaje se quede
quieto y simplemente parpadee, ondee, menee la cola, ya
sabes, lo que
se ajuste a tu Los requisitos son usar crianza de los hijos para unir partes
del cuerpo, animar una animación de ídolos de dos a cinco
segundos Puedes renderizar en ciclos o EV. Y este reto extra es hacer que el
bucle de animación sea perfecto. Entonces ya sabes cómo cuando el
cabezal de reproducción llega al final,
vuelve
y vuelve a jugar, puedes copiar todos tus fotogramas
clave iniciales hasta el final para que
sea un poco bucle como
si no saltara hacia atrás, pero simplemente continúa Es muy útil para
muchas cosas, pero no es necesario por ahora a menos que quieras
un reto extra. Los requisitos son usar parentalidad para unir partes
del cuerpo juntas, animar una animación inactiva de dos a cinco
segundos En el
panel de salida, aquí tenemos la velocidad de fotogramas y la
mía se establece en 24 FPS. Creo que ese es el
valor por defecto. W 24 cuadros por segundo y queremos dos a 5 segundos.
Veamos qué es eso. 24 veces dos, eso es
48, mínimo 48 fotogramas. Eso son 2 segundos y
máximo cinco fotogramas. 24 veces 520. 120-48 marcos. Puedes renderizar en ciclos o EV. Nuevamente, recomiendo ciclos. Se ve mejor, pero si lleva demasiado tiempo y solo lo
amasas, lo entiendo Puedes usar EV, que va a
ser mucho más rápido. Y los entregables
dicen que la resolución de
salida
a un formato cuadrado que es 720 por
720 o 1080 por 1080, y luego renderiza tu
animación ya sea como un video FFMPEG con compresión
MbEGF o guarda una secuencia de imágenes y
compilarla en un Lo más fácil es simplemente
ir directo al video. Pero si tu renderizado lleva
más tiempo que media hora, sugeriría renderizar
una secuencia de imágenes por si
acaso los bloqueos durante
los renders no son inauditos Hablo como un hombre con incontables
horas de renderizado perdidas en mi carrera. Y entonces ya sabes
el resto subido a la sección de proyectos de clase del sitio web y comparte
en redes sociales. Y aquí está la foto Macho
de Dan para inspirarte a unirte al
grupo de Facebook. Diviértete animando.
63. Completado. Proyecto de clase 7: asociación: Bien, mi robot solo está
rogando que se mueva, así que vamos a darle un baile. De veras quiero que el tipo se mueva
los brazos,
abra la boca, como, dando la
vuelta como si hubiera comido
algo muy picante Quizá. Oh,
ya sabes lo que sería divertido si los ojos parpadearan. La configuración en la ventana gráfica de la
izquierda, configuré mi modo en modo de vista previa de
material y configuré el mundo
de la escena para que reciba
iluminación de mi HDDI La razón por la que tengo
el modo de vista previa de
material activado y no el modo renderizado es que quiero poder ver
mi animación en tiempo real. Y cuando toco mi
cabeza de reproducción, si presiono Reproducir, se
puede ver en la esquina
superior izquierda cualquier viewpoort que tenga las superposiciones
de
la ventana gráfica Este no lo hace.
He desactivado las superposiciones de viewpod,
pero en esto, todavía
podemos
verlo que dice que es como voltear 24-25 fotogramas por segundo.
Eso es lo que queremos. En la salida del archivo, he establecido mi velocidad de fotogramas en 24, lo que significa que ahora estoy obteniendo reproducción en tiempo
real. Estoy viendo esto como
en realidad se supone que debe ser. Un rápido aparte aquí
sobre las velocidades de fotogramas. Mi animación es de 24
fotogramas por segundo. Ahora, cuando juegas la
línea de tiempo con la barra espaciadora, obtienes un número en la parte superior izquierda que muestra la velocidad a la que
estás jugando, y ese número debería ser aproximadamente el
mismo número que la velocidad de fotogramas. Pero a veces tu
computadora no puede reproducir la línea de tiempo a
24 fotogramas por segundo. A lo mejor la escena es
simplemente demasiado impresionante. Entonces este número se vuelve rojo porque no estás viendo
la velocidad correcta. Toda la animación
se está ralentizando para calcular cada fotograma
para animar correctamente, quieres ver la animación a la velocidad correcta.
¿Qué haces? El primer paso es
desactivar los modificadores. Este botón aquí en el modificador lo
apaga mientras trabaja, pero vuelve a encenderse cuando
vas a guardar una imagen. Recuerde también que los modificadores de superficie de
subdivisión tienen niveles separados para la
ventana gráfica Viewport es con lo que trabajas, render es lo que guardas Y finalmente, si todo lo demás falla, puedes ir a la
línea de tiempo y cambiar de play cada frame
a frame dropping. Y eso le permite a Blender saltarse fotogramas para que veas
la velocidad correcta. Y como segundo punto
de preparación, sólo te
voy a mostrar
otro pequeño truco. Entonces lo que quiero hacer
con esto es que
sea desseleccionadob, tipo de bloquearlo Para ello, tengo que añadir otro icono a la derecha en
el contorno. Tenemos ojo. Tenemos una cámara. Pero si subo a lo que se llama
esto una tolva. Ir a la tolva, puede
encender algunos iconos más, y para esto, solo quiero
este seleccionable. Si hago clic en eso, ahora puedo activar
o desactivar seleccionables o cualquier cosa. Entonces, si le hago clic para esto, ahora ya no puedo seleccionarlo en
el Viewboard. Muy práctico. Hagamos lo
mismo con la cámara. Presiona la cámara, sube
aquí, apaga seleccionable. Y ahora puedo empezar a
amañar a mi personaje. Antes que nada, estableceré el punto de
origen de todo. El punto de origen es el
pequeño punto naranja. Es donde todo
gira alrededor, y puedo moverlo subiendo a opciones y efectuar solo orígenes. Ahora puedo mover el origen
donde quiero que esté,
presionar G para moverlo, y luego asegurarme de que no se mueva en el eje de lado a lado. Desplaza X, no X, y luego
muévelo aquí abajo. O donde quiero que pivote
de tal vez desde el frente, G Y, desde el frente aquí. Y luego la boca,
voy a ver esto desde un lado. Otro lado. Entonces puedo alterar Z para
entrar en modo X ray, también este botón aquí, y luego mover ese origen
aquí abajo a donde giraría de
manera realista ¿Y qué más? Si quiero
pivotar el cuello, esto está bien. Y el delantal, si
quisiera deslizarme por
ahí es de donde se
deslizaría por ahí. El cuerpo voy a poner en la
parte inferior cerca de la cintura. Y para las caderas, la voy a
poner en el medio. Esa es la forma más
común de hacerlo. Los hombros,
siento que esto está bien. Este brazo aquí debería pivotar
a partir de este punto, creo. Y mirándolo desde un
lado, se ve bien. Yo haré lo mismo con este brazo. Debería estar por aquí. La mano. Ahora para esto, realmente no me siento
seguro porque
realmente quería dar vueltas
perfectamente sobre este eje. Entonces qué voy a hacer por éste,
en realidad, voy a hacer click derecho, presionaré set origin y
haré origin a geometry. Eso lo pone en el medio
preciso. Y si apago
el efecto solo orígenes ahora y trato de
girarlo sobre el eje Z, debería parecer
que
no pasa nada. Si hubiera estado un poco fuera del centro, digamos que lo acabo de poner como ahí, solo un poco fuera del centro. Di que me pareció correcto,
y luego empiezo a
girarlo . No va a quedar bien. Aunque ¿sabes qué? Quiero decir, eso puede ser divertido, pero no lo hagamos. Así que haga clic derecho en Establecer
origen origen a geometría. Lo mismo con esto. Las piernas, viéndolo desde el frente. Oh, encender afectan solo a los orígenes, y
probablemente debería girar por aquí y esto también. Pie por aquí
y el otro pie. Y para las manos,
voy a
mencionar eso ahora que está en
el medio perfecto, así que gira alrededor de la muñeca Ya sabes, otra cosa en la que
pensé es si
tienes baja velocidad de
reproducción de fotogramas, yo sí tengo 25 aquí,
pero si no lo haces también puede ayudar dejarme simplemente
apagar los orígenes del efecto. Puede ayudar ir a la pila de
modificadores y bajar los niveles de
la
subdivisión en la ventana gráfica, porque esto también puede ser
gravoso Así que simplemente bajando de
definitivamente no necesitas cinco para los ojos lo suficiente
para ver la forma, entonces esto también puede
mejorar drásticamente tu
rendimiento de visor No olvides de
vez en cuando guardar archivo, guardar, y tengo que adjuntar
todo junto. Entonces primero, empecemos por
las caderas, ¿sí? Todo está pegado
a las caderas. Entonces las piernas y el vientre están
todos unidos a las caderas. Los seleccionaré, y las
caderas duran y luego controlaré o comandaré P a
padre y padre al objeto. En algunos casos, cuando haces esto, las cosas se saltarán. Eso es porque tienes escalas
desiguales en las cosas. Como si hubieras escalado
cosas en modo objeto como este y las cosas se
saltarían. En ese caso, entra y
objeta, aplica escala. Hagámoslo otra vez. Padres
todo a las caderas, y luego padres los
pies a las piernas, los hombros y el cuello
y el delantal al cuerpo, brazos a los hombros.
Manos a los brazos. Siento que estoy cantando
una canción de jardín de infantes. Manos a los brazos,
brazos a hombros. ¿Está adherida el cuello?
Vamos a revisar. Sí, sí le pegué el cuello, así que vamos a unir la
cabeza al cuello. Y luego todo en
la cabeza a la cabeza. Ahora vamos a revisar, mover las
caderas, todo se mueve alrededor. Mueve el cuerpo, mueve
los hombros, el cuello, la cabeza, las piernas. Todo me parece correcto. Para que podamos empezar a animar.
64. Completado. Proyecto de clase 7: animación: Entonces otra vez, quiero que el
tipo esté como loco. En primer lugar, quiero que la cabeza
vaya y venga así. Así que vamos a establecer mi rango de marco. Empecemos con 120 y
veamos si eso es demasiado largo. Ese es el máximo permitido
para el proyecto, y luego sé
que necesito animar. A ver. Esa es
la rotación z. Podemos comprobarlo
haciéndolo, ¿verdad? Podemos hacer la rotación y luego mirar aquí abajo a
qué cambia el valor. Entonces sabemos que es la rotación z. A ver vamos a empezar
a mirar por aquí. Eso es 60 grados, y
luego agrega un fotograma clave. Y entonces qué tan rápido
quiero que se dé la
vuelta balanceándose como diez cuadros. Vamos al fotograma diez y hagamos
más 60 y luego agreguemos
un fotograma clave ahí Entonces ahora gira
la cabeza así. Y luego puedo simplemente duplicar ese primer fotograma clave, Shift D, duplicarlo al fotograma 20, y luego duplicar este
fotograma clave sobre el fotograma 30 Y sabes qué, sólo
voy a seguir adelante. Veamos cómo se ve
eso. Creo que el tiempo es bueno, entremos y refinemos
el editor de grafos, el grafo. Así que realmente no puedo
encontrarlo en ningún lado, pero puedo ir a ver
y luego enmarcar. Eso trae la vista a los fotogramas clave, y
luego veamos aquí Ampliemos un poco todas las
claves. En lugar de hacer esto, otro truco que me
gusta es ir por aquí y cerremos este menú. Aquí, podemos decidir
cuál es el punto de pivote. ¿De dónde escalamos las cosas? Y podemos escalar desde centros
individuales. De esa manera, si selecciono varios
fotogramas clave y los escalo, y eso los escala
cada uno individualmente. Si hubiera estado en el centro de la caja
delimitadora, entonces escalará así Entonces esta es una forma realmente genial editar varios fotogramas a la vez. Echemos un vistazo a eso. Es un poco más rápido. Escala
hacia abajo esto fue un poco desigual. Eso me gusta y
creo que volvamos a escalar cajas delimitadoras
y escalar todo Vamos a mover el último
fotograma clave al fotograma 70 y establecer el rango de fotogramas en
la línea de tiempo para fotograma 70 Digamos que esa es la
duración de mi animación. Y como que quiero que
haga un bucle perfecto. Entonces, en realidad, agreguemos
un último fotograma clave en el fotograma 80 y veamos cómo se ve eso Eso gira alrededor. Eso es genial. Agreguemos algunos latigazos de brazos. Hagamos este brazo aquí. Y vamos a ver ¿qué eje es ese? Ese probablemente va a ser
el eje Y. No, no lo es. No para esto porque el objeto está girado, pero eso está bien, porque quiero
que se mueva sobre este eje. Y mira eso. Eso no funciona del todo
. Cuando estoy girando alrededor de
ese punto de pivote, está exponiendo el
eje debajo. Entonces, en realidad, estos
puntos de pivote necesitan estar más arriba. Entonces seleccionaré
ambos y luego iré a
afectar solo a los orígenes
y luego los moveré. O, no, necesitan estar
más abajo, ¿no? Ah, y mira
eso. Es mover las manos con él porque
las manos están parentales. Entonces ahora tenemos un problema, pero en realidad no es un problema. Podemos arreglarlo subiendo aquí y afectar solo a los
padres también. No afecte a los niños.
Ese es mi PSA saliendo a la comunidad de traer
tu propia computadora portátil. No afecte a sus hijos. Así que ahora puedo mover esto hacia abajo. Y ahora,
apague estos volviendo, si giro ahora en la X, sí, va a ocultar el
eje todo el camino a través. Creo que ese va a
ser el camino a seguir para mí. Aunque obviamente,
no es un movimiento realista, pero, ya sabes, es
algo estilizado Así que gira sobre la X. Empecemos con el brazo un poco hacia arriba
así. Marco clave que. Y vamos también a entrar ya en
el editor de grafos. Y encuentra esto, ve
a ver y enmarcar. Quiero este fotograma clave en
el último fotograma también. Entonces, desplaza D y solo asegúrate de que el
último fotograma esté ahí. ¿Y cuántas veces
se agacha? Como, Oh,
probablemente debería ir bastante
rápido, ¿no? Como tal vez cinco cuadros. Y así se descalla. Y eso fue muy, muy alto porque enmarqué seleccionado en un solo fotograma
así que acerqué mucho Así que volvamos a
ver y enmarcar todos. Entonces va hacia abajo. Y
luego cambiaré D, duplicaré este fotograma sobre el fotograma diez y volveré
a subir. Eso va muy rápido.
Hagámoslo otra vez. Sólo turno D, todos
esos, muévalos. Seleccione todo. Turno D. Eso es bueno. Siento que deberían
ser un poco más variadas. Entonces tal vez algunos de ellos
deberían ir aún más abajo. Algunos de ellos deberían ir más altos. Después Shift D, duplica
todo esto. Y necesitaba estar
abajo en el marco 80. Entonces ahora mismo parece que
estoy fuera de fase. Eso está bien. Puede eliminar
este fotograma clave y moverlo al fotograma 80 y luego simplemente dar un empujón a los
anteriores un poco Estoy haciendo trampa. Eso está bien. A ver. Sí, eso es
divertido. Eso es muy lindo. Hagamos lo mismo
en el otro brazo, así copiaré todos
estos fotogramas clave,
Control C, y los agregaré aquí. Necesito fotograma clave primero la X, así que ve al canal X, haz clic en eso y Control V.
Eso hace lo mismo aquí Obviamente, no está del todo bien. Pero puedo escalar todos estos sobre
uno negativo en el eje Y. S para escalarlos, luego Y para escalar solo
en la Y y luego hacer menos uno. Eso invierte. Entonces solo asegúrate de
que al inicio, esté arriba y
luego baje. Sí. Genial. No sólo tengo que
hacerlo en un eje. Puedo hacerlo en múltiples ejes. Volvamos a la rotación Y, y eso no se ve del
todo bien, ¿verdad? Rotación Z. Ahí
vamos. Eso es mejor. Así que probablemente también puedas hacer un
poco de esto. Juguémoslo y luego
solo previsualicemos eso. Puedo parecer
como si estuviera nadando. A lo mejor sólo voy a mover esos permanentemente un
poco al frente. Creo que probablemente esté bien. Vamos a hacer que caiga la mandíbula. ¿Qué eje de rotación es ese? Eso no, seguro.
Es esto, sí. Entonces debería tenerlo alrededor 27 y luego tal vez
quier un poco Empecemos con esto, y puedo cambiar D
duplicar esto en alguna parte. Y luego el turno D
duplicarlo al revés. Y ahora que tengo mi rango, solo
puedo aleatorizar Y entonces el último será
el mismo que el primero. Vamos. Parece que está
entrando en pánico Oh, ¿sabes qué? Tengo
ganas de hacer trampa un poco. Creo que lo voy a hacer.
Creo que voy a hacer trampa. Entonces te dije que todo se adhiere a las caderas,
y eso es cierto. Pero ahora mismo,
creo que quiero que se
equilibre en una pierna. Y para eso, puedo ser padre de
las caderas a la pierna en su lugar. Así que en realidad voy a unparent
la pierna con Alt P, claro padre o ir a objetar
y padre y claro padre Y luego voy a ser padre
de la cadera a esta pierna. Y puedo fijar el punto
de origen de las caderas a ese mismo punto. Oh, no afecten a los niños. Sólo afectan a los padres,
PSA. Ven aquí abajo. Y ahora puedo rotar todo
el tipo sobre ese punto y hacer que se equilibre. Oh, eso es lindo. Eso debería ser bastante
lento en la rotación X. Entonces vamos a ver. Digamos que ese es el valor por defecto, unos
tres grados. Shift D, duplica ese
fotograma clave hasta el final, y luego tal vez
volcar a un fotograma clave, inclinar hacia el otro lado,
en un Veamos cómo se ve eso. No del todo. A lo mejor ponemos esto en el medio. Eso es mejor. Y luego en el eje Y, ¿
debería hacer algo ahí también? No, siento que eso
debería ser solo cero. Pero lo que sí quiero son los ojos solo para que
pueda ver los ojos. los puedo ver ahora mismo porque no
me deja ver a través del cristal. Voy a encontrar los ojos debajo de aquí. Se puede ver que he
seleccionado algo parentado a pierna derecha por su
selección aquí Entonces voy a hacer clic en eso y
luego está debajo de las caderas, y luego aquí debajo del cuerpo,
y luego debajo del cuello. Y luego sacamos la cabeza. Ahora estamos metido en ello, y luego en vidrio. Solo apaguemos el ojo
para que pueda ver debajo. Hagamos que los ojos
destellen también, porque puedes animar, como dije, cualquier valor, para que incluso puedas animar la
fuerza de la emisión Puedes hacer el
flash así. Oh, eso va a estar
bien en el fotograma cero. Tengamos una fuerza de dos y en el marco 80,
una fuerza de dos. Y ¿cuál es lo
más alto a lo que quiero ir? Vamos a verificar
esto en modo renderizado. Quiero ver cómo se ve
realmente. Sí. Sí, 50 Y entonces, ¿cuál es el más bajo al
que me quiero ir? ¿Qué pasa con el cero? Cero es bueno. Volveré
al modo de vista previa de material y esconderé el cristal y veré
¿qué aspecto tiene eso? Probablemente se encendería muy rápido y luego se desvanecería y luego volvería a
hacer lo mismo. No, debería apagarse más rápido. ¿Ves eso? Y en más
de una rápida sucesión. Sí. Esa es la cosa. Turno D. Hilarante. No me gusta el temblores
de labios, en realidad. Creo que es demasiado. Entonces,
vamos a reducir esas llaves. Selecciona todo, escala en
la Y, escala esos hacia abajo. Todavía es un poco
demasiado. Eso es mejor. ¿Deberían estar los brazos fuera
de la cara el uno del otro? Entonces, si tomo uno de ellos, y solo lo cambio. Eso es más caótico.
Eso es divertido. Eso es divertido. A mí me gusta. Pero asegurémonos de que termine en el
mismo marco en el que empieza. Debería girar la cabeza
completamente una vez. Es un robot. Él puede
hacer eso después de todo. Entonces para eso, tengo que
asegurarme de que el inicio es como el final es el
inicio más 360 grados. Así que 60 más 360 más 360. Ese es el final. Así que eso es
todo el camino allá arriba. Y ese giro final, solo
puedo borrar ese fotograma clave del medio y
ver cómo se ve eso Sí. Sí. A mí me gusta. A mí me gusta. Pero es un poco raro cómo, ya
sabes, él da
vueltas y luego se detiene aquí y luego continúa. ¿Ves eso?
Entonces gira, luego se detiene y luego continúa. Eso es un poco raro, lo que significa probablemente
debería
mantener esa velocidad. Entonces giraré esta
primera tecla para apuntar en este ángulo donde sigue la curva y
luego hacer lo mismo aquí. Eso es mejor. Y entonces puedes
tener algo de aleatoriedad en la amplitud aquí, también. Trae algunos de ellos hacia abajo,
trae algunos de ellos arriba. No seamos demasiado rígidos al respecto. Este tipo acaba de comerse un chile
serio. Comprobemos los otros ejes de
rotación en la cabeza solo para asegurarnos de
que no quiero que él,
como, asiente ni nada A lo mejor se está enfrentando
un poco hacia arriba. Sí, eso va a ser bueno.
Y el otro como la inclinación. Oh, eso es bueno. Sí, probablemente deberías inclinarte. Definitivamente. Bien. Empezando por aquí, incline de esa manera. Y vamos a ver. Si voy a ver y enmarcar
A, esa es la inclinación X. Vamos a inclinarnos hacia el otro lado. Sí, vamos a
sincronizarlo con la otra inclinación de la cabeza
para que siga Parece que pertenece. Y luego prepárate para girar todo el camino
simplemente yendo a cero. Y luego gira alrededor. Oh, bueno, no bueno porque el primer fotograma es de diez grados y luego
termina a cero grados. Entonces necesitamos esos diez grados
al final también. Pero no debería dar
vueltas a diez grados. Debería dar vueltas a cero, así que necesito derribarlos. Eso es mejor.
65. Terminado. Proyecto de clase 7: renderización: Bien, digamos que estoy bien con
esto. Esto es bastante bueno. Volveré al cristal. En realidad no
tengo que hacerlo. Todavía voy a renderizar porque está
encendido en el render. Ese es el botón de la cámara, pero sí quiero mantenerlo
encendido. Y luego veamos. ¿Está bien ir EV para esto?
Veamos la diferencia. Esto es con ciclos, y esto es con EV. Y obviamente, no.
No se ve bien. Tengo que hacer ciclos para esto. Lo voy a convertir a cómputos GPU. Baja aquí y
enciende el desenfoque de movimiento, lo que va
a marcar la diferencia en esto. Mucho movimiento rápido, luego
elija un lugar de salida. Quiero guardarlo como
una imagen, pero hagamos JPEG y lo guardemos. Tengo un camino aquí y lo
llamaré Oil boot versión uno. Después subraye y deje
algo de espacio para la numeración. Recuerda, Blender agregará números
de fotograma después de esto. Y luego en mi
configuración de render, veamos. ¿Quiero 4,000 muestras? A lo mejor puedo hacer
con la mitad de eso. Así que dividir por dos
me baja a la mitad. Recuerda que las muestras son, ¿por cuánto tiempo renderizará la
licuadora? ¿Cuánto tiempo funcionará para
eliminar el ruido del render? Y mi experiencia me dice
que no necesito tanto. Puedo hacer con cerca de la mitad. Pero si alguna vez estás en duda,
solo prueba tu escena. ¿Cuántas muestras
necesitas para obtener una imagen limpia? Mi resolución,
tengo 1080 por 1080, que es lo que especifica el
proyecto. Apaguemos este renderizado para guardar algunos recursos en
renderizado y luego ir a renderizar y renderizar animación y ver
cuánto tarda un fotograma, y luego calcularé
cuánto tardarán 80 fotogramas. Aquí vemos el desenfoque de movimiento
entrando con mucha fuerza. Por lo que el último fotograma
tardó 28 segundos. Vamos a redondear eso. Entonces tengo 30 segundos por fotograma, y tengo 80 fotogramas. Entonces van a
ser 2 mil 400 segundos, dividir por 60 para ver
que son 40 minutos Así que eso solo va a seguir renderizando durante 40 minutos y
luego se hará. Y así es hora de lo que en la industria llamamos un descanso
prolongado para el café. Lo editaré y nos
vemos cuando termine. Oh, ese fue un descanso encantador. Ahora son 40 minutos
después, y ya está terminada. Dice marco 80.
Ya terminamos. Hemos guardado todas las imágenes en
la carpeta. Aquí están. Y es momento de
compilarlos en un video en una nueva
versión de blender. Entonces voy a abrir una licuadora nueva. Y aquí, solo tienes que ir al
plus y a la edición de video en un espacio de trabajo de edición de video. Aquí abajo, desplazaré A, agregaré una secuencia de imágenes. Voy a esa carpeta,
presiono la primera imagen, presiono ocho para seleccionar
todo y agregar tira de imagen, y voy a recortar el final
a 80. Y vamos a comprobarlo. Parece correcto, pero la relación de
aspecto es incorrecta. Entonces estableceré la resolución
de salida
aquí arriba a 1080 por 1080. Y encantadora. Bien, vamos a
desmenuzar ruta un video Ve aquí abajo y en esa misma carpeta.
Yo sólo pegaré eso. Llámalo Petróleo comprado versión uno. Seleccione un
video de clavija FFM, bajo codificación. Voy a seleccionar MPEG cuatro, ¿
y sabes qué? Incluso subiré la calidad de media a
perceptualmente De veras quiero que esto se vea bien. Así renderizar y renderizar animación. Voy a correr muy rápido.
Yo no aceleré eso. Y ahora aquí dentro, tenemos
una película, película terminada. Y esa es la animación de mi
personaje. Ahora, vamos a
repasar de nuevo por qué lo
hicimos de esta manera aparentemente
muy tediosa de primero renderizar solo
imágenes fijas y luego volver atrás
y convertirlo en un video Solo recuerda que, si
renderizas directamente a un video, se romperá si chocas. problema realmente es
que solo puedes chocar o tal vez necesites cancelar
el renderizado o algo así, y no puedes recuperar si estás renderizando
directamente en un video. El video necesita
continuar renderizándose de principio a fin
para no estar corrupto. Pero una secuencia de imágenes, puedes comenzar y parar
cuando quieras. Si una de las imágenes falla, puedes volver a renderizar
solo esa imagen. Y por eso primero renderizamos
un montón de imágenes, y luego volvemos y lo
compilamos en
un video más adelante.
66. Modelado procedimental con modificadores: Video, te voy
a presentar mi modificador favorito. Haremos un par de nuevos modificadores, y entre ellos está el modificador booleano.
Es la más genial Te voy a mostrar eso usando
un avión para empezar. Desplaza A, agrega un plano de malla,
y luego inmediatamente, entraré en modo Editar con
tabulador y luego escalaré sobre el eje X, X y arrastraré hacia afuera para hacer una forma oblonga porque
esto va a convertirse en la base
de mi escalera Y lo que vamos
a hacer es modelar una escalera de aspecto complejo
usando solo modificadores Los modificadores son tan *******
poderosos y con ellos, puedes crear cosas
que no
tendrías ninguna posibilidad de hacer
sin Ya hemos
tocado algunos, y los usaremos todos
para hacer esta escalera. Entonces primero, iremos
al panel modificador, y luego agregaremos
un modificador y comenzaremos con solidificar Lladify que hemos usado antes, hace un plano de dos D Entonces voy a añadir algo de
grosor a esto. Eso es una escalera para mí, y
luego simplemente cerraré este modificador para hacer algo de espacio para que pueda ver
el siguiente que voy a agregar, que es el modificador de bisel Bisel. Eso hace lo mismo que
biselar algo a mano, excepto que lo hace
con un modificador Entonces si disminuyo la cantidad
o aumento la cantidad, se
puede ver que bisela todos
los bordes en mi objeto Agreguemos algunos segmentos a esto. Entonces uno es un poco muy pocos. Agreguemos uno más y uno más y otro y luego disminuyamos eso para solo
tener un ligero bisel Pero es un poco facetado, así que quiero sombrear esto suave. Voy a hacer clic derecho en el objeto
y sombrear Auto suave, lo que agrega otro modificador, un modificador suave, y
este se fija, lo que
significa que va
a permanecer al final
de la pila de modificadores
sin importar lo que agregue Entonces solo ten en cuenta, esto
va a quedar en la parte inferior, porque como ya he
comentado antes, estos están todos
calculados en orden de arriba a abajo,
y eso sí importa. Así que tenemos que ser conscientes de eso. Ahora, el siguiente modificador voy a agregar ese es el modificador booleano Es mi favorita.
Así EOL Boolean ¿Por qué se llama booleano? Boole es el nombre
de un matemático, y un valor booleano es cero
o uno Eso es lo que significa booleano.
Significa encendido o apagado. Y el modificador booleano
hace eso con la geometría. Entonces cuando lo agrego,
no pasa nada porque este modificador necesita otro
objeto para usar como guía. Entonces agreguemos uno.
Agreguemos Shift A un cilindro. Y luego volveré a mi escalera con el modificador
booleano Usaré el cuentagotas junto a los campos y lo usaré
para seleccionar mi cilindro ¿Y viste lo que pasó? Si entro en modo rayos X, se
puede ver que el cilindro
cortó un agujero en mi escalera. Y si muevo mi
cilindro alrededor, el agujero se mueve con él. Eso es genial para mí. Entonces, si ahora escondo el cilindro, hay un gran hueco en el agujero
del cilindro en esto, y tenemos un par
de ajustes aquí porque esto puede no funcionar. Al igual que, si estás
siguiendo por ti, esto puede no funcionar, dependiendo los detalles de tus objetos. Tienes que cambiar entre el tipo
solver, rápido o exacto. Rápido es más rápido. A veces no funciona,
así que tienes que usar exacto. A veces exacto no funciona,
así que tienes que usar rápido. Y en este caso, rápido deja
una malla abierta en este lado, pero una malla cerrada en este lado. Entonces en este caso,
exacto funciona mejor. Lo que normalmente hago con mis objetos booleanos es
que los enciendo aquí,
pero hago clic en el objeto y
voy a sus propiedades de objeto Y abajo en la sección de
visualización de la ventana gráfica, voy a mostrar como y
lo cambio a cable De esa manera, siempre se
mostrará como un cable, así puedo ver a través de
él mientras lo modifico. Así que todavía puedo ver dónde está, pero también puedo ver a través. Y también subo
al outliner y
lo apago en el render Entonces apago el icono de la cámara, es
decir, cuando renderizo, este
cilindro no se renderiza. Es como un
objeto cortador, un cortador de galletas. Ahora, te voy a hacer
una aún mejor. Mira esto.
Bajaré el cilindro, tal vez escalarlo hacia arriba en el eje z para poder
escalarlo aún más. Lo voy a mover por aquí. Escalarlo aún más. Hazlo pequeño. Ah, y lo que viste
ahí fue que se estaba moviendo justo a la mitad de mi objeto
y solo cortando hasta la mitad, pero quería cortar
todo el camino Y luego entraré en
la pila modificadora de este objeto cilindro. Todavía
no tiene modificadores,
pero quiero agregar uno El que quiero
agregar se llama array. Matriz duplica el
objeto en línea recta. Voy a añadir array, y ya ves que
obtenemos otro cilindro, y esto también corta un agujero porque el objeto booleano está haciendo referencia a lo que sea que se vea
este objeto, y eso es con
modificadores y Déjame cambiar el factor X de uno y lo deslizaré
a uno negativo. Y luego voy a subir la cuenta también. Digamos, seis. Aumentemos un poco ese
número. Mira eso. Si lo escondo, ahora he hecho un montón de
agujeros en mi escalera Pero voy a agregar otro modificador de
matriz a esto. Así que no sólo voy a hacer una matriz de
este objeto a lo largo de esta línea, voy a tomar todo esto y hacer una matriz que en una dirección
diferente. Así que agrega una matriz. Y no quiero
hacerlo en el eje X. Voy a escribir cero ahí, pero quiero hacerlo en el
eje Y, todo tipo uno. Entonces hagamos un poco más de uno y
agreguemos un par más. Entonces ahora hemos hecho
perforación en la escalera. Veamos desde arriba y solo posicionemos esto en un
lugar que tenga sentido. Ahora, es muy lento
moverse, y eso es porque está
calculando el modificador booleano,
y el modificador booleano
es muy lento,
pero es más rápido si
lo cambiamos de exacto a Si ahora lo muevo,
es mucho más rápido. No se queda tanto rezagado. Bien, entonces hemos agregado los cilindros.
Los esconderé. Ahora bien, aquí hay un interesante
punto de orden de operaciones. El modificador de bisel está ahora
antes que el modificador booleano, razón por la
cual está
biselando esta parte, pero no está Porque está biselando y luego está haciendo
el cortador de galletas Si el bisel viene después, entonces va a
biselar esos también Pero al modificador de bisel no le gusta el modificador
booleano Y es por eso que a los dos nos llegan algunos extraños problemas de sombreado como aquí, donde se puede ver, se ve algo así como
baches o grumosos de alguna manera, y el bisel no irá
tan Eso es solo una cosa
a tener en cuenta, el modificador booleano hace geometría
extraña que al modificador de
bisel no le gusta Entonces voy a mover eso de
nuevo a antes. Y luego agreguemos
otro modificador. Agreguemos un modificador de espejo. Ya conoces este. Y nosotros espejaremos sobre el
eje X y lo biseccionaremos Y obviamente hemos copiado el lado equivocado porque todos
nuestros agujeros desaparecieron, así que voy a voltear, eso
refleja todo el asunto. Y luego sobre este objeto, voy a añadir un modificador de matriz. Array, que duplica todo
eso, pero no en el eje X. No quiero nada en la X, pero la voy a mover
sobre la Y. Lo voy a mover un objeto sobre. Y luego agrega un par más. Y no sólo en la
Y lo moveré, sino que también lo moveré en
el eje Z. Lo que plantea todos esos. Y tenemos una
interesante escalera. Creo que lo sorprendente de
esto es que empezamos con solo un avión
y agregamos modificadores, y ahora tenemos toda una
maldita escalera perforada Y a este tipo de modelización se
le llama modelación procesal. Procesal, ya que en ella sigue un procedimiento de
principio a fin
para saber construir el objeto. Y este es un
flujo de trabajo muy común para cosas como esta es una herramienta muy útil
para tener en tu cinturón de herramientas. A menudo, no construirás
algo usando uno, dos, tres, cuatro, cinco, seis modificadores como yo tengo aquí Eso no es muy común, pero es bueno conocerlos. Lo que me encanta de los flujos de trabajo
procedimentales es que siempre
puedes volver atrás y cambiar de
opinión sobre algo. Entonces en este punto, he
completado mi escalera, pero digamos que quiero un
patrón diferente de perforación Yo puedo hacer eso. Puedo
entrar en el cilindro original. Puedo desocultar eso, bajar aquí, ahora
puedo mover esto
por aquí y puedo
cambiar puedo cambiar el factor en la primera
matriz para traerlos encima,
aumentar el conteo, disminuir el conteo esto tal vez, traerlos a colación Y ese nuevo patrón se actualiza
sobre todo el objeto. Creo que es
genial solo
mover esto y verlo actualizarlo a través de
toda la escalera. Y en cualquier momento, si necesito darme cuenta los modificadores para entrar
y editar algo, puedo hacerlo, y puedo
hacerlo con todos ellos
o solo con algunos de ellos. Pero es una buena idea comenzar por arriba y bajar
con tu postulación. Entonces en este caso, si
voy al primero, el
primer modificador
solidifico y lo aplico y
aplico el bisel
y aplico el booleano Ahora todo eso
es geometría real. Así que en realidad puedo ir y borrar el cilindro original, ya
no lo necesito. Y si entro en modo de edición, este objeto ahora en realidad
tiene esa geometría. La geometría es algo
extraña, pero está ahí. Y si no hubiera aplicado esos
si deshago y vuelvo atrás, luego entrar en
modo Editar solo me da ese plano original sin
la bodega, sin nada. Y si empiezo a ajustar
eso, puedo hacer esto. Y ahora ese es el
nuevo objeto base que se replica
en todo lo demás. Voy a tener que disminuir
el desplazamiento z aquí. Y para no
pellizcar esta esquina, voy a tener que
entrar en el solidificar
y encender incluso espesor Entonces
modelación procesal para hacer cosas
realmente complejas muy rápido y hacerlas
editables después del hecho
67. Modelado con splines: Otro tipo de modelado que quiero
mostrarte es el modelado spline Introdujimos splines al
principio del curso. Turno A, tenemos curvas, como ellos llamaban curvas Bezier.
No te preocupes por el resto. Agreguemos una curva Bezier y
editamos esta de la misma manera
que editamos cualquier otra cosa Presionamos tabulador y eso
nos da los mangos de Bzier. Estos son los mismos que
en el editor de grafos para animación y es lo
mismo que en Illustrator. Puedes agarrar las asas y
puedes cambiar el
perfil de la curva. Ahora ten en cuenta que
sigues trabajando en tres D. Así que ahora si miro
desde un lado, puedo arrastrar esto hacia abajo
y puedo arrastrar esto hacia arriba Y es muy fácil no saber realmente en qué eje
estás trabajando. Y puede empezar a
verse realmente extraño, muy rápido. Así que
ten en cuenta eso Y si alguna vez quieres aplanar todo, solo
selecciona todo,
A, y luego
escalarlo S en el eje z cual lo escala en el
eje azul y luego simplemente escribe cero, que escala todo
hacia abajo, y ahora es plano. Así que puede ser inteligente si
quieres que todo sea plano para trabajar desde la vista superior. Ahora todo lo
que hagas será plano. Entonces puedes rotar estos,
puedes escalarlos. Puedes agarrar las asas. Incluso puedes hacer clic derecho
sobre un punto y cambiar el tipo de manejador al igual en el editor de grafos
para decir vector, que lo hace recto. Haga clic derecho en el vector, y
ahora son rectos. O como me gusta alinearse. Si quieres agregar un
punto entre estos, también
seleccionas ambos, haz clic con el botón
derecho y presiona subdividir,
lo que pone un punto
recto entre ellos haz clic con el botón
derecho y presiona subdividir, lo que pone un punto
recto entre Y si quieres extender
uno, puedes presionar E, que es lo mismo que extruir sobre una malla y luego
arrastrar hacia fuera una nueva E, arrástralo,
E, arrástralo hacia afuera. Y si quieres
conectar los extremos entre sí, es decir,
cerrarlo, puedes hacer clic derecho
y presionar Toggle cíclico. Eso la hace cíclica
en el lenguaje de las licuadoras. Pero esta curva no es
visible en ningún renderizado. Esto es solo una
curva guía en este momento. Si queremos poder verlo, necesitamos
convertirlo en geometría. Podemos hacerlo en la pestaña curva aquí en el panel de
propiedades. Y aquí podemos cambiar
un par de cosas. También podemos cambiar la
resolución. Si lo vuelvo a bajar, se
vuelve muy dentado. Si lo subo, se vuelve
suave y bajo geometría, puedo cambiar el bisel Entonces, si aumento la
profundidad del bisel, eso le agrega un grosor. Y la resolución, esa es la resolución circular que da la
vuelta. ¿Cuántos segmentos
hay dando vueltas? Si entro en la vista wireframe
y desactivo el modo de rayos X, puedes ver
cuántos polígonos hay por ahí y
si lo disminuyo, puedes ver que se vuelve
mucho más dentado
y si lo aumento, Y este objeto es renderizable, si quieres hacer cuerdas o tubos, esta es
la manera de hacerlo
68. Introducción al texturizado: Has aprendido varias claves
para el realismo y la licuadora. Ya sabes usar
ciclos en lugar de EV. Ya sabes agregar pequeños biseles a
las esquinas para realzar el realismo Y ahora viene la pieza final
del rompecabezas para el realismo, y eso son las texturas
porque hasta ahora, nuestros objetos han sido de
un color uniforme plano sobre todo el objeto. Ahora es el momento de envolverlo
con una imagen. Pero giro de la trama. No puedes simplemente darle una bofetada. Oh, no, licuadoras no es tan fácil. Si lo fuera, lo
llamarían Figma. No,
en realidad no es obvio cómo agregar una imagen de dos D
a un objeto de tres D. Hay que tomar decisiones sobre a dónde van partes
de la imagen. Y para demostrar lo difícil que es eso, traje una
ayuda visual. Conejito de chocolate. Entonces el envoltorio es dos D.
El conejito es tres D, y hay que encontrar una manera de,
como, meter el envoltorio
en el conejito. Y la envoltura se puede aplicar
1 millón de formas diferentes. Puedes aplicarlo así.
Puedes aplicarlo así. Pero hay una manera en la
que quieres aplicarlo.
Tienes que hacerlo bien. Y este es el problema que
enfrentamos en licuadora, también. Ahora en Blunder, resolvemos
el problema a la inversa. En lugar de envolver la
imagen alrededor del modelo, lo que hacemos es
desplegar el modelo Hacemos pequeñas incisiones en
el modelo y la plegamos, y luego la
pegamos en una imagen Entonces, cuando volvemos a plegar el
modelo, la imagen se pega en todos los lugares correctos.
Esa es la forma en que lo hacemos. Desplegando el modelo,
pegándole la imagen y
luego invirtiendo eso Obviamente, esto
está en una computadora, así que todo es instantáneo. Este proceso se llama
desenvolvimiento y buenas noticias. En este curso,
dejaremos que Blender lo
haga de forma automática. También hay otro aspecto de texturizar,
porque recuerden, color no era el único deslizador que teníamos en el panel de materiales Teníamos cosas como
rugosidad, también, y resulta que
puedes usar imágenes para la
rugosidad, también,
porque el
deslizador de rugosidad, si recuerdas,
va 0-1, y eso es lo
mismo que del negro al blanco Entonces en una imagen, el negro sería completamente brillante mientras que el
blanco es completamente rugoso. Y si tomas una imagen en blanco y
negro, envuelves alrededor de
una modelo y le dices a Blender que este
es un mapa de rugosidad. Entonces las partes negras se vuelven brillantes y las
partes blancas se vuelven ásperas. Eso es genial, ¿eh? La buena noticia es que
no tienes que hacer
estos desde cero. Esto es tan común en tres D, que hay enormes bibliotecas de materiales con un
montón de mapas en línea. Y lo genial de
estos letreros es que obtienes un material completo
con mapas coincidentes. Entonces, por ejemplo, encontré
un material de pantano desagradable, que tiene agua
y tiene palos,
y se obtiene un mapa de colores Pero también obtienes un mapa de rugosidad y cuando se juntan, entonces el agua se vuelve
brillante y los palos se vuelven ásperos Se alinean perfectamente y se combinan para convertirse en un material
cohesivo En estos sitios, obtienes
más de dos mapas. No solo obtienes
color y rugosidad. Puedes obtener hasta
diez mapas diferentes. Solo necesitas
saber de cuatro. Estos son los cuatro que
crean casi cualquier material, cualquier material que puedas encontrar en el mundo real se puede describir, casi todos y cada uno, se pueden describir usando solo cuatro mapas, esos son color, rugosidad,
metálicos y normales El color es la imagen que
realmente ves rugosidad. Ya hemos hablado de
eso es brillo. El metálico describe dónde
está el objeto metálico. En este ejemplo, los
marcos de cobre alrededor de las
baldosas, eso es metálico. Y luego está lo normal, y este es un poco
un poco engañador Se ve el más groovy,
y lo que describe
es baches Entonces tu objeto puede
ser completamente plano. Pero cuando agregas un mapa normal, parece que
es ondulante, como que ya no es plano Y cuando miras
el borde del objeto, puedes decir que
sigue siendo completamente plano. Es solo que en la superficie, está la ilusión
de baches Entonces esta es
realmente interesante. Y estos cuatro mapas van juntos
para crear cualquier material. Y los obtienes en
diferentes sitios web, te
puedo recomendar dos. Te recomendaré polyhaven.com, que es gratis y también de dónde
sacamos nuestros HDRis y polígono deletreado con dos Is y ese es un servicio
premium, pero sí tienen muchos materiales gratuitos que también
puedes Otro beneficio de usar materiales de autor
profesional es Entonces, cuando tomas una
imagen y quieres
replicarla a través de una superficie eso puede parecer realmente estúpido Pero estos están hechos
para ser sin fisuras. Entonces, cuando
los azulejos uno al lado del otro, se repiten sin
mostrar una costura. La inconsútil es clave. Pero
aún no necesitas
ir a estos sitios web porque en los archivos de
ejercicios, te
he puesto algunos materiales, los
descargo y
en el siguiente video, te
mostraré
cómo ponerlos en uso.
69. Configuración de textura: ¿Sabes qué? Creo que estás listo. Creo que estás listo
para el Editor de Shader. Ya hemos usado
el editor de shader. No quiero ser demasiado dramático. Hemos abierto una nueva ventana. Ya hemos ido
al editor de shader y ya nos
cambiamos a world Lo que no escuchamos fue que
agregamos una imagen HDDI, ¿verdad? Pero volvamos a este paso
donde cambiamos al mundo. Volvamos a objetar. Puede que ya hayas
vislumbrado esto. Lo que ves aquí es el
material en mi cubo. Si hago clic en el cubo y
voy a la pestaña de materiales, hay un material en él, y ese es el mismo material que
ves aquí en forma de nodo. Esta lista tiene los
mismos parámetros que este nodo, e incluso
están sincronizados. Entonces si cambio el color, digamos a rojo, entonces también
cambia a rojo en el lado
izquierdo. Esta ventana se sincroniza con cualquier material que hayas
seleccionado a la derecha. Entonces si agrego un nuevo material, presione nuevo y haga este verde. Entonces ya ves, vemos el material
verde a la izquierda, y si hago clic en el rojo,
vemos el rojo a la izquierda. Así podremos editar cualquier material
en el Editor de Shader. Y podrías pensar, ¿Cuál es el problema cuando
son exactamente iguales? Bueno, el gran problema está aquí, igual que hicimos
en la hab Worlds, cuando agregamos una textura HDRC, también
podemos agregar texturas
aquí,
y esas texturas se
mapearán también
podemos agregar texturas
aquí, a nuestro objeto Entonces hagámoslo. Agreguemos un nodo a esta ventana
presionando Mayús A, y obtenemos una lista de
todos los nodos posibles que podemos agregar en esta ventana, y hay muchos de ellos, pero no se deje intimidar porque solo
usaremos un par Y el primero está bajo
textura y textura de imagen. Manténgase alejado de la secuencia de
imágenes, queremos usar la textura de la
imagen. Agrega eso, obtenemos un
nodo que es muy similar al
que elegimos el HDDI Y lo que hacemos es hacer clic en Abrir. Y voy a ir a una carpeta
donde tengo un material guardado. Entonces aquí están todos los mapas que
vienen con este material. Tenemos un color base,
tenemos un metálico, tenemos un normal, y
tenemos una rugosidad. Simplemente hagamos clic en
el color base por ahora y presionemos Openimage Y ahora tenemos
esa imagen cargada en este nodo.
¿Y dónde lo queremos poner? Queremos ponerlo en
el color de este nodo. Entonces sacando
del color aquí, lo
arrastramos rojo, y lo conectamos al color del shader Aún no podemos ver nada porque
no estamos en modo sombreado,
así que hagámoslo Vamos a desplazarnos por aquí
presionando la rueda de desplazamiento y haciendo clic en el
modo de vista previa del material. Y aquí vamos. El material ha sido
mapeado en el cubo, y así es como hacemos que
nuestros materiales sean realistas. Como, hasta ahora,
solo han sido colores planos, pero ahora pueden ser cualquier cosa,
cualquier cosa para lo que encuentres
un material. No va a pasar mucho tiempo
hasta que sientas la
necesidad de cambiar el mapeo
del material. Digamos, por ejemplo, en este caso, que los cuadrados son demasiado grandes para el cubo, queremos
hacerlos más pequeños. ¿Cómo lo hacemos? Bueno,
podemos hacer eso también con nodos. La imagen tiene una entrada
propia un vector, y ahí es donde le dices
cómo mapear en el cubo. Agreguemos otro
nodo para decirle eso. Cambiemos A, agreguemos un nodo de coordenadas de
textura, presionemos return para agregarlo, y tenemos un montón de formas
diferentes de mapearlo. Solo nos importa uno de ellos, y eso es UV pero te voy a
mostrar solo por diversión, qué pasa
si metes una ventana aquí porque me
gusta mucho esta. Ahora es mapear desde
el punto de vista, lo
estás mirando, sin importar desde dónde lo estés
mirando. Es súper extraño, muy trippy. Nunca uso esto, pero
entiendes la idea. Este nodo le dice a este nodo cómo poner la imagen
en el cubo. Y así, solo usemos UV. Y lo que pasa entonces es que
volvemos a la forma en que simplemente era porque si no
enchufas UV a aquí, va a suponer que
quieres mapear con UV. La UV es la forma más
común de mapear. Y así Blender solo
asumirá que eso es lo que quieres, y luego repasaremos lo que
es UV y lo que significa. Pero por ahora, solo sé UV es cómo mapeas una imagen
sobre el objeto. Blender ya asume que queremos UV, ¿por qué
agregamos el nodo? Bueno, porque entre estos, podemos cambiar el mapeo
con otro nodo, y ese es el nodo de mapeo. Así Mapeo MAPP. Puedo insertar esto automáticamente solo hacer clic en
él cuando esté entre estos dos, y eso lo pondrá
en la cadena de fideos Esto nos permite
cambiar el mapeo. Entonces, si saco la ubicación
X aquí, verás los cambios de mapeo
en el lado derecho. Es nervioso y raro porque
está cambiando muy rápido, pero si mantengo presionado Shift, cambiará un poco más lento, y
probablemente veas que
en realidad estoy deslizando
la textura alrededor Puedo hacer eso en diferentes ejes, e incluso puedo girarlo. Cuando rotas una textura, quieres hacerlo
en el eje z. Y entonces podemos decir alinear
las líneas con el cubo. Entonces ya no es un diamante, sino que es más como cuadrados. Y luego podemos cambiar la escala haciendo clic en el
primer valor de escala, arrastrando hacia abajo para seleccionar todos los valores de escala
y ahora puedo arrastrar los de un
lado a otro manteniendo shift para cambiar la escala
de la textura Bien, ya sabemos cómo mapear una imagen sobre el objeto. Hagámoslo con más mapas. Entonces en esta carpeta,
tenemos múltiples mapas. Tenemos, por ejemplo,
el metálico. Así que vamos a meter este. Y mi forma preferida de
obtener una imagen no es, hecho, agregar un nodo y
luego abrir una imagen. Se trata de hacer clic en la imagen
y arrastrarla hacia adentro. Para mí, eso es mucho más fácil. Ahora para este nodo, necesitamos hacer un poco
de preparación. Si me acerco aquí, verá, tiene un espacio de color,
y el espacio de color es SRGB Este menú desplegable le dice a Blender
cómo interpretar esta imagen. Como, ¿qué tipo
de imagen es? SRGB básicamente significa que es color, y esto no es color Esto es metálico. Entonces tenemos que cambiar eso. Tenemos que hacer clic en él, y
obtenemos muchas opciones, pero la que nos
importa no es color. Si una imagen no es para color, configuramos en no color,
fácil de recordar, eso va por todo lo que
no se usa para el color base. Pero tenemos que
recordarlo o de lo contrario Blender no va a interpretar
bien este mapa , y no
va a quedar bien. Vamos a enchufar esta salida
a la entrada metálica
del shader porque es el mapa
metálico, y es raro Y la razón por la que es raro es esta imagen no está mapeada de la
misma manera que esta. Recuerden,
lo movimos, lo rotamos, y lo escalamos, y no lo
hemos hecho con esto Entonces hagámoslo con esto también. Lo que podemos hacer es
seleccionar estos dos nodos, y podemos presionar Mayús D para
duplicar, moverlo hacia abajo y enchufar este nodo en
la entrada vectorial aquí, y eso mapea el metal exactamente donde lo queremos
en los intersticios Pero hacer esto no es
utilizar el poder de los nodos. Entonces déjame mostrarte
algo genial. Eliminemos lo que
acabo de hacer y en su lugar arrastremos un segundo fideo de este nodo de mapeo y
lo conectemos a la imagen, y hace
lo mismo Y ahora, si cambio
la escala de este nodo, cambia la escala
de ambas imágenes, así se mantienen alineadas. Eso es genial. Realmente puedes empezar
a ver el poder de los nodos cuando puedes conectar una cosa a otras dos
cosas para controlarlas a ambas. Esta es una de mis ventanas
favoritas en Blender. Bien,
sigamos adelante. Vamos a completar este material. Voy a volver a la carpeta. Por ahora, saltaré
lo normal y agregaré en el mapa de rugosidad. Haremos lo mismo
con el mapa de rugosidad, acercaremos y cambiaremos
el espacio de color de SRGB a no color porque
la rugosidad no es esto le agregaremos el
nodo de mapeo, también, para que mapee de la misma
manera que todo lo demás. Y veamos esto en
un ángulo de pastoreo para que
veas qué pasa
cuando lo enchupo Voy a enchufar este nodo
en la rugosidad
del shader y boom,
Rugosidad aplicada Obtenemos un interesante juego
de luces en la superficie. Realmente genial. Entonces, finalmente, agreguemos el mapa normal. De vuelta a la carpeta,
arrastre en el mapa normal. Lo mismo con esto, acercar, cambiar el
espacio de color de SRGB a no color y conectar el nodo de
mapeo a esto también, así que también sigue el mismo
mapeo que todo lo demás Y aguanta un segundo porque
necesitamos un nodo más entre esta imagen y el shader para decirle
al shader que este, de hecho, es un mapa normal, y el nodo para hacer eso se llama
convenientemente mapa normal También hay un nodo llamado
normal que se ve así. Esto no es correcto, borre eso. Lo que queremos es éste. Enchufamos el color
al color y conectamos la normal a la normal y
obtenemos el efecto de mapa normal. Es sutil en este caso, pero levanta las brocas de metal. Déjame enchufar esto para que
veas que esto es sin y esto es con e incluso podemos exagerar este efecto
tirando de la fuerza por encima de uno Vamos a diez por ahora. Se puede ver que realmente realza ese efecto de baches. Pero
voy a volver a bajar a uno. Entonces así es como mapear cada tipo de
mapa en el shader El color tiene un espacio de
color de SRGB, los otros no tienen color, y el mapa normal
entra en un mapa normal Para mapearlos, usamos un nodo de coordenadas de textura con el socket UV
entrando en un mapeo, y aquí
cambiamos el mapeo. Y así es como
hacemos cualquier material. Cualquier material está hecho exactamente de
esta misma manera. Entonces, para darte algo de
práctica con eso, puedes descargar
los archivos de ejercicio, y aquí, tengo seis materiales
para que los instales por tu cuenta. Sabes todo lo que
necesitas para configurar esto, pero todavía hay un
desafío aquí porque la mayoría de los materiales no tienen mapas para
cada deslizador. Si solo conectas estos mapas a sus
puntos correspondientes en un material, no
va a quedar bien. Porque faltan algunas cosas. No siempre se obtiene
un mapa de rugosidad. No siempre se
obtiene un mapa a color. Y en esos casos, hay que
establecer un color o
rugosidad manualmente. Entonces, lo que quiero que hagas es
descargar estos archivos de ejercicios y configurar todos estos
materiales para que se vean así. Esta es mi versión de
cada material individual, e intenta que la tuya se vea lo
más cerca posible de esto. Deberías poder hacer
eso, pero recuerda de lo hemos hablado antes de
usar el sombreador de vidrio Recuerda de lo que
hablamos Sheen, piensa que podrás
configurarlo todo por tu cuenta Y cuando
termines, puedes abrir el archivo de
mezcla de puntos de materiales donde he configurado todo y puedes
ver cómo lo hice de mi parte. Y luego cuando termines, estos materiales
son tuyos para que los guardes. Se pueden utilizar para cualquier
proyecto en el futuro.
70. Mapeo de proyección: Veamos cómo podemos envolver
una imagen alrededor de un modelo. Tengo un modelo de
casa simple aquí, y le he aplicado
un material. Ese material, si
pasamos a la vista Shader, se
puede ver que tiene una imagen enchufada a
su toma de color base De lo contrario, es un material completamente
regular, pero tenemos una textura de imagen
enchufada al color base Y podemos ver cómo se ve esa
imagen si convertimos esto en un editor UV. Recuerde, la edición UV es el proceso de mapear una
textura alrededor de un modelo. Y luego en el
menú desplegable en la parte superior, podemos seleccionar esa imagen Y se puede ver esta es
una imagen de un par de tejados y un par de
ventanas y algunas puertas. Y quiero
aplicarlas al modelo. Y para ello,
primero tenemos que poder ver una imagen en el modelo. Y ahora mismo estamos
en la vista en escala de grises, y podemos darle la vuelta a la vista de
textura o vista renderizada, pero también se puede ver una sola
textura en la vista sólida, que será más rápida
y menos rezagada Y eso es que puedes
entrar en el menú
desplegable de este menú de
sombreado de ventana gráfica, y bajo color,
cambiamos a textura, y eso mostrará
cualquier textura seleccionada en el material Pero aún no podemos ver nada, y eso es porque no
he empezado a mapear UV. Esta casa no tiene datos UV. No se sabe qué área de la imagen poner en
qué área de la casa. Entonces comencemos a agregar eso. Pasemos al modo Edición y seleccionemos solo un
lado de la casa. Seleccionaré una esquina y luego Control Shift haga clic en otra esquina para
seleccionar todo ese lado. Entonces voy a subir
al menú UV aquí arriba. Y tenemos algunas opciones. Ignoremos el desenvolvimiento por ahora y solo miremos el
proyecto desde la vista El proyecto desde la vista tomará cualquier forma que veas en este
viewpoard y lo pondrá aquí. Entonces, si lo estoy viendo
en ángulo, se proyectará en un
ángulo por aquí. Si estoy mirando
recto, se
proyectará directamente hacia aquí.
Entonces déjame mostrarte eso. Presione UV y luego
proyecte desde la vista. Esto es lo que obtenemos. Esta forma
exacta por aquí. Y para demostrar, si
voy a un lado, UV, proyecto a la vista, ya
ves, también tenemos esa
perspectiva aquí dentro. Y si solo lo consigo
exactamente de un lado, incluso
voy a hacer clic en
la pelota por aquí para ir precisamente desde un lado, presionar UV, proyectar desde la vista, y ahora puedo empezar a
moverla en esta ventana. Tienes las herramientas encima
en el lado izquierdo, pero prefiero usar
los atajos, que son los mismos que en
los tres D ViewPoardG para agarrar y mirar lo que sucede a la derecha
mientras muevo Es como si esto fuera una
ventana a la textura, y podemos ver esa textura
exacta por aquí. No es del todo diferente a la
herramienta de clonar sello en Photoshop. Si piensas en la forma la izquierda como la fuente de
donde estás clonando, y en la derecha donde
estás clonando. Entonces, si queremos una puerta aquí, entonces tendría que mover esto
a la puerta, y
eso aparecería. Si quiero una ventana, la
movemos a la ventana. Incluso podemos escalarlo hacia abajo y ver cuando
lo escala hacia abajo a la izquierda, luego se escala hacia arriba a la derecha porque la ventana llena
más de esa forma. Entonces así es como
comenzamos el mapeo UV. Veamos qué
podemos hacer hasta el techo. Echemos un vistazo a todo
desde la parte superior, seleccionémoslo todo y veamos, ¿eso seleccionó
algo en los lados? No, no lo hizo. Sólo los tops. Y luego desde
arriba, iré
al menú UV y proyectaré desde la
vista que me da el techo, y puedo moverlo
al techo morado aquí. Y eso me da
la textura del techo en el techo de la casa. Sin embargo, no es
exactamente como yo quería. Por un lado, está apuntando en la dirección equivocada para muchos
de estos mosaicos. Al igual que, en este lado de aquí, podemos ver
que las tejas van por el camino correcto, pero de este lado,
van por el camino equivocado. Entonces, ¿cómo arreglamos eso? Bueno, aquí solo
podemos seleccionar este techo. Y en el editor UV,
podemos rotarlo. Entonces mientras presiono R y lo giro, vigila lo que sucede en el
techo. Gira alrededor. Entonces, si mantengo presionado el control, puedo ajustar eso a
incrementos y obtener eso exactamente en 180 grados. Y mira eso. Ahora está apuntando en
la dirección correcta. Podemos hacer lo mismo con
estos dos tejados más pequeños. Entonces rote esto hasta que esté
apuntando por el camino correcto. Lo mismo con esto.
Éste y éste. Todo apunta por
el camino correcto. Y si sentimos que
las baldosas son demasiado grandes, recuerda lo que
hacemos escalamos la UV. Seleccionaré este polígono, y luego iré a
Seleccionar y seleccionaré Vinculado Vinculado que es
Control L para mí, y eso selecciona
solo esa isla
que está desconectada
del resto No está conectado a nada
y puedo escalarlo. No quiero
escalarlo demasiado porque entonces la segunda textura empieza a
arrastrarse por un lado Entonces voy a tener que hacer
algo como esto. Eso lo hace más pequeño.
Entonces vamos a ver. ¿Qué podemos hacer con
esta parte de aquí? Vamos aquí, haga clic en
la bola de pista. Presionaré el atajo
para ir al menú UV, que es apropiado,
y proyectaré desde Voy a pasar esto a una
de estas ventanas redondas. Toma esta ventana redonda aquí, y del otro lado, voy
a por la otra ventana redonda. Proyectar desde la vista,
muévalo por aquí. Eso es lindo. Y vamos
a conseguir una puerta aquí. Entonces hagamos estos cuatro que
proyectas desde la vista y alineemos la puerta para
estar en la parte inferior. Ahora bien, lo que puedes ver aquí es esta parte es más ligera que esta. La razón es que esta parte tiene coordenadas
UV apuntando
justo por aquí. Y esta parte
no lo hace, es decir, toma aquí un promedio de toda
la imagen. Entonces el color promedio de la imagen que se
aplica a esta parte. Entonces, si solo quiero obtener
una sección de este color, entonces tendré que
mapearla UV a esa zona. Así que déjame hacer clic
en Alt en este bucle y voy a desplazar click para agregar
este bucle y este bucle, y luego deseleccionaré lo que ya
he mapeado UV Quiero mapa UV, todo esto. Puedo volver a hacer un proyecto
a la vista. Pero si hago eso cuando haya
seleccionado una forma de tres d, entonces obtendrás esto. Como se puede ver, las paredes laterales se
aplastan mucho. Entonces, si trato de mapear algo a las paredes laterales ahora
como esta ventana, entonces se
estirará y se verá realmente raro Entonces una mejor opción en
estos casos es presionar U, y luego bajo desenvolver, tenemos un par de proyecciones
más Contamos con proyección de cubo, proyección de
cilindro
y proyección de esfera. Usemos la proyección de cubo porque esto es
más como un cubo. Y eso es como proyectarse
desde la vista desde este lado, este lado, y la parte superior. Es como proyectar
desde los tres ángulos. Lo que obtenemos es que cada
pared se coloca una encima de la otra y cada una de ellas mapea la imagen
sin ser estirada. Bajaré eso
y lo colocaré en un área vacía de la imagen
donde es simplemente azul. Ahora es azul por todas
partes. Ahora puedo mapear esos lados nuevo para poder seleccionar este lado, proyectas desde la vista
y moverlo a una ventana. Entonces, para resumir, puedes proyectar estas tres formas D en
un plano dos D por aquí, y donde las colocas es el área de la imagen que
esa área recogerá
71. Introducción a Desenvolver: Miró cómo seleccionar polígonos y luego
proyectarlos individualmente. Pero, ¿y si quieres
una textura continua que no se rompa? Eso no es del todo posible con la técnica que te
he mostrado, como en este ejemplo, con una tira y una textura de
tablero de ajedrez Veamos cómo podemos hacer
este tipo de efecto. Primero, eliminaré el mapa UV
que ya apliqué. Al hacer clic en el objeto,
yendo a sus datos de objeto, realmente no
hemos
usado esta pestaña todavía, pero aquí es donde
almacenas un montón de metadatos para el objeto. Y aquí abajo, tenemos mapas UV, que trae una lista, y este es el
mapa UV que he hecho. Vamos a hacer clic en menos para eliminar eso e iniciar el mapeo
UV desde cero. Entonces abriré una nueva ventana
y abriré el editor UV. Después presionaré tabulador y comenzaré
proyectando desde la vista. Así proyectar desde la vista. Esto es lo que hace. Ahí tenemos
la textura del corrector. Llegamos a ver el
anillo desde este ángulo. Pero en cuanto nos
movemos desde ese ángulo, se estira, lo
cual es raro. Intentemos también el otro
método que aprendimos, que es U unwrap
y cube projection Eso parece hacer el
truco un poco mejor, pero aun así conseguimos algunos estiramientos como las esquinas del cubo. Eso es cubo va así. Y se proyecta
desde cada lado. Pero en las esquinas, es como si no
supiera de qué lado escoger, así que recoge algunos de
aquí y algunos de aquí, y nos ponemos estirando. Ahora, en el caso de un cilindro
perfecto como este, podemos hacer trampa porque
es posible que hayas visto que si entramos en modo
Editar y presionamos de nuevo, en este menú, tenemos una proyección de
cilindro también. Y si presiono eso, bueno, no
lo
hace no se ve genial, aunque sea un cilindro. Eso es por la configuración. Nos sale un poco pop up. Abajo en la parte inferior. Y aquí dentro, tenemos un par de configuraciones
diferentes, y solo puedes
modificarlas hasta que se vea bien Sucede que sé que línea a objeto normalmente
funciona muy bien. Y en este caso, sí conseguimos, de hecho, el
mapa UV que queremos. Está un poco estirado, pero eso solo significa que tenemos que estirarlo en
otra dirección. Entonces en el mapa UV, puedo presionar S para que la escala cambie la escala, pero la
limitaré al eje Y. Y de esa manera, puedo encogerlo y conseguir los
cuadros de ajedrez cuadrados Está bien, por cierto, salir fuera de esta plaza. Eso solo significa que lo traerá vuelta. Es
como si fuera alicatado. Entonces, si escalo esto, y eso encogerá
toda la textura. Regresa al lugar
donde empecé. Veamos cómo se ve
el mapa UV perfecto para un cilindro. Es sólo una tira. Y la razón por la que esto
no está conectado consigo mismo como si la tira estuviera en tres D es que realmente no puedes poner una tira de tres D
plana sobre una mesa, como puedes intentarlo, pero tendrías que doblarla
y se vuelve rara. Entonces lo que tienes que
hacer es que realmente tienes que cortar en algún momento, tienes un lugar para cortarlo, y luego puedes colocarlo plano. Entonces eso nos da una pista de
lo que tenemos que hacer. Entonces, eliminemos este
mapa UV y hagamos esto manualmente. Para ello, tenemos que
seleccionar todo,
presionar U, desenvolver y
simplemente presionar basado en ángulo Lo que hace es toma esta
forma de tres D y trata de
aplastarlo lo mejor que pueda en el espacio UV En este caso, no le hemos dicho a
Blender que corte en ningún lado, es
decir, solo trata de
aplanarlo lo mejor pueda y el resultado se ve
previsiblemente extraño Pero si entramos aquí y
seleccionamos algún lugar donde
queramos hacer un corte, digamos, solo quiero que se corte
esta arista Puedo ir al menú UV o
presionar y hacer clic en Marcar SM. Un Sam es como un corte en el espacio
UV que resalta
ese borde como rojo. Ahora, sabemos que eso es una costura. Ahora podemos seleccionar
todo de nuevo. Podemos golpear U,
desenvolver basado en ángulo. Y ahora licuadora sabe
cortar eso y luego poner toda
la tira plana y
obtenemos el resultado que queremos. Y así es como comenzamos el
desenvolvimiento UV con puntos conectados
72. Desenvolver manual: A vamos a desenvolver esta sencilla casa juntos de una manera que haga que el tablero de verificador sea completamente
cuadrado en todos los lados Y para que consigamos damas que fluyan a través parece intacto Si trato de ser perezoso sobre esto y entro
aquí y presiono U desenvuelvo la proyección del cubo
y solo hago un cubo, y luego entremos
en la vista texturizada para ver cómo se
ve eso con las damas Entonces vemos que las damas realmente
no fluyen
por las esquinas Parece que sí, pero están
abatidos y son raros y tampoco
funciona aquí arriba Entonces intentemos
desenvolver esto correctamente. Primero tenemos que tomar una decisión
de cuál de estas caras de la casa queremos que
sea el frente de la casa? Cuál es el más importante
para no tener ningún corte en él. Y yo diría, digamos que este es el frente de la casa. Entonces seleccionemos esto,
esto, esto, esto. Y digamos esto aquí,
este es el frente. Quiero que esto se quede quieta. Bueno, eso quiere decir que queremos que esta teja se
adjunte aquí mismo. Queremos que eso se
apegue a este lado, es
decir, esto no es una costura. Y ahora tenemos que empezar a
imaginar un poco. Qué pasa si esto
está conectado a esto y esta fase también está
conectada aquí y aquí. Bueno, no va a funcionar porque
esta fase quiere
desplegarse de esta manera y esta fase quiere
desplegarse de esta manera, es
decir, vamos a necesitar
una costura pasando por aquí. Entonces presionaré a Mark Sam y luego seleccionaré
esta cara, esta, esta, esta, y también todas las caras
frontales y la probaré. Mira lo que Blender hace con nosotros. Desenvolver basado en ángulo. Y esto es lo que sucede. Rotemos todo esto para
que tenga más sentido. Obtenemos exactamente lo que describí. Obtenemos estas dos
tejas señalando en diferentes direcciones
porque están unidas a la
parte superior de la casa. Ahora, eso significa que
el tablero de ajedrez fluye perfectamente
sobre el techo Esta suele ser la forma en
que quieres texturizar. Quieres que las texturas fluyan
sin una costura visible. Veamos cómo podemos
hacer lo mismo con las paredes en el costado. Queremos que esto se
apegue a lo largo de este borde, es
decir, vamos
a tener que cortar los que están al lado. Esto y esto y hagamos lo mismo por el otro
lado, esto y esto. Marcas la costura y luego
seleccionemos todas las caras frontales y solo presionas C para
abrir la herramienta de selección de círculo. Seleccionemos todo lo
que queremos desenvolver y golpeemos el ángulo de desenvolver basado.
Y eso hace eso. Entonces ahora tenemos esa cara frontal con las paredes
unidas a los lados. ¿Y qué
aspecto tiene eso en tres D? Al igual que el
patrón de tablero de ajedrez continúa perfectamente. Hagamos lo mismo en la parte inferior. Queremos que se adjunte aquí, pero no aquí ni aquí, lo que
significa que en realidad es
correcto ahora así que solo
podemos agregar esto
a la selección. Golpear desenvolver basado en ángulo, y creo que deberíamos ser
buenos. Se ve genial. Ahora bien, esto significa que
el tablero de ajedrez no puede fluir perfectamente
por todos los bordes Esto es solo un hecho
del mapeo UV. Hacer un objeto tres D dos D es si esta cara
fluye perfectamente con
esto, tampoco puede fluir perfectamente con esto. Eso es sólo un hecho. Y el patrón del tablero de ajedrez es un poco indulgente con esto, pero se puede ver que en
realidad se aplasta aquí Ahora bien, ¿qué pasa cuando
llegamos a la parte trasera? ¿A qué queremos que esté
conectado el trasero? Bueno, en el espacio UV,
queremos que la parte trasera esté conectada ya sea a
esta pared o a esta pared Terminará
aquí o aquí. Y no importa dónde, pero vamos a hacer una incisión. En este punto aquí.
Usted Mark Sam. Y luego otra vez,
selecciona todo. Desenvuelves según el ángulo. Ah, ¿y qué pasa? Todo todo se rompe. Cuando todo
se rompe, eso significa que te falta
una costura en alguna parte. Algo no funciona. Y puedo decir lo que
no funciona en este caso. Ahora, Blender no
te dirá lo que no funciona. Blender simplemente lo arruinará. Pero la razón por la
que esto no funciona es porque se suponía que
el trasero acababa de salir por el lado, pero también está conectado
a la parte inferior y a la parte superior Entonces necesito
desconectarlo de esos también. Entonces necesito una costura en la
parte superior y en la parte inferior. Y eso se ve bien. Vamos a intentarlo de nuevo. Presione y desenvuelva según el ángulo,
y ahora funciona bien. Ahora tenemos la parte trasera de
la casa a la derecha de aquí, conectada a esta pared,
y se ve bien. Acabemos con esto con esas bridas del lado
donde quiero esas. Creo que lo que más tiene sentido es que están conectados
al techo, así que el flujo cruza
aquí y baja por el fondo, es
decir, que tengo que
cortar los lados aquí y aquí, y aquí ya hay una costura. Entonces veamos si esto
funciona. Primero inténtalo. Siempre es un poco de una apuesta. Como que tienes que
imaginar lo que va a hacer. Tú, Marcar costura,
seleccionar todo, desenvolver basado en ángulo.
Y lo hice bien. Y ahora toda la casa
está desenvuelta. Ahora, se podría decir, eso
fue mucho trabajo, Robin. Y, sí, sí, lo es. Es bastante trabajo,
razón por
la cual Blender tiene una opción
automática para esto, cual te mostraré
en el siguiente video.
73. Exportar un mapa UV: Hacer licuadora, desenvolver la casa
automáticamente esta vez. Realmente quería
mostrarte la lógica detrás del desenvolvimiento porque
en muchos casos, vas a tener formas que no son posibles de
desenvolver automáticamente, y vas a
tener que hacer trabajo manual, y tienes que
entender cómo funciona Entonces ahora que lo haces,
te puedo mostrar el método automático. Y es que presionas U, vas a Unwrap, y
solo presionas Smart UV project Eso va a hacer
el proceso que has aprendido, hacer costuras, proyectar cosas desde
diferentes ángulos de
la manera en que las cosas
de licuadora sean las mejores. Vamos a hacer clic en eso. Tienes un montón de opciones. Simplemente aceptaré los valores predeterminados, presionaré Desenvolver, y esto
es lo que hace. Cada cara está desenvuelta
y se ve decente. Quiero decir, no es genial. Las cosas no están conectadas de la mejor manera que podrían estar. Los techos están un
poco estirados. Esos tendrían que
ser estirados hacia atrás. Escala en la X,
estírelas hacia atrás. Haz como se supone que
deben ser. en general, bastante bien. Y ahora, si selecciono todo, puedo entrar aquí y ver
que esos techos ahora se superponen un poco con otras partes,
que no quiero. No quiero que se superpongan con otras partes del modelo. Así que voy a mover esto
aquí arriba y hacer lo mismo
con el techo aquí abajo. Muévelo hacia arriba Y lo que
puedo hacer con esto ahora es que
realmente puedo exportar esto y abrirlo en un
software de edición de fotos como Photoshop, o voy a usar
Affinity Photo. Entonces subiré a UV y
bajaré en la parte inferior, tienes diseño Export UV. Esto va a ser muy
útil para hacer empaques. Así que exporte el diseño UV. Ponlo en algún lugar de mi computadora
y luego lo abriré. En mi caso, Affinity Photo. Puedes usar Photoshop o cualquier otro software de edición de imágenes y ahora tenemos ese diseño UV, lo que significa que podemos comenzar a
diseñar en nuestra casa. Déjame hacer un trabajo
muy rápido aquí con la
herramienta de pincel y voy a hacer una carita sonriente en esta
cara de la casa y luego una cara muy enojada
en este lado de la casa Creo que estos son los
techos, ¿no? Voy a hacer un pequeño patrón de techo. Y ahora si escondo
ese fondo y solo exporto lo que acabo de hacer, exportar eso como PNG. Ahora, de vuelta en
blender, si importo esa imagen
al editor de shader, vez de usar mi textura de
corrector, agrego una textura de imagen y abro lo que acabo de
hacer en afinidad, y lo enchufo
al color base Mira eso. Se mapea perfectamente a la casa de la misma
manera porque en el editor UV, todo se alinea y dibujé en la UV tal como estaba
cuando lo desenvolví Esta es la forma en que puedes hacer
diseños en tres modelos D. Exporta el mapa UV de una manera que es la misma que
una plantilla de etiqueta. Entonces diseñas sobre eso y lo traes de
vuelta a la licuadora. Entonces ahora ya sabes
cómo hacerlo en ambos sentidos. Puedes mapear
tu modelo en una imagen existente o desenvolverla y luego hacer
tu imagen encima de eso
74. Proyecto de clase 08: empaques de productos: Otro proyecto más. Este es para empaques. Se puede decir, ¿no hice
ya los empaques? No, tú hiciste la botella, pero la botella necesita una caja. De hecho, así es como inicia
el proyecto. La botella necesita una caja
para parecer más cara. Diseña una caja que contenga la botella que has hecho y
renderiza una imagen de la misma. Se puede pensar que esto parece un poco inventado y lo es, pero este es un proyecto muy
útil Así que concéntrese en formas simples. La mayoría de las cajas son cubos, así que no hay necesidad de
hacerlo más complicado. Concéntrese en cambio en las costuras
visibles en el cartón y la
variación en las texturas. Entonces acabo de terminar de hacer
esta caja, y como pueden ver, no
es más que un cubo, pero se pueden ver
costuras visibles atravesando por aquí. Y la separación entre
la caja y la tapa, estos son el tipo
de detalles que realmente brillan
en los renders del producto. Y también fíjate que no
hice ninguna
texturación personalizada para esto No exporté un mapa UV y
luego hice un diseño para ello. Simplemente usé dos texturas, un material de roca y
un patrón de embaldosado Mapearlos en diferentes
áreas de la caja. Eso es suficiente para este proyecto. Y como dice en
la guía de proyectos, puedes descargar
texturas gratis de polyhaven.com Si quieres texto, puedes hacer tu propia
textura personalizada o usar tres textos D. La opción más sencilla es
usar texto de tres D. Ese es un modelo de
texto en tres D. Eso es lo que hice. En este caso, fui al
Mayús A y presioné texto. Entonces puedes editar
ese texto presionando tabulador y luego simplemente comenzar a escribir. Por lo que los requisitos son, UV desenvuelva la caja, como
quiera Eso significa que puedes proyectar
Smart, puedes cubo proyecto, puedes proyectar desde la vista, como
quieras, pero lo necesitarás porque
el siguiente requisito es usar texturas como parte del reto de
este proyecto y luego renderizar en EV o ciclos. El entregable es una imagen JPEG
o PNG que subes a la sección de proyecto o
asignación de clase en este sitio web Creo que vas a
clavar este, así que diviértete y buena suerte.
75. Terminado. Proyecto de clase 08: embalajes de productos: Mi empaque va a ser cuadrado porque quiero que
sea fácil para mí mismo. Entonces agrega un cubo,
presiona G para moverlo, Z para moverlo en Z, y presiona uno en el teclado para
moverlo apenas 1 metro hacia arriba. De esa manera, está sentado
justo en el suelo. Solo vamos a entrar en la pestaña y
seleccionar la cara superior y G Z. mueve eso hacia arriba hasta que tenga una
bonita caja muy bien proporcionada Siento que probablemente debería poner mi modelo insign aquí
solo para comprobar que le quede bien, pero estoy seguro que está bien Digamos que esta es mi caja.
¿Y sabes qué voy a hacer? Duplicaré esto, turno D, y moveré esto hacia arriba hasta
que esté descansando encima. Y esto puede ser como
la tapa encima de ella. Eso probablemente sea bueno,
aunque
probablemente ahora debería entrar en
modo Editar en ambos, seleccionar todo lo
que esté en la parte superior y luego moverlo hacia abajo para mantener esas
proporciones que me gustaron. Y entonces esto es lo que voy a hacer. Voy a entrar en cada uno de
ellos, ocultando al otro. En realidad, voy a empezar a cambiar el
nombre de las cosas. Entonces esta es la caja, y esta es la tapa. Vamos a la tapa. Muévelo hacia arriba. editaré a ambos, y seleccionaré este ritmo
y también
me gustará este ritmo y los insertaré
presionando manteniendo pulsada Shift, y veamos
cuánto de eso, luego voy a extruirlos a ambos Voy a entrar en wireframe realidad para que pueda ver
eso lo que estoy haciendo Extruir en el eje z hacia arriba, por lo que ambos se extruyen
en la misma cantidad Y eso pudo haber sido un
poco redundante porque, hecho, quiero esta extrusión. Vamos a verlo desde un lado para ir todo el camino hacia arriba así. Eso tiene más sentido para una tapa. Y luego en la parte inferior, realidad
eliminaré esto,
presionaré eliminar, y luego caras. Y entonces éste puede
obtener un modificador de solidificación. Entonces agregaré un modificador, buscaré SOL para solidificar
y luego solo aumentaré el grosor hasta que
sienta que este debería ser el grosor
del cartón Eso se ve bien.
Y luego agreguemos un modificador de bisel, BEV, bisel, porque no hay esquinas
completamente afiladas en la vida real, así que agreguemos algunos segmentos a eso y simplemente eliminemos
la Voy a hacer clic derecho y sombrear
Auto suave y voy a disminuir la cantidad hasta que
sienta que es una buena
cantidad de biselado para cartón Eso es para mí a 0.02 metros, y de hecho voy
a copiar
ese valor porque quiero usarlo en esto
también, el mismo valor. Entonces agregaré un bisel y agregaré
esa misma cantidad a esto. Agrega un par de segmentos, clic
derecho, Shade Autosmooth,
tal vez un segmento más Y eso se ve bien.
Ahora bien, puedo ver aquí que la solidificación
en realidad se inclina un poco
hacia adentro, y eso es porque no la puse Si enciendo incluso espesor, entonces va recto
hacia abajo. Eso es bueno. Ahora vamos a mapear UV estos para
que cuando la tapa esté
encendida, el tipo de mapa UV fluya
de uno a otro para
que la textura sea
continua cuando la tapa esté encendida. Primero, tengo que agregarles un
material a ambos, y voy a llamar a este patrón
material porque voy a agregarle
una textura de patrón. Y de hecho, voy a entrar directo al editor
de shader para
esto. Editor de sombreadores E importaré un
patrón que he generado usando IA para
encajar con mi tema. Y para poder verlo,
voy a entrar en la
vista texturizada, y esto es todo. Entonces agregaré ese mismo
material al patrón de tapa. Voy a abrir una tercera ventana. Voy a dividir este uno en dos
y entrar en el editor UV. Y seleccionando ambos, entraré en pestaña,
seleccionaré cada una de las fases, y lo haré para esto, no molestarme en
desenvolver UV correctamente,
aunque eso estaría bien, aunque eso estaría bien, pero solo voy a entrar en
desenvolver y proyección de cubo para que no te quedes sentado aquí
viéndome desenvolver Y en realidad es desenvolverlos
a diferentes escalas aquí. Entonces el superior tiene una
escala menor que la inferior, y creo que eso probablemente sea
porque tengo que ir a aplicar
objeto y escalar. Por eso suele suceder eso.
Entonces intentemos eso otra vez. Establecer todo. Desenvuelva la proyección
del cubo Y eso arregla eso. Entonces ahora
vamos a tratar de alinear estos. Iré a solo la
tapa, seleccionaré todo. Y en el editor UV, seleccionaré
todo aquí, también, y solo presionaré
G para moverlo, y luego Y y luego
moverlo hacia arriba hasta que se alinee. Y creo que ahí está
más o menos. Vamos a acercarnos. Creo que como que
lo clavé. Así que eso es lindo. Ahora en este punto, tengo que
elegir qué lado es el lado frontal porque
quiero que
sea un poco
mejor que los otros lados. Sólo voy a hacer un
poco de trabajo. Entonces vamos a ver. Hagamos esta. Escojamos este
lado como el frontal, y seleccionaré esta cara y veré dónde
está en la textura. Y en realidad, sólo voy a dibujar una pequeña marca
sosteniendo D y dibujando, solo para recordar
dónde termina eso. Entonces también me gusta la cara superior, y voy a moverla hacia arriba para
comenzar donde están esas marcas. Y eso significa que esos
en realidad también se alinearán. Ahora fluye continuamente
de abajo hacia arriba. Hagámoslo un poco
más realista
agregando un material de papel
al interior Entonces agregaré un nuevo material, nuevo lo llamaré papel, lo
haré bastante áspero, y luego iré a seleccionar estas
caras en el interior de la tapa y
asignarlas al papel para que
eso se vuelva blanco. Y voy a hacer algo
similar de este lado. Pero aquí creo que
en realidad solo voy a agregar una nueva malla, un cubo, encogerlo hacia abajo, moverlo hacia arriba y
borrar el lado superior. Y yo también haré ese papel. Seleccione la cara inferior de esa. Entra en la vista de estructura metálica, viendo desde un lado,
y lo moveré hacia abajo. Encogerlo un poco
y muévelo hacia arriba. Entonces ahora eso es como
forrar el interior. Ahora hagamos de esto
un poco funky. Tengo muchas ganas de usar
el modificador booleano. Hagamos un
cortador booleano con un cubo, viéndolo desde el
frente, luego movemos esto hacia arriba Entraré en Wireframe
Vew y presionaré tabulador para editarlo y
hacer esto inclinado Muévelo hacia arriba para decir aquí. Voy a usar esto para
cortar este objeto. Entonces sobre esto, voy a añadir
un modificador booleano. Lo pondré rápido solo para
que sea un poco más rápido, y luego gotero
ese objeto inclinado, que debería cortarlo en dos,
eso es un poco difícil de ver Entonces voy a entrar en este objeto, entrar en sus
propiedades de objeto hacia abajo a visualización de la
ventana gráfica y
configurarlo de texturizado a alambre De esa manera podemos ver a través de él. Y eso es genial. Y luego aquí viene
la parte genial. Duplicaré este objeto, el objeto que se corta, desplazaré D, lo
duplicaré y hago clic derecho para simplemente colocarlo donde estaba, luego entraré en su modificador
booleano y en lugar de
establecerlo a diferencia, lo
configuraré para que Y de esa manera, sólo se muestra donde está el objeto booleano Entonces esto ahora puede ajustar donde ocurre
el corte entre
los dos objetos. Ahora tenemos que ser
conscientes de donde en la pila pasa a ir este
modificador booleano Y en realidad pienso, vamos a ver. Ocultemos esto por un segundo
y ocultemos esto también. Y mira las diferentes
opciones que tenemos. Entonces el modificador booleano puede venir después de todo lo
que se ve así También puede ir antes del
bisel. ¿Qué pasa entonces? Bueno, entonces el bisel pasa
encima del booleano, lo que significa que esto ya no va a ser agudo lo que significa que esto ya no va a ser agudo.
Lo redondea un poco. Y si lo pongo
antes de que se solidifique, entonces corta el objeto
antes de que se solidifique, es
decir, agrega una cara aquí, y eso simplemente Entonces en mi caso, en realidad
quiero esto después de la solidificación, pero antes del bisel, así
me sale el Hagamos lo mismo para esta parte
superior después de la solidificación, pero antes del bisel, porque entonces me sale un
poco de Y esta sección inferior, no
quiero tener
el material del patrón. Voy a añadir un nuevo material a eso. Sólo voy a quitar el patrón. Agrega un nuevo y esto
voy a llamar fondo. Y para este material, quiero usar un material del que
descargué en línea, que es un material de pizarra. Arrastre la imagen de la pizarra, conéctela al color base y vea cómo se ve eso.
Es bastante interesante. Ajustemos un poco el tamaño de
esta luz
yendo a la pestaña y simplemente
ajustando el tamaño del UV, escalándolo para que
veamos más de esa textura. Incluso un poco más pequeño, entonces traeré también los
otros mapas. Entonces este es el mapa normal. Y recuerde, el
mapa normal siempre debe establecerse espacio de
color no
color y entrar en un nodo de mapa normal, no en la fuerza,
sino en el color. Y luego arrastraré
la normal hacia aquí, y eso nos da algunos
baches en la superficie Creo que esto es genial, entonces sólo
voy a aumentar
la aspereza. A algo un poco
más creíble. Eso es bastante interesante. Vamos a finalizar esto
agregando algo de texto. Mayús A, agrega algo de texto. Pulsaré Tab para editar el texto, y luego eliminaré lo que hay ahí
y solo escribo Daniels Ese es el nombre
de la marca, y entra en la configuración de texto. Y bajo fuente, seleccionaré la fuente de marca que seleccioné aleatoriamente para el
primer proyecto. Abre esa fuente. Es justo
entonces le voy a dar algo de grosor a este texto
entrando en su geometría. Y volteando el extruido, eso le da algo de grosor, y luego le
agreguemos también un poco de bisel Sólo un poquito. Y es
material que debería ser, creo, sólo un negro brillante. Así que baja la aspereza, hazla muy oscura Yo giro esto sobre el eje
X, 90 grados, lo
escala hacia abajo, lo muevo hacia arriba, y vamos a alinearlo
desde la vista frontal. Y solo trae
eso a la caja. G Y para moverlo sobre la Y, manteniendo presionado el turno
para hacerlo más lento, y luego llevarlo ahí. Eso se ve bastante dulce. Entonces digamos que esto es todo,
y quiero renderizar. Bueno, hay una
cosa que tenemos que
recordar a la hora de renderizar
cosas con booleanos, y es decir, si voy
a renderizar vista ahora,
ese objeto booleano, eso E incluso si apagas
eso en renderizado, todavía
va a aparecer
en el renderer de viewport Este año, simplemente no aparecerá si vas a
renderizar Imagen, pero aún así aparecerá
aquí, lo cual es molesto. Entonces, la forma más fácil de lidiar
con esto es entrar en cada objeto booleano e ir al modificador
booleano No obstante, recuerden, si aplicamos
esto y seguimos solidificando, entonces va a booleano
y luego solidificar, lo que nos dio ese mal aspecto donde solo se
conectó en la parte superior,
así que necesitamos aplicar realmente
todo lo que está por encima de él, también todo Eso es muy típico cuando
aplicas modificadores, tienes que aplicar
de arriba a abajo Entonces ve esto, aplica,
y esto aplica. Y luego esto también, solidificar,
aplicar, y aplicar booleano Puede ser una buena idea guardar el proyecto antes de hacer
esto para que siempre puedas volver atrás y editar
antes de aplicar los modificadores porque ahora entrar en edición
va
a ser un poco más difícil Ahora podemos simplemente eliminar
el objeto booleano,
eliminar, entrar en RenderView,
y va a renderizar y va a Cambiémoslo
de EV a ciclos, GPU y agreguemos una luz
agradable, una caja suave. Incrementar el poder.
Agrega una cámara. Entra en la cámara en
otra vista de tres D. Y devuélveme esa cámara. Establezca esta ventana gráfica para
renderizar esto en sólido. Así es como me gusta trabajar. Y luego solo haré un
telón de fondo rápido agregando un plano, entrando en la pestaña, escalándolo,
extruyendo el borde posterior,
haciendo clic en ese borde,
Control B para biselar,
haciéndolo suave
desplazándose hacia arriba extruyendo el borde posterior,
haciendo clic en ese borde, Control B para biselar, haciéndolo suave
desplazándose hacia Y vamos a sacar esa luz para que no esté en
la vista de la cámara. Llegó a aumentar de nuevo la potencia. Derecha, haz clic en Sombra Suave
en el fondo. Y en este caso,
solo hagámoslo oscuro. Renderizar Imagen Render. Esta es una imagen que
puedo compartir en mi portafolio. Fui bastante rápido
en este proyecto, y eso es por dos razones. Uno, creo que puedes
seguirlo porque es solo repetición de
cosas que ya hemos hecho. Y dos,
quería mostrarte lo rápido que realmente puedes preparar algo así como una toma de producto
decente Este es el tipo de
cosas que le
parecen alucinantes a
alguien que no conoce tres D, pero conoces todos los pasos
involucrados para hacer esto. Sabes que es
solo un modelado básico. Tienes que hacer un poco de desenvoltorio
UV automático y
tal vez un par de modificadores y obtienes algo que
en realidad es medio decente Tan bien hecho llegando
a este punto y completando el proyecto
de empaque.
76. ¿Qué sigue? : Y eso es un representante.
Sobreviviste a todo el curso, y ahora tu cerebro está lleno. Entonces te dejaré ir a
digerir todo eso. Pero primero, permítanme meter un par de
datos más ahí dentro Puedes manejarlo. Entonces, a
continuación, está en ti. Empiezas a usar licuadora
en tus propios proyectos, y tarde o temprano, vas a chocar con un obstáculo para el
que no te preparé Pero eso está bien. Ya conoces los términos. Tienes un motor de búsqueda. Hay un montón de respuestas
sobre licuadora en línea. Y trae tu propio
portátil también tiene cursos donde puedes aprender cosas que se atascan muy
bien con la licuadora. Quiero destacar
el curso de Photoshop en particular porque considero a un artista T D que no conoce Photoshop un artista TD
incompleto. Y el equivalente para la
animación es después de los efectos. Entonces, si quieres
sumergirte en la animación, concéntrate en el curso de after
effects. Y lo que también atasca muy
bien con la animación es el curso de animación para
principiantes. No está enfocado en
licuadora específicamente, sino que todo es
transferible a licuadora Pero no, esas son
solo mis sugerencias. Ve a aprender todo. Todo es valioso y trae tu propio portátil tiene
cursos sobre, ya sabes,
Illustrator, Premiere Pro, Light Room, Canva,
Figma, Webflow Al igual que, si se te ocurre
un diseño suave, por qué no traer
tu propio portátil ha hecho un curso sobre él, probablemente. Y me encantaría verte en cualquier curso futuro que haga, también. Así que gracias
al equipo por hacer su trabajo y a
usted por aprender. Y en el transcurso
de tu aprendizaje, has realizado proyectos. Yo lo recomendaría y
ya lo he dicho antes, te
recomendaré que
compartas tus proyectos con otros en tal vez en esta
plataforma o en redes sociales, tal vez ambas y obtengas algunos comentarios al respecto y
des feedback a otros. Así es una parte realmente clave del desarrollo como
artista. Lo digo en serio. Ese es el final del
curso. Bien hecho, pegándolo,
y ahora te vas. Esos modelos no van
a hacerse ellos mismos.