Transcripts
1. Introduction: Hi, welcome to my
YouTube success course. My name is Chris and I'm a
full-time video creator. Now I started my YouTube
channel in January 2018. YouTube was always a
part-time thing for me. It was a hobby, it
was a side hustle. I never really took it too seriously until the
events of 2020. Unfortunately, 2020 wiped out.
2. Why Start a YouTube Channel?: The first question I
want to answer is, why start a YouTube channel? Well, being a YouTuber
and uploading to YouTube has many
different benefits. Of course, if you
take it seriously, YouTube can pay you a living, and that can pay your
bills, and therefore, you can go full time
becoming a YouTuber. But even if you don't want
to become full-time on YouTube and you just want it to supplement your business, either way, YouTube is really powerful and can do a lot
for you and your business. But the question is, is it
too late to starting YouTube? Honestly, the answer is no. Yes, there is more competition
on YouTube these days. There's more and more
people uploading. More people are uploading
content and creating channels.
3. Think about your Niche: It's really important that when you upload to YouTube that you have a specific audience in mind. Because the problem is, if you try to please everybody, realistically, you'll go into please nobody. So it's really important to think about what are you offering? What can you offer? And why would somebody watch your channel over somebody else's? And for this, you really need to think about a niche. A niche is basically just a topic. So for example, my YouTube channel is broke or films and omnichannel, my niche is filmmaking. I talk all about filmmaking. Editing loads a different filmmaking and video production tips, and that is my niche. You would never catch me uploading a beauty video or a comedy skits. Everything on that channel is to do with filmmaking and how to improve as a filmmaker. And it's really important that you keep this in mind when it comes to your own YouTube channel. So if your business is all about coffee, for example, then your channel can be all about coffee. Or maybe you're not a business, maybe you're an individual and you want to just create a YouTube channel for yourself and your own brand. Well, that's completely fine. Just make sure that you're talking about a specific niche. It's very difficult these days to get successful with a vlog channel or a personality based channel. So if you're just uploading concept which is cost as selfish content, then unfortunately, nobody is going to watch because they don't care enough about you at this moment in time. So you've got to have a niche or a USP, a unique selling points that he's going to help people to want to watch your videos. So really think about your interests and what you enjoy talking about, what you would like to talk about. I'm really focus in on that. Note, you can get really, really niche and it doesn't matter because there is always an audience for everything. So yes, you could do something just as broad as coffee or football or makeup. But you could also get really niche. This is how you really going to capture a dedicated audience. So rather than talking specifically about coffee, you could go really into it and you can talk specifically about a different type of coffee and you'll channel can be all about that. Having a very clear nice to begin with is really important because people are going to fall in love with your content first and what you're talking about. And then they'll fall in love with you after, once you've developed a viewership and an audience, and the audience is starting to care about you as opposed to the content. This is when you can then start to explore out and talk about different topics. However, to begin with on YouTube, you want to be very specific about what you're talking about. So think about what you want to offer. Think about what interests you and make a YouTube channel, make YouTube videos all about that topic.
4. Planning: So now that you've figured out your niche and what you want to talk about on your YouTube channel before you start filming, we first just need to come up with a plan of action. And the first port of call is to create a content plan. Now a concept plan sounds really intimidating and really overwhelming. But realistically, all this is, is just a list of video ideas and when you want to release those videos on your YouTube channel. Now before we do all of that, It's worth just scribbling down as many video ideas as you can possibly think of. Another way that I like to do this is to keep a physical notebook. This is my Brooke of films 2021 video ideas list. And every time I get an idea for a video, I just open up the notebook and I scribble the video idea in. And this, I would probably say is the best way of figuring out future videos. Now you can sit down for a few hours one day, or you can just have this with you at all times in anytime he gets an idea, you just scribble it into the book. But once you've got a handful of video ideas written down in your notebook, you can then figure out your content plan. So you can figure out which videos you want to film first, and then you can figure out what needs to go into each and every video where you need to film and all of the logistics of filming. But then once you've figured out what videos you want to film, you can also figure out when you want to upload these. And this brings me on to my next point, which is to create an upload schedule. Now a few years ago, keeping an upload schedule, a really important step to growing your YouTube channel. And because of the ever-changing algorithm on YouTube, this isn't actually super crucial for growing your channel anymore. However, I would always keep to an upload schedule because having an upload schedule allows you to constantly keep churning out video content at a consistent basis. It's very easy to go three weeks, four weeks, five weeks without uploading a video because there isn't a deadline. But when you've got that physical deadline, you know, you have to create a video and it gives you that kick to create that video. Now, you'll upload schedule can be anything as simple as one video a month, one video every two weeks at one video every week. Or you could even go up to 23 or four videos every week. Now to begin with, I would keep that really small just so that you don't overwhelm yourself. So I would typically go for two videos a month to begin with. And then when that feels easy, you can bring that down to one video every week. Of course, the more comfortable you get in this process, the more you can increase there. So you can go up to two or three videos every week. However, it's really important not to overwhelm yourself and overwork yourself in the early stages of YouTube, because you might overwork yourself, burn yourself out and you'll fall out of love with uploading to YouTube. So it's really important to keep that to a minimal to begin with. And of course, when you're coming up with video ideas, it's really important to try and keep things interesting. So, yes, you have to stick to a specific niche, especially in the early stages of your YouTube channel. But that doesn't mean you can't try a different format, or maybe you could try something a little bit difference. So for example, if your YouTube channel was all about coffee, for example, maybe you could have a series all about reviewing a specific type of coffee. Or maybe you can have a series where people have a competition to create the best coffee or the best latte art or something along those lines, you can stick within a specific niche, but you could also try a different formats and different variations of different shows and series to keep your YouTube channel really interesting. It also really helps us about if you have a show or a series that you upload on a specific day. So maybe every Monday you upload a coffee competition series or show, and then maybe every Friday It's a review video, even though you're within that specific niche or keeping things interesting by changing the format of your videos. Now, you don't have to start with series and shows this is getting ahead of ourselves, that there's points. But it's really interesting to start thinking about that. Because when you start to grow and you can try to put more time, more efforts into your videos and create these series or shows.
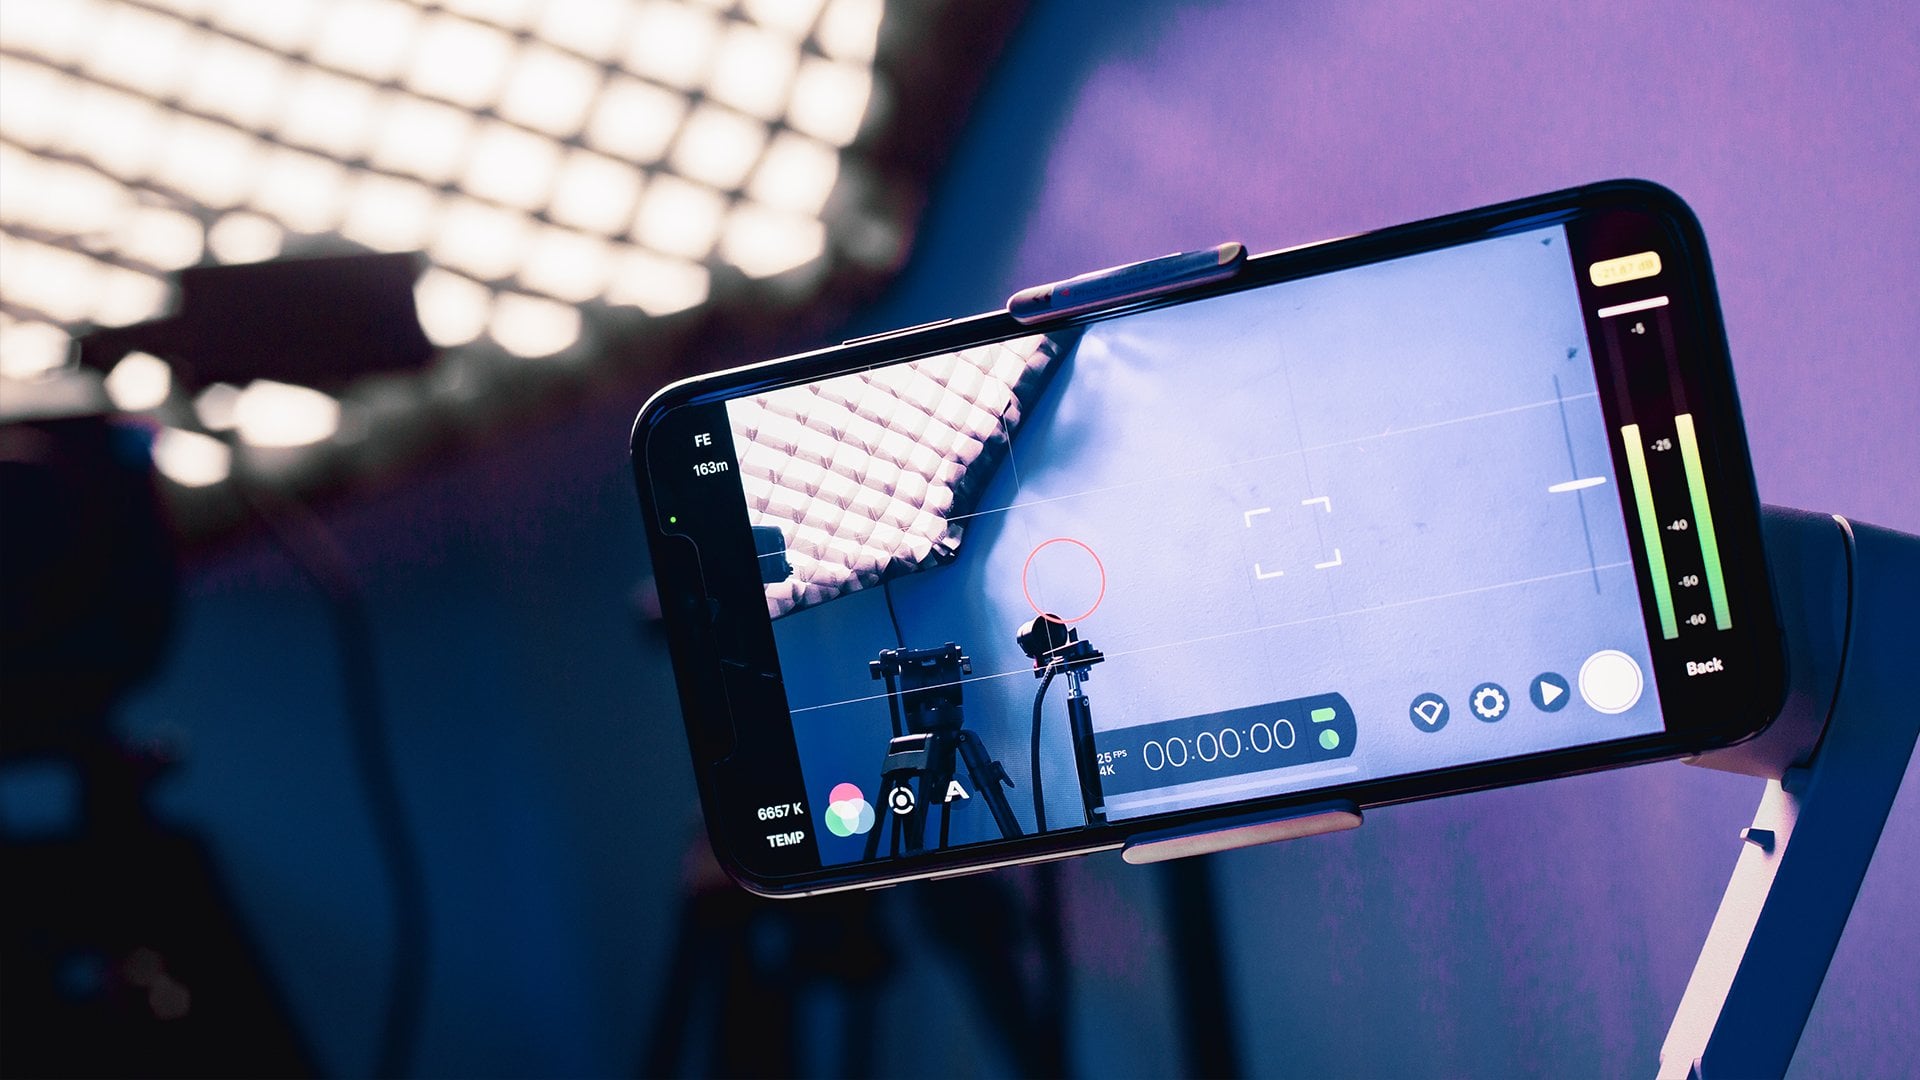
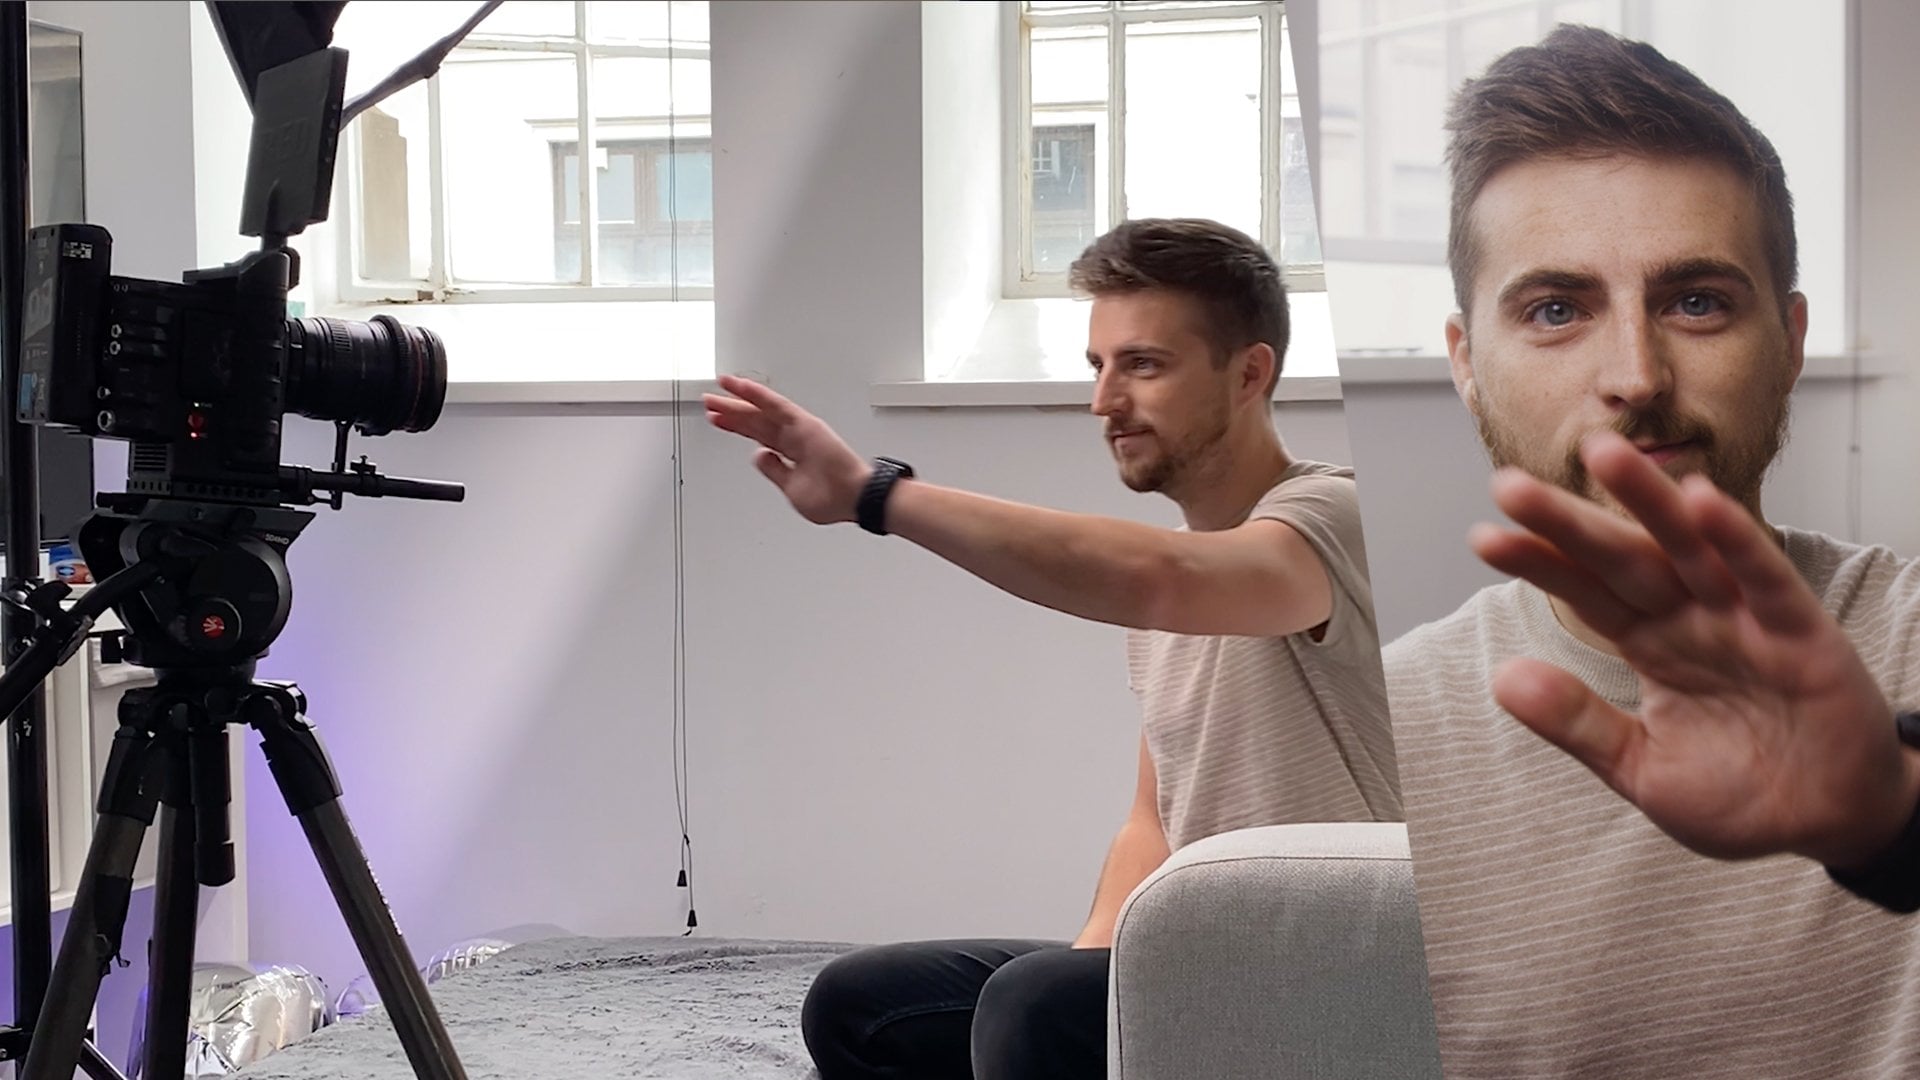
5. Sound and Visuals: At this current moment in time, you should have created your content plan. So you know exactly what videos you want to create and roughly when you want to upload this to YouTube. So now we need to actually go through the process of filming these videos. Now, there's a few things that you wanted to pay very close attention to when you're filming your videos to get the best possible footage. Now I'm not going to go into too much detail about how to get the best possible cinematic video, because that's not what is important here. It's important that we get a good enough image for YouTube with decent sound. So there's four areas that I want to briefly talk about in this episode. Camera, lighting, sound, and your background. So let me first start with the camera. Now, the best camera to shoot on is the one that you currently have. There is no need the early stages of YouTube to go out and spend thousands of pounds or thousands of dollars on a brand new camera. Because honestly in those early stages of your YouTube channel, you don't need all of that equipment. The most important thing is that you have a camera that can shoot Okay, video. So if you've got an iPhone, that's good enough for you at this point in time, if you are using your phone though, than I would definitely recommend using the camera on the back of the phone rather than the front of the phone. The reason why I suggest this is because one, the video quality is better on the lens out to the back of the camera. And second of all, if you're using the front-facing camera, instead of looking at the lens, you're going to look at yourself. And this menu going to be looking slightly away from the lens. And you might make that connection with the viewer. So it's really important that you are looking into the lens and therefore, using the lens on the back of the camera is going to help with that. It's also really important as well that if you're filming a talking head style video like this, that you put your camera onto a tripod. Because if somebody is holding this for an extended period of time than that camera shape, we'll get a little bit distracting if you all moving around though, and that's completely fine. Feel free to go handheld or use a gimbal if you wanted even smoother shots. However, though it doesn't matter what camera you're using. You could be using your phone or you could be using a cinema camera. If you neglect your lighting, your video won't look very good. So it's really important that you invest in some lighting. Now, you could simply just film your YouTube video position next to a window, and that will give you great lighting. So for this, I would recommend placing a chair next to a window and use the window at the side of the face, two lights, the person on camera. So if this was yourself, you're filming yourself on camera. Make sure you sit next to a window. Don't sit in front of the window. Sit next to the window. I like this side of the face. You can also position the window in front of you and behind the camera. And that would give you a really bright look on your video. However, if you wanted to shape your life a little bit more than you could turn around. So it's at the side or 45 degrees from the side. And that will give you a really nice smooth look without having to buy or use any additional lighting. However, though, if you wanted to be more controlled than you can purchase some video lights. And my recommendation for you is to buy a three-point softbox, a light kit. So a softbox lights is basically just this big soft lights. And if you get three of those, then you can create a three-point lighting setup. So a three-point lighting setup consists of three lights. Your key lights, which is your first light, which is on the one side of the camera. Then you've got your fill light switches your second lights, and this is on the opposite side of the camera. And then you've got your back lights and you can use a soft box or you can use a harsher light source for this if you wanted to. And that is to cost a light on the back of the head. So as you can see in this example, you can see it just creeping in here. This is the highlights and separating me from the background. So if you did want more control over your lighting, them purchase a three video light kit, preferably a soft box kit would be best because you'll get a, get a really nice smooth look and place two lights behind the camera at one on the left, one on the right's, and then place one behind, shining back at the back of the head. That will give you a really nice look in your videos. Of course as well, you can think more about other lighting and practical lighting and have it colored lighting in the frame. But that's all a little bit too technical for this course because we're just trying to get a decent enough look for now. Then of course, we are on to sound and sound is probably the most important parts of a YouTube video. Because if you have bad sound, people would disconnect and not even bother watching your content because it's distracting and it doesn't really pull the viewer in. So it's really important that you have clean audio for your YouTube videos. And the easiest way to do this is to just get the microphone as close to the person talking as possible. So rather than using the microphone in the camera, it's worth spending a little bit of money to get a microphone and make sure that is as close to the person talking as possible. So if you're on camera, try and get that microphone as close to you talking as you can. Take this microphone, for example. As of right now, this sounds really good. However, even just taking it over there, all of a sudden the microphone doesn't sound anywhere near as good as it did when it was back here. Let me give you another example as well. This is the audio through this microphone, nice and close, and audio from the camera. This audio, it doesn't sound anywhere near was good. And if you clicked onto the sheet, sheet video, this was the audio that was being used. You would click off, you would just run. You won't bother putting your time and effort into watching not failure. So the easiest way to get clean sound is to just buy an external microphone. The road video mike Pro is a great example of this. It's quite cheap, but it can give you really clean audio. You could also get wireless lavalier microphone or you can get a road wireless go for example, this is a nice clip on microphone. Or you can have a studio microphone like this. But whatever you go for, just get that microphone as close to you as possible. And then the last thing I want to talk about is building out your space. Because if you don't have an interesting background, if you'll just fill me against a white wall, there's no character and it doesn't look visually pleasing. So think about your background. As you can see in the back of my shots. I've got an iPad with my logo on it. I've got some camera equipment's I've got to join, but I've got some purple lighting, I've got a strip lights and all of this. It put that to create an interesting background. And it's really important that you do the same, because if I was filming this against a plain white background, it would be boring. And it's not really telling you anything. Whereas when you think about your background, you can add some blending into the background. You could use colors to reinforce a brand message or create a theme within your videos. So maybe different series have different colors. And he could also add props into the background to tell your story and add just a little bit more character into your videos. So when it comes to shooting videos, think carefully about your camera, lighting, sound, and background. If you put a little bit of time into maximizing your camera using some great lighting, adding a microphone in, and then thinking about dressing your background, you'll have a really visually pleasing and sounding YouTube video if you want to take anything away from this lesson though, sound is the most important parts of this if you don't have clean audio than people would disconnect. So invest in a microphone and get that microphone as close to yourself as is physically possible because that will give you great audio and that will help to improve the quality of your YouTube videos.
6. Talking on Camera: At this moment in time, you've got your content plan and your thoughts about the
technical aspects of filming, and you've got your
lighting in your background all set ready to go but now you need to actually get on camera and start talking
into the camera. But this is overwhelming
and uncomfortable and how do we get past this feeling
of talking into the camera? Well, my first tip to
you is to just practice, you don't actually have to
upload these videos anywhere. You can just first start off
by turning the camera on, pressing record, and just
talking into the camera. It might feel uncomfortable,
it might feel strange, it might feel awkward, and when you look
back at the footage, you might feel really uncomfortable but this
is a process that you need to go through and I promise you it will
get easier with time. I actually started filming
my YouTube videos back at the end of 2017 but
the problem is it took me three months
before I became comfortable enough to
upload the videos to YouTube and even then the
videos that I released in early January 2018,
they were awkward. Now the commonly most-used
transitions are the cut, fade to black, and
the cross-fade. I felt really awkward
on camera and that translated in the
video but now I feel really comfortable and confident talking
into the camera and I don't cringe
when I'm watching back the footage in
the edit either. It's a comfortable
experience from a filming and an
editing point of view. My first tip is
to just practice. Of course, that brings me
down to my next point which is to just be patient
with yourself. This is a new skill,
like with anything, you're not going to be perfect
at this straight away. You wouldn't expect to walk into a dance class and
be the best person thereafter just one
lesson and it's the same thing with
talking into a camera. This is going to take
a while before you get comfortable and that
translates into the camera, so be patient, put the work
in, and keep practicing. Of course, as well it helps if you know what you're
going to say, so prepare what
you're going to say beforehand because
if you're trying to think about what
you want to say on the spot then you're
just going to get tripped over your
words and you'll feel uncomfortable and that will make this awkward feeling 10 times worse than it actually is, so prepare what
you're going to say. However, don't over-prepare. The problem with a lot of new YouTubers and a lot
of people that step in front of the camera
for the first time is they over-prepare, and they almost create a
script for themselves. In fact, I've even been
on to some video shoots where people have used
a teleprompter so that they know exactly
what they're going to say at what points
but the problem is if you're reading a
script or you have a teleprompter then this
is just going to come off as soulless and
there's going to be no character and you lose the passion behind your voice and this can be seen on camera. So rather than allowing your excitements and your
passions to bleed through, you're cutting that
away and you just have this really monotone reading
voice and it doesn't really come across very
natural as you can tell. My tip to you would be to prepare a list of
bullet points instead, rather than a script, just have bullet
points talking about every topic you
want to talk about. In this case, for example, my bullet points here on this specific topic
are practice, be patient, Know what you will say but don't
over-prepare and then I can freestyle and play around with that
topic on camera. I know what I need to say but I'm allowing my
passion and my energy to come through with my words as I'm coming up with
this on the spot. Tip number 3 is to prepare but don't over-prepare
and then, of course, my next tip is it is
okay if you mess up, going back to my point
earlier, this is a new skill. You will mess up. You will trip over your words. You will say the wrong thing to begin with and to be honest, even now after doing
this for three years I still say the wrong
thing. I still trip up. I still make mistakes but
it's completely fine. Just stick with it. Go again, take a sip of water
if you have to, and just keep trying. Don't get furious or upset
or angry with yourself. If you keep tripping
over or get embarrassed, just take a moment, go from the top and carry on. Of course, don't film
when you're feeling tired, upset or stressed. If there's anything else
going on in your mind, you won't be able to
connect and this is just going to be an uphill
battle from the beginning. Before you've even
turned the camera on, you'll be in the wrong mindset and this just won't go well, so make sure you're
feeling refreshed and you're not distracted
and you're not stressed. Of course, this
is going to sound really rude but realistically, people don't care about you. People care about what
you're talking about. If you're creating a tutorial, they care about what
you're teaching. If you're creating a video
about a specific topic, they care about the
topic rather than you, the person that is
talking about it. Of course, it's important that you say the
right things and you present that in a clear
way but realistically, you are your own worst enemy. You'll see far more than
somebody else will. Yes, you might feel like you
look a little bit awkward on camera but that might not be the case with somebody else. Somebody might look at the
video and because you've given them all the information
that they were looking for, they're very happy
and they leave a very nice comment
on your video. Just remember that
the content on what you're talking about way way more important than all of the imperfections that you
might be thinking about. Yes, your hair hair
not be perfect. Yes, you might say slightly the wrong thing or say
it in a weird way. Yes, something that
might not look right or sound right or
be right but as long as the information is
correct and it's edited together in a great
video it doesn't matter, so just always think about that. Also as well, it's
really important to note that you are the editor. If you're filming this video, you have the power
to cut out sections. If it feels awkward or
it doesn't look right, you've got the power to
edit that out afterwards. Don't worry, feel free
to give it a go 3, 4, 5 times and choose
the best day afterwards. My next point is to look
directly into the camera. This might feel
extremely intimidating, to begin with, looking directly into the
lens, believe me, you're going to want to
look everywhere else except for the lens but if
you're looking over here, you're avoiding the camera or you are just looking
somewhere else you're not going to be
connected with the viewer and the viewer won't
be connected with you. Make sure you're
looking directly into the lens and that's an
easy way to appear as if you're confident and that
will help you to connect with your viewer and allow your viewer to connect with you. If this feels a little
bit intimidating there then feel free
to drift your eyes up a little bit and
look at the top of the lens rather than directly in the center of the
lens and it will still look like you're
looking into the lens. If you are filming
on your phone, by the way then make sure
you're using the rear camera rather than the front camera because if you are
using the front camera, you're just going to
drift over here and look at yourself rather
than the lens. Look into the lens and that will make you seem
more confident. Then my last tip or my last
message in this episode is done is better than perfect. Yes, it might not be
perfect but you've done it. You've talked on camera, you've delivered the message, you've said everything
you wanted to say. Yes, you might have tripped up a few times or said
the wrong thing or had to go back and try a
few times but you've done it. It might not be perfect
but you've done it, and that is all that matters. This will get better and easier every single
time you do it. Stick with it, keep practicing, and don't give up when
it feels uncomfortable because one day it won't
feel uncomfortable.
7. Structure: So now that you feel comfortable talking on camera, It's now time to start actually filming or YouTube videos. And our YouTube videos need to be structured in a way that will grab the attention of the viewer and keep them engaged throughout the video. So this is why we turned to our standard filmmaking structure, beginning, middle, and end. So you'll beginning is going to be your introduction. So your introduction is where you briefly talk about what you'll go into be doing or talking about in the video. Then the middle is going to be the content, it's going to be the main chunk of the video, then the end is just going to be outro, or it can be a summary. So following that basic beginning, middle, and end structure for your YouTube videos, that will give you videos a really nice flow. People will know what to expect though, get the contents and then we'll sign off with an algebra. It has a really nice flow to it. But there's a few other ways that we can slightly modify that structure to add more drama and excitement into the edit. The first one is to actually add a five to 10 second preview of the video. So in the first five to ten seconds, you can show a funny clip later on in the video. You can add a montage of what they can expect in the video. Or you can show everyday dramatic moments. So instantly we're cutting straight into some action. And then we can cut into our intro. So instantly the moment somebody clicks on to the video drama that got them hooked and VCs coming up. This is why you should stick around. And then we can go into our intro and a world of short attention spans. This is probably one of the best ways that you can grab somebody's attention. If they know they've got all of this drama coming up, all this excitement or these really awesome, hilarious thing coming up. They'll stick around to find that moment in the video so we can have a five to 10 second preview or Montage. Then we cut into our intro. And then once we've talked a little bit in the intro about what's coming up and what they can expect. Then we can cut to a title card or an animation. And this is why we show a branding. So this is why we can show our logo. We can add a title to the video. We can basically add some form of branding, haha, just to reinforce that branding. And then we go into the meat's of the video. So now we go into our content and this can be however long you need this debate. And now once we've finished the main chunk of the video before we go on to that lost Altria will summary section. It's always worth figuring out a way to get the audience involved. If you can, the audience and get them involved, they'll be more likely to stick around and go into the next video. So maybe if this is a tutorial, then you can challenge them to make the effects and upload it to somewhere for you to view and comment. If it's a challenge, you can get them to do something, can film that reaction. Just getting them to interact with your content a little bit more is going to be a really powerful way of keeping the audience member engaged with your channel. You could also use the space as well to do shout-outs, for example. So you could have a comments of the day section. So if somebody comments a hilarious comments on one of your videos, you can use the space as a way to highlight that specific comment. This again is going to keep your audience engaged and they're going to keep interacting with your content because they're fighting for that shout-outs. And then of course, once you've gone through all of this, you can then finish off with your algebra following that basic structure is going to give your videos the structure that it needs to keep your audience engaged. It's really important though, that the middle of the video, the main chunk of the video, isn't over bloated or isn't too long. If you're spending too long on specific moments than the viewer is going to get bored. So it's really important to watch this with really judgmental eyes and figure out what's boring, what works, what doesn't work. And then once you've gone through that process, just cuts it down to the point where you feel like it's constantly engaging. And once you've got to that point, you should have a really strong YouTube video and your structure should be perfect.
8. Branding: One of the secrets to creating a really strong presence on YouTube is to really think about your branding, because you'll branding is what ties everything together. Now when you hear the term branding, you'll probably just going to think about your logo. And yes, having a logo is really important, but it's also really important to think about your color scheme. You'll fonts that you use, the wording, the terminology. All of these things are really important, policy or branding. And it's really important that you think about these at every stage of the video process, brightening starts in what you talk about. So really think about your niche, that is the first points of coal when it comes to your branding. So if your channel is all about coffee, then only make videos about coffee this way you're sticking to your brand and every time you load something to your channel that's going into your brand. However, it's also worth thinking about colors. So the color scheme that I've chosen for my YouTube channel is purple, and I also use yellow as an accent. And you can see that mimics in the shots. So the back of the shots is purple. And then I've got this small yellowish light as an accent lights. And you can also see this color scheme echoed throughout my thumbnails and my channel design. And you can see purple and yellow constantly in use throughout my channel. So it's really worth thinking about how you can use color in your videos and your branding to tie everything together. The reason why this is important is because if somebody sees your thumbnail, that will instantly be able to tell that it's a video by you just because of the branding. They might not even see your face. They might not see the channel name. But if you've got a strong enough brand that they'll see the thumbnail at-a-glance and instantly know that this is one of the ways that you can build a really strong following on YouTube. And making sure that your audience knows what your branding is, is a really important step in that journey. It's also worth thinking about your font as well. So only have one or two different fonts that you use. Don't just use any random font when you're adding text, use only one or two different fonts. And this creates that uniformity within your branding. And again, that helps to reinforce your branding. And of course as well, you can come up with clever catchphrases and jokes and things that you say in every single video that again reinforces your branding. So going back to my YouTube channel, for example, at the start of every video I structure it's exactly the same. So I first begin the video by talking about what I'm going to talk about. And it said in a very similar way in this video, I'm going to talk all about this specific effects inside of this specific software. So let's get into it. In this video, I'm talking all about this really awesome feature inside of Adobe Premiere Pro. And that is also reframe. So let's get into it. That is my intro, and that's pretty much the intro for every single video. And then at the end of the video, I also say a very similar thing. Thank you ever so much for watching. I really hope you enjoyed watching this video. And if you did, then hopefully I will see you on the next video. See you there. Thank you ever so much for watching this video. I really do appreciate your support and hopefully I will see you in the next video. See you that having that at the start and the end of every single video ties it all together. And you know, you're watching a burka films video when you see those first five seconds, and you'll see this all over YouTube as well. So if you look at some of the big channels that have running jokes or sayings that they're used at the start of the video, they'll structure it the same. And this is all gone back to their branding. So whether that's the way you're structuring your video, a little running joke, a saying a specific word that you use all the time. All of these things can be treated as branding and that helps the audience to connect with you on a deeper level. So don't just think uploading to YouTube is about loading single videos. Each and every project has its own projects. Each and every video is serving larger project, which is the YouTube channel. So this is a small part of a larger puzzle. So if you're reinforcing that brand message and all of that terminology and everything you have in every video is going to create this uniformity across all of your videos. And that means your channel will become really powerful. And when somebody watches one video, they know exactly what that is and what to expect. So branding is really important and it's worth spending some time and effort into figuring out how you can create a strong brand and link all your videos together using your branding.
9. Editing Tips: So at this moment in time, you should have your video filmed. And this means you need to get your footage edited inside of an editing program. And that brings me on to my first tip. My first tip is, you don't actually need fancy editing software. You don't need to spend 5300 pounds or dollars. A really fancy editing program you can get by using the default video editing app. And if you're on a Mac, that he's iMovie and if you're on Windows, Movie Maker, now don't get me wrong. You can download the higher and more professional editing software and you will have more features and more things to do in those programs. But if you just want to cut your video, iMovie or movie maker, a perfect options. So my first tip when it comes to editing your YouTube videos is to cut the fluff. And what I mean by fluff is all of the stuff that isn't really contributing to the video. So if you're waffling and talking a little bit too much about a specific points. Get rid of it. If you're running an honoring, get rid of it. If there's hesitations, get rid of those. However, this is a fine line because it's very easy to take out every single hesitation and every, every, every point where you wander off a little bit and then you end up with a really robotic, really unnatural feeling video. So don't put too much, but just enough to the point where it's helping to flow the video along nicely. This will feel a little bit difficult to begin with because it's difficult to understand what you need to cuts, why you need to cut it, and at what point you need to cut it. But the more you do this, the more videos you create and the more videos you edit, the easier this will come to you and you'll have no problem cutting anything that isn't needed. Generally, if I upload a video which is around 10 minutes long, there's 20 minutes worth of raw video footage, which means I've cuts around 10 minutes of fluff study AMS, the Rs, the extra content or the hesitations that will be removed. So don't be afraid to get into your footage and Qatar anything which isn't serving the main video. If it's not moving the video forward, get rid of it. And then my next tip is to not be afraid to use B-Roll JVs or cutaways. Now these are all basically just fancy video terms for extra shots. So if you're talking about coffee, for example, a B-roll shot would be a shot of coffee. So if you're talking about the production process of a specific coffee, you'll show the shots of this happening. Showing is better than telling. If you could show somebody something, they'll understand it much greater than if you just say it. So once you've filled your video, go out and film all of the B-roll shots that are relevant to what you're talking about. And once you've got those B-roll shots at those in on top of your video footage. Having this just gives you a video of Arieti. It keeps the edit visually exciting and it's always giving something new for the viewer to watch. If for some reason that you can't go out and shoot B-roll, then you can't actually just use a second camera to add a little bit more life into the edit. So rather than filming just one camera, you'll notice in this course I'm using two cameras. So this one and this one. And the reason why I'm using two cameras is because most of this course is just me talking to the camera. So this would get Visually boring after awhile. So cutting between these two cameras just makes the edit a little bit more visually exciting. It is made just talking into the camera, but having two shots is giving me something to cut to. This main shock gets a little bit boring if you could combine the two of those though. So use a multi-camera setups or shoot with two cameras, cut between these cameras in the Edit and then use B-Roll when there's relevant points being made. That is going to give you a really dynamic and visually interesting video.
10. Tips for Perfecting your Thumbnail: So once you've edited your video, you should now be ready to upload this. But before we upload this to YouTube, we first need to create a thumbnail. And the thumbnail is the image that you are going to see when you see the video on YouTube. So you'll see the title and then you'll see a big image that is your thumbnail. It's really important that you get the thumbnail rights because most people on YouTube makeup and mind whether they want to watch your video or not by looking at the thumbnail. If the thumbnail is really boring or it's of a poor quality than most people will just skip the video that went even watch the video. The video could be incredible, but because the sunlight is boring, unfortunately, people would just skip past it. So it's really important that we put the time and the effort into getting a visually pleasing thumbnail. First tip is to take a picture with a stills camera or the camera on your phone for the thumbnail. So rather than just screenshotting a part of the video and adding notes into your thumbnail, you want to take a high-quality picture. Now it's been proven not showing your face in your thumbnail. Actually a way to get more people into the video. People connect with people. So if there's a person in the thumbnail, then chances are somebody will click on it versus if there was nobody in the thumbnail. So take a really high-quality picture of yourself in your location and use that for your thumbnail. Now it's really important that your thumb now is a clear representation of what the video includes. So if you're talking about coffee, for example, then there's no point in having you with a car on the thumbnail because you're not talking about to call your talking about coffee. So that would be really confusing and somebody would cook the video expecting a car video, but they'll have a coffee video. So there'll be really upset, disappointed, and they'll leave a negative review or dislike your video. So it's really important that your thumbnail represents the video. So if you are making a video about coffee, then take a picture of yourself holding a bag and coffee. I'll be using a coffee machine or doing something where you can visually see what you're doing. It's also really important as well that this is clear on all sizes. When you design your thumbnail, you'll be designing this full screen on your laptop or your computer. And it's really easy to see everything, every fine detail, easy to say. But when somebody scrolls, pause this on YouTube and the thumbnail is tiny, they might not be able to see that fine detail that you've put in the corner of the thumbnail. So make sure everything is easier to see at all sizes. So make sure everything that he's important in the thumbnail is easy to see. Oh, scales. And then of course, you want to make sure that your thumbnail is not too busy. Because the problem is if there's too much happening and there's too many points of interest, people won't know what to look at and it would just be visually overwhelming. And again, they won't click the video. So generally you want to try and only have a maximum of three points of interests. So generally, they still obey yourself what you're doing. So this could be the coffee machine, for example, and then a word. And it's really important that you only have a word or a very, very small sentence. Because if you have more than three or four words, it's unfortunately it can get really overwhelming because you've got a whole sentence, a person and something happening. Just a bit too much in a small-scale. So try it only have three points of interest. You'll self what you were doing and a title or a wood, something that he's visually dynamic. I'd also say as well, It's worth avoiding all of the spammy cliche types of thumbnails. So what you see, this red circle around something which looks a little bit random or a word saying, Wow, I can't believe this, you won't believe this. All of that feels really spammy and chances are somebody won't click on your video because that just go into think you'll video is a waste of time. So try and create a high-quality thumbnail that he's relevant to what's in the video. And then of course, tying this back to our video all about branding. You want your thumbnail to be parts of your branding. So this means you should incorporate your logo if possible. If you've got any words, make sure they're in the font that you use for everything else, and try and use colors that are relevant to your brand. Now going back to my YouTube channel, in my example, my brand colors are purple and an accent color of yellow. And you'll see most of my thumbnails are purple. There'll be the odd exception when purple is difficult to integrate into the thumbnail. But most the time it's going to be purple or failing that you will see the secondary color, which is yellow. So try and put your brand colors into your thumbnail to help tie all of the videos together and they go in the next video, I'm going to actually put all of these into practice and I'll show you how I realistically make a thumbnail inside of Adobe Photoshop.
11. Thumbnail Case Study: In this episode, I'm
going to give you a real-life case study
and I'm going to show you exactly how I would create a thumbnail inside
of Adobe Photoshop. With Photoshop open, I would go into New File and
I would go down into width and I would
change this to 1920 by 1080. Now, the reason why I'm
setting 1920 by 1080 is because this is the aspect
ratio of widescreen, and if we look at a
YouTube thumbnail, you can see these
are all widescreen. So 1920 by 1080 is the perfect size for
1080 or widescreen. With that selected,
we'll just go in to create and then that will
load up this blank canvas. Now, first things first, I want to just begin
by importing an image. I'll go back into
the Finder and I'll just drag an image
into Photoshop. As you can see, this
is just a photo of me smiling at the camera. Now, my first step would
be to add my branding. You can see my logo
creeping in here, but I don't feel like
that's bold enough. Now if you look at all
of my other playlists, you can see in the
bottom left-hand corner, my logo is sitting there. Bottom left, bottom
left, bottom left. The logo is there in pretty
much every thumbnail. That's my first step. I'm going to go into
my Finder and I'm just going to find my logo. That is BF.PNG, there you go. I'm just going to drag
this into Photoshop, I'll scale this down a little, and pop that into the bottom left-hand corner and then I'm just going to create
a brand new layer. Layer, New Layer, press "Okay", and I'm just going to go to
the paint bucket. Then I'll change
the color to black and I'm just going to fill
this with black paint. Now I'm just going to drop my
logo on top of that layer. Then for me, I'm just
going to go in to the Polygonal Lasso tool. I'm going to go
to the top right, select that point, go
down to the bottom right. Then I'm going to
go to the bottom left just before the logo, then I'll just go
above the logo to the top-left and then back
to the top right. Then I'm just going to
go to the Eraser tool. I'm going to increase
the size of the eraser. It made that around 500, 600, 700, somewhere around there, or even over 1,000. Select the layer 1 and we're just going
to erase all of that. Then if we press Command and D, you can see we've
created this nice border around the image. If you look on to
all of my examples, you can see that's the
case for all of them. My first step is to just add that conformity amongst
all of my thumbnails. Of course, you didn't
have to follow this exact example in
this color scheme, but just treat this
as a case study. This is my process and what I do for my YouTube thumbnails. Now, next step is to add a descriptive word or a
title into this thumbnail. I'm going to go to the T
icon and I'm just going to type out the word animation. That's going to be what
I'm doing in this video. Then I'm just going
to change the font to Avenir because that is the font that I use
in my thumbnail. So Avenir black. I'll change the color to
white and then I'm just going to decrease the size
of this down to around 100. I'm going to place
that in the middle. There you go. I
place that around here somewhere. There you go. That looks quite cool,
but at the moment, there's quite a bit
happening in front of it and behind it and it just
looks a bit distracting. Next up, I'm just going
to go into Layer, New Layer, and I'm going to go into this
rectangle tool here. So Rectangular Marquee
tool and I'm just going to draw a slightly expanded
rectangle around the text. Then I'll go back into
our Paintbrush tool, increase the size of this, and I'm just going to paint
within that rectangle mask. There you go. Just press Command and
D to get rid of that, direct that under the text, and I can see I've got the text on this black box, so
it now stands out. It looks really dynamic. At the moment, I've got
two points of interests. I've got myself and
I've got the word. Of course, as well,
if I really wanted myself to stand out, so then I could actually
separate myself from the background and fade the
background off a little bit. To do that, I just go onto that layer, so that background layer. Then I would go into this tool, so that is the Quick
Selection tool, and I'm just going to
draw around myself like this. There you. You can see I'm getting this
mask surrounding myself, and anything which isn't myself, I'm just
going to get rid of. To do that, I'm just going to go option and then just
draw over those spots. That is me, keep that. This isn't me, so
get rid of that. Then once that's completed, I'm just going to go Command
C and V or Control C and V, copy and paste, and as you can see, I've got
myself on a separate layer. Now if I go Layer, New Layer, I'm going to create a new background and
I'm just going to change the color of this
background to a dark purple, so somewhere around here. Then I'm going to go to the
paint bucket tool and fill that layer with that color and I'll direct that in-between the separated version of
me and the background, and then we'll go
opacity and we'll pull the opacity
down a little bit. As you can see, I'm now popping
out from that background. If I zoom in, you can see this mask is definitely
not perfect. I would have to go in and
clean that up potentially. But for now, I'm going
to leave that as is. If I want to myself to pop from this background even more, then I could select the
isolated layer, right-click, go into Blending Options, and then from here
it will go down to either stroke to
add this outline. You can see we can
change the color of this outline and then we can change the size of
the outline as well. Or alternatively,
rather than a stroke, we could go to Outer Glow. We can increase the opacity, we can increase the spread, we can increase the size, and that gives us this
really nice glow. Once you've got that to the
size that you want it to, you can just pull the
opacity back down again, and that's giving us
this really cool effect. You can also change the
color of this glow to your exons or your
secondary color. That's yellow in my example and that gives us this
nice color contrast. Now in my example, I think I'm pretty happy
with this thumbnail. It does what it needs to do. It's saying what to expect. You can see me, which is
a points of interests, and all I would
need to do now is just save this and
upload this to YouTube. But of course, you do have an extra points of interest
to add if you wanted it. If this thumbnail
wasn't clear enough, then I could add in another
layer to make it more clear. For example, if I just grab one of these random screenshots, so search bar, drag this on. You can see this is a
screenshot from a video. Now I'm going to
scale this down, and then to get rid of
this black background, I need to change the
opacity from normal to screen or I could change it to light and to
really soften that up. Then this could be my
third point of interests. I could add this end somewhere and have this
as an extra layer. I could also increase
or decrease the size of this as well to make
this pop more or less. But there you go. To be honest, I'm pretty happy
with this thumbnail. It matches up with my branding
because I've got my logo. I've got this border, which I use on all of my thumbnails. I'm using the same fonts. The purple and
yellow color scheme is coming through nicely, and there's three
points of interests, so it doesn't feel too busy. Before I edit this background, it was starting to feel
a little bit busy, but adding in this background has really soften things up. Now, I could take this one step further and blur
that background. To do that, I would need
to go into Filter, Blur, Gaussian Blur, and I would
increase the radius to around six or seven, so 6.8. As you can see,
nothing is happening and that's because I had
the wrong layer selected. Let's go on to the
bottom background layer and we'll add that
filter back on, and now you can see
that background has blurred and that's
popping even more. But all I do now from here
is just go File, Export, Export As, and then
I would export this from Photoshop as a JPEG
file onto my desktop. Call this YouTube thumbnail. Then from that, I could
just go into YouTube, go into the Edit section, go down to thumbnail, and I'll just change this
to that new thumbnail. As you can see, that is now
down there. But there you go. That is exactly how
I would design and edit a thumbnail for one
of my YouTube videos. Throughout this workflow, I have ticked all of my
branding guidelines and have gotten no
more than three points of interest in the thumbnail. This, in my opinion, would be a good enough thumbnail to add to a YouTube video. Of course, your workflow might differ to mine, and your fonts, your color scheme,
everything would differ according to your taste, your style, and your branding. But this is just a quick
insights into my workflow, and I really hope this helps you to figure out how you should be approaching thumbnail design
for your YouTube videos.
12. Best Practises when Uploading your Video: So now that you've finished your video, you need to get this onto YouTube. But before you press upload and send it off to the world, there's a few things that you need to know before you press the Upload button. So first of all, you want to upload this to scheduled rather than public. The reason why I'm suggesting a scheduled upload rather than just a public upload, is because when you schedule it, you can set your video to work in your upload schedule. So going back to one of those first episodes, we talked all about our content plan and upload schedule. So if you've decided to do one video every week, It's really important that that falls on the same date and time. The reason why is because one, it gives you the physical deadline of I have to do this video by this date and this time. But to your audience comes to expect that video at a specific date and time. So let's say every Monday at five o'clock, you upload your video. But it's a Saturday and you're busy on Monday. If you upload your video to scheduled and you schedule it to go public on Monday at five o'clock. It will automatically go public for you at the dates and time selected. This means you don't have to worry about physically pressing upload at five o'clock on a Monday, you just upload it when you have time and then she would do the rest for you. The reason why this is so awesome is because you can actually batch, film and edit your videos. So rather than filming one video at a time, you could actually film 345 videos in one day, get them edited and uploaded on the same day. And then you could schedule them to go out over the month on the selected days. So this is really awesome because it means you only need to put a few days into YouTube in order to get your month's worth of content. So you film for a few days, you edit for a few days, then you press upload, schedule them to all go out on their specific days. You can step back from YouTube for a few weeks before we have to do the process over and over again. This way, you chew and the scheduled upload feature is working for you rather than you constantly having to hit that specific dates and times, upload your video. Because problems arise, life gets in the way and chances out we might end up missing that deadline if we have to physically be at the computer at that date and time. And then of course, I would always recommend getting ahead of yourself. So if you haven't filmed a video before and you're uploading your first video. Don't upload it today. Don't upload it tomorrow. Don't schedule it to go public in the next week, I will try and get ahead of yourself, build up a buffer of videos and then upload all of those in one go at the scheduled dates and times. And this means you can stick to that consistent schedule. So that means if it takes you two or three weeks to make the next few videos, it doesn't matter because you've got videos ready to go and they're all uploading at the specific time. So having that buffer there, having three or four videos uploaded for the next few weeks, ready to go takes the pressure off you. You don't always have to be watching the dates and the time. Egypt create videos and upload them when you have time. And V6 means you always hitting upload schedule. Now next up we need to think about title, description and tags. Now they run it in that order. The title is the most important, description is secondary, and then tags aren't very important anymore, but it's still nice to have them. You'll title or your video title is the most important part. This upload process, you've got to get this rights to nail the success of the video. So you've got to, first of all, make sure you say what the video is about this company misleading or less representative. If you're making a video about coffee than that has to be in the title. But if there's a way for you to add mystery into that title and make people want to click the video because they're intrigued. That will help to get people into the video. There's a fine line between being mysterious and misrepresenting slash spamming. So make sure you find that fine line and practice this to make sure you get a really dynamic title, then your description has to be really clear and say exactly what is happening. Now tags, I'm not as important as they used to be on YouTube. On YouTube, tags were probably the most important part of the upload process. But these days the algorithm looks to the thumbnail, the title, and the description. However, it's always good to give YouTube and Google as much information about the video as possible. So just adding in a few tags that are relevant to the video can actually help to improve your chances of the video being seen. So just spend a little bit of time coming up with a few tags that are important and then you should be good to go. But the two most important things that you want to take away from this lesson, use the scheduled upload feature to maintain your upload schedule and then really put some time and efforts in SEO title and your description.
13. Visibility Options: When it comes to uploading
your video to YouTube, there are five different
upload options; public, private, unlisted, members
only and scheduled. Now, public is the first and the most obvious one in this
entire list, and that is, as soon as the video
has finished uploading, it will go public and people will be able to
watch your video. Now the next option is private, and this means you've uploaded
the video to YouTube, but only you will
be able to see it. If you share the
video on Facebook, Instagram, Twitter,
unfortunately, if it's private, then people will see
an error message, basically not allowing
them to watch the video because they
don't have permission. If you intend on
sharing the video, but you don't want it to
be seen on your channel, then that's where you have
the next option, unlisted. Unlisted is a really cool option if you want your
video to be seen, but you don't want it to live on your channel and you
don't want to promote it. If you want to upload
a video and you don't want it to appear
in subscription boxes, you don't want it to
appear in search results, you don't want it to
appear on your channel, but you do want it to be visible when people
have the link, then this is the best option. This means you can securely
upload a video privately, share the unlisted
link with somebody and they can view the video without having to be logged
into YouTube. This is also really
useful as well. If you've got a video talking about something
very specific, like competition details or something quite
specific like that, you can upload that video as unlisted and then you can share the URL or the YouTube link in the description
to your main video, and then when people click on the YouTube link to
the unlisted video, they'll go to that video. They'll be able to
watch the video, but it won't be added as a new video on your
YouTube channel. Unlisted is actually
a really cool option. The next option is scheduled. Scheduled uploading
is absolutely incredible and it's a
game-changer and I would really recommend using
scheduled upload if you're uploading to
YouTube on a regular basis. The way a scheduled upload works is you can upload
the video right now. As soon as the
video is finished, you can just upload it, but you can select the date and the time
it will go public. You could upload it today, but you could schedule it
to go public next week. Once you've uploaded
that and scheduled that, you don't have to
do anything else, YouTube will just automatically
turn that video from scheduled to public at the
date and time selected. If you have a YouTube
upload schedule, then having scheduled
uploading is a really great way of
sticking to that schedule. It means you don't have to
worry about being next to the computer at a
specific date and time. You just upload when
you're free and scheduled upload does
the hard work for you. Then of course we
have members only. If you are monetized and you have access to
channel memberships, then you will have
access to this. A channel membership is
essentially a paywall, a bit like Netflix, where a viewer can subscribe
to exclusive members-only content and for £5 or $5 a month or however much
they're willing to pay, they can view this
exclusive content. When you upload a
video and you set the visibility to members only, it means standard viewers of your channel will not be
able to watch the video, but any viewers that
are signed into that YouTube account with a YouTube account that
is a channel member, they will be able to
watch that video. There's five different types
of visibility on YouTube. Public, private, unlisted, scheduled and members only. It's really important that you select the correct visibility, because if you want to
upload a video in private, but you set it to public, the whole world can see it. Alternatively, if you want
the whole world to see it, but it's set to
private, it won't work. Make sure you know what
visibility you're selecting and make sure you've got
the right visibility selected for your video.
14. Adding End Screens and Cards: In this episode, I'm talking all about end screens and cards, because end screens
and cards are really important parts of
the YouTube upload process. Now, first we're going to
begin with end screens. Essentially end screens are just interactive cards that
live at the end of a video. A user has an option of clicking one of
these end screens, and an end card can allow a
viewer to access a new video, access a different playlist, subscribe to your
channel and there's a few different things
that you can do with these interactive end cards. Let me show you
how to install one of these end cards into
your YouTube video. As you can see, we are
in the YouTube Studio and we are in the Content tab, and this is showing me
all of my YouTube videos. Now I'm just going to go into this dynamic time-lapse course, and I'm going to select
the Details button. Now this will allow me
to change the title, the description, the tags
and everything else here. But we're focusing on
end screens and cards, and we're going to focus
on end screens first. If we just click this, you can see by default it
will come up with import from latest video and that is because I've
already done this before. It won't say that if you
haven't done this before, but generally you'll get
one video, one subscribe, one playlist, one subscribe, two videos, or you could just
add the elements yourself. So these are just presets. If you select Plus Elements, you can see you can add
a Video, a Playlist, a Subscribe button, a Channel, a Link which takes you off
YouTube or some Merchandise. I'm going to start with Video. As you can see by default, it will select
Most Recent Upload and that means whenever
you upload a new video, this card changes to
the most recent video. Then you could do
Best for Viewer and YouTube would select a video which is more tailored towards that
specific viewer. YouTube analyses viewer
behavior and if you have a video which is more catered to what they
would normally watch, then that is the
video that would be recommended as opposed
to a different video. But if you wanted to get
specific, you could select, "Choose Specific Video" and
you can just scroll through your archive of videos and
select one that works for you. Then once you've selected
that, you can just move that into position and then you can go into Plus Elements again and
add something else. Now, I generally like to do a video and a subscribe button. If I press "Subscribe", that will add in my logo and
when people hover over this, they'll get the
Subscribe button pop up. Of course as well you can
also add something else. You can add a Channel Link, you can add a Link
or you could add some Merchandise if
you have that enabled. I'm just going to move this
aside so it doesn't clash. You can see I've got
the merchandise there and at the moment it's
saying Best for Viewer, so you don't get the
option to change this. It would just select
a specific type of merchandise that
you have available. Now if you're not monetized
and if you are not linked to the spring website and you don't have merchandise
listed on there, then this option might
not be available. If you're not seeing that, then it means you're
just not monetized yet. If a viewer has watched
the entire of your video, they've sat through from
the beginning to the end, then chances are they are really interested in you
and your content. You may as well just divert
their attention into another video and keep those
watched minutes coming in. If they're going to sit through and watch a five-minute video, the emails will send them
to a different video or different playlist
and that will let them find more of your videos. But it will also help
you to capitalize on their time spent on
your YouTube channel. This is the best way to
grow your YouTube channel, making sure that
your current viewers are watching more and more of your content is an easy
way to get more views. Now next up we have cards
and cards are very similar, but cards appear midway through a video rather
than at the very end. An end screen is your
last 20 seconds, but a card is going
to be shown at any points which you select. If we go down to Cards,
you can see again, we can add in a video
card, a playlist card, a channel card or a link.
Let's start with a video. I'm just going to
select this video here, search bar animation
and as you can see, we've got this blue pen here. At the moment that is going to appear at zero-zero seconds. But if we drag this halfway through or a quarter
the way through, you can see at this
moment in time, we're going to get this pop up, and this is the card.
The video is this. Then we can add a
custom message. We can say click this video, or we could add some
teaser texts to say search animation, and you can preview
this over on the right. This is what it's going to load. This is a teaser text, so we'll select that
and then this is the custom message. These
are optional though. If you just leave these blank, then YouTube will
fill in the gaps and you'll get the title name coming up here and
then you'll get the title name here as well. Card is just going to be
a very brief pop-up in the top right corner of a
video and that's just going to show somebody that
they should watch this video or they subscribe to your channel or they
should view your playlist, or click an external link. Cards and end screens are
both really great options for taking your current audience and funneling them
into more content. If you're not taking advantage
of cards and end screens, then it really is a
missed opportunity. Whenever you upload
a video to YouTube, it's really important
that you add an end screen onto
your video and it's also really important to add one or two cards
throughout the video. Obviously, if you
have a longer video, as you can see in this
example on this video, is just shy of an
hour, in this example, I would probably add in
a card every 10 minutes. Every 10 minutes, I would just
suggest a different video. But if your video
is only 10 minutes then one or two cards
should do the trick.
15. Creating Chapters: Once you've added your
cards and your end screens, it's really important
that we add some chapters into our videos. Now a chapter is exactly
what it sounds like. It's just a way of
organizing the video; Chapter 1, Chapter 2, Chapter 3. It's the same as if
you're reading a book. Now when you've
got these chapters enabled on your YouTube videos, if you hover over the progress bar on the
bottom of your YouTube video, you'll notice that the
chapter title is going to pop up at each
different section. As you scroll through
the progress, you'll see each
different time code and each different name for
each different title. This is really
useful if you've got multiple different topics
throughout the video, or if you just want to set a clear plan of action
throughout the video. Now if we go back to
ends greens and card, you can see we've
got an actual button in the YouTube studio. However, that's not the
case with chapters. With chapters, you
actually have to do this by typing in the
chapters yourself. Once you've added in your
description in here, we can just add a section
down here that says chapters, and then it's really
important that you have an intro chapter. Make sure the time code is 00:00 and then we'll
call this introduction. Then let's say this
introduction lasts 30 seconds, so at 00:31, the first section will begin. Now you can be really
mysterious and just call this first
section, second section, third section, or you could actually name each
specific section. In this case, we would go for
setting up the time-lapse. Then you would just work through and just keep adding these in, so 00:59 will be next section, then we've got 03:45, next section, and you just keep repeating this process until
you've finished the video. Then you don't have to ever
add the end time code. If the video is 10 minutes
long and the last section starts at eight minutes
50, for example, you don't have to do 8:50 - 10, or you don't have
to put 10 altro, you just leave that last
section as your last section. With all of these
chapters added in, if I save this, and then go on to the video, you will notice that the
chapters have been enabled. As you can see down here,
we've got introduction, I can click this arrow
and that's going to load up this chapter's
window here. These are all of the
different chapters available in the video. But of course, again,
if I scroll through, then you can see you've
got the chapters all split into
different sections. You've got a clear title, you've got the video
thumbnail playing, and then of course, you've got the progress
bar popping up. Of course, if we go into the
description of the video, then you can also see
the chapters down here, and you can click
on one of these to take you to that
specific time code, 3:45 and you can see
we've gone to 3:45. Now you don't have to add
a chapter to your video, this isn't a rule from YouTube, but chapters are a
great way of organizing your content and
it can be really beneficial as a viewer, if a video has chapters. Now YouTube has found great success with
the chapters feature, so it's actually enabled
automatic detection of chapters. This means if you don't add your chapters in,
then by default, YouTube, will try and guess what times each different
chapter in your video is. Now, sometimes it will do
a really good job of this, and other times it won't work
like you want it to work. If you didn't want
this to be selected, then you would just
scroll down to the bottom of the video, go into Show More, and then you'll have
this section here, allow automatic chapters
when available and eligible. If you didn't want the automatic feature to
possibly go off on your video, then you can just turn this off. But you can just
leave this ticked on and then add in your
own chapters and the chapters that you add
in here will override any automatic chapters
that YouTube will create. To sum up this episode, chapters are a really great
and easy way for viewers to navigate through
your video and find the section that
they're looking for. They're very quick
and very easy to add into your
YouTube description. Again, it makes life really
easy for the viewer. Consider adding chapters
into your YouTube videos.
16. How to Grow Your Channel: Your video has gone live, but nobody is viewing the video. How do we get people to view our videos and how do
we grow our channel? Well, that's what we're
talking about in this episode. If you've just started a
YouTube channel and you've just uploaded one of
your first videos, you won't have an
audience on YouTube yet. It's really important
that you take advantage of your
current audience. Chances are you probably have another social media sites
like Facebook, Instagram, Twitter, Reddit, LinkedIn, take advantage of your
followers on these platforms. Share your video on
every single platform in a non-spammy way and try to get your current audience to
watch your YouTube videos. This is the first
way that you can get people into your
YouTube channel. Unfortunately, when it
comes to social media, we all need social
proof before we put our time or money
into something. For example, if two videos
were surfaced to you, one had 10,000 views and
the other had 23 views, which one would you click? Chances are you
would click the one with more views and
that's what you have to think about when
you're creating your content and you're
sharing your videos. If your videos only
have 10 views, then it's going to
be very difficult to get more people to watch. Try your very best to take advantage of your
current audience and try and push
that as much as you can without being spammy. If you can get more
people to watch your video from your
current platforms, then that means you're
going to get more views on YouTube and that means you
will have a better chance of getting organic
traffic coming into your YouTube channel
and your YouTube videos. Share your videos with your current audience and try to get your family, friends, and colleagues to
watch your videos, to get a view counter
starting to trickle upwards. Now, I know I've
talked about this quite a few times
already in this course, but sticking to your upload
schedule and being consistent with that is going to be a sure-fire way of
growing on YouTube. Now let's just step
out of YouTube for a second and think
about an analogy. Let's say we've got two shops. One is a small independent
high street store, and the other one is
a large supermarket, which one do you think is
going to sell more products? It's going to be
the supermarket. The reason why it's going
to sell more is because it has a larger store and
it offers more products. Now, take that analogy and
bring it back to YouTube. If your YouTube channel
only has five videos, then you've only got a few
products on the shelf, whereas if you have 500 videos, you've got a lot more products on the shelf and this
means you've got a higher chance of
somebody watching one of your videos or buying
one of your products. Be really patient and
really consistent with your upload schedule because the more products you
have on your shelf, or the more videos you
have available to watch, the higher the
chance of somebody watching one of those videos. My advice would be, keep to your upload schedule and don't expect anything to happen for at least 18 months
or even two years. If you try and build up
your YouTube channel and get that backlog of videos, get all of those
products on the shelf, then you're going
to have a really good chance of somebody watching one of those videos
and sharing it around. Then of course as well,
when you do start to get clicks and people are commenting
and sharing your videos, you need to nurture
that audience. What I mean by that is
say thank you to them, reply to them, like their comments, share
their comments. Reply to everybody that is actively engaging
with your content. They took their time to reply to your video and leave a comment, so it's really
important that you take the time to reply
to them as well. They didn't have to stop
and watch your video, they didn't have to comment, but they did so be grateful to them and reply to that comment. This is going to
show to them and other people that are viewing
the video that you care about your audience and chances are they're
going to want to be a part of your
community and they might end up commenting as well. Now let's step out
of YouTube again and let's just say your
favorite celebrity has uploaded a
picture to Instagram and you've left a
comment on that picture. If they reply to your comments, you're going to tell
everyone about it. You're going to be really happy. There's going to be
an adrenaline rush and it's just going to be
a really nice exchange. Think about that as the same
for your YouTube videos. If somebody comments, if you
reply to their comments, they'll have that nice
warm feeling as well. Try to nature that and
every time someone comments or likes or
engages with your content, make sure you're replying and continuing the conversation. Once you've been uploading for a short while and you've
built up a few videos, it's worth doing
your own research. Look at your videos and
see which videos have done well and which topics
have performed the best, and then make more content
with those topics in mind. Every time you upload a
brand new video to YouTube, you're basically adding in a new point in your spreadsheet, a new data point. Look back at your
previous videos, see what's done well, see what hasn't done well, and focus on making more
content on the stuff that has done well rather than
the poor performing content. The views, the numbers, the audience response, all of this is direct
feedback and you should be taking this into account when you're creating your content. Of course, though, it is
still really important that you do keep creating
content that you enjoy. If you happen to make
something and it does well, but you didn't enjoy the
process, then don't bother. Enjoying the process is more important than
chasing the views. Then another way to
get more views is to actually make content
that people care about. The easiest way to do this is to go onto a popular
YouTube channel that is living in your niche and then look at the
comments of their videos. If somebody has
asked for something or somebody has
mentioned something, try to make a video that
will serve their needs, because chances are if they're asking for that on their
favorite YouTuber, if somebody else in that niche, in that space on YouTube
creates content that is answering their question or
is around their comments, then chances are
they're going to watch that and if that performs well, they'll share that
with their friends. Make content that is
within your niche, but also look around and see
what does everybody else want on YouTube and try to
create content around that. Again, it's really
important that you're enjoying the content
that you create. But if somebody has asked for something and nobody has
answered the question, then this is your opportunity to physically answer
that question or make content around their comment and that's a great way to take advantage of a missed opportunity
from another YouTuber. Now before we finish
this episode, I first just want to say, I wish there was a
magic technique, something I could tell you
to do or to say or to talk about and that will
instantly give you a million views overnight. But unfortunately,
that does not exist. Unfortunately, all it is is
just consistent hard work. Keep uploading
videos that people want to watch and just
keep doing that on a consistent basis and eventually people will start to watch and the
views will come in. Now with all of that said, it's really important
that you are not concerned too much
about the numbers in the first few years of your
YouTube career because YouTube is difficult and there's a lot of
people on YouTube, which means there's a lot of
competition and this means your videos might
not get the views that you want at this point. But if you keep at
it, eventually, the channel will grow and
you'll get more views. For the first few years,
just put the blinkers on, ignore the views, ignore the followers and
the subscribers. Just focus on creating great content and interacting
with your audience, and eventually the views
will start to come. Keep creating videos
and keep working hard, keep replying to your audience and that's the best way
you're going to grow your YouTube channel and grow
the views on your videos.
17. Create a Dynamic Channel Trailer: When you click onto
someone's YouTube channel, you will see this video
appear on their homepage. This is that YouTube
channel trailer. Now, a YouTube
channel trailer is essentially a show reel
for your YouTube channel. The channel trailer is
explaining who you are, what you're talking about, what you're offering, and why somebody should continue
to watch your channel. Now, it's really
important that you get your YouTube channel
trailer correct. Because if you do a
poor job of this, then you're going to turn
people away from your channel. However, if you do
a good job of this, you'll be able to capture those people that
are on your channel, and convert those into
viewers and subscribers. First of all, a YouTube
channel trailer shouldn't be any more
than 60 seconds. Ideally, if you
could do it in 30, that would be perfect because attention spans are
getting shorter, and people won't want
to watch a two-minute, three-minute, four-minute
introduction video. They wants a quick introduction. Who are you? What's happening? Why should I stay? That's a structure that
you should follow. First of all, you want to talk about what the channel offers. Before you introduce yourself, you want to talk
about what they're going to get out of this. If a new viewer lands
on your channel, they don't know you, they don't care about you. They want to know what
they're going to get out of that time
on your channel. The first thing you
should talk about on your channel trailer
is what you offer? For example, on my
YouTube channel trailer, I first start with the question, [MUSIC] are you a
filmmaker? A photographer? Or somebody that
just wants to make something awesome for
their social media. [MUSIC] This question instantly
grabs their attention. If they're not a filmmaker, if they're not a photographer, if they don't care about these
things, they'll move on. Instantly, we've filtered out the people that aren't relevant. Next I go on to say, well, if so then you're
in the right place because on this channel, this is what I do. In those first ten
to 20 seconds, I've already said
who the channel is for and what the channel offers, and that's what you
should be doing in your channel trailer. Start off by talking about
what your channel offers, the type of audience, and the type of view you
want to watch your videos. Then you can move on
to an introduction. Because once the viewer knows
they want to stay around, then they'll want to make
a connection with you. This is why you can start
to talk about yourself and then start to talk about your
experience in this topic. In my channel
trailer for example, I introduce myself, and then I talk about
the facts that I'm a freelance filmmaker
and photographer. This is why I feel
comfortable talking about the specific topics and that's what you should
be doing as well. Introduce yourself, why you feel like you're
valid enough to talk about these things and then talk about how you going
to help them. Then of course, bring it back round to what you
plan on uploading to the channel and why
you feel like they would be a perfect
match for your channel. Essentially, the point of this channel trailer is to find the right viewer rather than
attracting every viewer. If somebody isn't interested in your topic or your niche,
then you don't want them. You don't want them
to stick around. You don't want to
false advertise to them and get them to
stay around because they won't be
interested and they won't engage with your content. It's better to have
1000 true fans than 100000 fans
which never connect. Treat your channel trailer as a way to attract
the perfect viewer, the perfect subscriber. What your offering? Who you are, why you feel
that you can talk about this, and then round this all sole
with some more details about your upload schedule and the type of content
that they can expect. Essentially it's what, who, why. Again, just to clarify, this shouldn't be any
more than 60 seconds. If you can do this
in under a minute, then this is perfect. Anything longer, people are
going to start to drift away. Keep the shorts engaging, tell the viewer what
they going to say, tell them who you are, and why you want to
talk about this. That should, in theory, capture that viewer and turn
them into a subscriber. Channel trailers on YouTube
are our first impression. If somebody likes that video, that's a good first impression. But if they don't
like the video, that's a bad first impression,
and they'll be gone. It's really important that
you spend the time to craft the perfect scripts and the perfect channel trailer to capture the perfect audience.
18. Creating a Channel Header: When you click onto
someone's YouTube channel, one of the first and
most obvious things that you will see is
the channel header. This is why it's really important that you
get this correct. Now, the channel header is that banner at the top
of the YouTube channel. The header is basically
there to serve a few really important
messages about your branding and what the
channel is committed to. It should show you
a color scheme, it should show your
branding and it should really briefly, in a few words, talk about
what the channel is about. You can also include
key information like an upload schedule
on your header as well. But it's really important
that you limit the amounts of visual content that you have there because if
it gets too busy, it will be too distracting. In this episode, I'm
going to jump into Adobe Photoshop and
briefly show you how I would design a very quick channel header
for my YouTube channel. Now, I want to jump
into Photoshop. I'm going to be using
a preset because I want the dimensions of
this to be correct. If you're wondering
where to get this, then I will make this
available to download. Just check the downloads or the resources section
to access this. Now as you can see, we've got
a few different sizes here. We've got TV, desktop max, tablets, and mobile
and desktop minimum. At a bare minimum, we have
to make sure that all of the key information lies
within this first middle box. If you're viewing the YouTube
channel on a mobile phone or you've got the
desktop tab shrinks up, then this is the part of the banner that
you're going to see. If you're on someone's
YouTube channel on an iPad or a tablet, this is the size that
you need to cover. Desktop max is the full width, and then a TV is
the entire width. It's really important
that your key information lies within here and
then the rest of this overspill is just basically an extra area for the background
to just fade off into. First of all, I'm just going
to delete this background. I'm just going to turn it off. Then I'm just going to go layer, new layer, press okay, direct this to the bottom and then I'm just going
to select a color, and I'm going to
select purple in this example and just
fill that background. Select the background, select the paint bucket tool
and fill the background. Now, I'm just going to
zoom into this part of the image because
this is what I want to focus on the most. From here I'm just going to go to Guides and I'm just going to turn the opacity down to around 24 percent
and I'm just going to lock this layer so I
can't move this around. Now from here, I need to go
ahead and find an image of myself to add onto this header. There you go. I'm
just going to drag this one into Photoshop. At the moment, you can see
that it's way too big, so I'm just going
to scale this down. I just got that down even more. Now, at the moment, it's over spilling over the
top and the bottom. I'm just going to go into this rectangle tool and I'm just going to highlight this section. Then we'll go Command C and V or Control C and V to
copy and paste, delete the bottom layer. Now, this is the part of the
banner that I want to use. I am actually just going to
expand the size of this. Just going to drag
this over to the left, hold Shift, and just expand the size of this so that
it fills the middle. Now, from here, I could just do that
same process again, I'm just going to go
to the rectangle tool, and I'm just going to
draw a rectangle mask within this smaller rectangle. Then we'll go Command
C, Command V, Control C, Control
V, copy-paste. We've got our main banner. From here, I'm just going to go into the quick
selection tool. I'm just going to draw a
quick mask around myself. As you can see, I was
selected the wrong layer. If I select Layer 3 and
then highlight it again, I can now go around myself. As you can see at the moment,
that hasn't gone too right. If I hold Option
on the keyboard, I can select or
deselect parts of the image that are
supposed to be there. Then once I'm happy
with this process, as you can see,
that's gone wrong again.There you go,
I'm happy with that. Once I'm happy with that, I can just copy and paste again. Command C, Command V, and I've got that isolated now. This means I can now add
some text in and have that text falling
underneath myself. I'm going to get to T
and I'm just going to type out Brooker Films. Then I'm just going to
highlight all of that, would change the color to white. Just going to decrease
this down to 30, no, will make that bigger. I'm just going to highlight
all of that again and we'll go to 40. There we go. Now, if we just send this
up, so there you go, you can see that sends it up and we'll drag this
underneath myself. At the moment you
can see the E and the R a bit too obstructed. I'm just going to go back
into that title and I'm just going to add more of a space
between Brooker and Films. Then I'm just going to
scale this all down to 36. Now, it went out even
further, let's go 30. I'm just going to
position that space over myself like this. I'm just going to
have less of a gap. There we go. There should
be a nice little bit of overlap. There we go. That looks cool. You can
see I've got myself, I've got my channel title. Now I'm just going
to add in a logo. Let's search for my
logo, so bf.png. I'm just going to add this into the right side of the image. There you go. Now, I just need to shrink this down. I'm just going to place
this in the middle. Somewhere around here
and that is great. Although, at the moment,
you can see the background is a little too distracting. I'm going to select
that background layer. We'll go to Filter, Blur, and select Gaussian Blur. I'm just going to increase
the Gaussian Blur a little bit. Somewhere around
here and press okay. Then I'm going to go layer, new layer, press okay on this. Then I'm just going to
draw a rectangle mask around the center of this image, so around this
[inaudible] grid line. I'll select the black color. Go to the Paint Bucket tool and I'm just going
to fill this in. Then I'm just going to decrease the opacity a little bit so
the background is darker, but not too dark. Somewhere around 30 or
40 percent would do. Sorry. Now you can
see I've got myself, I've got the channel name and
I've got my channel logo. Now, if I wanted to and if I feel like this isn't
getting too busy, then I can add some
more texts and I could put new videos every week. This is some extra information, and I'm going to select
my accent color, which is a nice yellow-orange
[inaudible] for this. I'm going to shrink
this down to around 15. Let's make that 10. I'm just going to direct this underneath the main text
or somewhere around here. There we go. You can see we've got
this really simple but effective YouTube header. Now, the first part of this
image is looking great. That channel header does what it needs to do, and it was great. But the problem is the
rest of this image looks a little bit empty. To prevent this,
I'm just going to copy this background, so that is Layer 3. I'm going to go
Command C, Command V and I'm just going to
nudge that over to the right and then I'm
going to go command and T, to load a transform, if you don't want to do the
keyboard shortcut by the way, that you can just go into Edit
and select Free Transform. Then I'm just going
to flip this around, so that is now mirrored like
this, and then place that. It looks like it has been
reflected over to the right. Then I'll just copy
Layer 6 or Command C, Command V, budge Layer 7
over to the right now. That is this layer. We're just
going to budge this over. We've got this really
cool mirror effect on this side as well. Now, I think that
looks really cool. Now if you wanted too, as well, you could also mirror this
downwards and upwards. But I actually don't mind just having this purple color
on the top and the bottom for TV because most people aren't going to
see this version. They're either going to
see this first version or they'll see the
wider version. With all of this said and done, I just need to turn
off the guides. I'm just going to select
that guide layer, select the padlock icon and turn this layer off by selecting
the eyeball icon. Then we'll go up into
File, Export, Export As. As you can see, that
is looking great. If we zoom into this,
that's looking pretty cool. We can just press
Exports and we'll call this YouTube header. Now from here, when you
go onto YouTube channel, you just want to hover over the top right of the header
to see this camera icon. Select that and that
would take you to the channel customization and this will load up banner image. We can just select Change. Then we can select
the YouTube header. Now, when we go onto
our YouTube channel, we'll see a brand
new channel header sitting perfectly in place. Just to mention
again, it's really important that you get your
channel header correct. Make sure you spend
some time and effort into perfecting the
perfect channel header. Make sure you're showing
yourself, what you're doing, and make sure it
clearly advertises what the channel is about. If you could also tie in
your branding and have your color scheme and the
same fonts in your logo, then that's really
great as well. But there you go. That is how I would create a channel
header inside of Adobe Photoshop and those
are some of the tips that you should be following
when creating yours.
19. Rearranging your Channel Layout: In this episode, I'm
going to talk about the layout of your
YouTube channel, because the layout of your
YouTube channel can either really help your channel grow or it can actually
damage your channel. So it's really
important that we put some time and
efforts into making our channel absolutely perfect from a view as points of view. If we look at my YouTube
channel, for example, you can see I've got this
really bold dynamic header. I've got my logo
and my branding is consistent between my
header and my logo. Now coming down to
here you can see we've got the YouTube
channel trailer, and this is just our
introduction to the channel. I would really recommend
creating a channel trailer for your YouTube channel because
it's a first impression, it's a great way of
introducing yourself and your content
to a new viewer. I would definitely
recommend creating a channel trailer and featuring
it here.Then of course, coming down here I've
got an uploads playlist, I've got a popular
uploads playlist, I've got a group of
different playlist, and then I've got a
members only section, selection of videos here. I'm using this homepage as a hub to send people
to specific videos. But the question is, how do you edit your
YouTube channel to go from the basic, fairly empty default
YouTube channel into something which has all of
these curated playlist. Well, first of all, you're going to want to go
into customize channel, and that will take you into
the YouTube Creator Studio. As you can see here, you've got video spotlights, and this is our channel trailer. Because I've already
got my channel trailer added in here, it's populating with this video. But if I just remove
this video for now, you can see it's
going to say add. I can just go add. Then I can search for YouTube channel trailer or
whatever the video is called, so that will be welcome to
Brooke Films in my example. There it is, Welcome
to Brooke Films and that has now been added in. Then you can see featured video for returning subscribers. If somebody subscribed, you can actually
change the video. You could do a specific video saying thanks for subscribing., or alternatively you could just keep this as the same video, and that's what I'm
doing in this example. Then down here you've
got featured sections. As you can see, I've got
uploads, popular uploads, multiple playlists, and
film and video courses, so that's a very
specific playlist. You can see down here
uploads, popular uploads, multiple playlists, and
then single playlist. As you can see in this
small text is as customize the layout of your
channel homepage with up to 12 sections, so I could add another eight
sections in if I wanted to, but I feel like 12 would
get a little busy. But if we go into Add section, you can see we can add uploads, member only videos, popular upload,
short videos, live, post live streams,
upcoming live stream, single created and
multiple playlist, then subscriptions
and feature channels. Now the channel
section is really cool because if you're
collaborating with other channels or you're
creating content similar to another channel and you
have a good relationship, then you could actually
feature different channels. You could call this channels, we could add another
channel here. Let's go to my second
channel, for example. I could actually
add myself in here, and this is going
to be a feature channel.Then of course you
could add in another section, so we could add in
single playlist. We can go through
one of our playlist, let's go into cinematography,
you can add that one on. Then of course we could
add members only videos. If you're wondering
by the way what a members only video is, then that is a source of income. On YouTube you can
create a members only section once your
monetized and this basically means that
people have to pay a subscription and you can select how much
they pay per month to view exclusive contents. In my example, I've put
the courses that I have on Skill share available
on YouTube to members, and that's what a
members only video is. If you are a channel member, you can view this but
if not, then you can't. You can actually highlight that section on your
YouTube homepage. Once you're happy
with all of that, once you've added everything in, you can actually just press, "Publish", and that
will publish all of those changes onto
your YouTube channel. Like I mentioned before though, it's really important that
you don't clutter there. At the moment, I would
say this is too many, so I would just actually
delete a few of these and to delete you just select the
dots and remove section. Of course, if you wanted
to move things around, then you just grab
this icon on the left and just drag those up or down, So you just drag those
wherever you want them to go. But once you're
happy with that, you just press "Publish", and then that will change all of those changes onto
your YouTube homepage, and your YouTube
homepage should now be looking something like this.
20. Top Tip: Batch Producing: One of my secrets when it
comes to producing regular, consistent content is to
make everything in batch. I batch produce my videos.
What does this mean? Well, on my YouTube channel, I aims upload three
new videos every week, which means I need to
create 12 videos a month, which sounds like a lot of work. If that meant I had to film on three different
days every week, so 12 different days of
filming to produce 12 videos, it would be really overwhelming
and really unachievable. This is why I batch
produce my content. So this means I plan out
my entire month's worth of content ahead of time and then
in one session of filming, I aim to film six videos, so two weeks worth of content. Then once I've filmed
all of these videos, I just get them all
edited in one go. This takes me roughly
one or two days depending on the
complexities of the video. Then once I've got
the videos filmed, I just get them into
the editing program and spend a day or two
editing these videos and then upload those to schedule and schedule those
to go out over the next two weeks and that is batch processing or
batch producing videos. Essentially, rather than
turning the camera on, lighting the video,
filming the video, editing the video,
uploading and doing that process for
every single video, you just group
everything together. See you plan everything
at the same time, you film everything
at the same time, you edit everything
at the same time, and you upload everything
at the same time. It's much more time
efficient and you get so much more done in
much less time. One of my biggest
recommendations for your YouTube channel, this will make your life so much easier is to just film
everything in bulk. So batch plan, film and edit your videos.
21. Playlists: In this episode, I'm talking
all about playlists. Now playlists are really awesome and easy
to use feature on YouTube that allow you to group different videos together. Now these are really important because if a viewer
is watching one of your YouTube videos and they were
enjoying the content, then chances are
they'll probably want to watch another one. But the problem is some
viewers won't go onto your YouTube channel and scroll through all of the
videos that you've got, they just want to leave it playing and just see
what comes up next, or just click a video
on the side of YouTube. This means you need to
try and make recommending a video to them as
easy as possible. If you group multiple videos together into a custom playlist, you can actually share
this playlist add the link to it in your description or add it onto one of
your end cards, and this ensures
that the viewer is going to stick with
your content and your videos rather than drifting away and finding
somebody else's content. It's also really awesome as
well because you can organize different types of content
into different playlists, and you can recommend
different types of playlists for different
types of viewers. Now as you can see,
we're inside of YouTube Studio and we
are in the playlist tab. These are all of the
current playlist that I have available. Now in order to create
a new playlist, you just want to go up into new playlist in the top right. You can change your
playlist title. Let's call this animation
tutorials, for example. Then, we can change
the visibility to public, private or unlisted. I'm just going to
select private for now because I'm not going
to share this playlist, but we'll just press Create. Then we'll go into
this new playlist. We'll go Edit in YouTube. You can see we've got
this page come up here. If we press this icon here, we can change the title
and then we can save that, or we could go down into here and we can
add a description. This playlist, misspelling
all over the place, this playlist is all
about animation. Now as you can
see, you've got up to 5,000 characters there. Try and make this a lengthy
description and thoroughly talk about what you're going
to see in this playlist. Now in order to add a
video into your playlist, you want to either go onto your channel or you can search videos and
add them in this way. But let's go on to the channel. I'll go into videos, and I'm just going to
click this first video. Now that the video has loaded, we can go down into the
save button down here. We can select Save, and that is going to load
up all of our playlist. We can add this to either that, just one playlist, or we can add this to
multiple playlists. But I'm just can keep that
selected on that one playlist. Now if we go back
into our playlist, so we go back onto
channel playlist and we go into animation
playlists again, you can see that one video
is going to be there. Now, of course, instead
you can actually go back onto your channels, so you go your channel. Then we go into videos, and instead of clicking
on the individual video, you can actually just select the three dots on that video. Let's go to this one, and there you can put save
to playlist and you can select animation
tutorials and click out. Then we'll add this one
in save to playlist, animation tutorials
and click out. Just do this to as many videos as you want to add
to that playlist. Save to playlist,
animation tutorials, and then when we go back
to our channel playlist, you can see we've
got all four of those videos in
their own playlists. If you wanted to, you could actually select a
specific video. Let's go for the Music Video
Lighting with One Light. You can go to these
three dots and you can set as a playlist thumbnail. If we wanted the thumbnail of the playlist to be
this one video, you can just change
that by doing this. Now unfortunately,
you can't have a custom thumbnail on
a YouTube playlist, but you can select the video which it will take
its thumbnail from. Instead of having this
logo animation sum, I'll take in a thumbnail
from this lighting video. Now let me just show you how
effective playlist can be. At the moment, we are in
my YouTube analytics. This all looks a bit complicated but don't worry
about that for now. Let's just go down and look at the average view duration
and watch time in hours. These are all of my
different playlist that I have on my
YouTube channel. Now it's showing me the most
successful one at the top, and then it's going down. It's descending down. As you can see, the
text animation, Adobe Premiere Pro playlist, throughout the month of
November has given me 1,892 views with a watch
time of 40.5 hours. Now if I hadn't have
created that playlist, then this means these
1,892 people that were watching this playlist might not have watched
more of my content. They might have
just clicked away and watch somebody
else's content. Having that easy
to find group of content that you can
recommend to your viewers is a really quick and easy way to ensure that you
get more views and therefore more watch time
from your YouTube content. Once you've got a
few different videos uploaded to your
YouTube channel, I would really consider creating a few different playlists and grouping your content together.
22. What Not to do on YouTube: Now at this moment in time, I've talked all about what
you should be doing to grow your YouTube channel and
create great content. But I haven't talked about
what you shouldn't do. Because there are a
few things that would land you in trouble
or would damage your reputation or could potentially lead you to being
thrown off the platform. The first one on that
list is spam or spamming. If you spam on somebody's video or if you're sharing
too many links around, then you'll just go into get a bad reputation and
people will avoid you, your channel, and your videos. If you're commenting
on other videos, don't bring it back to yourself. Don't say check out my channel
on somebody else's video. Just leave a nice comment
talking about their video. Then with links, don't
share way too many links. Don't go on to somebody
else's YouTube video and comment with a link
to your YouTube video. People will avoid your channel, or if you spam too much, then YouTube could
potentially restrict your channel or potentially
even block your channel. Don't spam, don't
comment too much, don't comment on the hope
that people will come back to your channel and don't share your links everywhere you go. Now views are the
currency of YouTube. The more views the video gets, the most successful it is seen, and the more likely it
will grow that snowball and you'll get more and more
views easier and easier. However, it's really important to get those
views organically. Do not ever buy views. Never buy likes, never
buy subscribers. Because first of all, this
looks really suspicious. If a video has 10 million
views and three comments, it's very obvious
what's happened here. Of course, people will
just know that you're buying views and they'll
turn off your channel very, very quickly and of course, YouTube could actually block your channel or a
movie from YouTube. Never ever buy views or
likes or subscribers. All of traffic
should be organic. The closest you can actually
properly get to buying likes or buying views
is to buy advertising. Use Google AdWords to buy adverts and there you can
share your videos around. But this does get
quite expensive. I wouldn't recommend this. If I was you, I
would just create great content on a
consistent level and that way you'll get a great amount of
organic traffic. It's also really
important as well not to copy or steal other videos. Now this could be
literally downloading and re-uploading their
videos. That is a no no. But it's also really
important that you don't steal somebody
else's video idea. Now of course, we can lean into other channels for inspiration, but it's important
that we're not recreating every single video
that a channel uploads. If you're constantly
stealing someone's ideas, then, first of all
what's the point? Because why would
you get the copy of somebody when you could
just watch the original? Then second of all, your
viewers will suspect this and they won't stick
around and you won't grow the audience that
you're trying to grow. Yes, look at other creators for inspiration and look around, see what everybody
else is creating, but come up with your
own ideas and figure out the best way of creating the content that
you want to create. Next up is copyrights. It's really important
that you do not break copyright rules because if you break copyright rules then your
channel could be deleted. Now the biggest
defender here is music. If you download music
from the top 40 charts, then chances are
it's going to get blocked, restricted, or removed. This is why you can use royalty free sites
like Epidemic Sound or Artlist to download music that is safe to
use in your videos. Of course, as well stealing other people's videos
and using them in your videos could land
your channel in danger. Now there is something on
YouTube called fair use when you can actually use
other people's videos. But there's quite a lot of loopholes and
there's quite a lot that you need to know about it. I personally have always avoided using anybody
else's material. I know there are whole channels
built around reacting to music videos and comedy series and reacting to other
people's content. But if you're using somebody else's content
without permission, then there's always
the risk that somebody will ask
you to remove it. Next up is to break your niche. Now, this isn't so much a rule. This one won't land
you in trouble, but breaking your niche and
breaking your specific topic will make your audience feel disconnected from you and
they'll eventually drift away. Now if you subscribe
to a YouTube channel, and that channel is
all about coffee, if all of a sudden
they start talking about traveling, well, you aren't interested
in traveling, you are interested
in coffee and if they start talking
about traveling, well, chances are you
might just give up, unsubscribe and move on. That's the same for
your YouTube channel. It's really important that you stick to a specific niche and a specific topic to keep
your audience happy. Now, you can float around and explore different areas
within your niche. But it's really important
that you don't drift too far away from your
niche or your topic. Now the next point here is
not a rule from YouTube. This is just a tip that
will help to keep you sane. Don't think about the
numbers too much. In the first year,
the first two years, the first three
years, it might take a while before you
get that traction. This means you'll have low
views, low subscribers. If you are paying too
closely to these numbers, then it can get
really discouraging. If I was you, I would focus
more on just creating great content and try your very best to ignore the numbers. If you're just doing this
for views and subscribers, then unfortunately
this is going to be a very disappointing
journey for you. Focus your attention on creating content rather than
chasing views. Then last up is, don't
do this just for money. If you're creating YouTube
videos and you've created a channel in the hope that
you'll become rich overnight, I can honestly tell you, first of all, that's
not going to happen. It takes a long time to
build a career on YouTube. Second of all, you're
just going to get discouraged when that
money doesn't come in. It takes 4,000
hours of watch time before you can even monetize
your YouTube channel. Don't focus on the money, focus on creating great
content that you enjoy. That's the best way that
you'll enjoy YouTube and stick with it over an
extended period of time. As long as you don't do
any of these things, you should be safe on YouTube. Just keep creating
content that you love and don't fall into
any of these traps.
23. Dealing with Negativity: YouTube is incredible. The fact that we can
create videos and the entire world can
see those videos, is absolutely incredible, and it gives us so much power. We can build businesses,
brands, companies. We can do so much with
the power of YouTube. But the problem is when the whole world has the
ability to watch our videos, this means unfortunately, some not so nice people
can watch our videos. This means sometimes we will deal with negativity and hate. The question that I'm covering
in this episode is how do I deal with negativity
and hate comments? Now, I wish I didn't have
to create this video, and I wish I didn't
have to say this, but unfortunately,
negative people exist and people will comment
negative things on your videos. Unfortunately, you could have the most perfect
well-crafted video, but somebody will find
something to say. It could be the way you look, it could be the way you've
delivered something. It could be the information
you're talking about. Negative comments
will arise and it's first of all really important
not to respond to them, because as soon as you respond
to a negative comment, it just leaves the person who's left that
horrible comments, more motivation to keep posting. They enjoy the fact that
you're reacting to them. They'll just keep posting more and more negative comments. Even though it's very
tempting to jump back and try and argue
and fight your case, it's just going to
cause more damage. The first thing that you want to do is to just ignore them. Now if their comments
go from mean to bullying or harmful comments, then you do have the right to
either report the comments, block them, or remove them. This is definitely the best way that I would approach
this situation. You can just remove their
comments and that is the quickest and easiest
way to get rid of them. Alternatively, though
you can't actually report that channel or you
could flight the comments, and YouTube will
actually go and have a look at that comment
and that channel, and figure out the best
way to deal with them. This means that channel could actually potentially be removed, and they'll have to
create a new accounts. Fortunately, it is possible for somebody to create a new account and just keep coming back, but you just have to
be consistent and just keep removing the comments
that are offending you, or report in the channels that are consistently causing harm. If you go into your
YouTube Creator Studio and you go into the
comment section though, you can actually filter
outwards and you can actually block specific
words from being used. If somebody is using an
offensive word against you, do you can actually
block all comments that use that word,
or that phrase. All you have to do is just
say delete all comments using this word and YouTube will filter out any comments
on your videos, and get rid of all of those. That's the best way that
I would deal with this. Now for some bizarre reason, I've found in my channel, and I've also found in
other channels as well, that once a negative comment or a few negative
comments have been left, it gives permission for other people to leave their
negative comments as well. If there's two or three
harmful comments, I'll find that video will
probably start to get an increasing number
of negative comments. This is why I would definitely recommend just removing
any harmful comments, as quick as you can,
just get rid of those. Don't let it grow
into something, can let your comment
section be full of negative comments and people arguing and fighting in
the comment section, you really want your
comment section to be a positive place where you can engage with your community. Make sure you get
rid of any harmful, offensive, or mean comments. That should ensure
that you have already cleaned happy comment section. Now my last thing to
say on this topic is, unfortunately, it doesn't
matter who you are. You are going to experience some level of negative comments. It's just the reality of being on social media unfortunately. Until the social
media giants figure out a way to filter
out these people, or put some license to
the Internet online. Unfortunately, people
are just going to be negative and put harmful
comments on videos. This is where you just have to develop some level
of thick skin, and just get on with it
and expect it to happen. Of course, if someone's
being racist, homophobic, or really horrible, then that's when you
really need to step up and get those people reported
and removed from YouTube, but if it's just a slightly
negative comments, and they don't like your
presentation style or something, then just take it on the chin
and roll with the punches. YouTube is a really
wonderful place. It can do so much
for your career, and generally nine
times out of 10, the comments are
really positive, and people really want you
to do well and you get a real sense of community
on a YouTube channel, but there will be the
odd exceptions and some people will
leave those negative, and not very pleasant comments. Just deal with those
accordingly and just expects that it's going to happen at some
point or another. I wish I didn't have
to share this advice. I wish everybody had a really lovely positive
outlook on life, and wanted everybody to succeed. But unfortunately, that isn't really the
case on the Internet, but generally on YouTube, most people are there
to support you. Just look at the positives
and ignore the negatives.
24. Outro: There you go. That's it for
the YouTube success course. Now uploading videos
to YouTube is a really fun process
and it's also really possible to turn
this into your career. But this all basically
comes back down to one word, consistency. If you're consistently creating and uploading videos to YouTube, then I can guarantee
you one day you will find a level of
success on YouTube. Whether you're making
filmmaking tutorials, coffee shop videos, or a show that
analyzes comic books. Then I can guarantee you if you keep creating content
around that nation, you're doing it on
a consistent level, then you will find the audience and you will have
success on YouTube.
 Chris Brooker, Filmmaker & YouTuber