Transcripts
1. Welcome!: Hey there everyone, and
welcome to my brand new course on creating the ultimate
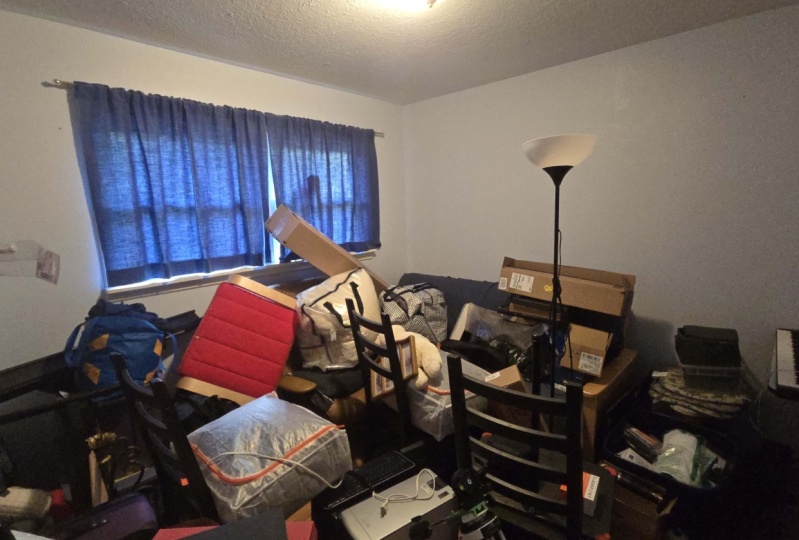
Youtube studio. Content creator studio at home. In, for example, a spare bedroom like this
one right here. Now as a Youtube myself, my name is Dylan.
Nice to meet you. I've got over
60,000 subscribers, 25 million views, and
four monetized channels. I've gone viral on Tiktok,
Instagram, and Youtube. And having a sort of space where I know I've
got my equipment, I've got my backdrop, I've
got my filming set up. It is key to growing on Youtube and being successful
on all social media. Create stuff to the
highest quality. In today's course,
we're going to be deep diving into what
equipment I have for my level, what you may need
for your level. I'm going to explain
everything that I've got, how I set up my equipment
in terms of lights, mics, cameras, how I film my videos, and what backdrops I'm using, and how I've got two different backdrops in a small space. Basically everything
you could ever need to become a successful and
efficient content creator. We're going to learn
today. And it all boils down to having
a nice studio. I cannot wait to get started. I look forward to seeing
you in the course. And I guarantee this will
add a lower value to your content creator
journey and help you on your way to
success. Let's go.
2. Unique Studio Must Haves!: Now first things first, I'd like to touch upon a few essential items for any studio. And then after this,
we're going to dive into how I fill my videos, my backdrop, my camera, my equipment, and ultimately
how I set everything up. But first things first, a
few key items for a studio. Number one, it's going
to be a whiteboard. Now a whiteboard is fantastic
for mind mapping ideas, getting that creativity flowing, and also adding content
scripts to this board. So let's say for example, I was making a Youtube video. I could write the script
on the whiteboard, I could have it
next to the camera, and then I could flip
between my camera, look at the script, back to
the camera, nice and easily, 100% one of the best investments
I made a Wi Fi booster. Now depending where you
are on your studio, a Wi Fi booster can be key for making sure your
productivity is maximized. And that is ultimately
part of what a studio is about, maximizing
productivity efficiency, along with ensuring you have a lovely set up to
create amazing content, to help you grow on
social media, on Youtube, and you need internet
connection to upload videos, to title them to do research. So a Wi Fi booster in a studio
is key for productivity. Just like this, a
spare camera battery. Now, whenever you're filming, the worst thing
that can happen is your camera runs out of charge. You have to sit down and
you have to wait for an hour for it to charge you up and then start filming again. You lose the rhythm. Maybe
the lighthouse side changes, there's a lot that could happen. But having a spare battery means that while
you're filming on one camera, you can charge up the
spare battery in the plug. And then if this battery runs
out inside of the camera, it's a simple switch. And happy days. Now next up I want to talk to you about something
quite interesting. This is your selection of, for example, if you're
redecorating your room paint. Secondly, every
studio has a desk. But things like the color of the desk make a big difference
when it comes to filming. For a very small example, the desk I've got right here, it's a nice light
beachwood color. Now, the nice light color, in my opinion, looks
great on the camera. Now I've got this
black mat that I'm going to substitute
out very soon. But for example,
if I had a dark, dark black desk like this,
what you're seeing right here, it changes the
composition of the shot. Now as a general rule of thumb, stuff like having plants and a nice light color is
quite a nice way to create an environment
in your videos that is very relaxing and
ultimately engages people. I would say obviously
a black desk can work, but what I'm saying is think
about what you're trying to achieve and what colors are
the things like your desk when it comes to creating
your own studio. For me, I like light color.
3. My Filming Set-Up + Equipment (KEY!): Now in this section
of the course, we're going to take a look
at my first filming set up. So I have a few different
filming set ups in this room, but the main one that I use is what we're about to
digest and look into. And this is the
one that I used at the start of this course. What you'll notice first
things first are all of the equipment behind me is designed so that when
I sit down at my desk, which I'll do for an example, right here when I'm
talking to the camera, I've got this nice three
D sort of backdrop. I'm lit up quite well and I've got the mics
coming down here. I've also got a few
items on my desk to add to that sort of spectacle
of a nice set up. But let's take it step by
step and break it down. So if you come all the way
over the back right here, first things first, I've
got a soft box light. It's probably very bright on
the camera. Nice and cheap. Amazon Softbox light, providing the main harsher
lighting conditions for when I'm sitting
down and filming. Now I have a lovely light over here that is slightly
more expensive. Now this one is a bit
more of a diffused light, which has different
colors more expensive. So if you're a
beginner, for example, then you'd want to start
off with a soft box. If you're looking to upgrade
and go full on studio, maybe one of these is
best because there's a lot more cooler settings
at the back right here. This is a newer light as well, so it's a bit big to get
in this section here. So I start off with my foundational light,
the soft box light. I've then got my
tripod right here. It's a nice manofrototripod
extendable. Very tall as well, so you can go really low down
or really high. And on top I've got my camera, so this camera is
a Loomis G seven. We'll see that angle that we're looking at in
terms of filming. So a bit of a desk
making sure none of the lights are in there or none of the cables are in there, and it's a really nice backdrop. Now the lens itself, as I
was saying, a default one, it is 12 60 and yeah, on top overall, a great
camera does four K, but you don't really
need four K. I would say though, if
you can afford it, it's even on my to do
list that you upgrade to a lens that you can do
low aperture shooting in, which really blurs
out the background. So they're a bit harder to
find. I've got one somewhere. I have a lens that blurs out the background
I invested in, and unfortunately where it
blurs out the background, I can't go far or close. It's only got one setting, but it's low aperture and
this is a 0.25 M 25 lens, and it's just nicer
when you look into it. Changing the aperture allows a blur background,
which can be very nice. All of these drawers
as well. By the way, I've got my equipment in, so as I was saying, so we've
got the camera, the tripod, the light, and there's a bit of a set up where the
cameras in front of the light just to allow
that light to diffuse. And sometimes you
can get shadows if you place the light
directly behind the camera. We want to avoid that. So yeah, we want to avoid having shadows on ourselves when we're filming. So making sure the
light isn't directly behind this camera
is how we do that. Then from my actual camera, I'm not using the microphone on this camera because it
would be too far away. If I'm sitting there and I'm recording on there,
it's too far. So what I've got is essentially this Tiger boom stand
cheap on Amazon. And I've got a road
mic attached to it. The road mic is a
bit more expensive, but definitely worth the money, especially in terms of audio. And so I've got this lead
that comes all the way from my camera to this
microphone here. This desk is essentially
what I use as a prop for filming and also what I use whenever I'm
actually editing. So the cameras over there
is coming towards me. I've got my light,
I've got my mic, and my mic is pretty much
directly above my head. So having that audio
quality of the mic being above my head versus back
down there on my camera, it increases the quality
of the production tenfold. So it's nice and close. It's about a half a foot. And this tiger booms, stand you make it high,
you make it lower. And then you come to
the stuff on the desk. Now this stuff on the desk for this filming set up
isn't as important, but you can get a nice little
Game of Thrones reference, a nice light here to create that ambient lighting
in the shot. And you'll see at the
start of this clip, the plant ports just give a
bit of health and greenery. And then this slide right here, sometimes what I
might do as well for this filming set up is
just ever so slightly twist this screen here
and it creates a bit more of a dynamic
homely feel as well. So there's a bit of
area to play around. I feel bob bits and
bobs on my desk, but overall, quite
minimalist, quite clean. And it just allows me to play around and lean in and talk. We're going to look
at a different filming set up in a minute, but that will be when I
essentially si around like this and I have the
whole thing facing me. So again, what the key is
as well is that behind me, and I appreciate that sometimes there might not be enough space, but I've got a bit more space behind me behind my
desk to actually add certain elements
to my filming in terms of a light
directly behind me. So that essentially when
I'm talking to camera, my back is covering
and hiding this light. But there's a purple
array coming behind me. And so what that allows to happen is it allows
a camera to pick up a sort of separation of distance between myself
and the background, which essentially creates
some sort of a blur. So that is a key tip that
took me years and years to learn and it's
absolutely fantastic. Now, follow me down
this way as well. Again, I've got, I've got a plant like myself.
I've been here. I've got a plant, I've got a
few more lights, one here. These don't really make
too much of a difference, they're just nice to
see in the background. I would probably take out this
as well if I was filming. And then I have this
little blue light as well that on occasion, if I didn't want the
might to being shot, then I'd hide this light down there and allow
that blue to show. Because remember, we're filming
from exactly over there. So if you point to where we're
filming and that camera's coming down here and this
is all in the backdrop. So essentially this is
the filming set up. I'm say, I'll take
a little seat. So what we've got is a
really high quality filming set up that of course, if you're going to go for the more expensive
lights and cameras, it can get quite expensive. But in terms of keeping it
basic, if you're a beginner, getting a tiger stand, getting a soft box
light, getting a tripod, and then using your phone and having a small light behind you, That is a reasonable thing to obtain as a beginner
or somebody who's just started out on Youtube or as a creator for a reasonable cost. And it makes such
a big difference to production when you start upgrading your content
and your software and your facilities. The bigger softbox light, the bigger lens,
the bigger camera, the more expensive the road
microphone go mike is. That's your next step
and it does create a huge difference now in
terms of these lights. These two right here, I'd say are one of the
best that I've got. So I've got a pair of them,
but I'm only using one. So if you get nice
and close in on this, it is a newer GVM light. Now the reason why
this is so good is because right
now it's on purple. But I could change this by
adjusting these nodules, change the color, change the brightness,
change the intensity. And it's on a nice little swivel as well, it goes
higher and lower. Natural fact, these two things are fantastic when
it comes to filming. And again, in terms of
smaller adjustments, I'm in a stool. I used to have a drum stool,
but it was too creaky, so now I've got a solid
stool right there, nice and solid, and
it works very well. And then sometimes
in the backdrop, as I'm saying more for
the other set ups, I've got these paintings, but I hope this gives
you a massive insight into what equipment
I'm using and how I'm setting up
my filming set up to get that lovely picture
quality you saw at the start. We're going to jump into filming set up too now.
Thank you very much.
4. Alternative Filming Set Up!: Now welcome to the next filming, set up filming.
Set up number two. So I'm going to move
all the equipment over from where it was before to a new spot and utilize the same background
in a different way, which is all about maximizing
space and efficiency. So first things first, this is kind of a really nice
versatile backdrop. I'm going to take them
both at the same time because they're plugged
in, that was a close one. And essentially what
I'm going to do is I'm going to put the mice here, just do a 360 to unravel this lead and
put the camera here. Now what I'm doing
is I'm essentially looking at creating a
filming set up utilizing, and if you come close
from my perspective, the lovely paintings and the
desk in a different way, a more sort of full
on, straight on way. So what I'll do is I'll position the camera
to start with, let's try it face
on with this desk, So face on right here. And again, I want this
light to be tight, so there's no chord showing. Never have any chord in that. The mic a bit higher. Just
so it catches my voice. Move it back a tiny bit. And then my thing right here, I'd even move this
purple light as was talking about four
again, just behind me. To create some
additional lighting. And to create that sort
of three D effect, put my stool just
in front of it. When I sit down, I'm going
to be blocking that light. This camera can go even further back and then I
just fool around. My more expensive light, the big one, the diffused one. It's quite warm right now here, lighting my face, making
sure there's no shadows. Get this just above
my head out of frame. And suddenly what I'm building
is quite a nice backdrop. So if you stand, so if you
stand where that cameras, you'll get a lovely idea of the type of shot that
we're going for. Does that look good? It
looks good, amazing. So what we're doing
is we're already utilizing the effect
of the light, the backdrop, and
the distance once again between the
backdrop and myself. And overall, the plants
come more into play, and less so of the
lights on that side, but more of the aesthetics. And it also gets away that
sort of curtain feeling. Now another cool thing we can do is slightly change the angle. This is where I put the camera. This time you stay
exactly there. I put the camera like this and I know that's going
to be in the way. There's no worries at all.
What we'll actually do, you can also look down
the monitor here. We'll zoom out a tiny bit. That's nomads, all right, But that's a rough angle of the set up that
we're going for. The corner of the room right here is going to
be at 180 degrees. So I line it up again, nice, like that. Ice like this. And this time we've
slightly changed the angle, but we've got the plant
in the background, we've got half of
the curtain, we've got half of the desk
and the paintings. And once again, it just
creates that sort of different feel where if I
was doing a tech video, then I might want to utilize my desk a bit more, for example. Or if I was doing a sit
down and a story time, that requires some
sort of engagement. And essentially, it's all about me presenting just myself
and the story I'm telling. I might opt to do it like this, where I've got distance and a blurred background of
me talking to the camera. Or if I was talking about
some sort of review, then I might like to
have a busier backdrop depending on what
I'm sort of filming. So in essence, there are another two filming
set ups right there that ultimately depend on the type of project
you're creating. And it's quite simple
once you've got the right equipment
to get that going. So my soft box light
is still over there, but you can equally
move that there and have that light
coming at you this way. And yeah, I just quite
like the versatility that you can get from
a small room with this sort of equipment.
So thank you very much. This set up can be done for beginners to all the
way to Pros as well. I'll see you in the next class.
5. Shadows & A Beginner Set-Up: So welcome to the
final camera setups and filming set ups
for this course today. So there's two final ones
I want to talk about. The first one you're
seeing right now, it's nice and a plain wall. So what I love about filming in the bedroom studios is that I could actually
utilize the wall behind me as a
plain wall backdrop for whatever content I
might need to be making. And subsequently, I can add a few little paintings
or portraits or whatever I'd like to add just to give it that sort
of extra flare. The lighting, once again, especially if you've got a light that goes colors or warm, can be used to just
make that white wall or whatever color it
is that a bit more ambient and having
ambient lighting, smaller lights here or there
for either side of me. Or using the light to make the wall ambient makes
such a big difference. So if you're struggling to
get a nice set up at home, if you're a beginner or a
pro, I would say, you know, as a beginner using a lamp
just directly behind you or a lamp facing up
this wall behind you. Because if you do
it in front of you, it'll give you a shadow, which right now I haven't got. Then essentially what you get is this lovely ambient texture. Now as well, if you
have, for example, the light like this,
there's still no shadow, which is the beauty
of this light. But essentially, if you put a light coming at you
on an angle and there's a wall behind this quite
plane, you might get a shadow. So the way to avoid shadows often is a general
rule of thumb. Is having, you know, two lights that are
coming at you like this, making sure that your light isn't being blocked
by your camera. Or even sometimes you
can add a small light behind your back to the wall and it eradicates the shadow. So just on this, if you
actually come close, you'll see a shadow right here. So for example, if you've
got a shadow often like this in your shod or behind you on the plane
wall when you're filming. Then what you want to do is adjust the position
of the lights. So for example, in this case, what has happened
is this stand is my light is essentially
piercing through this stand. So if I turn off this lamp,
you stay on that shadow. Is this lamp right here?
The shadow goes away. If I turn it on, the
shadow comes back. So if I was trying to fix
this problem in situ, what I would do is I would change the position of my lamp light
to the side here, or I would get another light, but I would play around
with it like this. So you see that me
adding this light here to the side has got
rid of that shadow. And that's exactly what I
was talking about before. Adding lights behind can help you eradicate shadows
if they're in your way. So that's a great tip
for a beginner or a pro, but either the gress, that's another filming set up that we can play around with and do. And then finally,
I love doing that. You've just got a
plain backdrop that I think if you just stand
directly in front of me there, then you see that
it's nice and plain. If you get really tight,
you'll see that there's nothing else behind me
except this blue backdrop. Very, very nice indeed.
6. Adding Personality to your Brand: Next up, we're
going to be talking about personality
in your studio. Now, I'm behind a play wall right now for a
very good reason. A Youtube studio or
a creative studio is much more than just a
place where you film. And it is a place where your viewers feel at home
watching your content. It's a place your
viewers come to recognize and feel
comfortable with. A great example is Ali Avdo, his studio at home
was fantastic. And whenever I saw that pop
up on Youtube, I thought, yeah, this is going to be a good quality video.
It's a lovely backdrop. I feel very relaxed
and I like the colors. Whereas if you're
starting off in your studio, it's a bit plan, it's a bit like this, it has no warmth to it, no personality. Then it is a lot
harder to generate more views and build that
connection with your audience, really, when I think
about it, a studio is also a place to connect. This is not ideal. If I spin the camera around, I've got something like this,
which is a tiny bit better. But if I spin it
around once more, then we get a bundle
of personality. Now what I mean
by this is all of the different
elements on my desk tell people a bit about me. For example, if your
channel is all about film reviews or movie
reviews or series reviews, and having stuff like this
from your favorite series, A Game of Thrones
ornament will be key to allowing the viewers to
understand your personality. Maybe you're a bit
of a collector, so you've got stuff like this. A gaming channel might
have God of War or your favorite game
memorabilia on the desk. But all of this stuff tells the person a bit about
yourself, the person watching. That is whether it be
the stuff you have on the backdrop like art or
the colors you're using, it just goes to show a
bit about you and adding that personality is fantastic.
7. Exemplary Studio Filming Set Ups: Next up we're going to be
taking a look at a few of the different filming
setups that I've used throughout the years
of being a Youtuber. Now I've been in many different households, many
different environments, and I've created many
different setups using the principles from today
in the same environment. So the first one
right here is one where I'm using a lot
of the stuff we saw in today's course so
far that set up where I've got a desktop to
the right hand side of me, providing me some nice light. The blue lips were in the
top hand corner switched on. There's a plant
in the back left, and there's also a small light going behind me to create
that sort of separation between myself and
the actual backdrop that allows for the background
to be slightly blurred, while my foreground
is in the focus. In this occasion, I did
also have a black desk, and I talked before
about a black desk being absolutely fine, but sometimes the lighter stuff, just like I'd
rather have lighter curtains in this situation, In this case right
here, take note of that desk and then take a
look later down the line. How when I have a beach with
one, it makes a difference. But overall, a very nice set up, utilizing the desk and
many other factors. Here's a bit more
of a recent set up. The same environment, the
same camera angle as well. The main difference here is
that I've got a nice warm, newer light like we
talked about before, directly behind me, this time projecting some
sort of warm light. We're having a little
detour here through my old house, and I basically, this is a collection of all
of my Youtube videos that have different setups from
throughout the years. Now, again, notice how in the background
there's the plant. The lips are on the
top right hand corner, but they're switched off. And then I've also got that
sort of yellow wave painting now, that warm light really reflects quite nicely
onto that painting. So one thing I'd say is just think about how the light
that's projecting behind you really impacts and works alongside the different elements in your backdrop overall. I prefer this just because of that brighter light
directly behind me. It kind of gives me this sort
of glow. Not personally. As I said before, a fan
of how dark it is on the right hand side or even
the backdrop of the curtains, I would ideally like for
that to be brighter. Next up, this, ah, this is a very interesting one. So this is basically not
a studio, it's no lights, there's no special fancy, anything at all, just, we're flicking to a podcast
clip, then we'll flick back. But basically, this
was taken from an office space where I
had to film something. So what I did was
I found a window. I pulled a chair up
directly to the window, Sat down, it's a nice gray
chair. It's nice in light. And then I pretty
much just started filming and you'll
notice that I made sure, again, there was a nice
backdrop distance, background distance
between myself and the wall just to allow there to be a slight
differentiator in terms of blurriness
versus focus. And I made sure
that I was lit up. And the rest is kind of just, it's just there, you know. The white walls are
nice and bright. The beachwood looks quite nice. The sunlight changed then, which is the inconsistency of shooting with natural light. But overall, there's a
great example of how you can apply some of
the principles of today in just everyday
general scenarios when you might not have lots
of equipment to play with. See, I was happy with
that overall, I'd say. But let's move on to the
next filming set up. This one is one of my favorites. It's a video that
did really well, so clearly this
backdrop was engaging. Now the first thing you'll
notice is that I've got lots of different lights and
lots of different colors here. So there's one big
light to the left hand side, the newer one that I
showed you earlier on that was creating that purple
backdrop in this course, but it's turned around
to project a red light. That red light is coming
across all of the backdrop. You'll see it there on the
plant, and you'll see it reflecting on my computer
screen on the black. And then it also
is combined with purple LED lights going around the side of my desk on the
right hand corner there. And overall, this effect of the red light and
the reflection, and the purple LED lights
creates this massive, sort of vibrant color. I've got a small lamplight
directly behind me in this scenario where I'm allowing myself to be lit
up from the back. You can see it right
there. And so overall, this set up was great
for storytelling. I'm kind of in line with the
angle of that wall change. And I've got a painting, I've got my desk on my curtain, So yeah, very nice, very
separated backdrop. This is my favorite
one right here. That's what I was talking
to you about earlier on. Notice how the difference
between what I had before and this is quite
a lot, it's a lot whiter. It's a lot brighter. It's a lot more lighter
colors, I'd say. So in essence, I'm
wearing a white top and thinking about
what clothes you wear to complement what your filming set up and backdrop is, is key. I've got my hand on the desk there as
well leaning into it, but my nice white mint green sort of set up
is all coming through. Whether it would be
the computer screen, the plants in the backdrop, the vine leaves dropping down. The light is turned up to a nice warm to
coldish blue tone, and that reflects nicely
on the white wall. If it was, for example,
green wall and I turned it up to the white blue setting,
it wouldn't look as nice. So overall,
everything is kind of coming into play really well, and it does look very nice. So that was one of my
favorite set ups following exactly the same
principles that you've basically seen throughout
this entire course so far. Now moving on to the next one. Once again, natural light.
No artificial light. I had, it was in my front room. I've got lots of
different objects in the backdrop
of my front room. Happy birthday. A
colorful painting. I brought the plant in,
There's a snooker table, this slightly blurred out, I'm in focus and essentially, massive natural
light coming through those windows to allow
me to get this effect. But overall, there's some of my key set ups that I've
used throughout my years. My favorite is the one that
I showed you beforehand. But obviously that requires
the right manner, space, light white paint,
certain color backdrop, certain color desk,
certain color top. So all of this
stuff is good to be aware of whenever
you're creating, building, and filming
in your home studio.
8. Key Software for Creatives!: We're going to be
taking a look at a few essential
programs and pieces of software that are key for content creators and
editing within your studio. So a lot of the work done up in that studio
is going to be not only filming but also creating editing and managing content. Now we talked earlier on about the wire board being great
for optimizing ideas. Now reminders and notes, or the other equivalent, depending on what
computer you're on, are great tools for essentially getting stuff done,
writing down ideas, brainstorming, having a
checklist of stuff you need to do in a day to
maximize that workflow. So I definitely recommend
using those two. The same for numbers and pages, it's like Word and Excel. Sometimes you might need to
do work with numbers or write down longer formed documents
like video scripts or ideas. Those are also great
tools for that. Voice memos and Garage Band. Now, whenever I'm recording some sort of external
audio in my studio, like you saw from
the mic on the desk, I'll use Garage Band. It's a great tool to get high
quality audio from a mic. And then voice memos.
Ifever, I've got a complicated idea or a song lyric or something
like that I like to record, I simply select voice memos, start recording, and
lay it out like that. And so those are great applications to
use in your studio, alongside obviously all the
mainstream ones as well. Now coming across here
notion, I use a lot, it's like my digital
Notepad and then I also have Adobe Premiere Pro. This is what I personally
use to edit videos, content. Now you can start, for example, if you're a complete
beginner on movie. But ultimately, I think the more you go and create content, the more demands you
have for software, for expertise, for
customization. And Premiere Pro is one
of the best for allowing high levels of customization
is industry standard. And ultimately it is
what I use because it does everything that I
could possibly require. So this is the software
that I use and recommend. I've got a whole host of
courses on my channel dedicated to showing you essentially how to
use Premier Pro, how to create cool video intros, hooks, and everything like that. So throughout my brand, please do browse and
have a look at those scrolling across. Once again, I have a whole host of
other different plugins. Spotify, agains for music
and boosting productivity. Zoom once again connect others. And then I have Adobe Lightroom, Adobe Photoshop, and
Adobe After Effects. I've really used Adobe Photoshop a lot for creating thumbnails, for making content brighter,
especially still images. So the thumbnail you
saw for today's course was all made and
edited in Photoshop. It's a place where you go and create higher quality images. You can add text, you can
do a whole host of things. So again, it's key software for people who are
creatives creating content. And it takes a very
long time to master, but ultimately it is worth it. You can start on
stuff like Pixar and a few online free tools
when you're starting out. But if the more you get, kind of delve into the professional
side of things, Photoshop is well
worth your time. But you can always go
online and type in online free thumbnail generator or online free photo editor. And if you're a beginner, that might be a good place to start. And then finally,
the last one I'm going to touch on today
is Adobe After Effects. Now this is where
essentially you can create your own
motion graphics and really personalize
the motion graphics that you're using
within your videos. So something that kind
of pops out and animates and comes up like that,
that's a motion graphic. And in after effects
you can customize that down to whatever you would like. For me, I'm still learning
this side of things, but it's another piece
of essential software in my studio that I use
along with Stream Labs. Now this is what
I'm using to record my screen right now and
speak into the mic. It's all done via Stream Labs, which is streaming software
where you can add layers, you can add cameras, you
can record the screen, you can do a whole host
of things livestream. And ultimately it is key. All of the Adobe apps are managed in the creative
cloud up right here, so you can see them all at once. And that my friends is the key
software behind my studio. And just one final not on. If you are a beginner,
then what you can do is on the App
Store, on your Mac, you can download movie for free. You can also edit clips on an iphone or phone using movie. And essentially, it's
a lot more simple to create and navigate
content in movie, especially when you're
starting out as a beginner. As you primarily work, I'd say with two layers,
the pictures and the audio. So here it is on screen right there if you'd like to go
and take a look at that. If you are somebody that's new to video editing,
because let me tell you, it is one heck of a
journey learning how to edit videos and you can
get very, very deep. And then simply when
you download it, it goes straight over into
your launch pad right here. And Microsoft and other
computers generally have another similar free version or video editing software built in for you to take a look at
if you're not on a Mac. But I hope that helps
you out a bit further. Please do let me
know what programs you end up going with down in
the discussion board below, but without further
ado onto the next.
9. The Class Project: It's time to deep dive
into the course project. Congratulations on
finishing this course. I hope you've learned a
lot along this journey. It really is a whirlwind. What you've seen in this
course today has taken me years and years and
years to build up. And essentially, I've
given it away to you for a short price of an
hour and a half to an hour. So yeah, very nice indeed. But the course project,
what I'd like you to do is look at what you've
got around you right now, and look at the equipment you'd like to get into your studio, Write me a list of
that equipment, and then next to
it a sentence on why you want it and why
you think it's right for the level of content
creation you're at right now or at the level of
work you're at right now. Then I'd like, if possible, for you to take a little video or a picture of what your
home studio is currently looking like and where those possible filming
points could be. Just to recap a list of some stuff that you're
going to get or you have inside of your studio and a sentence next to it,
why you have it. And then a few pictures showing
me your home studio with a possible few filming places
going forward as well. If you have any questions
or want any help about what equipment should I get or anything to do with
where should I put what, then please indeed ask them down in
discussion down below. Thank you very much. I've been, Dylan, see you in the outro.
10. Thank you!: Thank you very,
very much indeed, for watching today's course. I think that it's a
very valuable tool. Having a perfect studio set up no matter what
industry you're in, but even more so for
being a creative. So I hope this course has
been very useful to you. As always, please do leave
any feedback down below. And any questions
that I can help with, I'd be delighted
to help definitely comment them in the
discussion down below. And don't forget to check out
some of our other courses. Maybe you'd like to now go on to learning how to edit videos in Premier Pro or how to quick
start your Youtube channel. I have uncovered all of
that because I myself am an economics and
finance student turn social media guru, content creator. In
all different forms, I like to think I
can help you out. And as always, I appreciate you, appreciate your time till
the next time they can.
 Dylan Reeves-Fellows ⭐️, YouTuber, AI & Professional Editor