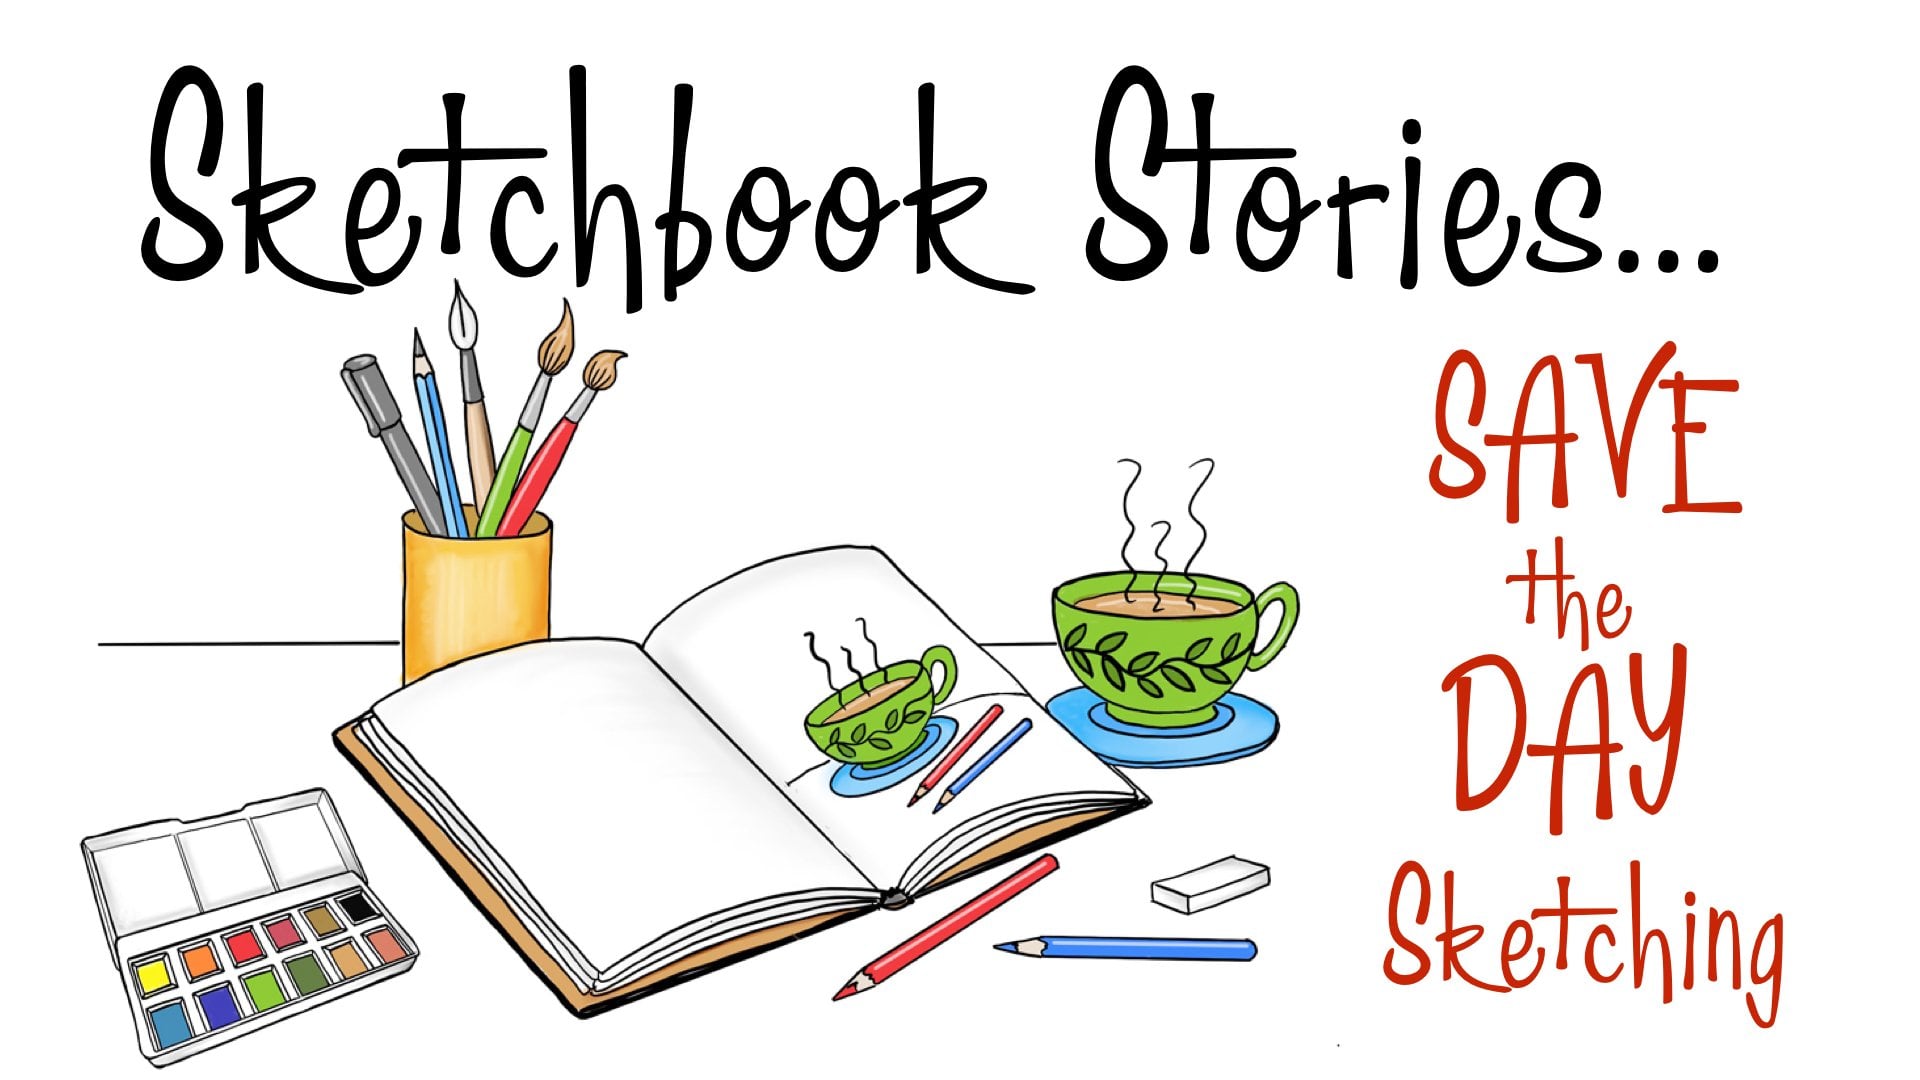
Transcripts
1. Introduction: Hello, everyone. My
name is Jessica, and I am a sketchbook artist
and Sketchbook teacher with a daily sketchbook habit that stretches over 22 years now. And I was thinking, what can I use as
a visual that's exciting for the introduction
to my brand new, and I thank best
Sketchbook class. Of course, I thought of
showing sketchbook pages. Now, we won't be doing
this complication in this first class
of the series. Each class in the
series is going to be a seven day project
class in which you're going to create seven days worth
of sketch booking. It will get more
complicated as we go. And if you are a
beginning artist, you can just begin
with us here and you will be surprised how
your skills will grow. If you're an intermediate
or an advanced artist, it's not about that for you. You already know how to draw
and how to paint, and so on, but what you may
still be troubled with is keeping the
practice going. Most people when they first
encounter the idea of keeping their life story in an illustrated journal
or a sketch book, they get pretty excited. I've had thousands of students
over the years online in retreats and so on and
the excitement level is high and it's wonderful
during the workshop. Then if I check in with those folks a month
or two months later, they're sad because they
were really excited, but they couldn't keep
going for this reason, that reason, or this reason. Surprisingly, those
reasons are common to many of these Wannabe
sketchbook artists. Is the same roadblocks. Get in your way. This
course is about that. It is set up with an operating
system that can't fail. It's foolproof for
you because all of those roadblocks that stop
you, we're stopping them. So if you want to learn life daily sketch
booking from the start, you're in the right place. If you want to k or restore
or keep your practice going, you're in the right place
because I'm going to give you an architecture that's going to work regardless of all of the excuses
that we've had. Let's move into this
really exciting class in our seven day project, and let's get
started on something that can really not
only save your life, change your life to
something that has a really joyful practice
in it every day.
2. Six Common Roadblocks: We're going to take a
few minutes to explore these common road blocks. We're going to try and do it
with a little bit of humor. Road block number one. I don't have the time
or I'm too busy. You have the same amount of time as anyone else is
living on the earth. The question is how
you choose to use it. If keeping a sketchbook
is important to you, you will invest time in it. Everybody is too
busy these days, mostly because we overbook, like the airlines do. Let's do what the airlines
do and bump some stuff, and you will have some time
for your sketchbook habit. Roadblock number two. My life is boring. There is nothing to sketch. There's always
something to sketch. Even in the most
boring of lives. Life itself is never boring
and is throwing things and ideas and images at you all day long from every direction
that you can imagine. Any of these are
actually sketchworthy. You just need to
see what's there, what's coming in and
choose something. Rope block number
three, I might fail. You might, but here's the thing. You might fail at anything. First of all, so what? Second, if you don't even try, you're going to fail for sure. That doesn't seem
scary for some reason. I don't really understand that, but it's better to
take the chance because you're not actually
afraid of failing. You're actually
afraid of trying. And you can overcome
that by trying. Number four, I
fear a blank page. That is a problem. But I have a solution for you. Get a blank piece of paper and sit at a table and
write on that paper, write down every scary thing
that that page might do to you and think on it for a while and write those things
right on that scary page. I bet the page is still a blank page after quite a
bit of thinking about this. Is a page can't do
anything to you. Only you can hurt you using
a blank page as a weapon. Roadblock number five. I'll ruin expensive sketchbook. I hear this so many times
I can't believe it. But I get it. Money
is an object. It's for most people, and when you buy something nice, and especially when
it's something nice, it represents a fun thing that you're going to do
that you want to do. You don't want to spoil it. But the best way you're going to spoil it is not doing it. A high quality sketchbook, pretty high quality sketch
book cost about $24. And that's what a lunch
and a restaurant costs, provided you're not at
Mickey D's or something. We know what happens to that
lunch in the next 24 hours. And you aren't going to do that much harm to a sketch book. And the sketch book will last you many days or months or week. And number six,
I'm not an artist. I'm an imposter. There's even a syndrome. And yes, there is. Whatever, you are not posing as an artist or
trying for a museum show. You're trying to be a
person who makes marks in a book to record the things
that happen in their life. Along the way, you
might accidentally learn to draw and paint better. And then you can think about being an artist at that point. But there's no imposter
syndrome for this. Which is a good thing
because we have enough syndromes to
choke an x anyway. No, we haven't covered all the roadblocks.
There are more. But these are the main ones, and the others that
come up are smaller, and we'll just toss them
to the side as they come along because they're
even more silly than the
3. Supplies: For this class, for our method, I'm going to recommend
that you buy the real common
size of 5.5 by 8.5. There are several brands. My favorite brand is
the Stillman and Burn, and I like the Beta
book for its texture. It's a very soft
press kind of paper. The most important thing,
it's a heavy weight paper. It's called multimedia paper, and it's in the
neighborhood of 140 pound. This one feels a lot heavier. But a lot of sketch
books will be marked with 140 pound or 300 GSM. And that's a page.
I'll show you here. It's a page that has
some oomph to it, S. It's a cardstock
kind of page. And this is great for
a couple of reasons. One is that whatever
you use on it doesn't bleed through
to the back page, meaning that you
can use every page, which is important in the practice we're
going to learn in our fool proof, no
excuses practice. And the second reason
that the weight of a paper is important is
if you use wet media, which I do, I do, always. And so when you use wet media on a book that
can't really take it, what happens, and you've
seen it a lot? I know. The paper warps When
the paper warps, the paint runs into the valleys, and it dries weirdly. And when you get
done with your book is about this, twice as fat, which taxes the binding, and which is just
messy on your shelf. And if you're an art
journal or as they call it, and you blue a whole bunch
of stuff in your sketchbook, then you probably love fat
pages like that, but trust me, you're not going
to love trying to paint with watercolor
warping pages, and you're not going to love
the result of it either. The next most important thing in our kit is a pencil
and an eraser. Now, this is my opinion. I am not in tune with all of the Internet
art instruction where you should just jump into using an ink pen and live with
the mistakes as you know, because I think that's one of the giant hurdles that stops
people from sketching. This is my permission stick, my magic pencil and eraser. One, I like the white erasers, and you can get the kind
that go on the end of a pencil or you can
get them in blocks. But soft and vinyl, that's like and then
pencils come in a range of hardness of the leads which aren't
lead, but we don't care. That's what we always call them. And the H is, the higher the number goes, the harder the pencil lead, I love a three H because it's hard
enough and soft enough. I draw very, very lightly with
it and it erases cleanly. That's not true the
softer B grade pencils because they smear. Okay. And so that if you
just have these two, fine, you got enough, but it'll be a little
boring after time. Okay? This is called
a fine liner. It's a pigment ink
fine point marker. This one is a Faber
castle pit artist pen, and they are my favorite
because they dry instantly and they're the most waterproof of all of
them that I've tried. I carry a water brush. The water brush has
a nice fine tip. And it carries its own
water in the barrel. This one needs filling. But anyway, you fill this barrel with water
and then you just take this brush along
and the water is right there. How
do you clean it? You have a piece of
paper towel because one squeeze on this barrel
cleans the whole brush part. And so you're in business
to go to your next color. That is just really
a great thing. You never want to squeeze this
over where you're working. Some people think that you
squeeze this to paint. Unless you're doing a
very big and very wet, and very washy kind of thing, none of which is going
to work in a sketchbook, you don't ever want
to squeeze it over because you're just going
to get a blotch of water, it's going to ruin what you did. That's our water and our brush. Any set of colors will do, you can have colored pencils. You can have markers, you can have a lot of things. If you're working at
homes, they're all great. If you're trying
to take this with you and do it on your lunch
hour at work or whatever, it's not as convenient to
have a bunch of markers rolling around or
colored pencils rolling around or whatever. So I vote for a tiny
box of watercolor, and as you grow, the color quality is going
to become more important. Starting right now just
doesn't matter one bit, and you can use anything. So if you have a
little box of paints, and go ahead and use that, and it doesn't have to be very many colors
or anything else. It is just start
where we're starting, you know, and we'll bloom
where we're planted, right? I love that saying, I'm going to show you something very inexpensive right
now that I actually do carry instead of a kit
like this because you can get it for $14 on Amazon. And then with some labor, no matter what level
of artist you are, you can make this your
quality of paint. These are so cool. They're
$14 in every they fan out. So this is all the room that you all the room that you have
to deal with is this, which really compares
well with this, but this has 12 colors. This has 48. Now, the colors that come with it
are kid quality, but not terrible at all. They will look fine, they'll look just as good as a marker. They just won't have a lot of watercolor qualities that
you get in bitter pains. Right now, you don't care. And I have remade this by popping out all of the different cakes
that came in it. And then mixing my two
watercolor to a consistency to pour a new set of
colors in there. When I bought this, it would unscrew here and I was able
to take all of these out. That's not true
anymore, unfortunately. And so it's harder to do because you're going
to have to do that. Then it takes a day to dry. So if you're interested in doing this and being able to
make it better as you go, it would be great
to get two of them, two of them for the price of one paint box because
what you could do is just run around with the
cheapie while you're getting started and making sure you're going
to stick to this. Then you can have
your other one around and follow the slow process
of changing it out. And the original comes with its own little
color charts here. I made these to
match what I did. But this is great
because look at this. So to be perfectly
straightforward here, this is what goes with me in
a real flat cross body bag that I bought off of
Instagram and thought, this is not going to be good. It's great. It's
just so flat and so small and it goes under
your jacket if you want. If you see that come up, that's a great place
to put these and your phone and your
glasses and go anywhere, weighs nothing and
it takes no space. Now, you might think
that would be it, and it would be had
I not discovered the world's greatest
little sketching tool, and it's also very inexpensive, and it is this. This is a six inch transparent plastic
ruler, very, very thin. Obviously, transparent
see through. The brand is Westcott, which I have is backwards, so it's reading backwards,
but that's the brand. The cost is like, I don't know, $2, something like
that on Amazon. And this is the most valuable spacing
drawing littering tool that I own outside
of things that make marks in books.
This is fabulous. Now it comes in two versions, and one divide as
we're used to here, divides the inch into eighths. But they have a version that divides the
inch into tenths. So you can do that however
you want to do that. But to be quite honest with you, I use this more by the s as
a little squares reference. I measure things in little
four little squares or two big squares, and it sounds pretty lame,
but it's really great. When you're working
on the run who wants to switch
from right brain, I'm making art to left brain, I'm counting the eighths
in a measurement. So that is it.
This is wonderful. It also can act as a
bookmark in your is so thin, it can be a bookmark
in here. Sketch book. So that is it. If you are all set to go through
these seven days and the seven days courses
that are coming up in this series and get all the
way to creating a really, really high level sketch booking
experience for yourself.
4. New Rules for Sketchbooking: Let's set up some new
rules, as I'm calling them, really guidelines for a different kind of
sketching experience, and we will skirt around some of the problems by
doing it this way. I know there's a hue and cry about there's no rules in art, which isn't true, but
we won't go there now. I'm just going to say that
rules are not a bad thing. Rules are guidelines
and I find them really helpful because if I can put
things in a line and say, I'd like to do it this way, it gives me a plan and a
creative mind is often in a little eddying position and floating in a river and
not having much direction. Sometimes the more direction we can offer to our
creative minds, the more progress we make. New rules for our
foolproof sketchbook practice, setting our goal. In simple terms,
I'm going to just say what we're going to
expect of ourselves. Our goal is that you open that sketch book every
day and you make a mark in it as simple as can be or as complicated
as you want it to be. But you sat down, you opened the book,
you made a mark in it. You have done your habit
forming thing for the day. Now how much further
you go with it is totally up to you and
how creative you get. But the base requirement is that you opened it
and you made a mark. Just the act of sitting
down and opening the book and putting something on the page will start
establishing your habit. Believe me, you
will enjoy looking back even on these
pages that are simplistic if you made
them that way because they'll tell you the
progress in this content, we'll tell you a
lot about yourself. Choose a time. Now
this is tricky. We had the roadblock
where we talked about it. It is not easy in
the kind of lives that we live today to reach
in and get a piece of time. I know that very well, but I have made a lot of
changes in that so that I can at pieces of time in my
life to what I want to do. You can too, you have just
as much time as I have, and you just have to pick a piece of time that
you think might work, and you're going to
be able to change that time if it doesn't work. But just choose a time of day when you think that you're going to be
able to do this. And it has to be a piece of time that's at least
10 minutes long, and it has to have possibility
that could stretch longer. There are no timers in
our sketchbook habit. I think that creating that ticking stress
at your elbow is the worst possible
antidote to creativity. Again, my opinion it's
probably not a popular one. Okay, your time needs
to feel relaxed. It needs to be a
time of day that you don't scream
past the counter and grab the book and
scribble and run. Just a piece of time maybe
right after you have lunch and you feel
sleepy or first thing in the morning with
your coffee or in the evening after dinner
or before dinner, with your glass of wine. Wherever you can put
that 10 minutes plus, put it there to start. If you find, Oh, my gosh, that didn't work, then
you can change it. Also, you have to make
up your mind whether your entry is going to be
about today or yesterday. Obviously, first
thing in the morning, you can put things about what time you got up or what time it is or
what date it is, things like that, but you
don't have your day's content. If you choose a time
relaxing in the evening, you do have your day's content. You could be putting
things down. When you get more
complicated with this, putting things down that
happened during your day. On the other hand, if you don't
have evening time at all, you could take a morning
slot and you could be doing your sketching
habit about the day before. That's just as fine. You just put a different date. You don't put today's date, but you do yesterday's
day today. As long as you're doing a
day every day, we're good. Choose a sketching spot. Now, I'm a meditator. I think there are a lot
of meditators out there, and we all try to get the habit to really
stick and be regular. An interesting
thing is that when a meditator chooses a certain
chair or a certain place, and that's where they meditate. When you get into it,
when you get to ha it, when you sit in that chair, your body automatically goes, Oh, we're going to meditate. And that works for this too. It's a good thing to choose a spot where you're going to do this little bit of sketch
booking every day, and at least for the first
week and sit there and do it. As soon as you sit down, I think your psyche is going to check into, we're
sketch booking. Choose a spot with
a comfortable place to sit in a platform to put your sketch book on
and with some good light. Those are the three requirements for comfort in sketching. A desk or an R table is great. Lap desk will do though. You just don't want to
be holding your book in one hand and trying to make marks in it with your
other hand because it's a very unstable
situation that way. Keep your sketch kit at hand. It's really important
that you can grab this little set of things. If you have to go hunting
for it, if it's put away, if it's underneath
stuff on a desk, It is not going to be
as automatic and easy. And so ideally, you
could keep it right in your sketch spot that you decided where you're
going to do this, if it's your dining room
table or whatever it is, if your little kit can sit there at least
for this first week, that would be really great. But if it can't,
then just have it in an easy spot to pick up on your way to your
sketching spot. Finally, it relates to what we just said, remove obstacles. We, we're so scattered and busy these days that when we
have a thing we want to do. If we can't move
directly toward it and pick it up and do
it, we get distracted. If in order for you
to do your sketching, you have to clear everything
off the dining room table, and if there's a stack of something the male that
has to be put away, you know all these
things that trip you up. It's a really great thing,
especially when you're beginning this habit
to get those obstacles out of your way so that
your line of thought can be directly from I'm going to do my sketch booking right
to picking up your book. If you can get other
things out of. I mean, cats and stuff, Yeah, you can't dogs. They're I think you heard my husky growling a
couple of minutes ago. Um, you can't necessarily get
everything out of your way. But whatever obstacles
you can remove, it's going to make it an easy thing for you to
pick up your book and sit down
comfortably and open it up and make a mark in it, write something, draw something. We're going to move on
now to seeing how to use our sketchbook in a new
way that is very enabling. Once we've done
that, we're going to start our seven day
journey together.
5. How to Use Your Sketchbook: Perhaps the most
important concept to our foolproof sketchbook habit is how we use our sketchbook. What we're going
to do is something very different than
what you're used to. Most people approach
a sketchbook, a daily life sketchbook, particularly by the page. Then you get to be afraid
of it and everything. But the thinking is that, so I'm going to put
today's whatever on this page and then tomorrow's
whatever on this page, and then oops I
missed yesterday. Now, what page do I
put the next thing on? Do I leave one page? Was
an exciting day yesterday? Is it going to take
a whole spread? This kind of problem
with chronology, we're going to call it,
cripples sketchbook habits. It happened to me along the way. It's happened to
everybody I know. And you end up with
this book with blank pages and you don't
know what went back there or you can't find the
pictures you were talking about or
on and on and on. And it probably sounds
familiar to you. So in our foolproof way of
creating a sketchbook habit, we're not taking that approach. We are taking the approach of using as much of a
page as we need. So to demonstrate
this prior to how I'll demonstrate this in
our seven days of practice, I'm just going to explain
the concept to you. In terms of this
blank spread here. So you'll find that our
choices for what to put for an entry for a day are going to vary
all over the place, and you're going to
have those days when you have no time and all
you can put is the date, and we talk about that. But when that happens, or maybe a sentence
about the fact that you haven't got a minute
to spare or whatever. When that happens, we're going
to write whatever it is. So let's just say, this happens to be
May thir, of 24. Maybe that's all
you get to get done today and you'll see we make
it fancy if we want to. Maybe you have a sentence
here and then I'm just going to put
nonsense, but that's it. That's all the time you've got. That's all of the
creativity you've got. You've just fried out your
possibilities for this day. This is okay, and we'll talk about that in permissions
in a few minutes. But this is fine. This is all you have to do to put the to do on your
to done list for a day, because our concept
in this course is that if you open this book
and you make a mark in it, you have completed your base
requirement for that day. If that's all you can do,
that's all you can do. If you can do a lot more, you can take as much
page as you need, and maybe it takes down here. But wherever it is, you're
going to put a dividing line. Now, this can be anything. It can be a strip of washi tape. It can be you take a marker and go make a squiggly
line going right across. It can be a branch. You'll see later on, draw a
branch with leaves on it. Any horizontal, even
colored marker stripes, any horizontal dividing
line that you want. It becomes part of the
look of your book. It also solves your problems
about what page you use for what and about blank pages because usually you won't be
starting on a blank page. So, very, very
important concept. Now, the simplest thing that I use for this is it's a
small brush pit pin, but this will work
with any brush pin, and colored ones would be even better because your book will
be all colorful and bright. But if this is all I have for
this day, then I do this. Because it's more exciting
than just a straight line. And now I'm done with that day and the next
day I start right here, and you just keep going and we keep going through
the whole book, and there will be days that you have so much to sketch and talk about story to tell that this whole spread
will be taken up, and the next time we'll be
starting on the next page. So important concept
or dividing line to solve the additional
roadblock of chronology in a life story book.
6. Permission Slips and the Back Porch: Let's talk about our concept
of permission slips. I made this up
because it astonishes me that we feel we need permission for
almost everything we do. We are as a species
always saying, I'm sorry. I don't know if that comes
from apple eating in a garden of Paradise
Where it comes from? We're so to say, I'm sorry, or is it
okay if I do this. The worst case scenario of that is when we
do it to ourselves. It's so hard to give ourselves permission or forgiveness
for making a mistake, permission to do something, or take a chance or whatever, and forgiveness
if we mess it up. We just don't seem to have
the capacity to do that. Sometimes symbolism
really helps with that. In your brand new sketchbook,
I've switched sketchbooks, because of how I have to use the different ones
for my lessons. But anyway, I want you to go
to the first back page Now, for a long time in my practice, and in my teaching, I talk about the back page being the back door to
your sketchbook, and I'll follow on
with that in a second. But in this course, the very back page is going
to be your permission slips. The top, I put permission slips, and then you can do any delightful visual thing that you want to do
with this concept. But one of them them would be, dry yourself some little funky
posted notes or whatever. I like to curve little notes that I leave in my sketchbood, because it's just more
interesting than just a box. You can fill these
in with a wash of color and just leave them
for filling out later. Because what you're going to do here is when you come
up with a block, a roadblock in this no fail
and foolproof practice. You're going to come back and get a permission
slip to do it. So let's just say, I
don't feel like doing today's entry because I did a really bad job on yesterday's, and I just don't feel like blah, blah, blah, you know,
whatever to be continued. You're going to
come to the back of your book, and
you're going to say, and you don't need to you
have permission every time because we have permission
slips right up here. But you're going to put
something like I can draw badly. Now, that's not a
wish, you know, you don't want to draw
badly. But it happens. And rather than
feel bad about it, you come back and
you give yourself permission for that
particular thing. And you do that every time you slip on a banana peel in
this practice, you know, you recognize that
kind of crummy, debilitating thought,
and you get rid of it by coming back here and giving yourself
permission to do it. The other thing about the
back of your book is that what I usually call mine because I don't need much
permission anymore. It's been many years, and I've been I need some, but I've been
granting permission to myself for a long time. But the back door
and the back porch, I call the last couple
of pages of your book. And they are for practice. They're a practice field. Sketchbooks traditionally
have been that for artists, before they became a
storytelling tool. They were placed to check out
how does that color look? How does this
colored pencil work? What if I tried to draw
a bunny or something? And you know what
if I did and you tried it and your bunny
looks really terrible. Not a good bunny at all. Like this. One. Um two things. You see what you might
have to correct or you might have to learn
before you go draw a bunny on your real
page in the front. But the other thing is, if you draw a bad bunny, you can always go over
here and you can say, I am allowed to
draw a bad bunny. I know this sounds
ridiculous, but trust me, our brains we can fool them with this stuff to draw a oops, see? Oops, a bad bunny. I just put bunny there. So The front of your book
is going to be wonderful, and you're going to make
a mark and every day, whatever that mark
is, and you'll you'll accumulate a bunch
of color and you'll start to accumulate a bunch of sketches and little
stories and all of that. All that will happen
from the front. All of your testing and
your permission slips, which, by the way, can be added
to any of the back porch. If you need more room for
your permission slips, they can be added here too, when the back meets the
front, the book is done. Believe me, when I tell you that this back porch is a
valuable reference. It's really, really
wonderful because I'm so often and I come
to my back porch and I look at something
that I tested. I look it up later. When I'm trying to do
something like that, again, I go like, What was
that color palette? You know? This could be
paint, swatches, and things. I'll go and find out what I did. It's important to note
what you did here. It's important to write
down what you did, because you'll come back
and you go, h, I like that. I want to do that again. And then what did I do?
And I still do that. I forget to write down, I drew this with a pit pin, and I used a yellow marker from Tombo I don't
put all of that. I put pit pin, you know,
yellow marker Tombo. But when I want that look again, I can go and get the
stuff and do it again. So our back of our book is our permission
slips, our back porch, our testing area, so that we don't have to do our
testing of whether we're going to screw up in our good pages so that
we feel bad about it. We're ready to move on
and start our practice.
7. Day 1 It's a Date: Okay, here we go. We're going to start on
the first left hand page of your sketchbook. So in our beginning Hair, what we're going for is something
that happens every day, and there's a difference
in it every day. And so we're always going to have something
to fall back on. We go, I can't imagine what I'm going to put
in this space today. Well, we got a few things that we are sure
that we can put. And one of them is the
date obviously of the day. Now, some people, and
it's very stylized, some people use a
date stamp for this. And date stamp is
stylized because there's a certain look
to it and the spacing, and that happens
because of the ru, the width of the
rubber that has to be used to put the
elements of the data. And so you get a look
that's like this. And a lot of people who do sketch booking really like this look because it's retro and
it has a lot going for it, and it's always laying there. It's not a lot of
art for you to do, but let's just suppose that you you're coming to
the end of a day, and you haven't got
more than 1 minute to pick that sketchbook up. We know how important it is to actually pick that
sketch book up. And so if your sketch book has a date stamp lying near it, that's all you have
to do that day. You have to pick up the
book and make a mark in it, and this is making the habit. So that's one way to do it, and it gives a retro
look and it gives a unity look to your
different entries. So and they run from I
don't know, $2 to 13. I think this one that we're
looking at is like 13. I prefer to write my date
in my own handwriting. So today is the 20 See,
that's the other thing. Have a calendar around so
you know what day it is. 23rd of April of 2024. And so I up in upper
left, upper, right. I try to stay out of my
way because I usually have something else to
put on that day. And so I'm just going to go over here and I'm going to say April. I do it in pencil first just in case I write down
the wrong date, which has been heard of. April 23, 2024. If I didn't write
down the wrong date, I'll come back with
my waterproof marker, and I will make that permanent. I use waterproof marker because
sometimes I want to put a swash of color just
for the fun of it. I'm going to let that dry, but this is a pit pin, so it dries almost instantly. That's a very plain
way to do it. If all I had today
was that time, I would make my
dividing line for today and wait till
tomorrow to continue. So this is dry, and I'm going to
erase it, the pencil. Now, if that looked
too plain to you, there's a couple of
things you could do. You could use a marker. But I am going to take kind
of a fat brush, like I say, anything that you have around
and go in some water and go in some green because I'm thinking of going
out and gardening today. So I've picked up some
green water color, and I'm just going
to go like this. And he got fancy. Now,
we have art for today. So we've made some progress. Another way I'd like
to make the date RD is to make a chop out of it. A chop is a term
that's used in Asia for it's a stamp that people have that is unique in
some way or another, and doing a date this
way is that same thing. Now the simplest way
to do it is to do a four number date. To do that, we're going
to draw a square. I always draw square. By putting two uprights that are parallel and then across
lines that are parallel, and I divide that
into four parts. Then in the case
of today's date, there would be a zero A four and a two int three. Now, that's cool. And it makes a little unit, you can make any size and you can put it
up in a corner or up in another corner or at the side of whatever
you put that day. Anyway, it's a
little design unit. When you go back with
your waterproof in, and it doesn't have to
be totally squared up because it'll get better every day because you're
going to make it every day. H. Now, that is pretty cool. And I'm going to grab. Do I want watercolor? Yeah, I'm just going
to use watercolor because I have some here. You could use marker
colored pencil. The watercolor pencil
would be really cool. We'll try that out
in the next road. And we're going this is dry now. We're going to erase our pencil. And I'm going to
grab a small brush. And I think I'll
make my zero blue. I'm going to keep
this really light so that the date shows through. Not so light that it's boring, but I'm not going right up to the line because I want to paint
right next to it. If you had a marker, this wouldn't be an issue, but watercolor likes to
blend in with itself. Right next to that, I'm going to do a yellow. I'm just going up
to the ink line and not touching the blue. I'm going to put green
down here, I think. And then a little red
or kind of orangey red, to liven things up a bit. These just happened to be
colors I have sitting in my glass palette here from
doing something else. Very convenient, and therefore, I'm reaching for them. There's kind of an orangey red. Now, this can be done with
four different greens. It can be done with
any color combination. So along with taking care
of you making a nice date. It can be a way to swatch any
new colors that you might have and see if they go together today. But
I like this look. And what we did is we
made a piece of art on of something that we can
easily do every day, and it would change every day. And if that was all
you did to start to establish your sketch
book habit, then fine. You know? At least
you're getting a book, you're getting some tools
and you're making marks and that is our goal in this
first seven day class. If that's already
enough for you, we're going to enhance it a little bit so that it will be. I'm going to make
a grid and that's just about one square
is still two across, but about three down now, and I'm using my pencil
to establish where it is. Then you want to just
divide this and you just use light pencil because you won't get it
right the first time, but just visualize
thirds on that. If you want to, don't
just visualize, get our handy dandy
little squares ruler and just see if they're
about the same. But I'm just trusting
myself for the moment. Keep your little handy
dandy squares rule around all the time because it's so useful for
just about everything, and we're going to divide
that in half and add the ink In this time, we have six squares, so we are also going
to put the year. We have O and four. We have two I do this some
pencil because I can correct. I I believe in aiming
for perfection. I know that you can
never really get there, but I like to try
because it makes things look pleasing
and there in balance. And then down here, we'll have
24, make those waterproof. Now I'm ready to add some color. I'm just going to do it in
a little different way. I got three pencils that
are watercolor pencils, and I am going to Just outline the inside with a little
stroke of each box. There's that kind of a green and it's more
of a blue green. Here's a yellow ocher. Again, this is where you
can see how colors look together if you're
wanting to know. I only have three because I'm just going to I'm
going to reverse the or change their order
over here for variety, but you can certainly have six colors because
you've got six boxes. I'm going to pick this
up and put it here. This is arbitrary. I just don't want them across from
each other at all. You start with a
water brush with clear and you start in the
middle where it's white, and you end up with
a white center and a color on the outside. And that's a different look
than the overall flat. Keep the write in the middle. Then here's that side. That's if you use
a six square grid, all of these are a fun
way to put your date. And you don't have
to do any of that. You can use a date stamp
or you can just p put your date in your own
writing in corner. You don't even have
to put the month. You might want to put the date. Okay. So, we looked at four different
things we could do with just one element of our day that we know will be there every day and
be different every day. We have completed our day. I've got my small
brush pit pin here. You can use any color brush pin. You can use marker, you can use anything
you want to. We're going to make
a dividing line because we are
done with day one. It doesn't have to be all
rised like that either, it can be a straight line. But the concept is,
we did something. We did something today. We started out
probably thinking, I don't know what to do
today because what is there? Well, our first of our elements, there is always what day it is. This is more important
than it seems because when you're 20
years down the road, and you're looking at
your books and you find something wonderful
that you sketched, and you don't have
any day on it of when it happened
is disappointing. It's always nice to
be able to look into your life and to know
when things were, and that associates them with
other things in your life. It's just a really
good thing to always have a date on anything you
put in your sketchbook.
8. Day 2 - How's the Weather, Part 1: In the case of this
first week's sketchbook, mine may not look like yours
because I'm not going to put a date on every section,
the way that you are. And there's a lot of
reasons for that. What goes on in the
filming doesn't all happen all in
a day and so on. But the idea for this
first seven days is that your sketchbook is going to follow our formatting of taking
as much room as we need, and we are going to
introduce you to a set of making our out
of nothing things, that anytime you
sit down with it, there'll be something
that you can do. So we did the date idea already, and today we're going to look at another thing that changes, happens every day and
happens differently, for the most part, every day, and that is the weather. By going to weather.com, you can start yourself
out with a lot of symbols and a lot of fun things that can
be elements in this. And I'm going to start with the most simple thing
is that we could put or high and low for
the day. And this is fun. In later years when
you go through, you can watch your
weather patterns and know when your gardening started
and a whole lot of things. So it's fun to watch the
temperature where you live, and if you take this on a trip, you to track that temperature. Let's just say, we
already put our date and our high here in Santa
Fe today is going to be 77, and usually they do this
on the other channel. And our low is going
to be, I think, 42. Okay. And you can
do that in ink, and that'll be permanent. You can do it in color. You can put a color
swatch over it. You can make that pretty
in a lot of ways. Also on the weather channel, you're going to find wonderful little simple
weather symbols. And for the base line of doing weather in
your sketchbook, you can just do that every day. And in learning a couple of the simple
symbols for weather. We're actually going to
learn to draw a couple of simple shapes easily. This all goes in our
little tool kit. But in Santa Fe, where I live, it's sunny almost every day, even in the wintertime, so that is a really nice thing. The sun, of course, can be just as simple
as drawing a circle. Now, you might notice that I did not just draw a
circle like this. The reason I didn't. Although after this many years I can draw a pretty good
circle like that. Most people can't.
It'll be flat, it'll be fat, it'll
be a lot of things. But when you draw a circle
in a sketchy way like this, you can always get rid of
the light pencil marks, but you feel your way because your brain knows what
a perfect circle is. You feel your way into
making that circle. Right here is a little
fatness place as you see. And then there can also be a flat that you would round out. But if you do this this way, you're going to correct for
the flats and the fats, and you're going to have a really good circle
when you're done. It's also a good thing to note that your book is
never glued to the surface. I always tell my drawing
students because your hand isn't always comfortable going in
a certain direction. If your hand is comfortable coming all the way
around a circle, you can turn the book instead. That is really good if
you're doing larger circles, and I'm just going
to demo that because there will be times
that we're going to be doing circles that
are bigger than this. I'm going to do them with
these little fuzzy lines. Now I went that far my
hands not comfortable. Turn the book. And now my hand is more comfortable
and I'm going to keep going with that and I am just
doing the best I can a feeling it out on my
initial run around the sun, as they say, or moon so. And Once I get all
the way around, I can bring the book back
and look at it and say, do I need some correcting? I do. I need a little correcting because I am a little flat on that
side. Can you feel that? Your brain knows a circle
is supposed to look like. Therefore, it's going to
tell you these things. This is not quite round enough, and I'm going to make
it a little more round. This is a little fat out here. I'm going to make it
a little more flat. And anyway. You get the drift. And so that's how to
draw a perfect circle. You can also use a
template, of course, so you can trace
around the bottom of a bottle cap or anything else. Here's a bottle cap now, you know, and this
one's got lumps. So that's going to make
a more interesting line. It's going to be trickier
to put ink around a sun because putting
ink is difficult, anyway, picking it up
and putting it down. So we're not going to
do that right now. We'll go straight to straight to watercolor and see
how well we do. Now, a sun, that's
already a sun, paint it yellow, and
it's a sun, okay? There are a lot of fancy
ways to make suns. I'm going to pull over my
iPad here for a minute. Just to show you,
I went to Google, I s Sun Illustrations, and I mean, it could
scroll this forever, but I did a screenshot of it. You're going to see just
millions of ways to make suns. You can do the same
thing on Pinters. And it's a very iconic thing. Copyright issues are not
really very effective here because really iconic
symbols that's been done, like, you know, but you're not publishing this or claiming
it or anything else. And so you will find
1 million ideas about how to illustrate a sun and make it more fancy than
just a yellow circle. Now, here is a little tip.
I'm going to show you. I'm going to get rid of
a lot of my pencil here because graphite
is water soluble. Then when it dries,
it is waterproof. That's why when you
draw something with a pencil and you paint
over it with water, you can't erase it any longer. But I want to show
you a trick here, and that is to take
any little marker, fine point marker that
is water soluble. You know what waterproof new. If you draw just a thin
line around your circle. Again, I'm going to give
myself the best chance of keeping my circle true by
turning the book as I go. It's a wobbly line, but I'm going to be fixing that. Not to worry. You know what, wobbly is what's going to happen until you do it over
and over again, it gets less wobbly. I'm just going to get
rid of any actual bumps, but I don't want to I'm going to fatten
that a little bit. I don't want to put too much
of this down and you'll see why in a minute when we put water color on because the idea is that
this is going to run into the yellow and give
it a vibrant sun appearance. I'm fixing a flat right here. Now, I have a paint brush.
I have a little water. I have a little yellow
water colored paint in a palette right here, that's just off camera, and I'm going to paint my sun and I'm starting in the middle. And before I ever hit that edge, I'm going to get a lot of yellow right here in the middle. I'm going to pick up some more. Didn't happen to be a very
bright yellow, but it's here. Brighter yellow will
give you more of a look. Now, I'm going to now work
my way up to that edge. With my yellow paint. As I hit that red,
it starts to run. Now, some markers will run
a lot more than others. This one I used, I purposely shows because
it's not really runny. It's like half lot of resistant. Watch as you do this that
your brush picks up some of the red and you can repair
your edges as you go. Now it's picking up
quite a bit of the red, and I'm going to be able to
enhance this little red halo. It makes a really nice, interesting sun out of
just a yellow circle. You can also do this with a water cool water
soluble pencil, that'll give you a lot
of mileage on the red. Something like a Tambo
will give you a lot more run for your money. But I like this is subtle
and I like subtle. I went ahead well off
camera and I I used a pit pin fine liner to put an ink line around
this other circle here. I've done several
billion circles in my life and so
it's not too bad, but it's still got a a
little noggi over here, and that is just the nature of the beast and so
don't worry about it. The best chance you have, again, is to turn things and just
do small bits at a time as you follow around the circle and turn your book if
you have to do that, rather than just try to do this because that is not going
to work out for me. I can promise you.
Sometimes after you look at something like this, you feel like, Oh, I want to
add something to my son to show the rays or make it
more designing or whatever. And I'm going to give you
a tip about doing that. It can be done with anything. It can be done with lines. Let's bring this
back for a second. It can be done with just
plain lines like rays. It can be done with
little triangles for rays or bigger triangles, or you could get all fancy, but who wants to do that. It can It can be done with
little paint strokes. This is fun. There's
no pencil here. It's just the water color. This might have been done
with orange watercolor paint, put on after you put the yellow, but it could have been done
just the way we did ours too. Then a paint brush was just used to put rays
all the way around. Now, if you are interested in your rays not running
into each other and your spacing being excuse
the husky bark, please. The spacing being pretty even, there's a trick for this too. That is to think of
that as a clock face. And you begin with your whatever
it is that you're doing. I'm just going to do
a little brush stroke in pencil at 12:00, and then put whatever
if it's a triangle, if it's a paddle like I'm
giving you whatever at 6:00. And then put one at 3:00. Input one at 9:00. Now this is whatever they are, if they're triangles, if they're
brush strokes, whatever. And then you can
pretty easily judge where the ones going between because you've
got a 1:00 here, and you divide that space
and half, you have a 2:00. So you get the idea and 11:00. And a 10:00. Running into my other son. As you continue this, you're going to have your rays arranged in
a pretty even manner. You're not going to
just start out and go around and then run into where there have to be
too many in one space. Anyway, that's just
really rudimentary, but there is a little
more fancy than this sun.
9. Day 2 - How's the Weather, Part 2: Moving right along, the other
thing besides sun is rain. I mean, there's a lot of things, but we're going
to simplify here. So if your forecast or your weather when you look
out the window is rainy, we have a different symbol, but we're going to
start with a circle again in order to make
that symbol work. And When there's small like
this, I don't turn the book. I just sit here and let
my pencil just do it. You make a dot directly above the middle of
your circle and have this distance right
here be as much as the distance across the circle. Then you can just go from 9:00 here and a tiny bit of
curve and from 3:00, a tiny bit of curve. And you can erase this right here and you have a
drop, a rain drop. Now on the weather channel, they love to use
this and they love to put a percentage
on it or next to it. In Santa Fe, that's
usually pretty low of a percentage chance. It's a chance whether
you're going to get rain. But it's a good
graphic element for putting art in your
sketchbook for that day. I think today it might
be like 2% here. You can do that, or you can put the 2% in here. That's
another fun thing. Then when we paint
this and I'm going to put ink so that I can paint this and the 2% in there is
still going to show. I'm just going to go up this
side and go up this side. By the way, when you
put these lines in, they can also come in a
little bit and that's a different shape of
water drop. Try that too. M 2%. And you' re to get
rid of the pencil. Give it like a second, so it doesn't smear. These pit pins are great, especially in the
smaller tip size. This is a S, it's a small, I think it's 0.03. I don't know. But anyway, it dries really fast. That was real time there. I've got a little
blue water color here and I'm going to
paint my water drop. You could use marker for
this if you wanted to. On a water drop, if you're painting it
and you want to be semi realistic, although
it's cartoony, but you're going to pick up your paint or not put as
much marker or whatever, depending on what you're using, coming down this
side as a highlight. Then there's usually
a reflection of the highlight on the
bottom right hand side. Now, that is a dark but
cool looking water drop. You can see the 2% in
there, but when this dries, I think I will just bring it back to life a
little more with this. We're going to move
over onto here with some combinations of weather
that make interesting arc. But before we do that, we're going to add another
base element of weather, and that's a cloud. You do that a part of a
circle is called an arc and I think parentheses
and that of an arc, and you can do a pretty
good cloud and make them around and then make it like
overlap that first one. They're different sizes. We're not going really big here. There we have a cloud. Suppose it's going
to be a cloudy day. This is a real simplistic
way to make that happen. Now, what if it's partly, which a whole lot
of the time it is, and then we're going
to make another cloud. I got to round out my arcs
here because they look bad. I always pre sketch so that
I can create on the fly. People who make enemies out
of pencils and erasers, have bats in the
belfry, quite frankly. They are the best permission that you can ever have to make a mark on a page because
you can undo it. It's like an undo key on
the computer. It's awesome. All right. I made another cloud because another
condition that we have, and I'm going to put it over here because it'll fit better with this shape is
your partly cloudy. So there we're going to have a sun sticking its
head out from some clouds. And you've seen
that a whole bunch. I'm going to show you
how to paint a cloud so that most of it stays
nice and white. So here's another
little media tip too. You can do this with this
idea and using a gray marker. If it's a really cloudy day and the clouds going
to be gray and ky, then you can do that because a real soluble marker is going
to give you a lot of gray, and I am not doing that. I am using a watercolor pencil. Any brand is going
to do for this thing because We are just a lining, and we want to do
the same thing. We want to move a little color, a little shadow along the edges. And so we're not putting too much and putting
just enough. Now, this time, we're going to use plain water
on our paint brush, and I am going to
use water brush. I love water brushes. They have water in their
barrel, and you can go, travel around with them and and not have to
carry water with you, but I love them for
this process as well. Before I do this, I'm going to erase
excess pencil. If you do that lightly, you leave your water soluble
pencil right where it is. Then I'll make that a
little less sloppy. And I'm going to take
this clear water, and I'm going to again, start in the blank area, move up to where the
water soluble color is. And this gray pencil
was a green gray, and I just grabbed it, but you're going to have
to use your imagination because this pretty
sunny cloud here. Now, what if you did this and what would you do to fix it? I will show you that. I will show you that because
it can happen. This is my actual gray. I had grabbed the wrong one. And so method number two. You can use the
lead, if you will, of a water soluble
pencil to pick up paint. Now this is going
to turn out to be a very cloudy day because be careful of
how much you pick up, and then you can blend it. That is going to be a
scary cloud because we're going to have to cover
our green with some gray. And you just paint
along the edge. The thing about a water
brush is that it is wicking water from the barrel to the tip of the
brush constantly. It's an even thing going on. A lot of people think
you squeeze this. If you did, you'd
have a big mess because a big drop of
water would come out. That's not what these
are supposed to do. These are supposed to just give you enough
moisture to make paint melt, if you will, but not too much. They are also awesome for blending because
they're wetting, whatever is there and blending
it into your white space. So I'm not going to enter
this in the next cloud drying painting contests that comes
up because it looks like it has a stomach ache because
of that yellow green. But that is a good
way to paint a cloud. Because we want our artwork to be pretty as simple as it is, I am going to show you what it looks like when you don't use a tornado green for your cloud. What I've done over here is I've used the real gray pencil again, and I have gone over
the edge of this cloud. Here's my water brush, and this one is not going to be anywhere near as
dark because all I'm going to do is paint right
up against the line, remake the line with
path water brush. Not smear it down
into the white. There you've got much
less threatening cloud. If you were to do that
with a baby blue color, it would be the cloud. This would be mostly cloudy. And if you did this
with a light blue, so it was a little
more cheery looking. It would be partly cloudy, and I'm going to throw
some yellow in here. My son. Now, we're going
to move over here, and we're going to do some different
combinations of weather. This could obviously
be inked in, it could be painted
in to be fancy. Before we totally move, I'm going to show
you a couple of real fancy sons that I did and another
sketchbook of mine. I was just on this
design a cool sun phase. And I just recently I finished
this one a long time ago. And I just recently I'm on 100 day project of finishing unfinished
pages in my sketch books. I ran into this one and I at
finish the one you started, but this is not a spread
that's done because I'm going to design more suns. But anyway, this is just
to indicate that if you think all I've got to
draw today is a sun, you can get nuts with that
and I've got a lot of time, but I can't think of anything to draw except the sun for weather. You know, you can
spend as much time as you want and make as
much of the pages you want and make an amazing
sun with all kinds of things around it with
quotes about sunshine. I mean, you can take this, I guess the point I
want everybody to understand is that you can
to keep your habit going, you can move from super simple. If there is no time and the choice is there is
no entry for that day, Then this is great. I mean, just put the
date, put the weather. You have a colorful entry, and that's all you need to
do get this thing open, get in here and do that much. If you get as we go along and you get this habit going on and you learn all these
little drawing tricks, you're going to want
to go and spend more time and have more
fun and make more art, and that is when you can take things that are as
simple as this, and you can go nuts and make a big piece
of art out of it. It's really a great freedom.
10. Day 2 - How's the Weather, Part : I. And so speaking of that, and we're going to take
this area over here to make ourselves some more
elaborate weather statements. And one of them is
going to be the kind of sky we see here in
Santa Fe all the time, and it's just so incredible. And that's that beautiful
blue sky with cumulus clouds. For this one, I'm going to
use my sky blue watercolor, and I'm going for the sake of you having a great
piece of knowledge, I'm going to tell you that the best possible
blue sky blue in watercolor is something that
this happens to be senile, and they call this I
think they call it royal. Yeah. They call this royal blue. And other manufacturers
like Daniel Smith, call it Vd I think
that's pronunciation. It's VE R DI TER, and it's made by, I
think mission as well. There are a number
of manufacturers that make that Vdter blue. It is a wonderful one for
skies for two reasons. It's very true to the cold
blue of a beautiful sky. Also it lifts and it
lifts wonderfully. Therefore, you can do what I
call an instant cloud thing. I'm going to show that
to you right now. You need a wash of
the blue paint. In other words, the paint with enough water to
make it sky like, and you need a tissue. Any kind of tissue will do. This is our cloud maker. When you make a wash, you mix some paint
into a little bit of water so that it gets to the
intensity that you want it. Then I'm dipping this big
brush in actual water, I'm coming into my wash and
getting a lot of paint on it. I'm just going to paint an area just in order
to show you this. I'm not going to cover this page or any such thing as that. And I'm going to make it a
little darker because I want some real contrast and I'm going to grab another
brush to smooth it out. I don't want it stripy. I'm going to do this
and let it settle just a little bit, but not much. And this can be any shape. You can fill in a
box shape or what. But while it's quite
wet like this, we're going to take this tissue and we're going
to wrinkle it up. We're going to press
it. Into our wet wash. Instant clouds, isn't
that wonderful? You want to be random
with this so you keep on re wrinkling
in a different shape. Maybe it narrows out
and goes over here. Maybe there's a
little puff there, and you see it starts
to look like a really. Then very lightly, you can use your tissue to blur
the edges of it. You don't really
want hard edges. Then You can take a brush, and I'm not going to go with
as big as one right now, but you can take a brush and
you can add plain water. Into the widest
part of the cloud, and then you're going
to blot again right away because you don't want that to go out and
make a hard edge. You just want that
area a little wider. If you practice
this on some scrap, sketchbook watercolor
paper, whatever, you're going to get
better and better at it until it just looks great. Once you are creating
these looking great, even in a dry area, though I can make a
little white happen by adding adding some fresh water
and blotting right away. Once you have this down about how to make a
really cool looking sky, that can be the artwork
for a whole section, if that's all you got to say. But this makes a wonderful
piece of art for any day. You can use a gray paint
to do a stormy sky, and it will be a real
similar thing to this. I'm going to show you a real
arty way to indicate rain. For this, I'm going to have
a very light background. This is still blue. I didn't really make it gray. You can have it be a blue, bluish turquoise, but you
want to be able to see it, but you want it light. Then you're going
to let that dry. We have our light wash
for the rainy sky. I have here a number
two paint brush, and this is called
a pointed round. It has a little belly here
that holds paint and water. It comes to a very fine tip
and this important thing. It has a flex. So we are going to use
this to make raindrops. If you don't have these brushes, I'm going to give you
an amazing source. And that is Amazon, and the brand name is A magic. It's all one word, A MAGIC. I'm not affiliated
with this in any way, but you get a set of nine
brushes for $14. They're great. They don't lose
hair or anything. Only thing that might be is that this feral is a tiny
bit loose in a wiggly, and you never want
that on any brush and less expensive brushes that happens because the glue is not. What you do to test that is you hold the feral,
shake the brush. If you're getting a
wiggly jiggly there, you just get a pliers, a household pliers, and you go right here
where these ridges are, and you squeeze that. And that causes the metal to squeeze in and to
grip the wood better. And you have a really good set. They're long handled, so
they're a little awkward, a really good set of pointed round paint brushes
for next to nothing. I'm surprised to find
how good they are. You also saw me using a filbert, also the same brand, same price, same set. They also make a flat brush and an angle brush. There you go. For very little money, you can have a lot
of paint brushes. We are going to make rain drops with a pointed
round brush. As we do it, we're going
to realize we could also do sun rays in this
very same procedure. So we want to load
this brush with paint that is a darker
concentration than our background. I'm going to practice out here a couple of times to show you. You barely touch the
point of the brush, you squish it down a little
bit and you pick back up. And as you go, your rain drops vary in color. The top is lighter than the bottom pulls the paint
as you pick the brush up. This is how we're going to
make our little steady rain. Now when you start to get
light enough that it is not showing up very well
against your background, then you're going to
reload your paint. I won't make you sit
through all of this, but the idea is to make
them like a rain shower. And to scatter them. You don't want to
lined up, rain drops would never be lined up. It takes a little practice in order to get your
pressure thing. A lot of people
are heavy handed, and I'm one of them sometimes, but I have really
practiced to lighten up. If it's not quite fat
enough on the bottom, just use the tip to make
it a little fatter. You would cover the entire area of your wash with
tiny rain drafts. It's really a good
looking way to show rain. Try to keep them
straight up and down because rain if one
of them is slanting, all of them would be
because it would be wind. You got to either have them
straight up and down or if it's a windy day
with a big storm, you might want to take
them all sideways, but they all have to do the same thing because
it makes sense. Everybody says there's
no rules in art, know what there is in reality, and so your arts not going to be authentic unless
you're a surrealist, which I am and I love,
you can change things. But in general, when
you're recording life, you want it to resemble life, and so you try to be authentic. This is a little bonus and I'm overdoing it because this
is a very long lesson, but I just want you to
think creatively and understand how one
thing leads to another and that you can just keep going
with these things. For example, you could make a larger version of your
parentheses that you did c and then make a few
more like this at the bottom, and then put a little top and join the top to where the point of
your arcs meet. You can even put those
little do dads that hold the fabric on the end.
You can put a handle. You come right down from
your sticky out thing on the top because that's where the handle goes and you can have an umbrella
to go with your rainy day. And you paint each section
a little different. And that would be a beautiful
little visual element. You can put the back ones
in, but you don't have to. You can keep it, you know,
the back curves back there, but why complicate life, right? You don't have to. I'm going to fix my
little corner there. Okay? When it rains in Santa Fe, we get very happy flowers, and that's an easy
thing to do, too. You start with a, you
know, a lumpy circle. I don't know what you call that. And you put you can do this by a pencil and then
drawing you can do it with your a little
larger size of your round brush to
just do it in paint, by just, you know,
tap, push down, and then in that case, you don't bring it
back to a point. You ph down and then pick
it up while it's still fat. But anyway, another
thing of practice, but I'm going at noon
and six and three, just because I want a real
nice symmetrical flower. You can clean it
up a little bit. Because now that I changed petal shape middle
of the road here, it doesn't look right right. You could make this center
really a lot bigger. It would be a sunflower. You can come down
and add leaves in that same brush stroke shape or instead of
drawing them at all, you could do that with
your round brush. And let's not forget there's
always a rainbow to be had. That is just arcs that are
done within each other, parallel to each other. Keep that space the same. Usually there's like six colors. Look that up on Google and just go ahead and paint in your
rainbow when it's done. You have a lot of range of play just working
with the weather. Not to mention quotes about the weather and predictions
about the weather and God forbid bad
storms where you have to draw a lightning strike. Which you do by starting with a tall little series
of mountains there, and then you have to
not the first one. You have to do a thing
like that where you repeat two of them. This would be going down
instead of up, of course. You'd really want to
draw it. That way. And look, there's a cloud
it could come out of. Anyway, that's the bonus. If you notice on our first day, we didn't have anything
to say visually. And so we put our brush stroke
right across here to say, that's it for that Tuesday. That's all she wrote. This time, we had a lot. And this can be in our lessons, we have a lot because we're
learning these lessons, but in your life,
you have a lot, and you will see more as
we go that on some days, you're going to have
this much space to fill, and then the beauty of the
way that we're approaching this is that that's
the whole day. We don't have to worry about,
you know, saving pages, for filling it and all
the other things are getting the way
sequence, chronology. All those things are
getting the way. They're just not operative
here because we're taking this approach. Have
fun with the weather. A
11. Day 3 Have a Drink, Part 1: We filled up the
last spread and we turn the page to start
with our day three, and I'm going to call
it that rather than put a date because the date I'm making this workshop
isn't going to compute. We're looking for
something else that happens in every day of
our lives and changes. And for today, we're going to look at the
idea of what we drink. Every day we drink liquid. If we didn't, we would be dead. And so we're going to
explore that a little bit to see icons and
little drawings that you can use to put in a daily entry about maybe
what you drank that day. Most times when you're
doing drinking vessels, it involves drawing an oval if you're doing a little
perspective on it. But let's just explore first, the most simplistic
shapes we can use so that if you
can't draw a thing, you won't be intimidated. I'm going to start
with the fact that a glass is basically
a rectangle. If you looked at it straight on, but usually there's
a slant to it, but a good way to draw a glass
is to draw that rectangle. Old fashioned glasses,
there's a lot of glasses that actually have
this shape right here. But a rectangle
also helps you to draw a glass that
has a taper to it. The reason that you start with a rectangle is because you put one slanted side in and you
note this space right here, and you make a dot on the other side about
the same space in and you have a glass symmetrical and then erase
this part and this part. There you go. There's a glass and I'm going to do it again. We can have them all in a row, but you could have a coca
cola glass shape too. We do this and this and this then same from the
other side of the box, do this and get
rid of our sides. And make this a little curvy. And you get the coca cola
glass a thing going on. Wine glass is just
a D on its side. If you look at it. You
see how easy it is. The shape of the D, of course, is going to determine
whether it's a white or red. Wine glass and if you know
about those things or care, You can make that happen. Now, in this case, I should not show this as an oval because we're looking
dead on from the side. What if we want to put
something in them, what we would do would be
just a straight line across. Then you can figure out the
right color for your wine. If this is water, you can do our trick about a little bit of blue
around the edge and then just wet it and leave
the middle like it was. If this was an old
fashioned glass, it always has that
glass bottom on it, and then your liquid would
come up here and this would be some kind of a
amber color. Okay. We've talked about
waters and soft drinks, and let's talk about
coffee and tea. So coffee mug can be
also a rectangle. It can have a shape. You can take two straight
lines and you can put two or a pair of parentheses. And a backwards for your handle. You might want to double it up. And there is a coffee. Cup. Mine is shaped more like my most common one is shaped more like a capital
U with a top on it, and there's our
capital C backwards. So Doodling is just
a great way to go ahead and do your beverages. I'm going to do a tea cup now. Straight from the
side. We're going to do our perspective
in a second here. Tea cup usually has a
smaller little bottom, a bigger top and rounded sides, but not fat like that one, more coming in, tapering in, and it has a little foot. Everybody out there
sketching teacups. You can find them, find samples every place. And that has a little delicate. You can look at this
also as a capital D. It's just a little
more curvy and rocky, but this one looks like
a capital D. I love the Alphabet because
the Alphabet helps us draw so many things because we all know how
to draw the Alphabet. So there we have a
dead on perspective, your eye level with whatever
these are sitting on, and so you only have
to do the flat shape. Because when you start to
do from a perspective, which is more
interesting looking, you have to draw an val. Val is a hard thing to draw. It just is, and
everybody thinks so, and so don't feel
bad if you think so. The reason that we have to deal with ovals
when we talk about a drinking vessel
in perspective is because of the actual structure
of a drinking vessel. This is a little plastic
cup that I use for water. The structure, the
architecture of a drinking vessel is actually
made of two basic shapes. It's made in reality of a rectangle and that's not
a good one and two circles. They're matching circles unless the bottom of the
vessel is smaller. Imagine that it's a
rectangle cut out of paper and it can
be wrapped around. That's what this
surface is right here. When we see it dead on, we just see one side and we get that rectangle that
we drew up here. But if we turn it in
that long rectangle that's going around the glass, the top of the
glass is a circle. And the bottom of the
glass is a circle. So you put this on you wrap this around and you put this on one end and this
on the other end, and you have a
perspective version of a drinking vessel
so that when you look at it from
some kind an angle, watch what happens
to the circle. And you look at it dead
on, there is a circle. When you start to tip it to look at it from a different
perspective, it's not a circle
anymore, it's an oval. The really important part is to remember that this distance right here is the same
all the way around. What that means is
that these two sides, in this case, are parallel, they sometimes might
be slanted like this. But the line that goes
along the oval here, this one has to be
echoed down here, because these two
are equidistant, the whole way around, what this does, this does. So when people and
people who don't know how to draw these
have decided it's a style. It actually not invented now. It came along with some
expressionism paintings, but they draw the
oval at the top of a vessel and then the sides,
and then they do this. Just it isn't right. It looks more like a valle
I did it. This isn't right. It feels not right, and that's because your
brain knows that what really happens when you look at this is that this line
is also curved. Okay? If you remember
that principle, you're going to be okay on any round or cylindrical object. And I do have a dedicated
skill share class about drawing cylinders. You can find it in the list
of my classes in my profile. If you want to get
really good at this, that's a really good
skill share class for you. All right. So drawing an oval has to be an exploration like we talked about with
circles, just has to be. Because if you try to press
hard and draw an oval, it's just going to look
really, really terrible. If you draw the right way, it's probably still
going to look terrible, but not for long. Because you're going
to get used to it. And so what by drawing
the right way, I mean, by drawing the sketchy way so that
you can get loose. And a good way to do
that is to do it from your wrist instead of
your fingers like this, okay So when you
get your pencil, just start before you
even hit the paper, start moving your wrist
in a circular thing and those automatic pendulum
drawing things. Once you bring your pencil down, you make a pretty good oval. That's only because
you're being loose, but what you're going
to do instead of we're not doing our little sketchy
until we go to fix it. But what you're going to
do is you're going to do let the oval find itself. And then you will use your sketchy lines to
reinforce where that is. As a reference where
the true line is. As a reference, it is just
a good thing to know. I'm going to make a fig one
here. I can show you this. It's good to know that what you have here is
absolutely symmetrical. O val is symmetrical. That means that if you
folded it right here, this would match up perfectly, just like a greeting card. It's also true that if you folded it that way,
it would match up. In other words, you
can test an Oval. That you drew by dividing it in half this way and then this way, and
then looking at it. If these, you can
just adjust some. There should not be a
point on either end. It should be a
rounded transition, but you can eyeball whether these four shapes
are equal or not. If they're not, you can use your sketchy
lines to round them out. This is a pretty good val, so I'm going to go with it
and make it into a glass.
12. Day 3 - Have a Drink, Part 2 : So here we have one of our
circles from our class, and we're looking at it at an angle and we're
seeing the oval. Okay. Then we know that the
sides of this are parallel. And generally speaking,
Despite the rule of perspective that says
that parallel lines get closer together as they
go toward the horizon. When we're looking at a
little vessel like this, the horizon is like
a long ways away. Poor man's perspective, poor woman's perspective,
if you will, is that don't bother with that when you're talking
small objects and up close because
you're just going to confuse the issue unless
it's a slanted glass. This one is not going to be. I want to draw this
actually as it is. We put our parallel
set of lines, and we know that this
is our rectangle. This is what wraps around
and makes this glass. Then this line down here, if this is a clear glass, this oval has to be
repeated down here. And so you're going
to get all loose again and just allow your pencil to float with your wrist
and try to duplicate this. See this curve line is going
to be parallel to this. And you're going
to a clear glass. You're going to see that
back part of the oval, but it's going to be
a little lighter when you draw and color it because you're looking through the
front side of the glass. Particularly if there's
a liquid in it, this is going to be a
little more obscure. Let's put a liquid in it. When we put a liquid in it, we know that liquid
always levels itself. Therefore, the liquid is
going to be a third circle, and because it's a third circle, it's going to be a
match to those two. Wherever it is, however
full you decide it is, you're going to
repeat here oval. This is going to
take some practice. But once you really
get practiced, you're going to just whip
cylinders out, easy as can be. This glass has a little
tiny bottom on it, it's another circle, but
it's really close in. We're not going to
mess with it too much, but we're going to see
it on the front usually. Now, on a glass, it was tapered like
this one up here, your bottom oval
would be smaller, but it would still echo that
same curve as the top one. If we were drawing
a tapered glass. Theoretically, the oval at the bottom being smaller would have a little
more of a curve. But That's one of those things. Don't get hung up on
the detail of that. Because if you try to make
this front line parallel and your ovals and
similar thickness, then you've got a perspective. That's the same on all of them. For our purposes, we're
not going to get any more complicated than that for
our perspective lesson. Let's talk about coffee
mugs again, though, because coffee mugs
are really a fun like theme for you because you probably have a whole
cupboard full of them. I do. I'll show you in a minute what I did about
drawing my coffee mugs. But if you got up and you had coffee this morning
and see the bottom, again, you're not going
to see through it. This is ceramic, but the bottom is it's going to
parallel that top. It's not going to be flop. And let's put our handle on our capital D or our
capital C backwards. And there we have a coffee mug. Now, you have coffee mugs, you probably have
designs on them. You might have your college logo or it might have flowers, I'm just going to
put a flower on here just because it's easy to do. We already know how to do it. And that makes a nice
coffee mug, decor. Now, what else can
you do if you're sketching what you're
drinking today? And again, we'll look in a
moment at a spread wire. I took this, you know, out further. Coffee bean. Those are easy to draw. They're an oval with a
little line in the middle. So it's fun to do that. If you use creamer or
sugar or something, you can put like
a big rain drop, but upside down and not
coming to a point yet, up here and a little edge on it, and you have a spoon
in your coffee. If you're doing T, you can do other little
graphic things as well, and I've done this quite a
bit, and I really like it. As you can see, it's
a good thing we have no rules about
the space we use, because this is going
to take a whole spread. I let it spread out.
You can do that too. T c. I'm going to
come in like this. Then come down and come around. This is one of those more
fancy tea cups and it's little foot and usually
a more delicate handle than a coffee mug. The whole tea experience is more delicate thing
for most people. And this has, like, maybe a gold strip around it because it's
a fancy one. All right. And what you can do with the T cup is you can
make it more specific. Here we have the
tag of our t bag. Now, that is just a rectangle with a little house roof on it, and the string goes through, you put a little
tiny hole there. What kind of t is this? You can get as fancy
as you want to get with your graphic on it. And I'm just putting a
little branch of something here for our example. Okay? If you want a
saucer under a teacup, That saucer, if you looked at it straight on, is a circle. And we're going to see it at the same perspective
as we're seeing this. It's going to be
bigger than this. When you're going to draw things that you need to
concentrate on the shape, just do it without worrying about what part of it's going to show and what part
of it isn't going to show. Just try to get yourself
in oval that works there. It's got to be bigger. This line has to
be very similar. But not exactly the same, but similar enough that
it looks like it matches. Then sometimes there's a
thickness to the saucer. You can always go back and
get rid of what doesn't show. But it's real important
that you allow your brain to see that basic
shape while it's drawing it. Our idea in using these iconic
drawings and such is to be able to illustrate
a part of our day. Once we've gotten this far, it's fun to look at, what else can we add? We added some coffee beans. We added the end of a tag tag. We can draw a t
bag, if you want. That is usually it's a
rectangle on the front, but it usually bent when
we're looking at it, it has a little tap
that joins it here. And this is kind of it's kind of more
of a pouch than a bag. And oftentimes it's a
double pouch, like that. And you can barely
see through it, but you can see a
level of T in it mos If you were to ink this in, you could just make that a
much thinner line in there. You can put texture before you put any color because
you're just going to use that real light
cloud kind of color for the see through
thing of a T bag. Again, you could be
fun and add the tag, make it maybe a different
shape this time. In a design, a different
flavor of tea. You can also use, you know, printing to
put in the kind of tea. Let's say that this
is jasmine tea. I hope there's such a thing.
I know there's Jasmine rice. Jasmine tea just came
to me out of nowhere. Did you put sugar into
your coffee or your tea? That's an easy
thing to draw too. We're going to go like this, we're going to make a capital D. You can have more shape to this if you want to this handle in the handle going to just go and disappear off the side. There's a little
curve to spoons, and you can just use
dots for your sugar. You can draw sugar cubes, too, if you know
how to draw a cube, I'm not going to go into this until we get to boxes of things because This is the longest
lesson in the world already. The handle might go up. That was kind of a flat handle there. That wasn't too fun. And there's another
little visual element for your morning coffee or tea. This is a spread that I did
by going into my cupboard for six days in a row here and choosing one of the decorative mugs
that I've collected. Then I thought it would be fun not only to just paint the mug, but tell the story of
where the mug came from, how it got into my life. If you collect mugs,
there's a story. In fact, just about
everything in your life has a story if you
stop and think about it, and that's what Savior life journaling is really about or sketch booking
is really about. Is the stories of your life. I'll just choose this one because it really had
a lot of story to it. This is by an artist in
Mexico. Her name is Mara. When she first started out, I had my first
gallery in Santa Fe, and I bought her mugs
for the gallery. They were very, very popular and her work just took off and was everywhere,
and it still is. You'll still see mugs in gift galleries by
the artist Mara. Other things, too, I
think she stretched out. But anyway, the
point being Here's six days worth of your
savior life journal, if you want it to be, or
you can do two a day, or you can make that apart
and have more on your page. No. The idea here is for us to understand the actual
abundance of ideas.
13. Day 4 - Let's Eat Something: So, on the next spread. Let's get started with Day four. And now we're going
to talk about eating. We talked about drinking, but another huge field of subject matter
that is something that happens every day and has a lot of variety to
play with is eating. And let's start with easy
ways to do breakfast. I think that a piece of toast is a pretty
easy thing to draw. You start with a a rectangle,
like we have been, and you round the corners like so and try to be
symmetrical on each side. Then you come out from
that shoulder there. There's a lot of kinds
of bread now, of course, but this is the wonder bread that a lot of us grew up with. And I don't have that
round enough right there, so something like this. And then you can use a
nice, you know, tan, whatever, however you like
your toast, light or dark. And then you can make
texture dots all over it, make it really look like toast. And that's an easy
way to paint it. You outline the crust would
be a darker color, too. And there is this type of bread, which doesn't fit in any
of the toasters now. I used to be that you basically got rye
bread in this shape. But now all your sourdougs and so on are made
in this shape. Again, and they don't
fit in the toaster. But again, you can paint a toast color and then add
texture with little dots. It's fun to draw what
you put on your toast. And so that would just be
a blob, kind of a smear, and maybe that's red with
little specks in it, and that's raspberry
jam or strawberry jam. Maybe you put peanut
butter on this one, And that's kind of a Oh, probably a raw sienna color. You have to make
it different than whatever color your toast
is, though, however. Okay. Eggs, Oh, my gosh, if you eat eggs there are
so many ways to go with it. An egg is easy if you just make an oval and not
have it symmetrical. So one end of an egg is father. And the other end is thinner. And sometimes they're white,
sometimes they're brown. And then if you get
farm fresh eggs, Oh, my God, they're beautiful, and you can make
them like they're kind of a light keel or turquoise color and
some green and gold, and maybe you'd like your toes to be a
little more three D. And so you can Just put a little line
down from each side. All of a sudden, we're
looking at that same piece of toast from an angle
from perspective, this crust would be a darker
color than your toast color. A fried egg is
always fun because this outside shape
can be anything. Then what you have for the
egg yolk is a half circle. Actually, I want this
to be fatter. So. Okay. There's hard boiled eggs. Again, the egg is cut this way. So you have an oval, fatter at one end, then on the other, but your
yolk remains nice and round. Okay, sausage links. I'm just going to go nuts here
because I want to give you a you probably granola if
you're all health conscious. But we'll talk about stuff
in a bowl in a minute. Chicken have sausages,
sausage links, I'm just doing this drawing quickly to show you
how easy it can be to create an
entire breakfast. Bacon is usually strawn like this in a parallel way because those are
wrinkles in a strip. The stripes that you put in
it so follow the edges there. This could be made
a little darker. Now you have some bacon. Here's how you could
draw a toast that was a three dimensional toast and
kind of on an angle here, so we're going to start
with our round top and we're going to put a little angle and then
a parallel line here because that crust would
follow the line of the bread. And then we're coming out
like this. Turn the books. Come like this and You wouldn't
see the inside of that, and you come down,
you would have a corner and this would
be parallel there. Okay. Maybe on here we
have a poach dag which has a relationship to clouds that we made
on our weather page. There you go. Sitting
on the piece of toast. Okay. Now, a lot of the breakfast things here
would be on a plate, so we're going to go
back to our saucer idea, and we're going to draw
ourselves a plate. We're going right through
this coach dg on toast here because I move my
whole arm to do this, just to feel out a
nice plate shape. And once you do a
plate, of course, you can put any of this on it. Okay, I'm not going to I'll
be finishing this up on, you know, cleaning
it up on my own, so I don't take all your time. I'm just trying to give
you some starts here. And then you get rid of the part that you couldn't
see, of course. All right. Now, let's talk about breakfast that we
could eat in a bowl. And when you do bowls, the dead on bowl, that's the easiest is like this. Is horizontal line. And it's a half a circle really. And if you wanted to do
it this way because you just perceive it more easily. It's a great way to do it. Let's put a few bowls here. And we're going to revisit more food in our
further adventures. But for now, we're just going
to go with the morning or the lunch time that you have simple things
that you can grow. This is from a straight on view, maybe you have oatmeal. Maybe you have a lot of oatmeal, maybe you have blueberries
in your oatmeal, blueberries or little balls that have a little hair on
them a little crown. I wouldn't say hair, that's
not very appetizing. But a crown. Maybe you have corn flakes. I'm making this stand
up way too far, but it's got to be a rough line, but a jagged line. Of course, you wouldn't
have them piled up this high because they'd
spill all over. But maybe you've got little
raisins in there too. Maybe it's raisin brand. And there's all kinds
of other cereals, but I'm going to
move to lunch on this bowl and have just
bigger roundy shapes, very random, and they will be colored green
because this is a salad. And perhaps you have some little cherry tomatoes
in your salad here and there. You might have a sandwich
for lunch in which case, any kind of bread can
be done like this. And you have two
pieces of bread, and then you fake what
is in the middle. This might be a Let's
say it's a BLT. You'd have little slices
of tomato in here. These would be red, and you'd have just some rough
bacon idea here. And then you have lettuce be sticking out
the sides, maybe, some ts. And this would be your brown
toast, and there you go. Maybe you have a fancy lunch
and you have a cheeseburger. So this is kind of a
quick lesson, but boy, you have a awful lot
of possibilities here, and I do a cheese burger
like a thing like this and that gets
kind of a brown color. And if it's a cheese burger, there will be some
dripping of orange, but maybe there's
still a tomato show in there. I've got pictures. I can show you of all of these things that I have
taken some time off. But the point is to understand
how much there is to draw. Whether you draw it
in a straightforward way with no perspective, is just options
everywhere that you look.
14. Day 5, Part 1 - Words In Sketchbooks: And the subject of lettering and words in a sketchbook practice, we're going to go
through a little bit of a sketch book tour and look
at the role that they play. They say a picture is
worth 1,000 words, and that's true, but sometimes your story needs
extra words as well. So there are many ways that printing issues on
sketchbook pages, and we're just going to
look at a few of the ways. And I want to let you know
that my pages after doing this for 20 some years
are more complicated, and I usually will
use a whole page or a whole spread and
don't in any way get intimidated because
that's where you're going to get to after you do enough practice of filling half pages
or whatever pages. You'll come to this same place, but it did take a while. So this was just some sketches I did of some Native
American things because it was Indian market. I live in Santa Fe, and Indian market is a
big deal every year. And so I needed a
little header for my page and I needed some information about
what I was doing. We're going to talk about how to make a header that works. They're never going
to be perfect. But how to make them
and how to make them show up where
you want them, ok? And we're going to talk about how do you print
and keep it straight and keep it neat and not running off the page or falling off the bottom of the page. You how I do this. There are lots of ways that people do it, and there are some
tools to use to do it. But after trying them
all and everything, I have my own method. It's a little painstaking, but it's worth it in the
end because you'll see that my writing almost always is straight on the
page because of that. And this kind of a spread here. This is daily sketch booking, and it needs a lot of explanation because it's
about nothing, really. You're making a
story about nothing, and that's really kind of fun. But you'll notice
on the left here, it's not really a heading. I've got my date,
I've got my weather. I went down to Albuquerque
that day and bought a bunch of stuff at home goods and at
the container store. I went for a happy hour burger, and that was really great. But it's all small sketches, and it's all little
explanations, and all of that was
printed and see, again, it's all straight, which is really nice. And the next day was
no more exciting, and it was raining, and I was looking for some
kind of a theme I could do, and everything seemed gray. So I painted a gray
paint brush and paint, and gray umbrella.
It was getting cold. It was the first time I had
put a sweatshirt on all year, that time, that year. Here we are again,
same kind of thing. I do a lot of little
spot illustrations. I do a lot of little writing. Then in cases like this, is a lot of writing because I wanted to tell the history of the story of finding these ceramic apples that
were hummingbird feeders. In this a page, there's a big illustration too. Well, actually, I've got
two oversize illustrations. Here you see a lot of
the use of words and of how your days can become interesting enough
to you that they, they start to look like
this and you start to use whole pages and whole
spreads for them. Here we have a lot of words because I wanted
to tell the story of a bizarre day where tomato worms ate
my tomato plants and a mouse got in my house, which my cats took care
of in not very kind way. I was having all this trouble
finding the right hoses for a watering system I was putting together, it was
a day like that. You get those days, you know, and I'm going back to bed because I can't
make anything happen. This page is just
about one thing. I forgot to even
put the date on it. This is one that I came back
and finished much later. But that was it for that
day. That's what I did. I created that garden
chime with glass. This spread it was a Saturday. I wanted to do some
sketch booking. Nothing was going on. The
weather still wasn't great. I decided that I would sketch Every sponge type tool
that I had in my studio. I keep them all in a big drawer. I got the drawer and I
took it out and I made pictures of all of
the sponge items from little dabers to those
foam brushes and rollers and round
ceramic sponges and the dehydrated kind that you can cut into shapes
and then you wet them and they get big make up
sponges, dabbing sticks. But anyway, that was a fun page. Took me all day, finished
it all in one day. But I had a lot of fun with it. Now I know if I need to find
a sponge for something, I know all my
choices that I have. This was a trip to an
art materials Expo. I bought things at it, and it was held at the
Buffalo Thunder Casino, which is nearby, and is
beautifully newly built casino. These are scenes that I sketched at the casino from outside, and these are products that
I bought $110 light bub. It's worth it's really a good light bulb for making
art and some fine liners, so I put all their colors there, and I wrote what everything was and what I thought about it. Came back with a review
of the light bulb later. And so words are pictures, also. Just like pictures are
words, words are pictures, because they help to illustrate the story that you're
putting in your sketchbook.
15. Day 5, Part 2 - Making Headlines: When I'm going to do lettering
of any kind, my tools, my absolutely necessary
tools are my pencil, eraser, and my
little square ruler. The first thing I'm going
to do is a headline and the headline is words because that's our
theme for today, and I'm going to show you exactly how I
go about doing it. In this case, I'm not
going to try to center it. I am going to have it start from the left
hand corner here. I'll be putting the
date over here, So the best approach
to a header in my experience is to turn a knob and change my mind
on how I'm looking at it. When I am just
printing or writing, I'm doing it like
anyone else, does it? But when I am doing a header, I want the letters to all have the same height and spacing
and shape them correctly. I draw them. I don't think of this at all like writing when
I'm making a header. You'll see what I mean
in a minute here. I am going to I'm going to start where I
think I want to start. But I'm not just going to make a dedicated line
right off the bat. I'm going to rough it in like
I would sketch anything. What I'm doing as I'm doing this sketchy approach is I'm
trying to watch the height. I'm trying to keep a
straight baseline. I'm trying to watch the height on each letter and make it
as much the same as I can. I really never did it. But it's a really
good start to correct from I do it really light because it's always going
to be some kind of fix it. If you're trying to
get something right. I'm a believer that things should be as perfect
as they can be. Nothing's ever going
to be all perfect. But if there's a phrase, I would like to see leave the entire online
instruction world. It would be it doesn't
have to be perfect. I like perfect. Give it up. It doesn't have to be perfect, but you try to be perfect because that's how
you get better. Okay, off the soap box. And now I'm going to take
a look at what I did and how right it is. And I use my little ruler to make sure the
first thing I'm going to do is make sure that the
baseline is truly horizontal. And so I'm going to use one of the heavy
red lines on my ruler. And I'm lining that up
with the side of the page, which is not out here. They're all different when
you have these books open. But there is the
side of this page, and I'm holding the ruler down, and I'm noticing
that I've got my D high and in the W,
a little bit low. I just think in terms
of these big boxes and half a box and little boxes. This way, I can just quickly
move through calculating things and not be
thinking it's an eighth of an inch and lag. All right. The height of my W that I made is one of these half boxes. I'm going to make a
mark there like this, and then do the same thing
at the top and that's going to give me my guideline
for the top of my words. I I do this alignment, but I always ball this space
too because this is supposed to be a parallel
set of lines here, the edge of the page on
the top of the ruler. Then I'm just going to lightly
put that guideline in. Now I know how to
adjust my letters, to the same height
as each other. I'm still just doing the
spacing here by hand, but at least when they're the
same height as each other, they're going to come
across as being even. So I have a fine
sketchy mess up here, but I'm going to choose whatever weight of a fine
liner to use. This is a one. I'm using a heavy one. I'm using a fine liner
because they dry faster. I'm just going to retrace my good lines and wait for that to dry for
a couple of minutes, and then I'm going
to erase the pencil. Now, this is very utilitarian, and I think I didn't wait
long enough because I got a little blurb there.
We'll live with it. This is just plain
block printing. You can be fancier than that. Even if you're not
a lettering person, and I'm going to show
you how, in this case, you would use a
thinner fine liner, but you can make the
letter you would make I'm just not going to bother with the
measuring right now because I'm trying
to show you something, not boring you to death. Sometimes a more casual look is something that
you might want. And so we're good
with how this is. I'm going to use a
smaller fine liner. But we have another
utilitarian headline. How do you make something more fancy when it's just
utilitarian like that? You just add a line
here and there and you try to keep it consistent. If you're going to make the second line B on the
front end of the letter, then you do that and you
would do it here on the O, and here on the r, here on the D, and here on the S. This
is still crooked, and I would rather have it. If I were doing this, I would have started with my guidelines. But you see that
that has already made the plane lettering, just a little tiny bit fancy. You can go back and put
these little seraps they're called at the pointed parts. You still don't do
anything with the O. But you can do it here and here, join the D there and let
it go over a little bit. That's a seraph. Sometimes
when an S is done like this, put a little up and down there. Now, my W is huge. The rest of it is wonky, and it even has a smear. However, you have the idea? You can do a much
better job of this and take much more time with it. I'm going to show
you another trick with your headline words, and I'm going to not use words because I want to use a word
that demonstrates it better. The other thing we're dealing
with right here is lines. So I'm going to use that word. And again, I'm drawing, instead of writing, I'm trying to match up
my height here. When it comes to
the inking part, that's the time that you make
a mass and make mistakes, and everybody does, and
that's the nature of ink. However, there are
ways to mitigate the damage that's
done when you ink, and I'm going to show you one
of those tricks right now. Notice how many uprights
are in this word. And the reason I changed words. This says a lot of roundies. There's a lot of uprights here. The thing that I do when I in, something like this,
a word like this, is I draw because I can
draw a parallel line, and I've had a lot
of practice and so have you if you've
taken my classes. And so I put those in first. And it's a real easy thing. To make sure that those are
parallel to each other. You're not seeing
the pencil so much. So you can watch that line
as you draw the next line. And with the S, we can't do anything to help
ourselves there. But once all the uprights are
in, and they're parallel. You know that your
word is sitting pretty straight on
its baseline already, all you have to do
then is go in and add your horizontal lines
or your slanted lines, while I'm doing horizontal, I just do the horizontal
because I'm in the mode, and your slanted lines
go point to point, so they're not difficult, and your curved letters
are always difficult. Because you got to get used to drawing curves with the ink. But you see how
nice and straight that is instead of these. When these telephone
poles, I think, them are leaning,
everything leans. And in general, unless
you're doing calligraphy, your leans aren't
going to line up. And so I use this trick to make them
look lined up anyway.
16. Day 5, Part 3 - Telling the Word Story: Now I'm going to
show you how I put little snippets of words here and there to
describe something. I am just going to
it's pretty nonsense, but I'm just going to put
here what we're talking about today just so that you can
get the idea of what I do. This time I'm not drawing, I'm doing my printing. This is D five, and we are talking about the use of words in sketch booking. Okay. I'm pretty practiced. And practice is the clue here. I'm not saying I
am a good printer. I'm not. And if you saw some early sketchbooks,
you'd really know that. But over time, I have come up with a somewhat
laborious system, but in using my system, doing it over and over again, even my rough cut
he turns out okay. It's not going way up
and way down and so on. Even having to slant the book
to have it on the camera. So this is what I do
in pencil and lightly, and I just write naturally. This line spacing comes out to be it's
usually in a range, but it comes out
differently each time because I'm just looking at how much space do
I want to take? How much space do I have left
many times because you have a bunch of pictures and you're trying to put a little
description here and there. It's about how much space
do you have left to use. And so I adjust for that, how big I print and how widely spaced my lines when
I'm doing my rough cut. Okay. The next step here
is to do what I did here. And I'm lining up way over here. If you can line up, if your
spine is straight right here, and you can line it
up this direction, then that's a good thing to do. But again, I'm getting myself a line that's parallel
to the edge of the page. I hope I'm I can't be overhead on this
because of the camera. All right. We're going
to say I did anyway. Then the second thing I
did is I find out what is my line spacing that just
happened automatically here. Again, it's my square
ruler. I love this. There you go, and there's the baseline of the second one I
did, and what is it? It's 3.5 little squares. Now, that's common for me
when I have more space. It will range. That's
about the most I ever do. It will range from 2.5 to 3.5. Very often, it lands at three. As I look at this, I'm making a judgment call. I think I've got that
lines facing two spaces. It just doesn't even look
like the words go together. Instead of the 3.5, I'm going
to make an adjustment here. I'm going to make it three. Now, I drew that right in middle of my words. That's okay. I'm going to line this
up with this line, and then I'm going to mark
where the three, one, two, three, one, two, three, one, two, three, and one, two, three. Now, I'm going to go
back and I'm going to put those guidelines
in in light pencil. Again, I'm trying to be
use this as a guide two. Because I can't just get
totally overhead here, mine might be off because it's best to be looking
right down at this, not at an angle, because your eye tells you
when things are parallel, your brain and your eye
together, your artistic guides. Okay. Now, let's say
that we just hope that these are going
to be parallel. So I have a fountain pen here that's filled
with colored ink. I like to do this kind
of copy in colored ink. Okay, and I'm just rewriting. I'm not trying to trace
over this at all. I'm just rewriting. And I'm going to have to
pick and bring my words up here because facing is
very different now. And we are look by now, we're totally off here. And we are talking about. You'll see though how this
absolutely works out. So in this case, we didn't even need
this last guideline because it closed it up enough. After the pencil is erased, we have a nice little
unit of words, a nice little piece of
story to explain things, and I'm really glad that I made the spacing smaller because when all the dewy
pencil is come, you can see that would have been a whole lot of white
space there and it would have looked kind of
loosely strong, if you will. Now, we are going to
do one more thing. And before we move on. And that is about how
do you center a word? How do you know that
it's going to fit in the middle and not be too far this way or
too far that way? You don't know, but there are things that you can
do to help yourself. And it involves a
piece of scrap paper. And so L et's use the word sketch booking because it's
nice and long and we would have no idea where
the center is. Right up at the
edge of the paper, I'm going to write my word and this is going
to be a headline, so it's all caps. But it doesn't matter
how nicely you do this. That's a real long one. Words not in the dictionary
yet, by the way. I think we sketchers made it up. All right, there we have it. One of the ways that people
usually do this is they count the letters and figure out what's the center letter. So one, two, three,
four, five, six, seven, eight, nine,
ten, 11, 12, 13. So that would be letter number seven would be the
center letter. So B would be your center
letter and this method, you'd go and make sure that that was in the center of a page. However, there is a
problem with this, and that is with the
width of letters. Some letters take a
fatter space than others. When you do it just by
letter count like this, and people would put that B, I'm going to erase this,
but I would use this. I'd say there's the
center, I'd put the B, and I would I'd go this way
with those six letters, and I'd work backwards here. And your and E. This would really need
some correcting, huh. K. Okay, that's not bad, but if you notice, it's not going to come across. This is going to have to
be stretched out to make it have this same
space at this end. So I don't like to do that. What I like to do
is have this word on a different piece
of scrap paper. And then Put that center that on your page. By I. Now, this so happens that my scrap paper is the
same width because I fold as this page because I folded a letter
size sheet in half. But so it's pretty easy to
figure out where it goes. But if it looks kind
of good like that, what you want to do is get
yourself your starting space. If this is my starting space, and I'm going to write about
the same size letters. Let's see what happens. So I've got and I'm not taking the time to draw my
letters carefully because I'm just demonstrating
something to you. If we've got our starting space, we can line this up right
underneath it here, and we know that the K
is going to go there. The, is going to go about there. T is going to go about there. If you follow your spacing
all the way along, like I just did, you can get
rid of your scrap paper. And you can proceed to making
your baseline horizontal and measuring your
height and making a height match and
everything like we did right over here
in the first place. But we have our headline
absolutely centered. Now, some people say, Well, just make the beginning
and then write it. Well, you're not
going to write it or print it same size a second
time, just guaranteed. If you want to keep your
centering that you found, you're going to also keep
your scrap paper right there. And you're going to place each
letter right above itself. And then you know you're going
to have the same spacing, and you're going to have
your headline centered. Okay, so we have done a lesson for today,
which is lettering. I am going to be erasing that because I just did
that to show you, so we still have
blank over here. But I am going to put in my
finish line for day five.
17. What We Have Accomplished So Far: In a successful
sketchbook practice, there are things that
you can do that really energize the practice
and keep you going, and one of those is to stop and get a sense
of accomplishment. And that's a really easy thing in sketch books because
you did some stuff. And you can look at
it, look at that page. I did that, and that
is an accomplishment. And you don't have that feeling like you're not getting
anywhere and you're not doing anything
and so on and so on. So what we're going
to do right now is just look back at
what we've done so far and as a little
bit of a review. We're going to pat ourselves on the back for getting
these things done. So a reminder, we are
creating a practice by collecting things that we know
that we can put on a page, put marks on a page, because if we can do that, whatever the marks are, we will get ourselves in
a position where we're doing really great pages
just because we want to. So we started out with the date. We were looking at
things that will be there every day and we'll
be different every day. And so we started out
looking at the date and ways to present the date that are prettier
than just writing it. But just writing it is fine. That's all you can
manage to do on a day. Great. Write it, draw
your dividing line. Okay, on day two, we talked about a
lot bigger subject that is there every day. And that's the weather. There's lots of variety and weather and lots of color
and lots of pretty pictures. So this will always
get you some mileage. Now, as we're looking back, notice that the high
and the low for the day can also be done in a
grid block, like up here. So you know, the warm
could be in warm colors, and the low could
be in cold colors, cooler colors like
green and blue. Then we went on to the fact that every
day you drink something. If it's out of a
bottle, a cup of glass, mug, whatever, every day
you drink something, if you didn't, you wouldn't
be with us anymore. So we explored all
the variety of that, whether it's just
a little tiny icon of a cup of something, whether it's a
glass of something, whether it's a
illustration of coffee, when you start to get
more carried away, you're going to do
more things like this, and you're going to
put your color in, and we're going to be talking about putting words in today. Um, so far we haven't done
that. But I did come back. I colored everything, even my lesson about
what a cylinder, what a glass is
really made like. What what a ellipse or an oval is actually
how it's constructed. And then another thing
we have to do to stay alive every day
is to eat something. And so we explored some breakfast foods
and some lunch ideas. We didn't get to dinner yet. I didn't get to painting my plate under my
poached egg yet. And this brings me
to something else I wanted to talk to you about, that gives you a very
high success rate for having a
sketchbook practice, and that is that you don't
have to finish every page. All you're doing in
and our approach to the practice is you are
putting things in place. So you know where the next
day is going to begin. But you don't have to
finish the inking, don't even finish the
finished drawing. If you have it there, and it's not finished. This becomes a
playbook, a workbook, for any time that you sit down and you just can't
think of a darn thing, and you just put the
date or whatever. But you feel like doing some coloring or
painting or artwork or just being
creative for a minute without dreaming up
something to draw. You go through your sketchbooks, and you will always find, at least I've always found, and I have, like 50 sketchbooks that there is something
that you can work on. And something we'll
speak to you. It's not like this will always
sit there and not be done. It will be because you're
going to revisit it enough in your
accomplishment search, that you're going to
come back and finish these things because they're
going to ask you to. And another thing
about our progression, how we're doing our
pages this way. If you had something like this where you did break
favorite breakfast foods, and then you did lunch foods, and you knew that later that you were going to
come back and you were going to add to this
some dinner items or some other favorite
foods, desserts, maybe. It is fine to make
that judgment call. And instead of making
a dividing line right here and starting on
day five in our case, your day, whatever it is. Just leave this and turn
the page and start. And when you come back again, you're going to see that, Oh, I was going to put some
dinner or dessert there, and you might just do one thing, and you might come back another time or you might do
two or three things, or you might do pencil
drawings of them and then leave them
for later or ink them, leave them for later for color. The choices are just
anything that you want. As long as it doesn't
creep in that, I didn't get it done,
should I started now? Should I start at the next page? There aren't any
police about this. In this case, I'm going
to turn the page. We are going to talk about
adding lettering, writing, and I'm going to leave
this for later and put in some dinner or dessert
at some point in time.
18. Day 6 - Color of the Day: O Our day six is a day of color, and we're taking a
very simple approach to this because we're on a journey to have something very easy and different
to do every day. To begin today, we are going to sit with our little book
open and close our eyes. And with our eyes closed, choose a color, any color. When you open your eyes, look around where
you're sitting and note what you see
that is that color. It's very likely that
you're going to see several things if you
have the lights on, you're going to see several
things in that color. Your second scan around
you is going to be, what is the simplest
thing that is that color that I
can put on my page? If you're sitting with
your sketchbook and your art supplies
right next to you, the simplest thing in
that color might be to make a swatch with whatever
you have near you, that is that color. So to demonstrate that, I'm sitting here and I
thought of the color blue. And when I open my eyes, I see several things. The simplest blue thing that I see from where I sit right now is my kind of gray blue
water colored pencil, and I use that to make
like sky vignettes, behind items and
stuff like that. And so all I'm going
to do right now is make a swatch with that
water colored pencil. As dark as you want to, the more you put on, the more it's going to float
a heavier paint around. I have a truly wonderful class on scale share about how to paint with
watercolor pencils. And if you have any
interest in that at all, you would have a lot of
fun with that class. And when you use
your water brush over that swatch of
watercolor pencil, you get an awakening of
the colors I call it, it gets bright and it gets wonderful and it gets painterly. Right with my art
supplies here is also a fountain pen that I
have with blue ink in it. And so I'm going
to take that and ink my title for the
day with Blue Ink. When I look around just
a little bit more, I find the top of
my water bottle, and it's pretty minimalist because we're trying to
use less plastic now, so it's not a big
fat top or anything. I use these for all
kinds of things. One of them is any kind
of little bit of masking fluid or a little I have my dog with me
again this morning. So the noises, please
please ignore. We do this early early in the morning before the
other dogs wake up. And so she's in the studio with me and she makes
all her morning sounds, stretching and
sometimes barking. Anyway, So I'm going to sketch this because it's really easy and it's here
and it's fast. And if you look at it, it's just like a glass, only really, really,
really short. If you think in terms like that, you can always
draw things if you have already learned how to draw the basic shape that
they are and we have. I'm going to do
this from an angle, and I'm going to make
an ellipse Again, sketch you until it gets right. I'm not trying to have
it straight across. I'm trying to have it at an
angle because it looks good. And then this has got
very short sides, like pretend this is a glass. And so the bottom has to be parallel to that curve just
like if it was a real glass. At this point, this can
be a vitamin tablet. A button on something. A button, if you put two
more ellipses right there. Anyway, that is a good way to think when you're
drawing things like, what does the shape look
like at this point? And you can take yourself into a few different directions
with a few of these. So to show that this
is my bottle cap, and then it's upside down, I'm going to put
the back of this Bottom ellipse, and we're
only seeing part of it, but it would go like this. Then there are some
ridge marks in there. Now, that also can hold paint. If you have a paint
that dries up and drops out of your palette
all the time. You can use a bottle cap as a half pan because
of these ridges, the paint will be, you take it from a tube
and put it in there. It's going to fill in there
and then dry. It holds it. That is, I have a whole Daniel
Smith palette like that because Daniel Smith paint
won't stay in my palettes. It's too dry here. Now, these lines are going
to contrast with those. And we're going to make that just a little
darker in there. And there we have
our blue bottle cap, and then you can
ink it and color it with whatever you
want to color it with. Here is another blue thing. I have a lot of blue things. This W I make a wash of a watercolor of a color of
watercolor that I use a lot. I make a lot of wash, and I keep it in a watertight
air tight little jar. And then it's there to grab, to do this is my sky blue, so this is like to do big washes in and
it's just available. But again, look at the
shape that I have. So I'm going to go over
here and I'm going to draw this bottle and start with an ellipse just like I
did them and make this one straight since it's in
real life full of liquid. Again, the sides, the
parallel curved line. This time with this jar, sides go right straight
down like that. And this is a solid color. This will be a solid color. You could make your cap
in color that it is, but I don't have to put
that I it weren't full, I would have another
ellipse that has to match. Okay, so I have my jar paint. Now, what I'm going
to do now rather than keep grabbing blue things, which I could do
for a while, my, I am going to encourage that when you are doing this kind
of thing and you have time. I mean, if you didn't have time, you might have only done that. And that's fine for today. If you did have time, you
might have just done that, and you might have done
this dark blue bottle cap and tried to play with different colors
of blue that you have, what this one would be darker. If it occurs to you as
you're drawing this, what occurs to me
is that that looks like the cap of a jar. And so what would
change if it was? Well, the inside wouldn't show. And so if it were another jar, The point of this now
is creative thinking, because that's a huge thing
that's going to happen. Huge process in your
sketchbook practice, is going to be
creative thinking. B let's just say, I've got my coffee. I have time. I'm sitting here
this morning and now I started out
with my little theme, but now what I'm going to
do is I'm going to play with my mind a little bit and fill up some space because you're exercising your
creative brain to do that. You are also learning to draw. The more you draw,
the better you draw. The more you think creatively, the more you think creatively, and that is a really
true gift. All right. Now if that's going to be
a different kind of jar, this one is still going to be
one of those that has this. It's going to be like
what pickles or some kind of something that comes
in a jar like this. We can I can't think of anything blue that comes in a jar like this unless it were
paint, but we did paint. And so this will be
not blue anymore. But that's okay because
what just happened is that you recognize the shape and
that could be something else, and you came over here and
you made it something else. We also said, and you can fill this with whatever
you want to fill it with. We also said that could be a button. Let's play with that. That could be a blue button, and we're going to do it
much the way we did that. And put our sides on
and put our bottom on, but we're not seeing
the inside of this. Like I said, you could draw
this again and have it be a vitamin tablet
or an aspirin. How would it be a pill? I would have a crease in the l? See how easy when you're
just free thinking. But this is going to be a button that will go on your coat. We put a couple more
ellipses there. This is not fancy. If it were larger,
you'd be putting the shading in the
holes on the back, but we're not doing
that right now. We are just making a real
simple looking button. I can't think of a content for this jar that makes
sense in the food world. I'm just going to make
this jar of water. I keep jars of water around to do my watercolor painting
so that'll be fine. Then we'll paint this with our method that we
painted our cloud, where we're just
going to put a little blue around the edges indicating it's a glass jar
and it's got water in it. Obviously, you can do this
with any and every color, and it's going to give you
whatever you need on that day. It's going to give you
just a little time and a little simple something, or it's going to if you've
got the time and inclination, allow you to go all over the place with your
creative imagination.
19. Day 7 - Words As Pictures: We've made it to day seven, and if you're still with us, you now have seven days
in a daily sketchbook, and you have already
accomplished a really big thing. Just sit quietly and look
around or think about your day, and what word comes to mind? In my case, the word garden comes to mind because yesterday, I bought a bunch of new flowers, and today is going to be my
day of working in the garden. And so I'm starting. I'm just going to
make a nice, nice, big version of the word garden. Now, of course, I need to go back and straighten
up and do that, all of that kind of thing. But I'm going to look at
this word for a minute and I'm going to
just ask myself, how can I make this
word more of a picture? I mean, because the word is
what it is is pretty obvious. I think that I might add. I might add some grass. This is my favorite
grass to make. You'll see it in a
lot of my classes. And on both ends. Then I think I'll put a
couple of flowers here, which are just simple, easy little cartoon guys. This one will be a lot smaller. And here goes another
flower over here. Oh. Now, instead of
doing the flowers, I could just have run a
little border of leaves. Leaves are parentheses that
are joined at the simplest. Then when you have a
branch with leaves on it, you have one of two things. You either have them
right across from each other or staggered. I'm going to stagger these because it just looks a
little more random and fun. All right. And there I have
illustrated the word garden, either in this kind of a
way or this kind of a way. Maybe your word was coffee, and you'll put some coffee beans next to it or a
little g of coffee. Maybe your word was water. Um, think until a word
comes to you that you can envision adding something to you just smile
with a happy face. You know, I mean, you can get
just as tacky as you want, or just as complicated
as you want. That's one way to do that
a word can be a picture. Another way that a word can
be a picture is to just write the words and add some
color elements or something. So we're going to look at how
words can make a quote or a piece of conversation or
some joke you heard today. And you can make
like a talk balloon and you can you can
make it normal like a talk balloon is normally like a big oval with a with
a little t on it, and then you erase this. But they can be more playful. They can be wonky
and they can be like around cornered
rectangle that you just draw in a real free
hand real crooked way. Within this can be anything that you said or that
somebody else said, or you can have a conversation by making two of these and have them talk to each other by the direction of this
little talk arrow. One prompt and one thing that
we all have and we always have are the thoughts that are running in our heads.
We're always thinking. That's why a lot of us meditate in order
to shut the noise off for long enough to have some peace for
a couple of minutes. But the high side of that, there's always thoughts
going through your head, meaning there's always ideas
going through your head. And it's fun. Thought
balloons are very fun to draw because they are a lot like clouds that we did
on our weather page. There are also places for
you to say stuff that you wouldn't really always say
out loud or with people. This cloud has little
baby clouds coming out of it because it's coming
out of your head. And so this is the
equivalent of this. Only when is like this. We all know, this is iconic. We all know that
this is a thought. And so on an occasion where
you are sitting there and you don't know what
to draw that day. Then watch what you're thinking as you're thinking
about what to draw. As you're rejecting what to draw and put some thoughts down. The only thing that
I encourage you to do is not put negative
thoughts down. Like don't sit here and
put a thought down. It says, I can't draw, I'm really lousy, I'm horrible.
I'll never be an artist. I'll never be a sketcher. Just throw those
thoughts to the side. We don't want them at all. I sit here this morning and I know I'm going to be gardening. One of my big questions, and I'm going to have to
research it is where do I put that raspberry bush. I bought a wonderful
baby raspberry bush and I honestly have
never grown one, have no idea where to put it. There is a thought.
Then that makes me want to draw some
little raspberries. Now, you don't have to do that. I just drawing that
thought, is enough. Because it came to
me, I'm going to draw a raspberry and to show that
it's a raspberry plant. I'm thinking about it. I'm going to draw
one of the leaves from the raspberry plant. I'll probably paint
that in, right? And all of your
thought balloons and your talk bubbles can
also be color down, and that makes a
really pretty page. I'm going to think another
thought for over here, and I'll be back a this finished so you can
see how it turned out.
20. Wrap Up: If you have been following along and making these pages
with me every day, you've actually completed
your project for this course. However, the idea of the class is that we
started something, not that we finished it. We are kick starting a
sketchbook habit that you can sit down every single day
and make a ma in your book. No matter how simplistic it is. What we've done in this
class is each day, we have looked at
something that happens every day in your life
and everyone's life, but doesn't happen
in the same way. Because that makes a
really good prompt for what you can
put in your book that day because
that thing is there in whatever appearance
it might have. Let's look at how we did
that and how these can expand into filling up your next couple of weeks
until the next class arrives. Okay. So we started with a date because every
single day has a date, and we can come into
our book and we can write the date and we
can put color on it or not. And that's it. You made a mark in your book. You have this automatic
accomplishment boring, but accomplishment. You did it. You opened the book, you
took the little bit of time, and you made a mark
because this will grow. Don't worry about it. It will grow and grow until it's
all you want to do. So we add different
variations that we could play with to play
with just today's date. And there are lots of other
ways we can add to this, but this is a start. So there's the
easiest thing to do. And we take our little
marker, brush, washy tape, whatever your dividing line is, and we get to start
the next day. You have to worry about
saving more time for that day because
I didn't happen. We didn't have anything we
could think of to put in. So that's fine. It's not
what we hope happens, but it's fine because
everything is fine. Day two, we talked
about the weather. This is a big one,
a really big one. You can just do anything
with this and everything, and you can go for as
long as you want to go on how is the weather
that day and fill as much space as you want to because it doesn't matter where the next day
is going to start. It's not going to be
necessarily on the next page. It's going to start
wherever it starts. Okay, so there's a big
variety to work from there. On day three, we talked
about the fact that every day you put
liquid into your body. And that is also like weather. A just huge variety. I mean, you could get
days out of just doing a portrait version of something
that you drank that day, whether it was this
or it was a glass of orange juice or if it
was a bottle of water. Again, something that's
always there and can be depicted in many ways. Okay. Day four, we went for the fact
that we have to eat every day in
order to stay alive. So we know that's something
that's happening. And the variety
there gets even more vast all day long. What
goes in your mouth? Keep track of this.
See if it's pretty, see if it's easy to draw. See if the dishes on is
pretty or easy to draw. Anyway, it's for sure, you're going to eat something, and it's pretty sure, you're going to be able to
draw it if it's simple. If you can't draw it, just write it down. Maybe write down the
recipe of your bowl of oatmeal and what you
happened to put in it that day. So again, we have success. We cannot fail at this. Then we moved on to the fact
if you can't come up with pictures that you can add words, or if you do come up with pictures and they need
some information, you can add words. And we talked about
how to do that so they don't make you ashamed. And we also said that that would be all
you need for a day. If you just want to write down a sentence that you read in a book because it
resonated with you. That's enough for that day if that's all the
time that you have. Day six, we sat
down and we closed our eyes and we
thought of a color. We just chose one randomly, and we opened our eyes, and we hunted for that color. We noticed everything in our environment that
was that color, and then the second
step of that, we started to look for things that were that color
that we could draw. Because that's important to feel empowered is a
really big impetus for you to continue to
draw things and continue to draw things means
continue to draw better. That is the way
you learn to draw, no two ways about it. Pick simple things. Pick just a color swatch if that's all you
feel capable of. But more than likely, every day you take
a look at this, you're going to have
a different color and you're going to see a
lot of things and you're going to grow into noting
them and you might put a little bit of
story with them. Okay. Our final day that words themselves
can be the artwork. Instead of backing
up the artwork, they can actually be artwork. They can be embellished with something from
their meaning. They can be a conversation that you write in talk balloons. You can make that
pretty by adding a little bit of color around the edge of the way
we do our clouds. There are quotes
all over the place, all over the Internet, you can find, and you
can write them in. You can illustrate them too. This would be really
fun to illustrate. I think it's Edna
St. Vincent Me, if I'm not mistaken. The Earth laughs and flowers. Well, I think of the things. You can make a bunch of whimsy flowers with
laughing happy faces. There's an obvious solution. You can draw the Earth. You can draw the planet
earth as a flower. You could make the planet
earth the center of a flower. Is creative thinking
thing, is really good. It's connected to
your last what if, you get this what
if and then you go, Oh, well, what if, blah. When you start to do that, notice it because
then you've opened the door to the creative
side of your brain, and that's a very cool thing. So how to go forward from here until the next
class and beyond, is that you will sit down
at your designated time and you got your little tiny
supply kit and your book, and you'll put today's date down on the next
space that you have, whether it's the top of a page, whether it's just
below a dividing line. And you will think through
these different ideas. You choose one and follow it
in all of its possibilities. Then if you got more
time, choose another one. I mean, it could have the date, it could have the weather
and whatever you drank. It could just have the date is the date and what you drank and what you ate. It could be. It could be an illustrated word. It could be all of this
in all of its variations. That is how you keep your
habit between this class and the next class is you
just continue in this book. So we got this far. The very next day, we would be starting at
the top of this page and who knows what is
going to happen, right? And where the dividing
line is going to go. Another thing that
will truly inspire and empower this practice is
to do it with other people. In that end, I have created a Facebook group for my student support for my skill share students,
and it's free. I encourage your upload of your projects to the
Skillshare project section. But what I'm missing
there is day to day, real life contact with my students and the ability
to answer questions before waiting until I get a notification that I don't see for another
day or something. That you have left a question. It's a fine system, but I need an enhanced system. So I invite you to join that student
support group for free. If you're on Facebook, you can search for it with
my name, student support. That's the name of the group, Jessica Weslock,
Student Support. If you search that,
you'll find it. I'm also putting a
link in my profile, and I have already put a link in the last discussion e
mail that I sent out. I'll see you there, and
I'll see you next class.
 Jessica Wesolek, Artist/Teacher