Transcripts
1. Intro: Hello, and welcome
to this class. And the thing that you see
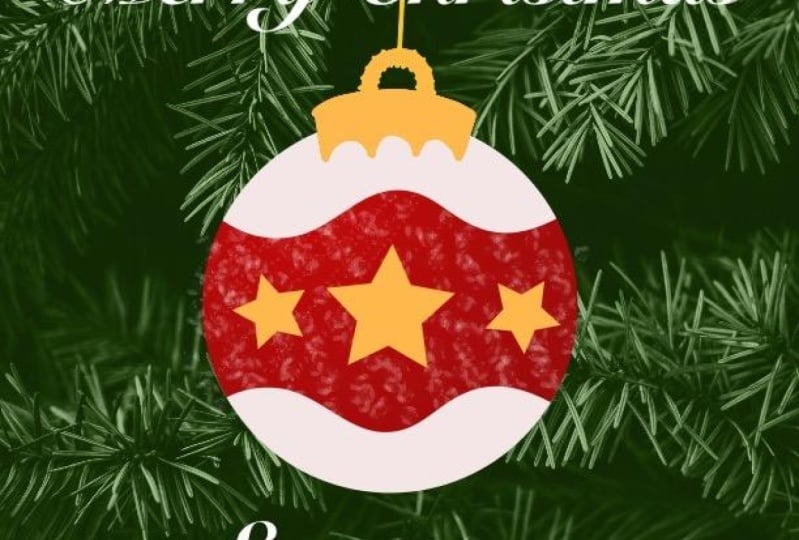
here on my little screen is the class brochure
that we are going to create in a little
program called TolSQuit. Yes, TolSquit is only for iPad, and it's a very powerful
animation software where you can to the animate and
you can draw in it. And in this class, it's aimed to help you learn how to use
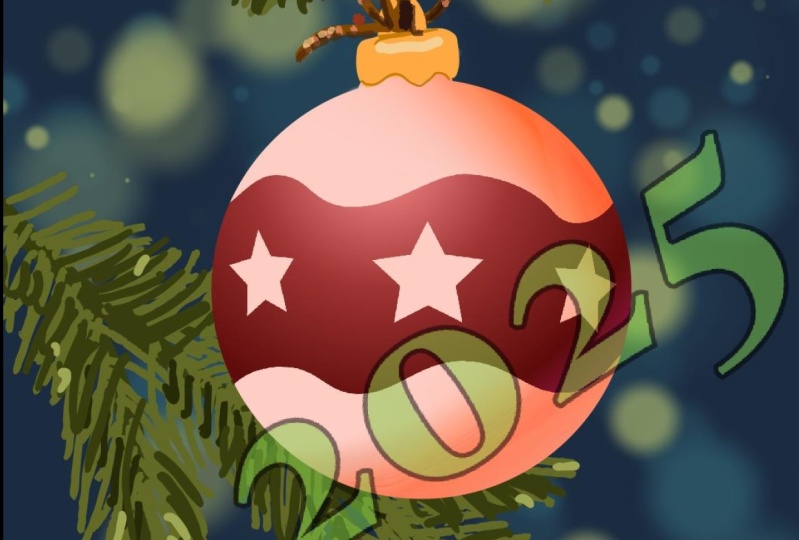
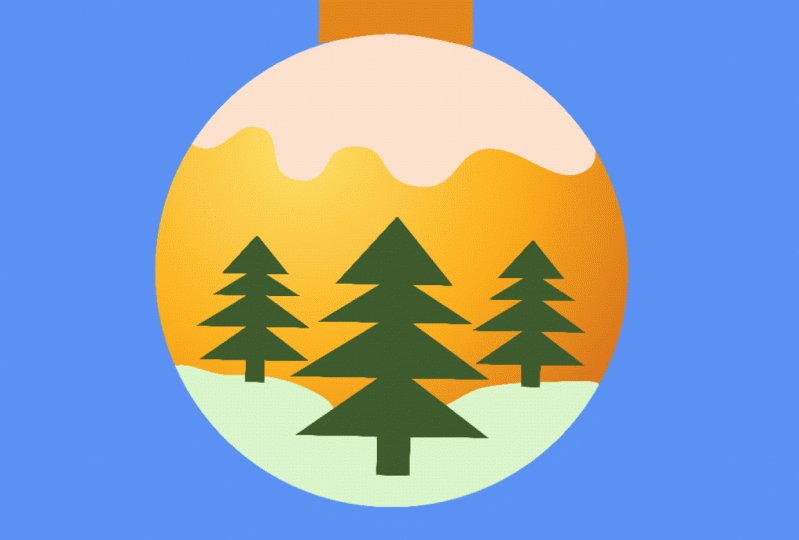
TolsQuit and how we're going to do that by creating this very simple
Christmas ornament, of course, you can do something more complicated than this, but I try to keep the class simple enough so
everyone can follow, especially if you have
never heard about Tscuid. Some people might even say that Tolsqud might
be better than some other programs which rhymes with dreams. I'm kidding. I'm kidding. Or, am I? So your class project will be to create
something similar. Of course, obviously,
if you do want to make a different ornament,
please do so. And once you're
done, do share it in the project section of
this class top below. So we can judge you. I mean, no, we will not
judge you, of course, not. But always share with
friends and family and show them the new skills that you just learned
taking this class. And always there will
be an extra project, an extra file where you can
download and play along. It will be a secret bonus video if you want to join in and
play around with that. It has to do
something with Santa. All in all, the cross is for
all types, but I will say, if you're a beginner, then you are at the right place
at the right time. So yeah, beginners,
you are welcome. And even if you don't feel like you can draw, don't worry. As you can see, there's
not much drawing involved, but there's a lot
of animating and learning the software
of Tun squid. So if you have
decided to draw in, I will see you in class. If you haven't, think again. Thank you again
for watching this, and I will see you in the class.
2. User Interface - ToonSquid : Okay, welcome. This is
tune squid for you. And the first thing we
are going to do is to create a new project from
Dlus button over here. We can name our new project. Or you can just
leave it like that. Let me just name this quickly. And now we can use the
width of 1080 by 1080, which will be a square, or we can use the
presets from here, one of them is a
little bit bigger. Depending on your device, it can handle 2014 by
2000 and then use that. The workflow will
be traditional and the frame rate will be
24 frames per second. So we just click W. Like we tap, create. So now we have our canvas, which is a square canvas. We are going to create our
Christmas card on this. And before we do that, let me just introduce
you quickly. On the left, you
have the tool bar, the tools that we can use. We have the move to the
selection to the brush, eraser Smich to feel to quicker. This is for the text. We write text, and this
tool is also very handy. It is the pen tool. Let's say if we tap on
the mesh once again, you will see that you will open a little window with all of
the rushes that you can use, and you can also import meshes. Now, let me just
choose sketching pencil brush, now tap away. And since I did press the picker and select
the white color, let me tap on the little color
here right now is white. We can change that to
black, tap again here. And let me show you a
little bit what we can do. O scribbles like this. Now, let's say you
made a mistake, you want to undo something. Well, there's a button for this, which is the undo
button over here, and it undos the
mistake that you made or maybe you did a stroke and then you
didn't want to do a stroke, you can undo only that
stroke and so on and so on. Or you can redo that stroke
by tapping the redo button. Or if you just want
to have a quick undo, use two of your fingers
and just tap once. And again, until you get to the point where you don't
need to undo stuff. So that's pretty basic
UI of tune squid. Now there are more
as you can see, there's more stuff
on the screen. Now, if you notice, I'm on
the brush too, right here. I just true. I true another
rush my clap again. You will see here on
the top right corner, there's two options,
two sliders. One of them is to readjust
the size of the brush, and the other one is to readjust the opacity
of the brush. So that can be
very, very helpful. Now, obviously, I
don't want to do this. Let me choose a novel
brush like this one, because we are going
to sketch in a minute. Now before we start sketching, I want to sketch the
Christmas Bowl illustration. I have to know where
exactly my sketch is. So if we tap on this
button over here, this is the area where we
can add drawing layers. Now, this one square is
with the drawing layers. So first to draw something, we can either draw the
screen and automatically, it will create a new layer. I I tap, it will remove the layer
because there's nothing. Or I can just press the plus
button and ask and say, I want to create a new layer, and it will create a
new drawing layer. So far so good, there's another type of layers that
we're going to look later, but this is how we
draw on our canvas, and we can hide this. Also, there's another option. These options are the properties for the layers that we have. So each layer will
have properties. And right now there's not much happening but let's
say I draw something, I can either lower the
opacity of that drawing. I can change the blending
mode and sew and so on. Right now, this layer
is a pixel layer. Anyway, let me just undo
this a couple of times. I'm going to hike this so I can have more
space to work on. And the other thing I want to show you before
we start sketching and doing anything is this
little arrow on the bottom here if I press you will see
that the timeline appears. Right now we are not going
to use the timeline. But if you notice
on the timeline, we have two layers now. One of them is the
background by default, and there's another layer,
which is layer one. If I open these
layers over here, we're going to see that we have another layer of layer one. But let's say if I create
more than one layer, let's say I have another layer. You will see that
on the timeline, there is just only layer one. So right now, the layers that we have here
on the timeline, they're different
than the layers we can create over here. So they might be a
little bit confusing. But as we progress and
start making stuff, you will see what's
the difference in which layers you can use. Ideally, you would like to use the drawing layers first and
then move to the timeline. So let's start with the sketch.
3. Christmas Ornament Sketch - Sketch Brush and Move Tools : Hi this. I don't need this
layer. Hide this layer. Maybe we'll make my size
a little bit bigger. And this is what we're
going to create. If you want, you can make up
your own designs. Go ahead. I will try to sketch something that will look circle enough. That's work right
there. I'm going to sketch my Christmas ornament. That's perfect. And and feel
free to design your own. I'm going to try to
do something very, very simple so
everyone can follow. We'll see how simple
that will be. If this is your first time
sketching on a tablet on iPad, in this case, it
can be challenging. So it takes some time. Definitely takes some
time. I'm coming from a digital tablet screen tablets, and ous there's a little
bit different than here. I'm a little bit stressed
with the camera on right now, but I'll try my best. And maybe I can do
something like this. So first, we're
doing the sketch. Now, I do want to have
some design on this. If you're happy
with your sketch, remember this is just a sketch. We're going to use
this sketch as our guideline to create our illustration and
then animate it. So you don't need to be that
fancy in detail with this. I think I like mine so far. So I do want to move
the whole thing a little bit to the
left to be centered. So to do that, to
move your drawings, you can press the arrow key on there and I can
move this around. And if you have your
magnet icon activate it, then you can snap to the
frame like this, right? Or let's say if you
want to move one of the stars in this case, I can take the selection tool, grab one of the
stars, let's say, this one, just for the
purpose of showing you. I can grab the arrow, the moving tool, and I
can just move the star. And I can also rotate this, and then I can go back and maybe select another star and then
I can move that as well. So there we go. I
think we're happy. I'm happy with my sketch, even though it's not the best, but we're going to move to the next one where we
are going to explore the timeline and
make new layers to illustrate our
already design here.
4. Timeline Layers: Sketch is done. Now we want
to create more layers. Now, by default, if
you're coming from follow shop, Adobe Animate, Illustrator, Clip Studio,
whatever you're coming from, if you don't know what
that is, it's okay. But usually the way you might think is to
go to the layers, create a new layer, maybe and then lower the
opacity of this layer. And then on this layer
to start and bring in some color to your piece
to finalize your piece, which is great to know,
but this is not how we're going to do this animation
in tunes squick. We're going to use the timeline for this instead of these layer. So I'm going to delete this, and I'm going to hide the properties
and hide these layers. And I did lower the opacity of the whole layer, so that's fine. I want to create
a new layer now, and the way I'm going to
create this new layer, I'm first make the
base of the ball, then the handle, and then maybe
almost before the handle, we have the little design with the stars and
snow, I guess. I'm going to do this
on separate layers. So the separate list
that I'm going to make, they will be on this timeline. Right now, we have layer one. We can tap on this layer, and we can rename this layer, and we can call
this layer sketch. Tap away. So we have a
layer called sketch. Now, for this plus button
over here, you can see that. We can tap on that and
then make a new layer. Now, you notice there's a layer two on our
little timeline. We can tap on that layer
again, rename that layer. This will be the
base of the ball. But right now on this
base, as you can see, by moving around the timeline, there's only one frame. And on this layer, there's
no draw happening. Before I start drawing, I can tap on the sketch. I can hold the sketch layer
and I can move it above, so be above our base layer where we still
have nothing draw. I can tap again and make
sure I lock this layer. So if by mistake, I decide to do something, I cannot change anything or mess up because this layer
right now is locked. So I don't want to do anything. I do want to go to
the base layer, and I do want to create
a little circle. Now, as you can see my amazing sketching skills
with the circle, not the best so let's try and use a
different tool for that, which will be this little tool, which is the pen tool. Now, the pen tool if you
tap again, it will appear. I call this a pen to,
called this a shape tool. But with this pen
as the icon is, we can create different shapes. If you don't want to create
different specific shapes, you can go here and you
can just choose free hand, and then you can do this with
the handles and everything. It's a little bit difficult
if you're a beginner, so. Let's do this simple the
simplest way possible, and choose the circle, which I didn't press. Now I did. And now, by default, I think the color is black, and we have this little circle. And the moment we
create a new shape, uh, tune squid automatically selects the move to over there. So I'm going to make the size of this a
little bit bigger. And yes, since it's black, I cannot see the sketch
layer which is on top of it. So when we go here to the
color, we can change the color, maybe something like
maybe maybe red. But now we can see
the sketch beneath, which is on top, beneath. But also what we can do
while we're still here, if you notice there
are different patterns that we can play around. I want to choose this pattern where in the middle,
there is a color, and the outside
colors a bit darker, and I can also move
the point of this. So maybe around here, I can choose the second
color, which is on this side. So the first color, is
the color I choose. Let's choose the second color which is black in this case. I don't want this to
be completely black. Maybe something darker,
darker red will do. So I'm going to tap
again on the color. And if I hide the
sketcher, which is on top, so we can see what we have, it's not looking
that bad, I think. So this is what I'm going for. I have the base of the ball. I'm going to review the
sketlater once again because I do want to do the rest
of the amazing design.
5. Mask Layer : Now we are going to
create a mask layer for the stars and for the top and bottom of this illustration. But I'm going to do that on
a separate layer once again. So I'm going to press
the plus button. I'm going to say new layer. It will be on top
of the base and behind the sketch layer.
We can tap again. And this layer, as I said, I want to name this layer as mask because we're going
to make this layer to be a mask to fit into the
red circle beneath. Right now, we have no
drawings on this layer, but we can create some drawings if I hide
the timeline for now. I'm going to grab
the pen tool and I'm going to go here and I'm going to choose
the pre hand tool. And I will try to
follow roughly, again, the amazing design by
expanding these handles. And if you notice,
I'm going outside of the bowl, but it's okay. We can fix this later. You're going to see how and why. Just now follow the pattern you have created
for your design. Which I'm not very
well right now. I like this. Ah. And also, while I'm at it, I can choose to have
slightly different color. And I can choose
this one as well, change the color to
the last color I use, and go back to the pen too. And this time, I can just
tap again and make a star. Maybe one star or maybe
three stars, let's see. A lot of stars Christmas. And I guess I don't know. So I can tap on the star and I can duplicate
it and I can move it. It's a little bit
maybe I can make it a little bit
smaller. Like this. And I can tap on this star, duplicate again, and then, whoa, not do that and
then just move it to the other side, and tap away. Then I can go back
to my mask layer. Now, if I open the layers here, you'll see that I
have a bunch of symbols which are
the three stars, the two on the top
and the bottom here, they appear as one.
So that's important. I'm going to hide this now.
And on this mask layer, I'm going to tap and I'm
going to say togo mask. So I don't know if you can see because the background is white. But we created a mask around
the base layer that we have. So everything all
that base layer will be covered with the
mask that we have here. And obviously, we can
still move it around. We can even animate
it if we want to. But for now, we're going
to leave it like that.
6. Vector Brushes : Now, maybe I didn't
mention that. You can move around the
canvas like any other most of the apps on the iPad
and zoom in, zoom out. You can re adjust this with
the two of your fingers. I am very terrible at this. As you can not now, I do need to create
again a new layer. This time, this layer
will not be a mask, but will be for the handle. So again, plus button, tap again, rename your layers, and then we're going
to call this handle. I have a handle. Now the handle, I'm going to hide this
one to have more space. The handle, we can either
try to use the brush, the different verses
we have or we can again use the pen tool. It's up to you which
one you want to use. If you want to use the
brushes, go ahead. I will use the brushes, but I will make the
handle to be a vector to be drawn with a vector brush
because if I type away here, because the vectors,
they allow me to draw outside of the canvas and I can move them outside
of the canvas. While the pixel brushes, they don't allow me to
have this flexibility. So I'm going to change
the color to I did use, I think, something like this. Again, it's up to you what color combinations you
want to use for yours. Don't worry, experiment. So I'm going to do this
part. And if I tap on the brushes on Edit se I'm using a vector
version which is the roh. I'm going to click
on the other brush. On every brush, you have some extra seconds
that you can play around and readjust them the way you feel comfortable.
These are mine. I think they are by default on the vector brush that
I just selected. But if you want to
copy them, go ahead. Or you can clear and
use the default one. Once you're done,
just press done, tap on the done, and we're
not going to back up, but it's good to back up
your files, obviously. And now, I'm going to try
to follow this. I will try. And I wish you
good luck as well. Now, this size of the verse is a little
bit too small for me, so I'm going to
increase the size. Now, you can also delete
the vector versus by selecting an eraser
and going very slowly. Eraser also can be chosen. Now I'm using the vector
eraser, which is this one. But again, you can use
whatever you feel like using. And I'm going to cover this. Now, in order for
me to see better, I'm going to hide
the sketch layer. And I'm still on
the handle layer. So now we're going
to use another tool, which is the bucket tool. So I'm just going to
press and fill inside. If you have any gaps
between your lines, you may not want to fill. So you need to increase
this bar over here, make sure you fill to, and you can play with this, you see if it will fill or not. And then if it
doesn't want to fill, you have to go and do it
manually, sometimes, sometimes. Not always. I guess I
will leave it like that. It's not a big deal. Now, I'm going to press again the vector brush,
which is this one. And I'm going to tap here. I'm going to make
a smaller size. I'm going to change this
to may discover here. I'm going to zoom
out a little bit. I'm going to draw a line. Basically, this will
be the string line. Here something like this. I've noticed the line goes outside of the white background, based on the frame that
we're going to have. Once we render this,
once we export this, the only white, whatever
is in the white square, that will be the visible part. So this upper file will not, but it will allow us to
swing it back and forward. So we don't have to
redraw everything again. And that's why it's actually the better versions
for this one.
7. Set Layers Hierarchy: Now we need to organize our layers that we
have on our timeline, and then we can animate them. So what I mean by this,
we're going to put some hierarchy on
each of the layers. In total, we do have
three that we're going to worry about the head on
one with the string, the mask layer, and the base. The sketch layer right
now is not visible. At this point, we can delete it. But let's just kick with it now. So in order for us to
book some sort of order, the idea is once we
move this string, we want the rest of the ball
to move with the string. So whenever the string moves, the bow element needs to follow. Before we do that, let's
go to the transform tool. Let me just hide
this for a second. And I'm going to tap to this
again on the handle layer, and I will say enable
pivot editing. Now, you may not see it. I'm going to zoom
in a little bit. But there is one point, the pivot point of
this whole layer. I want to move this point, grab it, and then move
it here on the top. And then this joystick
pile will appear. If I move that, it will
otic on that pivot point. So now the next part is for us to attach the base
of the ball and the or limit the illustrations
of the ball to this handle so we can
move everything together. That will swing on this
pivot point over there. So there we go, let's zoom out a little bit. And let's do some reorganizing of the hierarchy of the layers. Open our timeline. And then no matter which
layer we have selected here, press on this icon. It will show us the
transform hierarchy. And first thing we need to have here is to have
our handle layer, which is over here,
tap and hold, and then move it
to the hierarchy. This will be the first one.
This will be our joystick, the one that we move, and
everything else moves. So the next thing we want
to have is the base. We grab the base, and
we put it on top, not beneath, but exactly
on top of the handle. So it will have a little space, so it will attach to
the handle itself. And the next layer,
which is the mask layer, I didn't grab it. Now, I did. And then I can put it on
top on top of the handle, beneath the base or the handle, but on top of the base itself. So it will be beneath that. So once I hide this
and I go back to the handle layer without
doing anything else, ideally, now, if I
try to rotate this, the whole ball will rotate. Alongside wherever I
will take the handle, which I'm going to tap now because we don't
want to do anything. Now, if by any chance, this may not work for you
is because sometimes by DFOkelec we have selected the layer and we try
to move the layer. Sometimes the pre tool, the editing tool is selected. So in this case, we have selected the
mold and we want to only edit the layer, the
drawing itself. So if I move I will just
move the drawing and I will not move the rest of the layers,
which is not ideal. So I'm going to deselect this and as you can see the
handle is back over there, and we can just we
see it's working.
8. Animating - Motion Tweening: Okay, so we did our hierarchy. We did everything that
we had to do ideally. Now it's time to animate before we start
animating the handle. We might want to animate
our amazing design here. And also, let's add a
different background. How we can do that.
Plenty of ways. I can go back to the background
layer on our timeline, and I can go to the properties, and I can go on the
cover and literally, I guess, red idea. I don't know, and change
this to something festive. Is this festive or not? Yeah, does look like Christmas. Nice job or he can
choo somebody else. I don't know. So we
have the properties. Now, as I opened the properties, there's infinite background,
that's including symbols. Or you can simply make
a new layer and create some other symbols that are
behind the base of the bowl, so you can also animate those. But before we get
ahead of ourselves, I'm just going to leave this as a background so we can
see what's happening. And before we
animate the handle, let's try to animate the
symbols that we have here, which you can see
that I'm tapping on each individual one
and selecting them, and I can obviously move
the pivot point, you know. I can roti, and I
can resize this. I can maybe zoom in a little
bit to see what am I doing. And I can resize, as I said, tic, that's rotate. Then I don't know, we can move them not
the pivot point. Let me tap. Can I disable
pivot editing? Can I? No. Okay. The pivot editing
was on for whatever reason. And yeah, we can do
something like this. We can animate individual stars. So how we animate symbols in
our timeline is very simple. We are operating on 24 5/second right now. Don't touch that. It's fine. 24 is the standard, but we have a problem, and that is each of our layers is visible only for one frame
that we can see here. So how we can make our
animation longer is by extending our layers. So in this case, we made the ball base to be
visible for 11 frames. Now, the rest don't
follow because they are only for one frame visible. So let's do the
same for the rest of the layers that we want
to animate and be visible. Which again, this, if you
look at it is not enough. It's just 11 frames or
ten frames in this case. So I'm going to pinch
this a little bit, and I'll try to extend all
of them as much as I can. Not like that. So
we can do this, and we can extend them. Right now, the
more I print this, you will see the seconds. Right now, we have 2 seconds, 4 seconds, 5 seconds. We can do we can do
4 seconds for now. Right now, there's
no animation yet. So if I script for the timeline, you will see that
nothing is happening. But as I said, let's start animating the
stars, for example. How we can do that? Google
on the first frame. Select the symbol that
you want to animate and select the key frames icon, which is over this one. And because this is a symbol, it will give you a bunch of options where
you can animate. I will probably only animate the position Camalis if I move. We have frames over them, and I will maybe hide the scale, the opacity, the control, the field, the stroke. There's an extra stuff
that you can play around. But the more symbols we have, it gets more crowded. So around the second, the two second right there, I can move my marker, and I can just move
this to the right, for example, and you see there's a path that it will follow. And before I move anything else, I'm going to go to
the first frame, which is the position, right? I'm going to tap
on this. I'm going to select that key frame. I'm going to tap again and
I'm going to say, copy this. So I'm going to move my
marker away over here. I'm going to tap again here
and I'm going to paste this. So once we go to the first,
we're going to play this, and we're going to have
the star going back and forward to the
same position it was. So ideally, I want to
do that for the rest of the stars and even the tops
and the bottoms of this. Now after I animated
this very quickly, you can see, there's a slight
movement back and forth. It creates this
weird free effect. Now we can tap on this icon. So once we play our animation, it will loop for us to see
instead of just playing once. You know, and now it's time for us. We're
going to hide this. We're going to hide
the keyframes to animate the ball
going left and right. So this is where the
magic happens after we did the whole
hierarchy Shenanigans. So the handle, if I zoom out us, or just the handle a little bit better, the whole animation. We go on the handle layer, we press the key frames. Again, it will show us
a bunch of options. This time is less because
it's not a symbol. So around the second frame, maybe around here around
the 50th frame, let's say, I want the ball uh, yeah, I want the ball to
maybe not here, maybe around here on
the test something. I want to swing the ball to go to the right corner,
maybe around here. And around this frame, I want the ball to move to
the other corner, right? And on the final frame, I want the ball to go back to the same position so we can create this looping animation. So on the rotation, tap that. The first key frame that
we have for the ball, which is in this ideal
position, copy that frame. Right? This frame over here. And then go here your marker, tap again on this place and paste it. Now I'm
going to hide this. I'm going to go back
to the beginning by pressing this button, and I'm going to
come over here and play this with you and see
what type of thing we have. So it's not that fast,
it's not that slow, but we're not done yet
because we can add some easy in and easy
out for our animations. How we can do that, make
sure our keyframes are open. So we select the
keyframe that we want to add the easy in and easy out. And there's this graph
editor over here, the S curve, if you will. And now our animation
by default is linear, and it's doing this
can be very slow. There are also other
ways there's a cubic, and you can see the motion
if we choose this one, or you can choose
the easy out one. So you can play around.
There's the bouncing one. This one, unless we're making something that
falls and bounces. This one's there's
this elastic one. Maybe picture of this ones in. Yeah, this one's a
little bit better. It does have this weird motion, like a wavy motion. So far, I say it's good to go. F.
9. Animating - Frame By Frame : Okay, we're almost done before
we export our masterpiece. I do want to show you
another way, not one, but another way how you can make animations in tune squid, and that's frame animation. Now, we're going to
these are very simple. We have our ball, our motion
training on the ball, and I will enjoy the effect. I hope yours is working out to be even better
than this one. Now, pull now, I'm going
to hit pause on this and I'm going to open my cameline and I did delete the sketch
layer that was here. We do have background
based, mouse and handle, but I would like to
create a new layer on which I can make little
favorite frame animation. So poll the plus button, make a new layer, and we go to tap ones. Rename this to text. We will animate some text, but not from the icon of the text because that's
a little bit different. We do want to make it had drawn. So we're going to
write it ourselves. So to again. Now, I
don't really need that. The whole animation, so
we can hide that for a little bit from the
icons of each layer. And on this layer, we can go back to
the first frame, and we can say at a drawing. And because it's too
squished right there, we can extend a little bit, so it will be visible for one, two, five frames, I
guess, five frames. This drawing will be visible. Right? We can always
extend that for more. But for now, that's okay. So we can bring this down
and we can write something. I'm going to change
this to black, and I'm going to first
catch up something. I was thinking to write 2025. You can write something
along the lines of Merry Christmas, for example. So yeah, it's up to you
what you want to write on top of the car or if you do just swallow leave
it without a text. That's fine. I am going
to crave this pasoush. Let's see what we have. I hope that's visible. Maybe a little bigger, you know. And yeah, I think
I'm going to go for 2025 because we're entering 2025 in a few days
each, kind of. So I'm going to use my amazing sketching
skills to do that. That's too big, so I
can use the transform to make it a little bit smaller so I can make more
space for the rest. Well, now we need to
create another layer. Ideally, I will be creating
that layer from over here. I'm going to make a new layer. Then I'm going to rename this to I'm going to call
this text, right? Type away. This one we can
also rename to be sketch. And I would like to
lock this for now. We're going to delete it later. But before I lock it, I forgot. Before I lock this layer, press on the properties
and load the opacity. A little bit past there. Then we hide the properties, then we are going to lock this, and then we're going to move
to the text there on top. I'm going to hide this again. So now we're going
to ink the drawing. Is something you brush
you want to choose or there's inking brushes. I did create this one, which I call the round Brush. I'm going to press A person These are my settings for
that particular brush. They're smoothing
the cten percent. So the way you can do
this a similar brush, plus button new brush, and then you go on the brush, and then you can use the
settings the way you want. But I did create this one. So I'm going to use this brush. It's the inking, and I
did create this one. And again, these
are the options. So 10% of the spacing, and the smoothing is 38, and these two are checked. And the vector moon is fine, but that's not activated. So anyway, these are my settings if you want to use
the same brush or use the brush you want to
use zoom here a little bit. I'm going to go top
on each number. I go to ink them very
quickly, you know. And now I can go back
here to the joylist. I can unblock this layer and
I can delete the scheduler. So we have only one
layer with joys. And then we can open
our timeline again, and then we can move
our head marker, and on the end of this. And then we can say a drawing. Now, don't freak out. Nothing happened. Now, the
drawing is still there. We just need to review our onion skin so we can
see the previous drawing. If I move my marker, there is. If I keep moving my
marker to the next frame, it's an empty drawing. There's nothing there, but also it's visible for only one frame, if you notice here, you know. So I would like to extend that
as well. Maybe like this. So first one, five, then maybe 12, yeah. So now I can go again. I can trace this time
the previous drawing, and that's what I'm
going to do right now. Okay, so now we have two frames, one here, one here, and you can if I turn
off the onion skin, and I can play, and then always disappears because here
we have no frames. So we can duplicate the frames, double tap and slide, then tap on them, and
then cook coffee. That's it, then move
your head of the wker around final rock
here, tap, and paste. Now, there's a little
bit of space there. Let's just tap here, paste, tap here,
paste, almost done. So now if my going
back to the first one, we are going to reclay
our amazing animation. And as you can
see, it gets play. It's only two frames, and they are repeating
one after another. Now, obviously, you probably
want to add some color. So you can do that.
No problem there.
10. Frame By Frame - Coloring: We can do that is go open
your draw layers and you can not double
tap on the layer, and you can duplicate
that layer. And you can tap again and set this layer to be
a fill reference. So now we have two
layers with layer one. Again, you can rename them, but I'm going to use
the second layer. I'm going to close this. So I'm going to go to the
first frame. Go to close this. I'm going to go to the field t and right now it's in black. In this case, I'm not quite
sure which color to pick, so I'm going to reveal
the bow and everything, so I can choose maybe a bit
of cour. W to see this one. Yeah, this one is not that bad. So this one is that. Maybe something like this. Maybe something like this, then the final cour Yeah,
somewhere like this. And then we can switch them. So now we need to go to the
next frame and just start adding here and
then here, right. Okay, so now we have
something like this. Let's see what we have with
the texts and everything. It does bring more movement. You don't have to do
the sign text winging, which is, again, frame by frame. The idea of the frame by
frame is you draw one frame, and then you draw another frame. And when you play them together, you had a movement, and
this is our movement. I'm not quite sure if I like
the colors, but anyway, we are done with this, now we are going to explore
our Christmas card.
11. Finish!: I don't know about
you, but I'm not quite happy with the cx. I might not use the clicks. So when I play everything
together, I will get this. So let's say I'm happy
with this animation. Now I want to export
that and to share with my friends and family or
with the Internet or you. So how we can do that, we
can stop this right now. The way you export
your animation is by going to actions
and then export. Then you can open this
little window here. And you have different
files you can export, you can export
this into a video. You can this into a gift image, which ideally that's
what you want to use. And this is what
we're going to use in order for us to share our project into the project
files on this class, or you can still export
this into a gift format, so you can share this online with your friends and family. The important thing you need to note is boy you have
to give it a name. We already did that.
So tap away there. The range is all
of the scenes like just the current clip
the kernel frame, and here it says, which one will be
the first frame and which one will
be the last one. Right now, our frames are
95, I think in total. If we go here, we
can play around, like we see the
different frames and the number of the frame
and total the 96. The resolution we again,
I said at the beginning, but you cannot change the
resolution to be bigger, but you can make it smaller. So maybe 2000 flixel
is too much for this, maybe we can make it
maybe you can make it something, something,
delete everything. I will make this 1080 by ten, 80 and by default because
success keeps the aspect ratio, which I didn't know
how to click on, I change the other
number automatically. Again, this is a square.
That's how we create it. Very simple standard,
the phase per second, 24, active, effective FPS 25. And now here it's important
to I think by default is on the 50 but the quality
will not be the best. So do crank this up to 100
and I keep pressing stuff. And these are the seconds
that we're going to use. Once you're happy with them, you can press Export and you can choose where
to save your file. Now, I might save
this today files, which I have um. I did try some other files, and I keep calling them Christmas
Bowl or Christmas card. Either way, I'm
happy with this one, so I'm going to click
Save, and it's done. So now we have our
Christmas card. Hay. Well done. I'm glad you made it so far. Don't forget to share
this amazing project. Maybe you made more than
one. It's very simple. And if anything is very simple, there's another project that you can download and play around, which is the Santa project. Again, thank you so much for taking this class. I
hope it was helpful. To Scot is a very powerful
animation software, and there's way more you can do, not just the simple stuff
that I just show you, but it's up to you if you
want to explore more. And, yeah, that's
pretty much it. Happy Christmas.
Merry Christmas. Happy New Year. I'm
assuming you're watching or maybe you're not
watching this, I don't know. But in any case, um, see
you in the next one, and don't forget to share
your projects and obviously, share them with your
friends and family. Show them what you
learned today. I'm sure they will be impressed. Goodbye for now and take care.
12. Bonus Lesson Simple Frame By Frame Animation: M So we have here to squid. From the closed button, we can make a new file. We can name this obviously with the amazing name of
ball jumping, maybe. Or maybe I don't know, I figure out that we can
make a story for the ball. The ball will be trying to jump, but because the ball ate too
many hot dogs, it fell down. That happens to
all of us, right? So anyway, this is my seconds
that I'm going to use 1080. 1920 by 1080 will do for me. And it will be
traditional the workflow. Just for the porttorio I'm
going to create we're going to have our default setting
set up a tune squid. So the way we're going to
do the animation roughly, we are going to
bring our timeline, and on our timeline, we're going to create layers
on which we will create extra drawings layers
here because these lays the drawing less
and the layers in the tabline are
completely different. So let's just start off. By default, you're going to have one layer on your timeline, and you can collapse
the timeline if you don't have the
space here control. So I'm going to cap here. I'm going to rename
this. I'm going to call this ground
because we're going to have a reference point for our ground top
somewhere else, and I'm going to grab the brush. I'm going to be using
six big pencil brush. But if you want to
use something else, feel free, whatever you
feel comfortable with. I'm going to hide
this a little bit, and I'm going to make my
ground, and this is the line. I'm going to hold this
and automatically. I think this is
very common thing for most drawing
apps on the iPad, where if you hold something, it will make itself into a
line, and this is my ground. So I'm going to expand
this ground layer by holding holding by holding this. I'm going to pinch with my two fingers and
I'm going to make this maybe 2 seconds at best. You know, it could
be long enough if I hold this again, you
will see the seconds. If I pinch again, I'm going to see this. Anyway, this is
the ground layer. We're not going to
touch that. So tap again and lock
your ground layer. Fantastic. So now from this little plus button in
the corner on the left, we're going to make a new layer and this layer
will be tap again. It will be bol. Dory, we're gonna add some carat to the bow. It's not gonna be just the
boat. It's be your bow. This does not go well now.
Stop myself right here. It's going to be a ball cat. So we have a draw
layer and a bow layer. First instance, we
want to draw a ball. We can hide our timeline so we can have a bit more
space, I guess. And from the layers I can here, you see that all the draw
layers, we have nothing, so we can press the plus button and say, Hey, make a layer. Now, again, if I bring
back the timeline, you'll notice that this is a different type of layer
than the one that we already created
with the name bowl in our timeline. So
keep this in mind. There are different
types of layers. So now we have where to draw. I hide this and
I'm going to make my bowl that's my
bowl, one of them. That's my main character. So if I bring back the timeline, if I make this
drawing keyframes, I can refer them
to keyframes here. If I have this keyframe, if I zoom in a little bit, you will see that this
keyframe right now is visible for one, two, three, three
frames in total, we can expand this to four. And over here, I do want to
duplicate this same keyframe, and this one and this one, this will be my first keyframe. This one will be
my last keyframe because I want to create a loop. Once the ball jumps
and then lands, I want to have the
exact same pose. That's why I'm doing it. Anyway, from here, we can just make a new showing over here, and we can move this. If we hold it on the
key frame that we want, we can move them
somewhere there. Let's just expand this, hold it, tap hold, and move it. 2 hours later, I know tap hold
and move it a little bit. I am not good at moving
around in this amazing app. That's for the iPad for me. So I'm going to have
a new keyframe, which is completely blank. The previous one is this one, but from here, we can
start our animation. I'm going to hide my timeline, and I can press on the
onion skin on the onion. And we're going to see
our previous drawing. So from here, we go to
make our very simple, very simple animation
with this ball. I'm not trying to be
perfect right now for the purpose of
this video to be fast. That's a squish ball.
Someone's asking. And on the next one,
I'm going to zoom in a little bit to see how many
frames I'm animating on one. So I'm going to be
animating on four, so next one will be over here. So on four frames, one join will be visible for four frames. If you do know that. So on here, I want to make
the ball jump in the air. So as you can see
with the colors, the previous one is the red one. So all the balls in the air I'm going to extend this
again to be one. I mean, this one
might be lesser, maybe for free frames. And now here, I can either draw and automatically
make a keyframe, or I can just press the pull button from
there, but not really. So right now, we can just copy the first keyframe to
roughly have the shape. As you can tell, amazing shape. We can use the arrow
to what did I do? Amazing drawing skills. I'm nervous. I apologize to it. I'm going to go up around here, bots up in the air. I'm going to bring back
the timeline around here. So we can go through
the timeline and see how this is going. Doesn't look very precise, but, hey, it looks amazing. Having the movement.
That we want. So the ball is going
down, and around here, we're going to make
a new drawing, and we're going to squash the ball really,
really, really bad. Like hits the ground. And maybe around here. And then here, in a drawing, and then we're going
to go up a little bit. Right? To friends maybe. And then another drone here, like the last one, maybe. So disable the onion skin enable looking clue. And
we're gonna play this. Well, it's fly it,
and then it's not. Now, there's some
sort of problem here because I
didn't extend this. Let's just play this again. And right now this is very
boring but as I said, we can add some features
to this circle thing. I'm not going to clean
this up yet, but you can. But before we do that before we make into a circle circle, we can add some ice. How we can add the ice to this. Ideally, if you want to add new animations to your
existing animation, you want to make a new
layer from the timeline. So we're going to go
on the plus button again and we're going
to make a new layer, double, not double, tap on it. And we're going to call
this phase, maybe. And tap somewhere else, and we're going to go
on the first frame. And we're going to
add a drawing and this drawing will be visible
for the first frame. We can zoom in a
little bit, right. And we can add. And he is not impressed
with his life, but he will be when
he tries to fly. And also this drawing, I want to I will copy this
and paste it at the end. But for now, we're going to go for the rest of the drawings, so unable our onion skin, so we can see that. We can see roughly where the
eyes are and go back again, extend this next key
frame when we here. And then we're going
to make the eyes open or in the similar
shape as the ball is. And we're going to go through
the whole frames again. And on the last one, I'm going to go to the
first one here, tap, copy, and then move
your marker around here, tap again, and paste. And I'm going to turn this off, and then we're going to
go back to the first one, and we're going to play,
and this is what we have. Now, if you want to clean up
your animation, obviously, you can do that because clearly, this is not a proper
animation as you can sell. Add some characteristic to your characters with these eyes popping out and falling behind. Now, when we do the cleanup, the way we going to
do the cleanup is go around the key
perce we created. And usually how we can do that, we can lower the pasty, right? We can lower the paste and
once the passing is lower, we can create a new layer on our timeline, and on that layer, we can clean up our animation, which I'm going to show you
here in the speed thing. And yes, that's how you do it. Anyway, this is how we make very simple animation in framewfra animation
in clean Squit. Hopefully that was helpful. If you have any questions, do leave them in the
crops down below. I will be happy to answer them. If you have any troubles,
please do share. And that's it. I'm going to
see that one by from now.
 Munkaa, Digital Artist