Transcripts
1. Intro: Hello there. We ever wondered if you can make 2D Animation With Free Programs. Yes. Then this class is for you. We're going to learn to use the free program
called Krita. Yes. Krita is the drawing program. And we can make Simple
frame-by-frame animations. If you're a beginner
or intermediate, then you are and
the right place. All you need to do
is to hit Twitter at their website content that
and a simple graphic tablet. What you need to know
about Krita is that just like Photoshop,
but it's free. The class is long. Form hours. Don't be afraid to skip. The Tweening is if you think you need for our final project, you need to create it, animate your own knows
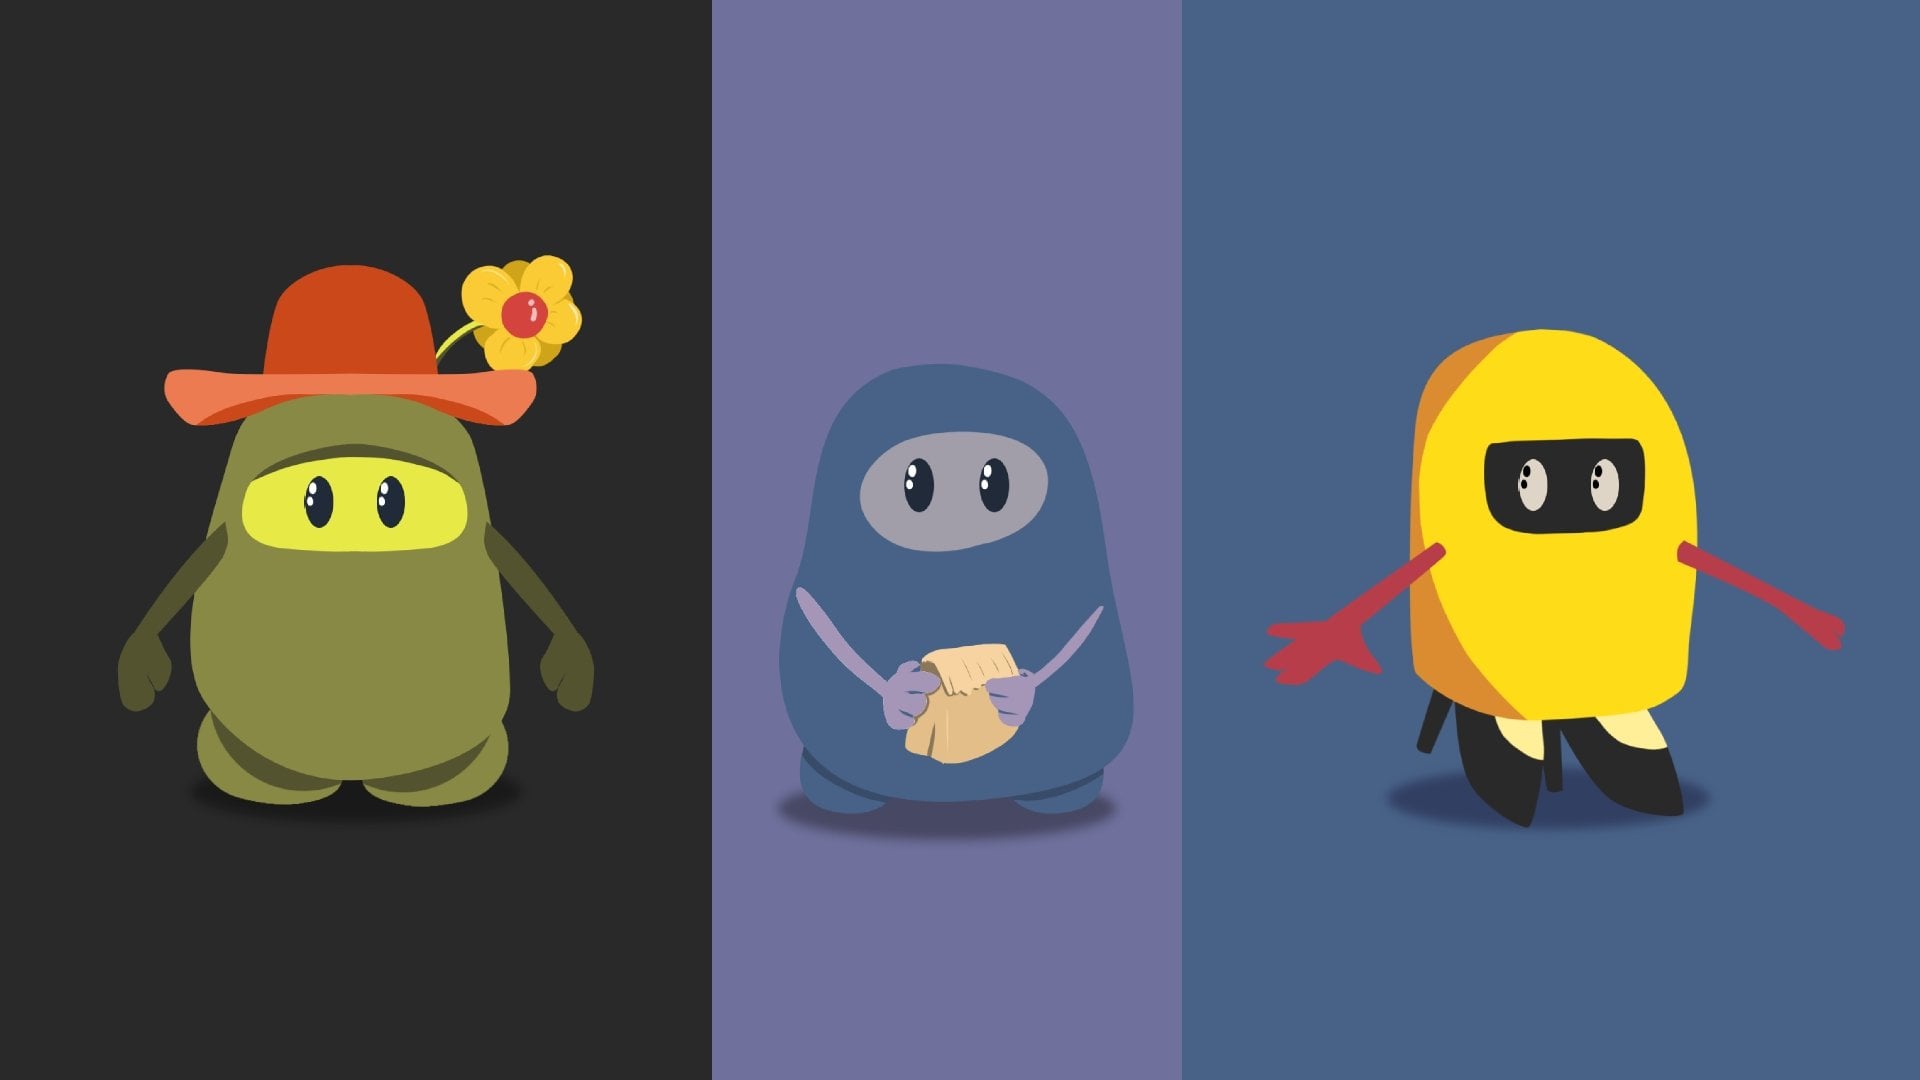
Character on the skateboard. We don't like Ghost skateboard. Then try to recreate some the other characters
shown in the class. There's plenty of
choice in clothing is Simple Background For our handling metal
house in the room. Don't be shy to share your
animations in the rest of us. Thank you so much
for watching this. I hope you find this
process can be used, smoke all the files
from the class you can download for free from the
project section of the class. I cannot wait to see
what you can make. See in the class
2. Lesson 1 - Move Around The Canvas: Hello, there is some
chance now this is create a coincident and
we're gonna work with this default
setup of Krita retina. I'm going to use five. I know there's numerous
hand over here, but I'm going to squeeze five. But it's probably
watching this class, I'm assuming there will be
a higher version pizza. Use that. Don't use an older version
of tweets and electrodes for under that
incidence is five. So make sure you get to five. And I showed you in
the previous video. So we won't we start anything, we need to hit Canvas something control
on how to get that. Well, yes, they talk from
Scott area over here. I'm going to create a new file. And it will pop up this middle window for
us, Let's say Docker. I'm going to use as a measurement because I
mainly do create stuff, animations and banners
that I usually use. The Internet space, rather dense than
the amount of print. If you wanted to print and you want to get a better
measurements, you can always change those premium inches
or centimeters, which means moving US. Right now we are going to create something for the inside. I'm going to post. I'm going to use
the full version for the H D size,
which is 192080. The resolution will be 70 to the wrist and you
don't have to touch. Ideally, you can
change the canvas, inner landscape or portrait. I'm going to hit Create now. We have a Canvas. Before we scrapped, doing
anything to that Canvas. I won't show you how
you can move around your cameras because
I think it's helpful. The twos here
dialogue people like to jump on and explain to every single
through what means, what it does and
why is it there? We're not going to do this. We need to know helps
move around Canvas. So I want to move
around the Canvas. I'm going to use only
my mouse for this. I do have a tablet, but
later on in the class I will show you when we're
going to use a tablet. If you don't have a
tablet and not worry, you can still use quit. Just wait your mouth
because there are plenty of tools that will allow
you can do that. But first, let's see how
it can move around here. And how would you move
around with cameras is by using the middle button mouse, if you hold that little button, shows a handling, it
can move like this. You can still use the middle
bottom of the mouse and scroller by scrolling
and scrolling out. That way, you can
zoom in and zoom out. It's very nice and
you can still move around like this. That's nice. Yeah, there you want
to know is once you start working
on the cameras, how you can rotate the canvas, prints something we'll
do, like to do that, get the visual angles, especially if you're using a tablet or to
rotate on the left. And six to help say the right. And if we wanted to
send sense this canvas, you can hit five center. Now, this is really
helpful to know, like the arm I paint
this information is going to be very
useful for him. The other thing
that I want to take your rotation is
settlement cell. This is the default
setting of pizza. We have a bunch of brushes and by default creates a desk
often with the brush. Yes, this is the free hand brush to all the shortcut for that is because you can immediately
start drawing your Canvas. Again, I'm using
my mouse for this, but it's the idea of,
first of all, why? First new drawing on your background layer,
which is not ideal. Second row. Once you
draw something in, you realize that it's a mistake, you can easily hit. Control. Z. That is not ideal to. Neutral. Straightaway is you can pick your time here and
take any bushing liking, you lose more time to do so is inverted straps
and free for me, I'm going to remove
them bushes from this button over here. That way. My layers that you see
here, the phone molar. Right now, we have more space. The moment I Scott
creating more or less.
3. Lesson 2 - Working With The Layers: How to create a new layer because this and
said it's not a, you control the bathroom. If I hit a new layer from here, I can create a new layer. Now if I drawn this new layer, just like that, now
looks like an alien. I'll smile that if I go
back to my Transform. Now as you see there, a square around the drawing itself is not
moving the whole cameras, which is very nice. If I draw something
else over here. Another alien. By Scott moving on, they are on the
same layer so I can move them individually because
they almost same layer. I'm going to hit Control Z
because we don't need that. Now we have wall there. First thing, after we know how
to move around the Canvas, after we know now to, to swallow them in the burst to the other ones that moved
to all the transform tool. Now let us see how
the layers work. Then they will very simple. I'm going to hit the
last mate for myself. Now have five lists. We're not going to call it the background layer
because that layer, if I hide it, it is a land
that usually cause by default. It's filled with white column and that's not
important right now. It has a fill color. And it's really hard when
you start drawing on it to pick only the Jones, the drawing you want. Let's just focus. Let us work just
like a sandwich or hamburger if you want to
imagine what I mean by that. The Box-Muller, let's
say the paint layer one will be my bottom layer. The paint layer number
five will be my top layer. The top layer is
the visible layer. The bottom layer,
the last layer. Not this one, but this will
be least visible layer. The last layer will
be the background. Let's try to draw something. I'm going to go
back to my brush. And I can increase the size
of the brush from here. Now some bigger stores. From this wheel, you see here, you can choose any color. Only choose maybe this score. We're going to try
to make a sandwich. Again, I'm using my
amazing mouse skills. This is the bum. That's one will have some, some lessons may
be helping, yes. Now let's layer. Let me maybe if you
are a vegetarian, I apologize, but I'm gonna
have some meaty burger. Then maybe we can consume
tomato, tomato, tomato, shame. I will want to use
the same shortcut. You don't have to remember it, but once you start
drawing inside, you would like to know it. That's the Control key. If you hold Control key, you can pick any
color on your Canvas. I want this color right there. Hit this one, is
the control key. I'm going to come here and
draw in my my heavier. I know you don't see it. Let me just put that. No. Again. Yeah, good. Yeah. Perfect. I think this
represents some very well how the layers here work. The bottom layers, you see my move tool shown who
is behind everything. You cannot see it because it's behind all of these
other layers. It's on the bottom. Now let's walk. Again. It's on top of this layer, but it's behind all
of these layers here. If I do my lectures, I guess you will see that. If I move up, you don't see it. But if my movement now you'll
see that it's on top of my base over here, my bump. The meat. I'm assuming he said,
I will go pork. Looks like clapping for this one is somewhere
in the middle. It's on top of these two. But it's on the bottom is behind this layer so
it can be hide them. Then we have male
tomorrow cleaners on top. I will need smear layers, but it's behind this top
breadth cap layer, LLC. The top one is on top of
everything that is seen here as the Finnish
hamburger piece. Breadth slice. Yes. This is how our layers,
unionization layers works. We can always name orders
that I always say that all my small YouTube channel
name unless we can coat. And if you double-click on the layer name that
we call this vase, they call this Lexis. And yes, that's how you, once you're done naming, naming the layer, you can, once done with that, you can click Enter so you
can basically saved the name. This is coma, and this is top. That way you will have better understanding
which layer is which, what do you have on that layer? Because sometimes It's
not just for animation, but we end up using
layers and subtract. If you don't know the name. And we don't know
what's on that layer is very confusing and very frustrating process
to figure that out. We tested thing,
drew a hamburger technically saying, but I mean, this was just for the
explanation and I'm going to hit the Shift and select
all these and I'm going to send
them to the bed. By still we have a bathroom lamp still I
can move around my Canvas. I know only know the burst
through and move to. But since I use my
mouse is better. It's better to know more than these two tools because notice, it's not very handy when the
mouse and also Maxi black. Or you can hit this Muslim heat. So he said to the main
colors that we have. I haven't tried the
other groceries, but really if you're
going to use your mouse, so in the other versions, they're not very ideal. If I use this one, does have a different texture. You can play around with that. Remember, do not drill or
animate on your background. Yeah, because it's not, it's not, it's not
useful to do that. Picking, showing z and
always remember to create any live on
your plus both. Now let's try two more. The other twos over here. That will help us
to work better. We allow mouse because again, the version is not ideal
co-worker who came out. And I'm assuming you
don't lock having tablet. Before I jump into that stuff. Maybe he's meant to
show you that there are other ways you can
still join here.
4. Lesson 3 - Selection Tool And The Island: Before we start drawing, as you saw there, I did a chance to
drill this island. Sketch. You'll have to do this, I will touch this or you can
use any other picture well, that matter, that you want to try to color with your mouse. Yes. Use the mouse here again, I'm going to show you some
other tools besides the burst to that for the people
who don't have tablets. And even in people
who have tablets, I do add up Musial Alpha, the other tools that they're not necessary for for the brush, for the public uses. So you saw me
sketching this out. A little island here with this. So this is our sketch. You will find this in the
class, extra documents. Psi, you can get it. But before you
Trout's full alone, maybe you won't see how is that. This will go. As you know, I do drill, drill this
on a separate layer. So once I grab my Move tool, I can move it whenever I like. Fitness on silent and see if you want to move
your mouse on the side. There's this rotation. I can come up and you can, you can also move
your anchor point. Moving here. And I can move from this point. Now, I will hit de-select why? De-select my movements.
To remember it. On this layer, we can
double-click this one and we can say sketch. We will know. The other way that you can know. You will know eventually
is clue that you can move the capacity of your layers doesn't matter how
many layers you have. The moment you said
that any layer, you can lower the opacity. We can lower the opacity
here to this color again. Now we can move this leg, can say color on this layer. You can call it any other way. And we can grab this
layer and we can rearrange the order of layers. I want the color, let
me behind my sketch. Sketch middle, top, and bottom. So whatever I call it, I can see the sketch constantly. So now we can scroll the
other truths that we have. I'm going to start
with a selection. We can make different
selections. So this is really
hard to work with, but it is very handy, especially if we
don't have a tablet. This, if I click on it, if I scarf making a shape, so it will be much easier. Let's say I want to make
this shape over here. If I zoom in, if I press, there'll be a button
on whom we are at point, sorry, point. And then this handle coming out, this line, coming
out on this point. If I click on it,
again, this like that. Let's try to make this
shape on this island. Okay. I'm going to click here. Maybe here. I'm going to click again, but this time I'm not
gonna release like click my inbox and I'm going to
drag this on the right. And you see that there is this weird curve
happening over here. And it continues. Now. I'm going to continue over here. We try to again press and hold and pull
to have this handle. Maybe this is too long. I'm going to hit the right
button, disliked this, but at this point Allen
made maybe around here. Here. It is very tricky too. So if you don't get the hang of it in the
beginning, that's fine. It is one of the hottest
years, by the way. Once I get to the same
point and click it, we'll make this selection. So what this means is I cannot draw outside
this selection. I can only draw
inside the selection. I'm going back to my brush. Now in this Cinderella brushes, let us go back to the basic one, and I'm going to go back to me. You can pick the color flat. I have to worry about how to use my
brush, how they use. It only covers the
selection itself. Now as you notice here, that now we have another layer, which is the selection mask. Once we are done
with the coloring, we don't even selection anymore. We want to call it
the rest of it. How could these likeness though
there's a couple of ways. One is actually, if you go
to select Manual there, then you can say a critter, these likeness, let it show
I don't need you anymore. You can just click this menu over here or you can
use the shortcut. Then again, don't pressure yourself to learn
all the shortcuts. Hit this. And you notice that the, the extra layer on top is gone and the selection
is also gone. If I hide the sketch
layer from these icons, if I zoom out, they do this Parliament. If I zoom out, we will see what we did. Bring back the sketch and we can make the
other part of this. I'm gonna use the same color. I'm going to use the same two. Now if he find these two
to be very hot to use, there are other theories as well as they did business, alex. It's kind of limiting U shapes. If you're one of those that you don't have a tablet and a pen. You're limited using
only your mouse. Make sure you practice a lot
with the Bezier curve tool. I'm going to hit Control
Shift on a dislike this course there are other tools here and it
can make different shapes. But then again, it's
hard and don't be. Let's realize, just
wanted to show you that you still
use the mouse, but it does take time to
learn the other trues. Now, the tree, the
tree, some salt, sand. We can do this. We can choose different, maybe more warm, brown if you don't want to switch with the
brush every time. There's a shortcut for
this reaction shift, Control Shift and backspace. And it will call this
automatically, this lightness. Now, for the coconuts, we can actually use the
Elliptical selection tool, the Ellipse tool,
just mentioned, calculus and different color. Here. Be very careful. I know maybe, maybe
we can try to delete. Let's you duly first week face. Do leave. This is not your typical leaf. I now I know caption
is very quickly, so I had a, I had some sort of sketch to show you
that you can go. By the way you can
use this technique. Give me know. If you can sketch on paper. You can say to you
sketch on paper and then take a
picture of that paper. Anything important to
create some babbling? Show you later how you
can actually do that. It means square over these two, obviously. This one maybe. So we have something. If I hide the sketch, this drawing, we really
yet, it's very simple. There's no shadows, No nothing. But we've got these weird, very hard shapes only
using our mouse. And that's why you just
want to show you that it is still achieve more. We need to still use your mouse. Now these selections here, pretty much the
same sort of truth, either find on top over here. You still have this
Bezier curve through. But it's a bit different. And I will show you
in a couple videos.
5. Lesson 4 - Using The Text Tool: So we will jump in. Let's just take a look of the other tools
that we have here. Very quickly. You can do that on
your own, small. But since I'm going
to use only mouse, Let's just try to see what
other terms we can use. I'm going to hit the new layer from here as you already know, I can't stop throwing
immediately, but then again, I'm drawing the mouth and that's not ideal. What we can do is
we can write text. Here. I can try to track, so I can make spiced threats and right now, cut
scholars black. I'm bringing this up here. Maybe we can increase
the size of sets. Can do you heard
something I will plot. It doesn't appear here. If you want to see
how it will look. You can see here,
but you see that there's no change
there. Hit Save. Now as you notice this, this, this window,
this panel here, it doesn't close automatically. The moment you could say
that's completely fine. You can close from here. But then again, if
you want to change, let's say if I have
some nice right, I can choose a font from here. Now this is my folder
on my computer, but I can't choose any other false phone here that you have on your computer. We have Halle in this smoke. Now. Again, it doesn't prove
it here, doesn't save. So when we click Save, now in this fast slick, I made a class from him. This is the biggest wall. This is the biggest
number we can get. Now if you want to
make this text bigger, we need to do this different to rather than changing
number here because the, the highest number,
that principle Kingo. But don't worry, we'll look into maintenance
mirror, right? So once I'm done with choosing
the tower and the fall, and if I want this to be bold, we can Claire, Of
course I can hit Save and then I can hit Close. Now, we have this list square or
rectangular lines around. So ideally, if you pull this, you shouldn't make your barrier, but not exactly okay. If you want to increase your
password, make it smaller, you need to talk to the
principal to remember this. It will give you a
slight different rectangular lines around this. But still, if you
go to the database, if you go to one
of the angles on the corners and if I
hit Shift so I can maintain the proportions
of this, I get this. I can move this in the center. I can keep increasing
this holding Shift. Remember that support. Now if I de-select this
box that we have here, we can just simply
click and clear. And now it's gone. Now we have a bigger class and it's black, white background. Now the moment I
don't follow the, the last year, but now
we have a vector layer. That's the one. This is where our
pets, this obviously. And this layer is
still I'm consumed. We don't have to
bother with that one, but then we have a vector lamp. Usually the pets layers
are less than pizza. And you can still move
this little not like that. Shown and z, if you're
not happy with something, you can still move this. And now I'm going
to hit Enter again. Now, what happens if I want to change on the color wheel test? Well, I can go back to the
pets, which is over here, which is in most programs, the text to the plus
icon is the letter T, So you can't miss this. If we wanted to change
the color here though, I go back to my test
score, not pull. We'll pump it cool. Announced. That was a bad joke. I'm sorry. Go ahead to do I'm
going to click, double-click on our text. And automatically it will pull our window, which is fantastic. Now when I say that from this, you don't know how many I can choose any other
color from here. I don't know what kind of call I want around getting the
call here and here. Maybe a little bit like this. Now I changed my texts. Now obviously it's
not change yet. Now we have to click Save. And it's changed and I'm gonna
hit Close and it's change. This is fantastic. This is great. Now I
can add to your comic, maybe you can make
a comment here, or you can add a new background. You can play around
with this obviously. And now I can make
my pencil a little bit smaller like this. Now, if resizing doesn't
work the way my mind works. Obviously, we need to look
up something called options. Usually is over here
behind this wheel. It says two options. These I'ma, come on. These are my two options. All right, Now I
have the transform from to have some options
here that you can play with. This thing here is clicked. Now I will uncheck
this and I'll try to again resizing this properly. If I don't hold Shift though, we'll have something like this. I don't like that model kit
in this area, I help you. This is my options for the corresponding value we're looking at when I'm open for now because as Notice we have
other tools here, right? So each of these two
that you see here, all of them halves,
half extra options. This is always there. Other effects and
I can add text. I say outline here or shadow. The way you view this new it is E half note
your text there. I can double-click this
and let's just name this holding how they works. Now, if I wanted to add
something extra steps, let's say an outline. I can hit the
bottom on my mouse. I can go to Layer Style. Now I will have
another window that I can add extra effects to this. I cannot, and
that's the shallow. The person when you complete
your how fast critter will give you the changes that
you can ingest over here, the defects cannot the stroke which is the outline of the class and it
takes a little time. It's not completely black doll, I say I want it to be, but how we can make the
outline black is simply, you see your question here. So to find our
business to a 100, it's not completely in black, so I can change
the blending mode, blend mode to normal. Now should be black. That hasn't been bigger because you can hardly see the shadow, which is kind of a bummer. So I can decrease its size
from, let's say eight. It can take to prevent this. But how long do you think? Nothing. Okay. Let me just go click OK.
And once I'm done, obviously, check all
the other stuff. We can either Inner Shadow, come on the area we can. Ultimately, it's hard to
see on a white background, obviously, in a row. You can have Bevel and Emboss. A common. We go, you can play with
these and all of them have extra effects to them. Then you can add and you
can play with in Canaan, just annoy you want to. I can just move this the width, the outline, and the
shallow for now. But this is just extra free
if you want to use this. I'm gonna hide this now. And we can move our
layer that we created.
6. Lesson 5 - Shape Tools: In KML to the other
tools that we have here. Obviously, this is the clear
which if you have a tablet, this will be useful to you. Usually adds automatically
embedding layer for the calligraphy to delete this because
I won't need them. Now, this is the edit shapes. If we had a shape, these to help us, help us to shape that shape. How to make shapes. Before we go to the shade
too that we see here, we can go to this line. It says one says a line. Basically, if I draw a
line, it will make a line. Now, interesting here. And you need to remember if you're going to
use your mouse, you can take advantage
of tweets, works. For example, if I'm
drawing a line here, it will take the color, the first column of C here, which in our case is black,
the foreground color. If I click on the
form of alcohol, let's say you don't have
the on the wheel here. So you can always
access this from here. You can pick another color. Today, I guess violence. Now if I draw again the line, if I hit, hit, if I hold shift, so ideally I should
be able to draw on how far is another line. Again, the car will change, the color will be taken for the first box that you see here. And also, if we zoom in, you will see that this
one is not quite perfect. It has some cracks here. This is happening. Why won't? Because I'm using
a different brush. If I choose the, the basic version control line. Well, you can see the difference now obviously
this one's a bit clear because what's happening is the line hits the
brush settings, so the burst twos on psi, you can take those as well, but it tastes the settings of the size and the brush itself. If I click on this muscle
on this button over here, on this window for me
to check out my brush. And then again, I'm
using my mouse so you won't see much difference. But whatever settings we have here for the particular
version that we're using, those settings will be applied to the two
that we're using. So let us say this new line too. But hey, look, there's the rectangular soon
let me click that. I'm going to make
a rectangular here with the settings of the brush and the column
that we have on emotion. And the size of my
loan is now eight. Something. Always new
lines will be thinner. Now, chances are you
may not hit this. You may not hit the way. And the rectangular tool, Here's an outline and there's no filling inside
because then again, we need to remember
that every tool that HCI here has two new options. So in order to manipulate this, to play around with this, too often you two
options and you need to select the clue
that you won't work with, in this case in the
rectangular tool. And you see here on
the angle and there's the moment curving happening. Let's say I don't
want to have this. Well, you can look
at two options. Make sure you let your tank. In this case, there's a component and then
you can look out for, first of all, the geometry
options is giving you a couple ideas.
I a couple options. You can either fill your shape. You don't have to feel ashamed. We can fill the shape
with the foreground power you see over here. Or you can film with
the background color. And I'll call, in this case, it's the second column
that would see here. Or you can put a pattern inside of your shape,
which is nice. But I have had this no
fill with the outline. The next option that you
see here is going to be the brush or you can
remove the outline. And if I control
whatever I told Mr. Nothing's happening because
I'm not doing anything. So I want to have the brush. And if I want to have
the background color, which is in this case the
black color over here. I can choose this, but I'm gonna have emerged
for her color over here. A rectangular tank healer shape. How to fix the angles, help to fix the corners. Go down. The size. Size now is blown this
in the last slide. So I did, I did, I
drew that and it will change obviously, is the ratio. Now x and y is our corner. You see here, right
now they're set to 20. I believe they're not set
to the default version. So I'm gonna fix
this by pressing 0. So if I draw here
to my head shift, if I won't have a
perfect square shape, for example, I will
get slight break, better, better coherence
compartment these ones. That's nice to know
if you want to use the shapes net
off provided here. Any other cleaning see here, work the exact same way. All them, all them all nice. They have answer options
you can play with and you can get different
effects in different. Next one is the
elliptical ellipse. Ellipse do something similar. Now if I want to fill
with background color, I want to have the
outlines competed. Brush. Hello, another
shape over here. Well, something
like this one way. Because if we're going to use the background color button
will call women this one. If we go through the
outline to be the brush, the brush color is this one. And the size of the brushes. Increase that and we'll
get something like this. Let's say normal to
have an outline. Well, simply put no offline. If I come here and just simply give them simple circle if you wanted to get
a perfect shape, by the way, remember to
hold shift when you're drawing your shapes on your
travel, your profit lines.
7. Lesson 6 - Picking The Right Brush: Exception, throw something
in here we are tablets. Maybe have a tablet you to
follow along or stick around. I guess I'm using
shortcuts and right now on my tablet, on your keyboard, you can use pace, whole space to move around
and everything else. Control Z obviously
to undo stuff. But most of the drawing
we'll be done with my pen. Obviously make sure you
make a new layer from here. I have my, I don't
usually like to draw with full black is maybe
something great shortlist. Anybody fall? We
witness brush over here now because I have
tried to create my own. I don't use that much. But all the emotions
that you see here, all of them are free and I
follow them on Twitter forums. If you look to the
cruciform cutscenes, offers some people in the law is off people who post their work, their general brushes like this. But part of these versions and you will have by default
when you install crisis. So don't worry if
some of the bushes missing soft brush, I'm sorry. As I said in the DNA, I was very tempted
when they were here, I was reading the script
that I can keep them here. Obviously. It's a choice in DNA. But once you open them, I once knew scroll
down and looked at all these brushes z get
integrated to try all of them. Maybe you should try to see which one works
the best for you. Maybe try just one version first to stall and joy
with that brush, right? And see if it fits. So we'll have a
couple of versions. You can charge us, catch the new ones here. And if I press harder
OC zone for chromosome, what you can do is pick maybe
for emotions from here. I'll try to pick a solid brush, which is this one. Try to draw three shapes. Here. I'll try to practice
a little bit. Yeah, let's just do this. Let's just practice
a little bit. You asked him to be
precise with this. By the way, don't worry. Surf terrible like mine. I'm not showing that much, but I'm trying to get
a head hang of it. Witness brush and the lighter I personally like the printer. The stroke looks. And don't forget that
you have two options. Right now you can add
versus smooth thing. Right now myosin LAN, very rarely I used
the other options. We can experiment with those. Yeah, just just there's some
cross hatching to the stand. You can play around
with every brush option over here if you
click on this button. And obviously this is
your brush editor. And you can also close them. Push over here, you
can click this. Usually I go to the
size and here's a graph that even if
you mess up something, that's just messing
this up and let's just do this. I
mean, what is this? You can always click
this button over here and refresh it will bring
this to the default. You'll have to worry about messing up something with your brush settings
looks completely fine. Brush. This time I
want more scratchy, stretchy version that
has a bunch of them. You can just try, try them, try them all. They'll be afraid to try. Now, let me get a
little extra choice. This one with this one. Same family willing to throw a square, triangular, triangle. And I'm trying to hatch, I would say, yes, you
have to be perfect. Okay. You need to use
get out of this and just get the US used to with
the brush and your pen, your scriptural of the
funding round brush. This one that wasn't perfect. Amazing, amazing,
amazing hatching. And the brush I want
to try. This one. Came push me. I liked this one to be honest. New, exact same thing. Maybe with this one, I
can change the brush size to this different pressure. The pressure. The less I, I push, the thicker the lines get. Obviously doing
amazing job here. Need a different fit them. This is definitely
not an interesting. I could lower the size section. I didn't know the size
and the beginning. This looks like at night.
Then what is this? Sunday? By the way, if you press E on your keyboard or I have shortcut on my pen, I can quickly switch to the
eraser, which is over here. Now are some nows off. Yeah, We have some
weird shading ion, but we did try
different brushes. Now I will have, this year, if I go against the brushes to another type of emergencies
will show on this MOOC. Brushes over here. Let's try this one. And I will slightly go on top and you see
what this is knowing, maybe it's too big. So unless you hit control and try some smoky
effect going on, the shadow will have to
do this. Left-right. Another version that is
gonna do the same thing. Too big, too vague, and maybe it's not
a show that would have the thumb effect. This is still a
slight difference. Smudge tool. If we go. This is interesting right? Now in the video, I'm gonna try to
sketch out a bunch of ideas for our
future character. Then we're going
to use to animate. But these mercy heating use even whole your background
Chang's When you do inside your animations. Even if you don't do animations, you can still use
different techniques and that's the idea behind this. So I hope this was helpful
to see you in the next one.
8. Lesson 7 - Ideas And Inking: Hello again. Now, I forgot to record
all this mindlessness. See here, I apologize. But these are my ideas on
the characters that we create and unmake
here in, please. I pick up free outcome these, I tried to figure out how we're going to animate them in the style and the style, but with the method of puppet
animation, which means, let's say if we have
this character here, we don't need to
create frame-by-frame animation with him or her. But we only just move the
limits of this character. That way we can create a
weenie animation inside. Yes, because Training
Innovation known as possible. Please encrypt a five and above. Before that we didn't
have that and we only had a drawing software in which we could have created frame
by frame animation. But now we can actually make some puppet animation,
aka 20 animation. I want to show you
how you can do that. We're going to start
first with that and then we will move to frame
your friend animation. Because family, family
animations curve, I'm consuming simply harder. Let's say if you don't feel very confident in your
drawing skills, you can get easily discouraged
by frame animation, but there's nothing
to worry about here. So what I did manage to record is the inking process of the
character that I put up. I put them here, holder, and now you see them. You see the process when
you try to add something. Despite English,
probably try to do that. It takes awhile. And yes, your best friend
isn't going to be Control Z because you're never gonna get the perfect angle,
the profit line. And it's something that you need to practice
over and over again. So if something, let's say you're inking it in particular
doesn't quite work out. We all have been on this
road and a lot of us are still on this row to get
better and better. Today. Isn't my free chosen once over here you can
give them names. I called his Susie. Hello reason if your name
is Susie and Folgers. She's cool. Okay. I did manage to ink them. Susie, here. I didn't notice right now, on your right here, the layers we have now on
different type of layer. In this case, this is not there, but this is a folder. This folder, if I
click the arrow, books with other layers and another folder
inside the folder, I'm gonna hide this and
reveal some of them. Sketches, let's say if
we move them around, now, all of them are processing. This one is too small. Let's say you have a couple
of layers like this. And you want to put
them into a group because salary increases
when they attract, select multiple layers,
Let's say I hold the control key and
select Move Polaris. If I tried to move them. Well, Kristen
doesn't allow me to move multiple colors like this. A lot for me to move
a couple of stuff, a couple of layers. I need to put them
into a one hoop. Now you can do this
with a shortcut, but you don't have to remember
the shortcut this week. My mouth, right bucks
and on the mouse. And we're going
to look for loop. I can say quit
group, put them in. Or you can see shortcuts,
individual groups here. So equipped group. All the layers will
pop up a group, but also as the layers, you can rename the layers. If you could double
click them all. If you double-click
on the group and kcal is a horrible robots, robots call them murmurs. In Kikwit enter and you have a name of that
group, that folder. Hide this now will have a folder inside in which we are going to have three different
list which I did not give names for those, Meredith. Oh my God. Not be like, Okay. Now if I click on
the group itself, will call this folder or group. If I click my move
to transform from, in this case, can
move them together. I think this is good. Thanks. Because we will try
to walk you through, let's say this little
character here I call this rope called a Susie and
this is her all pile up. We're going to try to ink this boy because in
the group itself, we will have the
different lengths, different parts of the
character, different layers, because that way we can actually animate
everything separately. And we don't have
control frame by frame each of the parts
of the character. So that's the idea that
we're going to go for it. Let's go with the
other characters, which will be frame by frame. But let's just start
with trying to. Often we ink our ideas
as you see here. Now, let's see how we can
make all the parts of them, all of the paths on separate layers and how
we can print some color. Again, I'm going to use just
the mouse for coloring them. We're going to use a lot
of the selection tools and I love the shape tool here, so you don't need a
tablet fullness as well. Let's get incidence.
9. Lesson 8 - Illustrating For Puppet Animation - Robo Character: Again, here we go. Here we go. Let's illustrate. I keep saying pneumonia. Illustrate this character here. You don't have to ink this, but I think if you want
to try different styles, you may want to ink that the catalysts that
escape shell here. But now we just first
try to use a mouse. Illustrate this blue here. Hello. That's why when it's new, I'm going to use
choosing their mouth. As I said. I'm going to say them
free hand selection to, or you can take the
natural selection from this one over here, I'm going to press hold
your left books on. I'm gonna make a loop here. N my selection over here. Now I have this character, but I need to cut
this character. What I want to do is put
some on your selection and then put selection
to a new layer mode. Now the selection
state since November, if you have watched in the
previously, let me island. Selection stays until we
deselect that flexion. So we can do that from select this language and a
shortcut on this over here, control shift on a boom. Now the selection. And now I can hide
the ideas layer. I'm going to have this
whole counselor over here. Now he's layer that
we can choose to put him into has no name. Blank, player number one, pasted, double-click on that. Call this separable. Boy. Let me call this one. You don't have to call anyway. He kind of small here, so I wanted to make
him better than once, center him maybe around here. I'll go to my
church, Rome to you. I'm going to put this
here and I'm gonna hit Shift X prime this more. Now if it's not in
spending properly, again through options,
and this is alright. Since not all this way is on. So now if I move it, move some extra inch, but if we know a whole
shift, then it won't move. And z, I miss this. So make it a little bit bigger than make a small
exome in this lesson. So I hit Enter, zoom
in a little bit. Now when you make
joins, in general, when you make them
smaller, like here, always need the
quantity will be lost because the list that we're using there harass
good listener. I'm vector layers. So it's good to know
if you want to have something big in size and you should make it
bigger in the beginning. And then scaling it
like derivatives, when you make it bigger, it
will lose them equality. But if I make it smaller, it will lose quality. We haven't rubber boy. Now, I won't see some power
sent to this boy, boy. I'll go to lower the opacity of this layer by
pressing on the layer itself can be only applies
to notice that not too much, because if it's too
much, obviously much, can I so even if
mucin yes, it's okay. Now, as I said before, I do prefer some
flowers which are here. And these are the course
I'm going to use. You have to use the same course. Now, my advice for coloring
obviously depends on you. Your color. Notice you have two colors that will compliment each other. Then one neutral color thing, it's hard to work with bright
colors and work with to. Ideally, if I bring that in
my advanced car, ideally, you want to have
contrast colors and you can pit opposite colors. Now, I can put just
for the sample, this methane, this is one of
the course I want to use. The opposite on this
column will be on the opposite side
of the wheel here. And this will allow concept
car while these two, they compliment each other and this one's kind of neutral. You can still use these. Maybe you can try these
colors, for example. You can go with the
ones I have here. It's really up to
you how you want to combine the course
alumina, delete this now. Let's figure out
how, what and why. This year has a
very simple shape. I almost called this
triangular rectangular shape. What we can do, since I
want to see the sketch. Alright, I won't
see the Roman boy. I can't put this on
top here on the ideas. We don't need them though. So I'm gonna create this
drop-down menu here. I'm going to add a layer, that layer, simple layer, simple layer that we're
going to call this body. So on the body, my food group call
this horrible. Boy, called it color maybe. Because we only have more of
that group in that folder, we can start building the
elements of the character. We're going to start
with the body. I will use the mouse for this, as I said before, the body, let's try. Yellow is if you want to put
any color on your canvas, simply control, do not release control until
you see this icon. Click on the color you
want and alphabetically you'll see here on your color wheel that you've
got the column you want, or you can see it here as well. So this is a very simple shape. I can use the Selection Tool, or I can use these tools
pretty much the same rank. Remember that every
two here I just need has two options
here, two options. Selection, selection. And now I can go up my brush. I can call this lilac. Or if I'm smart and
want to save time, I'm going to hit Control
Shift and backspace. And we're going to call
his way way faster. Or I can use a two name filter. And I'll try to call this, except the filter is a
bit picky in this case because the VL2 sees
everything on your canvas. If you want to make sure why it doesn't work the way
you want it to work. Obviously opened the
two options for that. So these are my two
options when they call, they try to mess
around over here. Now the problem why the film
is not ignoring the rest of the layers is
because the field is set the sample of
it to be all less, which means the field to
see only as you see here. We will see this nice little extra on this
layer over here. To prevent from that new, obviously you can leave
this current layer. Since almost current layer that we have body,
There's nothing here. It's at this selection
that we have made. And when we click on this and it moves is called the selection. But show that if you go to use the field trip to
color your selections, which is put on current layer. Sometimes you forget because if we tried to add lines and stuff, you want to go inside the lines, then the filter will
ignore that legs at home. So maybe they'll mess up a lot when the field
to in general, I'm gonna show you how
to cope with the field so in the future as well. Yeah, it's a very
interesting tool that not always work properly, but once you know how to manage the options here, we'll Control, Shift and deselect our
selection high humans and sketch that I
have done now we have this, we have this now. How to make this file, let's say another color. Let's say we've got to make
listen this call here. Well, thank you for asking. We can use we can use
another selection layer, which is the curve selection. And I just called the alerts. Now, it's tricky to which you have seen the
video in the beginning. So I'm gonna hit a point, I'm going to click on a point. I have a point. And this line coming
out from this point. I want to make a little
curve over here. So let's warm, maybe
it will be here. Let's move on here and this
point here, here, here. Now, if I let my brush go back to this car over
here, control track record. You'll see that I'm
calling him a favor. I just wanted to call it
the yellow box on this. Well, there's a little option
here that you may not know is this middle box and
the little bottom here. If I click on this, obviously makes showing
you on the brush tool. Make sure it's pain. It will only cover
not the selection, not just this selection
will cover the hours. Whatever you have
here on your layer. In this case, if I
hide the sketch. I only have this yellow
rectangular fee here. My brush move be
able to cover only on the rectangular passed on
this because it has colon. Now, why I cannot
call him almost because I have a
selection made over here. So once you have a selection, you can only work inside
of this selection. Inside of this selection though, this part on the
yellow triangular, triangular, rectangular
shape, but it's all here. I wouldn't be able to
call on this spot, not outside of the selection. That's a very good
way to help yourself, especially if you only
walk in with the mouse. So I'm gonna hit
control shift and they yeah, we got this. We're currently happening
on the sketch again. This is my body. Now. Obviously there's
some extra path. I in the, I call this a lot. Yeah, I can't be on separate
lib because if I want to move the books on site, yes, they can be on
the same layer as DES. So can lower the size of
the brush to remove this. Because if I tried to
core here, let us, if we tried to
control in general, I cannot show it because there's nothing here on this layer. On this layer, we
have only this. Now, I always made a mess. I will want to make nice. I can use another tool for that. That's the line too. Now we have the
same car as this. Maybe if I'm bringing back
the wheel to the wheel, to the wheel, the color wheel. I can bring this. It'd be a bit darker. And I can come over here. Hit shift to maintain
a straight line. And I will call again
on top of the body, can make another folder. Another morning. Hi the sketch. I can maybe a bit more so I can see what
am I doing really? Going there, almost there. Kids can make these
weird light bulbs, I guess they are against
plus o of the bone itself. I always go back to the body and not on the sketch we
don't want on shoulder. And I can use other tools like
the so-called the ellipse. The ellipse still I can show I can take different
column, which is this one. Go to Options because
I'm not sure what exactly is the function of this. Now, we have filled to
be background color, which is this one. And the aldehydes
will be no outline. I don't want to have that way. I wanted to have a
foreground color, formula. Alcohol was in the first
both Lindsey here. So if I ensure this
again, if I drew, if I make a shape and
the hips shift will have a hook shaped almost and I can make another
one over here. Hide going somehow. Embody. We'll go back to this later. Now I can make another layer
call this wheeled wheel. So we're going to create
this shape over here. I didn't know about to
the rectangular tool. And this time it has no fill. And only the push. Maybe we came in and asked me, what does this Control
C that I want to have? The core has to be
lazy to be a bit more around then what we have
now, how we can do that? I'm hitting the dishwasher. Welcome. Control-c. Go back down here, near around and around. I never collected. So if I put a number, let's say 25, it
will go from both. And now try to draw this. We have this nice shape
that's going on here. Well, I tried to like this. The other thing
that I want, I want to have background color, so I'm going to choose a
background color from here. I can hit this icon and try
to get this color here. Something like this. Not quite the person actually
quite enjoying that. Maybe, maybe, maybe
we can switch knows. It's got to have no fill. This layer, hide the ball. Hide the sketch. You can play around, obviously, can do inside Wilson side. But I just wanted to
make another layer, make the hand of this, we can make this movie. We're going to put
this behind the body. Can call this Hammond. We can build this bottom hand. Emotion, same thing, the
same shape on this one most around 0 and x4 think that was in the color and then the filling
is not the best. I think this, I think this car. And yet again, you
can play with colors. Try to get the
best designer yes. Higher than sketching
and see how this is going, going somehow. This is pace. This hand. I might hold this base actually. Now I can make this
plot over here. Whitney help. The basic curve to
my case has no fill, but it has the brush
mode we can build this. Can't remove the outline, so make a new layer. Behind something like this. This is all signs to be inside the loop point
shifts and behind this now, this a little bit
complicated for you and you don't want to make new
routes to be that complicated. I mean, go ahead, have to meet your calcium is
super-complicated like this. I'm trying to think
about how to, what counts and we want to move. So obviously the
hand will be moving. This here, can be moving. Maybe the eye here
will be moving. So wherever we want
to have to be moving, whichever far, who wants to be moved to make an animation with. And we need to have it
on a different layer. I guess when you learn again, I will appear out didn't
movements. The movements. I'm saying, I don't
know anymore. This is a bit too big,
but I can make it small. This will be if I hide this and this will
be on top of this. I don't know if I want
to help take this or am I going to make this
bottom the hand to move? Mayas what I might
as well just take the base and make them
into one layer button. We have to tell this case all my here that I
might move this shape. The rest of this has to be
on the layers Miller here. And try to make the arm,
the arm committing. Listen to this or this message you. Even more interesting. This arm which we
could call this hand. Let us see how I'm
going to call this hand plaintiffs using the
Bezier curve tool. Yes. Now, turn this around. Maintenance light. Have something like
this and this won't be the hand on the hidden behind the arm may be
the best on the cars. And how we do this. I wanted to make list
to me like a magnet so I can color these. And if I hide this now, go on. Maybe, maybe yellow. I don't want to
be careful not to go outside of this,
so I can just. Click here, preserve
the first lesson. It says here, alpha can trunk to make a different
color like that. Slept preference obviously,
because I'm not doing it. I'll take this car now. Let's see how that goes. Or I can make a
selection so I can have better functional
over this line. And even changing
slight bit slides like this actually shift. When you have
something like that. This is going behind here, then you have the arm and body. So here the wheels. The wheels were missing
out in the eye. The eye will be on top. Let me call this, I guess. You can call this any other way. Actually. We need a base with this, I guess, use the Ellipse. Do I move this here? This is too big though. Let me just decreasing the size. That's okay. I have to use more layers
to construct this. This more layers, more color to remove this now, this smear. Yes. Now obviously, I can
try to cut this. Or I can make some edges again. Go. Something like this. Let us see how I move
this a little bit. Yeah, that's better. Let's just remove this.
We have something like this almost here and I
guess we need to add some, some waves to this, this, this and this will be together
Control E to merge them. As I am base behind. We can only move this bar. And let's say if we
want to animate this, if I have the transform, move this here and I can
animate this like that. The best way to go, but
you get the idea right. How to do the wheels, new layer. One. I'm going to copy this
a couple of times. It's a bit like making
smaller copy of that layer. And you can duplicate the layer. And then chemo around here, we can make these
into one Control. And J. We have seen yellow video. I believe this will
be easier for you. Let me try to position them
like that and hit Shift. If I hide this, ideally, I'm going
to have wheels. I didn't make this and this and these two congruent
cheat in this term. Recall this leaves bony arm, hand, arm, and this is what is this base, base, base hand. Behind everything. Now, I guess we went
to I made this.
10. Lesson 9 - Shading Robo Character: Okay, so we have our character. We have here, given the name, we have the best, I guess I'm cool with volume. This is now going
to move at all, but we never know can move
the wheels and the hand. Whereas the hand and the arm
needs to obviously this, to animate this row like this. Now before me trying to
illustrate this point, when industries in
different parts of it, I also did first try, which will bring up over here, SIP, it's more here. This will be, you can
also use this as well. I will leave both of them and the other characters for free. Obviously, part of the
class, two trucks, I made them, even if you don't want to
illustrate them, right. So you can practice
with them as well. This is the first one I didn't. Cows all let small, but now if I try
to make it bigger, you will see that the
quality is not there yet. Now this one, I hit Control C. This one, if I compare them, you see that here we have, we have some shadows. This one is kind of plot
and naming I have done, but don't worry when
you, when you get this, you have an AFC appropriately. So if you want to make
your characters bit more, less 2D dimensional
and a bit more 3D. You can add shadows to them. How you're going to do that. Before we start animating. That's good idea
to have in mind. Well obviously you have a
human person separate layers. What you can do is
let's say this is the more muddy the body. Baldi. Baldi, you can make a new
layer on top of that Baldi. You could try to select the Boolean new layer and
put those into quick group. Once they're in the group, you can push this button over here, which is the Alpha. So basically, if I grab
just to showcase this, perhaps if I have that, the brush and if I tried
to call her this way, it will act as a mask
layers basically without me present this little button
here to preserve the alphas. This layer acts
exactly the same way when you check the alpha sine. So it will add as a mask
for the layer beneath. The body will have
a mask manage. And this one over here,
I will hit Control Z. You can double-click on
this API, call this mask. His sake of it. We can add some texture to this. Just to make this
less, less boring. Let's just say that. So if you go to your
brush library over here, scroll down, you should have some effect brushes
that you can use. This one was a good brush
size over here, the opacity. And if I click again,
I'm using my mouse. Thanks. I think it's too much, but if I make the
brush size bigger, I can make this be a little bit dirty because he's
a hardworking boy. And what else I can do is on the mask layer and I
can lower the opacity. And it looks like
I can play with the the blending mode
of the layer itself. So if I put an
overlay, you'll see, if I bring out new position, you will see this
effect that's going on. You can play it
again with the mode, the mode multiplier,
which is more, more or less than this. Usually what I like to do
is to put this on the lower one and use my arrow
keys on the keyboard. And I'll go through
the bending modes top and I'll look at my my drawing
and see how they look in. I was to pick the
best one I want. The white one was interesting is in the
initial, isn't the last one. Can go from screen. I think this is more this
is more subtle lightness. For the top, I guess. I can change the
color of white and see if this will
pattern same way. Not maybe we can change
the color of black. We'll see more Schaeffer there. But that's one way
to add some depth to your parts of this Robert. Boy. Never though. If you want to add another
mask to this body, you can again go to the
bulk quick the body. Then, first another
layer to that layer. And then you can again
make this neck be a mask. Remember the top layer that
we acted to be a mass. It could be a mask,
the bottom layer. Still this is a
mask, mask layer. Mask minutes to
mathematics in the body. It doesn't take this
layer to be anything. This can still be a mask, mask to the body as well. Now, if I try to
exclusion brush, brushes, you can do
that on your own force. That's scary. I can. All right, around here, this is, we're using black sprinkle here. Who is Boy? This is the stamp
we not going to put mountains in this lesson is that there are other
type of home purchase. Now we can use indicator also. If you want to experiment with this brush,
will that matter? Stop? Stop. Can go
back to new effects. Add some effects here. Again, we can change the
blending mode screen. I'm just using my mouse. We weren't no, go
through all of them. I usually just put this
on multiply a little bit. So it won't take that much. Now in this group where the
body and all the mask and hit Control E to
merge everything. Once you merge a couple of list, you cannot make any
changes on the layers. Now we have
completely new layer, we all the masks and they did. So now I'm going to, sorry, I'm going to
double-click on this. I'm going to call this body. Now on body looks
like it doesn't. I'll try to do that. The same thing for
the eye because the eyes is also very flat. Now, I can right-click on that layer and then
I'm going to add, No, I'm gonna, I'm gonna go
to Bupa instead of quickly, say, quit clipping group. With the click. Quick clipping group, you
will get a mask layer automatically will be on the top of your eye layer in this case, and it will be
activated to be a mask. It will be called mask layer. So this is another way to get
a mask layer for your rare. Yeah, this is, this is too much. I want to be more
dedicated here. Dedicate, dedicated assignment. No, it's not. I'm just going to
try to make them this weird shadow
effect going on. You can choose any other
brush for that matter. A bit harsh. So I'm going to listen. That's an interesting course. And even inside here I can. Now, if I had had her haha, I had a pen, I would do this. I don't want to use my pen. We can make quick selection
with the curve tool. If I zoom in, you'll
see that we're starting to see the lipid cells. So 1 here, the curving, the way you do the curving. If I didn't mention this, you press a new pool and you get a weird curving
happening here. You don't want to
poke through March, which is the next point is
going to be curved as well. Finishing this, we're going
to go back to the brush. Maybe not the best brush. Don't be afraid to
use salt purchases. Well, make this
estimate very slightly. Push this. Something like this. Again, this weird
going on there. You can play it at the
highlights and everything. But it's getting little
bit isn't getting there. Okay. That's all I'm gonna say. Like the who's who? I think the shading here
was way, way better. But again, you can
play with this. Once you're happy
with the shading that you do here, let me
just hide this one. Once you have moved that either iBooks and then
convert an approach. Whereas it more control. And here, now I can double-click on
this and we'll call this. We know what is this? It's an I. I will spend my attempt
to shade the rest and we're going to come
back here very quickly. This is another way
how you can do that. You can literally use
the gradient tool, which I guess I didn't
introduce here. The way I'm using the
gradient through. I made a mask
nonstop I just saw, and then I push and pull. But if you have, if you
have used the gradient, so you know what the units of this image is showing you here. Great stuff in there. Wow. Yeah, I'm gonna hide
this and this is why I didn't hit slight
grading from both sides. And then I came with
a brush and I use that brush as a herb
or as an eraser. Okay. Let's say this is
our final product. We have a one folder. Can move this boy, if I had the whole folder, of course, I can move
this in the middle here. Now before we start animating, obviously I'm gonna answer. Obviously. We need to have the tools
to do that so far creature, the setup for pizza
is drawing in. We already are drawing
in a way right now. We need to get our
animation to double voice. You can do that completely new. You don't try to move
stuff around that much. Go to Window workspace. The first one says animation. So I guess we could call that perfect bunch of stuff disappeared and
emotion stuff moved away. And now you are probably
not worry, not panicking. Get you here. Yet you character
still there, right? That's, that's great. We have a new window slash
Docker and cryptically called the Windows Dockers
and don't know why million special
call this a darker. So this is an animation
timeline Docker. Next to it. We haven't dimension curves. So before you start
perking outlet, so that's what we need. We need to have
animation timeline. I didn't order to
make animation. The audience skin here
is not very useful. In my opinion. We can keep it here,
the person you are. If you don't have
space on your tablet, Let's say I'm doing
this on screen tablet and you credit seminar small, then you can remove
this very easily. I'm going to keep this
one on your screen, the screen that
you're using it in a small setup instances too
complicated and remove this. But anyway, what we
need to focus on now here is to focus on itself. And last year, We
are very important. I will add a little
bit of ******* here. Two options also
important to be here, not always with the overview. Here is the idea where if you're painting
something like say, to see it from a wind
the smallest size to see if you're getting
your compositions right. If you're painting again, we're not going to paint now. You have more characters
to work with. So I probably move this. I didn't remove the tool
options by mistake. Let's just remove this
assessment, remove everything. If you remove
something by mistake, Lola warring can bring
this back either from the worst president shows you
or a little bit smaller. Like me. I know that if I go to the
settings here in the Windows, windows, see here
they're called bookers. We go to Settings
slash blockers. And then we need
our two options. Ideally, to have
them here somewhere. Where are they? They're there. You can bring back the wheel, the color wheel if you want to. Maybe do. Show well here. We'll show it there, but let me explain
too much space. I'm just going to grab the text. Just grab this hope
left button on your mouse and just couldn't
exclude the two options. I guess he made
this bigger again. We almost set now.
11. Lesson 10 - Ball Animation - Frame By Frame & Tweening Animation: It since we have
everything here. And also junctions
that how the heck, how time works and how to make animations here,
because that's why you hear. If you have skip
everything else. So first, find you in the right place if you want
to see how to animate. Especially if you
won't see how from May 20 animation
inside creates up. Before we get to
the transformation, we need to understand
how actually an animation works here. Hi, this character here. I get a new count. You count no new layer, right? Click Test. Going to type test. Now, let's just figure out how exactly this will help
us to make a new layer. This is just for the example. I'm using my mouse again here. This one amazing drawing there. On each of these layers. Is he here? Only the
list, not the groups, but this matter how many
lists you go to Create. Usually this little button here, only to these layers
without groups, again, only if layers
and you can see here, you can make animations
of those layers. Now how to make animation? Well, usually animation,
making my favorite nation. Well, this means is
you draw pictures, usual characters,
you grow anything. You play those drawings
together and you can't. The movement that you want. How to get the movement though, is to create keyframes. Or perhaps in general, that's where we need
the animation timeline. Here on the two Nice Last see here they have
pretty much in the same list as you see here. They just appear
on your timeline. In this case, we have this
test layer which will appear on our test
on this Teslas. So far we have, well, first of all, who are here, we have nothing.
You're always circle. Circle, shut up. Now if I hover here and we
can see a circle, but on this timeline,
nothing quite happens. If I can track here, we can expand and we
can see some numbers. And we're going to see
a little boxes here. These boxes, these
are our little, It's technically speaking. If I try to drag around,
nothing really happens. There is no one mentioned claim, which is we haven't
created any keyframes on our test layer in order
to create keyframes. And we print this little
button over here. And it will say add
a black key frame, clicked lists and stuff, but I cannot stop. Don't know. Yes, the amazing drone is gone. But now we can actually
start making our animation. This here is a blank keyframe. And on this blank
keyframe now I can draw similar amazing ball. And let's rename
this bolt stays. Because in order to, if I drag this again, the other frames
that we have here, the bolt symbol, both stays. It doesn't move. So in order to move the
bone, look, let's frame. And I can grab my transform
tool and I can go over here. Now if I remove my
mock-up previous, you'll see that this
square now is blue. That means we have a hat
add a new key frame. In this case, we just change the position of this bowling. Yes. Now if I play this from
this Play button, nothing, nothing fancy here it
should happens too fast, which is not the same
thing that we want. I'm going to stop this
and then I'll let you some basic stuff here. If we click on this mountain, see the start of our animation and the end of
our animation by default, the animation, the staff
made from frame 0, which is this frame over here. By default, the end of a 100, which is frame 100. And also the numbers
of the frames. It is Z over here is right here. If I move here, this
frame will be nine. If I move here, this
term will be 12. Now we will need cover old a 100 frames and
we'll need to make on each of these little
boxes to make frames on top. The other thing is the timing, the spacing here is too fast. Let's say I want to grab this
and move this to frame 24. Now, come again here and
click the play button. You'll see that there's
a little bit of waiting. What's happening here is
the timing is change, the spacing, social change. Christian explain for
all these frames. These squares that you see
here, by all these frames, they are in the same
frame as this one. So up until this random here, this is the same
drawing has displayed wall to break the child
won't show another term. We need to add a new key frame. This case we just
move the bowl. Again. This is a ball to another
space, different location. Now, this frame completely changes from this
frame over here. Now, from 2400 frame will have this sole frame playing up because we don't have
any other frames here. They take the previous frame, which is this one on this RAM. This is when the old
The elephant is. They take the Graeme
that we have here. In this case. We have this little frame. I hope I have explained
in this correctly. Now. Helping with frameworks, we'll
get into this more detail. But how to make three
animation this here, as you see, it's not, it's not smooth at all. How to make this? Is there like a clicker I
buckling animation here. It's not there. I mentioned intrinsic
worth, different. It's not that confusing
if you ask me, but you need to go for
some steps before you can actually make this
smooth transition to, It's one to place, to place a, good place B. In order to do that. I'm going to delete this button
here or remove keyframe. So right now we have
only one key frame squared for the whole animation. And also from this button, we can change this to me
play to consume 60th frame, let's say because we don't need our image to be that long. And you see how
that changes here. It is a bit lighter space
over here right now. Alright, now, frame rate,
usually straightforward. I mean, you can change the
frame rate, but 24 standards. And if you want to
make less drawings, you can change the frame
rate to 12 left same, but for now plentiful
will be fine with us. How to make mention. We have already
key-frame on our layer. Now, what we can do is
between the animation, technically it's not a nation, but we can make animation
out of this button on the layer that we want to tween to make clean innovation
on I bought in here. Then we need to add something
called shows full mask. This will add a mask. But unlike the other
map I showed you, this mass is not above, but it's inside
the layer itself. So if I hide it,
you won't see it, but you see there's
something here. So it's beneath
the layer itself. And if I zoom out,
do you see it now? Because it's a mask layer isn't true school mask layer
for that matter. Automatically on our timeline, we also see the actual
small mask now, but will not transform us. Now, we email if we
add a key frame, doesn't do anything
even if we duplicate, because not only
we haven't both of lubricating frame
duplicate this, it doesn't work on our
transform mask now, this is because when we
made three animation, we make that animation based
on our transform aspirin. And we don't make that tree animation inside the cleaning, inside the integration sublime. But we do make that
our animation curves, timeline, which are
a bit different. We don't see any
keyframes happening. We do have these weird squares, but they're not clickable on it. Make sure you're on your
photo mask layer and you go to Transform
electron formula. Animation curves were here. We have an alternate
row mask there. And now we have different
type of boxes here. Obviously we go to the
books on the plus button, which says add keyframes to
control scalar property. You have to remember this. This is basically how
you will add a keyframe, keyframe to remember
the position. Again, the position of this controlling of
this test layer, I'm going to click
this Plus button. And now scarier
still because again, we don't want penetrable
frames here we work with graphs can be a bit complicated and I can
put in stance on, I'm on track maintenance
by very simple. Now, we have key frames in
each of these positions. In this Canvas. Let me scan. This joint has position
x, position y. It has a scale
position x and escape, escape scale position y, shear y and x and y
rotation or X, Y and Z. Now we now going to use
all these positions, but all of them we will
appear once we click to add a key frame for this
transform mask, in this case, script through this and maybe on
this frame, which is frame. 15. Again, we can
see the prints here. We can then again add a
keyframe, add another dot. And under the colors
of these dots, they're represented
by the red one represents the position x, the green one position y. And if I scroll this
down, I lost it. You will see that
there are more, especially here, but
we can't see them. We don't have to worry about what sleep steps can come here. We have to worry
about this graph. So Bob, because we
haven't shading in here on this key frame, on this spray print 15. I'm going to grab my it
transformed one stone. I'm going to make sure that
I don't want transform mask and click the bowl itself and I'm going to hold
shift them around here. Now, notice something here
a little bit. Scroll up. You'll see that this
point now changing, it changes value
because I changed the position of this
transform mask, the position of this layer. If I go back to the
animation timeline, you'll see now we have added some keyframes
to all transform mask. Rare, but we didn't
add any key phrase on our normal layer testing
that we have here. The moment I click
on the placement and you'll see that
the mask layer, the transform assonance
disappears for my timeline. But if I click on the
mask now you'll see that, hey, actually here,
there's something here. And also this movie, we notice if I go back to
frame 0 and if I play this, remove artifacts were reversed super-fast because
these two keyframes are very close to each other. Well, I can do is to go
up more than around here. Maybe. It actually allows me to
contract the key frame from this animation timeline rather
than the animation curves. Because if I go back to animation curves
and complicatedly, that's a little bit caught
and walk with them. So that's why this
is a new future by way of a creator and
not everyone is happy to, to work in the animation curves and it takes time
to understand them. This is how much we're
going to work with them. We just go to add
key frames here. We're going to go back to
the timeline and we just got to change name in this
case will be the position. But as the movement is way more smooth and it's not
like very choppy. In the beginning
of this tutorial. I'm this class. Let's just play this again
and see the movement domain. Some of them, I will not look. This is one way to
make the speed slower. I can meet speed
faster like this. Or if I go back here, we're going to have the
beginning and the end of my animation on the
frame rate law, the frame essence they
will get from this. Well, let's say this will
slower speed right now. This isn't claw French. If I bring back 24. Move the mark on beginning Play. You see the difference when we try to change the
frame rate here.
12. Lesson 11 - Robo Character Puppet Animation - Part 1: So let's try to make the
eye move up and down. How are we going to do
that? Well, we could look to the eye since I overhear hybrids die and then we will add
to that full mask, which will appear beneath. And nothing happens because
we didn't do anyway. We're going to go through
our transform selection to work controlling t, but you'll need to know
shortcut for that one. Didn't mention, but now are to truly see here
are here on top. And I managed to have to use your thumb because they kind of go hand in
hand with ease. So far we have an oil
layer and on that island, an island, we have to show mass. And both of them appear here
on our animation timeline. But if I move this around
and you will see that it's moving around
this anchor point. And that's why it's also
called an anchor point. If I click Enter, it will remember the position. But if I scrub
through the timeline, the club, make an animation
when that didn't work. I'm going to hit control Z. I want to rotate this
because I'm going to do, I want to make this
go up and down, up. And now I want to
rotate this around, maybe this point over here. If we zoom in a bit more, you will see in the missing
pixels and we have here, but I can hover on
top of my anchor for, in this icon will appear, this hand we will appear. And I can click on it and
I can move anywhere else. It will not go outside. You can see it. But I want to move
it around here. Now if you cannot
grab it properly, it can zoom in and see the hand. Position it. Now when I move up, it will move around
this anchor point, which is not ideal because I'm going off of this circle here, so it's not very believable. Nothing here is quite believe
that capitalism the colors. So maybe we will limit ourselves up until here
to drag this here, rotate this around here, MHC2 here, but not above that. It's just not working. It's not just breaking
the illusion. So we don't want to
be an illusion here, which is great and I will
hit Enter, I Control Z. Even when they go to the
Animation Christmas, because that's where we add key pair swale tween animation. Once I add the first keyframe, when this plus button over here, I go back on this and you'll
see that reset the point. So now, now's the time for me once I added
the first key frame, Now's the time to
actually position the object that I
will try animate in the right position if you will. So right now I just want
to move this over here. And now I can rotate
this and make the changes of these position, position, of these points. I'm not going to say
this very heavily, but I do have a mutation. I do have a 0 already remembers the settings of each of
these points, if you will. A brief of these positions
of the mask itself, because successive terms
Womack mask number one. This is one, this is
what we are animating. Just flip through. Maybe, maybe frame ten. We can make another keyframe. Now, you can move
this up and down. I will lose track of time, whereas it lose it that we're working with
this sort of timeline, this server animation
curve section, thinking it's devastating for me because my scar
moving the points. You see that moving the
position of this object, but it's really hard to
maintain anything here. Control Z. I'm trying, I'm trying to use my transform fluids
much as I can and not to use the points here
and make curves and stuff. Now, as you notice
this place here, the anchor point is in
the same place as we hat and left-click
before because we already had a keyframe here. Remember our positioning? Always position.
Let us say this. We will have some, some may change a little bit, but now alpha is Corfu. Apparently it remembers
the first loading. It didn't refresh on time. So that can happen. Since I'm recording this will take me a little
bit more time, but it does have this
subtle movement. Now around here, maybe
around frame 14. Maybe I want this. I click on it again and again, I'm using my Transform. Zoom. Zoom keeps saying, if
I rotate this down, if I zoom out a little bit,
usually he's now gonna look down how this will
look in animation. It will go up and go slowly and very fast down because of the
positioning over here. Really hard to try to grab everything and just
move something. It moved up the
rotation on the y. So I believe it's due. Please controls inner ear. Not capture every single
point you can hide them. Of course you can
hide them from these. Now, there is no icons and right now we're going to
cover just an irritation on, so maybe we can't
reveal the rotation. So far we have managed
to locate this on the y axis rather
than not the y and z, what they might say,
it's z, the z axis. And then we have the x and y. So far is we are hopefully on the z-axis and how
we can improve, how we can not
easy in, easy out. If you're familiar Windows, that would be great
if you're not. Well, let's see how we can
hide the rest of them. And I can just, I cannot
select multiple points, which is a downfall. I can do select
individual person. I can hit Control, select more, no, not gonna hit to
try and hit Shift area. I can hit Shift to
select more points. Based on these, you can have some interpolation
which isn't easy in, easy out, which is over here, smooth hits and
sharpen, we hit this. You will see that
not a requirement, it happened and try to hit this. Now it has some effects to them. Basically what we
can do is we can make Mickey curve, our graph, our points, and we can create
some way of looking at x. This is what we have in this form. This is what
we're going to have. So if I go back to
animation timeline, you see that now today, in addition to the
traditional math, we have these papers that we
cannot add more from here, we can only make changes in
the intervention course. Just remember that
now if I play this, hopefully it won't crash, which we have a lot of
problems by the way, if a new completely
nucleotides on crashes. Sometimes that can be annoying. So my tip for you, if you're going to
make three animation, is once in a while, either hit Control S to save or you can wait where
you go to Save As, and I already have saved
this as a horrible boy, dock creates a file, so I can just simply quit. Control, click, Control. Click, press scenario can show unless ideally equal CEP and you solve that
very quickly there. So now if I put in a play
button, it should play. Yeah, that's that's
not that's okay. That's the interpolation that
we did with this per store. And then that's
just not showing z. If you think that's
there, that's wrong. We can try to do this. Getting, showing Z
a couple of terms. So we can go back
to the initial, can go back to the initial
animation that I did. So let's just play
this one more time. And that gives him into his, he might be running
and then stopping. And I can move the keyframes
here to remove the spacing, which is very important. Move it, move it. Now if I play this, we'll
get something else. You can play around
with those to get the exact movement
that you need. I'm going to stop this.
13. Lesson 12 - Robo Character Part 2: We have our personalization. She's doing this and
it makes some changes. Let's just do the arm. Now. It almost comes
from two elements in the arm and the hand. The magnetic. What I'm going to do
is supposed to solve them the hand here. And then I'll combine
that with the arm itself. Can get moved me, bring me going back and forth. Again. I would like
to do this in a loop. Pink style script
can be repeated. So what you can do to
make a looping animation. So we can start with
this top part from here, the full mask as always. And I'm going to go
to animation curves. I'm going to hit
they add a keyframe. Now. Now is the time to
set new anchor point. If you go on our whole
tank nor object. If we don't know
our anchor point, I can move it around. But I'm going to rotate this around when
it's new and more. I will try to centeredness
around the arm over here. Mostly. I guess that's the
center for this. I'm trying to look at the line center and based
on that line, that's fine. Once I cut this position, maybe I can hold it this way. This is my first position. If we go to make a
looping animation, if you want to make an
admission that repeats itself, remember in the first position, the last position, they
need to be the same. So this is my first position. So I'm going to go around 60 because I want to mention
will be 60 frames long. I'm going to hit keyframe
again without changing this. Somewhere in Omega wherever,
somewhere in between, if I go back to my
Tama customers against the trauma around
frame turf to you? Yes. I can charge this
on the opposite side, not that much because I break this rule to hit Control
S to save me test. We had crashing Kreutzer when we're using the
Ukrainian animation. Keep that in mind.
I'm going to hit play and see how this will look. And since I'm
recording the screen, it takes a little bit
for this to render, but, you know, send us in the eye because
I didn't fix the eye. But this ulcer whole tastes
like it's looping, right? That's all I want. Now once I got that, I want to hold take the arm as well and getting that
back and forth movement. But I cannot move the arm. I mean, I can move the
arm without the top part, but I didn't want them
to move together. What I can do, you can do this. You cannot undo this. I'm trying to say here is, I will try to merge the top arm, the hand, and the arm
itself to be on one layer. The problem here
is that we already have from full mask layer. Once we merge everything
together because we can't, we cannot go back
and change stuff. We can now go back and
make this into two layers. Since we have it, we
will have one layer. And let's say if we want to
shade of color who kwame, it, will be hot and almost
impossible to do so. So my advice to you
is to duplicate, to have duplicate layers. Or before you start
animating is good to come to your folder where your character and
duplicate that folder. You could call this copy right before you
start merging layers. We call this copy. Because when you try to
change your color, again, you can't change even
not calling me to change the part that
swell simply caught. Once we have this, I'm
gonna go tomorrow. One. I'm going to grab the hand. We have the full mask
layer, the hidden layer, and the omelette going
to hold Control, select more than one layers. I'm gonna hit Control. And of course this
color move time for critical to process this. Because again, I'm recording my screen is slower than usual. But ideally, by the end of this, we'll have one
layer than we can. Do motoring and dimension
on top of that layer. To see I have a
bunch of keyframes. Now, every little movement
that we're having here, now we have one layer. Only. This top part is moving. And now we're gonna
move the whole left again on the whole,
the whole hand. Again. Add a mask layer, boom. Format where we
are on a frame 0, which is our first keyframe. We're going to go to
animation curves, click Plus button, and we're
going to have a keyframe. And I go back to your Transform
weakness around here, maybe rotation point, zoom out, go back to your
animation timeline. Again, I want this to loop. So maybe we can go back
to the curves and go back to the last frame, hit the plus key frame button. We had the same
position on line 15. Guess we can go and
make this slide here. In here. Maybe we could go back and
change this to bureau hip. The hip flight. Getting some really
cool movement. I think it's very looping. Keeps saying that
it's going okay. I think I can animate
isn't the body? Body, it's not
connected to the eye, which is completely fine. I'm going to try to make
the body animation. We're gonna make a simple frame by frame animation
with the body. So no trainee on the body. So I'm gonna hit this
button over here again, we own our animation. I'm going to duplicate the frame because if I click
a new key frame, it will delete whatever
drawing I have on this layer. So I want to delete
what I have here. I just wanted to duplicate
it in order for me to start animating
with a keyframe here. So, so far we have
one key frame, which is the body itself. Around here. Maybe I
can duplicate again. Here. Maybe I can
duplicate again. I'm not moving the
ball itself yet. I'm going to make some
movement slim volume second now around here, because I have all of them
are duplicated. Frames. While he's looking down. Now can hold shift and
move this a little bit. His movie up, he's looking
at shift there down. Let's see what we actually have. You can play around
with the pacing, can make this
movement has faster. Let's say the in-between
frames will be frame. So we can copy and paste keyframes on this timeline,
unlikely animation curves. We can do that on all
animation timeline. So what I can do is to basically copy this frame and this
frame and then repeat them. This one, there's
another one over here, the in-between the world right now if I look at this
segment over here, over here, I will see
that up until here first, I will see that I'm animating your ***** frames. One frame. This frame is reasonable
for 1234 frames. This frame over here is
there's multiple 1234. This one over here, 1234. Now, this one is almost
invisible, way more than four. We need to fix that. Because if I play
this from here, it's like he's moving from her old I'm going to stop coping with this one, this one and this one. I will try to repeat them. It can feel there's a shortcut if we want to ultimately coffee
your keyframes, which is OK on your keyboard, or you can do it old school way. I brought on the
team if you want to copy, copy keyframes. And then after this 11234, so here I'm going to
hit Hide button again. I'm going to say
Paste keepers. Here. I'll do that same thing. Almost there. Now obviously here, I'm
missing somebody else. It's not enough space. So I might leave this as it is, and let's see how this
will go smoothly. I wanted to do is to move the wheels from
here that we have.
14. Lesson 13 - Robo Character Part 3: Against having this moving, but we need to make
the wave moving. Since I problem its own
now, writes them four-star. Or having him what happened
when the weirdness and we have the we're certainly
not doing well. I should say that
Walmart was news. I actually need to
redo this layer. So I'm going to draw out the
selection tool over here. It doesn't matter which
selection. I going to have me burst up
to me the eraser MO, Control Shift, de-select here. On this, the lonely wheel there. I'll try to make a
shape like this. Rectangular to actually put a foreground color
but with no outline. For Hurricane Cora
and I was black. We can coerce
should we add here, make the size smaller. But I thought this, and I have added the rounding around the the
angle. So undo that. Control Z here. Now if I should be more
rectangular shape, but this is just to
black is very strong. So I'm going to hit Control. Click this car from here. I'm just going to
do this instead. Yeah, I think this is better. Now on this wheel, I'm going to try to add it to troll mask. Initial frame. We'll go clinician
at a keyframe. It's always 60. Whole plate. This this is
me always and this won't be the same center. But saying I was
just crypt this r2. Now, I don't know if you can
see on the screen because my home is being annoying. So back here, I didn't say about print
the kind of crashed. So what I end up doing
is combining these two, then copy and pasting the other two and
the other one layer. I'm going to leave
this in the working part while using this instead of trying to
do it by yourself, but greater than person one UPC. So it may not UPC by your CPU is only made crash when
you try to do a couple, a couple of small dimensions. But in a way, now we have
something like this. I'm just going to scrub through. I mean, it's not that bad. Yeah. I mean, I want
to do is to make smoke coming up and the wheels. What we can do is try
our first applause. Yeah, our first frame
by frame animation. Gonna be, you can
still use the mouse, but you can use some of the clues here or sample the Ellipse tool
we'll do puffing shop. But I'm really use my pen
because you have a tablet, so I will try to use that. So far I will give
you some one folder, but I would like to do
and you fall a new, a new layer and call
this layer Smoke. My time. Remember
simple button way. I really hate brush for that. Key is the simplest brush. By the way. I'm looking
to find my pen. That's my dependent here. We can know more about
the color for now. We're going to go
convert frame 0. I'm just going to click create a new keyframe because even though if I Control anywhere
on the frames here, I need to have a blank
keyframe in all her to stop making animation on
the alias for that matter, because right now with this
layer has no animation. The moment I create a new
keyframe from over here. Now you will notice that
this symbol pops up. And also we have this
little light bulb. A light bulb is our
onion skin does, if you follow this, obviously mention in
the previous meeting is not the norm. I'm gonna walk you
from my hand here. If I move my marker, you'll see that we
have a blank square, has a little applies. A blue frame around. This means we have
a black key frame. The moment I started
drawing something. This is terrible. This
is very terrible. You can do in this slide. I will try to adjust this. Here's the size. That's why it's still. If I move my marker again, you will see now my square, my keyframe is filled with blue. That's fantastic. I think the next key frame
I can hit the new key, blank keyframe from here. The previous keyframe
that we will disappear. It is still there. If I move Hammacher back again, you will still see it. The Mach and the blank keyframe. We won't see it as good when you use favorite Herman innovation is to activate your
own your skin. Not always the principle, ie do, but right now I don't want
to see my previous frame. This is our amazing smoke. Now, if my skin, if I play this, you will
look at those very fast. What we can do is
to fix our facing. Facing. Right now we're
animating smoke on one. So basically our drawing, any of these trials for that matter is
miserable for only one. We can do this. You
can try to do it on, let's say, two frames. So what I wanted to hit shift
the last key frame and move one frame on the
right track to do that for every single
frame that we see here. The black key frame as well. Awesome plaintiffs, it
should be a bit of timing. Now, we want to repeat this. We can just grab all
these keyframes and hit Open your keyboard
and interest track this, and be around here and release. Same thing here. And now when we play, that way, we can always
call your smoke. You can leave it like this.
15. Lesson 14 - Robo Character Part 4: It usually when we have our amazing anyway happened a year. Now what else we can do? We cannot advise them onto
this white background, to be honest, I'm a huge fan. It is a good contrast. Sure. It's just maybe along
with the background change, we can add some
speed lines and we can show that this
little buddies traveling time and also keep changing smoke and
were driven depends on what kind of background
we're going to put it back. The background. I think that's pretty obvious. We can trace and
borrowed from here, we can change a couple of ways. First, I need to figure
out what kind of car. And I was thinking about like this, dark,
grayish, blackish. The fastest way he
can cover anything on your catalyst is to hit
Control Shift and backspace. And wallah, you're gonna
get something like this. And also in the small pizza, finding it's too small progress, try, let me teach it from there, but I can see the color here. So this isn't to get eight. I will spend my time with this. It's this ideal. I'll take my color. I won't keep you waiting, but yeah, this is the fastest
way and you can color. I will encourage you to
use your shortcut for that because there's obviously
other ways to do so. Fill tool again. But with that, you will see that if you look to new options, two options over here, you see that the symbol here, so two owners, we want
this to be a color layer. Now when I press this, again, ignore this platform. After he had control of times and now my paint and
posting the whole layer, I think that's the
column go for are always teach my smoke color. I'm going to go to
the small players a couple of ways you can do that. Now remember that we already haven't mentioned
here on this layer, which is coal smoke. If I color, let's
say it's going to be like not quite
white button Pilar. If I tried to call her now, again with my filter is not gonna be ideal patrols me there. How to do them. We can go over here and we can call this My once
we look in and lets, you will see that
lean machine using the exact same thing and the color is not
the same, isn't it? That method, hello
warmer control. It doesn't work. How to call this efficiently? Efficiently means thank you. Smoke layer or I books in their
group and go to clipping, which means we will
have one of those, yes, those mask layers. On my mask layer. Let's say this is the
colon worked for. I can just simply click
anywhere on the screen. It will call on my
mask. The mask layer. This is the mask layer that
we're working on here. You see that in the method doesn't have any
dimension, so on. Isn't going to work with all these frames here
for this small Claire. Well, let's find out this, this isn't the most, this is the fastest way you can call it. We can change the
color to something. That's the best way, yes. Oci, if you have only one color, all the animation layer is
the best way to add a mask. Now it's often just
call up the mask where I can just pick this one. I can just change the
color and immediately, and now I can curve. You will see that
all of them are still changing their car, still the same color
as our mascot, which is very handy
to know this. Change that to white. I think that way, so it's a fine. Now the other thing I wanted
to do before we export this, when we earned our
amazing animation, is to create a new layer. And I'm just going to call
this lab VG Erin men. That's not how you spell it. I guess. I just want to add a ground or my boy, way I'm gonna do that. I'm going to take
the line to like. This brush, it's my
personal confession. I call this in keep. You won't have this, whereas
previously the same version, this one, something different. I'm going to take
this merge and we'll try to see how it moves. Hit couldn't hit Shift, right? I'm going to add this line to add as my as my
floor for this horrible boy. Maybe here, maybe here, holding shift to
adjust this and maybe can use your arrow
keys on your keyboard. Mooney, I just know what
you want to press Enter. Business, Not bad. My floor now gonna
hit another layer. I'm going to call this. Lines. Will go again
to the line too. I'm just going to make them
the size of the motion. This way. Yeah, this one is fine. Maybe we can use
the yellow color. Now here's a very
simple speed lines. Just pass by cell,
click Shift, making, clip shift, click
Shift, straight line. Here maybe we'll create a
new keyframe from here, as you know, will disappear if I want to see
the previous one. So whether my own skin and I'm just going to maybe
continue this one over here. Maybe a new one
we'll pop over here. This one will continue
here, maybe around here. So we're animating own fives. We're animating on 5512345. This one woman and one
new keyframe over there. I'm going to continue
following the why. So we have here, this
one will come here, this one here, there'll
be a new one over here. We can hide the onion skin. Try to copy and paste
them from now on. Select Multiple
with Control Shift. Now once you select all
your key frames and hit ultimately keyframe on your, on your keyboard and then drag around the same spacing
as the previous one. Oops, I missed them. Shift all all to try to
copy them faster that way. I think we went down here. I'm going to hit Lay. Want to do now, this is still very static. And I want to move this block. I think the lines are okay. Go back to the rhomboid folder and we have the wheels now, they are in the folder
because we have, as I told you, I
had problems here. A critical trash close good
reminder to save control S. Once in a while, we'll
send the chain, I guess, are on separate layers and
now they are in one folder. What I need to do is I want to merge this bolus
or a button there, merchant hoop from E. It will take lot of time
because I'm recording this and always more and almost same now we have a new layer
here called wheels worse, because when the group now is, we have little keyframes. Now I'm not going to move
the keyframes themselves. I am just going to do another three-dimensional
multimode this to add h of four mask here and
go to animation curves. The first, the first
frame and a P frame. I'll try to get my
transform to hit the Shift. Move this up. Here. Down. Yeah, it looks okay,
but it's not a looping which I made
a mistake over here. I'm gonna move this
frame over here. And over here I'm just clicked. So we'll go add
automatic keyframe. And I'm going to
move this to me, the last one, this
one like that. Basically this frame, this way in this RAM,
they are both the same. Now it's looping 12. Obviously, the Wilson laba, I gave up on them. I just gave up on them. But now let's do this. Let's just call it n The smoke. How to do that?
Obviously, I need to hide the span-wise
because they are in my way. I want to see is this smoke and we can
double-click on that. Call this smoke or no. Smoke will have to go through every single
frame to color. And the smoke going to do that
is to put my field to grab this color and changing all layers and simple the photo on the tool
in the tool options. And I'm just going
to go through them. I'm going to use my
shortcuts on my keyboard. Dct, use them if you want
to move slowly one by one. I will try to call this. It's like he's like this
from this hole here. Nothing fancy by
painting the effects. Yeah, Pretty much. Now if you cannot call
something properly, either, zoom in to
see the pixels, then you do it when the
brush is up to you, how you want to
do this constant, I want to be fast, super fast. So I'm gonna use my
fill to be prettier. Now to see you that day. These ones now if
I go from gamma, they always call it y because in the beginning,
if you remember, I didn't manage to have all these windows Shift and welcome to split
all the frames. Once they basically call
cologne them with the old book, then there are these
waves over here. Emotion same frames. This one. Now if I print from duplicate frame this room
have the same effect. The only way you can
duplicate or clone A-frame pizza that
we will not know. Let's say I make a change
from this frame here. The exact same
change will be made in the first frame as well. Because doctrines, if
we zoom in just to see, I'm selecting this frame, but this ramp and this swim, they're highlighted, which means they're
on the same frame, their copies or clones. But let's just say that way
they're clones of this frame. If I take this frame, you'll see which are the
close of this frame. If this wall over here
and this one over here, pretty much the same price. But you can achieve that effect only if you
hold the old bottom. Even if you decide to
duplicate the frame, it will not have the same effect as these frames over here. I hope that clears
up any confusion, just let me know,
ask questions I will try to better maybe.
16. Lesson 15 - Robo Character - Render: That's it. For this. I'm not going
to change anything here. I have a lot of layers, but I'll leave you with
this whole document. Now you can play around, try to make new
animations over this. Once you build the
robot yourself, helps you ask for others. Finally, we managed
to make something. We can't let say, well, it looks File Export, Venus voice study
animations 1015. So this must be it. Well, it's not it. So here
it says Render Animation. Alto has the worst. Rather than innovation
pop-up window for us with some extra seconds
now we can play with, but there's this
one, cohere FFM PEG, if we go to the view section. Yeah, that's fine over here. And you can find it on
the official website. X a buildup that helps convert basically your animations in QA VU format or click
here you will have video. We have P&G. P&g wealth animation,
again, simple format. So here we'll give him a very common use format to
showcase your animation. Now if we wanted to
showcase your animation, let's say you own this theorem, maybe give him which
will not walk up to you. So you have to form this MPEG4. Maybe you can even try this. This format as well. This one will work for
MPEG-2 is for the win. Now, if you don't, if for whatever reason you will build them,
doesn't walk in. You'll see that
very early on was the church video
section over here. And start loading and then pop up an error message more level that error message, the error message is, chances are maybe you MPG, FFM, PAG build up, moving out
and tried to fitness. I have made a couple of
minutes on that topic, but I cannot guarantee you that you have a successful job. This, because it's RNA up to me. Sometimes I notice when
I update my codecs, my PC call this, you can do that and see if it's safe to do to update
UPC, call it. When I do that, sometimes build an action works. Same class because when
my buildup doesn't work because I also
experienced that I tried to, they might call next on my
PC and then it works tasks. But for some people that
doesn't work suffers. You have to re-install
the bill itself. How to install the
buildup may mean, well, twisting normal thing, a folder from the internet and putting the location of
that folder over here. So if I click on the folder here and the only
thing I need to do is to build up my buildup
is in this folder, like this double-click here. And the thing that
you need to look out for, bid foam here. And there's a buildup. You press on it plus plus, press Open, and then you will have your
build up working in the jail. But again, if it doesn't work, try to get on
different trenching, get it from nothing place. In my previous class
I did attaching in the working files on the side. So maybe I can do that
for you here as well. So if you build up this wall, you can bold that
form the files. It will be for Windows. Just let me know because
I'm using Windows. We are on the window,
the window on video section over here it says the first
frame is frame 0, as we notice, once we put
this button over here, the last one is the pipe 16. The width is 1920 byte and 18, which was the size
of our canvas. The frames per second is 24. Focus by cubic location. That home for 1 second. We have 2424 fresh spraying. This is one Second,
one dimension. Kim, that in mind, if you want to make the
size of your canvas more, more, we can do that here. You can put this to be 7, seven, twenty seven, twenty by. Predict will calculate what's the other side stream from the video location or we
can change our location. I have crisscross here. Boy, Let's say false, like this. And I'm going to
click OK. didn't have any error message
which we felt chassis. I'm willing to get
to the folder. I have this, which is over here. First scenario. This
is all horrible. Boy. Pulsatile for
my other window. And it's in the smallest
size is not 192720 by 4405. If I'm correct, I did this
in smaller size because it down we don't need to cover the whole size of my screen. Yeah, I can share
this on the Internet. It's up Instagram flash Arizona
is three or more YouTube. The way I can share that on this theorem on
YouTube, no, I can. Once again go through
her there animation. Instead of GIF image, I can scroll in this,
in this format. Now, again, if you're
told this on your piece, it does not allow any of the other formats
because of your color. So you see so many issues. Take a look and update them. You can ask, well how to do that and it will walk you through. So now we will call
this whatever. Save I'm going to hit. Okay, again, I'm going to
find this beautiful here. Now, I have sent this to be on the hook by
five and move this. You'll see that in cocoa
myelination is two seconds, which means we have
16 frames around. Here's the 1 second. Second, Second. If you are going to post this on
YouTube, will be a bit short. And also the file, the seventh, 20 sizes smaller. Maybe you can bring back
the 19 clean by 1018, but this will play only once. So, so far we have seconds
where you can make your animation longer and added into video editing program
and just copy and paste it. The combo of times you
will have an animation.
17. Lesson 16 - Frame By Frame Animation: I am going to do a very simple frame-by-frame
animation bowl, smart dimensions here. You can use the dimensions
for that matter. Yeah, I'm still hit Create. Okay, So we have a challenge. I didn't remove my onion skin. Now, you'll need that speaking because it shows you the current
frame is on forecasting. Famous on this much. Then this much. Again, I removed
that just because I want more space
here for my timeline. How to add more keyframes to your timer helped make
your camera and over. Because we're just going
to solve this question on Walmart revenues. When you open this
icon over here, show script starts and ends. If you want to have more
keyframes right now, more frames in general. Now we have another frame so we can put them
anymore to 200 frames, 600 friends or whatever. Now, if I play this, now you see that this is
slightly, slightly different. Tone, these frames, it
needs a lighter and darker. We can always add
more maps that way. Or you come here, you shouldn't push
the button over here to add a blank keyframe. It will add a keyframe. From this button. I
felt that that was a good thing to show you. I do not need though. I don't need to a key first
because I'm not going to animate on my bedroom
because it's a fill layer. First things first
create a new layer. Call this the
background, if you will. Not back wealth as we have, but I'm gonna go with this
are, all right, well, let me show you why I'm
going to call this are all the bad wrong about some part won't change
the color here. Yes. Your line tool and make a line. I'm using my my mouse from
this and only use my mouse, Let's use my pen. Let me slightly thinner. This will be on our background. We're not going to change
this on the art layer. I'm gonna create an alarm
because I will create a impulse involved from
one space to another. I want to help myself to enter at how the
animation will go. I won't create know why
you don't have to do this, okay, you can skip for the
actual animating plot. Again, it's a good practice. Just what I needed to do. I can't recall her from here. Then we can use our proof to current ratio to true option. We didn't have some extra
options. Right now. This two has no fill, but the Alpine isn't a brush and the brush right now
from me is 6.74. Pixels. Can decrease
business plans on you. I'm gonna stock from here. I'm gonna come over here, click and drag to
make the curve. Maybe I'll pull two here, will be my end of my curve. Now this continues to have a handle because
I clicked on it. But I want to stop
my, my shape here. So I'm gonna hit Enter. Enter to stop the shape
where we stopped it. And it will have the size of the version
that we are using, which is over here because
of our two options. Anyway, I'm going to lock
this layer because I don't want to draw the morning
lock your layer from here. You cannot draw on that layer. Now, I can't go here
and create a new layer. I'll call this. Can you guess what
we're going to call it? I'm going to call this both. On my arc layer. I want to lose your
prostate is I just want us, I want to see it, right, follow this off. But I don't want
to be too bright. I want to see it as a
guideline in a way. Welcome back to the ball. Maybe change your color. Blocking. Yes, or this car doesn't matter. Okay. Go back to your brush.
From the brush. I come over here, we
can choose any brush. Let's just go with
the default one. The default one. No, help
him or her on the canvas, we can zoom in a little bit. I think around the 100% that
you saw up on the screen, It's a nice quality. And if I go beyond that, you will see that
the quantity column breaks 100 pixels
and 100th Zoom. It's fine. I can literally Scott throwing a ball,
maybe a bigger ball. I'm using Control Z, by the way. Understood the adult like
18. Lesson 17 - Ball Animation: So the idea for this bolt to jump this AUC and
land over here. There are a couple of
ways you can do that. And the arc as we did. And we can try to
make pose to pose, good to decide where I'm
going to be our main process. Yes, for this little ball. That way, if you follow along, you will have
seemingly saved size. I think that's
listen to somebody for one of the main posts will be on top over here.
My ball layer. We'll go to frame this frame
which I can check the name, the number, and the name, the numbers on number six. And over here, touch
on microphone. Here I can press you
frame now Boeri in both. Gone forever. If I go back here, this wall here is
visible for 123456. Since I always notice
there's nothing here. Now I can turn on my onion skin. The more you start adding
frames to your own layer. This layer and this
layer on the same layer. By the way, if you don't know, the more I start adding
keyframes from his Muslim here, it will pop up this
little light bulb. So if I click on this
little MBA alumni, I will have the onion skin on. From here. I could sell that off. I click on this. You can keep it all. You can keep an
office up to you. Now, what we're going to do is to try to trace
on top of this bowl. I'm amazing. I'm
drawing both name. I am all about you, maybe you, I'm doing great job at Nouveau. I hope you do. It is for me today and every day
I have a bowl here. Now I got my
transform tool here. Crap, this is the
Go button brush. And I can either do this in again from this
side or I can hit, maybe come over here, which I can click this button which will walk
to duplicate my frame. Will not make a copy of the favorite, duplicate
the difference. So I'm gonna grab my Move
to move this over here. Maybe I hit Enter. So I'm gonna hide this
will go from this frame. And if I use the
shortcuts on my keyboard, these here on your screen, and if I go from
the frames I have, if I didn't see very, very bad animation,
it is sort of moving. It, I can hit play. This will happen.
It will not repeat. Because right now I have, if I click on this
button over here, I have 209 frames that I
always use all of them. Maybe around frame. Here. I can tell creates a Hey, I want to end my
animation of frame 5050. Now I've hit Play. So the repeating will
be faster and you can see the marker itself
goes very fast, repeats itself, which is nice. Obviously, animation is not the best, but hey,
we didn't know. What else I need to point out, your attention is
the frame rate. The lower the frame rate is the Shopee your animation
will look the higher the favorite is the standard for primary federal emissions, 20 for the better. You can lower this to make
this eight minutes 12, or you can make
this 24 subjective. You can experiment
with this later. Why this frame here is longer, it's visible because you see the frame after
this key frame, right? If you've seen the
frames after the way, much more than these two, right? So keep that in mind. But right now you don't
have to worry about the timing on the
spacing in general, he needs to figure out
how you're going to make this whole are filled with the animation principles. But right now I'm not
going to go through them. This class is likely, we will mention them, but
it's not our main focus. My focus is to use this whole
problem as a two to meet. A animations. Right now, I want to
focus on the next frame. This one. I want my bulb to have this anticipation
before it jumps up, we need to see the
bump going down. And I came to make a new frame, my onion skin again. And now you see that, you see the previous frame
and we see the net swim. But I'm gonna talk a little bit. Cautious. Amazing showing you as always. Let's frame over here
it was okay for me to make This bowl. In a way. Now I don't want to make
this to be smaller. Around the same size. Let's frame PS I can
make around here, again, postpartum trying to appear and draw on
top of this one. So take the size trap, this mistake, this
pulse over here, and over here, the next frame, I can duplicate the previous
frame from this button. And I can grab this
and put it here. Now, almost I don't want this, I want this to be
after clicking, drag and drop around. Maybe here. We can. We can make our lives easier if I have done
this wrong beginning. Well, I mean by that
we can Brooklyn on our frames and our keyframes and we can and give them colors. This will have the same column, this will have the same color. The main poses of our bulk colors that you
don't have to do this course. This is just a simple animation. Not important to
label your keyframes, but for you to understand. These are the face when football
will be all main poses. To phrase this one. Click button there. I guess green on this women
as well to make green, these are opposites in a way. These are also poses. Will be after. They have the same, there'll be opposite poses. But they also add as a guideline for me to decide for the
timing of the animation. Now if I play this
very fast improvement, that pretty bolus and
what we have so far. I mean, it does look a little
bit more alive, right? We have one thing happens
very fast, right? We can fix that later on, but it does have
more movement rather than the previous free poses
where we have one bowl here, one here, and one here. Now we have some, some
sort of moving very fast again because we
didn't fix all timing. But we do have an idea
what more can do. So from this frame
to this frame, we need to have the transition. So far. Transitions
happening very fast. Let's say from this frame, from this end to this
reinvestment fixed space. So I would like to
fix that somehow. Very lazy way to do that. By the way, if I click
on new frame over here, doesn't break because pizza, but it is fine. If I told that it is fine. From this pose to this pose, I would like to have
some in-between move at my amazing brush and I'm gonna be lazy witness
and you can play around, we can actually, after
you're done with this or maybe this is
the oldest class, you can play around
and Boudreau, ball animation exercise,
something online. And you see all lots
of other exercises because this is some sort of exercise for you to understand. A lot about timing, about, about why the balls
bouncing back and not just jumps straight down. Let's close. If you can learn a lot. Let's see what we have here. Different. Now obviously on
this side we didn't do much, but so far we have some
rocket launcher or that side. From this, from this to this, we can make a new frame. The onion skin can
make the in-between. It's very simple,
nothing fancy here. But you're getting
the idea behind this hopefully from this frame to this frame and
this frame over here. The last people who can
move this last in-between, maybe here, maybe the nitrile, these spacing, as I said. Don't mind this eraser again. This is a bowl. Looks like nothing like
combo by, couldn't be a bot. Maybe I can move this in the
middle here to deselect. That. Looks like a warm smile. Okay, so let's see what we have. We can hide the
R, maybe zoom in. This chaotic. This is one of the
key audit, both, while some can do
is when it lands, there could be some
salt over here. Bring back the community
to navigate myself. Squash, squash. Now, this, okay, if you add more
first in-between those, we look smaller. You make simple, very ugly. If I might say ball animation. If we remove the Arkin. Again, we'll have
something like this.
19. Lesson 18 - Simple Ghost Character Animation: Is try to do first frame
animation with arbitrary. Yes. I'm going to use these
administrations, you know, hit create a canvas. I'm going to move this
down naturalists, often the onion skin from here, I'm not going to
hide it from here. Click again and
make a new layer. And as you know, what we
want to do is to a counter. First lengthen the
first week's knew that. Now it's not a bad
coast character, so it's going to be
something complicated. I didn't want to try something. Maybe the size of this, this doesn't have
to be super clean or wherever something
very simple. I mean, this looks
like some eyes maybe maybe make this a
little bit like this. What do I have here? I have sent them
burst of doing this. This. Britain has no
business in your brush. Quickly, you can
draw that first. Thanks. If you mess up
something, click this button. Let's just try the beginning. A couple of times or
new layer. New layer. Let's just make a
simple, simple, simple. I'm using a tablet
for this obviously. Doesn't look like
a ghost. I know. I know, but think of something. Look like the snow mainly, yes. I'm switching between
the Burgess and within inversion duration
with the shortcut. I have a short clip on my my, I guess you make
this more wavy on Bolton. There's nothing there. Maybe not celebrate. Some are simple kind of don't
don't don't worry about it. Now. I want to I mean, is
this part over here? Let's first try on the
next frame over here. Put a key frame. I'm gonna hit my own skin and I can actually zoom
in a little bit. Now they're buttons on your
keyboard and risk-free. That's 4456. You can rotate
and seltzer with five. But I believe yeah,
for instance, num. So I'm going to try
to pick the line is now this animation
would have been had that clean on these Lindbergh. We can try to have some
movement in the beginning. And then when, once we're
happy with our movement, our frame-by-frame animation,
we can start cleaning out my frame animation. This. I can use the shortcuts
on my keyboard to see what's
happening obviously. And it goes, Let's rape, obviously shortcut
again, I'm going to hit Control Z. I had
a blank keyframe. Try to repeat the eyes. The eyes. Now, I did change
some heal my onion skin. I didn't activate the
previous previous frame. Looking up to me by
pretty on there. So now we can see the frame, the previous frame,
and let's frame. Just wondering how to do that. Now I know something, maybe just a bit. And this can be
smaller and smaller. Right now we are animated
constraint ahead, which is not always in here. Unlike the ball
animation that we did. With the ball animation
we have postponed. We had a little with planning. Here. I just made this
limousine character. You see here around Skelter. He is definitely definitely not keeping up with the
shape of the child. That's not always
ideal, isn't it? Popular from healing? Skin? Use my short cuts down on the keyboard and hit this. Now I can do sulfur here. I will click on this
frame and this frame. Then I'll click the play button. That's happening very fast. Let us say if we're
happy, we're finish. Well animation. Let's say this is our automation goes amazing. Clean up this. Let's
say this is it. Obviously, we want to fix the pacing around these frames
so they're not that fast. A couple of ways you can
do that is to click on this Matson and decide
your frame rate. Usually the standard is 24. Maybe you shouldn't cash that,
but if you're completely, you can try some, some
frames per second. If I change that and I put
this mountain here again, you see that inhibition
self, it's displaying slow. Because retina, we're playing eighth animations per second. That's somewhat slower. We can actually keep
the ink frames. I'm not quite happy. Animation. Looks on the bottom. But I'm not quite
happy with this. Him, I'm going to hit high
book. Then I moved frame. I'm going to grab
my life and Watson, I saw annoyed to grab frames here on your timeline on pizza. I mean, maybe, maybe
this way is better. This is very, very simple. All you're amazing character. Let's say now we're
going to clean up this. I want the artist stay the same. When we're going to use, we're going to have
a couple of layers. One layer, I'm gonna
double-click on that layer. I'm going to call this
layer. Hit Enter there. And I have another layer, call this layer body. I guess we could
call this new layer and we'll call this name bottom. Just technically, the bottom
is the one that's moving in the tail on the eyes. And the opacity of our
double-click here. Designers can say we
can on your past now, this on the eyes without creating a frame on
what the First Amendment. I don't think putting the
eyes, the shape here. I don't want to find
the Alpha and we want to have a fill color. Just keep them. Yes, that's nice. The hosts are done. Actually honest anymore. Now the body, I'm
going to use this, I guess somebody use this
same version obviously. There. Maybe zoom
in a little bit. I'm just drilled this
top part from here. This problem won't be changing. Now, I can play around with
the versions before I can play size and I can put
the graph over here. It will take us a
little bit of time. Now if you don't have a tablet, I'm just kind of a bummer. Tried to use the other
half shoulder here. I'm not looking at me. Perfect. Stop around here on the bottom. And we're going to do
this animation over here. On the first frame,
on the bottom, you see a new frame right here. If I move my mako citizen, the last key frame, I'm
just going to continue. I'm just trying to follow this, foster the body as much
as I can this way. And we will have a better
visual of our animation. Something here and there. Now let's frame. Come here and create
a new key frame. We can unable Ni skin. All right? Because we can see it, whereas the blue Here's an animation. Can change it. We, if we didn't do well enough, I can change completeness. You can see how the
animation changes, which is not ideal. I mess up. I guess straight ahead. But once you got new clean up, you can see your mistakes
and maybe the tail will go. Maybe, maybe we'll have
something like this and then brought him. Let's keep frame. This
is the last key frame. So now if I hide the main
animation, I love this. I hit Shift last paper so
I can set the scarf again. But I think this was faster. The better, a bit more clean. Then again, remember
that we have our framework to be 824. You see the change or here? 12? I guess crew office
better that way. We don't have to worry
about the pacing over here.
20. Lesson 19 - Simple Ghost Character - Working With Frames: It's an awesome. We have three different
layers and not all of them. We have animation. We have only on this layer. You have animation going, well, this little icon over
here, not this icon. It has no played box, implies that there is an animation of that
bucket little layer, so that's the bottom layer. Now what happens is amazing. My, my family I mentioned
with a character. Now, what happens
is if we want to move this calcium home
screen, how we can do that? Well, first of all,
we need to have all there for that character. What I like to do is if
that care is never simple. But I like to copy the elements. Hitting shift by the way, to select multiple or all control layers and hit Control and J or
i bottom over here. Cake layer mask. I'm gonna hide this previous
layers and these new ones, I can hit high books
in here again. We can move to them or you can see the
shortcuts over here. Now we have one layer. I'm going to call this. Now I know that he
doesn't have color, who were anything but not
that helpful, had the power. Well, that's a topic
for another time, but I will show you obviously in the last video right now, and we'll show you how you can move your character
around the screen. Yes, the animation so far
it's only four frames, or we have to be exactly a five because first ran
the count is 0, but please A-frame
there. That's fine. While to make this
animation longer, what we can do is to have the first frame I put in
there and hit this color. So notice in the first frame, the quick note on
the last frame, I bought some fitness as you don't have
to do this, right? I'm just showing you
that you won't lose the track of which frame is
first, which one was last? Because what are
we going to do now is I want to make this
animation longer. So I'll hit the first
frame and going to hit Shift grab the last frame. We can hit the high
Boltzmann here, and we can copy this frame. So let's frame over here. I can hit bottom face frames. So we have these
health standpoint. If we want this to be faster, faster, we can use
the shortcuts. Keyboard. Shift last frame
over here on your keyboard, and then move them, grab them and move
them that way with the old command while we
grabbing them and moving them, it will literally make a copy of all of these
rapes over here. You'll notice if I
click on this frame, this one will be highlighted is little coffee of this frame. This frame, this is
the first one, right? I hope you don't get to
wherever wherever this if I may change this frame or the drains, all the gains frames and
who have that change. Same thing applies
for the move frames. And the frames. Make sure if you want
to use the Alt command for your frames and you hit Open your keyboard and then
you move them around. And then you look at only made a one-on-one coffee
of this frame. If I click on this room, all of the other phrase
will be highlight. This one. In this world
because they are, because the way we copy
these five friends was selecting them
with the Shift button. The last one, we copy them using the coffee
frames from here. We didn't use the
alt key for them. When you're using the old key, you'll literally copying the making an actual coffee or the friend that if you make
a change on that copy, now that change will be
applied to every single call. Prefer that frame I
hold. That makes sense. Now. We have three frames. If I come and select these
and anyway, play this, you'll see that
you don't see it, but sadly, I want to
mention became longer now. Now, ideally, I'm gonna make my, my actual animation because right now my actual
animation frame a 100. I want to prove this to you by going on the first frame
play button over here. And once the mocker passes this rent and you'll
see that the cows and stops. We need to make our animation
to end on this frame. How we can do that, and we go to this bottom over
here and click N. We're going to add
this key frame, the mode of this frame, which is 29 over here. Enter. And now if I click here, again, this will loop. This will look inside. We export this, I
mean, not loop. It will play only once. Unless we add fullness
or 100 million. Asking if you have seen before. In this class. Let's try to move this little character
across the screen. How I do that? Well, I have shown
this is basically all amazing, amazing
frame-by-frame animation. But now I want to move
the whole counter. I do have the keratin
on one layer. What I can do is click on that layer on with
my hand button, go to Add Mask. And as I showed you before
in the previous videos, we just got to animate
the stretch more masks. So we will need to go
to animation curves. If you don't have animation
curves, place and person. These are the first week. I'm gonna glue on
my transform tool. I'm moving. I'm going to look
to the first frame, aka our 0 frame from this
Muslim gonna add a keyframe. Well my transform ask, so I want my ghost
characters go from here. We know that Alan animation
insult 29th frame over here. So over here, the moment I click now on my terms for mass
with my transform tool, it automatically
adds a key frame. I'm gonna move this,
I'm going to hold Shift to maintain industry line. I'm going to move this
on the other side. If I move around here, yeah, that's all right. If I go to my animation
channel length from here to the first frame, play this, have this body.
21. Lesson 20 - Simple Ghost Character - How To Color: Okay. So we're Hernandez. I thought. Why not? We can call our little ghost. Yes, sir. Why go with 11 column? We see them in shells
and stuff like that, but I won't show you
how you can holler. Maybe we can call this heroes and yellow because he
didn't wash himself. I guess that means
wash. You girls. Okay. But the thing is with this
animation before we render it, we cannot call this right now because right
now and this goes, this goes there has a
trust for a mask on it. So if I grab my
fill to business, how we get the
kilohertz and it gets, I'm going to switch this on
the first column in blue. Let's just put slightly. Slightly I see. This car yes or no. And if I try to harness my on my dose there
and yeah, it color. Now I'm going to hit
Control Z or is it because that's not what I want. They are a couple of ways we can call this
fellow over here, but we have the
crucible mass console. We can turn this off
or we can hide it. For the time being. From this icon. The icon can hide
the layers, right? So we're going to hide the
truth full mask layer. But the thing is, if we
want to color this, we can. The problem, the problem is that we don't really
have too many frames here. And I stopped calling
the first one. You will see that
there are a couple of problems that will occur. Obviously the sides here
and it will look like this, not maybe yours won't
look like this. You can look to, to Options, make sure you own your
fill tool and you can expand this a little bit
so we can see better. So my fill options right now, we have the threshold before the girls men should
be to the feathering to be 0. And the sample which is the
most crucial one over here, is to be all layers. Now I'm not going to
go through this again. What this means, yellow video. We're going to cover more in the future
videos, but otherwise, this is not the ultimate
coloring video. The ultimate colleague
less than here. But it's not that bad. I think it's very
hard edges over here. So what I can do is to grow the radius of the
feathering marriage. Maybe it's a free three layers. They're just made
a mistake there. And maybe two. Okay, So hit control
and C to this. And now with these new
options I can order again. And it gets this
cool effect inside, like it's glowing inside. And I kinda like that. Now always I cannot
change the colon. Like sound shouldn't
be a bummer, but let's just call this. Let's just go. Oh, these will take me awhile. The fastball, I'm going
for all the French. Now, the thing is, I'm going to go from these
frames and we'll call this. Okay. We're going to live with them.
And if I go here and here, and this is the
last ramus we know, right, Because we call this trailer to be
read me the last one. Now, as you remember,
our friends, they will duplicate differently. For example, this next
frame here won't be color because the idea was when we use the O key to have to create
an identical copy on a frame. So whatever changes
we make these frames, the rest of the phrase to
have the exact same change. Problem is that these 4412345
frames here, D is fine. They will not copy
it with the O key. They will populate
the way we copy them, we use the select. All of them will shift
the ribosome and then hoping we didn't
clone them the way, the way the rest
of the keyframes. Because when it comes
to this key frame, you'll see it's called
because it's literally a clone of this frame over here. And you can see we shall
keep them is clone. The one that has a
fraction on top. Which means these
ones are not closed. We need to go
through these again. Call him again. So yeah. Keep the animation
to be consistent. All I'm using my mouse here. By the way, these, these frames are
shown over here. And now if I play
this, it should play. More. And obviously decent
girls didn't wash itself how their heat. And we're going
to stop this out. Now when I review my
mask, it will apply. Let's see if it applies. Worm does. Now, we can export this fella. I don't want I know like
the white background. So I call here and
change the color. Like the dark gray. I'm going to use shortcut. I can use my bucket to assist the bucket
tool on the sample. All layers, I can hit Control Z. Because if I hit this right, if I call this again, if I go for the phrase, you will see that it
didn't see this one. That's ideal. So in order to call the whole
frame the whole canvas, I can finish the current frame again and again, basically. Now, I guess we can export
this fellow over here. Obviously he's outlines. I go back to transform us. They are black. Maybe the dark background
doesn't quite work. Keep an actually I'm
going to keep that. I'm going to export this. I'm going to show you
how you can export this video if you want
an image sequence. I'm going to show
you all of these because sometimes when we go to File and then
we go to Render, that's how you export
your animation. I know I say the term surrender. So random animation. And it will pop up
this middle Docker Hub with the way you want
to call it high. And you have a
couple of options. Now, the first one
is in a sequence, which means you explore every single frame as
you see here as a, as a separate image. This will be entitled like this. I think it's by default. Now the image sequence is not. Everyone wants to use an image sequence
because people like to have the right file like
the GIF image or video, or sometimes we look in the video because this
is where you can handle this S here or a video or
I haven't used this one, but this is the video
that you're looking for, the MPEG-4 video, or the given image, depends on your colors
on your computer. So you can research this
and if you have your, you can update your products
on your PC by the way, you can Google that and
see how that's done. Sometimes you don't have
the updated codecs and your FFM PEG file over
here doesn't work. We'll do have that problem
in the fail to export this, to handle this as
a GIF or a video. So whatever this file
doesn't work in build-up, doesn't work, is very
crucial for creativity away. You cannot export your, you cannot render your
animations intro video. But this doesn't mean that
you have to give up, right? So that's why I'm
want to show you how you can export
this image sequence. Sequence. The file format
usually go with PNG. It's a bigger file as a file or the JPEG JPEG image. And you pick your
location and your name, or in this case
will be, alright. And you pick the, the, the image location. I didn't make a
separate folder in that location is going
to make and hit Okay, it will export this in. No problem. Now since my buildup, this little thing
here works perfectly, I can export this as, as again. Let's try to export
this as a GIF. Obviously the size
is too big for me. So I'm going to size
this over here to 70. To remember that you can always scale down
union your image, your canvas when you
want to add form or you can not expand your image. I mean you can, but
you lose the quality. So here it says the first frame
here says the last frame. The way we have here,
the frames per second. The FFmpeg EEG buildup
is here as well. You cannot, if you
don't have this, you can click on the folder. And if you have almost
a new creature version, it will direct you to the website where
you can go home that you choose what kind of
format you're going to handedness this as a GIF. And obviously you choose the location now I
know it says venue, but as we said, it will be a gift. So I don't know about the
video. Pop over here. Excuse this. And I guess we'll do this with
the Herbert Boy hit. Okay? And we're going to
wait a little bit. So we're back. Make me some claim bigger, size. Here's our gift. We can pull this into prettier
or whatever you want. Bolus and your animation. You can pull this into our into kindle skill share
and then this cushion where you can post your projects and you
can share your amazing, amazing work with us so
we can see what it did. Alright, so this is one of
the ways you can explore this amazing animation
we just made. And I was in the
girls in wash itself. So that's another
topic for another day.
22. Lesson 21 - Drawing A Background: So we're going to
create a new file. New file. The
dimensions are nice. I'm going to use here is to create a background
for the girls. So that's one word. I'm going to create a room. Now her at first i inside to use this new tool which will help them to set
knee perspective. But it seems very complicated
and Adelphi I had the idea, so I decided to use that tool. So what I'm doing here is she used the basic things
like new line tool. I'm trying to draw a room. So you'll have control room. You don't have to
put your background can be anything else. But I'm going to just create room for the girls to pass by. And right now, this is
use, you can call this. As you can see, that I am
drawing on top of lines, right? So this is only the
sketching phase. Because nature home,
once I'm down, you see that kinda
make some mistakes. For example, right now I think contain door they're
making there. It will be too short
and too small. The girls, even though
the small enough, once they knew the window that I will do a window later on, you'll see that the
window is bigger than the orange doesn't quite fit for the hoops that have
huge windows and doors. I mean, maybe it can
be as bright now. I'm not trying to
have a perfect lines, perfect lives in general. I'm just trying to lay down the idea of walk where and why. I'm even doing the tyler tells the person centered
whole from this angle. And I'm using all the tools
that have shown along. We'll use the rectangular to
obviously no field there. The outline woman, the brush. I'm just lowering
the burst size. From now. You see that? Yeah, it's, it's a big, it's a big window
and it's a soul. So we know compresses the door. Yeah, that definitely
know there's a door will ask me why how door. I do use Control Z here. But again, this is like
a sketching stage where you just sketch out stuff
and see where they can go. So I am going to use
this to identify, I think I have showed him
for this tool allows you, this one over there,
allows you to, wanting draw one side. Obviously to draw on the other side can
be symmetrical on the other side as well. The other two. The other two, the
other icon next to it does the exact same thing. That's why I wish to
use from the twos. Basically when you draw, the drawing would
be symmetrical. So I'm going to make them
the most rare and just go try to make a couch or the
ghost to sit down, I guess. I'm not quite sure if this
is the house of the girls, but I'm just trying to make
living room on one side and another on the other
side so we can have some sort of background
noise on this. Symmetrical, symmetrical
too is great when you try to save yourself a
little bit of time. I'm going to make a
table for the lamp, nomial lamp on that table. So now I'm going to create, we need some Capra L'Oreal. I don't know why I
deleted the one of the windows of the window. But we'll fix that later. And yeah, I'm just
going to try to make a little small
car park over there. Because, why not? Feel free to draw
whatever you feel like? Again, this is just a concept
stage like sketching. Sketching stage where
you lay off your ideas. And actually we're
done with this. We'll get going again. And we'll try to fix the
mistakes that we made. But also to finalize a good lines like
these. You see here. What else we can do is we
can create a painting. Yeah. Or I guess it's
been real painting. I'm going to position
my role there. And I will try to draw a frame. Fancy praying. Well my painting, and it
will take me a couple of tries to her to see what
exactly I have there. Feel free to experiment. Obviously draw the room
the way you see it. You have to draw a couch in
the room, but it's good to, if you're following this, we will create a background
for your goals that you made. I think it's good. Maybe try to make
a couple of rooms, maybe not just because
they might case right now, we see two rooms here, right? Well, live at home
and the other one I want It's just another room. But you can try to make more
than one and see the goals passing through maybe
the walls as well. Because we need to head
toward their goals. They're on the painting
or picture there. What else we can
do is to, again, everything that you see that the way I'm drawing
it is a one layer, wholesome enjoying on
top of stuff and calls the meeting stuff to plant because every room
deserves to have a plants. Yes. This is my plot. Now I
know that I'm trying to plan on top of the couch, but I'm going to
go in and delete the path when the couch
and very shortcut. The shortcut for symmetry
between the brush and the eraser is E.
Once you click E, you activate here is that once you press E, my screen again, you deactivate the eraser or you can press V to
go back to your brush. So after we're done
with the Romans to save that rumor has it as a JPEG. Jpeg, JPEG file. That's the name of the file. Or you can save
this as a PNG file. Once you have that,
you can either open the girls file itself. Is it goes from the last time. Now we're not going to use
the toast, okay, yeah, hello goes, goes in one go. I'm going to play in
this just to see if everything goes well and thus, I'm not going to need
that goes with this one. So I'm going to click on
this icon over there. It's like a pin icon. When I click on the plus button, I'm going to find where is my
background, and here it is. So I have, I haven't go here. And I call this concept, and I think this is my
first course and by binding the corner so as you can see the door, There's
slightly better. I guess. We can lower the
opacity on that file. I'm going to change the
color and the background functional and I to
invert the colors. Because the reference image
now that I have the room, the concept that
I have is on top, I'm going to create
a new layer so I can talk in yellow there whom
the elements I will be, let's say the window, the, the picture, the
couch and the lamp, and maybe be the coffin there. They will be in the
back arrow so I can draw them on one layer. Why I'm doing this, one, drone and drone different
objects on different layers is because I want to create
some parallax effect. But once the girls class by, let's say from the door, want the, the, the wall that's that's
closest to the camera, that's closer to us. To be on top of the ghost
or the plant there, to be on top of the cost. So the cost to go
behind that plant. So everything that's
in the background, we will see the bone on top. You will see that later on.
23. Lesson 22 - Coloring And Assembling Background: So I finished my drawing. As you see, I'm going to walk you through
what happens here. Close right now, so I'm
going to hide it goes. As you watch the video before, if you haven't watched
that, I'm going to hide this this two I
finishing this up. But if I scar or for the layers that we
have a couple of colors we have with the
back row are wrong. We have telephone,
which on its own layer, the flower which
on its own layer. And then we have a wolf pack. The way I tried to do this, because my idea is, as I said before, when I drank, like when the girls pass
through this point, I want this, I want this, this wall to be informed. The ghosts, ghost to create the illusion to the
grocery store from the door. In order to do that, I need to have this part of the wall to be on
separate layer, which in my case here. Now, if I had the girls, now I decided to
create a new layer. I like to call this
layer core base. So what I did is grab
more fuel to here. When these options, I
move this around here. I have the threshold
to be, to grocers, to be four-fifths those
and to the sample, which is also very
important to be o layers. Now, this layer over here, behind all of these layers. And I will use this layer to be, my asset says can
be my car and buy. So what I'm going to do is
I'm going to call ischium this individual objects to own their own individual layer. And I will use this
core base layer as a reference because they
are all behind everything. And I want the plant
to be on its own. And the way I call this, I cannot do that because
I do have the plant or a flower on and solve
their problems. I cannot cook this part. So his smile is okay. Why isn't this too? Let's, let's try
this with the plot. I'm going to hit control. Click on the plan. Hi, my color vase. And I'm going to go to the plan. We're going to hit
the new layer. And I'm going to
put this new layer behind my plan, right? And then I'm going
to call this again. Now, this doesn't
work well here. Why? Because we have a
little gap over here. So I'm going to hit Control Z. I'm going to color these, these, these, these again. But I'm out here, I'm going to grab my mouse. And yellow tried to
call this lambda. And then when I come here, I will have a proper housing
and the smaller plots, I can hear my mouse
again, colonies as well. I'm using my mouse right now, but I feel like I won't
be needing years my, my, my pen, but I'm
too lazy to do that, so I will try my best to use, use the mouse look. That doesn't rhyme anyway. Star Wars and Keats,
anyone just meeting? But as I said, this
is what we have here. Now. Skilled flowers on Sunday, the Alliance of the flower, only its own Did I
miss something here? I guess it looks all right. The license on its own layer
and the color is, and so on. And so once I'm done with
the coloring of the object, I can hit Control and select the flower and
the flower scholar. I'm going to hit Control E
to make this into one layer. Now, it's going
to be on my layer and double-click on that
and the coldest flower. And that's why I tried to do
the rest of the other stuff. So I can hide the flower
because I don't need that. This is the wall
that's in front here. We can color the background. The background won't be
moving. So I'm going to come now go a new layer. I'm going to open
my current base and I'm going to choose this color, hi, my color base. And then we will try to
call this every hour. I think we did a good
job on this again. Then we call the
window hit Control to select Quick branded
colors on your canvas. This and then, then this, and then missing in pink, this. Is this I'm going to
speed up this video. Let me know. I have to watch me do
this all over again. Now let me reveal the phone. I think we're done here. We have the wall back. I think we can call
hello back as well. This color right now. This colon, the
whole thing though. Maybe we can stop the
color brown here. I'm going to grab the line tool. We still want our color
layer that we created. A graph, something like this. Maybe you're all here. And then I'm going to call
this looks all right to me. Reveal the other column. I mean, to use this stuff without the telephone that
will be in the background, the color stuff so that we can take the wound back in the background,
making one there. And then, then, then, then, then we can make a new layer
for this block of wool. And we can call this my
taking the same power. Here. She makes sense.
Yeah. Alright, we can merge these two rock wall. We can call this room. I can't type today. And this we can merge
together as well. This back wall, yes. Now, here's the flower and you're feeling
we didn't call them. What's the phones and create a new layer for the phone
to call on the phone. And we're almost done, I think, pull this telephone and we
can kind of call them base. So now what we have got moving
around and don't come out, we have the wall. We have flower in
a new color here, but because that's in the
planet will be visible. We have the phone and
have the rest of them. So now what we can do is to move to the front wall to be on top of everything
including the ghost, hold and drag on top. There will the gills and
just behind that wall. So now we go back. We see this. Yeah, this, but it goes
on top of the flower, so I don't want to do that. So we're going to move
the flower on top of it, goes and then the phone on
top of the dose, right? So now when I play this
hopefully looks amazing. Now we confusion
is no automation on the girls try
loops of curves, phone mask on first frame, control mask, the move through
here, the transform tool. And we can change this to be off screen and go
to the last frame. Is your mouth, move it. Move this to be off
screen as well. Holding shift to
maintain proper line. Let's play this. Yeah, he's running
around the house and it looks like a
looping animation. But, you know, I think it's
fun using the door from now. Okay. He knows how close the door. And he's running in
circles. Uh, yes. Yeah, this is how you make them pellagra for your
simple animation.
24. Lesson 23 - Ghost On A Skateboard Part 1: So in this one, I'm just
going to show you what I did. I manage the zombie, ghosts and anxiety, my
gross jazz keyboard. Now I'm going to put this out
in separate layer height. My other ghosts are going to
focus on this one over here. What we do is try to do, I will try to do
straight ahead animation because I already have
a design in my head. I will be animating
on the sale of the character and maybe
the head a little bit. So what I will do is to
first focus on the tail. So I will load your question the keratin and we'll
make a new layer, which I will try to
make, exhale movement. And furthers VUCA, I will change the
names and the layers. So first we got to try to do straight ahead
animation with Excel. So I'm not going to be
shown how body there is no need for me to
draw the whole body. Hi, The tailwind
behind the hoodie. So I can draw the hoodie on top. But that will happen
on different layers. So first we're going
to animate the tail, and then slowly we will move to T head and then show itself. This is the moment
we've got here. It's not the best, but I mean, maybe if I spend more
time to try to make this more fluid, it will do. The idea behind this was
to make this to repeat. So again, I tried to copy the first frame and try to make in-between
In-between the first man, the previous frame so I can have a proper last frame
if that makes sense. So it wasn't a tail is animated. I'm going to make a
new layer for that. And I will show the hoodie. Now, don't be alarmed by the names on the
life of the layers. So far we have only one
layer that has animation on. And now we're going to
have a static layer, the layer with the hoodie. And obviously that
will take me a lot of trial and error to
get the profit line. No worry, have to hit
control Z a couple of times. But at some point
you have to be like, Okay, this is good
enough, right? Okay, so once the
hoodie is done, I will make a new layer again, but this one will
be for the head of the fastener will see there. So I will try to make smooth animation like
animation of the head. Moving behind the
whole day itself. Again, I don't want to do
shoulder over and over again. Once we're done with
the basic animation. Then finally we can go to
this role, the skateboard. And later on, you'll
see that again, this is a little
separate layer on some. Again, increasing, we
want to do animation. We make sure we do it on the proper layer that we want to do this animation, Right? Surette, No, I tried
to delete this. Sounds all things
for me to show you. But I said to draw the scale
bar on separate layer. And I gave up on that. Now let's keyboard. And I think it's time for
me to stop adding the cars. So I decided to do is I already had designed this
character with the colors. So what I'm going
to do is to bring the ready design on the
character to the canvas. So it will be easier
for me to get the colors I need to call
on this feller faster. Now I'm figuring out how
I want this to white, which lasts and
wants to be visible. So first I'm going to start coloring the body
of the character. So when I call the
body of the calcium, that color will be on one layer. I need to go through the frames and it cover
all these frames. Now, the tail of the council is, once the head of the character
is serious, which ways? I think to keep the consistency
of the tail itself, because it will be changing
every single frame. Unlike the head
of the character, really use my fill tool and
using shortcut from trope, pick the color I need the
first frame, 0 frame. We're going to create a
blank frame older and I will start coloring the
course itself.
25. Lesson 24 - Ghost On A Skateboard - Final Project: So once we have the basic
colors of the girls, who did this just to see if
everything works out well. I'm not adding any
shadows quiz yet. So the hoodie, the color of the hoodies
on separate layer, and the color of the ghosts, those on a separate layer. Now, I will make a clipping
mask, a clipping group. I'll try. When you do that,
you will be able to have a mask layer on top. And that way you can start
adding the shadows and the highlights of your
animation in this case, will be your character. If you want to animate that, maybe because let's say, if I want to add
highlights to my ghost, it leaves the body of the
girls, not the hoodie. Maybe the best way to
do that is not wearing a mask layer, but with a, another layer on top and go again through the frames
and add the highlights. You need. To just select the
different body parts and add a slight
gradient effect. Then later on I drop
that idea in a way. Now give me my, I'm not
trying to replicate the exact the exact concept that I have on the right there, the illustration
that I have there. So yeah, occasionally who
the color and make sure to give different types
of shadows to calc. So I do keep slightly
the cost me the same. And as the lowly get the glow
of the character as well, once we get all the shadows
and the highlights in place, this is just optional. Of course. I will leave you
this file and you go in and open it and see
what has been done, how you want to do as well. By the end of this, I will make sure to have a
group layer with a character. And you have a group
of the calcium with the separate elements combining
making this character. But also you will
have one layer, which is the character itself. Because I will ask some
trainee animation hello side. Now I'm adding some
blur effects to the power of the goals that
I duplicated that power. So now we have to call two
layers with the color. And on one of the layers, I decided to add motion blur to be able to make this effect. Now, this adds to only
one on the frame. So you need to go through
all of the rest of the frames to hit
Control and left. It's a shortcut to repeat
the last effect you did. I'm going to move
this blur effect to be on top of the
lines in the character. I think the effect there is. More interesting. Then Denton be on
the O can be behind. And I will try to make, I'll try my best to change
the blending mode of that layer on the
copy of that layer to get a different
effect as well. And I will move this
on top so we can have the glowing head of
the character as well. And I will just play with
them, see which one. I like. Again, I'm not trying
to be tricky to the Today illustration
I have on the right, I just want to make
something better. Now the ratio works fine. We have glow on every single
frame, which is great. That's why we also see slightly more slight
movement on the head. Now, I will try to
add some shadows and some highlights
to the hurry with the different brushes we have Susan who these now I made it. I can add a couple of stroke, strokes of highlights,
which will help me see. I don't have this
weird illustration. Holy. This is again optional. You don't have to do this. It really depends on
the style you Lord for. And that's plenty machines. So simple as that to make the lines of the
tail and the head of the post can be white or slightly brighter pink because
again we have a pink nose. So I felt that this will
make the characters pop up, especially on the dark
background that we have. Again, this is just optional. You don't have to do it. Have you follow your account and design that you made and
you try to duplicate that. But again, it's just optional
and I think it looks better that way when
you have white lines. So once the animation
with keratin is done, every single animation
for that counter, including with the hoodie,
to be on one in one group. So after I've done that, I decided to
duplicate that group. That group that allows me
to have my character twice. Now, I'm not going to use
the group of the character, the group of character for me there if I want
to change something. But once I have this one
layer of the character, I can make the whole character, although we didn't
mention on the eyes, along with the
animation of the tail and the head to move together. That way. Now we have all the animations
of the character 01 layer, so we can move that carrot, but I need to duplicate the
animation base going to make my animation to be longer than the French
then we have here. So I managed to put the last frame to be read so I know where the animation ends. So I nowhere the frames, the frames after, so you can clone them or you
can duplicate them. You can use the shortcuts. Sometimes I use the shortcut,
sometimes I didn't. Just use shifted one to select multiple frames or control
worth the same way. And that's pretty much it. I tried to make this
animation to be a bit longer by duplicate the frame. This is the only way you
can make your animations. As of now, there's no
command to say loop yet. So the way you can look
something is to duplicate your frame so they
can repeat and you play them.
That's what we have. Minus glow is you
make wake up and they'll love to do that now with streaming from
animation that I have, I will add a mask as I showed you before
in the previous lessons, in the previous videos. I will try to rename. Again. There was a lot of
memory renaming. Here. You can name your layers
and when you want, as long as you know what they
mean and where they are, and what day, what
you have on them. You can name them potatoes
if you want that at all. I don't know. Yeah, but that's pretty machine, so I will make sure that I have the first one and the
last minute to be the same in order for
this guy to loop. And I will move up and down. And later on I will probably put some shadows beneath
him as well. Let's see how that looks. Fine to me. It's not that bad. Let's not the fast. Right now i'm, I'm making
12 frames per second, but you can always change
that as I showed you before. But in general, that's
my final result from this whole class. If you are eager, you can
make this or you can try to fold other class,
Daniela classes. The healthy is, I have shown you your final pose
you, this I think, is to try to make one
of the characters, of the many characters
now shows you here. It tries to animate them. If you love very calm,
confident with frame-by-frame, then try to make an animation, tried to make the
puppet animation, right, with the
little robots there. And I showed you
in the beginning. If you want to try frame
by frame and try to make this maybe a simpler version
of this goes character. Maybe you don't have
to give him to have a fancy hoodie or a skateboard. Skateboard is actually
to be elevated. You just need to
animate sneak lines. And yeah, I mean, just try to do something
and share with the class, share your amazing ghost or your amazing robot guy and
girl in the, that's my ****. I hope this was helpful to you. I did manage to finish this very It took me a while
to finish this class, so thank you so
much if we actually had gotten to the end of this, I have really a lot
of fun making this. I hope you had a
loss of it today. And I hope you use what
you learn from this. So make sure you
share your projects. And I hope I'll see
you in the future. Bye.
 Munkaa, Digital Artist