Transcripts
1. Welcome: Digital sculpting
is fast becoming a popular medium for
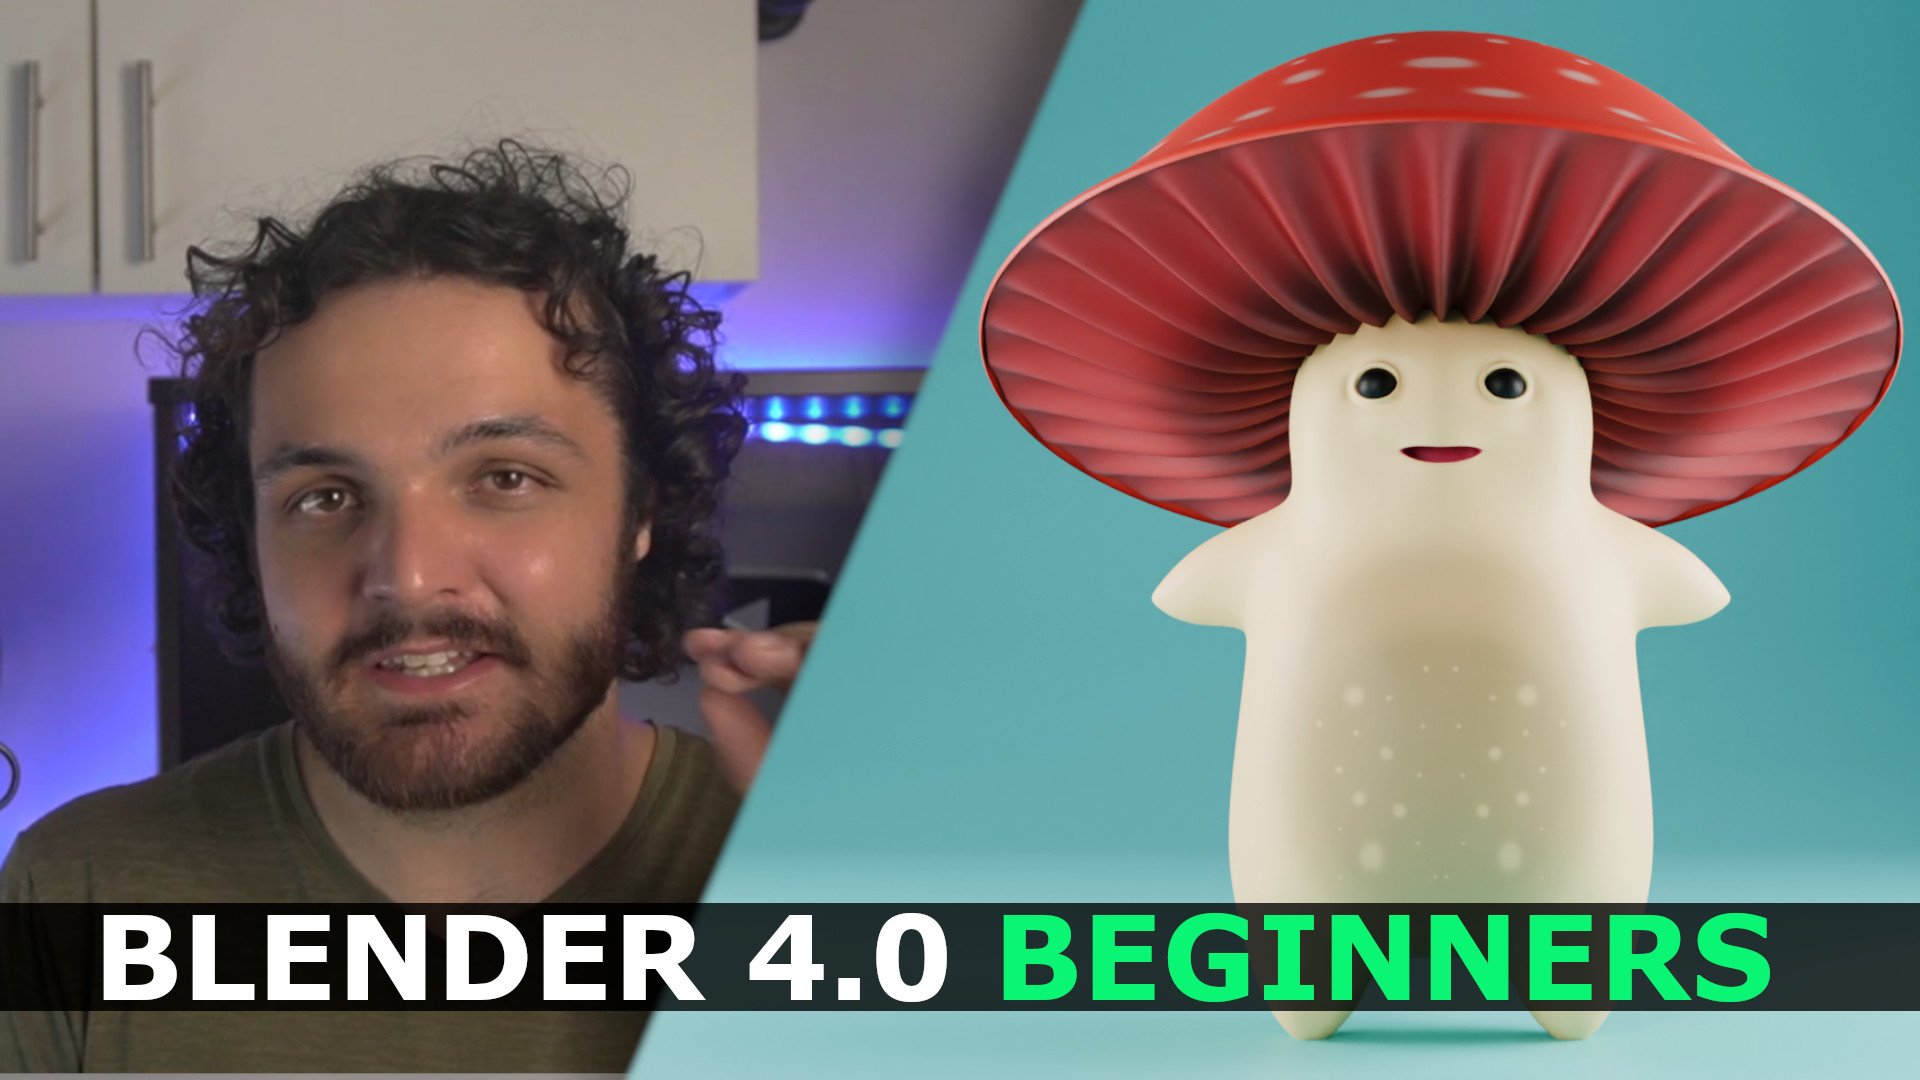
creativity and art. Welcome, my name is John Ray and in this Skillshare course, I'm going to be
teaching you a thing or two about sculpting in blender, which is a free and
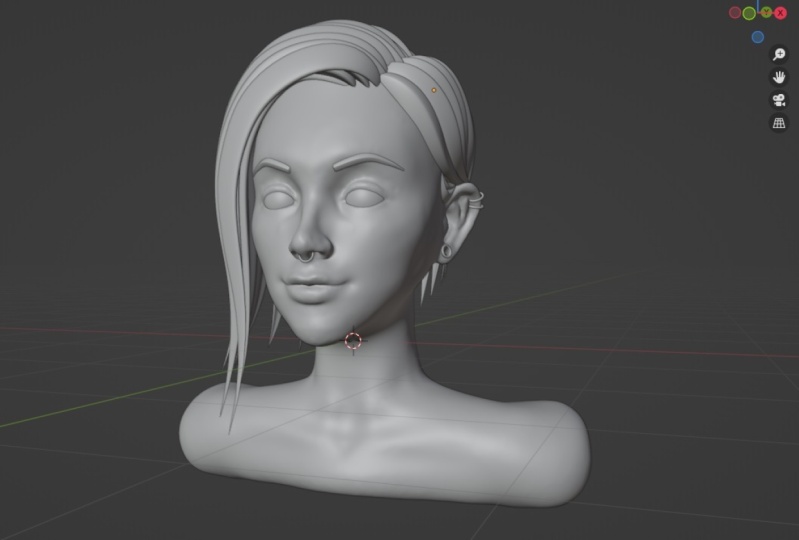
open-source software. The end result of following
this course will be sculpting this head that you see right
here with the hair as well, which we're gonna be
doing with curves. I'll be explaining
the whole process whether you're an
absolute beginner. I'll take you through
the first few videos explaining the
basics of sculpting. If you're already familiar
with a few things in blender, you can go right ahead to depart where we
sculpt ahead itself. And one of the things
that's going to make my course a little bit
different is that I'm approaching it from the
perspective of using a computer mouse and not
my usual graphics tablet. And this is simply because a
lot of people out there who may very likely
only have a mouse. And once you learn
the principles of sculpting and you get a little
bit comfortable with it. You see if it's a medium
that you'd enjoy, tin you can invest in
a graphics tablet, so just a mouse, that's
all you need and a free copy of blender which you can
download on the internet. All of the relevant
resources will be provided inside of
a resource file where you're going
to have all of the different blend stages that are relevant to the head scope. Also a model sheet and reference
board that you can use, and a startup file if
you don't want to set up your own scene and you want to just start from
where I'm starting. I encourage you guys to take what you learn from
this class and develop your own style a little bit and see what you
can come up with. I look forward to seeing guys in the course and I hope you enjoy.
2. The Model Sheet: So one of the things
I would highly recommend for people
who are getting into sculpting is to try and draw out a model sheet or
even find one online. Now the reason for this is
before you're really good at sculpting and you can kind of visualize things in free space, you're very likely going
to need something like a 2D reference to help you out and to kind
of get you started. And as you get more advanced, you can generally just start reforming a blob
and sculpting it. And you can look at some
reference images as a beginner, having a guide is
going to be helpful. I'm going to quickly
show you what I do, but I'm just teaching you
to fundamental principles. You don't have to use
GIMP like I'm missing, you don't have to use Photoshop. You can use anything, you can
use Microsoft Paint or you can just be old school
and draw it on paper, take a picture or scan it. It doesn't matter. Anyway, you prefer and that you're
comfortable with her work. But what you're gonna do
is just draw out a circle. That's a very handy thing to
do when you're starting out. And in that circle
you're going to draw a line down the middle
of that circle. So you can see here it's
a very simple concept and the length of that line, so the bottom of it, where the circle is, the length of that line that goes down should be almost about
half of the circle. So you could almost break,
get up and deferred. So you can look at this
as one segment down to the middle and not a segment
down of the same length. And then another
segment down if the same lengths to break
it up into phrase. And this is not a golden
rule, anything like that. It does tend to be a nice
proportion to work with. And then you can just
simply draw a line about less than a quarter of the
way down on the circle. And that's usually a
good place to start placing the bottom of your eyes. And then the top would be where your eye or bridges guard. Now, the IRS or generally, I tend to have a little
bit higher than the top of the eye and that
tends to be what you see in real life reference. And then I'll have
them coming down to about what a bottom of noses. But the lobe of the ear down the bottom
electrode let that come down just a little bit
lower than where did noses. And then somewhere between
the nose and the chin, I like to put a little dash just to indicate where
their mouth is. Now what you're going
to also want to do is you're going to want to
add in some reference lines. If you're drawing on paper,
you can simply just take a ruler and draw out
some lines diagonally. Now where you place
those doesn't have to be exactly the way I'm doing it. It's just anywhere with gives
you a point of reference. If a maid That's the
top of the head. So I took the circle
here and a line out from it and just above
the eyes and ears, underneath the
nose and the chin. And so just these four lines. And then what you
can do now you have these reference lines and
you can draw a side image. So did the exact same
thing as circle and a line going down and I
broke up into thirds, as you can see,
exact same thing. And then from there, I just drew out to the back of the
head a little bit of a curve and that you're
just out here to front because it's more of an
oval and that is a circle. And then I just made
a little triangle here to represent
the side of the eye. But you can see it lines up with the reference line and
the same thing here. The nose is very simple. I just drew that line down. I knew where to
end the bottom of the nose because
I can see here on the reference that's
where the line is here and the chin
is the same thing. A very simple and practical
way to get references is to go to a site like
Pexels or Pixabay, just type in face or
whatever you're looking for. And it should come
up with a bunch of really good results. You can download
whichever ones you want. And then there's a
free little program. I'm going to quickly show
you where you can drag them in to make a
reference board. So this program here is called pure reference one
I use all the time. You can simply go to pure ref.com and download it,
run out on the computer. It's available for
both Mac and Windows. And once you have it installed, you can simply run a pure ref on a computer and it'll pop
up with this window here. It's a very basic windowed
is no buttons or anything. You can simply
right-click anywhere in a window and move your
mouse to move it. You can also just
right-clicked by itself and then you can just go to Help and it tells you all of the
different commands. Now, if you want
to drag images in, you just download a whole
bunch of images that you want. In this case, I've got
two front on images of a face and to side on ones
that I got from Pexels, I just grab them
and drag them in. And then you can
just left-click on an image. You can
move it around. You can grab an image and scale it by going to the
handles and the corner. Very simple program
and very easy to use as hardly any need to
make a tutorial on it. But you guys can get the idea. You can just right-click
then save and then go save as and is saved at a reference board somewhere
on your computer. Now I've already done that, so I'm just going to
go ahead and close it. But what I am going
to do is, well, I'm going to be providing
along with this course, a reference board, cold faces side and front to
have those images. So if you haven't
gone and major R&B can just use the one that
I'm going to be providing. So having pure ref running
in the background, essentially it gives
you the opportunity, if you get stuck, to just quickly come
in here and just look at your references and you can drag as many
inheres you want. I'm not actually challenge
you guys to add it to this and just get many
faces is you can, whatever you're trying to model, drag it in there and you have a nice little
reference board and just make sure to save
it and you're ready to go. So in the next video I'll be talking about Blender
a little bit, some basic user interface
stuff and navigation. If you do already know
how to move around and blender and you know the
basic user interface. Feel free to skip ahead to the
video where we're going to be starting preparation
for sculpting. And you can go from there
so completely up to you. But thank you for
watching this part and I look forward to seeing
you in the next one.
3. UI & Navigation: Assuming that you're
absolutely new to blunder and you
have never used it. This video is going to
be taking you through the user interface
and basic navigation. So essentially just how you move around and how by no means can I cover everything that Blender has to offer
in a user interface? But I will provide a link to a full beginner's course
that I have on Skillshare. And you can also just go and
check it out on my profile. It's a very handy video and
it'll get you up to speed. Also, we're going to
be using a mouse, so we're not going to be
approaching navigation from the perspective of a
stylus or a tablet. Even though that's what
I personally use myself. A lot of people out
there don't have that primarily focusing on the
principles of sculpting. Even though a tablet is ideal, a lot of people may
only have a mouse. And I want to learn a
bit about sculpting before I want to invest
in a graphics tablet. So that is a little bit of an unusual finger off the mouse, but that is how we're going
to be doing it, a navigation. I'll also quickly note
that we are going to be using shortcut keys
on our number pad. And a lot of people don't have
a fully extended keyboard. So if you don't have that
little square grid of numbers on the side to usually
have 0 to seven. And you only have the numbers in the
top of your keyboard, like 12 free, old way
through to 90 on the end, you can simply go to Edit and Preferences under
the Inputs tab, you can go up to keyboard and
go to emulate number pad. And then the case that sit
on the top of your keyboard, the number keys will
emulate a number pad. So moving around in
Blender is quite simple. What you can do and I'll
quickly just enable my screen cascades that essentially just lets you
see what I'm pressing. So you can hold in shift in Blender and then holding
your middle mouse button. And that allows you to pan or move around in the 3D view port. And a free 3D view
port is this tab right here or this box by this
window, if you will. And that's where you do
everything in free day. So holding Shift and middle mouse button at the same time and moving your
mouse allows you to Penn. If you want to rotate, you simply hold the middle
mouse button in by itself. And he can rotate. And just those two right there, the middle mouse button
by itself to rotate and then shift middle mouse
button holding them both in, moving the mouse to pan. Those are going to
be the main things he used for navigation. You can also roll the
middle mouse button. So rollouts board and enroll
it back to zoom in and out. And they're getting back
to our shortcut keys. The reason I mentioned
the number pad. If you hit one on
your number pad, it'll take you into the
front orthographic view. You can enroll in a middle mouse button to zoom in and out. If he hit free on your
number pad, they're free. You can go into the
right orthographic view. Seven takes you to top, but if you wanted
to do the opposite, so if example, if you
want it to see to bottom, you could do Control
7 or Command 7. Now these shortcuts
may be a little bit confusing when you're
just getting started. So you can also just go to View and simply go to Viewport, and then just click on
one of these options. For example, let's go to front, and that's pretty much
just our view port here. There's a lot of
things that you can say about the viewport, but that's primarily the main thing you're
just going to need to know to get started
with discourse. Now I'll briefly mentioned how
you move an object itself. It's not going to
be that relevant. I was sculpting, but
just so you understand, in Blender, if you actually
left-click on an object, you can go over here to decide and you can click
on the Move tool, and then you can
just simply click on these little errors. I won't go into what the different axes are
and how you use them. But essentially the blue is z, so you can move it up on the z. You can left-click
on the red arrow, hold it in and move it that way. And that's why you can just move the cube belong into 3D spaces. Alternatively, you can hit
the shortcut, which is j. So hitting G on your keyboard allows you to move an object. And if you hit G and
any follow-up by z, you can restrict it to dizzy. If you then follow it by y, you can restrict it to the y
and an x restricts it to x. You can click on rotate, and it's the exact same
thing, but just rotation. So you can rotate
it on the X axis. And once again, I'm not really
going to go into that at the moment as it's not too
relevant to sculpting. But also here you can go
to scale and then you can click on these
different axes to scale along the axes. So in this case it could be z, in this case
it could be x. And then you can click in the middle and that'll
scale the whole thing. Also keep in mind that
this coordinate system, the z, x, and y is currently
working on the global space. So essentially
what that means is the cube might be
rotated right now. So if I rotate it and
then I got S and I go z, it's going to scale and dizzy, but it's going to skew to cube because it's using
the World reference. If you hit S and
then hit Z twice, it'll do it locally
on the z-axis. Now, I know that might be
a little bit confusing and if you don't understand
that, it's okay, that's not going to
be two important for following along with
the rest of these videos. But you can watch, like I said, my absolute beginners course, which we'll explain that in
a whole lot more detail. But for now, that is
how you essentially manipulate an object with
these free tools here, we are currently also in
what we call object mode, where we just move
objects around. Now if you go over here
and you go down to Edit, you can go into edit mode. And this is essentially
where you can individually manipulate the points which are known as vertices on an object. And you can do that by
selecting a vertices. Or you can go up here and
select either an edge. And you can also select
a face and the moving in here and I'm rotating or the exact same tools
and shortcuts stuff. The only difference is
you're going to be seeing a whole bunch of
extra options here, relate it to, to edit margin. Once again, it doesn't really
matter too much if you understand this for the
rest of this course. So Object Mode is
almost just like a collection of faces,
edges and vertices. And you can move them
around in 3D space. And if you were to edit
them, you can come to Edit. And that's where you can more
individually manipulate. And that's more what we call traditional modelling. We're
not going to be doing that. We're gonna be doing sculpting. So let's just quickly
we're going back into the object workspace. And when we want to
sculpt something, we can go up here. This is one way to go to object mode and just going
to sculpt mode. But alternatively, you can just select the object by
left clicking on it, then go into your
sculpting workspace and it is already
set up for you. I'm not going to
be touching these different workspaces up here. They're all four different
types of things. But essentially, this sculpting
workspace is going to have everything you need
to get into sculpting. And as we continue, I'll explain all of these different
things here. Now on top of the
3D view port here, which I've already explained. The one thing you're also
going to want to look at is just this scene collection up here or just outliner
as it's known. And that's where you're
going to be seeing all of the different things
that are in your scene. You can turn things on and off if you don't
want to see them, you can add things into
collections or groups, almost like folders
in Photoshop or GIMP. But as we continue, you'll understand
that as we've started using it in practical ways. But that is essentially
the user interface. So I feel like I'm
at this point where I can wrap this part up. And if there's one
thing you can take away from this is an absolute newbie. If you're still
learning Blender, just practice the navigation. Get comfortable with moving
around, with panning, rotating, and
zooming in and out, can practice those things. And also just going in
between the different views. The front orthographic
view, like I said, is one we go into quite
often because that's where we see the character
front on end of right view and a left
view which you can do with control free
or Command F3 as well. As long as you get
that cemented down and you practice that
you should be able to comfortably follow along
with the rest of this and a lot of the other stuff that went over your
head a little bit. If it's too new to you, don't worry too much. It's just getting you introduced
and you don't have to feel too much pressure to
understand every little detail. I'll make sure to
explain that as we go. And by the end of the
sculpting course, you'll be able to make something really cool and there'll be another bit of information
that you can use as an artist.
4. Setup For Sculpting: In this video, you're
going to learn how to set up your model sheets in Blender and how to organize your single little
bit and save it out. Before we get into the
rest of the course, you can use your own reference
material or model sheets. Just at least make
sure that whatever you bring into the
computer or scan or take a photo off is
at least something like a PNG file format, which I know works really
well with Blender. So if you go to the
Resources folder provided with this course, you will see the head
reference DEM file. Does it the same one from the earlier video where we
looked at model sheets. But once you have it opened up, what you're gonna do
is you're gonna go to File and then you're
going to go Export As, and then you can go find a
location on your computer. So I'm going to choose
my desktop as example. I'm going to click Export
and then just click here on this Export button on this
little panel that pops up. Now, I've already done that, so I'm not gonna do that, but that's what you guys can do if you're following along. I'll also mentioned
that you can leave the background
active if you wish. I prefer to switch
it off and just export this as a PNG
with an alpha channel. So essentially we're
just going to be seeing the lines and the rest is
just going to be transparent. So as I was saying,
on my desktop, I have already exported
the head reference PNG. What you're gonna
do is you're going to simply run blender. And here you can see
blenders now run. And by default, it just has
this scene here of the cube, the camera, and the light
as you've seen before. Also, I'll just quickly
mention once again, just in case anybody's MRD, I am using Blender 3D point or at this point of using a
really old version of Blender. And things may be a
little bit different, but before we get into anything like references
and setting something up, it's very good practice, especially when we're sculpting because it can be a little bit unstable when we have a lot
of geometry being added, lender may crash, so
make sure to save. So what you're gonna do
is you're gonna go to file and you're
going to go save as, and then select
somewhere in your computer where you choose the destination on your
systems completely up to you. I'm just like my
desktop and it's also very important
to come over here to the naming convention and name it something that
you'd recognize so you don't confuse yourself with a whole bunch of
untitled dot 000, whatever files that start
piling up on your desktop. So let's click on here and let's type in something like head, because that's what we're
going to be sculpting, underscore sculpt and, and what I like to do
and this is optional. You can go underscore
and then you can put 01. That's, I'm gonna go
ahead and go save as. And now you can see here is a head underscore
sculpt underscore 01. And the reason for
that naming convention is when we're sculpting, we may at some point
want to go back to an earlier stage
where we didn't mess something up occasionally
when you make a major change, instead of just going save, you can just go Save As then, instead of naming
everything again, you just simply click
on this little plus and it'll automatically
change that convention to O2. And he can go Save As so every time you make a major
move instead of just saving is
really good practice to save with these extensions. And that way, if you realize
you've made a big blunder, you can go back a few stages, and that's a very handy little
tip for you guys as well. So whatever stage of Blender
you've saved so far, just make sure you've saved it. And since we already now have our exported reference
image or model sheet, what we're gonna do is
we're gonna hit one on number pads to guard into
front orthographic view. And once again, like
I've mentioned, I do enable my screencast case. That's why you guys can
see the keys that I'm pressing and that should
be a big help as well. So indifferent
orthographic view, once again, one
under a number pad. What we're gonna do
is we're going to locate the image
that we've exported. So in my case, that's
on my desktop, I'm just gonna grab it and drag it directly into front view. Make sure not to drag
it on top of the cube because then it'll add it
to the cube as a material. You're going to now left-click on this plane that's
been imported. And you should see up here
in the Scene Collection, we now have this thing
here called an empty. It's also known in auto
softwares as a dummy object, but essentially it's not something that's
going to be rendered. It's just there in the background and has a
lot of different uses. So with this empty active, hit G to move and in Y, and you're gonna move it
back in your scene survey. It's not intersecting with the object we're
trying to work with. Once again, hit one on your number pad to go
into the front view. And you can now hit G with that plane selective
and try and move it right in the middle
so that this face here to front image
of our model sheet, right on that blue line. So you can see here
that middle line there. Just make sure it's right on that blue axis line in the
front orthographic view. And then we're gonna go
G, z and we're going to move it down sets of roughly where our cube is
just a little bit. So hitting Z on your keyboard, you can guarantee this thing
here called wireframe. And that way you'll
see Froude a cube. So you can now go G, z and move it down. And what I'm gonna do is
I'm going to move it, tilt the chin of this
model sheet is right on that red line that
you're seeing into view port or what
we'd call F floor. So that's the red axis line and that's just a good
point of reference. You guys can set it up
the exact way I'm doing. Now what we need to do is we
need a side image as well. So if we hit free
on a number pad to continue to write
for graphic view, we don't see a reference. All we have to do now is just select with that empty active, we can go Shift D to
duplicate a shift and D will duplicate and
then hit G and in Y. So GY after that duplication
and move it forward. And if this plane still active, we can go our Z, so RStudio tight and
z is the z axis. And then we can type
in 90 and hit Enter. So now it's rotated
at 90 degrees on the z-axis and we can hit afraid to go into a
right orthographic view. And we already have the
right height of this image. We just need to move it
on the y coordinate, which is this green line here. The right orthographic view, which is free and
a number pad and this new empty dot
000 001 active, we can go, gee, why and move it, and move it till it is sitting in the middle
of our scene here. Or you can look at that blue
reference line as well. You should also see
this thing down here called f 3D cursor, which is where things
get added in by default. We'll talk about
that a little bit later in some of the
upcoming videos. But that's what you
should be sinks and now it's perfectly
lined up that way. To only thing we need to do now is in our front view
is a hidden one. To go to front view again, you can go G and then go x and move it under negative
direction on the x. So we're just
moving it this way. And that way we
will still see it if we hit free on a number pad. But it won't be intersecting with the object we're
trying to model. So now you can hit Z and you can go into
solid view again. And you can see we now have a front reference and we have a side reference
perfectly set up. And once again, once you've made a major action in wonder, make sure to go Control S
or Command S to save and make sure that it's all secure
just in case it crashes. Now that's all really
good, but we can do a lot better by organizing
our singing. So what we're going to
quickly do is we're going to select both of
these planes so you can just left-click and
a scene and just drag until they're both glowing. So you can see this
orange yellowish outline. You can see over here
to both active up here. So you can hit the M
key on your keyboard, and then you can come
to New Collection and just type in RREF Enter, and then you can click Okay, and now you have a collection here or a layer if you will. And you can just untick
that to anytime we want to. We can bring that back
just like that and it'll make things a
lot more organized. You can also just click on
this front reference here, double-click on the empty here, and just
call it the front. And then you can click on
the one here on the side, come over here under the refs, click on it twice
and then just type in right or even side, whichever thing helps you
understand what it is. We're also going to
quickly just select the camera over here
and then holding shift, we're going to select
this little light in the scene and to get
them out of the way, which can hit M again. You can see they're
both active up here. So we're going to hit
M and we're gonna go New Collection and let's
just call that sane. And that's just seen
items that we can hit Enter and then
go OK. And now we can just come here and untick that as we don't need to see them yet because we're not doing any lighting or
materials, and that's it. Now we have a nice organized scene here
and you could just drop down these little tabs
here to make it look nicer. If you don't want to go
ahead and do this part, I will provide this startup file that's ready to go forward, the eventual part where we
start doing our sculpting. So in the next part
we're not going to be doing the head yet, but we're going to be doing some fun stuff with the brushes. I'm going to be taking
you through it and just a new scene and blender so
you can mess around a bit. It doesn't matter if
you make mistakes. It's just to understand
the brushes, some of the different settings, how to set up symmetry. So that is going to
be the next video. And after that, we'll finally
get into sculpting to head.
5. Brushes & Symmetry: Hello, In the previous video, we set up our scene so it's ready to go for when
we sculpt ahead. But in this video,
you're just going to open a fresh
seeing a blender. And I'm going to show you
the different brushes, how to use them and how
to sit up symmetry. So essentially, how
do we only sculpt on one side and it happens
on the other side. So we'd get it looking perfect. And it also saves
us a lot of time. Select your default cube by left clicking on it
and just bought away. If he go Shift a and you go over here to this
thing called meshes, you can add in a whole
bunch of different objects. You can move them
somewhere and just play around with the
sculpting if you want. But just for
demonstration purposes, I'm going to go with
this default cube here. So if you ever added an object, Left-click on it,
you can just hit Delete on your keyboard
and it's gone. So select the cube. And what we're gonna do is
we're going to go over here to our sculpting workspace and
everything is set up for us. Now just in case you missed a previous video
where I explained a user interface and a few
basic things about Blender. All mesh objects are
essentially made up of points. Now you don't have to follow
along what I'm doing here. I'm just explaining that I
just different points and edges make up an object and
sculpting, essentially, what we're doing is we're just moving them around with
these different brushes in 3D space versus
modelling where we do it point-by-point or face by
face and we extrude things. But a very big difference
with sculpting is that not only are
removing points around, but we're going
to be dynamically adding new topology.
What do I mean by that? So you better understand, I'm going to hit
Z on my keyboard. So hit Z and then go into
to wireframe mode here. And at the moment
you probably not seeing my screencast case. I'm just going to make
sure to enable them. What you do is you can click
on any one of these brushes. I'll explain what
they are in a second. Just use the default
draw brush here. So click on a surface
here and you can see you have this little gizmo comes up where there's a point. And if you click, left-click and you move around, you can
see you're sculpting it. It's just moving
around in 3D space. But what we need to do, so
we need to come here to this little tab under active tools in the
workspace settings. And this is called
dynamic topology. So come to the drop-down
and then click on this little tick to
activate it and it gives you a warning
and a reason. It does that because if you
have a preexisting model, it's going to triangulate
the mesh and read topologies it essentially adding new topology and you
can't reverse that. So that's gonna give you the warning and you're
gonna click OK. So now if we come over here, we have just destroy
Bosch and we click on a point automatically. It adds in a whole bunch of geometry for us, as
you can see here. So we have more
stuff to work with. Otherwise would just be moving the same points and we could never add in additional details. Now one of the
things I do need to explain with dynamic topology, and by the way, let's
just quickly hit Z and go back to our solid. And if you want to
see that lines there, just so you understand, you can quickly go to
this little tab here, cold object properties, and then you can go to Viewport Display. And under the viewport display, just an able wireframe
so you can see it. So let's quickly go back up
to the Tools panel here. And what I was saying earlier under the
dynamic topology here, we have the settings
here and I'll quickly explain what
the ardor important. By default, it is set here
to sub-divide collapse. But the main thing
here is to detailing which is set to relative detail. And what relative means is that when we click with a brush, so if you left-click
somewhere and it adds in new topology, it's going to base that on how
far you are from the cute. So look at the scale of the topology when you click
summer and then zoom in to roll the middle
mouse button closer and then press summer and look
at that. What do you notice? Look at a size of
these triangles and then look at the
size of dose wants. If you zoom out, look
how much smaller it is. And if I zoomed in even
closer than that and I made a selection there
or a paint like that. You can see there it's
even finer and finer. So it is relative distance
of where we are at. A downside with this is when you're just getting
started and you still getting used to how close you are to something
when you sculpt this can be bad because if you've really close and you're adding
a lot of fine detail, it can get dense really quickly. So when you just blocking out
and you're getting started, especially if you're a beginner, it's important to
come here under the dynamic topology and change to detailing,
to constant detail. So now it doesn't matter where you click
so you can hit F, just hit F to grow to
brush and move your mouse. You can click anywhere to detail is going
to be consistent. It's going to be
constant detail. And there's this great
poem we're blocking out. So this is a very crucial thing when it
comes to sculpting. If there's one thing you can
take away from this section, It's the dynamic topology is
a lot of other things here. We'll get into them. But just understanding
what dynamic topology is, how it differs from Box modeling
or traditional modelling and edit mode and why we want to work with detailing
the way we do. Eventually when we're finished with the constant detail and we have to RREF form of
a model established. We can eventually get into relative detail
when it's needed, but just for now,
keep it as it is. So let's get into the brushes themselves that if you look over to the left side
of your monitor, you're going to see
a whole bunch of tools on what's called
our tools panel. If you're not seeing
that panel, by the way, you can just hit T
on your keyboard. So to take, he will either take that away or bring it back. Now the one thing I can mention
about to this Tools panel is that a lot of these
brushes are very similar, almost the same with
little differences. Now the default brush
that is selected or active is to one here at
the top called a dual brush. And when you have a brush
active or selected, it doesn't matter which one. You can come over to your
Properties panel here. And under the active tools
and a workspace settings, you will see a picture of two brush and some of
the basic features here. And any of you who are familiar with something like
Photoshop or GIMP, you note that when
you make a tool, oftentimes you have
the default tool, which is the same
as log data tools. Differences are just
the different settings. So in theory, you can make just about all of
these brushes here. We have this default brush
by coming down here to the brush settings and changing
somebody's parameters. I'm not going to cover all
of them at the moment, but you can even get into
the Advanced tab and do a lot more stuff as you
grow as a sculptor, you can change the hardness
of it by coming here to, to fall off making
it hard smooth. So very similar concepts to working as a 2D artists with
different paintbrushes. Now, the one thing that we're going to use
a lot when it comes to brushes is
actually this brush over here called a
clay strips brush. You'll see over here
in the properties that it has a whole bunch of presets
that have changed here. So this is what makes
this brush what it is. And here's a picture
of what it looks like. Place trips, brush is the one you're going
to be using to add a lot of rough strips
of clay to your model. That's a very good
brush for fleshing out. If that's a word I could use, that that's going to be the
one we use quite often. And the thing that's
really cool is if you hold Control or Command, whatever brush you're using, you can do the opposite
action when you're holding in control or command. So just using the
clay strips brush by itself and in holding control
does the opposite action. And that's really cool Now
whenever you're sculpting on top of a surface and
moving topology around. You're going to
notice that told us it can be a bit jaggedy. So there's also a tool
called the smooth tool. You can come over here and just click on the smooth
tool and use that. But alternatively, and
this is what I strongly recommend whenever
you're using a brush, it doesn't matter what brush
when you need to smooth, instead of wasting time going
to click on a smooth brush, just holding Shift,
and then brush and automatically the
tool you're using doesn't matter which one while
you're holding and shift, it becomes a smooth
tool like that. And that's a much better way to work because you're
oftentimes going to want to smooth out strokes
as you're busy working. So just keep those two
brushes in mind for now to clays chip brush and
this brush as well. But once again, like I said, holding shift is a better way to access the smooth brush while you're using
the clay strips. So go ahead and just pause the video if
you want to try out this clay strips
brush on your model or your key blob whenever
you're working on, it's just for practicing and
try using smooth as you go. Try smoothing out the object
while you're holding Shift. And then using the
glaciers brush going over the surface to
add in some stuff or holding in
control of that tool to make a inverse of the tool. And that just gives you a
really good feel for the brush. And once you're done
with that partially fill a little bit more
confident what you're gonna do is you're
gonna go over here to another tool called
the grabbed brush. Now to grab parsers, a
really important brush when you first
blocking things out, you're not going to use it a lot when you get into
the finer details, but up front is very handy. So the way it works, if you come here to grab brush, you can essentially just
grabbed geometry and move it. You had a difference between the Grab Brush and other brushes is that it doesn't use
the dynamic topology. So in other words, when
you're moving it around, It's just moving
pre-existing topology. So it's going to stretch a lot. That can be good for you
making little adjustments. You don't have to
worry too much. But if you want to
stretch something out with the Grab Brush and have it dynamically
add in more sections. You're going to come to
the brush just below it, actually just two below it
called a snake hook tool. And at this pretty
much the same thing. The only difference
is it dynamically adds in more topology
as you're going. So if you're making things
like limbs or appendages, fingers, that's going to be the brush you really
want to use for that. So keep practicing
these two as well. So to grab brush
for moving around little sections and
the snake brush tool. And it's actually one
of my favorite tools everybody I've ever talked to. The does sculpting.
Absolutely loves this brush. It's just slow satisfying
to extrude things. And so play around with
what I just showed you and I'm also going to show you
something as well quickly. We are currently working
with constant detail, like I mentioned earlier. So if you go down to
your dynamic topology, that's all good, but currently the resolution is
a little bit low. So if we take this number here and we click and
we typed in seven, and now we come here to paint. We have a little bit
more resolution there. Don't worry, it'll
still be consistent. So we don't have to worry
about the relative distance. But if you need a little
bit more or less, feel free to change this value, I wouldn't recommend
going more than seven at the moment or less than free. But keeping that in mind, everything I've just
shown you really get you understanding how we're gonna do sculpting without having to understand all of the
other different brushes, just those few
fundamental brushes. And understanding the
dynamic poultry is what I really want to get across
here in this video. Now one more thing, just in regards to the brushes. If you want to change the
strength, you can come up here, but any brush and just change the strength
up here so you can just click the slider and
drag it and also to radius. The shortcut for that is F. F will change the scale. So f, very simple to remember. And Shift F, which is also
really easy thing to remember. So Shift F will increase
or decrease the strength. That's very easy to remember to try doing this
without having to go back and forth to these two values and just
use those shortcuts. Practice as much as you want. What I'm gonna do, in fact, on what, just use
what we have here. I'm going to quickly
explain something cold symmetry like I mentioned. So if we come down here, it doesn't matter what
object to working with. You can come down to
this option here called cemetery under the
dynamic topology. And over here you have
these values here. Now remember I mentioned in
some previous videos to z, x and y coordinates, RDS, world axes that make
up our 3D space. So if we're in a front
orthographic view, when we hit one on the number pad to thing we're
going to want to mirror on is what's
called our x-axis. See that red line, that's x. And you can confirm that
by looking up here and you should see the red is x. This is the positive value and
that's the negative value. All you need to do is come
here and click on mirror x. So that's what we want to use. Ideally, you'd start with
an object that has symmetry like a cube and then enable this and it'll
automatically do it. But if you've already sculpted something and you
want to summarize it, you can just click here on symmetrized and it'll
automatically symmetrized it. So in this case, it took
the negative side of dx here and mirrored it over to
decide maybe what you want, but what if you actually wanted to do it the other way around? So you want to decide
to mirror there. Didn't you going to come
here to the direction, and currently it's
the x negative. So anything decide
of dx is going here. So currently it's set
to negative x 2 plus x. So you just come here
and flip it around. Two plus x, two minus x. And now if you guys so
much rise, this one, the positive gets flipped
over onto the negative. It's not as confusing
as it sounds. It's actually really simple, but just keep that in mind. That's going to be very
handy when you get into sculpting and something
you are going to use a lot. So that's all I really have
to cover in this video. It's really that simple to
get started with sculpting. I'm going to explain
a few more details as we get into the
actual head skull, but just practice the things
that I just showed you. Getting a grasp of
these basic brushes, how to set up symmetry, and just getting used to this handy little shortcuts
that I've been showing you are really going to help develop you as a 3D sculptor. I look forward to see you
guys in the next video where we finally get to do
our heads sculpt. And it's gonna be a ton of fun.
6. The Head Rough Form: Welcome, and in this video, I'm going to show you
how to sculpt the head. This is going to be the
first part of sculpting the head where we just
do the RREF form. Now, if you haven't seen any of the videos preceding this one, where we go over to user
interface and basic navigation. This is say you're an
absolute beginner. I definitely recommend
you watch some of the first videos before
getting to this part. If you already know a thing
or two about Blender, then you can probably
start watching this video. Now, once again, if you haven't seen the
video where we set up this scene file here with the reference images
or model sheets. You can go ahead and watch that. If you don't want to
set up this blend file, you can just use the
one that I'm going to provide in the resources folder. It'll be cold,
something like head sculpt underscore, start file. And just in case you're
starting to watch from this point and you
haven't seen it. We're also going
to be using this program called pure ref. It's 100% free, very
quick to download. You don't have to use it,
but if you download it, you can use the pure ref file that I'm
going to be providing. So that's also going to be
in the resources folder. And a cool thing is once
you have that file open, the starter file for sculpting, and you have pure
ref running as well. You can just go
between these two if you need to have a
look at the reference, the thing that's going
to be a little bit confusing as I
have two monitors. So I'll be looking at my
references from time to time. But you won't see me
actually opening this up. But if you don't
have two monitors, you can just go back and
forth between these two. Pause the video and
just go back and have a look at a reference is
still a big help to you. Now to model sheet
is just going to be our overall guide for sculpting
so we can get the form. And when we get into the
real nitty-gritty details will be having a look at
these reference images. So I hope that's
been a little bit of a long intro for this video, but I just needed to get
that out of the way. So let's jump right into that starter file
and get sculpting. What we're gonna do is
we're going to select the default cube and hit
Delete on the keyboard. We're going to go Shift
a, we're gonna go into a mesh ups and add a UV sphere. And they're wondering,
why didn't I just add it into the startup
file to begin with? And that's just to teach you in additional thing just in
case you're not familiar with adding objects to the
scene and deleting objects. Uv sphere is going to
work a lot better to get started with our sculpting, especially for a head sort of that sphere active or selected. You're going to go to your
sculpting workspace up here. So click on it. And here you can see
all of the tools are set up and decide for us. If you cannot see that panel, you can hit T on the keyboard
to toggle it on and off. You should also be able
to see your radius and strength up
here and over here, under the object
properties, by default, this active tools and workspace settings
should be opened up. And this is where
we're going to see the different parameters. I am expecting that you know, at least the basics of what's going on in this workspace here. Now before we commence
with any sculpting, we also want to come down under up parameters to the
dynamic topology. Make sure to tick
the little box. It will give it a warning
because it's going to dynamically read
topologies as a mesh. So go ahead and
click OK and you can come to the drop down arrow
under dynamic topology. Open that up and we're
gonna go to our detailing. We don't want relative. For now. We want a nice constant
dynamic topology. So we're gonna go
to constant detail. And first starting point, a resolution of 12 will be okay. If you're struggling
a little bit with the poor performance, you can go even to eight. Remember this is explained in more detail in the
previous videos. But now as we sculpt dynamically add in our topology for us. So the brush we're
going to get started with is the snake hook tool. So come over here
to your brushes and click on the snake hook tool. It's the moment, it's
a little bit small. So I'm going to go f. F is the shortcut key to
grow the brush size. So bad that much. You can come here, drag
the slider if you wish. It's just much easier to use the shortcut key and a string. We could leave at a full
strength of one at the moment because we're going to be making quite drastic
alterations. So hit one on the number pad to go into
different orthographic view. And you should see
the front view of the model sheet could just drag the whole sphere
up to where to head sphere is here and to
reference quickly go back to to lay out your sphere
should still be active. Just hit one to get your
front or for graphic view. And then go G, Z and just
move it up and an S to scale. So back to the sculpting
workspace and sphere, isn't that properly positioned? We have a snake hook tool. Dynamic topology is
disabled because we went back out of sculpting mode. Go ahead and just
click on it again. Okay, and the setting
zeros still the same. And we also want some symmetry, so we want it to be the
same on both sides. So I'm gonna go down to
our symmetry and we're gonna go to the mirror
and make it the x, because the x is this red one. You can see up here
on this little gizmo, anything we change
on either side, we want to happen on the
side opposite of it, on that X, they're going to grab the front of the bowl
here just at the bottom. And I click on it and
we're going to drag down too much about that much. We're gonna go F and
grow to brush even bigger like there again and
drag it down even further. And all we're doing is
bringing that one part of the sphere down to fill in
the bottom of the face. Now we can fill into chicks
are a little bit so we can go F to shrink it a bit. It doesn't matter
which side you do it because it's mirrored on dx. Or we can now grab
these checks and just slowly drag them out like that. So let's hit F3 on the number pad to go into the
right or for graphic view. And we're going to
grab the front of the face here and just
drag it out a little bit. Don't worry about getting it
to match the details here. It's just a rough form
we're establishing. So very simple. And let's fill in the
back of the head here. To do that, we need to grow
to brush just a little bit by hitting F, grow, read a bit more,
grabbed a Beckett ahead and slowly,
little by little. Just pull that geometry back. And then come here
to, to back it ahead. Fill that in. And then we can
shrink it a little bit by hitting F Again, just shrinking it
about that much. And now we can start dragging this volume of the sphere here, the bottom part of it, down
bit by bit to make the neck. So all we're doing is
clicking and dragging and it's automatically filling
in that topology for us. So just little by
little, drag it. Feel free to adjust
the size as you go. So it's not grabbing
too much or too little, but just something like that. And it's looking pretty
good from the side. But if you now go
into the front, you can see the neck
is quite skinny. So into front view, you can just grab
that bottom part and drag it out
little by little. One on the number pad takes you into front or for graphic. And we're slowly just going to move the volume of that
neck out in front of you. Bringing that up a
little bit F to shrink. And this is bringing the
bottom of the shoulders out just a little bit, like sorry. So free on the number pad
to go into the right again. And all we're doing
at this point, it's just going back and
forth and just slightly adjusting the mesh here
we've asked snake hook tool, adjusting the size of the
brush when needed with the F shortcut and just
filling in that space. You can also just move around in the 3D space and just fill out these bits here a
little bit on the shoulder. And also you can just
come here to the neck, the back, and just pop
that out a little bit. Just drag that geometry out. So it's not in too much, we don't want to
pinch over here, choose rounding and neck
out just a little bit. Tiny little adjustments are old that are needed and
there we have it. That is all we did just now
was just a few basic moves. But we now have the
rough form of the head, the really rough form established what
we're gonna do now. Clay strips brush is rule, refined this rough
shape a little bit more before going on
to the next part. But you can already see
just how easy it is with just some basic brushes to start developing the
form of the model. Okay, so I need to
quickly explain something while I'm recording
part of this video, my computer crashed and
I lost some of the work, so I had to go back a few steps and just correct what I did here with the mesh that
looks at tiny bit different, but it's still more
or less the same. And what I was going to
say is we're gonna go over here to our place, rips brush. And I'm also going
to quickly just mention up here to sphere is currently just sitting here in the outliner when
we added it in. So just click on it
and make sure just to drag that into the
main collection at the top and
then just click on the little arrow there
just to drop it down. And now it's a bit
more organized. We're going to now
use a clean brush, like I said it to define a
shape a little bit more, but I want to explain something real quick
because I don't want you guys just
copying a tutorial. I want you guys to
learn something. So if you open up the
provided reference board to pure ref reference board, you're going to see some
references of the faces here. And now the thing with faces,
especially human faces, and this is where beginners
really miss it sometimes. And this is what I
want to emphasize. A model sheet is really good for getting you to make
domain shape of the face. But if you look at this
head, even though it looks good from the
front and a side. As far as a model
sheets here go, it just doesn't have the proper depth and structure
that a real face has. And that's why using
a model sheet in conjunction with
a reference board is really important
because human heads are not just round Ullman shapes. They have valleys,
they have eye sockets, and they're structured
as a jaw line. There's a squareness
to certain parts of the head and that's what
we really need to capture. So we're just gonna make the
basic indentation there. It's pretty simple, but I want you guys to
understand that. So just go back and forth
between the two files. We can zoom in, have a look at yourself familiar
with constructors. You understand why
you're sculpting, what you're sculpting
and you're not just doing it because somebody on it
tutorial said this. So the first thing
we're going to tackle here is just the
eye socket here. So let's go back into
a blend follows. We have a clay strips brush, and if you hit F
on your keyboard, you can shrink the brush
and let's make the brush a little bit smaller
and a strength. Let's make it, you can
leave it at about 0.5. Once again, shift f will
control the strength, but just somewhere
in the mid-range. And what we're gonna do is
we're going to come here and hold in control because we
don't want to add a strip, we're going to actually
do an inverse. So control or command
does an inverse. And what we're gonna do is
we're just going to come here and just make a little
divot like that, just one little trench. And then if you hold
down shift and you just click and used to
smooth brush and shift. Hold it in and just gently
smooth out that surface. And already now have a look at your reference
board and you can see what I'm talking about
and not just trying to work solely off
of the modal shape, but we want to understand
the structure. So it'll have a
look at that valley here and the eye socket. And here you can see it as well. So another thing you
probably notice here is this is looking
a little bit too blobby around the jaw line to want to square
that up a little bit. We're once again going to
use to clay strips brush. It's excellent. Put a sort of thing
so we can shrink it a little bit by hitting
F and a strength is fine where it is and when it come here and to draw
a line and we're going to make just a simple
strip coming up like this. So just a nice little
strip along there. Don't care too
thick or too heavy and then it just
lifts up like that. See you that over there. Then you can fill it in just a little bit
holding Shift and just do some lights moving
passes, just surround him. But don't get rid of that
detail, you just add it. We want that definition
here in the jawline. A very big mistake
that beginners make oftentimes is
too much roundness. And if you really want
to learn to emphasize those facial structures and a reference board is going
to be your best friend. Always have one open add to it. Learn the structures
of the face. In fact, look at
the front on image here you'll see
if you zoom into, this is not round, is actually a structure
that's squareness and agile. You can also define
that a little bit more. Coming to this tool over here, and I'll quickly mention, and this is called
a crease brush. So just click on it. And with this one we don't
have to do an inverse, but we're going to come here
to the bottom of the neck. I want to just start here and we'll just gonna make it crease. Now if this one you can make
it a little bit stronger. So hit Shift F and
make it quite strong. And then you can just
go around and just one little pass like that. And then holding Shift again
and just do a little smooth. And now we've just defined
that a little bit more. It's not perfect.
It's just developing a rough form such as
back to the clay strips. This is also add a little bit more volume to
the cheek here, just a little bit more
volume right here. And then once again
holding Shift and just to a little smooth path, just to smooth it out but
don't get rid of the details. So now to face doesn't
just look like an element, it has a bit of structure to it. So now we have that established
and in the next video, now that we have a
solid base to work on, we're going to start creating those initial facial
structures like the nose, the mouth, the eyes, and bolts of characteristics that make to face what it is. This is the very important
thing I want you guys to also remember when it
comes to sculpting. We don't want to get
straight into the nose, straight into the details. This is a very big
mistake people make. It isn't far more important to get the structure established. And then you have something
solid to build on top of. And it's gonna make sense if we were to make the
nose right up front, say for example, we
just made a extrusion come out here and
we might the nose. Now when we wanna
make big adjustments to the face and the shape of it, we're going to
destroy all of the finer details that we made. So that's one thing I can get you guys to take
away from that, using the references and
building a solid foundation, then that would be a
really good thing. I look forward to seeing
you guys in the next video. And remember, the blend
files are provided. So pop right in there,
have looked at what I did and hopefully they're
a big help to you guys.
7. The Head Features: So welcome to the part where I'm gonna be
showing you guys how to sculpt the facial
features themselves. In the previous lesson, we made do a rough form. But when it comes to
making the actual facial features like the nose, the mouth, the ears. We're going to also
simplify them at first and then build on top of
the simpler form. Make sure that you've been
saving your files as you go. Also make sure that dynamic
topology is still enabled if you ever go into
edit mode or you change modes up here, it automatically disables
dynamic topology. So just keep that
in mind. You always want to make sure it's
ticked over here. Once again, I do have
my screencast keys enable if you're
following along. So the tool we're going
to be using is still our trusty clay strips brush. It's the brush we really use
for most of the work we do. We have sculpting and I
would argue is probably wanted a more versatile
brushes you can use. The nose is a really
good starting point because it's a good
reference point as well. It's right in the
middle of the face. And once you have
that established, it's much easier to set up
the eyes and the mouth eyes. So we're gonna go
to this tool here, and that's called
the in-flight tool. And essentially it makes
kind of like a bubble. So hit one to guide your
front orthographic view. If you want to see
the model shape, you can hit Z and you
can go to wireframe. And you should be
able to see, um, what we're gonna do is
we're going to slowly start painting here. And you can't really
see much happening. Paint a little bit and hit Z
and then go solid through, started to make a bold share. If you'd go free
and you're going to your right orthographic view, you can see what's happening. So what we're gonna
do, we're gonna keep building on this bulge. And you can see here that
the triangles are looking a little bit big so it can't
get too much detail in. And if you recall from
the previous version, under our dynamic topology, we set the detailing
to constant detail, which means it doesn't
matter where we are located. It's going to always
be the same size. Let's come to the resolution. And for now, we're
going to keep it at 30, which is gonna give
us a finer mesh. So if you now paint, you can
see it's smaller triangles. So let's keep working
on this little bulb. So just making little
circular passes, getting into the right
or for graphically, just to see how
it's looking like. And let's just go
a little bit more. Okay, So now that's
looking about right. And then we're going to go
to a place, trips, brush, and we're going to
make a bridge that goes from this protrusion up to the top of the denotes here to just underneath
the eye averages. So we're going to start right
down here and just go up. And a strength is
currently set to 0.5. So Shift F if you need to adjust it and we're
just going to make some nice gentle strips going
back and forth like that. Okay. Now don't get too
excited and just really layer it just kind
of little by little. So you can go to the right
view. You can already see, we've got a little bit off
going a little bit over there, but not too big of a deal. So I'm going to
start just making more of a bridge
up here like that. Almost picture a
little V structure. And if we could click, go
back to our modal shape. As you recall from
the earlier part, we were looking at our
pure ref, reference board. Let's actually look at
the bridge of the nose here and you can see it's
more square looking down, it actually is around. So this part at the front
is a little bit more flat. Probably demonstrate
that by zooming in a little bit closer
to a front view. You can see this area here
is almost like a flat plane. So you could almost
break those down into planes more
than it is actually a perfectly rounded
or dumped surface or, or curved surface is almost
like an edge can say. And that's what we
want to keep in mind. So we don't get a flat, bland looking knows we
want that detailed air. It's very important,
but we don't want to overdo that sharpness
otherwise it looks too stylized and ultra
realistic to what we see in a realistic reference. So going back to the
right orthographic view, we can see that's
matching up a lot better if you need to adjust, you can just go to the grabbed
brush over here and grow decides by hitting F and just make the little
adjustments as needed. But over here we just want to establish the initial design. We're not interested in
doing fine detailing. Always building
the initial idea. And you can hit Shift, so holding Shift and just
lightly smooth out by clicking. And that's already looking good. But what it is,
but we still need to add a few more details. Let's get back to
our in-flight tool and we're going to hit F to
shrink it a lot smaller. And when it come here to decide and we're gonna make
a little bit of a bowl like this. Not too much. And you should see
on the outer side. All right, and we're going to
define it a little bit more around the edge by coming
to our crease brush. So come to decrease brush. You can bring the strength down. So Shift F, just bring that strength down a little
bit on a crease brush. And we're going to come
to a dynamic topology and let's give it a
resolution of 45. And we're going to come
in just over just bold we've made here and just
making some passes. We have that crease brush
or just a little bit of a crease coming in here
and then holding shift, just move around it like that. Now it's a little bit more
defined, still holding shift, just doing some little smoothing passes over here on the end, blending the tip of the
nose into the bridge here. We don't want to flatten it
out too much everywhere, so just be careful of that. Once again, just go
back to your reference, make sure to look at it. And you can see
here that this bulb here is a lot more smoother
than the bridge part here, which is a little bit
more of an edge to it. So make sure just to
blend that in carefully, we don't want to
lose that detail. It's also a little bit more of a defined edge here
and a tip of the nose. I don't know if you
can see that or not. But maybe here you can see
it a little bit better. So let's try and incorporate
that into the sculpt here. But coming to the
front, Let's go to our class trips and just do a little past edge
just to define that a little bit more holding Shift and just give it a lot smoother. Now before we add any more
strips of clay, well, Let's quickly get to grab brush and just make
some side correction. So hit free to go into the
right orthographic view, go back into dereference board and have a look at the
side view of deniers. And we can see that
there is a bit of a bulbous shape happening
at a bottom of tinnitus. You've got the main bulb of the nose and it has a little
protrusion, it comes out. But if you look at
al sculpt good, sitting a little
bit too forward. So we have to grab
brush enabled. We're going to hit F
to grow quite big. And we're just going
to move that topology back a little bit like that, just little by little,
just moving it back. And we're going to also
shrink it a bit and just make the bulb a little
bit more defined at the top, try to match it
with our reference. And then we're
going to just talk this often those up down here, just tuck it up to
sharpen it a little bit. And about they're just under debt protrusion here it is bold. That is where we're going to
have the whole of the nose. So just drag this part
down just a little bit. Make sure to look
at your references. Don't just guess
what you're doing. Just look at the shape and try and match
it as best you can. We have to grab tool, just little adjustments
so all you need, okay, so that's what we're
looking at a lot better. Just going to lift that. So let's make the nose hole. So what we're gonna
do is we're gonna go to our in-flight tool. We're going to hit F
to shrink the brush and we're going to hold
in control or command. And that'll allow us to
inverse that in-flight. And let's just
increase the strength all the way up to one. And let's just make that
hold air for the noise. So holding control. And now we have that setup
guide to your right view. And you can say that
should match up. Now we have our reference a look better and that
looks a lot more accurate. I guess I'll think I've
spent enough time on that general design
of the noise. We definitely will polish
it a little bit later on, but we're just establishing
domain features hairs. So now that we have our nose, we have a good reference point. It matches up well with our model sheet and
our references. Let's start with the mouth. And the mouth is actually in my opinion a little bit simpler. So we're going to go
to our crease brush. I'm going to hit F and
make it a lot smaller, but we wanna make
sure to strength is nice and high on
that crease brush. And you can hit Z go
wireframe and you can see what a Malthus and let's
just make a crease. If it's too strong,
she's less than it. Just making a bit of a crazy
like that, what a mouth is. We don't want to make
too much of a smile. We're not trying to
get an emotion here, but just making a
nice simple crease where our references
got to a right view. And you can see that
looks about right. But we do need to create a lip. So the way we do that,
we're going to go to a place strips brush. And we want to not
look right front on. We want to look
almost a little bit up when a grown-up
brush by hitting F. And let's decrease
that strength a bit. And we're going to hold shift. And we're gonna just do a
few smoothing passes just to flatten those out. And we're going
to look down now. And at about a 45 angle
looking down at that corner, we're just going to
slightly flatten it. But at the moment ellipse
just look too flat. Now, did we smoothed it? We can add some clay strips. So just gentle little passes, passes without clay strips brush and we don't
wanna go too flat. We almost want to make
it like a bit of an m. So picture like an N because
up and down like that, almost like a mustache. And as always as
you're doing this, you'll free to pause if you
have to look at references. References are very important. That's one thing I want to
keep emphasizing, right? See how the surfaces of the lip look and how they
fold into each other. They continue to
smooth it out a bit. Add some more strips, and come down here,
add a few more strips. And if you need to, you
can get the grabbed brush, hit F to grow it, and you can pull that
out a little bit. But what we need to do when
you grab the corner of the mouth and just tuck that
back a little bit as well, just making that slight
little adjustment, bringing that corner down. And you can see how the shape
is starting to form here, bringing that lip out
just a little bit. And I am looking
at my references as I'm doing this on
my other monitor, every guy and you
should see almost like a triangular shape here, but different lip here should
fall down a little bit. It shouldn't be
too bolus or flat. And this one here should be
a little bit more rounded and not as angled
in as the top lip. And that's definitely
something you'll notice when you look at a lot of reference images of lips back to the front and just grabbing that
crease brush one more time, going to hit F to shrink it. And this just make a crease
underneath here just to define that a little bit
more increased the strength. Just like little passes, don't overdo it, shift
and smooth it out a bit. So just adding a little
bit more definition to that lip now it's
by no means perfect. But you can already see where we're going
with this, okay. I just wanna make
a few corrections. Have to know it's just a
few minor ones that get to grab brush and zoom in. And let's just bring
this bottom part of the nose. Just bring it up. Just a little bit more. Grabs this, bring it in and just take the
tip it at bulb down, just tiny little adjustments. Once again, have a look at your references as
you're doing this. But we don't want to spit
here to be too wide. As it goes further
out towards the tip, it bends out more and as it
comes back down to the face, it goes out more display. We don't want this to
be two stripes to just have a look at your reference images and
you'll see what I mean. So that looks a lot better. We'll define some to shape
a little bit later on. But now we have the mouth and the nose pretty
much established, at least a rough form. So what we're gonna
do now is make the ears and just to find the area eyes are going to set now I'm going to
time-lapse stamp. So in other words, I'm going to speed it
up just a little bit, but I will now write
what I'm doing. And we're gonna be
using the exact same tools and techniques. And if you've been able to make the nose and mouth so far, you'll be able to do
to recitative things that I'm going to do
in time-lapse because they're really simple compared
to the nose and mouth. So you've kind of done the
hard part at this point. I'm going to be primarily using the clay strips brush
to get started. We have a smaller size and
about a medium strength. So using the clays to brush, I'm going to add a little
bit more definition to the cheek bones by adding a field trips and then
smoothing them out. Smooth tool using the
same clay strips, brush and holding
in-control for the inverse. I'm just going to
hold the eye away a little bit where it will later said We will make the eye
lids in the next part, but we're just trying to define the structure day
a little bit more. And I am looking at my reference images while I'm doing this. And the same with the,
I would just stare at the top bread
eyebrows would sit, just defining them
a little bit more with the clay strips
brush going back and forth to my reference images to make sure
everything looks okay. Now these edits are very
minor to just little details. Beefing up areas that need a little bit more
meatiness to them and getting rid of
the excess of bulk. Like for example here you
can see I'm just defining those cheekbones just
a little bit more and giving a little
bit more volume to those cheeks and interest to finding the joy on down below, just using the place
troops brushed her and the smooth tool
here you can see that the chin in particular
is a little bit too bulbous services flattening
it out there as well. Okay. So now that we have the
eye area established, what we did is made a little
bit more defined and just extended the cheeks
a little bit here just to make them
come forward a bit. Once again, old the spaced
on the reference images. So we're making sure we are
accurate with the references. What we're gonna do
now is make the ear. But with the ear, we're
not going to go very realistic when it just make
that a lot more basic, almost a little
bit more stylized. So we're gonna go
into right or for graphically by hitting
three on the number pad, you can hit Z and N go
wireframe and shrink the brush. Currently I have the
dynamic topology set to 30 and 12 brush about this big and
what you're gonna do, she's going to start painting just so you know where to start. And once you start it you
can hit C and go solid. And we're just
drawing this kind of like almost like a
question mark on an angle. You can increase the strength and we're just going
to keep going. And then we're gonna
go to our front view by hitting one on a number pad. And we can see
where we want that to be so that it's
not out enough yet. So we're just going
to keep building up. You can increase the strength
as much as you need to. We're just extending that. Okay, you can see
what's happening here. And it looks really
bad at the moment, but we're just getting that ear out and go back
to the front view and you should start
seeing it grow. One thing you can do
to speed things up is get the snake hook tool, grow to brush a bit and
from your front view, just start pulling that
ear out just a little bit. But be careful don't
want to overdo it. Makes sure the brush
is small enough so you don't poo to ear along with it, but we're just
bringing that mass out and don't worry if it
looks a mess at first. We're just trying to
establish the initial shape. So that all up. Just bringing it. I
didn't go back and forth between the front
and the side view. And just bring that
all backup the ear, just tuck it in and you can
see how we're just using those two simple brushes
to make our air, we can talk that skin behind the ear just to define it
back a little bit more. And let's pull out. And so this is something you can spend as much time
as you want with. But I'm going to keep
this ear very simple. We're not gonna be doing
any of the complex little features inside of the ear because the hair
will be covering it anyway. But we're just keeping
it really simple. Holding shift. I'm just moving it a little bit. Yeah. Stair is to rough ER in
place will always refine it a little bit more
in the next video, but that's how simply eras. I mean, I didn't even
have to time-lapse that. I just took a few minutes. But that's pretty much
out features done. What we're gonna do
in the next video is we're going to polish
it up a little bit, but we're 90% of the way there. And another thing you can do
is if you're comfortable and you feel like you have to size of the
topology figured out. You can just come here
to dynamic topology and go smooth shading. And the reason I didn't
have that enabled from the beginning is just
when you're getting started. I want you guys
to be able to see the little triangle so you know, you don't have too much of a dense geometry or
too big of a geometry, it can be a little bit hard
to gauge when you have the smooth shading
on any Can't see it. A little polygons that
make up your mesh. But if anything has
been confusing, Check out to provide
it blend files. I have all of the stuff in the resources, so
you can open it up. You can see exactly what I did. Very simple
techniques and tools. Nothing that I've used in the time lapses is anything different that I haven't
shown you guys how to do. I look forward to seeing
you in the next part and thank you for watching.
8. The Head Polish: In a previous part,
we were able to add some of our features
to our sculpt. And what we're
gonna do now is the polishing off where we
make it look really nice. And rules are going to be adding the eyes and the eyelids. And the reason I decided
not to add them in the previous part with the
facial features is because I feel like they need a
little bit more touching up a little bit more detail and attention and somebody
other features. So I'm going to just take
it nice and slow and explained to you guys
how you can make them, make sure you have your
reference images handy. And let's get started.
So we're just going to quickly go back to
our layout here. So click on the
Layout tab up here. We're gonna go Shift a and
we're going to go up to mesh. And the option we're going
to choose is UV sphere. End of that UV sphere active, you can go right-click and
just click on the option called shades move and it has some nice smooth
viewport shading. We're now going to
go S to scale and just scale that
down to about here. We're going to go
G to move and in Y to restrict that movement to the y-axis and move it forward. And then we're gonna hit free on a number pad to go into
an orthographic view. And we're gonna go G and we're
just moving it up to here. And then one on the number pad
to go into the front view. And we're gonna go g x
and move it along the x. Now one of the things we're
going to have to do is open up our trusty reference images. Once again, the pure
ref reference board is provided in the
resources folder. And let's have a
look at the eyes. We can see where to place. Notice scale of the
eyes is important. We don't want to make them too small and we don't
want to make them too big unless we're stylizing a character that might be
something you want to do. We're going for more
realistic look here. So a size of about
that much is okay. And then what we're
gonna do once we have the size, figure it out, is we're gonna go
into our right off of graphic view and let's
just move that back. You can also just hit G and
why to do it more simply. And we're going to move it in about there, back to the front. And it is exactly
where it needs to be. Now, we need to mirror this. I select the I go to this tab here, that's
your modifiers. We're going to give
this a modifier bigger and add modifier. And let's go give it a mirror. And what we can do is click on this little eyedropper
and we're going to select a reference objects. Let's select the head. Now. It's going to
place the eyes exactly parallel to each
other on the x-axis. Let's select our model again, and let's just go back into
our sculpting workspace. And you're going to
have to make sure that dynamic topology
is unable to. It's going to give you the same morning
and it's gonna go, Okay, let's go to our
clay strips brush. And what we're gonna
do is when you go into a front orthographic
view and we're going to hold down control or command, and we're just going
to remove some of the excess material
in front of the eye. You can then holding
Shift and just smooth out any of those rough edits. And now it should be a
little bit more open. Then come to the corner
here and hold down control and just make a
little bit of a divot there. Holding control to make an inverse of the
clay strips brush. Now Do you have debt? And what you're gonna
do is you're going to shrink the clay strips brush by hitting F and shrinking it. But you're going to go Shift F and you can grow to
strength old way to one. And when it come here to the corner of the eye
and we're gonna start adding some strips of clay
all the way around like this. Now we need a little bit
more geometry to work with. So let's go to our
dynamic typology and let's make the resolution
50 in this case. And now let's do that again. Click and drag and add
in a strip of clay, like half an element. And then we're gonna come in
here and do the same thing. One pass and then grow
to brush a little bit and then just another pass. Like that. We're then gonna
come closer in to the eye and then
more downward angle. We're gonna shrink the
brush a little bit. Now we're going to
add strip of clay along this ridge here. Just go a few passes, adding some strips of
clay. I like that. You can see we're just
defining that eyelid now. And then we're going to
come here to the corner and just make it a little bit
of an eyelid over there. We can now holding
Shift and just do a light smooth pass
down here as well. Just smooth it out while
you're holding shift. I can see what I already
have two bottom eyelid. And let's do the same
thing here at the top, we're going to hold in
shifts starting over here, and we're just going to
smooth that out already. We have our basic eyelid, not a tool we're
going to now use is just our in-flight tool. And we're just going
to come in here. We're going to make sure
it's nice and small. Make sure to strength is all
the way to one and we're just going to go around
and just in flight, the eyelid just a
little bit like that. Working our way down
and make sure to look at your reference
images as you go. Now we're not going
to make these 100% detailed of all the
little folds and everything, but we're just trying to get
that eyelid feel happening here and that's looking
pretty cool now at this point that we have
two general shape. Do I established we can go
to our dynamic topology and this time we're
going to change the detailing to relatives. Now the closer we come in to finer dynamic topology
is going to be. So we can have smoother,
more detailed surfaces. So we're gonna start over
here just going along, let's use the clay
strips brush for that. Let's take the strength down
and we're just gonna do a gentle pass like that. Now, just holding and
shifts, move it out. Now you can see that looks a lot less jaggedy then before. And do the same
thing at the bottom. Just one Passover. And then holding shift and
just do a nice smooth pass. So just in a few quick minutes, I've made the eyelids here and made some
little adjustments. It's now just a matter of
polishing the surface. They're gonna give you a few tips and how you can do that. So let's go to the clay strips brush and
what you're gonna do, you're gonna set that
clay strips brush down to very low strength. You're going to come here
back to your relative detail. Under the dynamic
topology and changed it to constant detail. Now if you hit Z and you're going to wireframe
and you're going to notice that most of your
topology is not that dense, but she started
getting around some of the detailed parts
like the eyelids. It starts getting
really dense because we use the relative detail. So we've got closer and
closer and it added in more topology dynamically. So what you can do is
with a set resolution. So if we click somewhere, you can see at the moment
the constant is set at 50. So let's make that property. What you want to do is find something that you think
is a good in-between. Fruity seems to be about good. So you're just gonna do
light little passes, refining the shape of the head. You really have to look
at your references, come back into your blend file and then smooth
out the surfaces. It just doing a light
little passwords the clay strips to add
volume where it's needed. So this is pretty much
just a matter now, if adding volume and taking volume and smoothing
out surfaces. And this is something
that you can do really easily without having to watch
a step-by-step tutorial. What I'm gonna do now
is I'm just going to time-lapse this part, but I'm just going to explain some basic things
while I'm doing that. But pretty much we are done with our character
at this point. It really is up to you how much you want to
smooth things out. How much do you want
to polish things and developed the quality
of the sculpt? Now I'm getting started with the details on the
back of the head. I feel like a volume just needs to be extended
a little bit. It feels a little bit too flat. And also the back of the
neck felt a little bit flat. So looking at some references, I tried to make the structures, the muscle and tendon structures did you see in the
back of the neck? And I was just a
few simple strips that are laid down
and smoothed out. And the same thing
here at the front. I'm not really trying
to make clavicles here, but just bringing that chest
out a little bit more. I also just did a quick
correction on the jaw here. I felt like it just needed to be emphasized a little bit more, especially around the corners. It was a little bit flat, so just a few light strips
of clay and a light smooth. And then I did a few
corrections on the nose. Now when you're getting to
define detailing on a nose, makes sure that you have some
reference images of a nose. The nose tends to be one of those more complicated
structures. So it's not just a matter
of me showing you, put a strip here,
put a strip there. You really need to study
the anatomy of the nose. And it's a lot of complicated
little structures underneath denotes that give it a unique kind of shapes
and different people are going to have this emphasized
in a different way. Likewise, the mouth is going
to be one of those things. We're also going to have to
look at some references. But in this case I was
just using my crease brush primarily just to tighten up some of the
areas in the mouth. And I'm just using the smooth
process related to clean up where it is jaggedy areas and also just a clay strips brush
was also used to when I needed to make some more
volume in certain places. The graph brushes also really handy if you just want
to slide things around. In this case, I went onto
the ear of that and I just moved somebody topology around just correcting
it a little bit. Now keep in mind the ear
will not be seen so much, so don't worry too
much about it. I also just went on then to correct the shape on
the base a little bit. And this part isn't
really something you have to do to
the degree I did. I just like to sharpen that up at the
bottom a little bit. I was just using the
simple grab brush and just dragging down the
client little by little, just to sharpen the edge there and define
it in a way that I felt looked a little bit
more attractive on to sculpt. But overall, the things
I'm doing here are just a little nitpicky things
that you don't have to go to the same extent is
try and practice some of the main things and get to genital thing established
that you're trying to sculpt. Now I'm not gonna go too
much further at this point. I will stop the time-lapse and just to finish
off something. Finally, after a whole
bunch of polishing and refining edges with the exact same basic tools
that I've shown you. This is the result
and it can definitely be polished even more
and pushed even further. But this is as far as I'm
gonna be taking it and I'm challenging you guys
to push yourself as well. This is not about
getting you to make the exact same thing that I
made to the exact same level. I'm trying to get you to learn the basic principles,
apply them. Do your research, look at
the reference images and see how good you can make the thing look that
you're trying to sculpt. In. The next part, we're
gonna be adding some basic hair with curves. In Blender. We're not going to be
sculpting two hairs, but this is a really good
way of working and it goes really well with Al
sculpting style. Whatever you've done so far, make sure to save it. And if you haven't gotten
this far with the sculpting, I will be providing the blend
files as we've been going. So definitely check that
out in the resources. And congratulations on making it this far fewer,
especially if you're new. And this has been a
big challenge to you. Congratulations. It's a really good thing
that you're trying.
9. Hair With Curves: In this part I'm gonna be
showing you guys how to use curves to make
some simple hair. Now I'm gonna be
showing you how to add into curves, how to edit them. But the overall process, I will time-lapse and
explain a few basic things, but it's at this point where
you guys can start making it your own and you don't have to follow
every little steps. I'll explain what you need to know and then I'll
show you how I did. It just makes sure that the
eyes that we've added in, remember we added in a sphere, you can just click
on it and just drag it into the main collection. I should, should be there. I have disabled the references. We don't need to see that. And what we're gonna do now is start adding in our splines. We're going to go Shift a, gonna go to this thing
here called curves. I'm going to go and
we're gonna get a path to add an a path. And we're going to
go G and just move it over to the side, doesn't
matter where you move it, just G and move it over
and then go Shift a again, go to your curves
and add in a circle. And you can go G and
bring it up here. And you're going to
click on this path. You're going to go to your
object data properties for the curves over here, and didn't going
to scroll down to the bevel option here under the geometry and
change it to Object. Click on the little eyedropper and the object is
gonna be that sphere. Now essentially
what's happening is this path is taking
this object here it is two-dimensional
circle and it's just extruding it across
the length of itself. Though, if we take this circle over here when
we tab into edit mode, so just hit the tab
key of it active. Go to your top orthographic view by hitting seven on
a number of Pat. And you can just select
this part here and then go G and just move it
in to make a shape. And now you can see
what's happening. Debt shape is
updating over there. We can also select this point over here, so just select it. And then you can go S to scale
and sharpen that up a bit. Select this point here,
S to sharpen the bit. And this one here, S
and sharpen that a bit. Scrub this one, bring it up and we're just creating a little bit of a
different shape, almost a bit of a planet ships. So what we're gonna do
is we're going to grab this path and we're
gonna go our x 90, I'm going to hit
Enter and then our y 90 and we're
going to hit Enter. And at the moment
the ends are open. So we're gonna go here
with this path active, and we're gonna go over to our object data
properties for the path. And we're gonna go
to the bevel option here and an under-damped
busier circle selection. We made an object just tick
this box called fill caps. Now two ends are filled tab
into edit mode of deselected. And now we're gonna
select these points are they're also
known as handles. And if you go Alt S in here and you have
to go Alt S not S, you can scale points. So let's select the
bottom one as well, holt S and scale. And now we're creating more
of a planted look to this. Select a point here, move it in. You can see we're creating
this strand looking shape. You can select any points
you want anytime and make edits if Alt S and you can simply just move
them around as well. This is pretty much going to
be the basis for our hair. Also, see the little orange dot floating right
there in 3D space. If you go back into
object mode by hitting Tab and you rotate, you just hit R to
write it, you can see everything
pivots around that. So what we want in edit mode, if you want to select
all of our points and we want to just go into our left or for graphic by going control free or Command F3. And we're gonna go G
and just move it down. So the top handle is
sitting right underneath that orange dot or
just roundabout there and also from the front. And the reason we're
doing that, if you're not hit Tab to go into
object mode again, and we hit R to write it. It should be rotating
around that point. And that's just going
to make placement of this hair curve a
little bit easier. So let's go to our front view by hitting one on
the number pad, Shift D to duplicate it. And this one here, it's
just gonna be our control. So I'm not going to change, I just move it over to the side, grab the duplicated hair
curve and scale it down, and then go G and
move it over here. Now, this is important
because we're gonna be adding materials to all of this
later in a portrait render. Before we duplicate this,
a whole bunch of times, Let's just go and click with it active on this little tab
here called Materials tab, click New, and it's just
added a placeholder material. If this curve here now active, you can either hit
G to move things. And I recommend that you
can also just make sure your move tool is active
and use the handles. So if that's easier for
you, but just hitting G and R and S to scale, those are gonna be
the best ways to go. So what I'm gonna do at this
point now is I'm going to speed this up a little bit after I've shown
you just a fingertip. But I'll explain what I'm doing. But essentially we're
just taking this now, we're rotating it
and replacing it. And we're going to make a
whole bunch of duplication. So after you've
placed it somewhere, you can go Shift D
to duplicate it, move it over R to rotate, and you can go into
different views. You can already see
what the idea is here. Duplicate by going
shift D scale. And once you want to have
a bit more of an edit, you can tab into edit mode. You can select the points or the handles in
here and adjust them a little bit like that. If you need more handles, you can also just select the end handles so you can go e to extrude them to get a little
bit more finer control. We can already see
how cool this is. Alt S will scale a point. This also keeps that in mind. Maybe to scale those. And you
can already see the points. So what I'm gonna
do now is now that you know how to do two curves, how to edit them, and
how simple it is. I can time-lapse this
and you guys can follow along and get
the general idea. I'll also just quickly mention, and this is important. This can get very dense, geometrically speaking,
very quickly, what you may have to do
if you don't want to get lagged is select to reference curve object with just a circle here and go
over to your properties here. For that, you're going
to go over to shape and go under the resolution
preview and change that something like two for now because we wanted
this to be relatively low. Otherwise, this is
going to get very dense quickly and you're
gonna get a lot of lag, especially if you're running
a powerful computer. You can do the same
thing by selecting these actual hair
splines themselves. And you can go to
dare shape and go to the resolution and change
that to something like five. But doesn't have to go to lab. It's something like
five should be okay. Otherwise is really going to
get dense really quickly. Just so you notice,
well, we have the model that we sculpted,
what I've gone and done, and this isn't
absolutely necessary, but I went to my
modifiers and I gave it a modifier called a decimate that it's
this one right here. I just left it on collapse, but I changed this ratio here. And what that does
is it decimates the mesh and changes it for you automatically and
it makes it more consistent based on
that value here. And that can also
just help make them model a little bit
less dense with geometry and also even out
the size of the faces. And it's something
that's non-destructive. So you can click
on the little view here and you'll see what the
original sculpt look like. And then you can click
on a window and you can see what it looks like. We have to decimate modifier. The only trade-off
here, by the way, it is that you may lose a little bit of
sharpness and detail which you can see I have
around the nose and the lips, but that's a trade-off
I'm willing to make for a little bit of
better performance and it doesn't
actually look too bad. Let's get into the time-lapse
and I hope you guys enjoy. I started duplicating
the main shapes here and just making the
fringe at the frontier, I went into edit mode and just individually
selected a handles, changing them a
little bit and not trying to make them look
exactly the same on both sides. But this part of the French,
especially different. We want it to be as
random on both sides. We definitely don't
want symmetry, though when we get to
somebody other parts, we will use dance to save
a little bit of time. You can now see that
I've started to establish a little
bit of a French here. Now the thing is
at a certain point when we're making
duplications and moving them around and we wrote it and we're gonna start getting limited with the rotation of the
actual curve itself. What you can do is in edit mode with all the handles active, you can go Control
T or Command T. That'll allow you
to add rotation to the individual
handles themselves. And that can be very handy for changing the orientation of the actual curve within
edit mode, you can also, at any point if you
need more geometry, you can grab a handle and
you can go to Extrude, extruded out to have
more to work with. And this can be really handy
for making your hair longer, where it needs to be longer. And if you needed to,
you can also select a point at any time. And you can also hit Delete. And then just say
delete vertices, and then just change a point. So there's all of these
different options you have with how you
can edit the hair. Very simple things to remember, but it is now just going
to be a matter of making circular right around the top of the head and filling
in that space. So I'm going to just kick
it back into time-lapse. In edit mode. I just took the curve
that I duplicated and I just moved the points out a little bit towards the bottom, making it a little bit longer and changing some at a scale. You can also extrude
points as you go. I'm just trying to get to
this part where the fringe blends kind of entity ear
on the side of the head, establish and keeping
the shapes very simple. So at this point you could
probably see here that I've made it only
on one slide here. So what I'm gonna do,
I'm gonna hold down shift and select all of
the side pieces here. I'm going to go Control
J or Command J, and that's going to join
them all into one group. And you can see I have
this little blue button up here and able that is called
proportional editing. And essentially if you click on a point, we have that enabled, you can hit G and it'll have a falloff effect on the
rest of the handles. You can also come here and
make it connected only. And that'll only affect the strand that
it's connected to. When you're using
proportional editing, when you're moving something, you can also roll the
middle mouse button to control the falloff. That's a handy tool as well, but for now I'm just
going to disable it. And when you join
them altogether, some of the things that
are going to change a little bit so you
can just click on any handle point and go
Control L or Command L, and that'll select the
whole thing by itself. You can go Control T or
Command T and then just rotate and correct and then go to the next one and do
the exact same thing. And that's just makes
them all into one group. What you can do now is you
can select the whole group in object mode and just go and
give it a mirror modifier. Click on the
eyedropper here and in select the head as a reference. And now it's all mirrored
onto the other side. That's going to save
us a bit of time. So you can see what's
happening here. We're just making our
little edits as we go. So I'm gonna take this
back into time-lapse. So what I'm doing here is just filling in the gaps at the top, simply just pulling
the points together. Remember, you can always extrude handles when you need to, if you need something
more to work with for just take it
one step at a time. And I'm worried about how
it looks like at first, it's just a matter of
little adjustments. Getting it just right. You can look at some
stylized ideas out there. Just a lot of cool
stuff on Pinterest and other sort of online references. But this is more of
a stylized approach that I'm taking here. And I'm trying to not
add too much as well. Otherwise we could get
a little bit of lag. But you can see here it's
a very simple concept, just taking the
curves that we have, duplicating them and changing the shape a little
bit and placing them. Here you can see by just going around and
little by little, just adjusting the
handle points, doing some basic
rotations and extrusions. Life made this, It's not
perfect by any means, but it's exciting to get there. The overall idea is
starting to develop. So I'm gonna keep going
on in time-lapse, but we're gonna be doing
now is duplicating the longer segments
and making the rest of the hair around the head and filling in some
spaces around here. Inside of edit mode
with the curves here, I just selected
one of them and I moved it around and made
it a little bit longer. So I deleted one at a top handles and just extrude
it out at the bottom one. I'm just trying to
make a long strip and decide it's pretty simple,
pretty straightforward. It's almost like the
ones at the top, but just a little bit longer. And what I'm doing here
is I'm duplicating it, rotating it and
moving them along, once again, radially
going along to head and just embedding them inside of the shorter hair segments. And that's what you
continue doing for the whole process is really
just a matter of duplicating, moving them around and definitely looked at
some reference images, look at some design ideas. I just went with just kind
of like really loose, stylized feel for the hair. It's not realistic by any means, but I really like it and I felt it went well with the sculpt. You guys can experiment with whatever you're
trying to do, try hunt different concepts and you really have
nothing to lose. If you don't like what you've
done, you can just come in, they're edited,
delete the splines, and just add a new ones. It really is up to you how
you want to approach this. You can see here with my style, I just kept it really simple. And I went back to somebody out or groups at the front
would have fringes. I just duplicated them
a little bit more, added a little bit more
volume at the front there. And yeah, that's pretty
much the whole process. You can also edit the reference
curve object is circle there and you can
adjust that a little bit to work around
with the hair shape. So I sharpen it up
there a little bit. That's optional. You can do it however you want. Generally when it comes to hair, I always like to say
that less is more. Sometimes you can ruin things, make things feel
a little bit too blocky by adding
in too much stuff, too much like it feels fixed. So just try and use what
you have and only add in new sections of hair when you feel it's
absolutely needed. It doesn't overdo it as well
because you're going to really get a bit of lag
because like I said, this does generate
a lot of topology. So this is as far as I'm going to be going with this hair, I'm trying to keep mine
really simple and stylized. I challenge you guys to
make it however you want. Come up with some cool
sketches and try and just make your hair the way you
want it to be too quickly. Organize things a little bit. We're gonna come over here to the outliner and just
drag it down a bit. Let's right-click in here, and let's just go
to New Collection, and let's just double-click
on that collection. Let's call it hair, and
let's just come here, click and drag to select
all of these curves. Click on him and just drag them into that hair collection, and then click on the
little drop-down here. And now that's on its own collection that
we can turn on and off. Also, like I said, I've turned off the href, the
scene as disabled as well. So just make sure
to save your file. I will be including this
blank fall as well. So if you guys get stuck, you can check out
this exact file. But in the next part I'm
going to show you how to quickly render out that's
not gonna take too long. We'll add a basic material
and that'll be it. And then you'll have something you can present your friends.
10. Render A Portrait: That's really awesome that you now have created your sculpts. You've probably made
some nice hair for it, made it your own
style, your own flair. What we're gonna be doing right now is we're going to
be doing a little bit of lighting and just staging
it and rendering it out. So you can just present it to people in a really nice way. We've seen from the
previous video. We're gonna go to
our outliner here and the scene fault we originally
set up or started with, depending on where you started, is gonna have a
scene collection. So just took that
to bring it up. And there's going to be the default camera and
the default light. You could add fresh ones and if you don't have
anything in there, but we're just going to select the camera and we're going to go over here to our
Output Settings. So the output properties, It's top box here is just a formatting bulks and resolutions here
are the x and y. So x is currently set to 900, the y is set to 10.580
already changed that yours will probably
be like 1920 by 1080. So just change these
values here accordingly. You don't have to do
the same resolution and you don't have to do
the same aspect ratio. So that's just how
I've set it up. But once you have
your camera active, you're just gonna hit
Zero on your number pad. They'll take into camera v. And when you have to camera active, what you're gonna do
is you're gonna go, gee, that'll move it. But once you've hit G, you can hold in your middle
mouse button, press it and hold it
and you can just move the mouse and you
can zoom in and out and then left-click. You can also double-tap
are with the camera active and that'll rotate
the camera like that. Now at the moment I
have my pivot point up here to Transform Pivot
set to median point. So currently it was
rotating around that. But what I want to do is
go to media endpoint, double-tap are that's
working a little bit better. Then you can hit J just
to move it by itself. And what you can do is find a nice orientation that you think works for what
you're trying to do. So you don't have to copy me or set it up exactly
the same way as me, but make your camera like a portrait dimension that you
like to place it somewhere. Do you feel looks
good and you can also just bring in your hair. And with these objects that
our hair is made out of, so I'm just going to select them and I'm going to
hit G to move them. In fact, we can also just hit M to hit the M key click
new collection, just go. Okay, this is another
junk collection just on ticket. We don't
need to see those. So just with our
camera in place, let's select outlier up here. Actually this is
delete it because I want to show you how
to add in the light. So just delete that
light and we're gonna go shift a. I'm going to go
down to a light options, add in an area light, then we're going to go G,
Z and just bring that up. And at this point we can go to 3D cursor under our
pivot transform. So if this light active,
if we now hit our, it'll rotate around
that 3D cursor here. We're just going to
hit R, rotate it. And let's go to our
light settings here, and let's make the
strength 120 for now. But we also need to come here to this little camera here
that's a render properties. The render engine is currently
set to EVs that doesn't do any sort of bounce lighting or write tracing, it, fakes it. So if you want a nice
render, just click on here and let's make that
the cycles engine, if you have a GPU, I'd recommend you use it. By the way, if you
want to enable that, just go to Preferences
under Edit, dirt to system and under
the optics and CUDA, you have to just take whatever your Jeep GPU
is if you have one. But it's not necessarily
you can work with a CPU and then we're
just going to come here under the sampling and
we're going to just set the sampling max
at the top here, that's just in the viewport
to set up the 200. And over here in the max
samples for the Render, we're going to set that to 200. That's all we need
because we will be clicking on this little
dude noise button here, so make sure that's active. So if the sample right isn't high enough to
clean up old noise, denoise will take
care of that for us with the light act as just quickly go
back to the settings. And now if we hit Z, we can go to our render view. There we go. So let's actually also, we've outlined still active, just go over here to the size and let's
make that two meters. Now, the bigger you
make that size, the software you're
lighting is gonna be, but you're also going
to lose some strength. So you got to play between
the power and the size. And depending on the scale, if you've seen this value is
going to change to bigger, you're seen as the more power
you have to pump into it. It's based on real-life physics. So to inverse square
law is going to apply. The greater distance between your light source and an object, the more light is
going to dissipate and the more power is going to be required to light your scene. So what kind of things you
have to take into account? Just drag that up to E field, the lighting is satisfactory. But what we can also
do is go over here to our real properties. And under the surface you
can click on the color here. And currently it's just
using this value here. And you can also change
the color as the lighting. But what you can do is click on this little tab and give it the sky texture under
the sky textures here. And you can just go over down to the strength and make it
something like 0.2 for now. And let's hit 0. You're going to camera
view and you can see that's what we have so far. So I'm just going to hit
Z and I'm gonna go solid. What we can do is add
in a little backdrop. So we're going to go Shift
a, we're going to add in a plane S to scale it. And we're gonna go G, Z and
just print a plane down. So that's sitting underneath
here and you can go S, x and skeletal lung
the X like that. Then just with that active
hit Tab on your keyboard, and you can just select
this back edge here, hit B to extrude and z
and extrude it up on a Z. Disabled proportional editing
if you have it enabled, and we still have that
edge active there. So we're going to go, gee,
why and move it back, then just select this edge. And if you go Control
or Command B, you can create a
bevel on an edge. So just move your mouse, didn't wrote the middle mouse
button to add in segments. And now I've rounded out, so just tap back
into object mode, right-click and go shapes, move. Now we can go into camera
view by hitting 0. I'm gonna select my camera. I'm going to go to
my camera settings, and this is something you
can choose to customize, but I'm gonna go to the
focal length and make it 95. And then I'm just
going to go, gee, middle mouse button just
zoom out a bit more. I just liked that
a little bit more. That's sort of depth to the
camera completely up to you. The only downside
is when you go to a really long focal
length and zoom in, you're really going to get that horrible kind of stretching. So obviously there
are limitations, but completely up
to you study out photography a little bit if
you want ideas for that. Now for his Zoom,
we go rendered. We're gonna see we
have two backdrop. You can also go Control
B in object mode. You can go Control B
in your camera view, click and drag over
the camera and it'll limit the rendering
to the camera view. That way it saves you a
little bit on performance. Now you can select the light and let's grab this
slide we have here to decide and we're going
to go Shift D to duplicate it and
move it over our Z. Bring a light source from this
side in camera view hit Z. Didn't ever wondered. What I'm trying to do is
just get some lighting to come from the side here
and hit the sculpt. You can go Shift D to
duplicate a light, rotate, move through these, these are pretty standard things,
pretty easy to do. So just mess around
with lighting. I'm looking to give
any specific guide to lighting on the end of today, there are some ideas like
three-point lighting. We have two light
sources on the side. Light maybe from the top. And then you can also
add some rim lighting at the back to help your
subjects stand up. But this is not a
lighting tutorial. Once you are happy with a bit of lighting that you have
and you have a backdrop. You can actually click on the subject or to sculpting
go to your materials. And you, if you remember from
one of the earlier parts, we did owl hair. We actually, before we
duplicated the hair paths, we just gave it a
default material. And so all of these things
shared at material, it's just cold material since
the hair already has that, let's just click onto head. Go to this materials tab and
under the materials so you can go and just get a drop-down and choose that same material. You can also click on the
eyes under the materials tab, a drop-down and give it that material and
didn't gonna come over here just under the
surface and you can give it whatever
color you want, hits the thing got rendered and you can see
that's what you have. So mess around with devalue. I like to come down
over here under the surface and
increase the roughness. If you increase
roughness is less reflective and it makes it look a little bit more like clay, almost a little bit
like terracotta. And I like a little
bit of a darker value and maybe a little bit
more yellowish in red. So it's a little bit
less terracotta, but I liked that sort of clay look and you get a lot of
different clays out there. Now if we have that
as a material, it can also just select
the background plane. You can go to your materials, go new, and under the color, you can give that a
color if you want a darker environment backdrop, you can just
decrease that value. You can also change the colors. So these are things
that are completely up to you in your
own creative style. I'm just gonna go with
something a bit darker just to help to
subject here pop out. But with the lighting, by all means up to you to determine
how much do you want to increase or decrease
the strength of your lights and
how many you want. But for me, I just like to see the sculpt that I've done and make sure it's
got some nice lighting. Once you're happy
with all of that, makes sure to save as you go. You can go to render
and go to Render Image. Blender is going to
start rendering and then did a noise and kicks
in and it looks pretty good. So there we have it. That is the conclusion to this
series that I've been doing. I really hope that you
guys have enjoyed it. And if your result doesn't
look exactly like mine, don't let that intimidate you. You're still learning. And if you're, you've
made something, you've made something
in its domain points. So I'd like to thank you guys for taking the time to watch my Skillshare course and I'll
do a little video steel, just to mention a few
things after this one, we'll just give you guys
a bit of a challenge and talk about a
project you can do, but this is pretty much it. And I hope you guys
enjoy your day.
11. Thank You: This is the official
outro for my course. And what I'm gonna do
here is just give you guys a little bit
of a challenge and explain some things
that you can do for your project, for
the class project, if you were one of the people that are
absolutely new to it, you should now know some of the fundamentals to get you started if you're
already sculpting, but it's video, she's
kind of extended your knowledge a little bit. And if it doesn't really
matter where you're at with the class project. And what I want to
challenge you guys with is to build your
reference board, the one that I provided
and that I showed you in the earlier
parts how to setup, go online, find the resources
and put them into it. There's no harm in
building a really big one, or even different ones for
different kinds of people, different ages, different
groups, different cultures, whatever references
you're trying to collect together,
they're more diverse. And it filled in your
reference board is it's going to really
help you develop as a, especially as a
character sculptor. And there's a lot of different
avenues of sculpting. But if you're really
into characters, which I believe most people are, It's great to watch courses, but developing and
learning the anatomy is going to be the
most important thing that's really going to help you. The tools will always changing, the techniques always changing, but the principles of learning
from reality and getting a feel for things is always
going to be really important. So data is going to be what I want to leave
you guys with. And once again, thank
you for watching. I'm looking forward to seeing in the project section what some of you guys are sharing
and what you do with this. It's gonna be
fantastic to see him. I'm really excited about that and I'll see
you guys next time.
 PIXXO 3D, 3D Character Artist, MoGraph Teacher