Transcripts
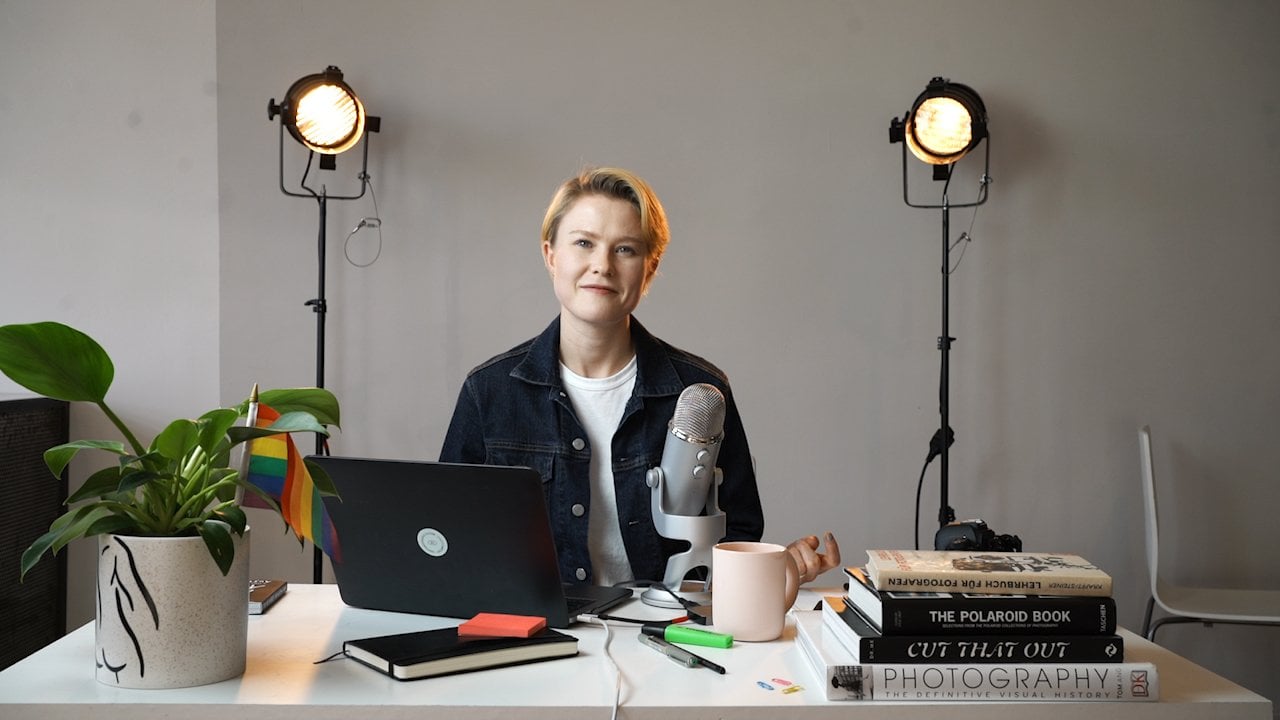
1. Introduction: Creating any kind of content is easy. Creating content that inspires others and maybe even teaches you something about yourself is anything but easy. But don't worry, because I'm here to help you to tell your story and share it with the world. In this class, you will learn how to plan, shoot, and edit a video that will showcase who you are, so you can engage and connect with your followers. Hello, everyone. I'm Sophia. I'm a Berlin-based photographer and filmmaker. In the last couple of years, I created multiple video campaigns for brands all over the world. I've worked on Pride shoots for Adobe and Skillshare, and recently released my first documentary. On top of that, I'm constantly working on my personal projects. One of them being about representation, where I shoot one-minute long videos of my friends and ask them what representation means to them. That project actually gave me the idea for this class. I even think the restriction of one minute is perfect to really make you think about what you want to say. For me, videos are great way to engage with people. It's the perfect tool to tell a story, your story. By telling your authentic story, you can inspire others to do the exact same. A lot of my work is about queer representation, so my personal projects are usually about that. But your project can be about whatever moves and inspires you. I have been asked why video; why not just a photo? I feel like everyone has taken a self-portrait by now, and I just wanted to do something a bit different. I also participated in a video competition where I had to shoot all by myself, and I realized how much fun that was. It gave me the freedom to do things my way, to make mistakes, and also to capture things that are just important to me. To give you an idea, this is the first video I created by myself. It was exactly one minute long, and in the end won the first place in the competition. I spent the last two days going over all my hard drives and old projects. I tried editing some cool shots together, but for some reason that didn't feel right. Because the videos that made me smile were not the cool and cinematic ones. I kept going back to old clips of my friends that I shot on my phone with no intention of using, I just wanted to capture that moment. Right now, these moments have become a source of hope, something to look forward to and also something that reminds me of what I'm really grateful for. The people in my life that make me want to capture and remember moments. Right now the phone calls we have and the plans we make together, and the fact that even now with everything that's been going on we keep on creating meaningful moments by being there for each other, even when we can't be in the same room together. Throughout this class, you will not just learn how to create amazing content. You will also reflect yourself and think of things and topics that are important to you and that you're passionate about. See it a little bit like using videography as a mirror to look at yourself. The class is for beginners that want to experiment with videography, and also for everyone that just wants to dig a little bit deeper and create inspiring content. I'm super excited about this, and I will be creating my own video alongside you. Take a deep breath and let's get started.
2. Class Project: The class project will be a one minute long video that shows something that is important to you and that you are passionate about. It can be about whatever you want. It can be a conversation that you have with yourself that comes to life through video. It can be short film about your surroundings or something that moves you. When it comes to what is important to you, there are no rules. The great part about this video is you can do it completely by yourself. It might be but challenging, but even more worth doing. In the end, you can be proud of yourself and what you made completely on your own. This class is designed to guide you through the video production and editing process while giving you useful tips about creating inspiring content. I like to combine learning technical things with learning something about ourselves. Because for me, great technique and year is nothing without an important message to tell. We will begin with deciding what focus the video should have. What story do you want to tell and why is this important to you? After that, we will look for visual inspiration and make a little plan that will help execute that project later on. After that, we will set up our camera and audio gear and we will start shooting the video. In addition to walking you through the creative process, we'll also be going through some basic shooting tricks and cover some basic editing aspects in Premier Pro. When it comes to gear, I like to use as little as possible. I will be working with natural light, and I will use my Canon 60 Mark 2 and a zoom recorder for audio recording later on. But to be honest, you can use whatever camera you have available to you, even your phone is perfectly fine for audio and video recording. The only thing you will need is a tripod or something to hold your camera. In the end, we will edit the video. I know that editing with Premier Pro seem a bit overwhelming sometimes, especially if you're just starting. But I promise you, if I can learn how to use it, you can learn how to use it. I know this might sound like a lot, but I will promise you, you will do an amazing job. I will be here with you. Creating by yourself gives you the freedom to work on your own time, to make mistakes without anyone watching, and to try again and again until you have your own story the way you want it. You might also think can making a video, actually teach me something about myself? My answer to that is, you'll never know unless you try. Let's try it together.
3. You Are the Story: Let's start. In this video, we will talk about content and the story you want to tell. Since we're doing this together, I will show you how I approach my search for a story and ideas. A good idea and message is key. You can have the best camera, the most amazing lighting, but if the content you're creating isn't engaging and inspiring to others, it probably won't be as successful. I try to create content that people can relate to. In order to find that, I ask myself what moves me? Since I can't look into other people's heads, I think that's the best place to start. For me personally, queer representation is really important, because I'm part of the LGBTQIA community and because I feel like I connect to that community in a way that enables me to show authentic representations. In my most recent videos, I've asked other people what representation means to them. In this one, I will ask myself, the exact same question. I think if you find something that is important to you, they're other people out there that share the same values and ideas. For example, through raising a question, you can inspire others to think of their own answer to that question. What I do, because I'm old school like that, I make the mind map. I write down the idea and the things that I want to say about that topic. Let me show you how. Now it's your turn. I want you to think of something that moves you. A question that you have been asking yourself for a long time or something that you wonder about. Write it down and just see what comes to mind. Just to give you some ideas, here some questions I've asked myself lately. If I could change one thing in the world, what would it be? Looking at my life, what is one thing people don't know about me? What would I do if I wouldn't have to worry about making money? To inspire others for me means to encourage them to think. Through that, you can engage with others and talk about important issues. Now that we have our idea in mind, we can think about how we want to shoot it. In the next video, we will look for some inspiration so when it comes to shooting, we know what to look for. See you in the next class.
4. Finding Inspiration: Let's address the elephant in the room. I changed my outfit. It's not the best for consistency, but it got really cold in here. But now let's talk about inspiration. When I think about creating a new video and I know what kind of story I want to tell, the next step is finding inspiration on how I want to tell that story. You can find inspiration through so many different outlets. Magazines, books, films, music, or just walking around. The list is basically endless. I want to encourage you to walk through your apartment where you are at the moment and look for things that catch your eye. Once again, there are no rules. When you're done looking for inspiration in the offline world, you can move on to the online world. Search for words online, check out images, and maybe even movies that you think contain something that could inspire you. Sometimes you can even find inspiration on the Camera Roll on your phone. When I work on personal projects, I like to try new things. Get a little bit experimental and see what happens. You're the one that has to like the outcome and nobody else. So just see where that freedom takes you. I recently found old footage that my dad took of my sister and I when we were kids. I love the colors, the way the camera moves, and even the little flicker in the footage. Since I like that vintage look, I usually go through the footage and see what makes the style unique. The shakiness of the camera movements, the desaturated colors, the sound not being the best, all these things. There's also another aspect that I like about these videos. They make the content a little bit more relatable because they seem not impossible to make yourself, they're realistic and familiar. For me, these kinds of videos are the ones people relate to the most. Maybe you want to try creating a vintage video as well. Later on, I will show you some tricks that will help to achieve that look. Once we know what we want to shoot and how we want it to look like, we can start setting up. In the next class, we will get everything ready to shoot our video.
5. Planning the Shoot: Now we will talk about what you should plan in advance before shooting your video. I'm a big believer in having a plan, but then also adjusting that plan as you go. I learned pretty early on that having too much of a plan gets you stuck on one idea, which is also not good, but having too little of a plan is a waste of time because then you start shooting, but you don't really know what to do. We're going to find a middle ground here. Before I start my videos, I decide on a few things: the length of the video, where I want to shoot, what I need, what music I want to use, the scripts and the shortlist. Why are these six points important? Knowing the length of the video sets the frame for me. My workflow is very different when shooting something that will end up being 10 minutes long or something that is just one minute long. I need less shots, so I can also plan with less time. I also like the constraint because it makes me feel a little bit more creative. Also, of course, one-minute videos are really nice to share on social media as well. Where I'm shooting is important for preparing my gear, and to know what shots I can take in that space. I try to think of the props in advance because there's nothing worse in really wanting to use this one item and then realizing you don't have it there, it happened to me multiple times. Make sure you have all your props ready. Next thing, music. Music can change the whole atmosphere of your video. It's really good to know in advance what kind of music you want to use. Will it be upbeat? Will it be sad? Will it be dramatic? The only thing you have to really make sure is that you're using music that you have the rights to, but you can find a lot of royalty free music all over the Internet. The question of whether there will be a voice over or if you want to talk directly into the camera, dictates if you want to record the sound in the camera or through an external device. That's completely up to you. Depending on what story you want to tell, I would suggest making a simple script just so you don't have to improvise too much. Once you have all of that, I suggest making a little shortlist. When I started making videos, I never made a shortlist and I learned the hard way that you should really have one because later on you're missing some shots and you're going to be really upset. Just make a simple list, write down the things that you really don't want to miss. Here's what I have planned for my video so far. I will be shooting in my studio. That's where we are right now. I used to shoot a lot in my apartment, but for this, I wanted a little bit more space. We also have this really nice big mirror, which I think I can use for some really nice reflections. I want to keep my video pretty simple, so I will only need a chair and myself. I picked a pretty dreamy song. I think it will go well with my story I want to tell. I will be doing a voice-over. I like voice-overs because it means I don't have to think about what I look like while I'm talking. It also means I can record the audio with an external device, which for me is really nice. As of making a shortlist, I like mix of close ups and wider shots. I always write the shots down. For a one-minute video, I think having at least six shots is a good starting point. I will go for face close up, hands close up, shoes close up, jump cuts sitting on the chair, picking up the camera, wider shot, reflection in the mirror. Once we know what we want to shoot and how we want to shoot it, it's finally time to start filming. Now, it's getting really exciting. You have everything planned to start shooting and telling your story. In the next video, I will show you how to set up your camera, shoot your footage, and what to be mindful of when filming. I'll see you in the next video.
6. Shooting the Video: You have made it so far. Now it's time to put your plan and ideas into action. I loved this part of the process, especially when I'm working on my own because I feel like I can experiment, play around, and also just take my time. Before we begin, I want to remind you again that this is something you're creating to tell your own story, to reflect yourself, and to be creative. There are no rules. Try new things, just be adventurous. Let's start. It feels a bit inception because I'm filming myself, filming herself. I just wanted to explain what I'm going to do. I'm going to set up my camera. I have my shortlist next to me, so I know what I want to shoot. I will start with the close-ups because I sometimes feel like that's a bit easier. I will get my camera ready and then I will show you the settings that I use on my camera and how I shoot the close-ups. Stay tuned. I don't want people to obsess too much about settings, but I want to share with you the settings that I use. I'm shooting a 25 frames per second. You can also shoot at 24 frames per second. That always means that your shutter should be double of that. My shutter is 50, that makes the motion really smooth. There's a lot of science behind this, but we're not going to get into that too much, you just have to trust me on this one. Then I'm using an aperture of 2.8. That means I have a nice blurry background, and since I'm shooting with natural light, I have enough light coming into the camera to get a nice image. The ISO, I'm just adjusting to the lighting situation. Since we're going to use vintage look, we can really go high on the ISO. The ISO is basically brightening up the image, and the higher the ISO sometimes you get a grainy image. But vintage videos are grainy anyway, so we're not really worrying about that. Let's start shooting. We're done shooting our footage. There are two more things I want to mention before we move on. One is the shortlist. I'm constantly checking my shortlist while I'm working, and like I mentioned in the beginning, it's great to have a plan, but you sometimes have to change that plan. I cross off all the things that I've already shot, and there's one thing that I didn't like. I tried it, it didn't look good, so I'm just not doing it. I just wanted to encourage you again, if there's something you don't like, it doesn't look like you wanted to and it's not really working out, don't get stuck, just try something else and move on. The next thing I'm going to do is I'm going to record my voice over. For that, I'm using a Zoom recorder. You can easily record with the memo app on your phone. Phones are great for recording audio. I'm just used to that one, that's why I'm using it and let's go. You made it. You recorded your video. Now that we have our footage, it's time to import it into Premiere Pro and I will show you how to edit the footage and also add a bit of a vintage look. I see you in the next video.
7. First Steps Editing with Premiere Pro: Welcome to the editing part of this video. We're going to look at the footage that we just shot, we're going to look at the audio, and then we got to put it all together so it's perfect for social media. Let's get started. You can see my screen here, I already imported my footage. It' very easy, just command I, go to the folder where you have all your footage, and then click on that and import. If your window is not looking like this, you can always go up to Window Workspaces and then go to Editing and it should look like that. Here in the media browser we have our footage. What I'm going to do now is I'm going to import all my footage into my timeline, and then I'm going to start editing. You import into your timeline by going here, click on one of your clips. A new sequence from clip that will create a sequence that has the exact same settings as your footage, which usually is best because it makes your footage look nice and it's not changing the footage itself. Then, I'm going to drag all the footage that I have onto the timeline. That's usually what I do when I'm working with footage like that that I just want to put together, so it looks nice. I drag it onto the timeline first, and then I'm editing it the way I think it looks nice. Just to give you some simple tricks, you can edit with Premiere Pro or like cutting clips specifically by going to the end of the clip and just dragging it, or you can use the razor tool that we have here, and then cut at the point where you want to cut. I'm going to finish cutting the pieces how I want them, and then I'll be right back.
8. Adding Movement: What I've done now is I cut the clips, I dragged and dropped them where I wanted them to be. It's pretty easy. You click on the clip, you drag it where you want it. I want to show you one really cool thing because what our video is lacking right now is a little bit of movement because we know the camera was on a tripod, but we can actually make our footage move in Premiere Pro and I'm going to show you how we do that. You just click on the clip that you want to move and then you go up here to Effects Control. Click on the clip "Effects Control". Here we go. Then you see here motion and you see position. With this one, we can move the footage horizontally, and with this, we can move the footage vertically. What we're going to do first is we're going to crop in a little bit. As you remember maybe, I hope you remember. When we were shooting, I had this little tip on screen that you should shoot a little bit wider than you actually want it to be because now we're going to crop in. Once we crop in, we can make the footage move and I'll show you how. We're going to crop in to 150 and then I recommend going to fit here, going maybe to 50 so we can actually see the full thing and you click on it. Then you see here we have this frame which actually shows the full footage, this is how big it is, but since we cropped in, we can only see the closer part of it. What we're going to do is we're going to hold down and drag it all the way to the side. As I'm dragging, you can see that the number over here is changing because I'm changing where the image is horizontally. What we can do now is we can set a keyframe and we do that by going over here to Position and just toggle this little clock. By that, we made a keyframe. Then we're going to move over here to the end of the clip, more or less, maybe around here, going to go up again here, click so we can see this frame again. We're just going to hold it and drag it to the other side. As you can see, we have this little blue line here and by dragging it and then letting go, we created another keyframe over here and that's basically it. I'm going to show you what that looks like. We have this here and then you see what happens. The footage moves as if we were tilting the camera, even though we've only done it in Premiere Pro. That's a good trick to make your footage look more realistic and people are going to be were you not filming this by yourself. Another thing we can do is we can zoom in. We can do the exact same with scale that we did with position. We're going to have this clip here and you see scale here and I set a keyframe by clicking on the clock and then we're going to go to the end of the clip and we going to put a number in here. You can easily put in a number, let's say 120, and then you will see the footage actually going to zoom in. Perfect. This is how you add movement in zooms after you actually recorded the footage in Premiere Pro. The next thing I'm going to show you is how to make the footage look a little bit more like vintage footage which means we are going to add a little bit of grain and we're going to desaturate the footage a little bit.
9. Creating the Vintage Look: Now that we have cut our footage and we have added a little bit of movement, I want to show you how you can make your footage look vintage. What you want to do for that is get an adjustment layer. An adjustment layer is basically like a layer that you put on top of your footage because you don't want to change the footage itself. Also, with an adjustment layer, it's very easy to adjust something for a lot of clips, so you don't have to do it clip by clip. Let me show you how I do that. I go here and you see new item, Adjustment layer, and just going to say yes, that means it creates an adjustment layer with your sequence settings, but since we created the sequence with our settings of the footage, that's totally fine and it's all the same size. Then you're going to drag this onto your timeline. You going to make it as long as your clip. Here we go. The first thing we're going to do is we're going to desaturate the footage a little bit because this vintage footage is always a bit like the colors are faded out. You're going to click on the" Adjustment Layer" and then you're going to go up to the top here and go to Color. Then you're going to see here on the right side, you can make a lot of changes. The first thing I'm going to do, is going to go down with a saturation, because I want it to be desaturated, I'm going to take down the blacks a little bit. Then I'm going to go to Creative, and we're going to use something that's called faded film. We're going to go up with that. I think that is already looking pretty good. We can go up here again and play a little bit with the contrast, maybe go down with that a little bit more. Then if you want to see what the before and after looks like, you just go here to this little eye next to the adjustment layer. You can click this on and of and then you can see the difference in the footage, without, with. The next thing we're going to do is we want to add a little bit of grain. That's also super easy. You just go to Effects here. Then you've going to type in noise. You go down here to noise and grain, you're going to take that noise and drag it onto the adjustment layer. Then you go here to the effects controls. You scroll down and then you will see here, noise. You can change the amount of noise. Now it's at zero percent, but obviously we want to add a little bit, so we're going to put in 10. You can already see if you want to go and higher here. A little bit closer, you can see that already added a little bit of grain, I actually want a bit more. Let's say 15. Yeah, that looks nice. Now if we turn this on and off without our adjustments after, I think that looks pretty good. Now I'm going to show you how I edit the audio for this.
10. Editing the Audio: Now that we have edited our video footage, I'm going to show you how I edit the audio, which I think is equally important. First thing we're going to do is we going to mute the track that has the audio track to the video clips that we recorded, since we're not using that and it's just going to be distracting. You can easily mute something when you just go on to the M next to the track. If it's highlighted, then that means the track's muted. Next thing we're going to do, I'm going to drag my voice over underneath that. I'm going to make that a bit bigger so we can actually see it. Here is my voice-over. Here's my voice-over. It sounds really crisp and very nice. What I want it to sound like it's more like from far away or through like through a TV. Once again, I make it sound like everything's easy on this software, but there is an easy way to do this. We have it highlighted here. Then go on to effects over here. I have my noise there, we just go out of that. We go to Essential Sound here, Essential Sound. Then you click here on Dialogue. What I'm going to go down here, preset, and we go to old radio. I think that's the best. Then enhance for speech. I will show you what that sounds like. Good representation looks authentic. No, it doesn't just look authentic, it is authentic. That's already the sound editing that I'm going to do to my voice because I really like that. It sounds like I'm far away. It sounds vintage, it's what we wanted. Now the last thing I'm going do is I'm going to add the music that I've picked out for this. I'm going to drag this underneath. Usually when you get music, be careful because it's very loud, you always have to turn that down quite a bit. It's also way too long so we will take the end of the songs, it's the same for the audio than it is for the video. You just hold the end and you drag it. Now we see what that sounds like with the song. I think it's still a bit too loud. Now you can just play around with the sound. It matches, go down with the volume of the song you have. Go up a little bit with the volume that you have for your voice-over, may be change where you want the voice over, but that's basically up to you. You can also play around with the presets that they have here, outside a room, podcast voice, whatever you like. I think for the vintage look, the old radio is really cool.
11. Creating Subtitles: One very important thing that I want to show you because I think for accessibility and inclusion, it's very important to have subtitles. I'll show you how to create the subtitles in Premiere Pro because Premiere Pro has speech-to-text. It's actually super easy. Once again, it's easy to create your subtitles. You just go to Window, scroll down to Text, Transcribe Sequence. We know that my voice-over is an audio number 2 and transcribe. Then we wait a little bit. Once that processes my voice-over. Here we go, usually it does a really good job. I would recommend reading through this one more time. But if you are happy with it and if you're not happy, you can just click in. Change what you want to change. Then you say create captions. Create. Through that it creates the captions for you. What we're going to do now because you know that vintage subtitles are yellow. I want to change that as I just mark all my subtitles and go to graphics. That opens it up here, I'm going to change the font. Let me show you what this looks like here. Going to change the font to Helvetica. I think that's the best one for that, Helvetica Regular. Then we're going to click on "Fill" and drag that down here to the yellow. See to see what we like here. Something like that. I think that looks good. Then we can go back to editing and here we have it. What does good representation look like? For me, good representation looks authentic. It doesn't just look authentic. I realize there's a mistake and then I can just go here and make changes. That's how you make your subtitles.
12. Export for Social Media: I realized the sun was going down while I'm recording, so we have to hurry up with this last step. The last step we're going to do is we're going to get the footage ready to be exported and to be uploaded to social media. What I want to show you is how you can actually get the footage to be in the size of an Instagram story or a Reel, this is how I usually export my footage. Let's jump right in. What are we going to do. We can close the text here since we're happy with the subtitles. We will go up here, this makes that a little bit smaller. But we have to go to our sequence here in our project bin. You can see this is my sequence here. What I'm going to do is I'm going to "Right-click" on that. I'm going to go to Auto Reframe, Sequence, click on that. Then I can choose what ratio I want my footage to have. You can go one by one if you want to post it in your feed. I usually go to Vertical, since that's what you need for a story or a reel. We're going to say Create, and it already creates that for you. Let's drag this down here a little bit, and let's watch that. The only thing I would recommend doing once you've done that is going back to the subtitles, going back to graphics, and making them a tiny bit bigger. Because it tends to get really small once you've auto-reframed it to 9 by 16. You can do that here in the graphics panel once you've marked all the subtitles and there's the size, and then just play around. I think that's good, yeah, so that people can actually read it. Then what we want to do, we go to the end of our clip and we're going to hit "O", which means output, like in and out. You can make in and out little frame, so it knows what to export. Then you hit "Command M". Then basically it already sets it to this 9 by 16 frame, and you can click on the "Output Name "and decide where you want to save this and what name, I'm going to call it, Representation IG Reel. You hit "Save", and you hit "Export", and it exports your video, and then you have it in the perfect settings for social media.
13. My Video : What does good representation look like? For me, good representation looks authentic. No, it doesn't just look authentic, it is authentic. For me, the only story I can actually tell authentically is my own. I feel like the only person I can really represent is myself, and through that, hoping that someone can identify with that. I think I want to see more diverse stories, I want to see more intersectional stories, and I hope through that, people will feel more represented by the stories they see in the media. Yeah, I think that's what good representation looks like for me.
14. Final Thoughts: You made it. Congratulations. You created a video self-portrait. I hope you had as much fun as I did and that I could give you a little insight into my workflow. I hope you will continue to create content that inspires others and will give you the opportunity to engage with your followers. I can't wait to see your projects, so please share them with me, and if you have any questions, don't hesitate to send me a DM on Instagram, and if you want to see more of my work, follow me there. I'm so glad you joined me on this journey and I wish you all the best for all your future projects. See you soon and take care.
 Sophia Emmerich, Berlin based photogapher