Transcripts
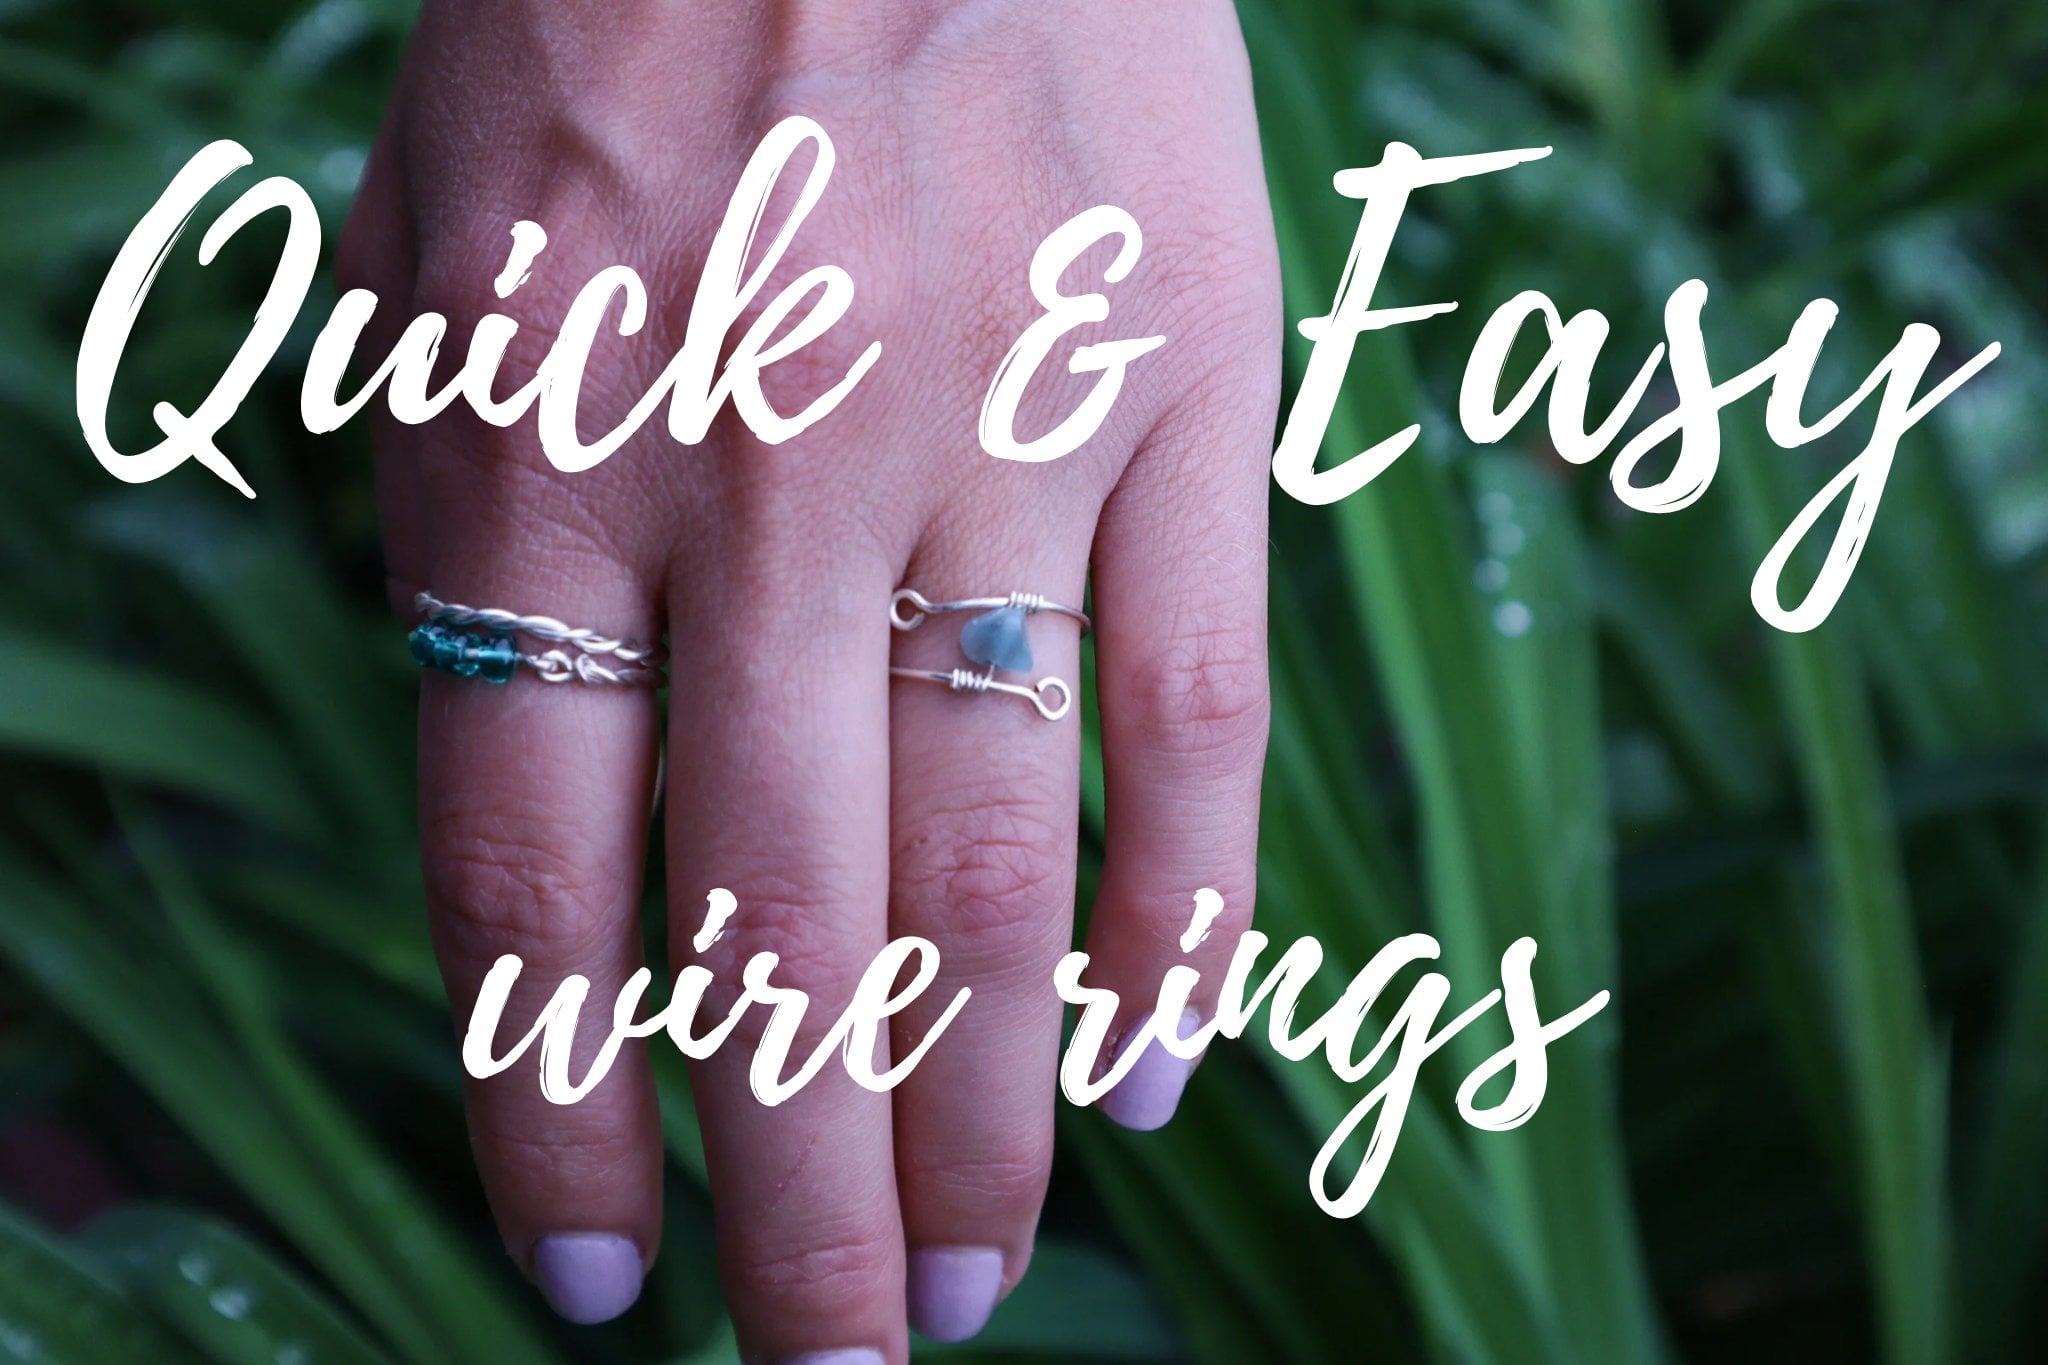
1. Introduction: Hello folks and
welcome to this class. We will be creating three
different ring designs, as well as using three different ways to
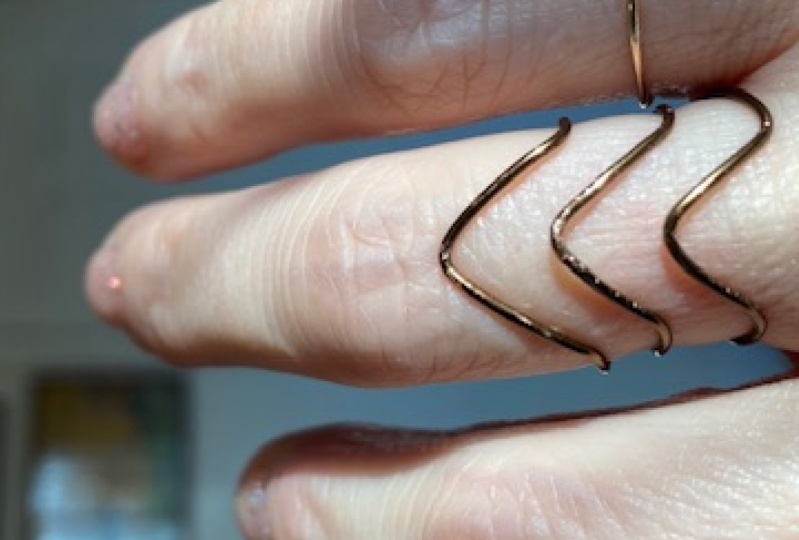
close off a ring. The stack chevron is an
adjustable ring where we will learn to crease the wire to get a sharper angle on our design. The next design is a heart ring, and this one we will be
making two different ways, an adjustable and non
adjustable closure. The final design that we will be making is the five strand ring. This one we will
learn how to wrap multiple strands of wire
to finish off the ring. I hope you enjoy this class
and learn something new. It's super helpful to me if
you leave comments letting me know how the class went for you and upload pictures
of your project. If you like this class, I'm sure you'll enjoy checking out the other videos that I
have on my page again. Thanks so much for watching. Now let's jump on
into the class.
2. Stacked Chevron Ring: Start off our class, we will be making the stacked chevron ring. We will be using a ruler
as well as a file. And I chose a size seven for my ring mandrel for our wire. We are using 20 gauge solid
brass wire for our tools. We are using wire cutters, nylon jaw pliers, and
our needle nose pliers. Starting off, we
are going to grab the nylon jaw pliers and
smooth out a length of wire to begin the ring. We will take our
needle nose pliers and placing the wire in the
very tip of the jaws. We're going to create a small loop at the end of the wire. Now taking the ring mandrel, we will place the wire onto it and start bending
the wire around the mandrel with what looks like about halfway
around the ring mandrel, we will begin bending the wire to create the first
chevron shape. To create the first
bind in the wire, you can either use your fingers, as I am doing here,
or grab your need in those players to create
the bend in the wire. We want to make sure
that the peak of our chevron lines up with the loop at the
back of the ring. After we check that
point to make sure that we are in the right
spot with our wire, we will then bend that
wire into a sharp angle. Now to create our
third and final bind on this little chevron shape, we want to make sure
that it is lined up with our first bind on the other
side of the chevron peak. A useful tip for getting a nice sharp angle into your
wire is to crease the wire. Basically. By that I mean bending the wire past
the point at which you want it and then
bringing it back helps create a tighter
bind in the wire. Holding the wire firmly
on the ring mandrel. We are going to bring the
long end of the wire around again and using that first
chevron as our guide, we're going to repeat the steps, creating three bins in the wire to create
our second chevron. Using our fingers to
create the initial pin, we will increase the wire and
then bring it back so that our angle is a little bit sharper and it holds
its shape better. After creating the
third bend in the wire, we will then wrap the
long end of the wire completely around the
ring mandrle once more and repeat all of these steps one more time
to create a third chevron, wrapping the wire as tightly as possible around
the ring mandrel. Holding it firmly
in our fingers so that the chevrons line
up with each other. As we begin bending the wire, using the chevron below as our guide, we will
take the wire, creasing it to create
our sharp angles and creating our third
and final chevron. Once we finish creating
the chevron shape, we will then bring
the long end of the wire around to
the back of the ring. Here we are going to take our wire cutters and
cut off the extra wire, leaving enough wire
so that we can create a small loop to match the first one that we
made at the beginning. Using our needle
on those pliers, we will bend the wire
up and around to create a loop that goes in the opposite direction of the
first loop that we wrapped, placing the wire into the
very tip of the pliers. We'll bend around to
create a small circle. A neat little trick for
a flattening down wire is to use the handle
of your pliers. Now, once we release
the tension where we were holding the wire
onto the ring mandule, all the wire is going to want to spring back and loosen
up a little bit. Using our fingers,
we're going to spread the ring apart,
separating the chevrons, and then twisting them
together to tighten up the ring back into
its original size. At this point, we can also tighten or loosen the angles of the chevrons so
that they are more even and matching to each other. Once you are done adjusting
the shape and size, you have completed the
stacked chevron ring. I'd love to see pictures
of your finished project. Please upload those in
comment and let me know how this class went for you Now, I'll catch you in
the next video.
3. Heart Ring - two ways: Next step, we will be making this heart ring two
different ways. We're going to start off
by using a 20 gauge wire, and I chose a silver
plated copper wire. We're going to need
a ring mandrel. I chose size seven. We also have a file
as well as a ruler. We will be using the
wire cutters as well as nylon jaw players, or
wire straightener. In a needle nose player
and a flat nose player. We are going to use the
wire straighteners, smooth out the wire before we even start creating our design. Next we're going to be placing
the wire on the ruler at 2.5 " for the size seven
ring that we're making. If you're making a
larger size ring, obviously you'll need
more wire or less wire. If you're making a smaller ring, keeping our fingers at
that 2.5 inch mark, we're going to grab
the flattenose pliers and place them at that point. And then create a sharp
V shape in the wire. Placing the base of that
V at the 2.5 inch mark. We're going to hold
that measurement with our fingers and cut off the wire with the
needle nose pliers. We will now create
the top of the heart, placing the wire into the
very tip of the pliers. We're going to bring
that long end of the wire down and around
to create a loop. We want the wire to end
up being straight out horizontally from what will
be our completed heart. As this will create
the band of the ring. Moving to the other
side of the heart, we are going to take that wire
and repeat the same steps, wrapping it down and around, bringing it straight
out the side to create the loop and
finish the heart shape. Once we have created the loops, we'll go back with
our fingers and the pliers to make sure that the heart shape is symmetrical before we begin
creating the band. Before moving onto
the band of the ring, we're going to take the nylon
op players and flatten out the design with
the ring mandril. We will now create the band of the ring by wrapping both ends of the wire and criss crossing them around
the ring mandrel. Pressing the wire
tightly against the mandril to give it its
shape as well as the size. We want to keep the bottom of the ring centered with the
heart on top of the ring. And placing our
thumb at that point, we're going to bend the
wire straight down. Then we're going to move to the other end of the wire
and do the same thing, making sure that it is
centered with the heart. We're going to take that other
end of the wire and bend it straight up next. With the needle
on those players, we are going to place them into that bend and take
the end of the wire, wrapping it around
to create a loop. Placing the wire into the
players at the same depth as the first loop ensures that our second loop
is the same size. Then we are going to
use the wire cutters to cut off the excess wire. I want to do this from
the side of the loop. Having snipped off
the excess wire, we're going to use the
needle nose pliers to tighten down the loops, making sure the ends are
tight against the band. This ring is now
completed unless you want to do a few
finishing touches like here, using the nylon jaw
pliers to make sure everything is flat
and placing it on the ring mandrle
one time to resize it and make sure that it
is in the correct shape. Now we are going to be
making the same ring again, but with a non adjustable band. All the steps for creating
this ring are the same, except for once we get to the closure for this
size seven ring, we are going to measure
3 " out on our wire. Create a sharp bend in the wire, Measure three more inches, and cut off the extra wire, giving us a total of 6 "
for a size seven ring. Now grabbing our
needle nose pliers, we will create the
heart shape itself. Remember when creating the
heart to place the wire into the pliers at the same depth on both
sides of the heart. So that that loop or the
circle shape there is the same size on both sides to give the
heart a symmetrical look. Once you have the
initial heart shape, you can go back with the pliers
or your fingers and bend the wire to adjust
the heart a little more just to make
sure it looks even. Once we have finished
creating the heart shape, we can go on to making the band. This is where the design changes because we are not
making adjustable band, but a secure closed one placing the wire
onto our ring mandule. We're going to wrap it around to create the initial
circle of the band, watching to see where the
center of our heart is, we're going to take one end of the wire and bend
it straight down, Making sure that that bend is centered with the heart on
the top side of the ring. With the first wire bent down
straight along the mandrel, We're going to bring
the second wire, bending it up in the
opposite direction of the first wire at this point to create a
sharper bend in the wire. I guess you could
say over extend the wire and bring it past the point at which
we really want it. Once the wire has been over
bent or over extended, however you want to say
it, we're going to bring the wire back so that each
end is straight up and down. Next, we're going
to take the ring off of the mandrel
so that we can take both ends of the wire and begin wrapping them around
the band of the ring, holding the ring securely. We are going to wrap
the wire around the band of the ring,
alternating sides, wrapping the one side,
turning it around, wrap the other side until we have wrapped that wire
around two or three times. Pulling the wire tightly so that that coil that we are
creating is nice and tight. As we bring the wire around, wrapping it onto the
band of the ring. We can also place
the ring back onto the ring mandule and use our
night lon jaw players or flat nose players to help
tighten up the coil as we wrap it around so that everything is tight,
there's no gaps. And it just helps give the ring a really
nice finished look. You want to wrap the wire around the band of the ring a
minimum of two times, but you can really
wrap it if you have left yourself
in a extra wire. You can wrap that band all the way up with your extra wire. Or I like to do about
three or four times around before grabbing
my wire cutters, my wire snips and cutting off the wire
as close as possible. Then I grab the file to
smooth down any rough ends. And maybe grab the
flatenose piers just to make sure everything
is tight and smooth, that none of the ends will catch anything when
it's being worn. Like I mentioned,
Grabbing the flatness pliers to press down,
as you can see here. Pressing down the ends of the wire to make sure
that everything is tight, squeezing together the
coils if you need to, however finished you
want your ring to look, I prefer having a
closed, tight coil. Some people like to
leave it more open or a looser wrap, guess
you could say. But really that's
just up to you. Just want to make sure
that the ends are down so that they don't
catch on anything. And then file everything
smooth to finish out the wrap. Now here we have both rings. The silver one with
the adjustable and the gold with
a secured closure. There you have it,
the heart ring. Two different ways.
Let me know in the comments which
one you prefer.
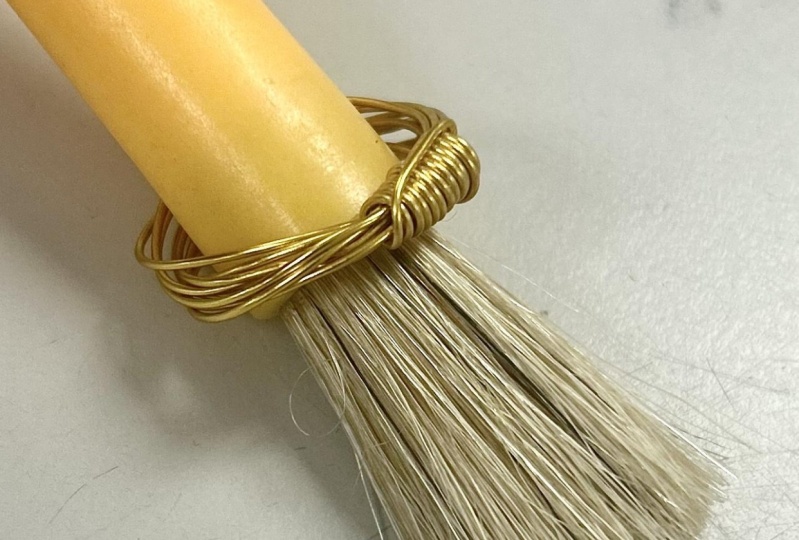
4. 5 Strand Ring: For our last video, we will be making this five strand ring. We will be using solid
brass wire in 20 gauge, a ring mandule in size six. And our wire cutters,
nylon Jop players, and the flat nose players
using the nylon op players. We are going to begin by
smoothing out the wire. Next we are going to take
the wire and place it onto the ring mandule,
leaving a small tail. It's about 2 ", maybe three. We're going to wrap that wire around until we have
wrapped it five times. Wrapping it as tightly
as you can and holding it firmly against
the ring mandule, because the wire is
going to want to spring back from the shape that
you are wrapping it into. Once we have five strands of wire wrapped around
the ring mandril, we're going to take our
wire cutters and cut off the excess wire so that
our little tail of wire. Both ends are the same length. You'll notice that as soon as I let go of the wire to cut it, that all the coil loosened up. That's something we're
going to have to make sure that we hold
tightly against the mandril so that we keep
the proper size for our ring. This might be the
hardest part only because you have to hold
all five of those strands tightly against the
mandrile so that they don't spring back out as you begin
finishing off the ring. Holding the wire as tightly as you can against
that ring mandule. We're going to grab
our flat nose wires. Take one end of the wire, bending it straight down to create a sharp 90 degree turn. Now that we have this first
end of the wire bent down, we want to bend the other end of the wire in the
opposite direction. To do that, we are
going to slide the ring up to the opposite end
of the ring mandule. Then we are going to
tighten it back down, bringing the wire tight against the ring
mandril and holding it firmly before we
take our flatness pliers and take that
long end of the wire, bending it in the opposite
direction of the first, bending it straight down along the ring mandril to create
a sharp 90 degree turn. Once we have both ends
of the wire bent, we want to remove the ring from the ring mandule without
releasing any of the tension. Otherwise, our ring is going
to want to spring back. We want to take both ends of the wire and wrap them around the band of the ring using
our flat nose piers. We are going to take
one end of the wire and bend it sharply down
so that we can then bend it through the center of the ring using our fingers to press the wire all the
way through the ring. We will then take our
flat nose piers and press down and tighten
that bend in the wire. Paying special attention
to holding the ring, making sure that you are gripping it tightly so
that the wires don't shift and you don't lose the
size of ring that you are making using the
flatenose pliers. Pinch that, bind tightly against the ring and then fold
the wire up and over, continuing to press the wire
tightly against the band. Having turned the ring around, we're going to do the same thing with the opposite end of wire, pushing the wire through the ring with our
fingers and then using the flatenose pliers to make sure that everything
is tightened down. We squeeze the wire tightly
against the band and making sure that the folds are
pressed closely together. Pressing the end of wire down through the
center of the ring, we're going to make sure
everything is secure and squeeze it tightly
with our flatenose pliers. And then turn the
ring around and do the same thing with
the other end of wire. Pushing the ends of the
wire up just a little bit allows us to get a closer
cut with our wire snips. Then we can take our
flatenose pliers and press the ends back down, securing them firmly
inside of the ring. Using the file.
Smooth down all of the ends to make sure that there's nothing
sharp or catching. This last step is totally
optional, but if you'd like, you can spread out the wires as I did just to fan
it out a little bit instead of leaving it tight as when I wrapped
it on the mandril. Thanks for watching guys. I hope you enjoyed this class. Please upload your
pictures of the project, comment and let me know what
your favorite ring was, how this project went for you. I'd love to hear from you and I'll see you
in the next one.
 Katrina Anderson, DIY wire jewelry and craft tutorials