Transcripts
1. Intro: Hello. My name is Natalie and welcome to this cost
creative watercolor class. Today we will be painting
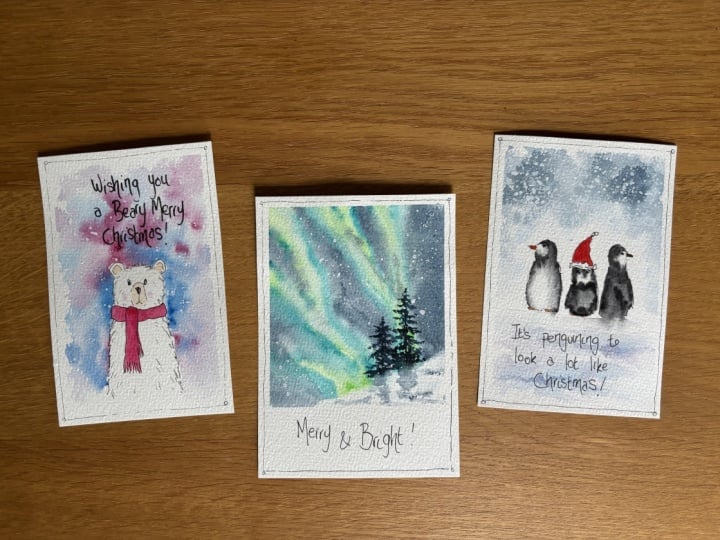
three winter themed designs, a curious polar bear, a magical aurora borealis, and a curious group of penguins. These designs are not only
simple and fun to create, but also can be transformed into handmade and unique
greeting cards to share with loved ones. Let's dive in and bring these winter wonders to
life with watercolor magic.
2. Materials: Let me quickly tell you about
the materials we will need. First, of course,
watercolor paints. I have a set that
comes with a palette, but if you don't have one, you can use a regular plate or any other palette
for mixing colors. A container of water. The paper I'm using is slightly larger than
a standard postcard. It's sick with a
weight of 300 grams, so it looks neat, doesn't bend and is
easier to work on. You'll need a board and some asking tube to
fix a paper in place. For brushes, you'll need two, one larger brush
with soft bristles, like a squirrel brush, and a smaller one
with a sharp tip, and stiffer bristles,
leg syntatykalin skin. I have a calligraphy brush,
but that's optional. The main thing is to have one big brush and
one small brush. You also need a pencil, I need a two razor, tissues, and some
medium sized salt. I keep mine in a small jar. If you want to speed
up the process, you can use a head dryer, but it's not necessary. That's everything we'll need.
3. Polar Bear: Let's get started on creating
a scene with a polar bear. First, I'll secure the people to board using masking tape. We'll begin by sketching the
polar bear with a pencil. Keep the drawing simple and silhouette like to give it
a slightly childlike look. Draw the basic shape, the head, body, and ears You can lightly outline the eyes and sketch
a simple muddle. With the pencil sketch complete, we can move on to
the background. For this, we'll use vibrant colors to make the
effect of a nighttime sky. I will use ultramarine
blue, turquoise, violet. You can choose any
other colors you like. Start filling the
space around the bear. Use different colors. Walk smoothly and carefully
around the silhouette. The outline of the fire can be slightly uneven
to mimic texture. Don't use a single colour
for the background. Add variety with
shades of blue violet, and even dark navy. While the paint is still wet, you can enhance it with
additional colors. To create the effects of
snow or falling stars, we let pinplas and salt
for unique textures. If any area of the
background feels too light, you can go back and
add darker shades. I want to make the ears a little more even. Okay. For the stars, use bright yellow paint to
add a few splatters. Protect the bear by
covering it with a tissue, so the paint doesn't
accidentally land on it. Once the splatters are done, w a bit so that the
paint soaks in slightly, and then you can add
water effects for beautiful patterns
as the paint blends. The surface is too wet now. It's important to
know that the paper shouldn't be too
wet at this stage. Wait until the surface loses its glossy shine slightly
for the best results. And now you can
prepare your salt. Different grain sizes
create different effects. Medium sized salt works best, but fine salt produces
delicate textures, and cars salt creates
more pronounced patterns. When the background
starts to dry, begin adding salt carefully. Sprinkle it all the wet areas. Then splash water
using a brush or your fingers by lightly
wetting your hand. Once applied, leave the
background undisturbed, so the salt and water
can walk the magic. Now, let's add details
to the polar bear. Take a fine brush and pee in
the eyes, nose, and ears. Use light gray or
light brown paint to give the details more depth. You can also syilize
the Barras for with gentle dabs of paint
using the fine brush. Outline a muzzle
with the same paint. Blade. Then switch to a bold black color to define
the eyes, nails, and mouth. Meanwhile, the salt
on the background will start forming
interesting patterns. If the dcters aren't as
vibrant as you'd like, you can wait a bit longer and add more salt
to the wet areas. Once everything is dry, remove the salt by
gently brushing it off or blotting
it with a tissue. Remember, salt textures
are always unique. The result depends on the
paper's moisture level, the timing of the
salt application, and even the type of paper used. And practice will help you
achieve the desired effect. Let's wait a bit. When you are satisfied
with the salt effacts, carefully remove
any remaining salt. If you are in hurry, you can use a hair dryer to
speed up the drying process. Gently shake off any remaining salt, or load the paper with a tissue. Once a paper is completely dry, peel off the masking
tape carefully to avoid damaging the
edges of your artwork. And there you have it. One
beautiful cut is finished. I hope you enjoyed the process. It's a quick and fun way to
create something beautiful. You can add an Asa polar
bear or two to make it a family cut or try drawing
a different animal. The process will
remain the same. Let your creativity flow, create your own scenes and don't forget to
share your results.
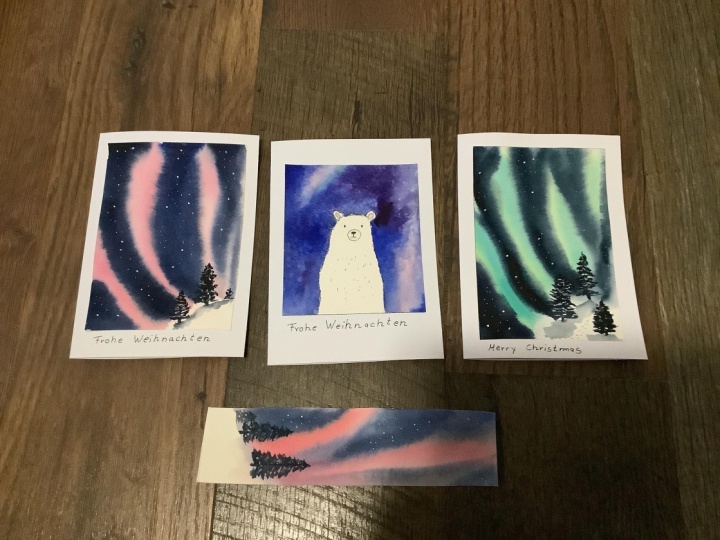
4. Aurora: Now let's create a scene
featuring the nos and lights. I've already secured the
paper on a board with tip, but I did it in an unusual way. I wanted to make the
image more square. This format will resemble
a polroid photo, leaving space at the
bottom for a message or greeting for the person you'll
be gifting this cut to. Let's get started.
First, with the paper, I leave a small
triangular section white. This will represent a snowy hill where we will later
draw some trees. You won't need a pencil
sketch for this. We will work quickly
and intuitively. What about the colors? Let's start with
a bright green to define the direction of
the nose and lights. You can tilt the tablet slightly in the
opposite direction. Next, at Turquoise. This color is essential for capturing the essence
of the aurora. Use wet, diluted paint to create beautiful
flows and streaks. You'll also need dark blue, such as indigo, and you can mix in a hint of
violet for extra depth. Fill the spaces
between the light streaks with dark shades. Near the transition
from the snow, add more turquoise or water
to create soft gradients. Each painting will be unique. No two northern lights
can look the same. If you like the result so far, you can leave it as is. However, I decided to add motto coils for a vibrant touch. Till the paper slightly in the other direction to guide
the paint into new flows. Once the aurora is complete, create a smooth gradient so the white snow
doesn't appear empty. Lightly tone the snowy
hill to suggest shadows. And while the surface
is still wet, I want to add some dark
spots to this area. And this You can tilt it the other way. Just be careful that water from the edges doesn't flow
onto the drawing. Don't forget to stop in time. And before moving
to the next step, let the piper dry completely. If you don't want to wait, you can use a hair dryer
to speed up the process. Next, we'll add stars. And for this, you'll need white Gage or seek
white watercolor. Create numerous platters
across the sky. If any splters look
too large or uniform, gently blow them with a tissue. After adding the stars, let's move to the trees. Take a fun brush and use the same color palette
to maintain harmony. That blue indiga mixed with a
touch of violet with loose, free strokes, pin the
silhouettes of the trees. I hold the brush loosely
to get those bold strokes. The first tree will be larger, while the second one will
be slightly smaller. Use bold strokes to create
the upward tips of the trees. Fill some areas with solid color to give the
scene variety and freedom. After what rinse your
brush and lightly blend the lower edges of the trees to create a
shadow effect on the snow. At this point, the painting
is almost complete. Carefully remove the tape. Since the paper is dry, you can do this
without damaging it. Peel off the tape slowly
and your painting is done. The result is a vibrant
and atmospheric scene. The space at the
bottom is perfect for reading a greeting
or personal message. Experiment with different
colors and directions for the nose and lights to create
your own unique versions.
5. Penguins: Now let's draw a
group of penguins. It's actually very simple. I secured the paper
to keep it in place and make it
easier to work on. If you are drawing
in a sketchbook, there is no need for this step in this
particular project. Let's start by drawing a line where the
penguins will stand. Use oval shapes to roughly mark where each
penguin will be placed. Don't press too
hot on the pencil. I'll fed five penguins
in my composition. Let's start with a
penguin at the edge. And let's define their
characteristic features. Each of them has a
round head and a body. Since we're working
with watercolor, we'll first fill
the silhouette with water and then add paint. The top of the
penguin's hat is dark, so we'll make sure
to include that. The next penguin
will face forward. Is head is slightly rounded, transitioning smoothly
into the body. We can add wings for the tail. And I'd like to give this penguin red head
to make it stand out. The dark section on its head and black accents on the sides will help
define its look. The set penguin will
face to the right. It has a head, a small beak, and a slightly elongated body. You can depict one
wing on the side. The first penguin will
also face to the right, but will be slightly larger. Is head is turned more, showing a larger dia, and its wing will appear
closer to the front. Let them be slightly
different from each other. The last penguin is a baby. It's facing forward, standing
close to its mother. But it's head is slightly tilted and its body is compact
as if it's snuggling in. Now that the penguin
silhouettes are ready, and now we'll use an
interesting technique. Let's move on to watercolor. At first, we'll
need clean water. Fills a penguin
slouete with water without worrying too much
about the fine details. Fills a sloues with large spots. The heads can be painted
with a fine brush. Use gray paint, applied
sick for a bold effect. If you'd like, you can mix in another color
for ready depths. Paint the beak with thin brush, then start filling the
body with dotted strokes. You can use one brush, loaded with diluted paint for light shadows and the second one will be with sika paint
for stronger accents. Add the eyes right away. Paint the next penguin
in a similar manner, outline its face,
then draw its wings. Then carefully blend
edges with water. You can dog on the lower part of the
body slightly for volume. Let's move on to the next one. So it's head, wings, and bottom. If the paper had dried out, you can wet it again. Repeat this process
for each penguin. And let's down to
the smallest one. Use more defined strokes for the wings and feet if needed. If necessary, draw the
details more carefully. Now, let's paint the hat. First, wet it with clean water, then apply bright red paint and carefully outline the shape to keep the hat looking
interesting. And here I needed to
finish drawing the ice. Here is such a minimalistic
and timonious postcard. If you like, you can add snow
by splattering white paint. However, I prefer a
minimalist style. So I leave the painting as is. Carefully remove the tape. You now have a cheerful and
featuring a penguin family. You can add mo penguins, change their poses, or
include accessories. Turn on your imagination and
create your own stories, and don't forget to
enjoy the process.
6. Conclusion: Thank you for joining me in this winter
watercolor Adventure. I hope you enjoyed painting these fun and festive
designs as much as I did. Don't forget to share your artwork in the
project gallery. I'd love to see your
creative interpretations, whether you give the SS cards or keep them as
personal treasures. I hope they bring warmth and
joy to your holiday season. Until next time, keep
creating and stay inspired.
 Natalia Nikitiuk, Capturing Life's Beauty