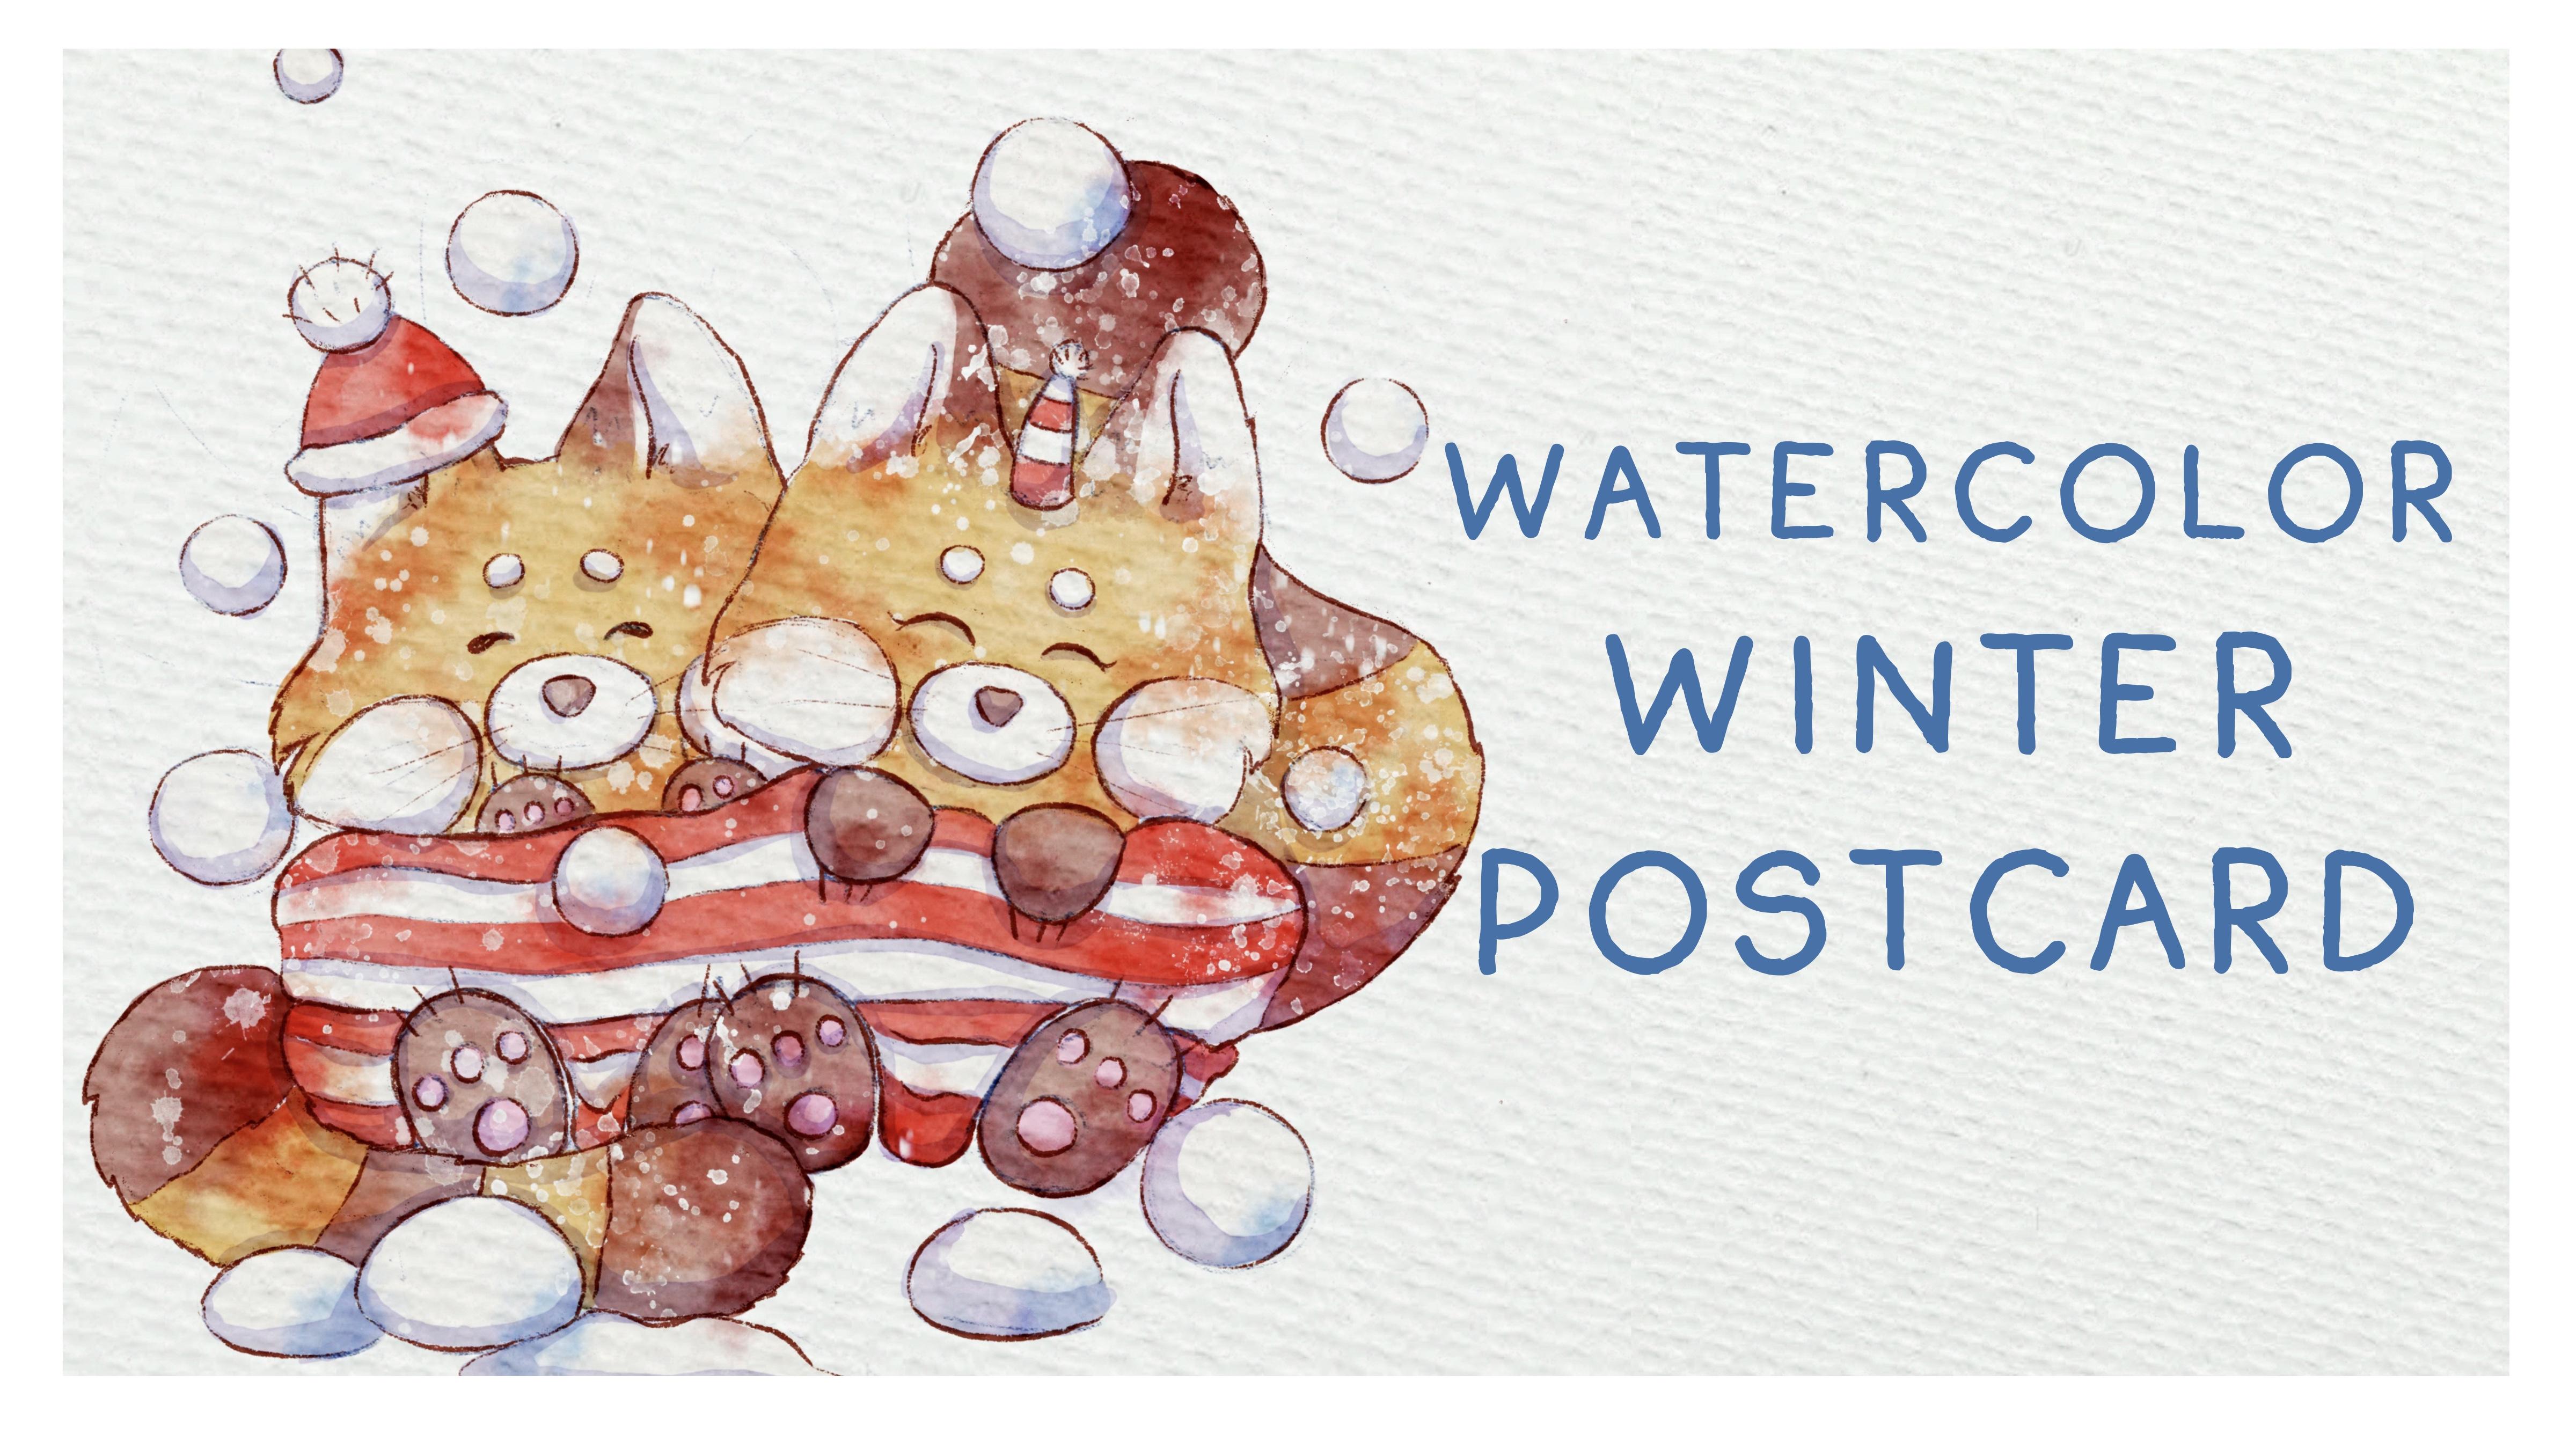
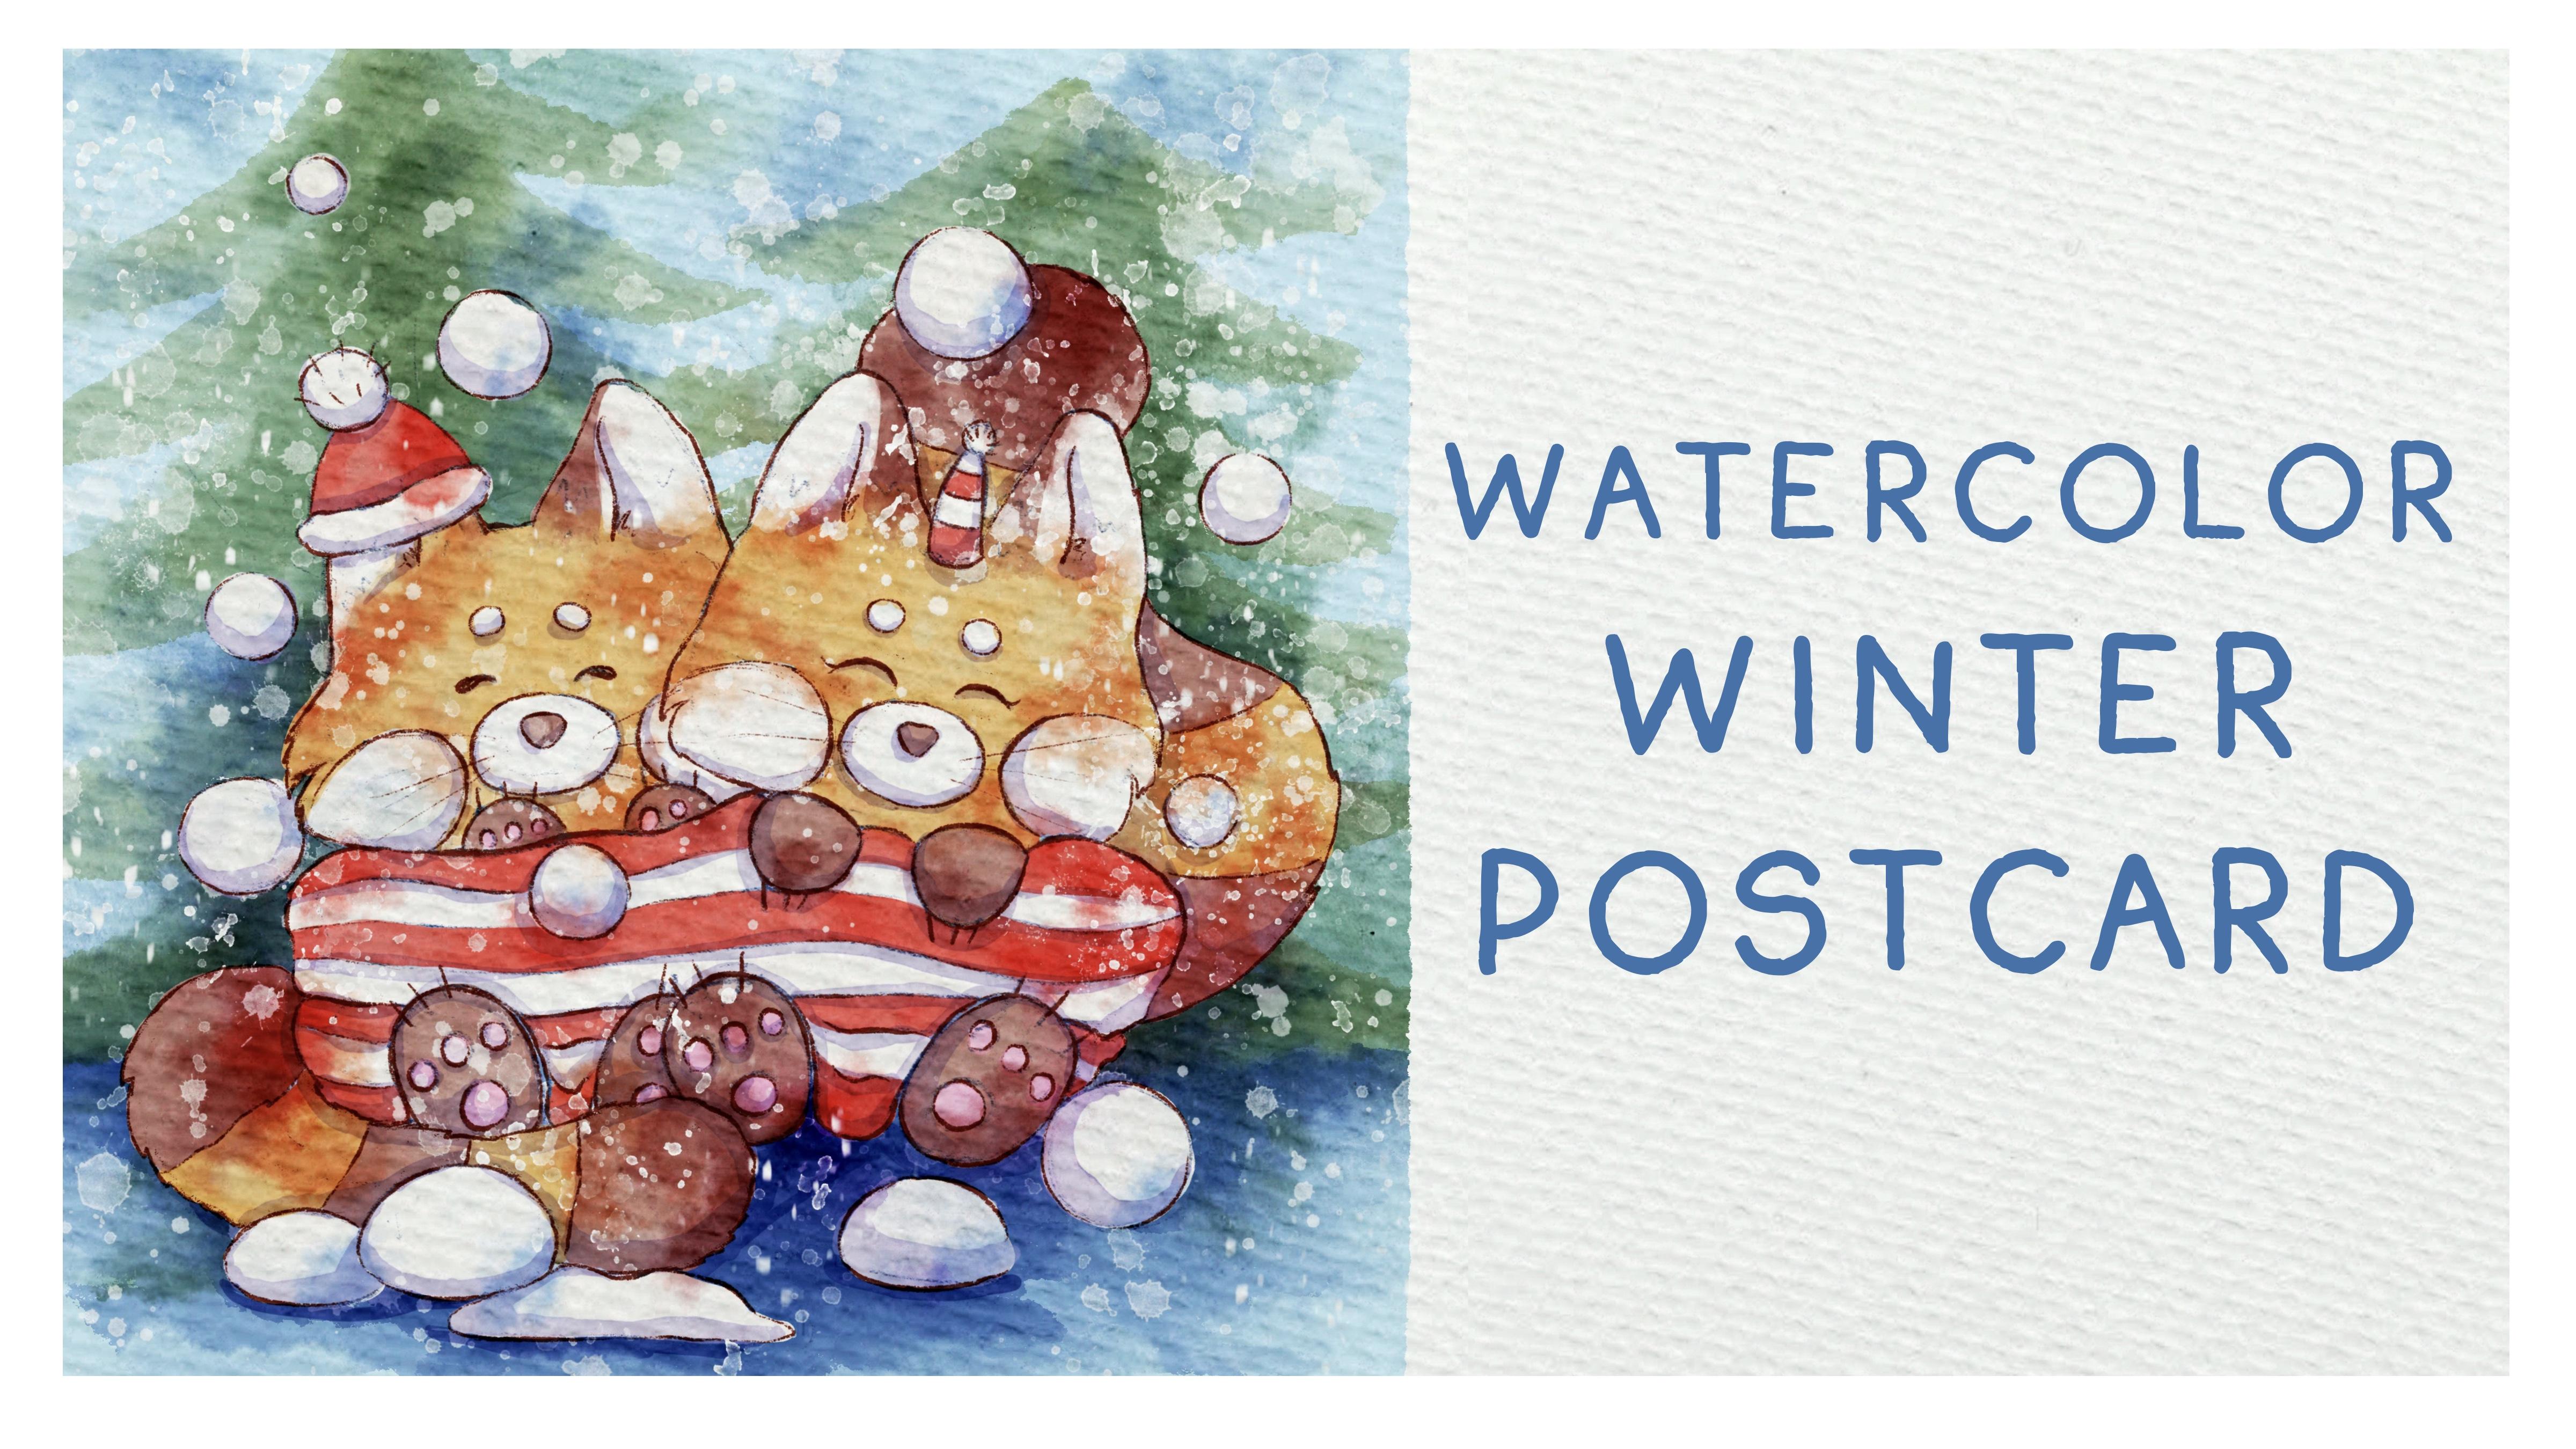
Transcripts
1. Introduction: Hello, my lovely artist.
Welcome to my class. Winter holidays are coming, and it's time to
be a little bit of wizards and create
magic around you. And if you are looking for a unique gift for
the beloved ones, my class is for you. So let's dig into digital watercolor art
and paint together. Cute winter postcard in
a fast and simple way. My name is Ingaon and I'm here to show you
that watercolor, digital watercolor
specifically is magical, you can create this
magical world with all those cute characters and whimsical nature
with your own hands. So that you'll need procreate and a little bit of inspiration. In this class, I'll
start by telling you where to find tools
for the class and how to get ready for painting
process like creating watercolor paper in procreate and exploring all the
layers that we have. We will have pretty
fast class today, so there is no need to spend
time on creating sketch. I prepared one for you. And finally, we will move
to painting process. I will show you
how to add colors, shades and watercolor
texture to our art. And in this class,
we will explore the blending layer modes
and clipping mask tool. I'll show you that it
is very useful tool. And the most important
in the end of my class, you will learn how to create postcard for winter holidays. By the end of my class, you will be able to
create cute character, red panda specifically
in Procreate, using simple
watercolor technique in a fun and simple way. During the course, I will slowly move you throughout my workflow, explaining every
step and describing procreate features and
watercolor painting techniques. So what you will learn
how to create postcard, how to paint in watercolor
style digitally in procreate, how to create watercolor
paper texture because sometimes
it can be tricky, so I'll show you an easy
way how to do that. Then how to paint in
more detailed way, reach traditional
watercolor look. Also how to paint
background in two ways watery with less details
and more opaque look, how to use layers
blending modes, clipping mask to also how to add shades and color
variations to our art. So what you will need
for out today's class? I'm going to use
Procreate with IPad and Apple Pencil.
You also can use it. You can use Procreate or some other drawing tools or just regular watercolor
paper and paints. About course
resources, as a bonus, I will share with you all
the digital tools that I mentioned in a class
like texture paper, custom brush set,
color palette font, my own pictures that I created. So who is this class for? It's for the intermediate
level and for advanced procreate
users for those who are interested for
digital watercolor art, cute characters, and
winter illustrations. And one more thing that
I want to mention, your opinion and your
feedback are very, very important to me. So feel free to tell me
what you think about the class in discussion
or review section. I will be glad to reply to you. My dear art fellows, I can't wait to start
this class, indefinitely. I can't wait to see what you
upload to project section. So let's not wait. Let's grab our iPad
and Apple Pencil and jump into winter
atmosphere altogether.
2. About Class Project: Now let's talk about
class project. Just follow a few steps, create a postcard
with cute red pandas in watercolor style that
will bring joy to you. Of course, don't forget to use the tips that I gave you today. And if you want, you can create
totally different thing, anything that helps you to feel happy during the
painting process. I will use Procreate
for this class with iPad and Apple Pencil. You also can use them or it can be some other drawing pads or just regular watercolor paper and paints, whatever you want. And guys out today's
class is pretty easy and covers topic
of winter holidays. Today's illustration
can be used as a unique gift for your
friends or family members. So are you ready
to experiment with digital watercolor technique
and learn some new tricks. Once again, you can choose completely different topic
and draw something new. Try experiment and enjoy
painting process together.
3. Tools and Resources: In this class, we will talk
about resources and tool and where to find and how to use
them. It's pretty simple. Follow the steps, go to
projects and resources section, download freebies,
go to Fils app, and then import all the
freebies into Procreate. Hello, my lovely art fellows. Today, during our today's class, I decided to cover the topic of Christmas postcard because we're going to have Christmas
soon a new year. So the specific feature of my class will be
that we will not spend a lot of time on creation because I know a lot of
people are in hurry. Maybe you kept wondering what present to prepare
for your beloved ones. So this is a class about
simple postcards that you can create within 30 minutes
and then present it. So if you are ready,
let's get started. And the first thing that we
need to do is open Procreate, then tap plus and then
tap square this one. So because Atleast postcard
will be in square shape, and I already prepared
for your sketch, so we don't need to spend extra time on creating that one. Of course, if you want, you can create your own sketch, use the idea so
illustration you would like to use for
your illustration, so it's totally up to you. So what I'm going to
do I just need to input our sketch
into the Procrit. By the way, let me tell you where you can
get the freebies. All the freebies you can get in Projects and Resources section under the headline Resources. But please pay attention. Open my class in browser. It can be Rome or Safari. Why browser? Because if you do it through
the Skillshare app, my freebies might
not be visible. So you go to the browser, then you go to my class, then you go to Projects
and Resources section, and there you will
see all my freebies. Once you download them, you need to go to Files app, or you can just simply tap all the files will
be in Downloads folder, and then press Add and
press Insert the file. And I on the freebies,
you can find this kit, you can find swatches, also the phone that
I prepared for you. You can use any other phone
that's also totally fine. I prepared for you
my watercolor paper and also the art that
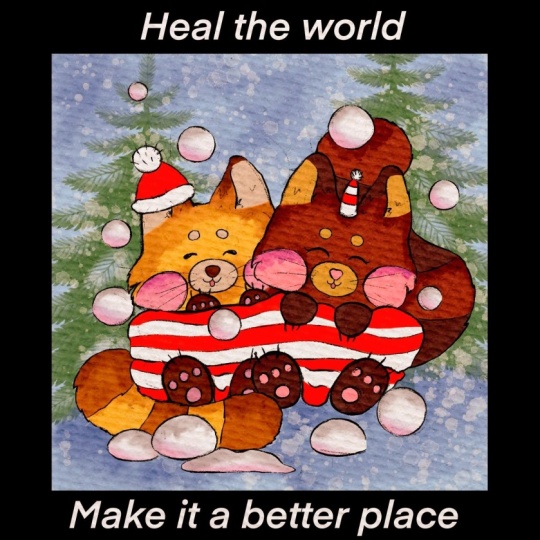
we will create today. So let's tap Christmas
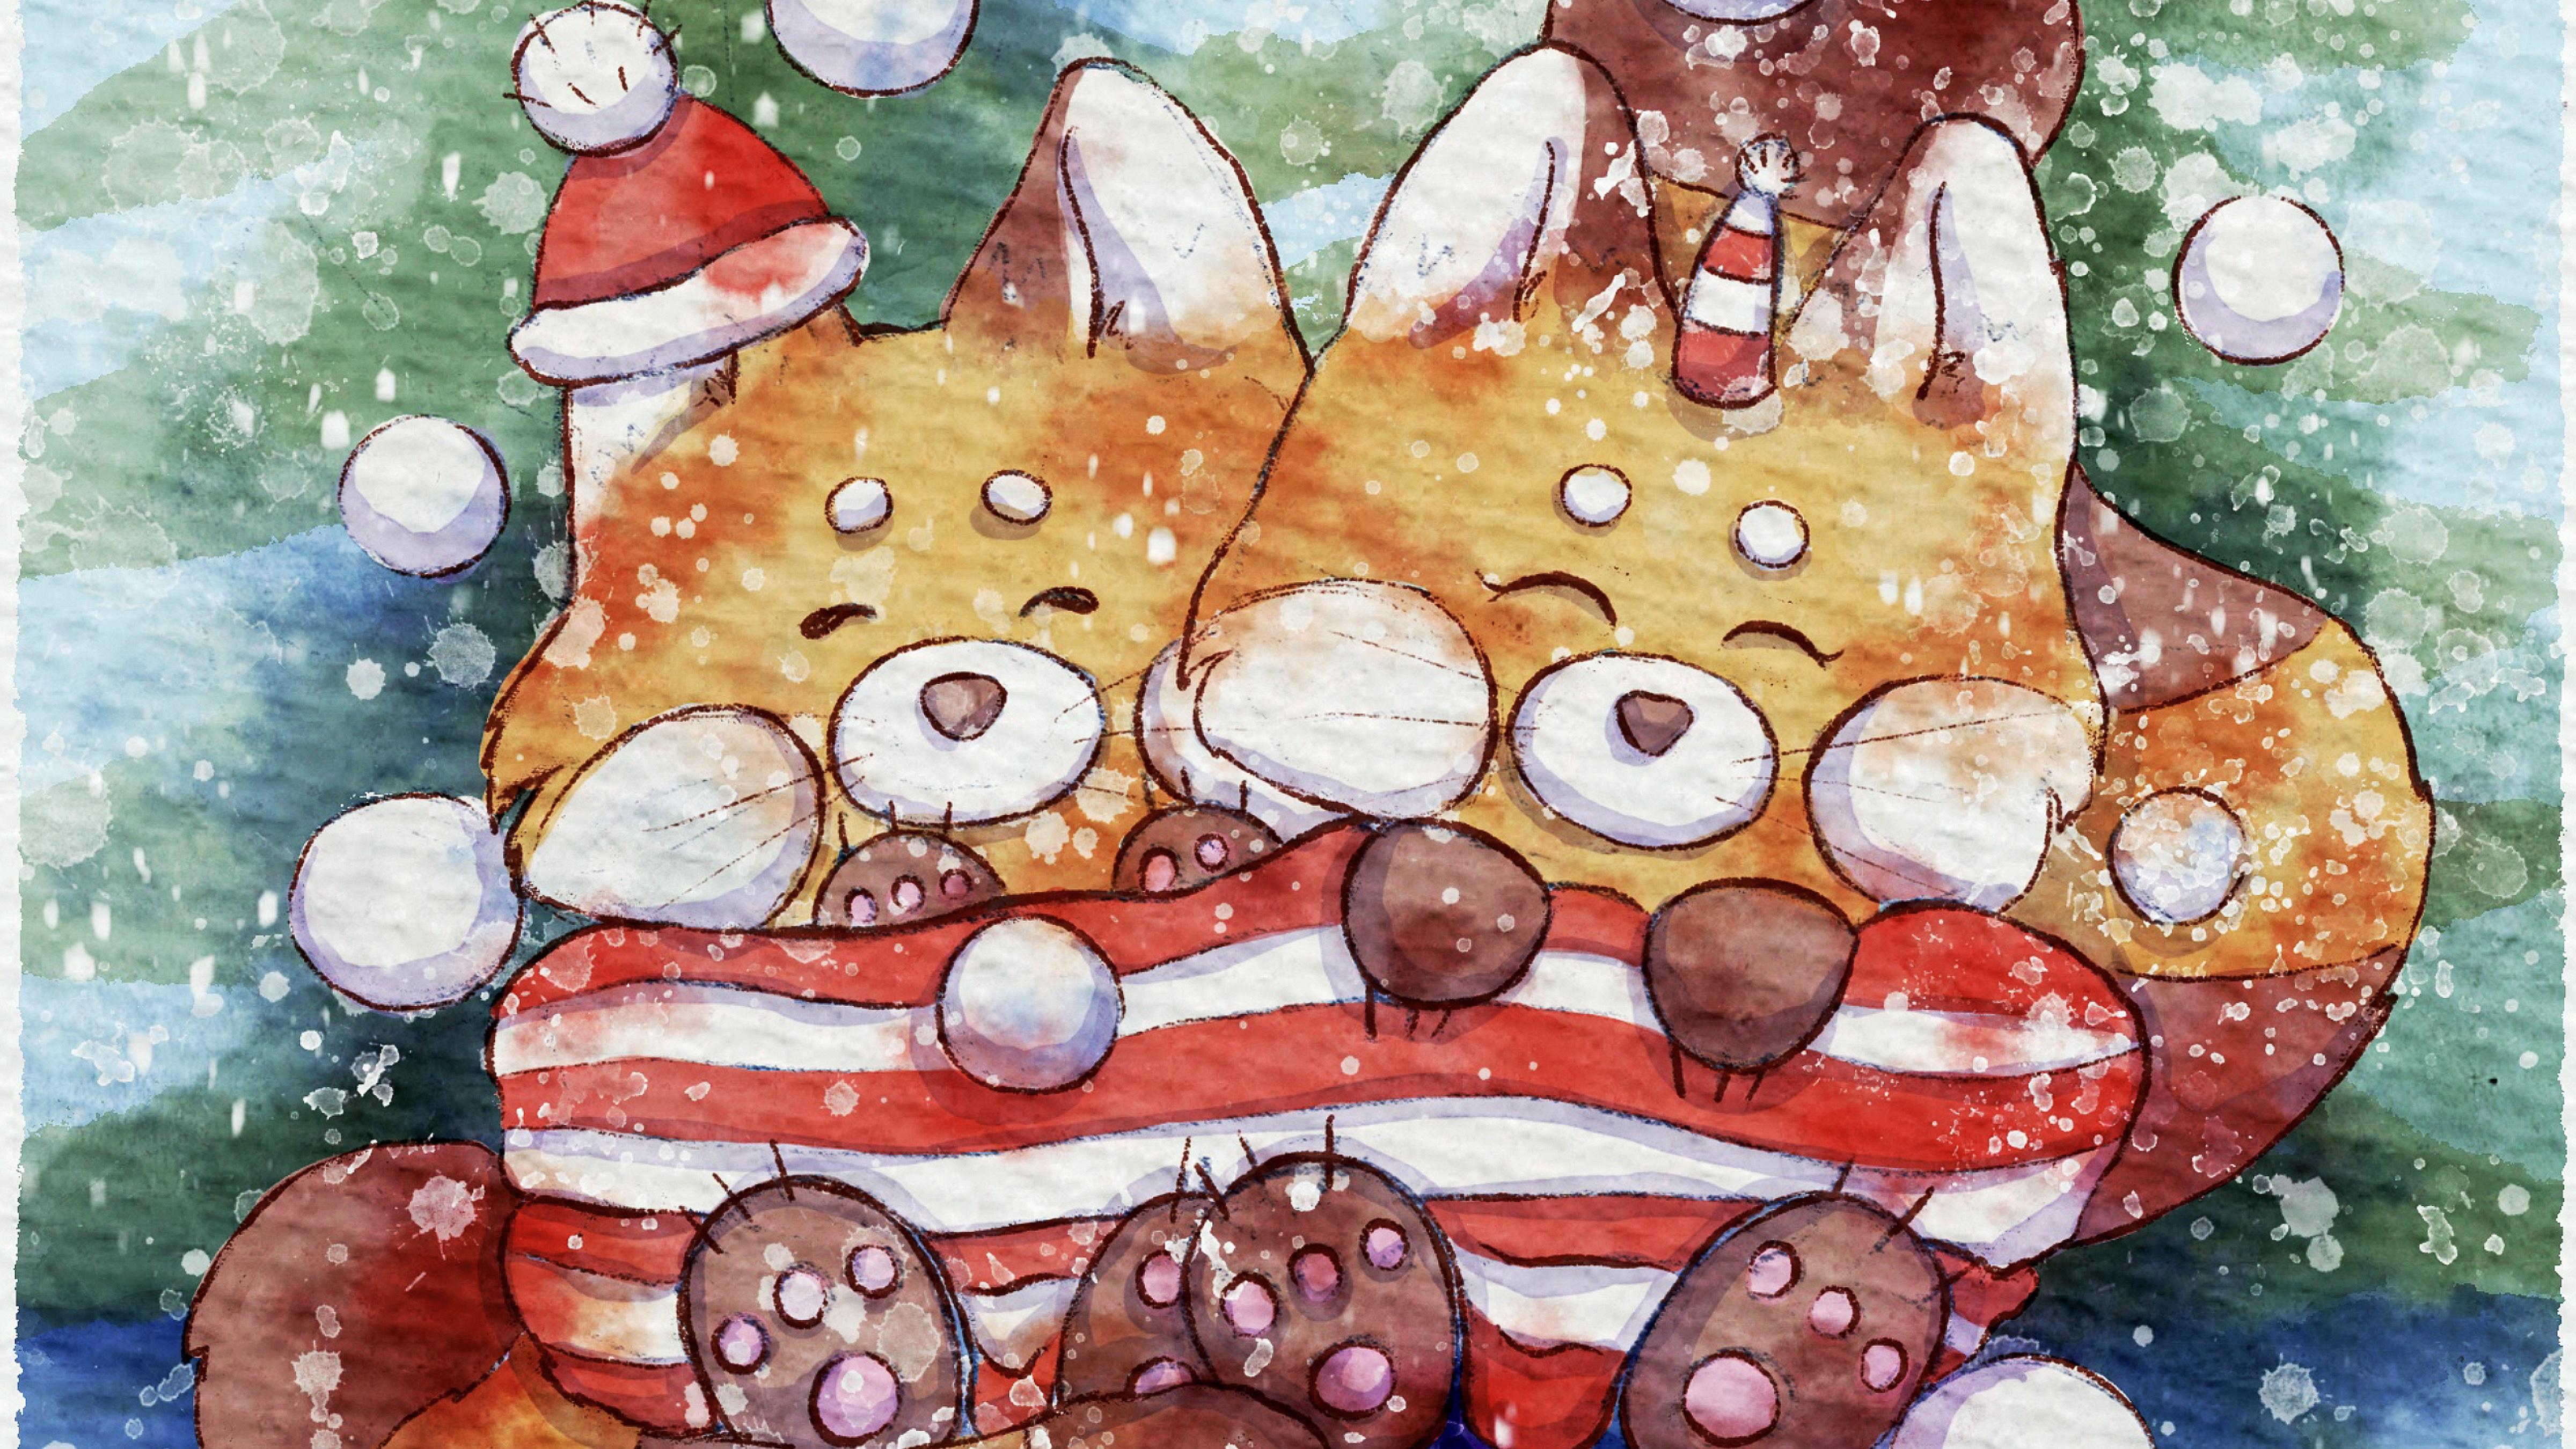
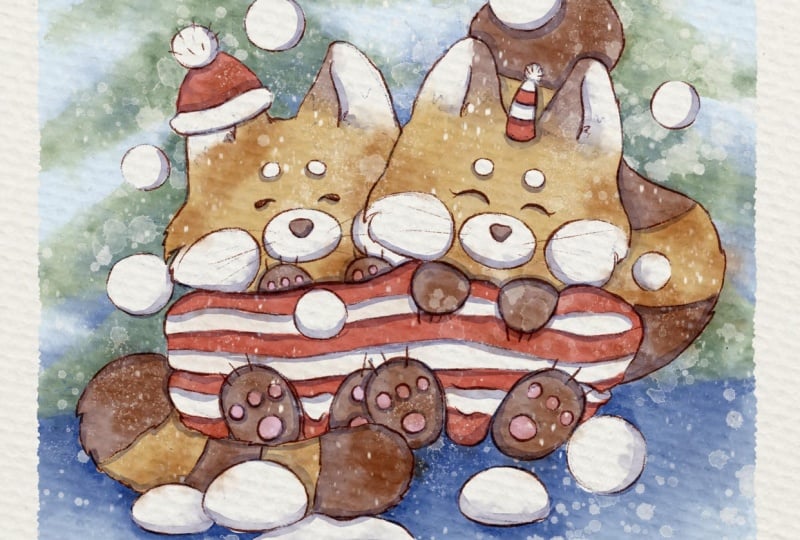
postcard sketch. And you see, isn't it that cute? I prepare those lovely, very cute red pandas for our main characters
for the illustration. Also, I added a
couple of snowballs. Later we'll add snowflakes too, and we'll create very
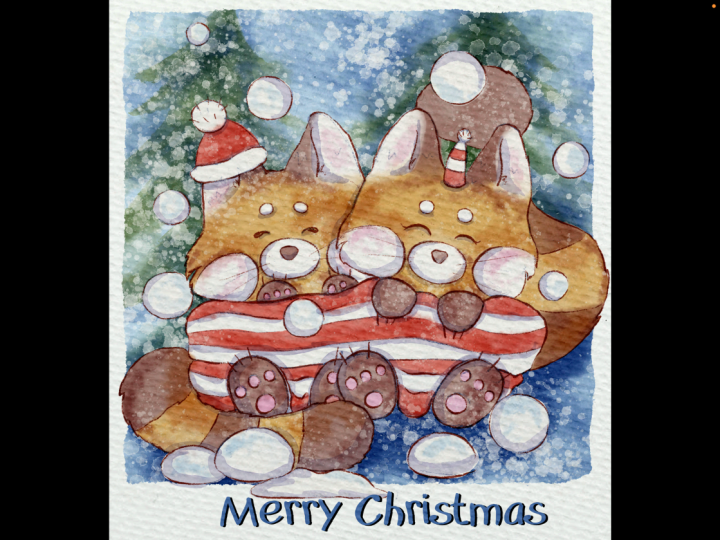
simple background. I already have tiny
reference picture, the illustration that
I created a little bit earlier while I was
preparing our class. So let's use it as our
reference picture. Let's go to the Canvas.
Press reference. This is our lovely
reference illustration. Next step, what we're
going to do if you want to move our brush set
along with color palette, my suggestion, we need
to split Oscreen into two parts into two apps. From the right side,
we can have Procrit, and from the left, we
can have Files app. Then what you have to
do is track and drop all the files from Fils
app into the Procrit, we'll go and move our swatches. Same you can do with a brush
set track and drop it. Already have our brush set here, so I don't need to
copy it second time. About our palettes, it's called Christmas postcard,
very lovely one. You need to tap three dots, and here you will have set as a default button, sets active. Already set it, you see the blue button here
at the left side. When you press disk, you can see our color
palette here underneath. So once you copy it, dragon drop everything, we
can close our files up. But what I didn't do is I
need to move our paper. So I created one more layer
and then move paper here. And then because we don't need
to use our phone for now, but we also can drag
and drop it Wi Ting. We need to move our paper to the edges fisting because the size of the paper
is not rectangle. Then we need to rename it paper. And now let's move
to the next part of the class where I will briefly show you how to
create texture paper.
4. Creating Paper: Hard to create
watercolor illustration without what color
texture paper. So we will fix this issue, too. So let's talk about
it in details. Okay, now let's talk
about texture paper. So we have our paper layer. Let's duplicate it three times. The top layer, we will move to multiply and then turn it off. Second layer, that one, we will move to color burn, blending layer mode
and turn it off. Let's go to the third one, go to the blending layer
modes and go to linear burn. Here. Perfect. Now, next step. So what we have to do
is duplicate layer where we have linear burn,
blending layer mode. We do it once. And
then by swiping right, you selected two layers. So we selected layers with linear burn,
blending layer mode. And once we selected two layers, we need to pinch them together. It will let us merge
two layers together. Why I do it? Because I want to intensify watercolor texture in our paper, and by duplicating and
merging layers, I can do it. Let's turn off a linear burn
blend layer mode paper, and let's come back
to color burn. About color burn, I
want to duplicate the layers two times
by swiping right, I selected two
color burn layers, and then by pinching
with two fingers, those two layers together,
I will merge it. That's it. Now I want to make visible our linear
burn blending layer mode. And now I want to lower
the opacity till 50, 60%. For the color burn, it will be around 85%. And let's go to multiply. And for multiply, I
want to move to 20%. Then all paper is ready. So now, once you paint
with watercolor brushes, you will have very realistic authentic watercolor texture. I'll show you later. So what we have to do now is let's select
all paper layers, and we won't merge it. We're going to press group. So now all three
layers with paper, we combined in one group. And now let's rename
it and write paper. And then by swiping left, we have lock option. So now I will not accidentally
paint on our paper layer. Next, let's go to the
layer where we have our sketch and rename
it and write sketch. Pretty obvious, right? Now
I want to move sketch to the top because I want the
pencil texture be visible. So for the second one, I'll write, bla color. So that's where I'm
going to add color. Then I'll create
one layer above, and I will write shade. Also, I'll create
one molay above, and I will write snow. And then about the color, I'll create one molayer and I'll place it underneath
our color layer, and I'll write background. That's why I want to place it as a first layer because I
want our color layer with our cue rest pandas be on top in front of
all other layers. So once I paint as
a background layer, it will not affect
my cute pandas. And about shades,
I think I want to duplicate shades layer
and place it underneath, but about background layer, so it will be shade
for the background. As you see at our illustration,
we have a lot of those. And I think that's it. We have our brushes here. I prepared for you
a lot of brushes. I left for your Bag
B pencil in case, if you want to create
sketch by yourself, Boni incur to emphasize
some of the details. And then artistic to add some background, lovely,
beautiful shades. Bu dark watercolor edges
will be our main brush, B natural stains, brush, and blender will be our main
blending brush, I think. Let's just do it. So if you want to use it as
a blending brush, you just need to law tap thing. And then this brush stays
as a blending brush. Bu salt for our snow, Blabs les also for our snow. And I also left for
you a couple of stemps that I'll show
you how to use it. We're going to use them as
a clipping mask. L this. Clipping mask shades. I'll show you later
how to use it. I think we all set, and now we are ready to start
adding colors. Now, we
5. Final Project: Adding Colors: Jump into painting process. Use the brushes that I
provided ebay freebies, or native procreatsO
your own brushes. Don't forget to
paint on the layers that are under the
texture paper. We will have very easy
painting technique today. So let's not wait and go to our final project
illustration, and I will show you
everything right now. Okay, now let's go
to color layer. Then we will go and grab dark
water color edges brush, and then let's grab our
first orange color. And let's start add
colors to our super, super lovely red pandas. You don't need to
be too precise. If you want, you always
can blend everything. I'll show you a
few options how to paint more saturated
version of illustration, the one that you have in
our reference picture, or if you want to have
a little bit pale one, like muted, it's also
a very nice touch. It can help you to add more vintage wipes to your
art to your postcard. So depending on your
preferences and your style, you can control the color
saturation in your art. Super cute. Now, let's
go to the tails. As you see, the size of the
brush is slightly lower than my recommendations because my distration is
pretty detailed. That's why I am trying to
control the size of the brush. And also, it's
pressure sensitive. So the hardest you press, the biggest the size
will be like this. This is like, very
slightly pressed, and this is I press so harsh. So control the intensity and how thick you want to
have your brush strokes. Lovely. Next, I'll go with
brown color. This one. Maybe slightly brownish. And Laura says, I want to add some
brown color to the ear. I spent so much time
creating this sketch. You just cannot believe
it. I tried to make my cute pandas as
cute as possible. And at first, they were not that chubby and the face
expression was a little bit, like, angry, so I spent quite some time
to create this sketch. So I hope after my, like, tries and fails, you, you will save some time while creating
your own postcard. So you freely can
use my illustration, my sketch, for
your own postcard. It's totally fine because I
know that it might be hard to think and create the
composition for the art. Ring, ring ring
now. Lovely pose. It's fine. You can
go beyond the lines. It's not a big problem. Once again, just warm reminder, paint everything underneath the paper
layer group, not a bow. Because if you place
your layer above, let me show you what happens. You see you lose your
watercolor texture. But once you move
it, wait a second. Once you move it here, you already have that paper
coming through the panes. That's why it's very
important to keep it at the bottom of all
your layer library. I have slightly cold, so I'll try to speak a
little bit less this time. We'll just try to enjoy
our painting process. Let's try to create
some kind of, like, relaxing SMR atmosphere where all of us can paint in a most, like, beautiful
and relaxing way. Bigger. So part with tails for that one. We can increase our brush. You can use our
pencil as an eraser. Another thing, try not to lift your Apple pencil
from the screen. If you do so it's
not a big deal. You always can improve it by blending the gaps like
this here, you see, we have like two colors
overlapping each other, but we can use blending brush to blend it in a
very natural way. I think color in part is
the most time consuming. And also, you might
notice for the sketch, I used brown color because
I didn't want to have it, like, too black, for example. Okay, now, next step, I'll go with this
lovely pink color, and I'll add it here. Mm hmm. Going. Okay, next, let's go with hat. Red color. Try not to go beyond the lines. Next, blending tool. I want to blend the
color, this brown color. I want to make it like it blends naturally into
another color Lexis. I think it's important to give a little bit softness to our
art today because after all, it's winter holidays, Christmas
New Year's atmosphere. Likes it. So red color, let's paint scarf and hat. A Okay, we've done with all
colorful colors. And what I want to
do now is go with a bright white almost
white colour color, but, in fact, it's actually
a little bit beige color, so it's not purely white. So what we have to do is to
fill all our area that's supposed to be almost white with this color.
Why we have to do it? Because later, we
will need to remove the transparency. So be careful. If you want, you can just remove the background color and paper so you will see
better way you're painting. And with this color, you can have overlapping.
It's totally okay. You see it so convenient because if we keep our
background color on and paper, we might not see what
we are doing, actually. And later, because
I'm going to use the background color for
creating background, we might overlap, and our cute red pandas will look
a little bit dark and dull. W this color, you
don't see the overlap. It's actual. So
it's totally okay. D. D u the last one. Da da da da. Finally, we can
turn on everything. Now, let's do the next step, very, very important one. So almost 20 minutes we wait in colors to have a lovely
cute red pandas. So I'm going to speed up
the video, so don't worry. What we have to do now is
like I promised to you, I'll show you how
to make our art brighter if you want to
exaggerate the colors. And the second one,
we need to remove the transparency of our
panda because as you see, we actually can see the grid you see coming
through the colors. That means that the color or the brush is
semi transparent. So what we have to do now is
let's just by swiping left, duplicate our cute panda. Now you see the super
super vibrant and cute. I will lower the
opacity till 50%, and then I'll merge it together. But the transparency
is still there, not that visible already, but in order to remove the
transparency completely, we need to duplicate
our layer two times. So by swiping left, we press duplicate layer. And now we need to go
to the lower layer. And if you don't want to have your art that bright anymore, we need to move the lower layer, this one to the white color. Let's go to adjustments, press hue saturation
and brightness. And in a brightness, if you move all
the way up to 100, we created one more white layer. Let's just remove the
background, color, and paper. You see, we don't see the grid with additional
layer, almost don't see. So if you want, you can
duplicate it even more. Like make three
layers in this case, our panda definitely will be will not be semi transparent. And another my suggestion turn off our color layer,
stay on white one, and go again through
the parts if you see that we still have
some semi transparent areas, like, for example, near the
ears, let's see where else. The rest seems very nice. Okay. If you're satisfied
with everything, you think it's enough, we can make our colored layer
visible and we move right, and by moving right,
swiping right, we created, we
selected two layers, and then by pinching, we will merge two
layers together, and our colored layer
will stay on top. Let's turn on background
color and our paper. So now we have lovely, very lovely cute pandas and we are ready to move to
the background color.
6. Final Project: Background: Show you what we can do
with the background. How to add watery or ope look, you will decide which
one you like most. So little by little, we will build our beautiful background. Now, like I said, it's time
for the background color. So let's just
duplicate this layer, go to the very lower layer, move to the blue color, then go with the
selection tool and make sure you have the
rectangle on turned on. And then make some kind of frame and fill
it with a color. Like that. So simple, right? And then if you don't like it
to be that bright, you can lower the opacity, or you can go to curves, and here control the brightness and intensity of your color. I think for me, this
color is very nice. So I'm going to
keep it that way. And then we will finally go
to the background color. And now let's go with
slightly darker blue color. We will have Blue, dark,
watercolor edge same. Or if you want, what
about Blue artistic? And let's just Bartistic
has very lovely, sharp, edgy filling, and I think it might
look very lovely. Yeah. It's okay. Don't worry if
you go beyond the lines. It's not a big problem. We're going to use this
layer as a clipping mask. So how to do it by pressing
as a background layer, you need to press clipping mask. Now it's clipped and it doesn't go beyond
our rectangle layer. Now we have blending tool, and if you want, you can
blend some sharpness. You see, and it has very
beautiful soft look. I like so much. A key. So what I'm gonna do
now, maybe later, I'm going to add a
little bit more shade here and there, blend this part. I'm going to paint
Christmas tree. And we're going to
do it pretty simple. So let's just go with bright
green color, and here, same. You can grab wartisa
It's also fine. Try to paint lovely
Christmas tree. Color it. I want to
add one more here. If you don't like something, I'm going to use Bu dark
B artistic as an eraser we because I'm going to
keep same toothy filling. And theme I'm going to do
from the another part. So your Christmas tree
shouldn't be perfect. All pandas are not transparent
is that when you paint, it doesn't affect our
lovely cute animals. So this is the first one. I can just paint one more tree. And here I just want
to blend the lion, edge line and create
lovely, beautiful trees. Okay, so later we're
going to add more shades. For now, it's okay
for the background. Later, I will add more shades, more blending techniques,
color saturation. But for now, I'm pretty happy with what we have
for our background color.
7. Final Project: Adding Shades: Once we finish adding colors
to our final project, the second step will
be adding shades. Different techniques
will require you to use different brushes and shades
will look differently, too. I hope you are ready for
this creative process, and again, let's not
wait any longer, and let's keep working together. And let's go to the shade here. I'll move it to the multiply, and let's start adding
shades to our red pandas. Okay. About sketch, I want to move blending layer
mode to multiply, so it will look more like, part of the picture. So about the shade, here you have also
a few options. You can go to Bartistu
if you want to have tooth lines or you
can go with blue, dark, watercolor
edge, edges brush. That's what I'm going
to use right now. And about the shade, you can go with
this violet color. And so what you have to
remember about the shade in areas where we have two objects next to each
other, we gonna have shadow. Why pick this shade? Because it's pretty universal. Later, I'm going to add a little bit more
depth to our shade. So first, I go to
the lightest colors. H very cute, very lovely. Your shading doesn't
need to be perfect. You can make mistakes. You can make it
like a little bit. Mm. An perfect. You see, shades make such a big
difference in our art. Thanks to it, we have very beautiful, very
dimensional illustration. Okay. So we added some volume
to the scarf, too. Okay, happy with everything. Next, let me show you
about the saturation, the one that I told you about
adding depth to our art. So depending on how warm you
want to have it or how dark, you can adjust the shade, and that's what we had before, what we have now. So done with this part, too. Now let's move to the adding
shades to our background. O
8. Final Project: Adding More Shades: Time to move to adding
more shades part. And we will use so many
blending layer modes and procreate rigs and
different brushes too. In this part, we'll
spend more time and paint way more details.
Let's not hesitate. Okay, at the background layer. We're going to have our shade, and I'll move to multiply and
also press clipping mask. So it will be clipped to
our background rectangle. And then I'm going to go with slightly
darker shade, same. No same. Let's stick
to the artistic. You used it before,
let's keep using it. No, I don't want this color. Let's go to slightly
darker, dark blue color. I want to show shadow here. Literally everywhere.
Blending tool. So the darker color will be the more dimension you will add. Okay, now, what
I'm going to do is I will go with dark green color, and I want to add some
darkness here, too. What if you use another brush? I think it would look fine, too. Let me show you how. Okay. About another brush, I'm gonna use Bonatral
stains brush blender because we can use this brush as a brush and as a blender, too. And thanks to those splatters, you're gonna have pretty
realistic watercolor look. Now go to use blending brush, and let's just come back
to the background color. Now I want to make it
slightly brighter. Just a little likes it. Okay, shading layer,
blending brush, and I want to just blend. Oh, wait a second here.
Background color. And I want to blend some of the color green color so that will show very beautiful
watercolor look too. Now finally time
for the blue color. Little bit blue shades
here and there. Curves. And you decide
about the brightness, how bright you want to have it. I want to keep it out that way. Now, the other thing is, I will go to
Clipping Mask shades and I'll press
clipping mask now. And now I'll move to multiply. Now we're going to add shades to our lovely foxes with the
same brush, orange color, and I want to add Oyo some
orange shades here and there. Finally, show some
watercolor look. You can go beyond the lines. You can just blend some of the colors with
the background. That's totally okay because that can help us to add this
beautiful watercolor look. Now, reddish shade and just show some watercolor texture
to the pose and tails. Because it clipping mask it
doesn't go beyond the color of our lovely appendas
Now red color. I want to add some
redness from the head, and I will add to head, too, and two scarf. Likes it. Now it might look a little bit more realistic. Now, blue color. Maybe slightly lighter
for our balls. I want to add a little bit of blue shade to the snowballs. And slightly pinkish,
orangish shade. I don't even know specifically
which one to use. I want to add to fluffy
cheeks and ears like that. So that's what we have.
That's why I wanted to use this beautiful
clipping mask option. It's really super convenient. Same curse, decide
about the intensity. I want to keep it pretty bright. Okay, now let's move to the next part I'll add Snowflakes. Next, let's go to the snow. We're still going to have
tiny details, so don't worry. Snow the double tap,
we have white color. We will have laps azole as
our big lovely splatters. By the way, about the snow, you can keep it less duplicated. Clear one layer. One layer will be underneath, and it will be in
clipping mask mode. I just want to add
some snow filling without damaging our
art with animals. Like it. So it looks very lovely. By duplicating, you
make it you can make it slightly vibrant. I duplicated two layer, move one opacity of
first one to 50%, and then I'll merge
that together. Let's go to the main snow
layer and bola vis laze again. Maybe slight is smaller. Now I can add some of the
snow flakes. Super cute. And we have bull salt, that is a little bit stronger. Another option, what
I want to show you. Let's go to the original
native procreate brush sets, and here we're gonna have let
me find where the elements. Who snow snow here. And it's not the only one
thing you can use this snow. D has a very realistic feeling. Duck. Okay. And by
duplicating the snow, you will be able to make
it a little bit brighter. I think I gave I too much of that cause I want to
keep this snowy feeling, so that's why I duplicated
one of the layers. And my thin because we have stem brushes,
why don't we use it? Let's go to the shade layer. It's in the background,
blended layer mode. Go to multiply. You see, it's
automatically clipped, and I'll go with
this blue color, and I will go with
this Blue watercolor stamp seven green color. Wow. Look at that one. It added some depth. P This one. Watercolor stem two. Yep. So as you see, Christmas trees are
not that visible, but thanks to our art for this thanks to
this blurry feeling. It does have very lovely. Atmosphere What if we
just move saturation a little bit higher? Okay. Very beautiful. I think we don't need H reverence
picture anymore. And one more thing
that I want to do, let's go to the background
color about eraser. We're gonna go B
Buran in your brush, and I just want to make it less artificial
and more natural. So I want to have
the toothy edges. By the vases brush, you
also can use for in tiny tiny details for your art. If you want to make ice
a little bit brighter, just use darker color. When I have an idea where
to place the the text, not as my reference picture, I found better idea
just came to my head. Ding ding. So if you are happy
with everything, you can actually
merge it together. Let me show you how like
this ting and ding ding. By the way, I just
realized that maybe I beautiful cute pandas, but too bright for
the background. So what I'm gonna do
is I'll go multiply, have this bluish,
maybe purple shade, and I'll go with
Batral stains brush. Suitable. Just want
to add a little bit. Of darkness? This
is super lovely.
9. Final Project: Adding Details: It's almost the end of a class. Now it's time for
the final touches. We will add tiny details and
some text to our postcard. Okay, what I want to
do? Let me show you. So I'll just select
all the layers, and I'll just place it a
little bit on top here. So I left some space for the text or your
weight. What happened? Thing and sketch
to a little bit. And maybe what if we extend? How can a tiny bit like that? Saying we're going
to do this paper, let's just unlock
it so we can make some changes and move
it here to this part. Wow, it's like
polaroid illustration. Okay, let's go with my
clams Imperfection, blue color font, add add text, clams Imperfection, so you
can write Happy New Year. And place it here. Or, you can choose any other
font you like. Doesn't need to be
exactly the one that I shared with you. Very lovely
illustration is ready. Guys, I hope you
enjoyed this class, and you got some
inspiration, creative ideas, how to create lovely, cozy illustration for
the winter holidays. Happy New Year and merry
Christmas to everyone. Congratulations. This is
the end of our class, and now you definitely
should be proud of yourself. You learned some useful things and created beautiful painting. And in the future,
you can create more. So what we have learned
and why we did it, now you know more about creating cute red pandas in watercolor style
digitally in Procreate. You learn how to create
watercolor paper texture, how to create postcard, how to paint in
more detailed way, reach traditional
watercolor look. Also, how to paint background in two ways watery and more opaque, how to use layers plant in
modes, clipping mask tool, and also how to chase and
color variations to our art. So now let's talk why
this class was useful. Now you can experiment
with your own style. You gain some inspiration
and creative idea. And what's more important, we can create digital
art that is so similar to traditional
watercolor medium. Guys, I will be happy to
see all your projects in project section and
give my own feedback. Also, I would really appreciate your opinion about this class. You always can leave a view in review section. So what's next? In my future class, we will keep exploring
watercolor and keep adding magical
atmosphere to our art. Cover for the picture book
will be our next project. So let's see each other
in next class. Bye bye.
 Inga Yoon, Digital illustrator and teacher