Transcripts
1. Introduction to Product Photography : Hello, I'm Cecilia Cruz. I'm a professional photographer
and here in my studio, I create images for my clients on portrait
and product photography. I love creating compositions
that communicate something. I know you also believe
that everyone should have some photographic
knowledge to use in their everyday life
and in their business. In this class, I'm
going to show you how to start in
product photography. We're going to use
a very simple set up that you are going to use every time to create beautiful images using
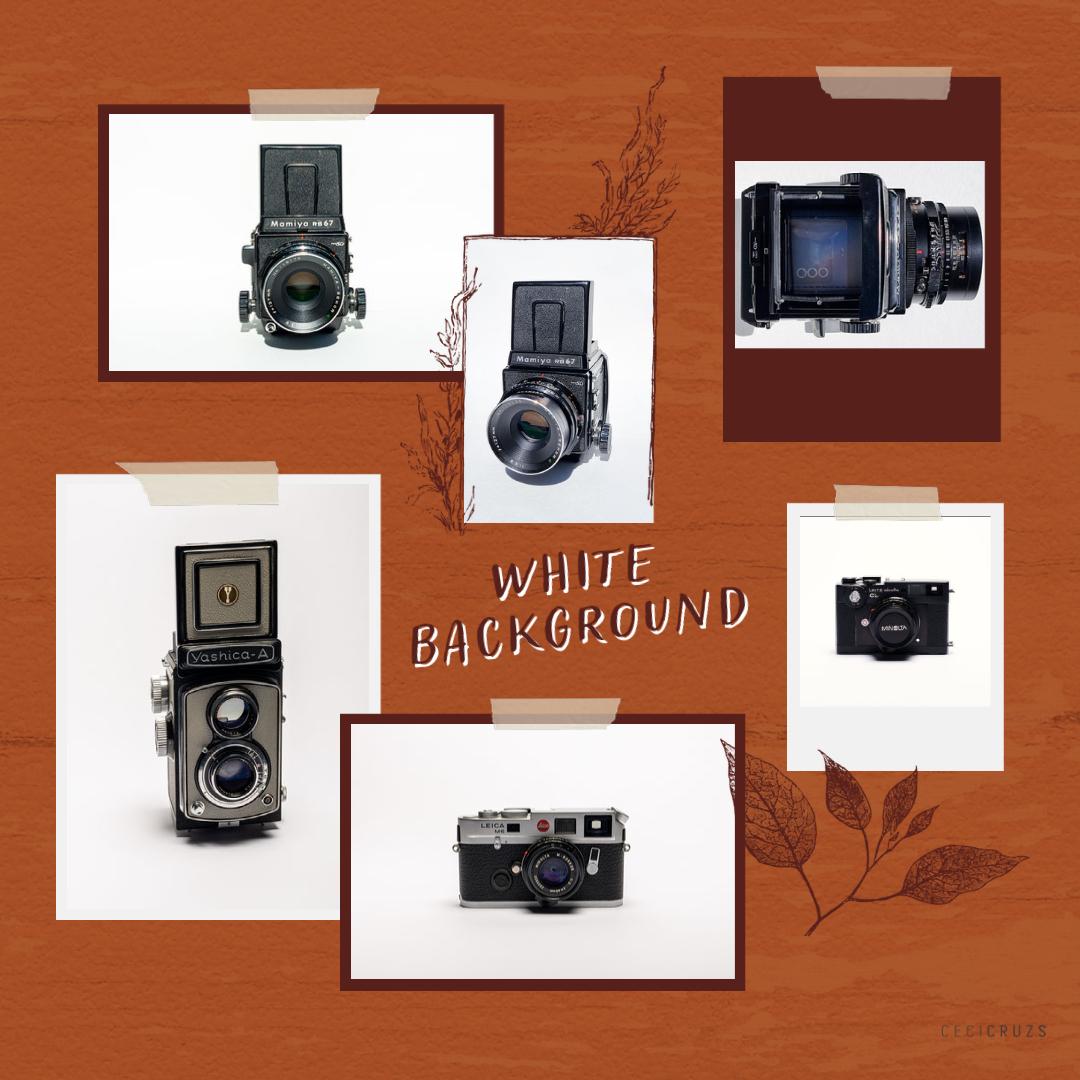
a white background. This is the setup that I've
been using for many years. If you are selling your products over any social media
platform or e-commerce, you know how useful it's to have your pictures over
a white background. You can do a lot
of things with it and also the image doesn't
have to be boring. I'm also going to
show you how to edit your photographs so you can use them right away in
a very simple way. You can use your camera
phone or a DSLR, anything you have available. This class is for a beginner. If you are just starting
in photography, or if you just want to improve
your photography skills, this class is for you. If you want to know all my
tips and tricks on how to create a perfect white
background product photography, grab your camera and
let's get started.
2. Getting started with natural light: Welcome back to my studio. This class, I'm going
to show you how to create a photograph
using a wide background. But this time, I'm
going to show you how to do it using only
natural light. Why natural light? Well, just one main reason. It's a very good source
of light and it's free, so it is not to like about that. I'm going to show
you how to start in product photography this time using only a white background to create a photograph
of anything you want. It can be a product, it can be just an object
that you like, anything. The issue here is
that this setup is very useful and is very
useful because, well, you never know when you are
going to need an image to post on social media or on
an e-commerce platform. You can manipulate this image. You can crop it, you can remove the
background, if you like. It's a very versatile
setup to have in your repertoire of things
to do with photography. When we were using
natural light, it is important to take into consideration the
hour of the day. I did this setup, all the examples that
you're going to see, when the light is very bright. For example, I'm
here in Mexico and it's very sunny most of the day. Mid day especially, it's very, very sunny. Just keep in mind
that you have to choose the hour of the
day when the sun is right open to the sky so you have all the light
coming right at your table or your product
where you are setting up all the equipment
and the product, so you have these
very beautiful light wrapping around your object. There are some things that
you are going to need to create this setup, which are very simple
and inexpensive. I use cardboard,
white cardboard, any kind you have available. Or maybe you just have a
white table and a white wall. You can use that. Also that you have the
natural light available, where you are going to
set up all your things. For example, I did
it on a chair, exactly the one that
I'm sitting right now. I place my cardboard on top. There's something that you have to take into consideration. I think it was
mistake from my side, but everything turned out okay. The problem was that when I
did this setup, it was very, very windy and I have to do the same set of like two times because the wind
kept blowing my cardboard. But anyway, just
keep that in mind. If you want someone
to be helping you to keep all your
things in place, well, you can do that. But apart from that, just place your cardboard on your surface like an L shape, and that's like the major
pieces that you need. You can use white paper, any kind of white paper,
like large sheets. I used bond paper to create a curvature
around my product. I'm going to show you here
in a diagram why I did it. This is because I
just want to have the seamless idea of visually to have the light
bouncing around my product. You are also going to
use some binder clips. I used the clips to hold the paper in place
with the cardboard. You can use tape, anything you have available. I mean, it's not set in stone while you want or
have available. I mean, just keep in mind the idea of how to
place your paper. If you don't have this
paper available at the time that you're
going to do to your photos and you only
have the cardboard, you can skip the part of the paper and only
use your cardboard. The only thing is that maybe the horizon is going to
show in your pictures. But if you have some editing
skills in Photoshop, you can remove the line of
the horizon if it's visible. But otherwise, you just use
the white paper to create this seamless background
where you have no lines on the horizon and
everything looks very smooth. I took photos of
the products, well, of the objects with my camera and also
with my cell phone. You can do use either one
that you have on hand, so whatever you feel
comfortable working with.
3. Lighting setup using the sun: What is the process or the
magic behind using this setup? What makes the setup very
useful is that when you have your source of light
right above the object, what the light does is that when the light falls
over the object, it wraps around the
object with the light, it bounces around, so it creates this even
texture around it. The highlights and the shadows, everything looks much more interesting because you can see all the details
of the object. Especially when you are
selling your products online, it is important to
show all the details. When you have your main source of light above the product, the light creates this feeling of enveloping the object with light so you can
see every detail. Another advantage of
this lighting setup is that you have shadows
that are very defined. I really like that aesthetic
in my product photography. This setup is something
that you should practice in any kind of situation that you
have available. Not every day the
light is very bright, but you can adjust your exposure according to the amount of sunlight that you have that day. Also, don't forget
to take photographs of your product from
different sides. I shoot the product
using my camera, DSLR, and also my smartphone. There is no limit to what
you can do with your images. If you want to be closer or step a bit away
from your product, just try to be creative
in how you are going to approach this product
photography session.
4. Tips and tricks using natural light: What you can do to improve your photography is some
just simple tricks. For example, I chose
cameras that I have that are really beautiful
because they have lots of texture and they are
visually interesting. But you can choose any object that you want to photograph. What I did is I
cleaned everything perfectly because
with a good lighting, you can see all the details. Make sure that you clean all your objects because
any kind of dust or scratches or anything
that you don't want to be there is going to
show in the picture. So clean everything, just for good measure. Also, when you are
photographing an object, you can do straight in
front of the object, you can photograph it, but also try other perspectives. You can shoot above it, from one side, from the
right, from the left. Just adjust your angle of vision to whatever
you are shooting. Photography is about that; about being creative even when the object maybe doesn't
look that appealing. Just try to show other sides of the same object to create
this diversity of images. When working with
a digital camera, DSLR, make sure to have
your correct exposure. If you are using your
camera in manual mode, make sure that you have exposure correctly to the amount of light that you have
available that day, otherwise use the
automatic mode. You can do that, there's
no harm in that. Or if you are using
your cell phone, probably your cell phone is
going to take a good camera considering the amount of light that you have
available at the moment. There's really not much error that you can encounter
in this kind of setup. Believe me, it is this
kind of photography that you will have a
good result even if you are not very sure about what you are doing at the moment. Even if you don't get a good picture when
you first try it, just try it again. Maybe correct the
position of the object. Maybe that's what you are
not liking at the moment or the position that you
are taking the photograph. Maybe it's something like that. Just be patient when you are
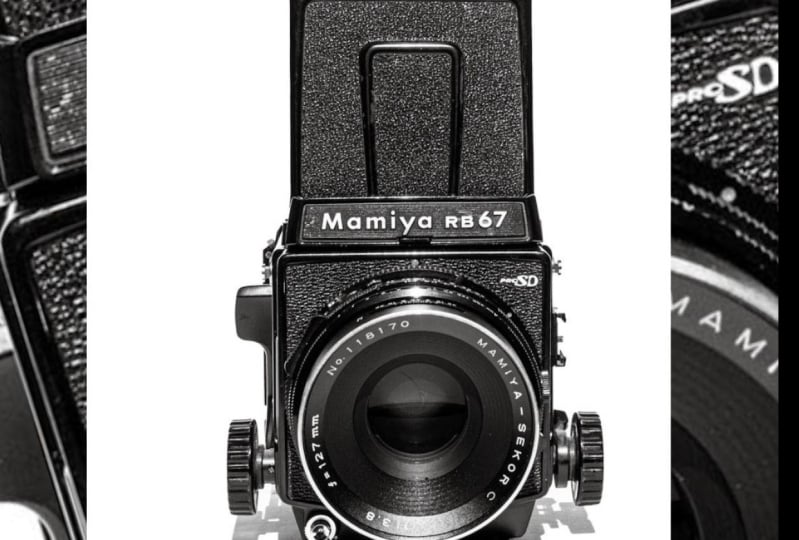
taking your photographs. As you see what I did that day, it was just placing my camera, the object that I
was photographing, this vintage camera, just placed it in the middle of the cardboard
to take the photo. What I always keep in
mind of doing is taking a landscape and
vertical portrait because you never know
when you are going to need either one of these
combinations of photos. Maybe if you are
using them on eBay, you need something horizontal. Or if you are sharing on Instagram stories you
need something vertical. Just try to have a combination of horizontal and vertical
photographs of your product. It's better to have more photos than you need
than just two or three.
5. The images : Let me show you all
the images that I have from that day
that I photograph my vintage camera with samples of the ones that I took with my cell phone and
with my camera. The difference is not that much. It's just that I
like shooting with both cameras and see
what I have in the end. Here are the examples. As you see, the editing
is going to be minimal because we have a very
good light source. The sun was very strong and
the whites are very white and we have very
nice contrast and the texture in the
camera looks beautiful. The editing process is
very straightforward and this is because
from the start we have the exposure correctly
from the camera and from the camera from our cell phone so everything looks
just as it should be. We are just going to do minor adjustments
to the image so we can use it right away. There are two kind
of softwares or apps that I like using for
editing my photos. The app from my phone, I use Samsung, it's great. I just edit using
the native app from Samsung and you can use the app from any
phone that you have. Or I also use Lightroom because
working in photography, I pay subscription to Adobe so I have
Lightroom available. But unless you use Lightroom constantly or for any
other work that you do, use what you feel most comfortable working with
the editing process. Both applications are going to give you mainly
the same results. You can crop your image, you can adjust the curves, the exposure, the
amount of whites, blacks, color, you can
adjust temperature. Everything works
mainly the same. It just changes the kind of software that
you choose to work. Also, if you work
on your computer, there are endless sources of applications that you can
use to edit your images. But let me show you how I
edited these disciplines.
6. Editing process: Images that we are
going to be editing are the ones that I took
with my smartphone. You can use any filter
that you have on your app. They are actually very good, and if any of those
work for you, go ahead. What I want to do
with an image is to improve the white background. Since the image has just this combination
of black and white, I want to make the
white background pop. You can do this by
improving the brightness or the exposure or a
combination of both. Also, by getting
the contrast up, we can improve how
the blacks look, the saturation,
and the difference between the highlights
and the shadows. This is something that
you can do in every image to have a better looking
result at the end. The shadows, I'm just
improving it a little, and saturation there's
not much to do there. I also wanted to change the
temperature of the image. You can make it
warmer or colder. It depends on what's the
look you are going for. Then, I just needed
to crop the image a little bit just to make
it balance. That's it. That's the resulting image. Now we're going to use Lightroom for this
next photograph, and it's basically the same. Lightroom, what it has is
more options from where you can edit your image.
But I did the same. I change the exposure
to improve the whites. Also, I improve the contrast
in the image a little bit. Just move this
slider to where you feel the image is getting to
the point that you want it. Also, the highlights, as you see the texture
is improved a lot, and it's something that I
wanted to do with these images. Since the product of the
object has a lot of black, I also increased that one. But just move the sliders and see what happens
with your own image. You can change the
sharpening in your image. This is something that I
would recommend you do with a soft hand because you
don't want to overdo it. Also, you can check the buttons for removing chromatic
aberration and lens corrections. This is quite useful
because some lenses have very dramatic change
for the distortion, so this one is very useful. I do it all the time. Unless you are
working with lines, you can also use geometry, but this time the image
was quite all right. Then just do a little bit of cropping to balance the image, to make it center. I just always check if there is something
else to do with the image is if I want to do something different or if I
missed anything. This time, I wanted to
change the temperature also. I went the other way to
make it a bit warmer. It just depend how you
feel it looks better. These are the final
photographs of our product. I think they look great. Please, show me your images, I want to see
photographs that you created using this
lighting setup. I'm very curious to see all
the things that you do. Also, don't forget to
check out the resources that come with these class
from the lighting setup, and all the things that I did. You always have a reminder on how to create
this lighting setup. If you have questions or
any other comments or suggestions about the class
or any other things that you like to see coming to
product photography, please let me know. If you are also
interested in creating this setup by using
artificial light, I also have another class using a strobe light, a softbox. That one is also
very interesting. Thanks for watching
the class to the end. Share your products and
see you in the next one.
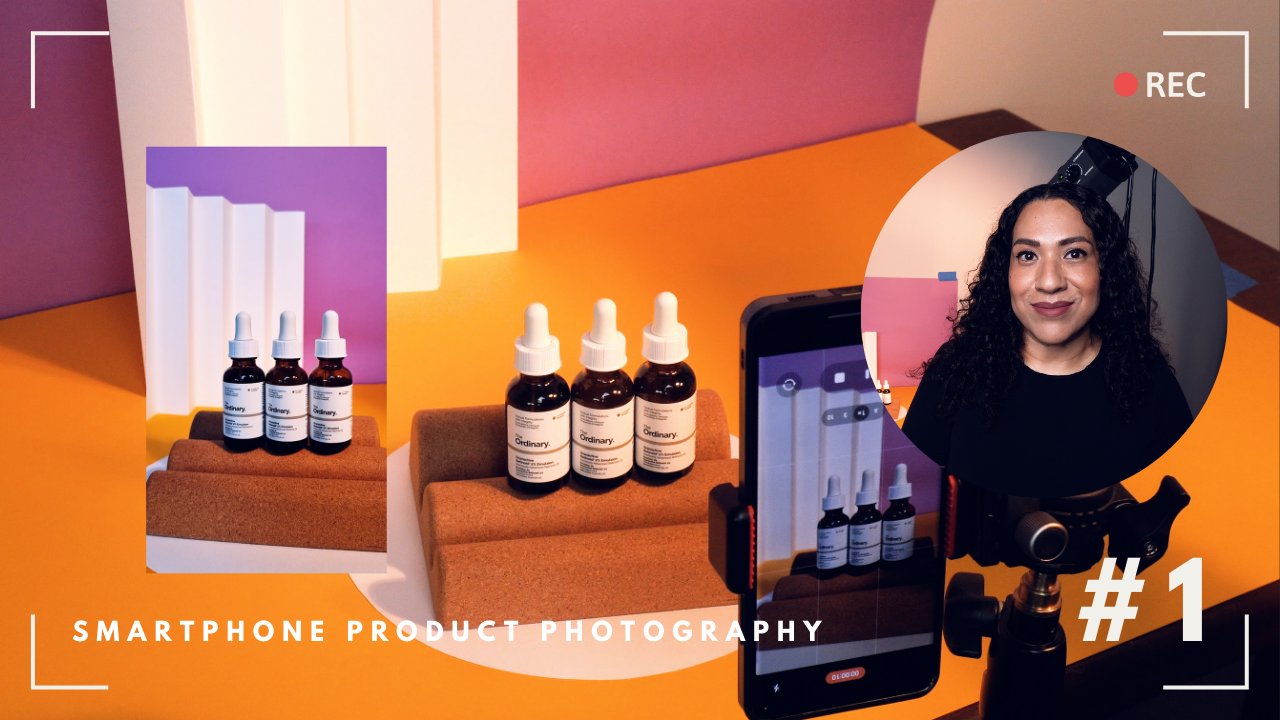
7. Getting started with studio lights: Welcome back to my studio. Today I want to show
you how to create white background
product photography using a very simple setup. This photography is very
useful because you can create your own photographs for e-commerce purposes or maybe you just want to update
your own website. This kind of photography you
can do it either using natural light
or artificial light. If you want to know how to do these white background
photography using natural light, I advise you to go to my
profile and check one of my other classes where I use
exclusively natural light. I will be using a strobe
light as you see behind me. But if you have any other kind of artificial light that you want to use, go ahead. When you finish this class, you will be able to create your own white background
photography products. It's a setup that is very
simple and is very fast. Once you know how to do it, you can do it all the time. I use it for my
website or when I want to sell something on
Etsy and update it that's the go-to setup for
white background photography. It's a setup that
I also use when I want to create a
stock photography. If you want to create photographs for any
of those purposes, this class is for you. There in the background is the setup that we are
going to use today. As you see, it's very simple. Just one light that I have on a tripod and a sheet of paper. This one comes from
a roll of paper, the bond type, the type that
you use for your printer. But if you don't have something
like a roll of paper, you can use two separate
sheets of cardboard or any other paper
that it's soft. You can just overlap those two sheets of paper to create a seamless background. Also, you are going to
need well, your products, just a bit of a tape to place the paper
where we want it, and your camera or
your smartphone. I use both and it's great. For the purposes of this class, I'm going to use my DSLR, I use a Nikon camera. I use my file in RAW. Later, I'm going to edit also my file so you can see
the final results. As you see, my strobe is half power almost
and I'm going to use a small softbox that
actually I haven't used a lot. When I was trying
to find what kind of diffuser to use
for the light, I came across this one, and this one works perfectly. I want something to
diffuse the light because it helps
creating soft shadows. But if you don't have a softbox and instead
you have an umbrella, go ahead and use that one. Or maybe if you don't have an umbrella and just a
flash, use that one. The only thing that is going
to be different is that your shadows are going
to be a bit sharper, stronger, but that's
really not a problem. You can either fix that
in post-production when you edit your photo or you just can leave
the file as it is.
8. 2 Lighting setup using one studio light: I have a small collection
of analog cameras. I have used all of them so I thought about using one of
my cameras of model today. This one is a Mamiya, it's quite big and heavy. It's very pretty because
it has a lot of texture. It looks so nice with
a white background because all the details in
the camera really pop up. As you can see, I
placed the paper with a little bit of curvature
behind so we can create this nice curve
in the background to make the light just wrap
around the subject, in this case the camera. This setup, what it does is once that I press the shutter, the light flashes, the light is going to wrap around the object and it's going to create an even lighting
throughout all the sides. Also is going to give you this really nice texture
that the camera has. The highlights that we're
going to have and the shadows are going to be the same in all the places
around the object. That's why we want to have
the light coming from above, from over this object so we
can have this nice lighting. Let's do a test and take some
photographs of the camera. Let me show you what's
the final result. Here is an example of one of
the photographs that I took. As you see, the light wraps
around the object so nicely. You can see a lot of
texture in the object. The shadows are very soft. They are defined but
not really extra sharp. They are defined and
also they are soft. We have these
beautiful lighting. We just have to do a little
bit in post-production, but really not much. I want to see what
product did you photograph using thIS
white background setup.
9. 3 The images studio: Here are the resulting
images from the day that I photographed the
small collection of cameras that I have. I truly like this lighting setup because when the light
hits the object, all the textures really show. Since the light bounces
around all the sides, you can see all the details. Actually, you can use any
object that you like. You can see that
it's very simple. You can do a lot of
work in one day. You can have a series
of objects that you want to photograph and
just keep changing it. What I would advise
you is to take photographs of your object
from different sides, not just only one side. Here as you see, I stood up or at eye level, took photos of the object. Just make sure that you
have your right exposure, because that is going
to save you a lot of time after in the
editing process. My small collection
of analog cameras gave me the chance to practice once again, this
lighting setup. As you see, well, they are very photogenic. They look very nice
under this light. I will be using these photos
for not only this class, but I actually want to create some cyanotypes
using these images, because when you have
a white background, you can isolate just the object. I think this will be very
useful for other projects, not only this one.
10. 4 Editing process: I will be using Lightroom
to edit my photos. What I do it's very simple. I just want to change a
little bit of the exposure. Remember just to do the changes according
to your own image. As I'm considering here, what I need to change is mainly the shadows because
the white is very white so I'm just going to
adjust the contrast and the highlights to see how this
affect in the final image. As you see here, when
I open the shadows, the image changes completely. It's very minimal
all the process that I'm doing for this part. Just move this slider
and see what happens. Here are the whites, because I want the white
background to really be as white as it can be and that does
not affect the final image. Also to see all the
texture and in this case, I will be changing
texture and clarity. This just makes the
pixels a bit sharper. Well, Lightroom has a button
for chromatic aberration and lens profile correction
for over the lens so you can click that one if you have or if your app has it. Also, with the axis
transformation it helps when you
have vertical lines. If you have it, click it. I think the final part will be changing a bit
of the temperature. I want it a bit warmer and
also to change the crop. These to make the image
balance because I had that part to the right where I didn't have papers so
cropping really helps. Just a little bit and move the crop around and
see what happens. I think that's it
for the final image. Just remember to do this process with the app
that you have available. If you're using your
smartphone or your laptop, use what you know. It doesn't have to be
Lightroom precisely. Please, share your project. It's very important and
also leave a review if you have a little bit
of time and you want to see more
classes from me. That's it for this time. I hope to see you soon
in another class. Bye.
 Cecilia Cruz Sandoval, Photographer / Content Creator