Transcripts
1. Introduction: Welcome to the Enchanted Forest. This is another really
popular topic that I teach. Today, we're going to set some fun and
whimsical characters into a forest that comes alive. All you need with
you is pencil and paper and a black fine
liner to outline. Alright, let's get started.
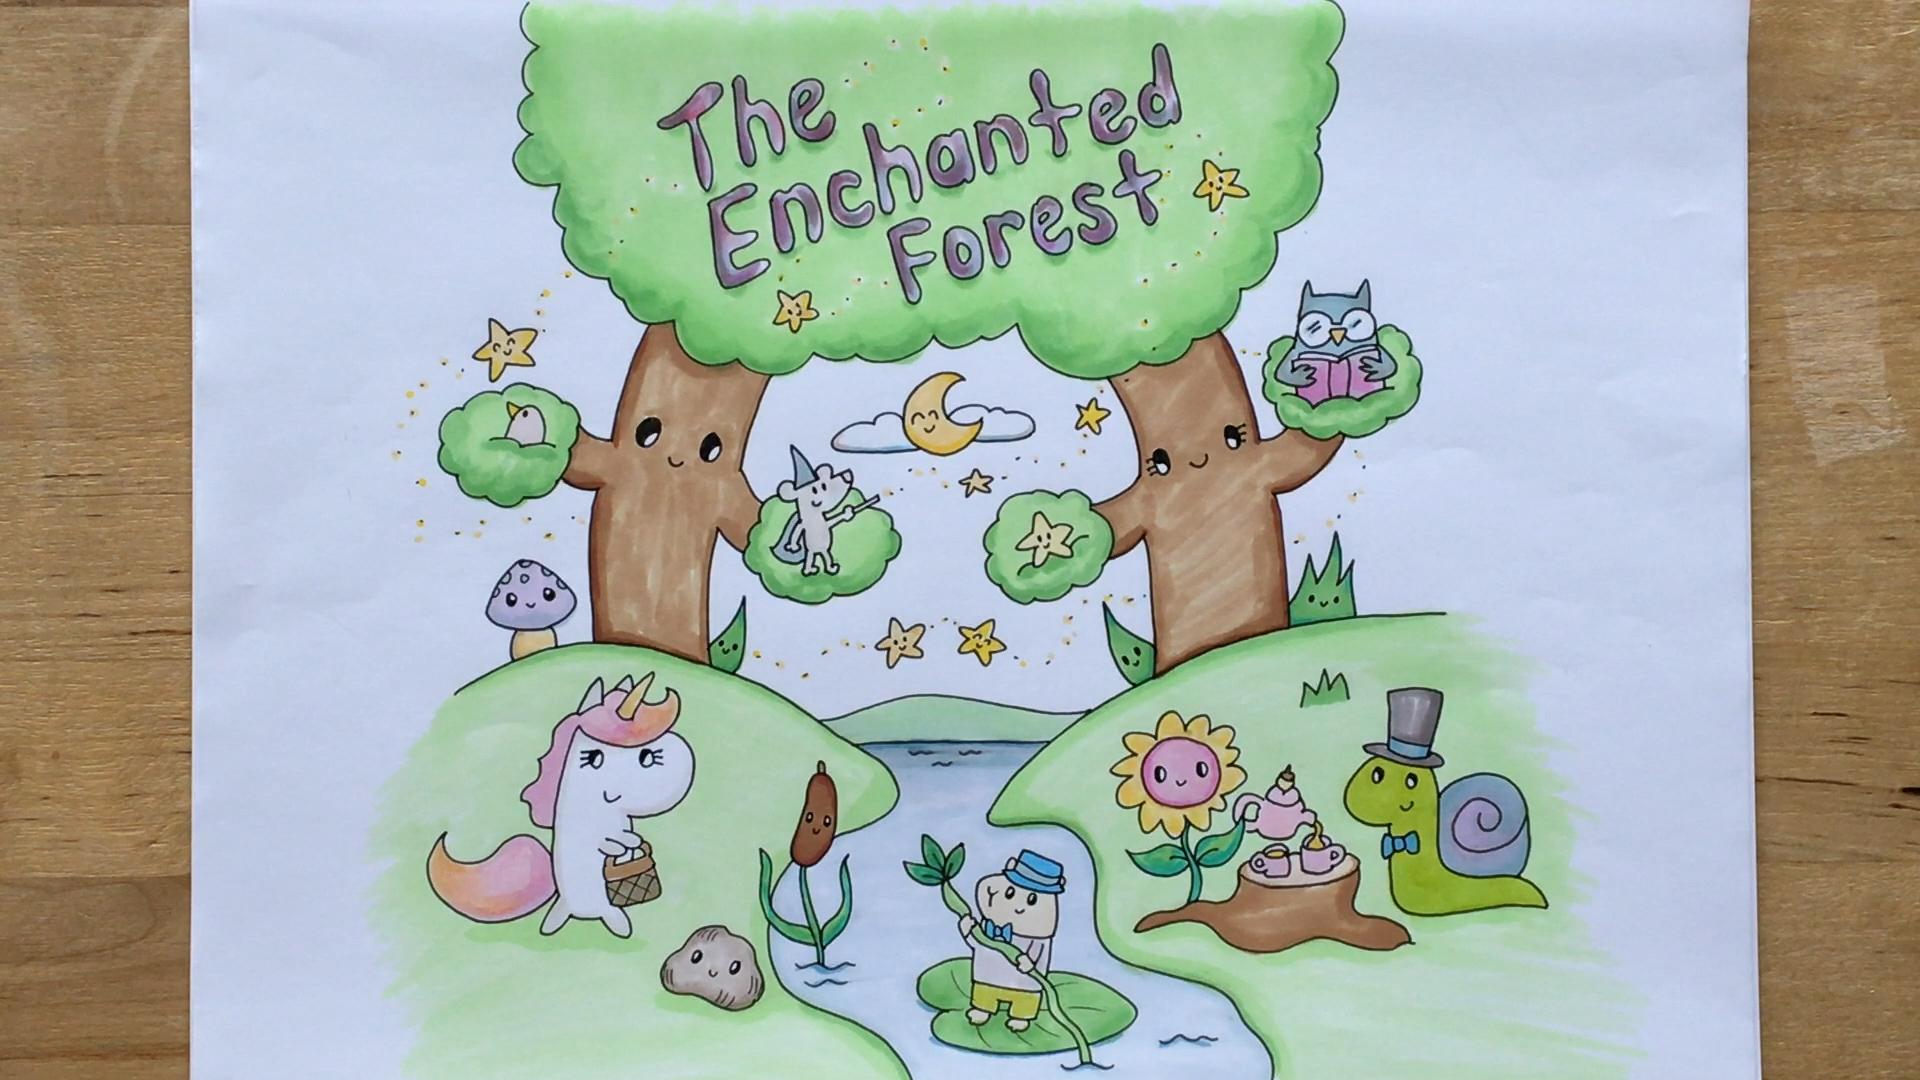
2. Sketch the Forest: Here's our concept for
the enchanted forest. We've got our trees that come to life with our stars
that swirl around. In the foreground, we've got a little flower
and snail having tea, a unicorn coming in to see the
little rock and bull rush. And this little guy on his
lily pad coming up the river. Plus some of the
little details around little mushroom and
blades of grass. All right, let's get started. To start with, we're going to
need a fair amount of space for our trees because they're a main feature
of our drawing. I'm thinking that our page needs to be divided in about half, where half of it is going to be our banks coming
down to the river, and the other half
is going to be the trees in the background. So the tree tops are going to take up about a
quarter of the page. That'll come along
somewhere around here. At a quarter of my page,
it's going to be tree tops. Then halfway through, this is where the banks are going
to come down to the river. I'm just going to sketch
those in lightly. Like I said, somewhere around
halfway through my page. Then we've got the rivers, of a little stream
swirls along like this, however you feel like, okay? Make it I'm going
to make it a little bit asymmetrical here. So How's that?
Something like that. Yb be a little further
over on this side, cause we do have the snail
and flower having teeth. I want a fair amount of
space for that here. I'm going to move my little
stream over ale bit, okay? But it's about halfway
through my page. Then we've got the two trees
in the center of the page. I'm going to draw them so that they angle in a little bit. I don't want them
perfectly straight. I want them to look
they're the characters. So I want them to look not
absolutely dead straight, and I want them to lead my viewer's eye in
a bit to my page. So that's why I'm going to
angle them in like that. And this might come a
little bit further down. We'll see how that looks. But I like that kind of feel for the start
of the composition. Now let's connect these
two banks together. We'll horizon in the
background there. Then I'll see how
that's feeling. Okay. Something like that for the start of
our composition. Now, it's a forest, so we're
going to need more trees. I think that will
be quite nice to have a tree in the foreground. You know something maybe
coming off the page, a little bigger
tree here, perhaps, coming off the page, and then I'll bring
its leaves up here. It neat up a few of
these lines so I can see how it's starting to take shape. Okay. Take off a
bit of hill there. I think that's pretty good. Now, these two essential
trees, they've got branches, a they hold our stars, our little enchanted stars. Let's put those on cause
they're going to affect, you know, anything else
that I put in here. Maybe I want a third tree
here or who knows, you know? So let's get these in
because they'll constrain how much space we have for
trees. They are the branches. Nice. Then over this side, one more bridge.
One more bridge. I think it's a little slimmer. Let's see. Something
like that. Nice. Now, it's looking
quite symmetrical. I think perhaps if we're doing
another tree on this side, maybe it ends a
little bit earlier. Maybe it ends something
more like this. Partially through my page. About a third, you know, about a third of the
way through my page. And then maybe I put in another tree in the
background here. I want to look fairly dense, right? It's a forest. So how's that? Is that looking
like enough trees? I know, I have another one here if I wanted to in
the background, maybe even smaller,
so it looks a little bit more in the distance. I'll leave it I'll live
it off at the time. I don't want it to
be too symmetrical. I think that is
looking fairly decent. Now, because this
is our background, I'm not going to ink any
of this in just yet. Okay? Let's stick in a few of the features and then we'll start getting in our characters. So these guys have little
little faces on them. Little eyes on this guy. Here he is a little smile. This tree here. I neat
her up a little bit. Here, she's got lashes. She's quite cute. Go move
her face up below it. I don't want it to be or
move the branches down asma. It The branches are
like arms, right, so I want them to be a
little bit below her face. I still want it to
look quite cute. So the face is quite low down. You could draw the
face up here, right? I have a different look to it. So you decide what suits
your taste. There she is. I need to make it a
little wider so I'm getting her lashes.
It's quite important. Don't want to miss
those. And, you know, this little character will
have face on her or him. We have this tree. I don't know. It depends how how
your trees fall. You may be put a
branch on this guy. I'm going to leave him plain, okay? There it is. This one, I don't know because we've got
our unicorn over here. I don't know if I'll
have space for a branch, but you can play
around with yours. I mean you can put a branch up here and a little
character there. You at you have a little
acorn or something, a little character up there. That could be quite ed just be a little tiny branch
or something. I'm leaving it off
for the time being. To keep it simple. Here's
this guy's sky's face. Brilliant. Okay,
that's a good start. Let's dot around a
few of the stars. So we can get a feel for how much detail is going
to be in our background. Also, I think I'm going
to put in the moon. You can put it in or
not. It's up to you. The moon and a
little cloud there. I'm going to have a
little be a star here, she's holding on her branch. So maybe a bit big.
Make that little him. Another little little
star is like flying up off of this branch. Then they're going
to kind of around. My maybe one here. They'll have star dust trails. Maybe there's one down there. More start. I could put one here for sure. One there. Maybe
maybe one more here. I don't want to overdo
it, but at this stage, it's all right because we're just leaving this
part in pencil. And once we get the rest
of our characters in, we can decide if it's looking like it's enough or
if it's too much. All right. Perfect.
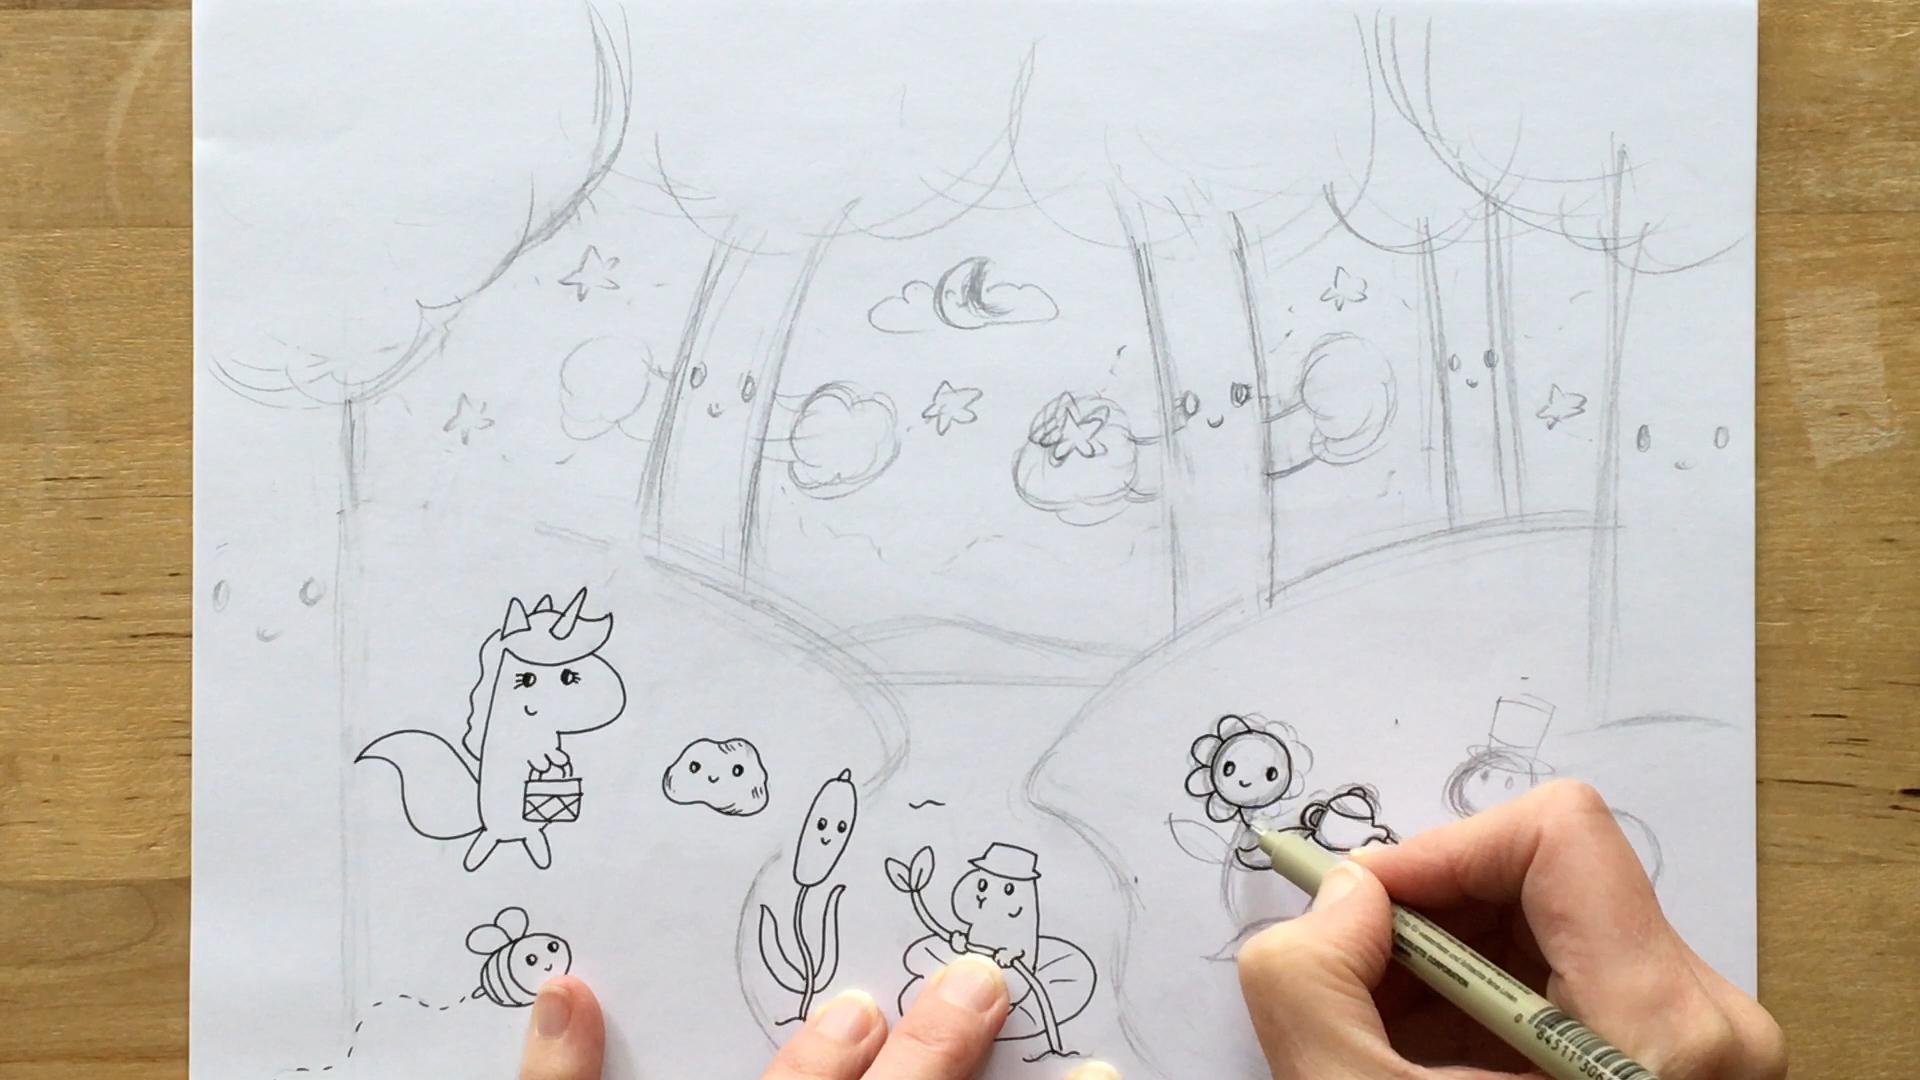
3. Paddling Mouse & Bulrush: So, like I said, I'm going
to leave that at that stage. No ink that yet. And let's come down into the main part of our
drawing with our characters. So number one, I think we'll go with this little guy and
the Lily pad here, okay? You can make him something else. We, I'm just doing
like he's like a little little mouse
or something, okay? So there are two characters involved in this little
bit. There's the bull rush. Okay. So the bull rush there, and this little guy is Lilypad. So I'm going to sketch them at the same
time because I want their faces to be looking at each other,
right? They're interacting. So anything where the
characters are paired up, or need to have a
reference to one another. I want to draw them,
especially at the same time. Okay. So that way I
know that I'm getting their positioning right
versus one another. So there's my oval, long oval for this bul rush, looking over at her friend, the guy here, here he is. A little bit lower
down. Let's see. So what the feeling that
he's coming up the river? Maybe I maybe just raise
her up a little bit. She is a tall bull
rush after all. I am angling her head in
a little bit so she's, you know, we can feel
her lean in, okay? S waves her her leafy arm. Then she just ends in a
little wave down there. Okay. And you can see why I don't
think in the background, start with the river and that because I might
need to change how it falls so that it feels nice the way it comes around
these characters here. Let's continue on
with this little guy. He's picturing his
eyes about there, looking over at her. And he's got a branch. He's sort of like a punting
along the river here. I draw that diagonal
across his body because I want to make sure
it's not going to chop off a foot or
something like that. That's where his feet
will be and he'll have a little paw on it there and another little paw there, maybe. I make sure it falls in the right position,
which I think it does. He's going to wear
his little hat, a little hat on and litle
ha is smiling away. H. The end of it I put I just put a couple of little
leaves on the end, you put a flower, you put something else. I'm
going to keep it simple. Then I make sure
that the lily pad is positioned under
him like that. I think I'm ready to ink my
first couple of characters. It doesn't matter too much
which one you do first. I is in her first
then around her head. Lovely. This little
guy gain eyes first, so I know that I've got them angled in the right way
that his little nose. Simple little smile
and I get his head in. Want to make sure that
it hits the right point yes I'm giving him a little fingers on the curves to the end
of his hands there. Then, of course, he's
got this branch that comes out of his
little p. It's curvy. And then the lily pad. Oops have caught in the bottom
forgotten his little feet. Okay those in first before. Lily pad. Okay,
that's good. Perfect. There could be, he'll put a couple little
other waves in here, but I won't do too much, what if you want to put
in your little squirrel there fishing or something else? Brilliant. So first couple of characters are inked in. Oh.
4. Unicorn Picnic: And next, how about we do the unicorn that's coming down this
bank to his friends, I don't know, the rock or the moss or whatever
he's coming, whoever he's coming
down to visit, okay? Oh, one of thing. I
think. Put, little bit of patterning on
this little texture rather on that lily pad, just so that he
stands out versus it. Okay? So that's that. All right. Unicorn.
So the unicorn here is going to
stroll down the bank. It's got a fairly
large, you know, want a decent size head
because we need to get on, you know, ears for
lock, horn, right? So fairly decent
size oval there. And the character is coming down to hang out with, you know, his friend rock and I could be somebody
do rock and acorn, you know, maybe rock
and Acorn coming along here or something.
I don't know. I think maybe I
will make it here. Is going to be acorn.
I'm going to do acorn. That's going to be acorn. We make the rock
here rolling on in. Acorn size and small. I know that I need
a decent amount space for this unicorn, so I think I need to move
her along a tiny bit. Because I remember we've
got her head fairly big. Her body's fairly small, but we also she's
got a long tail, right's kind of like
a decent sized tail. So in goes her head. Also, for example, I don't
want to the horn to intersect, like here with my tree, so I need to plan out
where that's going to go. Okay, so that's why I have
her a little bit lower down. That's why I'm just
playing around with where she's going
to be positioned. I think around
there should work. Now, let's get in the
I'll get in her forelock, something like that, just a
tear drop shape, basically. I Drowsf a tear drop up there. Her horn is basically centered about that oval,
if you can see that. Okay. And then her ears, one of them will sort of
be on this side and come out of this part
of her forelock. And just see the little bit of the other ear
on the other side. She her nose extended. Let's see. That's all right. And then her main kind of goes down the
back of her there. And she's got she's
just strolling along, but she's she's holding
a little basket. Or something, have a
hold or something else. A little basket of goodies, she's bringing a picnic, and she strolls along. I'm keeping the arms and the
legs super simple. Okay. Then there's her tail. You just think about
the shape of that. It's just a big tear
drop kind of thing. I can always move my
tree over as needed. I don't want her to precisely
intersect with my tree. So go. I'm comfortable enough space. Super. Now we've got
she's coming down to, I don't know, maybe
I'll put rock in here. Hold on. Change my mind again. This is s put horizon. There are eyes a little small. I'm not going to
do any nostrils. I'm going to leave her
just like that, I think. Here she is looking
at. This will be rock. There's a little B flying
in. How about that? I think a couple
little characters here might be cute. I'll
be a little B. That's our rock. There's
not much to him. Here's this will be a little B. Maybe we could show her
flight path like this. I think that's quite cute. That'll be enough
characters there. Let's start. I'm going to
in in the unicorn first. And her eyes looking over here. Does she need me I go
to give her eyelashes. You decide if your
character needs eyelashes. There she is no smile and
down around her body. Carry her basket of I
don't know, some goodies. There's her main and then last
but not least lovely tile. Brilliant. Here's
our friend Rock, looking over at what
she's bringing in. I just make a wavy. I might give him a
little texture on them. That's probably enough. O B. You could have a little honey pot or something
if you want her to have a little more detail. I'm gonna leave her simple just because I think that's
probably enough down there. I will put her flight path on. I think you can go in front
of the tree. That's right. Great. So there is our
unicorn and her friends. See if she's dry. H?
5. Flower Tea Party: Let's go to the other bank here. Now, over here, we have our flower and our
snail having tea. Okay? So you need a
fair amount of space. I think it's a good idea that we chopped this tree here because, you know, they're going to
be a little bit wide, okay? We've got the log. They're having tea the little
cups of tea on the log. A centered around here, might
need to move mine over. Although the flowers
me'snarrow, right. She's just a stem. In this little guy here. He's a little bit taller. So here's our snail. There's his head,
and he'll come down, they'll be around here. I lightly sketch that in. But the constraint here is, I need to have the teapot
pouring into these cups. They need to be a
little bit lower. They need to be low
enough down that I can have a teapot above. Okay. I'll just maybe
move those down a smitge. This is all part of
the process, right? It's like playing around with
where everything aligns. There's the t pot. I have a D shape
right little spout. And then whoops so I need
to move. Move my cup over. I don't want to spill. Okay. So there's the teapot. And then this other little
cup, move that over. Then I just, you know, just
sort of position where this stump is underneath. Okay. Now, my flower. So I I put on her arm her leaf arm because
she's holding the teapot, then I'll do the stem. Then I can place her face
it needs to go. I do. There. Make sure I had enough
space for the petals. Move he leaf hand down a bit. I don't want to be
too cramped in here. Play around with that
until you've got it in the right position. Then I can do her face. So it depends on
my character and what sort of
situation they're in, what order I'll draw things in. But I do find, when you have something
where the character is actively doing something
that has to align, you know, I'll draw
the action first. So there we go. Now I
can come over and do him and make sure that he feels like he's in the right
position versus her. He's got a nice little hat also. I got to leave space for that. I think this do. I think he's in a good spot. And the shell. I go
around like this. It's basically
circular and I come out like this and then I
hit that part of his back, if you will, and
then curve around. He's good. He's going to look. Terrific. Let's ink
in these little guys. I will actually do the
teapot in her arm first. So that I know that
it's in the right spot. And then I can do
the rest of her. Looking down at herself,
the pouring tea. Lovely. I can go around. I can go around the stump
all right, I think. And now our snail. I can do eyes first because he's just looking on. He's
not doing anything. Look, plans, of course, I go a little smoke. Great. Those characters
look terrific.
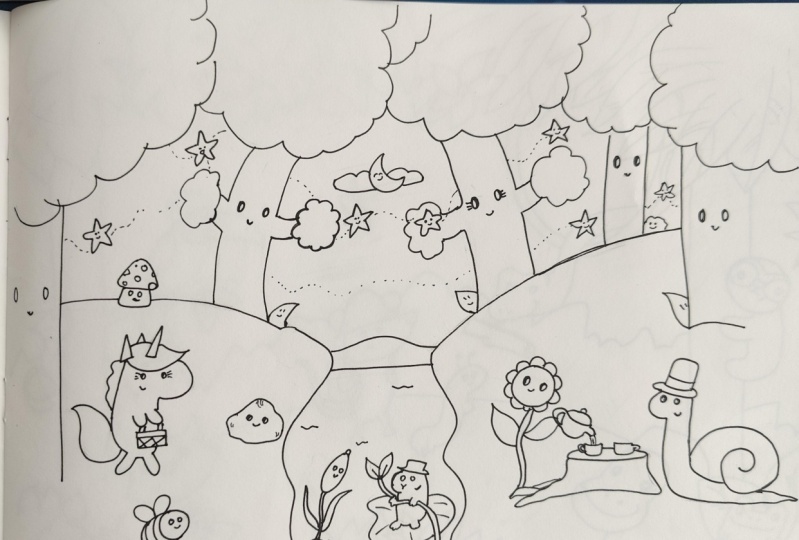
6. Enchant the Forest: Now we can come along
and start inking in our background and adding in any other little details
that we think need to go in. We don't have a toadstool. Maybe we can do a
little toadstool. I've got that space there. I definitely want
to get that in or some other little rocks or blades of grass or other little characters that could be bringing it to life. Es. Terri. Great. I'm going to start with inking
in the moon here. So I've been my page, dear. You could do have he could have his eyes open, he
could have his eyes. I'm doing it with his
eyes closed. Okay. Eyes closed. Lovely. I'll do
these two main trees where we're seeing
the full tree, and they're going to
be looking over here. You could have them
looking somewhere else, but I like having the characters looking where I want the viewer's
eye to go right? I want the viewer's
eye to come in here. That's why I'm going to do that. Is release this cute little
star. Pat faces on them. It's looking good. I
like adding the trees in I start starts to
feel like a forest then. Brilliant next tree. Oh, I gotta leave space
for her eyelashes here. She's also looking
this direction. Her little star on her branch. And then the next
little start Oh, I got to do her. Lovely. I'm going to do these two trees
in the foreground because this one, comes in here. I'll do this guy. Looking into our scene. And then how about this the
one character back here. One more star in this
little space, I think. You could put stars
they could be up in the branches as well. But I'm I'm going to stick with keeping
it in the spacing. I think that it will be
enough detail in our drawing. Maybe use one more star there. I'll leave it plain for that. Time being, I think is
going to be enough. Yeah, I think that's going
to be enough detail. This little character
in the foreground. He's actual the biggest And we have a couple
more stars left. But more start us, dot that around where I
think it's going to work. That's pretty good. Yeah. It's probably enough. And then any other
little details? I think I had said about
doing a little mushroom, Guy. Didn't I have here.
He could be there, you know, he would
be by the tree. He maybe hangs out
with the tree here. Okay. I'll do here. He's just in the
background here. Okay, a little mushroom. And perhaps, maybe a couple of blades of grass
around this one. I've got little faces on them. You could could have had a plad of grass in
the foreground here. My bee cuts that off,
so I won't do that, but that's another option. Okay. Play around with whatever is working with your composition. So those blades of grass. I could do a rock
beside one of these. Let's see, how about
here. Moss. This is moss. Okay. That's that moss. I would have been good over
here. Put it on the tree now. And I can change my I'm
going move my mushroom bit. This drawing because
there's a lot of planning for the background initially. It gets quite sketchy. There's a lot of pencils
to erase, I find. But sometimes that's what
you have to do when you're drawing a picture that
has a lot of overlap. So there's always a lot more
planning that goes into it. That's a bit messy
with sketching. Well, let's see. I don't have a ton of space for my
mesion this I'm hesitating. There is. And I'll do one
blade of grass there. That, I think should
be enough. Let's see. I kind of feel I
mightn't be able with somebody peeking
out here, you know. It's not going to be too much. Maybe. I'll get in the mushroom and let's
see how it looks. I think he needs a few spots. Yeah. I think I do need
this blade of grass. Definitely. And then
over here, I like moss. Yeah, moss is perfect. I'm drawing this
line now of my ill, and I'll put on here. I'm going to do this
blade of grass first. Yeah, that was good. And then I think I'll just
do one over here. That's probably enough. Now, all that remains
is drawing in the bank, the hills, the little
horizon at the end here. Another wave or so. And I think that's it. As off the lost of my pencil. Well, I hope you enjoyed
drawing the Enchanted Forest. There's always lots
more you can add. You know, you put
something up in trees. You can add other characters. So it's a fun one for that. And if you finish
off your drawing, I love seeing everyone's work, so please share your
drawing with our group, and I hope to see you
in the next lesson. Thanks for cartooning. If
you enjoyed this video, please leave me a review, and don't forget to
share your drawings. I love seeing everyone's
work. See you next time.
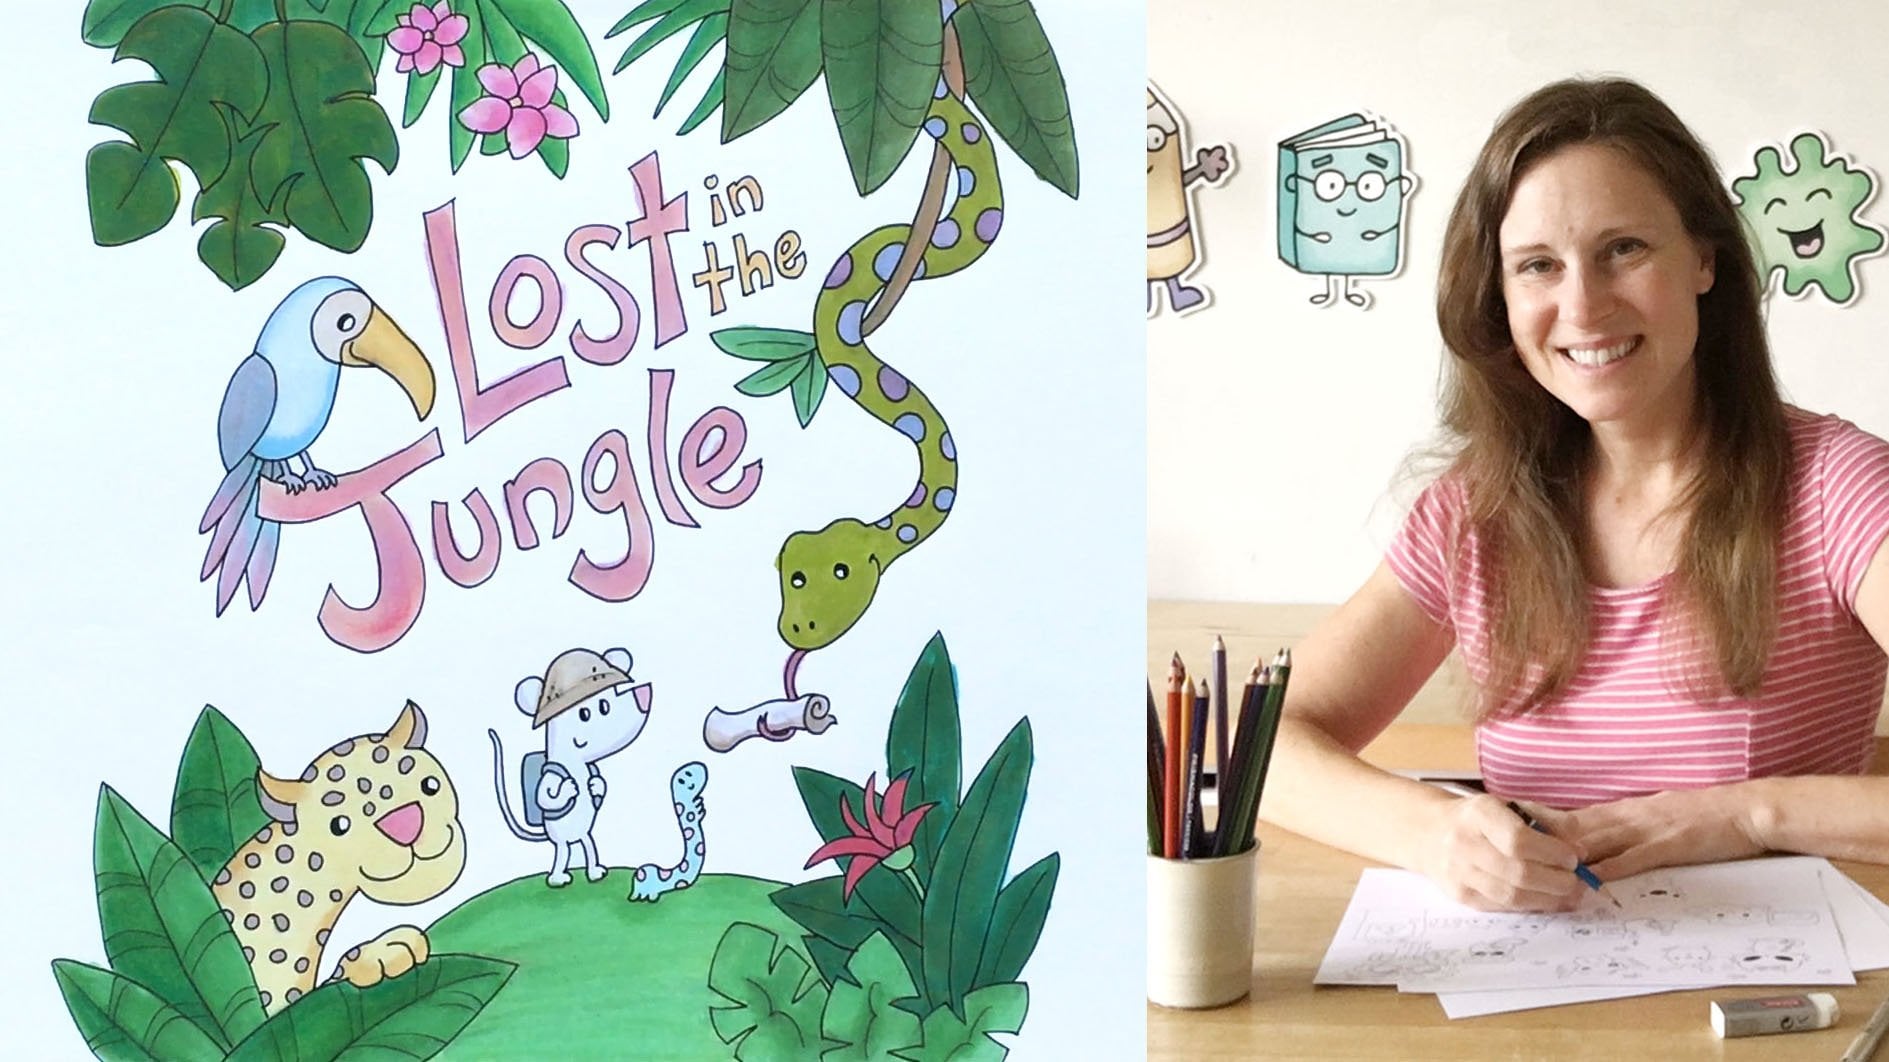
 Sarah Jane Vickery, Artist