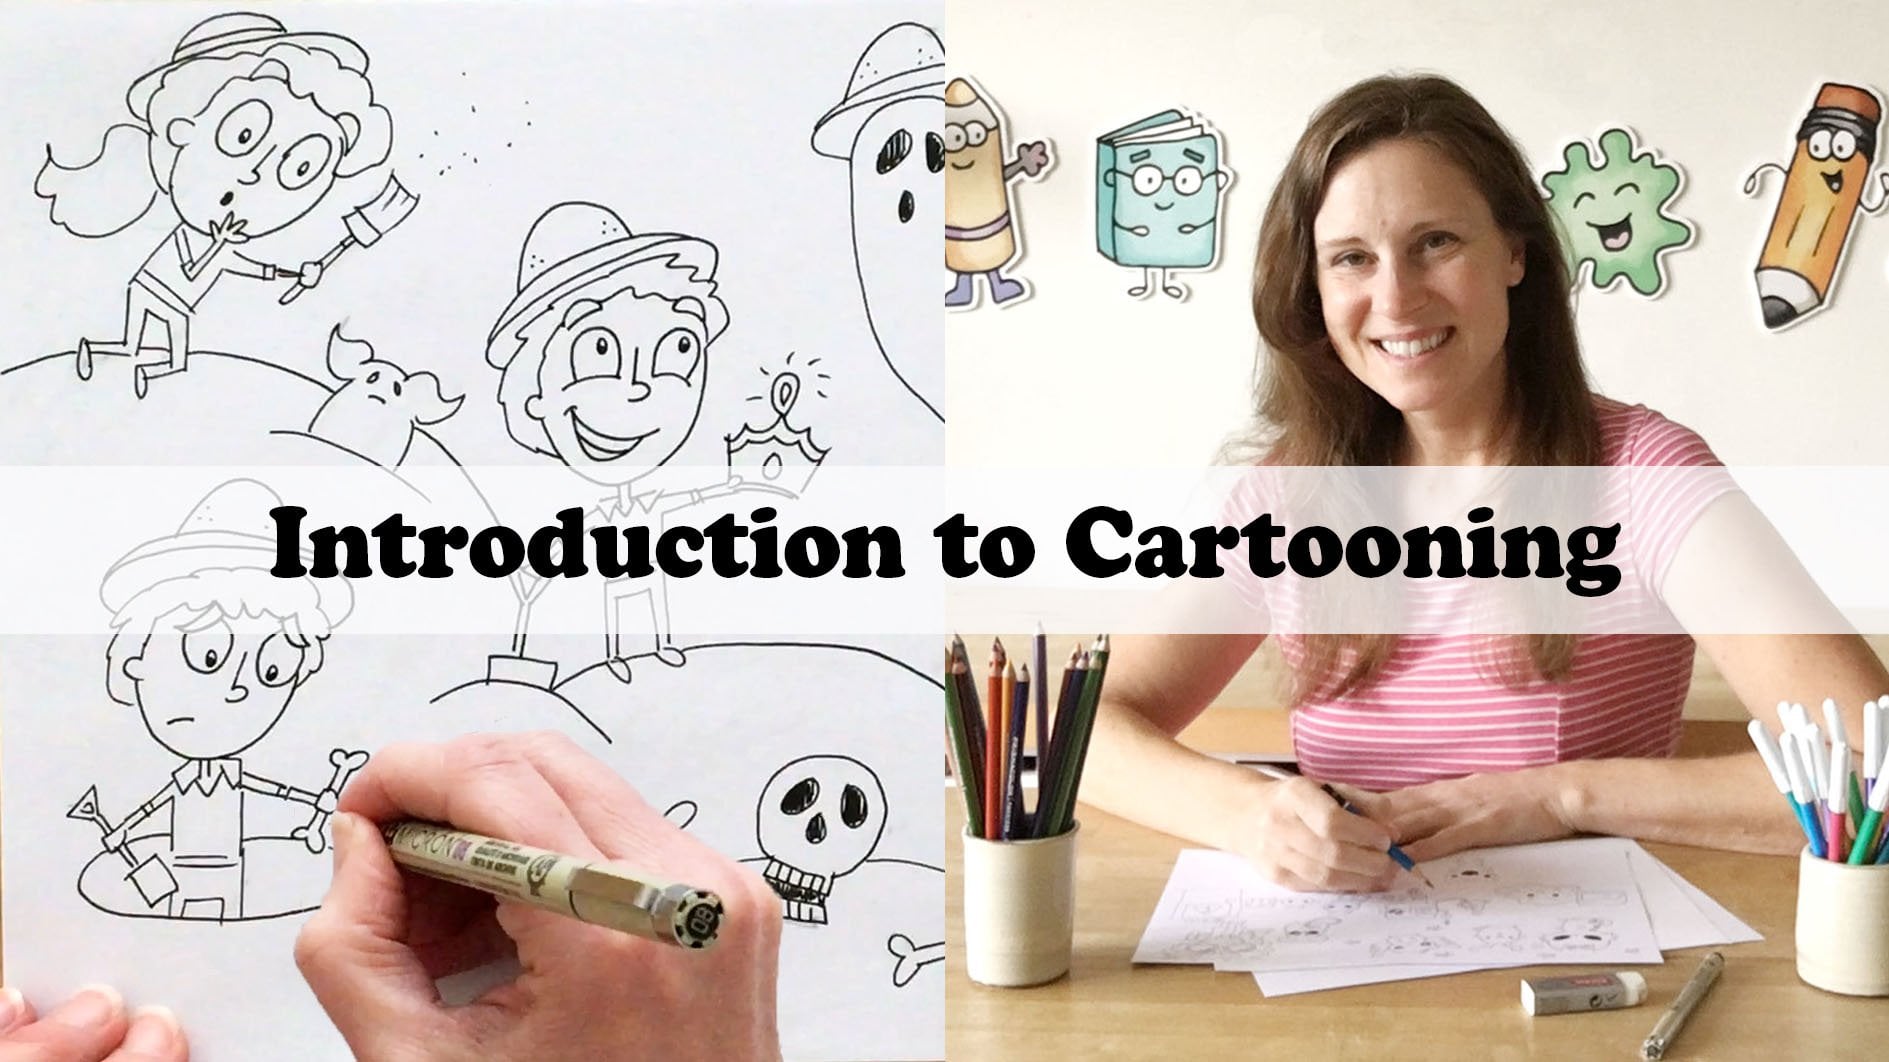
Transcripts
1. Introduction: Welcome to Lost in the Jungle. Our main character has got
himself in a bit of a muddle, and the other jungle animals
come in to help him out. All you need with
you is pencil and paper and a black fine
liner to outline. Alright, let's get started.
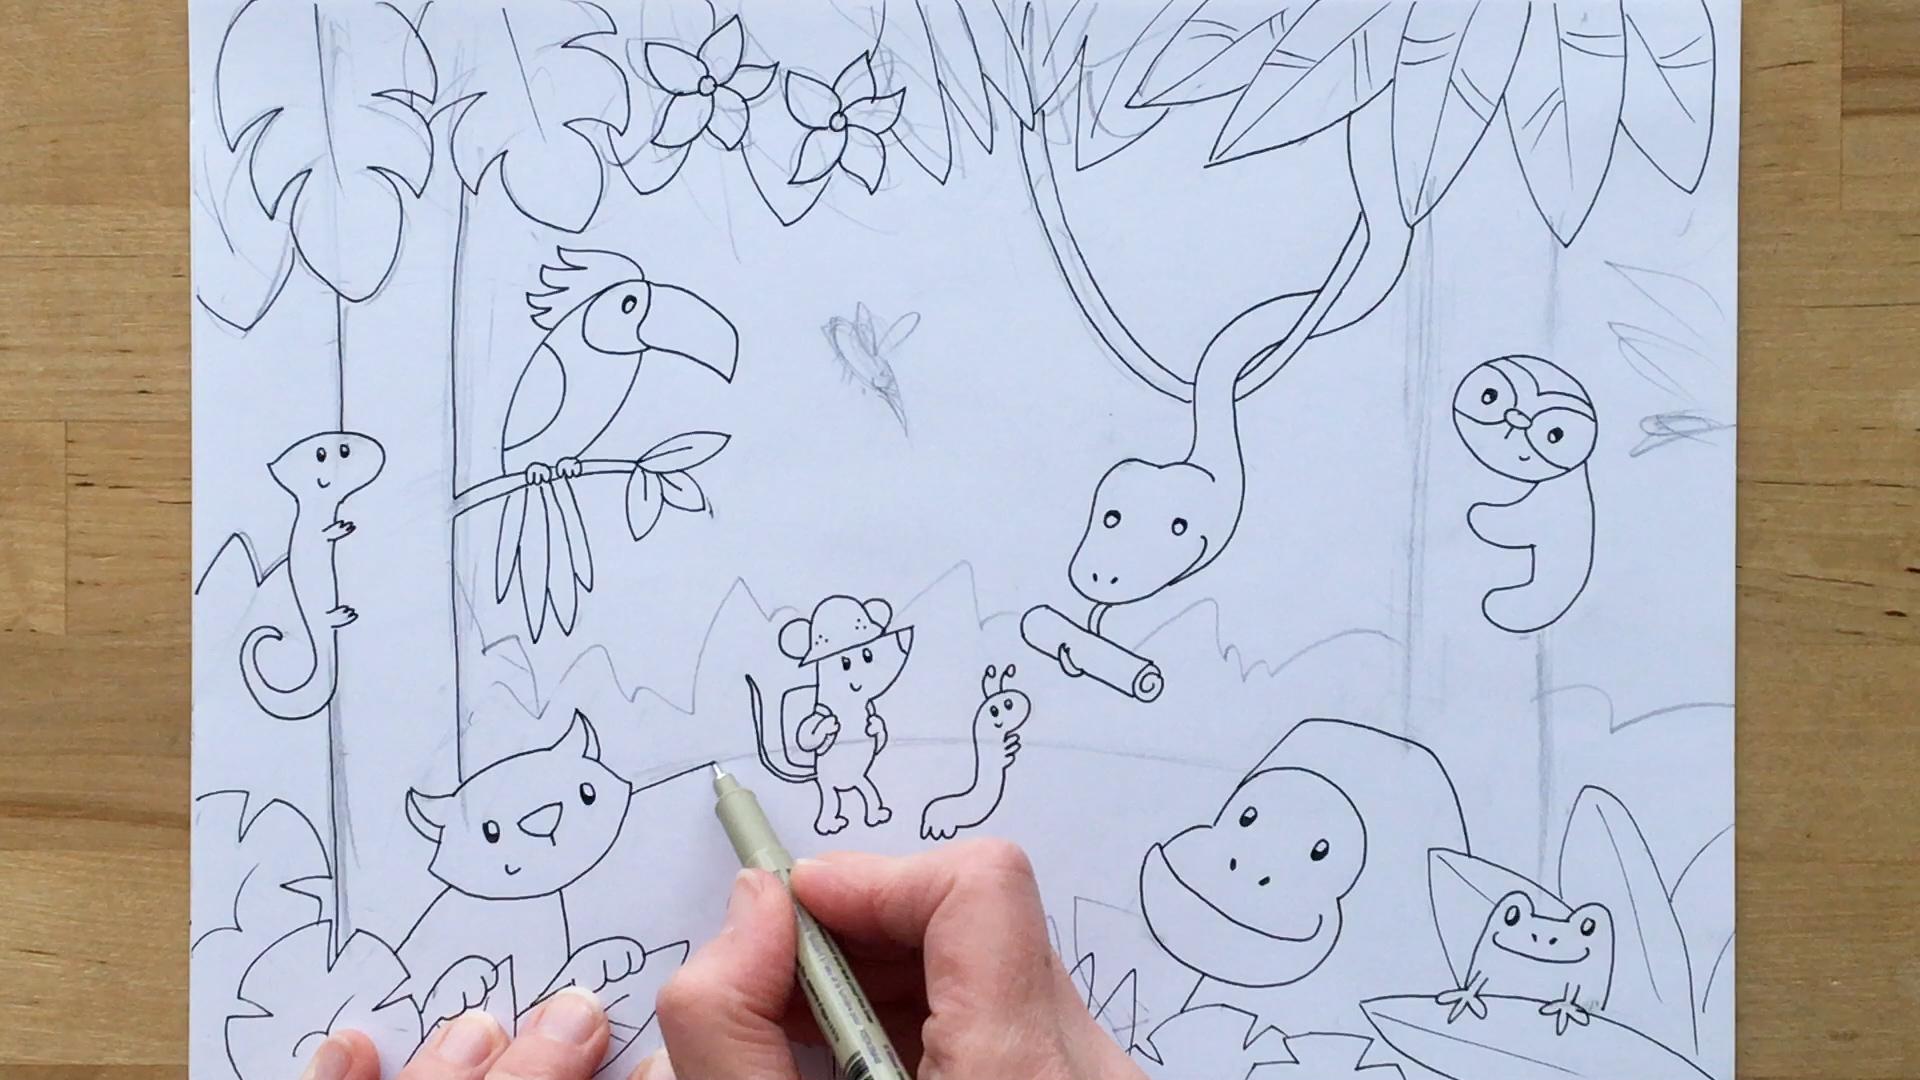
2. Setting and Main Characters: Here's our concept for
Lost in the jungle. We've got our little
central character that's, that's my mouse, Henry. He is with his little friend, A, some sort of little
caterpillar, what have you. We've got a parrot
looking down at him, some nice, you know, foliage
and tropical flowers, and this lovely little
snake coming in and handing him the map and a little leopard coming out of the out of the bushes here. All right, so let's get started. We'll begin with this design and then add some more to
the rest of our drawing. Okay. So we're going
to need a fair amount of space above for the canopy and the
characters that are coming down from the top. So I'm going to
set my ground line about a quarter or a
third through my page. So that's about, about a third. I'll be something like
that. So my main character is he's going to be
set in here, okay? Then I want to
allow, like I said, a good amount of space, it's going to be
something like up here, about a quarter or so, that's going to be my canopy
so we can show some foliage, some of our tropical
flowers, et cetera. That'll be something
like up there. Like I said it's
about a quarter, a quarter to a
third of the page. Then down below, we have
two as well, one or two, we can decide, one or two
characters in the foreground, that are peeking out from what will be some denser foliage. We want this feeling that we're looking into the space from quite a dense
kind of setting. Somewhere around there, I'll just slightly sketching where that kind of foliage
will be and then we'll have one or two characters, I'm thinking two, kind of
kind of like their faces looking in our leopard and maybe like a gorilla
or something. So there and there. I just sort of lightly sketching where I think those characters
are going to go. Then I'm thinking to make
it look even denser, maybe what we do is
have a couple of tree trunks coming down through here because we
want somewhere to put, we've got our parrot, and we can get in maybe like
a lizard or a sloth, something up in the trees. A couple of trees will be here I'm thinking
and around here. Something like there. Maybe a branch coming off, we'll put our parrot on a
branch off of this tree, parrot could go around there. And then, this will be, you know, some foliage and
tropical flowers, et cetera. And then maybe, you know, we want we've got our
snake coming down, so he comes down off
of a branch here. And this snake needs to know, his face needs to basically end right near our
central characters. There's little mouse? O you're change to anything
else you want, you know. You want to your
cat or your dog. And this is he's little
friend caterpillar character. All right. So that's
what I'm doing is just roughing in my
basic composition. Okay? Because I have characters in the foreground
that are larger. You know, I want to
make sure that I'm leaving enough space for them. And I also want
to make sure that I'm going to have, you know, the central characters
and the central action, which is the snake coming
down in a good position. So I think that will
basically work. And then you know, we worry about what else we can
fill in here afterwards. It could be some
smaller characters, I be a butterfly or a
mosquito or what have you. So let's begin with the
main characters and, I think, probably this
snake coming down, right? Okay? So, you know, his face will be around.
Roundabouts there. Let's do the main character. So he's going in there. And he's made from. I've got a little D shape. Okay. That's the
character's head. We will be looking up slightly, a little bit angled
up, looking over here. His eyes will be in there. The body is just a elongated oval or elongated D shape. Yeah, I make it a
little bit smaller. He's a mas. It's fairly small. I just checked you
know I think I've got the right kind of angle
looking up there. He He's we're going
to show his ears, but he's got to have his little, you know, explorer's hat on, so. Another little D shape there. Okay. Sit that on top of him. We want his ears ping through. There they go. Curves there. And he'll be, you know, just sort of stepping
along, okay? Stepping along.
He's going to need, you know, he's going
to need his backpack on, he'll have a backpack. And maybe he's got, you know, his hands on the straps here. Two little circles
for his hands. It's just a curve as
his elbow comes around, like that. We don't
really see the other one. We can see a little curve
of his elbow there. Then his eyes really
simple Oly black eyes. Curve for his nose. Here's just decide how how
long face needs to be. How long his nose need
to be Little smile. He's thrilled. He's
about to get a map. It's just backpack back there. Oahten it to leave
space for his tail. Also be little little
feet marching along. Well, that's a pretty
good sketch for him. And his friend here I'm
he's a little caterpillar. He'll be reaching for the
map a val for his head. I'll exaggerate him a
bit, not too too small. Maybe we'll add it just need a little cap on, I'm thinking. Need a hat on too. I'm
going to put a hat on him. Exaggerating the size of him and make a little bit bigger. You want to be able to
get enough of a face on him and net happy expression. And he just, you know,
curves around like this. He stands up on his
little back legs. And he's reaching for
reaching for the map. Okay? I'm going to sketch because
these characters all go together and their
interaction goes together. I'll sketch them all in first, and then I will ink them. Okay. Just in case, you know, if something's not
aligned quite right, I still can change it, right? So that's why I'm not going
to ink these guys yet. Let's get in the snake's head. So yes, he's going to
come down somehow, you know, snacking around
obviously down this branch. But the first thing that I draw in is the character's head, because I can always move
the body around, right? And so I know that
the eyes are going to need to be somewhere
around here. You know, he's looking over. He's looking at at our mouse. And we also have to have space for the map that he's carrying. Okay? So, I get in the
shape for his head, which is val with a little
bit of a point at his nose. I'm going to get a bit of a dip in his head there.
Let's see how he looks. G rounded up if you want. Be a little big. I'm
going to make it a little bit smaller.
I'm going to make. I don't want it
to be too too big because he's in our
mid ground, right? He's like right at
the foreground. There and his tongue is going to come out and wrap
around this map. It's just a cylinder. Maybe a little bit smaller. All right. So now, I make sure I get this character's
eyes in so that, you know, he's looking in
the right kind of alignment. Okay? We have a
nice little sort of triangle interaction happening
here in our composition. And his smell just
curves around like that. And then I will take him
take his body up, okay? And I can almost draw in, you know, I can do the
branch afterwards, right? So I can decide how
he's going to go, you know, like this. However he's going
to curve around. And he's going to, you know, he's either in front
of the foliage. I think he comes out of whatever
foliage we've got here. I'm going to sketch
him these leaves. Something like that. Okay. Because when we ink this guy, he's going to need to
disappear into somewhere. Let's get his body in his body. Then I can draw the
branch through him. There are different
ways of doing it, but. H like that,
disappearing into there. The branch, I can imagine, it
would go around like this, maybe it curves off like
that, branch or could be, could be a vine. You
could do it like this. You could do a curve.
Maybe we'll do that. Be curve of a vine,
he could be on. We'll do that
Opportunis on a vine. All right. And I just remember which parts
of him are going to be in front of the vine. Okay. And then maybe,
you know, he goes his body goes in
behind the vine there. And then, is in front of again. Just to remind me for
when I'm inking it. Okay? And I think that's good
for those characters. So I'm going to ink in this
part and then I'll stop here. Won't do any more of the tree. Okay. Let's start with. Let's get Henry. His little expression and his hat. Down around his body. I'm just giving at, you know, a little curve to his hand
as I come around there, give him a little
little extra feature. Same with his feet. Backs have gotten his ears. I can't forget those. Brilliant. Okay, onto his
little friend here. No, I don't know I leave I
might leave the hat off. You just ought if you
wanted to put it on or I M come Ltenda or something. Let's see. There. Oh,
Better get his eyes. Smile. Reaching for our map. Yeah here. Give him
a little antenna. Let's see what he looks like. Gives a bit of a
keener expression at, you know, angling up at the map. Brilliant. He's got
a little spots on the maybe I'll leave him
for the moment we'll see. Now our snake. Let's get his eyes in.
He's looking down. He's going to be
looking down at this. And around his face. I'm going to give him
nostrils, I think. So tongue, and let's get
let's get the map in here. O. And his other part of his tongue comes
around it like this. Okay. And then just up up his body and not forgetting
this vine that he's on, okay? I just sort of You know, when I'm trying to make
it so that the body aligns from one side of the
vine to the next, you know, even though I've
drawn this line, I'll lead my pen
along this line, make sure it's kind of
lining up and then, you know, continue
this line around. Just hope my my pens moving
in the same direction. You know, I'm more likely to get it lined up
properly that way. Okay, so now we've got
this little space here. Let's I'm going to draw
in a few of these leaves, the ones that intersect
with my snake. Okay, and then I'll
leave the rest, just those parts that I know
I'm going to have to Heaven. I'm just putting a
tiny bit of texture on those leaves to bring them out contrast them versus him. Maybe he
does these balls. I'm can decide that
afterwards here a few few more leaves. That's probably good.
I'll do this one as well. Brilliant. I'm leaving
this part of the vine. It can be finished when we
do the rest of this foliage. Okay. So, there we go. Those guys are in our
first characters.
3. Parrot, Sloth and Lizard: These trees. So I
think we could do, like, like, maybe a sloth here. Here's climbing up. Oh, we're
going to do our par here. So here's our parrot. Yeah,
let's get that character. And the parrot, and then, like, I think thinking a
sloth, you know, could could be a really simple little one climbing
up this tree. Okay. L et's do the parrot. So the parrot is, first of all, I decide how far I want this
parrot from my character. I' actually bring the
parrot down a little bit. Just so a little
bit closer in here. I feel like I want the
characters, fairly close. And I want to leave my
viewer's eye down here. So the parrot, because I got this nice or whatever
tropical bird this is. I can make it get a longer beak, you know, some tropical
bird with a big long beak. I can lead my viewer's eye down in a little similar angle, you know, the way that I
got the snake coming in. So that will be, you know, the beak of the parrot. Okay? And the parrot
is just made out of a tropical bird
made out of a oval. There's my branch. He
or she will sit on. Maybe we could just let me get
a little lizard over here. So simple little lizard
climbing up there, perhaps. Now the parrot, so
I'll do a simple. I'm going to give it a
smile here, you know. And maybe a little. There's some color
around its head, and I can have a fancy fancy
feathers up there and long, nice, long tail feathers. Okay. Holy long tail feathers. I'll just do a simple
curve for its wing. That's I want to make
sure that I'm getting the fairly good sizes,
these characters. It's just going to have simple little feet on this branch. Move by branch of a sma I can put I can put a tropical
flower on the end here, I can put you can do
that if you want. I'm just going to
put some leaves. Brilliant. I think we can
probably ink this guy, but thinking on the
lizard, you know, we're going to have I'm
going to place this lizard because perhaps my tree needs
to be smidgen and narrower. I can do my lizard is place
his head, you know, maybe. He's got a c curvy kind of tail. And just simple little
simple little feet around the trunk of this tree. I just I place the
bit below the pairs. Again kind of brings
my viewers eye. For example, I
don't want to align them exactly perfectly. It's nice to have
some asymmetry. Let's in these characters in. Who says tail to be
curved, I don't know. Let's do the bird here. I first. He's got
to be looking down, so point his eye down a bit. Could be looking somewhere here could be looking
somewhere else up to you. Ing. Fancy feathers there. Simple wing. Let's get him on his branch. And, of course, he is
lovely. Tail feathers. I don't want to low
down because we've got our leopard coming in here. Perfect. I can leave
him like. There he is. Now, let's do the
little lizard guy here. Oh. A little of you down his back and
give him nice kind of curvy curvy style tail. There we go. Brilliant. Now, I think we can we can either go up
this tree and do this, but let's come over
and do our other tree, and we'll leave this until we decide how we need in terms of, you know, tropical
flowers, et cetera. Let's do this loth. So
place my character's head. You could do h on the other side if If you want him
looking, you know, maybe might make more sense for him to be looking
into our scene, so I could put the
character here, head on this side of the tree. Plus a little bit
further from my snake. I don't want him to
be too too close. I wrap his little paws
around the trunk. I don't want him too low down
because I got this other, you know, gorilla character coming in here. I
can move him along. There is simply simply
wrap them around. Can curve, and curve
his legs a little bit, so get the feeling
of the round trunk. And here's my slog head. Angle a bit more like this. Let's raise off these lines. I'm need this line changes. I'm going to need this line
up this character's beak. I'm going to leave it like
that. Alright, Sloth. Here in my Sloths eyes. Fairly central in the face, cause I've got the little, markings that go around
him and his little nose, te smile on O can
even leave with none. I was just ed on that. It's a little marking
on the top of his head, kind of different colors, don't they?'s I'll try to face. I just do a little
straight line. I leave him play. We'll
put a smile over here. I think it looks better.
Nice, simple character. Maybe I could put a,
a branch coming out of here or you know, wild flowers or something. I'll leave it. I'll
leave it for the typing. Let's ink this guy in. Eyes first. Looking down
and over at this scene. Marking on the top. And then
just around the characters. Body. I'm going to keep
that all really simple. He'll give them a little claws or something if you want to but. I'll leave them p. I worry
about the tree trunk later. When we design our foliage
happening in here.
4. Leopard, Frog and Gorilla: Let's come into our foreground. We've got our leopard,
somewhere around here. And we've got our gorilla, you know, somewhere around his
nose and top of his heads. Or around here. Maybe
we could do we need a think we need like something little like like a
little tree frog, you know, a little
froggy in here. Can be sat on one of the leaves, and he's just peeking
up over kind of thing. Okay? So I think maybe I can get those three characters in. L et's do the leopard. Like I said, I'm just sketching in where these characters
are going to go just so I can feel that it's
going to feel kind of balanced in my drawing. In goes the shape of
my leopard's head, or maybe as a panther
or something. I don't know. Nice
little oval eyes there. Going to make the note.
Let's see how big those need to be. Like that. I'll give him I small, it's off a little bit
further off the head. Ears like this. Andres going to have one paw up. He's got a paw up on
one of the leaves here. He's pushing it to the
side. To take a peek at. What's going on with
our characters? A, so There we go. And once I think I'm
sketching in the right area, I can always just erase off those initial sketchy
lines so that I can get a better feel for how he's going to turn
out once I income. I think I'm going to point
this face a little bit. Give a little bit of shape to
that. Not quite so rounded. That looks better, I think. And let's get in. He's hidden like the snake. He's hidden in the bush here, so let's do a few different would do
some different style. There's going to be
round style leaves. I'm just doing a little
dart through them so that they look a little different. Okay, lots of different
variety. That should work. You could show I don't quite have room because
my lizards here. You could have shown just the top of his
tail coming through, but I'll leave him at that. Let's ink in this guy. I haven't put any spots in him. Because I'm trying to
decide if he needs to be a panther or a leopard. And also, I haven't
done any patterning on my other characters on my snake or my
caterpillar here yet. So I don't want to have too many characters
with patterning, you know, I can always
add it afterwards. And he's looking over here. He could be looking
over at the gorilla. Be looking over here theg. And just a little two. Let's see he knows
he want two paws up. Let's see how he
looks. I'll leave it. I'll leave it at one. Okay.
I'll put the two paws. Let's see what L's see
what it looks like. There's one p. And our leaf in here he is going
to have his other pap. He's curious guy. Brilliant. And then I
can just, you know, move these leaves
around just suit, okay? Le pattern on them. That's it. We can put in more leaves and foliage here afterwards I'll wait on that. Let's look at the gorilla, and I'm possibly this
little frog guy here. The gorilla, make sure I've got enough
space for this guy. To erase off this fg he I want to make sure
I get in my nice fg. Kin being there. He just got his little
little front legs out here on top of the
leaf, like that. I give a nice little smile. I'm going to move
nostrils. There he is. And here, we're going to
need a few more leaves here. Then the gorilla peaks out. So his eyes line those up. Top of his head is
squared off. That's why. I want to look quite big,
so I just make them quite broad and angle it out so that we just don't
know how far he goes. So he's quite big
guy. And his mouth. He's look like he has a bit
of an underbk go here we go. Smile on him. I'm going to
give him nostrils as well. He'll look over there. Then not showing any arms or
anything on that character, and we need some crazy
leaves down here. I guess we can probably
fill these in now. Okay? Maybe a lot of the s.
I'm going to change. I'm going to give myself
some rounded leaves or maybe maybe there need to be
tropical flowers in here. Okay. Let's just get in a couple of these by
him and then here, I think I'm going to do
some tropical flower to. Let's in these two characters. I don't think it really
matters which ones first. I'm going to do the frog guy. I like his little smile. Yeah, let's get his. Legs in. I had a lot of curious
characters in this drawing. Perfect. Then the leaf. And now our gorilla eyes. Looking over and around
and around his face. You could have given he
could have eyebrows, you know, if you want
to give him eyebrows. You go to leave him. And now we need to hide him
in a little bit of bush. That's probably good. And now, we can decide on maybe
some trouble flowers. I want to have you
in here. Brilliant.
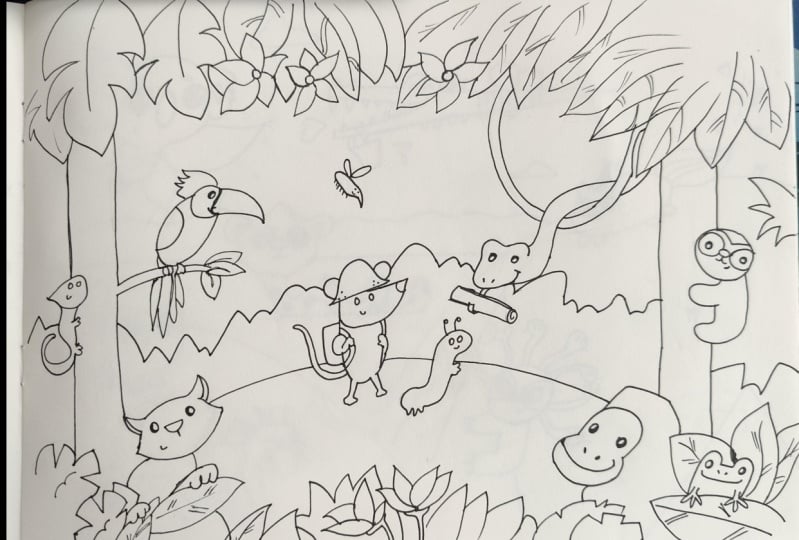
5. Trees, Flowers and Foliage: I got most of our characters in. We could I feel like there needs to be a little
something up here. You know, maybe we can
do something small, like, you could do a butterfly, or, I'm gonna do a little I do a little moss the Jung I'm gonna do a little
mosquito fly in. Could fly in the other way.
I think that's pretty good. He's gonna hear us. He's a
friendly mosquito, you know. He doesn't bite you. He just comes in to say hello. Littles, maybe he's no bit long. Look that deadly. Here we go. There's a mosquito. Like I
said, it could be a butterfly. You could add that in as
well, it's up to you. There could be something
sat on this branch. It could have a spider or
something sat on the branch. I'll leave it though. I'm
going to leave it plain. And I'll draw him in and then we can just finish off our fol. I definitely want to get
in some tropical flowers, k. So We can decide where they're
going to go cause they'll draw attention at me, not as much as a character. But ops missed I missed drawing his chest
in here. Here it go. Not as much as a
character, obviously, but it's still something that
will grab grab attention. This is what happens when you erase off your pencil and
you realize, Oh, look, my character is not attached
to miss parts of his body. All right. Let's
get that. It's ca I made my leaves a little bit
shorter than expected. Okay. Lovely. Up here, I've got
a good amount of space. So let's put in some leaves. Some of these, and let's get in some tropical
flowers here. Okay. Just I'm going to
do two like that. And I've done these kind
of longer. Style leaves. And then up here,
I'm going to do just like a broader leaf. Okay? I want to
show a fair amount of varieties, so let's do some. Broader style of leaf. It's not about space to stick
one other little character, but I think we'll find this
is going to be enough. And possibly, you know, possibly I could show a
different style of, you know, leaf coming in here at the
edges of this character. You know, another
little pointed. I'm so we had down here. I'm going to put,
I think another flower down here
just to make it, you know, three, I could I
could do a different style. I'll do a longer kind of kind of petal like
that. Go off the page. That should do the trick. And then I'll ink this in, and then we'll see if
we need anything else. We do have our ground line here, so I want to just fill that
in with a little bit of, you know, this style of brush. I'm not going to do
the details in there. It's we're going to show the
outline of the bush there. And then that will probably
continue off our page. I want to take my viewers
eyes off the page there. Maybe I'll bring this up
let's see if it needs to I'm careful where I
intersect my characters, right? So that's why I brought
this line down here. I don't want to I don't want to make a
confusing line that goes, for example, right into
the character's tail like that. I don't
want to do that. So I want the bush
to go like this, you know, into his body and then down like that,
which might work. Okay. But I don't want it to be confusing to my viewer's eye. I think that will
probably do the trick. And I make sure that these
lines are going to come down into okay positions
versus my foreground. I think that's good. Let's
outline the foliage. I'm going to do
the flowers first. And I'll do this flower too. Might be a bit big. I'm
going to make this one. Actually, I'm going to make
it a little bit smaller here. I don't want too much
competition with my characters. That's what I'm thinking. I goes off the page. I think that's enough. Lead into this kyle, right? I think that all works
Up to these leaves. I need to finish off my vine. I'll do that once I got
these leaves and above. That should do the
trick. One more here. And my vine. I can just follow
this line around. Oh, I forgot my mosquito. I'll do him in a minute. I might need a little
branch. I don't know. Get in the ground line. We're going to leave this plane. I think we've got enough. I think I've got enough
going on in my drawing. Few little leaves here. And last but not least
our mosquito, hold on. I want to race off my lines and see how
everything's looking. There's a lot of
sketching in this because it's very dense with
all of the jungle. I find my drawing
winds up being very, you know, a lot of pencil
lines on it, very sketchy. But sometimes I find I need that in order to
figure out where everything is going to go for a
drawing that just has a lot more going on in it and where it's all quite
interconnected. So anyways, by the end, you can take a lot of racing. I'm most there. Brilliant. Now, our our little mosquito last but not least.
I can't forget him. Simple little legs.
And in he comes. Brilliant. Well, I hope you
enjoyed lost in the jungle. And if you have
finished your drawing, I love seeing everyone's work. Do post your work in our group. And thanks for cartooning, and I hope to see you
in our next lesson. Thanks for cartooning. If
you enjoyed this video, please, leave me a review, and don't forget to
share your drawings. I love seeing everyone's work. See you next time.
 Sarah Jane Vickery, Artist